You love the idea of fresh herbs on your kitchen counter, vibrant flowers brightening a dim corner, or starting vegetable seedlings long before spring arrives. This dream is achievable, even if your home lacks abundant natural sunlight. Many small-space gardeners wonder if artificial light sources, specifically grow lights, are a necessity or a luxury. The answer depends on your plants, your goals, and your available natural light.
This complete guide empowers you to make informed decisions about indoor garden lighting. We will break down how light fuels plant growth, explore different types of grow lights, and provide practical advice for selecting, setting up, and maintaining the best grow lights for your unique small garden. You will learn when grow lights are essential, when they offer a valuable boost, and how to use them safely and efficiently to cultivate a thriving indoor oasis.

Do You Really Need Grow Lights? The Core Question
Deciding if you need grow lights involves evaluating your plant’s needs and your home’s natural light conditions. Plants convert light energy into chemical energy through photosynthesis, a process vital for their survival and growth. Without adequate light, plants become weak, leggy, and unproductive.
When Grow Lights are Essential
Grow lights become a critical component of your indoor garden when natural light is insufficient for your chosen plants. Consider these scenarios:
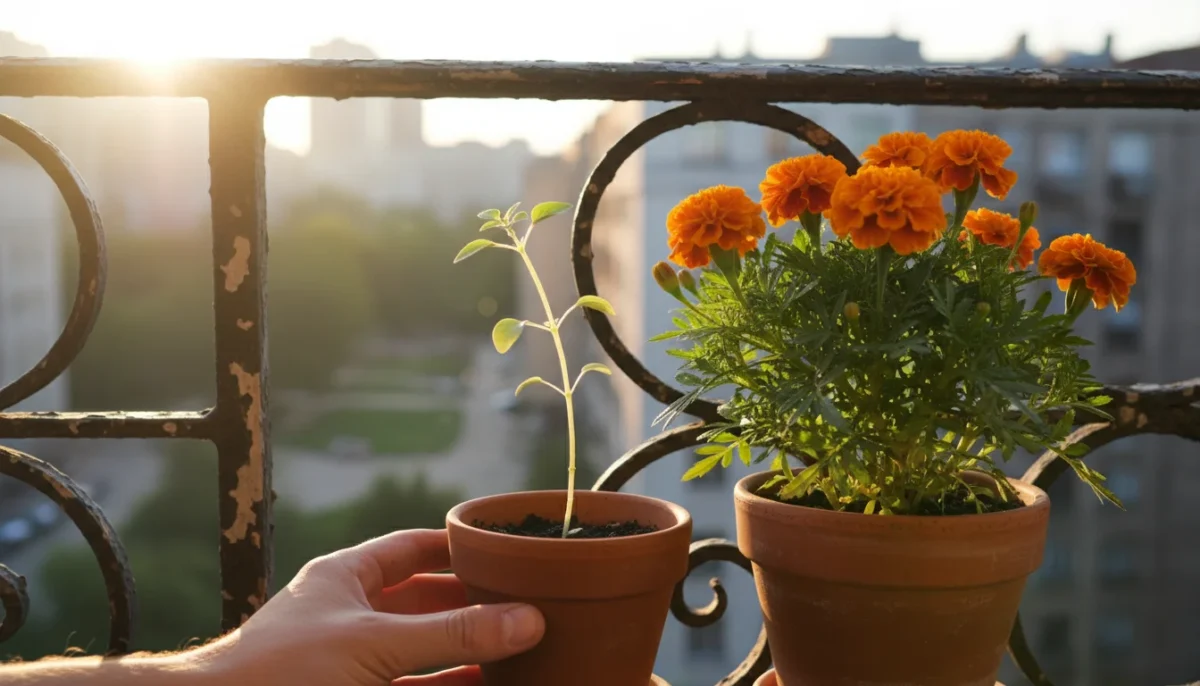
- Seed Starting: Young seedlings require bright, consistent light to develop strong stems and leaves. A windowsill often provides weak, uneven light, causing seedlings to stretch excessively, a condition known as etiolation. Grow lights prevent this, promoting robust starts for your outdoor garden or healthy growth for indoor plants.
- Growing High-Light Plants Indoors: Many popular garden plants, such as tomatoes, peppers, and fruiting herbs, demand intense, prolonged light exposure. If you aim to grow these plants indoors, even a sunny south-facing window may not provide enough. Grow lights supplement natural light, ensuring these plants receive the energy they need to produce fruit.
- Winter Gardening: As daylight hours shorten and light intensity diminishes significantly in winter, even formerly bright windows may become inadequate. Grow lights allow you to continue growing herbs, leafy greens, and even some flowering plants through the darker months, maintaining your harvest or extending your bloom season.
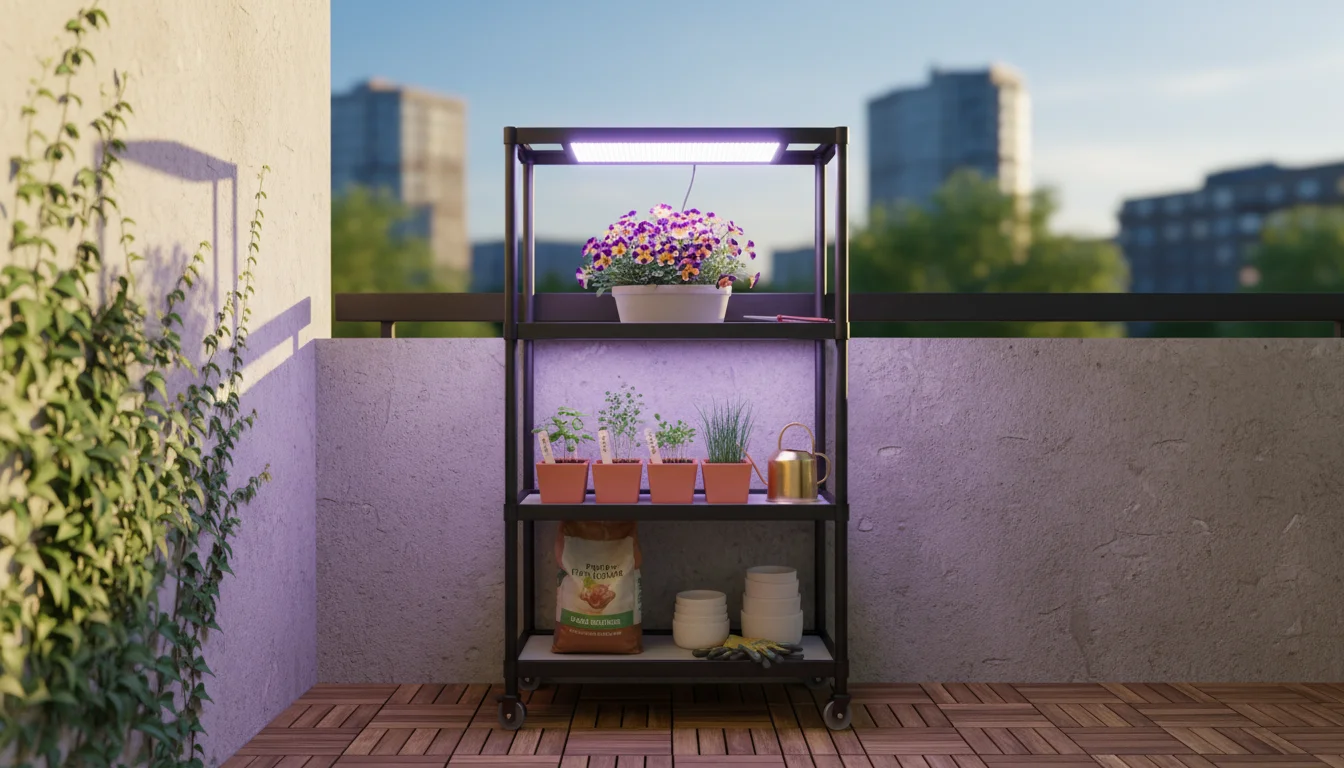
- Low-Light Locations: If your preferred growing space is in a room with minimal windows, or only north-facing windows, artificial indoor garden lighting becomes a non-negotiable requirement for almost all plants. You simply cannot rely on ambient room light for successful plant cultivation.
- Specialized Plant Needs: Some plants, like certain succulents or orchids, have very specific light requirements that are difficult to meet with natural light alone. Grow lights offer precise control over light intensity and duration, catering to these unique demands.
When Grow Lights are Optional or Supplemental
In other situations, grow lights might not be strictly necessary, but they can significantly enhance your plants’ health and vigor:
- Boosting Growth: Even with decent natural light, a grow light can accelerate growth, deepen coloration, and increase yields for many plants. If you want your herbs to produce more prolifically or your foliage plants to show off richer hues, supplemental lighting can help.
- Extending Daylight Hours: When your natural light is generally good but the days are short, a grow light can extend the “on” period for your plants, allowing them to photosynthesize for longer and accumulate more energy.
- Aesthetic Appeal: Modern grow lights are increasingly discreet and even decorative. You might choose a stylish light fixture to highlight your plants and integrate your indoor garden lighting into your home decor, providing both functional light for plants and ambiance for your space.
Ultimately, assessing your plant’s specific light needs against your home’s natural light availability guides your decision. You avoid investing in equipment you do not need, and you ensure your plants receive optimal conditions for thriving.
Understanding Light: Your Plants’ Fuel
To effectively use grow lights, you need to understand how plants perceive and utilize light. It is more complex than simply “bright” or “dim.” Light has several properties crucial for plant growth: spectrum, intensity, and duration.
Light Spectrum: The Colors Plants Use
Sunlight, often perceived as white, is actually a full spectrum of colors, each with a different wavelength. Plants primarily use specific parts of this spectrum for different functions:
- Blue Light (400-500nm): This wavelength drives vegetative growth, promoting strong, compact stems and healthy leaf development. It is crucial for seedlings and foliage plants. Too little blue light leads to leggy, stretched plants.
- Red Light (600-700nm): Red light is essential for flowering and fruiting. It also influences stem elongation and seed germination. Combined with blue light, it encourages robust overall plant health.
- Green Light (500-600nm): Plants reflect most green light, which is why we see them as green. While less critical for photosynthesis than red and blue, recent research suggests green light penetrates deeper into the plant canopy and contributes to overall growth, particularly in dense foliage.
- Far-Red Light (700-800nm): Beyond the visible spectrum, far-red light influences flowering, stem elongation, and helps regulate plant responses like germination and dormancy. It works in conjunction with red light.
Most grow lights aim to provide a “full spectrum” light that mimics sunlight, or they offer specific “grow spectrums” tailored to emphasize blue and red wavelengths, maximizing photosynthesis for plant growth. The “best grow lights” for your situation often provide a balanced spectrum appropriate for your plant’s life stage.
Light Intensity: How Much Light
Light intensity refers to the amount of light reaching your plants. It is measured in a few ways:
- Lumens: A measure of light visible to the human eye. While useful for general room lighting, lumens are a poor indicator for plant growth because plants see light differently than humans.
- PAR (Photosynthetically Active Radiation): This refers to the range of light wavelengths (400-700nm) that plants use for photosynthesis. It is a more relevant metric than lumens for plant lighting.
- PPF (Photosynthetic Photon Flux): Measures the total amount of PAR light produced by a light source per second. This is a measure of the light fixture’s total output.
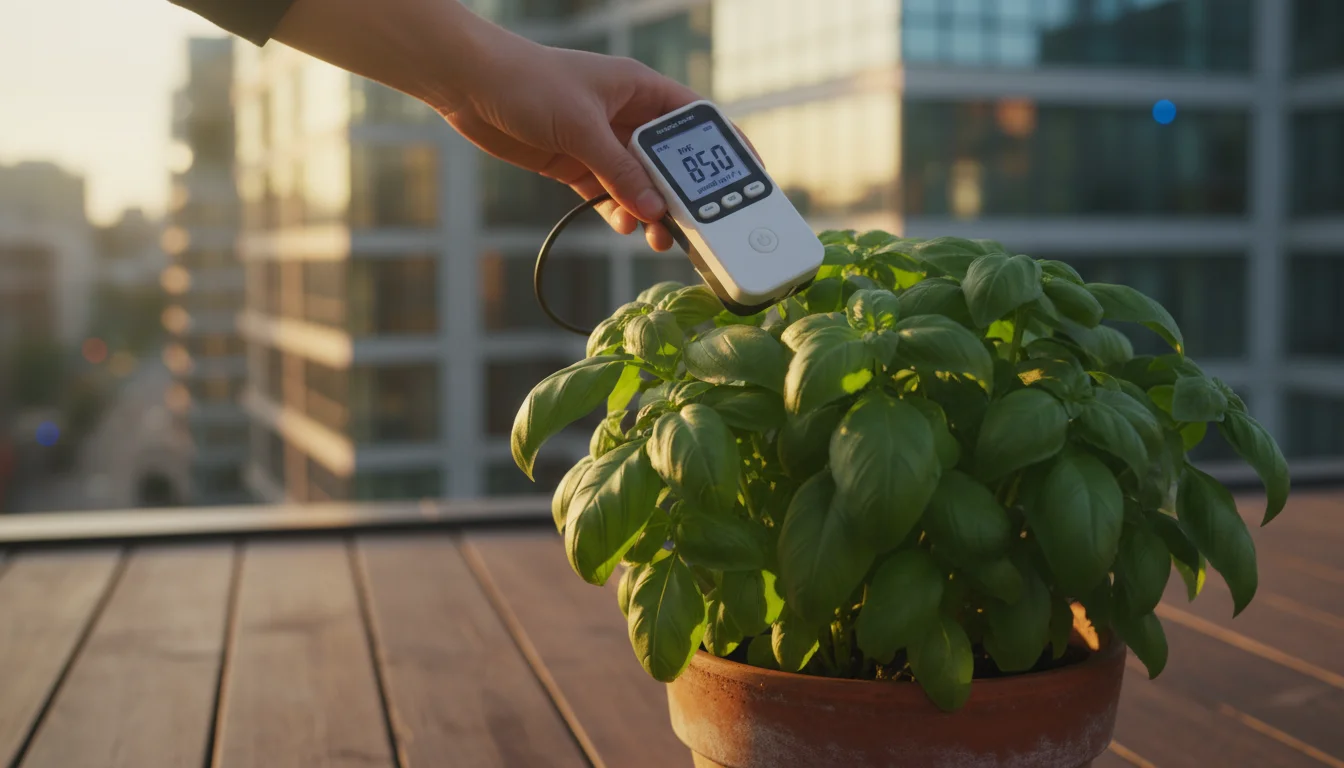
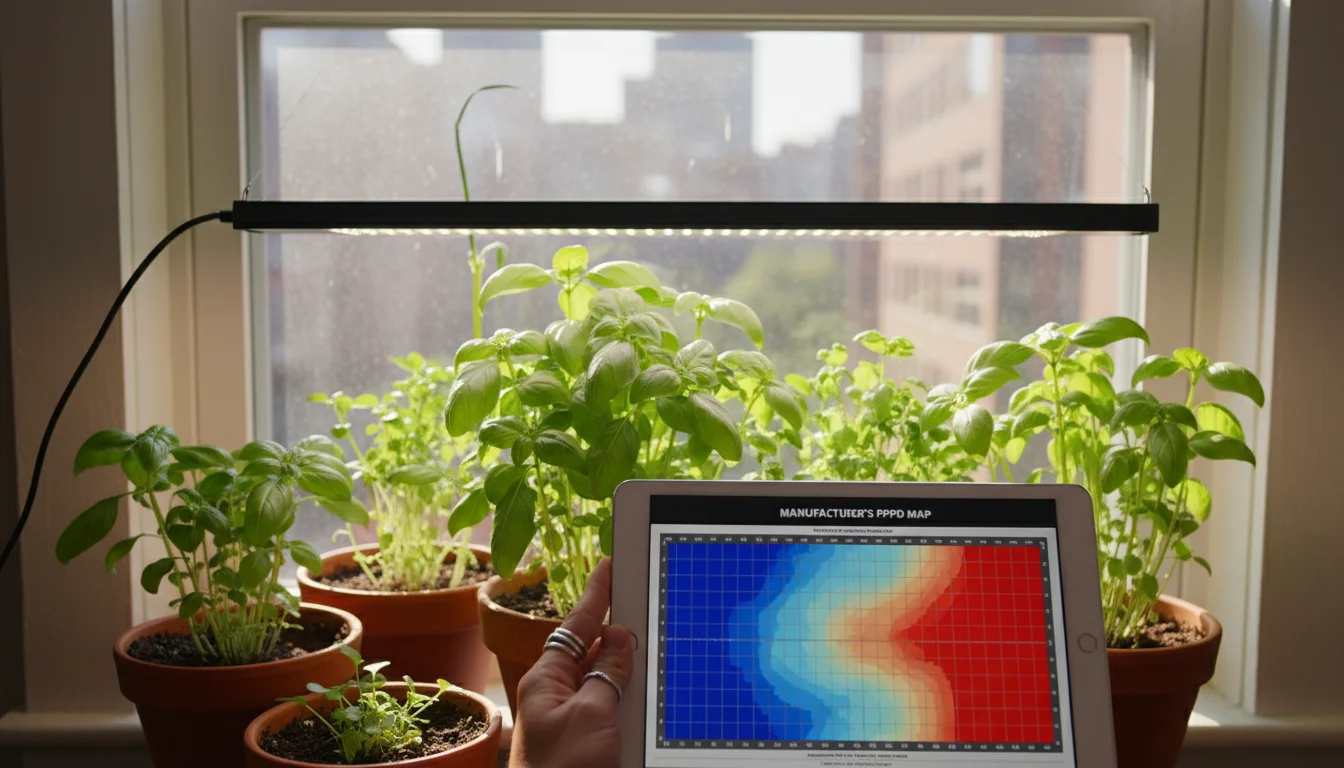
- PPFD (Photosynthetic Photon Flux Density): Measures the amount of PAR light that actually reaches a specific surface area per second. This is the most crucial metric for gardeners, as it tells you how much usable light your plants are receiving at canopy level. Higher PPFD values indicate more intense light. Different plants have different PPFD requirements for optimal growth.
When selecting indoor garden lighting, pay attention to PPFD measurements provided by manufacturers, often at various distances from the light source. This helps you determine the appropriate hanging height for your specific plants.
Light Duration: How Long Plants Get Light
Photoperiod, or the duration of light and dark periods, influences plant growth and development, particularly flowering. Plants are often categorized by their photoperiodic responses:
- Long-Day Plants: Require long periods of light (typically 14-18 hours) to flower, like many summer vegetables and annual flowers.
- Short-Day Plants: Require long periods of darkness (typically 12+ hours) to flower, such as chrysanthemums and poinsettias. They need short light periods.
- Day-Neutral Plants: Flower regardless of light duration, as long as they receive sufficient overall light intensity, like tomatoes and many common houseplants.
Most indoor gardeners aiming for continuous growth or seedling production will use a longer light duration, often 14-16 hours per day, followed by 8-10 hours of darkness. Darkness is crucial for plants to process energy and perform other metabolic functions. Always avoid leaving grow lights on 24/7, as this stresses plants and inhibits proper development.
Types of Grow Lights: What’s Right for Your Space?
The market offers several types of indoor garden lighting, each with distinct advantages and disadvantages. For small-space and low-maintenance gardening, factors like energy efficiency, heat output, size, and cost are paramount. You will primarily encounter LEDs and fluorescent lights.
LED (Light Emitting Diode) Grow Lights
LEDs are the most popular and versatile option for modern indoor gardening, particularly for small spaces. They represent the current standard for efficient grow lights.
- Pros:
- Energy Efficiency: LEDs consume significantly less power than older technologies, reducing your electricity bill.
- Low Heat Output: They run much cooler, minimizing the risk of heat stress to plants and reducing the need for elaborate ventilation in small setups. This also saves space, as you do not need as much clearance.
- Long Lifespan: High-quality LEDs can last 50,000 hours or more, meaning years of use without bulb replacement.
- Tunable Spectrum: Many LEDs offer full spectrum light, while advanced models allow you to adjust the spectrum to favor blue for vegetative growth or red for flowering.
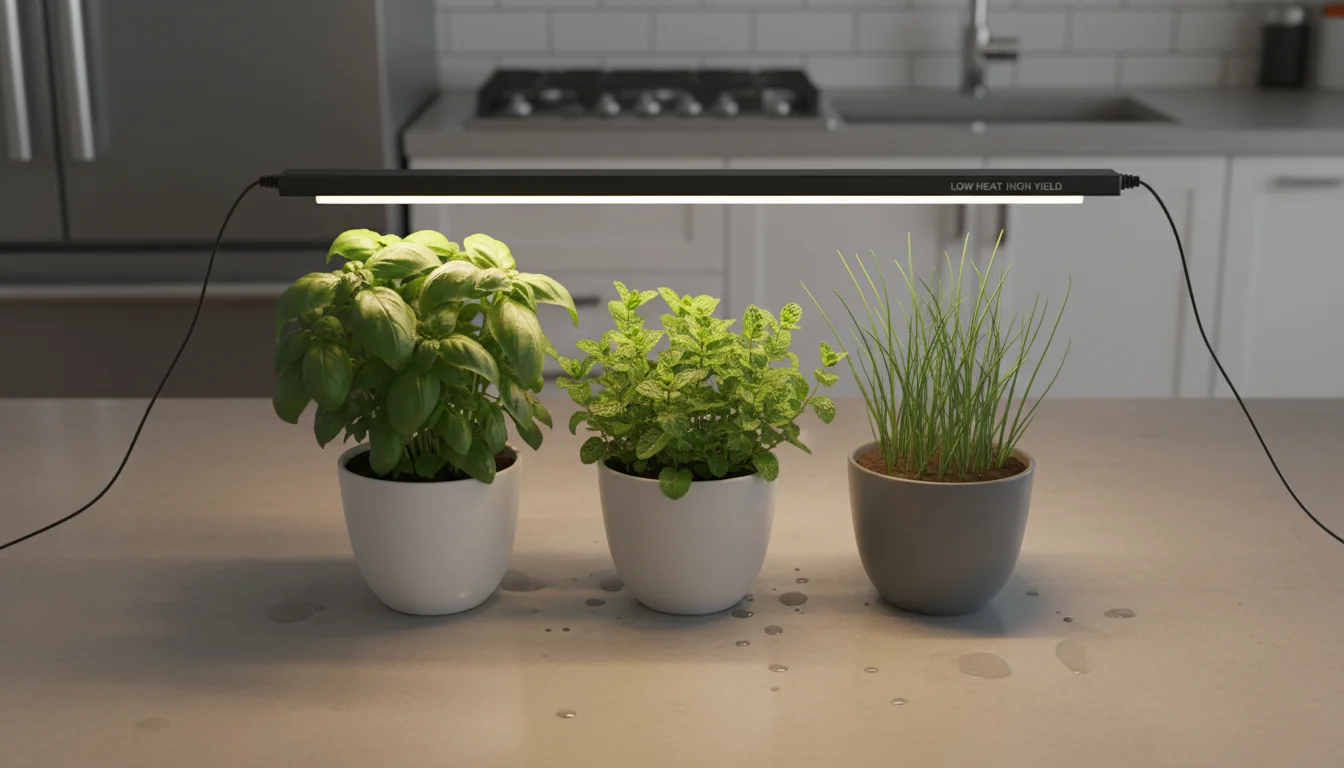
- Compact and Versatile: Available in many forms, from small bars to clip-on lights and panels, making them ideal for shelves, carts, or desktop gardens.
- Cons:
- Higher Upfront Cost: The initial investment for good quality LED grow lights is generally higher than for fluorescent fixtures.
- Quality Varies: A wide range of quality exists. Cheaper LEDs may lack sufficient intensity or proper spectrum, leading to disappointing results. Research reputable manufacturers.
Fluorescent Grow Lights (T5/T8)
Fluorescent lights, particularly T5 and T8 varieties, have long been a go-to for seed starting and growing leafy greens. The “T” refers to the tubular shape, and the number indicates diameter in eighths of an inch (T5 is 5/8 inch, T8 is 1 inch).
- Pros:
- Affordable: Generally less expensive upfront than LEDs, making them a budget-friendly entry point for indoor garden lighting.
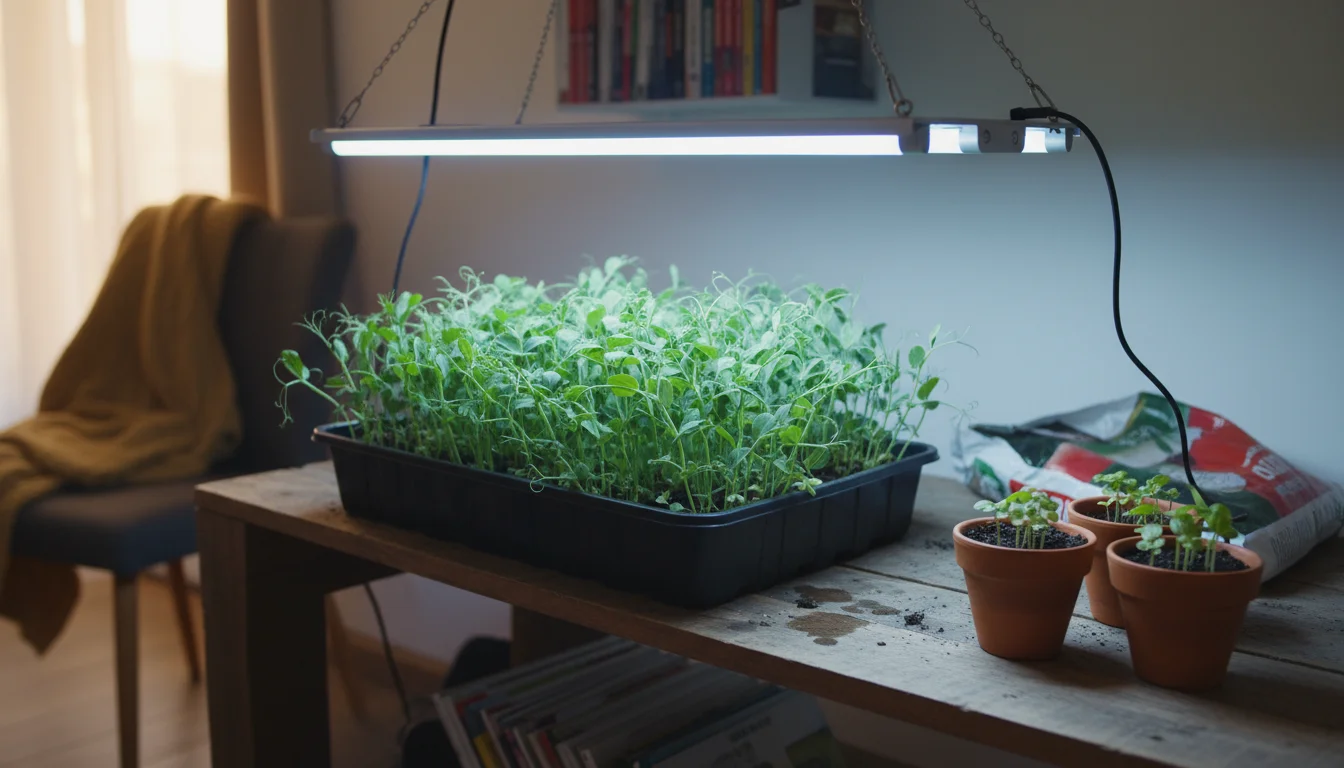
- Good for Seedlings and Low-Light Plants: T5s, especially, provide excellent light for starting seeds, propagating cuttings, and growing leafy greens or herbs that do not require extremely high intensity.
- Lower Heat Than HIDs: While hotter than LEDs, they are manageable for most small indoor setups compared to older HID lights.
- Cons:
- Lower Intensity: Fluorescents typically do not offer enough intensity for fruiting plants like tomatoes or peppers unless placed very close to the canopy.
- Shorter Lifespan: Bulbs need replacement more frequently than LEDs, usually every 10,000-20,000 hours, as their intensity degrades over time.
- Less Energy Efficient: They consume more electricity than LEDs for comparable light output.
- Bulkier Fixtures: Tubes are longer and require more space for the fixture itself.
Other Types (Less Common for Small Spaces)
- Incandescent Lights: Inefficient, produce too much heat, and lack the correct spectrum for plants. Avoid these for growing plants.
- HID (High-Intensity Discharge) Lights: This category includes Metal Halide (MH) and High-Pressure Sodium (HPS) lights. They are very powerful and used by commercial growers or for large-scale operations. However, they produce significant heat, consume a lot of electricity, and are too large and intense for most small-space home gardens.
Here is a quick comparison of the main types of grow lights relevant for home gardeners:
| Feature | LED Grow Lights | Fluorescent (T5/T8) |
|---|---|---|
| Energy Efficiency | Excellent (lowest consumption) | Good (better than incandescent, worse than LED) |
| Heat Output | Very Low | Low to Moderate |
| Lifespan (Bulbs/Diodes) | Very Long (50,000+ hours) | Moderate (10,000-20,000 hours) |
| Upfront Cost | Moderate to High | Low to Moderate |
| Intensity for Plants | Variable, from low to very high (ideal for all plants) | Low to Moderate (best for seedlings, greens, herbs) |
| Spectrum Options | Full spectrum, specific plant growth spectrums, tunable | Cool white, warm white, or specific grow spectrums |
| Best Use for Small Spaces | All indoor plants, seedlings, fruiting plants, year-round growing | Seed starting, leafy greens, herbs, supplemental light |
Choosing the Best Grow Lights for Your Needs
Selecting the best grow lights involves balancing your plants’ needs with your space constraints, budget, and energy considerations. You want a light that provides adequate power without unnecessary expense or bulk.
Assess Your Plants’ Light Requirements
Different plants have varying light needs. Identify what you plan to grow:
- Low-Light Plants (e.g., peace lily, pothos, many ferns): Often thrive with ambient room light or a low-intensity LED or T5 fluorescent. They do not need powerful grow lights.
- Medium-Light Plants (e.g., most herbs, leafy greens, African violets): Benefit greatly from supplemental light. A T5 fluorescent or a moderate-intensity LED panel works well.
- High-Light Plants (e.g., tomatoes, peppers, citrus, most flowering plants, succulents): Absolutely require significant artificial lighting to thrive indoors. You need powerful LED grow lights with high PPFD values.
- Seedlings and Cuttings: Need consistent, bright light to prevent stretching. T5 fluorescents are a classic choice, but full-spectrum LED bars also work exceptionally well.
Consider Your Growing Space
Your physical space dictates the size and form factor of your indoor garden lighting:
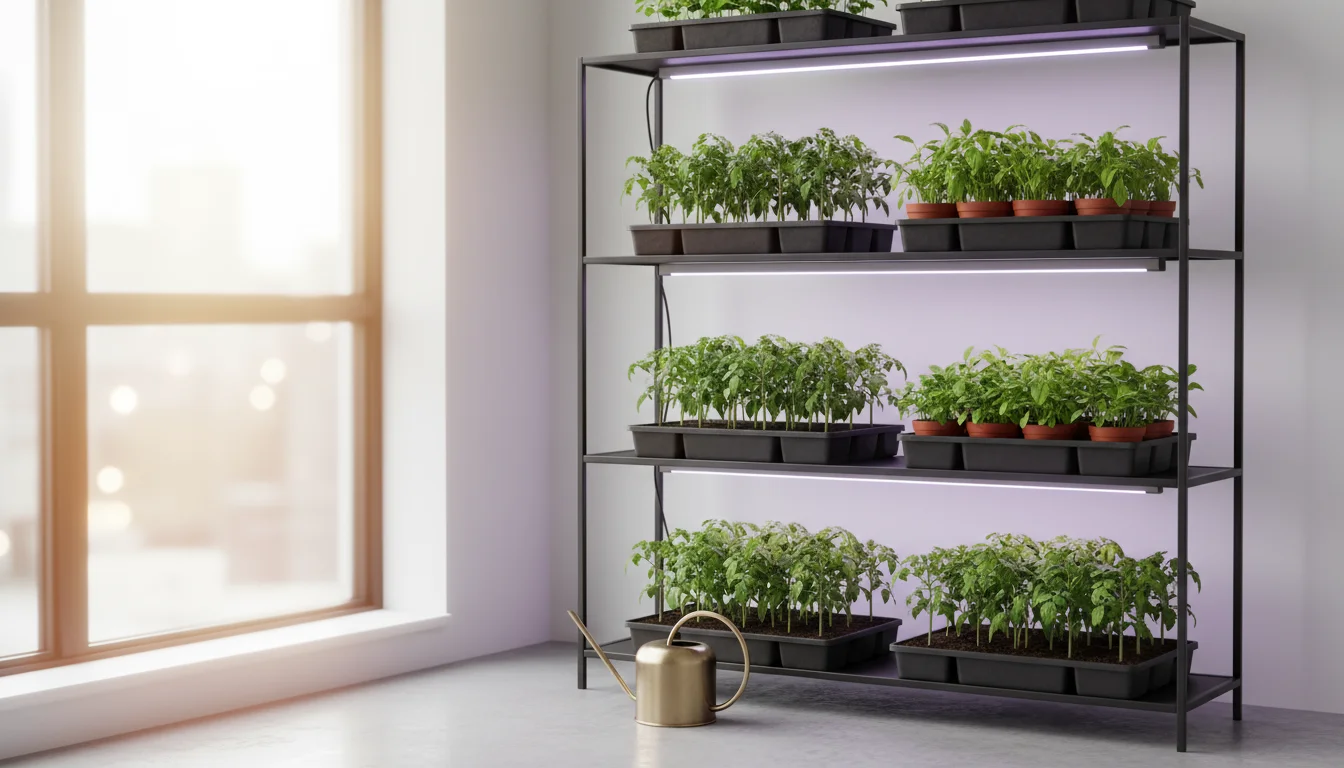
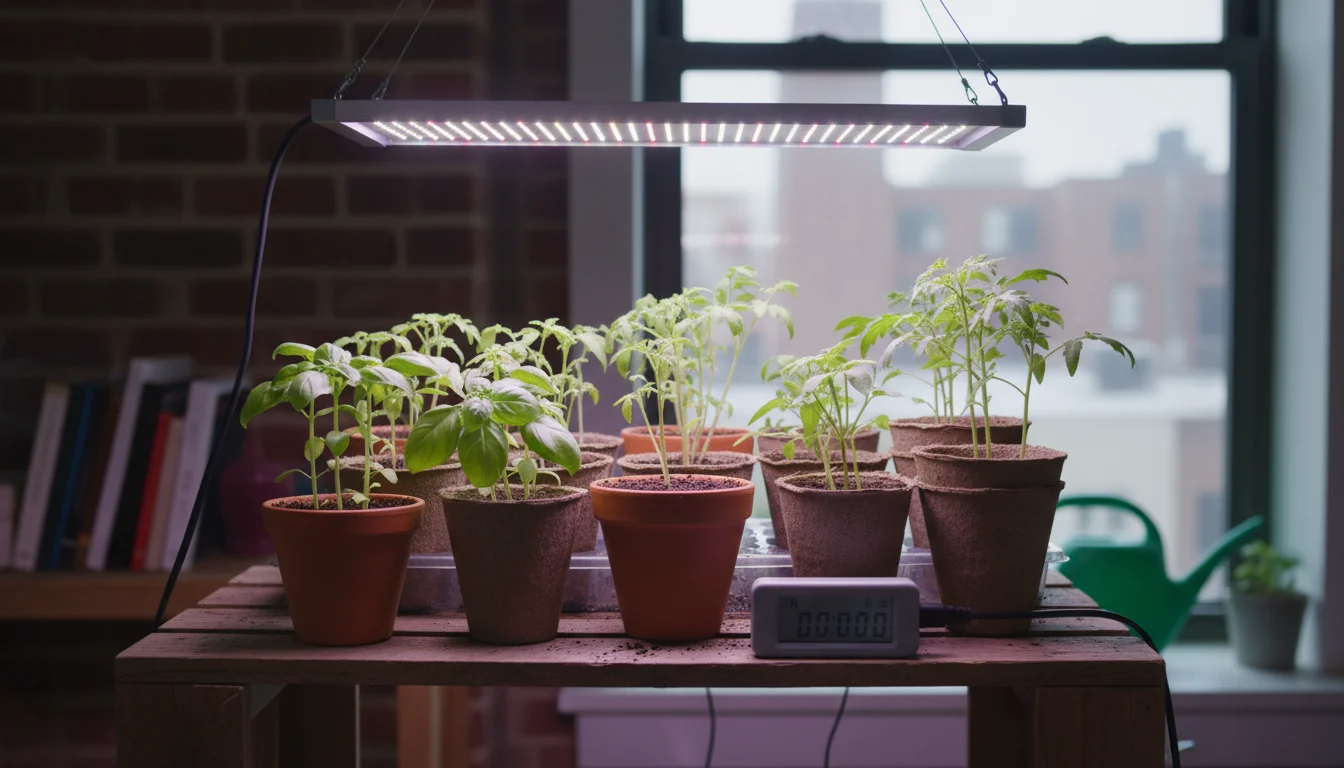
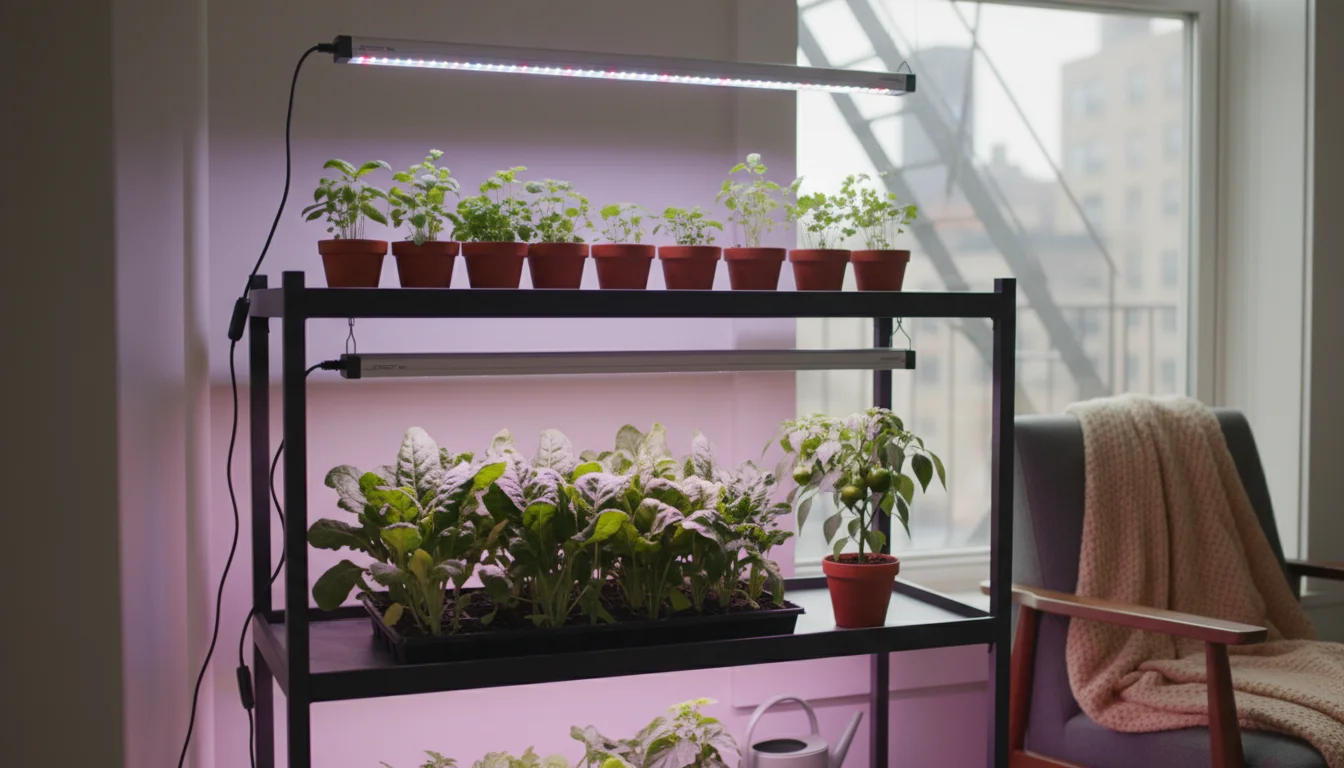
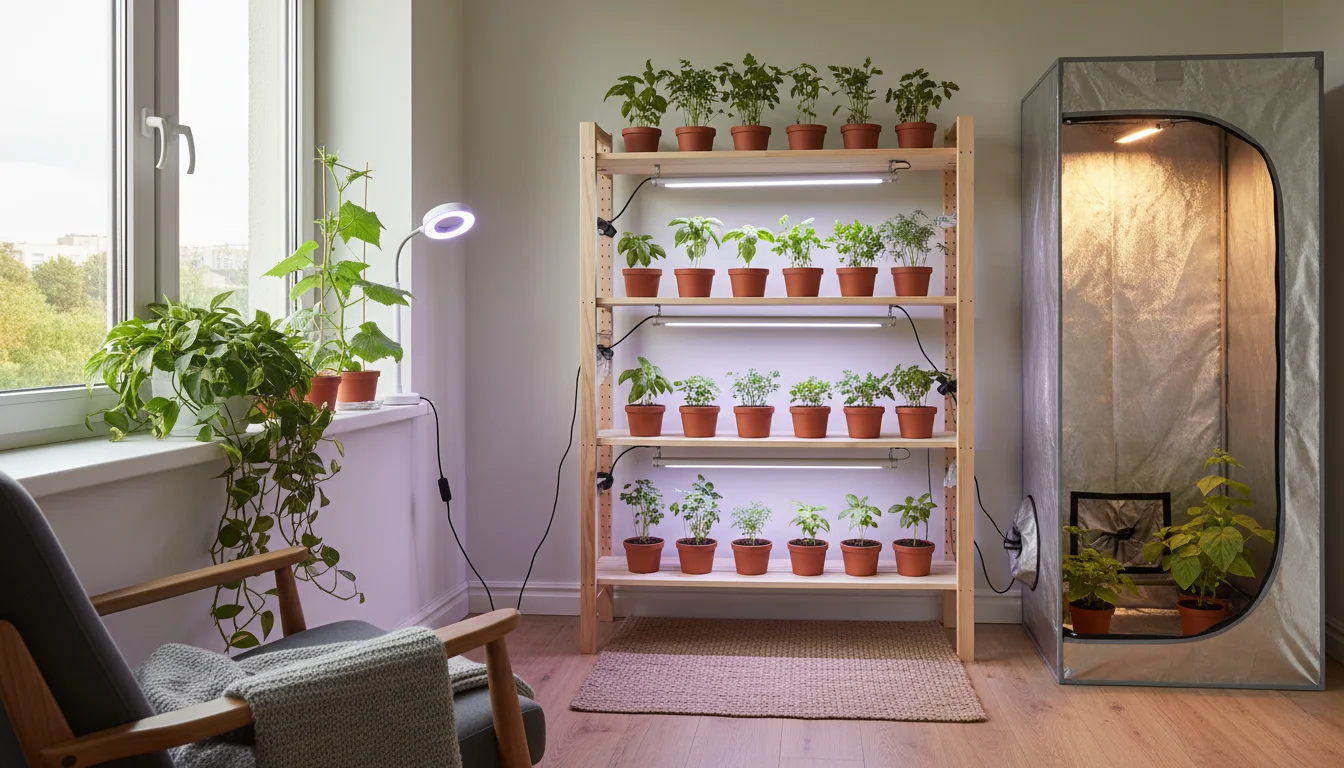
- Shelves or Racks: Long bar-style LEDs or fluorescent tubes fit neatly under shelves. Ensure enough vertical clearance between shelves for both the light fixture and plant growth.
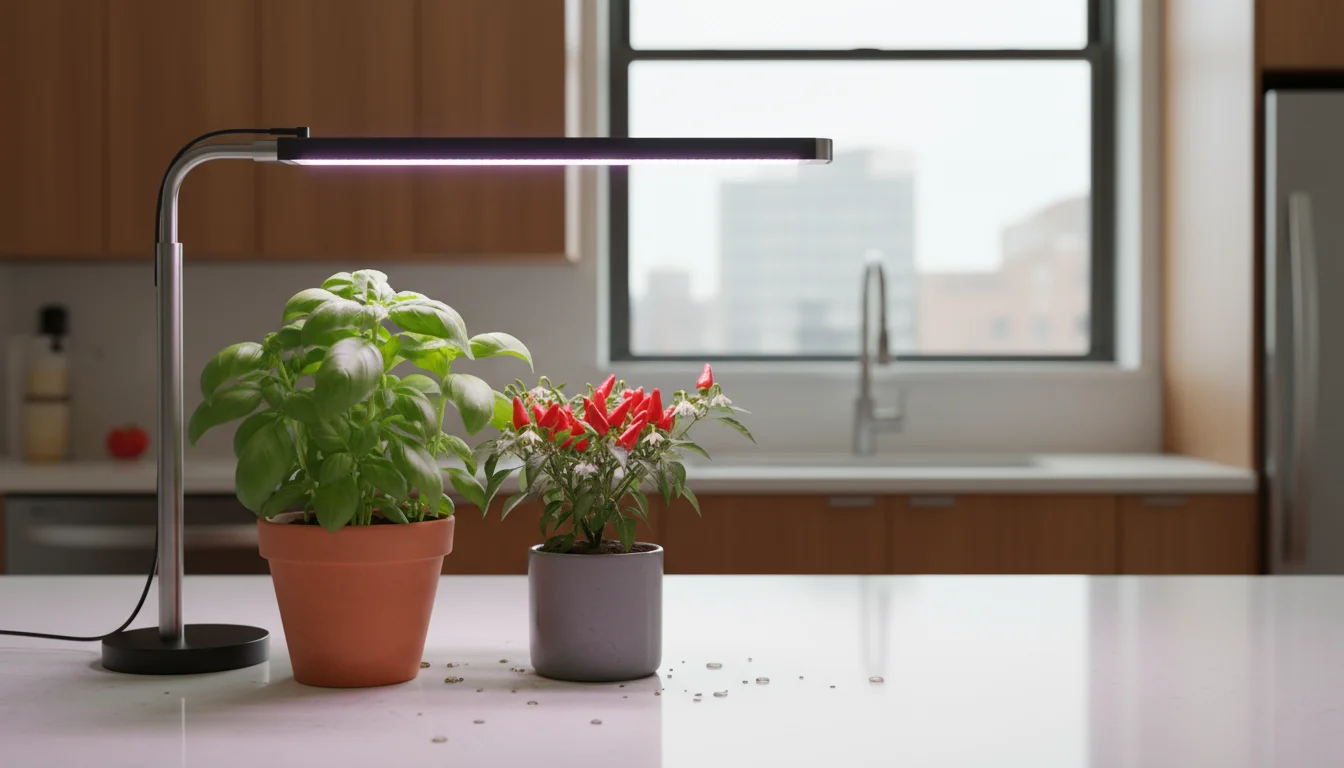
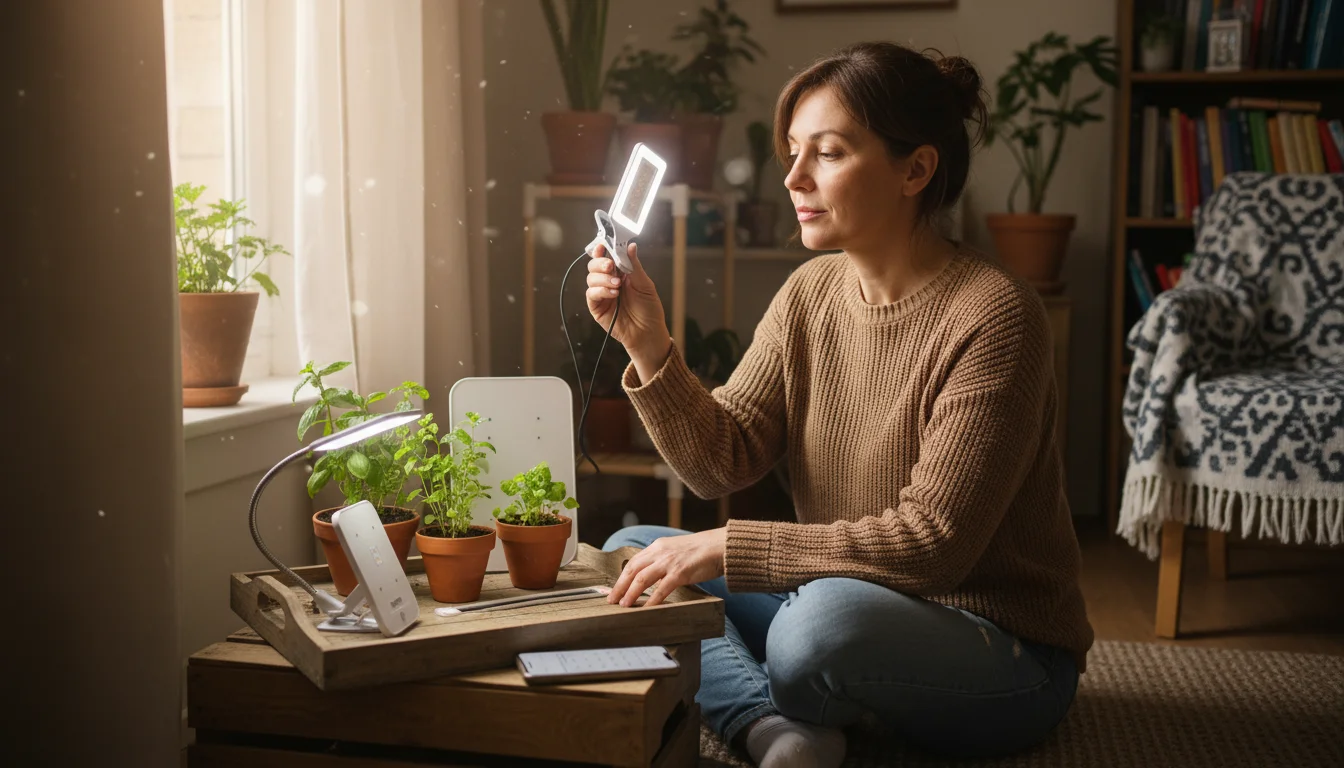
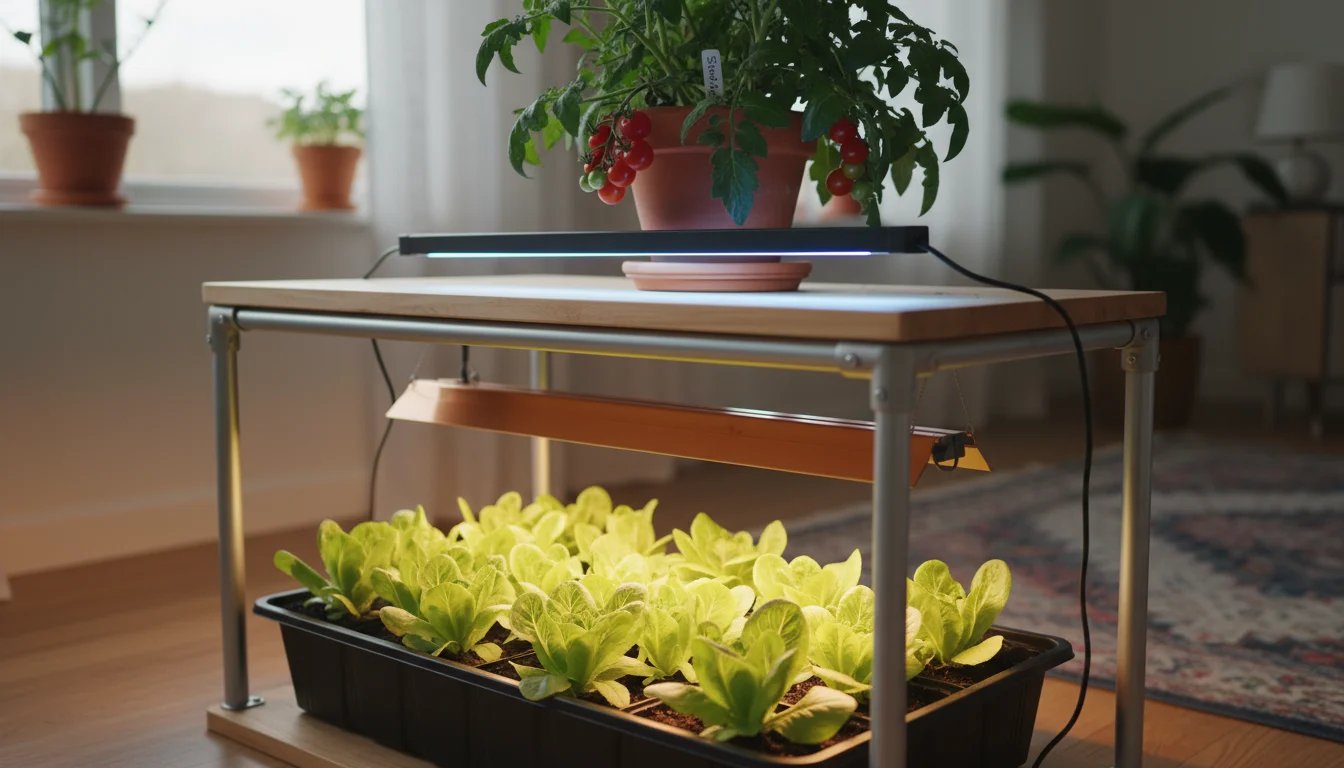
- Windowsills or Desktops: Clip-on grow lights or small, compact LED panels with stands are excellent for individual plants or small groupings.
- Grow Tents or Cabinets: If you are dedicating an enclosed space, you can use more powerful LED panels that efficiently cover the entire footprint. These are ideal if you want to control environmental factors precisely.
Evaluate Light Specifications
When comparing different grow lights, look for these key specifications:
- Spectrum: For general growing, “full spectrum” LEDs are a safe bet. If growing specific plants, ensure the spectrum supports their needs (e.g., more red for flowering, balanced for leafy greens).
- PPFD Output: This is critical. Manufacturers should provide PPFD maps or charts at different hanging heights. Aim for:
- 100-250 PPFD for seedlings/cuttings.
- 250-400 PPFD for leafy greens, herbs, and low-light houseplants.
- 400-800 PPFD for flowering, fruiting, and high-light plants.
- Wattage: While not a direct measure of plant growth efficacy, wattage indicates power consumption. More efficient lights provide higher PPFD per watt.
- Coverage Area: The manufacturer specifies the effective footprint a light can cover. Match this to your growing area. For small spaces, you often need a narrow, focused light.
Budget and Energy Efficiency
Your budget influences your initial purchase, but remember to consider long-term energy costs.
- Upfront Cost: Fluorescents are cheaper to buy, but LEDs offer better long-term value due to lower energy consumption and longer lifespan. If your budget is tight, start with T5 fluorescents for seedlings and upgrade to LEDs later.
- Operating Cost: LEDs win hands down here. Their energy efficiency means lower electricity bills, which adds up over months and years of use.
By carefully considering these factors, you can select the best grow lights that precisely meet the needs of your plants and fit seamlessly into your small-space gardening setup.
Setting Up Your Indoor Garden Lighting System
Proper setup is just as important as choosing the right grow lights. Incorrect placement or inadequate support can harm your plants, waste energy, or even create safety hazards. Follow these steps for a successful indoor garden lighting system.
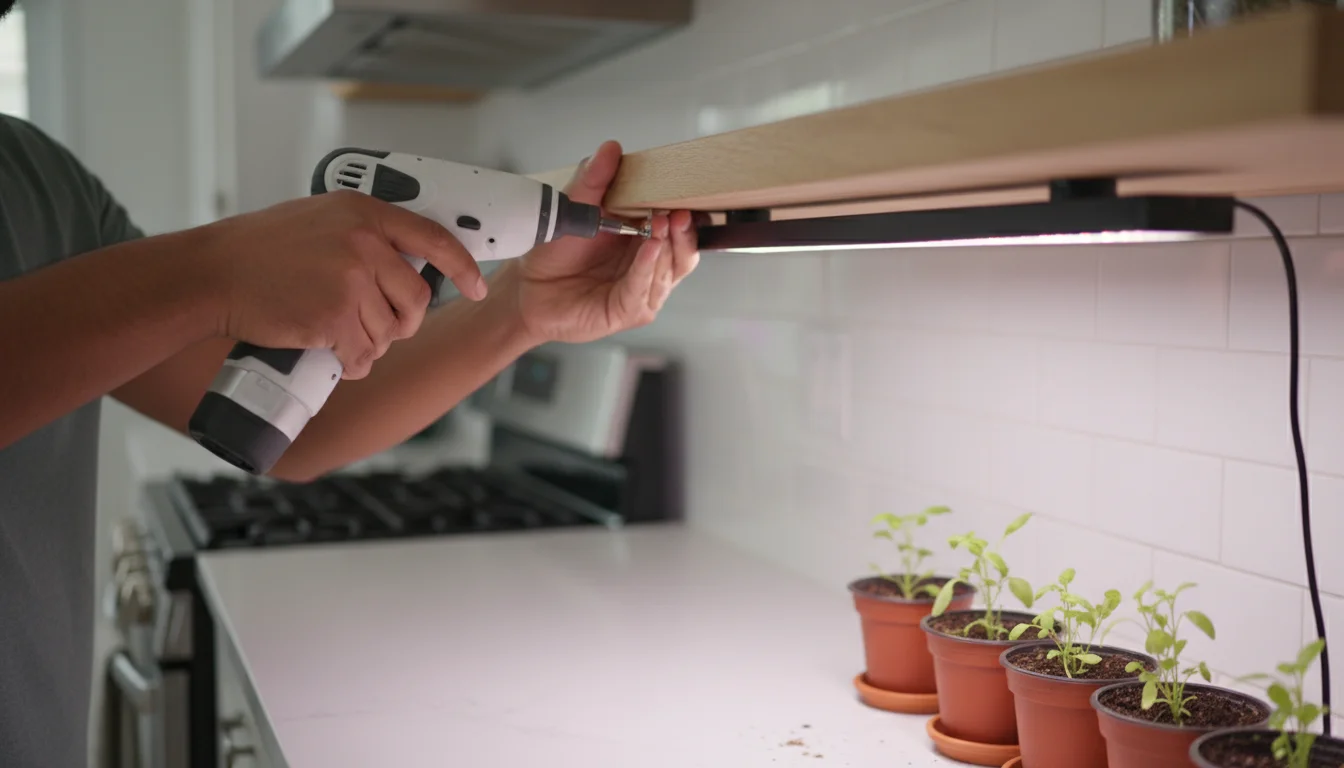
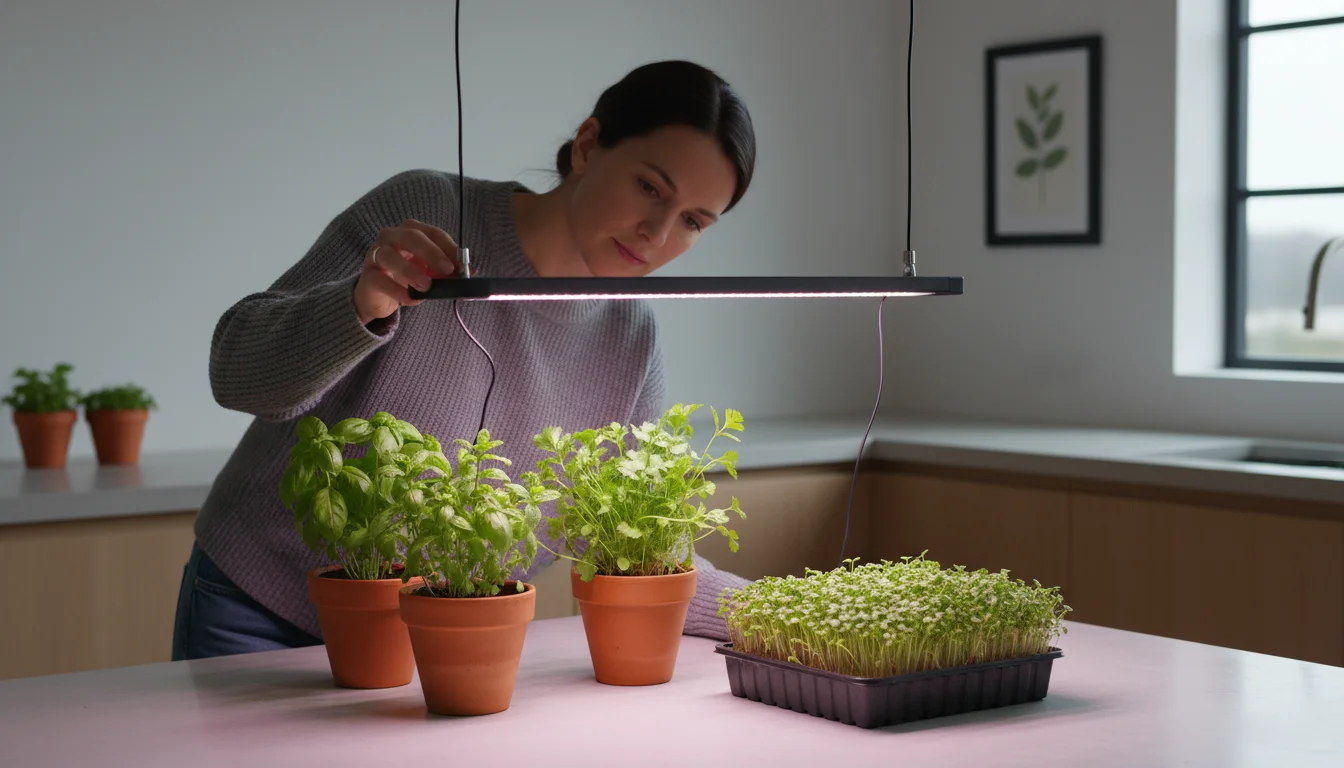
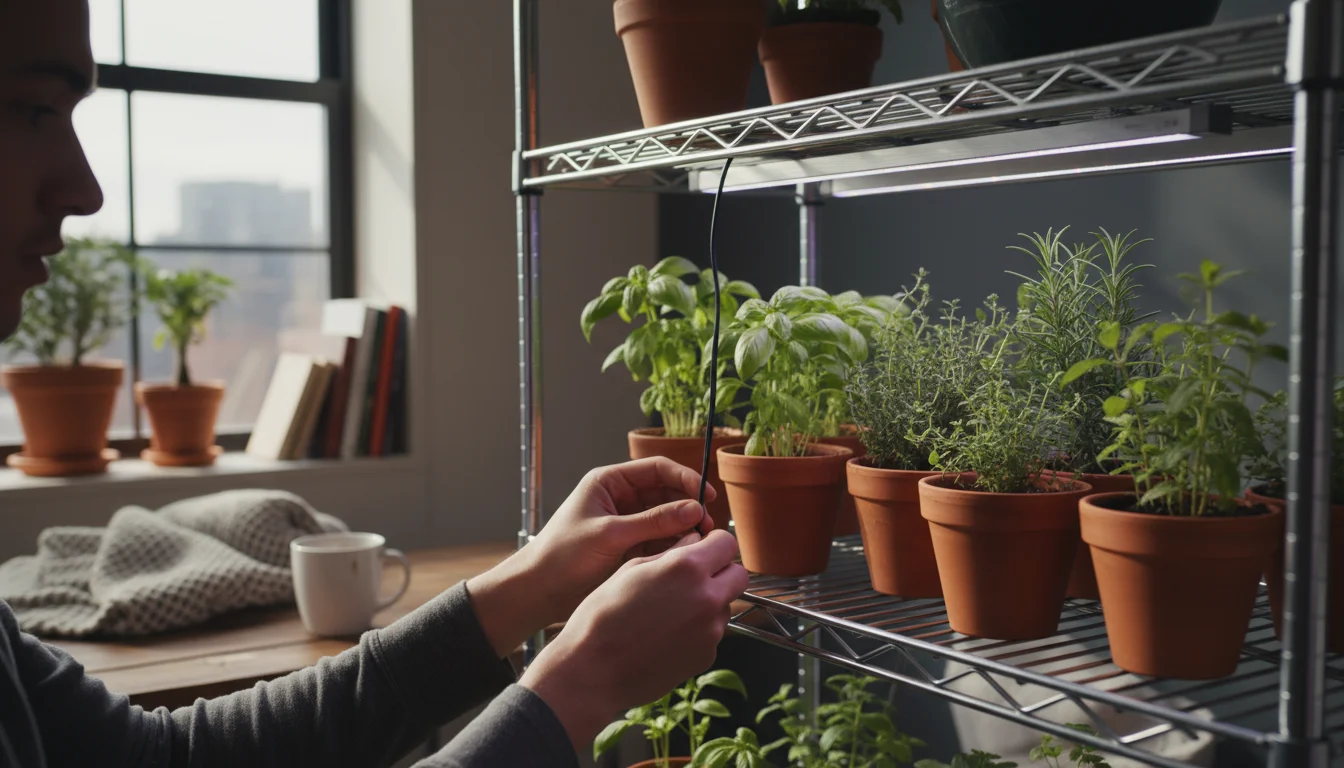
Step 1: Secure Your Light Fixture
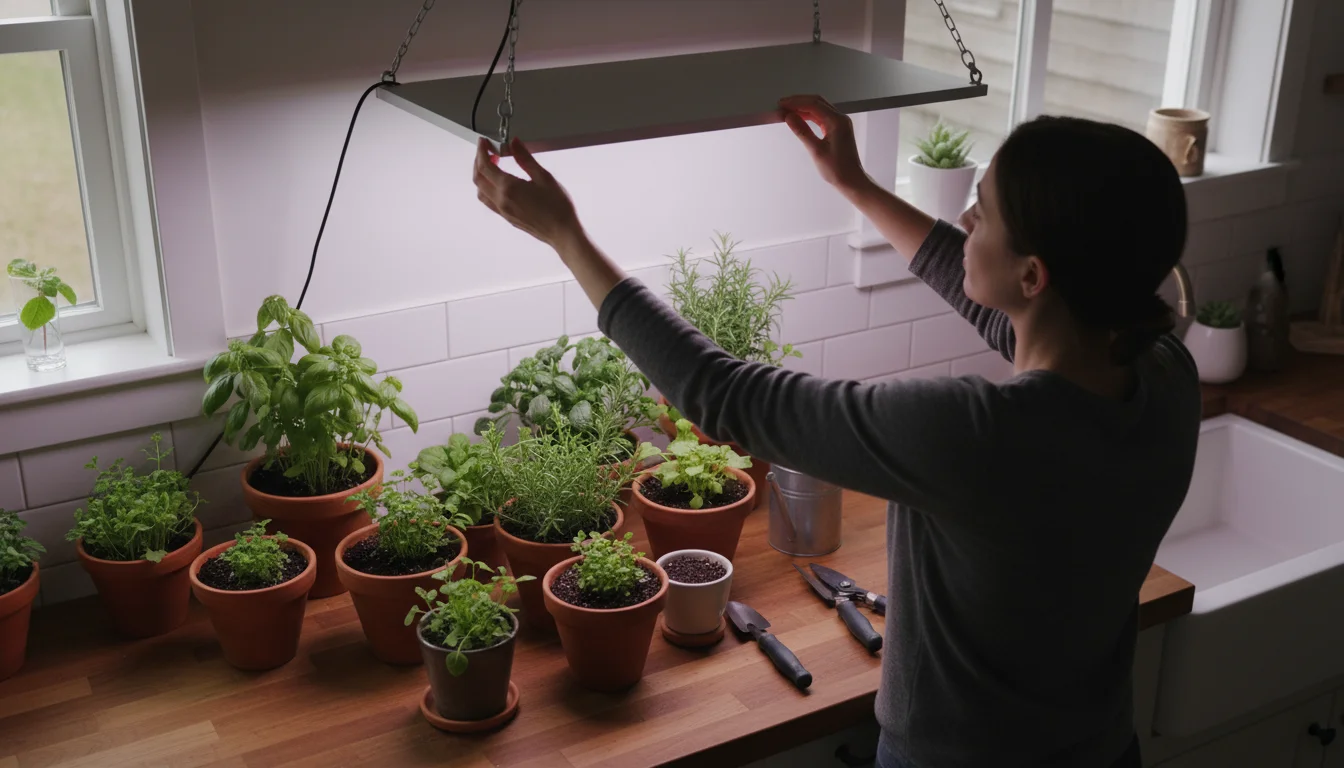
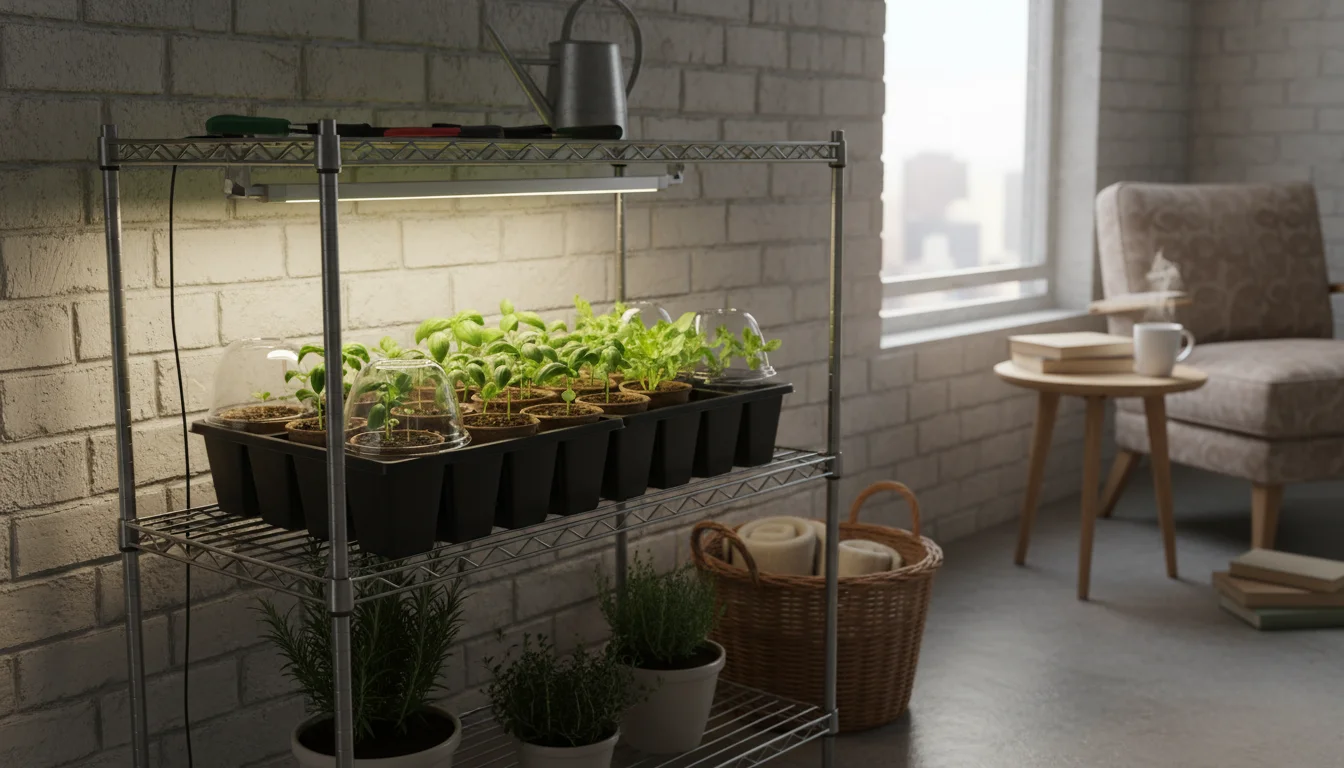
Mounting your grow light securely prevents accidental falls, which could damage your plants or fixture. For small setups:
- Under-Shelf Mounting: Many bar-style LEDs and slim fluorescents come with clips or screws for attaching directly to the underside of a shelf. Ensure the shelf is sturdy enough to support the light’s weight.
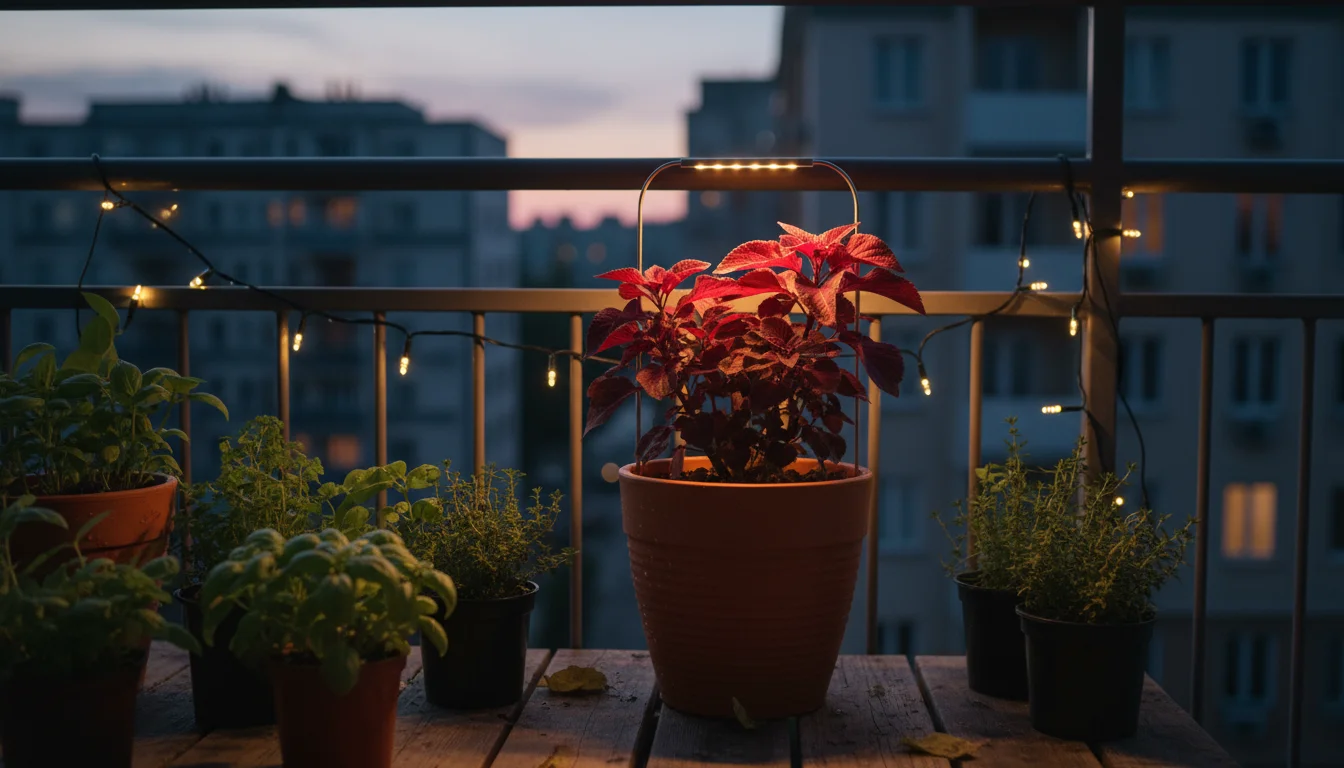
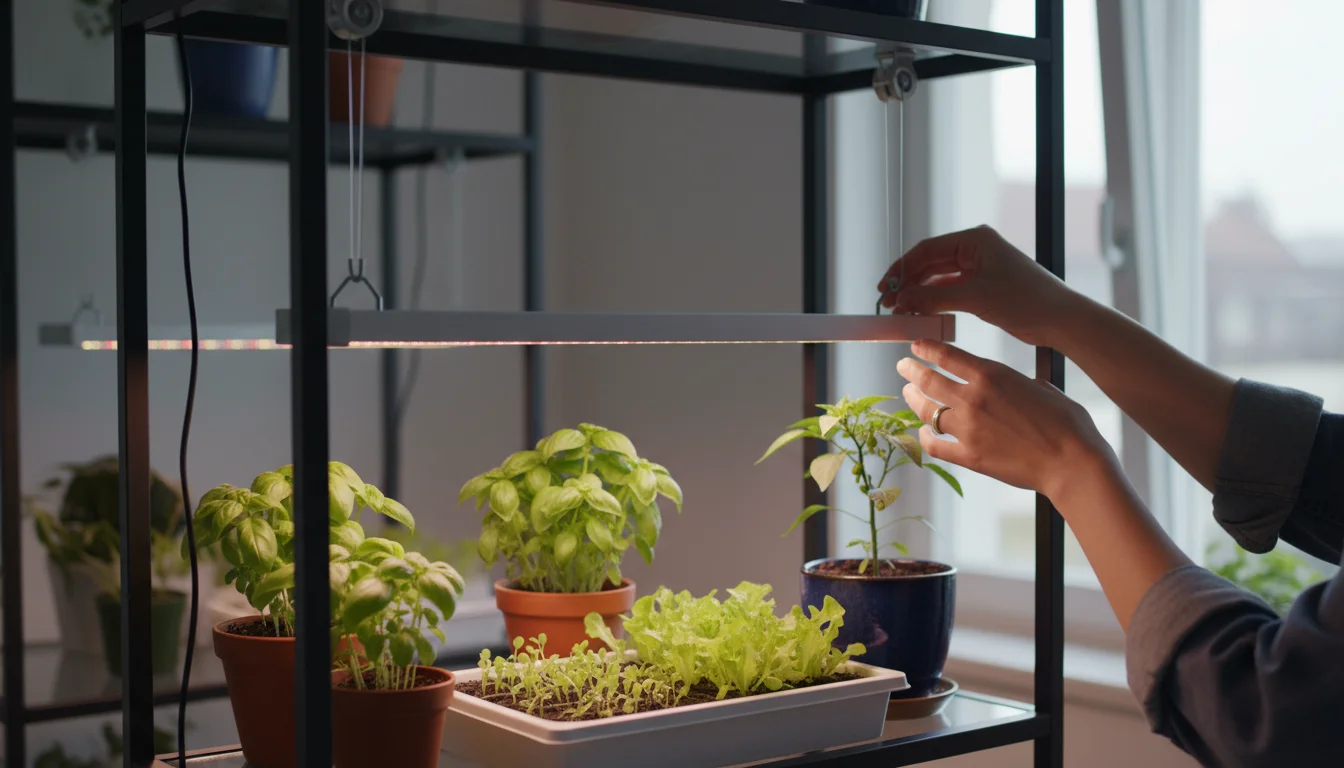
- Hanging Systems: For panels or larger lights, use adjustable rope hangers or chains. These typically attach to eye bolts screwed into a sturdy ceiling joist or the top frame of a grow rack. Adjustable hangers are crucial for raising and lowering the light as plants grow.
- Clip-On Lights: These are ideal for single plants. Ensure the clip attaches firmly to a stable surface, like a shelf edge or pole, and that the gooseneck arm holds the light head steadily.
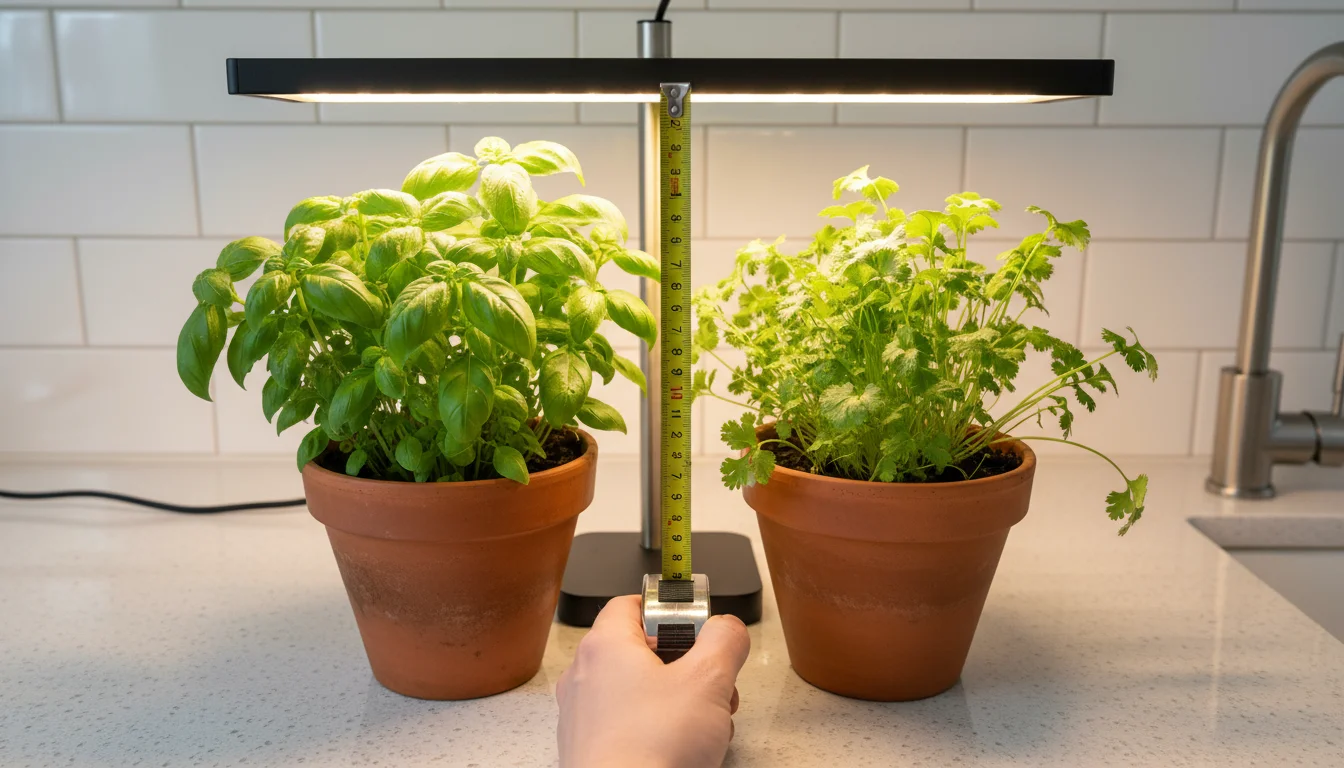
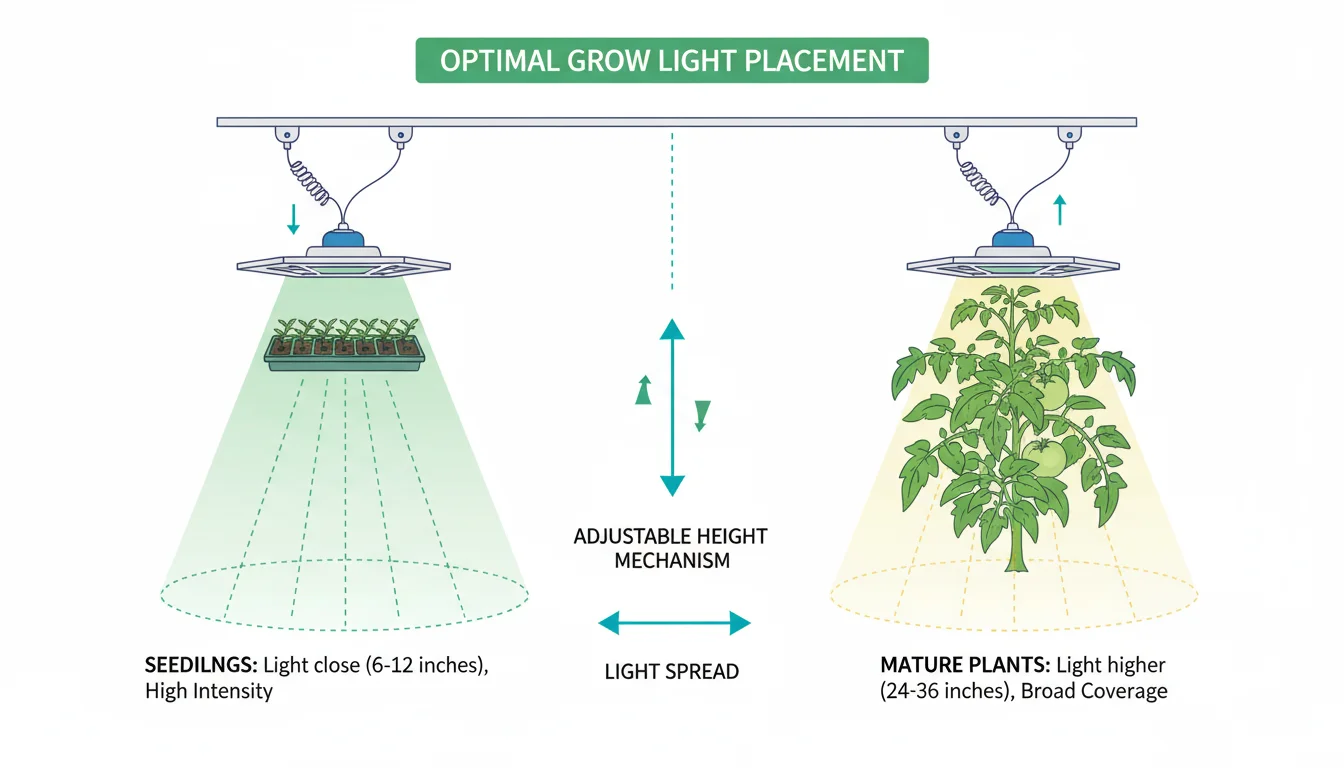
Step 2: Determine Optimal Hanging Height
The distance between your grow light and your plants is critical for light intensity. Too close, and you scorch your plants; too far, and they stretch.
- Consult Manufacturer Guidelines: Always start with the recommended hanging height provided by the grow light manufacturer, especially if they include PPFD charts.
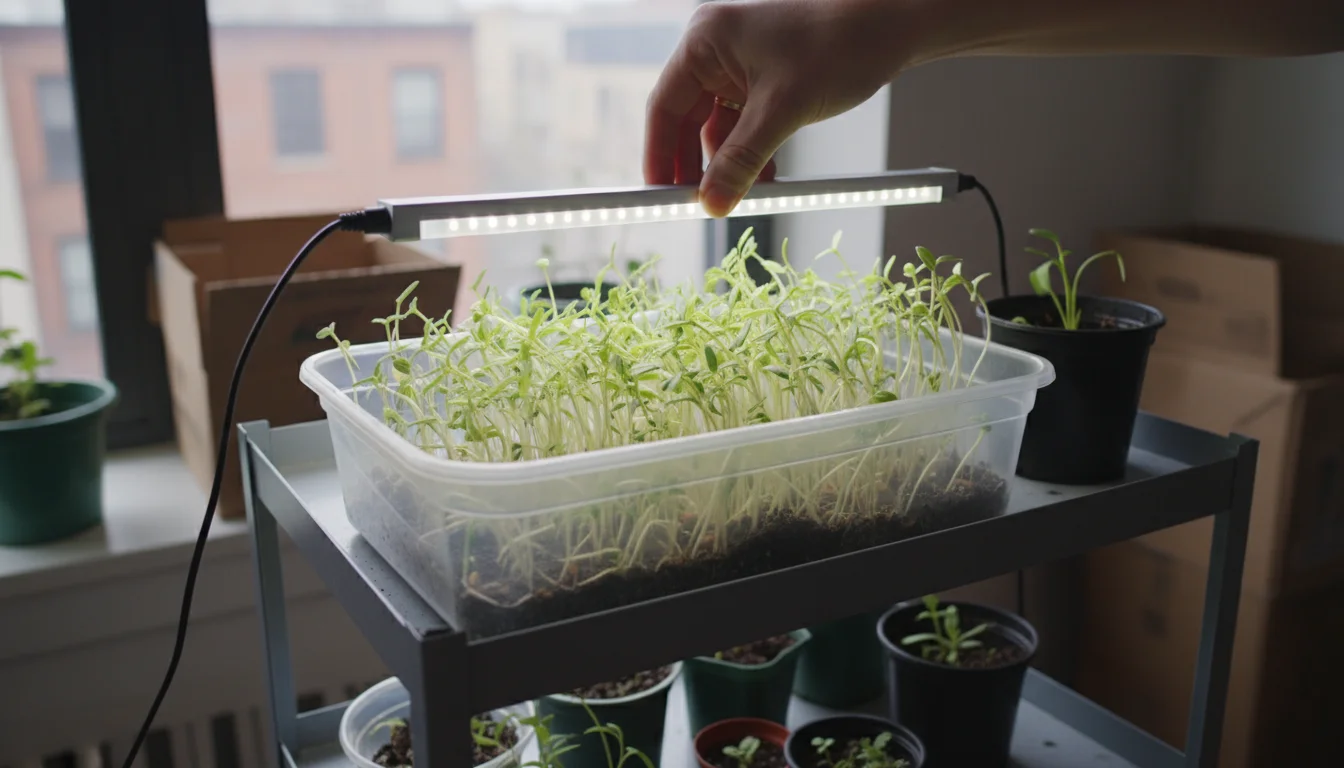
- Seedlings/Cuttings: Generally need lights very close, often 6-12 inches (15-30 cm) from the plant canopy. Fluorescents can be even closer (4-6 inches) due to their lower heat output.
- Vegetative Growth (Greens, Herbs): Typically 12-24 inches (30-60 cm) for LEDs, 8-12 inches (20-30 cm) for T5 fluorescents.
- Flowering/Fruiting Plants: These often require more intense light, so LEDs might be 12-18 inches (30-45 cm) away, but always monitor your plants for signs of stress.
Observe your plants closely. If leaves yellow, crisp, or develop bleached spots, your light is too close. If plants stretch, become pale, and develop weak stems, the light is too far away or not intense enough.

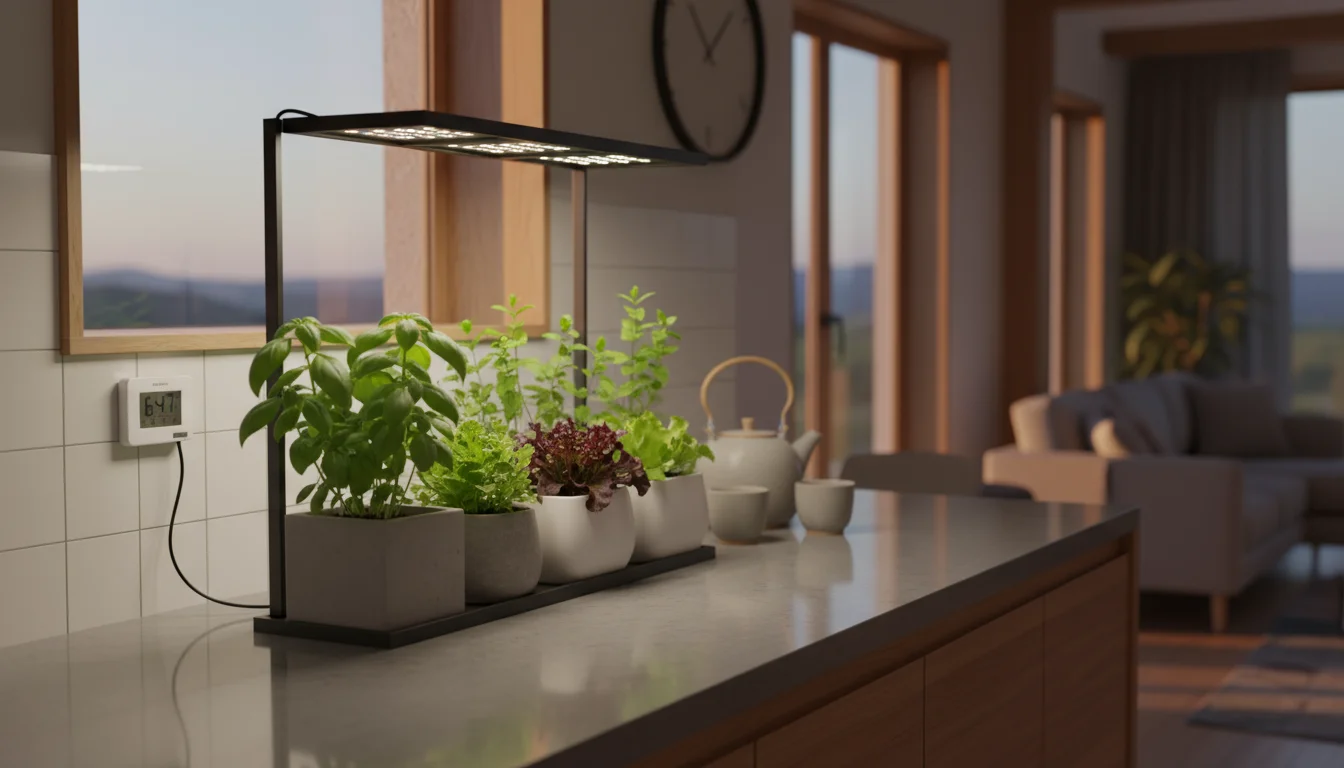
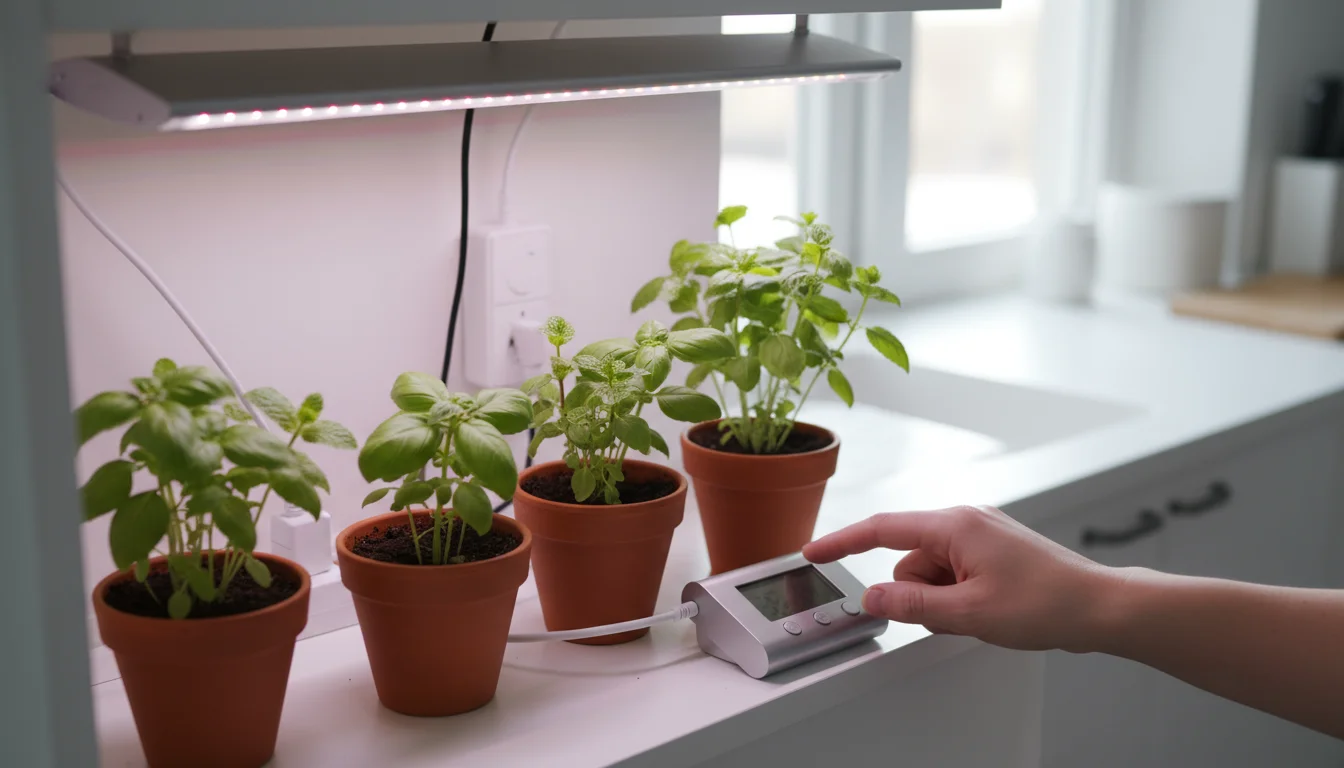
Step 3: Connect to a Timer
A simple mechanical or digital timer is an indispensable tool for managing your indoor garden lighting. It ensures consistent light cycles, which plants prefer, and frees you from manually turning lights on and off.
- Consistency: Plants thrive on routines. A timer provides the consistent light duration necessary for healthy growth and proper photoperiodic responses.
- Energy Savings: Prevents accidentally leaving lights on too long, saving electricity.
- Ease of Use: Set it once, and your lights operate automatically.
Ensure the timer is rated for the wattage of your grow light. For most small grow lights, a standard household timer works well. Plug the light into the timer, then plug the timer into the wall outlet.
Step 4: Ensure Proper Air Circulation
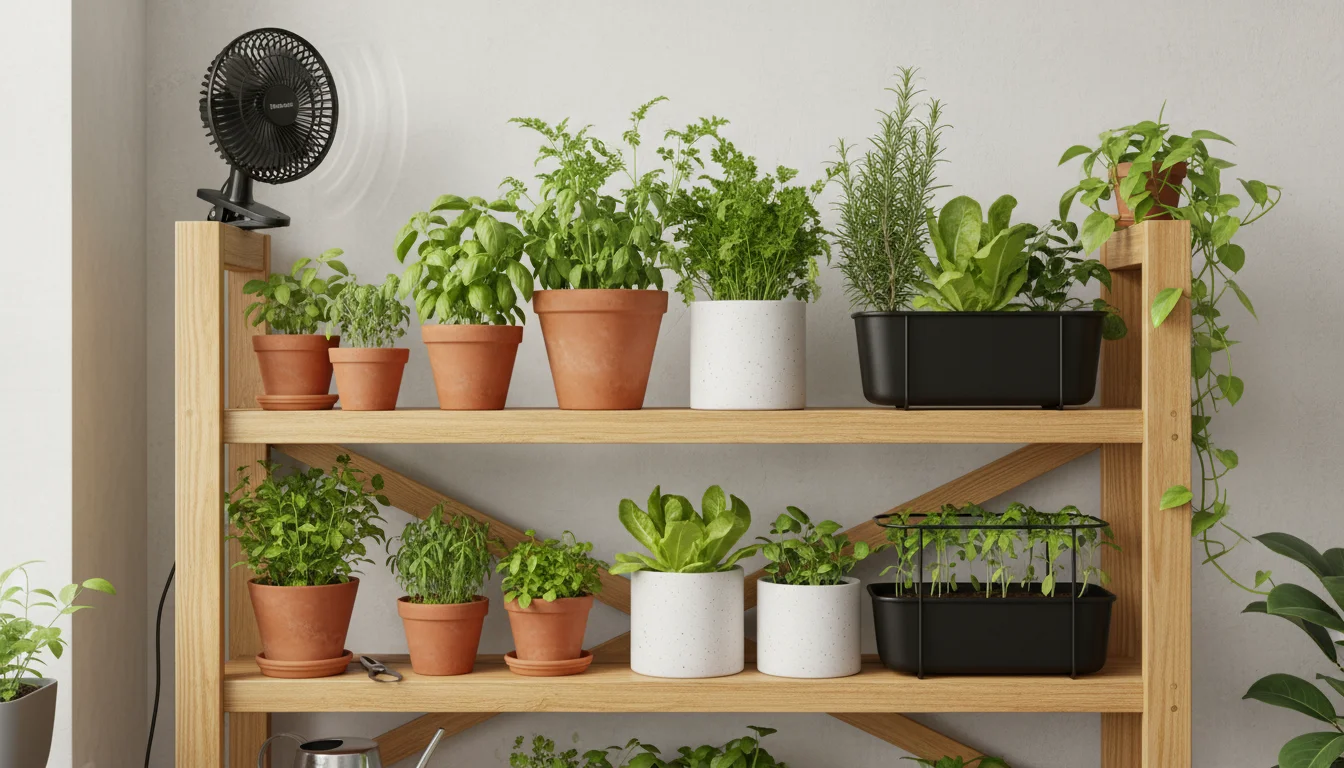
Even low-heat LEDs can create a warm microclimate around your plants. Good air circulation prevents stagnant air, reduces humidity, and helps strengthen plant stems. A small clip-on fan positioned to gently oscillate near your plants is often sufficient for small indoor gardens. This simple addition mimics natural breezes, discourages pests, and prevents fungal issues. Proper air circulation is a key aspect of healthy indoor growing environments, often overlooked by beginners.
Optimizing Light Schedules and Intensity
Once your indoor garden lighting is set up, you need to fine-tune the light schedule and intensity to match your plants’ specific growth stages. This approach maximizes growth and avoids common issues like stretching or scorching.
Adjusting Light Duration (Photoperiod)
The “on” time for your grow lights typically ranges from 12 to 18 hours per day, depending on the plant and its growth stage. A period of darkness is essential for plants to carry out metabolic processes and rest.
- Seedlings and Cuttings: Provide 16-18 hours of light per day. This long duration encourages rapid initial growth and prevents stretching.
- Vegetative Growth (Leafy Greens, Herbs, Houseplants): Maintain 14-16 hours of light. This supports continuous foliage development and vigorous growth.
- Flowering and Fruiting Plants (Tomatoes, Peppers, Strawberries): These often benefit from a slightly shorter photoperiod, typically 12-14 hours of light, especially if they are day-neutral. Some plants are “short-day” and require a consistent 12 hours of darkness to initiate flowering. Research your specific plant’s needs.
Use your timer to manage these cycles precisely. Consistency is key for plant health. Avoid irregular light schedules.
Managing Light Intensity and Distance
Light intensity, measured by PPFD, varies significantly with the distance from the light source. As plants grow, you must adjust the light’s height.
- Monitor Plant Response: The best indicator of correct intensity is your plants themselves.
- Signs of Too Little Light: Plants stretch towards the light, stems are thin and weak, leaves are pale or small, lower leaves may yellow and drop.
- Signs of Too Much Light (Light Burn): Leaves may curl upwards, develop bleached or yellow patches, appear scorched or crisp, growth may stunt. This is more common with powerful LED grow lights placed too close.
- Adjusting Height: Most grow lights for small spaces come with adjustable hangers or can be moved on shelves. Raise the light as plants grow taller to maintain optimal distance, ensuring the entire canopy receives even light. Lower the light if plants show signs of stretching.
- Dimmable Lights: Some advanced LED grow lights feature dimmers. This allows you to adjust intensity without changing the physical distance, offering precise control. Start with lower intensity for seedlings and gradually increase it as plants mature.
Remember that the edges of your growing area receive less intense light than the center directly under the fixture. Rotate your plants periodically to ensure all sides receive adequate exposure, promoting balanced, even growth across your indoor garden. The Oregon State University Extension Service offers additional resources on plant light requirements.
Maintenance, Safety, and Energy Efficiency
Proper care and safe operation of your indoor garden lighting system extend its lifespan, protect your plants, and keep your home safe. Additionally, smart practices help you manage energy consumption efficiently.
Regular Maintenance for Your Grow Lights
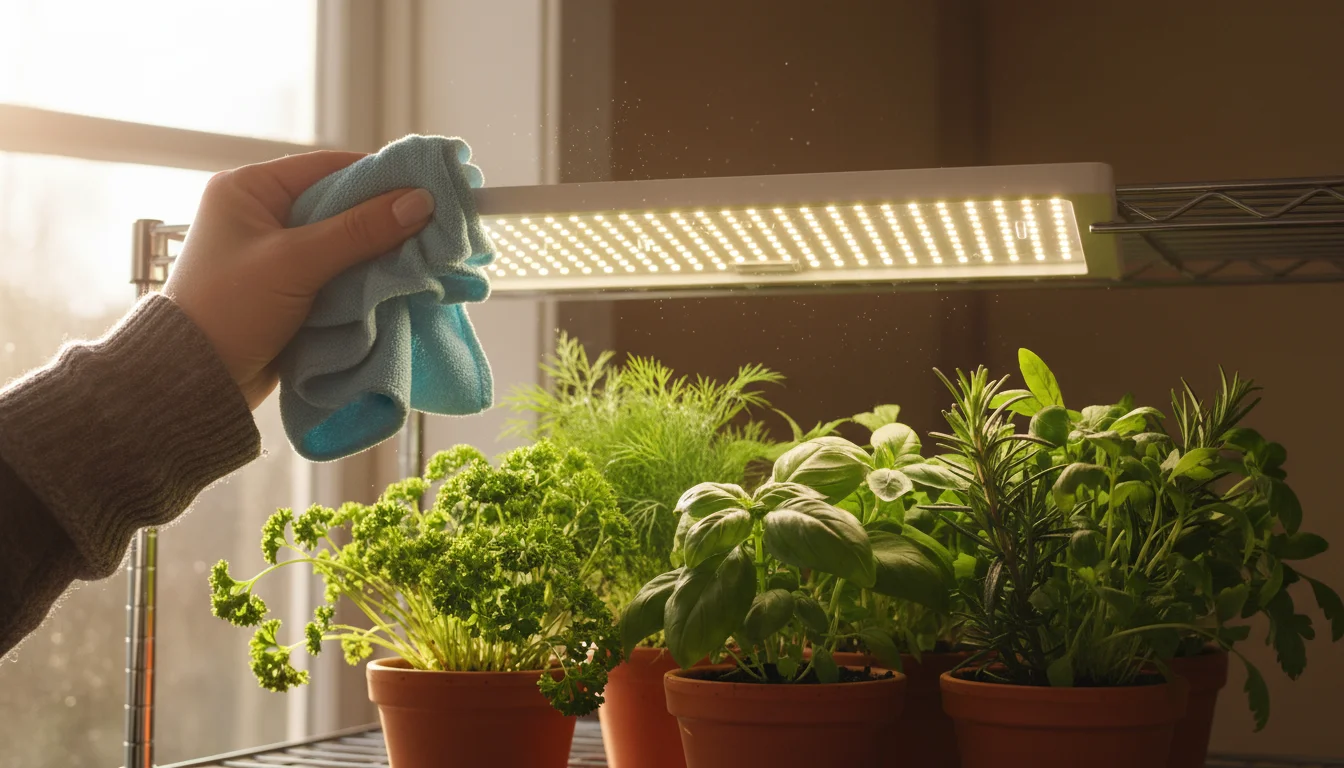
- Keep Fixtures Clean: Dust and debris can accumulate on light surfaces, blocking light output and reducing efficiency. Gently wipe down bulbs, LED lenses, and reflectors with a soft, dry cloth periodically. Avoid abrasive cleaners or excessive moisture.
- Check Connections: Regularly inspect all electrical connections for looseness or signs of wear. A secure connection prevents flickering and ensures consistent power delivery.
- Replace Old Bulbs (Fluorescents): Fluorescent bulbs lose intensity over time, even if they still light up. For optimal plant growth, replace them every 12-18 months of active use, or as recommended by the manufacturer. LEDs have a much longer lifespan and do not require regular bulb changes.
- Monitor Hangers and Supports: Ensure hanging chains, rope ratchets, and shelf mounts remain secure. Over time, vibration or plant growth can stress these components. Re-tighten or replace as needed.
Prioritizing Electrical Safety
Working with electricity near water and plants requires vigilance. You must prioritize safety:
- Water and Electricity Do Not Mix: Always handle grow lights with dry hands. Avoid spraying water directly onto fixtures or power cords. If you use a watering can, be careful not to splash. Electrical safety in home and garden environments is paramount to prevent accidents.
- Use Grounded Outlets and Extension Cords: Plug your grow lights into grounded (three-prong) outlets. If using an extension cord, ensure it is rated for outdoor use or heavy-duty indoor use and can handle the light’s wattage. Avoid overloading outlets.
- Avoid Damaged Cords: Regularly inspect power cords for fraying, cuts, or exposed wires. Immediately replace any damaged cords or fixtures.
- Proper Ventilation: While LEDs produce less heat, ensuring good air circulation around the fixture prevents heat buildup. This extends the life of the light and reduces any potential fire risk.
- Keep Out of Reach: Position grow lights and cords out of reach of children and pets. Chewing on cords presents a severe electrocution hazard.
Maximizing Energy Efficiency
Even with energy-efficient LED grow lights, you can still implement practices to minimize your carbon footprint and electricity bill:
- Choose Efficient Lights: As discussed, LEDs are the most energy-efficient option. Invest in quality fixtures with high PPFD per watt ratings.
- Use Reflective Surfaces: Painting walls white or using reflective materials like Mylar or white foam core around your growing area significantly increases light efficiency. These surfaces bounce stray light back towards your plants, meaning less light escapes and is wasted.
- Optimize Your Light Schedule: Do not run lights longer than necessary. Stick to the recommended light durations for your plants. A precise timer is your best friend here.
- Position Lights Correctly: Maintain the optimal distance from your plants. Light intensity drops off rapidly with distance, so a light too far away wastes energy trying to reach plants that are not receiving adequate intensity.
- Monitor for Degradation: For fluorescent lights, remember they lose intensity over time. Replacing old bulbs ensures your plants are always getting sufficient light without you having to compensate by running the lights longer.
Common Challenges and Troubleshooting Your Grow Lights
Even with the best grow lights and careful setup, you might encounter issues. Knowing how to identify and address common problems helps keep your indoor garden thriving.
Plant Stretching and Legginess
If your plants are tall, thin, and reaching excessively towards the light, they are telling you they are not getting enough light intensity.
- Solution:
- Lower the Light: Gradually move your grow light closer to the plant canopy.
- Increase Intensity: If your light has a dimmer, turn it up.
- Add More Lights: For a larger area, you may need additional fixtures to achieve even coverage and sufficient PPFD.
- Check Bulb Age: If using fluorescents, old bulbs lose intensity. Replace them.
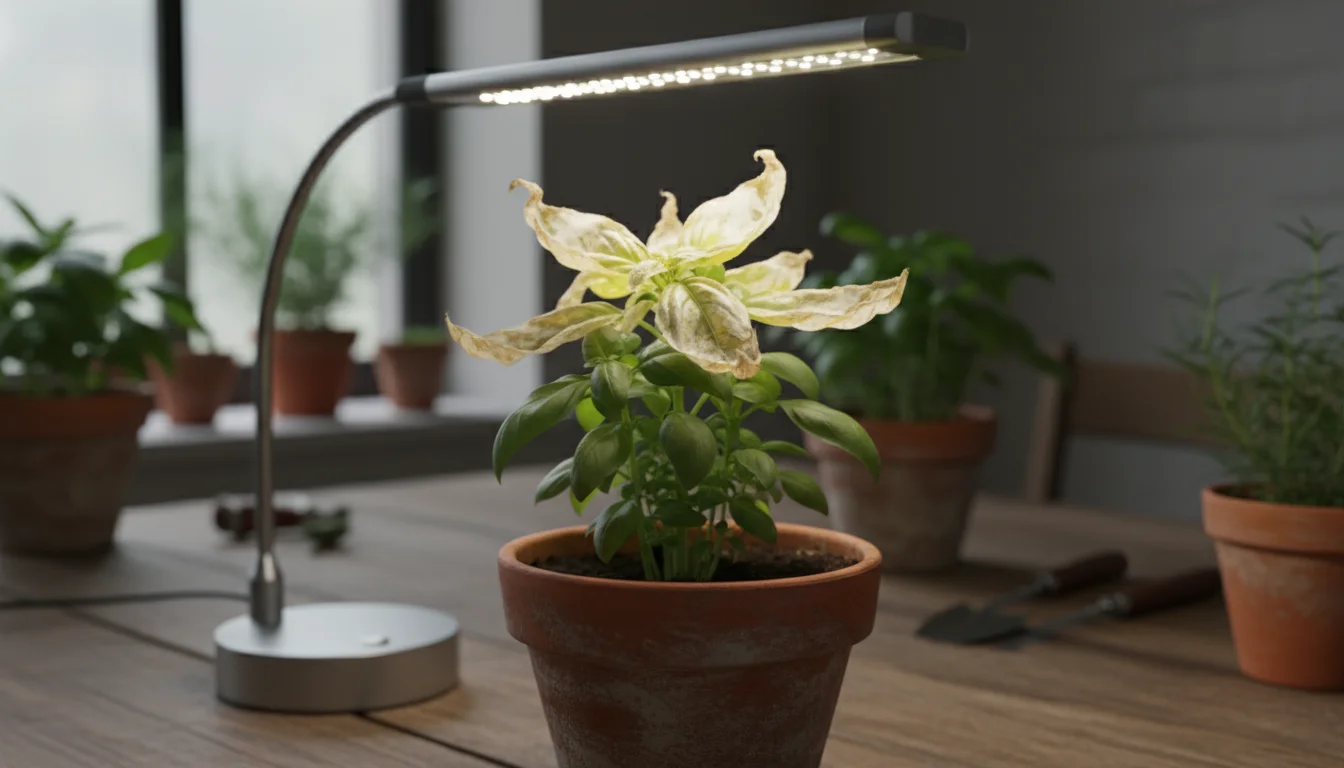
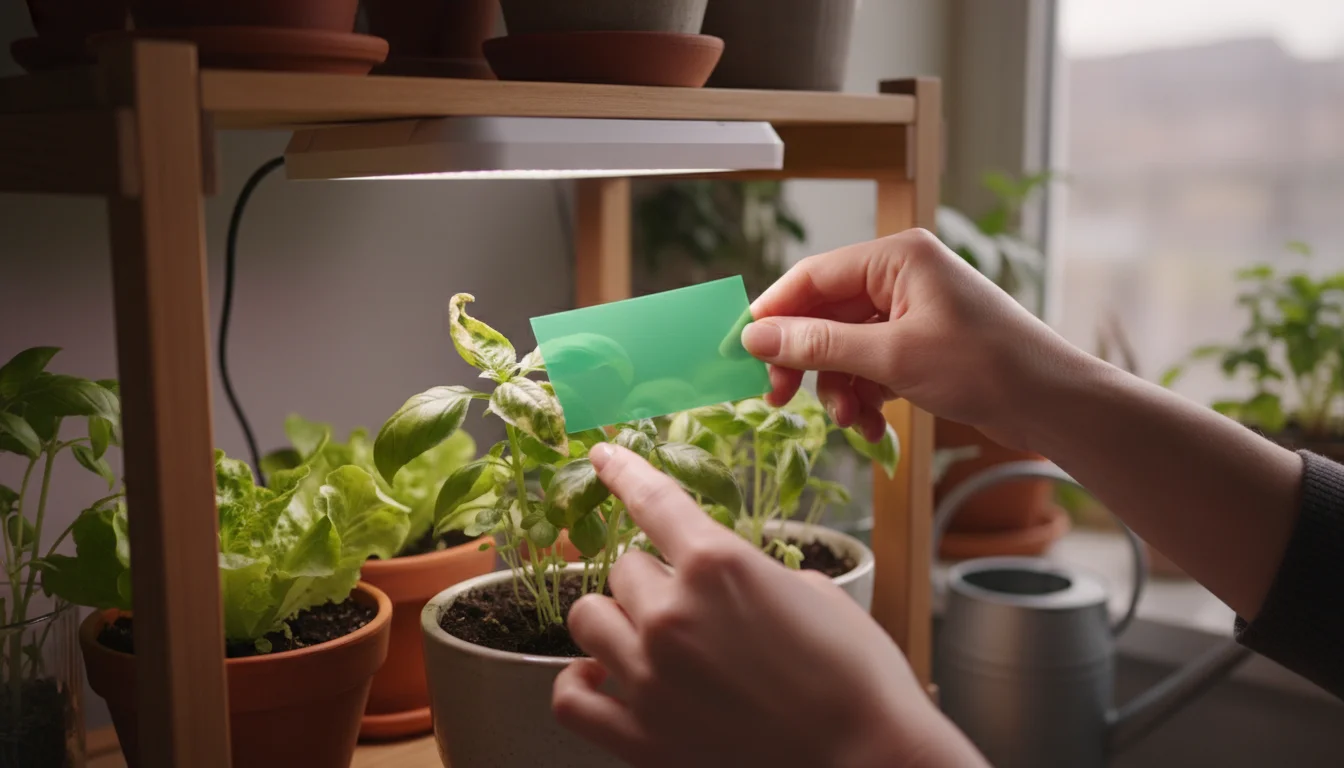
Scorched or Bleached Leaves (Light Burn)
Symptoms include yellow or white patches on leaves, crisping, or leaf edges curling upwards. This indicates too much light intensity or that the light is too close.
- Solution:
- Raise the Light: Move your grow light further away from the plants.
- Reduce Intensity: If your light is dimmable, turn the intensity down.
- Monitor for Recovery: Damaged leaves will not heal, but new growth should appear healthy.
Uneven Growth
If some plants or parts of plants grow better than others, your light coverage might be inconsistent.
- Solution:
- Rotate Plants: Periodically turn your plant pots to expose all sides to the light.
- Adjust Fixture Placement: Ensure the light is centered over your growing area.
- Add Supplemental Side Lighting: For tall, bushy plants, consider adding smaller, lower-intensity LED bars to provide light to the lower canopy.

Algae Growth on Soil Surface
A green film on the soil surface indicates excess moisture and too much light reaching the soil. While usually harmless to plants, it suggests conditions ripe for fungal gnats and other issues.
- Solution:
- Reduce Watering: Allow the top inch or two of soil to dry out between waterings.
- Improve Air Circulation: A small fan can help dry the soil surface.
- Mulch: Cover the soil with a layer of fine gravel, perlite, or an inert mulch to block light from reaching the soil surface.
Flickering Lights or Complete Failure
This points to an electrical issue or a failing component.
- Solution:
- Check Connections: Ensure all plugs and connections are secure.
- Test Outlet: Plug another appliance into the outlet to confirm it works.
- Replace Bulbs (Fluorescents): A flickering fluorescent often means the bulb is at the end of its life.
- Inspect for Damage: Look for any visible damage to cords or the fixture itself. If damaged, discontinue use and replace.
- Consult Manufacturer: If the light is under warranty and troubleshooting does not resolve the issue, contact the manufacturer.
By actively observing your plants and your indoor garden lighting system, you can quickly diagnose and resolve most issues, ensuring your plants continue to thrive under optimal conditions. The Missouri Botanical Garden provides valuable insights on plant health and care.
Frequently Asked Questions
How close should my grow light be to my plants?
The ideal distance varies significantly based on the light type and intensity, as well as the plant’s needs. For seedlings or low-light plants under fluorescent lights, you can place them 4-6 inches away. For powerful LED grow lights with mature plants, the distance might be 12-24 inches. Always start with the manufacturer’s recommendations and observe your plants. Raise the light if you see scorching, or lower it if plants appear leggy.
Can I leave grow lights on 24 hours a day?
No, you should not leave grow lights on 24 hours a day. Plants, like most living organisms, require a period of darkness to complete essential metabolic processes, such as respiration. A continuous light cycle can stress plants, inhibit proper development, and reduce yields. Most plants thrive on a schedule of 12-18 hours of light followed by 6-12 hours of darkness.
Do grow lights use a lot of electricity?
Modern LED grow lights are very energy-efficient, using significantly less electricity than older grow light technologies like HID lights. While there is an ongoing cost, the amount is often manageable for small indoor setups. Using a timer to ensure lights are only on for the required duration, and choosing efficient full-spectrum LEDs, helps minimize your electricity bill. Fluorescent lights use more power than LEDs but less than HIDs.
What is “full spectrum” and why is it important?
“Full spectrum” grow lights aim to mimic natural sunlight, providing a balanced output of light across the visible spectrum, including essential red and blue wavelengths. This is important because plants use different wavelengths for various physiological processes, from vegetative growth (blue light) to flowering and fruiting (red light). A full spectrum light supports overall healthy growth from seedling to maturity, rather than just one specific stage.
How many grow lights do I need for my small space?
The number of grow lights you need depends on the size of your growing area, the intensity of your chosen lights, and the light requirements of your plants. For small shelves, a single bar-style LED or a T5 fixture might cover 2-3 square feet adequately for herbs or seedlings. For fruiting plants in a larger area, you might need a more powerful, larger LED panel or multiple smaller lights to achieve sufficient and even coverage. Calculate the square footage you need to cover and compare it to the light’s specified coverage area.
For reliable tool and safety guidance, see
UF/IFAS — Microirrigation for Home Landscapes,
Oregon State Extension — Cleaning & Sharpening Tools,
Missouri Botanical Garden — Watering Tips and
National Safety Council — Home & Garden Safety.
Disclaimer: Follow manufacturer instructions and local regulations. Wear appropriate protection, store blades safely, and keep tools away from children and pets.