
For research-based plant care guidance, visit
Chicago Botanic Garden, New York Botanical Garden, Royal Horticultural Society (RHS) and University of Minnesota Extension.
Disclaimer: This article is for informational purposes only and is not a substitute for professional advice. Consult local extension services for region-specific recommendations.
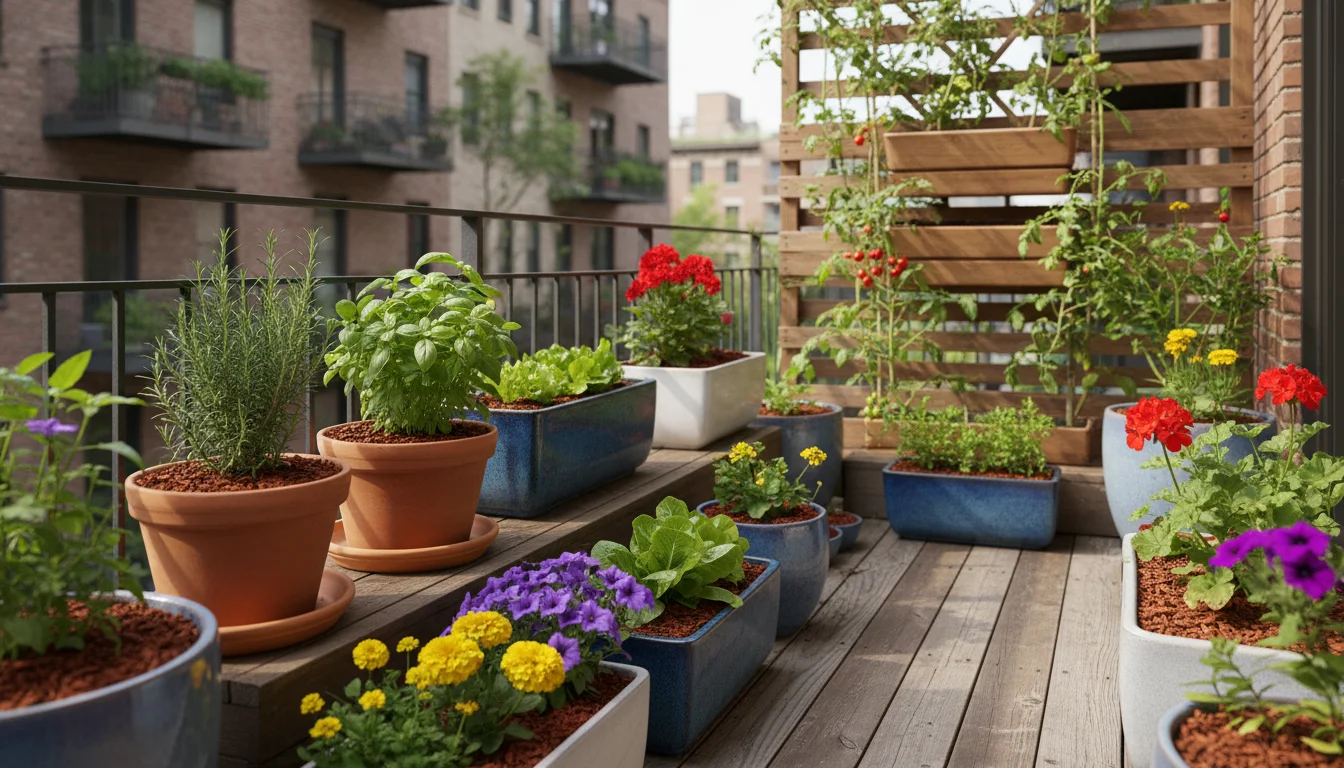
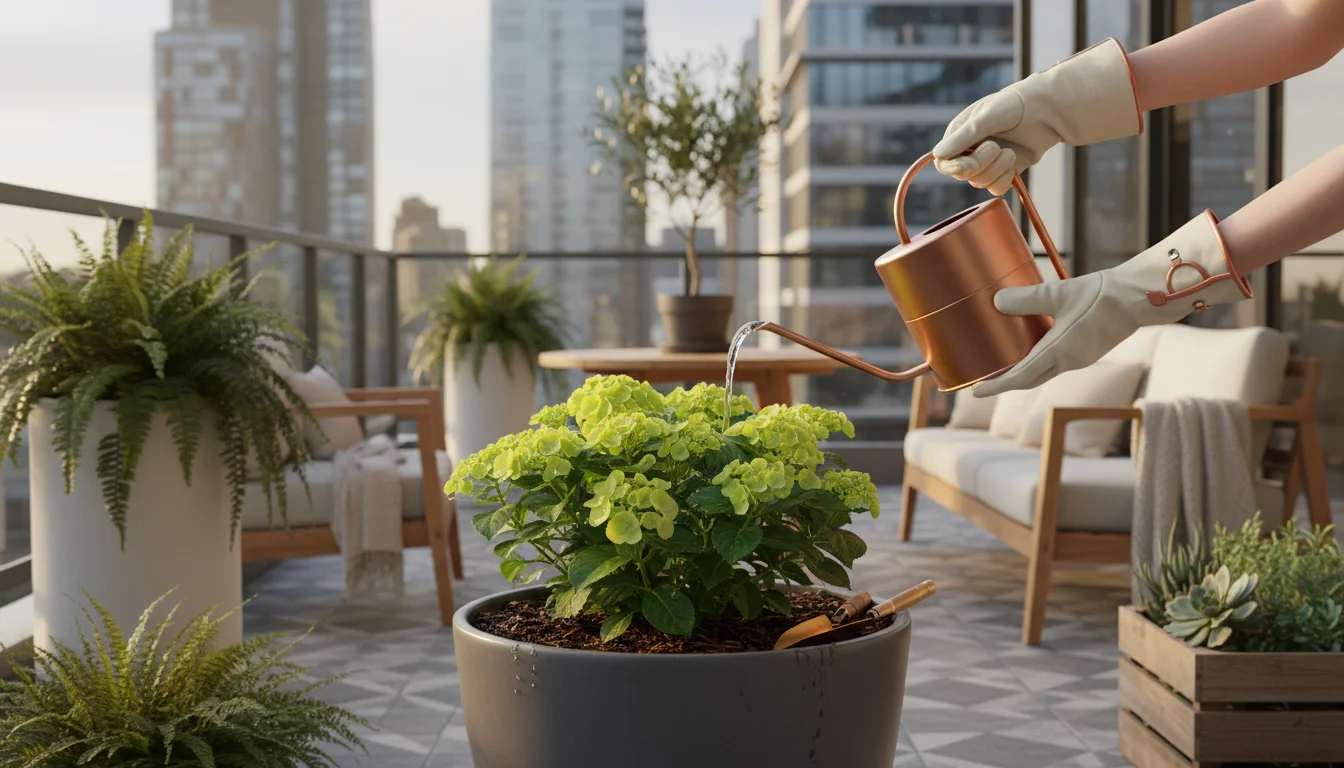
Keeping container plants healthy and vibrant in small spaces or low-maintenance gardens often feels like a balancing act. You strive for that perfect blend of beauty and ease, but sometimes your potted plants struggle despite your best efforts. Wilting foliage, rapidly drying soil, or a constant battle with weeds can be frustrating. What if there was one simple, effective technique that could address these common issues, improve plant health, and reduce your gardening workload? There is, and it’s called mulching.
Mulch, a layer of material applied to the surface of the soil, is a cornerstone of successful garden care. While often associated with in-ground garden beds, its benefits extend significantly to potted plants, offering solutions to many challenges unique to container gardening. Understanding the “why” behind mulching will empower you to implement this practice with confidence, transforming your container garden into a thriving, resilient oasis. We will explore the practical benefits, guide you through choosing the right materials, and provide actionable steps to ensure your potted plants flourish with minimal fuss. Prepare to discover how this straightforward technique can revolutionize your plant care routine, giving you healthier plants and more time to enjoy your garden.

Discover Container Mulching Benefits
Mulching your container plants offers a multitude of advantages that directly address the specific environmental challenges potted plants face. Unlike plants in the ground, container plants have limited soil volume, exposing them to more rapid changes in temperature and moisture levels. A simple layer of mulch provides a protective barrier, evening out these fluctuations and creating a more stable environment for your plant’s roots. This stability translates into healthier growth, less stress, and ultimately, a more beautiful and resilient garden.
One of the most significant benefits is improved moisture retention. Container soil dries out much faster than garden soil, especially in terracotta pots or during hot, windy weather. Mulch acts as a shield, slowing down evaporation from the soil surface. This means you water less frequently, conserving water and reducing the time you spend on daily plant maintenance. Research by various agricultural extension services, such as the University of Minnesota Extension, consistently shows that mulched soil retains significantly more moisture than unmulched soil, often reducing watering needs by 25-50 percent. This benefit is particularly valuable for container gardeners who may struggle with consistent watering schedules or live in arid climates. By keeping the soil consistently moist, but not waterlogged, you create ideal conditions for root development, allowing your plants to absorb nutrients more effectively.
Beyond water conservation, mulching helps regulate soil temperature. In summer, the sun beats down on pots, causing soil temperatures to soar and potentially cooking delicate roots. Mulch insulates the soil, keeping it cooler and preventing thermal stress. Conversely, in colder weather, mulch provides a layer of protection against freezing temperatures, helping to stabilize soil warmth and protect roots from sudden drops. This thermal regulation is critical for preventing root damage and ensuring your plants remain vibrant through seasonal changes. Imagine your pot sitting on a scorching patio; without mulch, that soil is heating up rapidly. With a protective layer, the temperature remains much more stable, mimicking the natural buffering found in garden beds.
Weed suppression is another practical benefit. Weeds compete with your potted plants for vital water, nutrients, and light, especially problematic in the confined space of a container. A layer of mulch physically blocks sunlight from reaching weed seeds, preventing them from germinating and growing. The few weeds that might sprout will be weaker and easier to pull, saving you effort and ensuring your plants receive all the resources they need to thrive. This creates a cleaner, more aesthetically pleasing container and reduces the need for manual weeding, which can disturb delicate roots.
Furthermore, organic mulches, such as shredded bark or compost, contribute to long-term soil health. As they decompose, these materials release valuable organic matter and nutrients into the potting mix. This process improves soil structure, enhances drainage, and feeds the beneficial microorganisms that are essential for a healthy root system. While container plants rely heavily on potting mix and fertilizer, the gradual enrichment from decomposing mulch adds an extra layer of nourishment and vitality, extending the life and productivity of your potting medium. This slow release of nutrients complements your regular feeding schedule, creating a more robust and self-sustaining micro-ecosystem within your pot.
Finally, mulching provides an aesthetic appeal. A neatly mulched container looks tidier and more finished. It can hide exposed soil, camouflage unsightly drainage holes, and create a uniform, polished appearance across your entire collection of potted plants. The visual impact alone can elevate the look of your small space garden, making it feel more intentional and cared for. From a practical standpoint, this means less dirt splashing onto your patio or deck during watering, keeping your outdoor living areas cleaner and more inviting. Mulching is a simple yet powerful technique that offers substantial advantages, from water savings to improved plant vitality and enhanced beauty.
Understanding Mulch Types for Container Gardening
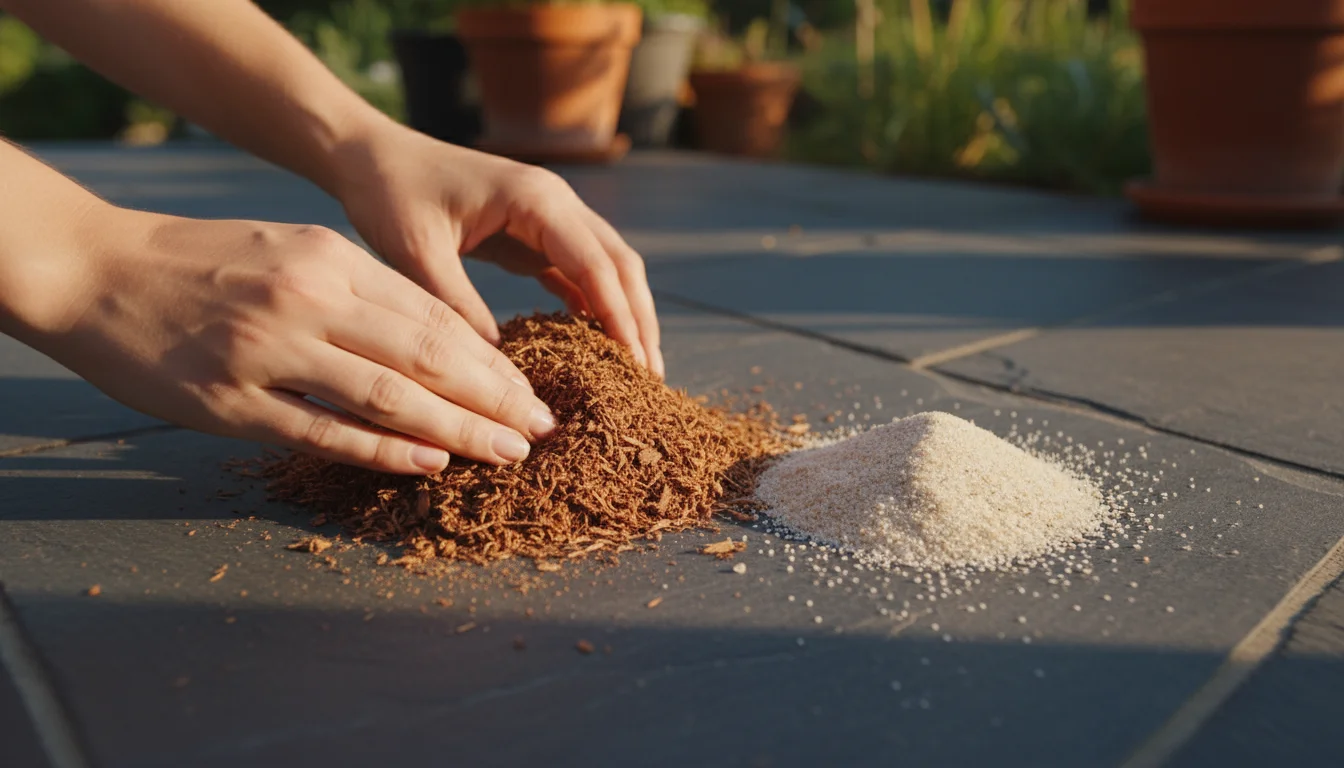
Not all mulches are created equal, and understanding the differences between organic and inorganic types is crucial for making the best choice for your container plants. Each type offers distinct advantages and disadvantages, and the right selection depends on your plant’s needs, your aesthetic preferences, and your commitment to sustainability. Knowing these distinctions will allow you to select a mulch that not only performs well but also aligns with your gardening philosophy.
Organic Mulches
Organic mulches originate from plant material and decompose over time, enriching the soil with organic matter and nutrients. They are excellent for improving soil structure and providing a slow-release food source for your plants. Because they break down, you will need to replenish them periodically, typically once or twice a year, depending on the material and climate.
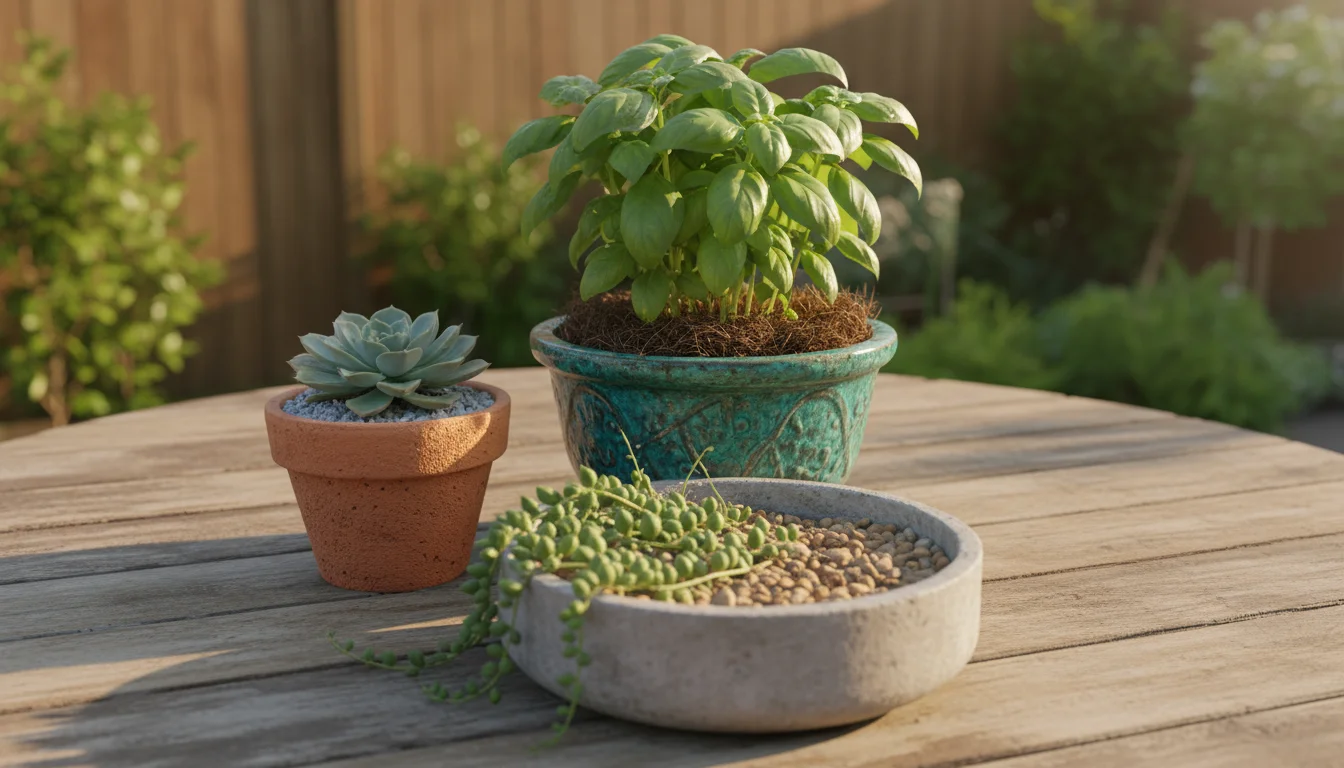
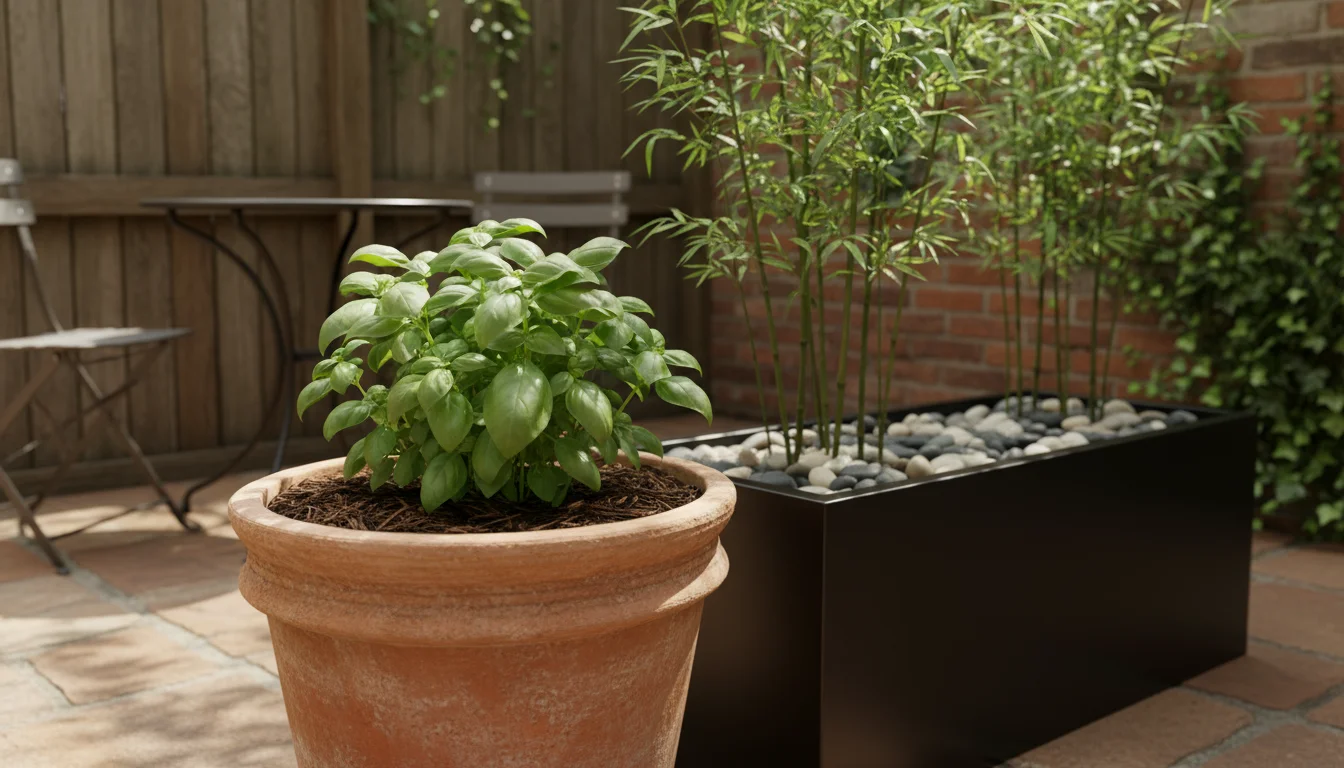
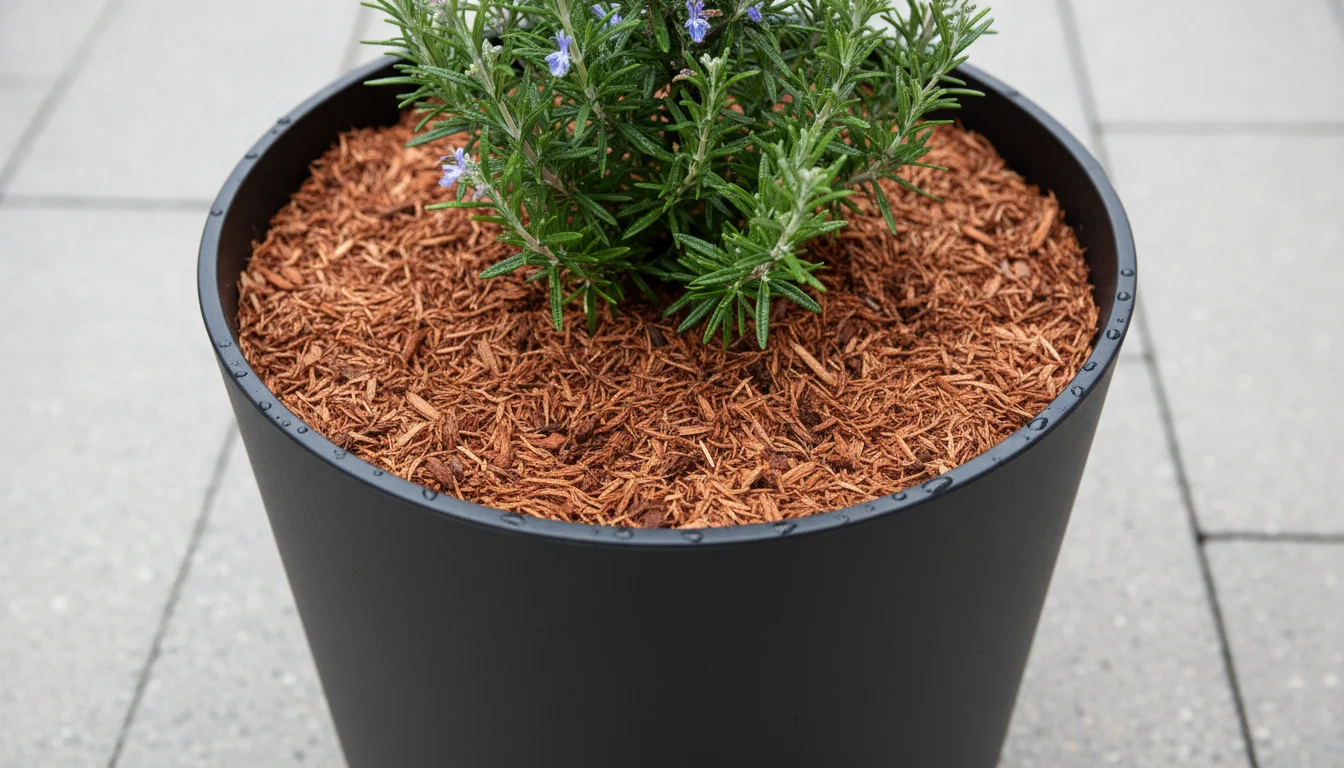
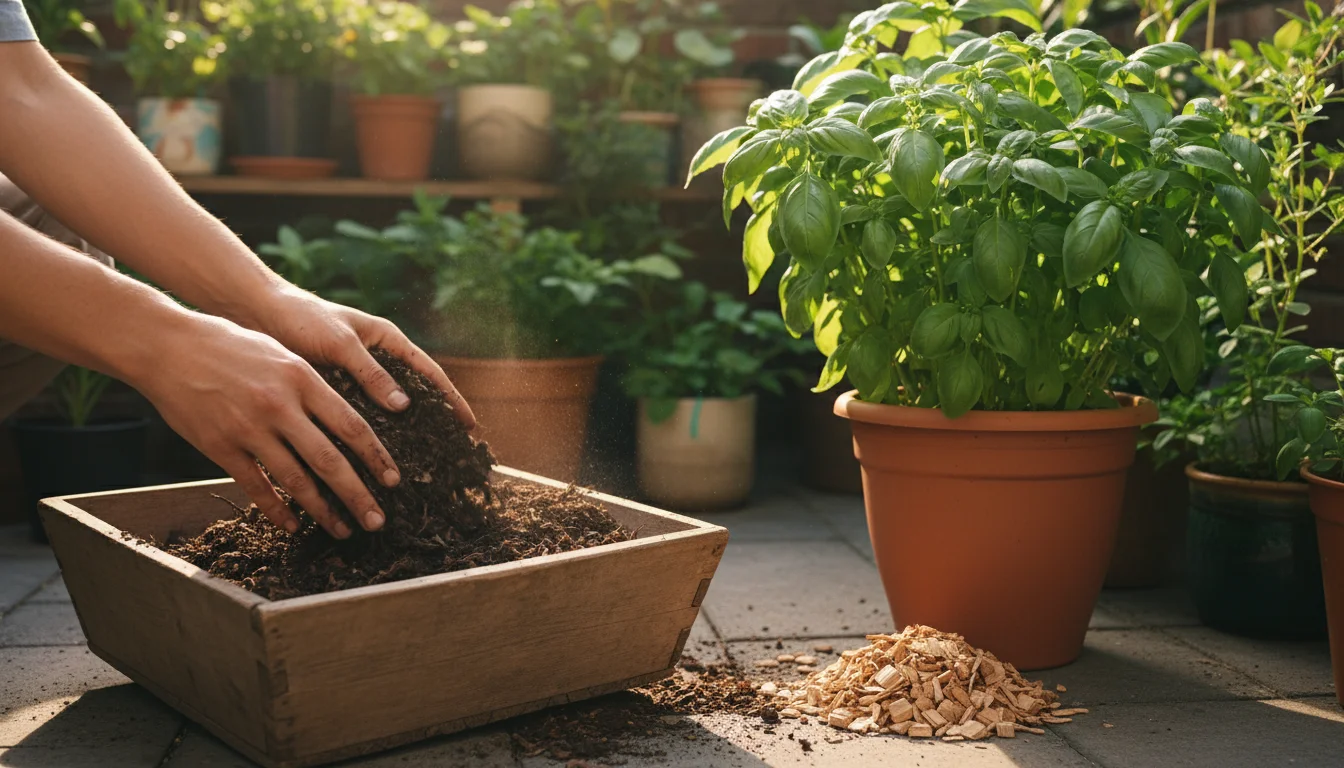
- Wood Chips or Shredded Bark: These are popular choices due to their attractive appearance and longevity. They decompose slowly, making them a good option for perennials, shrubs, and trees in containers. They come in various colors and sizes, offering aesthetic flexibility. Shredded bark, in particular, tends to interlock, preventing it from blowing away easily. Ensure you use aged or composted wood products to avoid nitrogen tie-up, a temporary condition where decomposing wood draws nitrogen from the soil, potentially impacting plant growth.
- Compost: A fantastic organic mulch, compost is rich in nutrients and teeming with beneficial microorganisms. Applying a layer of finished compost directly to the soil surface not only helps retain moisture and suppress weeds but also provides a gentle, continuous feed for your plants. It breaks down relatively quickly, requiring more frequent replenishment, but its soil-building properties are unparalleled. Use a high-quality, finished compost that is dark, crumbly, and smells earthy.
- Straw or Hay: While more commonly used in vegetable gardens, straw or hay can serve as effective mulch for larger containers, especially for edibles. They are excellent at moisture retention and temperature moderation. Be mindful to use straw, which is typically seed-free, rather than hay, which often contains seeds that can sprout into unwanted weeds in your pots. Straw also lightens the soil as it breaks down, which can be beneficial for heavy potting mixes.
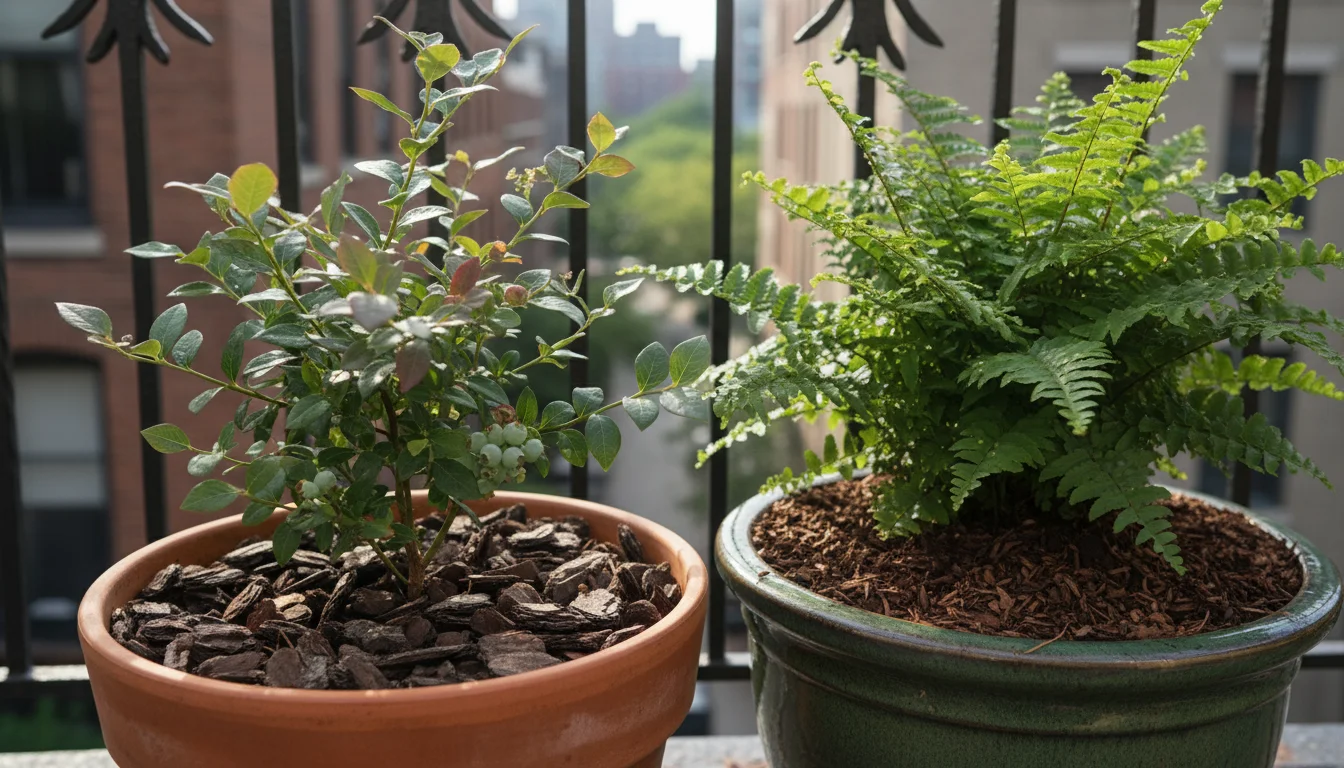
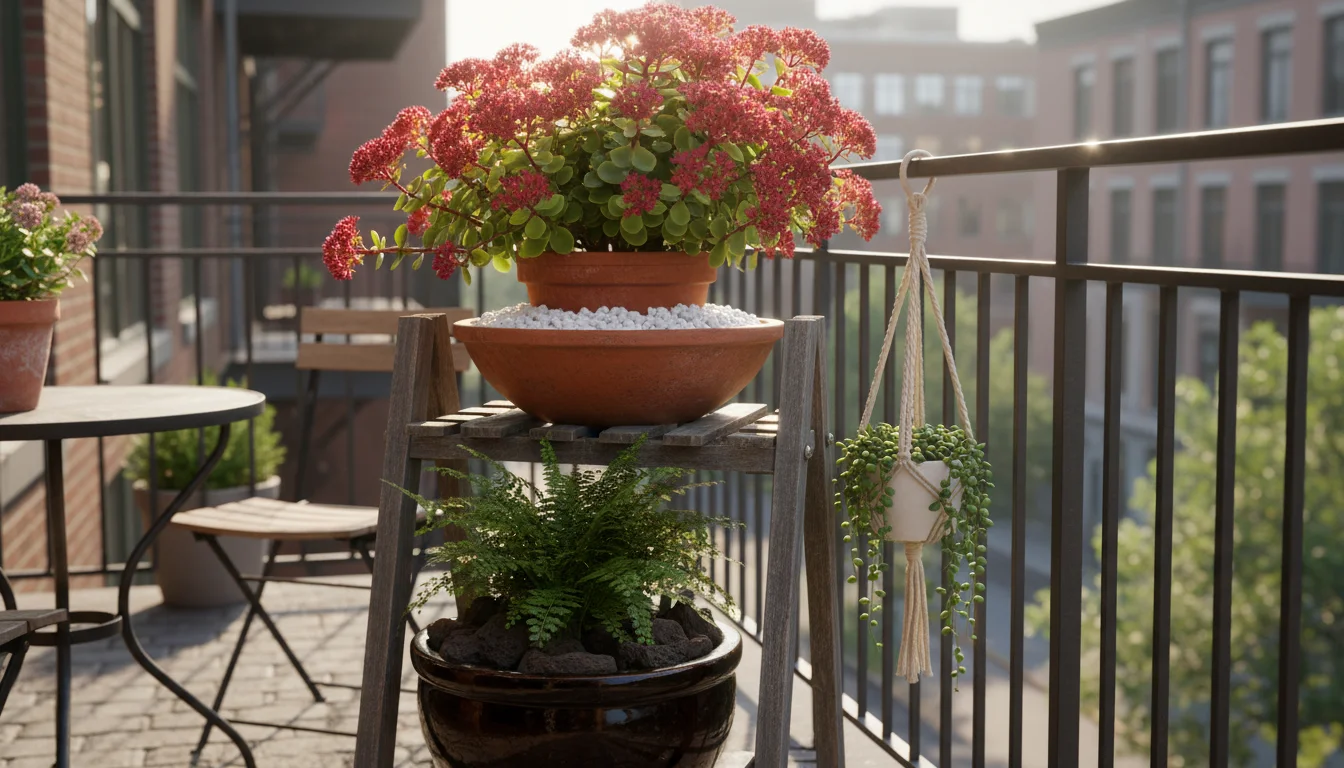
- Pine Needles: If you have access to pine trees, their fallen needles make an excellent, slightly acidic mulch. They are lightweight, allow good air and water penetration, and decompose slowly. Pine needles are particularly well-suited for acid-loving plants such as blueberries, azaleas, or rhododendrons in containers, as they can help maintain a lower soil pH over time.
- Leaf Mold or Shredded Leaves: Gathered autumn leaves, especially when shredded, make a wonderful free mulch. They decompose into “leaf mold,” a rich, dark material that significantly improves soil structure and water retention. Ensure the leaves are disease-free. Shredding them helps them break down faster and prevents them from compacting into a water-repelling mat.
- Coco Coir Chips: These fibrous pieces derived from coconut husks are a sustainable and excellent option for container mulching. Coco coir chips are lightweight, highly absorbent, and decompose slowly. They retain water effectively and provide good aeration, making them ideal for many container plants. They are also pH neutral, so they will not alter your soil’s acidity or alkalinity.
Inorganic Mulches
Inorganic mulches are non-plant-based materials that do not decompose. They do not add nutrients or organic matter to the soil but excel at temperature moderation, moisture retention, and weed suppression. They are permanent, meaning you will not need to replenish them often, if at all.
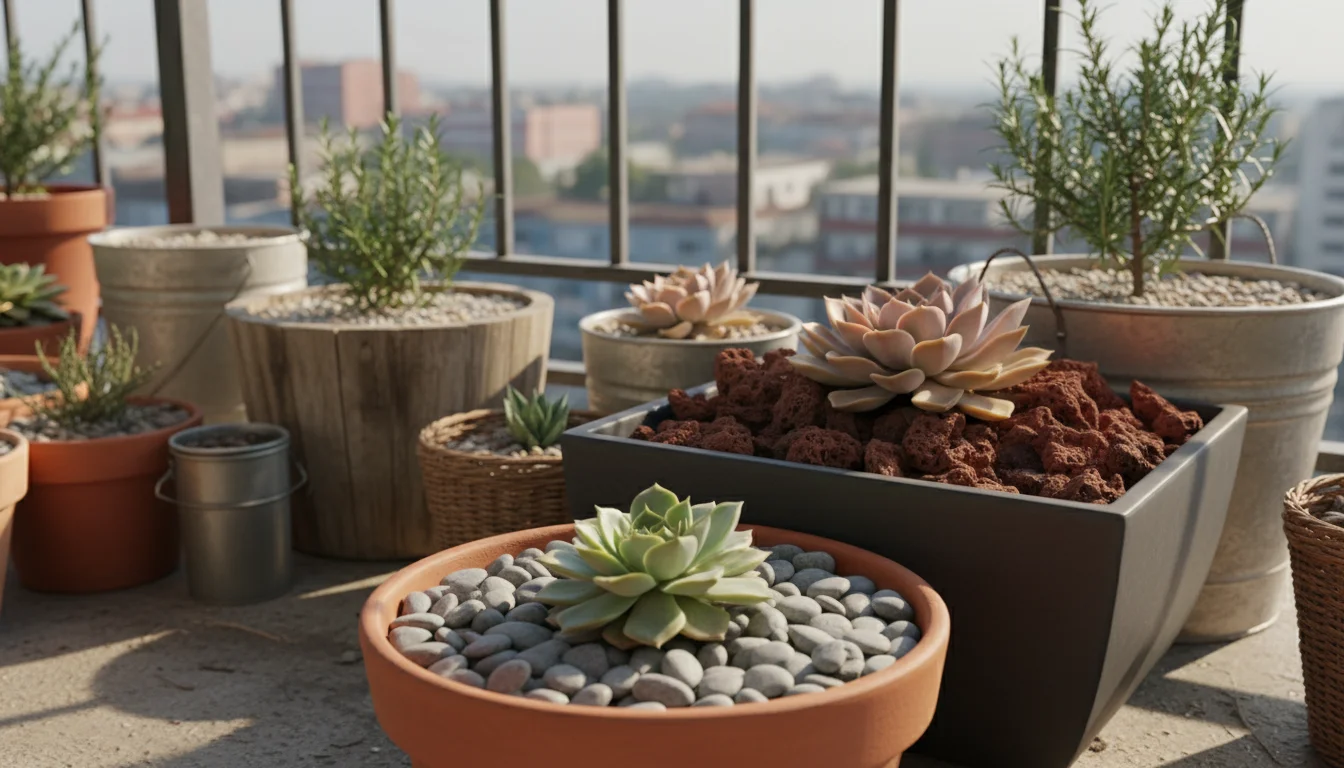
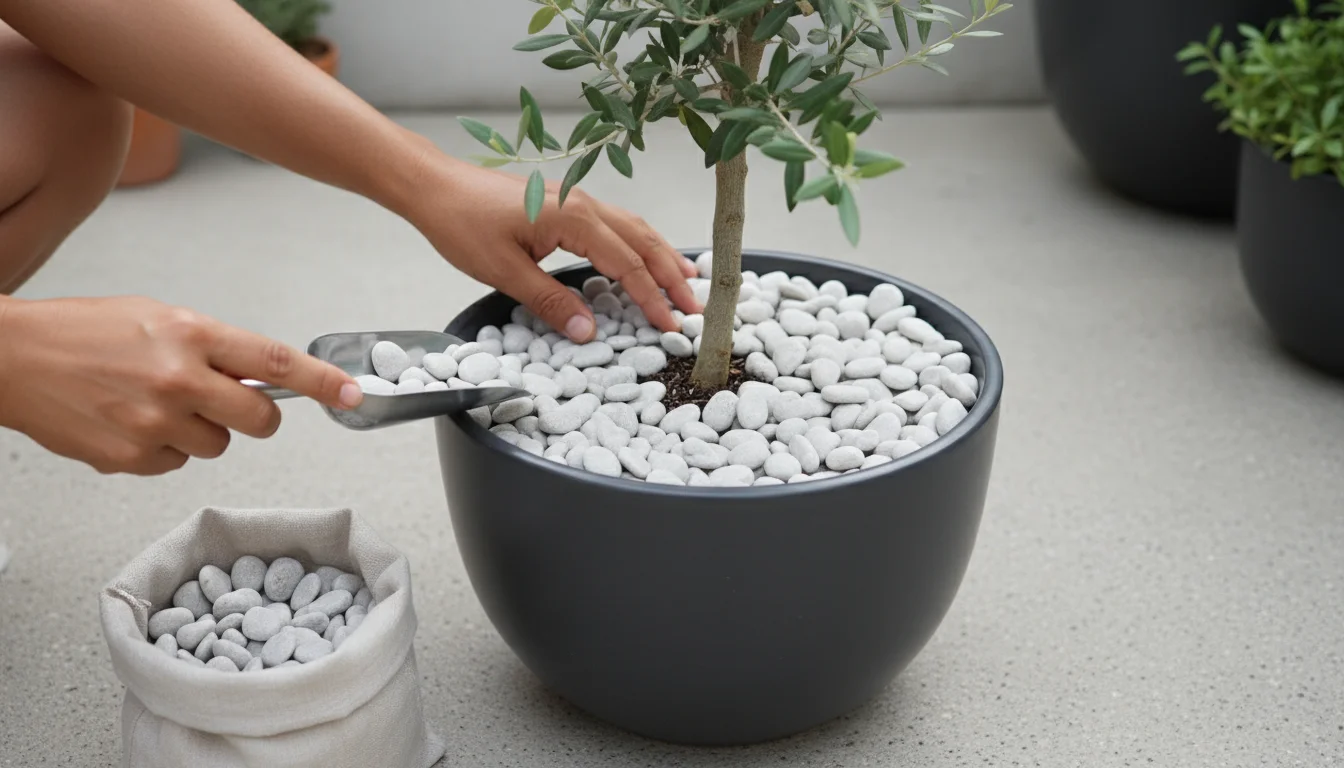
- Pebbles or Gravel: Decorative and long-lasting, pebbles or gravel offer excellent drainage and can prevent soil splash. They are particularly effective at keeping soil temperatures stable and are ideal for succulents, cacti, or plants that prefer drier conditions, as they help reflect heat. However, they can be heavy, which might be a consideration for large containers. They also do not add any organic material to the soil.
- Lava Rock: Lightweight and porous, lava rock provides good insulation and prevents soil from washing away. Its irregular texture adds an interesting visual element, and it is excellent for retaining warmth, which can be beneficial for some plants in cooler climates. Like pebbles, it does not contribute to soil fertility.
- River Rock: Smooth, rounded river rocks offer a polished, natural aesthetic. They function similarly to pebbles in terms of soil protection and temperature regulation. Their weight makes them stable in windy conditions.
When selecting your mulch, consider the specific needs of your plant. For example, a succulent in a container benefits more from inorganic mulches like pebbles that enhance drainage and reflect heat, while a leafy annual benefits from organic mulches that enrich the soil as they break down. Always aim for a material that complements both your plant’s requirements and the overall look of your garden.

Choosing the Right Mulch for Your Potted Plants
Selecting the ideal mulch for your container plants involves more than just picking a material you find attractive. It requires considering the specific needs of your plants, the size of your containers, your local climate, and your aesthetic preferences. A thoughtful choice ensures your mulch performs optimally, supporting plant health and simplifying your care routine. Let’s break down the factors that guide this decision.
Consider Your Plant’s Needs
Different plants have varying requirements, and your mulch should ideally complement these. For instance, acid-loving plants like blueberries, camellias, or azaleas thrive when mulched with materials that contribute to a slightly acidic soil pH. Pine needles, pine bark, or even coffee grounds (in moderation) can help achieve this. Conversely, plants that prefer alkaline conditions, or those sensitive to acidity, will do better with neutral mulches such as coco coir or inorganic options like gravel.
For moisture-loving plants such as ferns or many annuals, organic mulches like shredded leaves, wood chips, or compost are excellent choices. They excel at retaining soil moisture, reducing the stress of rapid drying in containers. For plants that prefer drier conditions, like many Mediterranean herbs or succulents, inorganic mulches such as small pebbles, gravel, or lava rock can be more suitable. These options enhance drainage around the base of the plant, prevent rot, and reflect heat, mimicking their natural arid environments.
Container Size and Material
The size and material of your container also influence mulch choice. Larger containers generally accommodate a wider range of mulch types, including chunkier wood chips. Smaller pots, however, might be overwhelmed by large pieces of bark; finer mulches like coco coir or fine gravel are usually more appropriate. The depth of the mulch layer is also important; aim for 1-2 inches in smaller pots and up to 3 inches in larger ones. Terracotta pots, known for their porosity and rapid drying, benefit immensely from any type of mulch that helps retain moisture, especially organic options. Plastic or glazed ceramic pots, which retain moisture more effectively, might allow for a lighter hand with moisture-retaining mulches or greater use of inorganic types for aesthetics.
Climate Considerations
Your local climate plays a significant role. In hot, dry climates, mulches that are highly effective at moisture retention and temperature moderation are paramount. Organic mulches are excellent here, but inorganic mulches like light-colored gravel can also help reflect intense sun and keep soil cooler. In cooler, wetter climates, good drainage remains important, but you might prioritize mulches that protect roots from cold snaps. Organic mulches provide insulation, while darker inorganic mulches, like lava rock, can absorb and radiate warmth. In areas with heavy rainfall, mulches that do not compact easily and allow water to penetrate are crucial, preventing waterlogging and fungal issues.
Aesthetic and Maintenance Preferences
Finally, consider the look you want to achieve and your willingness to reapply mulch. If you prefer a natural, earthy look, shredded bark, compost, or leaf mold are excellent. For a more modern, minimalist, or formal appearance, decorative pebbles, river rock, or lava rock can be stunning. Remember that organic mulches break down and need replenishment, usually annually or biannually. If you prefer a truly “set it and forget it” approach, inorganic mulches are your best bet, as they are permanent. However, they do not contribute to soil fertility, so you will rely entirely on your potting mix and fertilizer for nutrient supply.
By weighing these factors—plant type, container specifics, climate, and personal preference—you can confidently select a mulch that not only enhances the beauty of your container garden but also actively supports the health and longevity of your plants. This informed decision-making is a key step in developing a low-maintenance, high-reward gardening approach.
Step-by-Step Mulch Application for Containers
Applying mulch to your container plants is a simple process, but following a few key steps ensures maximum benefit and avoids common pitfalls. Proper application creates an effective barrier for moisture retention and temperature regulation, while improper application can lead to problems like fungal growth or pest infestations. This practical guide will walk you through the process, ensuring your mulching efforts truly support your plants.
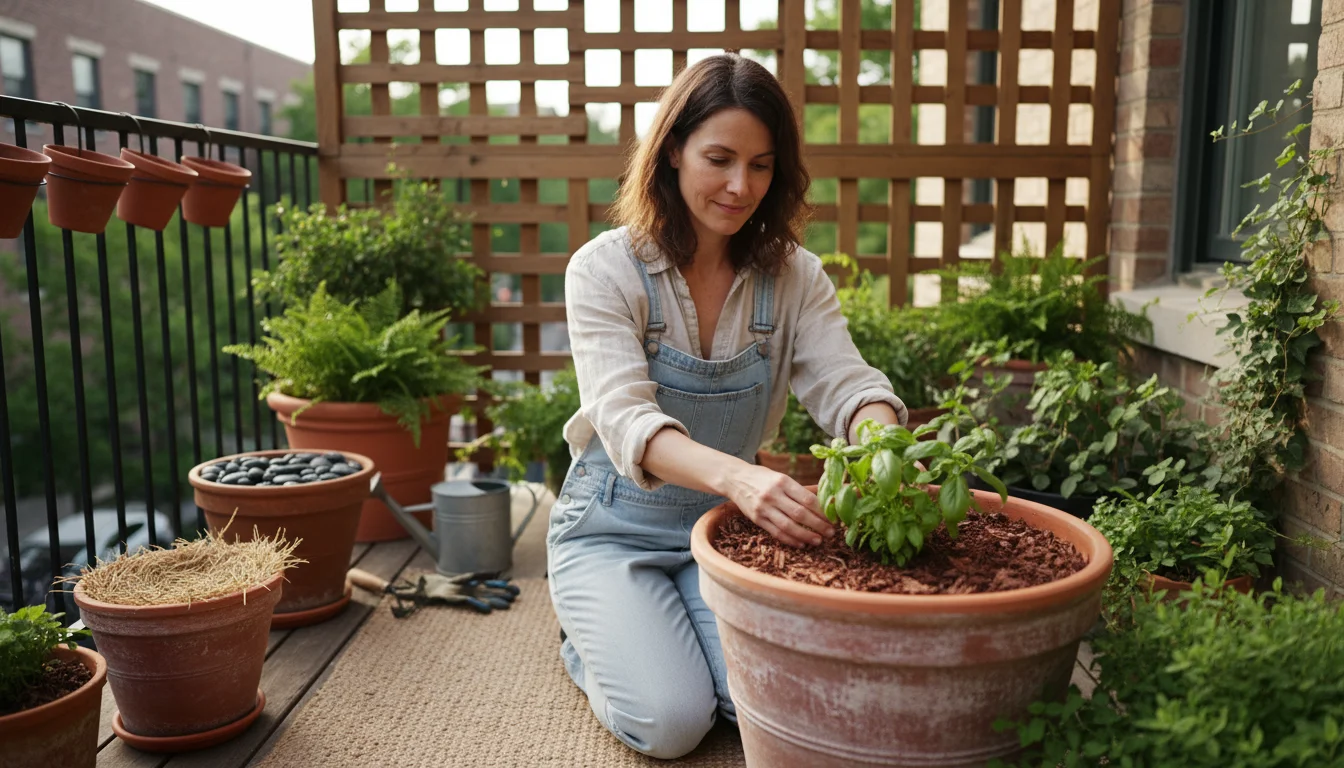
Step 1: Prepare Your Container and Plant
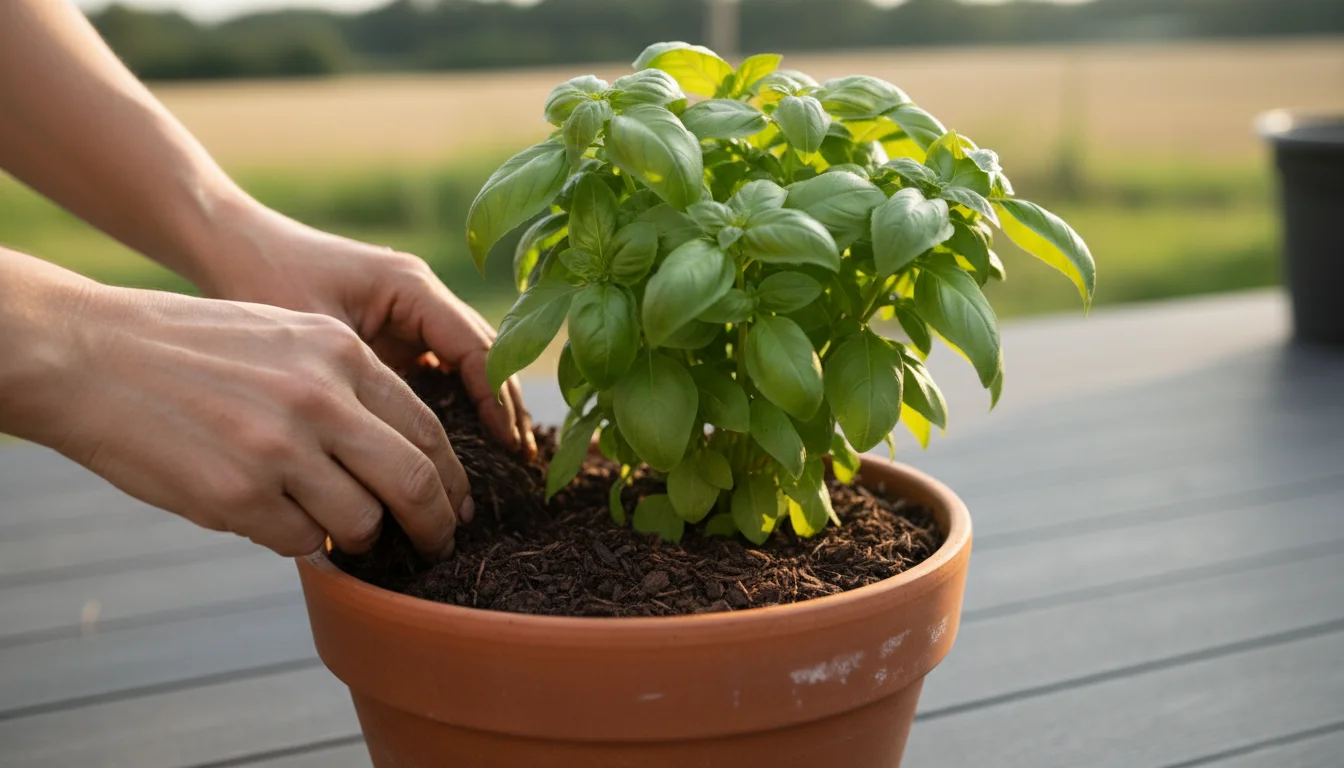
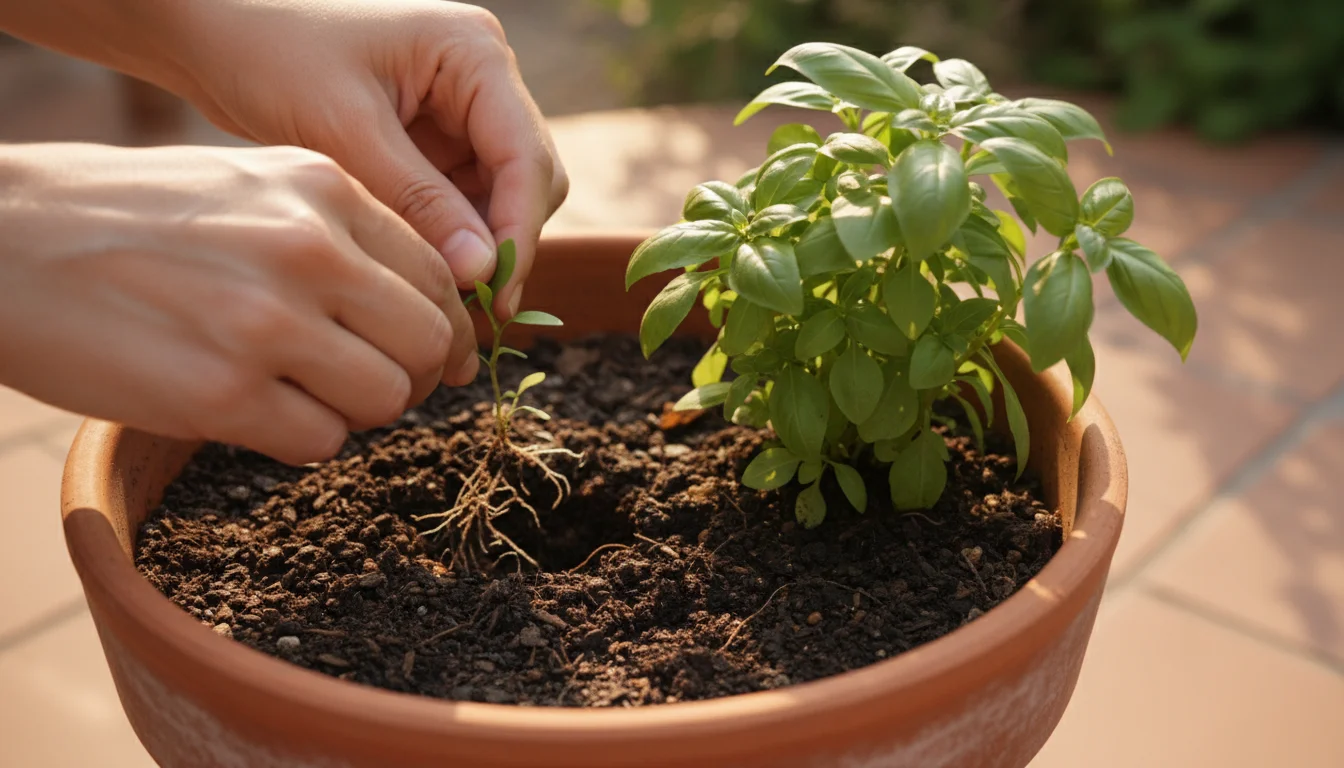
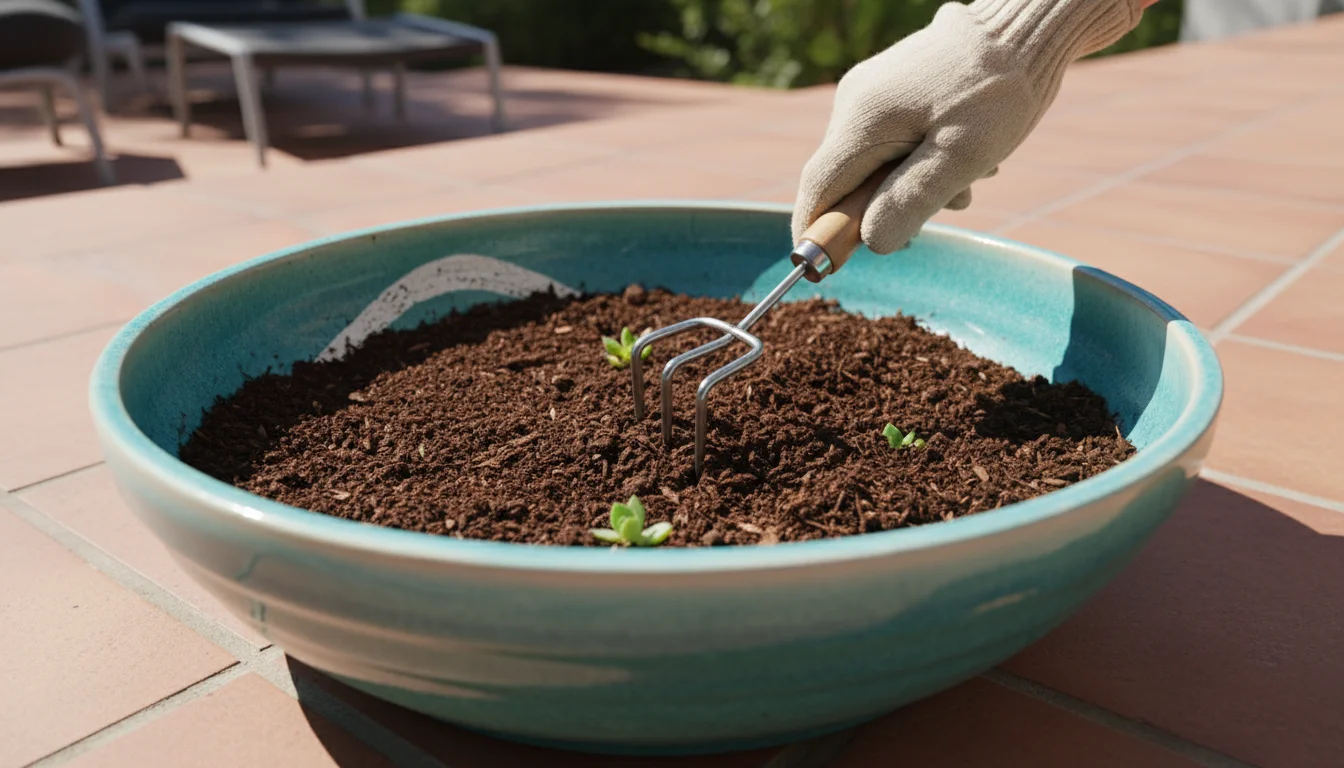
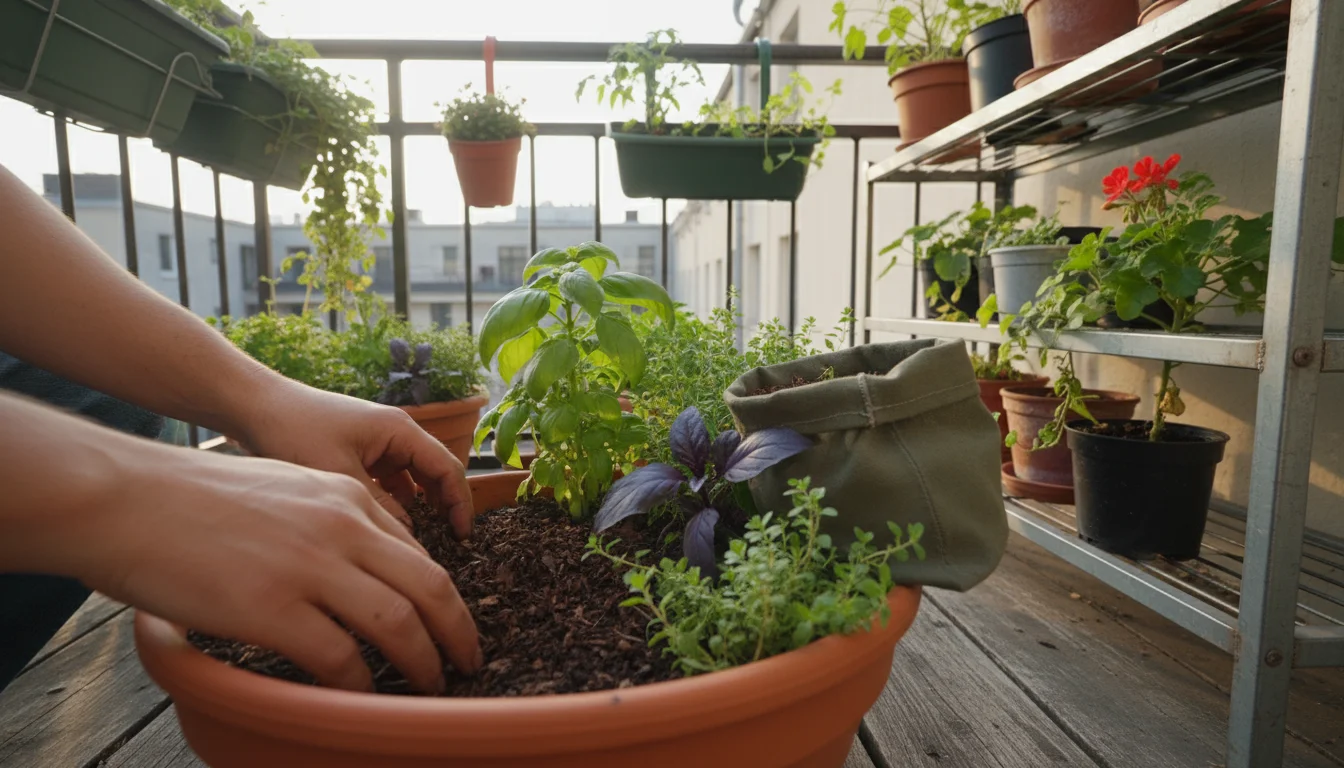
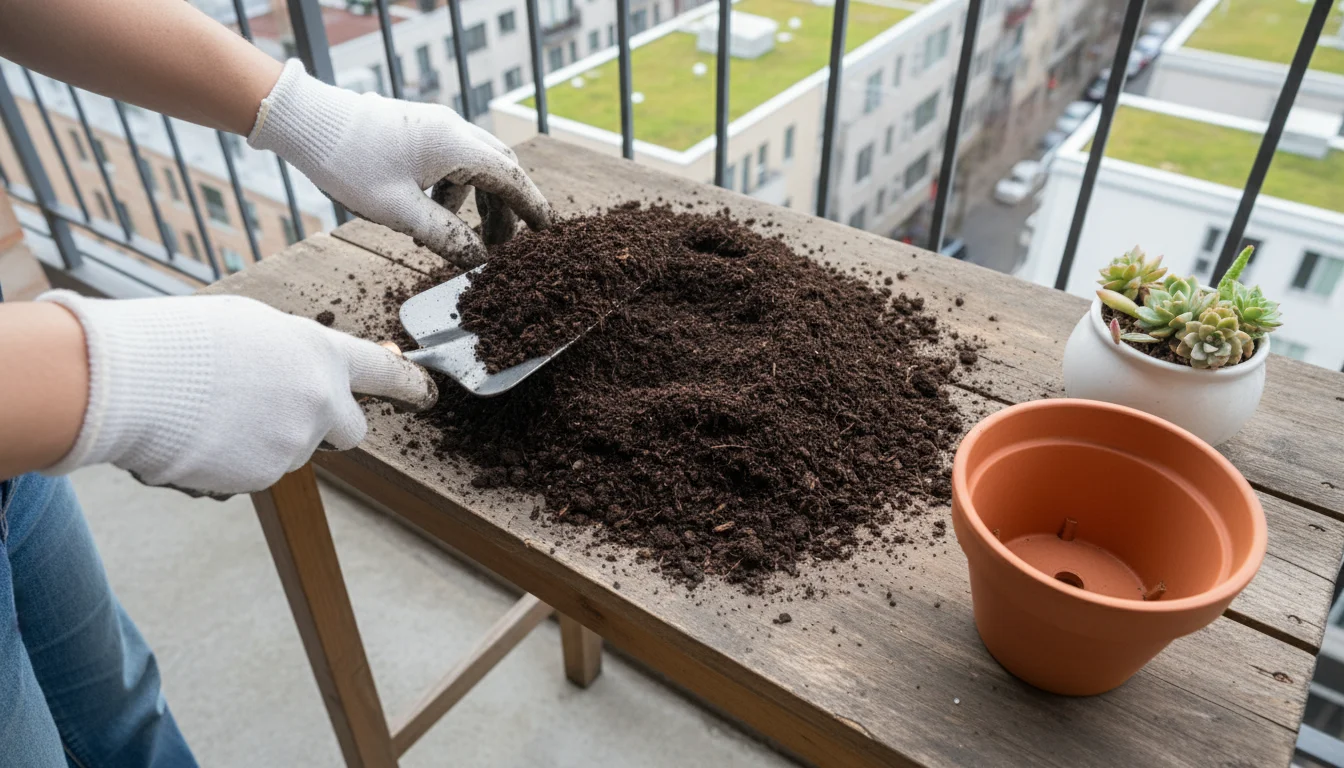
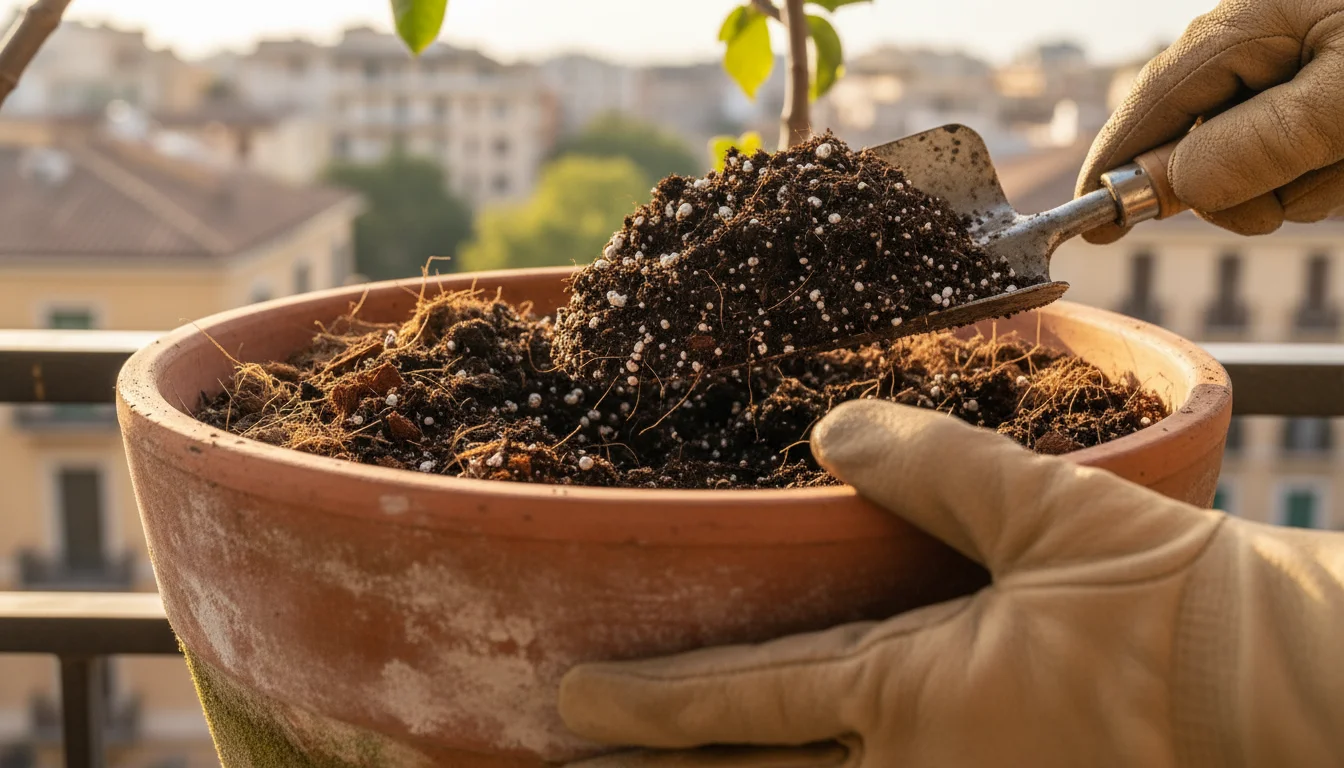
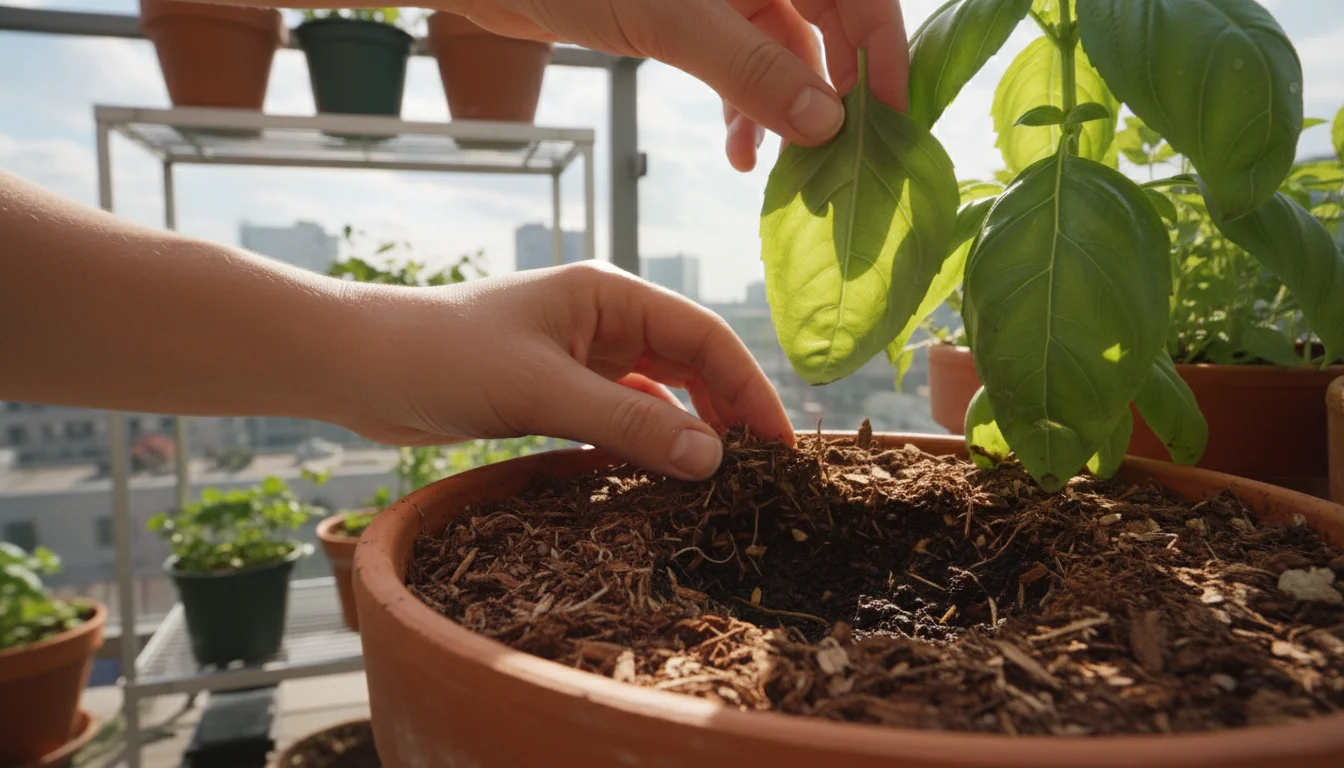
Before you even touch the mulch, ensure your plant and its container are ready. Start by thoroughly watering your plant. Mulch applied to dry soil will trap dryness, which is counterproductive. The goal is to retain existing moisture, so saturate the soil first. Next, remove any weeds that may be growing in the pot. Mulch is excellent at preventing new weeds, but it will not eliminate existing ones. Gently pull them out, ensuring you get the roots to prevent regrowth. Finally, if the soil level has settled significantly, you might want to top it off with a bit of fresh potting mix, leaving adequate space for your mulch layer.

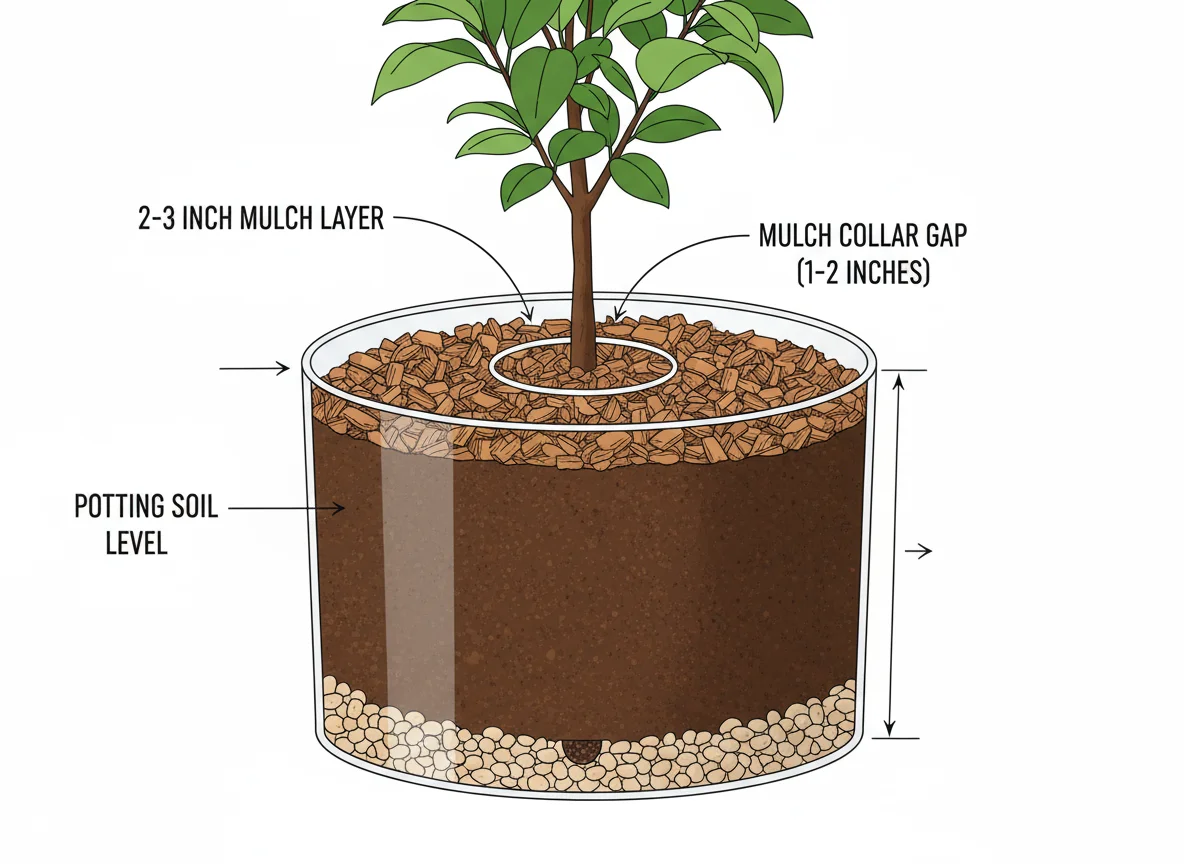
Step 2: Measure Your Mulch Depth
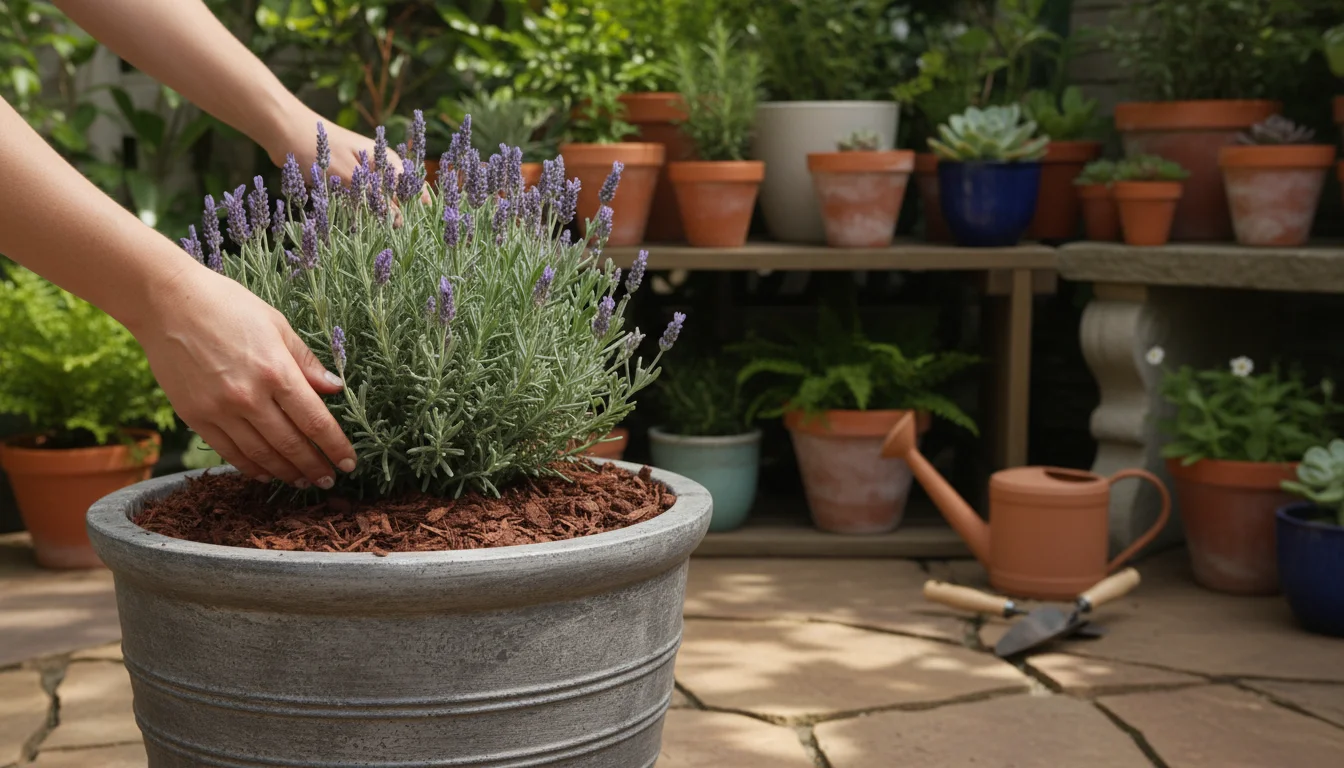
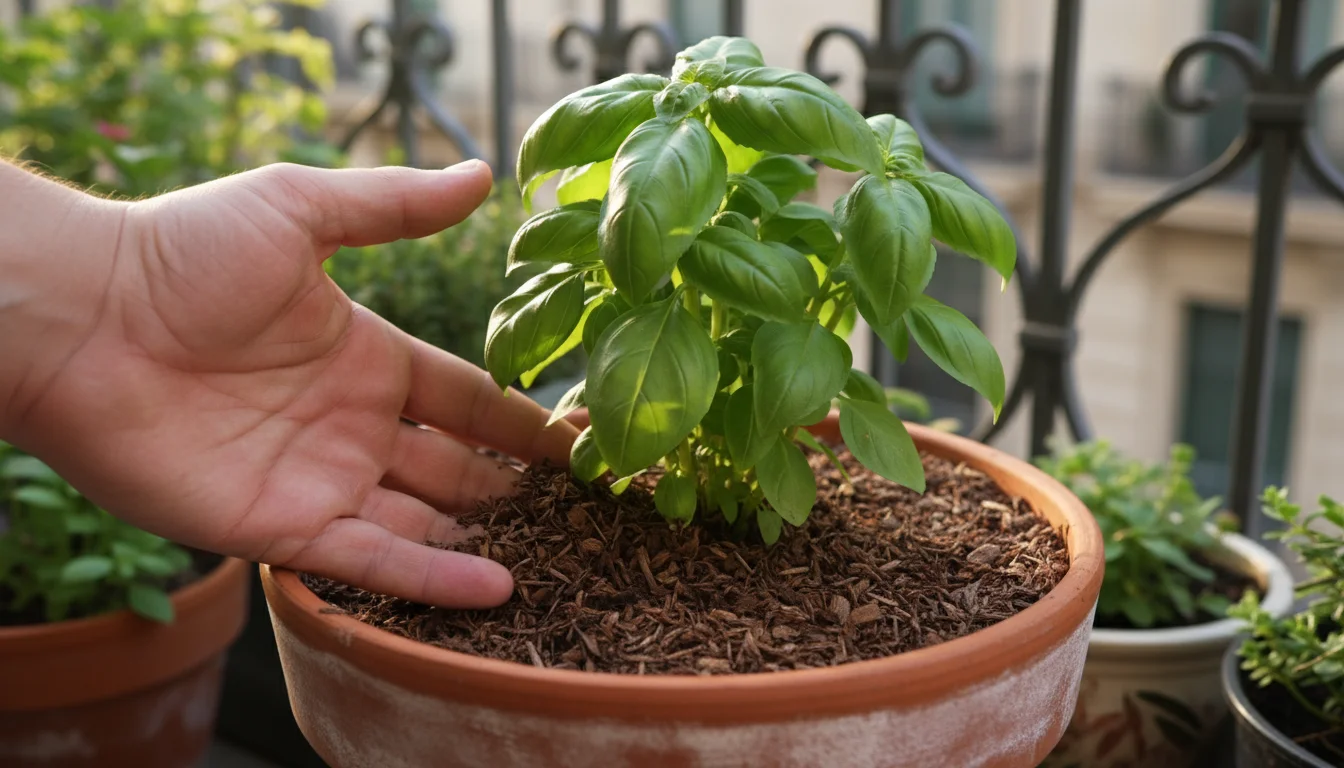
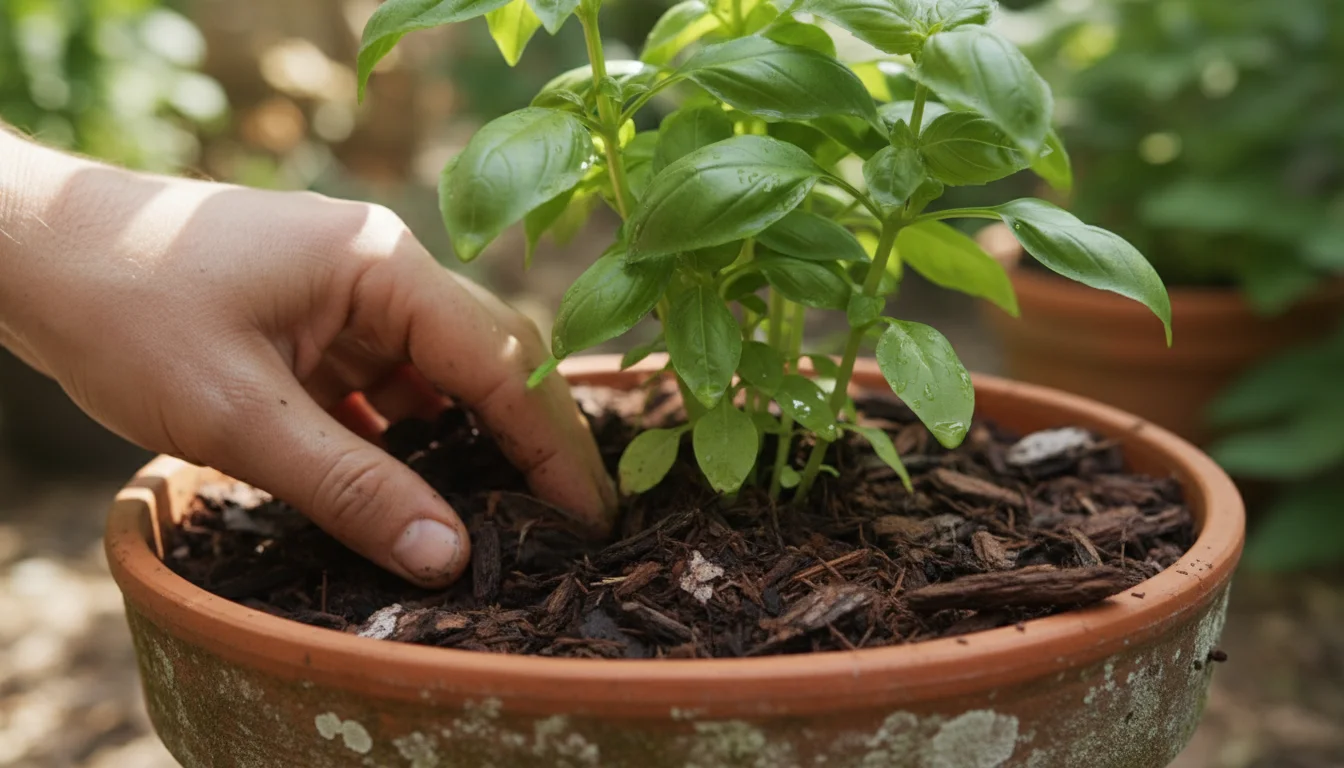
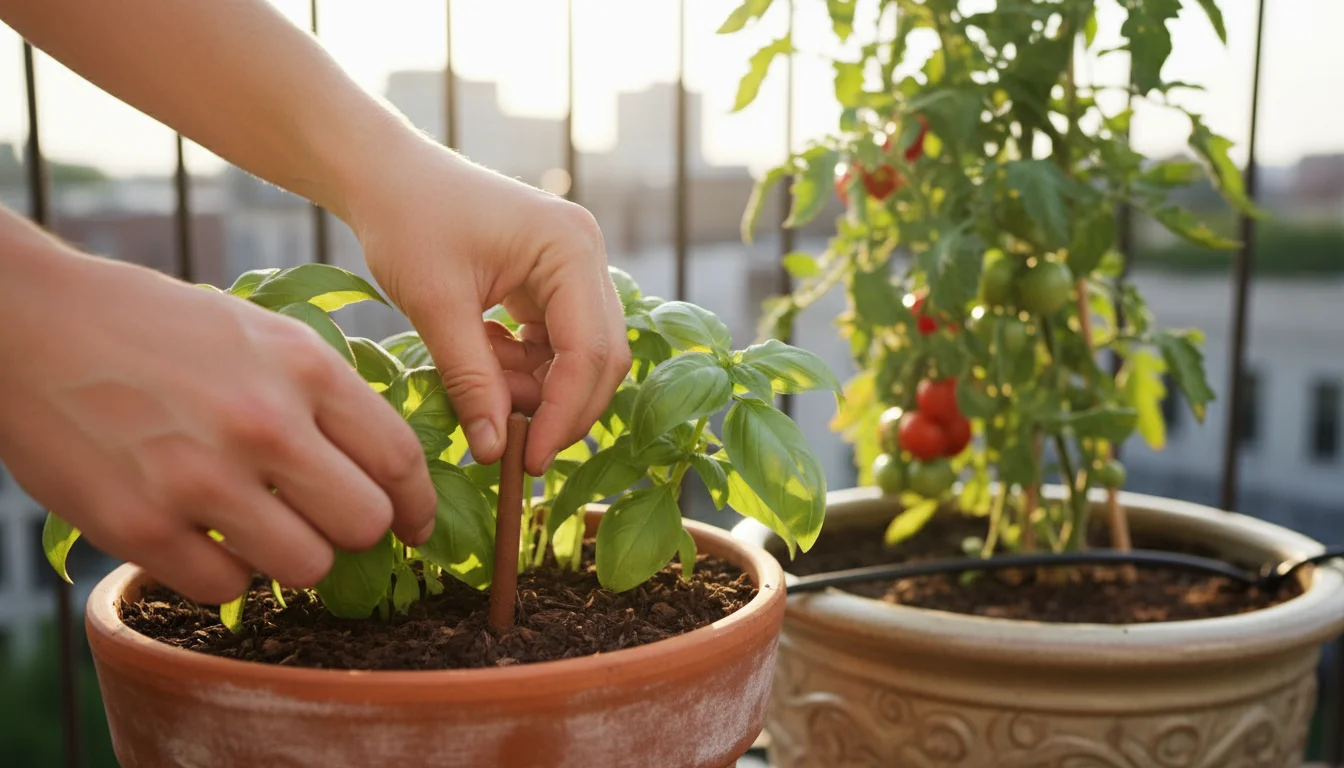
The ideal mulch depth for containers is typically between 1 to 3 inches, depending on the size of your pot and the type of mulch. For smaller pots (under 8 inches in diameter), 1 inch might be sufficient. Larger containers (10 inches or more) can handle 2-3 inches. The key is to leave a small gap, about half an inch to an inch, between the mulch and the base of your plant’s stem or trunk. This is called the “mulch collar.” Piling mulch directly against the stem can trap moisture, leading to stem rot or creating an inviting environment for pests. Always err on the side of slightly less mulch rather than too much, especially for sensitive plants.
Step 3: Apply the Mulch Evenly
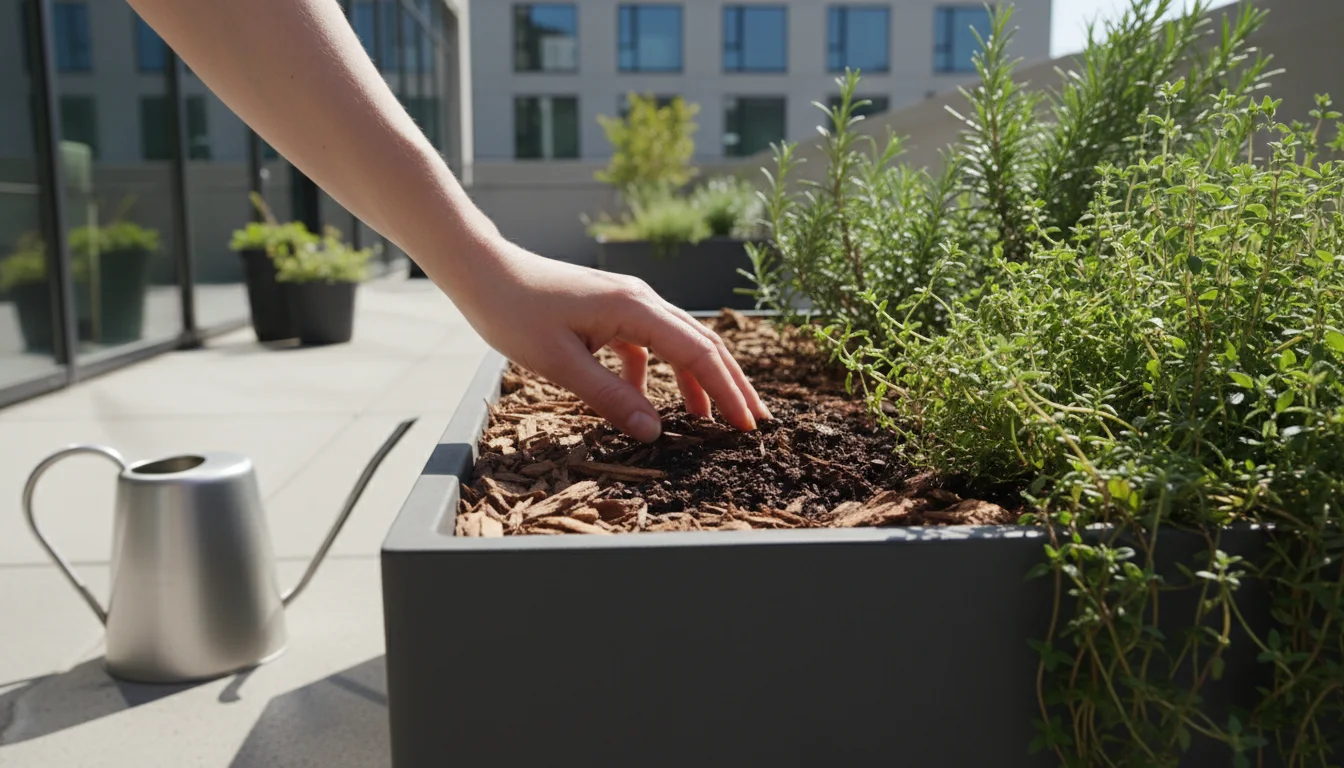
Carefully spoon or pour your chosen mulch material onto the soil surface, distributing it evenly across the entire top of the pot. Ensure you cover all exposed soil, reaching right up to the edge of the container. Use your hands or a small trowel to spread it gently. Remember to maintain that mulch collar, keeping the material away from the plant’s stem or trunk. For very dense mulches like fine wood chips, you might want to fluff them slightly to ensure good air circulation. If you are using pebbles or gravel, spread them to your desired depth, ensuring they cover the soil completely.
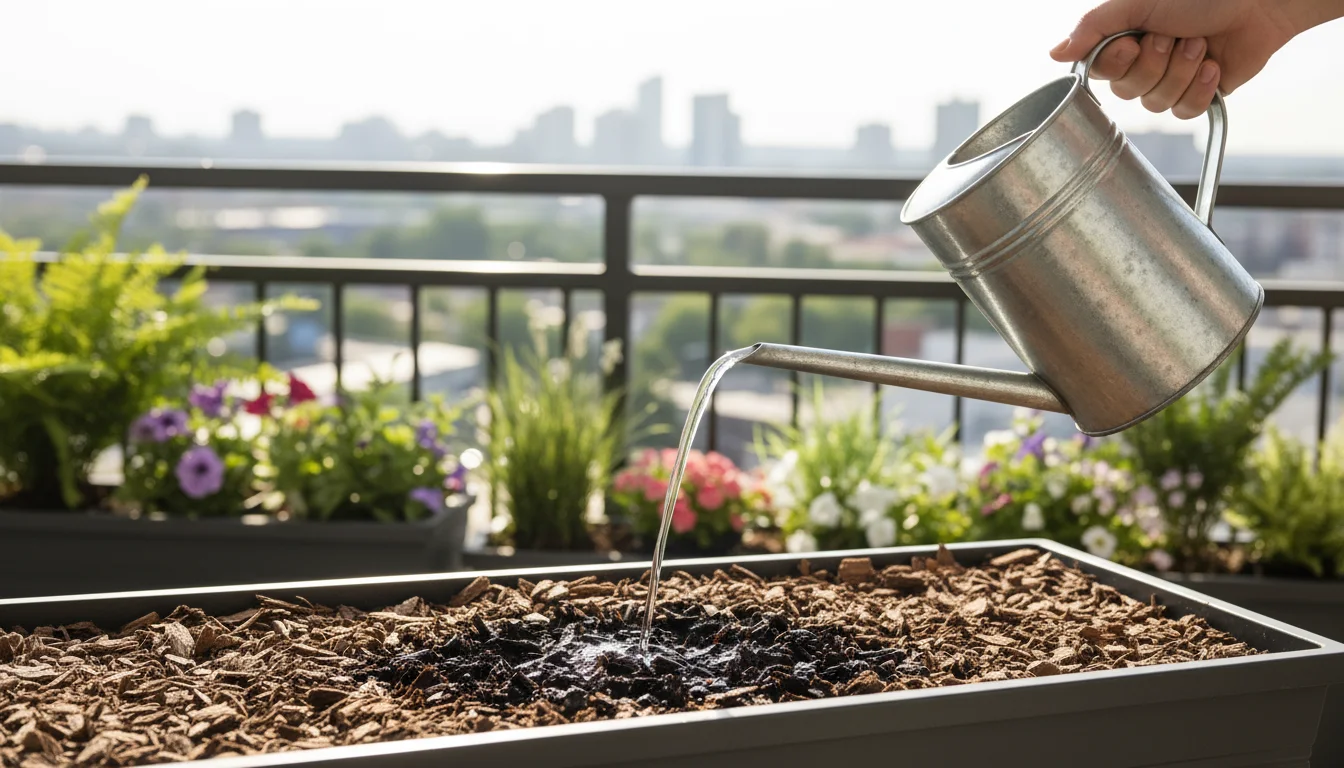
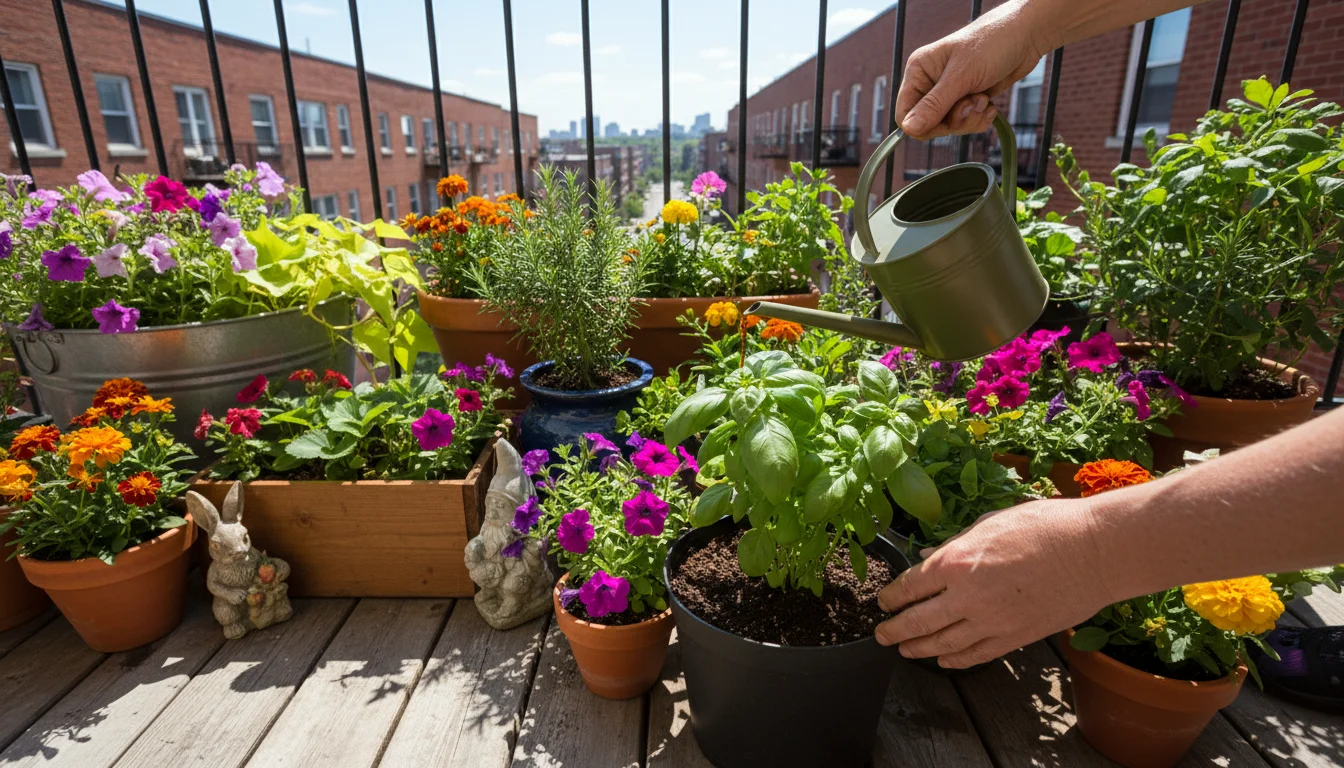
Step 4: Water Lightly to Settle the Mulch
After applying the mulch, give the container a light watering. This helps to settle the mulch into place, ensuring it makes good contact with the soil surface and reducing the chance of it blowing away or floating during heavy rain. It also helps to visually confirm that water can still penetrate the mulch layer and reach the soil below. If you notice water pooling excessively on top of a particular type of mulch, it might indicate it is too dense, or you have applied too thick a layer. Adjust if necessary.
Step 5: Ongoing Maintenance
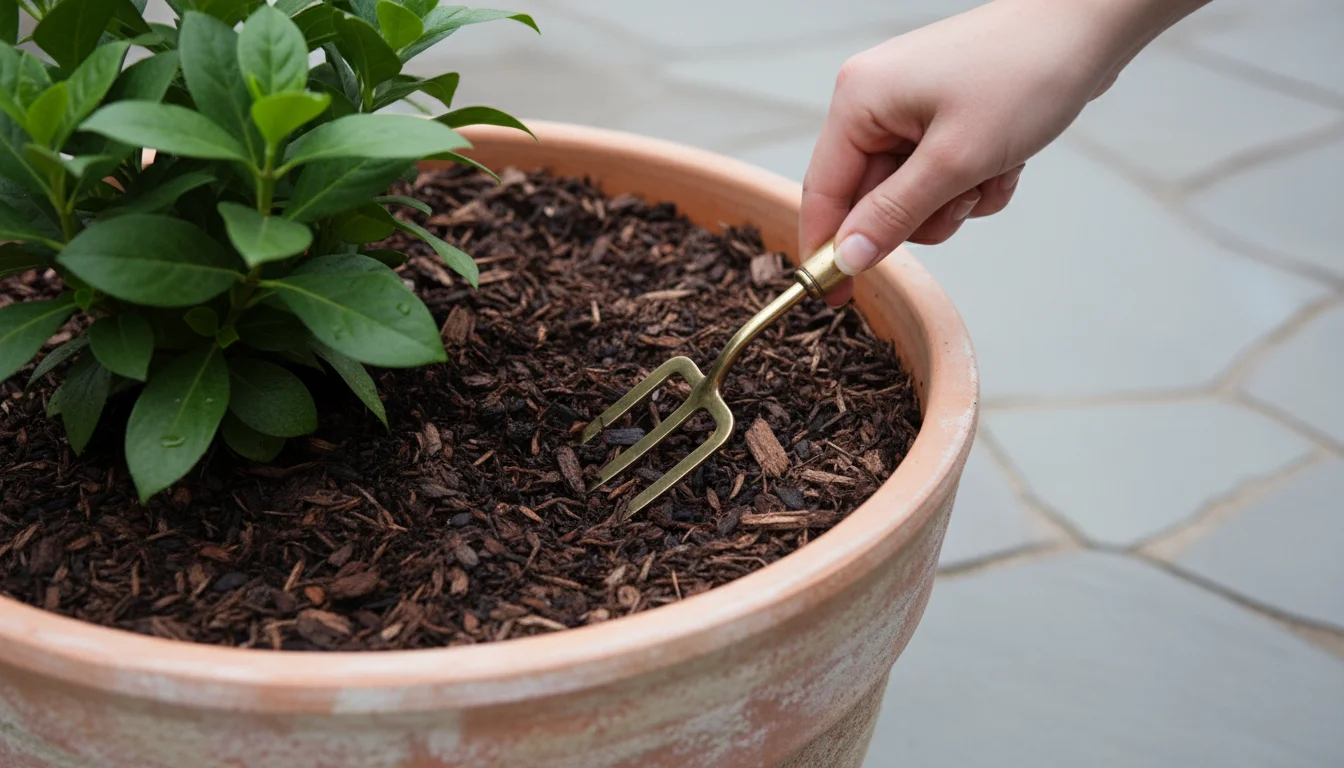
Mulch is not a “one and done” solution, especially organic types. Periodically check your mulch layer. As organic mulches decompose, they will thin out. Replenish them as needed to maintain the recommended depth, typically once or twice a year depending on the material. If you notice any signs of mold, fungus, or pests, gently rake through the mulch to aerate it or remove the affected area. For inorganic mulches, you may occasionally need to rinse them off to remove dust or debris, but they generally require less frequent attention. Always monitor your plant’s health and adjust your mulching practices if you observe any negative changes.
By following these steps, you will effectively utilize mulch to support your container plants, reducing your watering efforts, regulating soil temperature, and suppressing weeds. This simple addition to your plant care routine yields significant returns in plant vitality and garden enjoyment.
The Science of Soil Protection and Moisture Retention
Mulching is more than just throwing some bark chips on top of your potting mix; it is an application of horticultural science that significantly impacts the microenvironment of your container plants. Understanding the underlying mechanisms behind its benefits empowers you to appreciate its true value and apply it more effectively. Let’s delve into the scientific reasons why mulch works so well for soil protection and moisture retention.
Reducing Evaporation
The primary way mulch conserves water is by creating a physical barrier that reduces evaporation from the soil surface. When sunlight and wind directly hit moist soil, water molecules gain energy and escape into the atmosphere as vapor. This process, known as evaporation, is accelerated in containers because the soil is more exposed and has less insulating mass compared to in-ground beds. A layer of mulch traps this moisture, acting like a blanket that slows down the rate at which water can escape. Data from various agricultural studies consistently show that mulched soils can reduce water loss through evaporation by 30-70 percent, depending on the mulch type, thickness, and environmental conditions. This directly translates to less frequent watering for your container plants, saving you time and valuable water resources.

Temperature Regulation
Soil temperature fluctuations are a major stressor for container plants. In summer, direct sunlight can heat potting mix to extreme temperatures, potentially damaging delicate roots, which prefer a consistent range. Mulch acts as an insulator, shading the soil surface and preventing direct solar radiation from warming it excessively. It essentially reflects some sunlight and absorbs others, dissipating heat before it reaches the soil. Conversely, during cooler periods, mulch helps retain the heat absorbed by the soil throughout the day, preventing rapid cooling at night or during sudden temperature drops. This thermal stability reduces stress on roots, allowing them to function optimally, absorb water and nutrients efficiently, and contribute to overall plant vigor. Think of it as providing a stable climate control system for your plant’s underground world.

Preventing Soil Compaction and Erosion
Rainfall and overhead watering can lead to soil compaction and erosion, even in containers. When water impacts bare soil, it can dislodge particles, wash away nutrients, and compact the soil structure over time. This reduces aeration and drainage, suffocating roots and hindering water penetration. Mulch absorbs the impact of water droplets, dissipating their energy and preventing soil particles from being displaced or compacted. It also creates a more stable surface that is less prone to erosion from wind or heavy watering, keeping your potting mix where it belongs. This protection maintains the fluffy, aerated structure of your potting mix, which is vital for root health.
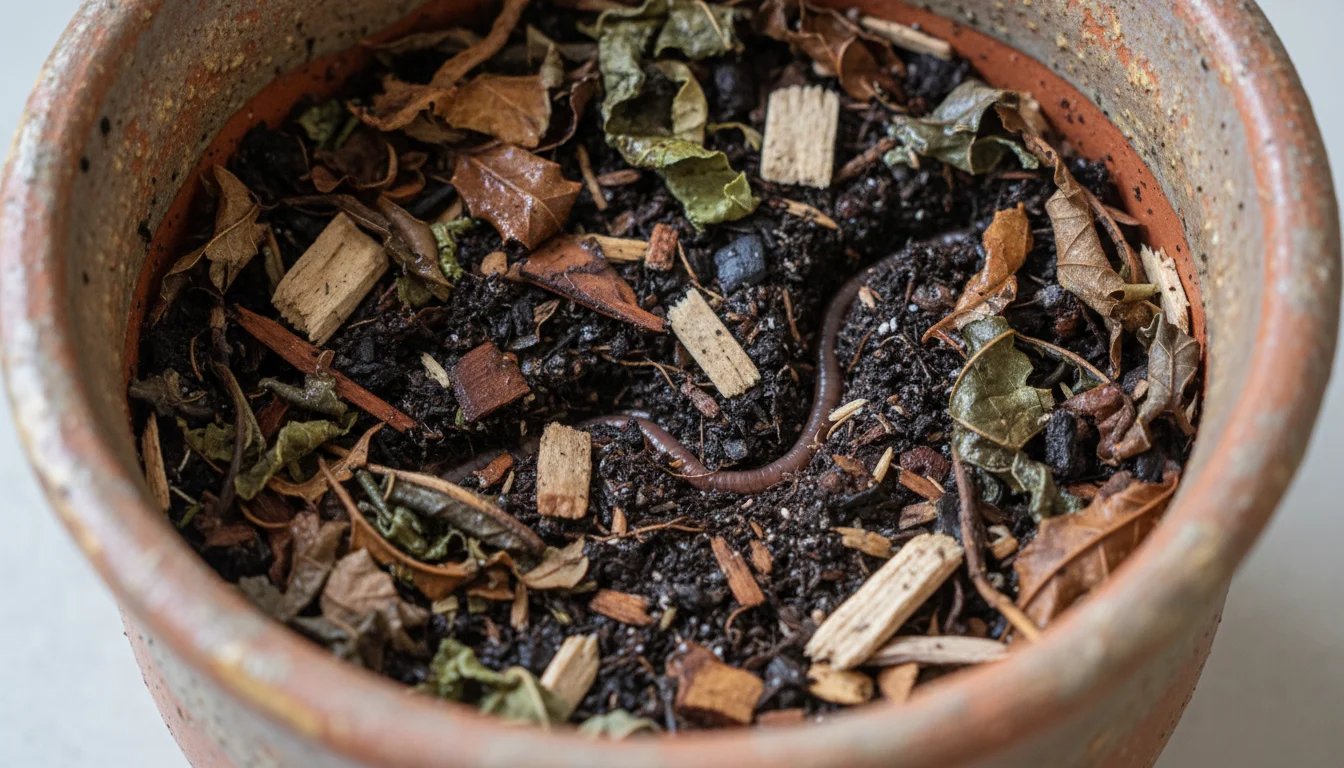
Enhancing Soil Biology (Organic Mulches)
Organic mulches offer an additional scientific benefit: they enrich the soil biology. As organic materials such as wood chips, compost, or shredded leaves decompose, they become food for a vast network of beneficial microorganisms, including bacteria, fungi, and earthworms. These organisms break down the mulch into humus, a stable form of organic matter that significantly improves soil structure, water retention capacity, and nutrient availability. Humus acts like a sponge, holding onto water and nutrients and slowly releasing them to plant roots. It also improves soil aeration and aggregation, creating a healthier environment for root growth. This symbiotic relationship between organic mulch and soil biology is crucial for sustaining a healthy, vibrant container garden, reducing the reliance on synthetic fertilizers and promoting a more natural ecosystem within your pots.
Understanding these scientific principles reinforces that mulching is not merely a superficial treatment. It is a fundamental practice that creates a healthier, more stable environment for your container plants, leading to robust growth, increased resilience, and a more sustainable approach to gardening.
Troubleshooting Common Mulching Issues
While mulching offers numerous benefits, improper application or choice of material can sometimes lead to unintended problems. Being aware of these potential issues and knowing how to address them ensures your mulching efforts remain beneficial, not detrimental. Here, we tackle some common mulching problems you might encounter in your container garden and provide actionable solutions.
Issue 1: Mulch Creates a “Crust” or Prevents Water Penetration
Sometimes, certain mulches, particularly very fine-textured organic materials or those that have compacted over time, can form a water-repellent layer. This means water pools on top and runs off the sides of the container rather than penetrating the soil, leading to thirsty plants despite watering. This can also happen if the mulch layer is too thick and dense.
- Solution:
- Rake or Loosen: Gently fluff or lightly rake the mulch layer to break up any compacted areas. This helps restore its porosity.
- Check Depth: Ensure your mulch layer is not excessively thick (more than 3 inches for most containers). Remove some material if necessary.
- Consider Mulch Type: If this is a recurring issue, you might need to switch to a coarser mulch type that allows for better water penetration, such as shredded bark or coco coir chips, rather than very fine compost.
- Aeration During Watering: When watering, apply water slowly and gently. You can also use a watering wand to ensure the water soaks through the mulch and into the soil.
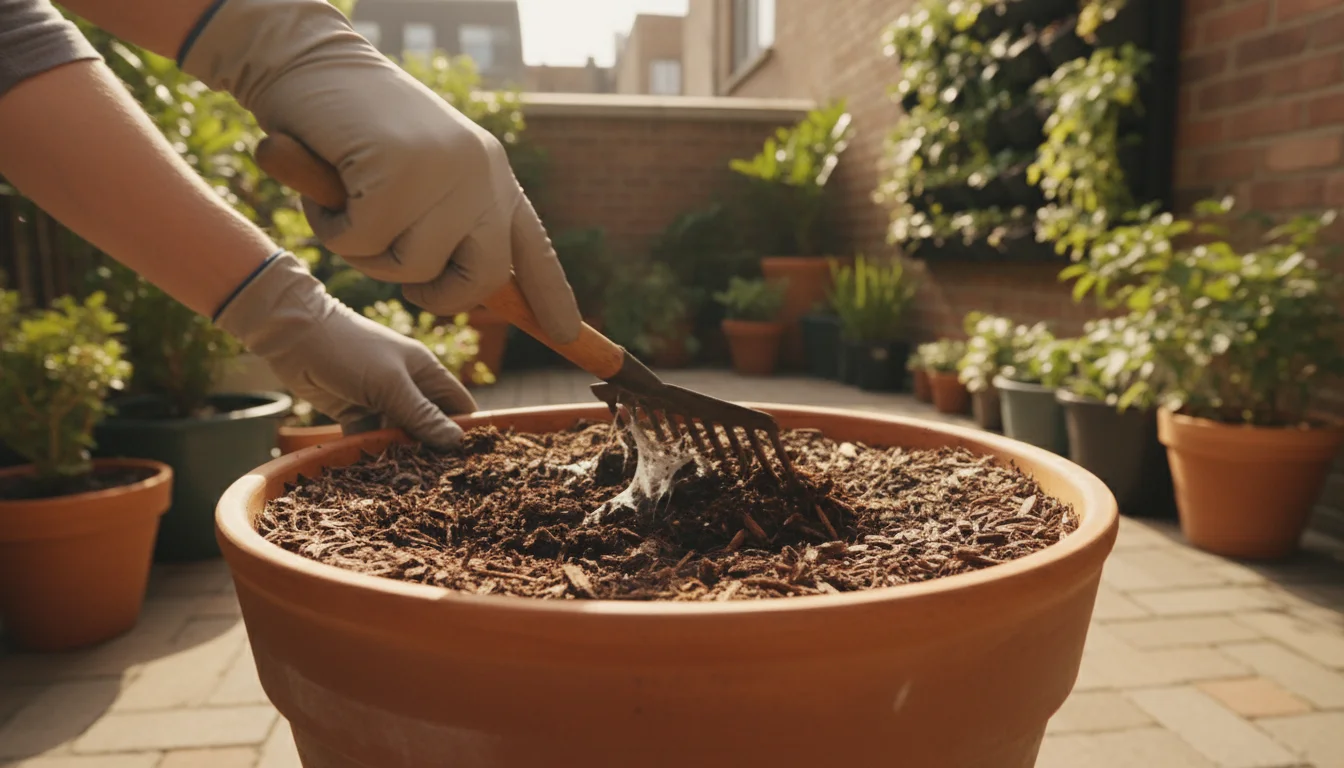
Issue 2: Mold or Fungal Growth on Mulch Surface
A white, fuzzy, or brightly colored fungal growth on your mulch can be alarming. This usually indicates excessive moisture and poor air circulation within or directly above the mulch layer. While often harmless to the plant, it can be aesthetically unappealing and, in rare cases, might signal conditions conducive to harmful pathogens.
- Solution:
- Aerate Mulch: Gently rake and turn the mulch to expose the damp areas to air and sunlight. This often stops fungal growth.
- Reduce Watering: Assess your watering schedule. You might be overwatering, or the mulch is retaining too much moisture for the current conditions. Let the top layer dry out slightly between waterings.
- Adjust Mulch Collar: Ensure mulch is not piled directly against the plant stem. A gap allows for better air circulation around the plant base.
- Thin the Layer: If the mulch is too thick, it can trap excessive moisture. Reduce the depth to improve air flow.
- Consider Mulch Type: If consistently problematic, switch to a more open, less moisture-retentive mulch or one that decomposes more slowly.
Issue 3: Pest Infestations (Slugs, Snails, Fungus Gnats)
Mulch can sometimes create a damp, sheltered environment that is attractive to certain pests, such as slugs, snails, or fungus gnats. These pests thrive in moist conditions and may find the mulch a convenient hiding spot.
- Solution:
- Maintain Mulch Collar: Keeping mulch away from the stem helps deter slugs and snails from climbing onto the plant.
- Water in the Morning: Watering early in the day allows the soil surface and mulch to dry out before nightfall, making the environment less appealing to nocturnal pests.
- Thin Mulch Layer: Reduce the mulch depth to promote faster drying and less shelter.
- Aerate Regularly: Raking the mulch periodically can disrupt pest habitats and expose them to predators or drier conditions.
- Consider Inorganic Mulch: For plants prone to pests that thrive in organic matter, switching to pebbles or gravel can eliminate their preferred habitat.
- Natural Controls: For slugs and snails, consider traps or barriers. For fungus gnats, allow the top inch or two of soil to dry completely between waterings, as their larvae require consistent moisture.
Issue 4: Mulch Blowing Away or Floating
Lightweight mulches, such as shredded leaves or straw, can be susceptible to being blown out of containers by wind or floating away during heavy watering. This defeats the purpose of mulching and creates a messy appearance.
- Solution:
- Choose Heavier Mulch: Opt for mulches with more weight and interlocking properties, such as shredded bark, coco coir chips, or decorative pebbles.
- Use a Top Dressing: For very lightweight mulches, you can place a few decorative stones or small pieces of gravel on top to hold them in place.
- Settle with Water: After applying, water the mulch lightly to help it settle and compact slightly.
- Edge Containers: For containers with wider rims, this is less of an issue, but for straight-sided pots, ensuring the mulch is not piled too high can help.
By proactively addressing these common issues, you can ensure that your mulching practice consistently contributes to the health and beauty of your container garden, providing all its intended benefits without unexpected drawbacks.
Embrace Sustainable Mulching Practices
As gardeners, we have a responsibility to not only nurture our plants but also to care for the environment. Adopting sustainable mulching practices is a straightforward way to contribute to a healthier planet while enhancing your container garden. This involves making eco-conscious choices about the materials you use, how you source them, and how you manage them over time.
Choose Locally Sourced and Renewable Materials
The most sustainable mulch is often one that is locally available and renewable. This reduces the carbon footprint associated with transportation and supports local industries. Look for mulches that are byproducts of other sustainable processes, such as:
- Leaf Mold/Shredded Leaves: This is arguably the most sustainable and cost-effective mulch. Collect fallen leaves from your own yard or a neighbor’s. Shredding them yourself (with a lawnmower or leaf shredder) helps them decompose faster and prevents matting. This turns what might be considered waste into a valuable resource.
- Compost: Using homemade compost as a mulch is a fantastic way to recycle kitchen and garden waste. If you buy compost, look for local, organic suppliers. Compost not only mulches but also enriches your potting mix with nutrients and beneficial microbes.
- Arborist Chips: Many local tree service companies are happy to deliver wood chips for free or at a low cost. These chips are a byproduct of tree pruning and removal and make excellent, long-lasting mulch. Just ensure they are not from diseased trees.
- Coco Coir Chips: While not always local, coco coir is a byproduct of the coconut industry and is considered a highly sustainable alternative to peat moss. It is renewable, has excellent water retention, and is pH neutral, making it a great eco-friendly choice.
Avoid mulches that are heavily dyed with synthetic colors, as the dyes can contain chemicals, and the energy required for processing is often higher. Also, be cautious of purchasing mulches that come from unsustainable forestry practices or those that are transported over vast distances, unless a more sustainable local alternative is truly unavailable.
Reduce, Reuse, Recycle Your Mulch
Embracing the principles of “reduce, reuse, recycle” extends to your mulching habits.
Reduce your overall consumption by choosing longer-lasting mulches where appropriate.
Reuse old potting mix that has been revitalized with compost and fresh amendments.
Recycle decomposed organic mulches. As organic mulches break down, they become part of your potting mix. This “used” potting mix, once plants are removed or repotted, can be revitalized and reused for future plantings, rather than being discarded. For example, once the season is over, you can empty your containers, remove large root balls, and then mix the remaining soil and decomposed mulch into a compost pile or use it as a base for refreshing new potting mixes. This practice significantly reduces waste and conserves resources.

Water-Wise Mulching
Sustainable mulching inherently promotes water conservation. By significantly reducing evaporation from your container soil, you naturally decrease your watering frequency and overall water usage. This is particularly important in regions facing drought conditions or for gardeners committed to water-wise practices. The scientific evidence is clear: mulched containers require less water to stay hydrated. Make sure your watering system, whether manual or automated, takes into account the reduced need for water in mulched pots to avoid overwatering.

Avoid Peat Moss as a Mulch
While peat moss is sometimes used as a soil amendment, it is generally not recommended as a mulch and is certainly not a sustainable choice. Peat bogs are unique wetlands that take thousands of years to form and are vital carbon sinks. Harvesting peat moss releases stored carbon dioxide into the atmosphere and destroys critical habitats. Opt for peat-free alternatives like coco coir, compost, or shredded wood products, which offer similar benefits without the environmental cost. Many garden centers now offer a wide range of peat-free potting mixes and mulches, making this an easy and impactful sustainable swap.
By consciously choosing sustainable mulching practices, you not only improve the health of your container plants but also act as a responsible steward of the environment. It is a win-win for your garden and the planet.
Beyond Mulch: Holistic Container Care for Thriving Plants
Mulching is a powerful tool in your container gardening arsenal, but it is one piece of a larger puzzle. For your potted plants to truly thrive, it is essential to integrate mulching with a holistic approach to care. This means considering all aspects of your plant’s environment and needs, creating a comprehensive strategy that supports long-term health and vitality. By combining the benefits of mulching with other best practices, you build a resilient and vibrant container garden.
Choosing the Right Potting Mix
The foundation of any successful container plant is a high-quality potting mix. Unlike garden soil, potting mixes are specifically designed to provide excellent drainage, aeration, and moisture retention in a confined space. Look for peat-free mixes that contain a blend of organic materials like compost, coco coir, and perlite or vermiculite. These ingredients ensure proper aeration, preventing the roots from becoming waterlogged, while still holding enough moisture to nourish your plant. Mulching will enhance the performance of a good potting mix, but it cannot fully compensate for a poor one. Regularly refresh or amend your potting mix, especially if reusing it, to maintain its structure and nutrient content.
Consistent and Mindful Watering
Even with mulch, mindful watering remains crucial. Mulch significantly reduces water evaporation, meaning your plants need less frequent watering. However, this also means you must be careful not to overwater. Always check the soil moisture level before watering, not just the mulch layer. Stick your finger about an inch or two into the soil below the mulch. If it feels dry, it is time to water. If it still feels moist, wait. The exact frequency depends on the plant species, pot size, and weather. Mulching allows for more consistency, but your judgment based on soil feel is paramount. Ensure your pots have adequate drainage holes; standing water is a death sentence for most container plants.
Balanced Nutrition Through Fertilization
Potted plants rely entirely on you for their nutrient supply, as the limited soil volume quickly depletes nutrients. Mulching with organic materials like compost provides a slow, gentle release of nutrients, but it usually is not enough on its own. Supplement with a balanced liquid fertilizer or a slow-release granular fertilizer, following product instructions carefully. The Royal Horticultural Society often recommends feeding container plants regularly during their active growing season. For most plants, this means fertilizing every 2-4 weeks during spring and summer, and reducing or stopping in fall and winter. Opt for organic fertilizers when possible, as they are gentler on the environment and promote soil microbial life.
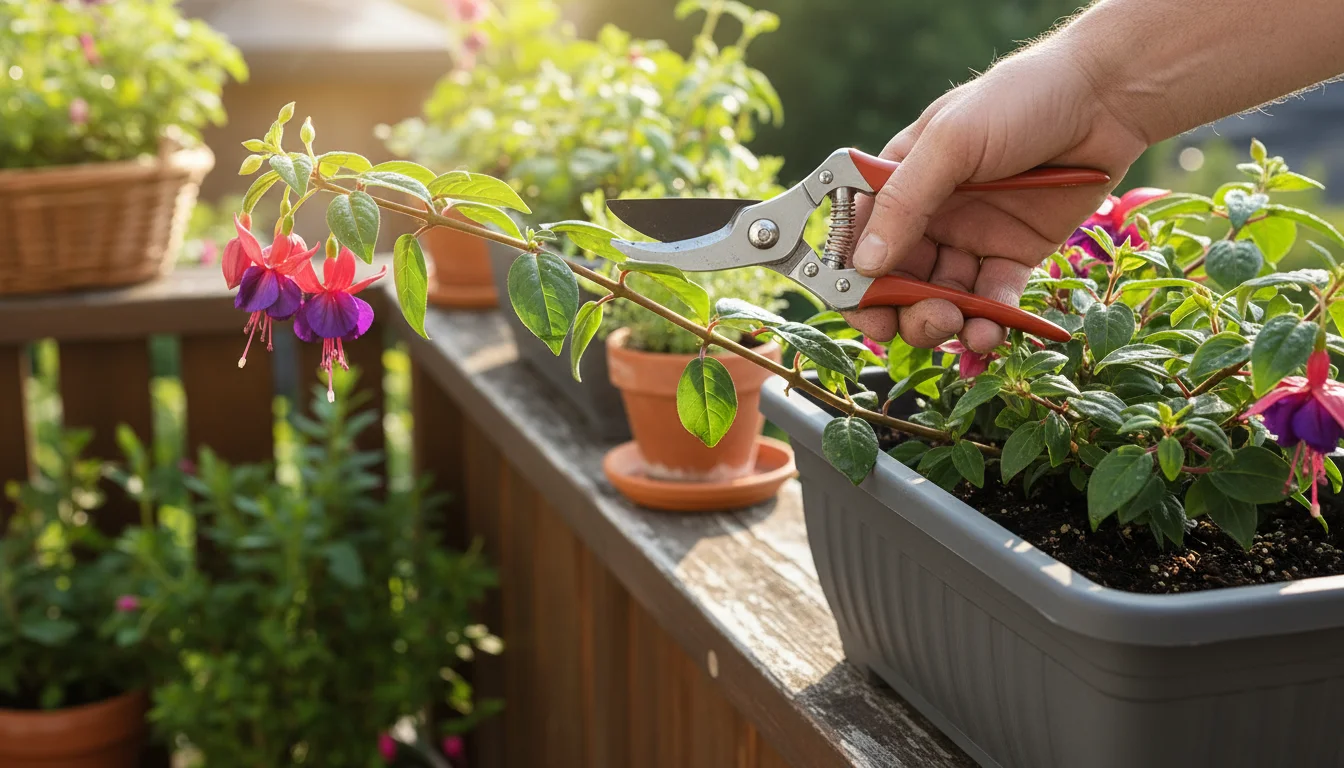
Regular Pruning and Shaping
Pruning is vital for maintaining plant health, shape, and encouraging new growth in containers. Remove dead, diseased, or damaged foliage and stems promptly. Prune to encourage bushier growth, control size, or improve air circulation, which reduces the risk of fungal diseases. Regularly pinching back leggy growth can keep your plants compact and full, maximizing their visual appeal in small spaces. Tools should be clean and sharp to make precise cuts and prevent the spread of pathogens. Good airflow around the plant, combined with mulching, further reduces disease pressure.
Monitoring for Pests and Diseases
Even with optimal care, pests and diseases can sometimes appear. Regular inspection of your mulched containers is key. Check under leaves, along stems, and on the soil surface for any unusual spots, discoloration, or tiny insects. Early detection allows for prompt, often less intrusive, treatment. Mulch can sometimes harbor pests if it remains too wet, so observe your mulch layer for signs of trouble. Many common issues can be resolved with simple, eco-friendly solutions like neem oil sprays, insecticidal soap, or manual removal. A healthy plant, supported by holistic care including proper mulching, is more resilient to pest and disease pressure.
By weaving mulching into a comprehensive care routine that includes careful potting mix selection, mindful watering, appropriate fertilization, regular pruning, and vigilant pest management, you create an environment where your container plants do not just survive, they truly flourish. This integrated approach ensures your small-space garden remains a source of joy and beauty with minimal fuss.
Frequently Asked Questions
Can I use mulch for all my container plants?
Most container plants benefit from mulching, especially those that prefer consistent soil moisture. However, plants that thrive in very dry conditions, like some cacti or succulents, might benefit more from inorganic mulches such as gravel or small pebbles that enhance drainage and reflect heat, rather than moisture-retaining organic mulches. Always match the mulch type to your plant’s specific needs.
How often do I need to reapply mulch to my containers?
For organic mulches (wood chips, compost, leaves), plan to replenish them annually or biannually. They decompose over time, adding nutrients to your soil, but their volume will decrease. Inorganic mulches (pebbles, gravel) are permanent and generally do not need replenishment, though you might occasionally rinse them to keep them clean.
Will mulch attract pests to my potted plants?
Properly applied mulch generally does not attract pests. However, a mulch layer that is too thick, consistently wet, or piled directly against the plant stem can create an appealing environment for slugs, snails, or fungus gnats. To prevent this, ensure good air circulation, maintain a gap between mulch and stem, and avoid overwatering. Many beneficial insects also find shelter in mulch, contributing to a healthy ecosystem.
Can I use garden soil as mulch in my containers?
It is not recommended to use garden soil as mulch in containers. Garden soil can be too heavy, compact easily, and may introduce weed seeds, pests, or diseases into your potted plants. It also lacks the specific properties, like aeration and drainage, that make commercial mulches effective for container use. Stick to commercial mulches or appropriate homemade organic materials.
What is the best depth for mulch in container gardens?
The ideal depth for mulch in containers is typically between 1 to 3 inches. For smaller pots, 1 inch is often sufficient. For larger containers, you can apply 2 to 3 inches. Always ensure you leave a small “mulch collar,” about half an inch to an inch of space, around the base of the plant stem or trunk to prevent stem rot and allow for proper air circulation.