
As winter’s chill loosens its grip, early spring emerges as a pivotal moment for your garden. This season offers a fresh start, allowing you to lay the groundwork for a flourishing year, even in the smallest spaces. For those of you aiming for a low-maintenance, thriving garden, strategic early spring garden prep provides immense dividends. You set the stage for abundant blooms, robust edibles, and healthy plants, minimizing future problems. This guide empowers you with practical, actionable early gardening tips, ensuring your plants thrive without demanding complicated routines.
We will walk you through essential tasks, from assessing your space to revitalizing soil and planning new additions. Embrace these simple habits now to cultivate a beautiful, resilient garden all season long. Preparing your garden in early spring is not a chore, it is an investment in your gardening success.
Table of Contents
- Understanding Early Spring’s Importance
- Assessing Winter Damage and Your Space
- Revitalizing Your Garden Soil
- Container Gardening Spring Essentials
- Tool and Supply Readiness
- Planning and Planting for New Growth
- Efficient Watering Strategies for Spring
- Proactive Pest and Disease Management
- Spring Pruning and Cleanup Techniques
- Frequently Asked Questions

Understanding Early Spring’s Importance
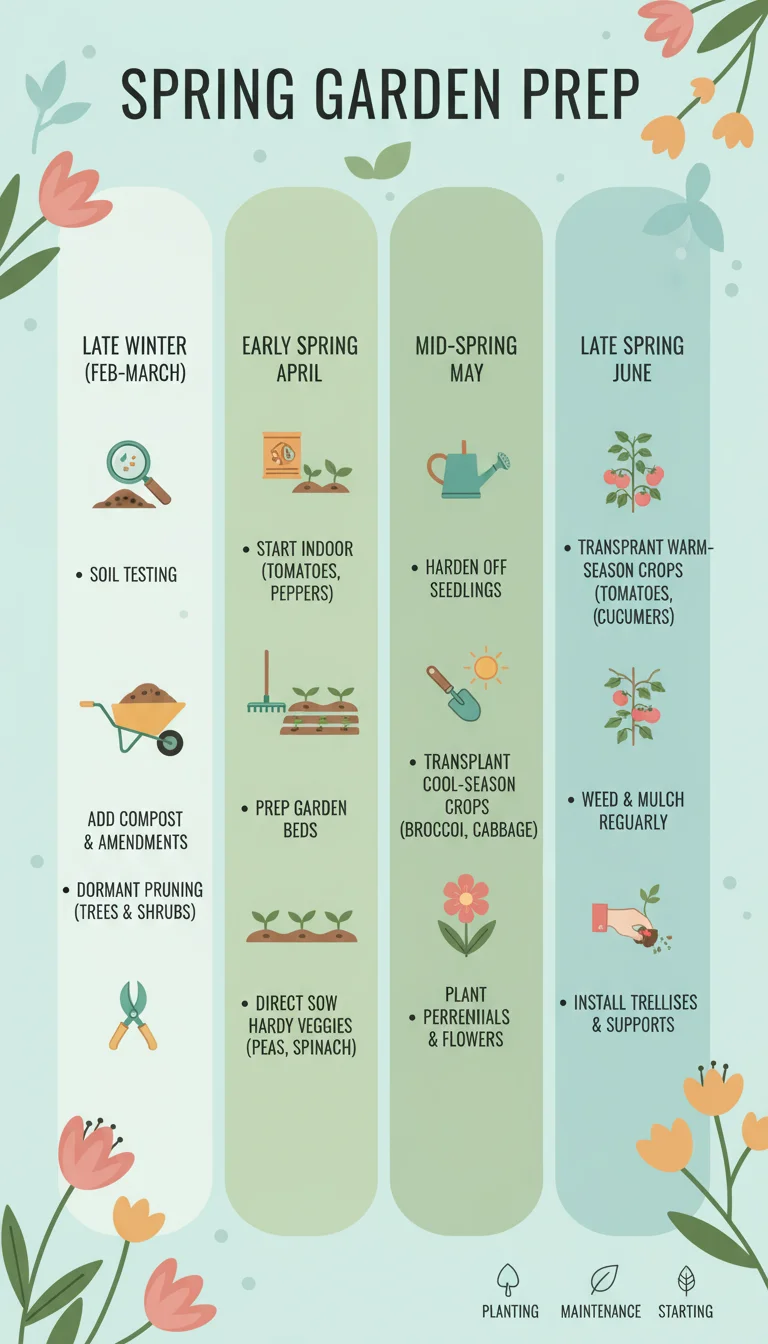
Early spring is more than just a transition season; it is the foundation upon which your entire garden year builds. By taking proactive steps now, you create a robust environment for your plants. This season, typically from late February through early April depending on your climate zone, brings a unique set of opportunities for gardeners. Temperatures begin to moderate, and daylight hours noticeably lengthen, signaling plants to emerge from dormancy. However, you also face potential late frosts, so vigilance remains crucial.
For small-space gardeners and those who prefer low-maintenance approaches, early spring prep becomes even more critical. You leverage limited resources effectively, preventing issues before they escalate. For instance, addressing soil compaction now ensures better root development for plants, which in turn leads to stronger, healthier growth with less need for intervention later. Think of early spring tasks as setting your garden on autopilot for success. You establish healthy systems that support plant vigor naturally.
Ignoring these early gardening tips often leads to a cascade of problems: stunted growth, increased susceptibility to pests, and diminished yields. Data from horticultural studies frequently shows that plants receiving proper early season care exhibit significantly higher resilience and productivity. For example, a well-aerated and nutrient-rich soil bed from early spring preparation can reduce a plant’s vulnerability to common fungal diseases by up to 40%. Investing a small amount of effort now saves you considerable time and frustration in the hotter months.
This comprehensive spring garden prep checklist guides you through each vital step. It ensures you maximize your gardening potential, cultivating a thriving, beautiful space with minimal ongoing effort. You will discover practical strategies for container gardening spring readiness, soil health, pest prevention, and more. Let us prepare your garden for its best year yet.

Assessing Winter Damage and Your Space
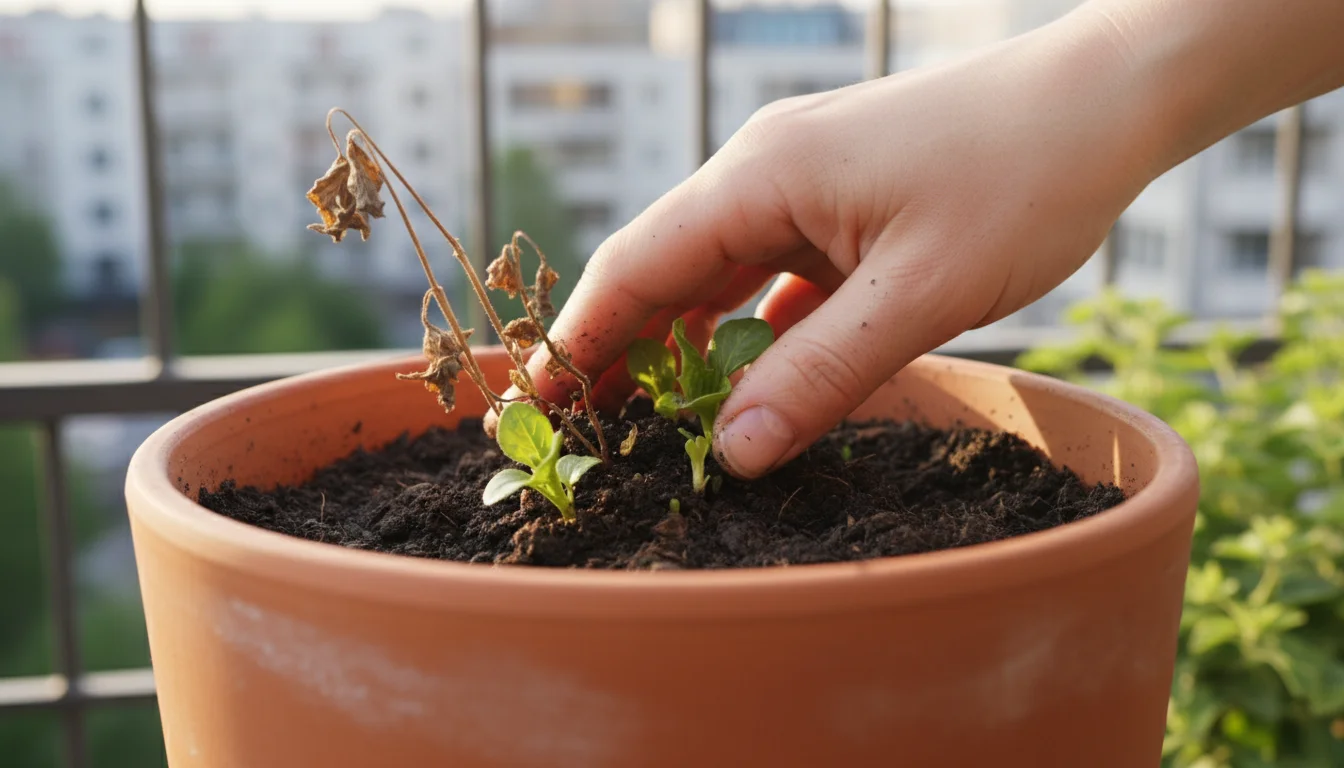
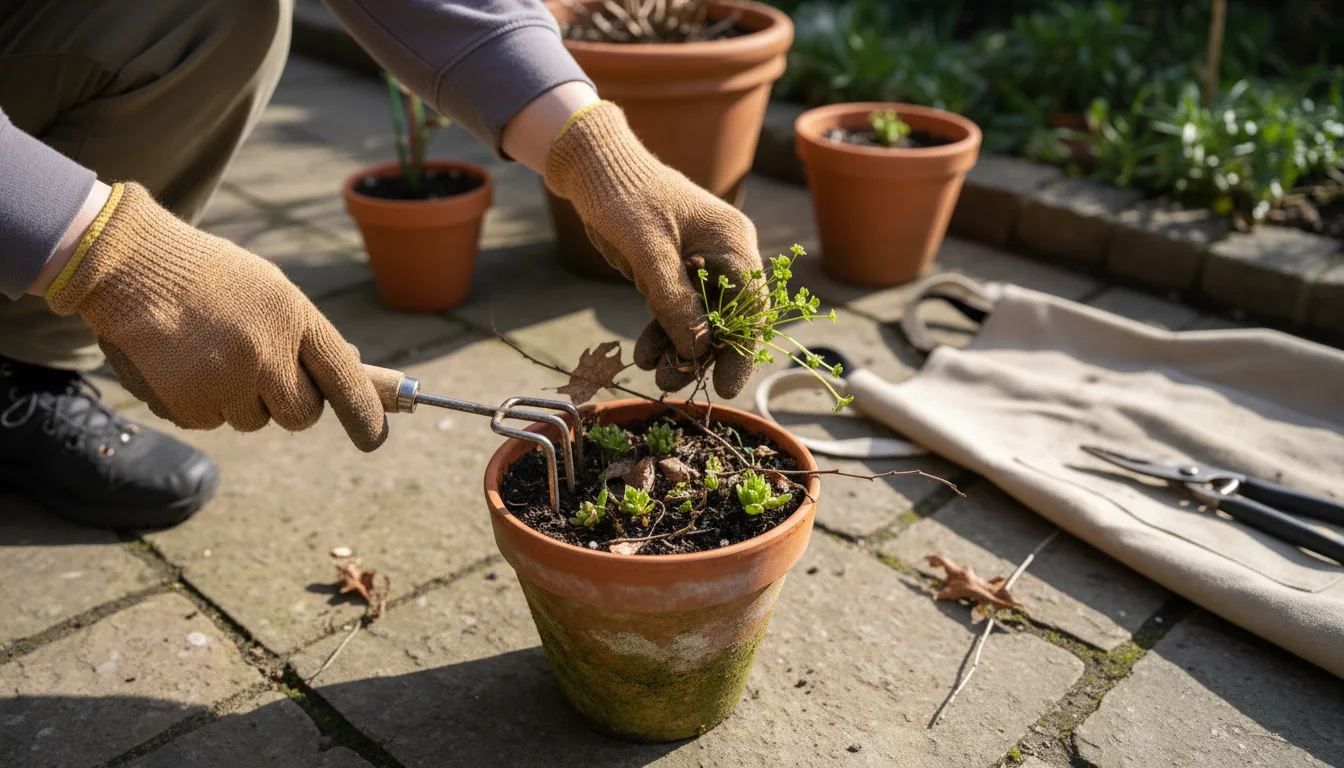
Your first step in early spring garden prep involves a thorough assessment of your garden. Winter can be harsh, leaving behind a trail of damage or debris. Walking through your garden with a critical eye allows you to identify what needs attention before new growth truly begins. This proactive inspection saves you time and effort later, preventing small issues from becoming major problems.
Inspect Existing Plants and Structures
Begin by examining all your existing plants. Look for signs of winter kill, which appears as brown, brittle, or mushy stems and leaves. Perennials, shrubs, and small trees may show dead branches. You should also check for plants that may have heaved out of the ground due to freeze-thaw cycles, exposing their roots. Gently push these back into the soil, ensuring their root crowns remain covered.
- Perennials: Cut back any dead foliage from last year’s growth. Healthy new shoots often emerge from the base. Identify plants that did not survive winter; plan for their replacement.
- Shrubs and Trees: Inspect branches for breakage, splitting, or bark damage. Look for signs of rodent gnawing at the base of young trees. Prune away dead or damaged wood using clean, sharp tools.
- Evergreens: Check for winter burn, which looks like scorched or browning needles. While you cannot reverse this, you can prune affected tips and ensure the plant receives adequate moisture as temperatures rise.
- Garden Structures: Examine raised beds, trellises, fences, and container gardening spring setups for structural integrity. Repair any broken boards, loose fasteners, or leaning supports. Strong structures protect your plants from wind and provide necessary support as they grow.
- Irrigation Systems: If you have an automated irrigation system, check for broken lines, clogged emitters, or damaged sprinkler heads. Repairing these now prevents water waste and ensures efficient delivery once you begin regular watering.
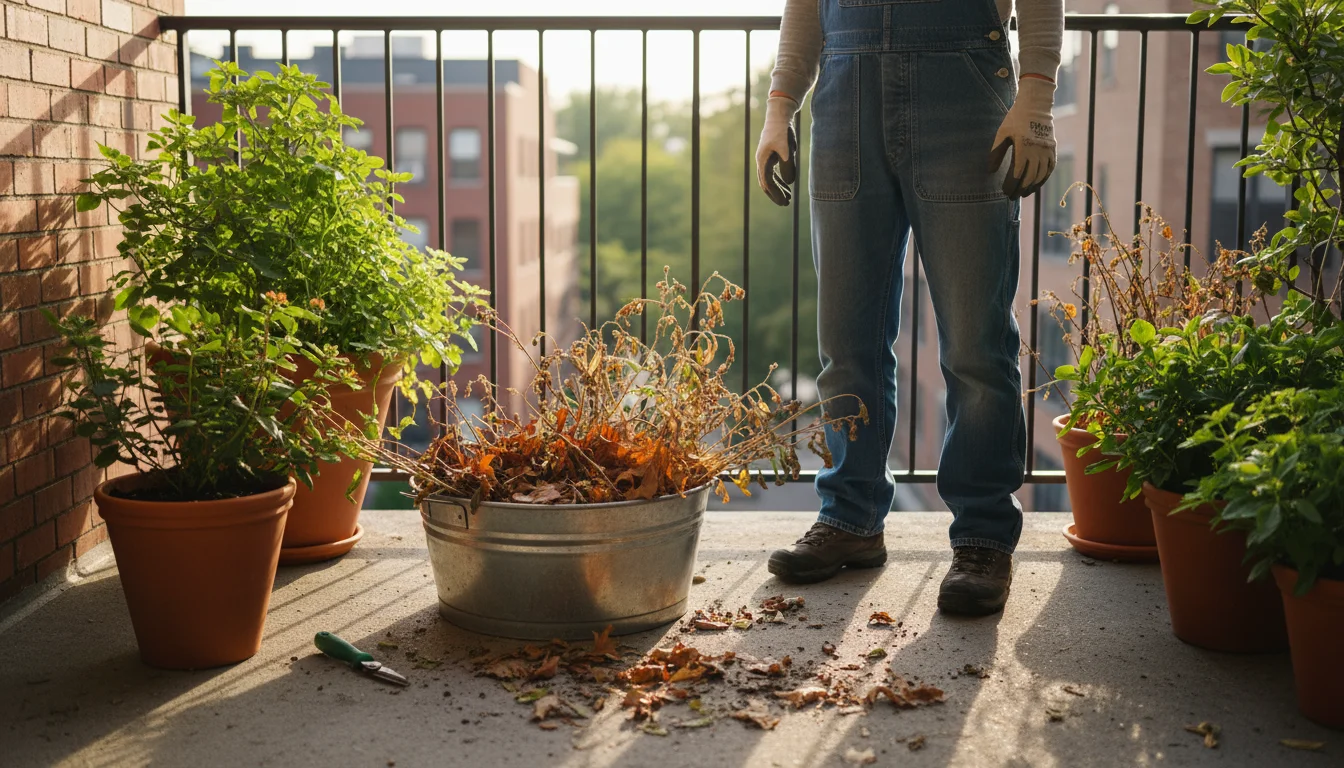
Clear Debris and Plan Layout
After your initial assessment, systematically clear your garden space. Remove any remaining fallen leaves, spent annuals from last season, or general winter debris. This cleanup prevents pests and diseases from overwintering and provides a clean slate for new growth. Be mindful of beneficial insects that may still be dormant in leaf litter. Consider creating a small designated area for this material if you have space, or add it to your compost pile.
Consider your garden layout. Do you want to try a new plant arrangement? Are there areas that received too much or too little sun last year? Early spring is the ideal time to re-evaluate your planting strategy. Sketch out a plan for new plants, considering their mature size and light requirements. For container gardening spring efforts, determine which pots you will reuse and which new ones you might need. A thoughtful plan prevents impulsive purchases and ensures every plant has the best chance to thrive in its designated spot.
Revitalizing Your Garden Soil
The health of your soil directly dictates the health of your plants. Early spring offers the perfect window to replenish and rejuvenate your garden beds. Healthy soil provides essential nutrients, retains moisture efficiently, and offers robust support for root development. Neglecting your soil makes plants more susceptible to stress, disease, and nutrient deficiencies. Prioritize this step as the cornerstone of successful spring garden prep.

Understanding Your Soil’s Needs
Before amending, assess your soil. You can perform a simple squeeze test: grab a handful of damp soil. If it crumbles easily, you likely have good loam. If it forms a tight ball, you have clay soil. If it falls apart instantly, you have sandy soil. Each type has different needs. Clay soils benefit from improved drainage, while sandy soils need better water retention. All soils benefit from increased organic matter.
Consider a soil test, especially if you have had issues in previous seasons. Your local extension office often provides affordable soil testing services. This test reveals your soil’s pH and nutrient levels, guiding your amendment choices. For example, if your soil lacks nitrogen, you know to incorporate nitrogen-rich amendments.
Incorporating Organic Matter
Adding organic matter is perhaps the single most impactful step you can take for soil health. Organic matter improves soil structure, enhances water retention in sandy soils, improves drainage in clay soils, and provides a slow-release source of nutrients. You should aim to incorporate at least 2-4 inches of organic material into the top 6-12 inches of your garden beds. This creates a rich, fertile environment for roots.
- Compost: This is a gardener’s best friend. Homemade compost, derived from kitchen scraps and yard waste, provides a balanced mix of nutrients and improves soil structure. Purchase peat-free commercial compost if you do not make your own. Peat harvesting damages valuable ecosystems, making peat-free options a more environmentally conscious choice.
- Well-rotted Manure: If available, well-aged manure (from cows, horses, or chickens) offers a powerful nutrient boost. Ensure it is truly “well-rotted,” meaning it no longer smells strongly and appears dark and crumbly. Fresh manure can burn plant roots with its high nitrogen content.
- Leaf Mold: Decomposed leaves create a light, airy soil amendment that significantly improves soil structure and water retention. Collect fallen leaves in autumn, store them in a bin, and let them break down over winter for use in spring.
You can gently fork these amendments into the top layer of your soil. Avoid over-tilling, which can disrupt the delicate soil microbiome and destroy beneficial fungi and bacteria. Instead, work the organic matter in carefully, preserving as much of the existing soil structure as possible.
Ensuring Proper Drainage and Aeration
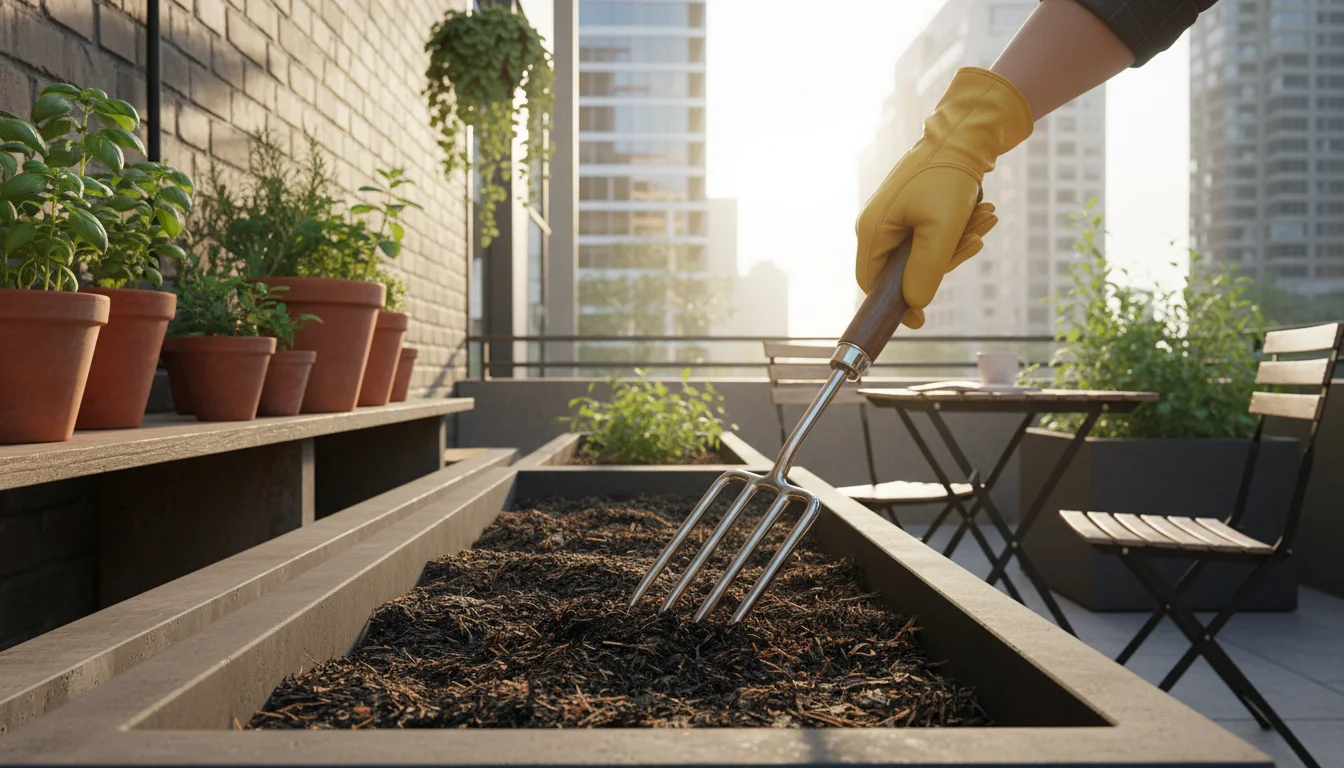
Good drainage is crucial for plant health, preventing root rot and ensuring oxygen reaches plant roots. If your soil retains too much water, organic matter helps break up compacted clay. You can also consider creating raised beds for areas with particularly poor drainage. Raised beds offer excellent drainage and allow you to control soil composition completely. Aeration, which is the process of loosening soil to allow air and water penetration, also contributes to healthy root systems.
For established beds, avoid compacting the soil by walking only on designated paths. When preparing new beds, gently loosen compacted soil with a broadfork or garden fork before adding amendments. This process improves air circulation and water infiltration, creating an ideal environment for your plants to thrive.
For more detailed information on improving soil health, you can consult resources like the Oregon State Extension’s guide to soil health, which offers research-backed strategies for various soil types.
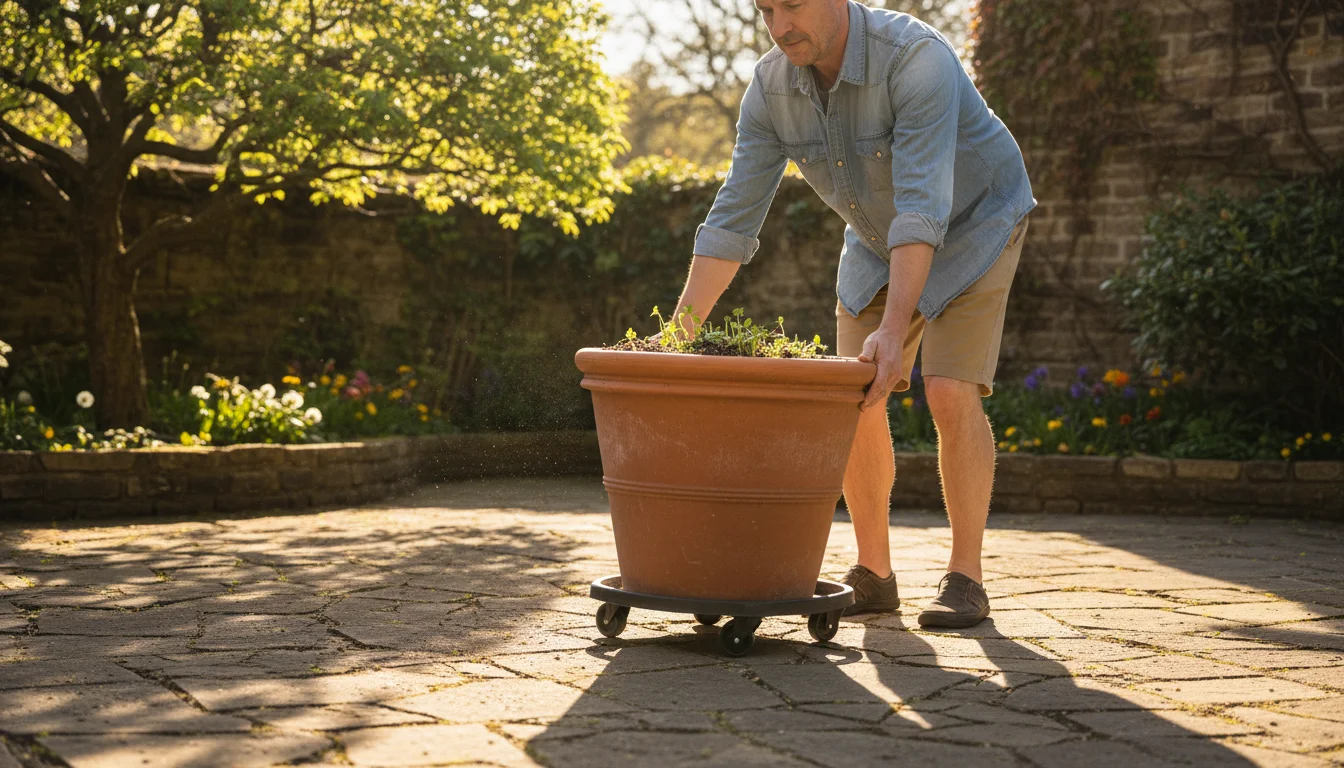
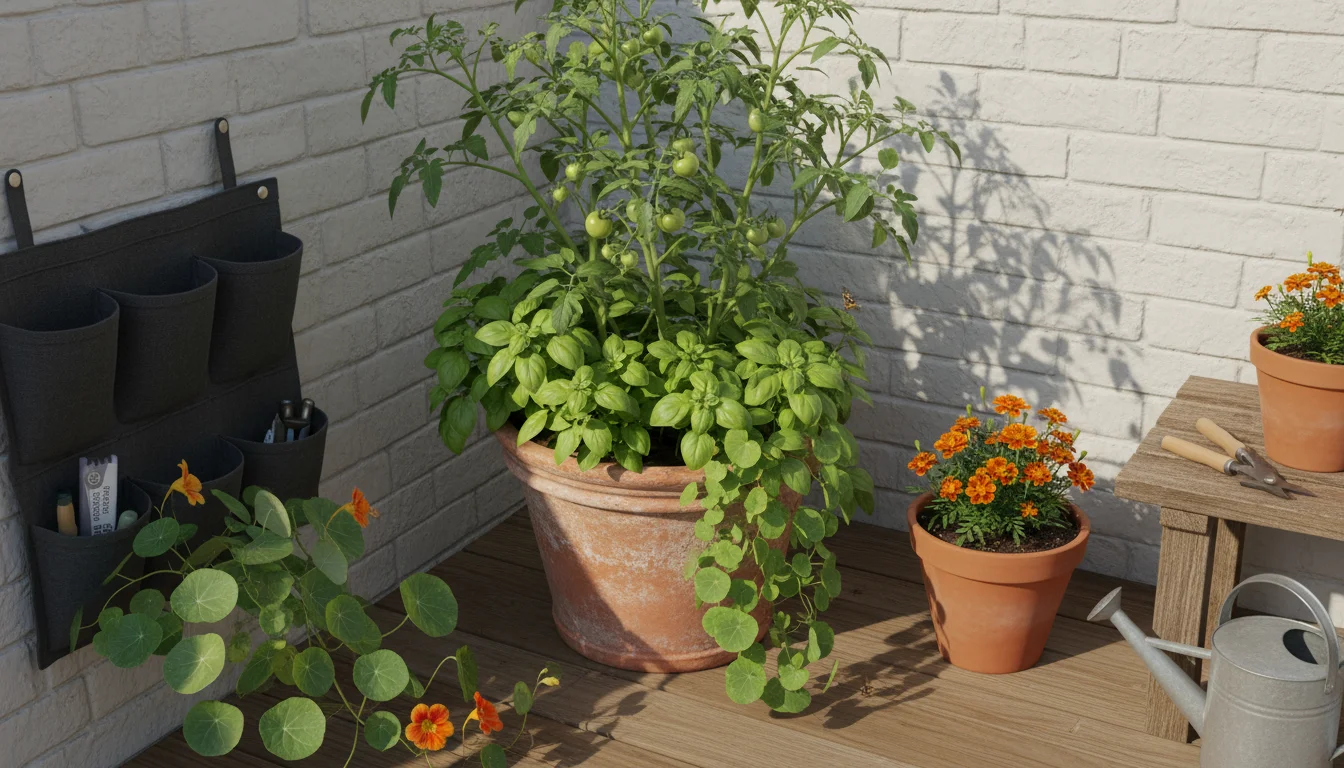
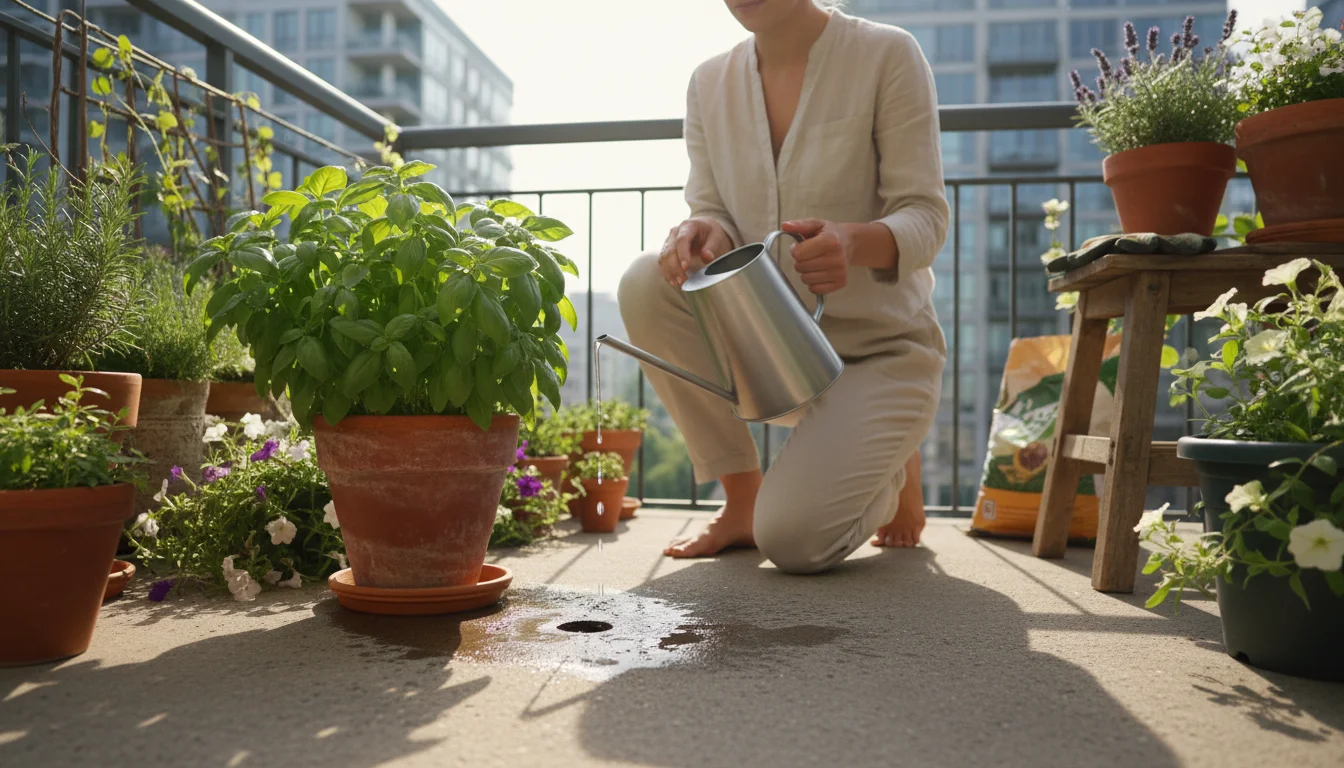
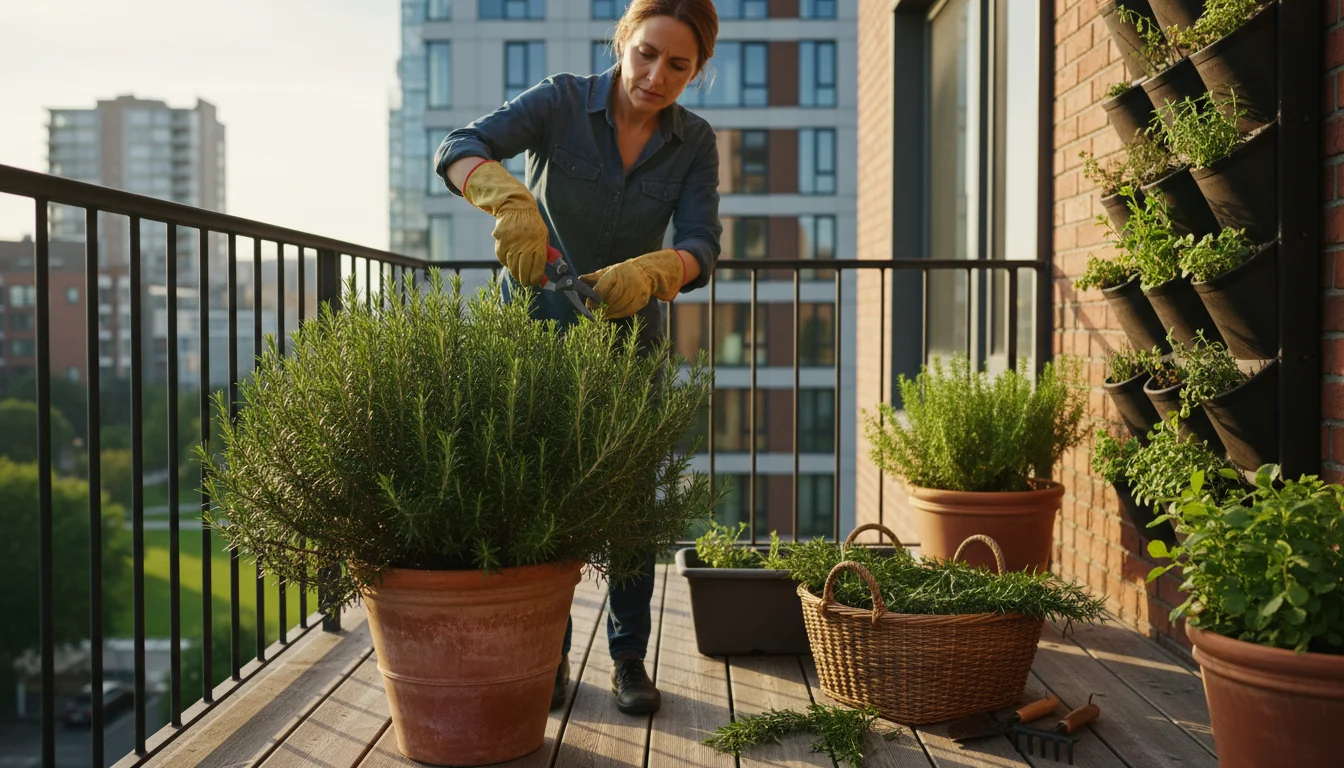
Container Gardening Spring Essentials
Container gardening spring prep requires specific attention, as potted plants rely entirely on you for their environment. Small-space gardeners often find containers indispensable for growing herbs, vegetables, and ornamental plants. Proper preparation now ensures your potted plants have the best possible start and continue thriving throughout the season.
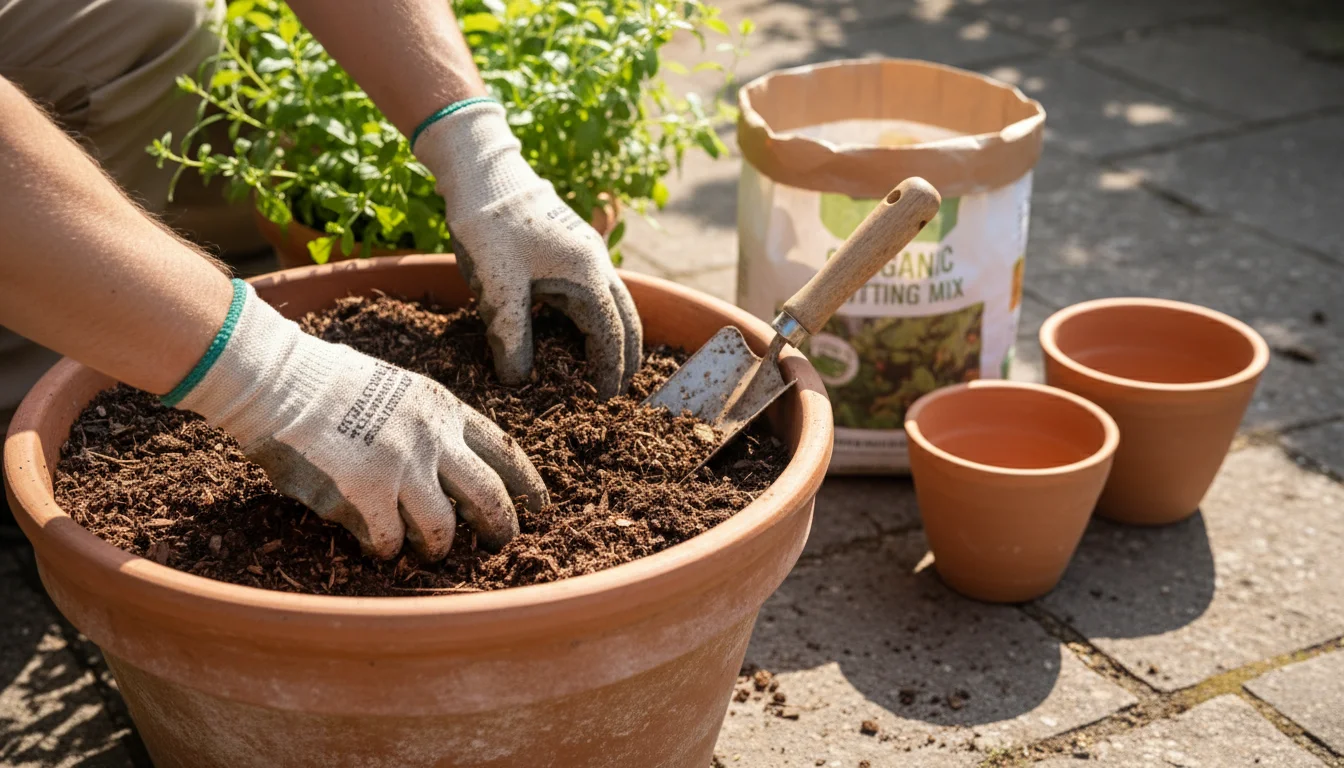
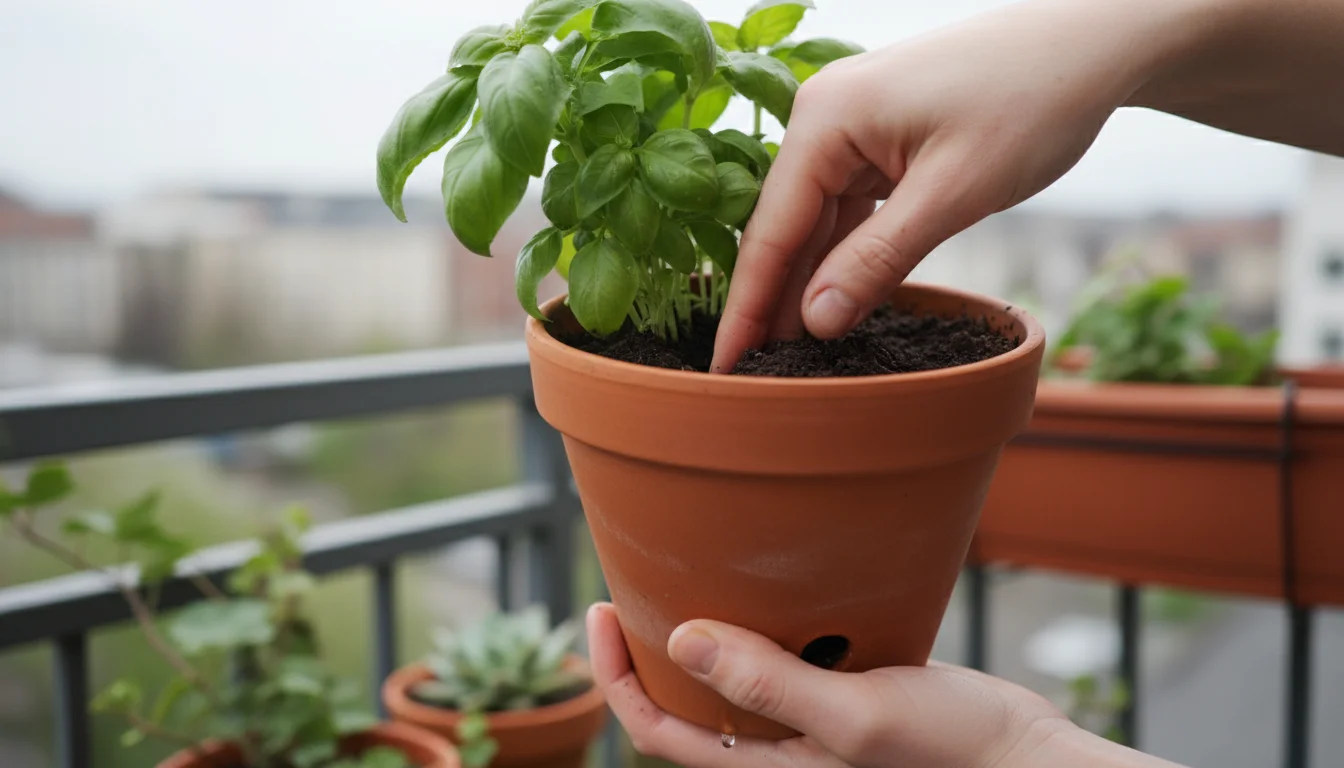
Refreshing Potting Mix
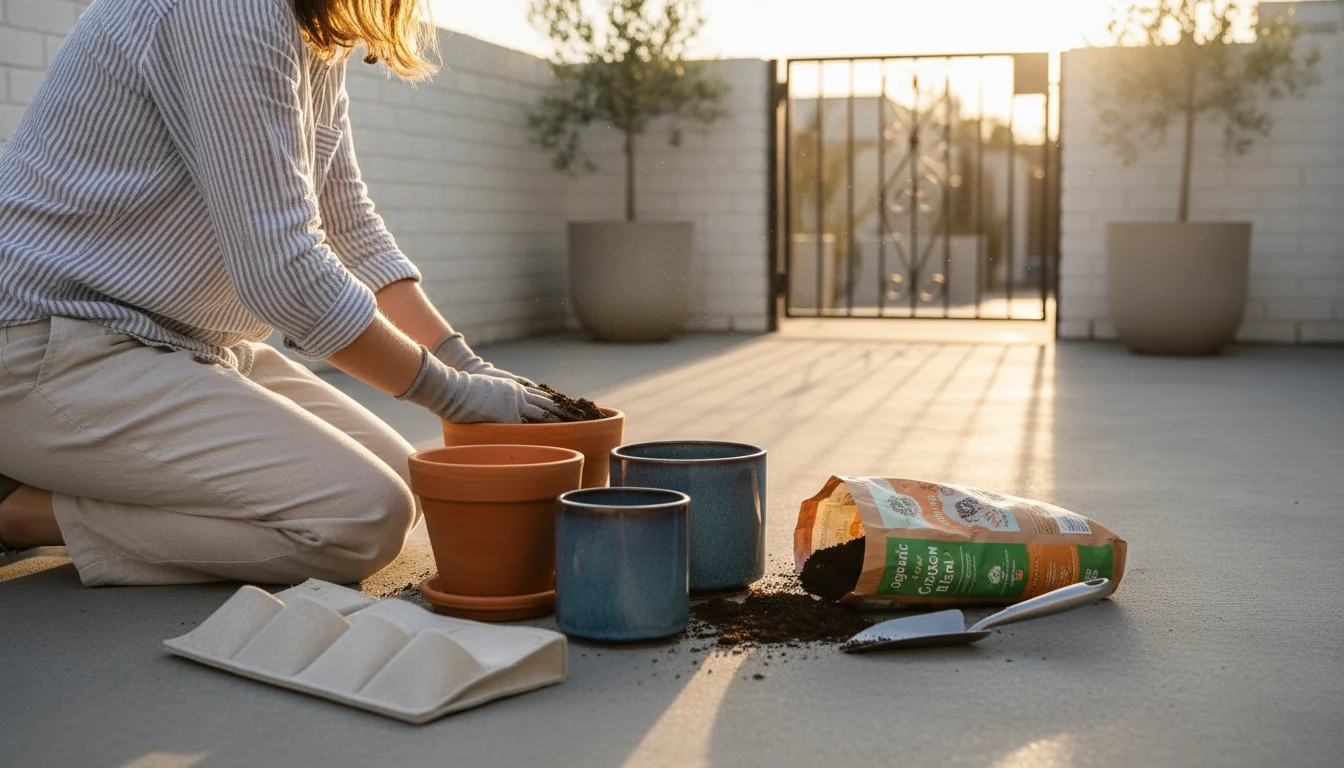
The potting mix in your containers degrades over time. It loses its structure, nutrients deplete, and it can compact, leading to poor drainage and aeration. You cannot simply reuse old potting mix indefinitely without consequence. For annuals, you should replace most, if not all, of the old mix each season. For perennials or shrubs in containers, you can often refresh the top few inches of soil rather than completely repotting.
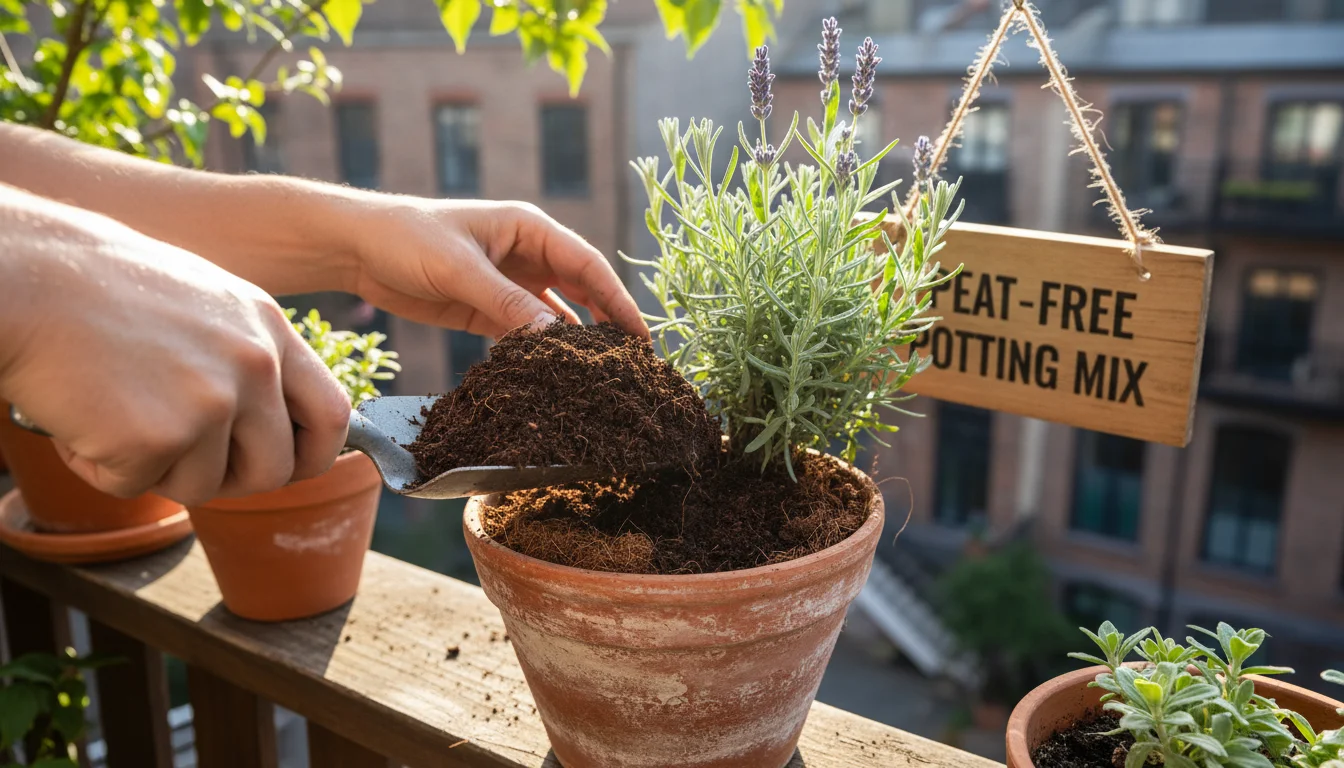
When replacing or refreshing, always choose a high-quality, peat-free potting mix. Look for mixes that contain compost, coco coir, or other sustainable alternatives to peat. These provide excellent drainage, retain moisture effectively, and offer a slow release of nutrients. Incorporating a slow-release organic fertilizer at this stage also gives your plants a head start.
Actionable Steps for Potting Mix:
- Empty and Clean: Remove all old potting mix from containers if you plan to reuse them for annuals. Scrub pots thoroughly with a stiff brush and a diluted bleach solution (1 part bleach to 9 parts water) to kill any lingering pathogens or pest eggs. Rinse thoroughly.
- Partial Refresh: For established perennials or long-term plants, gently scrape off the top 2-3 inches of old potting mix. Replace it with fresh, nutrient-rich potting mix. You can also carefully poke holes in the remaining old mix with a stick or chopstick to improve aeration.
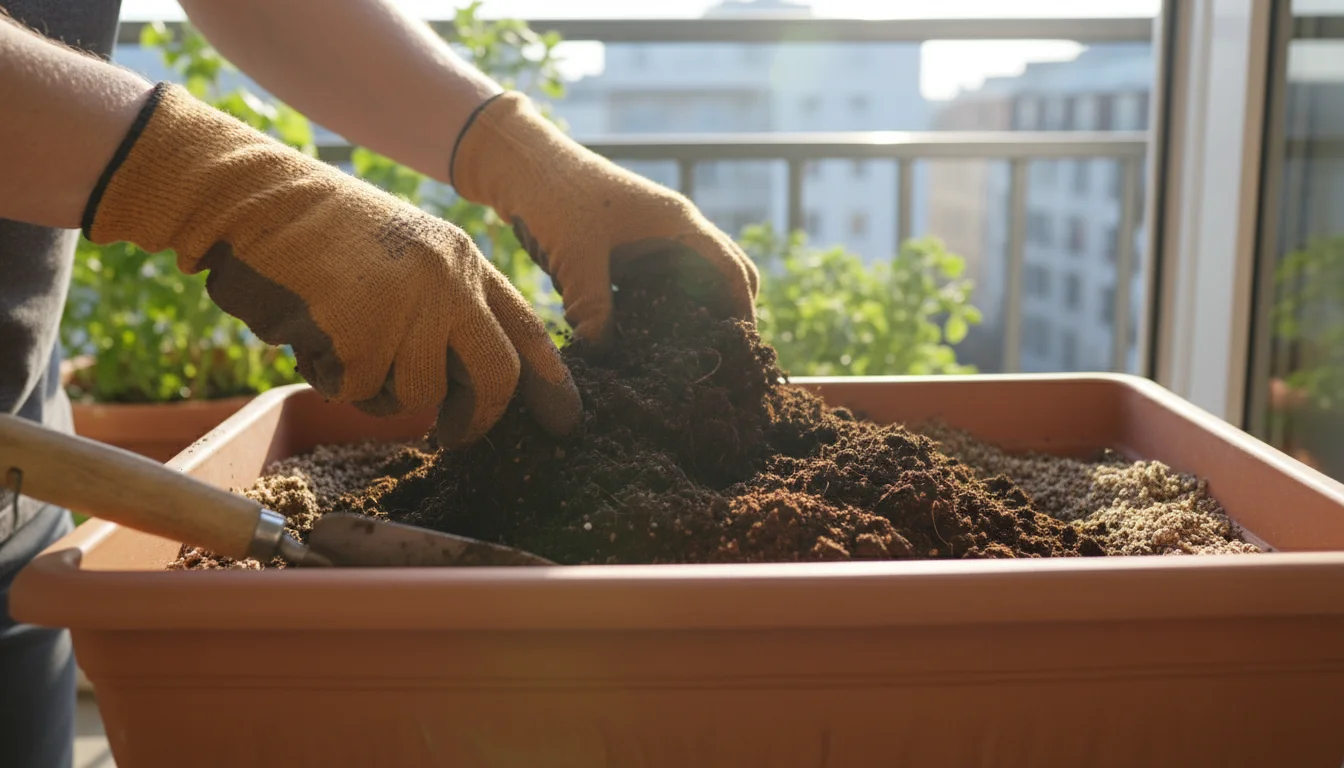
- New Mix Blending: If you are creating your own mix, combine equal parts fresh peat-free potting soil, compost, and perlite or vermiculite for enhanced drainage and aeration. This blend provides a robust foundation for new plantings.
Checking and Cleaning Containers
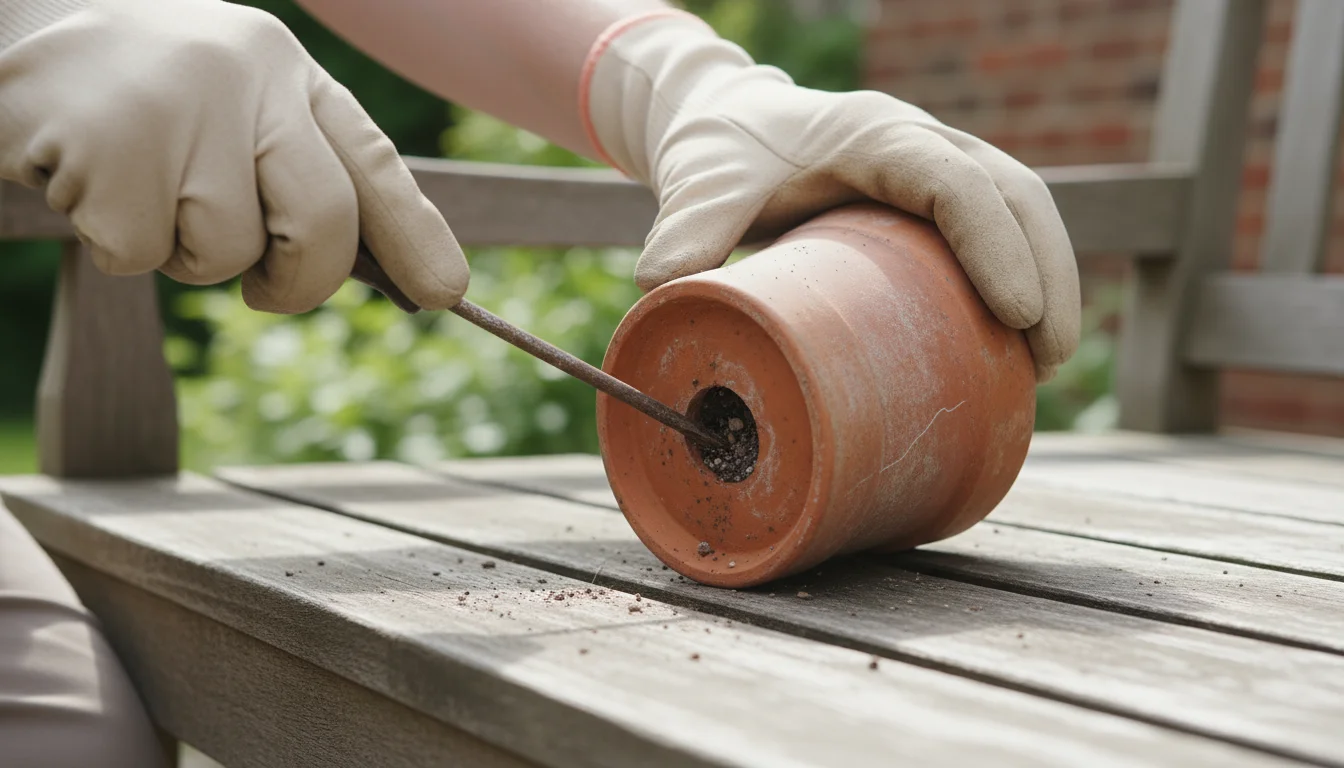
Beyond refreshing the soil, inspect your containers themselves. Cracks, chips, or general wear and tear can compromise their integrity. Plastic pots can become brittle over winter, while terracotta pots might crack if they absorbed water and then froze. Ensure all drainage holes are clear; clogged holes lead to waterlogged roots, a common cause of plant demise. You can use a stick or screwdriver to poke through any blockages.
Consider the size of your containers. If a plant appears “root-bound,” meaning its roots circle tightly around the inside of the pot, it requires repotting into a larger container. Roots encircling the pot limit nutrient uptake and stunt growth. When repotting, choose a container only one size larger, for example, from a 6-inch to an 8-inch pot, to avoid overwatering issues. A container too large holds excess moisture, which can suffocate roots. Ensure the new pot has ample drainage holes.
Repositioning and Sun Exposure
As spring progresses, the sun’s angle changes, and nearby trees or structures leaf out, altering light conditions. Re-evaluate the placement of your containers to ensure your plants receive optimal sun exposure. Most vegetables and flowering annuals require at least 6-8 hours of direct sunlight per day. If a spot previously worked, verify it still does. Move containers as needed to maximize light, or conversely, to provide afternoon shade for plants that prefer it in hotter climates. Understanding your plants’ light needs is a fundamental early gardening tip that prevents many future problems.
Tool and Supply Readiness
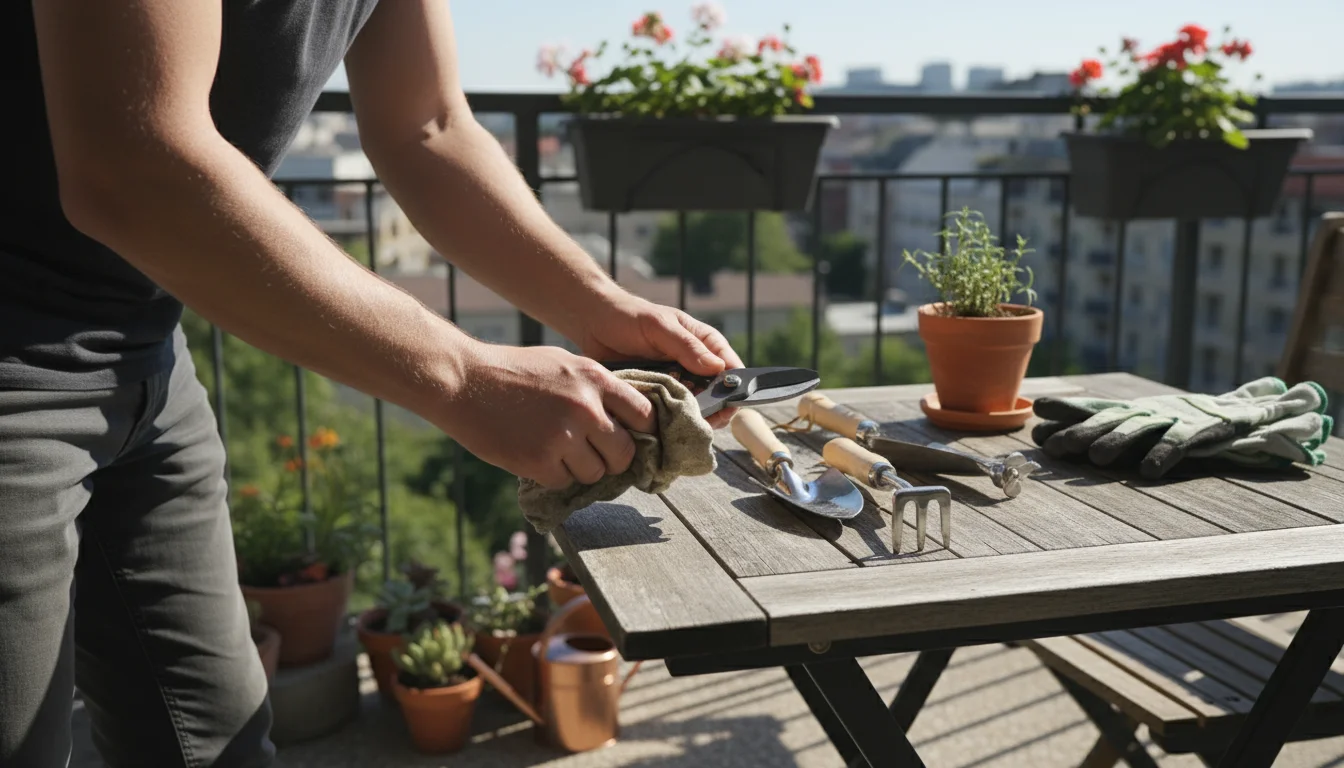
Your garden is only as efficient as your tools. Early spring is the ideal time to take stock of your gardening equipment, ensuring everything is clean, sharp, and ready for action. Well-maintained tools make tasks easier, reduce plant damage, and minimize the spread of diseases. A robust set of supplies also ensures you are prepared for every step of your spring garden prep.
Cleaning and Sharpening Tools
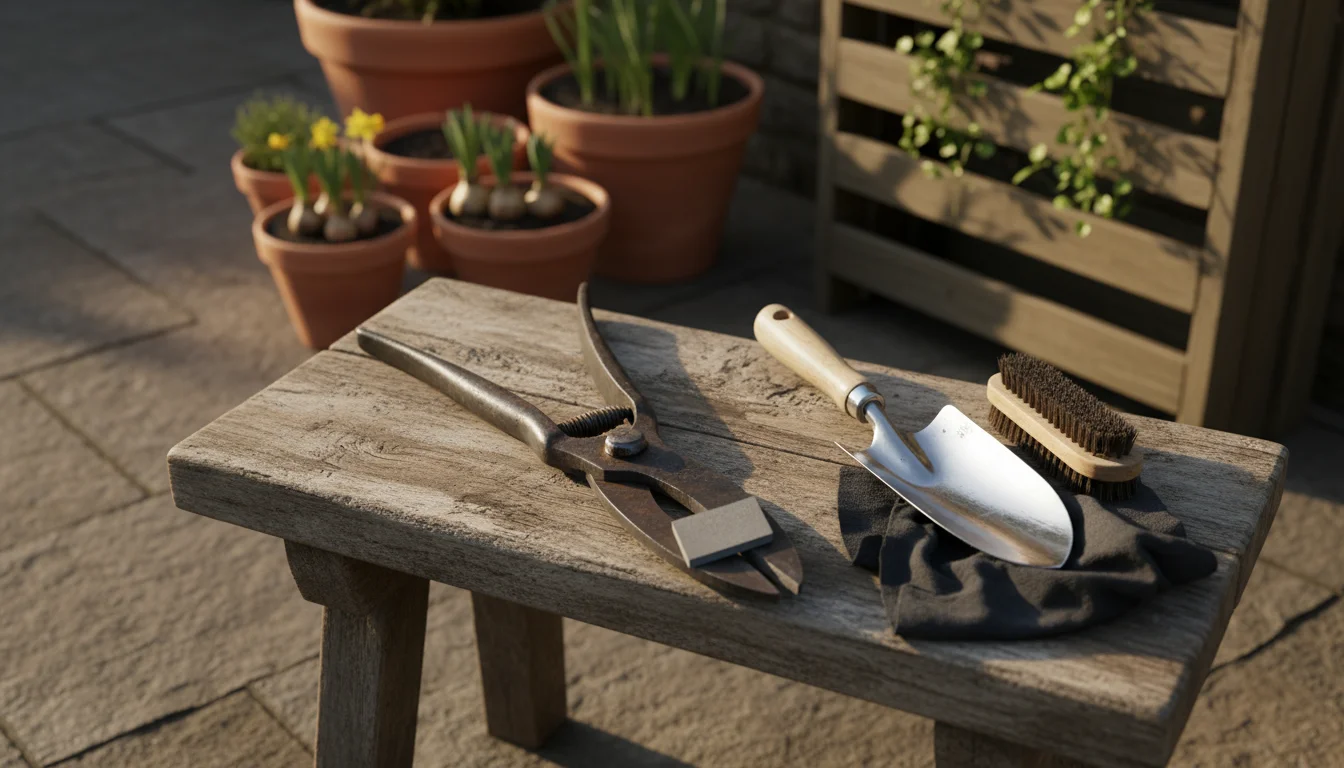
After a season of use and a winter of storage, your tools likely need attention. Dirt, rust, and sap can harbor pathogens and dull blades. Clean tools thoroughly: remove any caked-on soil with a wire brush, then wash with warm, soapy water. Dry them completely to prevent rust. You can wipe metal surfaces with an oiled rag, linseed oil works well, before storage to add a protective layer.
Sharp tools cut cleanly, promoting faster healing for plants and requiring less effort from you. Dull pruners can crush stems, leaving jagged wounds vulnerable to disease. Sharpen your pruners, loppers, and shovels with a sharpening stone or file. If you are uncomfortable sharpening tools yourself, many hardware stores offer sharpening services. You can find detailed instructions on tool maintenance from sources like the Royal Horticultural Society on tool care.
Essential Tools to Check:
- Hand Pruners: For small branches, deadheading, and light pruning.
- Loppers: For thicker branches that hand pruners cannot manage.
- Garden Trowel: For digging small holes, planting, and transplanting.
- Shovel or Spade: For digging larger holes, turning soil, and moving amendments.
- Garden Fork: For aerating soil and incorporating organic matter.
- Gloves: Protect your hands from thorns, dirt, and blisters.
- Watering Can or Hose with Nozzle: For efficient and targeted watering.
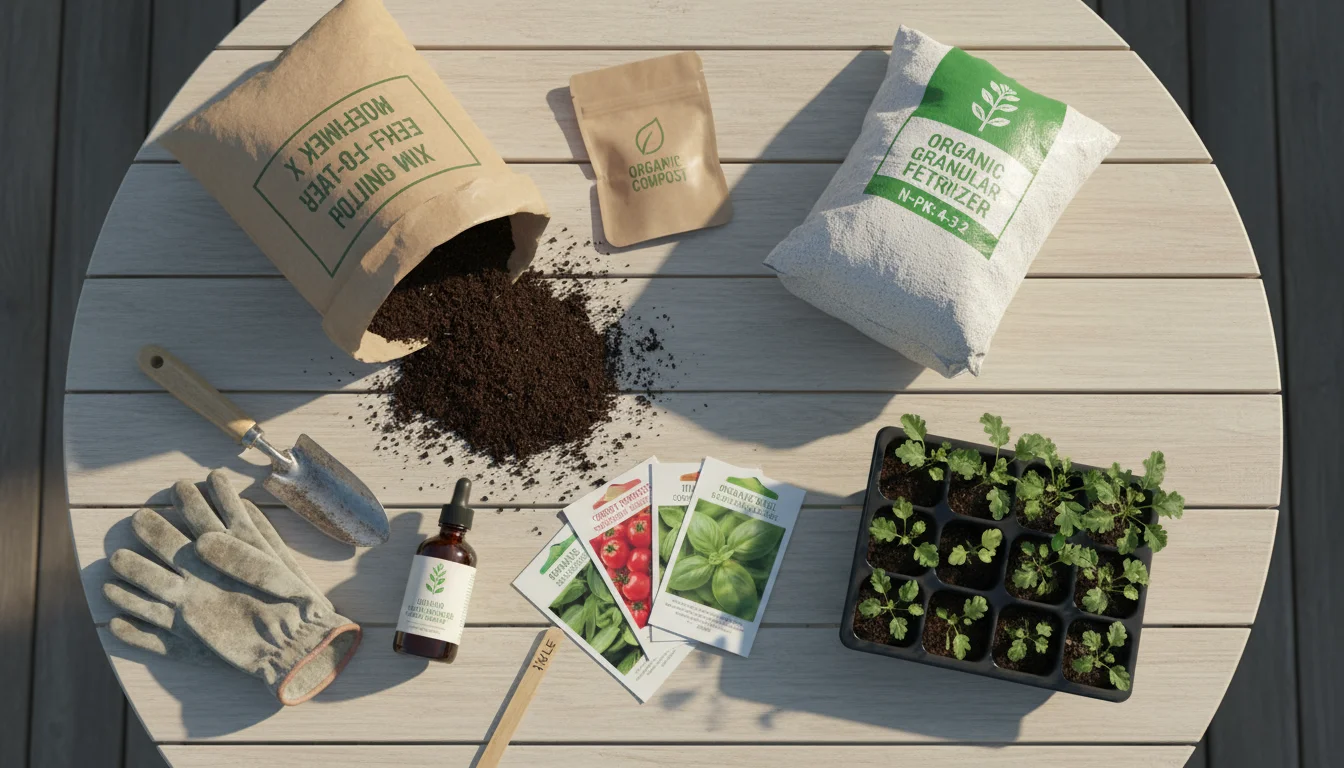
Stocking Up on Essential Supplies
Before you begin your planting spree, ensure you have all the necessary supplies on hand. Running out of potting mix or fertilizer mid-task is frustrating and delays your progress. Create a checklist of items you anticipate needing for your spring garden prep and new plantings.
Key Supplies for Spring:
- Potting Mix: Choose a high-quality, peat-free mix for containers and seed starting.
- Compost: For enriching garden beds and improving soil structure.
- Organic Fertilizer: Opt for slow-release granular or liquid organic options. These feed plants gently over time and avoid chemical runoff. Look for balanced NPK ratios suitable for general plant growth, or specific formulations for vegetables if you are growing edibles.
- Seeds or Seedlings: Purchase these based on your planting plan. Ensure you choose varieties suited to your climate and space.
- Plant Labels: Essential for keeping track of what you planted where, especially for seeds or young seedlings.
- Stakes, Trellises, Cages: For supporting climbing plants like tomatoes, beans, or peas. Install these early to avoid disturbing roots later.
- Pest Control Supplies: Have on hand eco-friendly options like insecticidal soap, neem oil, or beneficial insect releases, so you are ready to act at the first sign of trouble.
By preparing your tools and supplies now, you streamline your spring garden prep process. You eliminate interruptions and empower yourself to tackle gardening tasks efficiently and effectively. This attention to readiness underscores a low-maintenance approach: prevent problems and delays before they occur.
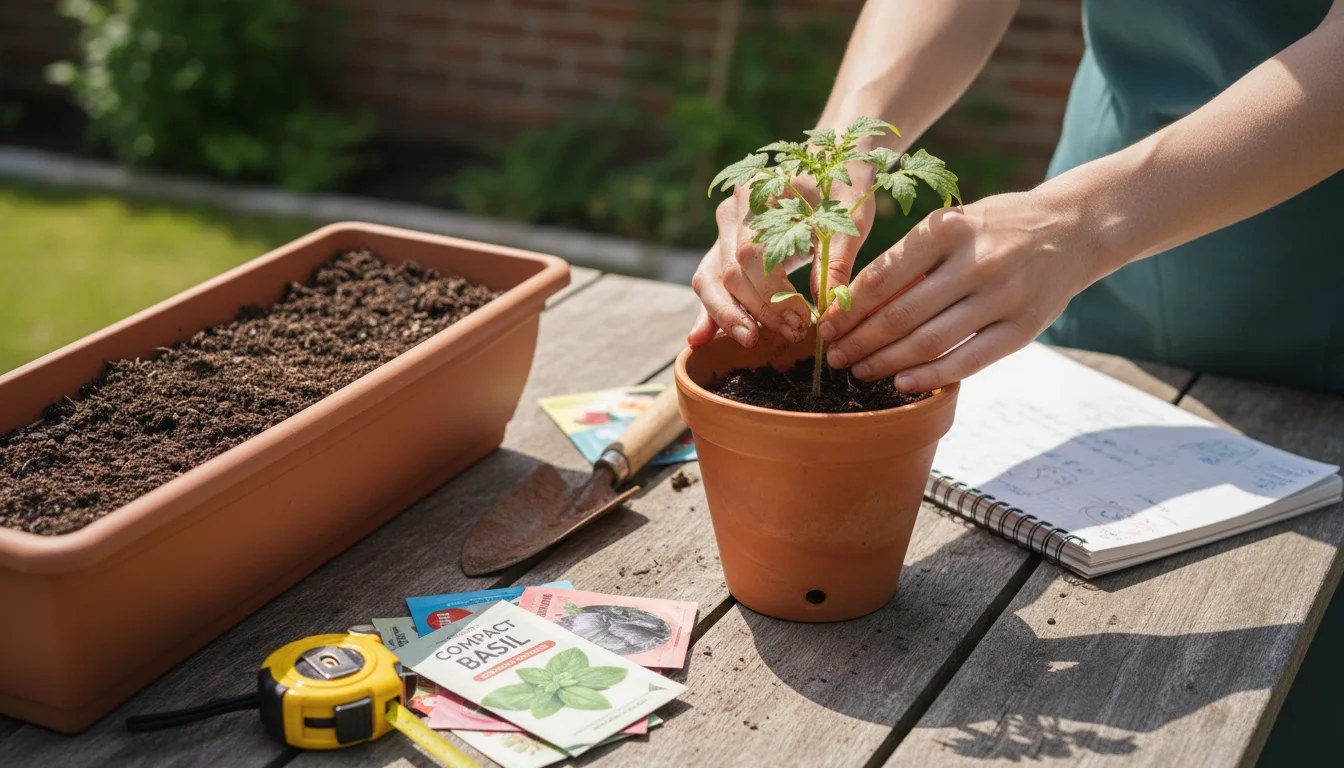
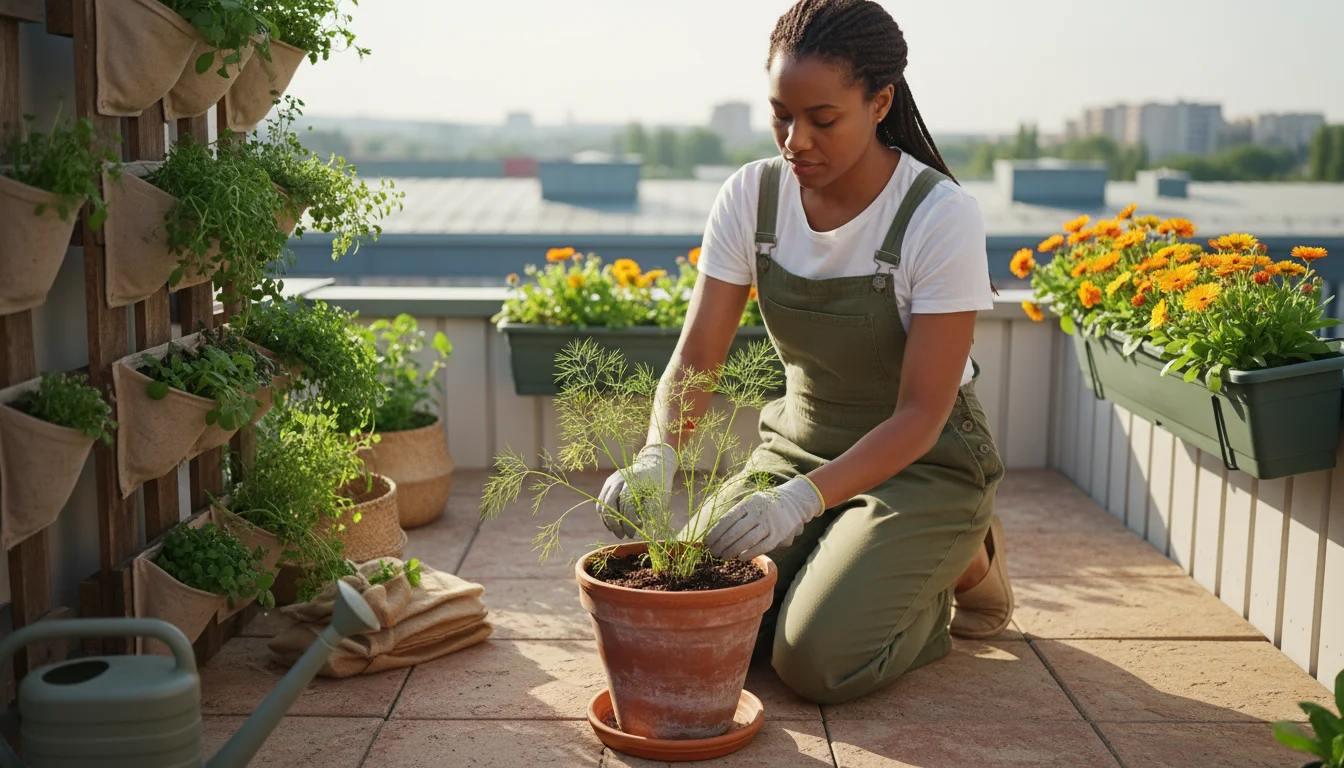
Planning and Planting for New Growth
With your garden space assessed and soil revitalized, you are ready for the exciting phase of planning and planting. Early spring is when you make critical decisions about what to grow, whether from seed or transplant, and how to position these new additions for optimal success. Thoughtful planning prevents overcrowding and ensures each plant receives the resources it needs. This is where your early gardening tips truly come into play, shaping your garden for the season ahead.
Selecting the Right Plants
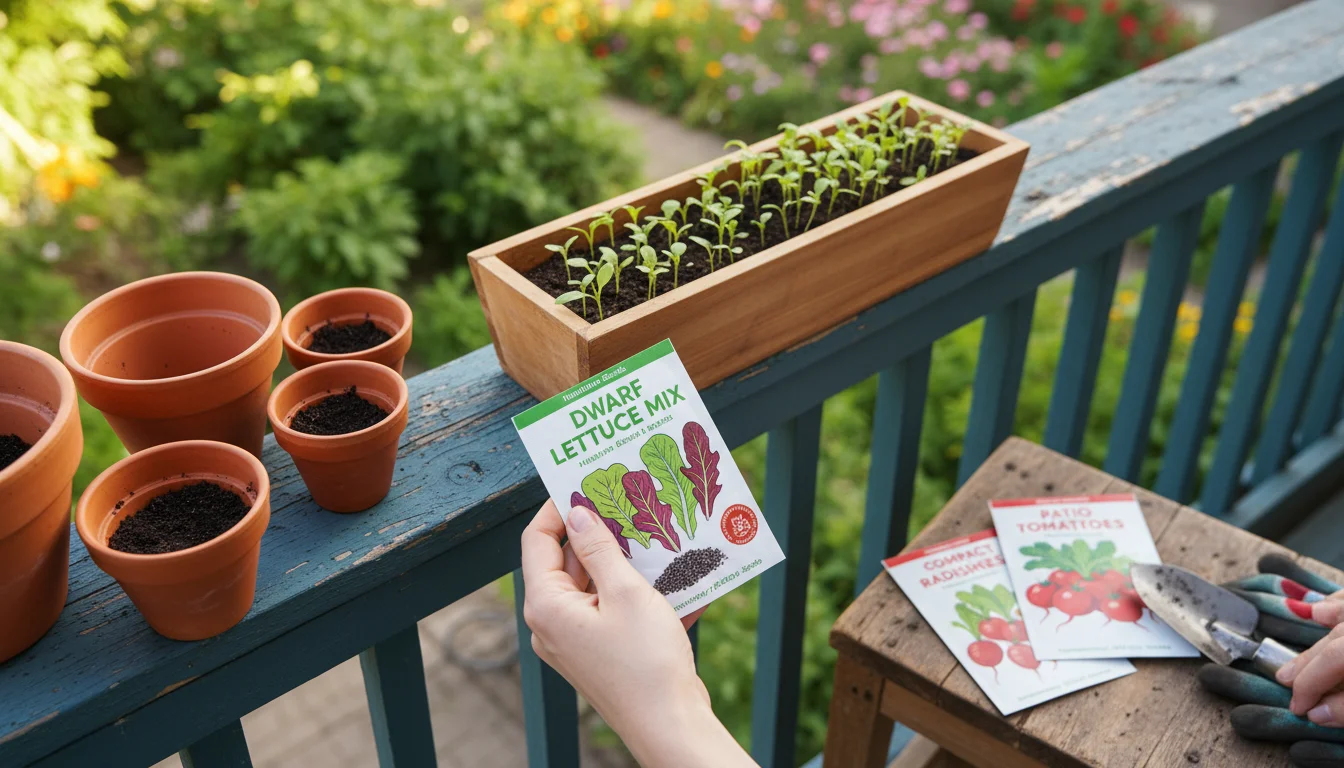
Choosing plants suited to your specific conditions is paramount for a low-maintenance garden. Consider your local climate, hardiness zone, and the amount of sunlight each area of your garden receives. Pay attention to mature plant size. In small spaces, compact varieties of vegetables, herbs, and flowers perform best. Read seed packets and plant tags carefully for information on light requirements, watering needs, and expected growth.
For edible gardens, research planting dates specific to your region. Cool-season crops like lettuce, spinach, radishes, and peas can go into the ground early in spring, often several weeks before the last frost date. Warm-season crops like tomatoes, peppers, and beans need warmer soil temperatures and should wait until after all danger of frost passes. You can check your local extension service for precise planting calendars.
Opt for disease-resistant varieties when possible. Many modern cultivars offer enhanced resistance to common fungal or bacterial issues, reducing your workload in terms of pest and disease management. This choice exemplifies a proactive, low-maintenance approach.
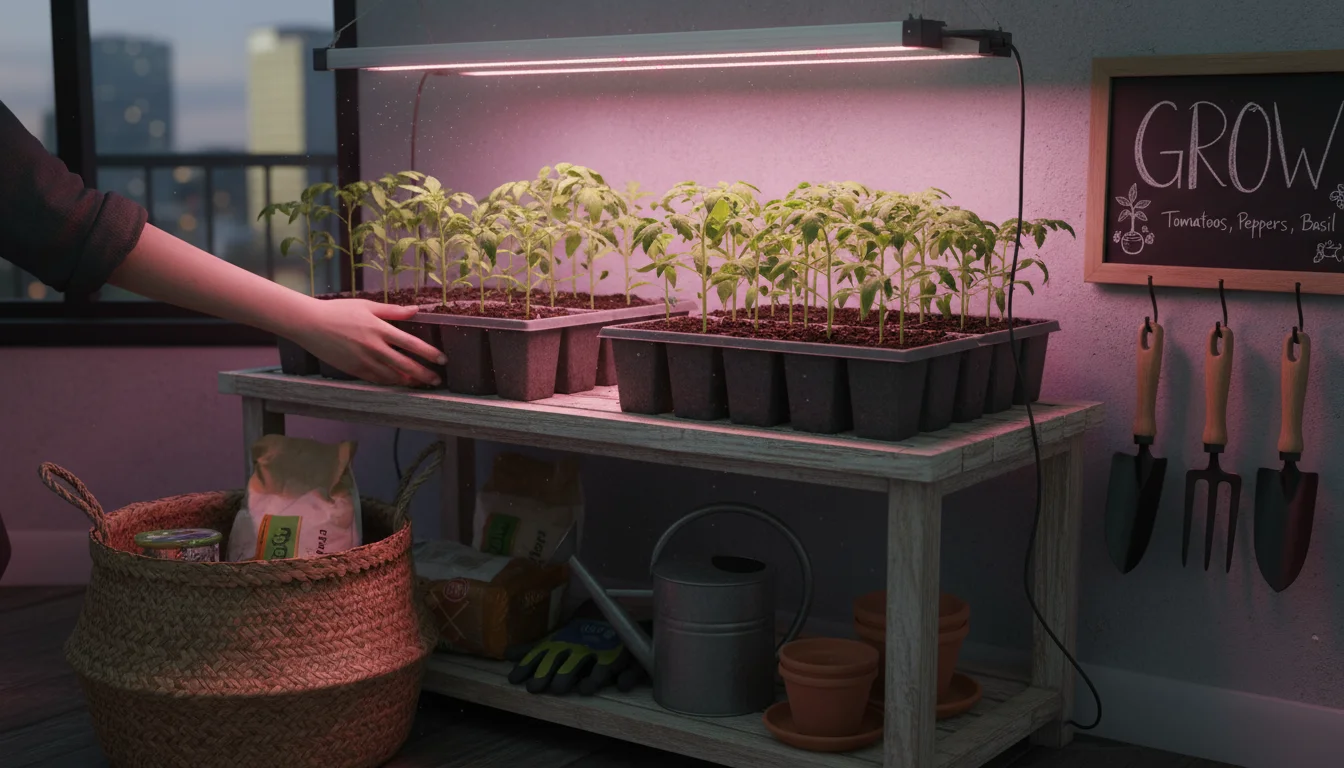
Seed Starting Indoors vs. Direct Sowing
Early spring marks the beginning of seed starting. Deciding whether to start seeds indoors or direct sow them depends on the plant type and your climate.
- Seed Starting Indoors: This gives warm-season plants a head start, especially in regions with short growing seasons. Tomatoes, peppers, eggplants, and many flowering annuals benefit from indoor starting 6-8 weeks before your last frost date. Use sterile, peat-free seed starting mix and provide adequate light, grow lights are often necessary to prevent leggy seedlings.
- Direct Sowing: Cool-season vegetables and many annual flowers thrive when direct sown into prepared garden beds once the soil is workable. These include carrots, beets, cilantro, calendula, and sunflowers. Follow seed packet instructions for planting depth and spacing.
Remember to “harden off” seedlings started indoors before transplanting them outside. Hardening off means gradually acclimating young plants to outdoor conditions, sun, wind, temperature fluctuations, over 7-10 days. Start by placing them outside for a few hours in a sheltered spot, increasing exposure daily until they are ready for permanent planting. This crucial step prevents transplant shock, ensuring your plants transition smoothly to their new home.
Thoughtful Layout and Companion Planting
When placing plants, consider their mature size to prevent overcrowding. Overcrowded plants compete for light, water, and nutrients, leading to weaker growth and increased susceptibility to pests. Give each plant adequate space according to its needs.
Companion planting is an early gardening tip that enhances plant health and productivity naturally. Certain plants benefit from growing near each other. For example:
- Marigolds deter nematodes and other pests from tomatoes.
- Basil improves the flavor of tomatoes.
- Nasturtiums can act as a trap crop for aphids, drawing them away from more valuable plants.
- Legumes like beans and peas fix nitrogen in the soil, benefiting nearby nitrogen-loving plants.
Research simple companion planting combinations that suit your chosen plants. This natural synergy reduces the need for chemical interventions, aligning with environmentally conscious gardening practices.
Efficient Watering Strategies for Spring
Water is life for your plants, but inefficient watering wastes a precious resource and can harm your garden. Early spring marks a shift in watering needs as temperatures rise and plants begin active growth. Establishing smart, efficient watering habits now ensures your plants receive adequate moisture without overwatering or waste. This is a critical component of low-maintenance and environmentally conscious gardening.
Understanding Spring Watering Needs
Unlike the dormant winter months, plants in spring actively grow, developing new leaves, stems, and roots. This increased metabolic activity means they require more water. However, spring weather can be unpredictable, with fluctuating temperatures and occasional heavy rains. You must adjust your watering schedule accordingly.
The key is to avoid both extremes: chronic underwatering stresses plants, while overwatering suffocates roots by displacing oxygen in the soil. Overwatering is a common mistake for beginners and often leads to root rot, especially in container gardening spring setups where drainage can be an issue. Data from various garden studies indicates that incorrect watering practices contribute to approximately 60-70% of plant health problems.
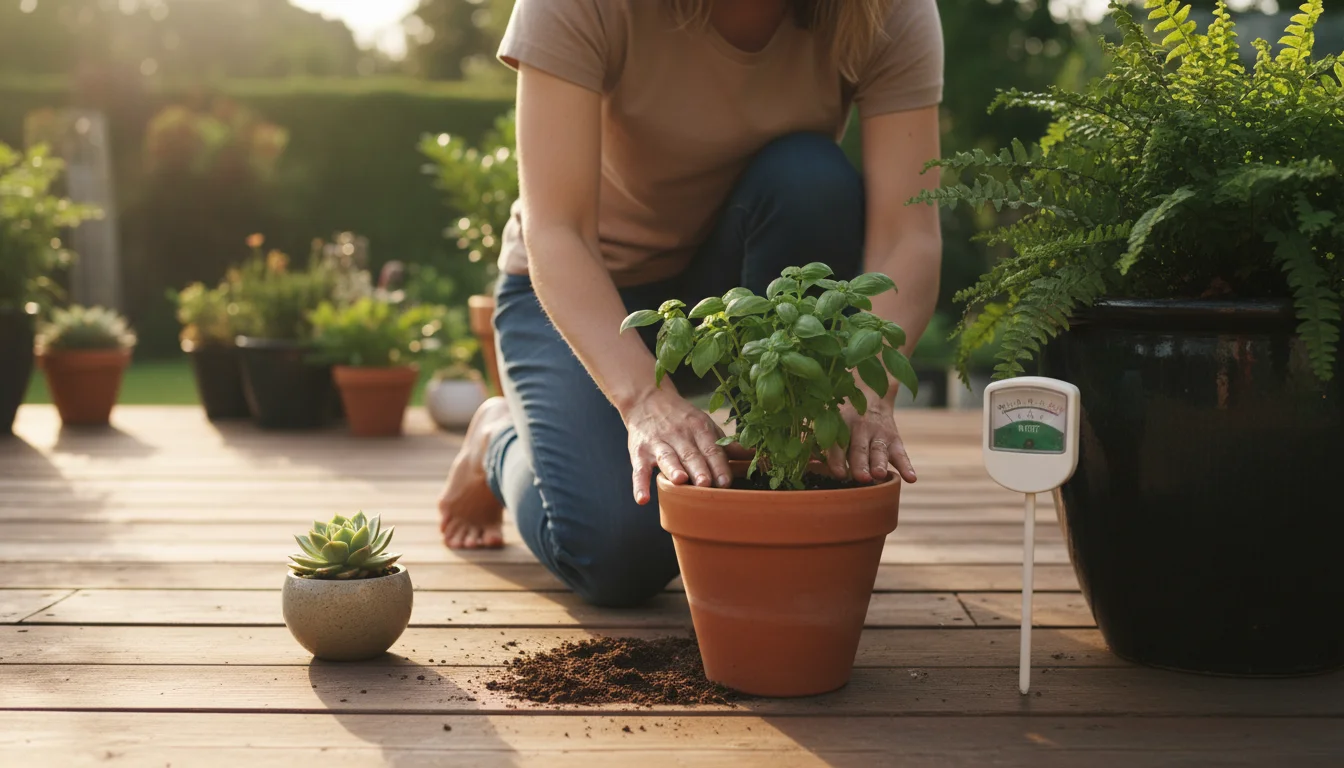
How to Determine When to Water
Do not water on a fixed schedule. Instead, water based on your plants’ actual needs. This varies depending on plant type, pot size, soil composition, and weather conditions. Here are effective methods for determining when to water:
- The Finger Test: Stick your finger about 2 inches deep into the soil. If it feels dry, it is time to water. If it still feels moist, wait. This simple, reliable method works for both in-ground beds and containers.
- Moisture Meter: For more precision, particularly in larger containers or raised beds, a moisture meter can provide a reading of soil wetness. Insert the probe into the soil and refer to its indicator.
- Container Weight: For smaller pots, lift them. A dry pot feels significantly lighter than a well-watered one. This tactile method becomes intuitive with practice.
- Observe Plant Signals: Wilting leaves are an obvious sign of thirst. However, some plants also show wilting from overwatering, due to root damage, so combine this observation with a soil moisture check.
Always check the soil moisture before watering. You prevent unnecessary watering and conserve water. Adjusting your habits based on environmental cues is a fundamental early gardening tip for success.
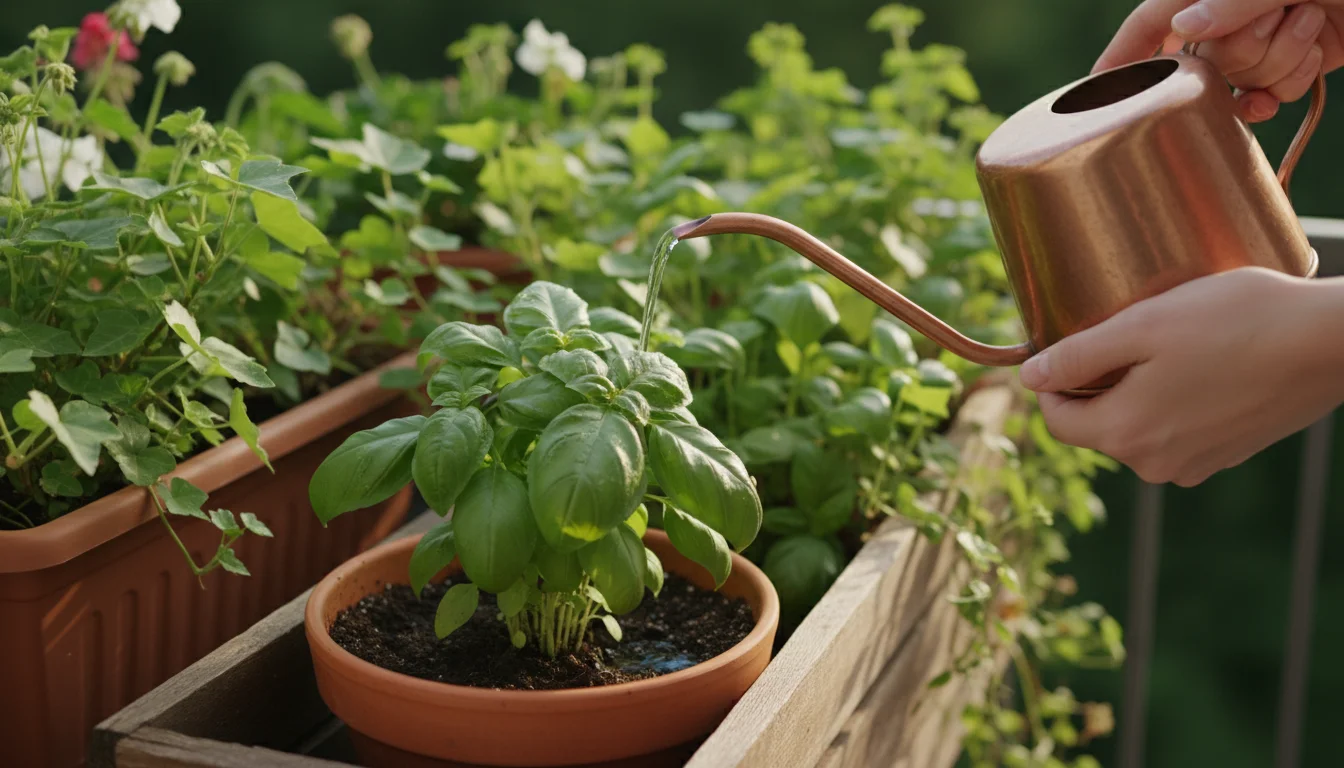
Efficient Watering Techniques
Once you determine your plants need water, apply it effectively. Deep, infrequent watering is always preferable to shallow, frequent watering. Deep watering encourages roots to grow deeper into the soil, making the plant more resilient to dry spells. Shallow watering encourages surface roots, which are more vulnerable to drying out.
- Target the Root Zone: Direct water to the base of the plant, where the roots absorb it. Avoid overhead watering, which can promote fungal diseases on leaves and wastes water through evaporation.
- Slow and Steady: Water slowly and deeply until water drains from the bottom of containers or penetrates several inches into garden beds. This ensures even saturation. For containers, water until you see water flowing from the drainage holes.
- Water in the Morning: Watering in the morning minimizes evaporation and allows foliage to dry before nightfall, reducing the risk of fungal diseases. If morning is not possible, late afternoon is the next best option, avoiding the hottest part of the day.
- Mulch: Apply a 2-4 inch layer of organic mulch, like straw, shredded leaves, or wood chips, around your plants. Mulch significantly reduces soil moisture evaporation, suppresses weeds, and moderates soil temperature. This dramatically cuts down on your watering frequency.
- Rainwater Harvesting: Install a rain barrel to collect rainwater for your garden. Rainwater is naturally free of chlorine and other chemicals found in tap water, making it excellent for plants. This eco-friendly practice reduces your reliance on municipal water and lowers your water bill.
By implementing these efficient watering strategies, you ensure your plants receive optimal hydration while conserving water, a vital aspect of environmentally conscious early gardening tips. Proper watering during spring garden prep lays the groundwork for a robust and vibrant garden throughout the growing season.

Proactive Pest and Disease Management
Early spring is not just about nurturing new growth; it is also a crucial time for proactive pest and disease management. Catching issues early prevents widespread infestations and severe plant damage. A low-maintenance approach means vigilance and prevention are your best tools. You minimize the need for reactive, intensive treatments later in the season by taking action now.
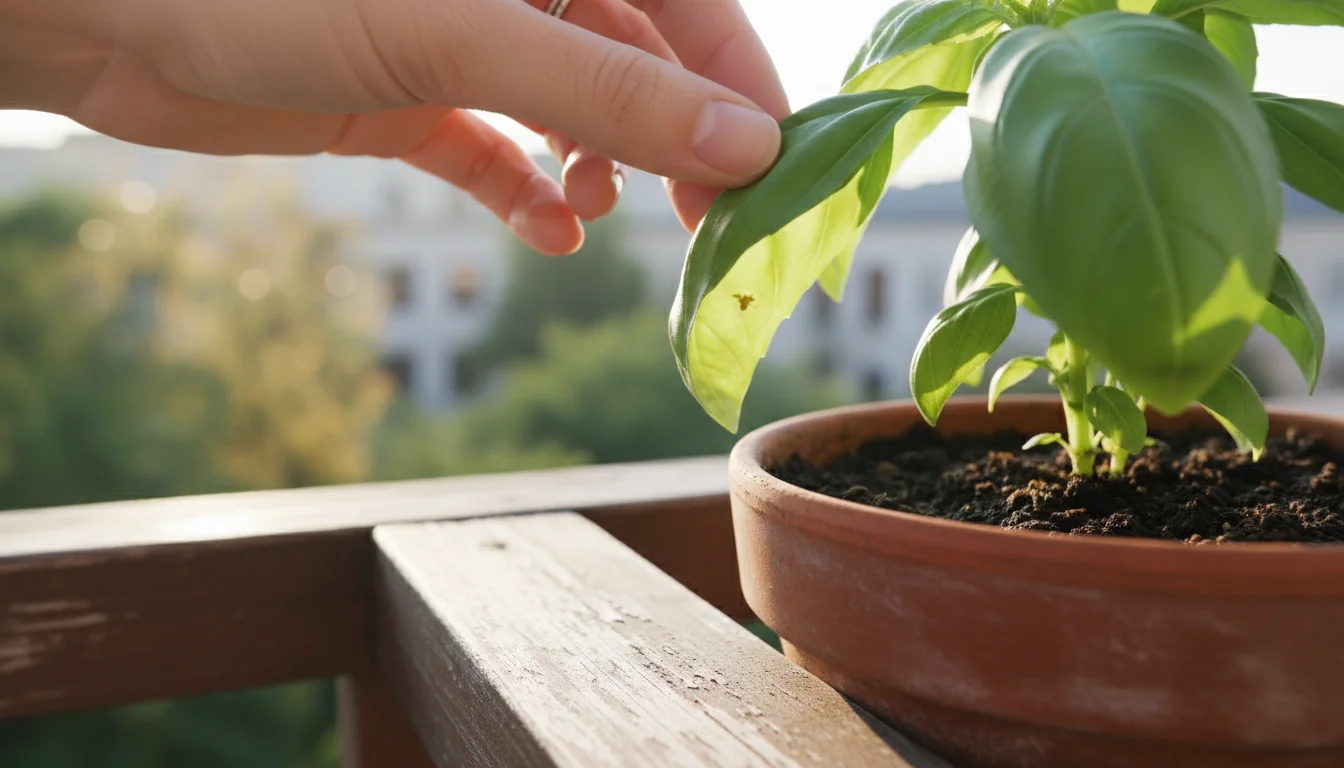
The Importance of Early Detection
Pests and diseases often begin subtly. A few aphids on a new shoot or a slight discoloration on a leaf can escalate quickly if left unchecked. Your early garden walks should include close inspection of your plants. Look under leaves, along stems, and at the soil surface for any unusual activity or symptoms. Data suggests that early intervention in pest management can reduce crop loss by up to 70% in small-scale gardens.
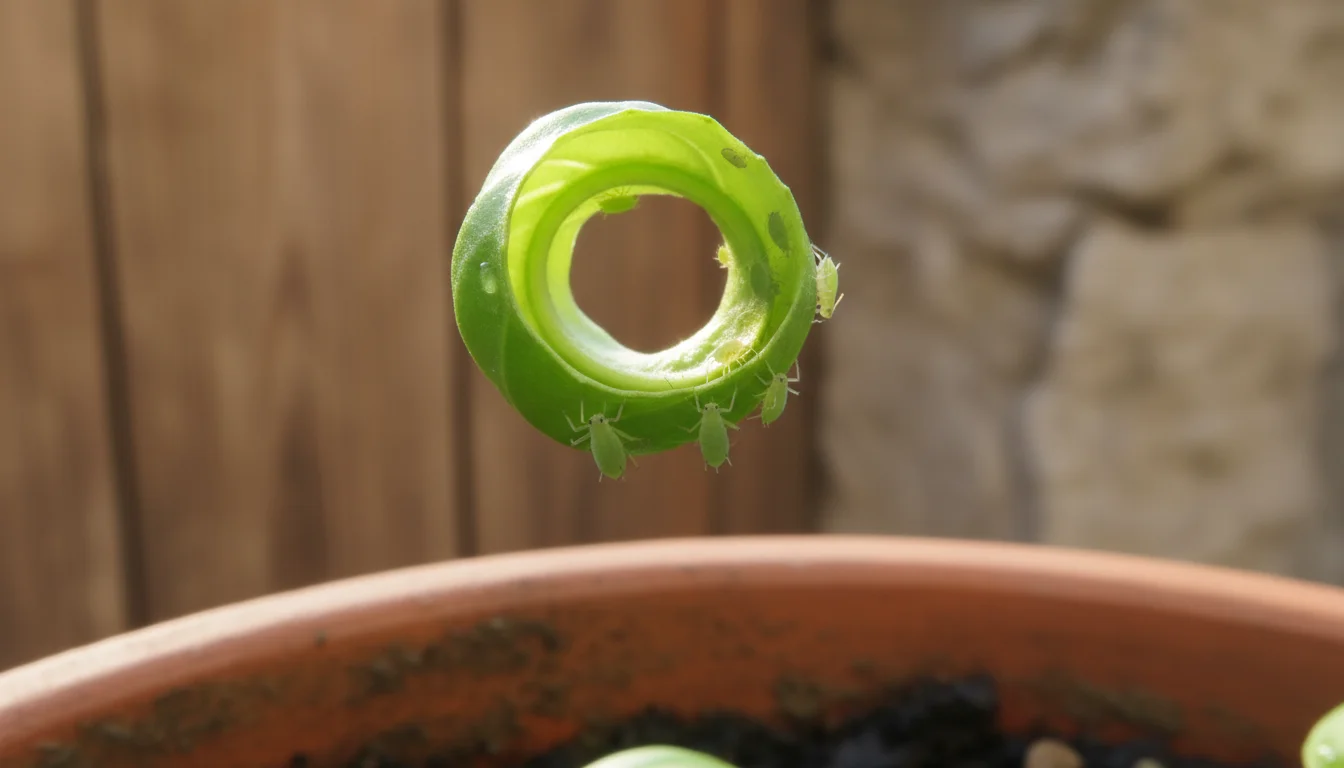
Common Early Spring Pests and Diseases
Several common issues emerge with the warming temperatures of early spring:
- Aphids: Small, soft-bodied insects that cluster on new growth, sucking plant sap. They often appear green, black, or red. Look for curled leaves or a sticky residue, honeydew.
- Slugs and Snails: These mollusks become active in damp conditions, munching on tender young leaves, especially seedlings. Look for slime trails and irregular holes in leaves.
- Fungal Diseases, for example, Powdery Mildew: Although more common in humid summer, early spring can see the start of powdery mildew, appearing as white, powdery spots on leaves, particularly if airflow is poor.
- Cutworms: These caterpillars feed at night, severing young seedlings at the soil line. They often curl into a C-shape when disturbed.
Eco-Friendly Prevention and Treatment
Your goal is to create a resilient garden ecosystem that naturally deters pests and diseases. Avoid broad-spectrum chemical pesticides, which harm beneficial insects that help control pest populations. Instead, opt for environmentally conscious strategies:
- Sanitation: As part of your initial spring garden prep, remove all plant debris from previous seasons. Many pests and disease spores overwinter in spent foliage. Clean up dropped leaves, weeds, and old mulch.
- Beneficial Insects: Encourage natural predators. Plant flowers that attract ladybugs, lacewings, and parasitic wasps, for example, dill, fennel, calendula, yarrow. These beneficial insects prey on common garden pests. You can even purchase and release ladybugs into your garden for immediate pest control.
- Crop Rotation: If you have an in-ground garden, rotate your crops annually. Planting the same crop in the same spot year after year depletes specific nutrients and allows pest and disease cycles to continue. Move plant families to different locations each season.
- Physical Barriers: Use row covers to protect young seedlings from flying insects and birds. Place cardboard collars around young plant stems to deter cutworms. Hand-pick slugs and snails in the evening and dispose of them, or set beer traps.
- Watering Practices: Follow efficient watering strategies. Wet foliage, especially overnight, promotes fungal diseases. Water at the soil level in the morning.
- Proper Spacing: Ensure adequate air circulation around plants by giving them enough space. Overcrowding creates humid conditions favorable for fungal growth.
- Organic Treatments: For active infestations, use targeted, gentle treatments. Insecticidal soap or neem oil sprays effectively control aphids and spider mites with minimal environmental impact. Apply them according to product instructions, usually in the early morning or late evening.
By integrating these proactive and eco-friendly strategies into your early gardening tips, you cultivate a garden that is less reliant on chemical interventions. You ensure your plants remain healthy and productive throughout the season, minimizing stress for both you and your environment. A healthy garden starts with preventing problems, not reacting to them.
Spring Pruning and Cleanup Techniques
Spring pruning and cleanup are vital components of your early garden prep. These tasks shape your plants, promote healthy growth, and improve air circulation, ultimately contributing to a more resilient and productive garden. Understanding when and how to prune different plant types empowers you to make informed decisions for your specific needs. This active management is a core part of low-maintenance gardening, preventing future issues by addressing them now.
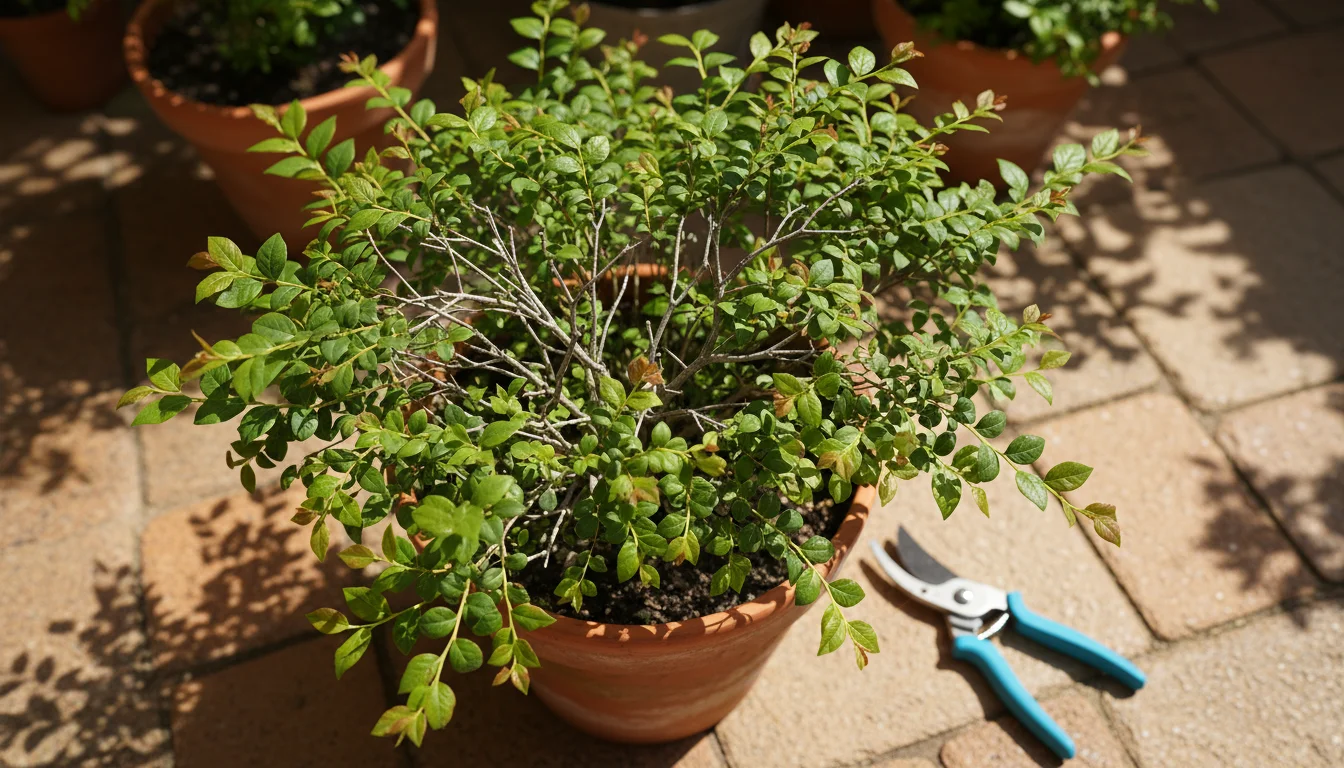
Why Prune in Spring?
Pruning serves several key purposes:
- Removes Dead or Damaged Wood: Winter often leaves behind broken, diseased, or dead branches. Removing these improves the plant’s overall health and appearance, preventing potential entry points for pests and diseases.
- Promotes Air Circulation: Thinning out dense growth improves air flow through the plant canopy, which reduces humidity and helps prevent fungal issues like powdery mildew.
- Encourages New Growth and Blooms: For many flowering shrubs, pruning stimulates the production of new wood, which is where the most vigorous flowers appear. For fruit trees and bushes, proper pruning enhances fruit production and quality.
- Shapes the Plant: You can guide the plant’s growth habit, maintain its size, and achieve a desired aesthetic in your small space.
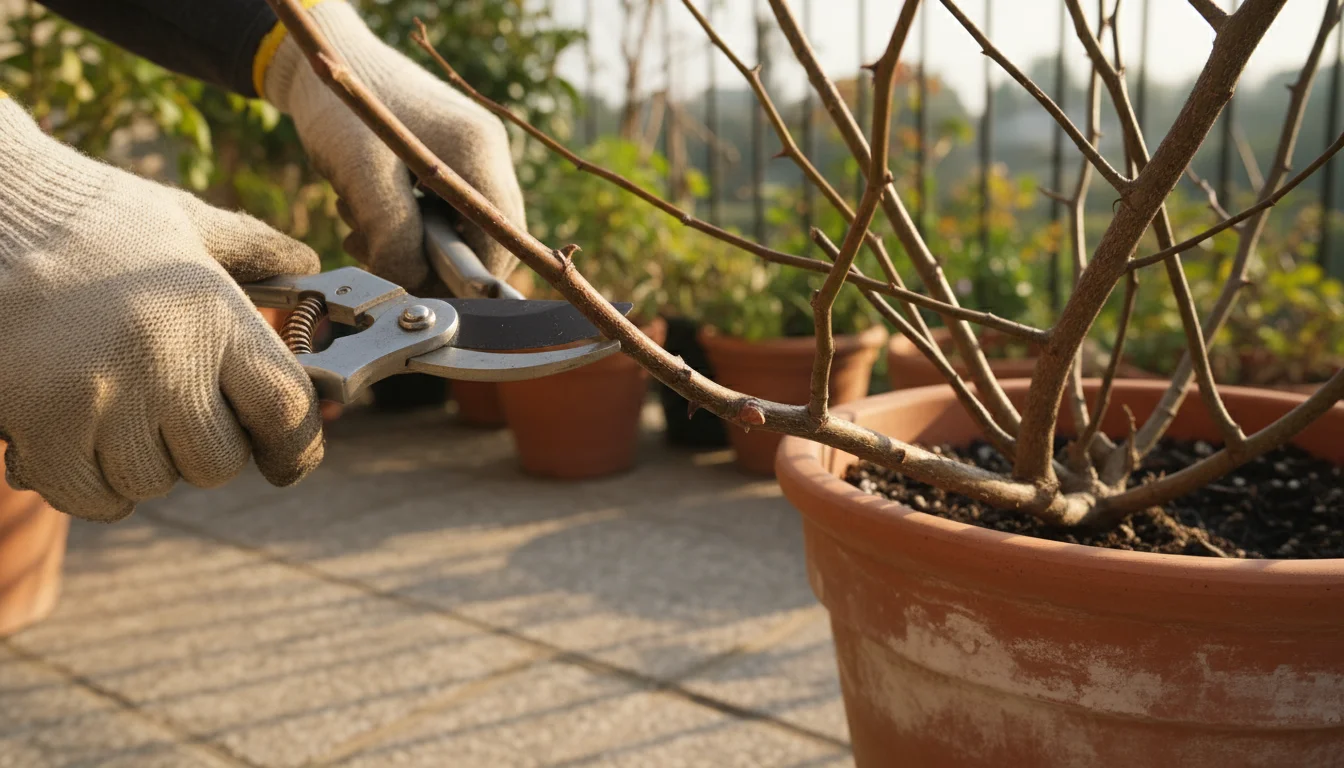
The timing of pruning in early spring depends heavily on whether your plant flowers on “old wood”, last year’s growth, or “new wood”, current season’s growth. Pruning at the wrong time can remove developing flower buds, sacrificing your blooms for the year.
When and How to Prune
General guidelines for early spring pruning:
- Deciduous Trees and Shrubs, that flower on new wood: Prune these in late winter to early spring, before new growth begins. Examples include roses, many varieties, clematis, Group 3, crape myrtle, and most fruit trees. You remove dead, diseased, or crossing branches, and thin out weak growth. Make cuts just above an outward-facing bud or to the main stem.
- Evergreen Shrubs and Conifers: Lightly prune to shape and remove dead or damaged material. Avoid heavy pruning, as evergreens recover more slowly. Generally, you prune these after their main flush of new growth.
- Perennials: Cut back any remaining dead foliage from last year. For plants that died back to the ground, wait until new shoots emerge before trimming. This ensures you do not accidentally remove live growth.
- Fruit-bearing Plants: Prune dormant fruit trees and berry bushes, for example, raspberries, in late winter/early spring to improve air circulation, encourage fruit production, and maintain an open structure. Research specific pruning techniques for each type of fruit plant.
Always use sharp, clean pruning tools. Dull tools tear plant tissue, creating wounds that invite disease. Disinfect your tools between plants, especially if you suspect disease, by wiping blades with rubbing alcohol or a bleach solution. This prevents the spread of pathogens throughout your garden.
General Garden Cleanup
Beyond specific pruning, early spring cleanup involves a general tidying of your garden beds. Remove weeds that have started to emerge; catching them now, while they are small, is far easier than battling established weeds later. Weeds compete with your desired plants for water, nutrients, and light.
Rake away any remaining winter mulch or debris from around the base of plants. While mulch is beneficial, a thick layer directly against stems or trunks can harbor pests and promote rot. Once beds are clean and amended, you can apply fresh mulch to conserve moisture and suppress new weed growth. This holistic approach to spring garden prep creates a welcoming and healthy environment for your plants to flourish.
For additional resources on proper pruning techniques for various plants, consider consulting guides from reputable sources such as the Chicago Botanic Garden’s pruning guidelines, which offer specific advice for different plant types.

Frequently Asked Questions
When is it safe to plant warm-season vegetables in early spring?
You should wait to plant warm-season vegetables like tomatoes, peppers, and beans until after your area’s last expected frost date. This typically occurs in late spring, not early spring. You can find your specific last frost date by checking with your local extension office or an online resource based on your zip code. Planting too early risks frost damage and stunted growth.
Can I reuse potting soil from last year for my container garden?
You can reuse potting soil, but it requires refreshment. Over time, potting mix compacts, loses nutrients, and may harbor disease pathogens or pest eggs. For annuals, replace most of the old mix with fresh, peat-free potting soil. For perennials in containers, you can often remove the top few inches of old soil and replace it with fresh mix, incorporating some compost or slow-release organic fertilizer. Always ensure good drainage.
What is the most important thing I can do for my garden in early spring?
The most important action you can take in early spring is revitalizing your soil. Incorporating 2-4 inches of high-quality organic matter, such as compost or well-rotted manure, into your garden beds significantly improves soil structure, nutrient availability, and water retention. Healthy soil creates a strong foundation for robust plant growth and helps prevent many common garden problems, making it a cornerstone of effective spring garden prep.
How do I know if my plants are getting enough water in spring?
Use the “finger test” to check soil moisture. Stick your finger about 2 inches deep into the soil. If it feels dry, it is time to water. If it still feels moist, wait. For containers, you can also lift the pot; a dry pot feels noticeably lighter. Avoid watering on a fixed schedule. Instead, water deeply and thoroughly when the soil indicates it is dry, encouraging deep root growth.
Should I fertilize all my plants in early spring?
Not necessarily all at once. For newly planted seedlings or annuals, a general purpose organic fertilizer incorporated into the soil or potting mix provides a good start. Established perennials and shrubs may benefit from a slow-release organic fertilizer application as they emerge from dormancy. However, avoid fertilizing plants that are dormant or still very young. Over-fertilization can burn roots and harm plants. A soil test guides precise nutrient application.
For research-based plant care guidance, visit these reputable sources:
- Oregon State University Extension Service — Gardening
- Chicago Botanic Garden
- New York Botanical Garden
- Royal Horticultural Society (RHS)
Disclaimer: This article is for informational purposes only and is not a substitute for professional advice. Consult local extension services for region-specific recommendations.