For research-based plant care guidance, visit
Royal Horticultural Society (RHS),
University of Minnesota Extension,
Cornell Garden-Based Learning and
UF/IFAS Gardening Solutions.
Disclaimer: This article is for informational purposes only and is not a substitute for professional advice. Consult local extension services for region-specific recommendations.
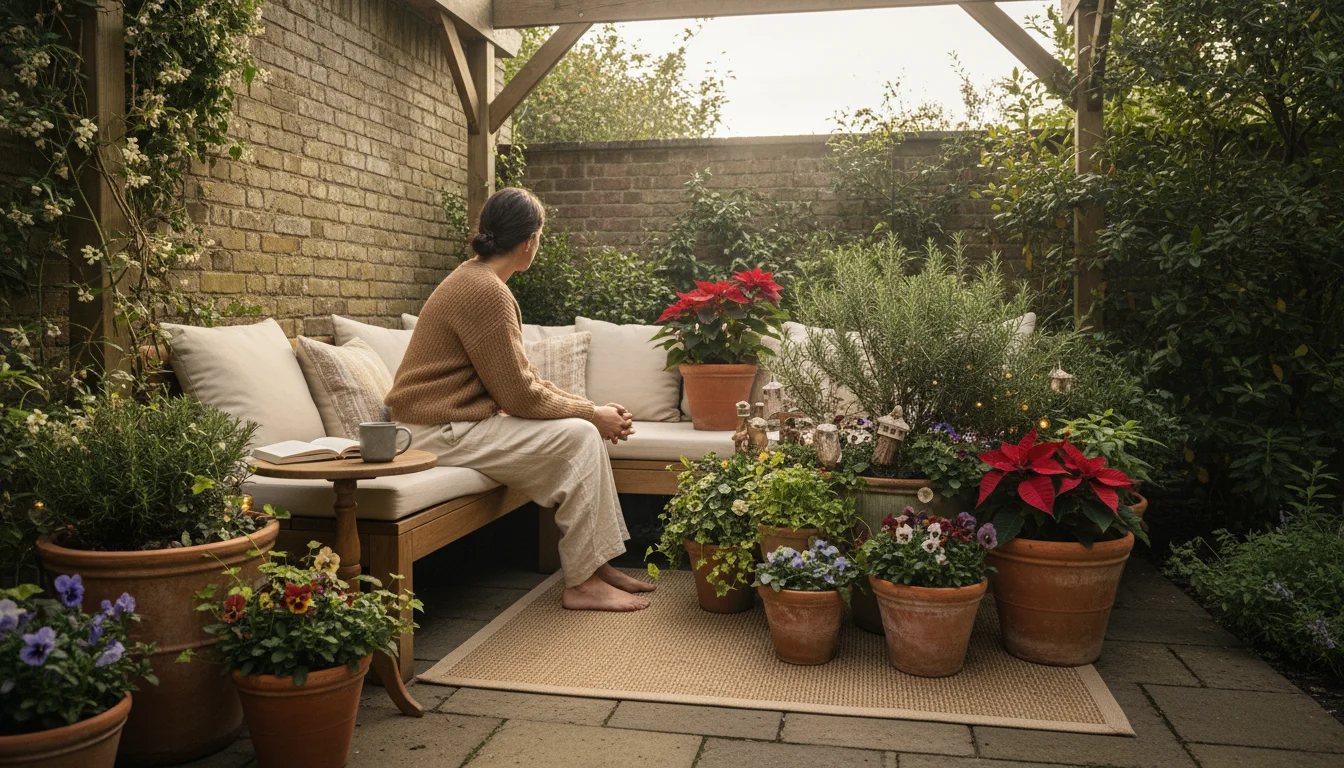
The holiday season brings a wonderful opportunity to infuse your home and garden with festive cheer. Even in small spaces, you can create stunning displays using container gardens. These holiday garden projects elevate your decorating, offering practical ways to celebrate the season with living plants. We help you transform your patios, balconies, or windowsills into vibrant, welcoming spectacles, emphasizing simple care routines and sustainable practices. Get ready to craft beautiful, low-maintenance festive planters that delight you and your guests throughout the holidays.

Getting Started with Your Festive Planters
Embarking on holiday garden projects starts with a solid foundation. You want containers that complement your festive vision and provide a healthy environment for your plants. A well-chosen container and the right potting mix set your display up for success. We guide you through the initial steps, ensuring your holiday planters thrive from the moment you begin.
Choosing the Perfect Containers
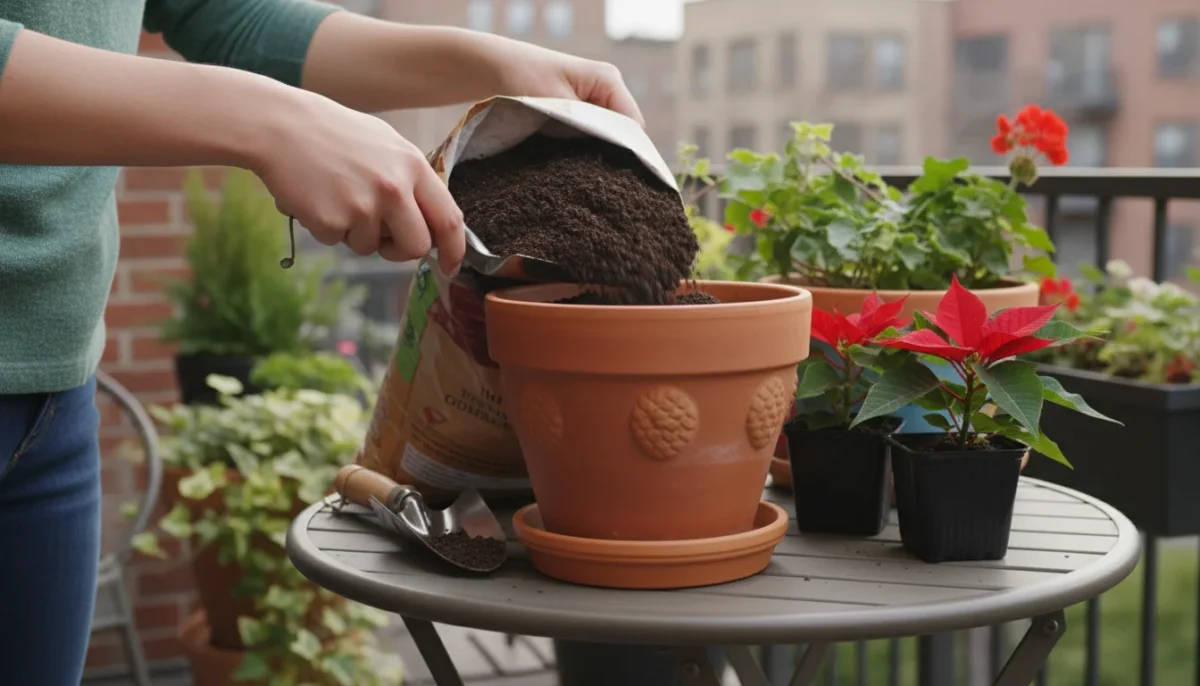
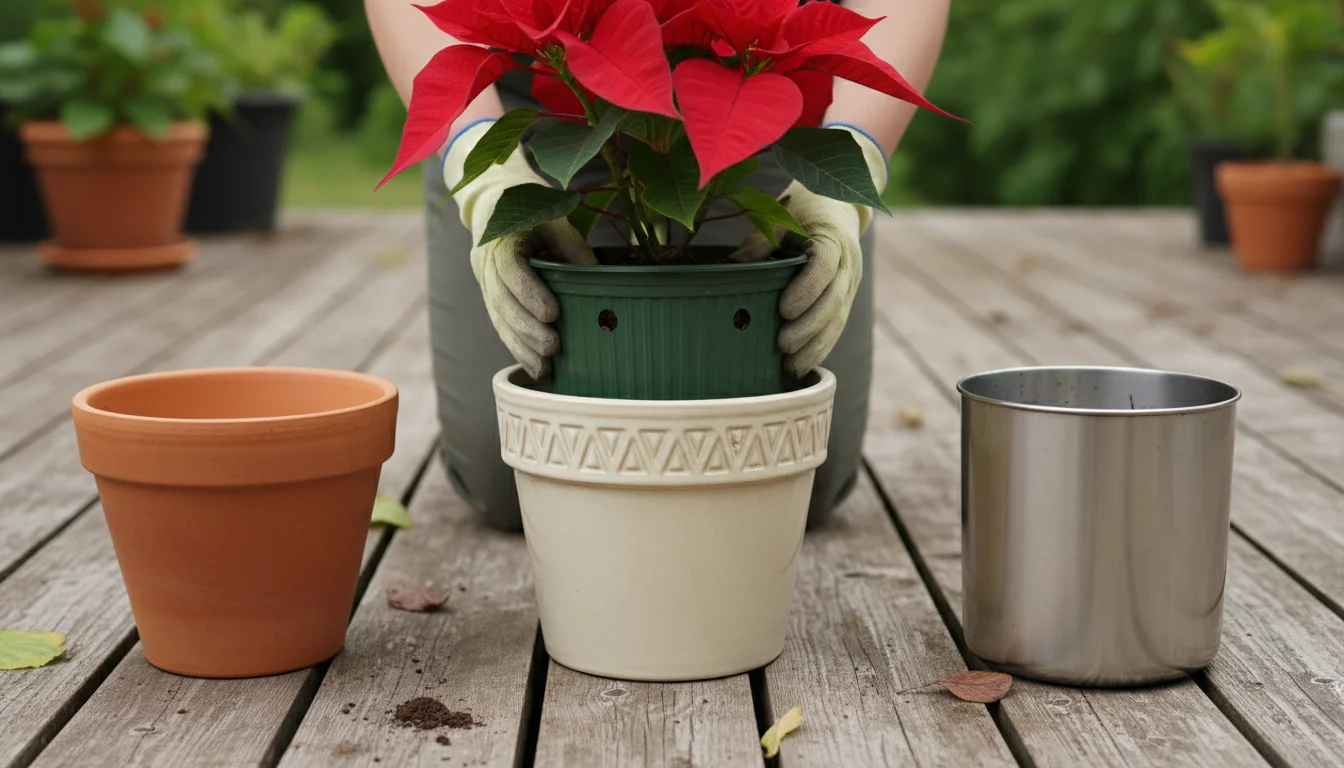
Container selection significantly impacts both the aesthetics and the health of your holiday plants. Consider size, material, and drainage. For outdoor displays, larger containers offer better insulation against cold temperatures, protecting plant roots. Indoor displays allow for more decorative, delicate options. For example, a 12-inch diameter pot provides ample space for three to five plants, creating a fuller look. Always select containers with drainage holes. Without adequate drainage, water collects, leading to root rot. If you fall in love with a container lacking holes, simply place your plants in a smaller, drained pot and then nest it inside the decorative outer container, ensuring no standing water remains. This approach gives you flexibility in container choice.
Materials like terracotta breathe well but dry out quickly. Plastic retains moisture longer. Ceramic and glazed pots offer elegance but can be heavy. For festive outdoor containers in colder climates, choose weather-resistant materials like fiberglass or thick plastic to prevent cracking from freezing and thawing cycles. For instance, a durable resin pot withstands winter elements better than delicate ceramic.

Gathering Your Supplies
Once you select your containers, gather necessary supplies before you begin planting. This streamlines the process and ensures you have everything on hand. Here is a practical checklist:
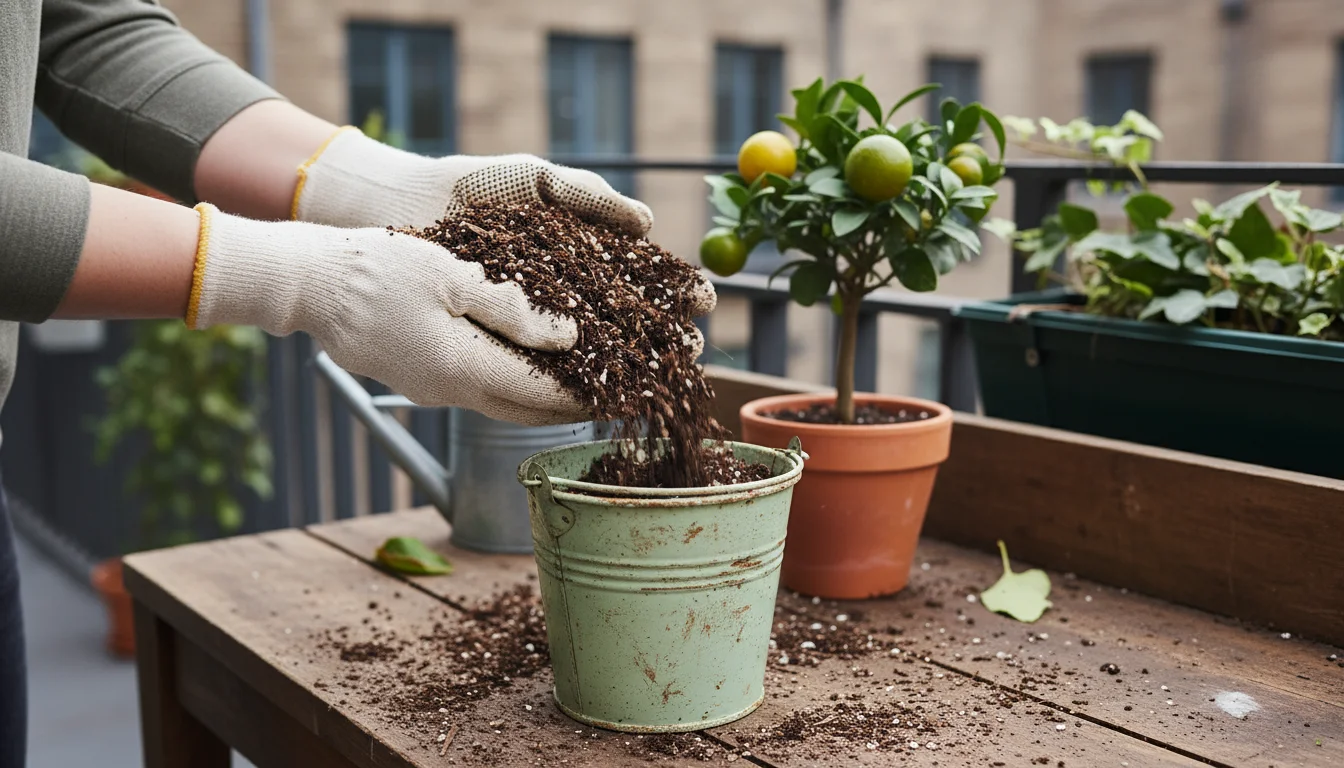
- Potting Mix: Choose a high-quality, peat-free potting mix. These mixes retain moisture and nutrients efficiently while providing excellent aeration for roots. Peat-free options also align with environmentally conscious gardening, reducing reliance on peat bogs, which are vital carbon sinks.
- Small Trowel or Scoop: Essential for handling potting mix and placing plants.
- Gardening Gloves: Protect your hands.
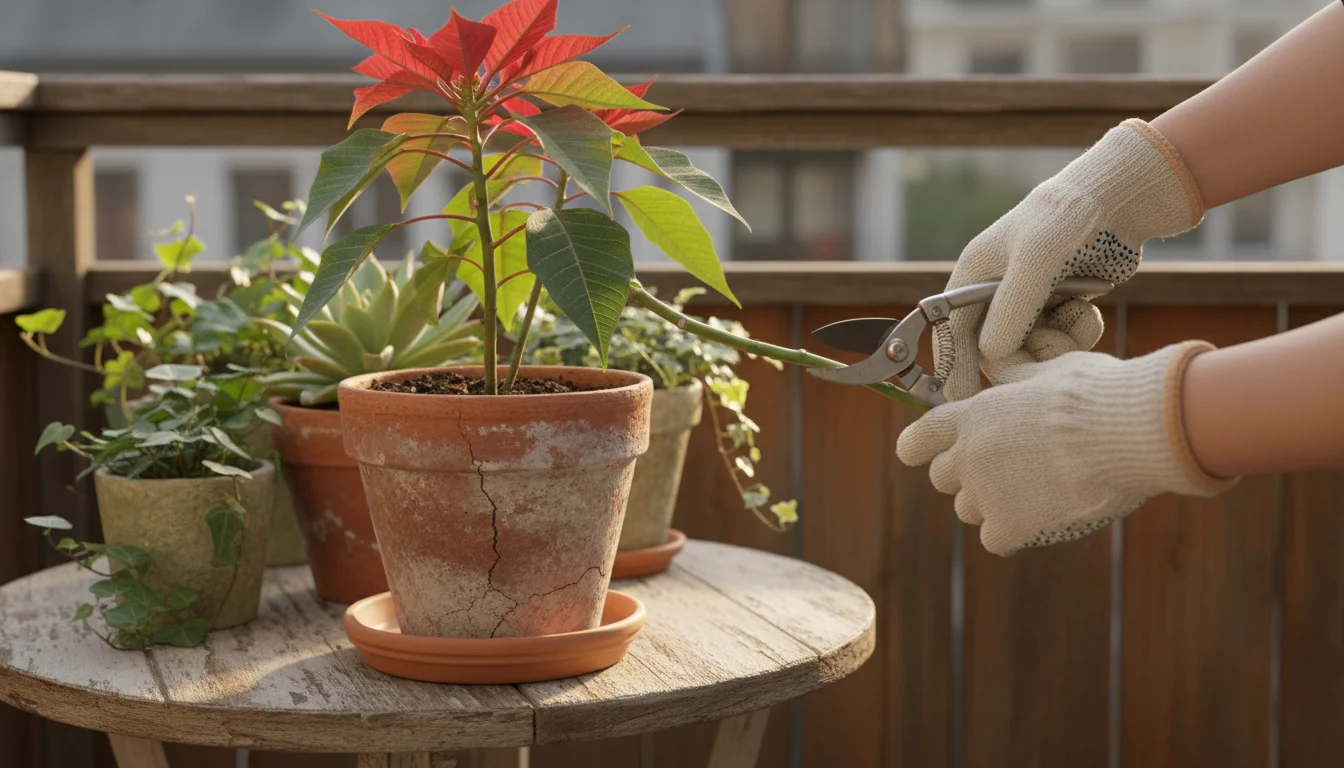
- Pruners or Scissors: For light trimming, removing damaged leaves, or shaping plants.
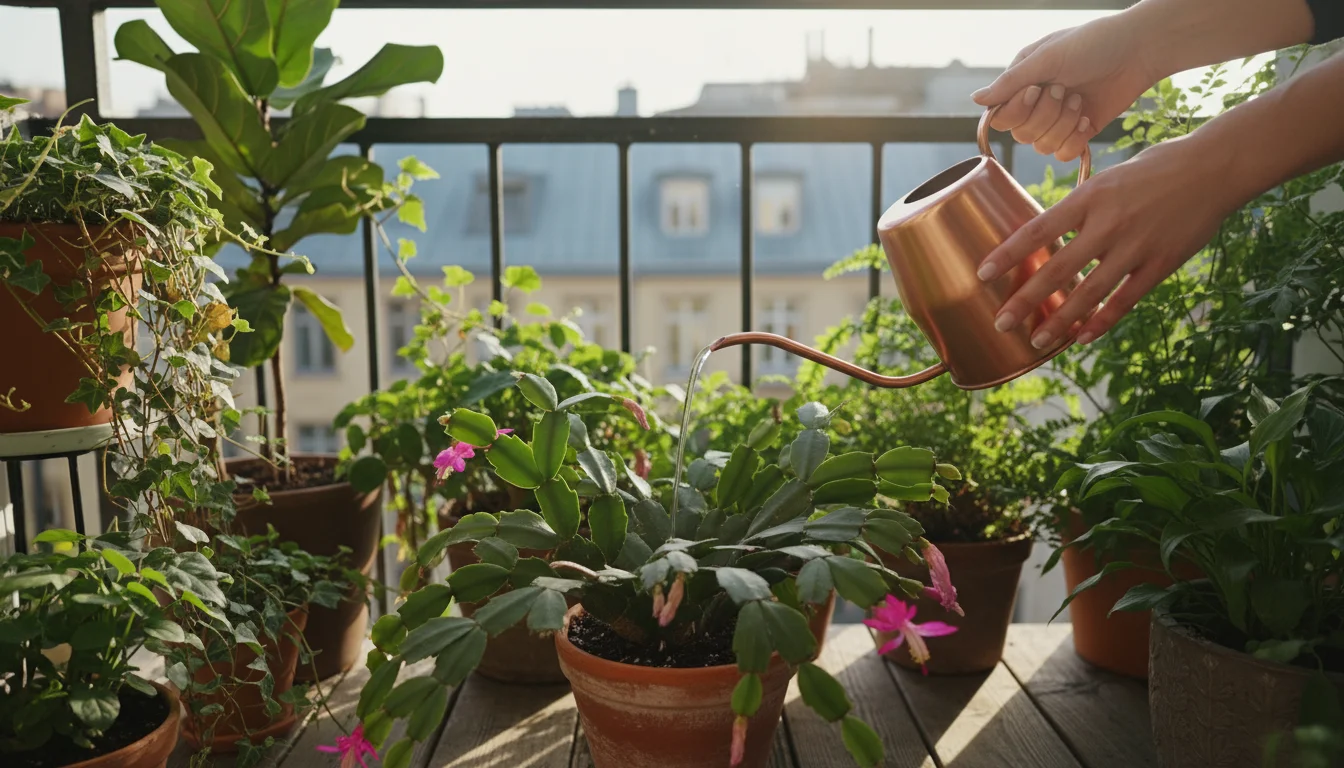
- Watering Can: A long-spout watering can helps direct water precisely, especially in dense arrangements.
- Decorative Elements: Pinecones, berries, ribbons, small ornaments, fairy lights, or even painted twigs add a festive touch. These elements personalize your display and elevate its holiday appeal.
- Drainage Material (Optional): While good potting mix is key, some gardeners add a layer of coarse material like gravel or broken pot shards at the bottom of deep containers. This is largely unnecessary if your pot has good drainage holes and you use appropriate potting mix, as it does not improve drainage but rather reduces the available space for roots. Focus on a quality potting mix and proper watering.
Having these items ready makes your holiday garden project enjoyable and efficient. You prevent interruptions and maintain focus on creating your beautiful festive planters.
Selecting the Right Plants for Holiday Displays
The success of your holiday garden projects hinges on plant selection. Choosing plants that thrive in your chosen environment (indoors or outdoors) and complement each other visually ensures a stunning, long-lasting display. We explore various options, from classic evergreens to vibrant flowering plants, helping you make informed decisions for your festive planters.
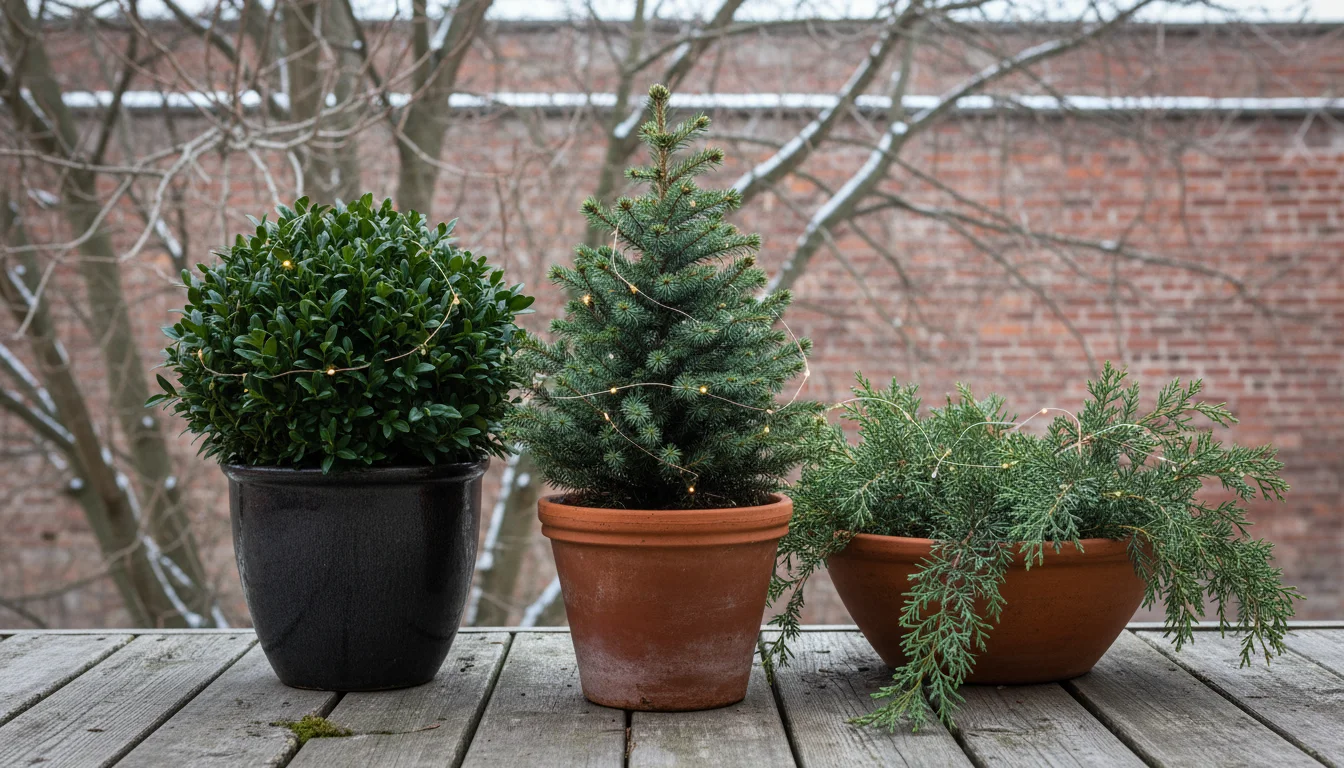
Cold-Hardy Evergreens for Outdoor Charm
For outdoor holiday containers, cold-hardy evergreens provide structure, color, and texture that withstand winter temperatures. These plants form the backbone of many festive arrangements, offering enduring beauty even when other plants fade. Look for dwarf varieties suitable for containers.
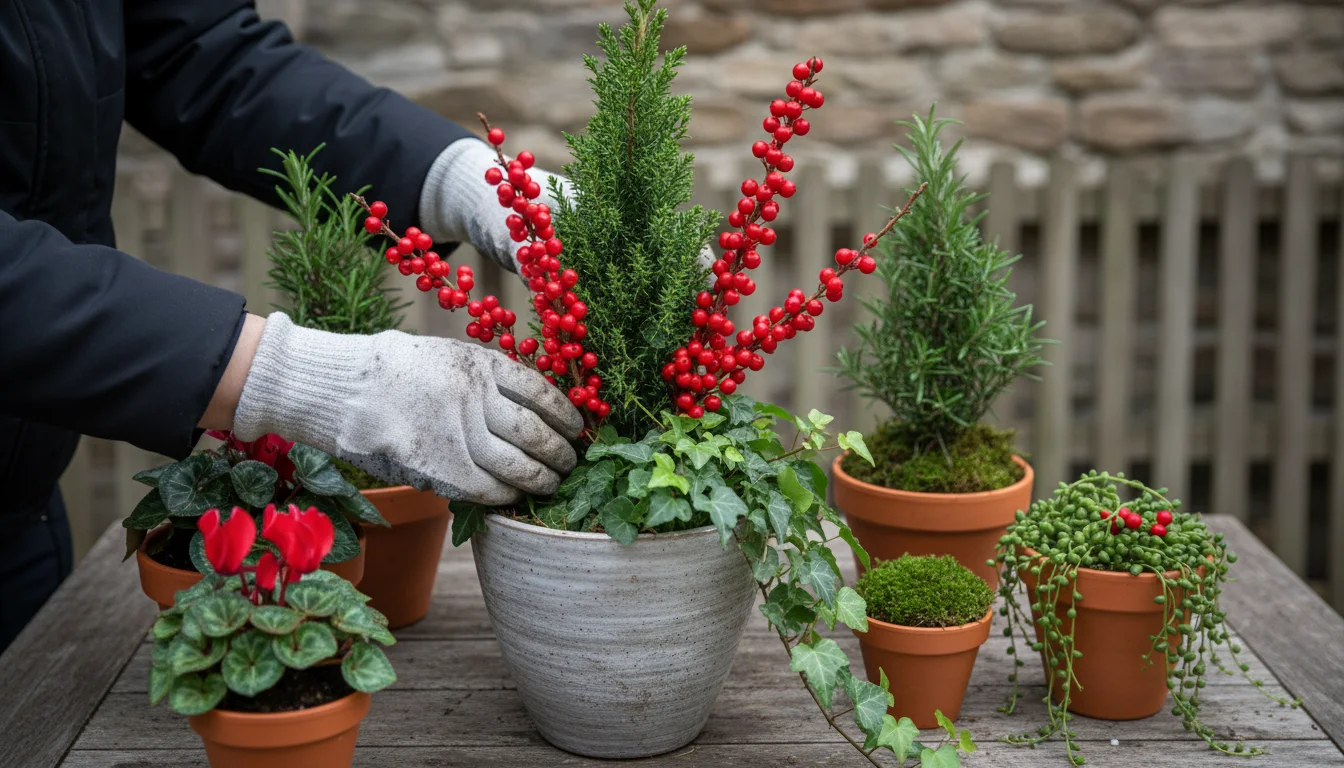
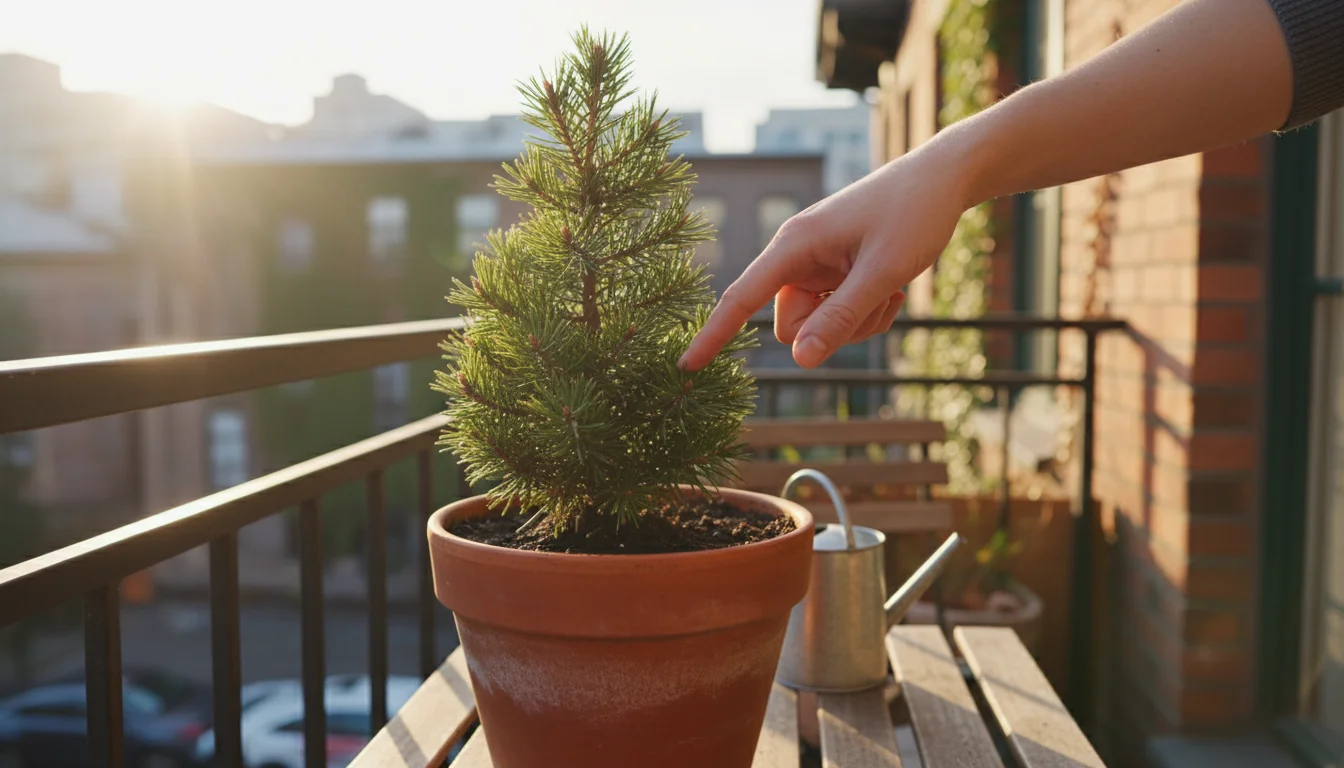
- Dwarf Conifers: Varieties like dwarf Alberta spruce, juniper, or cypress add a miniature Christmas tree effect. Their varied forms and textures create visual interest. They tolerate cold well and remain green all season.
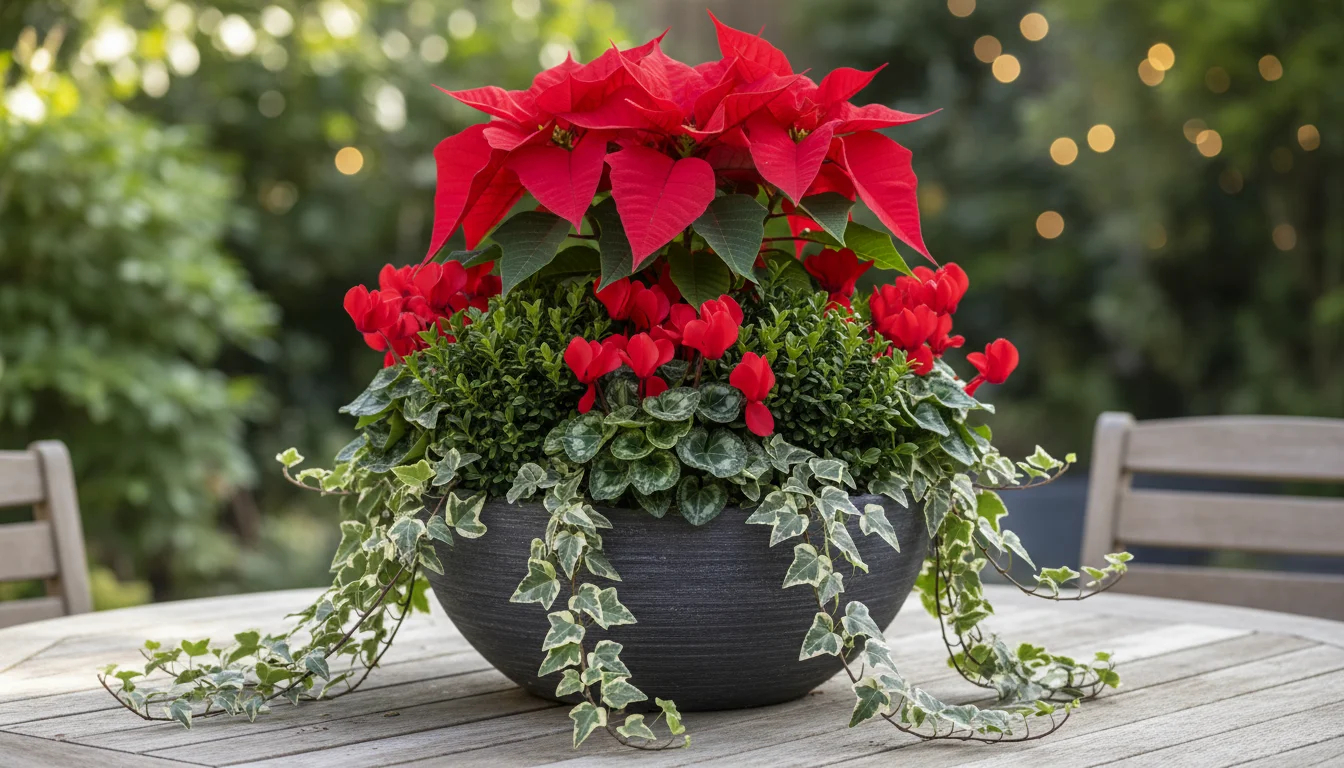
- Boxwood: These dense, green shrubs offer classic elegance. Their small leaves and compact growth habit make them perfect for formal or traditional displays. They respond well to pruning, allowing you to shape them.
- Holly: With its glossy green leaves and vibrant red berries (on female plants), holly is a quintessential holiday plant. Ensure you choose a variety hardy for your climate zone.
- Ivy: Trailing ivy varieties provide a beautiful spiller element, cascading over the edges of your container. Many are surprisingly cold-tolerant.
- Ornamental Kale and Cabbage: While technically not evergreens, these provide stunning rosettes of white, pink, or purple foliage. They tolerate light frosts, deepening their colors in cold weather, and add a unique, unexpected texture to holiday planters.
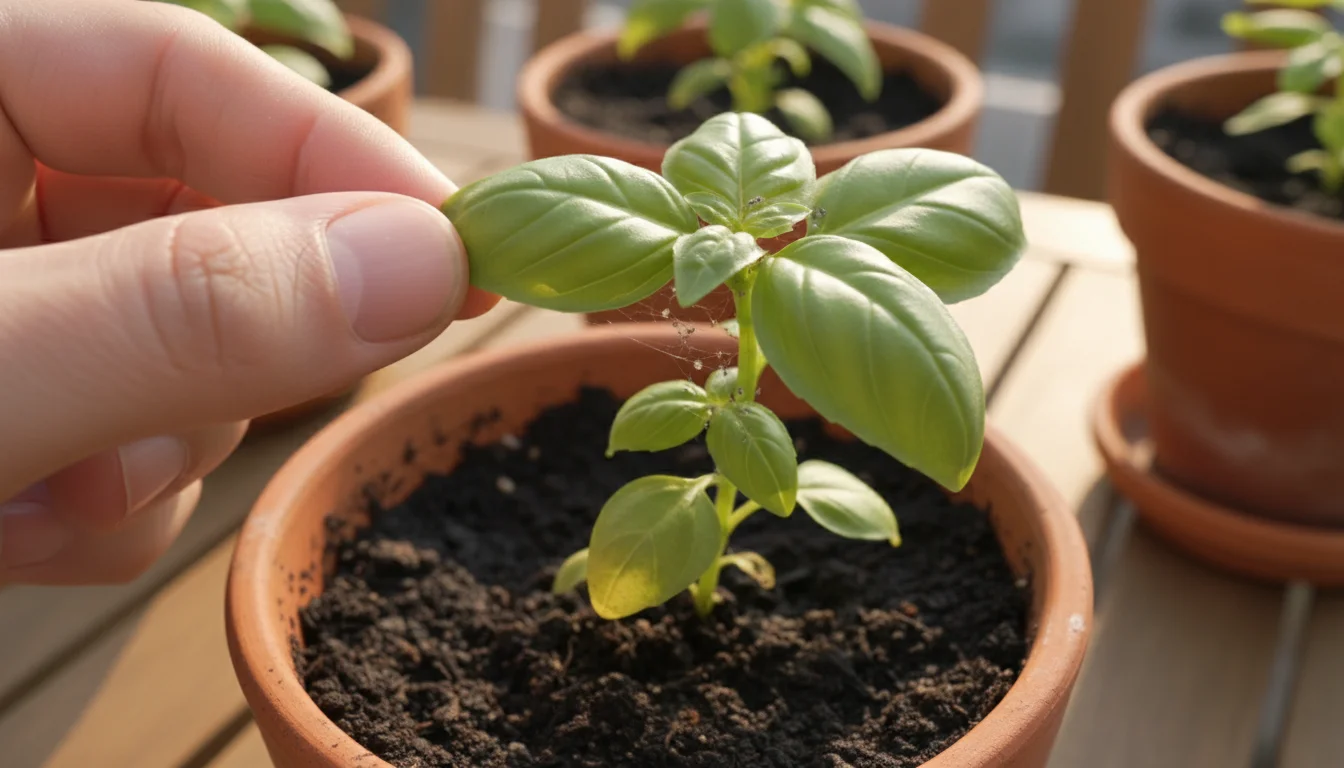
When selecting outdoor evergreens, verify their hardiness zone. For example, a plant rated for USDA Zone 5 survives temperatures down to -20°F (-29°C), ensuring its resilience in many winter climates. Healthy plants show vibrant color and no signs of stress or pests. Inspect them thoroughly at the nursery before purchasing.
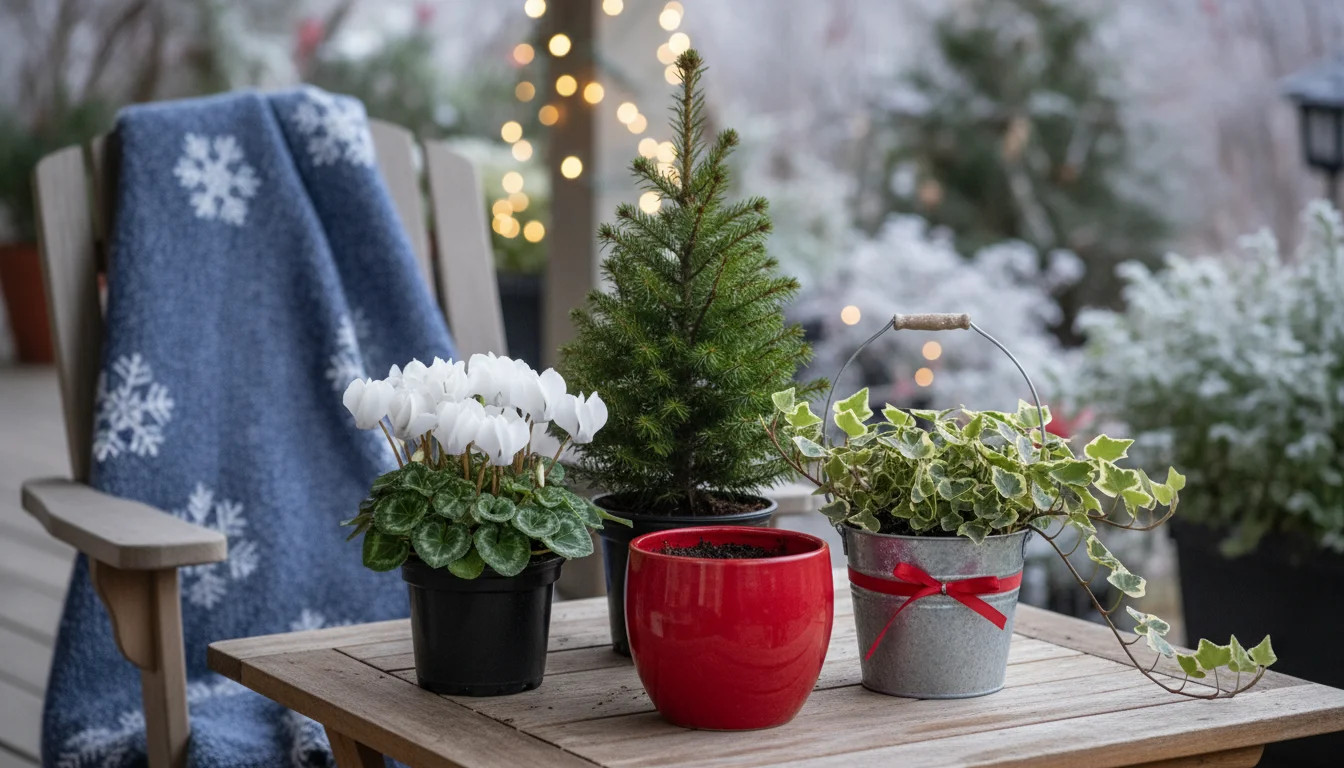
Vibrant Flowering and Foliage Plants for Indoor Sparkle
Indoors, you have more flexibility with temperature-sensitive plants, allowing for a burst of color and fragrance. These plants often become focal points in your festive planters.
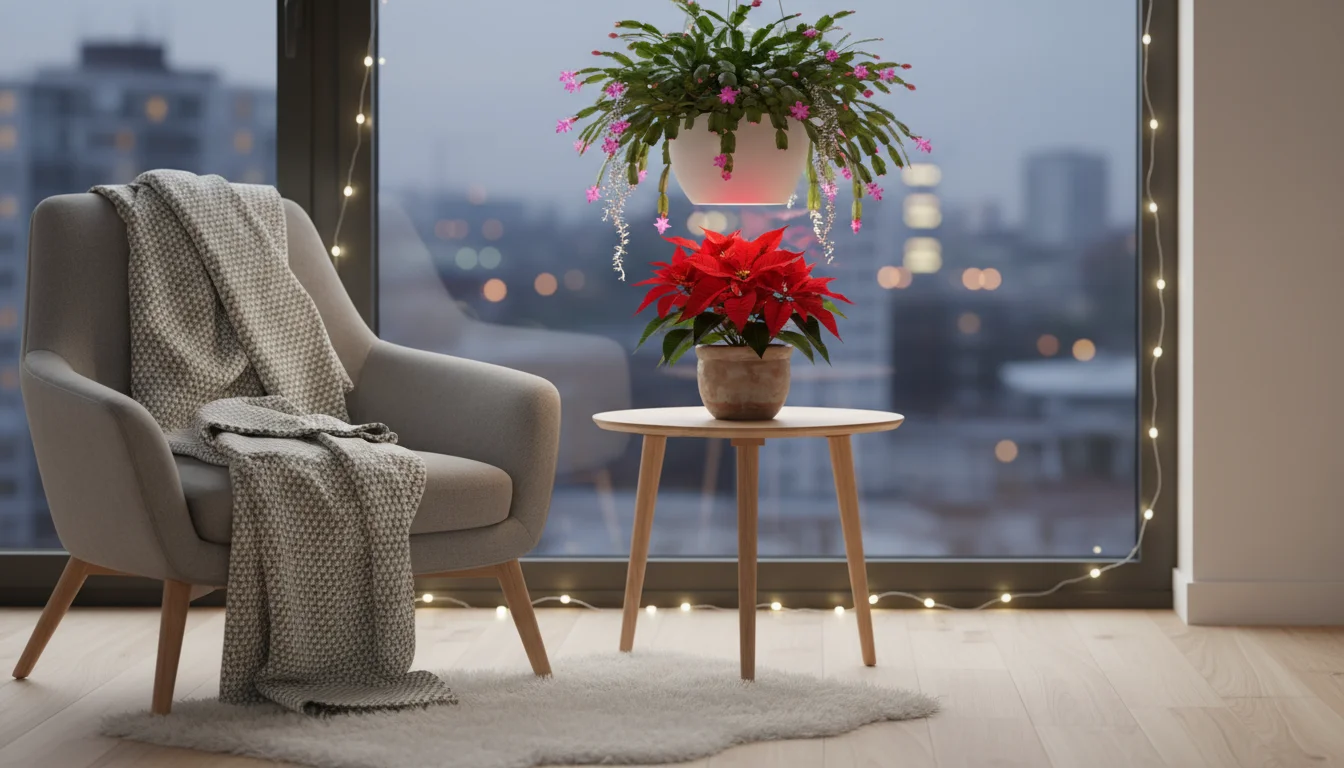
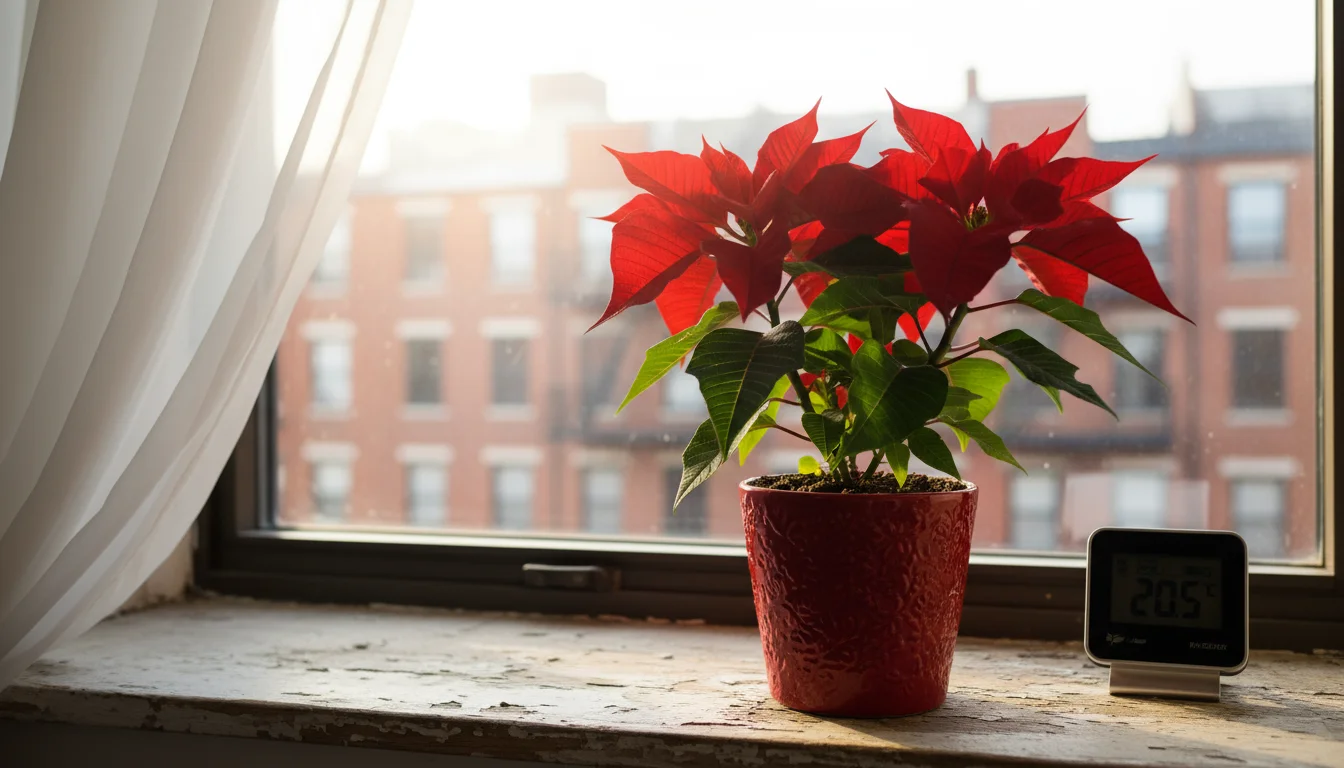
- Poinsettia (Euphorbia pulcherrima): The iconic holiday plant. Choose varieties with strong, dark green leaves and firm, brightly colored bracts. Avoid plants with yellowing leaves or wilting. Poinsettias prefer bright, indirect light and consistent moisture, but hate soggy feet.
- Christmas Cactus (Schlumbergera spp.): These succulents bloom reliably during winter months, offering beautiful pink, red, white, or purple flowers. They enjoy bright, indirect light and moderate watering. Their cascading growth makes them excellent “spiller” plants.
- Amaryllis (Hippeastrum spp.): Known for their dramatic, large trumpet-shaped flowers, amaryllis bulbs are popular for holiday forcing. Plant them in containers with good drainage, allowing the top third of the bulb to remain exposed. They provide a striking “thriller” element.
- Cyclamen (Cyclamen persicum): Delicate, heart-shaped leaves and upswept flowers in shades of pink, red, or white. Cyclamen prefer cooler indoor temperatures and bright, indirect light. Water them from the bottom or carefully to avoid wetting the crown of the plant.
- Paperwhites (Narcissus papyraceus): These fragrant, white-flowered bulbs are easy to force indoors. Plant them in shallow containers with gravel and water for a quick, aromatic display.
Combine these with smaller foliage plants like variegated ivy, ferns, or even small houseplants like peperomia for added texture and greenery. The key is to select plants with similar light and watering needs to ensure harmonious growth within your festive planters.
Designing Eye-Catching Holiday Containers
Once you select your plants, the fun of designing your festive planters begins. Thoughtful arrangement transforms individual plants into a cohesive, stunning display. We introduce you to a popular design principle and offer practical steps to assemble containers that captivate throughout the holiday season.
The Thriller, Filler, Spiller Concept
This design principle simplifies container gardening, guiding you to create balanced and visually appealing arrangements. It applies beautifully to holiday garden projects:
- Thriller: This is your focal point plant. It stands tall and creates drama. Think of a dwarf conifer, a stately amaryllis, or a tall, vibrant poinsettia. The thriller draws the eye upward and anchors the entire arrangement.
- Filler: These plants complement the thriller, adding volume and substance to the middle layer of your container. Boxwood, cyclamen, or smaller poinsettias work well. Fillers bridge the gap between the tall thriller and the trailing spiller plants.
- Spiller: Spillers cascade over the edge of your container, softening its lines and adding a sense of abundance. Trailing ivy, Christmas cactus, or creeping juniper are excellent choices. They complete the look, making the container appear full and lush.
For example, a classic holiday planter could feature a dwarf Alberta spruce as the thriller, surrounded by white cyclamen as fillers, with variegated ivy spilling over the sides. This combination provides height, mid-level interest, and graceful trailing elements.
Step-by-Step Assembly Guide for Your Festive Planters
Follow these steps to create your holiday container masterpiece:
- Prepare Your Container: Ensure your pot has drainage holes. Add a layer of fresh, peat-free potting mix. Fill it about one-third to halfway, depending on the root balls of your plants. This provides a good base for your plants to sit on.
- Place Your Thriller: Center your tallest plant, the thriller, in the container. Gently remove it from its nursery pot. If the roots circle tightly around the pot (root-bound), gently loosen them at the bottom before placing. This encourages new root growth.
- Add Your Fillers: Arrange your filler plants around the thriller. Position them to create a full, lush middle layer. Consider their mature size and leave adequate space for growth, especially for indoor plants that will stay for weeks.
- Integrate Your Spillers: Place your spiller plants near the edges of the container, allowing them to drape gracefully over the sides. Rotate the container as you work to ensure an even distribution of plants and a balanced look from all angles.
- Add Potting Mix: Fill in around all the plants with more potting mix, ensuring all root balls are covered. Leave about an inch of space from the rim of the pot to the soil line. This “headroom” prevents water from overflowing when you irrigate. Gently pat the soil down. Avoid compacting it too tightly, as roots need air.
- Water Thoroughly: Water your newly planted container until you see water draining from the bottom. This settles the soil and eliminates air pockets. For indoor plants, empty any excess water from the saucer after 15-20 minutes.
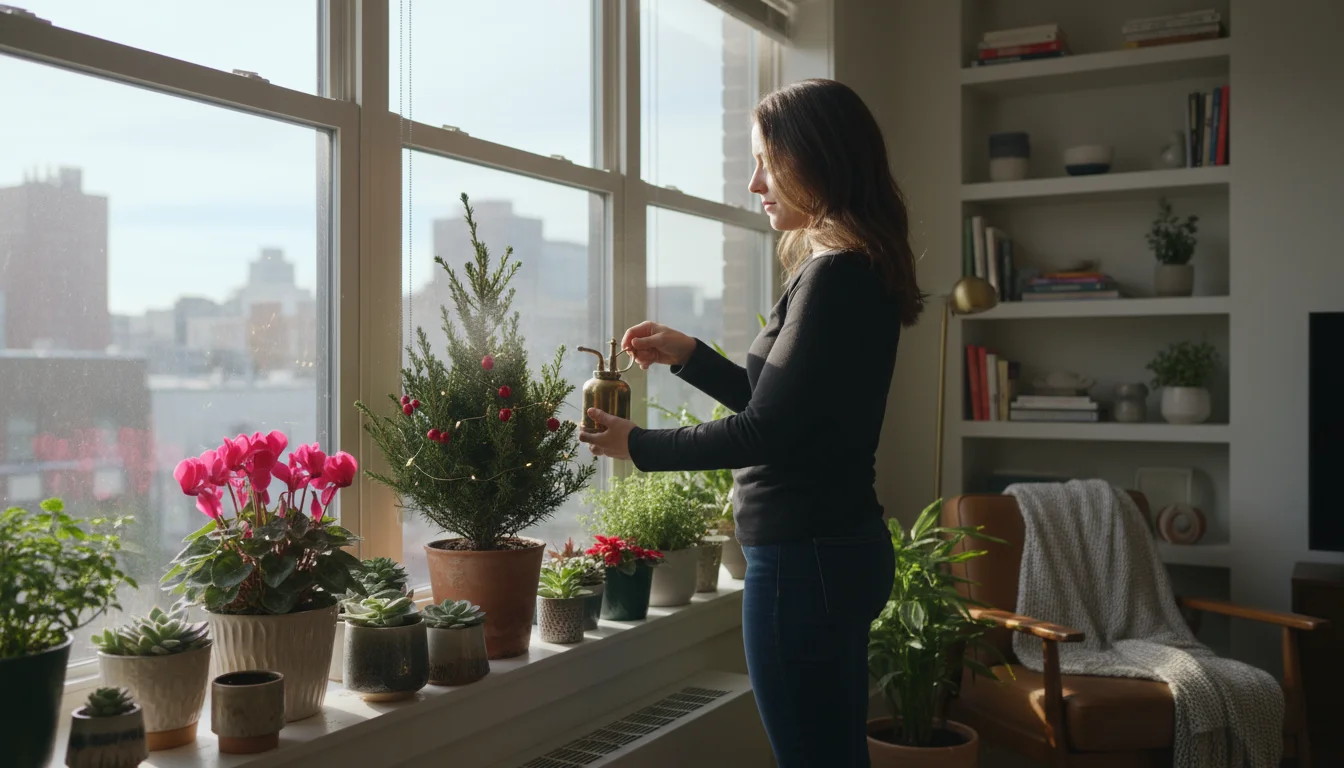
- Decorate: Now add your chosen decorative elements. Arrange pinecones, berries, ribbons, or small ornaments on top of the soil or nestled among the plants. Battery-operated fairy lights can add a magical glow, especially for evening displays.
This systematic approach ensures each plant has sufficient space and proper care from the start, contributing to a vibrant and healthy festive planter.
Caring for Your Festive Arrangements Indoors and Out
Maintaining the beauty of your holiday garden projects requires consistent, simple care. While specific needs vary by plant, fundamental principles apply to all festive planters, whether they grace your living room or adorn your porch. We simplify watering, lighting, and temperature management, ensuring your displays remain vibrant throughout the celebratory season.
Watering Schedules Made Simple
Overwatering is a common culprit in plant decline, so understanding proper watering is crucial. The goal is to provide consistent moisture without waterlogging the roots. Different plants and environments have varying needs.
- The Finger Test: This is your best tool. Stick your finger about an inch or two into the soil. If it feels dry, it is time to water. If it feels moist, wait. This method is more reliable than a strict schedule, as environmental factors (temperature, humidity, light) affect how quickly soil dries.
- Outdoor Containers: These often dry out faster due to wind and exposure. During dry spells, especially before a deep freeze, thoroughly water evergreens. A well-hydrated plant handles cold stress better. During freezing temperatures, plants do not actively absorb water, so avoid watering until temperatures rise above freezing. Use lukewarm water for indoor plants to prevent shocking the roots.
- Indoor Containers: Generally require less frequent watering than outdoor ones, but heated indoor environments can accelerate drying. Plants like poinsettias and cyclamen prefer consistently moist, but not soggy, soil. Christmas cacti, being succulents, tolerate drier conditions between waterings. Always ensure your pots have drainage holes, and empty excess water from saucers.
When you water, water thoroughly until you see it draining from the bottom. This ensures the entire root ball receives moisture. Shallow watering encourages shallow root growth, making plants more susceptible to stress. For large outdoor planters, a slow trickle from a hose for several minutes works well to ensure deep saturation.
Light and Temperature Management
The right light and temperature conditions are critical for the health and longevity of your festive planters.
- Light Needs: Most holiday plants, especially flowering ones like poinsettias, cyclamen, and amaryllis, thrive in bright, indirect light. Place them near a window that receives good natural light but avoids direct, intense sun, which can scorch leaves. Evergreens outdoors tolerate full sun to partial shade. Rotate indoor containers every few days to ensure even light exposure and symmetrical growth.
- Temperature Control:
- Indoor Plants: Keep indoor holiday plants away from direct drafts, heat vents, or cold windows. Poinsettias prefer temperatures between 60-70°F (15-21°C). Cooler temperatures (around 55-60°F or 13-15°C) extend the life of cyclamen and Christmas cactus blooms. Avoid sudden temperature fluctuations, which stress plants.
- Outdoor Plants: Protecting outdoor containers from extreme cold is essential. In very cold climates, consider insulating pots with burlap or bubble wrap. Group containers together for mutual insulation. For prolonged severe freezes, temporarily move smaller containers into a garage or unheated shed. Even hardy evergreens benefit from protection in containers, as their roots are more exposed than when planted in the ground.
Consistent environmental conditions help your plants flourish. Monitor your plants daily for signs of stress, such as wilting or discolored leaves. Early detection allows for timely adjustments, ensuring your holiday garden projects remain beautiful throughout the season.
Sustainable Holiday Decor: Eco-Friendly Choices
Embracing sustainability in your holiday garden projects allows you to celebrate the season with a reduced environmental footprint. Simple choices regarding materials, plant sourcing, and aftercare contribute to a greener holiday. We highlight practical, eco-conscious habits for your festive planters.
Making Green Choices for Your Festive Planters
Sustainable gardening starts with your purchasing and planting decisions.
- Peat-Free Potting Mixes: Opt for potting mixes that do not contain peat. Peatlands are vital ecosystems, acting as significant carbon sinks and supporting unique biodiversity. Harvesting peat damages these environments. Modern peat-free alternatives, often made from coir (coconut fiber), compost, or wood fibers, perform just as well, providing excellent drainage and aeration.
- Reusing and Repurposing Containers: Give new life to old pots or other items. An old metal bucket, a wooden crate, or even oversized tins can be transformed into charming holiday planters with a bit of paint and creativity. This reduces waste and adds unique character to your displays. If reusing plastic containers, ensure they are clean and disinfected to prevent disease transmission.
- Sourcing Local and Sustainable Plants: Purchase plants from local nurseries or growers. This reduces transportation emissions and supports local businesses. Local growers often provide plants better adapted to your regional climate. Inquire about their growing practices to ensure they align with sustainable principles, such as integrated pest management.
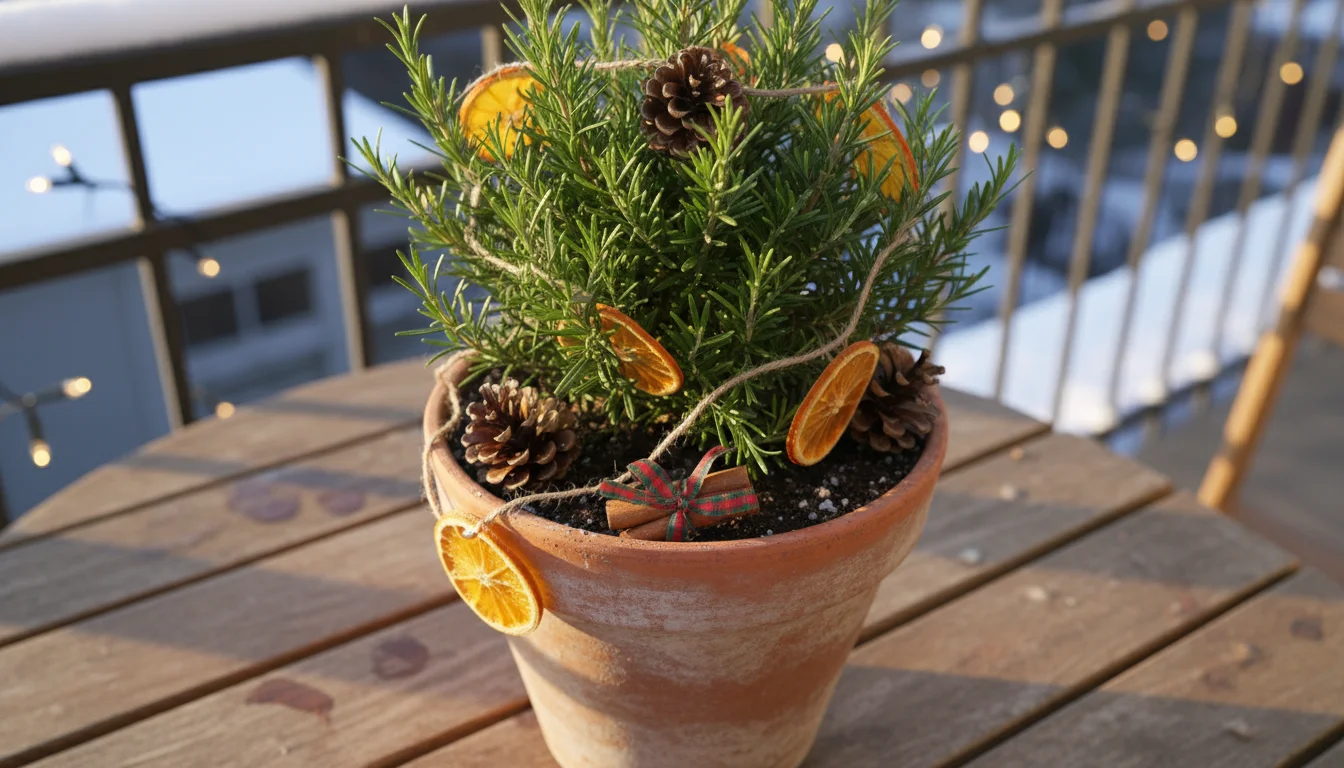
- Collecting Natural Elements: Instead of buying plastic decorations, gather natural elements like pinecones, branches, dried berries, or acorns from your own garden or local area (where permitted). These add an authentic, rustic touch to your holiday garden projects and are completely biodegradable.
Every decision, from the soil you use to the decorations you select, offers an opportunity to practice more environmentally friendly gardening. Your festive planters can be both beautiful and responsible.
Eco-Conscious Care and Aftercare
Sustainable practices extend beyond initial setup into the ongoing care and post-holiday life of your plants.
- Water-Wise Practices: Use efficient watering methods. Water plants deeply and less frequently, rather than shallowly and often. Mulching outdoor containers with pine needles or shredded leaves helps retain soil moisture, reducing the need for frequent watering. Collect rainwater for irrigation if possible, as it is naturally soft and free of chlorine.
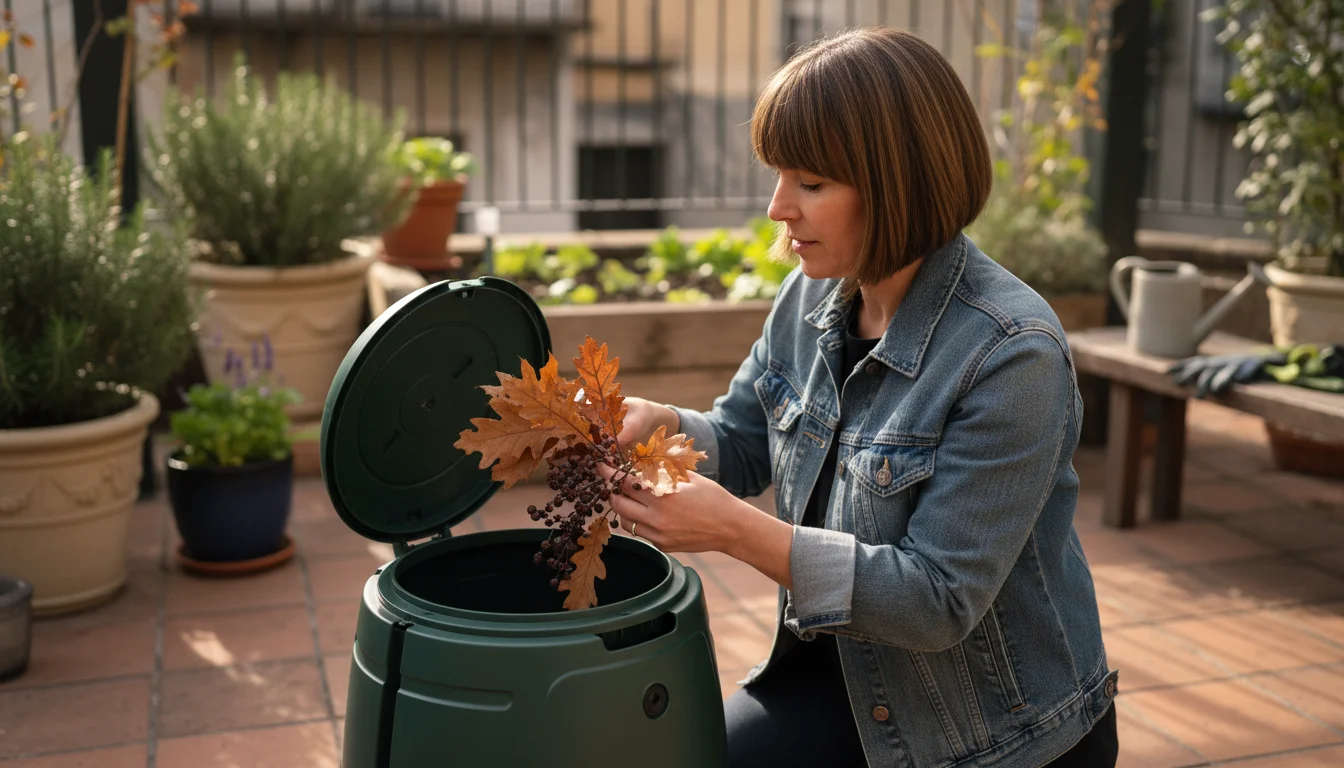
- Composting Spent Materials: After the holidays, if plants cannot be saved or transplanted, compost them. Fallen leaves, spent flowers, and non-diseased plant material enrich your compost pile, returning nutrients to the soil. This diverts organic waste from landfills and creates valuable fertilizer for future garden projects.
- Propagating and Dividing: Many holiday plants, like Christmas cacti, are easily propagated from cuttings. Share cuttings with friends or start new plants for next year’s displays. Dividing perennial plants from your outdoor containers in spring also provides new plants, reducing the need to buy more. This extends the life and value of your plants.
- Natural Pest Control: If pests appear, start with the least toxic solutions such as a strong spray of water, insecticidal soap, or neem oil. Encourage beneficial insects in your garden. Avoiding synthetic pesticides protects pollinators and the broader ecosystem.
By integrating these sustainable habits into your holiday garden projects, you create beautiful festive planters that also contribute to a healthier planet. Your enjoyment of the holidays deepens with the knowledge that you garden responsibly.
Troubleshooting Common Holiday Plant Problems
Even with the best intentions, your festive planters might encounter a few challenges. Recognizing the signs of distress and knowing how to respond quickly prevents minor issues from becoming major problems. We cover common ailments affecting holiday plants and provide practical solutions to keep your displays flourishing.
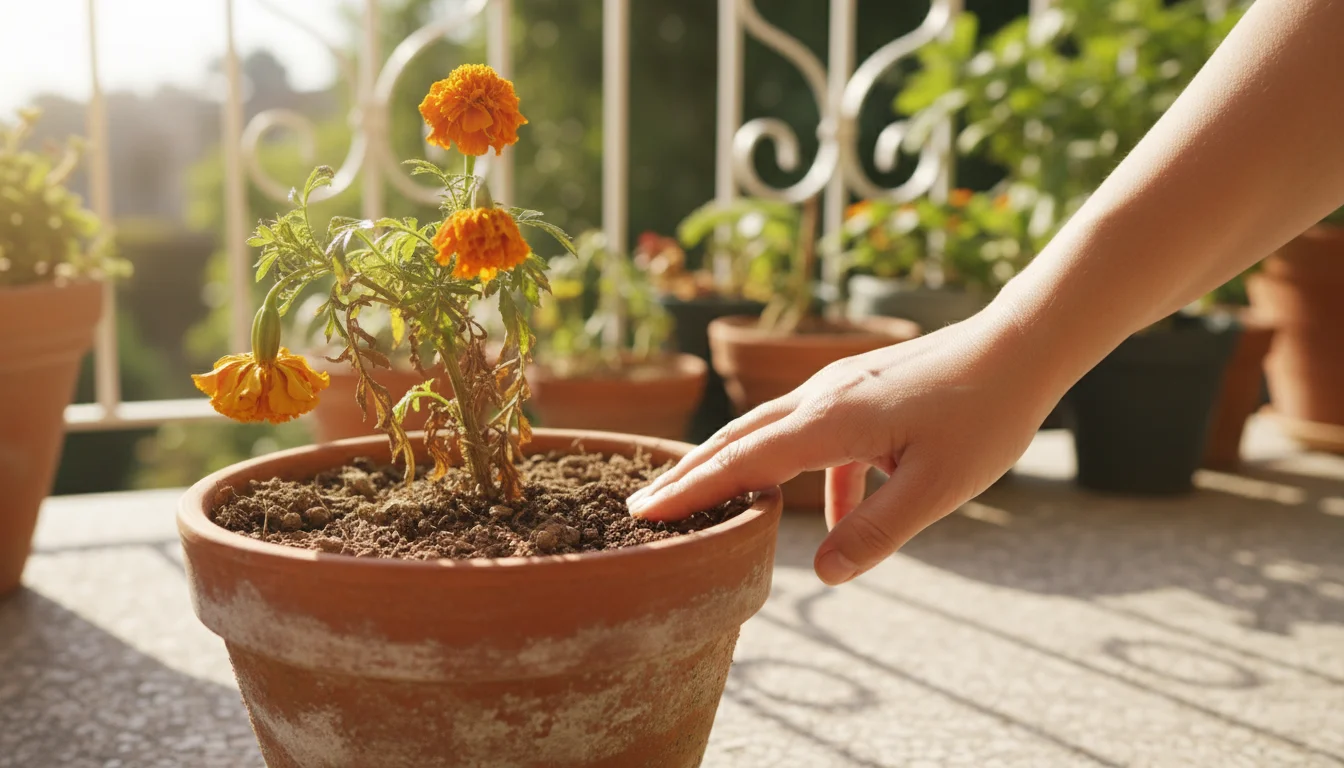
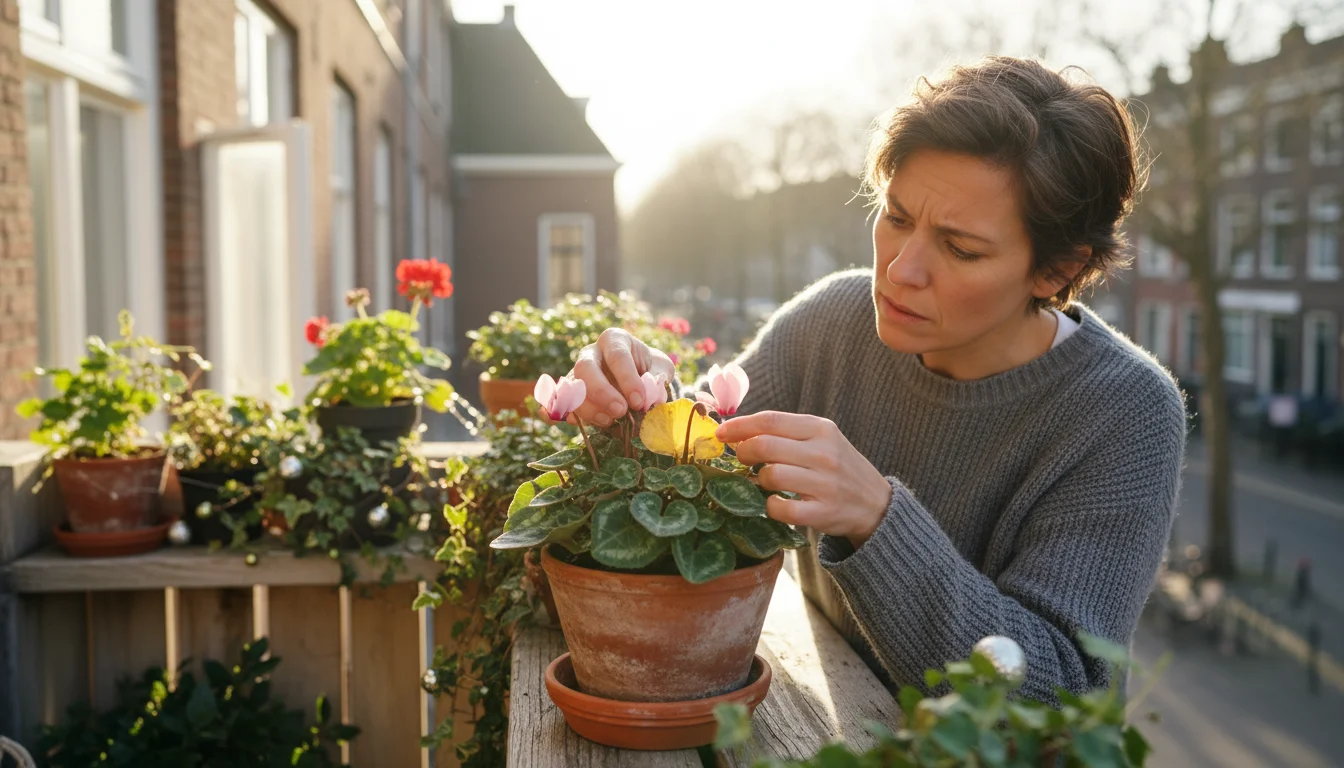
Diagnosing and Addressing Wilting or Drooping Leaves
Wilting is one of the most common signs of plant distress, and it usually points to a watering issue.
- Underwatering: If the soil is bone dry and your plant looks limp, it likely needs water. Thoroughly water the plant until water drains from the bottom of the pot. For severely dry plants, try bottom watering: place the pot in a saucer or basin of water for 30 minutes to an hour, allowing the soil to soak up water from the drainage holes. Remove it once the topsoil feels moist.
- Overwatering: Paradoxically, overwatering can also cause wilting because soggy soil starves roots of oxygen, leading to root rot. If the soil is consistently wet and smells musty, you are likely overwatering. Allow the soil to dry out significantly between waterings. If severe, carefully remove the plant from its pot, inspect roots for mushy, brown sections (signs of rot), prune affected roots, and repot in fresh, dry potting mix. Ensure proper drainage holes are not blocked.
- Cold Shock: For indoor plants, exposure to cold drafts or temperatures below their tolerance can cause drooping. Move the plant to a warmer, more protected location.
The key is to feel the soil before watering. This simple habit prevents most watering-related problems, ensuring your festive planters remain perky and vibrant.
Addressing Yellowing Leaves and Pest Infestations
Yellowing leaves often signal nutrient deficiencies, environmental stress, or pests. Pest infestations, while unwelcome, are manageable with early detection and natural remedies.
Yellowing Leaves
Identify the cause of yellowing leaves to implement the correct solution:
- Nutrient Deficiency: Especially in plants kept for longer periods in the same potting mix, nutrient depletion can lead to yellowing, particularly in older leaves. While holiday plants typically do not require heavy feeding, a balanced, diluted liquid fertilizer can help if you plan to keep them beyond the immediate holiday season.
- Overwatering: As with wilting, consistently wet soil deprives roots of oxygen, manifesting as yellow leaves. Allow the soil to dry out more between waterings.
- Cold Temperatures: Some indoor plants, like poinsettias, react to cold by shedding yellowed leaves. Protect them from cold drafts.
- Natural Aging: Lower leaves on plants naturally yellow and drop off as they age. This is normal and not a cause for concern. Remove them to keep the plant tidy.
Ensure your plants receive appropriate light, water, and stable temperatures. This preventative care minimizes leaf discoloration.
Common Holiday Plant Pests
Inspect your plants regularly for signs of pests, particularly on the undersides of leaves and in leaf axils (where the leaf stem meets the main stem).
- Spider Mites: Tiny, almost invisible pests that create fine webbing. You will notice tiny dots on leaves and a general dullness. They thrive in dry, warm conditions. Increase humidity around the plant and spray with insecticidal soap or neem oil.
- Mealybugs: Small, white, cottony masses found in leaf axils and along stems. They suck plant sap. Remove them manually with a cotton swab dipped in rubbing alcohol. For heavier infestations, use insecticidal soap.
- Aphids: Small, soft-bodied insects, often green or black, clustering on new growth. A strong spray of water dislodges them. Insecticidal soap also works effectively.
- Fungus Gnats: Small, flying insects that hover around the soil surface, indicating consistently moist soil. Allow the top inch of soil to dry out between waterings. Yellow sticky traps help capture adult gnats.
Safe Treatment Strategies: Start with the least toxic methods. For instance, a strong stream of water from your sprayer can remove many pests. Insecticidal soap, a common organic treatment, suffocates soft-bodied insects. Neem oil, derived from the neem tree, disrupts insect feeding and reproduction cycles. Always follow product instructions carefully when using any treatment. Consistent monitoring and early intervention are your best defenses against pests, preserving the health and beauty of your holiday garden projects.
Extending the Life of Your Holiday Plants
The beauty of your holiday garden projects does not have to end with the new year. Many festive plants can continue to thrive long after the decorations are put away, either indoors as houseplants or transplanted into your garden. We provide practical advice on transitioning your holiday plants, ensuring their longevity and continued enjoyment.
Post-Holiday Care: Acclimating and Dormancy
Successfully extending the life of your holiday plants involves understanding their needs after their peak blooming period.
- Poinsettias: After their bracts (modified leaves, often mistaken for flowers) fade, poinsettias benefit from a period of rest. Keep them in a bright location, but reduce watering frequency. Once danger of frost passes in spring, you can move them outdoors to a shaded spot. Prune them back by about one-third in spring to encourage bushy growth. Reblooming poinsettias is a commitment requiring strict light-dark cycles in fall, but many enjoy them as green foliage plants or compost them after the holidays.
- Christmas Cactus: These are relatively easy to keep year-round. After blooming, reduce watering slightly. They enjoy bright, indirect light. To encourage reblooming next year, provide a period of cool temperatures (around 50-55°F or 10-13°C) and 12-14 hours of uninterrupted darkness each night for about 6-8 weeks in fall.
- Amaryllis: Once blooms fade, cut the flower stalk but leave the foliage. Continue to water and fertilize the plant throughout spring and summer to allow the bulb to replenish its energy. In late summer, allow the foliage to die back by withholding water. Store the bulb in a cool, dark place for 8-10 weeks, then repot and resume watering to initiate new growth and another bloom cycle.
- Cyclamen: After flowering, cyclamen often enters a dormant period. Leaves may yellow and die back. Reduce watering and move the pot to a cool, dark spot. In late summer or early fall, repot the tuber in fresh potting mix and resume watering, positioning it in a cool, bright location to encourage new growth.
Understanding each plant’s natural cycle helps you provide the specific care it needs to recover and potentially bloom again. This sustainable approach reduces waste and maximizes your investment in your holiday garden projects.
Repurposing Outdoor Container Plants
Many of the evergreens used in outdoor festive planters are excellent candidates for permanent garden residents, especially in small-space gardens.
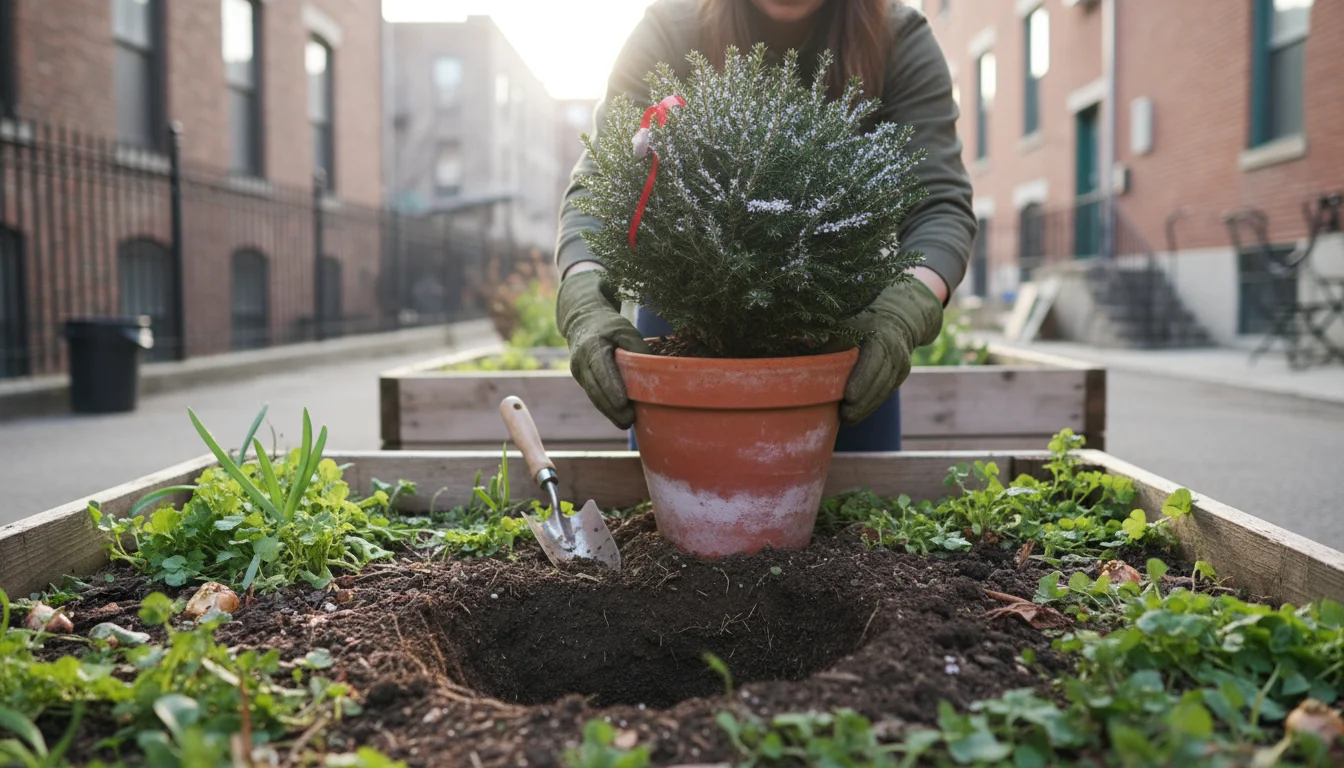
Transplanting Evergreens:
- Prepare the Site: Choose a location in your garden suitable for the plant’s light and soil needs. Dig a hole twice as wide as the root ball and the same depth.
- Acclimatize: If temperatures are still very cold, keep the plant in its container in a sheltered spot (like an unheated garage) for a week or two to help it adjust before planting directly into frozen ground.
- Remove from Container: Gently remove the evergreen from its holiday container. Loosen any circling roots (root-bound roots) to encourage them to spread into the garden soil.
- Plant: Place the plant in the prepared hole, ensuring the top of the root ball is level with the surrounding soil. Backfill with garden soil, gently firming it around the roots.
- Water Thoroughly: Water deeply immediately after planting.
- Mulch: Apply a 2-3 inch layer of organic mulch around the base of the plant, keeping it a few inches away from the stem. Mulch conserves moisture, regulates soil temperature, and suppresses weeds.
Dwarf conifers, boxwood, and holly often thrive when transplanted into the landscape. Ornamental kale and cabbage are typically annuals and can be composted once they fade. By giving your evergreens a second life in your garden, you extend the enjoyment of your holiday garden projects beyond a single season, creating lasting beauty and contributing to a sustainable landscape.
Frequently Asked Questions
Can I keep my poinsettia year-round, or do I discard it after the holidays?
You absolutely can keep your poinsettia year-round. While challenging to get them to rebloom with their signature red bracts due to specific light-dark cycle requirements, they make attractive green foliage plants. After the holidays, prune back the stems to about 6-8 inches, keep it in a bright location, and water when the top inch of soil dries. Move it outdoors in spring after frost danger passes, then bring it back in before the first fall frost. If you want to try for red bracts again, you need to provide 12-14 hours of uninterrupted darkness each night for about 8-10 weeks starting in early fall.
How do I prevent my outdoor evergreen holiday containers from freezing solid?
To prevent outdoor evergreen containers from freezing solid, choose large, thick-walled containers that offer better insulation. Water them thoroughly before a deep freeze, as moist soil retains heat better than dry soil. Mulch the top of the soil with a few inches of straw, pine needles, or shredded leaves. For added protection, group containers close together against a sheltered wall, wrap pots with burlap or bubble wrap, or temporarily move smaller containers into an unheated garage or shed during extreme cold snaps. Ensure containers have excellent drainage to avoid water accumulation, which would freeze and damage roots.
What is the best way to get my Christmas cactus to rebloom next year?
To encourage your Christmas cactus to rebloom, provide a period of “rest” in the fall. Starting in mid-September or early October, give it 12-14 hours of uninterrupted darkness each night for about 6-8 weeks. This means no artificial light exposure. Also, move it to a cooler location, around 50-55°F (10-13°C), and reduce watering slightly. Once flower buds begin to form, usually in late November or early December, return the plant to its normal bright, indirect light location and resume regular watering. Avoid moving the plant too much once buds appear, as this can cause them to drop.
Are holiday plants like poinsettias and holly safe for pets?
While often exaggerated, poinsettias (Euphorbia pulcherrima) are generally considered mildly toxic. Ingesting parts of the plant typically causes mild gastrointestinal upset, such as nausea or vomiting, but rarely severe issues. Holly (Ilex species), particularly its berries, contains saponins and is more toxic, potentially causing vomiting, diarrhea, and lethargy if consumed in significant amounts. It is always best to keep all plants out of reach of curious pets. If you suspect your pet has ingested any plant material, contact your veterinarian or a pet poison helpline immediately for advice specific to your animal and the plant.
My outdoor holiday evergreens look dry and brown in spots, but I water them. What is happening?
This “winter burn” often occurs when evergreens lose moisture from their needles faster than their roots can replace it, especially on windy, sunny winter days when the ground is frozen. Even if you water, the plant cannot absorb it if the soil is frozen. To prevent this, ensure deep watering before the ground freezes solid. Apply an antitranspirant spray (a protective coating that reduces moisture loss) to foliage, following product directions. Providing some wind protection, like burlap screens, also helps reduce moisture loss from foliage. Persistent browning may indicate extreme cold damage or other underlying issues, but winter burn is a common cause in containerized evergreens.