Categories
Plant Care & Maintenance

Winter is Coming: How to Stop Pests from Overwintering in Your Balcony Pots and Soil

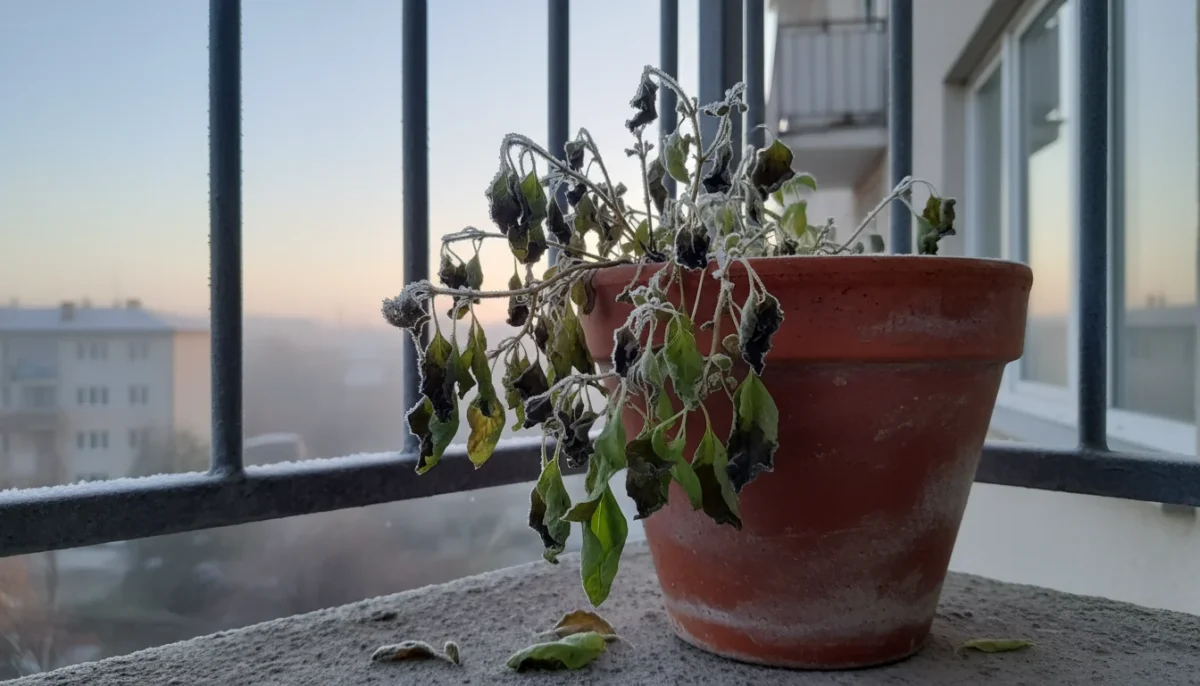
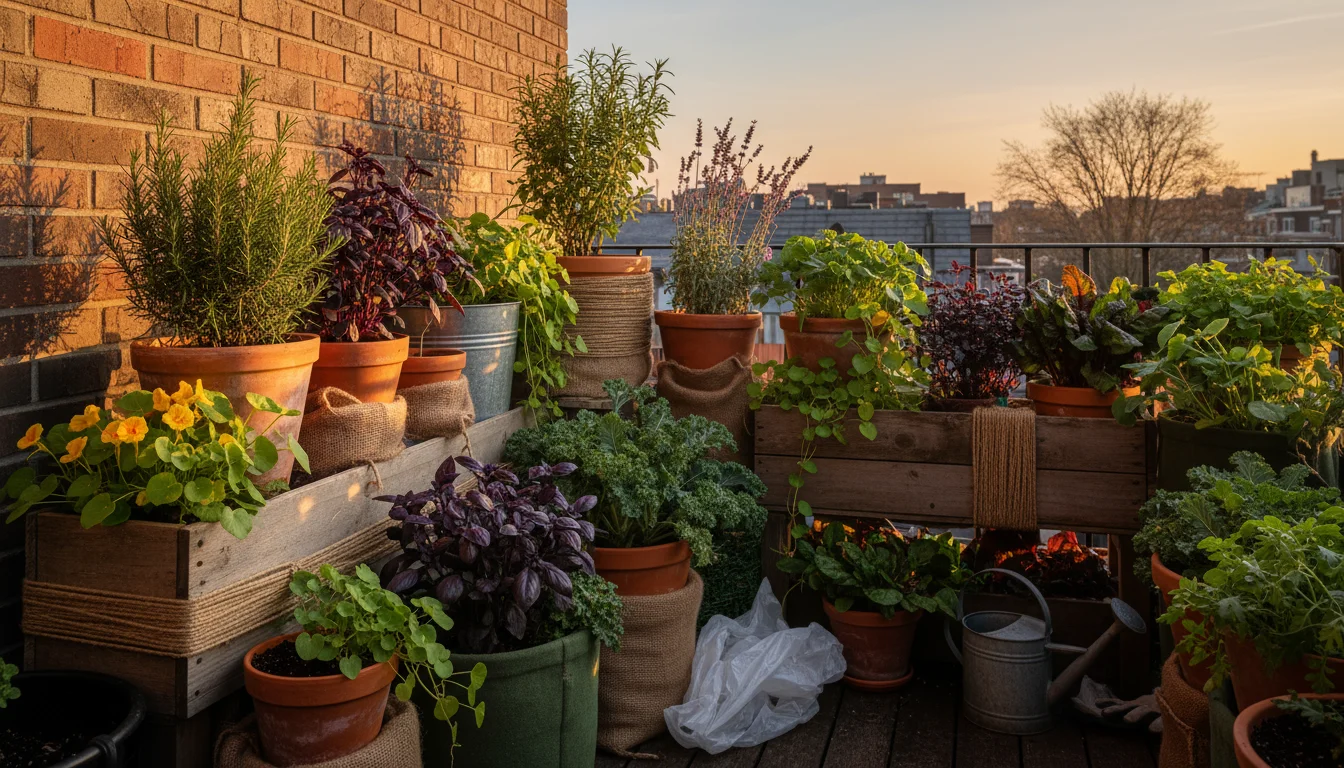
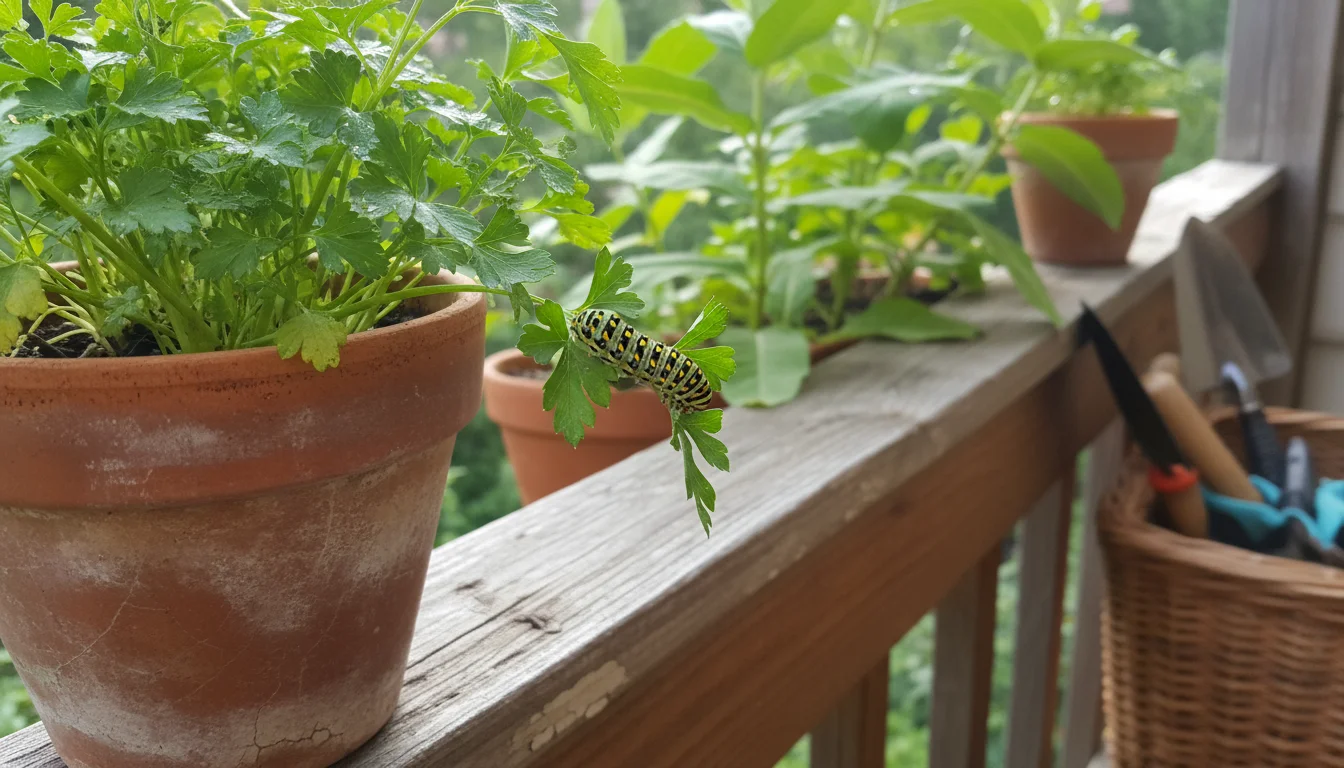
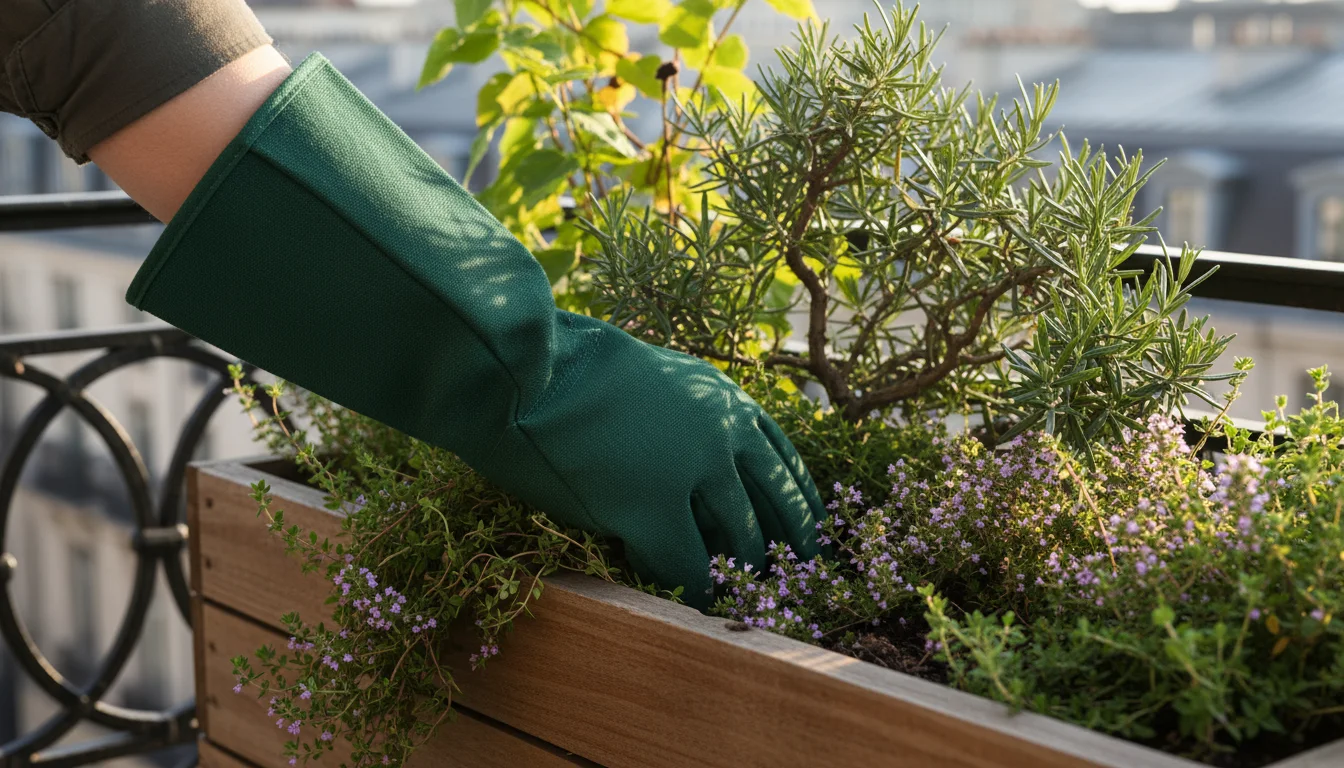
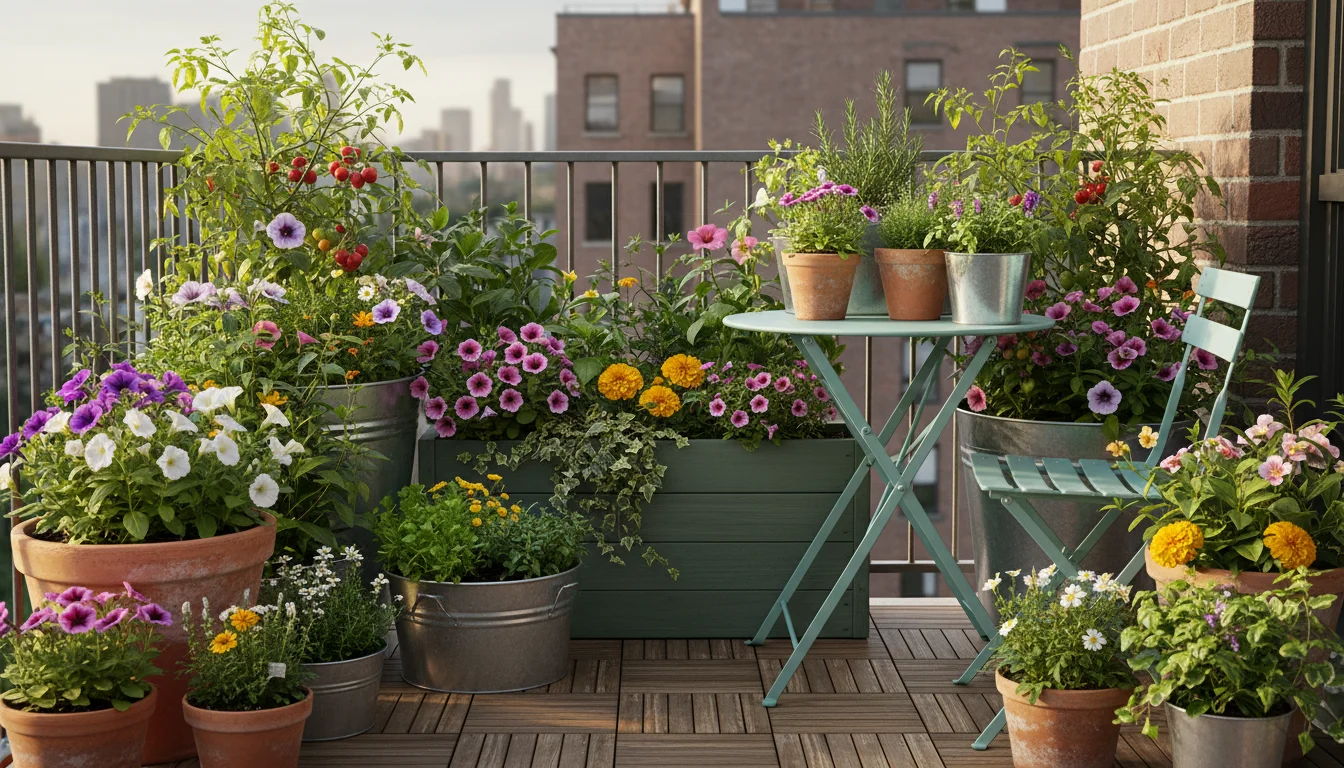
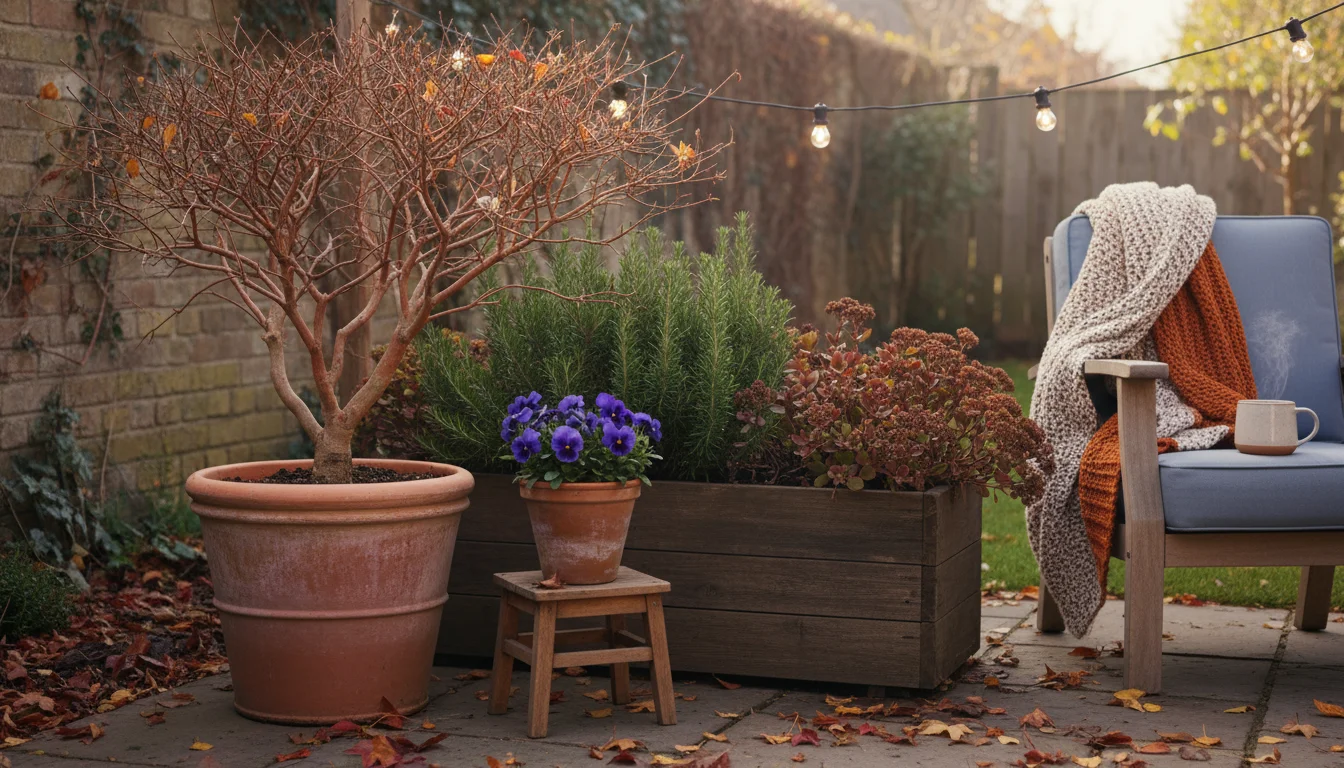
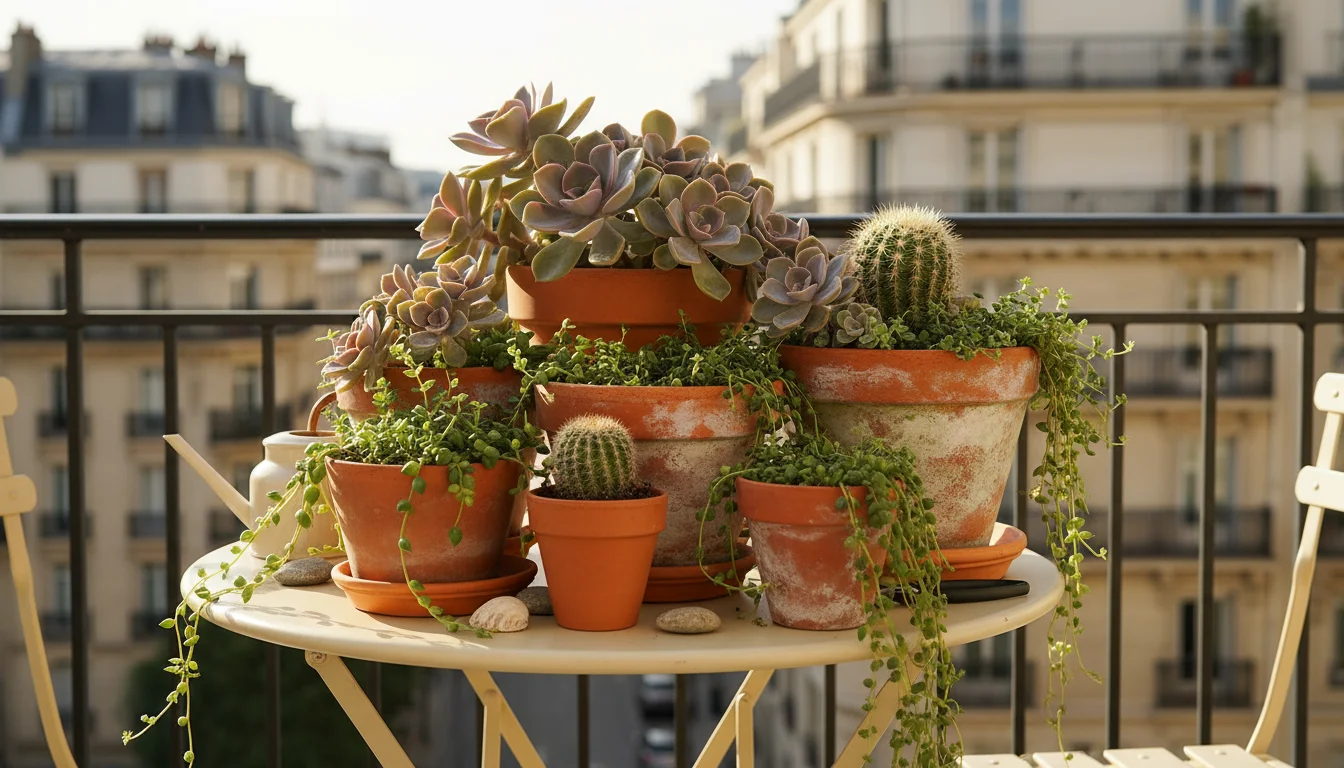
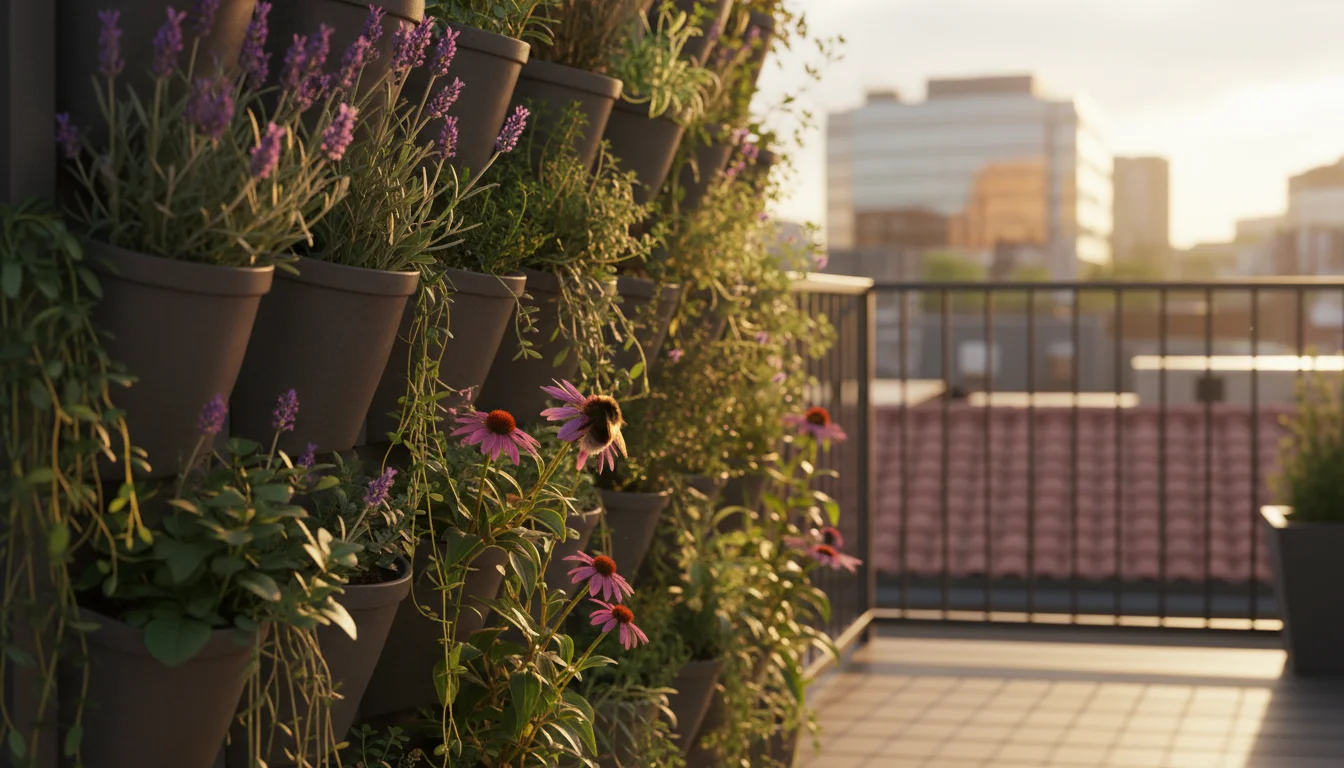
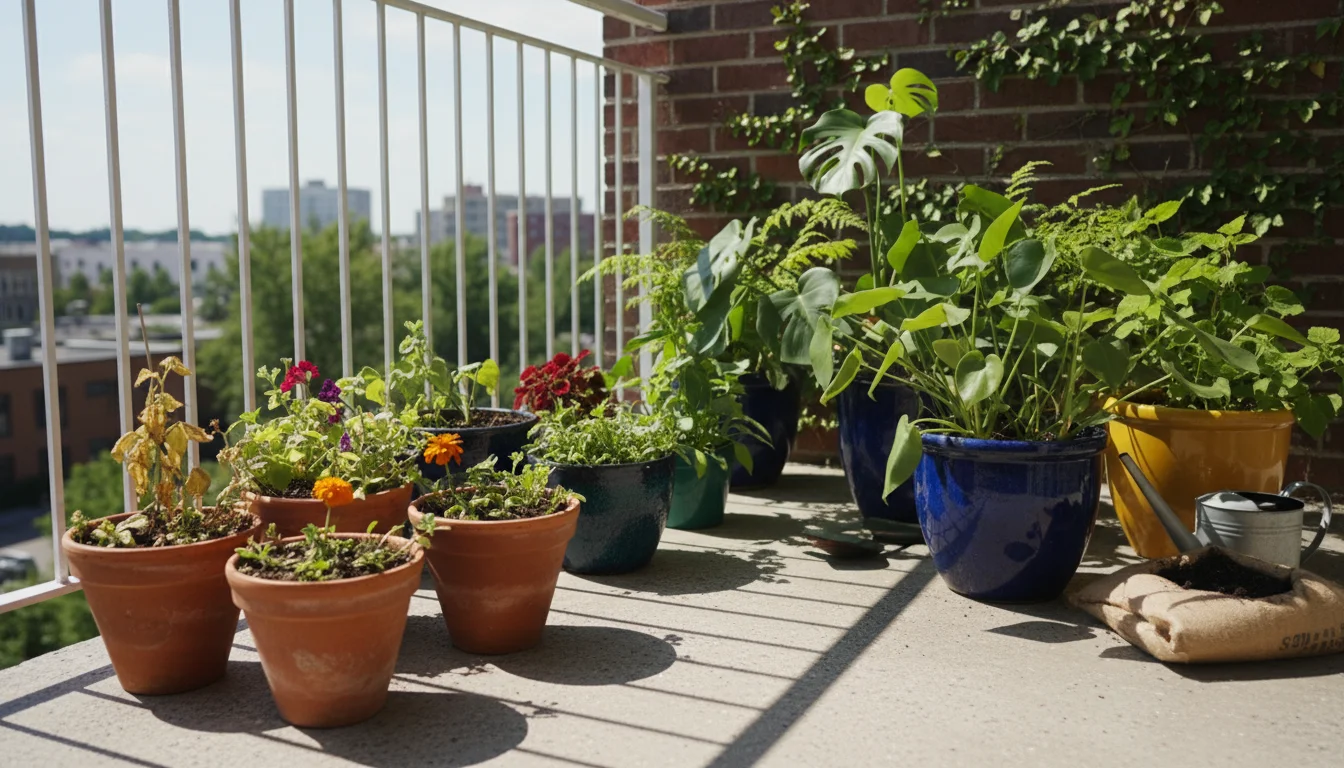
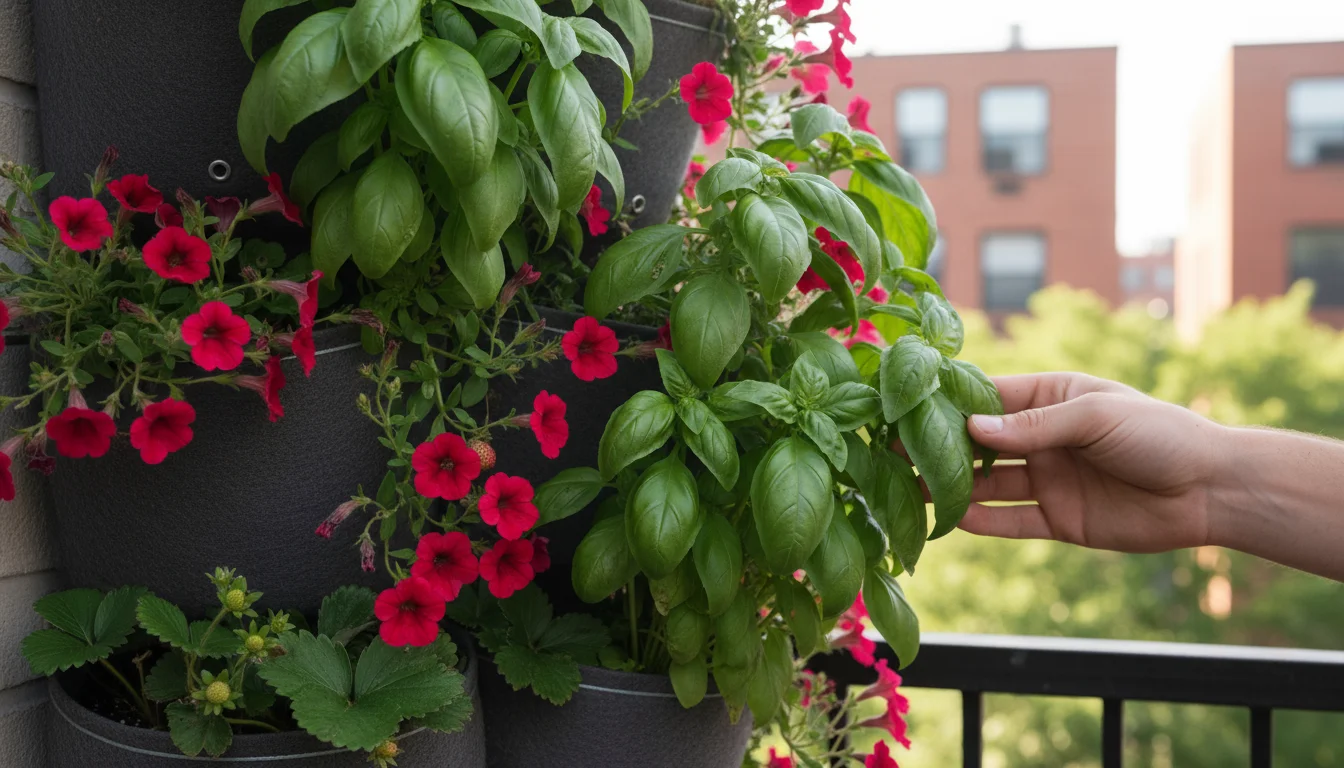
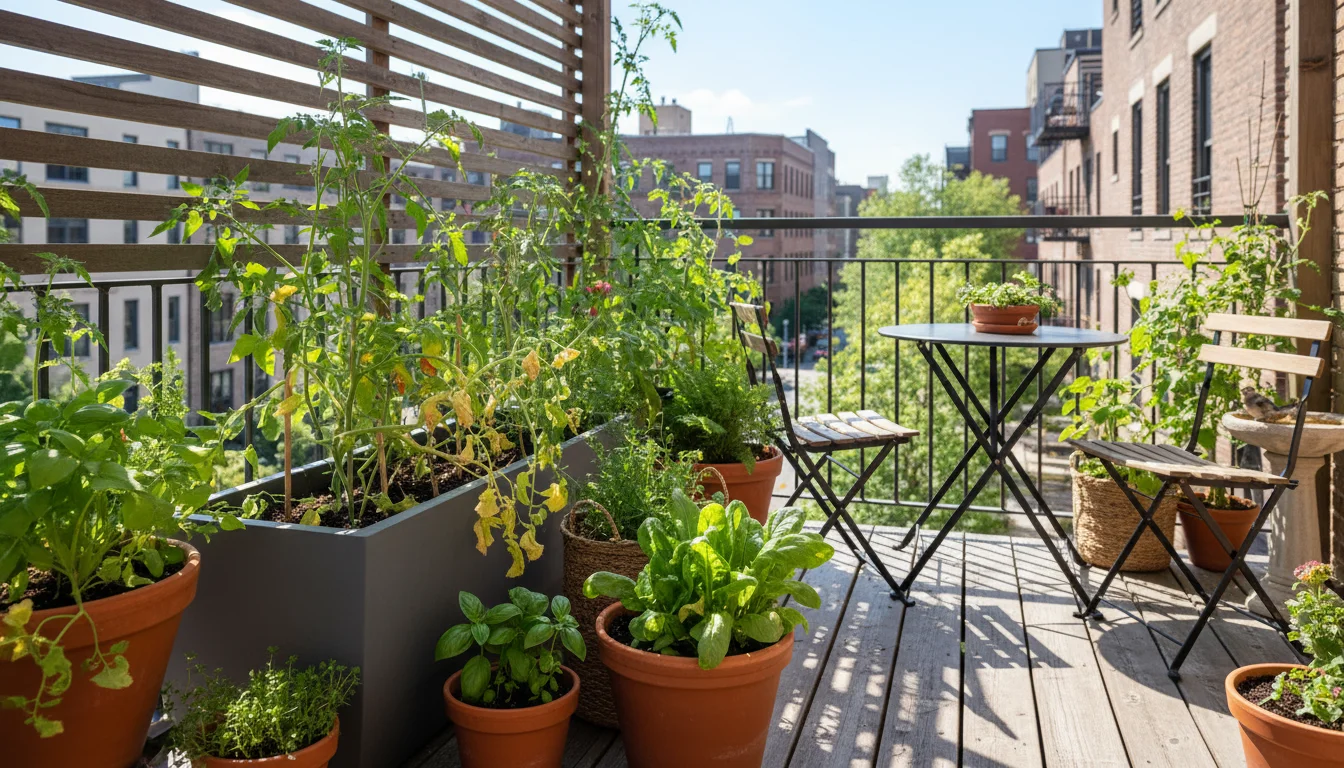
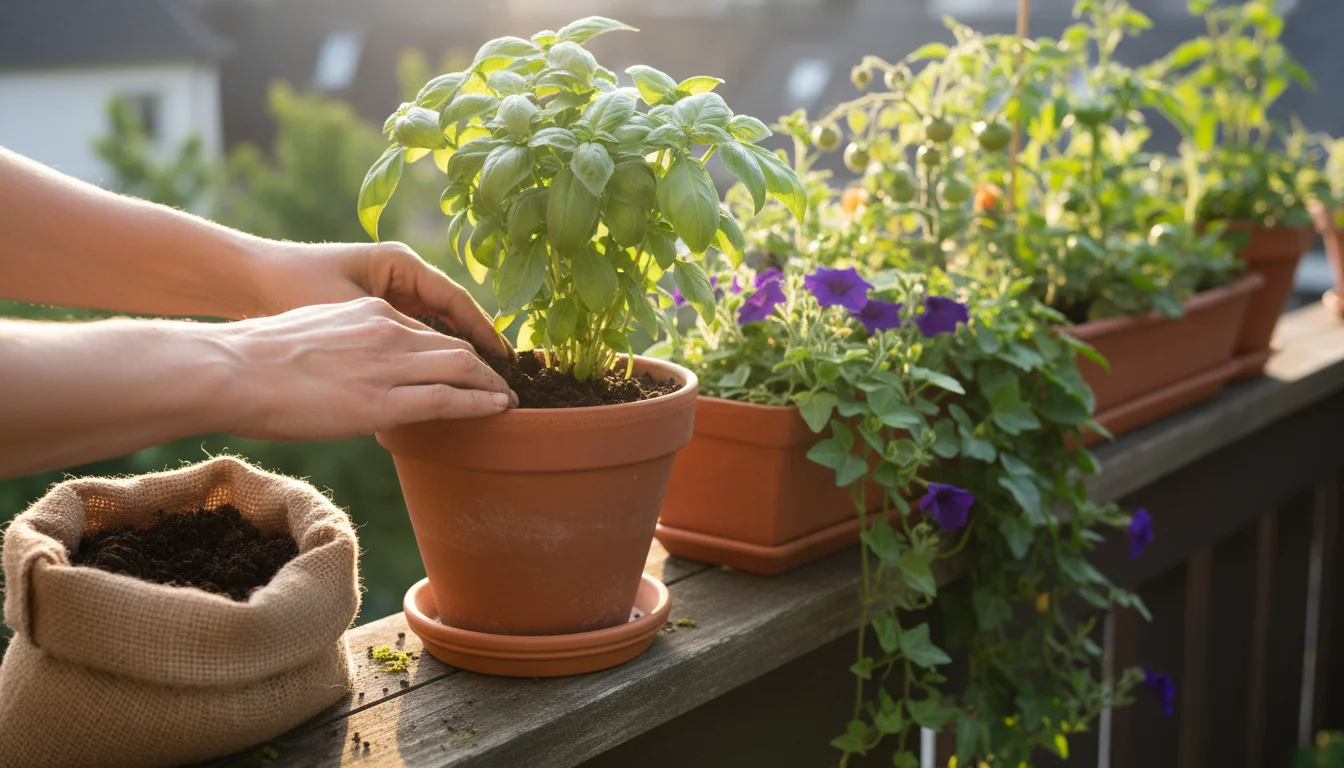
As the days shorten and a chill enters the air, many gardeners begin to wind down their growing season. If you tend a balcony garden, patio plants, or a small backyard plot, you might be thinking about putting your containers away until spring. However, this transition period is one of the most critical times for pest management. Skipping proper fall pest control can lead to an unwelcome surprise next spring: a resurgence of familiar foes, thriving from a winter spent safely tucked away in your pots and soil. By taking proactive steps now, you can significantly reduce the population of overwintering pests, ensuring a healthier and more vigorous garden come spring. This guide will walk you through practical, actionable strategies to safeguard your container garden, helping you understand how to get rid of bugs in potting soil before winter and prevent future infestations.

Understanding Overwintering Pests in Small Spaces

Pests, those unwelcome visitors in your garden, have developed clever strategies to survive the winter months. For many common container garden pests, this means finding a sheltered spot to lie dormant, often within your very own pots and soil. These microscopic or tiny invaders don’t simply vanish with the first frost; they seek refuge, waiting for warmer temperatures to emerge and resume their destructive activities.

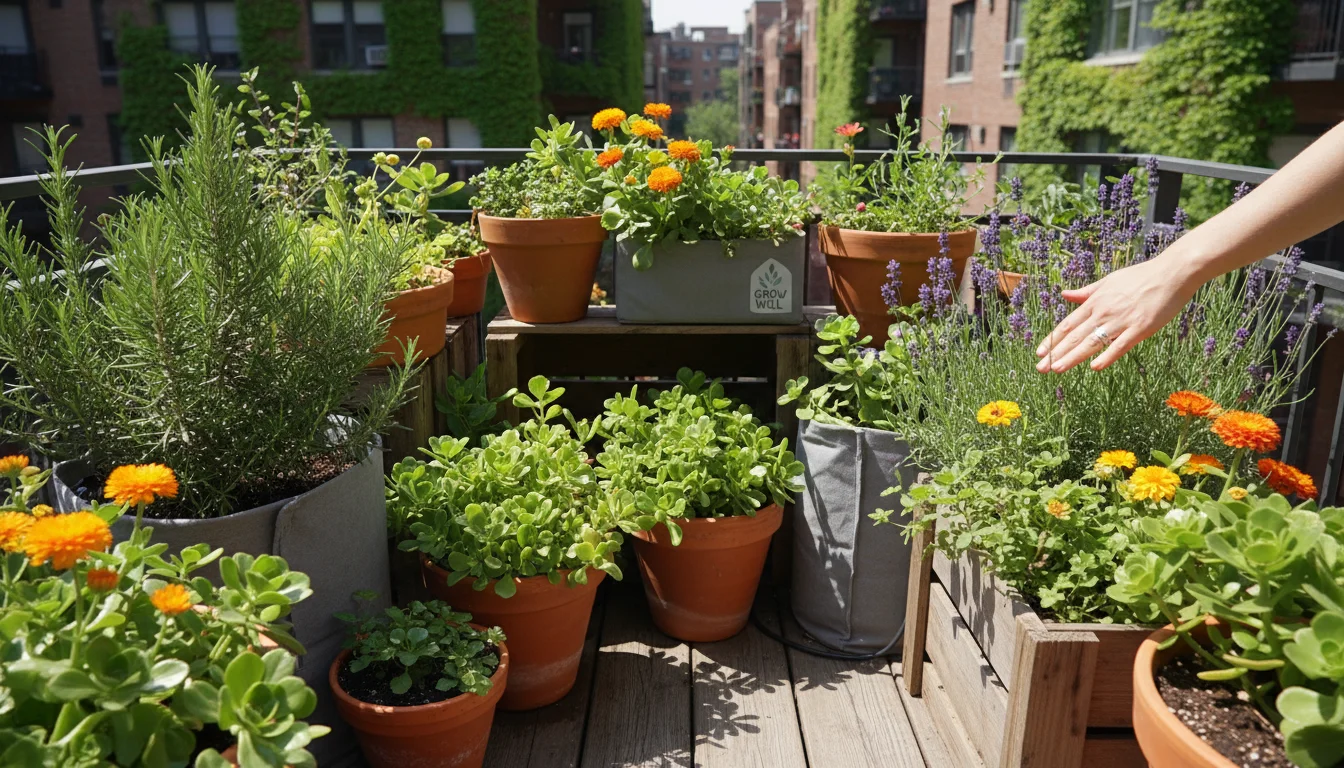
In small-space gardens, where plants are often in close proximity and soil volumes are limited, the risk of pests successfully overwintering is particularly high. A single overlooked egg cluster or a handful of dormant larvae can explode into a full-blown infestation come spring, impacting your young, vulnerable plants. Understanding how different pests overwinter empowers you to target them effectively.

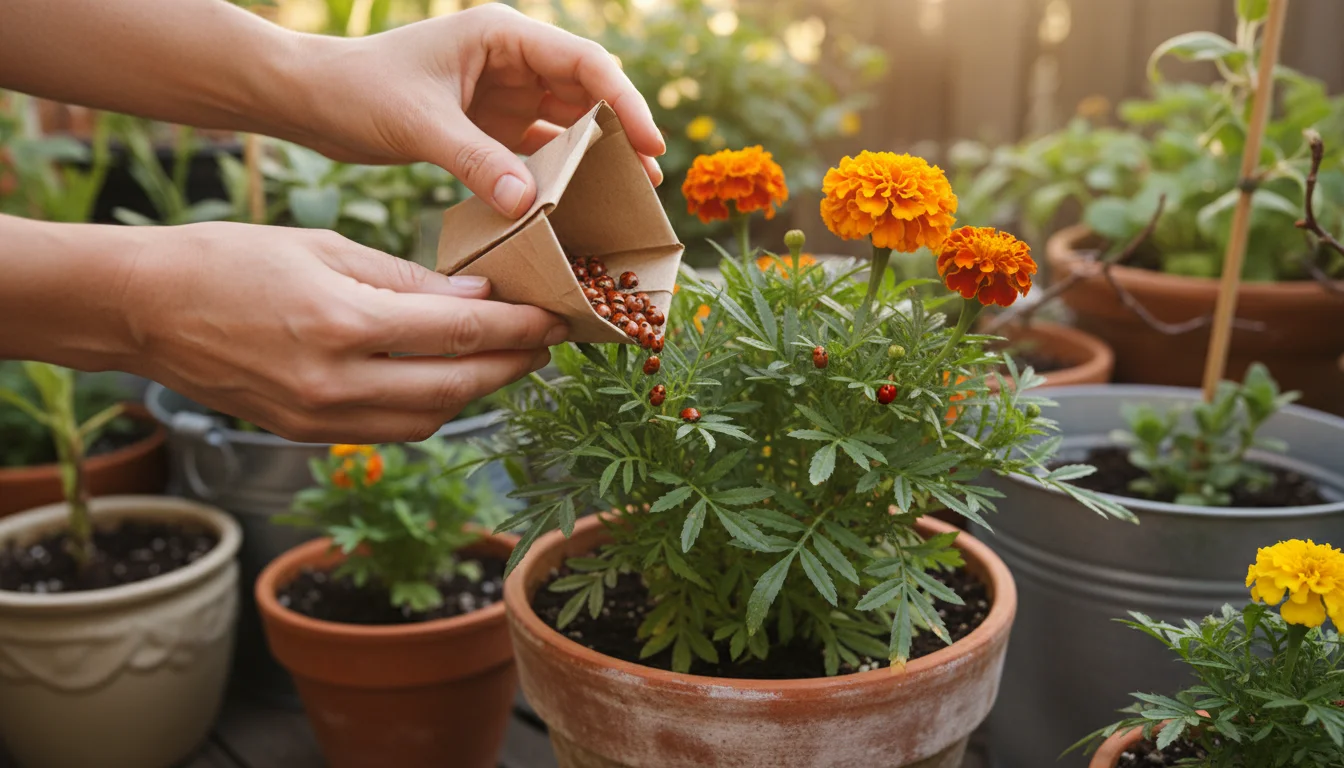
Aphids, for example, frequently lay tiny, dark, oval-shaped eggs on plant stems or even in the crevices of your pots. These eggs are incredibly resilient and hatch when spring arrives, quickly leading to new aphid colonies. Fungus gnats, a common nuisance in moist potting soil, can overwinter as larvae or pupae within the soil itself. Spider mites, though often thought of as a summer pest, can hide as adults or eggs in plant debris or under pot rims. Slugs and snails burrow into the soil or find shelter under containers. Even scale insects, which look like tiny bumps on stems, can survive as nymphs or adults through winter. Their ability to remain hidden makes early detection and fall pest control crucial. If you ignore these pests now, you set yourself up for a bigger battle later.

Why Fall Pest Prevention Matters for Your Spring Garden

You might wonder why you should dedicate time to fall pest control when your plants are dying back or already gone. The answer lies in the life cycles of garden pests. Most common garden insects reproduce rapidly. A small number of overwintering individuals can quickly multiply into thousands once conditions are favorable in spring. Think of it as a snowball effect: a minor issue in fall becomes a major headache in spring.

Taking preventative measures in autumn offers several significant advantages:

  • Breaks the Pest Cycle: By eliminating pests before they can overwinter, you directly interrupt their life cycle. This prevents the next generation from emerging in spring, giving your new plants a clean start. Consider the example of preventing aphids in spring by treating in fall. If you destroy aphid eggs now, there are simply fewer aphids to hatch and infest your tender seedlings next season.
  • Reduces Chemical Reliance: Proactive fall treatments mean you might not need to resort to stronger chemical interventions in spring, aligning with an environmentally conscious gardening approach. Early intervention is often less invasive.
  • Saves Time and Effort Later: Dealing with a handful of hidden pests in fall is far easier than battling a massive infestation when you’re busy planting and tending your spring garden. You save yourself significant time, frustration, and potential plant loss.
  • Promotes Plant Health: A garden free from a high pest load allows your plants to focus their energy on growth and production, rather than fighting off invaders. Stronger plants are inherently more resilient to stress and occasional pest pressure.
  • Maintains a Healthier Ecosystem: By targeting harmful pests without broadly affecting beneficial insects, you contribute to a balanced garden ecosystem. Many beneficial insects are less active in fall, allowing you to specifically target pests.

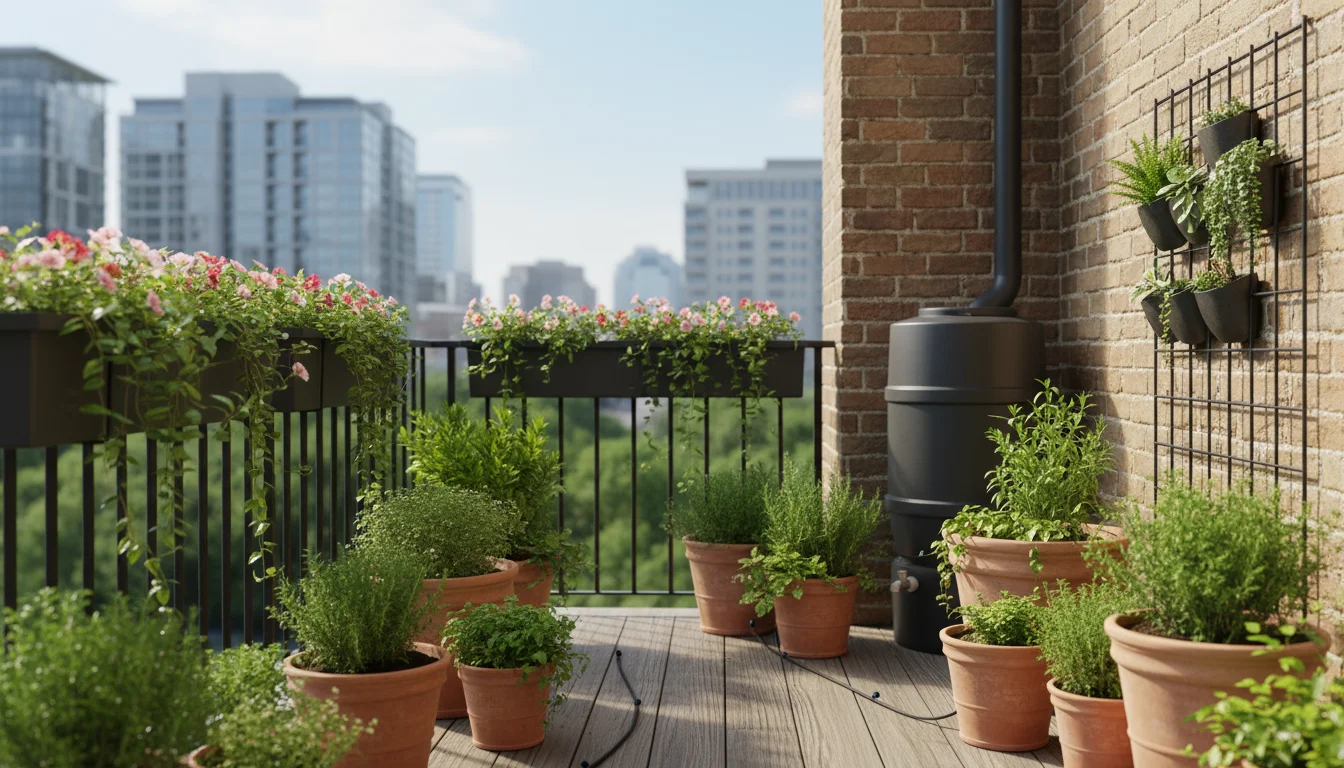
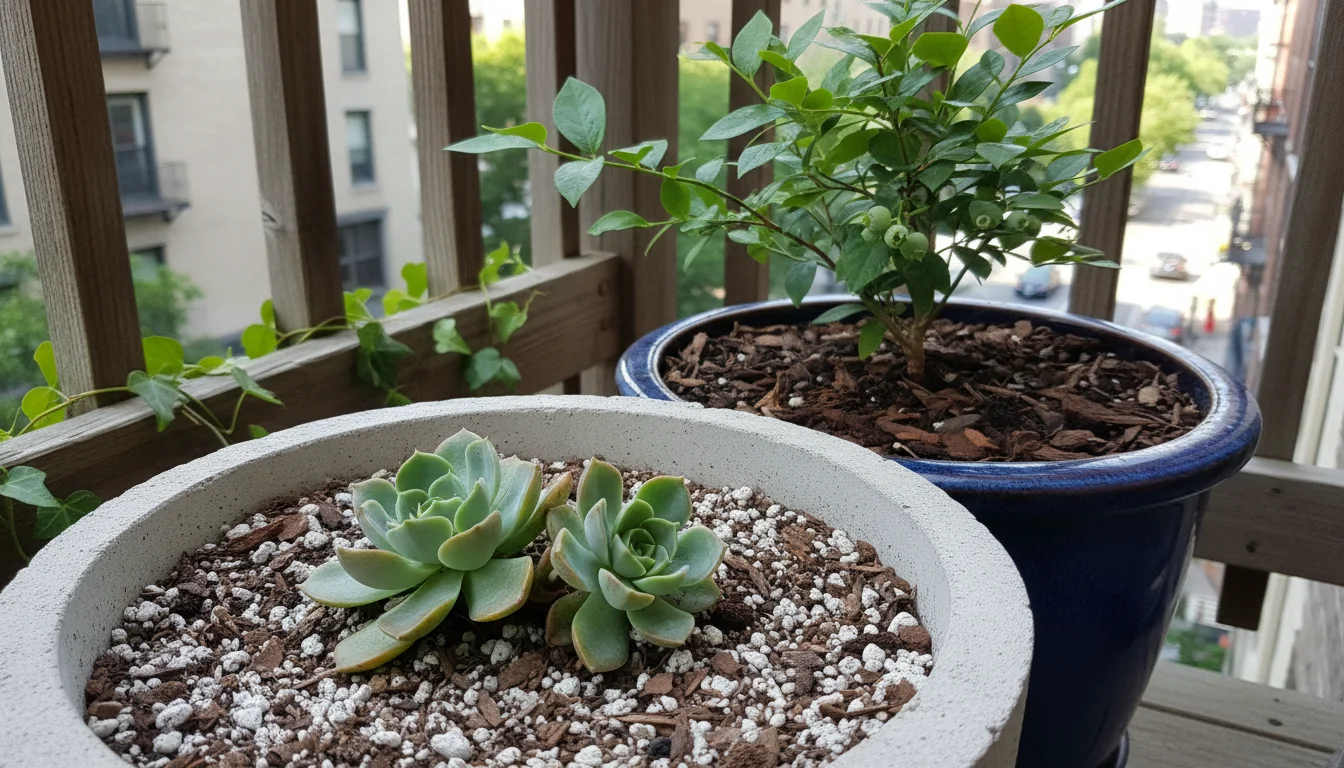
This proactive strategy is especially important for container gardens. The confined space of a pot often means that pests have fewer places to go, making your focused fall efforts highly effective.

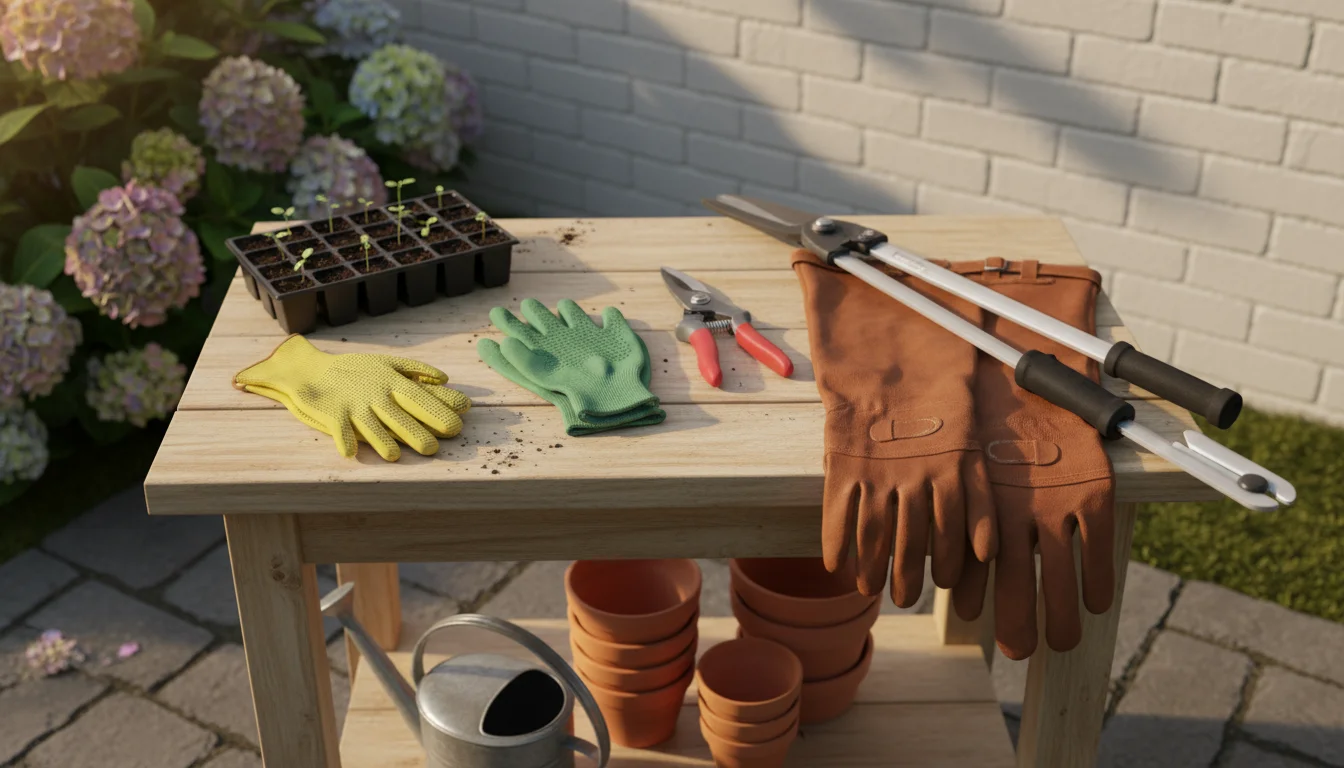
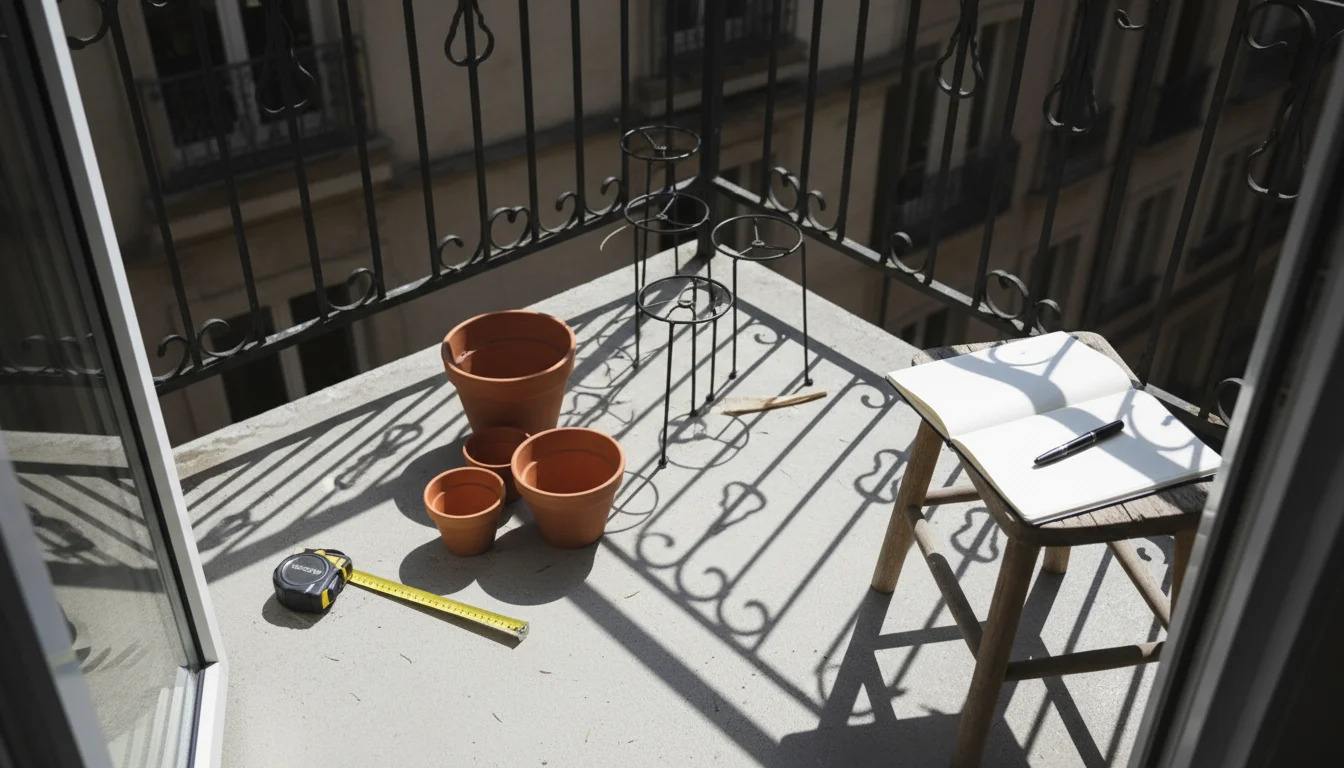
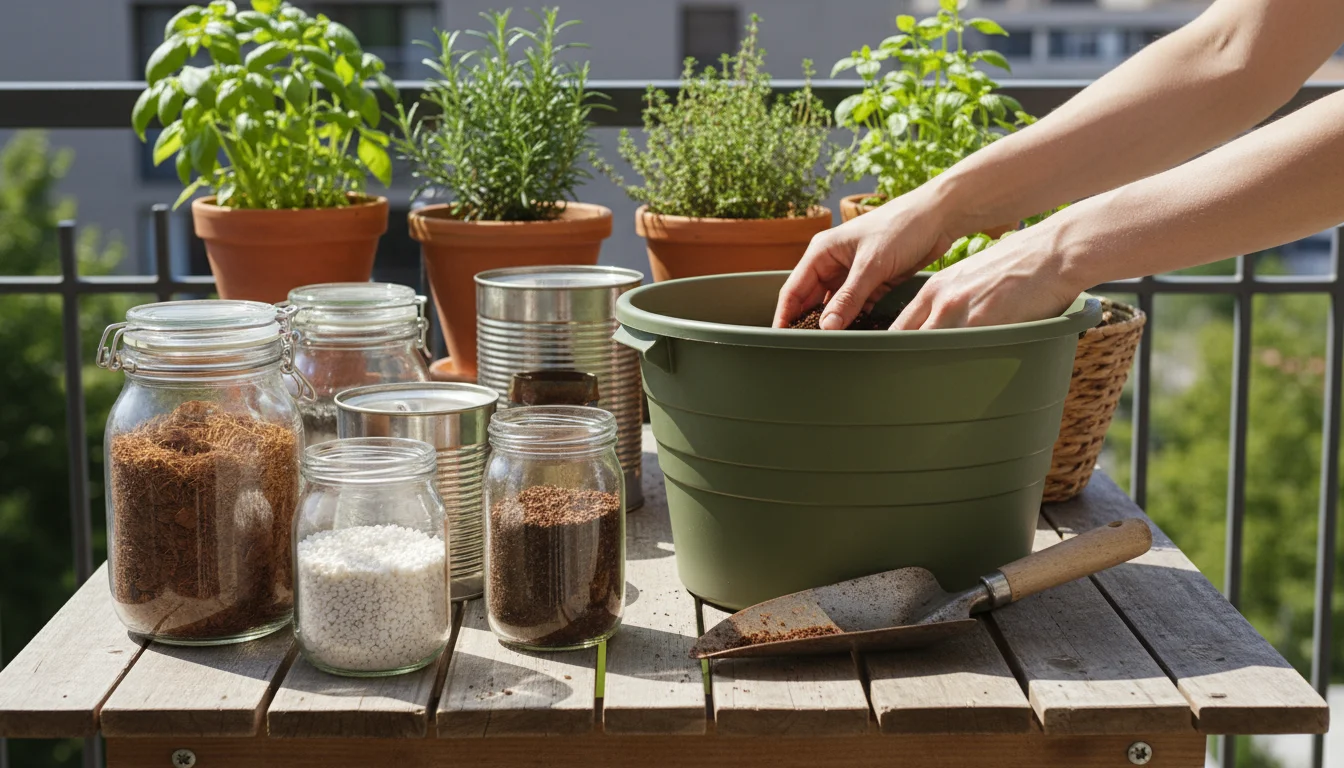
Your Fall Pest Control Toolkit: Essential Supplies

Before you embark on your fall pest prevention mission, gather the necessary tools and supplies. Having everything ready streamlines the process and ensures you don’t miss any crucial steps. Most of these items are readily available at garden centers or even around your home.

  • Stiff Brush or Scrub Brush: Essential for cleaning pots and removing stubborn grime and hidden pest eggs.
  • Hose with a Strong Nozzle: For rinsing plants and containers. A high-pressure setting helps dislodge pests.
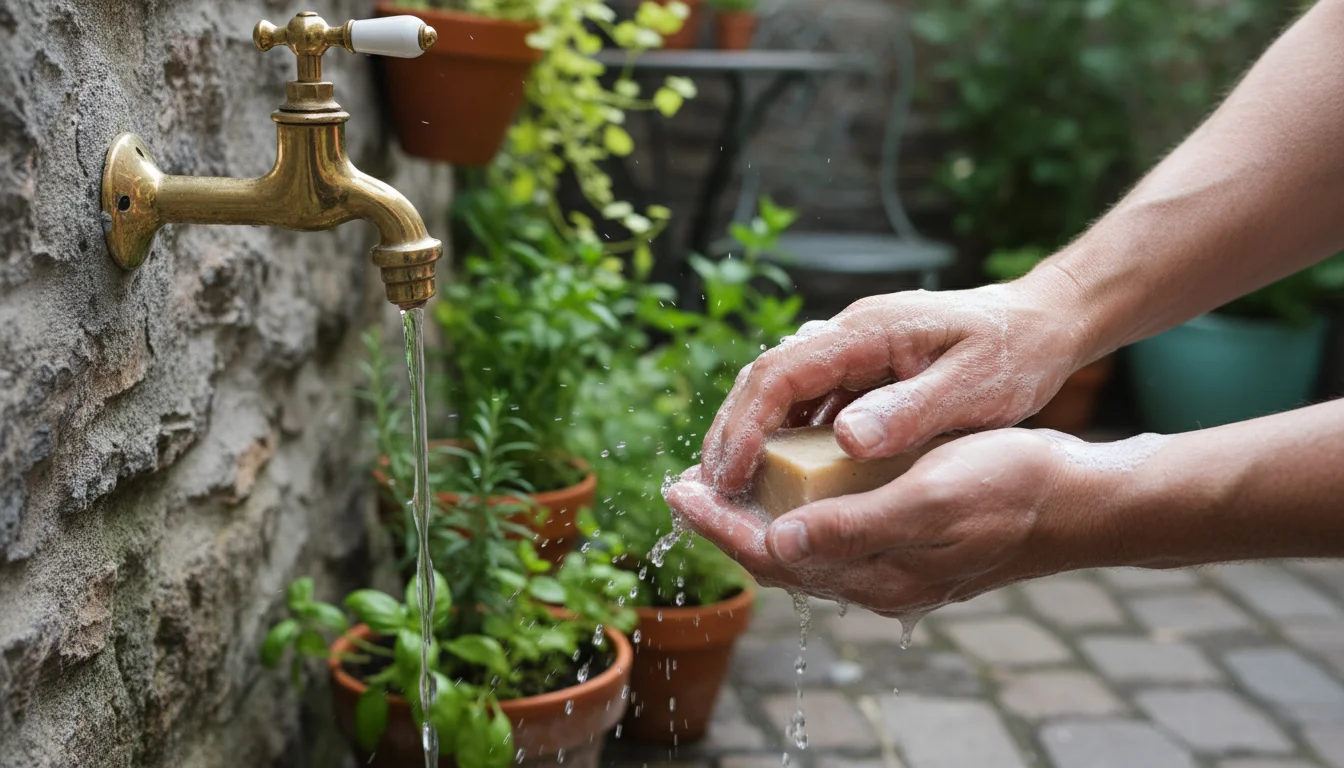
  • Warm Soapy Water (Dish Soap): A simple, effective solution for cleaning non-porous pots. Use a mild, biodegradable dish soap.
  • Bleach Solution (1 part bleach to 9 parts water) OR White Vinegar Solution (undiluted): For sanitizing terracotta or plastic pots, especially if they housed diseased plants or severe infestations. Always rinse thoroughly after using bleach.
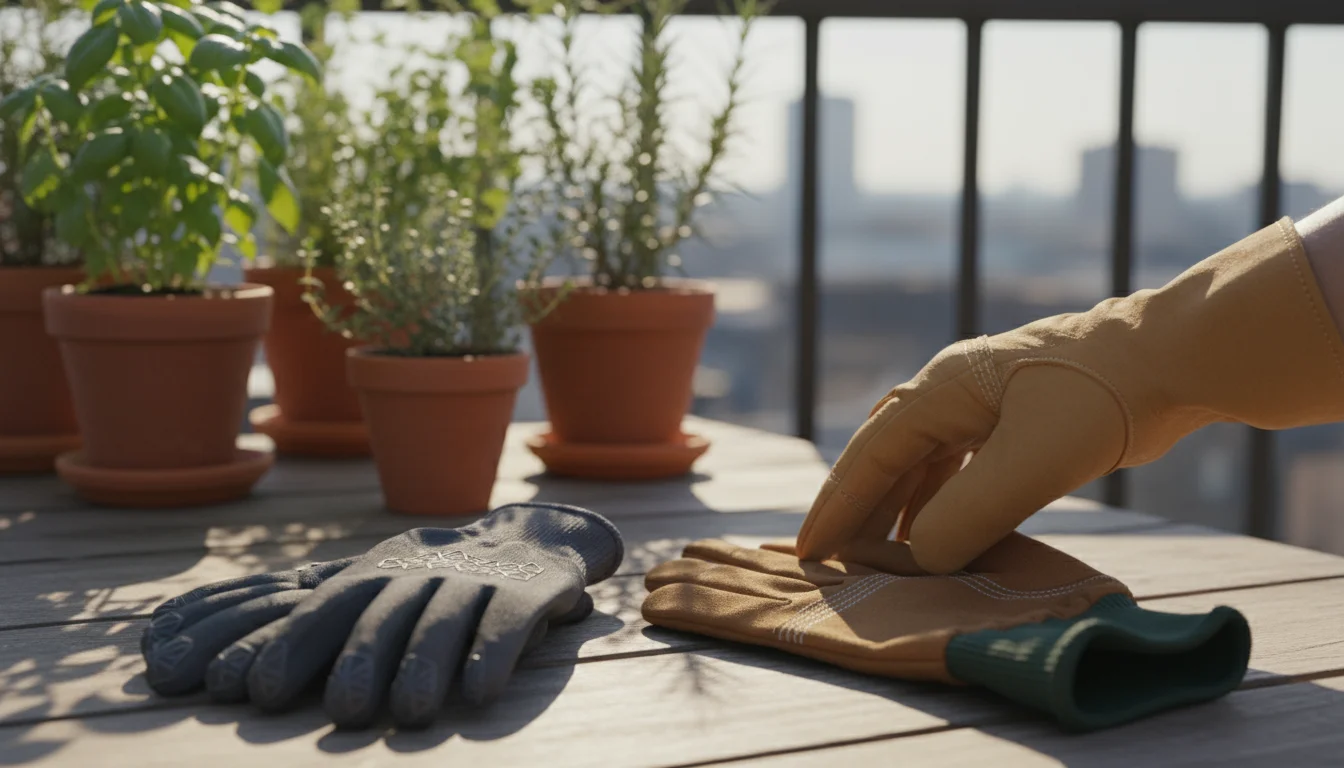
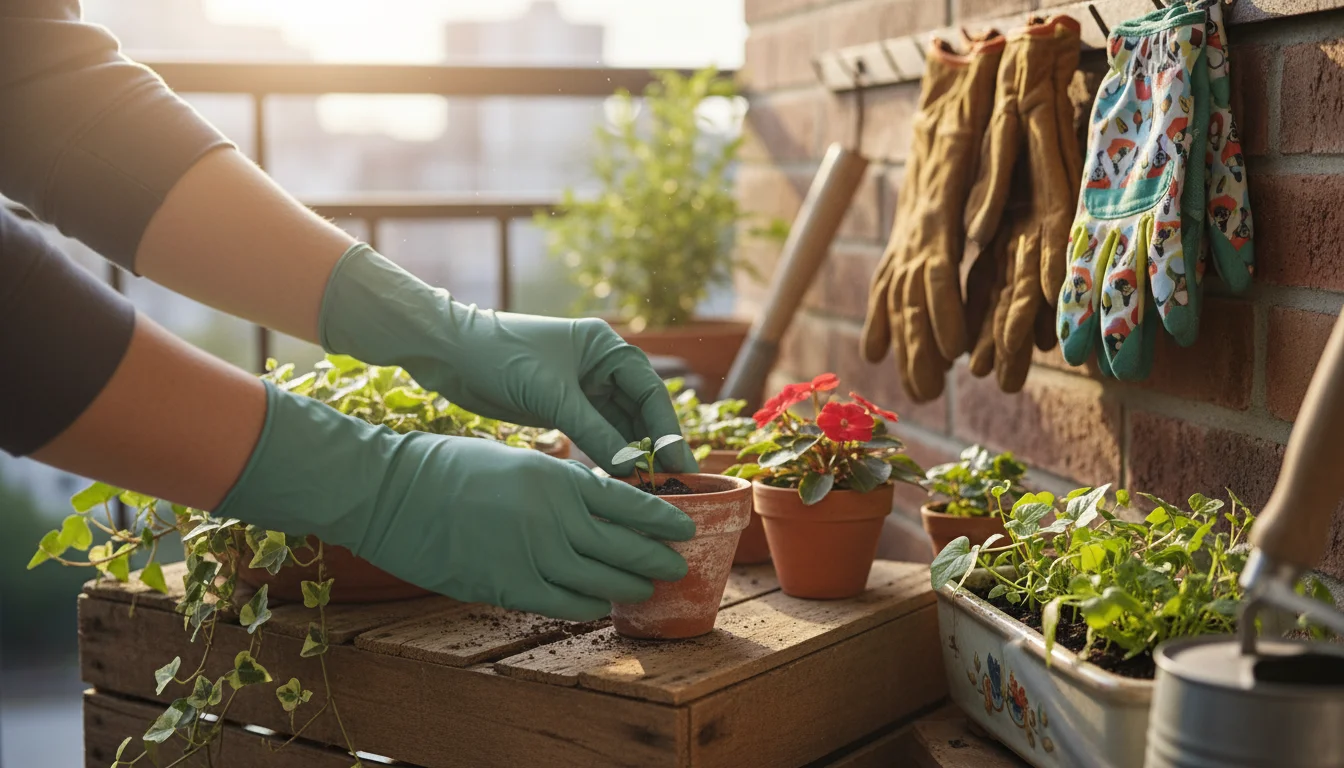
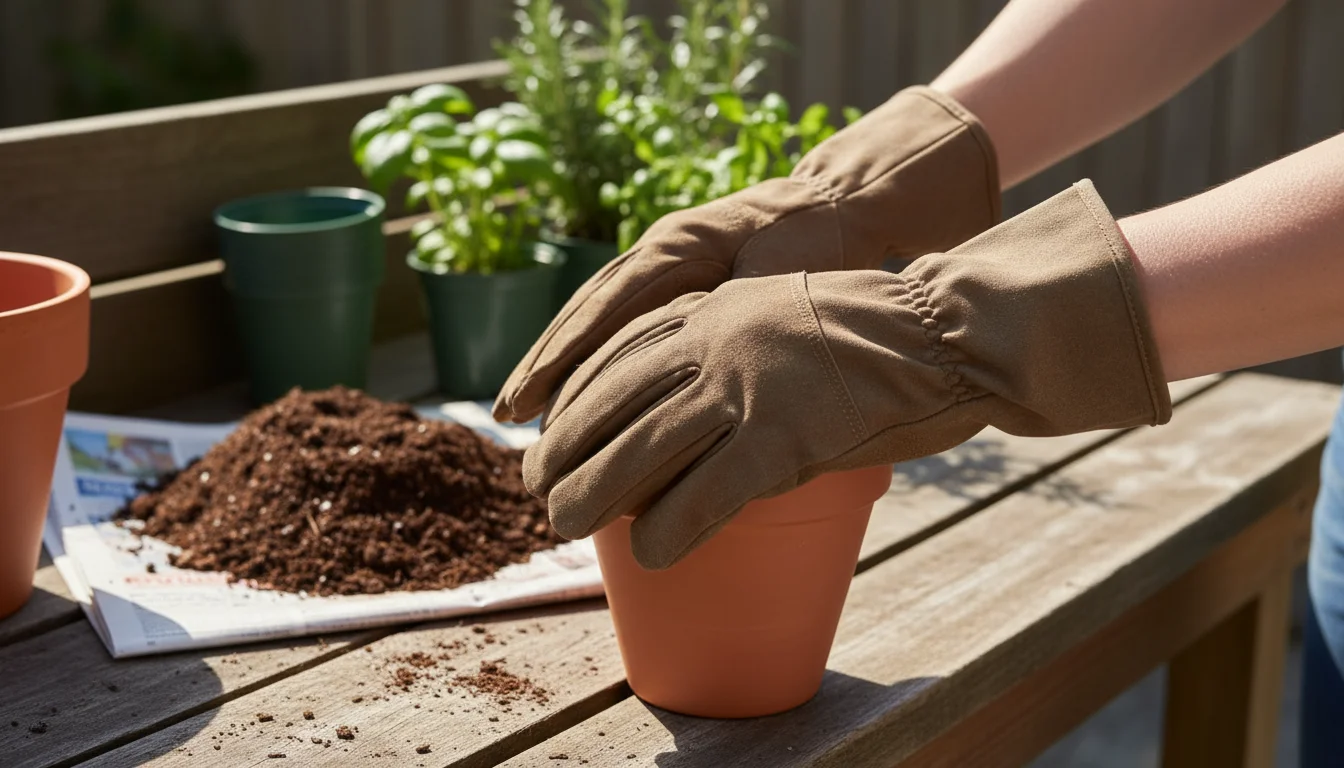
  • Gloves: Protect your hands from soil, cleaning solutions, and potential skin irritants.
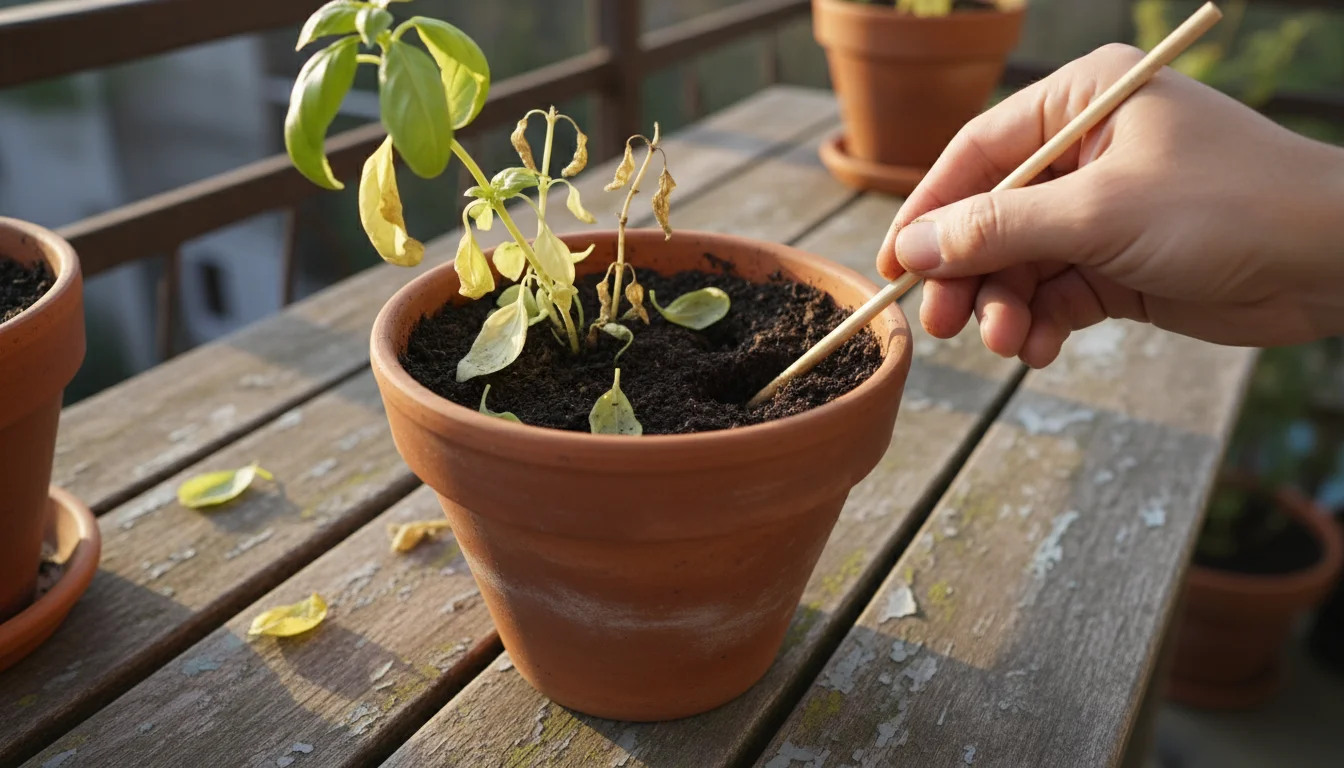
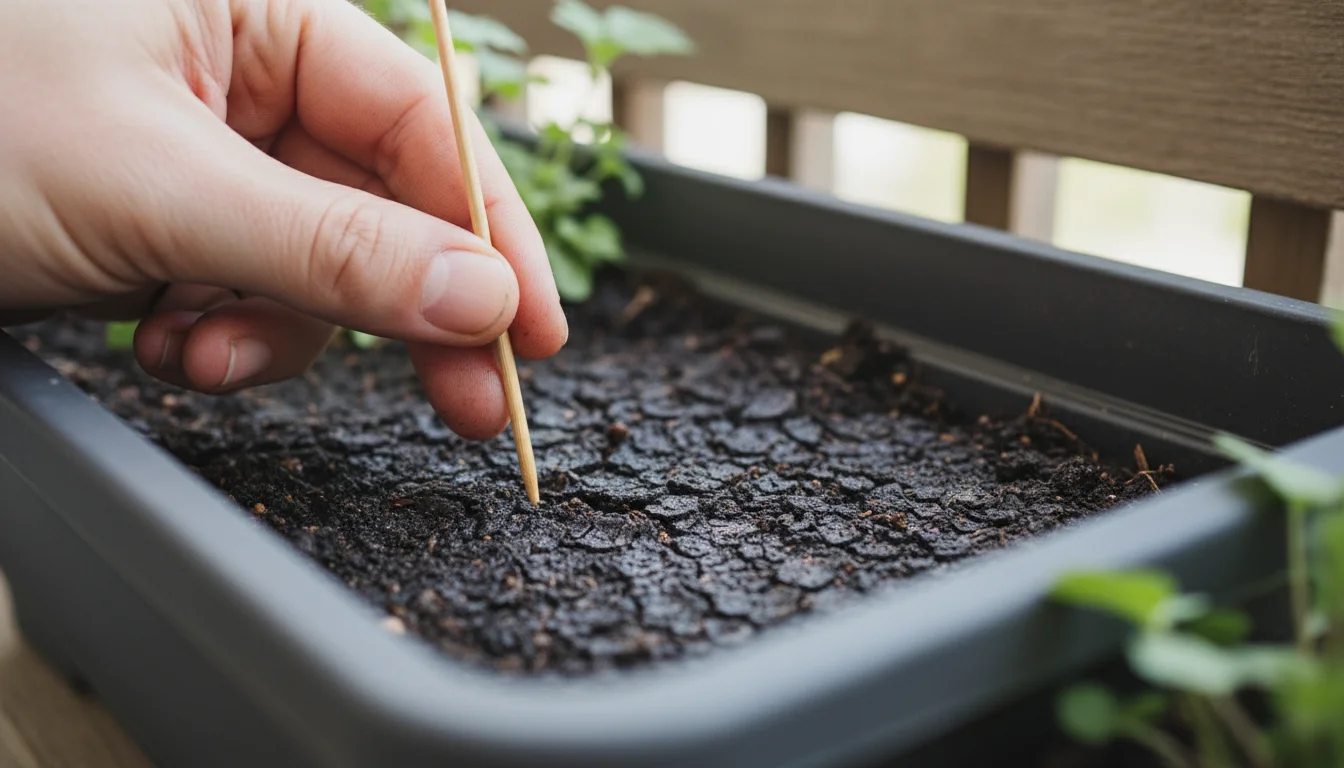
  • Small Trowel or Hand Rake: For carefully disturbing and removing the top layer of soil.
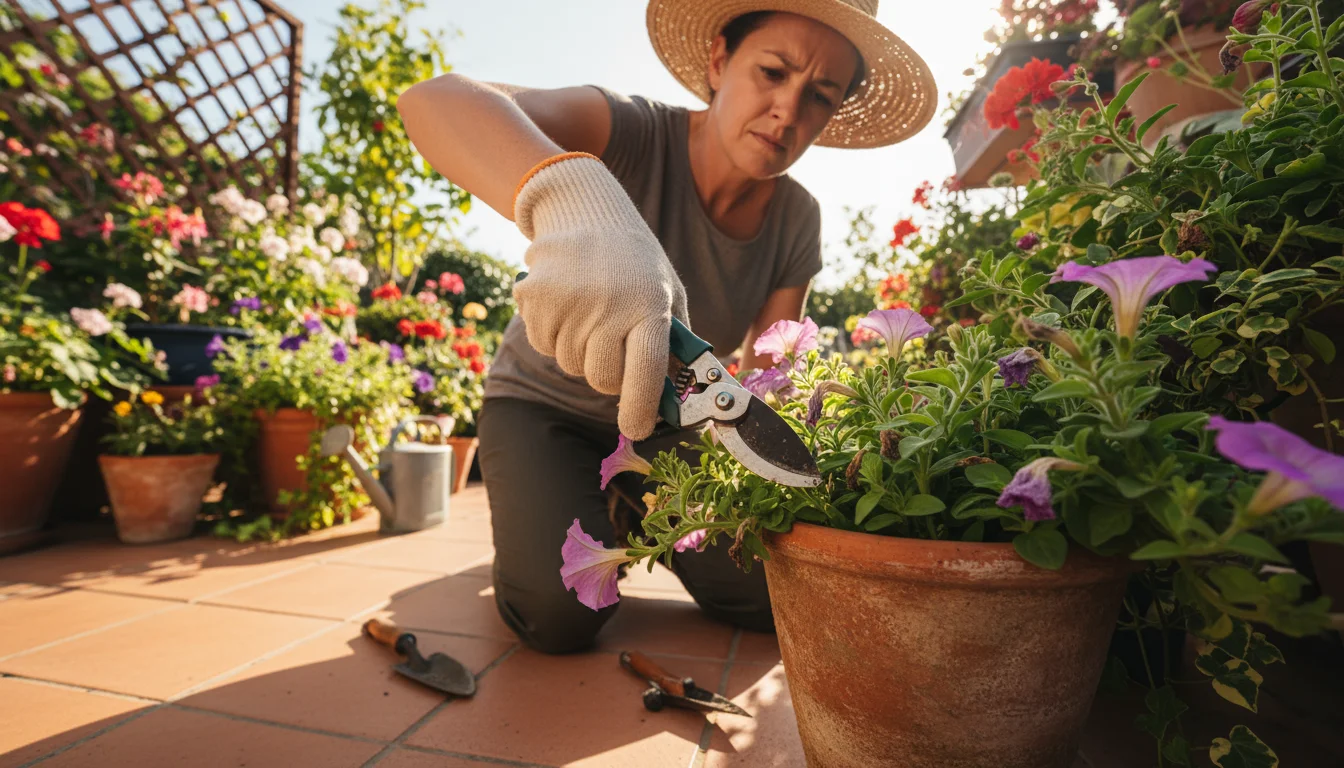
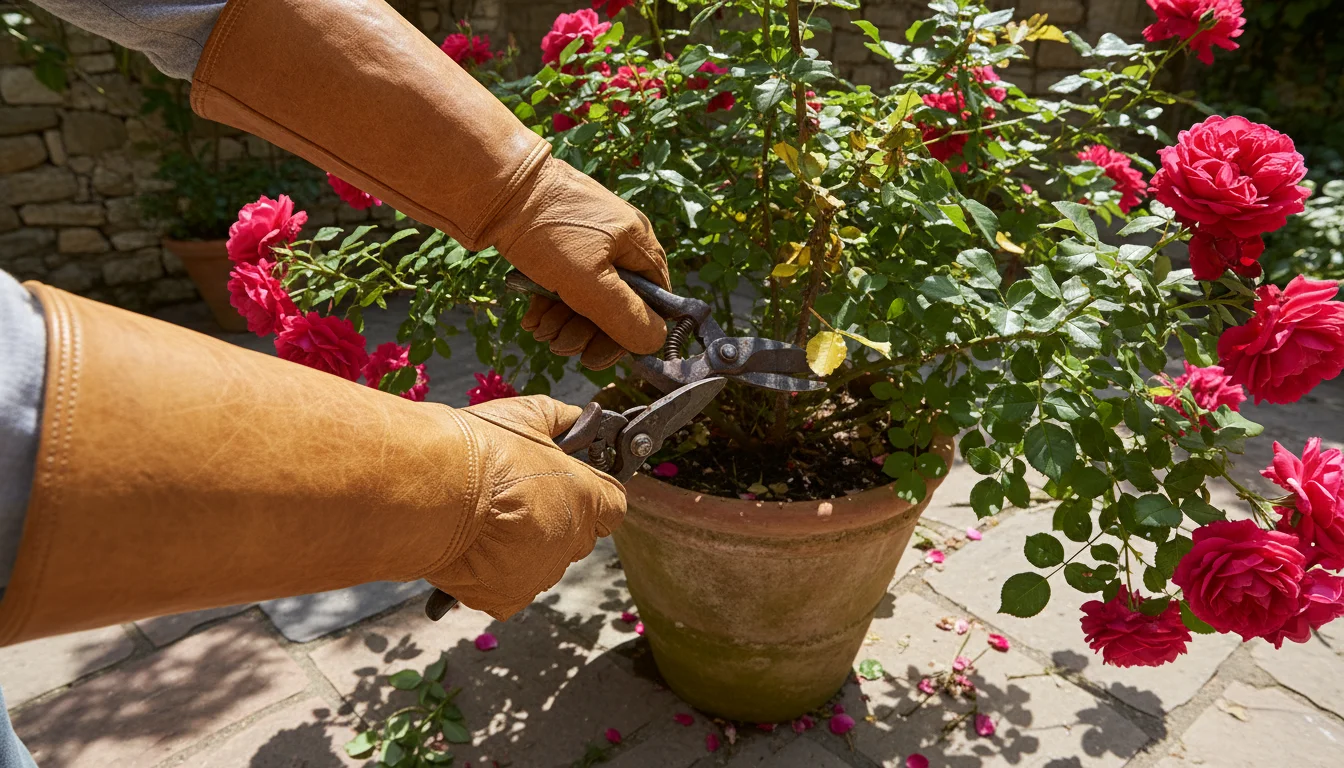
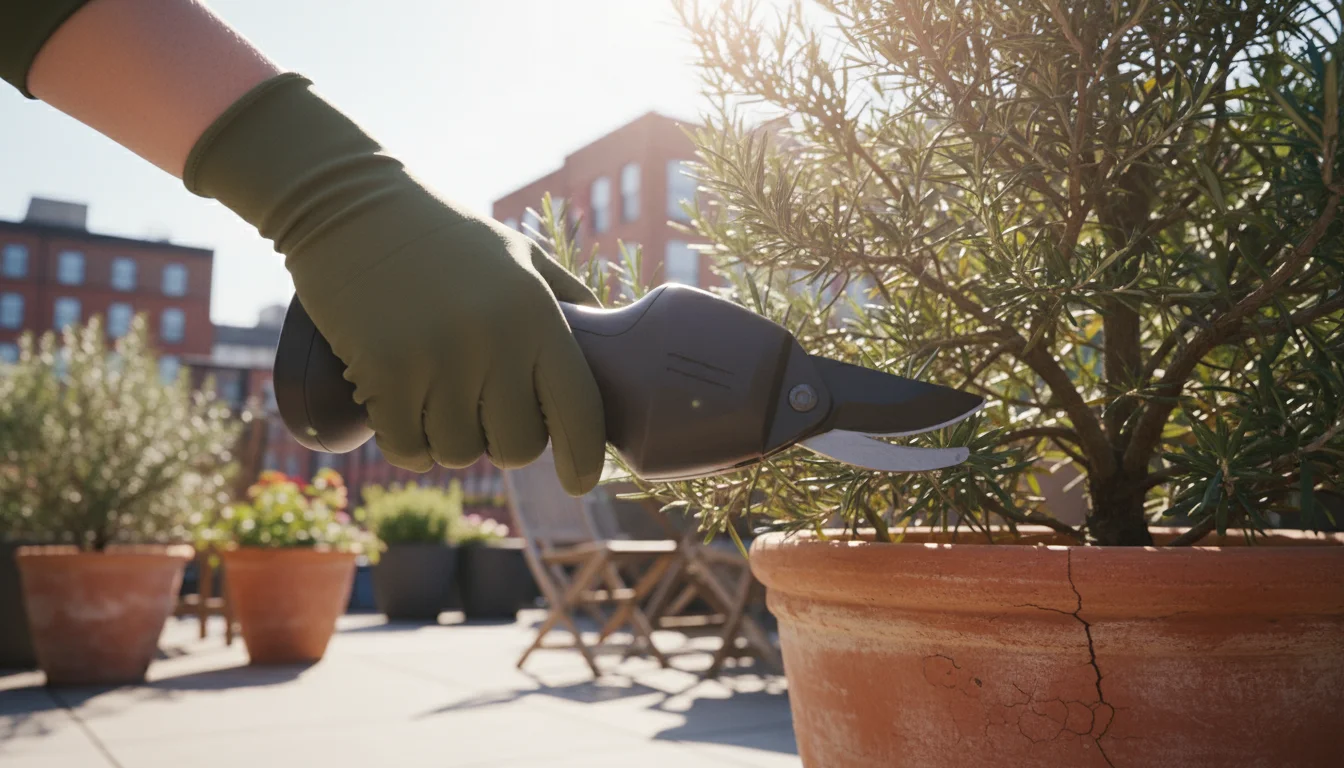
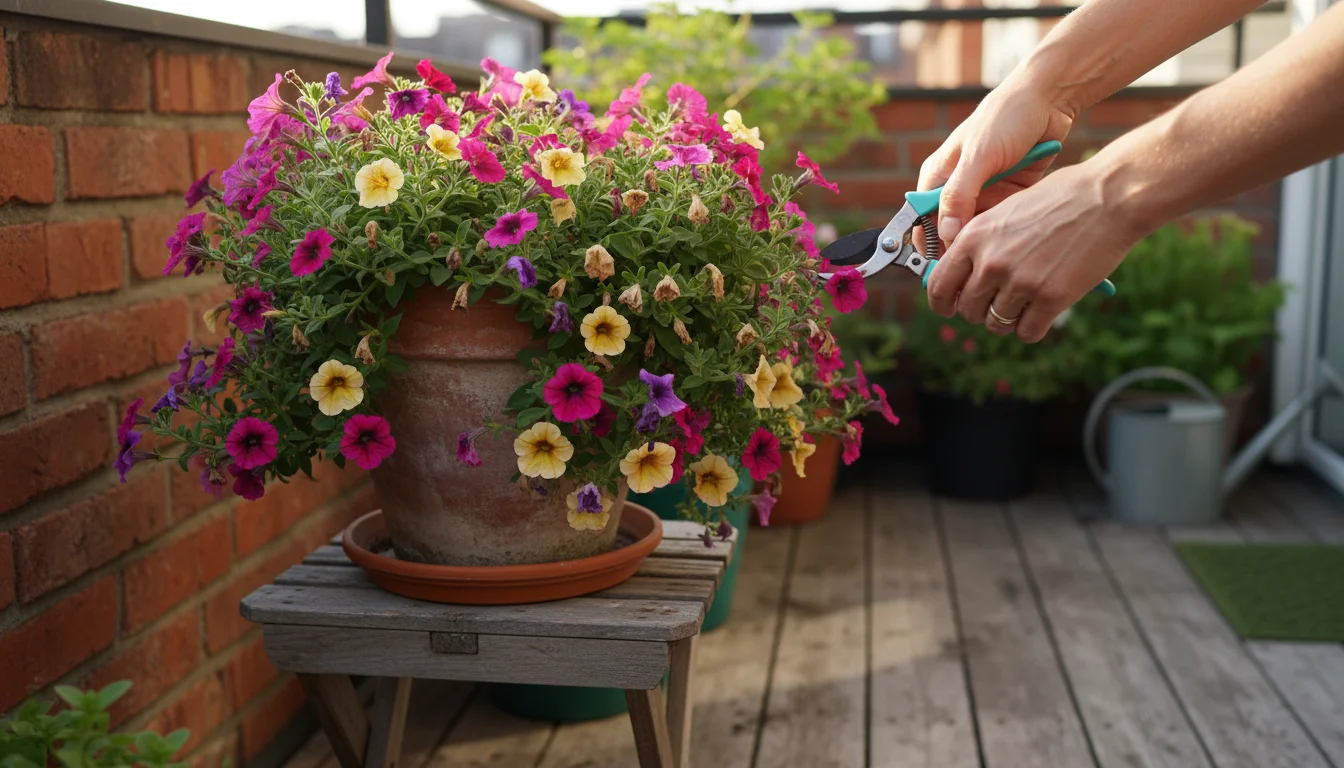
  • Pruning Shears or Scissors: To cut back dead or diseased plant material.
  • Garbage Bags or Compost Bin: For proper disposal of infested plant material and old potting soil.
  • Bucket or Large Tub: Useful for soaking smaller pots or mixing cleaning solutions.
  • Insecticidal Soap or Neem Oil (optional, for specific applications): If you plan to treat lingering pests on plants you’re overwintering indoors or in a sheltered space.
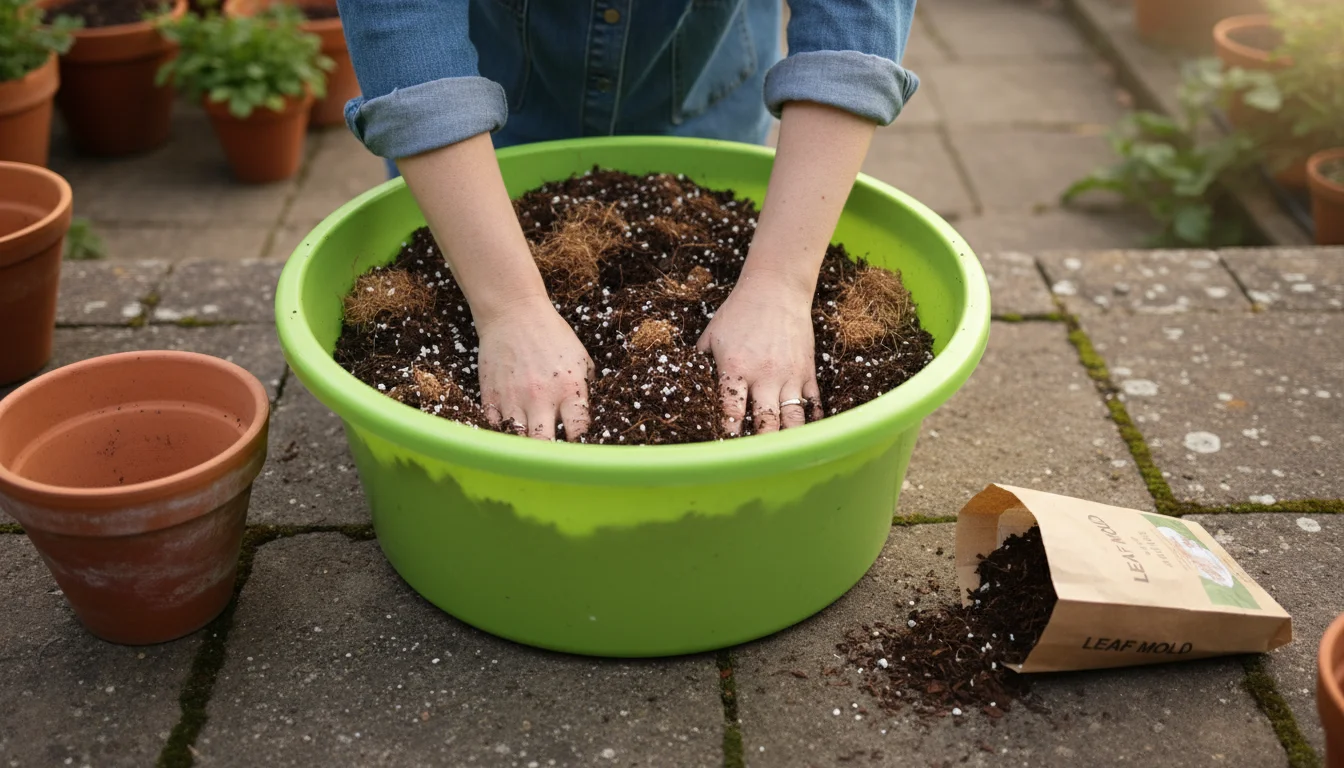
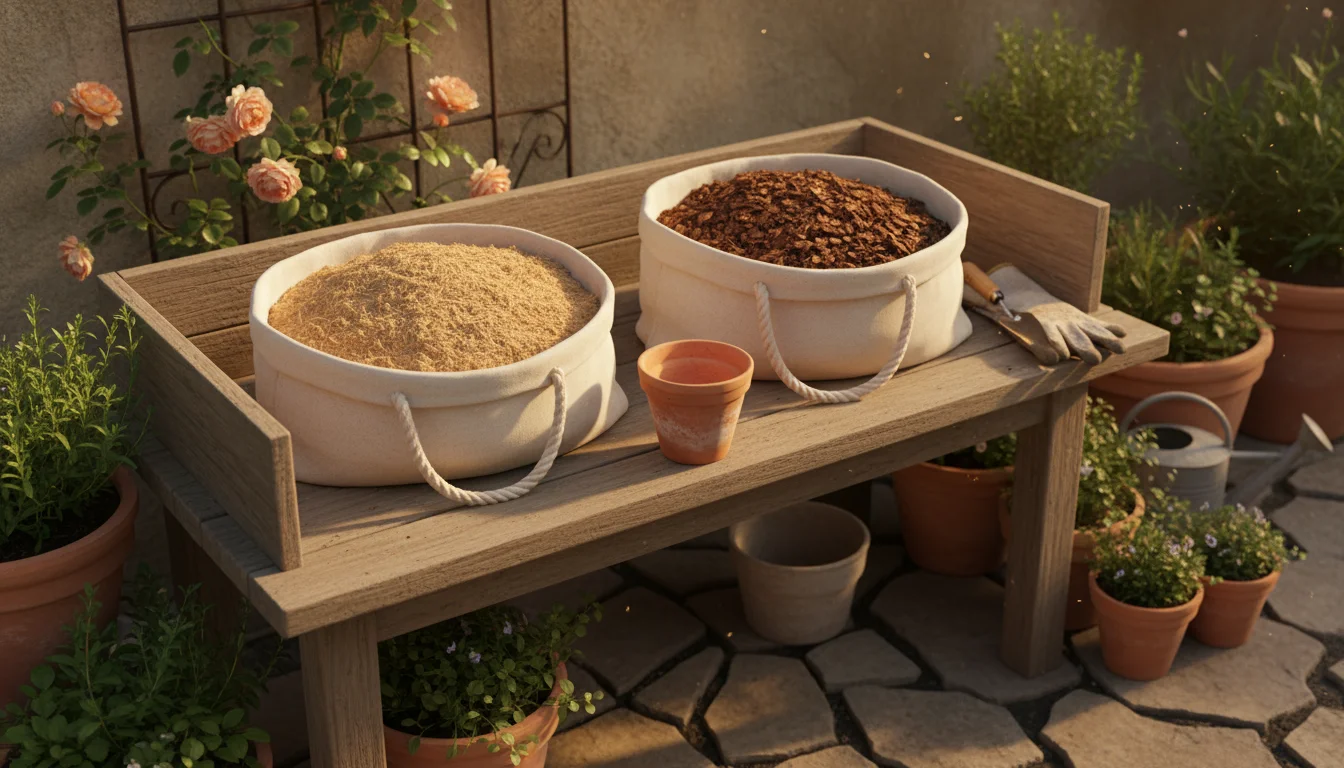
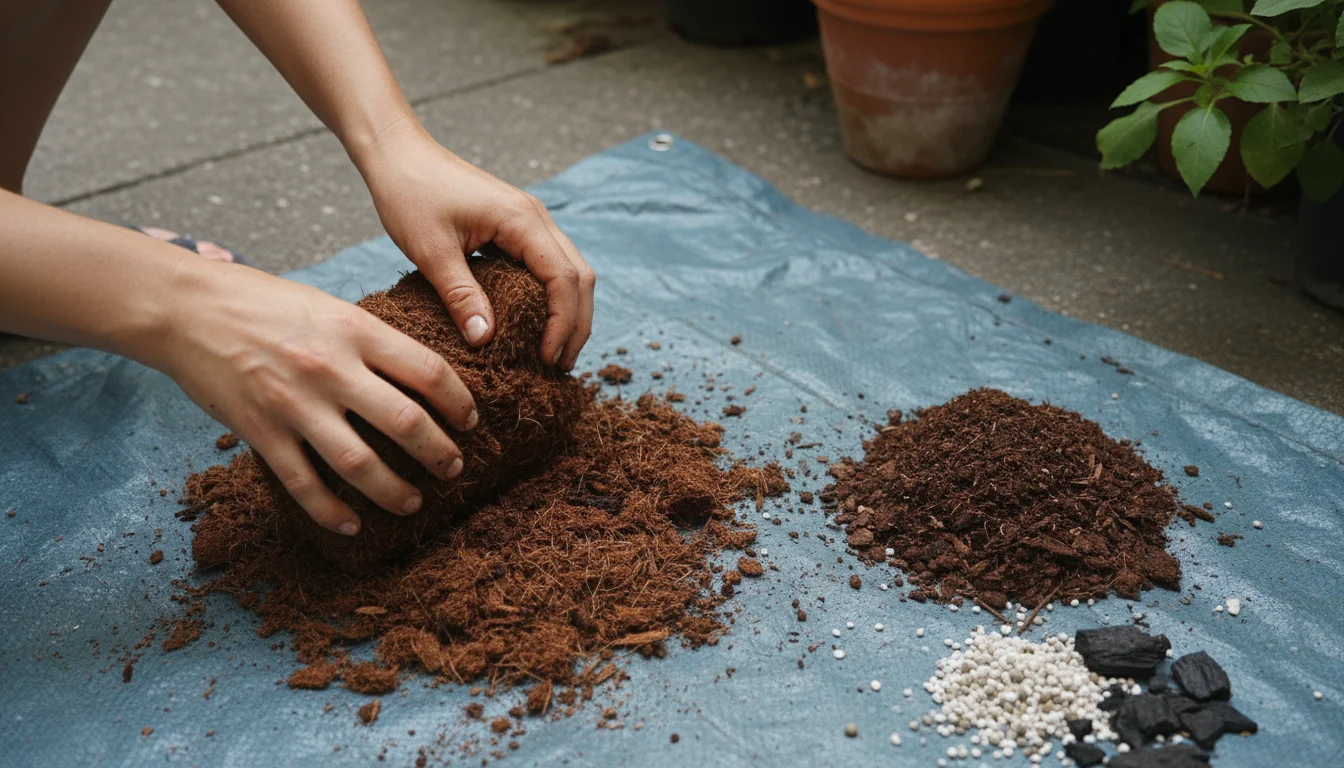
  • New Potting Mix: If you plan to refresh or replace old soil, having fresh, sterile mix on hand is beneficial.

By assembling this toolkit, you equip yourself for an effective fall pest control routine, preparing your container garden for a fresh, pest-free start next spring.

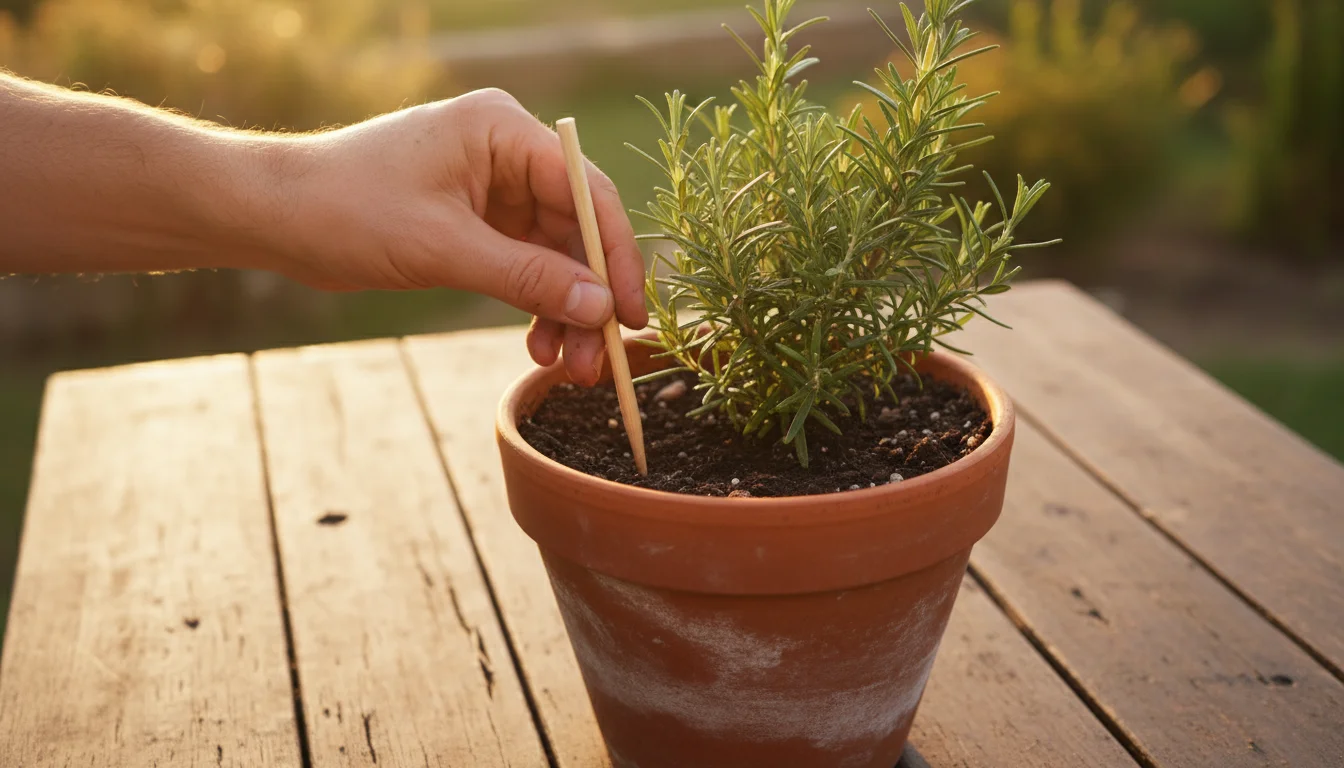
Step-by-Step: Preparing Your Pots and Plants for Winter

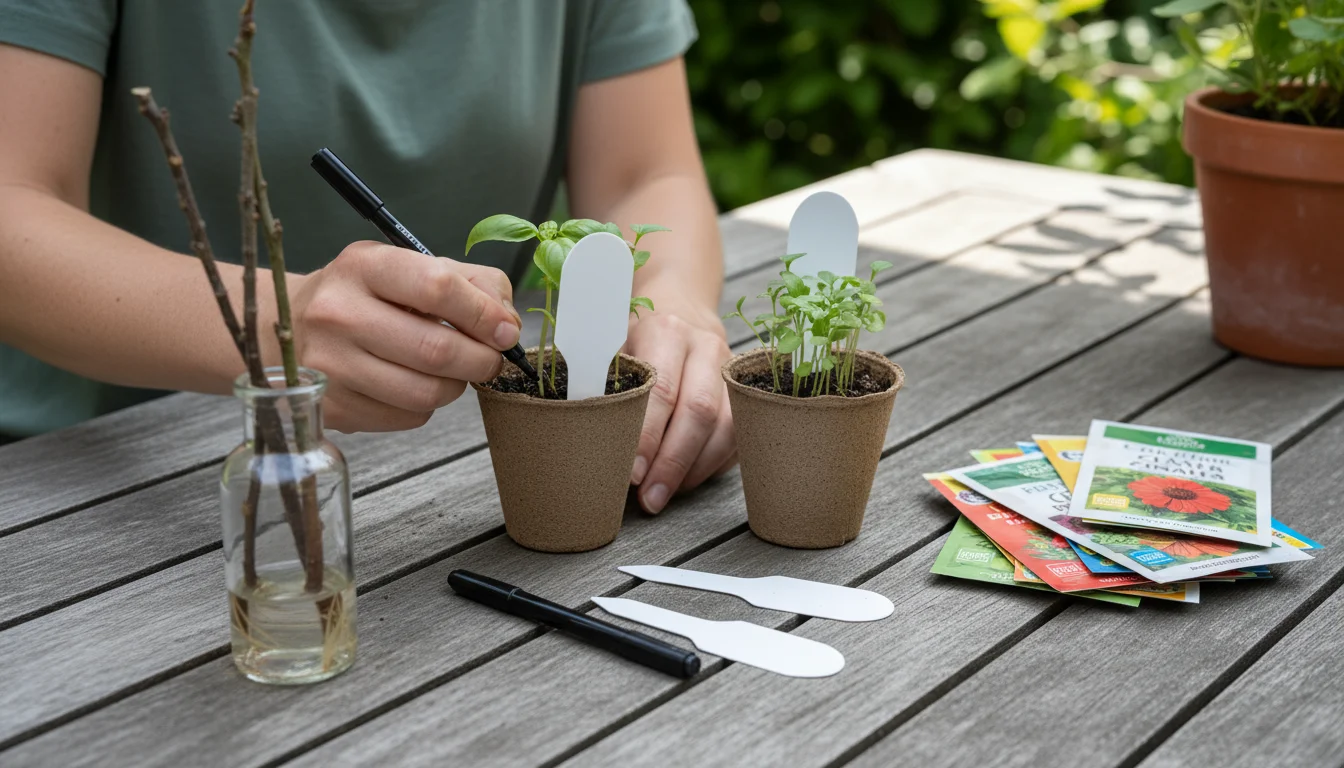
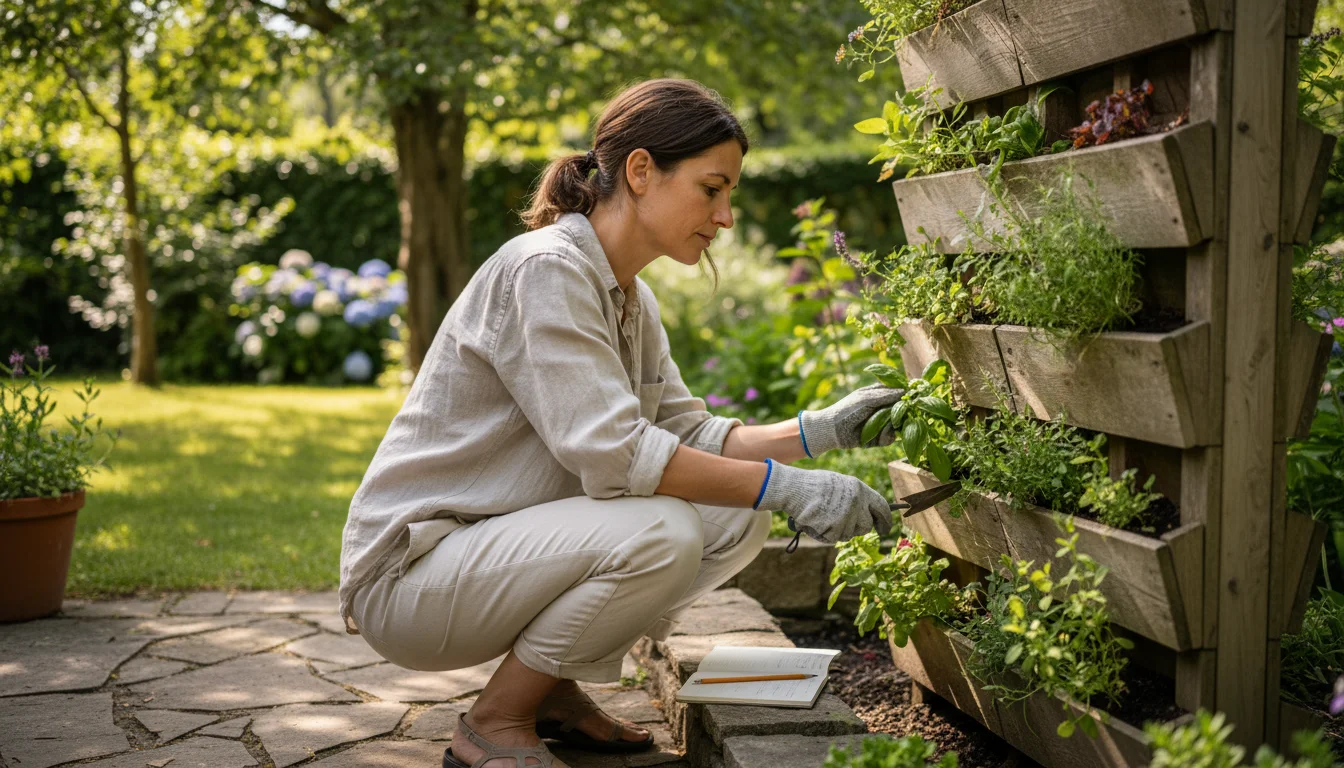
Preparing your container garden for winter is a multi-step process that focuses on cleaning, inspecting, and, if necessary, treating your plants and pots. Follow these steps to ensure a thorough fall pest control effort.

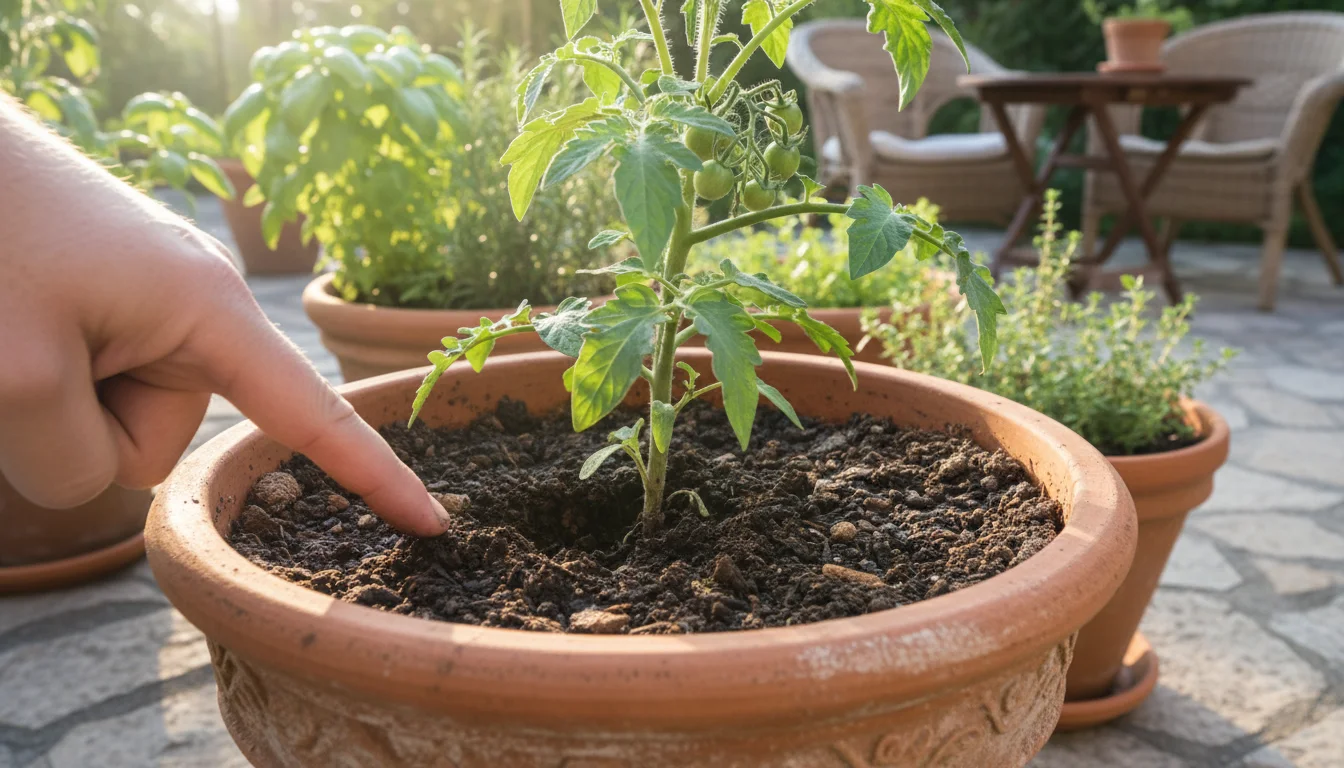
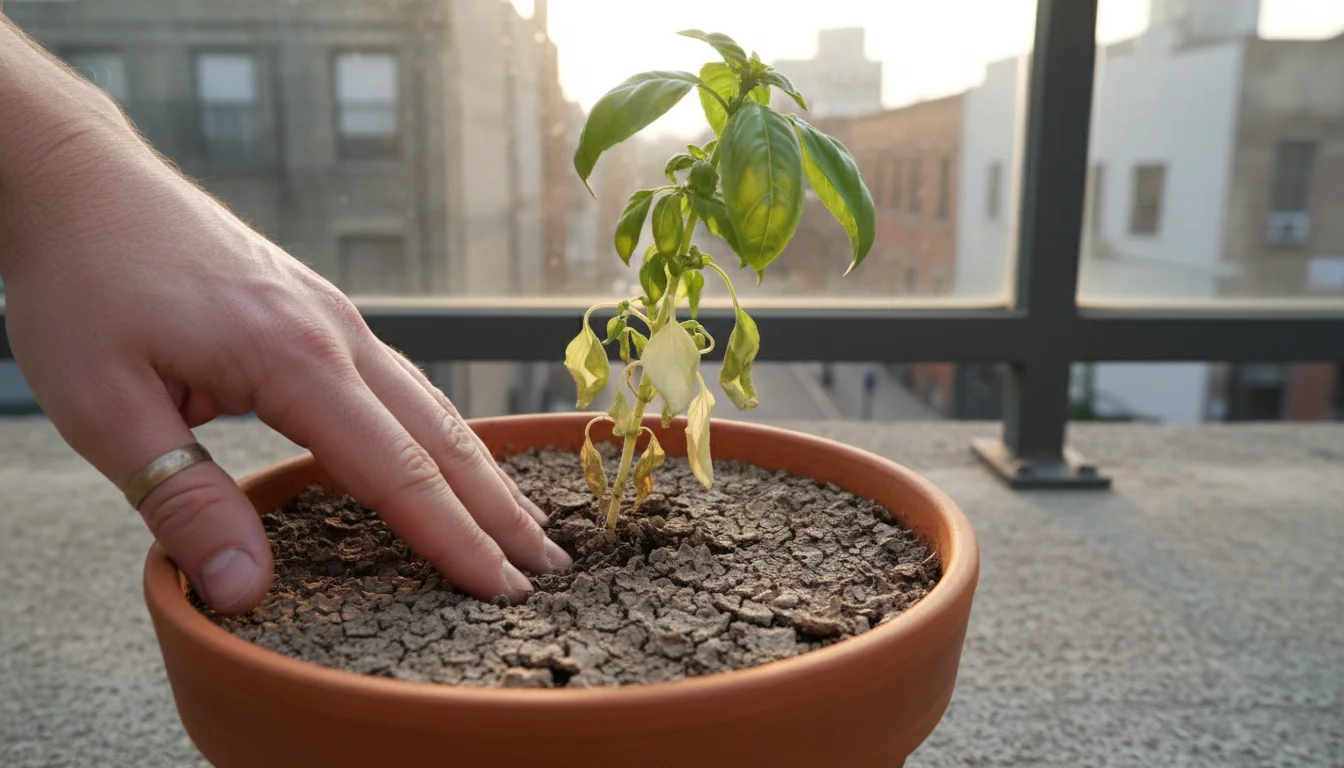
  1. Remove Plant Debris: Begin by clearing away all dead or dying plant material from your pots and around your gardening area. This includes fallen leaves, spent flowers, and any weeds. These materials provide excellent hiding places for pests and their eggs. Dispose of infested debris in sealed garbage bags, not your compost pile, to prevent the spread of pests.
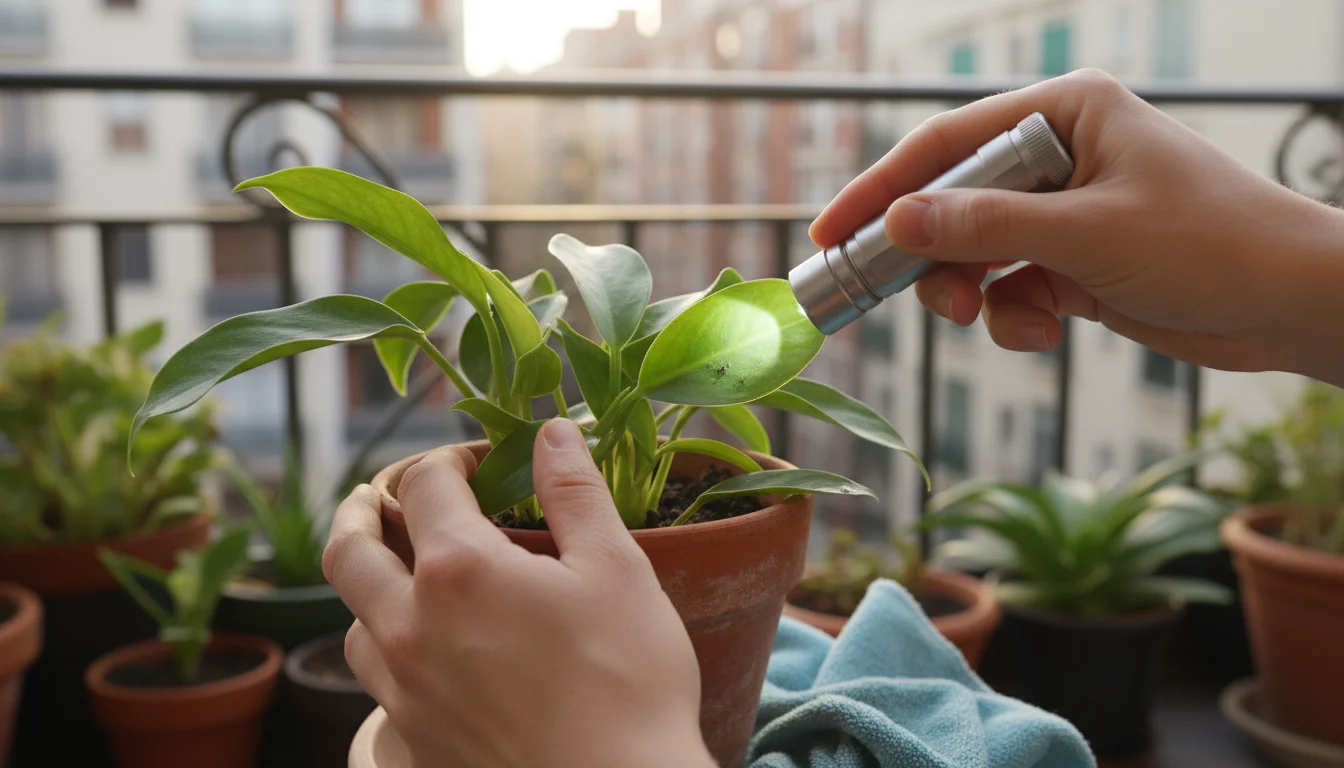
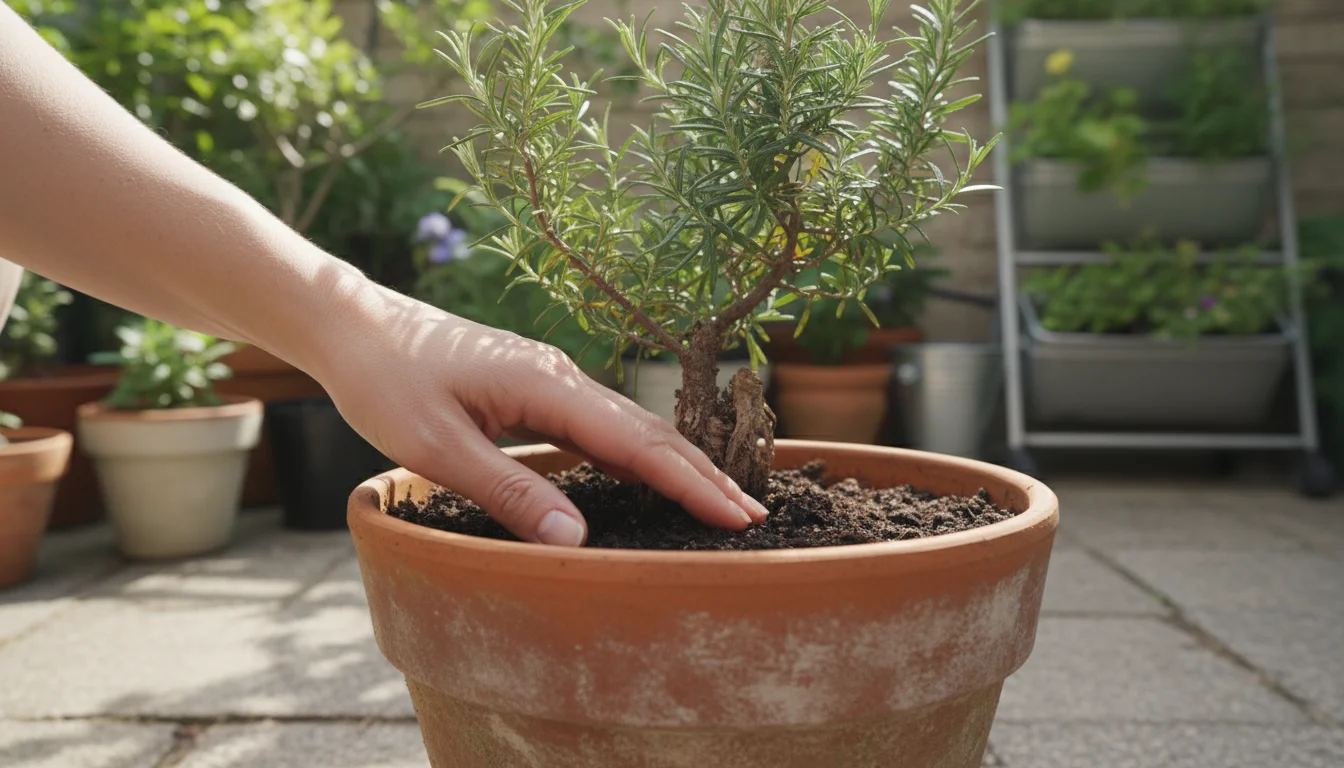
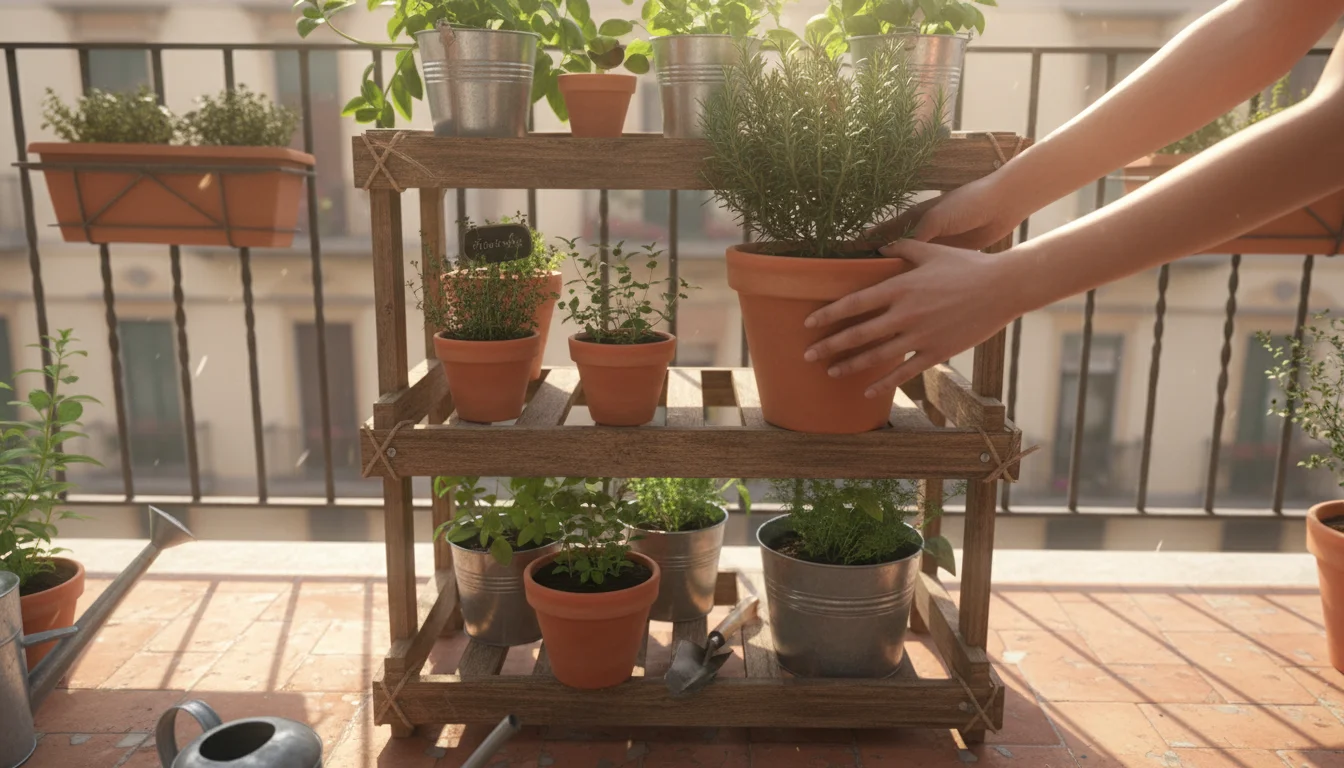
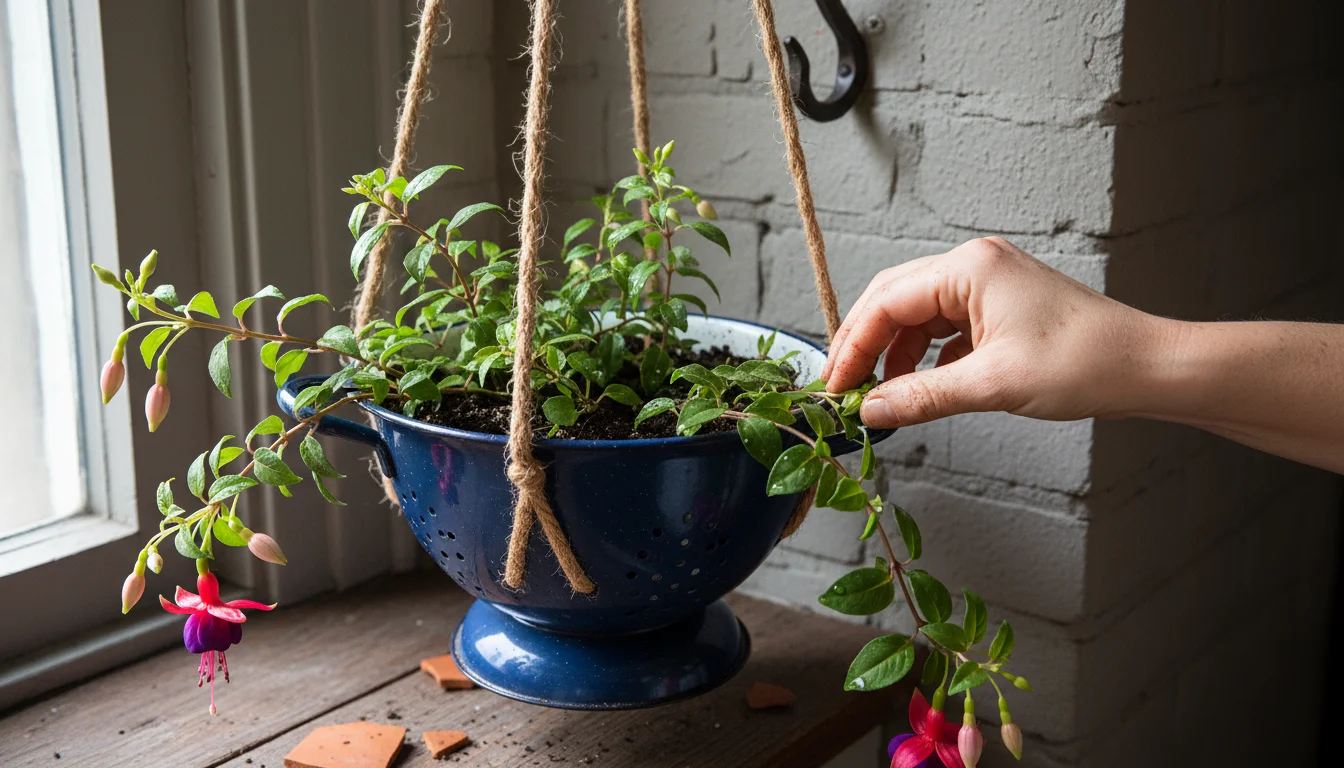
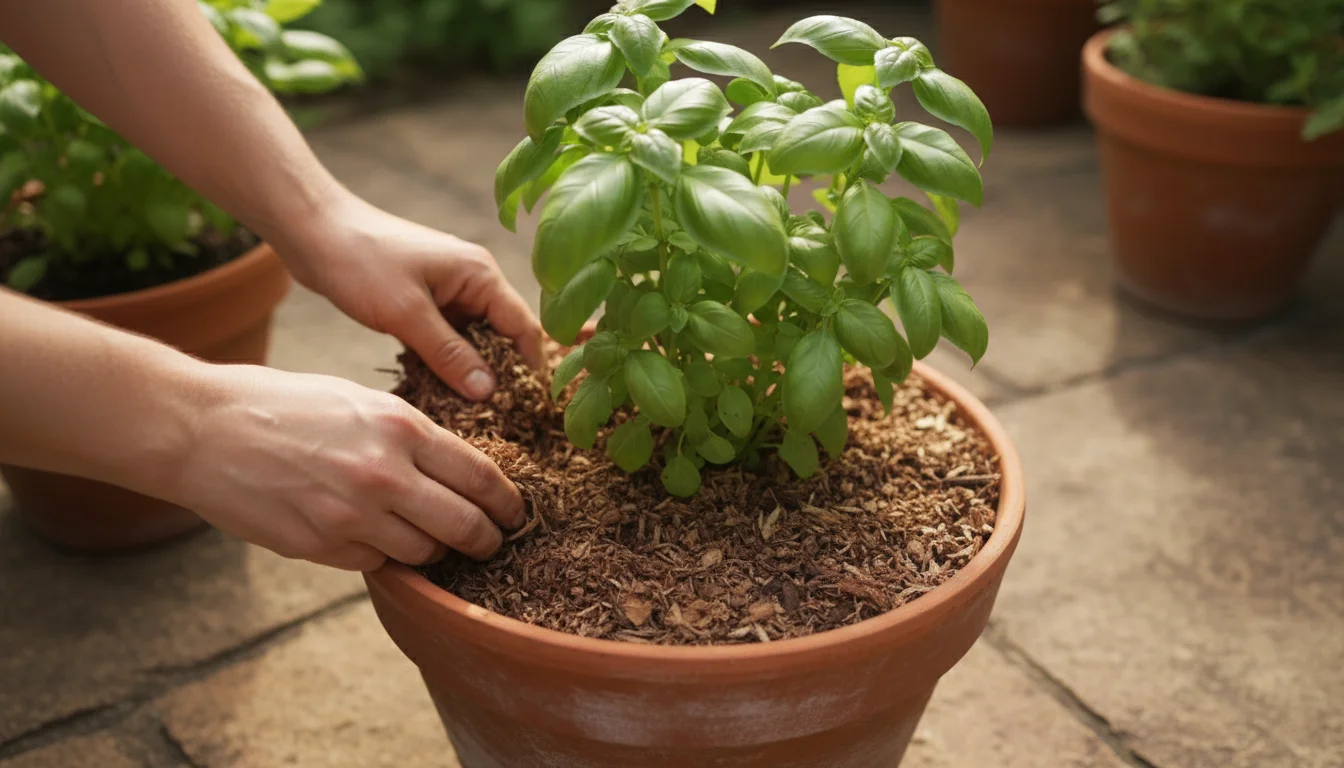
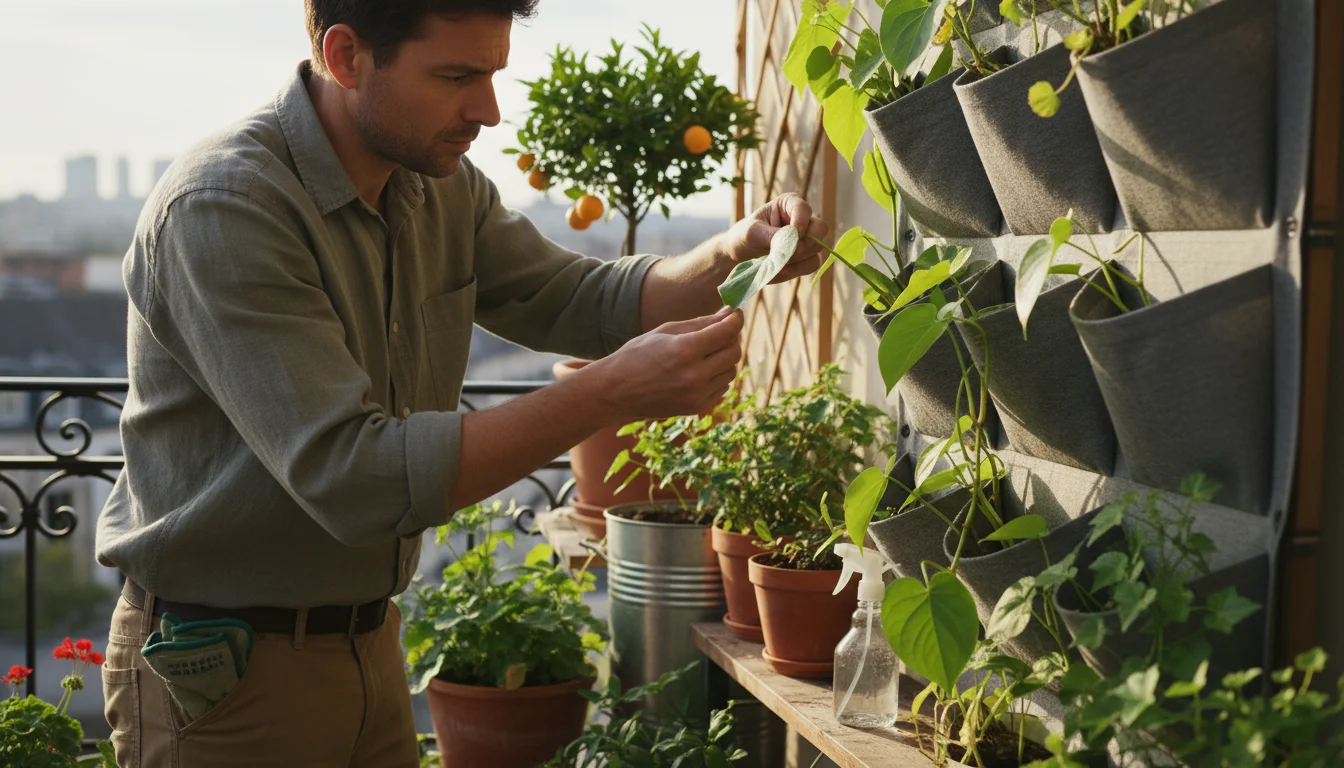
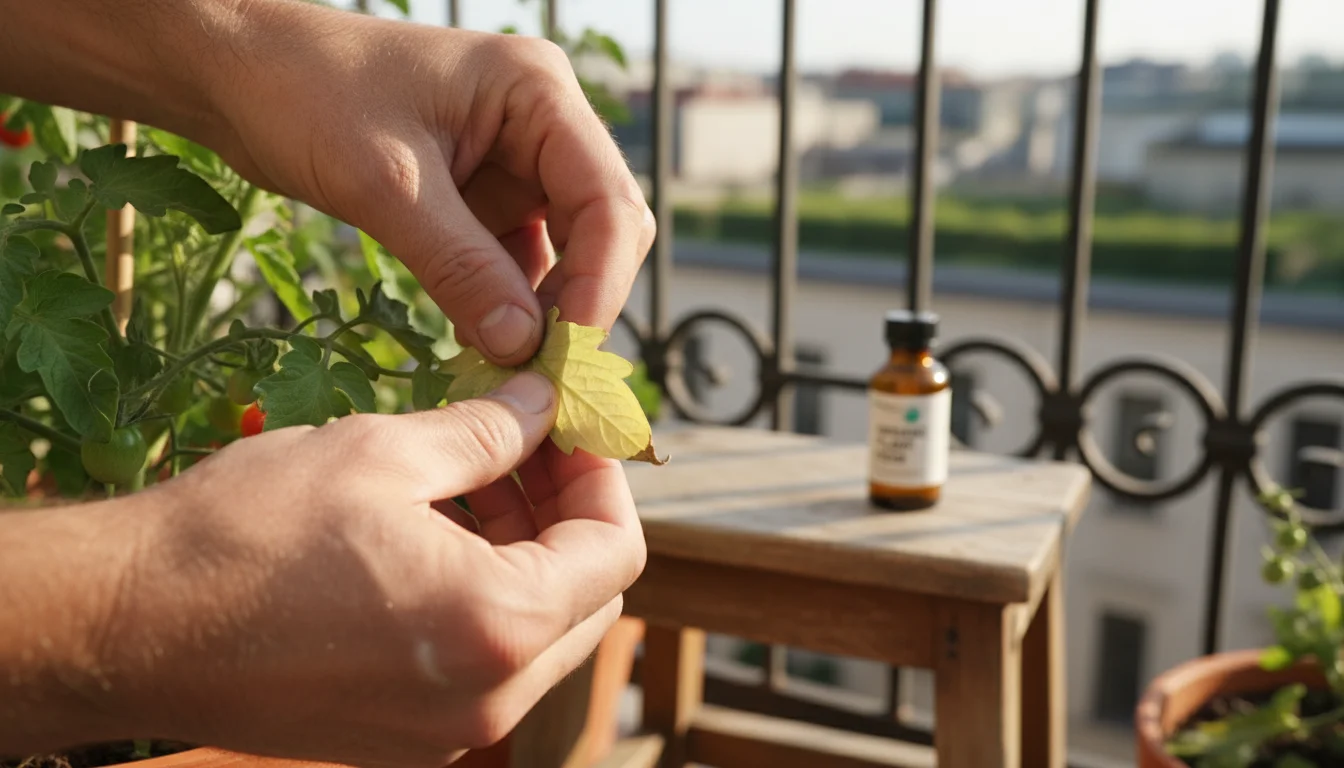
  2. Inspect Your Plants Thoroughly: For any plants you plan to overwinter indoors or in a sheltered spot, a meticulous inspection is non-negotiable. Look closely at the undersides of leaves, along stems, and even in the crooks of branches. Use a magnifying glass if needed. Search for signs of pests:
    • Aphids: Tiny, pear-shaped insects, often green, black, or red, clustered on new growth or undersides of leaves. Look for their sticky honeydew or white exoskeletons.
    • Spider Mites: Very tiny dots, sometimes red or brown, often accompanied by fine webbing on leaves and stems.
    • Scale Insects: Small, immobile bumps, brown or white, on stems or leaves.
    • Mealybugs: White, cottony masses found in leaf axils or on stems.

    If you find signs of pests, treat them before bringing the plant indoors. A strong spray of water can dislodge many pests. For more persistent issues, an application of insecticidal soap or neem oil can be effective. Always follow product instructions carefully.

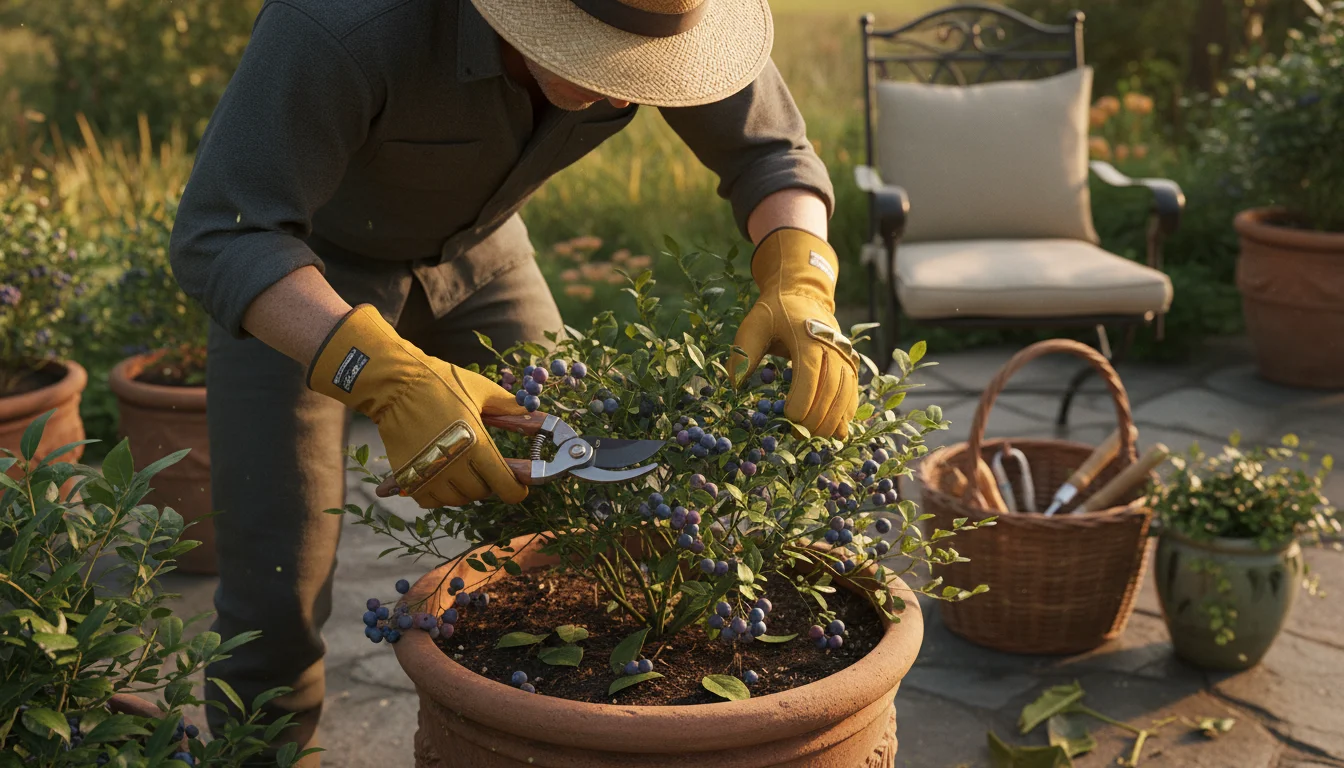
  3. Prune Back as Needed: Trim back any leggy, diseased, or pest-ridden parts of plants you intend to keep. This not only makes the plant more manageable for winter but also removes potential hiding spots for pests. Make clean cuts with sharp, sterile shears.
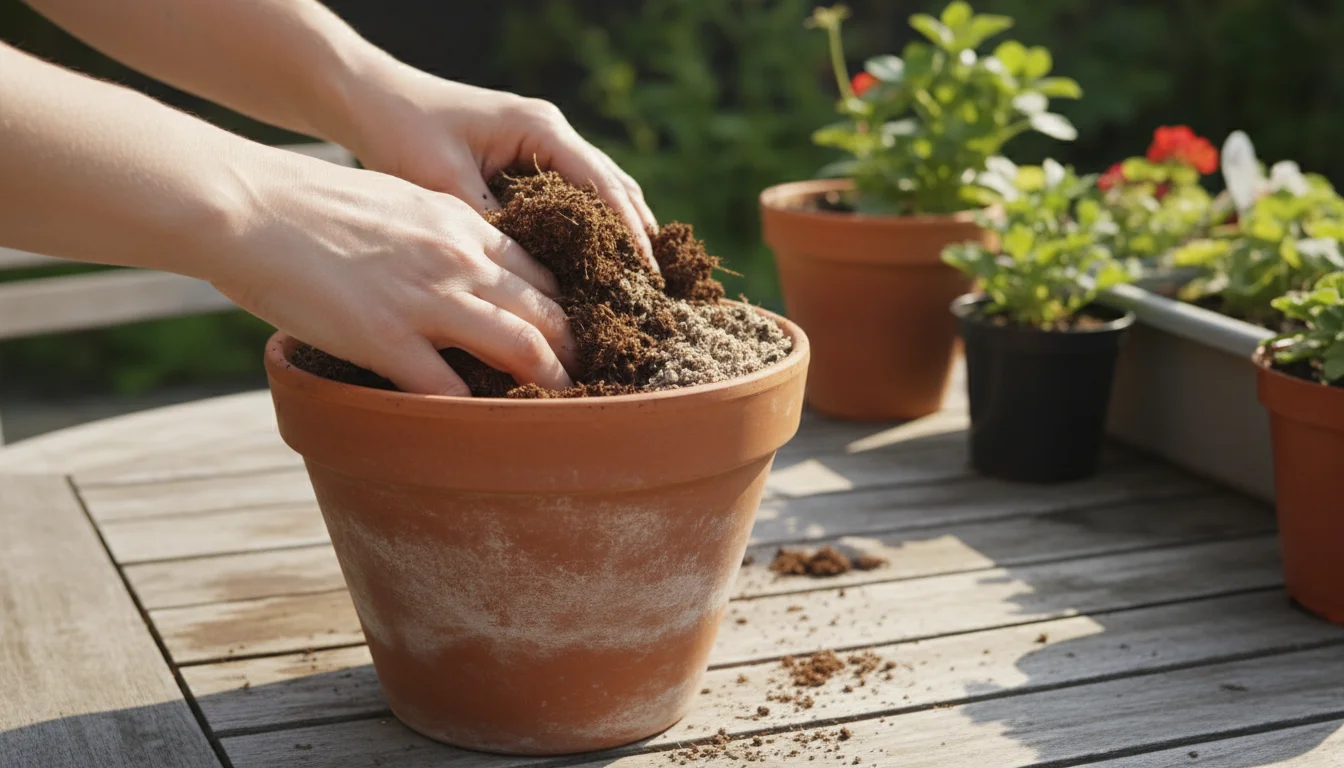
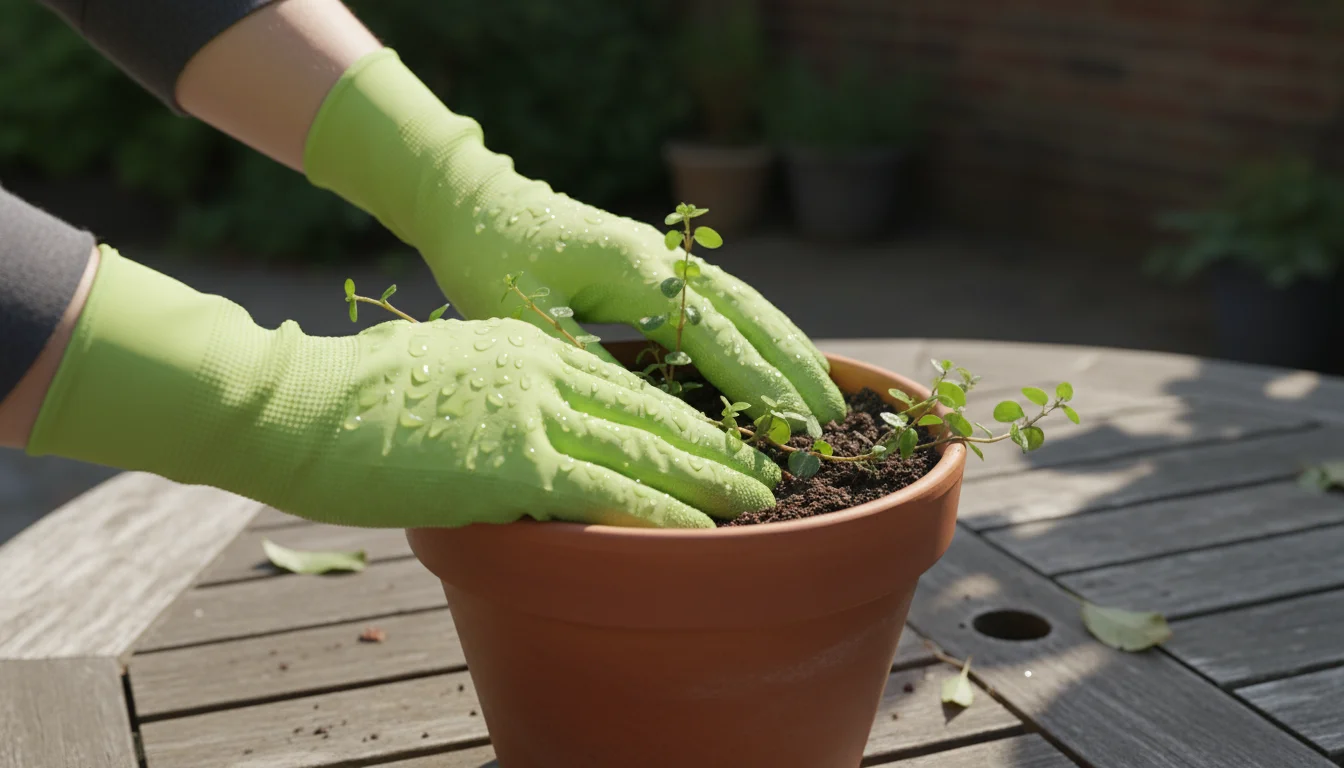
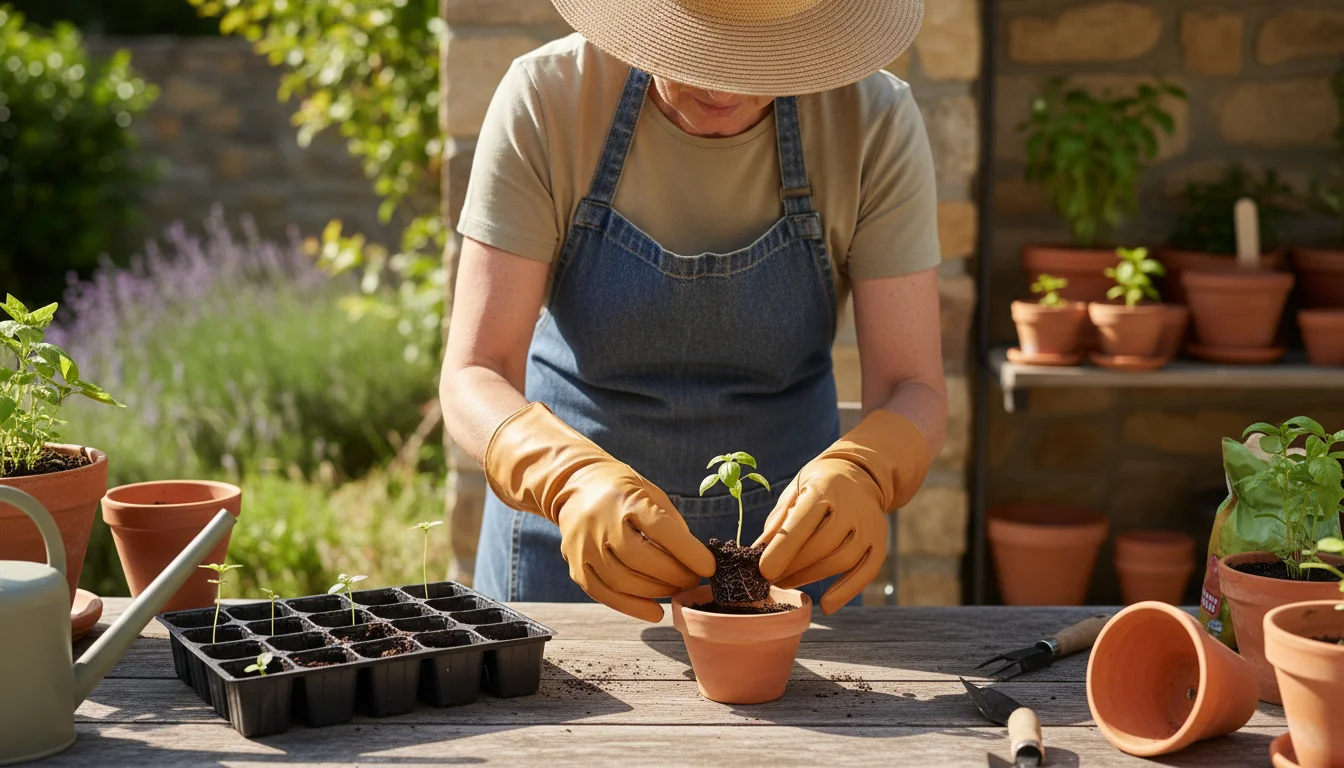
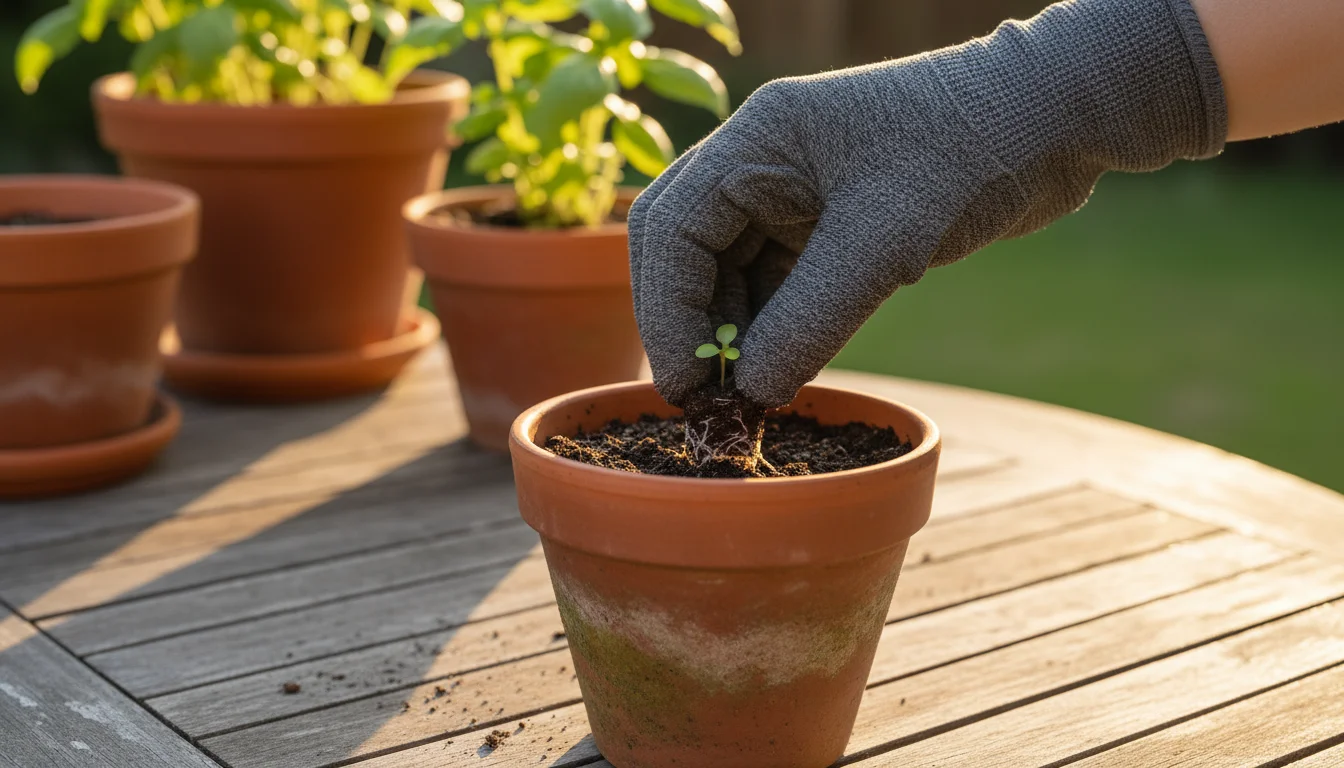
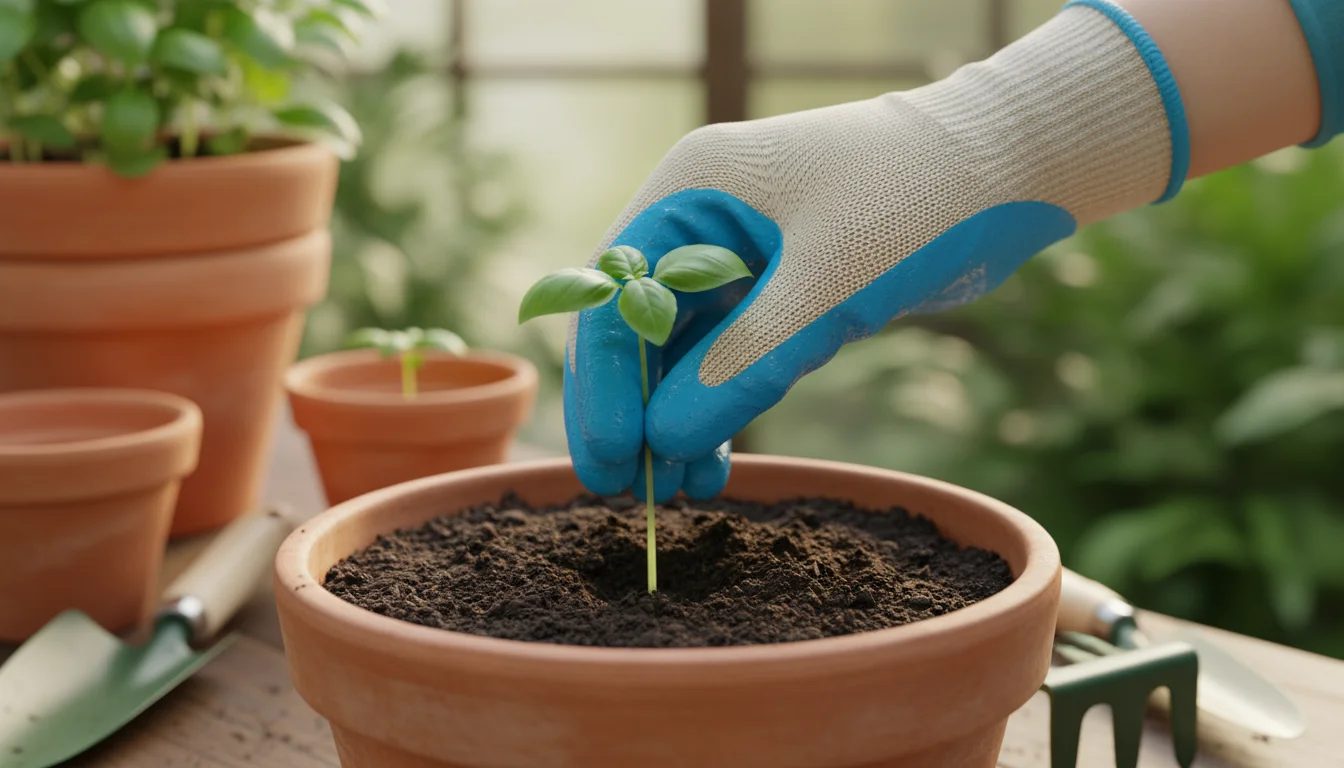
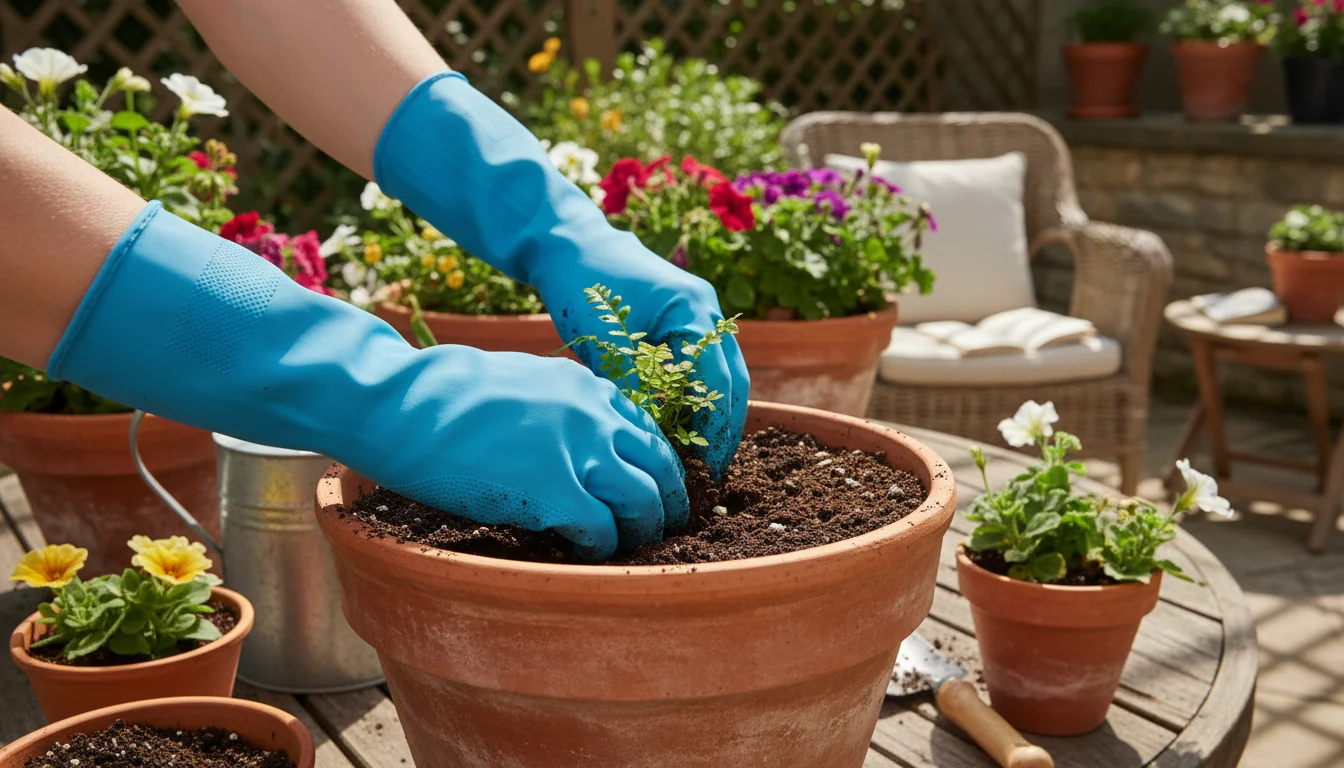
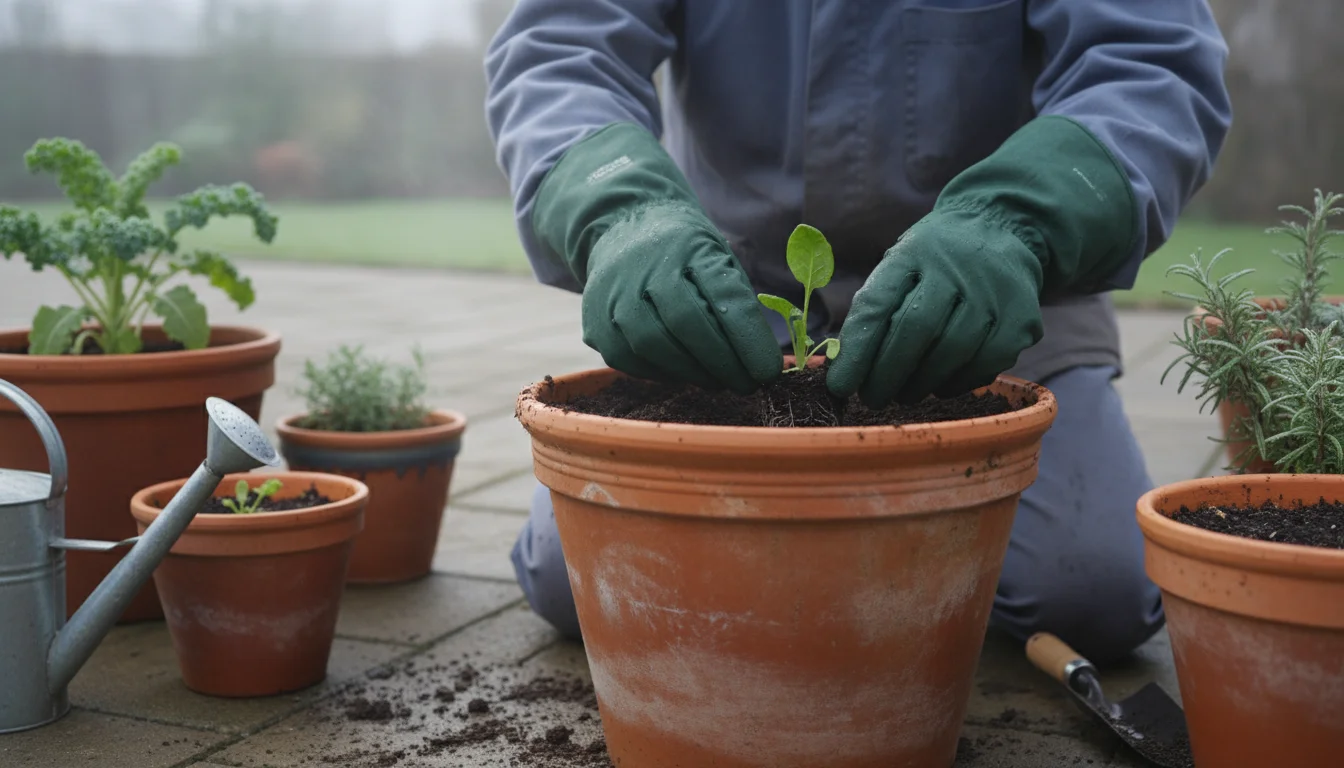
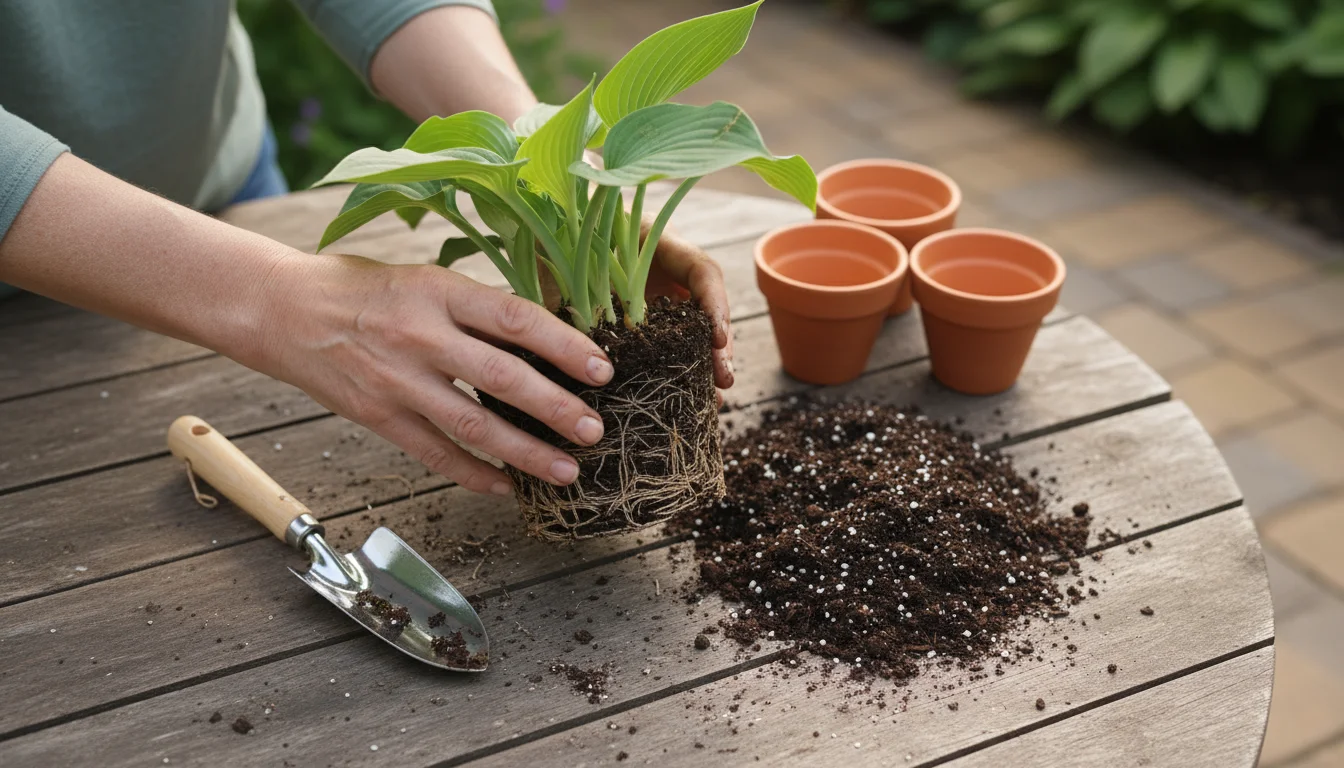
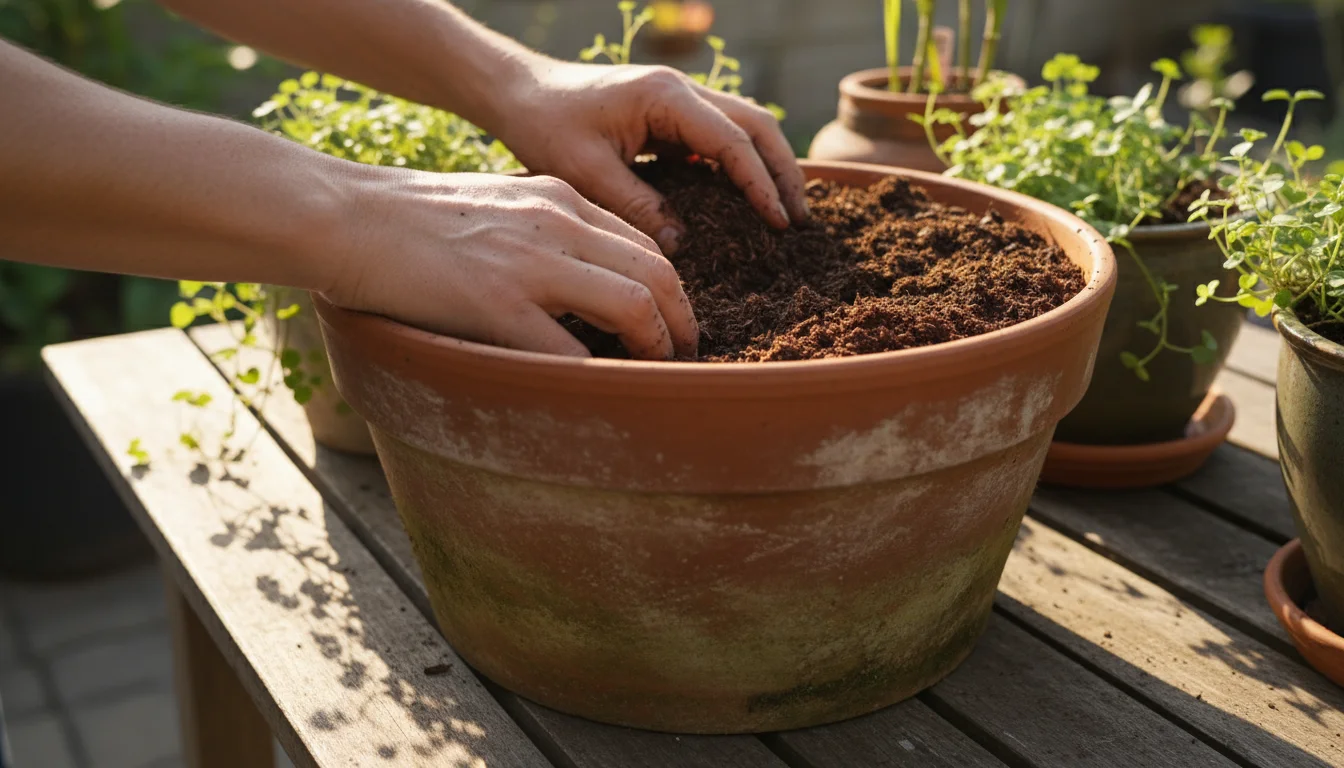
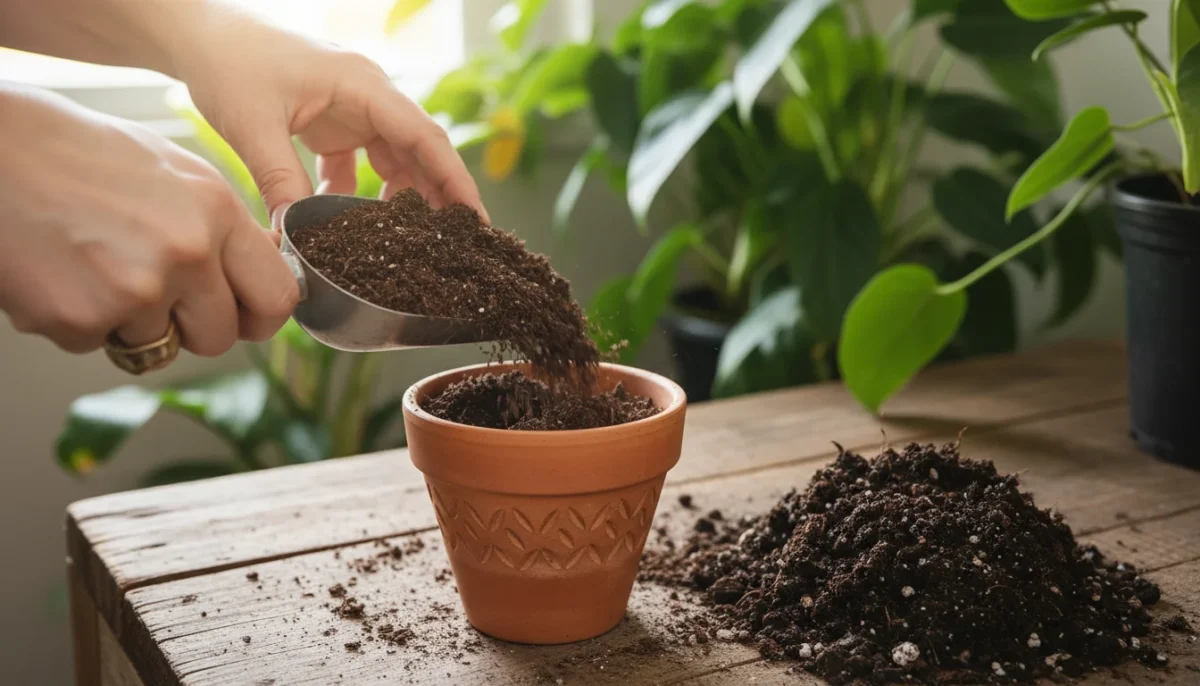
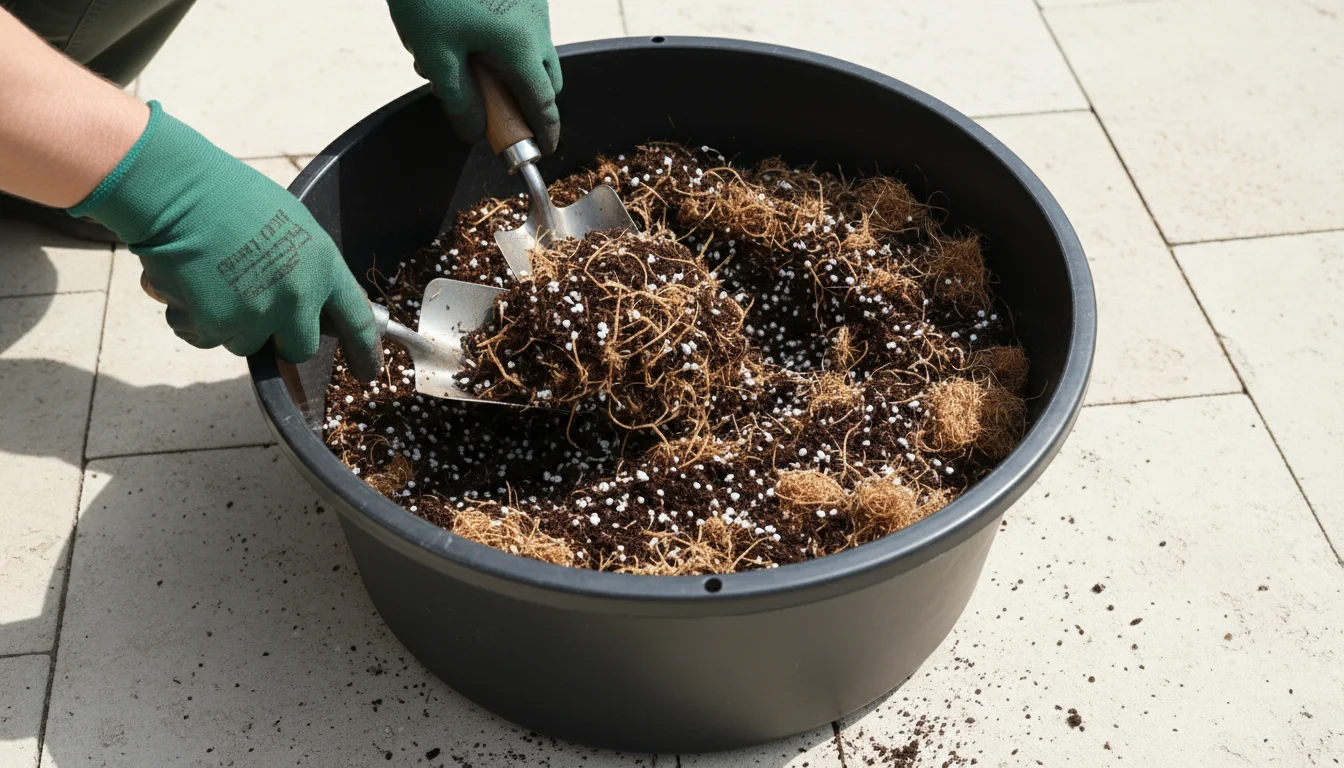
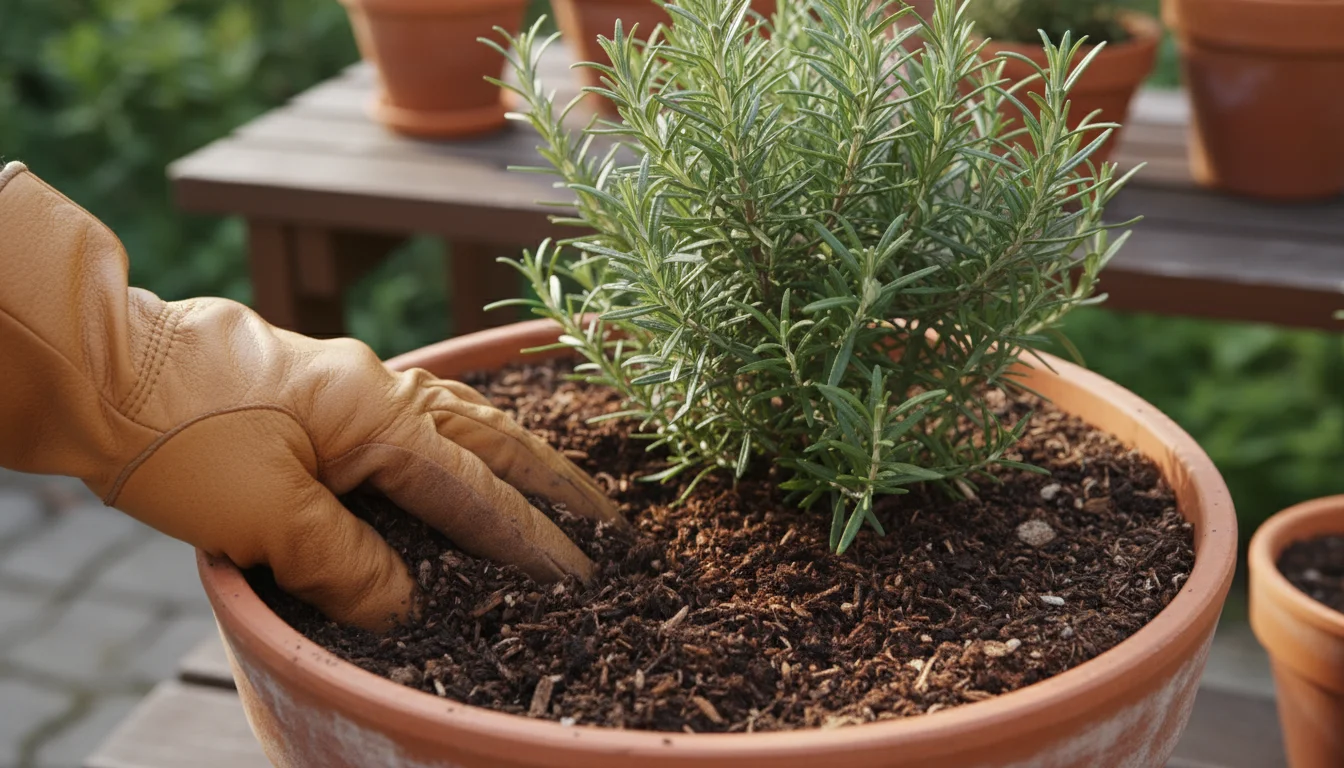
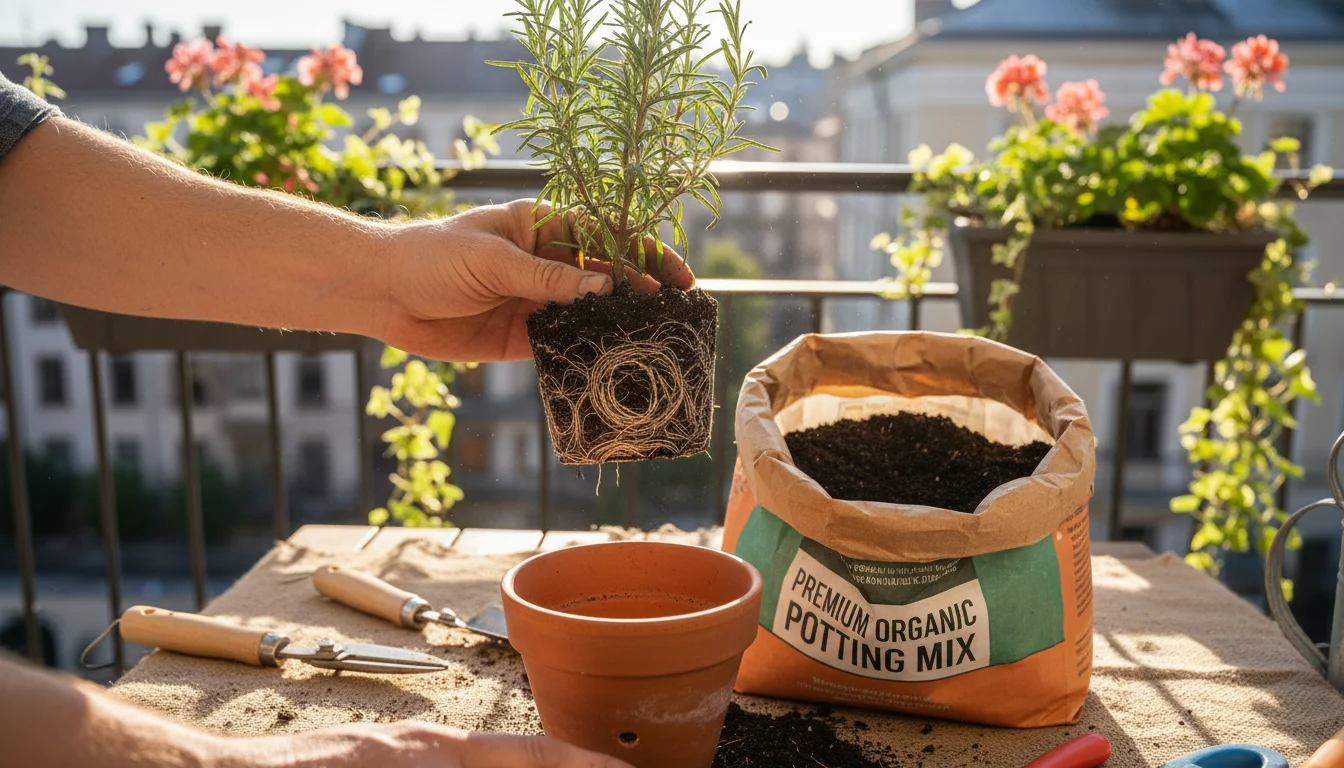
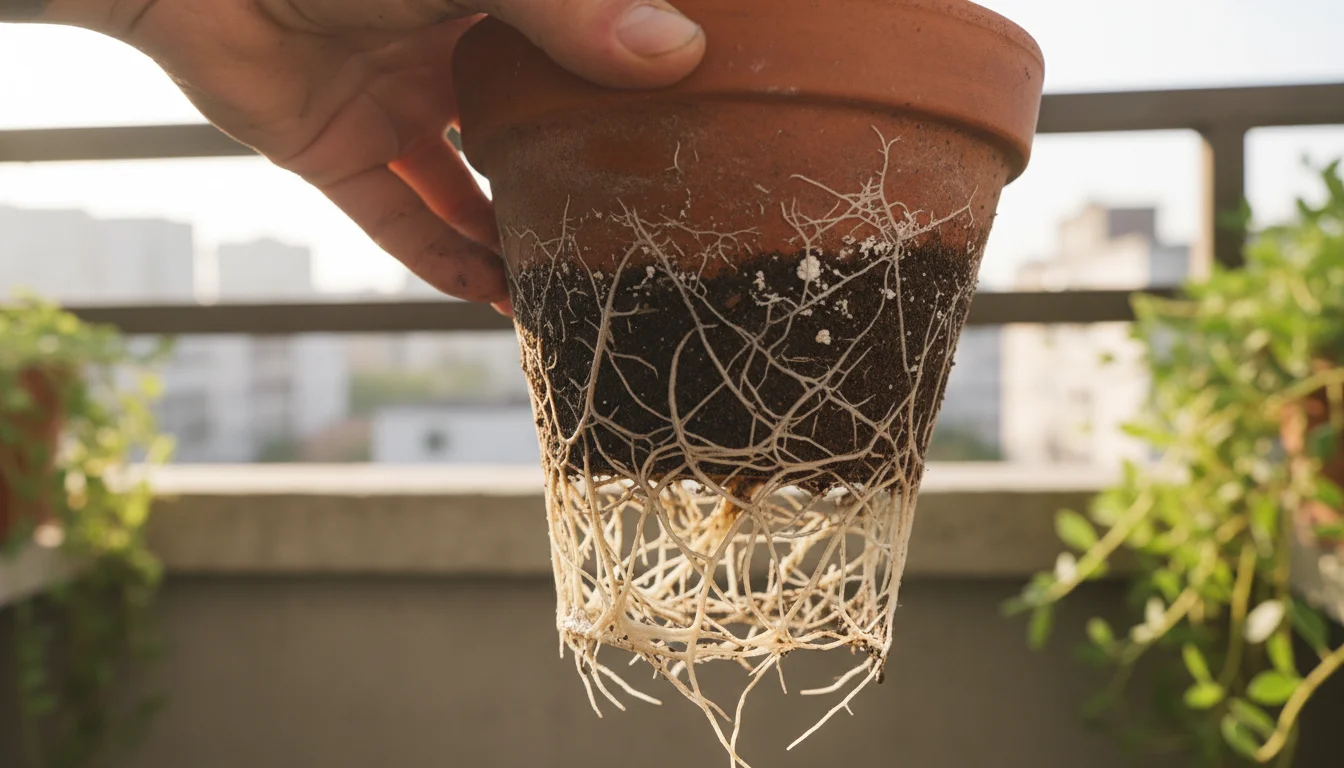
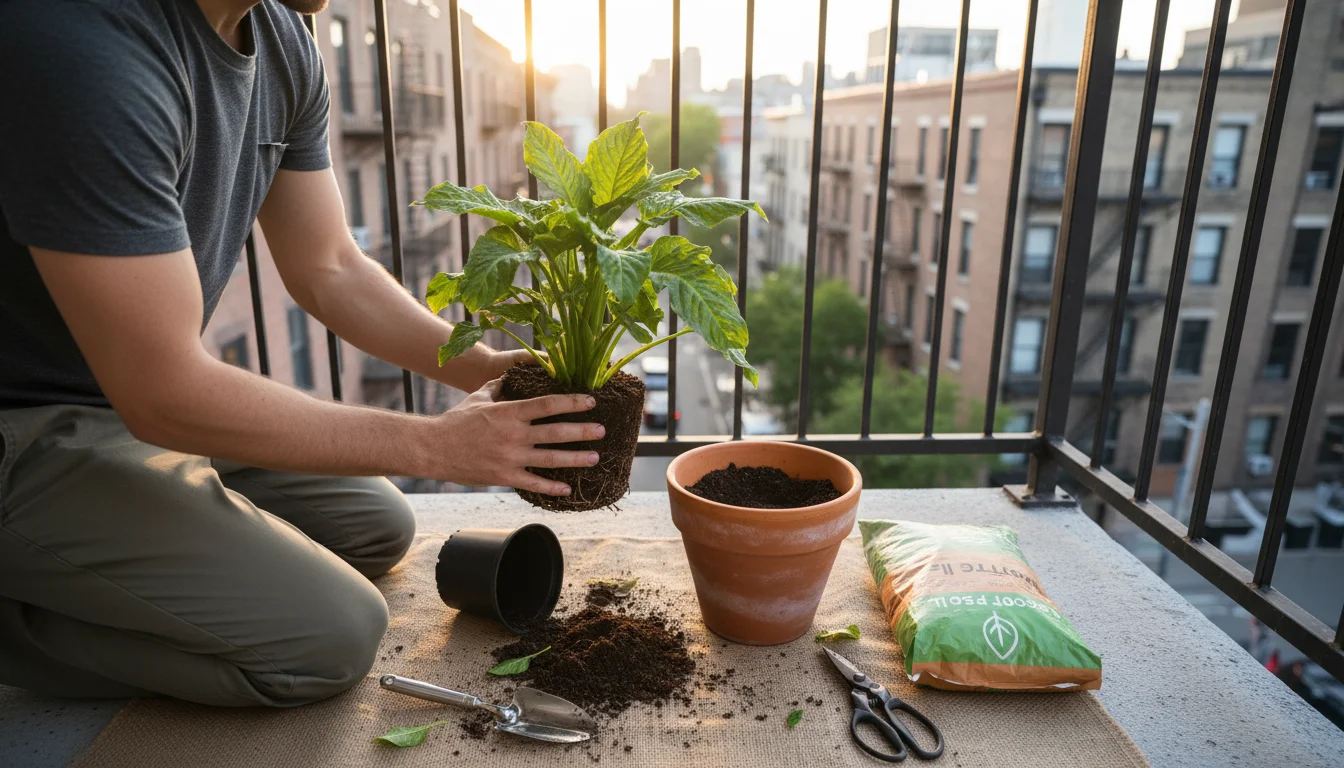
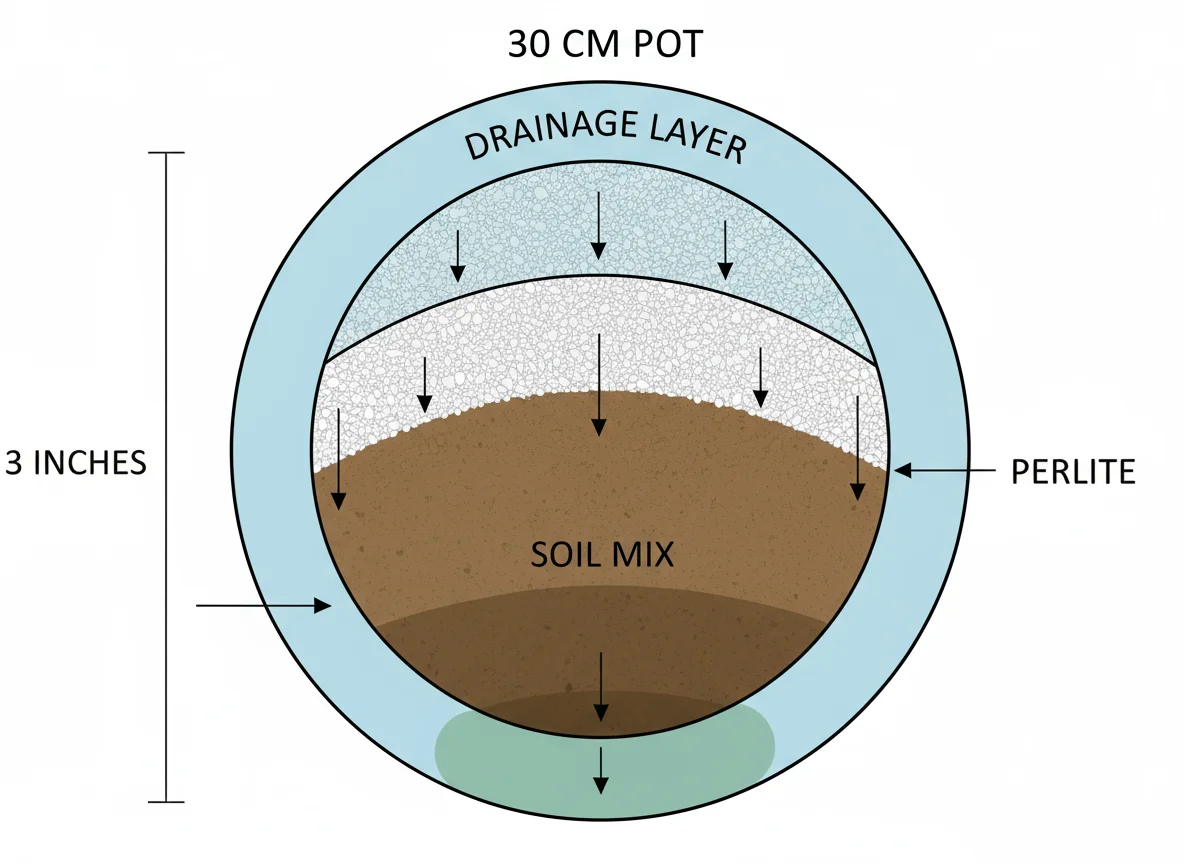
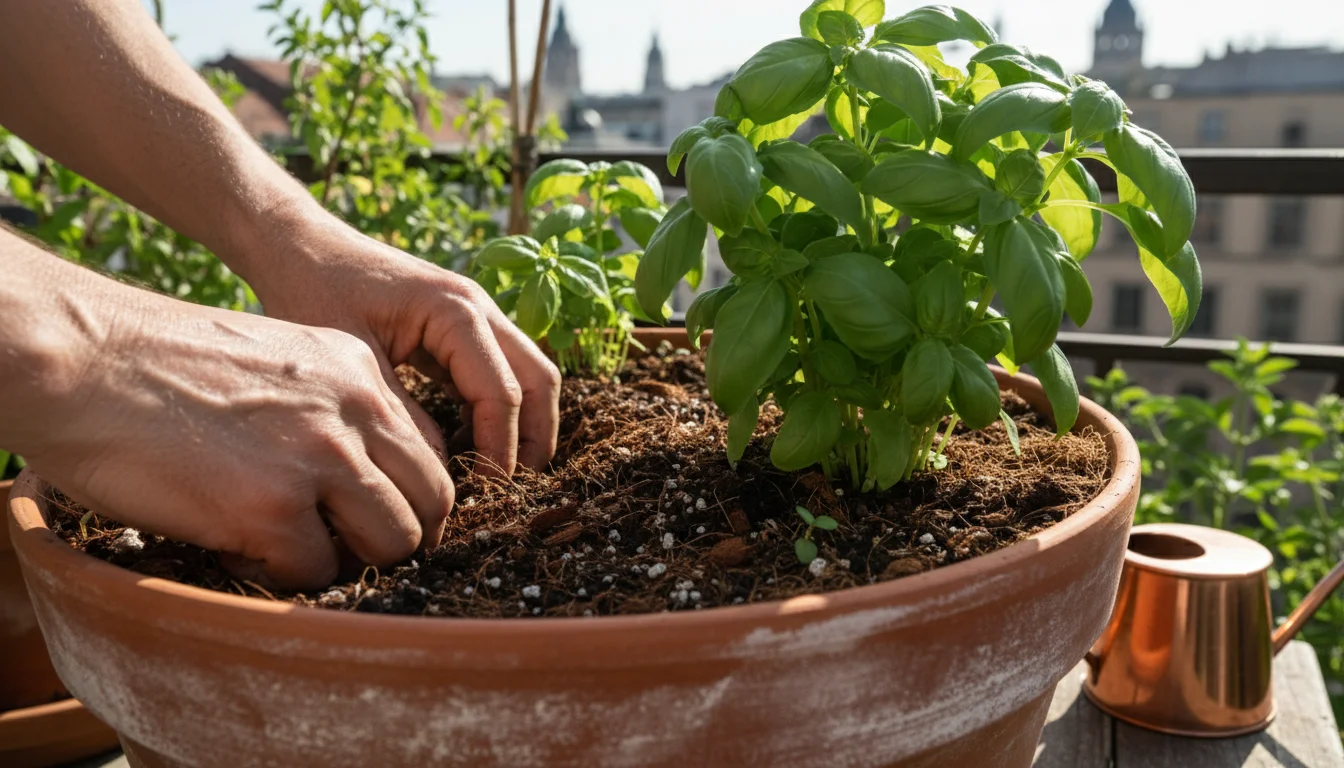
  4. Consider Soil Replacement: This is one of the most effective methods for how to get rid of bugs in potting soil before winter. Old potting mix often harbors pest eggs, larvae, and even fungal spores. If a plant has struggled with pests or diseases throughout the season, it’s best to remove as much of the old soil as possible, gently teasing it away from the roots. Replace it with fresh, sterile potting mix when repotting for winter. This dramatically reduces the chances of overwintering pests emerging in spring.
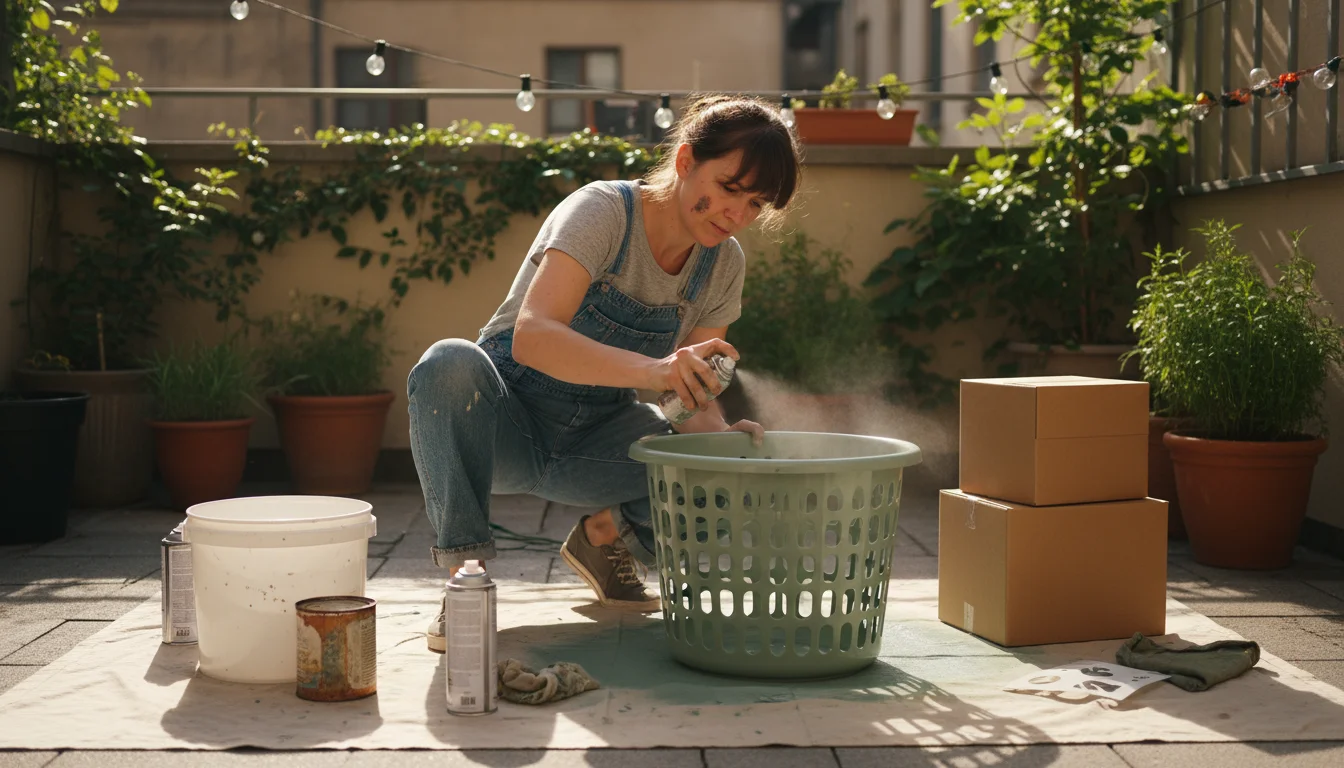
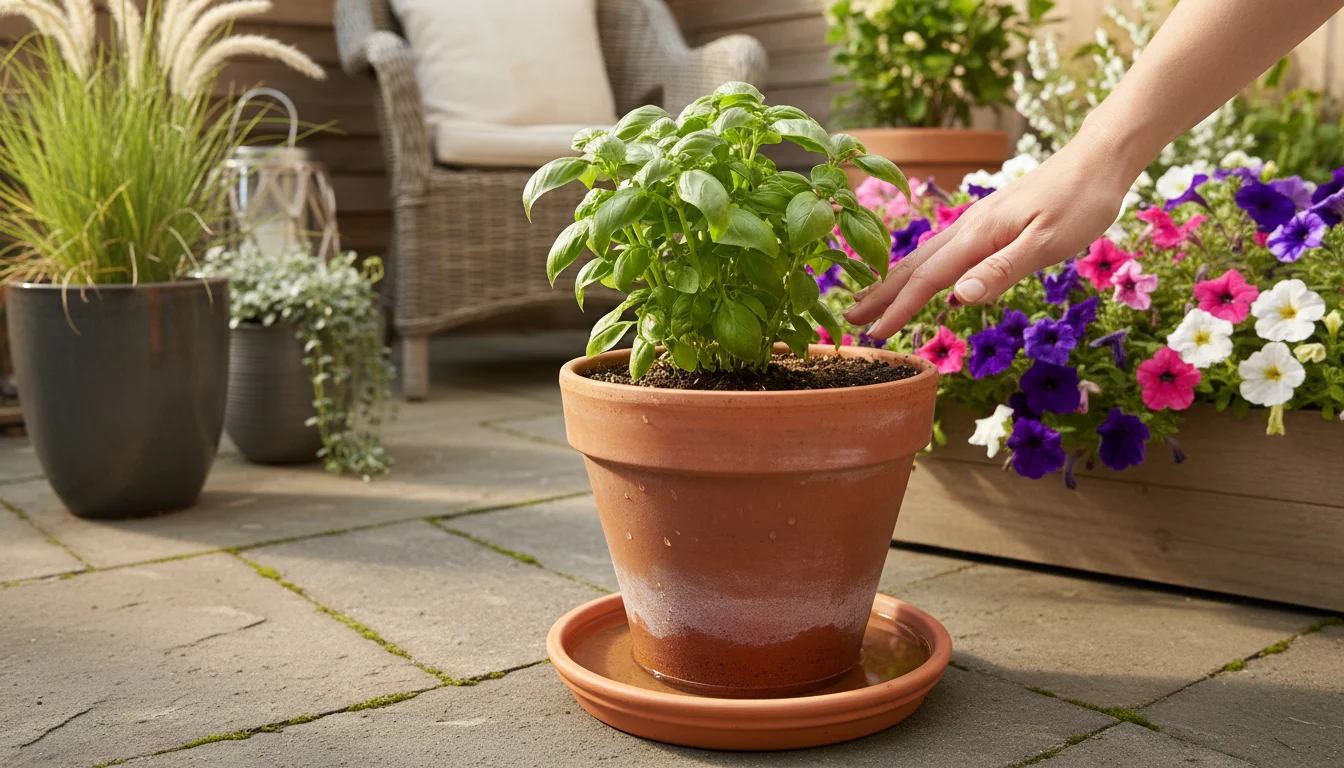
  5. Clean the Outside of Pots: Don’t forget the exterior of your containers. Pests and their eggs can cling to the rims, sides, and bottoms of pots. Use a stiff brush and warm soapy water to scrub all surfaces. For a deeper clean and sterilization, especially if you suspect disease, a dilute bleach solution (1 part bleach to 9 parts water) or undiluted white vinegar can be used. Rinse thoroughly with clean water afterward to remove any residue.

This meticulous preparation lays the groundwork for a successful, pest-free winter.

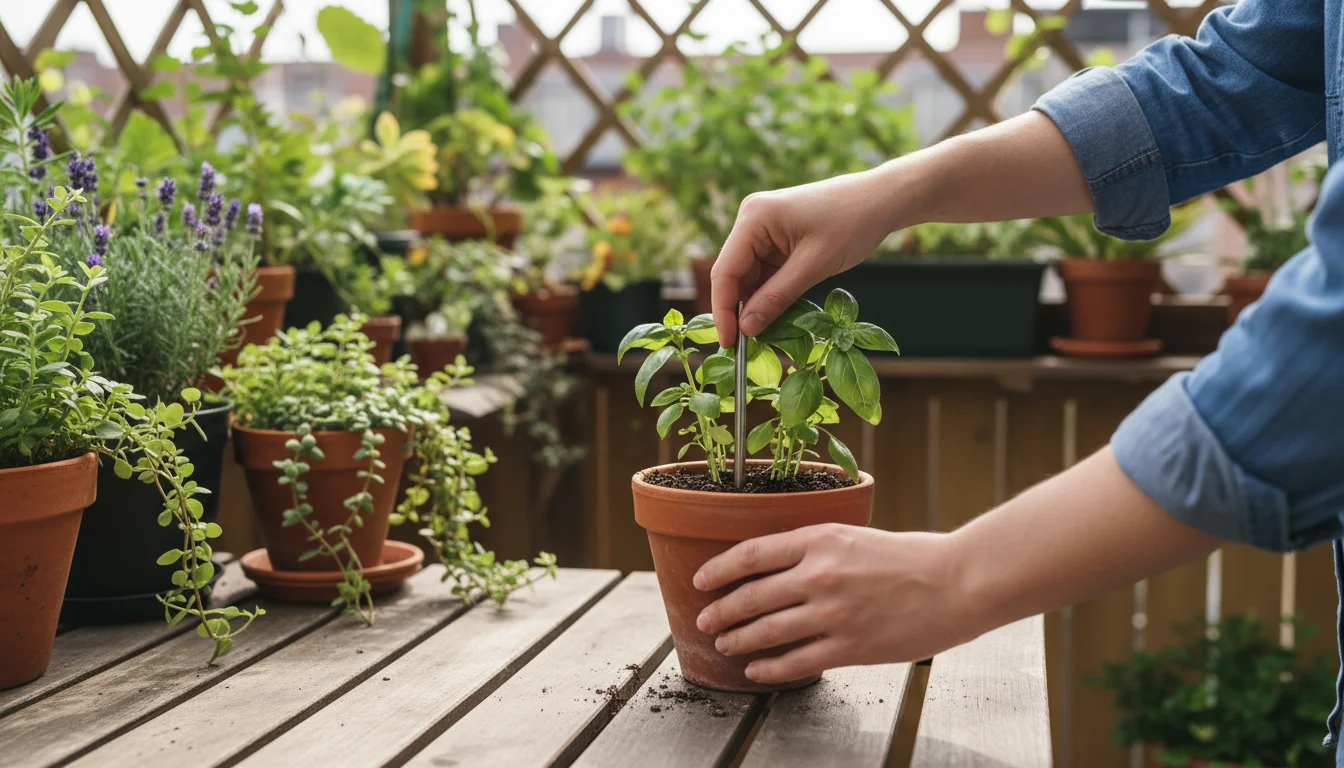
Targeting Soil Pests: How to Get Rid of Bugs in Potting Soil Before Winter

The soil in your container garden is a prime location for many pests to overwinter. Fungus gnat larvae, slug eggs, certain beetle larvae, and even some spider mite eggs can all survive the cold tucked away beneath the surface. Addressing these hidden dwellers is a critical part of fall pest control.

Here are effective strategies for targeting soil pests:

  • Soil Drench for Overwintering Insects: For pots you plan to reuse with existing soil, or if you’re trying to save a specific plant, a soil drench can be a powerful tool.
    • Nematodes: Beneficial nematodes are microscopic roundworms that naturally occur in soil. Specific species, such as *Steinernema feltiae*, are highly effective against fungus gnat larvae, thrips pupae, and other soil-dwelling pests. You can purchase them online or at garden centers. Mix them with water according to package directions and apply as a soil drench. They are safe for plants, pets, and humans, and they leave no harmful residue. This is an excellent organic solution for overwintering insects in the soil.
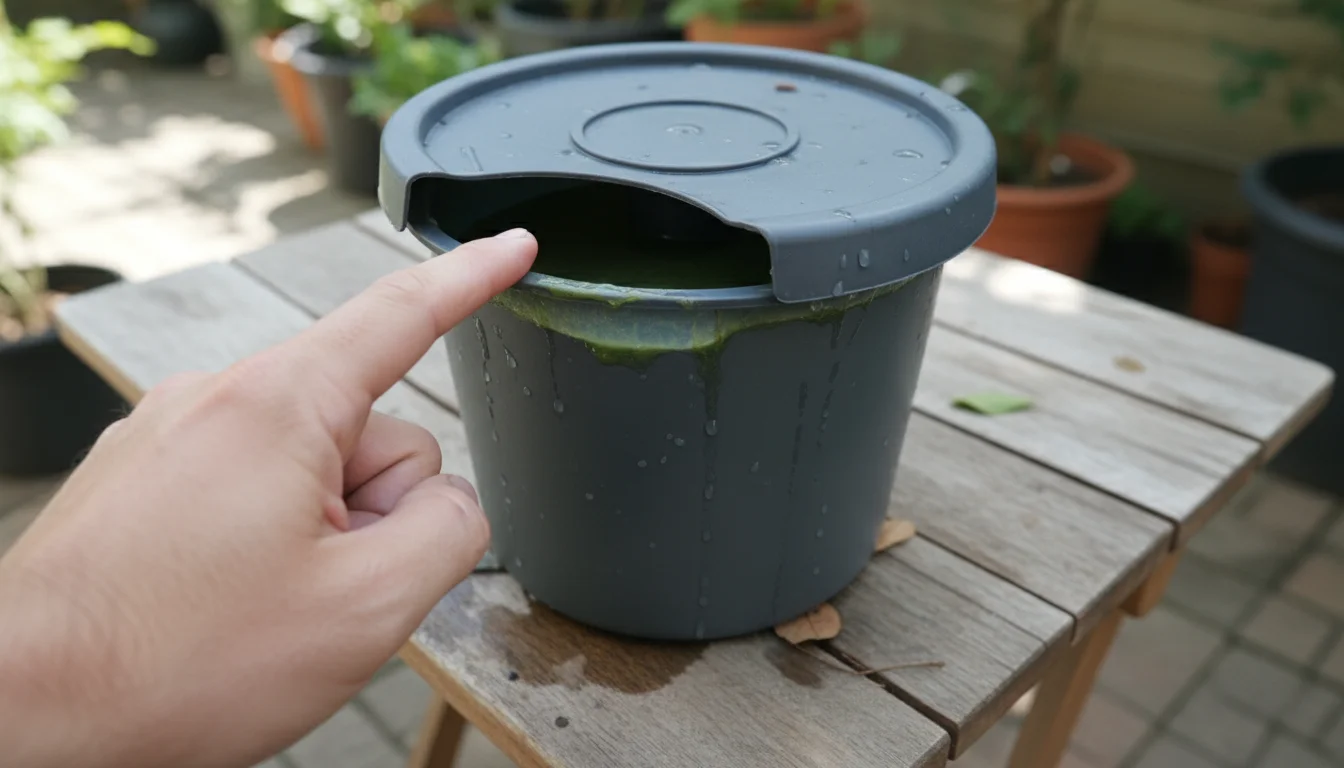
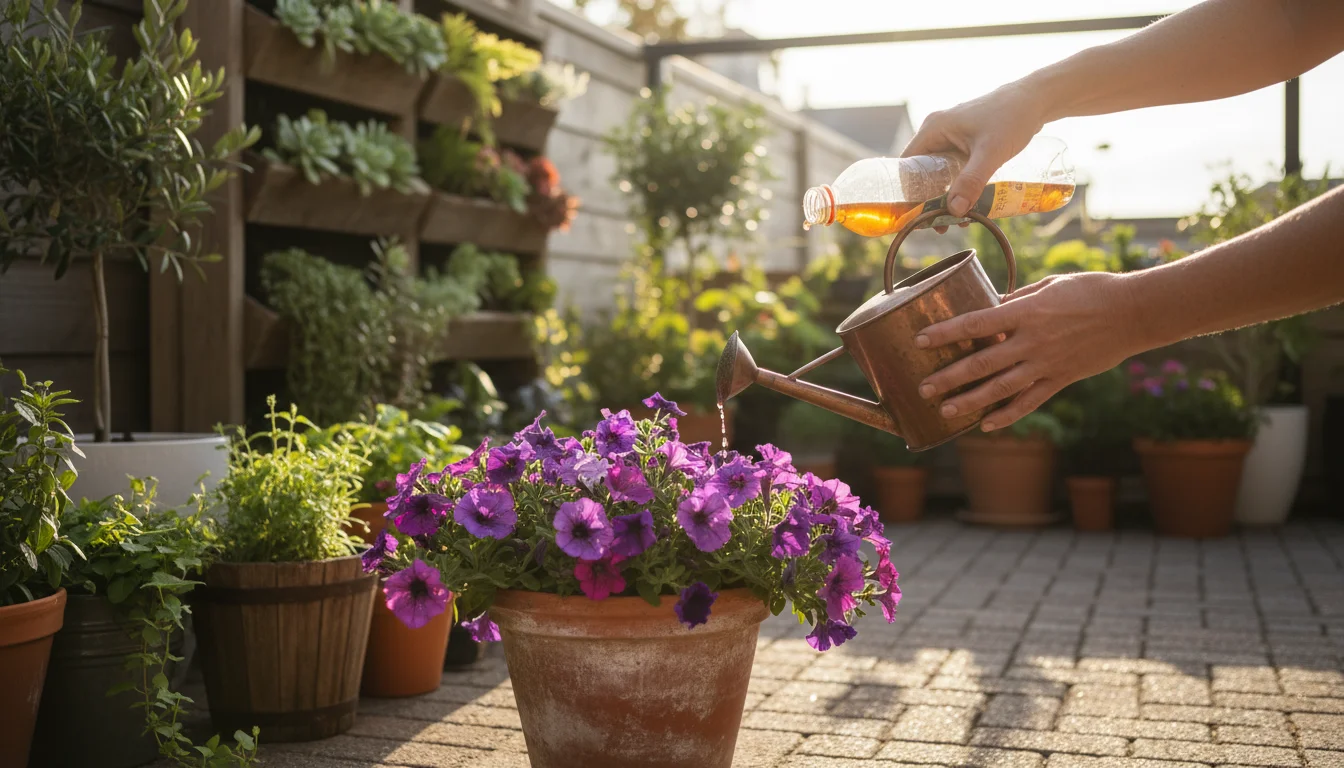
    • Hydrogen Peroxide Solution: A dilute solution of hydrogen peroxide (1 part 3% hydrogen peroxide to 4 parts water) can be used as a soil drench. It oxygenates the soil, which can kill fungus gnat larvae and other anaerobic pests. It also breaks down into water and oxygen, so it’s not harmful to your plants in proper dilution. Apply it when the soil is slightly dry, ensuring it penetrates well.
    • Insecticidal Soaps or Neem Oil Solutions: Some insecticidal soaps and neem oil products are formulated for soil drench applications. These can effectively target a range of soft-bodied insects and their larvae in the soil. Always read the label to ensure the product is suitable for soil application and your specific plants.

    When applying any soil drench, ensure you thoroughly saturate the soil until it drains from the bottom of the pot. This ensures the treatment reaches deep into the root zone where pests hide.

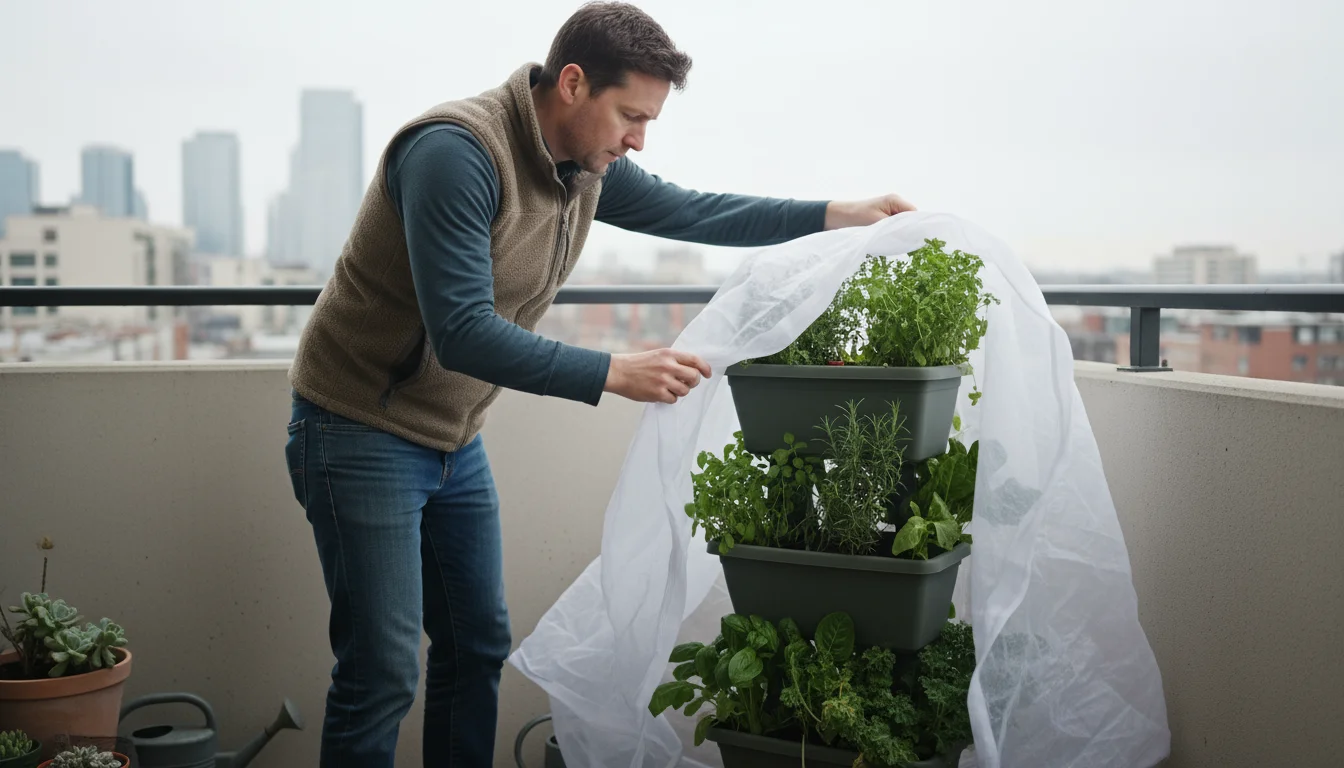
  • Solarization (for empty pots with soil): If you have pots with old soil you want to reuse next year but without plants, solarization is an excellent chemical-free method. Water the soil thoroughly, then cover the pot tightly with clear plastic sheeting, securing it to trap heat. Place the pot in full sun for several weeks (the longer, the better, ideally a month or more). The sun’s heat will pasteurize the soil, killing most pest eggs, larvae, diseases, and weed seeds. This technique is most effective in regions with strong, consistent fall sunlight.
  • Freezing (for smaller amounts of soil): For smaller quantities of potting soil, you can kill overwintering pests by freezing it. Spread the soil in a shallow tray and place it in a freezer for at least 48-72 hours. This will kill most insects, eggs, and larvae. While effective, it’s not practical for large volumes of soil.
  • Discarding and Replacing Soil: As mentioned before, the simplest and often most effective method is to completely discard old, potentially infested potting soil. Never reuse soil from pots that had significant pest or disease problems without thoroughly sterilizing it. Always dispose of infested soil responsibly, ideally in a sealed bag in the trash, to prevent pests from finding new homes in your compost or garden. Then, replenish your pots with fresh, sterile potting mix for next season. This ensures a clean slate, greatly preventing aphids in spring by treating in fall.

By implementing these soil-focused strategies, you directly address a major overwintering site for container garden pests, drastically reducing the population before they can become a problem next year.

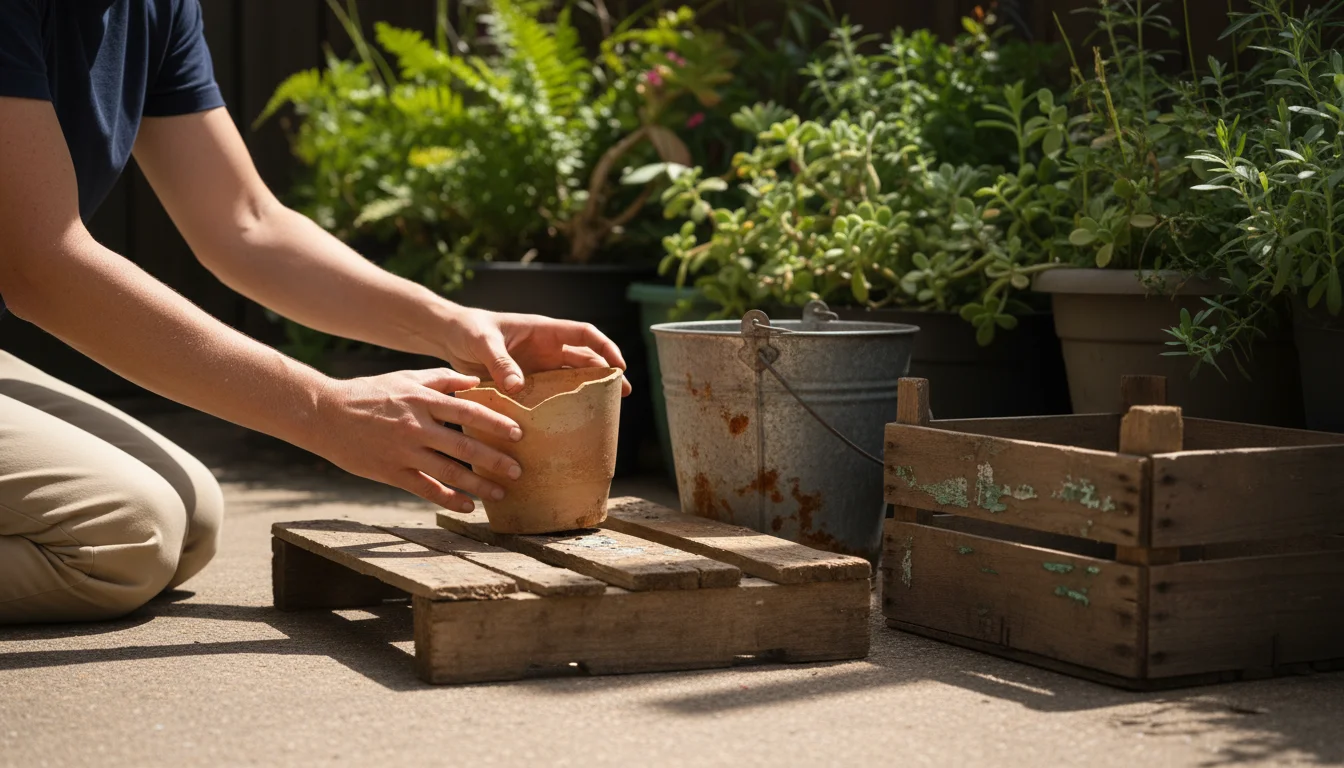
Protecting Empty Containers: A Crucial Step

Once your plants are either brought indoors or removed for the season, your empty containers themselves become important targets for fall pest control. An uncleaned pot is a potential five-star hotel for overwintering insects and disease pathogens. This step is often overlooked, but it’s essential for preventing future pest issues.

Here’s how to properly clean and store your empty containers:

  1. Remove All Old Soil: First, empty all remaining potting mix from your containers. Even a small amount of residual soil can harbor pest eggs, larvae, or fungal spores. Scrape out any caked-on soil with a trowel or a stiff brush. If you plan to dispose of the soil, do so responsibly.
  2. Wash Thoroughly with Soapy Water: Use warm water and a good squirt of mild, biodegradable dish soap. With a stiff brush, vigorously scrub both the inside and outside surfaces of each pot. Pay special attention to rims, drainage holes, and any decorative crevices. These are common hiding spots for pests. Rinse thoroughly with clean water until no soap residue remains.
  3. Sanitize Your Pots: This step is particularly important if your containers housed diseased plants or suffered from heavy pest infestations.
    • Bleach Solution: Prepare a solution of 1 part household bleach to 9 parts water. Soak plastic and glazed ceramic pots in this solution for at least 10-15 minutes. For terracotta pots, which are porous, a shorter soak of 5 minutes is usually sufficient, as they absorb the solution more readily.
    • White Vinegar: As an alternative, you can use undiluted white vinegar. Soak pots similarly. Vinegar is a good, less harsh option, though it may require a slightly longer soak or more scrubbing for heavy deposits.
    • Rinsing: After sanitizing, rinse the pots thoroughly with clean water. For bleach-treated pots, an extra rinse or two ensures no harmful residue remains that could affect future plants. Allow all pots to air dry completely before stacking or storing them.

    This sanitization process effectively kills bacteria, fungi, and any lingering pest eggs or dormant stages that the scrubbing might have missed.

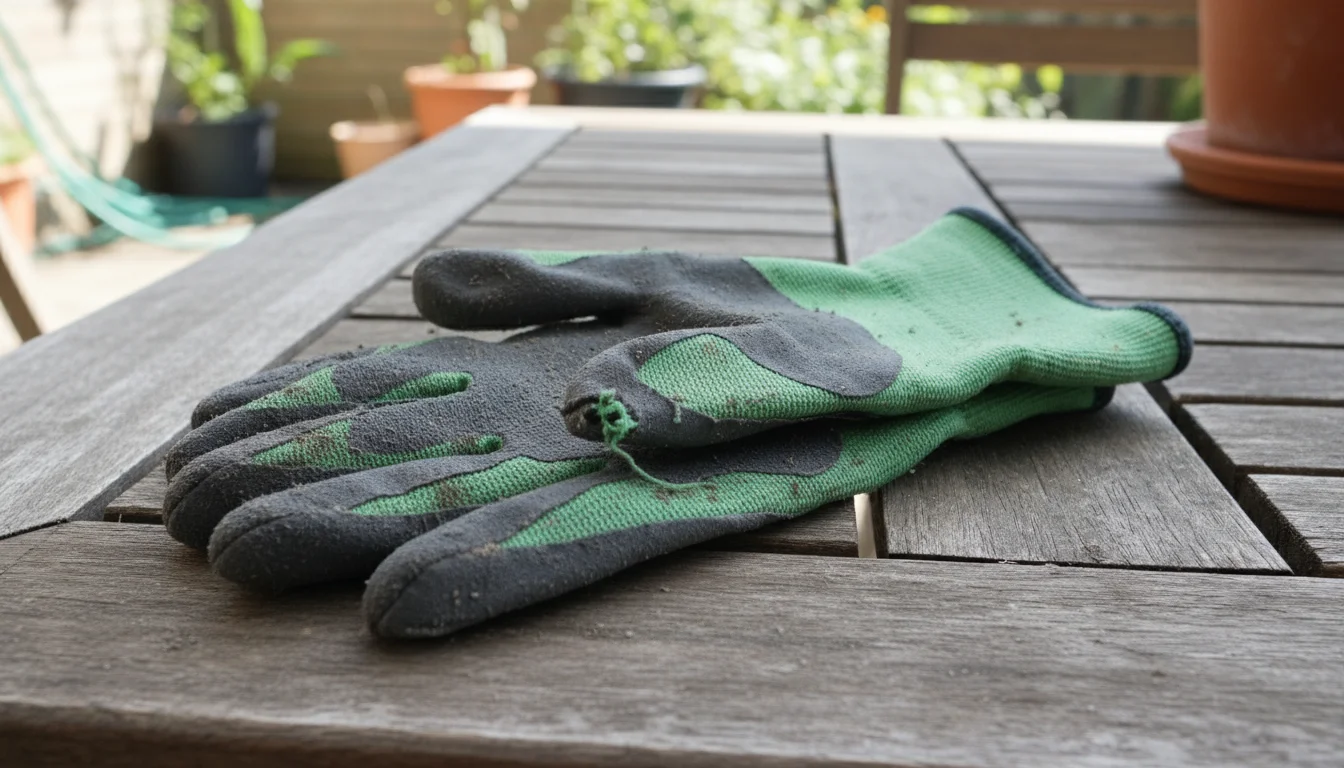
  4. Inspect for Damage and Repair: While cleaning, inspect your pots for any cracks, chips, or damage. Repair minor cracks in plastic pots with strong adhesive or consider replacing severely damaged containers. Damaged areas can become future hiding spots for pests.
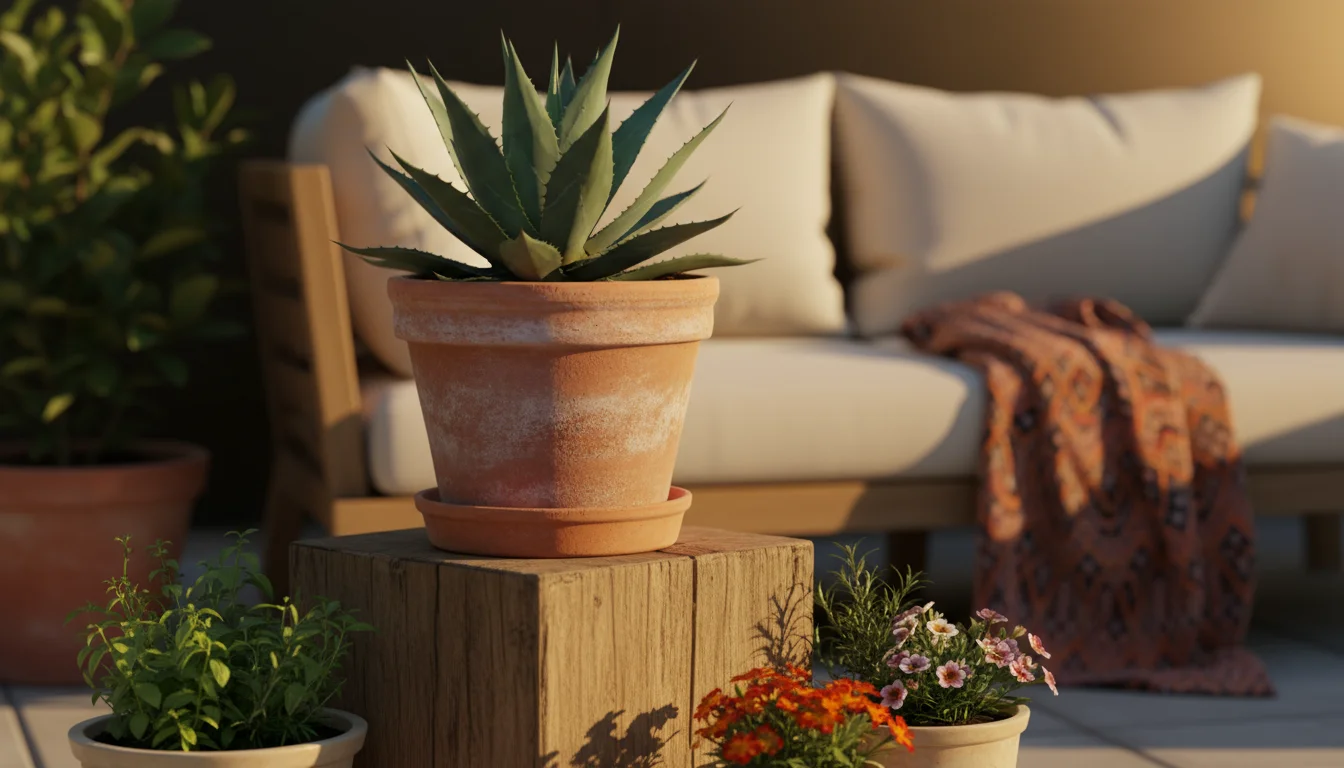
  5. Store Properly: Once your pots are sparkling clean and completely dry, stack them neatly in a clean, dry, and sheltered area. A garage, shed, or even under a tarp on a patio works well. Storing them upside down can prevent dust, debris, and curious critters from settling inside. Keeping them off the ground can also deter slugs and other crawling pests.

By diligently cleaning and storing your empty containers, you eliminate another major opportunity for container garden pests to overwinter, ensuring they are ready for a fresh, pest-free start next spring.

Organic Solutions for Overwintering Insects

For the environmentally conscious gardener, using organic solutions for fall pest control is a priority. These methods often leverage natural processes and substances to combat pests without introducing synthetic chemicals, aligning perfectly with the SimpleGardenJoy ethos of sustainable gardening.

Here are some effective organic approaches:

  • Beneficial Nematodes: As mentioned in the soil pest section, beneficial nematodes are tiny, non-segmented roundworms that naturally live in the soil. Specific species, like *Steinernema feltiae*, are parasitic to a wide range of soil-dwelling pests, including fungus gnat larvae, flea beetle larvae, cutworms, and some weevils. They seek out and kill pest larvae, then reproduce, providing ongoing biological control. They are completely safe for humans, pets, plants, and other beneficial insects like earthworms. Apply them as a soil drench in the fall when soil temperatures are still above 45-50°F (7-10°C). This is a top-tier organic solution for overwintering insects in your potting soil.
  • Neem Oil: Derived from the neem tree, neem oil is a powerful organic pesticide, fungicide, and miticide. Its active compound, azadirachtin, acts as an anti-feedant, growth disruptor, and repellent. For overwintering pests, you can use a diluted neem oil solution as a foliar spray on perennial plants you are bringing indoors or as a targeted soil drench for specific soil pests. It works by interfering with the pest’s hormonal system. Apply according to package directions, typically in the evening to avoid harming beneficial insects active during the day.
  • Insecticidal Soaps: These soaps are specially formulated to kill soft-bodied insects like aphids, spider mites, and whiteflies on contact. The fatty acids in the soap dissolve the insect’s outer protective layer, causing dehydration. While primarily a contact killer for active pests, a thorough application in fall can significantly reduce populations on plants you plan to overwinter indoors. Ensure good coverage, especially on the undersides of leaves.
  • Diatomaceous Earth (DE): Food-grade diatomaceous earth is a fine powder made from fossilized diatoms. On a microscopic level, it has sharp edges that scratch the waxy outer layer of insects, causing them to dehydrate and die. You can lightly dust DE on the surface of potting soil to deter crawling insects like ants, slugs, and even fungus gnat adults. Avoid using it on plants with open flowers to protect pollinators. It’s safe for mammals and birds.
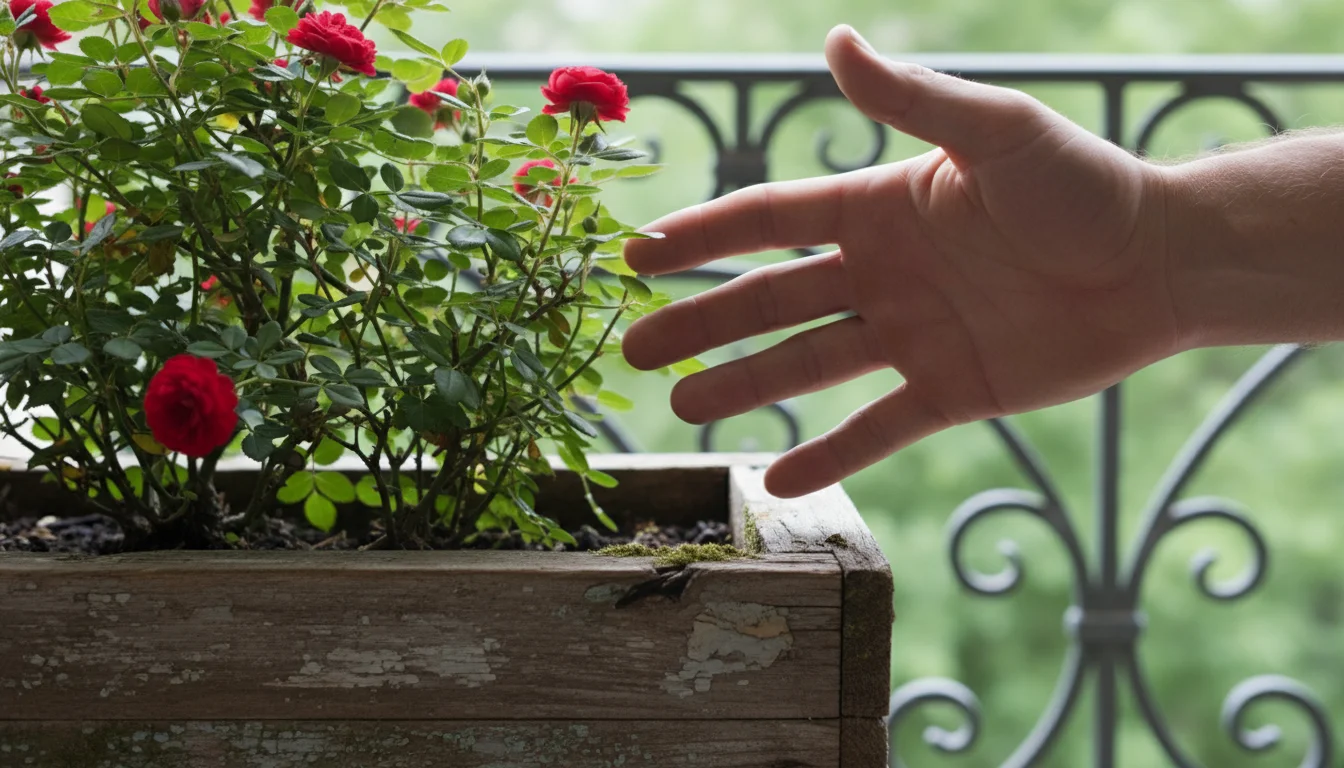
  • Manual Removal and Pruning: Sometimes, the simplest organic method is the best. Manually picking off larger pests, squishing egg masses, or pruning away infested plant parts are highly effective, especially for minor infestations. This direct approach removes pests without any chemical intervention.
  • Compost Tea and Healthy Soil: While not a direct pest killer, promoting healthy soil biology with practices like using compost tea (a liquid extract of beneficial microorganisms from compost) helps plants become more robust and resistant to pests and diseases. Strong, healthy plants are naturally better equipped to withstand pest pressure, reducing the chances of a minor issue becoming a full-blown infestation in spring.

By integrating these organic solutions into your fall pest control routine, you safeguard your garden’s health and contribute to a thriving, balanced ecosystem.

Common Mistakes to Avoid in Fall Pest Management

Even with the best intentions, it’s easy to make missteps in fall pest control that can undermine your efforts. Being aware of these common mistakes helps you avoid them and ensures a more successful, pest-free spring.

  • Neglecting Empty Pots: A frequent oversight is focusing only on plants and forgetting the containers themselves. As detailed earlier, empty pots can harbor eggs, larvae, and disease spores. Always clean and sanitize your containers thoroughly before storing them. An uncleaned pot essentially acts as a dormant pest incubator.
  • Composting Infested Material: Tossing pest-ridden plant debris or old potting soil directly into your home compost pile is a recipe for disaster. Most home compost piles do not reach high enough temperatures to kill all pest eggs or pathogens. Instead, bag and discard infested material in the trash to prevent the pests from simply overwintering in your compost and returning to your garden next season.
  • Bringing Uninspected Plants Indoors: If you plan to overwinter plants inside your home, a thorough inspection and, if necessary, treatment are non-negotiable. Skipping this step often introduces pests like aphids, spider mites, or whiteflies into your indoor environment, where they can quickly multiply in the stable conditions and then migrate back outside in spring.
  • Ignoring Drainage Holes: Pests love dark, moist, hidden spots. Drainage holes in pots are perfect examples. When cleaning containers, make sure to thoroughly scrub and clear the drainage holes of any debris or potential pest hiding spots. Blocked drainage holes also lead to waterlogged soil, which creates an ideal environment for fungus gnats and other moisture-loving pests.
  • Applying Treatments Incorrectly: Whether using organic or synthetic products, failing to follow label instructions is a common mistake. Using too little product may be ineffective, while too much can harm your plants or the environment. Pay attention to dilution rates, application methods, safety precautions, and recommended timing. For instance, some treatments are most effective on specific life stages of a pest.
  • Underestimating the Persistence of Pests: Pests are resilient. A single treatment in fall might not be enough if populations were high during the growing season. A follow-up inspection or a second application might be necessary, especially for persistent issues or if you are overwintering sensitive plants.
  • Reusing Heavily Infested Soil: While refreshing soil is sometimes possible, if your potting mix was teeming with pests all season, it’s often best to simply discard it and start fresh. The effort to completely sterilize heavily infested soil might outweigh the benefit, and you risk a recurring problem. Prevention is often easier than eradication.

By actively avoiding these common pitfalls, you enhance the effectiveness of your fall pest control efforts, ensuring your container garden has the best chance for a healthy, pest-free start in the spring.

Year-Round Pest Management: Beyond Fall

Effective pest control isn’t a one-time seasonal task; it’s a continuous, year-round commitment that supports a thriving, low-maintenance garden. While fall pest control is crucial for breaking the overwintering cycle, integrating good practices throughout the year builds resilience and minimizes future problems.

Here are strategies to maintain pest management beyond the fall season:

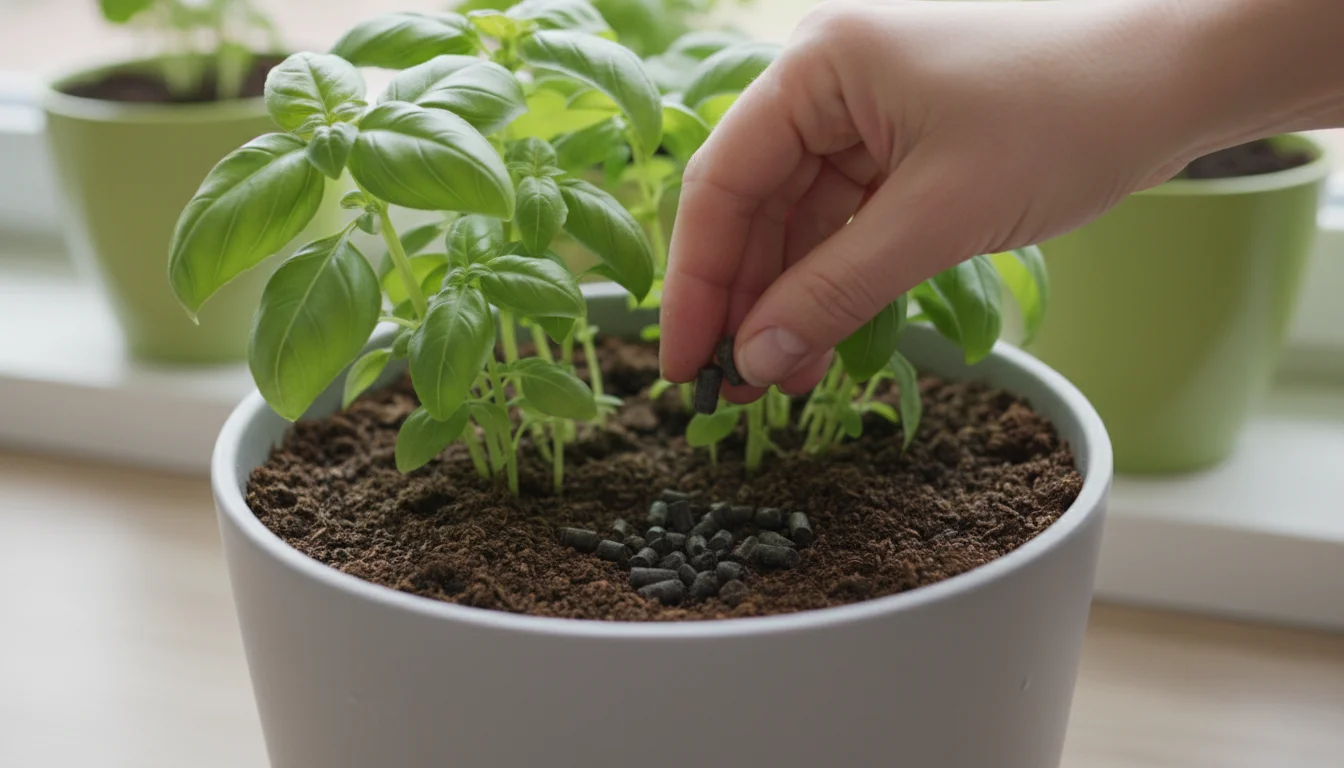
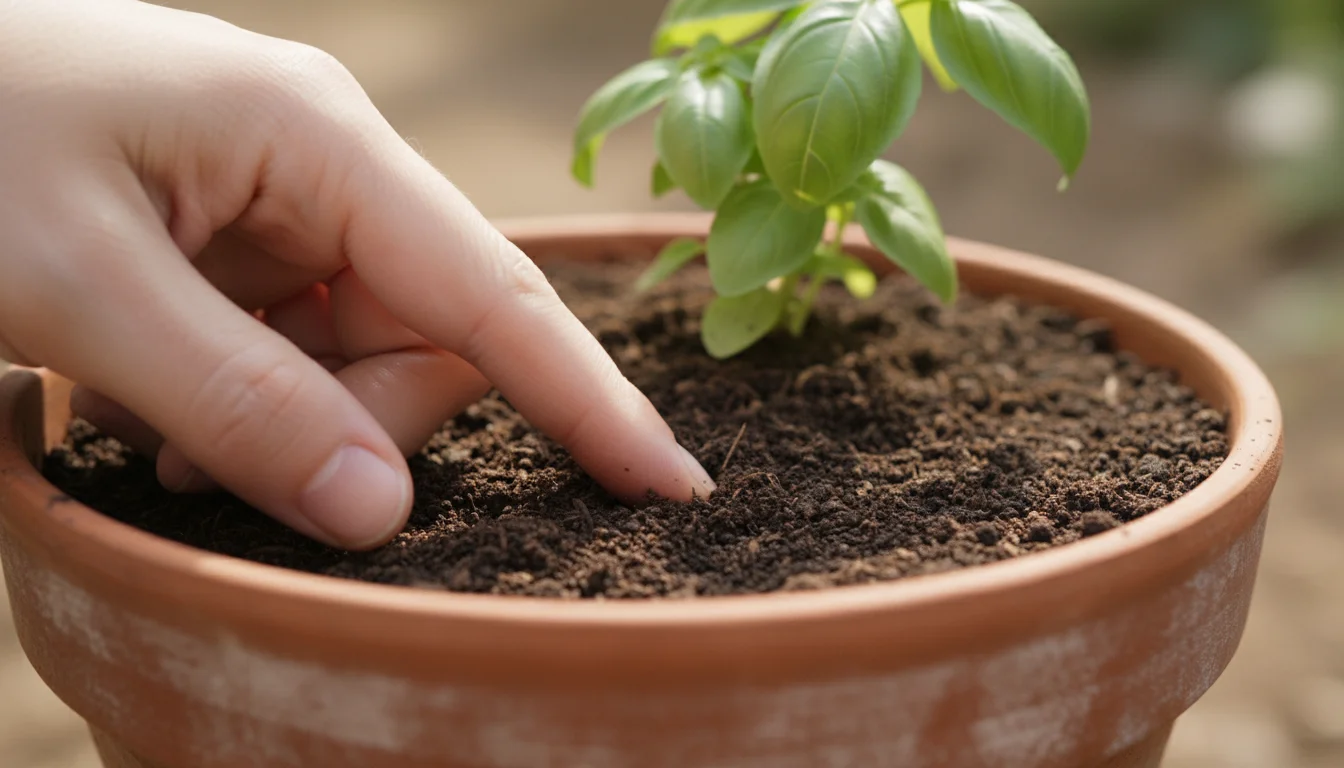
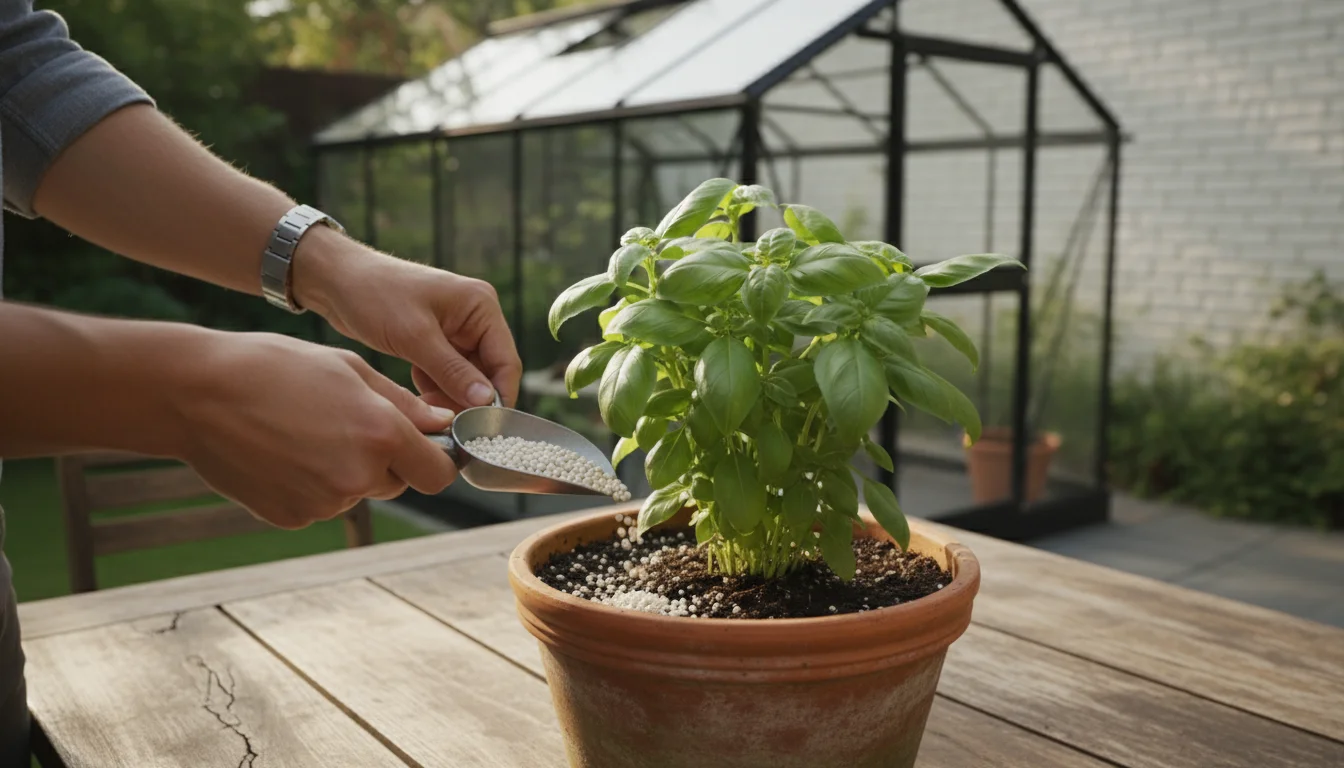
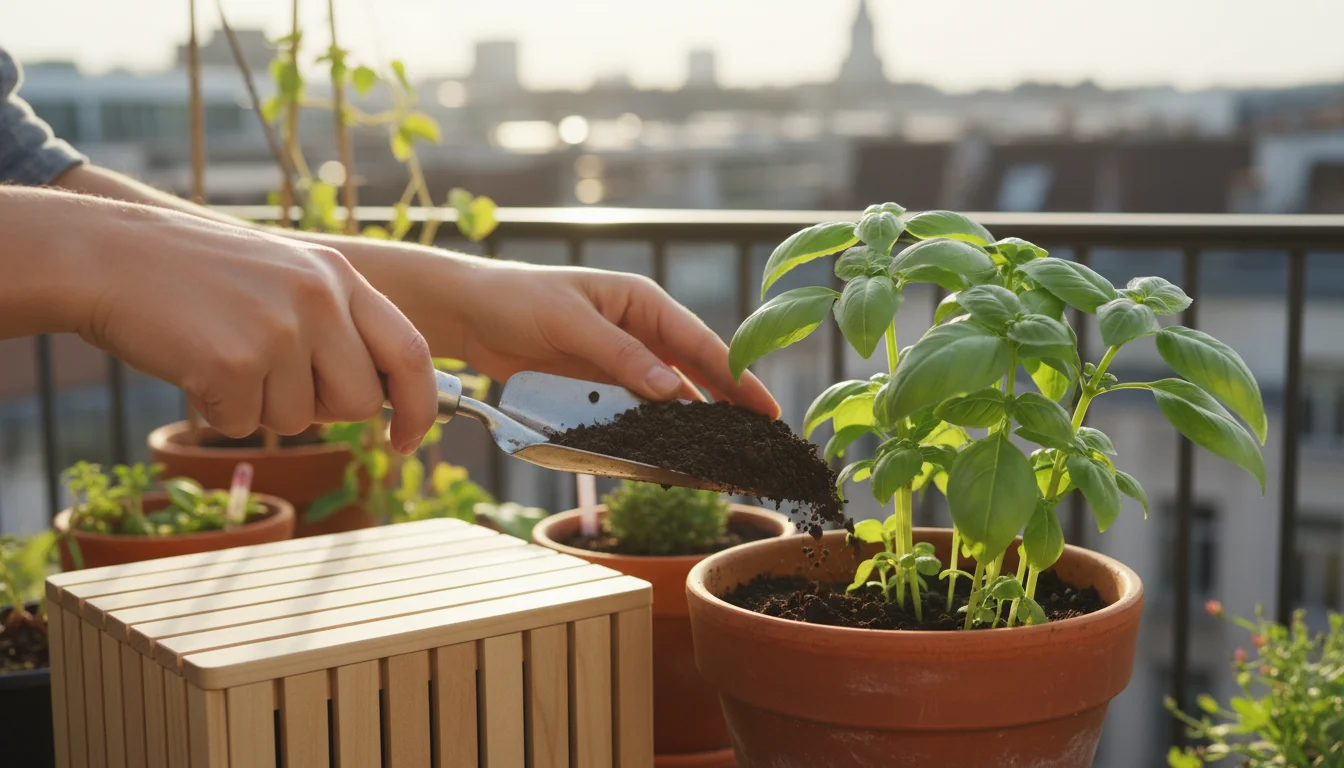
  • Start with Healthy Plants and Soil: A strong defense begins with healthy plants. Plants under stress, whether from poor watering, nutrient deficiencies, or inadequate light, are more susceptible to pest attacks. Provide your plants with the right conditions, use good quality potting mix, and consider adding compost or organic fertilizers to boost soil health. Healthy soil fosters a robust microbial community that can suppress some pests and diseases.
  • Regular Inspection is Key: Make a habit of inspecting your plants frequently, even daily. Catching a pest problem when it’s just starting is always easier than battling an established infestation. Check leaf undersides, stems, and new growth for any signs of trouble. Early detection means you can address issues with simpler, less intensive methods.
  • Embrace Diversity: Planting a variety of plants, including companion plants, can deter pests naturally. Certain herbs and flowers can repel pests or attract beneficial insects that prey on harmful ones. For example, marigolds can deter nematodes, and nasturtiums can act as a trap crop for aphids.
  • Sanitation Throughout the Season: Don’t wait until fall to clean up. Promptly remove any dead or diseased leaves, spent flowers, and weeds during the growing season. This reduces hiding spots for pests and prevents the spread of diseases. Always dispose of infested material away from your garden.
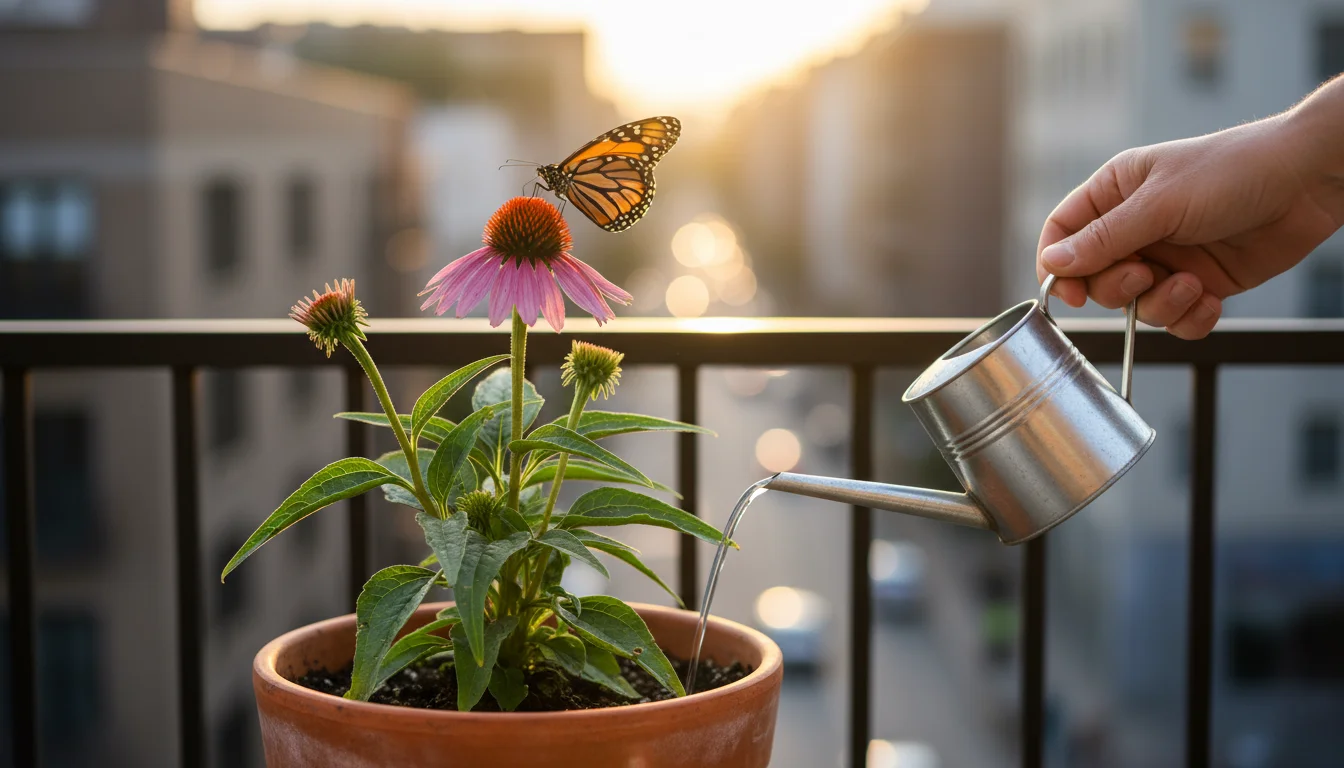
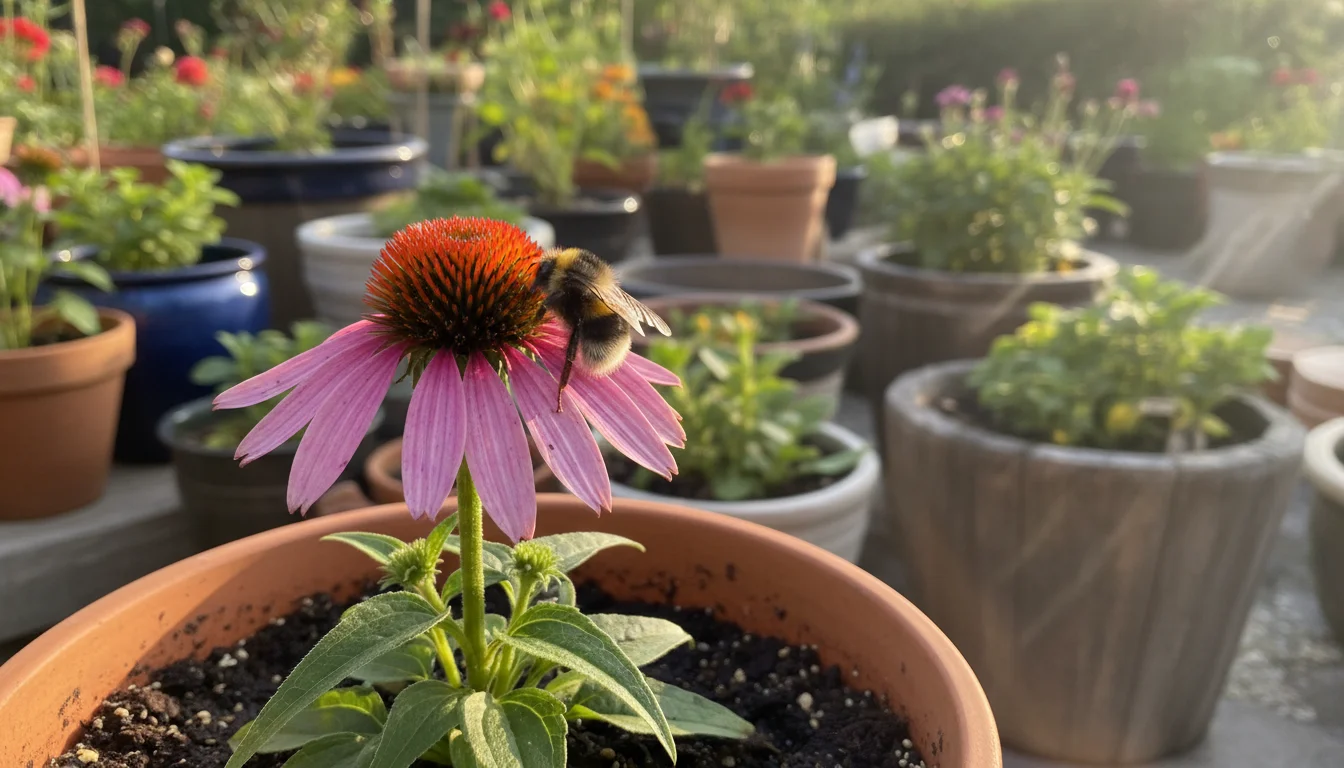
  • Encourage Beneficial Insects: Attract natural predators to your garden. Ladybugs, lacewings, hoverflies, and parasitic wasps are voracious eaters of aphids, mites, and other soft-bodied pests. Plant flowering herbs like dill, cilantro, and fennel, or flowers like cosmos and coneflowers, to provide nectar and pollen for these beneficial allies.
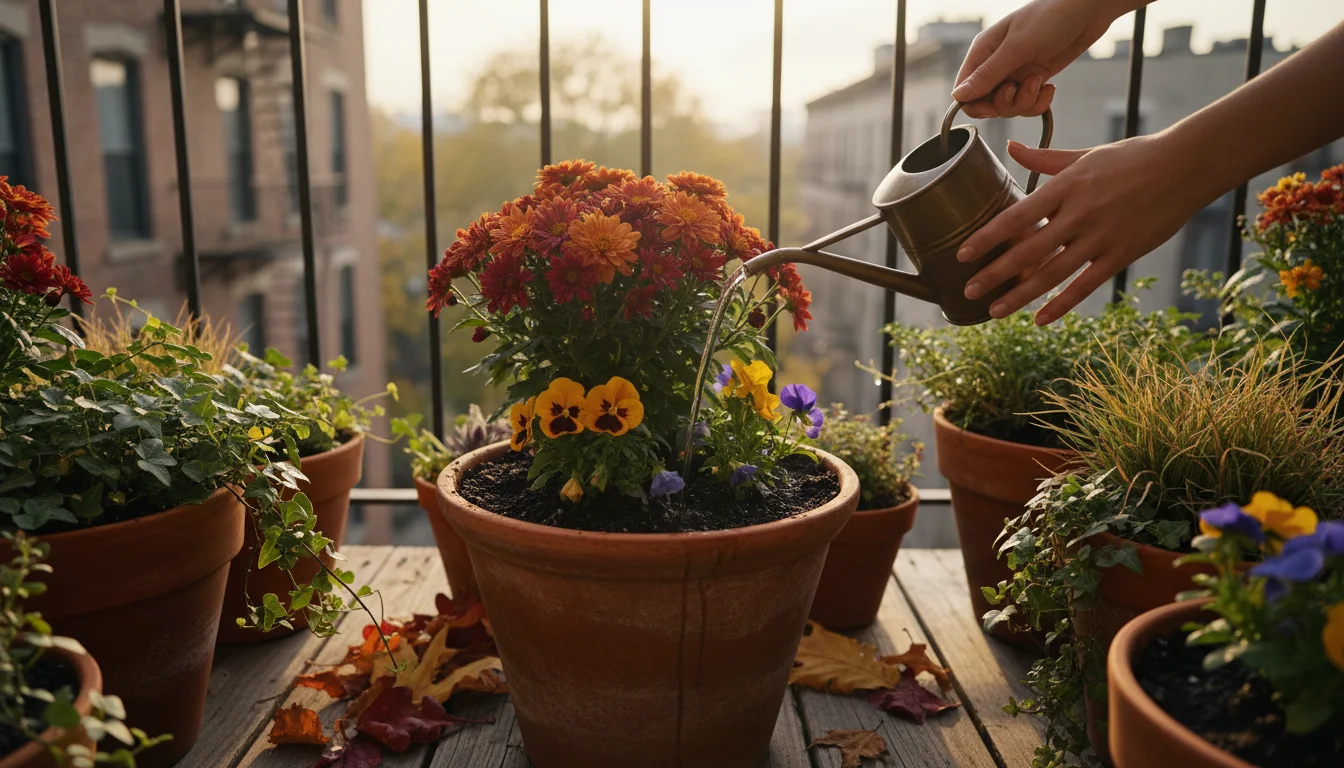
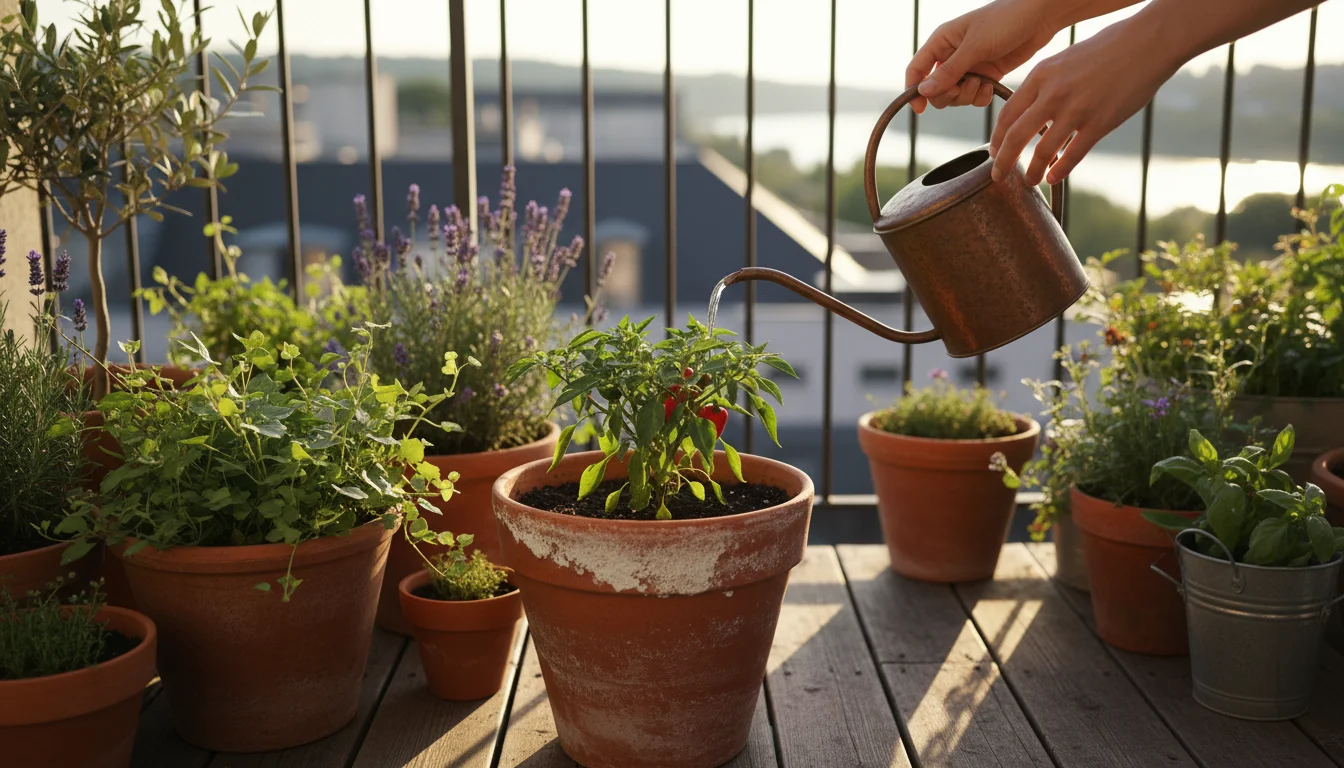
  • Proper Watering Practices: Avoid overwatering, which can create conditions favorable for fungus gnats and root rot. Water at the base of your plants to keep foliage dry, reducing fungal diseases. Ensure your pots have excellent drainage to prevent standing water. “Drainage” refers to how efficiently water moves through your soil and out of your pot, preventing roots from sitting in soggy conditions.
  • Quarantine New Plants: Before introducing any new plant to your existing collection, especially if you plan to integrate it into your container garden, isolate it for a week or two. During this quarantine period, inspect it daily for any hitchhiking pests or signs of disease. This simple step can prevent a new infestation from spreading to your established plants.

By adopting these holistic and consistent pest management strategies, you create a garden that is naturally more resistant to pests, making your small-space gardening experience more enjoyable and truly low-maintenance, not just in fall, but all year long.

Frequently Asked Questions

Can I reuse potting soil from pots that had pests, if I treat it?

You can potentially reuse potting soil from pots that had minor pest issues, but it requires thorough treatment. Methods like solarization or freezing can kill many pest eggs and larvae. For significant infestations, it is generally safer and more effective to dispose of the old soil and replace it with fresh, sterile potting mix. This completely removes the risk of lingering pests and disease pathogens.

What if I find pests on my indoor plants during winter?

If you find pests on plants you’ve brought indoors for the winter, act quickly. Isolate the infested plant immediately to prevent spread. Treat with organic solutions like insecticidal soap or neem oil, ensuring thorough coverage, especially on leaf undersides. Repeat applications may be necessary. Regularly inspect all your indoor plants, even those not showing symptoms, to catch new outbreaks early.

Is it really necessary to clean pots every year?

Yes, cleaning pots every year is highly recommended, especially if you reuse them. Residue from old soil, mineral deposits, and microscopic pest eggs or disease spores can cling to pot surfaces. Regular cleaning and sanitizing eliminate these potential hiding spots and sources of future problems, ensuring a healthy start for your new plants each season. This preventative step greatly reduces your workload later.

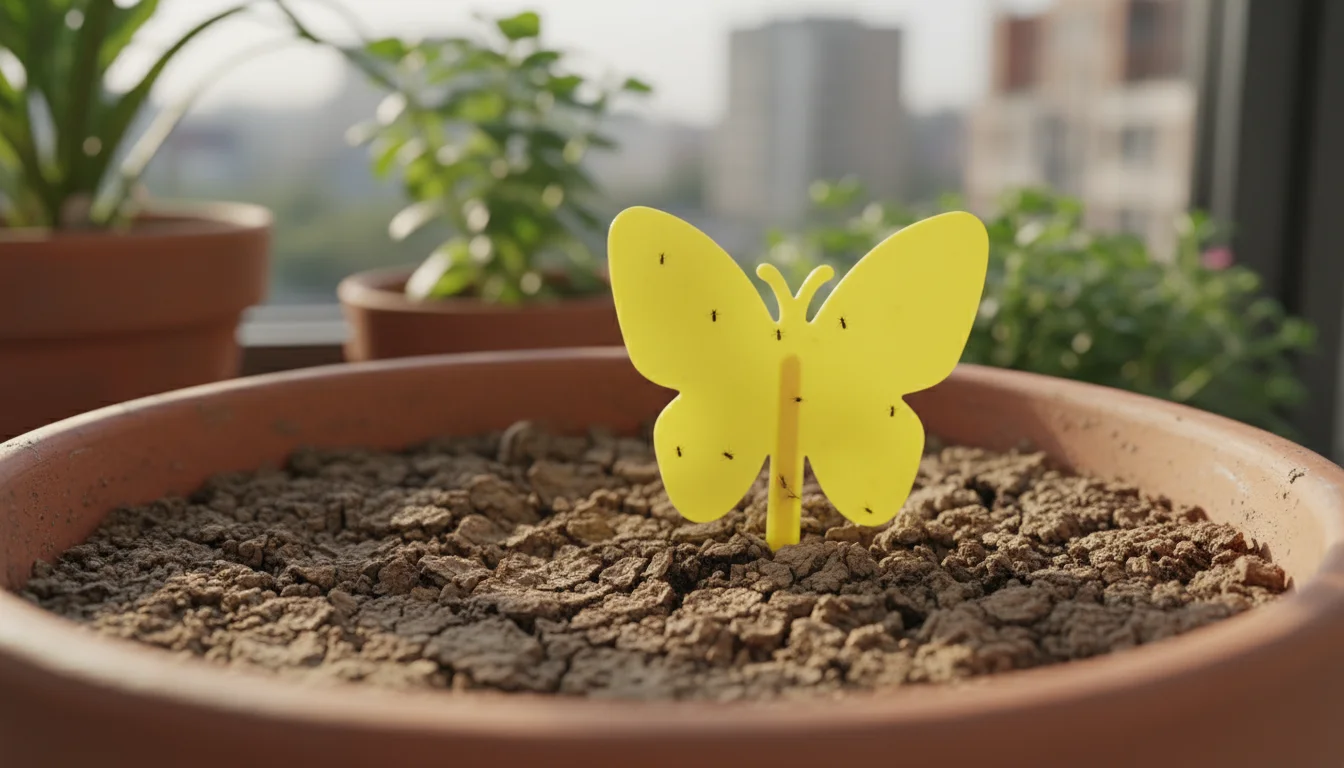
How do I know if my soil drench for overwintering insects was effective?

You will largely see the effectiveness in the spring by observing a significant reduction in pest populations that typically emerge from the soil. For fungus gnats, a common soil pest, you might see fewer adults flying around after treatment. You can also monitor by placing yellow sticky traps near the soil surface; a reduction in trapped insects indicates success. For nematodes, it can take a few weeks to see the full effect, as they work by infecting larvae.

Can cold weather alone kill all overwintering pests in my pots?

While extreme, prolonged cold can kill some pests, many common container garden pests have evolved to survive typical winter temperatures. They do this by laying resilient eggs, entering dormant states, or finding sheltered microclimates within your soil or pot crevices. Relying solely on cold weather is often insufficient for comprehensive fall pest control, especially in urban environments where temperatures can be milder or inconsistent. Active intervention is generally required.

For trustworthy gardening information, visit:
Arkansas Extension — Yard & Garden, Kansas State University Extension — Horticulture and Oklahoma State University Extension — Lawn & Garden. These organizations provide expert, research-based advice for gardeners at all levels.

Disclaimer: This article is for informational purposes only and is not a substitute for professional gardening advice. Always consult local extension services or horticulture experts for region-specific guidance.

Categories
Plant Care & Maintenance

Protecting Your Balcony Garden from the First Fall Frost: A Beginner’s Checklist

As autumn arrives, a shift in the air often signals the impending first fall frost. For your balcony garden, this can feel like a sudden threat, especially when your container plants are still thriving. A single night of unexpectedly low temperatures can cause significant damage or even kill tender plants you have nurtured all season. However, with proactive steps and a clear understanding of what to expect, you can protect your cherished balcony garden. This guide provides practical, actionable insights to help you prepare your container plants for winter, ensuring their survival and your continued gardening success.

Preventing frost damage does not require a complex overhaul of your gardening routine. Instead, it involves understanding a few key principles and implementing simple, effective strategies. We will cover how to assess your plants’ vulnerability, when to act, and the best methods for shielding them from freezing temperatures. You will learn straightforward techniques for frost protection, whether that means bringing sensitive plants indoors or providing adequate outdoor cover for more resilient varieties. Our goal is to empower you to safeguard your balcony garden with confidence, turning a potential seasonal panic point into a manageable task.

Close-up of a basil plant in a terracotta pot on a balcony, its green leaves wilted and darkened from frost damage.
Those first chilly mornings can quickly turn tender leaves to black.

Understanding the First Fall Frost Threat

The first fall frost marks a crucial transition in the gardening season. It often arrives unexpectedly, catching many gardeners off guard. Understanding what frost is and how it impacts your container plants on a balcony helps you prepare effectively. Frost occurs when the air temperature at ground level drops to 32 degrees Fahrenheit (0 degrees Celsius) or below. Water within plant cells freezes, expands, and ruptures cell walls, leading to irreversible damage that appears as blackened, wilted foliage.

Balcony gardens face unique challenges when it comes to frost. Container plants are more susceptible to cold damage than plants in the ground. Their roots are exposed to ambient air temperatures on all sides, unlike garden beds where soil acts as an insulator. This means the soil in your pots cools down much faster and reaches freezing temperatures sooner than the surrounding ground. A temperature of 35 degrees Fahrenheit (1.7 degrees Celsius) can be too cold for container plants, particularly tender annuals and tropical perennials, if sustained for several hours or if wind chill is a factor. Your specific balcony microclimate, influenced by building shelter, sun exposure, and wind, also plays a significant role in how quickly temperatures drop and how severely your plants are affected.

A “light frost” typically sees temperatures drop just below freezing, affecting only the most sensitive plants. A “hard frost” or “killing frost” brings temperatures significantly below freezing for several hours, causing widespread damage to most non-hardy plants. You want to act well before a hard frost. Data shows that even a few hours at 28-32 degrees Fahrenheit (minus 2 to 0 degrees Celsius) can prove fatal for many common balcony plants like impatiens, petunias, and basil. Observing local weather patterns and paying close attention to forecasts becomes your most powerful tool in protecting your balcony garden.

A person on a balcony garden inspects a pink petunia surrounded by various container plants like basil and fuchsia.
Checking which plants need extra care as the weather changes.

Identifying Your Vulnerable Balcony Plants

Not all plants react to cold temperatures in the same way. Knowing which of your balcony garden plants are most susceptible to frost damage allows you to prioritize your protection efforts. Broadly, plants fall into categories based on their hardiness.

  • Tender Annuals: These plants complete their life cycle in one growing season and are highly sensitive to frost. Examples include impatiens, petunias, coleus, basil, tomatoes, peppers, and most common herbs like cilantro. Even a light frost can cause these plants to collapse.
  • Tender Perennials: These plants can live for multiple years in warmer climates but cannot tolerate freezing temperatures. Common balcony examples include geraniums (pelargoniums), fuchsias, begonia, and tropical houseplants like philodendrons or ferns that you bring outside for summer. Their foliage will quickly succumb to frost, though some might regrow from protected roots if conditions improve quickly.
  • Half-Hardy Plants: These tolerate a light frost but will suffer damage in a hard freeze. Pansies, violas, snapdragons, and some leafy greens like kale often fall into this category. They might survive the first light frost with some leaf damage but need protection as temperatures drop further.
  • Hardy Plants: These plants are naturally adapted to cold temperatures and can withstand freezing. Many evergreen shrubs, perennials native to your climate, and certain herbs like rosemary or thyme can handle frost, especially when planted in the ground. However, even hardy plants in containers can become vulnerable. Their roots, as mentioned, lack the insulation of garden soil, meaning prolonged freezing temperatures can still damage them.

Check the plant tags or do a quick online search for any plant whose hardiness you are unsure about. Look for information on USDA Plant Hardiness Zones or similar local zone systems. This data provides a general guide, but remember, container plants on a balcony are always a bit more vulnerable than their in-ground counterparts, typically performing as if they are in a zone one or two levels colder. For example, if a plant is hardy to Zone 7, it might only reliably survive winter in a container if you are in Zone 8 or higher, or with significant protection.

Pair of hands on a balcony railing next to a smartphone showing a frost warning, with healthy potted plants in the background.
Stay ahead of the chill! Checking the forecast helps keep your balcony plants safe.

Timing is Everything: When to Act on Frost Warnings

Effective frost protection hinges on acting before the cold arrives, not after. A reactive approach often means your plants have already sustained damage. Your primary tool for timing your protection efforts is the local weather forecast.

  1. Monitor Local Forecasts Diligently: Begin checking weather forecasts daily as soon as autumn nights start getting cooler. Pay specific attention to overnight low temperatures. Many weather apps and websites offer hourly forecasts, which are incredibly helpful for tracking temperature drops.
  2. Understand “Frost Advisory” vs. “Freeze Warning”:
    • A Frost Advisory typically means temperatures will drop to 33-36 degrees Fahrenheit (0.5-2.2 degrees Celsius), potentially leading to frost in low-lying or exposed areas. This is your cue to start preparing.
    • A Freeze Warning indicates temperatures will reach 32 degrees Fahrenheit (0 degrees Celsius) or below for at least two hours, posing a significant threat to sensitive vegetation. This warning demands immediate action.
  3. Consider Your Balcony’s Microclimate: Even with a general forecast, your specific balcony conditions matter. A south-facing balcony sheltered by an overhang might stay warmer longer than an exposed north-facing one. Observe how quickly temperatures drop on your balcony on cool nights. Data from a simple outdoor thermometer placed on your balcony can give you a more accurate picture of your unique environment, often revealing temperatures a few degrees different from the generalized city forecast.
  4. Act Proactively, Not Reactively: Do not wait until the temperature has already dropped. The crucial time to implement frost protection strategies is in the late afternoon or early evening, before temperatures begin their significant descent after sunset. This allows you to apply covers or move plants before the cold stress begins. You want to cover plants when temperatures are still above freezing.

A good rule of thumb: when overnight temperatures consistently hover around 40 degrees Fahrenheit (4.4 degrees Celsius) or below, you should start planning and gathering your supplies for potential frost protection. The first fall frost can often be isolated, followed by a period of warmer weather, so you might need to uncover and recover plants multiple times. Stay flexible and prepared.

Hands watering a vibrant potted plant and clearing autumn leaves from another pot on an urban balcony.
Watering plants and clearing debris on a balcony before the first frost.

The Essential Frost Protection Checklist for Balcony Plants

Preparing your balcony garden for the first fall frost requires a systematic approach. This checklist outlines the key steps you should take to protect your container plants effectively.

  1. Hydrate Your Plants Thoroughly: Water your container plants deeply in the late afternoon on the day before a predicted frost. Moist soil retains heat better than dry soil, releasing it slowly overnight and providing critical warmth to the roots. Water also conducts heat more efficiently than air, helping to protect plant tissues. Avoid overhead watering that wets the foliage, as this can exacerbate frost damage if the water freezes on the leaves.
  2. Clear Away Debris: Remove any dead leaves, spent flowers, or garden debris from around your pots. This prevents fungal diseases and pest problems that can worsen when plants are stressed by cold. Cleanliness also ensures your protective covers fit snugly.
  3. Relocate Small, Tender Plants: Your smallest, most delicate annuals and tropical perennials are the easiest to move. Bring them indoors completely for the duration of the cold spell. Place them in a brightly lit room, away from cold drafts or direct heat sources. This is the most reliable method for sensitive species.
  4. Group Larger Pots Together: For plants that are too large to bring indoors, or those that are more tolerant but still need some help, group their containers closely together. This creates a small, communal microclimate where the plants share residual heat and shield each other from wind. Placing them against a warm wall of your building can add an extra layer of protection.
  5. Elevate Pots Off Cold Surfaces: If your pots sit directly on a cold concrete or metal balcony floor, elevate them using pot feet, bricks, or wooden blocks. This prevents direct heat transfer from the pot’s base to the cold surface, which rapidly cools the root zone. Even a small elevation can make a difference in insulating your container plants fall.
  6. Apply Mulch: For container plants that will remain outdoors, add a layer of organic mulch, such as straw, shredded leaves, or wood chips, to the top of the soil in each pot. A 2-3 inch layer insulates the roots, preventing rapid temperature fluctuations in the soil. This helps protect potted plants from first frost by keeping the root ball warmer.
  7. Prepare Protective Coverings: Gather appropriate materials for covering plants. This could include old sheets, blankets, burlap, or dedicated frost cloths (also known as row covers). Avoid using plastic sheeting directly on foliage, as it conducts cold, potentially causing more damage where it touches the plant. If you use plastic, ensure it does not touch the plant leaves.
  8. Support Covers Properly: When covering plants, create a mini “tent” structure to prevent the material from resting directly on the foliage. Use stakes, tomato cages, or even inverted laundry baskets to support your chosen covering. This ensures an insulating layer of air remains around the plant.
  9. Secure Coverings: Use clothespins, clamps, or weights to secure your covers to the pots or stakes. You want to prevent wind from blowing the covers off or allowing cold air to funnel underneath. An effective covering is one that stays in place.
  10. Monitor and Uncover: Remove coverings promptly once temperatures rise above freezing in the morning. Leaving plants covered during the day can cause them to overheat, depriving them of sunlight and potentially creating humid conditions ripe for fungal issues. Check the forecast regularly to determine if subsequent cold nights require re-covering.

Following this checklist helps you systematically approach frost protection, addressing the various ways cold can impact your balcony garden. This proactive approach ensures your plants remain healthy and vibrant for as long as possible.

Close-up of a gardener's hands inspecting a potted tropical plant leaf on an urban balcony with a flashlight, checking for pests.
Prepping my green friends for their indoor winter retreat!

Relocating Your Plants: Bringing Them Indoors Safely

For many tender container plants, the safest and most effective frost protection is bringing them indoors. This strategy applies particularly to tropical houseplants you moved outside for summer, annuals you hope to overwinter, or delicate herbs. The transition from outdoor to indoor environments can stress plants, so careful preparation makes the process smoother.

  1. Inspect for Pests Thoroughly: Before bringing any plant indoors, meticulously inspect every leaf, stem, and the underside of the pot for pests. Common culprits include aphids, spider mites, whiteflies, and slugs. A small infestation outdoors can quickly escalate into a full-blown indoor pest problem. Use a flashlight for a close examination.
  2. Clean Your Plants: Wipe down leaves with a damp cloth to remove dust and any lingering pests. For plants with persistent pest issues, consider hosing them down gently outdoors or applying an insecticidal soap specifically formulated for plants. If you use insecticidal soap, do this a few days before bringing them in to allow time for the treatment to work and rinse off any residue.
  3. Prune as Needed: Trim back any leggy growth, dead leaves, or spent flowers. This reduces the overall plant mass, making it easier to manage indoors and minimizing potential hiding spots for pests. It also helps the plant focus its energy on new growth adapted to indoor conditions.
  4. Acclimate Gradually: The shock of moving from bright outdoor light to lower indoor light can cause leaf drop. If possible, transition plants gradually. Move them to a shadier spot on your balcony for a week before bringing them inside. Once indoors, place them in the brightest available window or under grow lights, away from drafts from doors or windows.
  5. Consider Repotting (Optional, but beneficial): If a plant is significantly root-bound, meaning its roots circle tightly around the pot, repotting it into a slightly larger container with fresh potting mix can reduce stress. Use a peat-free, well-draining potting mix. However, avoid repotting right before a hard frost if the plant is already stressed, as this adds another layer of change. In such cases, wait until spring.
  6. Maintain Proper Watering: Indoor plants typically require less frequent watering than outdoor plants due to lower light levels and less air circulation. Allow the top inch or two of soil to dry out before watering again. Using a moisture meter can provide accurate readings of soil moisture, preventing both overwatering and underwatering.
  7. Provide Adequate Humidity: Indoor heating systems often create dry environments, which can be detrimental to many plants, especially tropical varieties. Increase humidity by placing plants on pebble trays filled with water (ensure pots do not sit directly in the water), misting regularly, or using a small humidifier.

Bringing plants indoors is a commitment for the winter months. By taking these steps, you minimize stress and maximize the chances of your container plants surviving winter happily inside your home, ready to return to your balcony garden in spring.

Potted plants, including herbs and small flowers, grouped tightly against a warm brick wall on an urban balcony.
Grouping pots together against a warm wall keeps plants cozy.

Outdoor Plant Protection Strategies for Balcony Gardens

Not all balcony plants can or should be brought indoors. Some are too large, or perhaps they are hardy enough to withstand mild cold but still need help with extreme temperatures. For these plants, effective outdoor frost protection is essential. These strategies aim to insulate plants, trap ground heat, and block cold winds.

  1. Grouping and Location:
    • Cluster Pots: As mentioned in the checklist, grouping your pots tightly together is a simple yet effective strategy. This creates a collective mass that retains heat better than individual pots.
    • Move Against a Wall: Position grouped pots against the warmest wall of your building, ideally one that receives some afternoon sun. Walls absorb solar radiation during the day and slowly release that stored heat overnight, offering a crucial buffer against falling temperatures.
    • Corner Protection: Corners of a balcony or building provide extra shelter from wind, which exacerbates cold stress. A corner can act as a natural windbreak, reducing the chilling effect on your plants.
  2. Covering Plants with Appropriate Materials:
    • Frost Blankets/Row Covers: These lightweight, breathable fabrics are designed specifically for plant protection. They allow light and some moisture to penetrate while trapping heat. You can buy these at garden centers. They are excellent for covering plants on a balcony for frost.
    • Old Sheets or Blankets: Any thick fabric material like old bed sheets, burlap, or moving blankets can provide protection. The key is to ensure the material is breathable and does not hold moisture against the plant.
    • Avoid Direct Plastic Contact: While plastic sheeting can block wind and some cold, it is not ideal for direct contact with foliage. Plastic conducts cold, and where it touches leaves, it can cause frost burn. If you must use plastic, ensure it is tented over the plants, creating an air pocket, and does not touch any plant parts. Secure it well, as plastic can easily tear in the wind.
  3. Creating a Protective Structure:
    • Use Stakes or Cages: Insert stakes into pots or use tomato cages to create a framework over your plants. Drape your chosen covering material over this frame. This prevents the cover from flattening your plants and ensures an insulating layer of air remains around the foliage.
    • Inverted Containers: For smaller plants, an inverted terracotta pot or a plastic storage bin can serve as a temporary cloche. Ensure the container is large enough not to crush the plant. These work best for short, quick frost events.
    • Cardboard Boxes: Large cardboard boxes can also be used as temporary covers. They offer good insulation but can become soggy if wet, so only use them in dry conditions or for very short durations. Ensure they are removed in the morning to allow light and air circulation.
  4. Adding Insulation to Pots:
    • Wrap Pots: For individual pots, especially those made of terracotta which cools rapidly, wrap the sides with burlap, bubble wrap, or old towels. Secure the wrapping with twine or tape. This extra layer of insulation helps protect the root ball from freezing.
    • Pot-within-a-Pot: If you have larger, empty containers, consider placing a smaller potted plant inside a larger, empty one. Fill the space between the two pots with insulating material like straw, shredded leaves, or even crumpled newspaper. This technique significantly boosts root protection.
  5. Strategic Watering:
    • Moist Soil, Not Wet Foliage: As previously mentioned, water deeply in the late afternoon before a frost. The latent heat released as water freezes (and its higher specific heat capacity) keeps the soil warmer than dry soil. Ensure you water the soil, not the leaves, to avoid ice formation on foliage.

Implementing these outdoor strategies maximizes the chances of your container plants surviving cold snaps. Remember to remove coverings during the day when temperatures are above freezing to prevent overheating and allow for air circulation and sunlight. Consistent monitoring of the weather forecast allows you to deploy and remove these protections as needed, effectively covering plants on a balcony for frost.

Person in warm clothing observing subtly frost-damaged plants in containers on a city balcony early morning.
Patience is key when checking plants for frost damage on a cool morning.

Post-Frost Care and Assessment for Your Balcony Plants

The morning after a frost, you might wake up to a potentially disheartening sight in your balcony garden. Do not panic. Taking the right steps immediately after a cold snap can sometimes salvage plants or at least help you understand the extent of the damage. Here is how to assess and care for your plants after the first fall frost.

  1. Do Not Immediately Prune Damaged Foliage: It is tempting to snip off all the blackened, wilted leaves right away. Resist this urge. Damaged foliage, while unsightly, can still offer some protection to the underlying stems and new growth if another frost is expected. Wait until the threat of frost has completely passed for the season before pruning.
  2. Assess the Damage Patiently: Give your plants a few days, or even a week, to fully reveal the extent of the frost damage. Sometimes, a plant looks terrible immediately after a frost, but the roots and lower stems remain viable. New growth might emerge from the base. Look for signs of life in the stems: scrape a small piece of bark on a woody stem. If it is green underneath, the stem is still alive. If it is brown or black, that section is likely dead.
  3. Provide Consistent, Moderate Watering: After a frost, plants can be stressed. Ensure the soil remains adequately moist, but do not overwater. Check the soil moisture regularly, and water when the top inch or two feels dry. Avoid fertilizing, as the plant needs to recover, not be pushed into new growth prematurely.
  4. Ensure Adequate Sunlight: If you moved plants indoors, ensure they receive sufficient light. If they stayed outdoors, uncover them once temperatures rise above freezing. Sunlight is crucial for photosynthesis and recovery.
  5. Pruning Dead Material (Later): Once you are certain the frost season has ended, or once a part of the plant is definitively dead and dry, you can begin pruning. Use clean, sharp pruning shears. Cut back to healthy, green tissue. This encourages new growth and improves the plant’s overall appearance and health. Dispose of dead material to prevent fungal issues.
  6. Consider Winterizing or Disposal: For annuals that have succumbed completely to frost, it is time to remove them from your containers. You can add them to your compost pile if they are disease-free. For tender perennials that show signs of life, you might still bring them indoors for the winter or protect them further if you intend to overwinter them outdoors in a protected spot.
  7. Reflect and Learn: Take notes on which plants survived, which did not, and which protection methods worked best for your specific balcony. This information is invaluable for next year’s frost preparations. Perhaps certain areas of your balcony are colder than others, or some plants consistently struggle. This reflective practice helps you adapt and refine your frost protection strategy for future seasons.

Post-frost care is a test of patience. By carefully assessing the damage and providing appropriate care, you can often help your plants recover or learn valuable lessons for future gardening seasons. Remember, every gardener experiences losses, but every loss also offers an opportunity for learning and growth.

Gardener covers potted herbs on an urban balcony with a repurposed bedsheet, next to a basket of shredded leaves.
Protecting our balcony plants with cozy, repurposed covers and leaf mulch.

Sustainable Frost Protection Practices

At SimpleGardenJoy.com, we champion environmentally conscious gardening. Integrating sustainable practices into your frost protection strategy benefits both your plants and the planet. This means making choices that reduce waste, conserve resources, and minimize your ecological footprint.

  1. Reuse and Repurpose Materials:
    • Instead of buying new frost covers every year, reuse old bed sheets, blankets, burlap sacks, or even large cardboard boxes. These materials work just as effectively as new products and prevent waste.
    • Collect fallen leaves from your neighborhood to use as mulch in your pots. Shred them first to make them more effective and less prone to blowing away. This provides insulation and enriches the soil as they decompose.
    • Consider creating simple DIY cloches from repurposed plastic milk jugs (bottom removed for ventilation) or clear plastic containers for smaller plants. Just remember the rule about not letting plastic touch foliage.
  2. Choose Perennials and Hardy Plants:
    • Over time, shift your balcony plant selection towards hardy perennials and shrubs suitable for your climate zone. While container plants are always more vulnerable, choosing species inherently more tolerant of cold reduces your frost protection burden.
    • When selecting annuals, opt for varieties known for their tolerance to cooler temperatures if you live in a region with unpredictable fall weather.
  3. Water Wisely:
    • The practice of watering deeply before a frost is also water-wise. It provides essential insulation without requiring excessive, wasteful applications. Focus water directly on the soil to maximize absorption and minimize evaporation.
    • Install a rain barrel on your balcony, if permitted, to collect rainwater. This free, chemical-free water source is excellent for your plants and reduces reliance on municipal water, especially during times of specific watering needs like pre-frost hydration.
  4. Prioritize Plant Health Year-Round:
    • Healthy, vigorous plants are naturally more resilient to stress, including cold. Focus on providing consistent care throughout the growing season: proper watering, appropriate feeding with organic, slow-release fertilizers, and good pest management.
    • Use peat-free potting mixes. Peat harvesting has environmental concerns, and many sustainable alternatives offer superior drainage and aeration, promoting stronger root systems that can better withstand environmental stresses.
  5. Compost Green Waste:
    • After you prune frost-damaged plant material or remove spent annuals, compost them instead of sending them to a landfill. This turns organic waste into nutrient-rich soil amendment, closing the loop in your garden’s ecosystem. Ensure any diseased plant material is not composted to prevent spreading pathogens.
  6. Share Knowledge:
    • Talk to fellow balcony gardeners about their frost protection strategies. Sharing practical tips and experiences within your community strengthens collective gardening efforts and promotes more sustainable practices.

Adopting sustainable frost protection methods not only protects your precious balcony garden but also aligns with a broader commitment to environmental stewardship. These small, thoughtful choices collectively contribute to a healthier planet and a more resilient garden.

Gardener's hands hold an open notebook with frost tips, gently touching a potted fuchsia plant on a balcony.
Planning ahead to protect tender plants on a chilly evening.

Frequently Asked Questions

What temperature is too cold for container plants?

Generally, temperatures at or below 35 degrees Fahrenheit (1.7 degrees Celsius) pose a risk to tender container plants, especially if sustained for several hours or if wind chill is a factor. While a light frost occurs at 32 degrees Fahrenheit (0 degrees Celsius), the roots in containers are more exposed and vulnerable to cold than those in the ground, so acting at slightly higher temperatures is wise.

How do I know if my plant is frost-damaged or just wilting?

Frost damage typically appears as blackened, water-soaked, or translucent foliage shortly after exposure. The affected leaves or stems might feel mushy or limp. Wilting from lack of water usually involves dry, drooping leaves that often perk up after a thorough watering, and they rarely turn black. If you suspect frost, wait a few days to see how the plant reacts before making a final assessment.

Can I use plastic garbage bags to cover my plants?

You can use plastic garbage bags as a last resort, but ensure they do not touch the plant’s foliage. Plastic conducts cold, and where it contacts leaves, it can cause more damage than protection. Use stakes or an inverted bucket to create a tent-like structure, so the plastic forms an insulating air pocket around the plant. Remember to remove plastic covers promptly in the morning as they can cause rapid overheating.

Should I fertilize my plants before a frost to make them stronger?

No, avoid fertilizing plants right before a frost. Fertilizers, especially those high in nitrogen, encourage tender new growth, which is extremely vulnerable to cold damage. You want plants to slow down their growth and harden off naturally as fall approaches. Stop fertilizing sensitive plants several weeks before the typical first frost date in your area.

What if I forget to cover my plants and a frost hits?

If your plants get hit by an unexpected frost, do not immediately prune the damaged parts. Wait until the full extent of the damage is clear, which might take several days. Damaged foliage can still offer some insulation if another cold snap is coming. Once the threat of frost has passed for the season, prune back only the definitively dead, blackened, or mushy parts to healthy tissue. Provide consistent, moderate watering and good light, and sometimes plants will surprise you by recovering from the root zone.

For research-based plant care guidance, visit
Iowa State University Extension — Yard & Garden,
Washington State University Hortsense,
University of Minnesota Extension and
Penn State Extension — Trees, Lawns and Landscapes.

Disclaimer: This article is for informational purposes only and is not a substitute for professional advice. Consult local extension services for region-specific recommendations.

Categories
Sustainable & Eco-Friendly

Attracting Butterflies with the Right Plants

Envision a tranquil corner of your home, bustling with the delicate dance of butterflies. This is not a distant dream reserved for sprawling gardens. Even a small space, be it a balcony, patio, or a compact yard, offers incredible potential to become a vibrant haven for these vital pollinators. You hold the power to create a thriving ecosystem, supporting local biodiversity directly from your home.

Butterflies bring beauty, life, and an essential service to our environment: pollination. By strategically selecting the right butterfly plants and implementing sustainable gardening practices, you contribute directly to their survival while enhancing the natural charm of your outdoor area. This guide empowers you with practical, actionable steps to cultivate a truly pollinator friendly garden, regardless of its size. We focus on low-waste habits, water-wise methods, and safe pest management, ensuring your small space gardening efforts create lasting positive impact.

For research-based sustainable gardening guidance, see
Cornell Waste Management Institute — Composting,
UF/IFAS Gardening Solutions — Florida-Friendly Landscaping,
The Xerces Society — Pollinator Conservation, and
Pollinator Partnership — Garden for Pollinators.

Disclaimer: This article is for informational purposes only and is not a substitute for professional advice. Check local regulations before installing rain capture, using greywater, or composting food scraps outdoors.

A monarch caterpillar actively feeding on a milkweed leaf in a terracotta pot on a patio, with blurred nectar flowers in the background.

Understanding Butterfly Needs: More Than Just Flowers

To successfully attract and support butterflies in your small space garden, you must understand their complete lifecycle requirements. Butterflies do not simply visit flowers; they live complex lives that involve distinct stages, each with specific needs. Your garden, however compact, can provide for many of these needs.

A green Swallowtail caterpillar eats dill in a terracotta pot, while a Monarch butterfly sips nectar from Zinnias in an adjacent container.

The Butterfly Life Cycle: A Brief Overview

A butterfly’s life consists of four fascinating stages: egg, larva (caterpillar), pupa (chrysalis), and adult. Each stage depends on different resources. Adult butterflies require nectar for energy, but caterpillars, the larval stage, need specific “host plants” for food. Without these host plants, butterflies cannot complete their life cycle, regardless of how many nectar-rich flowers you provide for the adults.

Vibrant urban balcony garden with butterflies feeding on nectar flowers in a vertical planter and a milkweed host plant showing nibbled leaves.

Key Elements for a Butterfly-Friendly Habitat

  1. Nectar Plants: These are the fuel stations for adult butterflies. They provide essential sugars and nutrients, giving butterflies the energy to fly, mate, and lay eggs. Look for plants with simple, open flowers, as these allow easy access to nectar. Clusters of flowers also make a more efficient food source.
  2. Host Plants: These are the nurseries for caterpillars. Each butterfly species often has a very specific set of plants its caterpillars can eat. Monarch caterpillars, for example, feed exclusively on milkweed. Providing these plants ensures the next generation of butterflies can thrive. Embracing a few nibbled leaves shows you are successfully supporting the butterfly lifecycle.
  3. Water Source: Butterflies need water, but they do not drink from open ponds or bird baths. Instead, they “puddle.” This means they extract moisture and minerals from damp soil, mud, or shallow puddles. You can create a simple puddling station with a shallow dish, sand, and water.
  4. Shelter and Sun: Butterflies are cold-blooded and need warmth to fly. Sunny spots in your garden are crucial. They also need shelter from strong winds and predators, which dense foliage or small shrubs can provide. Avoid entirely manicured spaces; a little wildness helps them hide.

By considering these four elements, you move beyond simply planting pretty flowers to creating a true ecosystem that supports butterflies from egg to adult.

A Painted Lady butterfly sips nectar from a purple coneflower in a sunlit balcony container garden with native plants.

Choosing the Right Butterfly Plants: Nectar Sources for Adults

Selecting the correct butterfly plants is paramount for attracting these winged beauties. Prioritize native plants whenever possible, as they are best adapted to your local climate and provide the most familiar food sources for native butterfly species. Native plants often require less water and maintenance once established, making them ideal for a low-maintenance, pollinator friendly garden.

A Painted Lady butterfly rests on fuchsia verbena, surrounded by purple salvia, in a modern vertical garden planter.

Qualities of Excellent Nectar Plants

  • Long Bloom Period: Choose plants that bloom for an extended time or select a variety of plants with staggered bloom times to provide continuous nectar throughout the growing season. This ensures butterflies always find food.
  • Flower Shape and Color: Butterflies prefer flat-topped clusters of flowers, or tubular flowers, which provide a landing pad and easy access to nectar. Bright colors like purple, pink, yellow, and red attract them most effectively.
  • No Pesticides: Ensure all plants you purchase or grow are free from systemic pesticides, which can harm or kill butterflies and other beneficial insects. Inquire with your nursery about their growing practices.
  • Grouping: Plant flowers in clusters or drifts rather than single specimens. Large patches of color are more visible to butterflies from a distance, making your garden a more attractive target.

Vibrant container garden on a small patio with blooming Zinnias, Salvia, and Coneflowers in terracotta and ceramic pots, visited by a butterfly.

Top Nectar Plants for Small Spaces

Many fantastic options thrive in containers and compact beds. Here are some reliable choices:

Plant Name Key Features for Butterflies Care Notes for Small Spaces
Coneflower (Echinacea purpurea) Provides a large landing pad; long bloom time; attracts many butterfly species. Full sun, well-draining soil. Drought-tolerant once established. Can get tall; choose compact varieties.
Salvia (Salvia spp.) Tubular flowers loved by butterflies; wide range of colors and bloom times. Full sun. Many varieties are compact and drought-tolerant. Deadhead for continuous blooms.
Zinnia (Zinnia elegans) Bright, daisy-like flowers; abundant nectar. Choose single-petal varieties over double for easier access. Full sun, good air circulation. Heat and drought tolerant. Great for containers.
Lantana (Lantana camara) Clusters of small, colorful flowers; attracts many butterfly species. Full sun. Tolerates heat and drought. Can be grown as an annual or perennial depending on climate. Check if invasive in your area.
Penta (Pentas lanceolata) Star-shaped clusters of flowers; a butterfly magnet, especially in warmer climates. Full sun to partial shade. Blooms continuously. Great for containers and hanging baskets.
Cosmos (Cosmos bipinnatus) Simple, open flowers; easy to grow from seed; provides continuous blooms. Full sun. Tolerates poor soil. Many compact varieties available.
Bee Balm (Monarda didyma) Unique tubular flowers; especially attractive to long-tongued butterflies. Full sun to partial shade. Prefers moist soil. Good for a native, pollinator friendly garden.

When you integrate these `butterfly plants` into your compact yard or balcony, you immediately increase its appeal to local butterfly populations, transforming it into an active feeding ground.

A woman's hand observing a small Black Swallowtail caterpillar munching on dill in a terracotta pot on a small, sunny patio.

Beyond Nectar: Essential Host Plants for Butterfly Larvae

Attracting adult butterflies is only half the mission. To truly support their entire life cycle and ensure future generations, you must also provide host plants for their caterpillars. This is a critical component of any effective `pollinator friendly garden`.

A Monarch butterfly hovers intently over a milkweed plant in a terracotta pot on a patio, assessing a leaf for egg-laying.

Understanding Host Plant Specificity

Most butterfly species are highly selective about their host plants. A female butterfly will only lay her eggs on the specific plant species that her caterpillars can eat. If those plants are absent, she moves on, and that butterfly population cannot reproduce in your garden. This biological imperative underscores the importance of including host plants in your design.

A striped Black Swallowtail caterpillar eats parsley in a terracotta pot on a balcony. Softly blurred milkweed and a vertical planter are in the backg

Common Host Plants for Your Small Space

Identifying common butterfly species in your region helps you select appropriate host plants. Research local native butterfly species to maximize your impact. Here are some widely recognized host plants that can often be integrated into `small space gardening`:

  • Milkweed (Asclepias spp.): Absolutely essential for Monarch butterflies. Plant common milkweed, swamp milkweed, or butterfly weed. Ensure you plant native milkweed varieties specific to your region. For instance, common milkweed (Asclepias syriaca) thrives in many eastern and central North American regions, while desert milkweed (Asclepias subulata) suits arid western areas.
  • Parsley, Dill, Fennel (Apiaceae family): These culinary herbs double as host plants for Black Swallowtail caterpillars. You can grow them in containers and enjoy their culinary benefits while supporting butterflies.
  • Bronze Fennel (Foeniculum vulgare ‘Purpureum’): A beautiful ornamental herb that also serves as a host for Black Swallowtails. Its feathery foliage adds texture to your garden.
  • Rue (Ruta graveolens): Another host plant for Black Swallowtail caterpillars. Handle with care, as sap can cause skin irritation in some individuals.
  • Violets (Viola spp.): Host plants for Fritillary butterflies. Many violets are low-growing and can be tucked into small garden beds or containers.
  • Passionflower (Passiflora spp.): Host plant for Gulf Fritillary and Zebra Longwing butterflies. Its striking flowers also provide nectar. Many varieties are vining and can be grown on trellises, ideal for vertical `small space gardening`.
  • Willows, Poplars, Aspens (Salix, Populus spp.): While many species are large trees, smaller willow shrubs exist that host Mourning Cloak butterflies. Consider dwarf varieties if space allows.

When incorporating host plants, anticipate that caterpillars will munch on the leaves. This is a sign of success, not a problem. Embrace the nibbled leaves as proof your garden provides true sanctuary for butterflies.

Woman kneeling on a sunlit urban balcony, arranging a purple verbena plant into a terracotta pot surrounded by various containers, a vertical planter,

Designing Your Small Space Butterfly Oasis

Creating a butterfly haven in a compact area requires thoughtful design. You want to maximize space, provide necessary resources, and create an appealing aesthetic. `Small space gardening` techniques make this entirely achievable.

Small patio garden corner with a vining passionflower on a trellis, clustered pots of petunias, salvias, and trailing alyssum.

Strategic Layout for Maximum Impact

  1. Vertical Gardening: Utilize vertical space with trellises, hanging baskets, and wall planters. Vining host plants like passionflower or nectar plants like petunias can climb upwards, saving precious ground space.
  2. Container Grouping: Cluster containers to create a larger visual impact and a more substantial patch of color, making your garden more visible to butterflies. Grouping also helps maintain humidity and makes watering more efficient.
  3. Layering Plants: Use plants of different heights. Taller plants in the back or center of a container, with medium-sized plants and low-growing ground covers or trailing plants around the edges. This creates depth and offers varied shelter.
  4. Sun and Shelter: Identify areas in your small space that receive at least 6 hours of direct sunlight daily for nectar plants. Also, consider areas that offer some protection from strong winds, perhaps near a wall or a dense shrub, where butterflies can rest.
  5. Puddling Station Integration: Place a shallow dish filled with sand and water in a sunny, accessible spot. This provides essential minerals for butterflies without occupying much space.

Diverse container garden on a patio with glazed ceramic, fabric grow bag, repurposed wooden crate, and recycled plastic pots, all with flowering plant

Choosing the Right Containers and Materials

Your container choices impact plant health and visual appeal. Opt for larger containers whenever possible, as they retain moisture longer and provide more room for root growth, reducing watering frequency. Terracotta pots look attractive but dry out quickly; plastic or glazed ceramic pots hold moisture better. Ensure all containers have drainage holes.

Consider upcycling materials for your containers. Old tires (check for leaching), repurposed wooden crates, or even sturdy fabric grow bags offer sustainable and economical choices. If using wood, opt for FSC-certified wood, ensuring it comes from sustainably managed forests. For plastic containers, look for those made from recycled materials.

Butterfly garden bloom calendar showing plant types for spring, summer, and fall, with butterfly icons.

Planning for continuous blooms throughout the year is crucial for a successful `pollinator friendly garden`. Different butterfly species emerge and are active at various times, so a staggered bloom schedule ensures there is always a food source available. This thoughtful design element greatly enhances your garden’s effectiveness.

A gloved hand waters a potted purple salvia plant on a balcony, with a monarch butterfly visible on a Tithonia flower in the soft background.

Water-Wise Habits for a Thriving Pollinator Garden

Water is a precious resource, and efficient watering practices are fundamental to sustainable `small space gardening`. You can keep your `butterfly plants` healthy and vibrant while minimizing water waste, directly benefiting both your garden and the environment.

Early morning sun illuminates a watering can precisely watering the soil around a purple Verbena in a terracotta pot on a balcony, emphasizing efficie

Efficient Watering Techniques

  1. Deep, Infrequent Watering: Instead of frequent shallow watering, water deeply. This encourages roots to grow deeper, making plants more resilient to dry spells. Check soil moisture by sticking your finger about an inch or two into the soil; if it feels dry, it is time to water.
  2. Morning Watering: Water early in the morning. This allows the water to soak in before the heat of the day causes excessive evaporation. It also gives foliage time to dry, reducing the risk of fungal diseases.
  3. Targeted Watering: Apply water directly to the plant’s root zone, rather than spraying the foliage. This reduces waste and ensures the water reaches where it is needed most. Drip irrigation or soaker hoses are excellent for this, even in small setups, but a simple watering can works effectively for containers.
  4. Self-Watering Containers: Utilize self-watering containers, which have a reservoir that gradually wicks water up to the soil. These reduce watering frequency significantly, ideal for busy gardeners or those with limited mobility.

Gloved hands apply light wood chips as mulch around a vibrant purple Salvia plant in a terracotta pot on a sunny patio.

The Power of Mulch

Mulch is your best friend for water conservation in any garden, especially in containers. A 1-2 inch layer of organic mulch, such as wood chips, shredded leaves, or straw, offers numerous benefits:

  • Reduces Evaporation: Mulch acts as a barrier, slowing down the rate at which water evaporates from the soil surface. This means you water less frequently.
  • Regulates Soil Temperature: It keeps soil cooler in summer and warmer in winter, providing a more stable environment for plant roots.
  • Suppresses Weeds: Mulch blocks sunlight, preventing weed seeds from germinating. Fewer weeds mean less competition for water and nutrients.
  • Enriches Soil: Organic mulches break down over time, adding valuable organic matter and nutrients to your potting mix or garden soil, improving its structure and fertility.

Apply mulch to your containers and garden beds, keeping it a few inches away from plant stems to prevent rot.

Compact dark green rain barrel on a small brick patio, connected to a downspout, with a watering can filling from its spigot. Lush container plants su

Rain Capture for Small Spaces

Even in a small space, you can implement basic rain capture. A small rain barrel or even just placing buckets under a gutter downspout can collect surprisingly large amounts of water. Rainwater is free, unchlorinated, and excellent for plants. Ensure any rain capture system is securely installed and check local regulations, as some areas have restrictions on rain harvesting.

Close-up of hands releasing ladybugs onto a marigold plant in a terracotta pot on an urban patio, signifying natural pest control.

Safe Pest Management: Protecting Your Pollinators

For a truly `pollinator friendly garden`, safe pest management is non-negotiable. Chemical pesticides, even those marketed for garden use, can be lethal to butterflies and other beneficial insects, often with long-lasting residual effects. Embrace Integrated Pest Management (IPM), a holistic approach that prioritizes prevention and non-toxic solutions.

A gardener on a sunny patio gently lifts a fuchsia leaf in a pot to inspect it, surrounded by well-spaced, healthy container plants.

Principles of Integrated Pest Management (IPM)

  1. Prevention:
    • Healthy Plants: Strong, healthy plants are less susceptible to pests. Provide adequate sunlight, water, and nutrients.
    • Right Plant, Right Place: Choose plants well-suited to your local climate and conditions. Stressed plants attract pests.
    • Good Air Circulation: Space plants appropriately to allow air to flow, reducing humidity and fungal issues.
    • Inspect New Plants: Before adding new plants to your garden, inspect them thoroughly for any signs of pests or disease. Isolate them if you see anything suspicious.
  2. Monitoring:
    • Regular Checks: Routinely inspect your plants for early signs of pests. Look on the undersides of leaves, stems, and new growth.
    • Learn to Identify: Understand which insects are harmful pests and which are beneficial predators (like ladybugs or lacewings) or simply part of the ecosystem (like caterpillars on their host plants).
  3. Mechanical and Cultural Controls:
    • Hand-Picking: For larger pests like slugs or caterpillars (if not on a host plant), physically remove them.
    • Strong Water Spray: A direct spray of water can dislodge aphids, spider mites, and other small insects.
    • Pruning: Remove heavily infested plant parts.
    • Companion Planting: Some plants deter pests naturally or attract beneficial insects. For example, marigolds can deter nematodes.
  4. Least-Toxic Options (Last Resort):
    • Insecticidal Soaps: These work by smothering soft-bodied insects. They have low residual effect but require direct contact with the pest.
    • Horticultural Oils: Similar to insecticidal soaps, these suffocate pests. Use them carefully according to label instructions.
    • Neem Oil: A botanical insecticide that disrupts insect growth and feeding. It generally has a low impact on beneficial insects once dry, but avoid spraying when pollinators are active.

Close-up of a Monarch butterfly on a potted coneflower with minor leaf damage on an urban balcony at golden hour, observed by a gardener's hand.

Crucial Considerations for Pollinator Safety

Never spray any pesticide, even organic ones, when butterflies, bees, or other beneficial insects are active on your plants. Apply treatments in the early morning or late evening when pollinators are least active. Remember that the goal of a butterfly garden is to encourage insect life, not eradicate it. Embrace a philosophy of tolerance for minor damage, understanding that a few chewed leaves signify a healthy, functioning ecosystem where life cycles are unfolding naturally.

When purchasing `butterfly plants`, specifically ask if they have been treated with systemic pesticides, such as neonicotinoids. These chemicals are absorbed by the plant and become present in its pollen and nectar, making them toxic to any insect feeding on them for an extended period, even months after application. Opt for plants guaranteed pesticide-free to ensure you provide a safe haven for pollinators.

Hands deadheading purple salvia in a terracotta pot on a sunlit urban patio with other vibrant flowers and a monarch butterfly.

Nurturing a Pollinator Friendly Garden: Year-Round Care

A thriving `pollinator friendly garden` requires ongoing care that extends beyond initial planting. Implementing sustainable practices throughout the seasons ensures your small space remains a welcoming and resource-rich environment for butterflies.

Person inspects a blooming coneflower in a pot on a sunlit urban patio with various containers, some showing dried stems.

Seasonal Maintenance for Continuous Support

  • Spring Awakening: As temperatures rise, begin by gently clearing any overwintered debris. Many butterfly species overwinter as eggs, caterpillars, or chrysalises in leaf litter or on plant stems. Avoid over-tidying too early. Allow ground cover and old stems to remain until consistent warm weather arrives, protecting these dormant stages. Assess existing `butterfly plants` for health and plan for new additions, prioritizing native varieties.
  • Summer Blooms: This is peak season for butterflies. Maintain consistent watering, especially for container plants, and deadhead spent flowers on nectar plants (unless they are host plants or you want them to go to seed) to encourage new blooms. Continue monitoring for pests, employing safe, non-toxic methods.
  • Fall Preparations: As the weather cools, select plants that offer late-season nectar, such as asters and goldenrod, to support migrating butterflies and those preparing for winter. Allow some plants to go to seed, providing food for birds and structure for overwintering insects. Resist the urge to aggressively “clean up” your garden; fallen leaves and dried plant stalks offer crucial shelter.
  • Winter Dormancy: Your small space garden might appear quiet, but life persists. Leave dried stems and seed heads as natural insulation and potential overwintering sites. Protect tender perennials in containers by moving them to a sheltered location or insulating their pots. A layer of straw or burlap around containers helps guard roots against extreme cold.

Close-up of hands mixing dark compost into lighter peat-free potting mix in a terracotta pot on a weathered patio table.

Enhancing Soil Health in Containers

Container gardening demands particular attention to soil health because plants rely entirely on the potting mix you provide. Over time, potting mix degrades, and nutrients deplete. You can maintain a vibrant environment:

  • Use Peat-Free Potting Mix: Choose peat-free potting mixes to support environmental sustainability. Peat harvesting damages crucial wetlands. Peat-free alternatives often contain compost, coir, or other sustainable materials. These mixes also tend to have better drainage and aeration.
  • Amend with Organic Matter: Regularly incorporate compost or worm castings into your potting mix. These amendments slowly release nutrients, improve soil structure, and foster a healthy microbial community, which is vital for nutrient uptake by plants.
  • Slow-Release Organic Fertilizers: Instead of synthetic, fast-acting fertilizers, use slow-release organic granular fertilizers. These provide a steady supply of nutrients without the risk of over-fertilization or nutrient runoff. They also promote beneficial soil microbes.
  • Avoid Salt Buildup: Over time, mineral salts from tap water and fertilizers can accumulate in container soil. Flush pots periodically by watering thoroughly until water drains freely from the bottom for an extended period. This helps leach out excess salts.

By actively nurturing your soil, you create a stronger foundation for your `butterfly plants` and ensure they can continuously provide the resources butterflies need.

A person on an urban patio engrossed in a tablet, surrounded by container plants like coneflowers and pentas, and a vertical herb garden.

Frequently Asked Questions

Can I really attract butterflies to a small balcony?

Absolutely. Butterflies primarily seek food (nectar and host plants), water, and shelter. Even a few well-chosen containers with butterfly plants can provide these essential resources. Focus on density, continuous blooms, and specific host plants to maximize your appeal. Vertical gardening and grouping pots also enhance visibility for butterflies.

How do I know which butterfly plants are native to my area?

Consult local resources such as university extension offices, native plant societies, botanical gardens, or reputable native plant nurseries. Websites like the Xerces Society or the Pollinator Partnership offer regional guides. Providing your address to online native plant finders can also generate a tailored list of appropriate `butterfly plants` for your specific location.

What is the most important thing to remember for a pollinator friendly garden?

Avoid all synthetic pesticides. Even a tiny amount of pesticide residue can harm or kill butterflies and their larvae. Prioritize native plants, provide both nectar and host plants, and observe your garden regularly for natural solutions to any challenges. Embrace the idea that a truly `pollinator friendly garden` welcomes all stages of insect life.

My host plants are getting eaten by caterpillars. Is this a problem?

No, this is a sign of success. The purpose of a host plant is to feed butterfly larvae. Caterpillars munching on leaves indicates that butterflies are using your garden for reproduction, which is the ultimate goal of creating a `pollinator friendly garden`. Resist the urge to remove them; they are the future butterflies of your garden.

How often should I water my butterfly plants in containers?

Watering frequency depends on various factors: plant type, container size, soil mix, and weather. Generally, check the soil moisture daily by feeling an inch or two deep. Water thoroughly until it drains from the bottom. Deeper, less frequent watering encourages stronger root systems. Incorporating mulch significantly reduces watering needs.

Categories
Tools & Gear

Gardening Gloves Tested: Which Protect Best?

Your small garden brings immense joy, whether it is a bustling balcony, a compact patio, or a cozy backyard corner. Every time you dig, prune, or plant, your hands become your most essential tool. Protecting them is not an optional luxury, it is a practical necessity for comfortable, productive gardening. Choosing the right gardening gloves means the difference between a pleasant afternoon tending your plants and a session ending with blisters, scratches, or even worse, an unexpected encounter with unseen pests or harmful bacteria. This article guides you through the world of gardening gloves, helping you identify the best gloves for gardening in your small space.

We will explore various materials, discuss critical features like fit and grip, and match specific glove types to common small-space gardening tasks. Our goal is to equip you with the knowledge to select durable, comfortable, and highly protective gardening gloves, ensuring your hands stay safe and ready for your next gardening adventure. Let us make your gardening experience safer and more enjoyable, one pair of gloves at a time. This thorough tool reviews guide will help you find the perfect pair.

Close-up of a bare hand tending rosemary in a pot on a patio, with a tiny scratch on a finger.

Why Gardening Gloves Matter: Beyond Basic Protection

Many new gardeners underestimate the importance of quality gardening gloves. You might think a quick planting job does not require hand protection, but even minor tasks carry risks. Your hands face numerous hazards in the garden, even in the smallest of spaces. These risks range from minor annoyances to serious health concerns. Understanding these dangers helps you appreciate why selecting the right pair of gloves is a foundational step in safe gardening.

A bare hand reaches near a thorny rose in a rustic wooden planter box; a splinter is visible in the wood.

Common Hand Hazards in the Garden:

  • Thorns and Splinters: Rose bushes, berry plants, and many ornamentals possess sharp thorns. Even seemingly harmless plant stems can conceal tiny splinters. Digging in soil often uncovers bits of wood or sharp debris. Gloves create a barrier against these painful penetrations.
  • Blisters and Abrasions: Repetitive tasks like digging, weeding, or pruning without gloves can quickly lead to blisters. The friction from tool handles or rough soil causes skin irritation and breakdown. Gloves absorb this friction, preventing painful sores.
  • Skin Irritants and Allergens: Many plants, such as poison ivy, stinging nettle, or even common ornamental plants, release sap or have hairs that can irritate your skin. Some people develop allergic reactions to certain plant materials. Gloves prevent direct contact, protecting you from these unpleasant reactions.
  • Soil-borne Pathogens: Garden soil harbors various microorganisms, some of which can cause infections if they enter cuts or open wounds on your hands. Examples include tetanus bacteria or fungal spores. A good pair of gloves acts as a shield, minimizing exposure to these potential threats.
  • Chemical Exposure: If you use fertilizers, pesticides, or even organic pest deterrents, direct skin contact can be harmful. Gloves provide a crucial barrier, preventing these substances from absorbing into your skin. Always check chemical product labels for specific personal protective equipment recommendations.
  • Insect Bites and Stings: Wasps, spiders, ants, and other insects can reside in your garden beds. Reaching into foliage or overturning soil can disturb them, leading to unexpected bites or stings. Gloves add an extra layer of defense against these unwelcome encounters.
  • Sun Exposure: Prolonged time outdoors exposes your hands to harmful UV rays. While not the primary function, some gloves offer a degree of sun protection for your hands, preventing sunburn and long-term skin damage.

Beyond protection, gloves also enhance your gardening experience. They improve your grip on tools, reduce fatigue, and keep your hands cleaner. For small-space gardeners who often work in close quarters with delicate plants or compact containers, dexterity and comfort are key. You want gloves that protect without hindering your ability to handle small seedlings or maneuver around tight spaces. Choosing the best gloves for gardening means prioritizing both safety and functionality.

Three different types of gardening gloves displayed on a balcony, one being examined by a gloved hand, showing construction details.

Understanding Glove Materials and Construction

The vast array of gardening gloves available can seem overwhelming. You will find gloves made from a single material or sophisticated combinations, each designed for specific purposes. Understanding these materials helps you match the glove to your typical tasks and environmental conditions. Here is a breakdown of common materials and their characteristics:

Hands in green nitrile-coated gardening gloves plant a trailing plant in a terracotta pot, water droplets visible on the glove surface.

Synthetic Materials:

  • Nitrile: Often seen as a coating on cotton or nylon gloves, nitrile offers excellent puncture resistance, good dexterity, and a strong grip, even when wet. It is a common choice for general-purpose gardening gloves, providing a balance of protection and tactile feel. Nitrile is also a good alternative for those with latex allergies.
  • Latex: Latex coatings offer good grip and flexibility, but they are less durable against punctures than nitrile. The primary drawback is that many people have latex allergies. If you use latex gloves, ensure no one with an allergy will handle them.
  • Neoprene: Known for its water resistance and insulation properties, neoprene is ideal for working in wet or cool conditions. It provides good flexibility and keeps your hands dry, making it useful for watering, cleaning ponds, or working with wet soil.
  • Nylon and Spandex: These form the base fabric for many lightweight gloves. They offer stretch, breathability, and a close fit, contributing to excellent dexterity. They are often combined with coatings like nitrile or latex on the palms for added protection and grip, while the backs remain breathable.

Hands in light cotton gloves gently seed a terracotta pot on a sunny patio table, with a blurred balcony garden behind.

Natural Fibers:

  • Cotton: Basic cotton gloves offer good breathability and absorbency, making them comfortable in warm weather. However, they provide minimal protection against thorns or punctures and absorb water quickly, losing their effectiveness when wet. They are best for very light tasks like seeding or handling dry, soft plant material.
  • Bamboo: Similar to cotton, bamboo fibers offer superior breathability and moisture-wicking properties, keeping your hands cooler and drier than cotton. They are also naturally antimicrobial. Like cotton, they are best for light, dry tasks where high dexterity is needed, but they do not offer significant puncture protection.

Hands in light-tan goatskin gloves carefully hold a thorny rose stem in a terracotta pot on a patio, showcasing leather's dexterity and protection.

Leather Materials:

Leather gloves offer superior durability and puncture resistance, making them ideal for heavier tasks. The type of leather affects flexibility and feel.

  • Cowhide: This is a common and affordable option. Cowhide is durable, offers good abrasion resistance, and provides solid protection against thorns and rough surfaces. It can be a bit stiff initially but softens with use.
  • Goatskin: Goatskin leather is thinner and more supple than cowhide, offering superior dexterity while still providing excellent puncture resistance. This makes it a popular choice for tasks requiring fine motor skills, such as pruning roses or handling delicate plants with thorns. It is generally more expensive than cowhide but offers a better balance of protection and feel.
  • Deerskin: Deerskin is exceptionally soft, flexible, and comfortable. It molds to your hands over time, providing a custom fit. While very comfortable, its puncture resistance is generally less than goatskin or cowhide, making it better for tasks where comfort is paramount and significant thorn protection is not the main concern.

Close-up of a hand in a gauntlet gardening glove with reinforced fingertips, planting a trailing green plant in a terracotta pot on a patio.

Glove Construction:

Beyond the primary material, how a glove is constructed impacts its performance.

  • Coated Palms: Many gloves feature breathable fabric backs and coated palms. This combination provides dexterity and comfort on the back of the hand while offering grip and protection where it is most needed.
  • Reinforced Fingertips: Look for gloves with extra material or padding on the fingertips. This area experiences a lot of wear and tear, and reinforcement extends the glove’s lifespan and protects your nails.
  • Cuffs: Cuffs vary in length and style. A shorter knit cuff keeps debris out but offers less wrist protection. Gauntlet-style cuffs extend further up the forearm, providing critical protection when working with thorny bushes or reaching into dense foliage, preventing scratches and insect bites on your lower arms.

By understanding these materials and construction details, you can begin to identify which types of gardening gloves will best serve your specific needs, whether you are repotting herbs or pruning a thorny dwarf rose.

Gardener's hand in an ill-fitting, baggy glove struggles to use small pruners on a container plant on a sunlit patio.

Finding Your Perfect Fit and Grip

You might think any glove will do, but a poorly fitting glove can be more detrimental than no glove at all. The right fit directly impacts your dexterity, comfort, and safety. A glove that is too large can slip, reduce your grip on tools, and even snag on branches. One that is too small restricts movement, causes fatigue, and can tear easily. Achieving the perfect fit means finding a balance between snugness and freedom of movement.

Gardener in well-fitting gloves delicately transplants an herb seedling into a pot on a sunny patio table, demonstrating precision.

The Importance of a Proper Fit:

  • Dexterity: For small-space gardening, you often perform intricate tasks like transplanting seedlings, tying up vines, or harvesting small vegetables. A glove that fits well allows your fingers to move freely, maintaining your fine motor skills. Loose gloves make these tasks clumsy, increasing the risk of damaging plants or injuring yourself.
  • Comfort: You want to wear your gloves for extended periods without discomfort. A well-fitting glove minimizes bunching, rubbing, and pressure points, preventing blisters and fatigue. Gloves that are too tight can cut off circulation, making your hands feel cold or tingly.
  • Safety: Loose gloves can snag on thorns or tools, potentially causing accidents. They also offer less effective protection if the material bunches up, creating gaps for debris or sharp objects to penetrate. A snug fit ensures the protective material stays where it needs to be.

Close-up of a person's hand resting on a wooden patio table, being measured around the knuckles with a bright yellow fabric tape. Potted herbs are sof

How to Measure for Your Gloves:

Most glove manufacturers provide sizing charts. To find your size, you typically need two measurements:

  1. Hand Circumference: Use a flexible measuring tape. Wrap it around the widest part of your dominant hand, just below your knuckles, excluding your thumb. This measurement is usually the primary determinant of glove size.
  2. Hand Length: Measure from the base of your palm (where your hand meets your wrist) to the tip of your longest finger. Some charts also include this for a more precise fit, especially for gloves with longer fingers.

Compare these measurements to the brand’s sizing chart. Remember that sizes can vary slightly between manufacturers, so always check the specific chart for the gloves you are considering. When trying on gloves, ensure you can comfortably make a fist, spread your fingers, and pick up small objects. There should be a small amount of space at the fingertips, but not so much that the material bunches.

Gloved hand with textured palm carefully planting a small basil seedling into a terracotta pot on a sunlit wooden patio table.

Grip and Tactile Feel:

Beyond fit, the grip a glove provides is crucial for safety and efficiency. Different coatings and materials offer varying levels of grip.

  • Textured Coatings: Gloves with textured nitrile or latex coatings on the palms and fingers provide excellent grip on tools, even when wet. This is especially beneficial when handling plastic pots, metal tools, or slick plant stems.
  • Leather Gloves: While inherently grippy, leather can become slippery when wet, especially smooth varieties. Some leather gloves incorporate textured patches or synthetic palms to improve wet grip.
  • Tactile Feedback: A good glove should allow you to “feel” what you are doing. Thinner, more flexible materials or coatings offer better tactile feedback, which is important for delicate tasks like handling seeds or fine pruning. Too much padding can diminish this sense, making precise work difficult.

A gardener's arm in a long, forest-green gauntlet glove reaches deep into a dense balcony herb planter, showcasing forearm protection.

Cuff Length Considerations:

The cuff length impacts protection and comfort.

  • Short Cuffs (Knit Cuffs): These are common on lightweight, general-purpose gloves. They offer minimal wrist protection but allow for maximum wrist mobility and keep debris from falling inside the glove. They are good for potting or light weeding.
  • Long Cuffs (Gauntlet Cuffs): Extending several inches up the forearm, gauntlet cuffs provide superior protection against thorns, scratches, and insect bites. They are essential when working with roses, prickly shrubs, or reaching deep into dense foliage. These cuffs often have an elasticized opening or an adjustable strap to ensure a snug fit around the forearm, preventing debris from entering.

By prioritizing proper fit, understanding grip characteristics, and choosing appropriate cuff lengths, you elevate your gardening experience, making it safer, more comfortable, and ultimately more productive.

Assortment of gardening gloves and tools on a patio potting bench, showcasing options for various small garden tasks among container plants.

Glove Types for Common Small Garden Tasks

Your small garden may have a limited footprint, but it still demands a range of tasks. You will transition from delicate seeding to robust pruning, and each job benefits from a specific type of glove. Matching the right glove to the task ensures optimal protection, comfort, and efficiency. Here, we break down common glove categories and their ideal applications in a compact gardening setting.

A gloved hand (blue-coated palm, beige knit back) gently plants a basil seedling into a terracotta pot on a patio table, surrounded by other container

1. Light Duty/General Purpose Gloves:

  • Description: These are typically lightweight, breathable gloves, often made from nylon or bamboo with a nitrile or latex coating on the palm and fingers. They are flexible and offer excellent dexterity.
  • Best For:
    • Potting and Repotting: Handling soil, filling containers, and gently setting plants without getting hands excessively dirty.
    • Seeding and Transplanting: Delicate tasks requiring fine motor skills, like handling small seeds or carefully moving young seedlings.
    • Light Weeding: Pulling small, non-thorny weeds from beds or containers.
    • Harvesting Herbs and Leafy Greens: Picking vegetables and herbs where minimal protection is needed but clean hands are desired.
  • Why They Excel: They offer good tactile feel, allowing you to manipulate small items. The coating provides a decent grip and keeps hands relatively clean and dry. They are comfortable for extended wear in warm weather.

A gardener wearing tan goatskin pruning gloves carefully prunes a compact berry bush in a large terracotta pot on a sunlit patio.

2. Medium Duty/Pruning Gloves:

  • Description: These gloves offer more robust protection than light-duty options. They often feature a thicker nitrile coating, a blend of synthetic and leather materials, or entirely goatskin leather. They might have reinforced fingertips.
  • Best For:
    • General Pruning: Handling small to medium-sized branches with hand pruners, protecting against minor nicks and sap.
    • Working with Thorny Plants (Mild): Ideal for tasks around plants with small thorns, like some types of compact roses or berry bushes, where you need dexterity.
    • Digging and Planting: More substantial digging in raised beds or larger containers where you encounter roots or rough soil.
    • Handling Rough Materials: Moving small rocks, mixing compost, or spreading mulch.
  • Why They Excel: They strike a balance between protection and flexibility. The enhanced durability resists punctures from moderate thorns and abrasive surfaces, while still allowing enough finger movement for precision work. Goatskin leather provides excellent protection with good dexterity.

Close-up of gardener's hands in heavy-duty leather gauntlet gloves pruning a thorny rose in a terracotta pot on a sun-dappled patio.

3. Heavy Duty/Rose Gloves:

  • Description: These are the champions of protection, typically made from sturdy cowhide or thicker goatskin leather, often extending up the forearm with gauntlet cuffs. They prioritize puncture and abrasion resistance over fine dexterity.
  • Best For:
    • Pruning Thorny Roses and Shrubs: Essential for protecting your hands and forearms from severe thorn punctures.
    • Clearing Overgrown Areas: Tackling dense, woody growth in your small space, or dealing with plants that have sharp leaves or stems.
    • Handling Cactus or Succulents with Spines: If your small garden includes these, heavy-duty gloves are a must.
    • Moving Heavy Debris: Lifting rough branches or working with construction materials during a garden renovation.
  • Why They Excel: Their thick material and extended cuffs offer unparalleled protection against the most aggressive thorns and sharp edges. While they reduce dexterity, the trade-off is worthwhile for high-risk tasks, preventing serious injury.

Hands in bright, waterproof gloves repotting a plant in muddy soil within a terracotta pot on a sunlit patio with container plants.

4. Waterproof/Wet Conditions Gloves:

  • Description: Made from materials like neoprene, natural rubber, or sometimes a heavily coated synthetic, these gloves are designed to keep your hands completely dry.
  • Best For:
    • Watering and Irrigation Setup: Adjusting drip lines, handling watering cans, or working with hoses without getting your hands soaked.
    • Working in Muddy Soil: Essential for planting or repotting in very wet conditions, or clearing muddy drains.
    • Cleaning Pond Filters or Water Features: Protecting hands from dirty water and potential aquatic irritants.
    • Applying Liquid Fertilizers or Pest Control: Creating a barrier against chemical contact (always check product labels for specific PPE).
  • Why They Excel: They prevent water from reaching your skin, maintaining comfort and warmth in wet environments. They are often easy to clean and resist absorption of liquids.

Gardener in insulated green gloves planting a spinach seedling into damp soil in a terracotta pot on a cool patio.

5. Cold Weather Gardening Gloves:

  • Description: These gloves feature insulation, often a fleece or thermal lining, beneath a water-resistant or waterproof outer layer.
  • Best For:
    • Winter or Early Spring Tasks: Planting cold-hardy greens, checking on dormant plants, or preparing beds when temperatures are low.
    • Working with Cold, Damp Soil: Protecting hands from the chilling effects of wet earth during cooler months.
  • Why They Excel: They keep your hands warm and comfortable, allowing you to extend your gardening season into cooler weather without discomfort. Look for models that still offer decent dexterity for the tasks you need to perform.

By building a small collection of these specialized gardening gloves, you ensure you always have the right protection for any task your small garden throws your way. This approach maximizes both your safety and your gardening enjoyment, making your gardening gloves an indispensable part of your tool kit.

Gardener in green nitrile gloves transplants seedling into pot on balcony; other glove types hang in soft focus background.

Glove-by-Task Recommendations: A Practical Guide

Choosing the best gloves for gardening means understanding that no single glove does everything perfectly. Your gardening activities vary, and so should your glove selection. This practical guide presents a table outlining common small-space gardening tasks and the types of gloves best suited for each, helping you make informed decisions.

Matching Gardening Gloves to Your Tasks
Common Small Garden Task Recommended Glove Type(s) Key Features to Look For Why This Choice Works
Seeding & Transplanting Light Duty/General Purpose (Nitrile/Nylon, Bamboo/Nitrile) High dexterity, snug fit, good tactile feel, breathable back. Allows precise handling of small seeds and delicate seedlings without crushing them. Keeps hands clean.
Potting & Repotting Light Duty/General Purpose (Nitrile/Nylon), Medium Duty (Thicker Nitrile, Goatskin) Good grip on pots, moderate dirt/moisture resistance, flexibility. Protects against soil, dampness, and minor abrasions from containers. Maintains good grip on wet or dry pots.
General Weeding (Non-thorny) Light Duty/General Purpose (Nitrile/Nylon, Bamboo/Nitrile) Flexibility, grip for pulling weeds, reasonable hand protection. Keeps hands clean and prevents minor scrapes, while allowing full range of motion for efficient weeding.
Pruning (Light, Herb Snips) Light Duty/General Purpose (Nitrile/Nylon), Goatskin Leather High dexterity, good finger control, protection against sap and minor nicks. Enables precise cuts with snips or small bypass pruners, protecting from sticky sap and accidental cuts.
Pruning Thorny Plants (Roses, Berries) Heavy Duty/Rose Gloves (Cowhide, Thick Goatskin with Gauntlet Cuffs) Exceptional puncture resistance, thick material, extended forearm protection. Essential for preventing deep punctures and scratches from aggressive thorns, safeguarding hands and forearms.
Digging & Soil Amendments Medium Duty (Thicker Nitrile/Nylon, Goatskin), Heavy Duty (Cowhide) Durability, abrasion resistance, strong grip, moderate protection against sharp objects. Withstands rough soil, roots, and potential debris. Prevents blisters and protects against sharp edges.
Watering & Working in Wet Soil Waterproof/Wet Conditions Gloves (Neoprene, Rubber) Fully waterproof, good grip when wet, keeps hands dry and warm. Prevents hands from getting wet and cold, maintains comfort, and improves grip on wet tools or hoses.
Applying Fertilizers/Pest Control Waterproof/Wet Conditions Gloves (Rubber, Neoprene, Thick Nitrile) Chemical resistance (check specific product label), full hand coverage. Protects skin from direct contact with chemicals, reducing absorption risks. Always follow manufacturer guidelines.
Cold Weather Gardening Cold Weather Gardening Gloves (Insulated, Waterproof Outer) Insulation for warmth, often waterproof, decent flexibility for the cold. Keeps hands warm and dry, allowing you to work comfortably in lower temperatures, extending your gardening season.

Remember, this table provides general guidance. Your specific needs might vary based on the plants you grow and your local conditions. Consider having at least two pairs of gardening gloves: a lighter pair for delicate work and a more robust pair for protection against thorns and heavier tasks. Investing in the right glove for each job saves you discomfort, prevents injury, and makes your gardening experience much more enjoyable.

Freshly washed fabric and leather gardening gloves drying on a compact rack on a sunny urban balcony amidst container plants.

Caring for Your Gloves: Maintenance and Longevity

Your gardening gloves work hard, and just like any other tool, they benefit from proper care and maintenance. Cleaning and storing your gloves correctly extends their lifespan, keeps them hygienic, and ensures they are ready for your next gardening session. Neglecting glove care can lead to unpleasant odors, material degradation, and a shorter useful life, making it a critical aspect of your tool reviews.

Gardener's gloved hands, wearing blue coated fabric gloves, actively washing with soap and water in an outdoor basin.

Cleaning Your Gardening Gloves:

The cleaning method depends largely on the glove material.

  • Synthetic and Coated Gloves (Nitrile, Latex, Nylon, Bamboo Blends):
    1. Rinse Immediately: After use, rinse off loose dirt and debris under running water.
    2. Wash with Soap: For tougher grime, wash your gloved hands with mild soap and water, as if you were washing your bare hands. This helps remove embedded dirt and plant sap.
    3. Scrub Gently: Use a soft brush or your other gloved hand to gently scrub away stubborn dirt.
    4. Rinse Thoroughly: Ensure all soap residue is gone, as it can dry out materials.
    5. Air Dry: Squeeze out excess water without twisting. Hang them to air dry completely, ideally in a well-ventilated area away from direct sunlight or heat, which can degrade coatings. You can use clothespins or a glove dryer rack.
  • Leather Gloves (Cowhide, Goatskin, Deerskin):
    1. Brush Off Dry Dirt: Never submerge leather gloves in water. Once dry, gently brush off any loose dirt or soil with a soft brush.
    2. Wipe Clean: For stubborn grime, dampen a cloth with a small amount of mild soap (like saddle soap) and gently wipe down the leather. Avoid soaking the leather.
    3. Rinse (Spot Clean): Use a clean, damp cloth to wipe off any soap residue.
    4. Air Dry Slowly: Shape the gloves and allow them to air dry slowly at room temperature. Avoid direct heat, which can make leather stiff and crack. You can put them on occasionally as they dry to help them retain their shape.
    5. Condition (Optional): Once dry, you can apply a small amount of leather conditioner to keep the material supple and prevent cracking. Follow the conditioner product instructions.

Important Note: Always check the manufacturer’s care instructions on your specific gloves, as some may have unique recommendations. If you have handled chemicals, ensure you follow appropriate decontamination procedures, possibly disposing of the gloves if they are not rated for chemical resistance.

Dry gardening gloves hang neatly on hooks and in a mesh caddy on a wooden slatted wall in a tidy small-space patio garden.

Storing Your Gloves in Small Spaces:

Proper storage prevents mildew, extends glove life, and keeps your small garden space tidy.

  • Ensure They are Dry: Never store damp gloves. This leads to mildew, unpleasant odors, and material degradation.
  • Hang Them Up: For small spaces, hanging is ideal. Use a simple hook on a wall, a pegboard, or a clothesline. This allows air circulation and prevents crushing.
  • Utilize a Mesh Bag or Caddy: If hanging is not possible, a breathable mesh bag or a small, dedicated caddy allows for air circulation while keeping gloves together. Avoid sealing them in airtight plastic containers.
  • Keep Away from Extreme Temperatures: Store gloves in a cool, dry place. Extreme heat can cause synthetic materials to become brittle and leather to crack, while extreme cold can stiffen materials.
  • Dedicated Spot: Designate a specific spot for your gardening gloves. This keeps them organized and easily accessible for your next task.

Gardener's hands inspecting a well-worn, coated fabric glove, highlighting peeling grip and thinning material on the palm.

Inspecting for Wear and Tear:

Regularly inspect your gloves for signs of wear.

  • Holes or Tears: Even small holes compromise protection.
  • Thinning Material: Areas that are becoming thin will soon develop holes.
  • Loss of Grip: If coatings are peeling or wearing off, the glove’s grip and protection diminish.
  • Stiffness or Cracking: For leather gloves, severe stiffness or cracking indicates the leather is breaking down and losing its protective qualities.

Replace gloves when they show significant wear. Continuing to use compromised gloves can lead to injury or discomfort, defeating the purpose of wearing them in the first place. By dedicating a few minutes to proper care after each use, your gardening gloves will serve you well for many seasons.

Close-up of a gloved hand deflecting a sharp, broken pot shard in a container garden.

Safety First with Gardening Gloves

While gardening offers tranquility and rewards, it also presents potential hazards. Your gardening gloves are a primary line of defense, but their effectiveness depends on how you use and maintain them. Prioritizing safety ensures that your gardening remains a joyful and healthy activity. Here are key safety practices related to your gardening gloves.

Gloved hands carefully trim a dead leaf from a basil plant in a terracotta pot on a balcony table, showcasing protection for small tasks.

Always Wear Your Gloves:

This seems obvious, yet many gardeners omit gloves for “quick” tasks. Even a few minutes of exposure can lead to splinters, irritations, or contact with harmful substances. Make wearing gloves a habit for every gardening activity, no matter how small or seemingly benign. This consistent practice protects your skin from the minor scrapes to significant threats.

Gloved hand reading a chemical fertilizer label with standard gardening gloves blurred in background.

Protect Against Chemicals:

When working with garden chemicals, such as fertilizers, pesticides, or even strong cleaning agents for your tools, always check the product label for specific personal protective equipment (PPE) recommendations. Some chemicals require specific types of gloves, such as chemical-resistant rubber or nitrile gloves, which offer a higher level of barrier protection than standard gardening gloves. Never use gloves that have come into contact with strong chemicals for regular gardening tasks afterward, as residues can transfer to your skin or plants. Dispose of chemically contaminated gloves according to local guidelines and product instructions.

Gloved hands on a bright patio potting bench, one adjusting a cuff, ready to work with soil in a terracotta pot.

Prevent Disease and Contamination:

Soil contains microorganisms, some of which can cause infections if they enter cuts or open wounds. Wearing gloves prevents direct contact with potentially harmful bacteria or fungi. If you have any cuts, scrapes, or open wounds on your hands, ensure your gloves are intact and provide a complete barrier. Clean your gloves regularly to remove soil and pathogens, preventing their spread to other areas of your garden or home. The National Safety Council provides guidance on home and garden safety, emphasizing protective gear.

Close-up of a gardener's hand in a snug-fitting fabric glove, using a small battery-powered pruner to trim a dense rosemary plant on a sunny patio.

Avoid Snags and Entanglement:

Ensure your gloves fit snugly. Loose or oversized gloves can snag on tools, branches, or machinery, potentially pulling your hand into danger. This is especially important when using power tools, even small battery-operated pruners or trimmers. While most small-space gardeners primarily use hand tools, remaining aware of this risk is crucial. Always prioritize a fit that allows dexterity without excessive material that could catch.

A pair of well-worn green and gray gardening gloves, one with a visible tear on the fingertip, lying on a wooden patio table next to potted herbs.

Inspect and Replace Regularly:

Before each use, quickly inspect your gloves for holes, tears, or thinning spots. A compromised glove offers compromised protection. Even a small puncture can allow thorns, chemicals, or pathogens to reach your skin. Replace worn-out gloves promptly. Continuing to use damaged gloves creates a false sense of security and puts your hands at risk. Think of your gloves as essential safety equipment, not just a casual accessory.

A gardener's hands, faintly soiled, are diligently washing with soap under a stream from an outdoor faucet on a small patio.

Clean Hands After Use:

Even with gloves, it is a good practice to wash your hands thoroughly with soap and water after every gardening session. This removes any residual dirt, sap, or microscopic particles that might have seeped through or transferred during glove removal. This simple step further reduces the risk of skin irritation or exposure to pathogens.

By integrating these safety practices into your gardening routine, you transform your gardening gloves from a simple accessory into a vital piece of personal protective equipment. This proactive approach ensures your hands remain healthy and protected, allowing you to enjoy your small garden without worry.

Person on a small patio reads a tablet surrounded by a container garden, gardening gloves and a potted herb on a nearby stool.

Frequently Asked Questions

Q: How often should I replace my gardening gloves?

A: Replace your gardening gloves when you notice significant wear, such as holes, tears, thinning material, or a loss of grip. For frequently used gloves, this might be every season or two. For less common use, they might last longer. Regular inspection helps you decide when it is time for a new pair to ensure consistent protection.

Q: Can I wash leather gardening gloves?

A: Generally, you should not machine wash or submerge leather gardening gloves. Water can stiffen and crack the leather, reducing its lifespan. Instead, brush off dry dirt. For tougher grime, wipe them with a damp cloth and a small amount of saddle soap. Allow them to air dry slowly away from direct heat, and consider conditioning them to keep the leather supple. This approach maintains the integrity of the material.

Q: What is the best type of glove for handling thorny roses?

A: For thorny roses, heavy-duty rose gloves are the best choice. These typically feature thick cowhide or goatskin leather, often with extended gauntlet cuffs that protect your forearms. Look for reinforced palms and fingers to prevent punctures from sharp thorns. While they reduce dexterity slightly, the superior protection they offer is essential for safely managing thorny plants.

Q: Are “one size fits all” gardening gloves effective?

A: “One size fits all” gloves often compromise on fit, which can reduce dexterity and comfort. For light, quick tasks, they might be acceptable. However, for serious gardening or tasks requiring precision or robust protection, a properly sized glove is always more effective. A snug fit improves grip, prevents blisters, and ensures the protective material stays in place. Invest in gloves that match your hand measurements for optimal performance.

Q: What should I do if my gloves get wet and muddy?

A: If your gloves get wet and muddy, clean them promptly. For synthetic or coated gloves, rinse them under running water, wash with mild soap, and then air dry completely. For leather gloves, brush off as much mud as possible when dry, then gently wipe clean with a damp cloth if necessary, and allow them to air dry slowly. Never store damp gloves, as this encourages mildew and odors, and can degrade the material. Proper cleaning and drying ensure your gloves stay hygienic and last longer.

For reliable tool and safety guidance, see
UF/IFAS — Microirrigation for Home Landscapes,
Oregon State Extension — Cleaning & Sharpening Tools,
Missouri Botanical Garden — Watering Tips,
National Safety Council — Home & Garden Safety and
Royal Horticultural Society (RHS) — Tools & Equipment Advice.

Disclaimer: Follow manufacturer instructions and local regulations. Wear appropriate protection, store blades safely, and keep tools away from children and pets.

Categories
Garden Design & Ideas

Budget Garden Design Tips That Look Expensive

Designing a beautiful garden, especially in a small space, does not require a large budget. You can create an outdoor sanctuary that looks luxurious and feels inviting without spending a fortune. This guide provides practical strategies and actionable advice to help you achieve a stunning garden makeover that is both affordable and sustainable.

Disclaimer: This article is for informational purposes only and is not a substitute for professional advice. Consult local extension services for region-specific recommendations.

Woman kneeling on a patio, looking from a sketchbook with garden plans to empty pots, embodying thoughtful garden design.

Plan with Purpose: The Foundation of Budget Garden Design

Every successful budget garden design begins with a clear plan. Spontaneous purchases often lead to mismatched items and wasted money. Before you buy anything, assess your space, understand its limitations, and define your vision. This strategic approach ensures your affordable garden makeover looks cohesive and thoughtful.

Tape measure on a sunlit balcony floor near terracotta pots and a planter stand, with shadows highlighting sun and shade zones.

Assess Your Space

Start by observing your balcony, patio, courtyard, or compact yard throughout the day. Note how sunlight moves across the area, identifying sunny and shady spots. Understand prevailing winds and any existing features you want to keep or hide. Measure your space accurately. Knowing your dimensions helps you choose appropriately sized elements and prevents overcrowding.

Person on patio contemplating design, surrounded by container plants, a vertical garden, and notebook.

Define Your Needs and Wants

Consider how you will use your outdoor area. Do you need a cozy reading nook, an entertaining zone, or a productive edible garden? Perhaps you want a blend of all three. Listing your priorities helps you allocate your budget effectively. For instance, if entertaining is key, comfortable seating and practical surfaces take precedence over elaborate plant collections.

Person's hands sketching a compact urban balcony layout with zones and container ideas on kraft paper at a wooden patio table.

Sketch Your Layout

A simple sketch on paper transforms your vision into a practical guide. Draw the outline of your space. Mark existing permanent features like doors, windows, or railings. Experiment with different arrangements for seating, containers, and pathways. This step, sometimes called “zoning,” helps you designate areas for different activities. For example, you might create a dining zone, a quiet corner, and a planting area. Aim for clear traffic flow, ensuring pathways are wide enough for comfortable movement, generally at least 24-30 inches for a single person. Consider the view from indoors too; make sure your garden presents an appealing picture when seen from inside your home.

Hands sort through salvaged items like pallet wood, a metal bucket, and a ceramic pot on a patio for DIY gardening.

Shop Your Home and Salvage Yard First

Before buying new items, look for hidden treasures around your home. Old ladders can become vertical planters. Discarded wooden crates transform into rustic shelves or container stands. Seek out affordable garden makeover supplies at thrift stores, yard sales, or even construction salvage yards. You often find unique, character-filled pieces for a fraction of the cost of new items. For example, an old metal bucket, cleaned and drilled with drainage holes, makes a charming planter. Wooden pallets, often available for free, offer versatile material for DIY projects like privacy screens or vertical gardens.

Vibrant urban balcony garden with artfully grouped terracotta, galvanized, and painted wood containers, lush with herbs and flowers, under golden sunl

Clever Container Strategy for Affordable Elegance

Containers are the backbone of small-space gardening. A thoughtful container strategy makes a significant impact on your budget garden design, creating a polished look without expensive pots. Focus on cohesion and smart grouping.

A collection of various-textured charcoal grey pots on a patio, filled with green plants and white flowers, unified by color.

Choose Cohesive Materials and Colors

You do not need matching pots, but aim for a cohesive look. Select a limited palette of materials or colors for your containers. For example, use terracotta pots of varying sizes, or choose plastic pots in a single neutral shade like charcoal or cream. This creates a unified appearance, making your collection look intentional and well-designed rather than haphazard. A mix of textures, such as smooth ceramic and rough concrete, adds interest as long as the color scheme remains consistent.

Person spray-painting an old plastic laundry basket on a patio, surrounded by other budget-friendly containers awaiting transformation.

Thrift and Upcycle Containers

High-end containers cost a lot. Instead, hunt for pots at thrift stores, yard sales, or community plant swaps. Paint old plastic pots with spray paint designed for outdoor use to give them a fresh, uniform appearance. You can transform buckets, old tires, or even large food-grade containers into stylish planters. Always ensure containers have drainage holes. If a container lacks them, drill a few holes in the bottom to prevent root rot. This simple step protects your plants and extends the life of your budget-friendly vessels.

A lush, artfully grouped display of five container plants on a stone patio, showcasing varied heights, colors, and trailing foliage.

Group for Impact

Instead of scattering individual pots, group them together. Create clusters of three or five containers of varying heights and sizes. This arrangement creates a lush, abundant display, making the area feel more substantial and luxurious. The “thriller, filler, spiller” concept works wonderfully for container groupings: choose a tall plant (thriller) for dramatic height, medium-sized plants (fillers) to bulk out the pot, and trailing plants (spillers) to cascade over the sides. This technique creates visual interest and depth, elevating your budget garden design.

A wheeled plant caddy holds a large ceramic pot with an olive tree on a flagstone patio, next to a terracotta pot elevated by brick pot feet.

Utilize Wheeled Bases and Pot Feet

For larger containers, wheeled bases offer flexibility, allowing you to easily move plants for optimal sunlight or to rearrange your layout. Pot feet or risers lift containers slightly off the ground, improving drainage and air circulation. This prevents staining on your patio surface and helps roots stay healthier. You can create inexpensive pot feet using old bricks, flat stones, or even plastic bottle caps.

Lush, multi-tiered vertical garden on an urban patio wall, featuring ground pots and a sleek wall-mounted planter brimming with diverse plants.

Vertical Gardening and Layers: Maximize Your Small Space

When you have limited ground space, look up. Vertical gardening and layering techniques add immense visual interest and plant capacity without consuming precious floor area. These methods are crucial for an affordable garden makeover, making your small space feel larger and more dynamic.

Eye-level shot of a patio wall featuring a purple clematis on a reclaimed wood trellis and a fabric wall planter bursting with petunias, sedum, and he

Embrace Trellises and Wall Planters

Install trellises against walls or fences for climbing plants like clematis, edible peas, or small gourds. You can construct simple trellises from bamboo stakes, reclaimed wood, or even old bed frames. Wall-mounted planters, such as repurposed shoe organizers or DIY pallet planters, allow you to grow herbs, succulents, or annual flowers directly on a vertical surface. These turn a plain wall into a living work of art, enhancing your budget garden design significantly.

Hands placing a potted rosemary on a rustic wooden tiered plant stand filled with herbs on a sunny balcony, showcasing vertical gardening.

Tiered Stands and Shelving

Tiered plant stands or shelving units create multiple levels for containers. This layering technique allows you to grow more plants in a compact footprint. Look for inexpensive shelving units at hardware stores, or build your own from salvaged wood. This strategy is particularly effective for herb gardens or collections of small potted plants. The vertical arrangement adds depth and complexity, preventing the space from appearing flat or cramped.

A hand gently adjusts pink fuchsia trailing from a repurposed blue colander hanging planter on a painted brick wall.

Hanging Baskets and Planters

Hang baskets from sturdy hooks on walls, pergolas, or ceilings. These add another dimension to your planting, creating a soft, cascading effect. Choose plants that trail well, such as petunias, fuchsias, or strawberries. Use strong, secure hooks to ensure safety. You can also craft hanging planters from repurposed materials like old colanders or coconut shells, adding a unique, artisanal touch to your affordable garden makeover.

A layered arrangement of container plants on a patio, showing tall ornamental grass, colorful petunias, and trailing thyme in various pots.

Create Height Transitions with Plants

Beyond hardware, use plants of varying heights to create visual layers. Place taller plants at the back or center of groupings, medium-sized plants in the middle, and shorter, trailing plants along the edges. This natural layering creates depth and makes the space feel lush and abundant. For example, a tall ornamental grass or a slender evergreen shrub provides a backdrop, while colorful annuals fill the mid-ground, and creeping thyme spills over the front.

A blue-green Agave plant in a large terracotta pot on a wooden stool, surrounded by smaller plants on a patio in warm sun.

Creating Focal Points: Draw the Eye, Define Your Space

Every well-designed garden benefits from a focal point, which is the first thing your eye notices. A strong focal point gives your garden purpose and direction, making it feel more intentional and expensive. You can achieve this effect with minimal investment in your budget garden design.

A charming casement window in a stucco wall, enhanced by a weathered wooden bench holding various potted plants under warm afternoon light.

Utilize Existing Features

Look for existing elements in your space that can serve as a natural focal point. This could be a striking architectural feature, a mature plant, or a beautiful view. Enhance it rather than creating something new. For instance, if you have a charming window, place a small bench and a few potted plants beneath it to highlight its appeal. This approach saves money and capitalizes on your garden’s inherent character.

A vibrant electric blue bird bath repurposed as a succulent planter, surrounded by potted herbs and artfully arranged river stones on a small urban pa

DIY Art and Sculptures

Transform everyday objects into garden art. An old bird bath, painted a vibrant color, becomes a compelling centerpiece. A collection of smooth river stones arranged artfully provides a calming visual. You can also create simple sculptures from reclaimed wood or metal scraps. These DIY elements add personality and uniqueness to your affordable garden makeover, drawing the eye without breaking the bank. For inspiration, consider visiting local art fairs or community gardens to see how others use salvaged materials.

A tall, elegant Karl Foerster Feather Reed Grass in a sleek dark grey planter is the focal point of a small, sunlit patio corner with a bistro set.

Strategic Plantings

A single, striking plant in an attractive container can act as a powerful focal point. Choose a plant with interesting foliage, a unique form, or vibrant flowers. An upright ornamental grass, a dwarf evergreen, or a dramatic canna lily can command attention. Place this focal plant where it is easily seen from your main viewing areas, such as your indoor window or your outdoor seating. The surrounding plants then complement, not compete with, your chosen centerpiece.

Asymmetrically arranged container garden on a small patio featuring a tall grass planter balanced by a cluster of smaller pots.

Consider Symmetry or Asymmetry

You can create a sense of balance through either symmetry or asymmetry. Symmetrical design, where elements mirror each other, often feels formal and elegant. Place identical planters on either side of a doorway, for example. Asymmetrical design, which balances different elements by their visual weight, creates a more relaxed, natural feel. This might involve grouping a tall planter with several smaller ones to achieve visual equilibrium. Both approaches work for budget garden design, depending on the aesthetic you prefer.

Close-up of container plants on a patio at sunset, showing silvery lamb's ear, purple heuchera, and green creeping Jenny.

Mastering Color and Texture Palettes on a Budget

Color and texture are powerful design tools that profoundly influence the feel of your garden. A well-chosen palette makes your space feel cohesive and sophisticated, even with inexpensive plants and materials. Focus on creating contrast and harmony to achieve an expensive look on a budget.

A stylish container garden featuring diverse foliage: delicate maidenhair fern, bold Bergenia, variegated hosta, and deep purple Heuchera on an urban

Emphasize Foliage Over Flowers

While flowers provide bursts of color, they are often ephemeral. Focus on plants with interesting foliage textures and colors. This provides year-round appeal and a consistent design aesthetic. Consider plants with variegated leaves, deep purple hues, or silvery-green tones. Mixing fine-textured foliage (like ferns) with bold-textured leaves (like hostas) creates dynamic visual contrast. For instance, you might pair the delicate fronds of a maidenhair fern with the broad leaves of a bergenia. This strategy is cost-effective because foliage plants are often more affordable and require less maintenance than those grown purely for their blooms. The Missouri Botanical Garden offers excellent resources on selecting plants for foliage interest.

A serene urban balcony garden at dusk, featuring terracotta and gray pots filled with blue, purple, and white flowers, softly lit by fairy lights.

Limit Your Color Palette

A restricted color palette often looks more sophisticated than a riot of many colors. Choose two to three main colors for your flowers and accessories. For example, a cool palette of blues, purples, and whites creates a serene atmosphere. A warm palette of reds, oranges, and yellows offers vibrancy. Using a monochromatic scheme, featuring different shades of a single color, creates a highly elegant and tranquil garden. This intentional choice makes your budget garden design appear carefully curated.

Low-angle shot of a deep teal glazed pot and terracotta pot on a jute rug, surrounded by pebbles, stone, and driftwood on a patio.

Introduce Texture with Hardscaping and Accessories

Beyond plants, incorporate texture through your hardscaping and garden accessories. Rough-hewn stones, smooth river pebbles, weathered wood, or a textured outdoor rug add depth and interest. A ceramic pot with a glazed finish next to a terracotta pot offers pleasing contrast. These elements contribute to the overall tactile experience of your garden, making it feel richer and more complex.

Container garden on a patio in late autumn, featuring a small tree with interesting bark, evergreen herbs, and pansies.

Plan for Seasonal Interest

Consider how your garden will look throughout the year. Select plants that offer interest across multiple seasons, whether through their flowers, foliage, berries, or bark. For example, a small deciduous tree with attractive winter bark provides year-round appeal. Spring bulbs emerge early, followed by summer annuals and perennials, then plants with autumn color or winter berries. This thoughtful planning ensures your affordable garden makeover remains captivating regardless of the season.

A woman's hand gently touches a lavender plant amidst a vibrant container garden on a patio, featuring rosemary, sedum, and calendula.

Smart Planting Choices: High Impact, Low Cost, Sustainable Growth

The plants you choose form the heart of your garden. Smart planting choices save you money, reduce maintenance, and support local ecosystems. Prioritize sustainable, resilient plants for your budget garden design.

Woman's hands label small pots of green seedlings on a weathered patio table, next to plant cuttings rooting in water, with seed packets.

Start from Seed or Cuttings

Purchasing mature plants is convenient but expensive. Starting plants from seed or propagating from cuttings offers a significantly cheaper alternative. Many annuals, herbs, and even some perennials grow readily from seed. Ask friends and neighbors for cuttings from their healthy plants. This method requires patience but yields many plants for minimal cost. You can also find seed swaps at local gardening clubs.

A fuzzy bumblebee foraging nectar on a vibrant purple coneflower in a terracotta pot, bathed in warm afternoon sun on a patio.

Choose Native and Pollinator-Friendly Plants

Native plants are naturally adapted to your local climate and soil conditions, meaning they require less water, fertilizer, and pest control once established. This dramatically reduces long-term maintenance costs and environmental impact. Many native plants also support local pollinators like bees and butterflies, contributing to biodiversity. For region-specific plant recommendations, consult your local agricultural extension service or a native plant society. The New York Botanical Garden offers extensive resources on native plant gardening and ecological benefits.

Hands gently dividing a perennial plant on a weathered patio table, surrounded by small empty terracotta pots and a trowel, under soft sunlight.

Embrace Perennials and Divisions

Perennials return year after year, eliminating the need to replant annually. While initial perennial costs might be higher than annuals, their longevity makes them more cost-effective over time. Furthermore, many perennials can be divided every few years, giving you new plants for free to expand your garden or share with others. Look for perennial divisions at plant swaps or from generous gardening friends. This practice helps your affordable garden makeover grow over time without continuous expense.

An artfully arranged collection of drought-tolerant plants in various containers, including lavender, succulents, and ornamental grass, on a sunny urb

Select Water-Wise Plants

Water is a precious resource, and excessive watering costs money. Choose drought-tolerant plants, often called xeriscape plants, that thrive with minimal irrigation once established. Succulents, sedums, lavender, and many ornamental grasses are excellent choices for water-wise gardening. Group plants with similar water needs together to optimize your watering routine. This thoughtful selection reduces your water bill and conserves resources, making your budget garden design more sustainable.

Hands mixing dark, rich peat-free potting mix with compost, coir, and perlite in a green trug on a patio, an empty terracotta pot nearby.

Improve Your Soil with Composted Materials

Healthy soil is the foundation of a thriving garden. Instead of buying expensive amendments, enrich your soil with free or low-cost organic matter like homemade compost, leaf mold, or aged wood chips. Compost improves soil structure, drainage, and nutrient retention, leading to healthier, more resilient plants. Many communities offer free compost or wood chips. For container gardening, use a peat-free potting mix. Peat harvesting has environmental concerns, so choosing alternatives supports sustainable practices. A good quality potting mix often includes coir, compost, and perlite.

Cozy urban balcony at dusk with warm solar string lights draped over an ivy-covered trellis for privacy, illuminating various container plants.

Strategic Lighting and Privacy: Setting the Mood for Less

Thoughtful lighting and privacy solutions elevate your garden’s ambiance, making it feel luxurious and functional, especially in the evening. You can achieve these effects with inexpensive materials and smart placement in your budget garden design.

Cozy urban patio at twilight, illuminated by solar stake lights in planters, solar string lights on a privacy screen, and overhead LED string lights c

Affordable Lighting Solutions

Solar Lights: Solar-powered stake lights or string lights require no wiring and cost nothing to operate after the initial purchase. Place stake lights along pathways or to highlight specific plants. Drape solar string lights across railings, overhead structures, or through shrubbery for a magical glow. They create an inviting atmosphere perfect for evening enjoyment. Ensure you purchase quality solar lights that provide adequate illumination and withstand outdoor conditions.

LED String Lights: For areas with access to an outdoor outlet, low-energy LED string lights offer bright, durable illumination. Look for commercial-grade string lights with replaceable bulbs for longevity. These provide a sophisticated, café-style ambiance. Always ensure outdoor lighting is rated for outdoor use and properly installed for safety.

Repurposed Lanterns: Fill old glass jars or lanterns with battery-operated fairy lights or LED candles. These provide soft, diffused light and add a charming, rustic touch. Group them on tables, hang them from hooks, or place them along steps for gentle guidance after dark.

A small patio with a sage green painted lattice panel and climbing vine, next to a bamboo frame woven with dried branches, creating privacy.

Creative Privacy Screening

Lattice Panels: Inexpensive wooden or plastic lattice panels provide a base for climbing plants, quickly creating a green screen. You can paint lattice to match your aesthetic. Install them directly to existing fences or secure them to posts in containers for a mobile screen. This offers instant privacy and a beautiful backdrop for your budget garden design.

Bamboo Frames: Construct simple frames from bamboo poles and weave natural materials through them, such as willow branches, rushes, or even thick yarn. This creates a natural, breathable screen that adds organic texture to your space. You can often find bamboo poles affordably at garden centers or even forage for suitable branches if permitted in your area.

Tall Planters with Strategic Plants: Use tall, slender planters filled with fast-growing, dense plants like clumping bamboo (non-invasive varieties), ornamental grasses, or tall shrubs. Place these planters strategically where you need to block an undesirable view or create a sense of enclosure. This method offers flexible privacy, as you can move the planters as needed. For example, a row of three tall planters with ‘Sky Pencil’ hollies or ornamental grasses provides excellent screening for a patio.

Outdoor Fabric Screens: Hang outdoor fabric panels or inexpensive sheer curtains from a simple rod or wire to create temporary privacy. Choose weather-resistant fabrics that complement your garden’s color scheme. This option offers a soft, airy feel and can be easily removed or adjusted. For a durable option, consider repurposing canvas drop cloths.

A wide, slightly elevated view of a tidy urban balcony garden, showcasing thriving low-maintenance plants in containers and a vertical planter.

Design for Low Maintenance: Keep Your Garden Looking Pristine Easily

A garden that looks expensive is typically well-maintained. Designing for low maintenance from the start ensures your garden stays beautiful without consuming all your free time or requiring constant spending. This is a core principle of an effective budget garden design.

Vibrant Echeveria succulents, a small cactus, and trailing thyme thrive in varied terracotta pots on a sun-drenched urban balcony bistro table.

Choose the Right Plants for Your Climate and Conditions

Selecting plants appropriate for your specific microclimate, sun exposure, and soil type is the most critical step in reducing maintenance. Plants struggling in unsuitable conditions require constant intervention, such as extra watering, feeding, or pest treatment. Research plants that thrive in your area with minimal fuss. For example, if you live in a hot, dry climate, focus on succulents, cacti, and Mediterranean herbs. For reliable information, consult university extension services; the Royal Horticultural Society (RHS) website provides comprehensive plant advice.

Close-up of hands mixing dark compost into potting soil in a terracotta pot on a wooden patio surface.

Improve Soil Health

Healthy, well-draining soil leads to stronger plants that resist pests and diseases, requiring less intervention. Amend heavy clay soils with organic matter like compost to improve drainage. Add compost to sandy soils to improve water retention and nutrient availability. Optimal soil structure reduces the need for frequent watering and fertilizing.

Hands applying rustic shredded bark mulch around a vibrant basil plant in a terracotta pot on a sunny patio.

Mulch for Moisture and Weed Control

Apply a 2-3 inch layer of organic mulch, such as shredded bark, wood chips, or pine needles, around your plants. Mulch suppresses weeds by blocking sunlight, reducing competition for water and nutrients. It also helps retain soil moisture, meaning you water less frequently. Furthermore, mulch insulates plant roots from temperature extremes. Use locally available and affordable mulch materials. This simple step significantly reduces weeding and watering tasks, making your affordable garden makeover much easier to maintain.

Bright patio garden with diverse container plants showing drip irrigation, a vertical planter, and a rain barrel with a watering can.

Install Efficient Irrigation Systems

For container gardens and small beds, consider a simple drip irrigation system or soaker hoses on a timer. These systems deliver water directly to the plant roots, minimizing evaporation and waste. While there’s an initial setup cost, they save water and labor in the long run. Even a self-watering planter, which holds a reservoir of water, can significantly reduce your daily watering chores. For very small spaces, a watering can filled with rainwater from a rain barrel (a budget-friendly addition) handles most needs.

Hands gently deadheading a spent flower from a vibrant calibrachoa in a terracotta pot on a balcony, using small pruners.

Prune for Health, Not Just Aesthetics

Regular, light pruning maintains plant health, encourages bushier growth, and prevents diseases. Remove dead, damaged, or diseased branches promptly. Deadheading spent flowers also encourages plants to produce more blooms. This preventative maintenance avoids more extensive, time-consuming issues later. Understanding your plants’ growth habits helps you prune effectively without overdoing it.

A chic vertical garden on an urban patio, made from stacked charcoal gray crates filled with herbs and strawberries. A person thoughtfully observes a

Frequently Asked Questions

How can I make my small garden look bigger on a budget?

To make a small garden look larger, use large, fewer containers rather than many small ones. Group plants to create lush zones. Incorporate vertical elements like trellises or shelves to draw the eye upward. Use a consistent color palette to create harmony and a sense of expanse. Strategic placement of a mirror can also create an illusion of depth, just ensure it is weatherproof and safely secured.

What are the cheapest materials for garden landscaping?

The cheapest materials often include salvaged wood (pallets, old fence pickets), river stones or pea gravel for pathways (buy in bulk for savings), reclaimed bricks for edging, and repurposed household items for containers or decor. Look for free compost or wood chips from local municipalities to enrich soil and mulch beds. Starting plants from seed or acquiring divisions from friends also reduces plant costs significantly.

How do I create a focal point without spending much money?

You create a focal point by highlighting an existing feature, such as an interesting wall texture or a striking corner of your space. Repurpose an old bird bath, a uniquely shaped stone, or a salvaged architectural piece. Plant a single, dramatic plant in an attractive, thrifted pot. The key is to draw the eye to one specific, interesting element, not necessarily an expensive one.

Can I really grow a beautiful garden if I am a beginner?

Absolutely. Start small with easy-to-grow plants like herbs, succulents, or resilient annuals such as marigolds or zinnias. Focus on good soil and consistent watering, which are fundamental to plant health. Observe your space, learn from your experiences, and do not be afraid to experiment. Many online resources and local gardening communities offer invaluable advice for beginners. You build confidence and knowledge with each successful plant you grow.

Categories
Container Gardening

Vertical Garden Systems Compared: Which One Works Best?

Do you dream of a lush garden but feel limited by a tiny patio, a narrow balcony, or just a small patch of yard? Vertical gardening transforms your growing space by moving plants upwards, turning walls, railings, and even corners into vibrant green canvases. This innovative approach makes gardening accessible, even for those with the most constrained footprints. Imagine harvesting fresh herbs from a living wall right outside your kitchen, or enjoying a burst of colorful flowers cascading down a vertical planter. It is an efficient, beautiful, and highly rewarding way to bring nature into your home.

This guide will demystify the world of vertical garden systems. We compare various types, break down their benefits, and help you choose the ideal system for your specific needs, budget, and gardening aspirations. We provide practical insights, plant suggestions, and maintenance tips to ensure your vertical garden thrives. Let us explore the best options for maximizing your green space.

Lush vertical garden on a brick wall, filled with herbs and greens. Hands harvest basil, illustrating small-space abundance.

What Are Vertical Garden Systems and Why Choose One?

A vertical garden system allows you to grow plants in a stacked or tiered arrangement, utilizing vertical space instead of horizontal ground area. Think of it as gardening upwards rather than outwards. These systems come in various forms, from simple wall planters to complex hydroponic setups, all designed to maximize plant density within a compact footprint. For anyone facing limited yard space, a balcony, a patio, or even just a sunny wall indoors, vertical gardening offers a transformative solution.

Lush urban patio with diverse vertical gardens covering a wall, featuring herbs, flowers, and vegetables in fabric pockets, modular systems, and stack

The Compelling Benefits of Vertical Gardening

Embracing a vertical garden system provides numerous advantages, particularly for urban dwellers and those new to gardening:

  • Maximizes Space: This is the primary driver. You convert unused wall space or a small corner into a productive garden. A 2-foot by 2-foot footprint can yield as much as a 10-foot row of plants on the ground, depending on the system and plant choice. It is ideal for small balconies, apartment living, and tight backyards where traditional beds are not feasible.
  • Aesthetic Enhancement: Vertical gardens are inherently beautiful. They transform bland walls into living art, adding vibrancy, texture, and a sense of calm to any environment. A well-designed vertical garden serves as a focal point, boosting your property’s curb appeal or brightening an indoor space.
  • Improved Air Quality: Plants naturally filter pollutants and release oxygen. A vertical garden, particularly indoors, contributes to cleaner, fresher air within your home. A 2015 study published in the journal Environmental Science & Technology showed that indoor plants effectively reduce common indoor air pollutants like formaldehyde and benzene.
  • Increased Accessibility: Growing plants at eye level or waist height reduces the need for bending and kneeling, making gardening more comfortable for individuals with mobility challenges. This design also makes harvesting easier and less strenuous.
  • Reduced Pests and Diseases: Elevating plants above ground level can deter some common ground-dwelling pests, such as slugs and snails. Improved air circulation around the plants, which vertical designs often provide, also reduces the likelihood of fungal diseases.
  • Water Efficiency: Many vertical garden systems, especially those with integrated irrigation or hydroponic designs, are engineered for precise water delivery directly to the roots. This minimizes evaporation and runoff, leading to significant water savings compared to traditional in-ground gardening. Some systems can use 70-90% less water than conventional methods.
  • Sound Dampening: A dense vertical garden acts as a natural sound barrier, absorbing ambient noise. This benefit is particularly valuable in urban environments or on busy streets, creating a more tranquil space.

Whether your goal is to grow fresh produce, cultivate beautiful ornamentals, or simply enhance your living environment, a vertical garden system offers a practical, engaging, and highly effective solution. It proves that you do not need a vast plot of land to enjoy the many pleasures and benefits of gardening.

Diverse vertical garden systems: a fabric pocket planter with herbs, a modular plastic wall system with flowers, and a terracotta stacking strawberry

Understanding the Core Types of Vertical Garden Systems

Vertical garden systems broadly fall into a few distinct categories, each with its own structure, planting method, and suitability. Knowing these foundational types helps you assess which design best aligns with your space, budget, and gardening style. As you consider wall planters or other vertical kits, you will encounter variations of these core systems.

Hand watering vibrant herbs and leafy greens in a repurposed wooden pallet vertical garden mounted on a pastel stucco patio wall.

Wall-Mounted Systems

These systems attach directly to a wall or a sturdy vertical surface. They are excellent for utilizing existing structural elements and can create impressive living walls. Wall-mounted vertical garden systems maximize space efficiently, as they do not require any floor area. They are often seen on exterior walls, fences, or even interior accent walls. Installation generally requires secure mounting hardware to support the weight of the system, plants, and wet soil.

  • Examples: Fabric pocket planters, modular panel systems, repurposed pallet gardens.
  • Best For: Decorative displays, herbs, leafy greens, small annuals, succulents.

A person's hand picks a ripe strawberry from a thriving multi-tiered vertical plant stand on a sunlit urban balcony.

Freestanding Systems

Freestanding vertical garden systems are self-supporting structures that you can place anywhere with a flat surface. They offer flexibility in placement, allowing you to move them to optimize sunlight or rearrange your space as needed. These systems often consist of stacked containers or tiered shelves. They are a popular choice for patios, balconies, or even indoors, as they do not require any wall attachment. Stability is a key consideration for freestanding units, especially taller ones, to prevent tipping.

  • Examples: Stackable planters, tiered plant stands, vertical tower gardens.
  • Best For: Strawberries, small vegetables, a mix of herbs and flowers, or creating a mobile garden.

Medium-close shot of a modern vertical hydroponic tower on an urban patio, lush with leafy greens and herbs, visible water tubes and plant roots.

Hydroponic and Aeroponic Vertical Systems

These are more advanced vertical garden systems that grow plants without soil. Hydroponic systems deliver nutrient-rich water directly to the plant roots, often through a pump and tubing network. Aeroponic systems take this a step further, misting the roots with nutrient solution in an air-rich environment. Both methods offer incredibly efficient water usage, faster growth rates, and often higher yields. They require a greater initial investment and a more hands-on understanding of nutrient management and system operation.

  • Examples: Vertical grow towers with water pumps, specific kits designed for soilless cultivation.
  • Best For: Leafy greens (lettuce, spinach), culinary herbs (basil, mint), some fruiting plants (strawberries, dwarf tomatoes).

Understanding these fundamental categories sets the stage for comparing specific vertical garden systems. Each category caters to different gardening goals, technical skills, and environmental conditions. Your selection will depend heavily on what you want to grow, where you want to grow it, and how much effort you are willing to invest in setup and maintenance.

Three distinct vertical garden systems on a sun-dappled urban patio: a fabric pocket planter, a modular plastic wall panel, and a stacked tiered plant

Once you understand the basic categories, you can delve into the specific designs of vertical garden systems. Each design offers unique advantages and disadvantages, making some more suitable for particular plants, spaces, or budgets. Here we compare some of the most popular vertical kits and wall planters available.

Overhead view of a fabric pocket planter on a wooden fence, filled with vibrant herbs being watered by hands with a black watering can.

1. Fabric Pocket Planters (Soft-Sided Wall Planters)

These systems consist of multiple pockets sewn into a durable fabric backing, typically felt or recycled plastic. You fill each pocket with soil and a plant, then hang the entire unit on a wall or fence using grommets or a strong rod. Fabric pocket planters are among the most affordable and easiest vertical garden systems to install.

  • Pros: Extremely lightweight and flexible, making them ideal for temporary installations or renters. They are relatively inexpensive to purchase. The breathable fabric promotes good root aeration, which can prevent root rot. Installation is simple, often requiring only a few hooks.
  • Cons: Fabric can dry out quickly, especially in sunny, windy conditions, requiring more frequent watering. The fabric may degrade over time, leading to a shorter lifespan compared to rigid systems. Drainage can sometimes be inconsistent, with water potentially pooling in lower pockets if not designed well.
  • Ideal for: Herbs, small annual flowers, succulents, leafy greens like lettuce and spinach. These are excellent wall planters for beginners.

A gardener's hand plants in a modern charcoal-grey modular panel vertical garden, filled with herbs and flowers on an urban patio.

2. Modular Panel Systems (Hard-Sided Wall Planters)

Modular vertical garden systems use individual plastic or metal panels that interlock or connect to create a larger green wall. Each panel typically contains several planting cells or troughs. You mount these panels directly to a wall. Their structured design offers a very clean, modern aesthetic.

  • Pros: Highly durable and long-lasting. They often feature integrated irrigation channels for efficient watering and drainage, which helps prevent overwatering or dry spots. These systems provide excellent structural support for plants and offer a highly customizable design, allowing expansion as your garden grows.
  • Cons: Generally more expensive than fabric pockets. Installation can be more complex and may require tools and a secure mounting surface to support the significant weight of wet soil and plants. They are less forgiving to move once installed.
  • Ideal for: A wide range of plants, including ornamental grasses, ferns, small shrubs, succulents, and a variety of edibles. They create impressive, permanent living walls.

A woman's hand waters a three-tier black stackable vertical planter tower filled with strawberries and herbs on a sunlit patio.

3. Stackable Planters (Vertical Towers)

Stackable planters are freestanding systems composed of several individual planting tiers that stack one on top of the other around a central column. Each tier usually has multiple planting pockets or openings around its circumference. You often water them from the top, allowing water to trickle down through the layers.

Stackable planter diagram: 3 pots (30cm) shown stacked. Arrows indicate water flow downwards through soil layers to drainage.

  • Pros: Freestanding, so you can place them anywhere with a flat surface, including patios or indoors. They are relatively easy to assemble and disassemble, making them portable. They offer good plant density in a small footprint.
  • Cons: Plants in lower tiers may receive less sunlight, leading to uneven growth. The system can become top-heavy and unstable if not properly weighted or if placed in a windy location. Limited depth in each planting pocket restricts root growth for larger plants.
  • Ideal for: Strawberries, small peppers, compact herbs, annual flowers like petunias, and leafy greens. These are popular vertical kits for growing berries.

Vibrant pallet garden on an urban balcony, showing lush lettuces, nasturtiums, and strawberries in fabric pockets, with an 'HT' stamp visible.

4. Pallet Gardens (Repurposed Wall Planters)

These DIY-friendly vertical garden systems use discarded wooden shipping pallets. You can convert a pallet into a planter by attaching fabric or wood to create pockets for soil, then leaning it against a wall or mounting it. They offer an eco-friendly and extremely budget-conscious way to start vertical gardening.

  • Pros: Very low cost, often free if you can source pallets. Highly sustainable, repurposing waste materials. They offer a rustic, natural aesthetic.
  • Cons: Pallets can be heavy and difficult to move. You must ensure the pallet is safe for gardening, checking for chemical treatments (look for “HT” stamp for heat-treated, avoid “MB” for methyl bromide). Drainage can be inconsistent, and wood will degrade over time unless treated or painted.
  • Ideal for: Herbs, small annuals, succulents, and leafy greens. These make creative wall planters.

A modern charcoal grey hydroponic vertical tower teeming with lush leafy greens on a sunny urban patio, showing its self-contained base.

5. Hydroponic/Aeroponic Vertical Towers

These advanced vertical kits are typically self-contained systems that recirculate nutrient-rich water. Plants grow in inert media (like rockwool or coco coir) or suspended in air, with pumps delivering precise amounts of water and nutrients on a timed schedule.

  • Pros: Extremely water-efficient, using significantly less water than soil-based systems. Faster plant growth and higher yields are common due to optimized nutrient delivery. No soil means no soil-borne pests or diseases.
  • Cons: Higher initial cost and more complex setup. Requires a reliable power source for pumps. You need a good understanding of nutrient balancing and pH levels. Technical issues like pump failure can quickly harm plants.
  • Ideal for: Rapid growth of leafy greens (lettuce, spinach), culinary herbs, and some smaller fruiting vegetables like strawberries.
Comparison of Popular Vertical Garden Systems
System Type Cost (Initial) Installation Difficulty Durability/Lifespan Best For Key Considerations
Fabric Pocket Planters Low Easy Low to Medium (1-3 years) Herbs, small annuals, succulents, leafy greens Dries out quickly, requires frequent watering. Lightweight.
Modular Panel Systems Medium to High Medium High (5+ years) Ornamentals, ferns, larger herbs, diverse edibles Heavy when filled, requires secure mounting. Excellent aesthetics.
Stackable Planters Low to Medium Easy Medium (2-5 years) Strawberries, compact vegetables, annual flowers Can be unstable if tall. Uneven light distribution.
Pallet Gardens Very Low (often free) Medium (DIY) Low to Medium (1-4 years, depending on wood) Herbs, leafy greens, small ornamentals Check for chemical treatments. Heavy. Rustic look.
Hydroponic Vertical Towers High Medium to High High (5+ years) Leafy greens, culinary herbs, strawberries Requires power, technical knowledge, higher initial investment.

Carefully evaluating this comparison helps you narrow down the best vertical garden systems for your unique situation. Consider your budget, the amount of time you can commit to maintenance, and the specific plants you wish to grow. Each type of vertical kit and wall planter serves a particular purpose in the diverse world of vertical gardening.

Person on urban balcony comparing a thriving wall-mounted fabric pocket garden with a multi-tiered metal vertical planter.

Choosing the Right System for Your Space and Style

Selecting the perfect vertical garden system involves more than just picking one that looks appealing. You must align your choice with your specific environment, gardening goals, and personal preferences. Answering a few key questions about your space and lifestyle will guide you toward the best fit among the many available vertical garden systems.

Person on a sun-dappled urban balcony observing light patterns on a brick wall, a potted basil plant gently rustling in the breeze.

Assess Your Location: Sun, Wind, and Support

  • Sunlight Exposure: Observe your chosen location throughout the day. How many hours of direct sunlight does it receive? Most fruiting plants and many herbs need at least 6 hours of direct sun. Leafy greens and many ornamental plants can tolerate partial shade (3-6 hours). Full shade (less than 3 hours) limits your plant choices to shade-loving varieties like ferns or specific herbs. This factor dictates which plants you can grow and therefore influences the optimal system.
  • Wind Exposure: Exposed balconies or patios can experience strong winds, which dehydrate plants quickly and stress structures. For windy spots, choose sturdy, heavy modular systems or secure stackable planters. Fabric wall planters may flap and dry out too fast.
  • Structural Support: For wall-mounted systems, assess the wall’s integrity. Is it brick, concrete, wood, or drywall? Brick and concrete offer robust support for heavier modular systems. Drywall may require anchors or mounting to studs. Freestanding vertical kits need a level, stable surface to prevent tipping, especially when filled with soil and wet plants. Always confirm the weight capacity of your mounting surface before installation.
  • Water Access: Consider how you will water your garden. Is there a water source nearby? Proximity to a hose bib or an outdoor spigot simplifies hand watering. For larger systems, plan for potential drip irrigation setup, which minimizes daily effort and conserves water.

A person hand-watering a pallet vertical garden on a patio, with a modern hydroponic vertical tower visible in the soft background.

Consider Your Budget and Commitment

  • Budget: Vertical garden systems range dramatically in price. Repurposed pallet gardens cost next to nothing, while advanced hydroponic vertical kits can be hundreds or even thousands of dollars. Determine how much you are willing to invest in the initial setup, including the system, soil, plants, and any necessary tools or irrigation components.
  • Maintenance Commitment: How much time and effort are you willing to dedicate to your garden? Fabric wall planters require daily watering in hot weather, while automated hydroponic systems need regular monitoring of nutrient levels. Choose a system that aligns with your lifestyle. If you travel frequently, an automated or self-watering system might be a better choice.

Sunny compact patio featuring diverse vertical gardens: modern panel with ornamentals, colorful fabric pocket with herbs/greens, rustic stackable stra

Envision Your Plants and Desired Aesthetic

  • Plant Types: What do you want to grow? If fresh herbs and leafy greens are your priority, almost any system works, but pocket planters or hydroponic vertical kits excel. For strawberries, stackable planters are often ideal. If you desire a lush, permanent green wall with diverse ornamentals, modular panel systems offer the best structure and longevity.
  • Aesthetics: Do you prefer a rustic, natural look (pallet gardens), a sleek and modern design (modular panels), or something more informal and colorful (fabric pockets)? The visual impact of your vertical garden system should complement your outdoor or indoor decor.

By systematically evaluating these factors, you can confidently select vertical garden systems that not only fit your physical space but also align with your gardening aspirations and practical needs. The right choice ensures a successful and enjoyable vertical gardening experience.

Person's hands gently hold a small potted trailing herb towards an empty vertical garden pocket on a sunny urban patio, surrounded by other starter pl

Selecting Plants for Your Vertical Garden Success

Choosing the right plants is crucial for a thriving vertical garden. Not every plant adapts well to vertical growing conditions. Your selection should consider the specific system you have, the light conditions of your space, and the growth habits of the plants. Matching plants to their environment ensures they flourish, providing you with bountiful harvests or beautiful displays.

A modern vertical garden on a sun-dappled urban patio, showing sun-loving tomatoes in bright light and shade-tolerant lettuce in soft shade.

Key Factors for Plant Selection

When selecting plants for your vertical garden systems, focus on these critical characteristics:

  1. Sunlight Requirements: This is paramount. Place sun-loving plants (most vegetables, herbs like basil, rosemary) in the sunniest pockets or tiers. Position shade-tolerant plants (some ferns, leafy greens like spinach, mint) in areas that receive less direct light, such as lower pockets or in a partially shaded location. Most vertical gardens will have varying light exposure depending on height and orientation.
  2. Water Needs: Group plants with similar water requirements together. Mediterranean herbs like thyme and oregano prefer drier conditions, while lettuce and basil need more consistent moisture. Overwatering plants that prefer dry conditions can lead to root rot, especially in systems with less efficient drainage.
  3. Growth Habit:
    • Compact or Bushy: Ideal for most pockets and modular systems. Think dwarf varieties of tomatoes or peppers.
    • Trailing or Cascading: Perfect for softening edges and adding visual interest. Strawberries, nasturtiums, sweet potato vines, and petunias look stunning as they spill over the sides of vertical kits or wall planters.
    • Shallow Root Systems: Most vertical garden systems offer limited root depth. Plants with shallow root systems, such as lettuce, spinach, radishes, and most herbs, thrive in these conditions. Avoid large, deep-rooted plants like full-sized tomatoes or corn.
  4. Size and Weight: Consider the mature size of the plant. A small seedling grows much larger. Ensure the vertical kit or wall planter can support the mature plant’s weight and provide adequate space without overcrowding. Overcrowding reduces air circulation, leading to disease.

Close-up of a multi-tiered vertical garden on a balcony, featuring lush nasturtiums, lettuce, strawberries, and basil under dappled sunlight.

Recommended Plants for Various Vertical Garden Systems

Herbs (Excellent for almost all vertical garden systems)

  • Basil, mint (especially in its own pocket, as it spreads aggressively), thyme, oregano, chives, parsley, cilantro.
  • They are compact, have shallow roots, and offer continuous harvests.

Leafy Greens (Great for hydroponic, pocket, and modular systems)

  • Lettuce (various varieties), spinach, arugula, Swiss chard, kale.
  • These plants grow quickly, thrive in consistent moisture, and have shallow root systems.

Fruiting Vegetables (Best for stackable, modular, or robust pocket systems)

  • Strawberries (especially trailing varieties for stackable planters).
  • Dwarf tomatoes, bush beans, small peppers (requires adequate support and sun).
  • Consider compact cucumber or zucchini varieties if you have a very sturdy system and ample space.

Flowers (Ideal for decorative wall planters and modular systems)

  • Petunias, nasturtiums (edible flowers), impatiens (for shade), pansies, violas.
  • These add color and can attract pollinators.

Succulents (Perfect for shallow wall planters, especially modular ones)

  • Sedum, sempervivum (hen and chicks), echeveria.
  • They require minimal water and thrive in well-draining soil, making them low-maintenance options for sunny spots.

Hands planting a native sedum seedling into a modular vertical garden, surrounded by various thriving native plants and a pollinator.

Emphasizing Native Plants and Eco-Friendly Choices

Even in a small vertical garden, you can contribute to local ecosystems. Consider incorporating native plants suitable for your climate and vertical setup. For example, some small native ferns thrive in shaded vertical pockets, while native sedums flourish in sunny, well-drained wall planters. These choices support local pollinators and biodiversity, enhancing the environmental impact of your vertical garden systems.

Always start with healthy plants or seeds. If buying seedlings, choose those with strong, compact growth and no signs of pests or disease. A little research into your chosen plants will ensure they thrive in their new vertical home, providing enjoyment and abundance.

Close-up of hands securing a black fabric planting pocket onto a modular wooden vertical garden frame on a balcony.

Setting Up Your Vertical Garden System: A Step-by-Step Guide

Once you have chosen your ideal vertical garden system and selected your plants, the next exciting step is setting it up. Proper installation ensures stability, longevity, and optimal growing conditions for your plants. While specifics vary by system, these general steps apply to most vertical kits and wall planters.

Vertical garden components, lightweight potting mix, starter plants, and essential tools collected on a sunny patio floor, ready for assembly.

Step 1: Gather Your Materials and Tools

Before you begin, collect everything you need:

  • Your chosen vertical garden system (e.g., fabric pocket planter, modular panels, stackable tower).
  • High-quality potting mix. Do not use heavy garden soil, which compacts and hinders drainage in containers. A lightweight, well-draining potting mix is essential.
  • Your selected plants or seeds.
  • Watering can or hose with a gentle nozzle.
  • Appropriate tools for assembly and mounting: screwdriver, drill, level, measuring tape, hammer, anchors, sturdy hooks, or wall brackets (if wall-mounted).
  • Gloves for planting.

A person touches a brick wall on a sunny patio, observing light and stability. A watering can is in the foreground.

Step 2: Prepare Your Location

Confirm your chosen spot meets the necessary conditions:

  • Sunlight: Double-check the light exposure one last time, ensuring it matches your plants’ needs.
  • Stability: If wall-mounted, ensure the wall is strong enough to bear the weight of the system, wet soil, and mature plants. For freestanding units, ensure the ground is level and stable.
  • Water Access: Plan how you will water. Is it convenient to reach with a hose or watering can? Consider a drip irrigation system for larger installations to simplify watering.

A person connects two dark grey modular vertical garden panels on a sunny patio, assembling the system with focused hands.

Step 3: Assemble the Vertical Garden System

Follow the manufacturer’s instructions carefully for assembling your specific vertical kit or wall planter. This usually involves:

  • For Fabric Pockets: Simply unfold and prepare to hang.
  • For Modular Panels: Attach individual panels together if they interlock. Ensure all pieces are securely connected.
  • For Stackable Planters: Assemble the base, then stack the tiers one by one, ensuring they lock into place if designed to do so.
  • For Hydroponic Systems: Assemble the tower, connect pumps, and tubing, and ensure all seals are watertight before adding nutrient solution.

Hands place a decorative paver brick at the base of a tall, freestanding vertical garden system on a sunlit urban patio, ensuring stability.

Step 4: Mount or Position the System

This is a critical step for stability and safety.

  • Wall-Mounted Systems: Use a level to ensure the system hangs straight. Mark drilling points precisely. Drill pilot holes if necessary, insert wall anchors, and then securely fasten the system using appropriate screws or bolts. Always err on the side of caution; a fully watered vertical garden becomes surprisingly heavy.
  • Freestanding Systems: Place the assembled system in its final position. If it is tall or lightweight, consider adding weight to the base (e.g., bricks, sandbags) or securing it to a nearby fence post with ties to prevent it from toppling over in wind.

Close-up of hands planting a green trailing plant into a vertical garden pocket, firming soil, with a nursery pot nearby.

Step 5: Add Potting Mix and Plant Your Garden

Now for the fun part:

  1. Fill with Potting Mix: Fill each pocket, cell, or tier with your lightweight, well-draining potting mix. Leave about an inch of space from the top of the container to prevent soil overflow during watering.
  2. Plant Your Plants: Gently remove plants from their nursery pots. Loosen any circling roots at the bottom. Create a small hole in the potting mix, place the plant, and backfill with soil, lightly firming around the base. Ensure the plant’s crown (where the stem meets the roots) is at the same level as it was in its original container. Avoid burying the stem too deeply or leaving roots exposed.
  3. Arrange Strategically: Place trailing plants at the top or edges to cascade downwards. Position plants needing more sun in higher, sunnier spots, and those tolerating less light in lower or shadier sections.

Close-up of water dripping from the bottom pocket of a vertical garden onto a patio, signifying thorough initial watering.

Step 6: Initial Watering

Thoroughly water your newly planted vertical garden immediately after planting. Water until you see moisture draining from the bottom of each pocket or tier. This settles the soil around the roots and eliminates air pockets. For hydroponic systems, fill the reservoir with your pre-mixed nutrient solution and ensure the pump and drippers are functioning correctly.

With careful setup, your vertical garden systems will establish a strong foundation for healthy plant growth. Enjoy watching your new green space come to life!

A woman in a linen shirt gently waters a thriving strawberry plant in a mid-level pocket of a lush vertical garden on an urban balcony.

Essential Maintenance for Thriving Vertical Gardens

Maintaining a vertical garden differs slightly from caring for an in-ground bed, primarily due to the limited soil volume and elevated position of the plants. Regular attention to watering, feeding, and general plant health keeps your vertical garden systems vibrant and productive.

Person's hands checking dry soil in a wall-mounted vertical garden pocket, holding a hose with a fine spray nozzle on a sunny balcony.

Watering: The Most Critical Task

Because vertical garden systems hold less soil, they dry out significantly faster than traditional garden beds. The elevated position also increases exposure to wind and sun, accelerating evaporation. Consistent and adequate watering is paramount.

  • Frequency: Expect to water more frequently, often daily or even twice a day in hot, dry, or windy conditions. Check the soil moisture by inserting your finger about an inch deep. If it feels dry, it is time to water.
  • How to Water: Water slowly and thoroughly until you see water draining from the bottom of each pocket or tier. This ensures the entire root ball receives moisture. For wall planters, ensure water drains away from the wall to prevent damage.
  • Understanding Drainage: Drainage refers to how water moves through the soil. Good drainage prevents waterlogging, which can suffocate roots. Vertical garden systems must have adequate drainage holes. Lightweight potting mixes also promote good drainage. Poor drainage leads to root rot, a common killer of container plants.
  • Automated Systems: Consider a drip irrigation system for larger vertical garden systems. These systems deliver water directly to each plant’s roots through small emitters on a timer, saving time and water. This is especially beneficial for hydroponic vertical kits.

A hand sprinkles slow-release granular fertilizer into a basil plant in a vertical garden pocket. A watering can and liquid fertilizer are nearby.

Feeding Your Vertical Garden

With frequent watering, nutrients leach out of the limited soil volume quickly. Your plants need regular feeding to thrive.

  • Liquid Fertilizers: Apply a balanced liquid fertilizer every 2-4 weeks, diluted according to package directions. This provides readily available nutrients.
  • Slow-Release Fertilizers: Incorporate slow-release granular fertilizer into the potting mix at planting time. This provides a steady supply of nutrients over several months, reducing the frequency of liquid feeding.
  • Hydroponic Systems: These systems rely entirely on a precisely balanced nutrient solution. Monitor and adjust the nutrient strength and pH regularly according to the plants’ needs.

Hand gently pinching basil in a sun-drenched vertical garden planter, with lush herbs and ripe strawberries visible.

Pruning and Harvesting

  • Pruning: Regularly pinch back or prune plants to encourage bushier growth, prevent them from becoming leggy, and maintain a desirable shape. Remove any yellowing, diseased, or dead leaves promptly to improve air circulation and prevent the spread of problems.
  • Harvesting: For edible plants, consistent harvesting encourages more production. Pick herbs and leafy greens regularly to keep them producing fresh leaves. Harvest fruiting plants like strawberries as soon as they ripen.

A person closely inspects a leaf on a wall-mounted vertical garden on a balcony, checking for pests. A spray bottle is nearby.

Pest and Disease Management

Vertical gardens are generally less prone to soil-borne pests, but aerial pests can still be an issue.

  • Inspect Regularly: Make it a habit to inspect your plants daily for any signs of pests (aphids, spider mites, mealybugs) or diseases (fungal spots, mildew). Early detection makes control easier.
  • Organic Solutions: Use organic pest control methods first. A strong spray of water can dislodge aphids. Neem oil, insecticidal soap, or homemade garlic sprays effectively manage many common pests without harming beneficial insects or the environment.
  • Good Air Circulation: Ensure plants are not overcrowded, which reduces air circulation and increases humidity, making them more susceptible to fungal diseases.

Person covering a three-tiered vertical garden planter with a frost cloth on a compact balcony on a cool, overcast day.

Seasonal Adjustments

Depending on your climate, you may need to make seasonal adjustments:

  • Frost Protection: If temperatures drop, either bring portable vertical kits indoors or cover wall planters with frost cloths.
  • Summer Heat: Increase watering frequency and consider providing some afternoon shade for heat-sensitive plants.
  • Winter Downtime: For annuals, you might clear out the system and replant in spring. For perennials, protect them or bring them indoors.

Consistent, mindful maintenance keeps your vertical garden systems thriving, providing continuous beauty and bounty. Your efforts will yield a lush, productive green space that enhances your home.

A person's hand hovers over subtly yellowed leaves on a vertical garden plant, troubleshooting issues on a sunny patio.

Troubleshooting Common Vertical Garden Challenges

Even with the best planning, you might encounter a few hiccups with your vertical garden systems. Knowing how to identify and address common problems helps you keep your plants healthy and your garden thriving. Here is how to tackle some typical challenges.

Close-up: Wilting, yellowing basil leaves in a fabric vertical planter pocket. A hand touches the visibly dry soil, checking moisture.

Challenge 1: Wilting or Yellowing Leaves

This is perhaps the most common symptom, and it can indicate several issues.

  • Symptom: Leaves look droopy or limp, turning yellow or brown.
  • Possible Causes & Solutions:
    • Underwatering: Vertical gardens dry out quickly. Check the soil. If it is dry, water thoroughly until water drains from the bottom. Consider watering more frequently or installing a drip irrigation system.
    • Overwatering: Although less common in well-draining vertical systems, constantly wet soil can lead to root rot. If the soil is soggy and smells foul, you might be overwatering. Ensure your system has adequate drainage holes. Allow the soil to dry out slightly between waterings.
    • Nutrient Deficiency: Yellowing, particularly of older leaves, can indicate a lack of nitrogen or other essential nutrients. Because soil volume is limited, nutrients deplete faster. Apply a balanced liquid fertilizer. For hydroponic vertical kits, check and adjust your nutrient solution.
    • Too Much Sun/Heat Stress: If leaves look bleached or scorched, your plants might be getting too much intense sun. Provide some afternoon shade or consider moving portable vertical kits to a slightly shadier spot.

Close-up of hands gently turning a basil leaf in a fabric vertical garden, revealing small green aphids on the underside. Patio setting.

Challenge 2: Pests Infestations

While elevated plants can deter some ground pests, insects can still find their way to your vertical garden.

  • Common Pests: Aphids (small, often green, clustered on new growth), spider mites (tiny, create fine webbing), whiteflies (small, white, fly when disturbed), mealybugs (fuzzy, white cotton-like masses).
  • Solutions:
    • Regular Inspection: Check the undersides of leaves and new growth daily. Early detection is key.
    • Manual Removal: For small infestations, pick off pests or use a strong spray of water to dislodge them.
    • Organic Sprays: Apply insecticidal soap or neem oil according to product instructions. These are effective against many soft-bodied insects and are safe for edibles.
    • Introduce Beneficial Insects: If you have a larger garden or serious recurring issues, consider releasing ladybugs or lacewings.

A stackable terracotta planter on a balcony shows healthy herbs on top, stunted marigolds in the middle, and struggling, yellowing lettuce at the bott

Challenge 3: Uneven Growth or Poor Production

Some plants grow well, others lag or produce poorly.

  • Possible Causes & Solutions:
    • Uneven Light Distribution: In stackable planters or wall planters, lower plants or those on one side might receive less light. Rotate freestanding vertical kits regularly. For wall-mounted systems, choose plants appropriate for the light levels each section receives.
    • Nutrient Imbalance: Some plants are heavier feeders than others. Ensure all plants receive adequate and consistent fertilization.
    • Root Competition: Plants might be too close together, competing for limited space and nutrients. Thin crowded seedlings or provide more space between mature plants.
    • Incompatible Plants: You may have grouped plants with very different needs. Review your plant selection and ensure they share similar requirements for sun, water, and nutrients.

A hand covers a small, dark hydroponic reservoir where a faint green algae film is visible, on a balcony patio table.

Challenge 4: Algae Growth (Especially in Hydroponic Systems)

Algae is common in systems where light reaches nutrient solution or moist surfaces.

  • Symptom: Green slimy film on the growing medium, reservoir walls, or water surface.
  • Solutions:
    • Block Light: Algae needs light to grow. Ensure your hydroponic system’s reservoir is opaque. Cover any exposed growing medium or water surfaces to prevent light penetration.
    • Clean Regularly: Periodically drain and clean reservoirs and system components with a diluted bleach solution (then rinse thoroughly) or hydrogen peroxide to kill algae.
    • Increase Airflow: Good air circulation can help reduce humidity, which contributes to algae growth on surfaces.

By understanding these common issues and implementing the practical solutions, you can quickly get your vertical garden systems back on track, ensuring a productive and beautiful display throughout the season. Regular observation is your most powerful troubleshooting tool.

A sleek, dark grey vertical garden filled with herbs on an urban patio, fed by a slim rainwater collection barrel via a drip line.

Sustainable Practices for Your Vertical Garden

Gardening, even in a small vertical space, offers a fantastic opportunity to embrace environmentally friendly practices. By making conscious choices, you can minimize your ecological footprint, conserve resources, and contribute positively to local ecosystems. Integrating sustainability into your vertical garden systems enhances both your garden’s health and the planet’s well-being.

Close-up of a vertical garden with drip irrigation watering thriving thyme and sedum plants, with a rain barrel visible in the soft background on an u

1. Water Conservation: Smart Watering for Small Spaces

Vertical garden systems can be incredibly water-efficient, especially compared to traditional ground gardening. Maximize this potential:

  • Drip Irrigation: Install a simple drip irrigation system. These deliver water directly to the plant roots, minimizing evaporation and runoff. You can find affordable vertical kits with integrated drip lines.
  • Rainwater Harvesting: Collect rainwater in barrels or large containers. Use this “soft water” to irrigate your vertical garden. Rainwater is naturally free of chlorine and other chemicals found in tap water, which plants appreciate.
  • Choose Drought-Tolerant Plants: In sunny, exposed vertical garden systems, select plants with lower water needs like succulents, some herbs (thyme, oregano), or native plant varieties adapted to dry conditions.
  • Mulch: Apply a thin layer of small bark chips, coco coir, or other suitable mulch to the top of your vertical pockets or containers. Mulch helps retain soil moisture, reduces evaporation, and regulates soil temperature.

Person's hands planting basil into repurposed plastic bottles and containers on a muted green pallet vertical garden, on a sunny patio.

2. Repurpose and Recycle: Give Materials a Second Life

Reduce waste by incorporating repurposed materials into your vertical garden systems:

  • DIY Wall Planters: Transform old plastic bottles into self-watering planters. Use cleaned food containers or sturdy buckets for individual planting pockets.
  • Pallet Gardens: As discussed, reclaimed wooden pallets make excellent, low-cost vertical garden frames. Ensure they are heat-treated (HT stamp) and not chemically treated.
  • Buy Recycled Systems: Many commercial vertical kits and wall planters are now made from recycled plastics. Look for these options when purchasing new systems.

Close-up of hands mixing dark organic compost, light coco coir, and white perlite for potting mix in a basin on a sunny patio, with blurred vertical g

3. Soil and Nutrient Management: Building Healthy Foundations

Healthy soil is the cornerstone of sustainable gardening, even in vertical contexts.

  • Compost Power: Incorporate homemade compost or high-quality organic compost into your potting mix. Compost enriches the soil, improves its structure, and provides a slow release of nutrients, reducing the need for synthetic fertilizers.
  • Organic Fertilizers: Opt for organic, slow-release fertilizers over synthetic ones. Organic options feed the soil microbiology, creating a healthier growing environment. Examples include worm castings, bone meal, or organic liquid feeds.
  • Make Your Own Potting Mix: You can create your own lightweight potting mix using a blend of compost, coco coir or peat moss, perlite or vermiculite. This reduces plastic waste from buying bagged mixes.

Golden hour illuminates a vertical garden on a balcony, with a bumblebee pollinating native flowers like lavender and coneflowers.

4. Biodiversity and Native Plants: Supporting Local Ecosystems

Even a small vertical garden can contribute to biodiversity:

  • Plant for Pollinators: Include native flowering plants or pollinator-friendly herbs and annuals. Even a few pockets of flowers attract bees, butterflies, and other beneficial insects to your small space.
  • Focus on Native Species: Research small native plants suitable for containers or vertical growth in your region. Native plants are adapted to local conditions, often requiring less water and fewer inputs. They also provide crucial habitat and food for local wildlife.
  • Avoid Pesticides: Stick to organic pest control methods. Harsh chemical pesticides harm beneficial insects, pollinators, and can leach into waterways.

By consciously integrating these sustainable practices, your vertical garden systems become more than just a source of beauty or food. They become a testament to responsible living, demonstrating how even in limited spaces, you can cultivate a garden that gives back to the environment.

Woman in comfortable garden attire crouching, thoughtfully examining soil and a plant in a modular vertical garden on a sunny small patio.

Frequently Asked Questions

Can I grow vegetables in a vertical garden?

Absolutely! Many compact vegetables thrive in vertical garden systems. Leafy greens like lettuce, spinach, and kale are excellent choices. Herbs such as basil, mint, and chives also perform exceptionally well. For fruiting vegetables, consider strawberries, dwarf tomato varieties, and small peppers, provided your system offers adequate support, sunlight, and root space. Avoid large, deep-rooted vegetables that require extensive growing area.

How often do I need to water a vertical garden?

Vertical gardens typically require more frequent watering than in-ground gardens because the limited soil volume dries out faster. In hot, dry, or windy conditions, you may need to water daily, or even twice a day. In cooler, humid weather, every 2-3 days might suffice. Always check the soil moisture by feeling it an inch or two deep. If it feels dry, water thoroughly. Consider a drip irrigation system for larger setups to ensure consistent moisture and reduce manual effort.

What is the best type of soil for vertical garden systems?

The best soil for vertical garden systems is a high-quality, lightweight, and well-draining potting mix. Avoid heavy garden soil, which compacts easily in containers, restricting root growth and drainage. Look for mixes that include ingredients like peat moss or coco coir for moisture retention, and perlite or vermiculite for aeration and drainage. These components prevent waterlogging and ensure healthy root development, which is critical in the confined spaces of wall planters and vertical kits.

Can I move my vertical garden indoors for winter?

Many vertical garden systems are portable and can be moved indoors for winter protection, especially if they are freestanding vertical kits or lightweight wall planters. Before moving, inspect plants for pests and treat any infestations to avoid bringing them indoors. Ensure your indoor space provides adequate light, which might require supplemental grow lights, and maintain appropriate humidity levels. Not all plants will survive indoors, so choose hardier varieties or treat annuals as seasonal decorations.

Are vertical gardens expensive to set up?

The cost of setting up a vertical garden varies widely. You can create a vertical garden for very little money by repurposing materials like wooden pallets, plastic bottles, or old gutters. These DIY wall planters are incredibly budget-friendly. Commercial vertical kits, such as fabric pocket planters, start at a moderate price. More advanced modular systems or automated hydroponic vertical towers represent a higher initial investment due to materials, technology, and installation requirements. Your budget and desired complexity determine the overall cost.

For trustworthy gardening information, visit:
Missouri Native Plant Society,
Wild Ones — Native Plants, Natural Landscapes and
Pollinator Partnership. These organizations provide expert, research-based advice for gardeners at all levels.

Disclaimer: This article is for informational purposes only and is not a substitute for professional gardening advice. Always consult local extension services or horticulture experts for region-specific guidance.

Categories
Plant Care & Maintenance

Soil Basics: How to Build Healthy Soil in Containers

Building healthy soil is the cornerstone of successful container gardening. The soil in your pots provides more than just an anchor for your plants; it serves as a dynamic ecosystem, delivering essential nutrients, holding water, and allowing roots to breathe. Understanding the fundamentals of container soil helps you cultivate vibrant, resilient plants, whether you are growing herbs on a balcony or a miniature orchard on a patio.

Unlike garden beds, where plants draw nutrients and moisture from a vast and interconnected network, container plants rely entirely on what you provide in their limited space. This article guides you through selecting and creating the best potting mix, maintaining its vitality, and ensuring your plants thrive with minimal fuss. Your journey to a greener thumb begins with understanding the ground beneath your plants’ feet.

For research-based plant care guidance, visit
Chicago Botanic Garden,
New York Botanical Garden and
Royal Horticultural Society (RHS).

A gardener's hands sifting airy potting mix into a terracotta pot, with a clump of dense garden soil nearby for comparison.

Understanding Container Soil: Beyond Garden Dirt

Many new gardeners assume they can scoop up soil from their backyard and use it in pots. This is a common misconception that often leads to plant distress. Garden soil, rich in clay and organic matter, is excellent for in-ground beds, but it becomes compacted and suffocating in a confined container. Your goal for successful container gardening involves creating an environment where roots access everything they need without becoming waterlogged or starved for air.

Container soil, often called potting mix, is specifically engineered to provide the unique balance necessary for plants growing in pots. It needs to be lightweight, well-draining, and capable of holding moisture and nutrients without becoming dense. Unlike garden soil, which naturally replenishes its nutrients and maintains its structure through microbial activity and earthworms, container soil slowly degrades over time. It requires a more active management approach from you. Choosing the right foundation for your plants directly impacts their growth, bloom production, and overall resilience against pests and diseases. This fundamental difference emphasizes why a specialized approach to container soil is not just beneficial, but essential.

Consider the structure of garden soil versus potting mix. Garden soil typically contains a high percentage of mineral particles (sand, silt, clay), which, when compressed in a pot, reduce air pockets. Roots need oxygen to thrive; deprived of it, they struggle to absorb water and nutrients, leading to yellowing leaves and stunted growth. Potting mix, on the other hand, comprises materials designed to resist compaction, ensuring ample aeration for healthy root development while still providing adequate moisture retention. This careful balance prevents common issues like root rot and drought stress, giving your plants a stronger start and a longer, healthier life.

Sunlit patio potting bench with open bags of coco coir and bark fines, alongside a terra cotta pot and gardening gloves.

Key Ingredients of a High-Quality Potting Mix

A good potting mix achieves a delicate balance: it drains quickly enough to prevent root rot, yet holds sufficient moisture for plant hydration. It also provides aeration for roots and offers a suitable foundation for nutrient delivery. Understanding the components allows you to make informed choices when buying or blending your own container soil. Here are the core ingredients you will find:

  • Base Material (Peat Moss Alternatives): Traditionally, peat moss was a primary component due to its excellent water retention and light texture. However, peat harvesting is not a sustainable practice. Consider eco-friendly alternatives such as coco coir (processed coconut fiber) or composted bark fines. Coco coir is particularly popular for its renewable nature, neutral pH, and ability to hold moisture while promoting good aeration. Composted bark fines improve drainage and provide some organic matter.
  • Aeration Components: These materials create air pockets in the mix, crucial for root respiration and drainage. Perlite, lightweight white volcanic rock, is a common choice. It prevents compaction and improves drainage. Vermiculite, a mineral with a mica-like appearance, also improves aeration while offering superior water retention and some nutrient exchange capacity. Pumice, another volcanic rock, serves a similar purpose, offering excellent drainage and porosity.
  • Water Retention Agents: While base materials like coco coir naturally hold water, additional components might be included to boost moisture retention, especially for plants that prefer consistently damp soil. Vermiculite, as mentioned, excels here. Some mixes also incorporate water-retaining polymers, though natural alternatives are generally preferred for small-space gardening.
  • Nutrient Sources: A high-quality potting mix usually includes a starter dose of nutrients to support plant growth for the first few weeks. This comes from organic fertilizers, worm castings, or a slow-release synthetic fertilizer. Worm castings are a fantastic natural option, providing a balanced range of macro and micronutrients in a gentle, slow-release form. Composted organic materials also contribute to the long-term soil health for plants.
  • pH Adjusters: Most plants prefer a slightly acidic to neutral pH (6.0-7.0). Potting mixes often include lime to raise pH or sulfur to lower it, ensuring the mix is suitable for a broad range of plants. Many pre-made mixes are pH-balanced, removing this concern for you.

By understanding what each component contributes, you gain the knowledge to assess pre-made bags of potting mix or confidently combine your own materials, tailoring the container soil to your specific plant needs.

Gloved hands mix dark compost, light coir, and white perlite in a large plastic tub on a clean patio, building potting mix for containers.

Building Your Own Potting Mix: A Hands-On Approach

Creating your own potting mix offers several advantages: you control the ingredients, ensure freshness, and can tailor it precisely to your plants’ specific needs. This practice often saves money in the long run, especially for gardeners with many containers. It is also an environmentally conscious choice, allowing you to prioritize sustainable components like peat-free options and locally sourced compost. Begin by gathering your chosen materials and a large tarp or mixing bin. Work in a well-ventilated area, and consider wearing gloves and a dust mask, especially when handling dry ingredients.

Ingredients for potting mix—coco coir, perlite, vermiculite, compost—in assorted containers on a patio table, with hands reaching for a mixing tub.

General Purpose Potting Mix Recipe

This versatile blend works well for most annuals, perennials, and vegetables.

  1. 4 parts Coco Coir or Composted Pine Bark Fines: This forms the base, providing moisture retention and structure. Coco coir is excellent for its sustainability and consistent quality.
  2. 2 parts Perlite or Pumice: Incorporate these for superior aeration and drainage. They prevent compaction and ensure roots receive vital oxygen.
  3. 1 part Vermiculite (optional): Add this for enhanced water and nutrient retention, especially beneficial for plants that prefer consistently moist soil.
  4. 1 part High-Quality Composted Organic Matter (e.g., worm castings, finished compost): This provides a slow-release source of essential nutrients, enriching the soil health for plants. Ensure your compost is fully broken down and does not smell putrid.
  5. Optional: 1-2 tablespoons per gallon of mix of a slow-release organic fertilizer: This gives plants a sustained nutrient supply.

Mix all ingredients thoroughly until they are uniformly distributed. The goal is a light, fluffy mix that feels moist but not soggy. If it feels too dry, lightly dampen it before use.

Echeveria succulent in a concrete pot with gritty soil next to a miniature blueberry bush in a ceramic pot with dark soil, on an urban balcony.

Specialized Mixes: Adjusting for Specific Plants

  • Cactus and Succulent Mix: These plants require exceptionally fast drainage. Reduce the water-retaining components and increase the aeration. A good mix would be 1 part coco coir, 1 part perlite/pumice, and 1 part coarse sand or fine gravel.
  • Acid-Loving Plants (e.g., blueberries, azaleas in containers): Ensure your base material is naturally acidic, like peat moss (if you choose to use it, ensure it’s sustainably sourced) or specific types of composted bark. You might also incorporate a small amount of elemental sulfur. Test your mix’s pH if you are growing sensitive plants.
  • Heavy Feeders (e.g., tomatoes, squash): Increase the amount of nutrient-rich compost or slow-release organic fertilizer in your general purpose mix to support their vigorous growth.

Always sterilize any non-commercial amendments you introduce, such as garden soil or uncomposted organic matter, to prevent pests and diseases. Baking small batches in an oven (200°F/93°C for 30 minutes) can sanitize materials, though this is less common for typical potting mix components. Purchasing high-quality, sterile base materials significantly reduces these risks, ensuring a healthy start for your plants.

Close-up, adult hand sprinkles organic slow-release fertilizer pellets onto rich, dark soil around a healthy basil plant in a light gray ceramic pot.

Maintaining Optimal Soil Health for Thriving Plants

Building a great potting mix is only the first step; maintaining its health throughout the growing season ensures your plants continue to flourish. Container soil is a living, working environment, and its quality can degrade over time. Consistent care habits prevent many common plant problems and extend the life of your soil.

Adult hand uses a chopstick to aerate dense soil in a terracotta pot with a rosemary plant on a sunlit patio.

Understanding Soil Compaction

Over time, watering, plant growth, and gravity cause potting mix to settle and compact. This reduces the crucial air pockets, hindering root access to oxygen and impeding drainage. When soil compacts, roots struggle to spread, nutrient uptake becomes less efficient, and the risk of root rot increases significantly. You might notice water sitting on the surface for longer periods or running straight through the pot without being absorbed. To combat this, gently aerate the soil periodically. Use a chopstick or a thin stick to poke several holes an inch or two deep around the base of the plant, being careful not to damage major roots. This simple action helps restore some aeration and improves water penetration.

Gloved hand gently scratching dark compost into the soil of a terracotta pot containing a lush herb plant on a sunny balcony.

Replenishing Organic Matter

Organic matter in your container soil breaks down, releasing nutrients and improving soil structure. As it depletes, the soil loses its ability to retain moisture and nutrients effectively. You can replenish this by top-dressing your pots with a thin layer (about half an inch to an inch) of high-quality compost or worm castings every few months. Lightly scratch it into the top layer of the soil. This slow-release addition revitalizes the microbial activity in the soil, providing a steady supply of nutrients and enhancing the overall soil health for plants. This practice is especially important for long-term container plants, such as shrubs or small trees, which remain in the same pot for extended periods.

Close-up of hands using a pen-style soil pH test kit on a container-grown basil plant with slightly pale leaves on a rustic patio table.

Monitoring pH Levels

The pH of your potting mix influences nutrient availability. Over time, factors like tap water chemistry and fertilizer use can shift the pH. If plants show signs of nutrient deficiencies despite regular feeding, a pH imbalance might be the culprit. You can purchase an inexpensive soil pH test kit from garden centers. Adjusting pH typically involves adding small amounts of garden lime to raise it or elemental sulfur or peat moss to lower it. However, it is generally simpler to monitor and adjust by flushing the soil occasionally with fresh, pH-balanced water, or by refreshing the top layer of soil with new, balanced potting mix.

An un-gloved finger gently probes dark potting mix in a terracotta pot to check moisture, with green plant leaves visible.

Watering Wisdom: Keeping Your Container Soil Just Right

Watering is arguably the most critical skill for container gardeners. Too much water suffocates roots; too little causes stress. The right technique depends on several factors: the plant species, the size of the container, the type of potting mix, and environmental conditions like temperature and humidity. Do not water on a strict schedule; instead, water based on your plant’s needs and the soil’s moisture level.

An un-gloved index finger checks the soil moisture in a terracotta pot holding a cherry tomato plant on a sunlit patio.

The Finger Test: Your Best Tool

Forget fixed schedules. Your finger is the most reliable moisture sensor. Insert your index finger about two inches into the soil. If it feels dry at that depth, it is likely time to water. If it feels moist, wait. For smaller pots, checking the top inch often suffices. This simple, hands-on test prevents both overwatering and underwatering, two of the most common mistakes in container gardening.

A terracotta pot with a green herb soaks in a water-filled saucer on a patio, demonstrating bottom-up watering for dry soil. A hand checks the dampnes

How to Water Effectively

When you water, water thoroughly. Pour water slowly over the entire surface of the soil until it drains out of the bottom of the pot. This ensures all the container soil is saturated, encouraging deep root growth. If water immediately runs through, the soil may have become hydrophobic (repels water). In such cases, place the pot in a saucer of water for 20-30 minutes, allowing the soil to absorb moisture from the bottom up. Once the top surface feels damp, remove it and allow any excess to drain.

Avoid frequent, shallow watering. This encourages roots to stay near the surface, making the plant more vulnerable to drought stress. Deep watering promotes a robust root system, enhancing the plant’s overall health and resilience. Ensure your pots have drainage holes. Without them, water collects at the bottom, leading to root rot regardless of your watering frequency.

Sun-drenched balcony garden with terracotta pots and glazed planters, some plants looking thirsty, others lush, illustrating varied watering needs.

Environmental Factors and Seasonal Changes

Your watering frequency changes with the seasons and your environment:

  • Summer Heat: High temperatures and strong sun increase evaporation. You might need to water daily or even twice daily for some plants. Check more frequently.
  • Winter Dormancy: Many plants slow their growth dramatically in winter, requiring much less water. Reduce watering significantly, only watering when the top several inches of soil are dry. Overwatering in winter is a leading cause of plant demise.
  • Humidity: In dry environments, soil dries out faster. In humid conditions, it dries more slowly. Adjust your checks accordingly.
  • Container Material: Terracotta pots are porous and allow water to evaporate more quickly, necessitating more frequent watering than plastic or glazed ceramic pots.

By mastering these watering principles, you contribute significantly to the ongoing soil health for plants and their overall vitality, creating an environment where they consistently thrive.

Hands pouring liquid fertilizer into a watering can next to a vibrant petunia in a terracotta pot on a sun-dappled patio.

Feeding Your Plants: Nurturing Soil Nutrients

Even the best potting mix has a finite nutrient supply. As plants grow and you water them, nutrients leach out. Regular feeding becomes essential to maintain vigorous growth and abundant blooms. Choosing the right fertilizer and applying it correctly is a key aspect of long-term soil health for plants in containers.

Close-up of a vibrant vertical container garden section: lush basil, red flowers, and green strawberries. A hand gently tends a leaf.

Understanding Fertilizers: NPK and Micronutrients

Most fertilizers list three numbers: N-P-K (Nitrogen, Phosphorus, Potassium). These are the macronutrients plants need in the largest quantities:

  • Nitrogen (N): Promotes lush, green leafy growth.
  • Phosphorus (P): Essential for root development, flowering, and fruiting.
  • Potassium (K): Supports overall plant health, disease resistance, and water regulation.

Plants also require micronutrients (e.g., iron, zinc, magnesium) in smaller amounts. High-quality complete fertilizers include these. For container plants, a balanced fertilizer (e.g., 5-5-5 or 10-10-10) works well for general growth. You might opt for a higher phosphorus formula during blooming or fruiting phases.

Close-up of hands applying granular slow-release fertilizer to a thriving basil plant in a terracotta pot on a sunny patio table.

Types of Fertilizers for Container Gardens

  1. Liquid Fertilizers: These are fast-acting, providing immediate nutrient uptake. Mix them with water according to package directions and apply during your regular watering. Use them every 2-4 weeks during the active growing season. A common mistake is using too strong a solution; always dilute to half strength for most container plants to avoid fertilizer burn, especially for young or sensitive plants.
  2. Slow-Release Granular Fertilizers: These pellets are incorporated into the top layer of the container soil or mixed in when repotting. They release nutrients gradually over several months, simplifying your feeding routine. Follow product instructions precisely for application rates and longevity. This option is great for busy gardeners seeking low-maintenance solutions.
  3. Organic Fertilizers: Options like fish emulsion, kelp meal, compost tea, or worm castings provide nutrients in a natural, slow-release form, often improving soil health for plants by feeding beneficial microbes. They are excellent for an environmentally conscious approach. Worm castings, for instance, release nutrients slowly as microorganisms break them down, preventing nutrient shock and improving soil structure. Apply worm castings as a top dressing every 1-2 months.

Gardener's hands inspecting a slightly yellowing cherry tomato leaf with a crisp edge, with liquid fertilizer bottle in background.

When and How Much to Fertilize

Most plants benefit from regular feeding during their active growing season, typically spring through late summer. Reduce or stop fertilizing during fall and winter when most plants enter dormancy. Over-fertilizing can damage roots, leading to “fertilizer burn,” characterized by crispy brown leaf edges. Always err on the side of under-fertilizing or using a weaker solution, especially with liquid feeds. Observe your plants for signs of nutrient deficiency (e.g., yellowing leaves, stunted growth) or excess (e.g., burnt leaf tips, excessive leafy growth with no flowers), and adjust your feeding regimen accordingly.

Consider the plant type: vegetables and heavy-flowering annuals are generally heavier feeders than most succulents or slow-growing perennials. Match your fertilizer to your plant’s specific needs, and remember that healthy soil is the best foundation for efficient nutrient uptake.

Gardener's hands lifting a root-bound herb plant from its pot on a sunlit balcony, revealing dense, circling roots, with fresh potting mix nearby.

When to Refresh Your Soil and Repot Your Plants

Container plants cannot stay in the same potting mix indefinitely. Over time, the soil degrades, compacts, and depletes of nutrients, impacting the overall soil health for plants. Roots outgrow their space, becoming “root-bound,” meaning they circle tightly around the pot. Knowing when to refresh your soil or repot is crucial for continued plant vitality.

Hand lifting a terracotta pot on an urban balcony, showing dense white roots emerging from drainage holes and fine roots on the soil surface.

Signs Your Plant Needs Repotting or Soil Refreshing

  1. Roots Emerging from Drainage Holes: This is a clear indicator that the plant has filled its current container and needs more space.
  2. Water Drains Too Quickly or Not at All: If water rushes through the pot without soaking in, the soil is likely degraded or hydrophobic. If it sits on the surface, the soil is compacted.
  3. Stunted Growth or Yellowing Leaves: Despite regular watering and feeding, if your plant is not thriving, a lack of root space or depleted soil might be the problem.
  4. Plant Wilts Frequently: A root-bound plant has less soil to hold moisture, requiring more frequent watering.
  5. Visible Roots on the Soil Surface: As roots grow, they may push up through the top layer of the soil.
  6. Heavy Salt or Mineral Buildup: A white crust on the soil surface or pot rim indicates mineral accumulation from tap water or fertilizers, which can hinder nutrient uptake.

Gardener's hands gently hold a plant's root ball on a small balcony. New pot, potting mix, and tools are laid out for repotting.

Step-by-Step Repotting Guide

Repotting provides your plant with fresh container soil and room to grow. Choose a pot that is only one size larger (e.g., from a 6-inch to an 8-inch pot) to avoid overwhelming the plant with too much soil, which can lead to overwatering.

  1. Prepare Your Materials: Gather your new pot, fresh potting mix, pruning shears, and a watering can. Ensure the new pot has drainage holes.
  2. Remove the Plant: Gently tip the plant on its side, supporting the base of the stem. Slide the plant out of its current pot. If it resists, you may need to gently tap the pot or carefully run a knife around the inner edge.
  3. Inspect and Loosen Roots: Examine the root ball. If it is a dense, circling mass, gently tease apart some of the outer roots with your fingers or a small fork. You can also prune off any dead, damaged, or excessively long roots, especially those circling the bottom of the root ball. For a severely root-bound plant, you might need to make shallow vertical cuts into the root ball to encourage new outward growth.
  4. Add Fresh Soil to the New Pot: Place a layer of fresh potting mix at the bottom of the new pot. The goal is to set the plant at the same soil level it was previously, or slightly higher if the old soil had settled significantly. Do not add gravel or pot shards to the bottom of the pot; this does not improve drainage and can create a perched water table, which actually hinders it. Good potting mix and proper drainage holes suffice.
  5. Position the Plant: Center the plant in the new pot. Ensure the soil line is about one inch below the rim of the pot, leaving room for watering.
  6. Fill with Potting Mix: Backfill around the root ball with fresh potting mix, gently tamping it down to remove large air pockets. Avoid compacting the soil too tightly; it should remain airy.
  7. Water Thoroughly: Water the plant immediately after repotting until water drains from the bottom. This settles the soil around the roots.

Most annuals and vigorous houseplants benefit from repotting annually. Slower-growing plants might only need it every 2-3 years. If you want to keep a plant in the same size container, you can “pot up” by removing the plant, shaving off an inch or two of the outer root ball, and refreshing the soil before placing it back in the same pot.

A gardener's hand probes dry, crusty soil in a terracotta pot containing a struggling basil plant with yellowing leaves on an urban balcony.

Common Soil Problems and How to Solve Them

Even with the best intentions, you might encounter issues with your container soil. Identifying these problems early helps you intervene effectively and restore your plants to health. Many common plant ailments trace back to an imbalance or deficiency in the soil.

Close-up of a hand gently aerating waterlogged soil in a potted basil plant with a chopstick, showing yellowed leaves on a balcony table.

Problem: Waterlogging and Poor Drainage

Signs: Water sits on the soil surface for long periods, leaves turn yellow and drop, plant wilts despite moist soil, a foul odor emanates from the soil, or small fungus gnats appear.
Cause: Overwatering, compacted potting mix, insufficient aeration materials, or a pot without drainage holes.
Solution:

  • Check Drainage: Ensure your pot has adequate drainage holes. If not, repot immediately into a suitable container.
  • Improve Aeration: Gently poke holes into the soil with a chopstick to create air channels. For severely compacted soil, consider repotting with a fresh, well-draining mix containing more perlite or pumice.
  • Adjust Watering Habits: Only water when the top two inches of soil feel dry. Learn the finger test and follow it consistently.

Waterlogging diagram: 30cm pot, drainage layer, perlite layer. Arrows show water flow hindered by poor drainage.

Close-up of a hand using a thin stick to gently aerate compacted, dry soil in a rectangular balcony planter box, with a slightly stressed leafy plant

Problem: Soil Compaction

Signs: Similar to waterlogging, water struggles to penetrate the soil, plants appear stressed, and root growth is restricted.
Cause: Repeated watering, lack of aeration amendments, or using heavy garden soil in containers.
Solution:

  • Aerate Gently: Use a thin stick to poke holes in the soil, being careful of roots.
  • Top-Dress: Add a layer of fresh, aerated potting mix or compost to the surface.
  • Repot: If severe, repotting with a new, properly formulated container soil is the best approach.

Gardener's hands top-dressing a healthy herb in a balcony pot with compost. A nearby leafy green plant shows pale, yellowing leaves.

Problem: Nutrient Depletion

Signs: Slow growth, yellowing or discolored leaves (chlorosis), weak stems, reduced flowering or fruiting, despite proper watering.
Cause: Plants have consumed all available nutrients, or nutrients have leached out from excessive watering.
Solution:

  • Fertilize: Implement a regular feeding schedule with a balanced liquid or slow-release fertilizer during the growing season. Refer to our feeding section for details.
  • Add Organic Matter: Top-dress with compost or worm castings to provide a natural, slow-release nutrient source, enhancing overall soil health for plants.

Person flushing a terracotta pot with a watering can, showing white mineral crust on the pot and subtle browning on plant leaves.

Problem: Salt and Mineral Buildup

Signs: A white crust on the soil surface, pot rim, or drainage holes. Plant leaves may show burnt tips or edges.
Cause: Hard tap water and accumulation of fertilizer salts.
Solution:

  • Flush the Soil: Every few months, thoroughly flush the soil by slowly pouring a large volume of clean water (at least two to three times the pot’s volume) through the pot. Allow it to drain completely. This washes away excess salts.
  • Use Filtered Water: If your tap water is very hard, consider using filtered water or rainwater.
  • Moderate Fertilization: Do not over-fertilize, and always dilute liquid fertilizers to half strength.

A yellow sticky trap with several small fungus gnats caught on its surface, inserted into the dry soil of a terracotta pot on a balcony.

Problem: Pests in the Soil (e.g., Fungus Gnats)

Signs: Small, dark, mosquito-like insects flying around the plant or crawling on the soil surface. Their larvae feed on roots.
Cause: Consistently moist soil and decaying organic matter provide an ideal breeding ground.
Solution:

  • Allow Soil to Dry: Let the top inch or two of container soil dry out completely between waterings. This breaks their breeding cycle.
  • Yellow Sticky Traps: Place these near the plant to catch adult gnats.
  • Biological Control: Introduce beneficial nematodes (microscopic worms) that specifically target fungus gnat larvae. You can purchase these online or at garden centers.
  • Top Dressing: A layer of sand or diatomaceous earth on the soil surface can deter egg-laying.

Addressing these common soil issues proactively leads to healthier, happier container plants, minimizing stress and maximizing their potential.

Hands gently loosening rich, dark soil in a terracotta pot with thriving basil on a sunny urban balcony, highlighting sustainable soil care.

Embracing Sustainable Soil Practices

As supportive plant care coaches, we advocate for practices that benefit your plants and the planet. Sustainable choices in your container soil and gardening habits contribute to a healthier environment, often resulting in healthier, more resilient plants too. Making eco-friendly decisions for your potting mix and care routines aligns with a mindful approach to gardening.

Hands breaking apart a block of coco coir on a blue tarp, with piles of composted bark and rice hulls, an empty pot, and trowel nearby on a patio.

Prioritizing Peat-Free Potting Mixes

Peat moss is a traditional component of potting mixes, known for its water retention and sterile nature. However, it is harvested from peat bogs, which are crucial carbon sinks and unique ecosystems. Peat bogs take thousands of years to form, making peat moss a non-renewable resource. Choosing peat-free potting mixes or blending your own with alternatives like coco coir, composted bark, or rice hulls significantly reduces your environmental impact. These alternatives perform just as well, if not better, and support sustainable resource management.

Bare hands scoop dark, rich worm castings from a modern wooden worm bin into a terracotta pot holding green basil on a sunny urban balcony.

Composting for Soil Enrichment

Composting your kitchen scraps and yard waste transforms them into nutrient-rich organic matter. This “black gold” is invaluable for enhancing soil health for plants in containers. Mixing compost into your potting mix or using it as a top-dressing enriches the soil with diverse microorganisms, improves its structure, and provides a slow-release source of nutrients, reducing the need for synthetic fertilizers. If you do not have space for a large compost pile, consider a worm bin (vermicomposting) for a small-space solution that produces excellent worm castings.

Urban balcony container garden featuring self-watering pots, mulched soil, and a compact rainwater collection barrel under soft afternoon light.

Water-Wise Care

Efficient watering conserves water and prevents nutrient runoff. Employ strategies like:

  • Rainwater Harvesting: Collect rainwater in barrels or simple containers. Rainwater is naturally soft and free of chlorine and other chemicals found in tap water, making it excellent for plants.
  • Self-Watering Pots: These containers have a reservoir at the bottom, allowing plants to draw water as needed, reducing evaporation and extending watering intervals.
  • Mulching: Apply a thin layer of fine bark or coco coir on the soil surface. This helps retain moisture, reduces evaporation, regulates soil temperature, and suppresses weeds, especially for outdoor containers.

Hands apply dark worm castings to a basil plant in a terracotta pot on a sun-dappled balcony railing, with other blurred plants.

Sustainable Fertilization

Opt for organic and naturally derived fertilizers over synthetic ones whenever possible. Organic options like fish emulsion, kelp meal, and especially worm castings, feed the soil’s microbial life, which in turn makes nutrients available to your plants. This holistic approach supports a healthier, more resilient container soil ecosystem. When you do use synthetic fertilizers, ensure you apply them at recommended rates, or even half strength, to prevent runoff and minimize environmental impact. The best approach is always to improve the inherent soil health for plants rather than solely relying on external nutrient inputs.

Person kneeling on a balcony, thoughtfully inspecting a basil plant in a terracotta pot, surrounded by other container gardens.

Frequently Asked Questions

What is the difference between potting mix and potting soil?

While often used interchangeably, “potting mix” is the more accurate term. It generally refers to a soilless blend designed specifically for containers, composed of ingredients like coco coir, perlite, and compost. “Potting soil” can sometimes imply it contains actual garden soil, which is too heavy and compacts in pots. Always choose a product clearly labeled as “potting mix” or “container mix” for optimal results.

Can I reuse old potting mix?

You can reuse old potting mix, but it requires rejuvenation. Old mix loses its structure, nutrients, and might harbor dormant pests or diseases. To reuse it, first remove any old roots and debris. Then, enrich it by mixing in 50% fresh potting mix, generous amounts of compost or worm castings, and perhaps some new perlite for aeration. Only reuse mix from healthy plants; discard any mix from plants that suffered from pests or diseases to prevent spreading issues.

How can I make my potting mix drain faster?

To improve drainage, incorporate more aeration components into your potting mix. Add extra perlite, pumice, or coarse sand. Aim for a ratio where these elements make up 25-50% of your total mix, depending on the plant’s specific needs (e.g., succulents prefer more drainage). Avoid adding a layer of gravel at the bottom of the pot; this does not improve drainage and can worsen waterlogging by creating a “perched water table.”

Is it okay to use garden soil in my containers?

No, you should generally avoid using garden soil in containers. Garden soil is dense and contains heavy clay and silt particles that compact tightly in a pot, leading to poor drainage and suffocating roots. It can also introduce weeds, pests, and diseases into your contained environment. Always use a purpose-made potting mix designed for containers to ensure proper aeration, drainage, and moisture retention.

How do I know if my plant is root-bound?

Your plant is root-bound when its roots have grown so extensively they fill the entire pot, circling tightly around the inside. Signs include roots emerging from drainage holes, stunted growth, rapid wilting even after watering, and water running straight through the pot without being absorbed. To confirm, gently slide the plant out of its pot; if you see a dense mass of roots forming the shape of the pot, it is root-bound and needs repotting.

Disclaimer: This article is for informational purposes only and is not a substitute for professional advice. Consult local extension services for region-specific recommendations.