Categories
Edible Gardening

Foraging Your Balcony: How to Harvest and Dry Herbs in the Fall for Winter Use

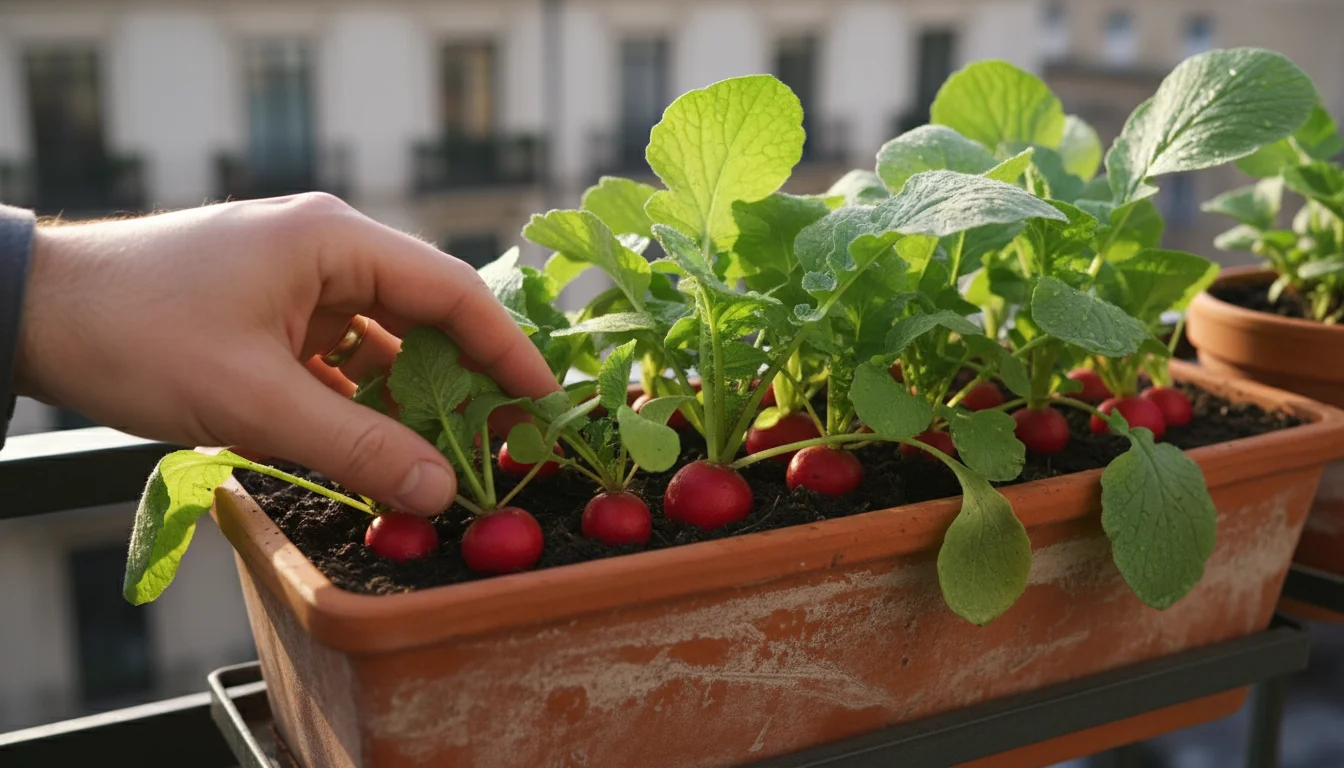
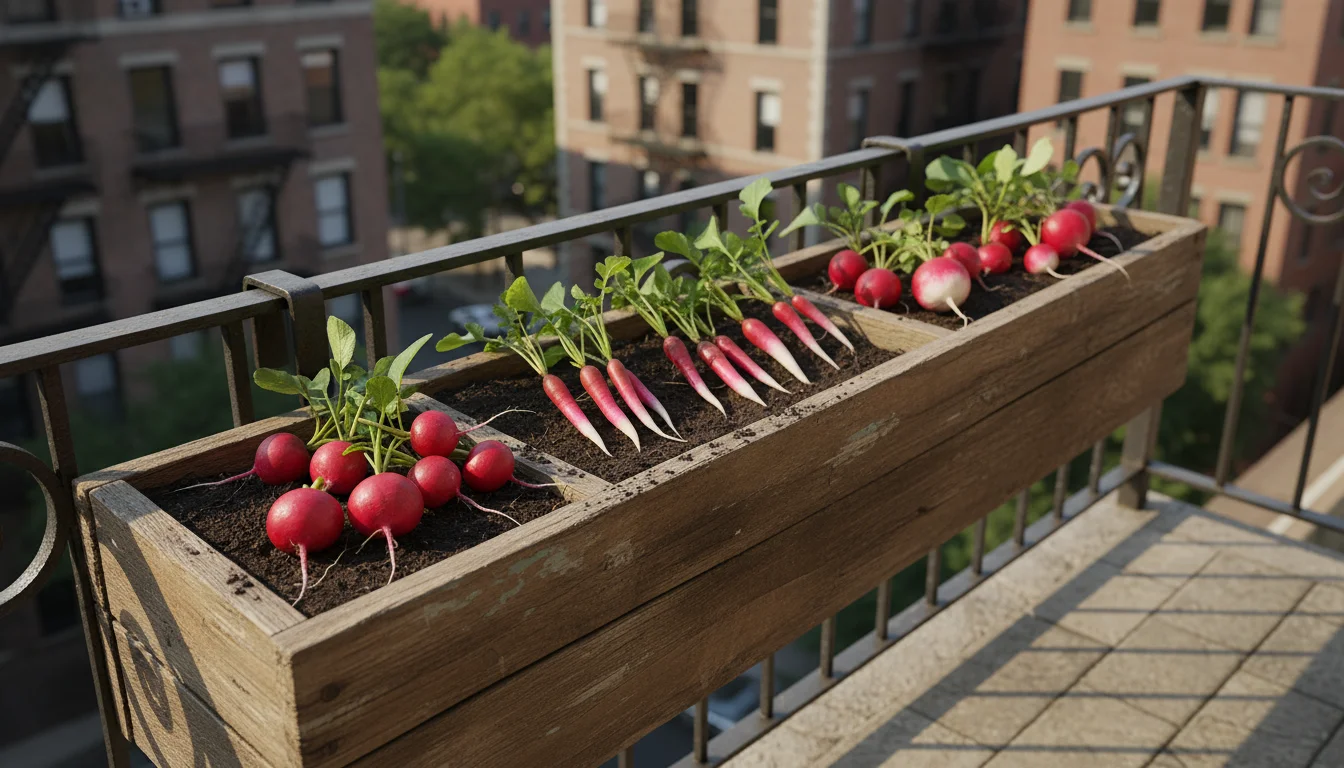
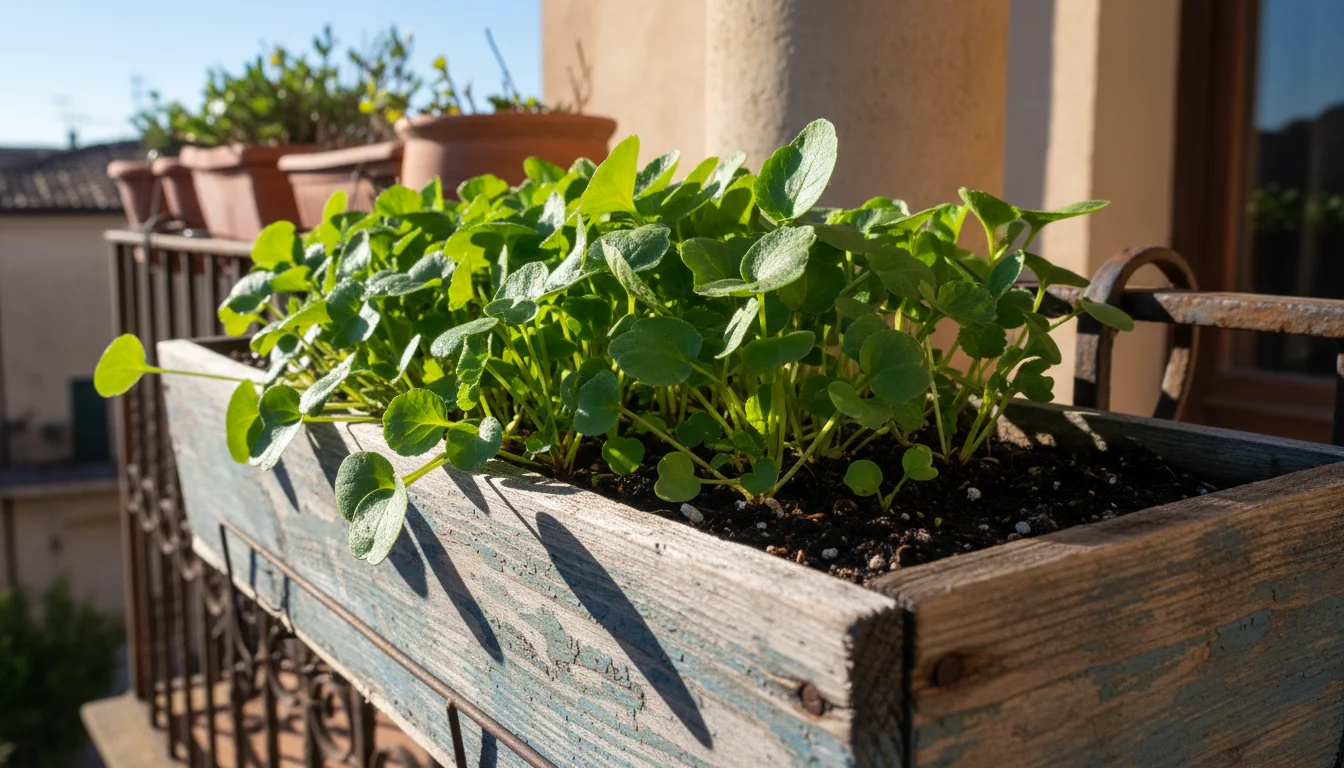
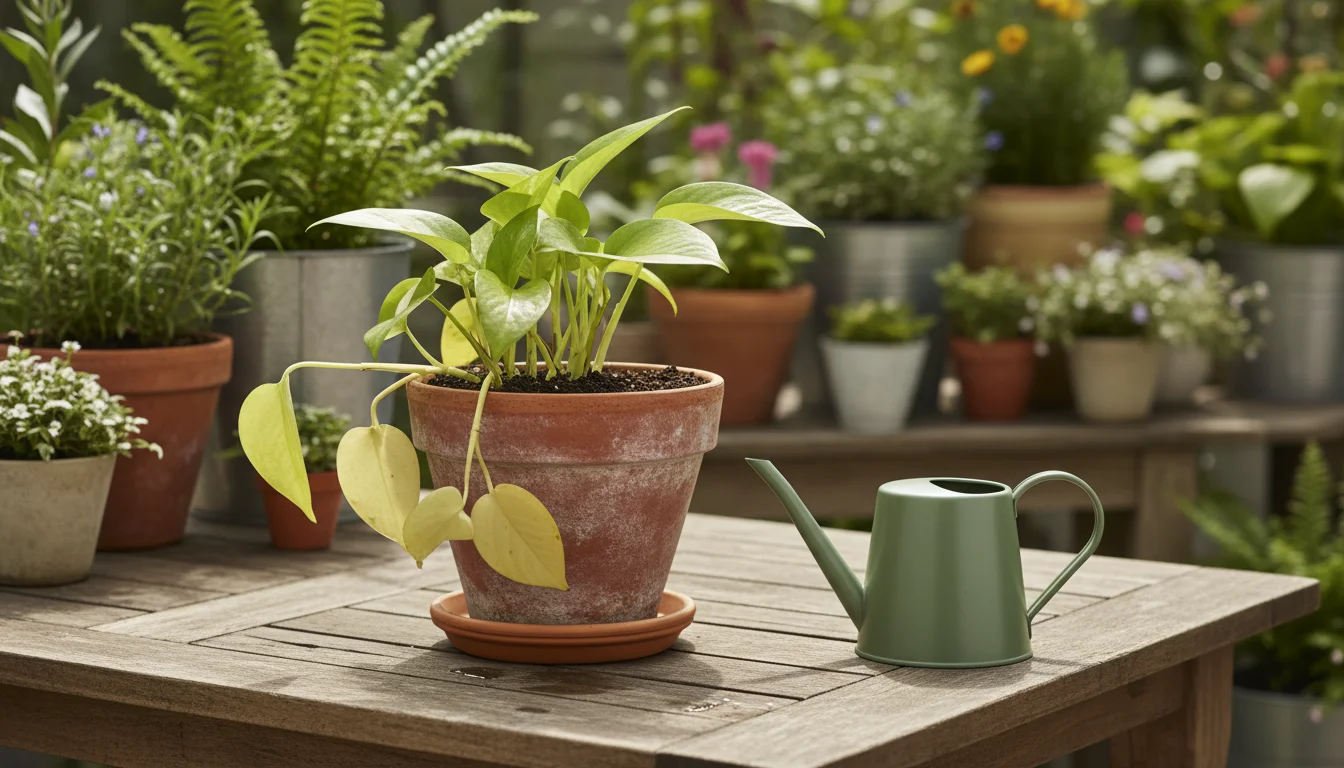
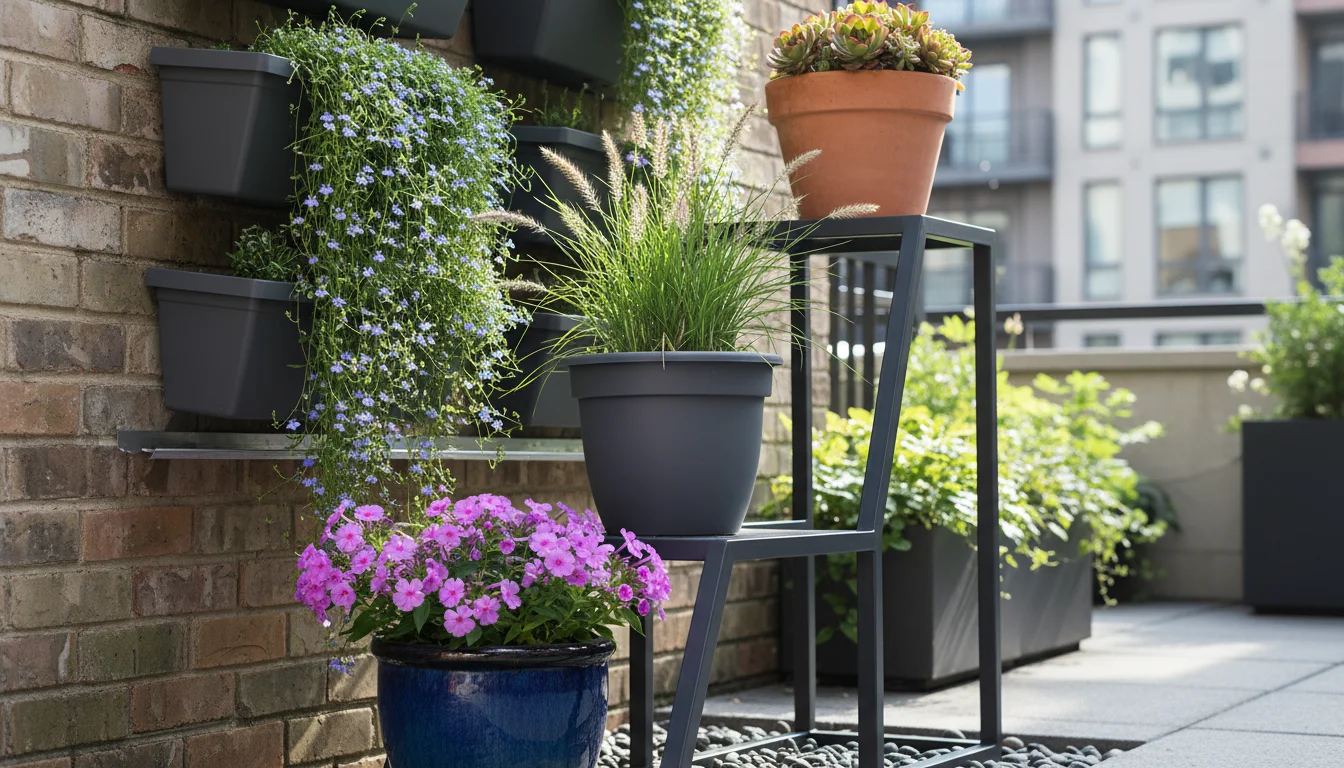
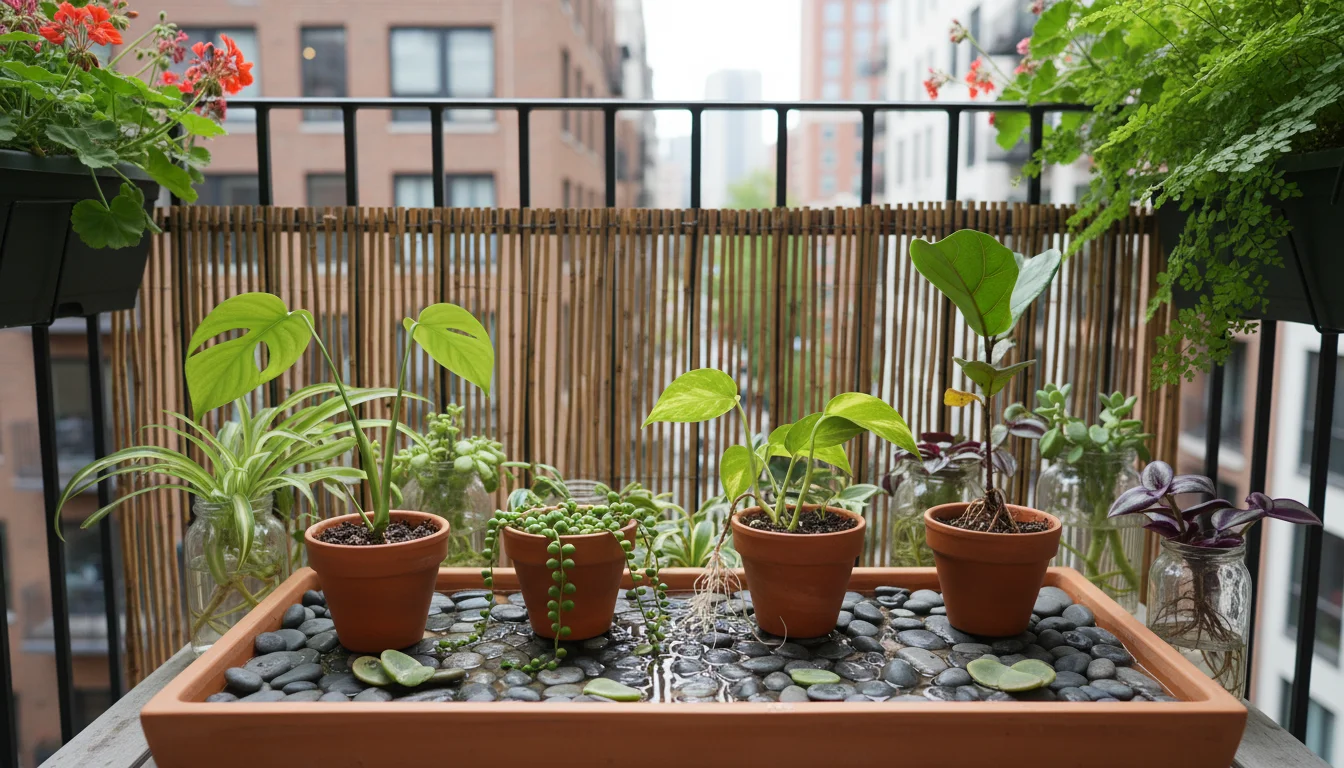
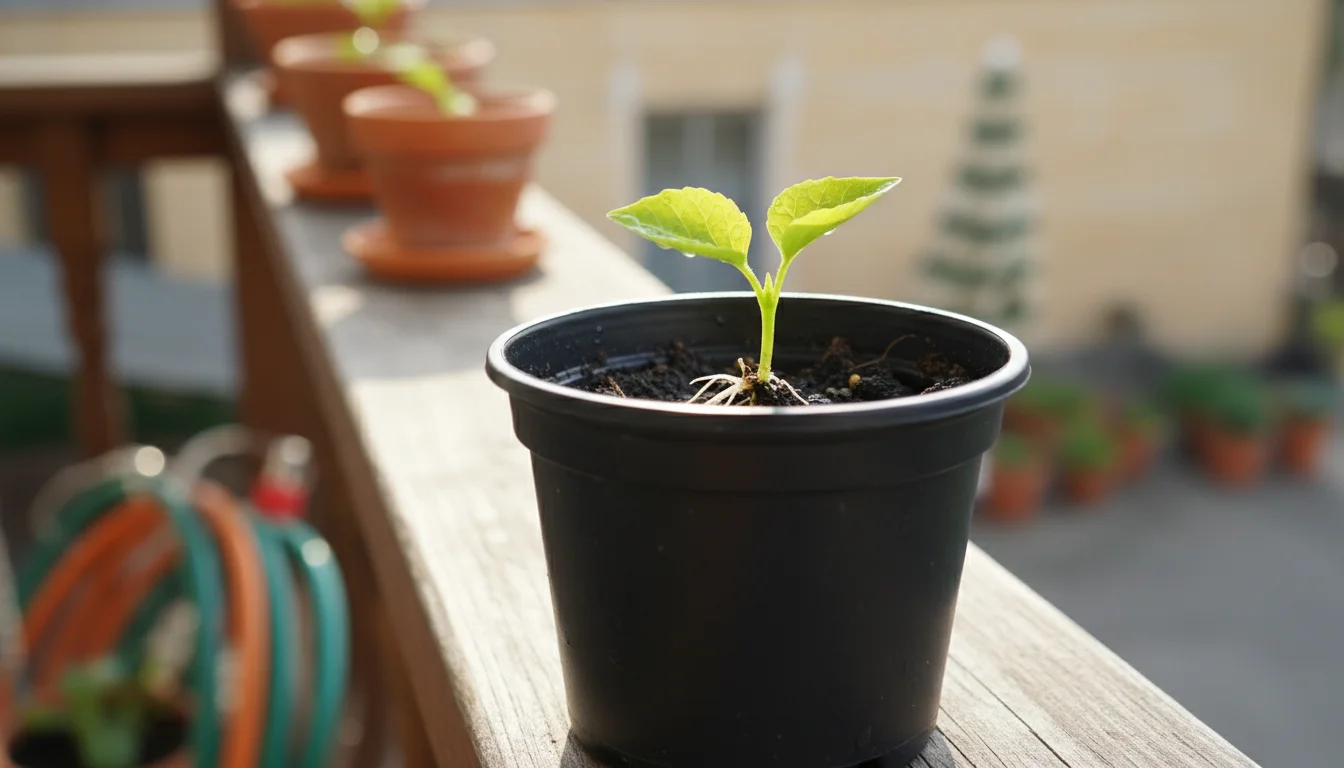
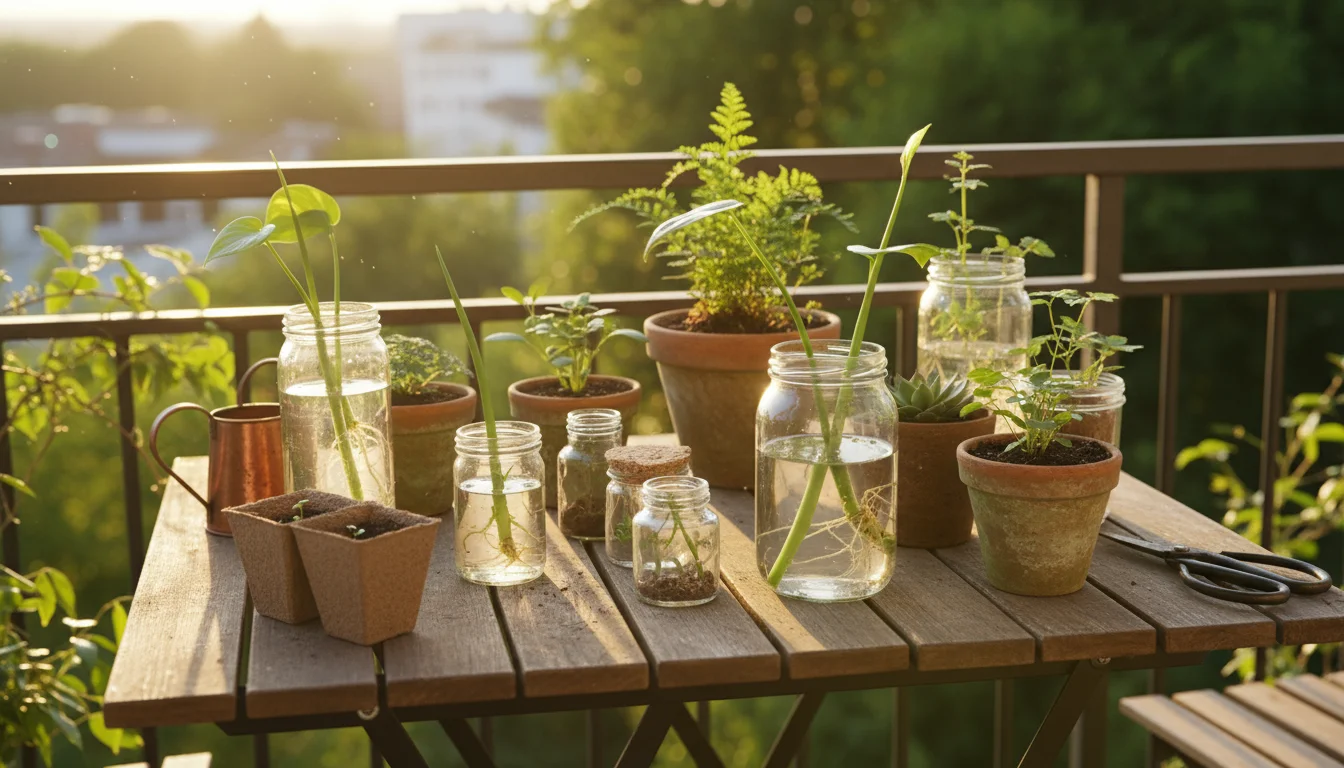
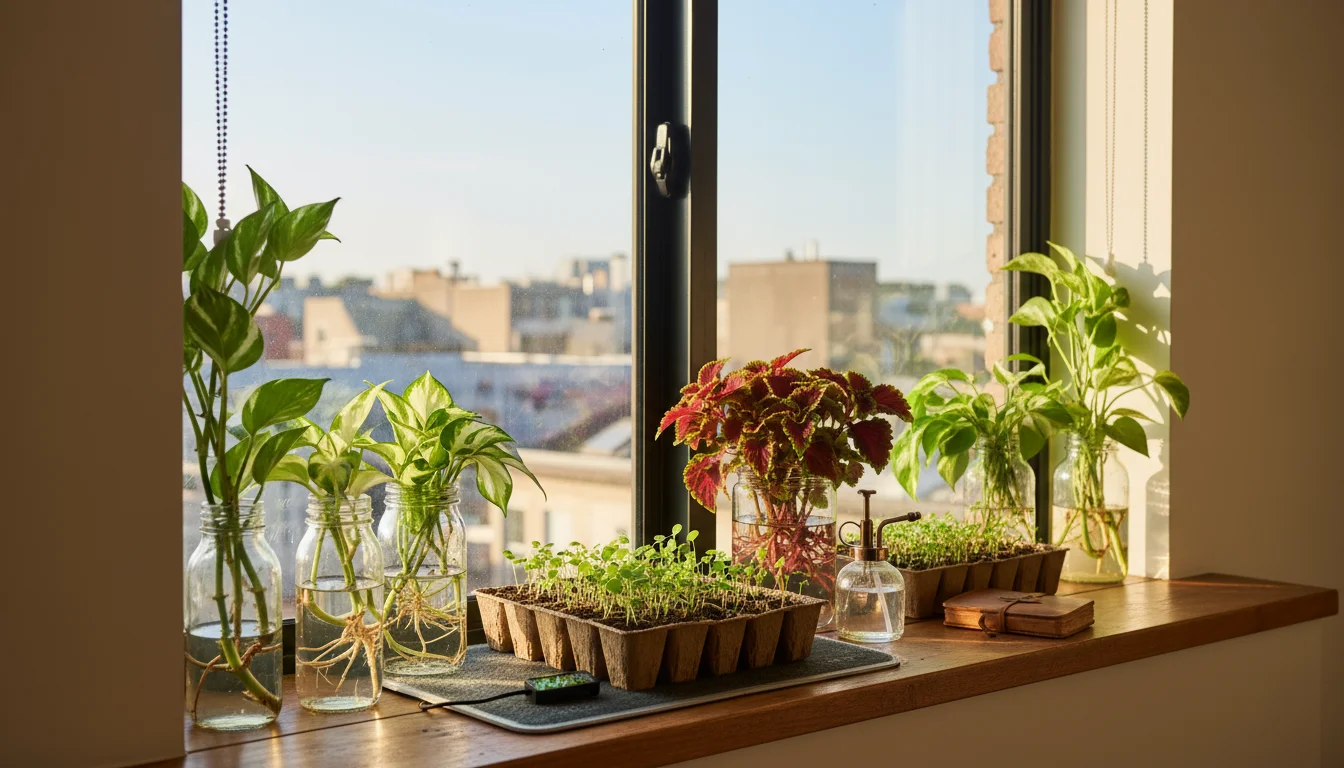
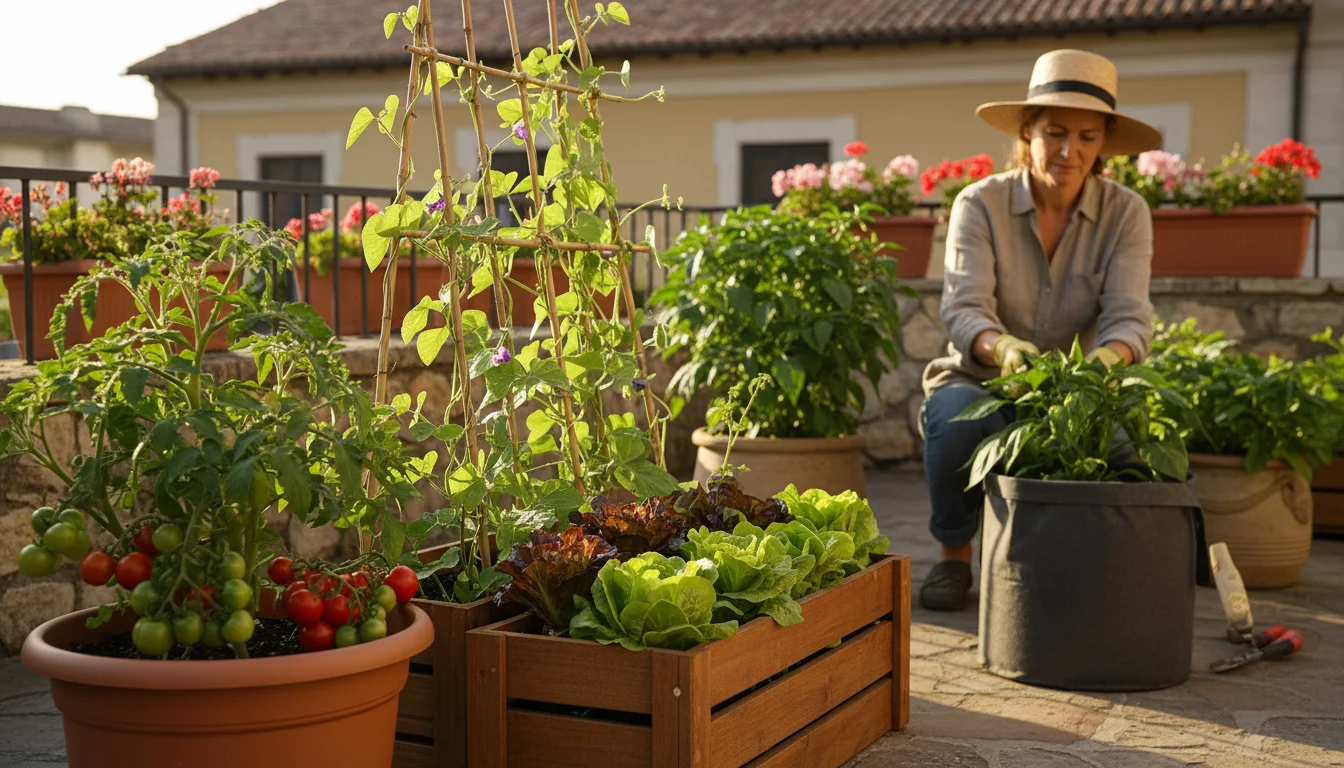
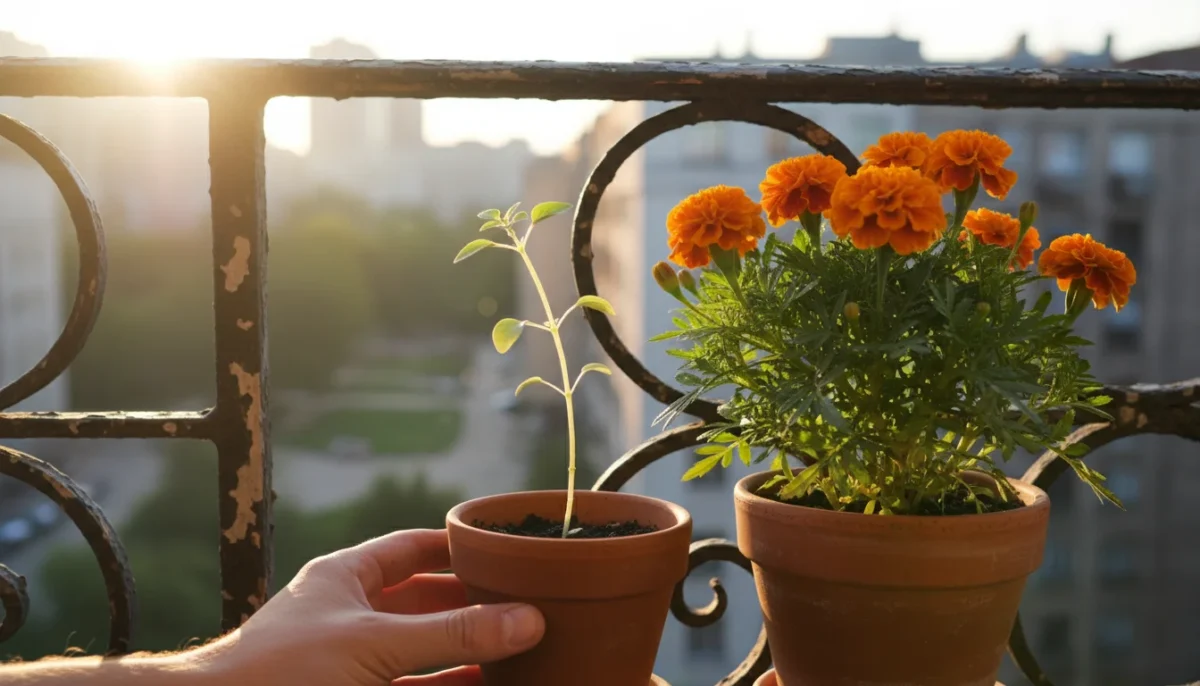
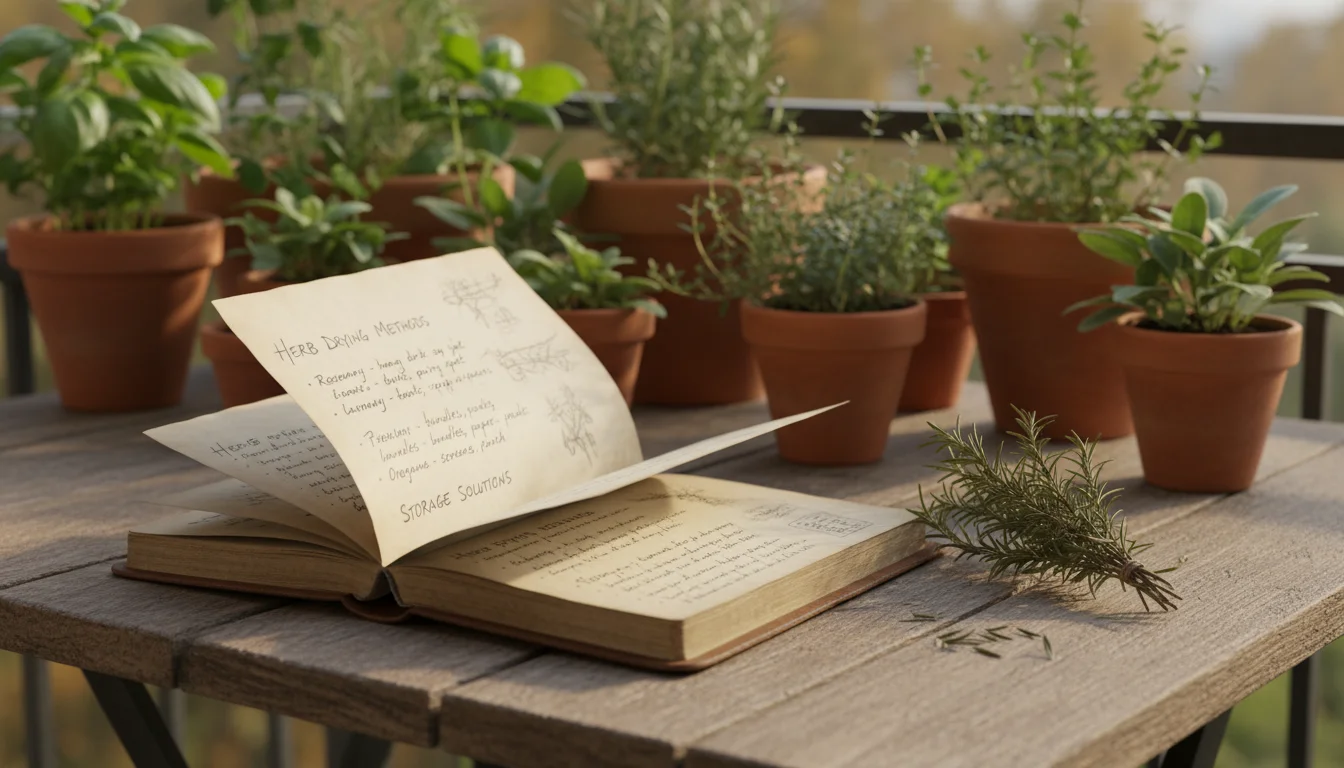
As the days shorten and a crispness enters the air, your balcony or patio garden might feel like it is winding down. For the savvy small-space gardener, however, fall is not an end. It is a prime opportunity. It is the perfect moment to extend the life and flavor of your container-grown herbs, preserving their goodness for the colder months ahead. Imagine sprinkling your own home-dried basil onto winter soups or infusing tea with mint you grew yourself. This article guides you through transforming your autumn balcony bounty into a winter pantry of aromatic treasures.

A hand snips a robust rosemary sprig from a terracotta pot on a balcony railing, surrounded by other green container herbs.
Peak fall harvest: a hand gathering fresh rosemary from a balcony pot.

Why Fall is Prime Time for Herb Harvesting

Many herbs reach their peak flavor and oil content just before they begin to slow down for winter. The cooler temperatures of fall often encourage a burst of growth, and plants funnel their energy into producing robust leaves. This makes autumn the ideal time for harvesting herbs for maximum flavor. You capture the essence of your garden at its peak, ensuring that the dried herbs will deliver a powerful punch of taste to your winter dishes. Furthermore, harvesting in the fall encourages your perennial herbs, like thyme, rosemary, and oregano, to put energy into root development for winter dormancy, contributing to good fall herb care.

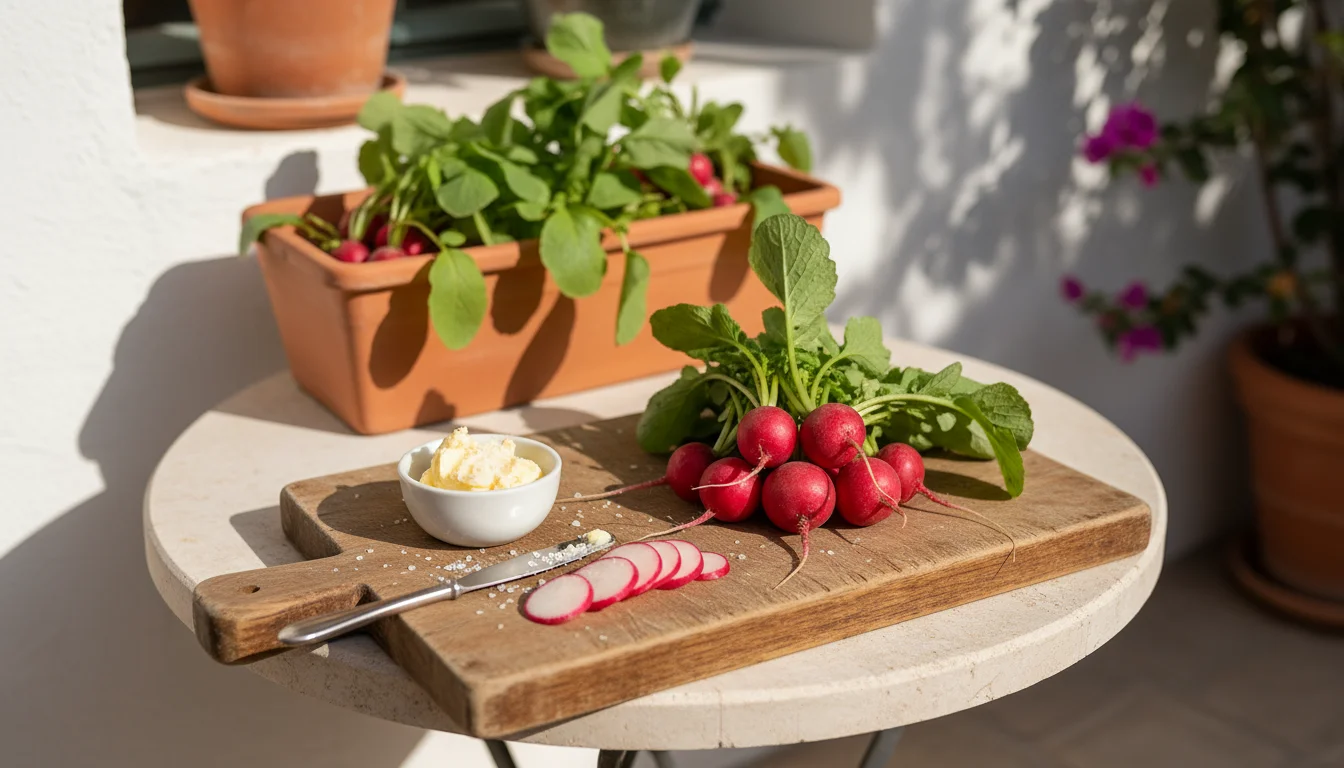
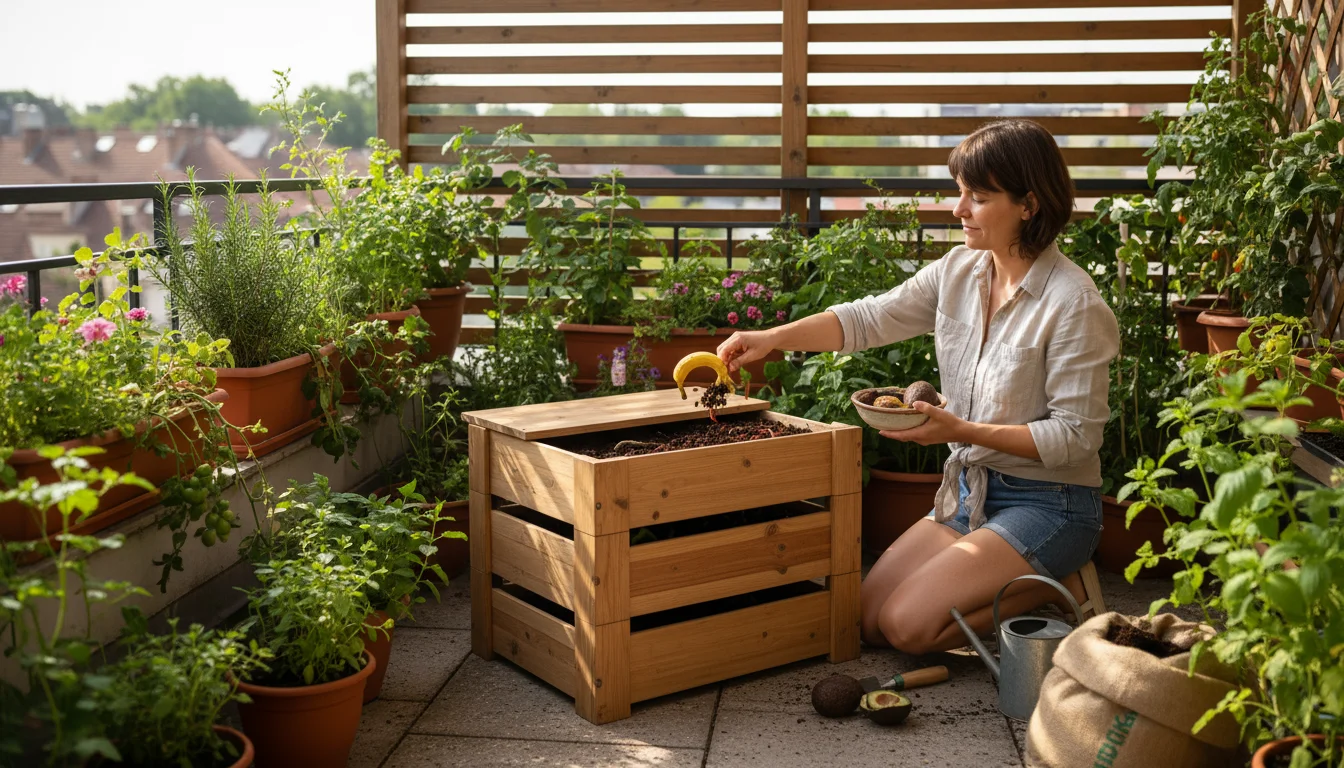
Drying herbs extends their shelf life significantly, turning a perishable seasonal delight into a pantry staple that can last for months, even up to a year, when stored correctly. This practice supports a sustainable approach to gardening, reducing waste and maximizing the yield from your small-space efforts. Instead of letting those last few sprigs wither away as temperatures drop, you transform them into valuable ingredients, ready to brighten up any meal. This foresight also saves you money on store-bought dried herbs, and nothing beats the satisfaction of cooking with ingredients you grew and preserved yourself.

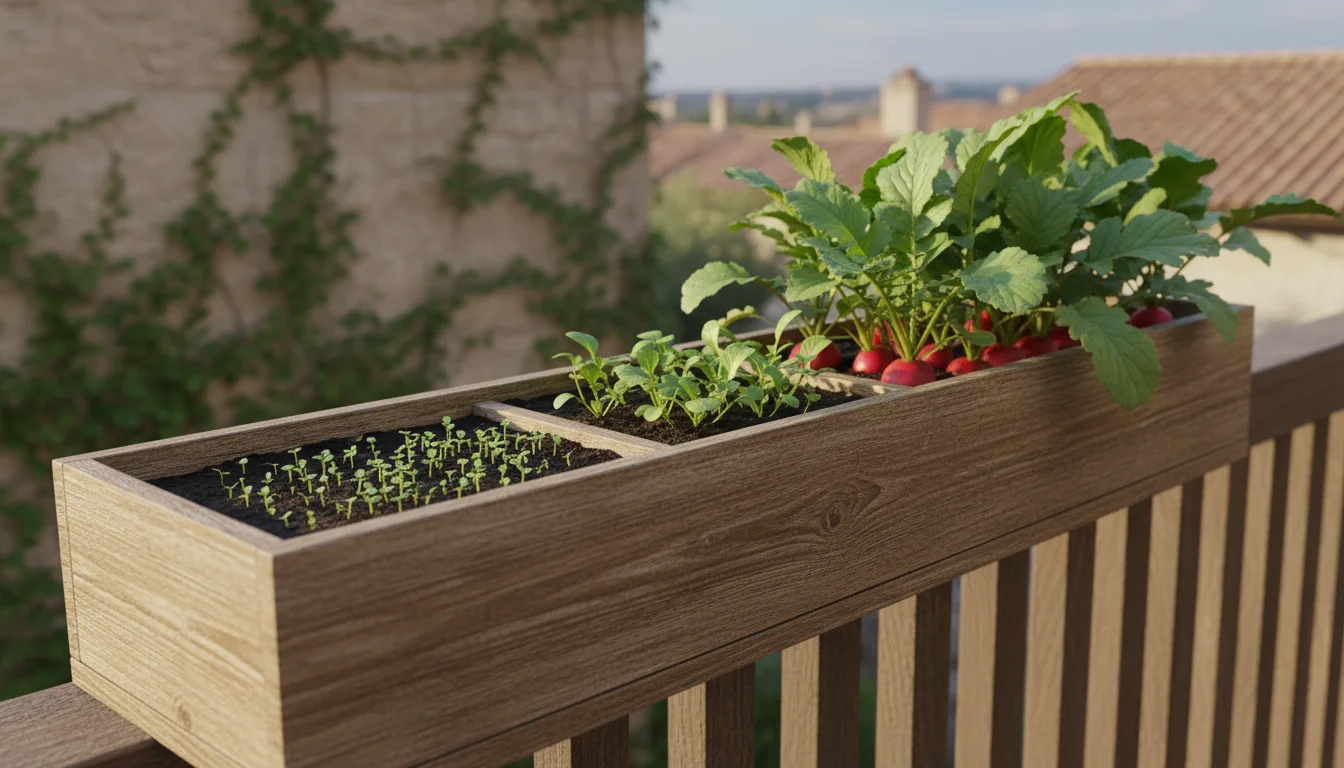
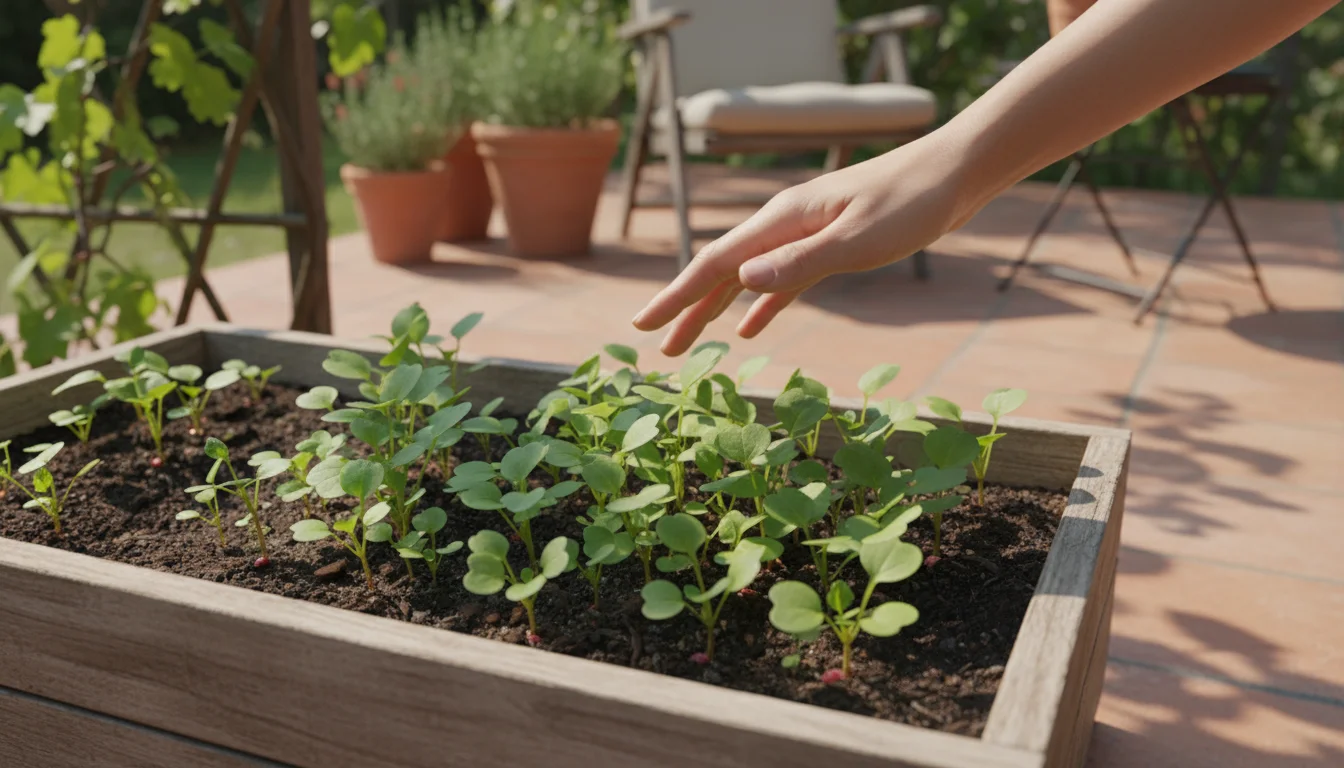
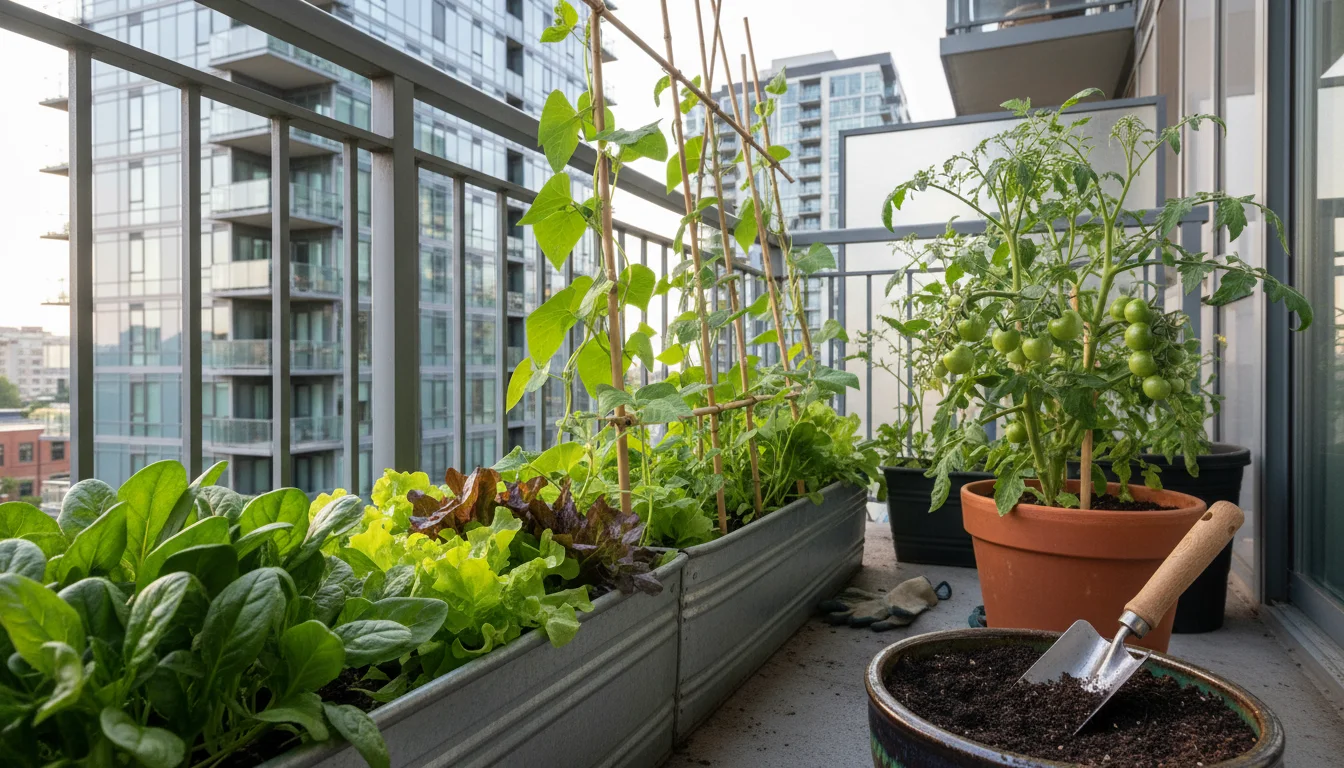
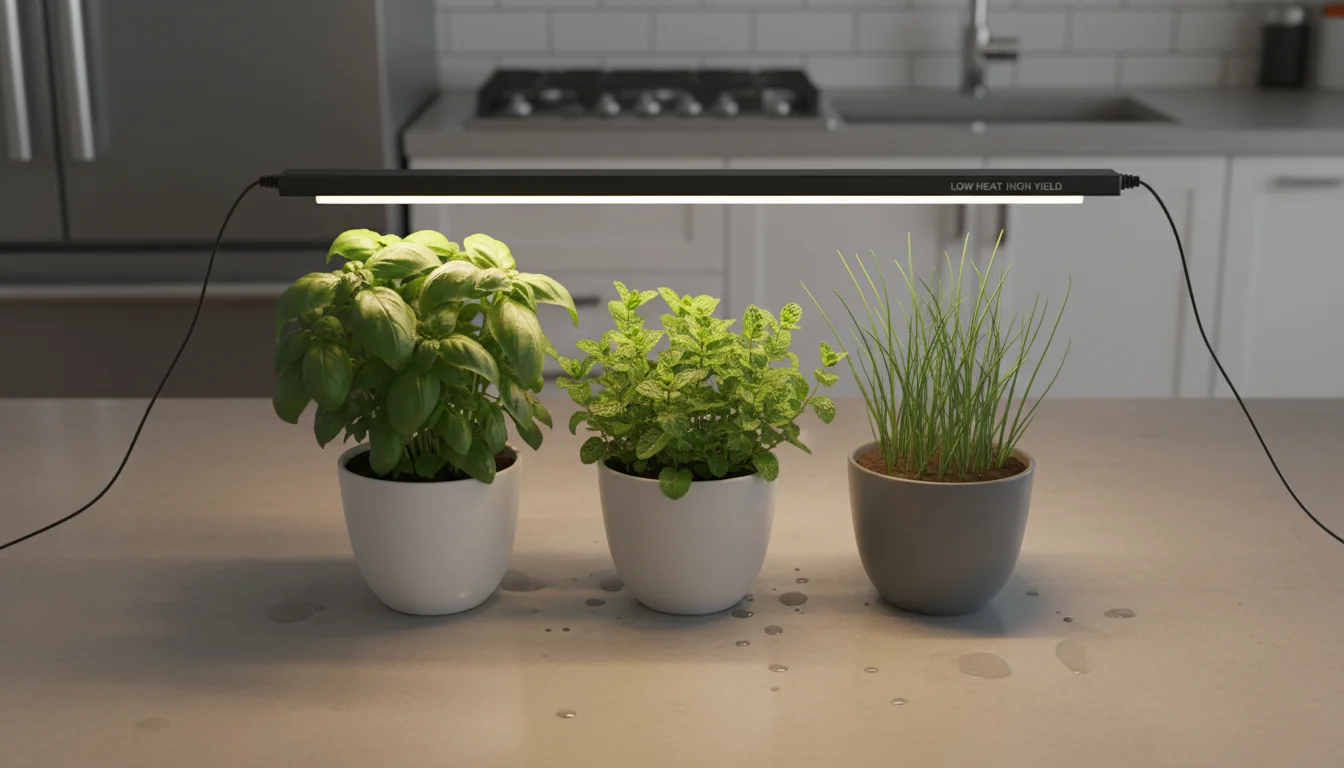
Consider the varying characteristics of different herbs when planning your fall harvest. Leafy herbs such as basil, mint, and parsley are excellent for drying, retaining much of their aroma. Woody-stemmed herbs like rosemary, thyme, and oregano also dry beautifully, becoming even more potent in their dried form. Even chives, while often enjoyed fresh, can be chopped and dried for later use, though they may lose some of their pungent kick. Planning which herbs you will dry helps you focus your efforts and ensures you have a diverse collection for winter use.

A woman's hand uses a green spray bottle to mist water over a lush, potted basil plant on a balcony, making its leaves glisten.
Gently misting basil on the balcony, getting it ready for harvest.

Preparing Your Herbs and Tools for Harvest

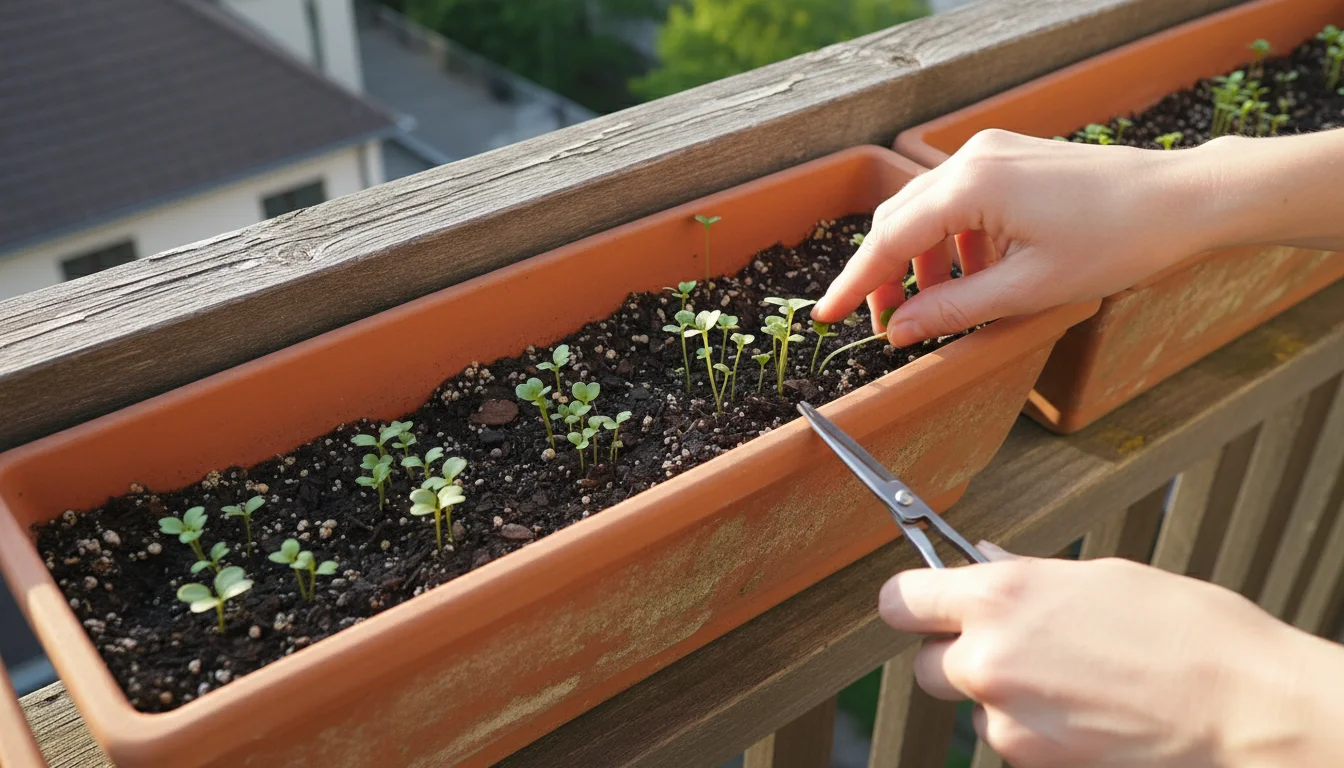
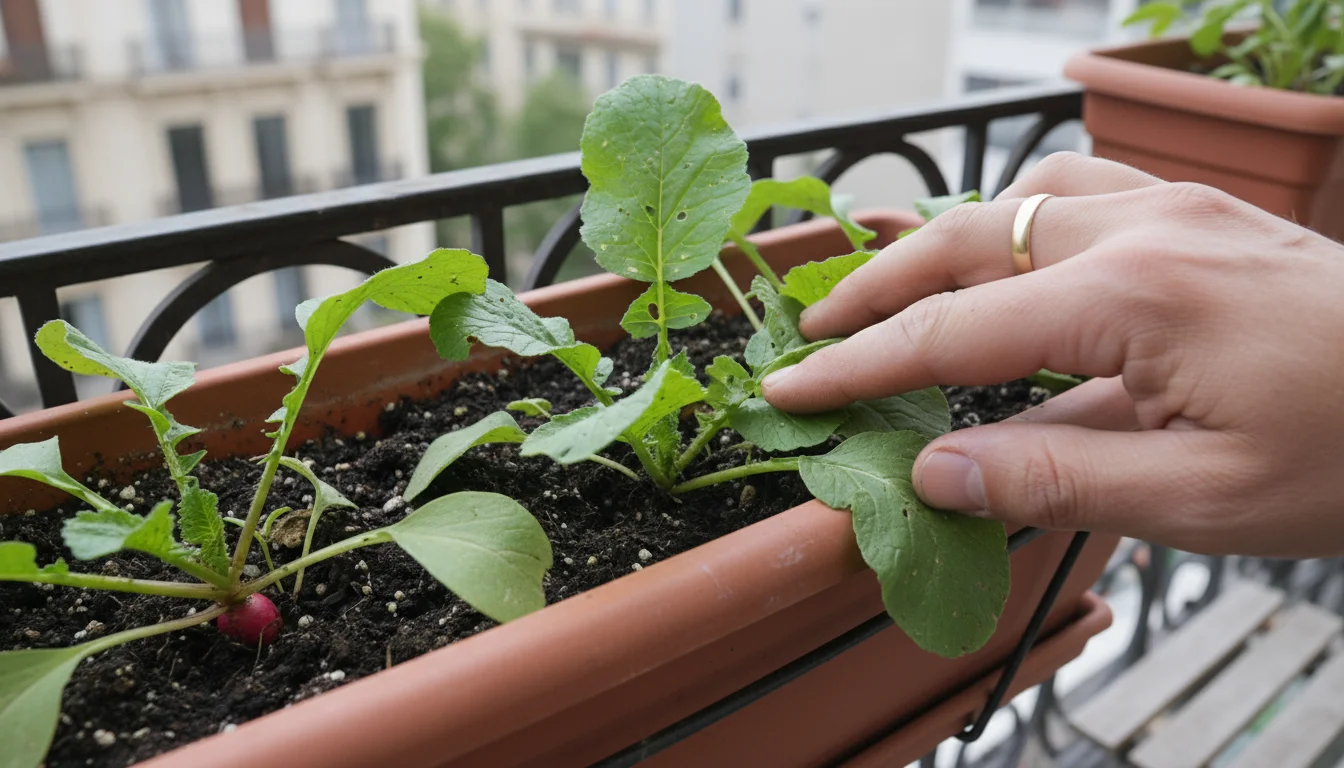
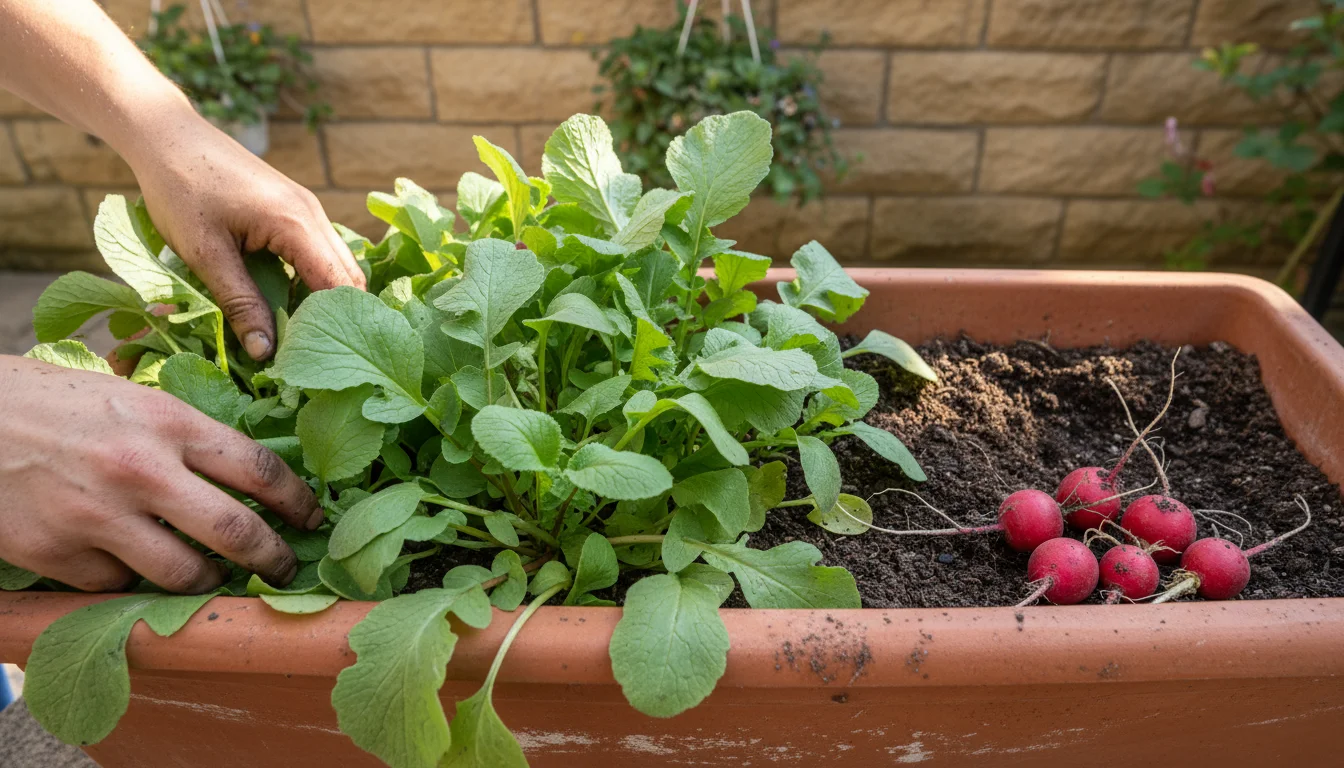
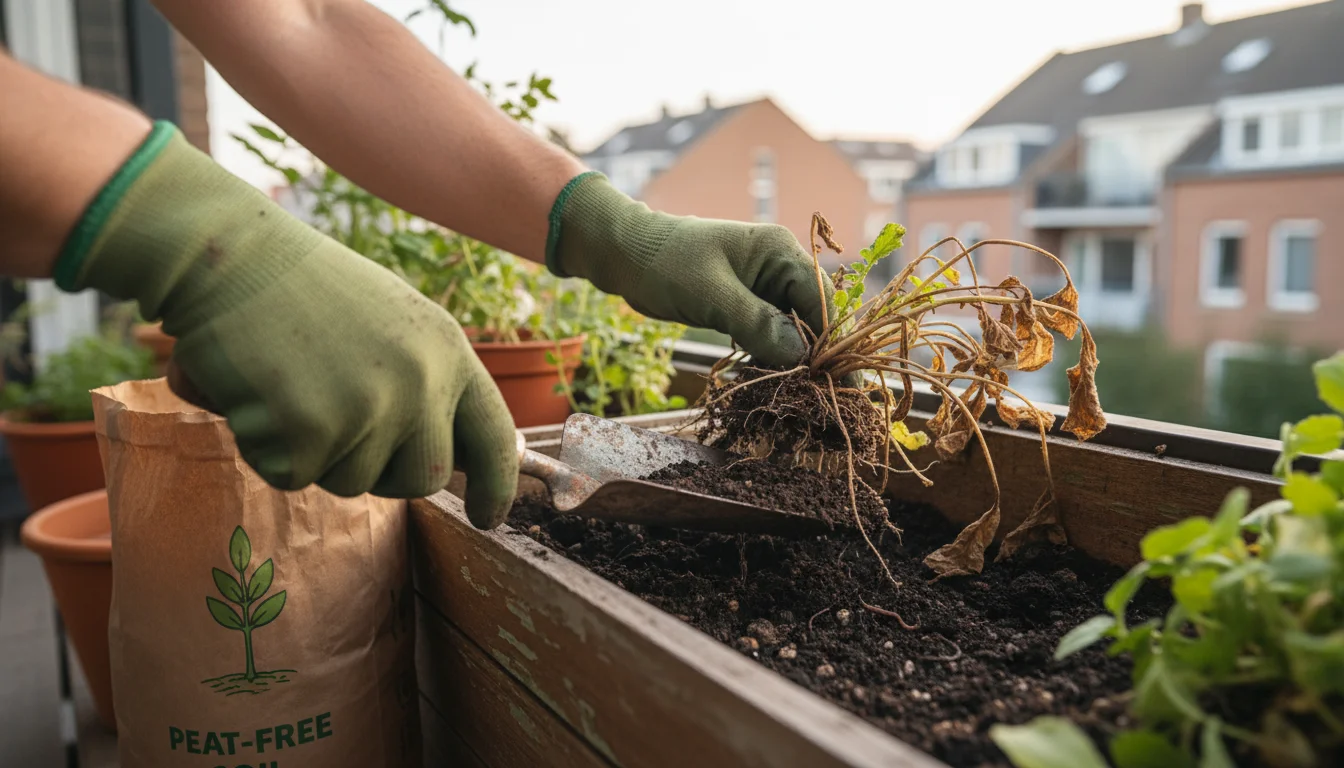
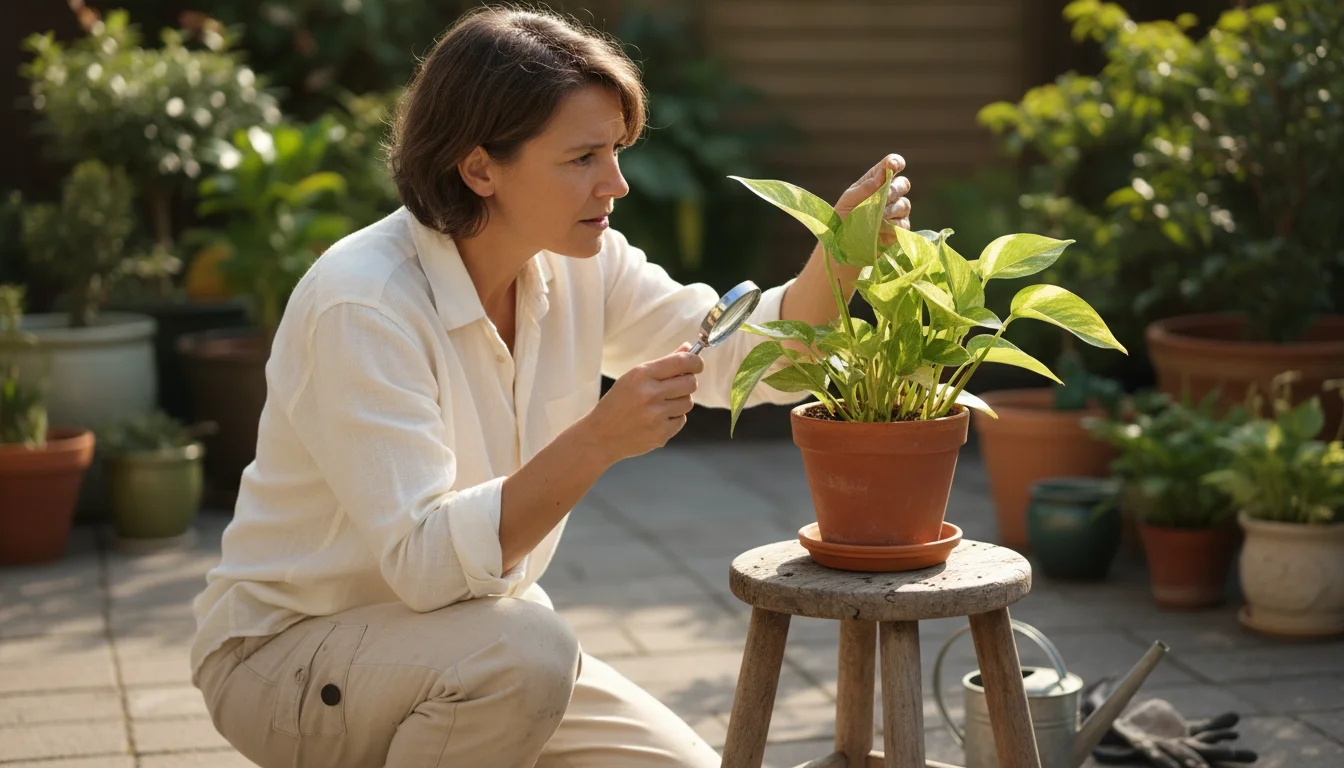
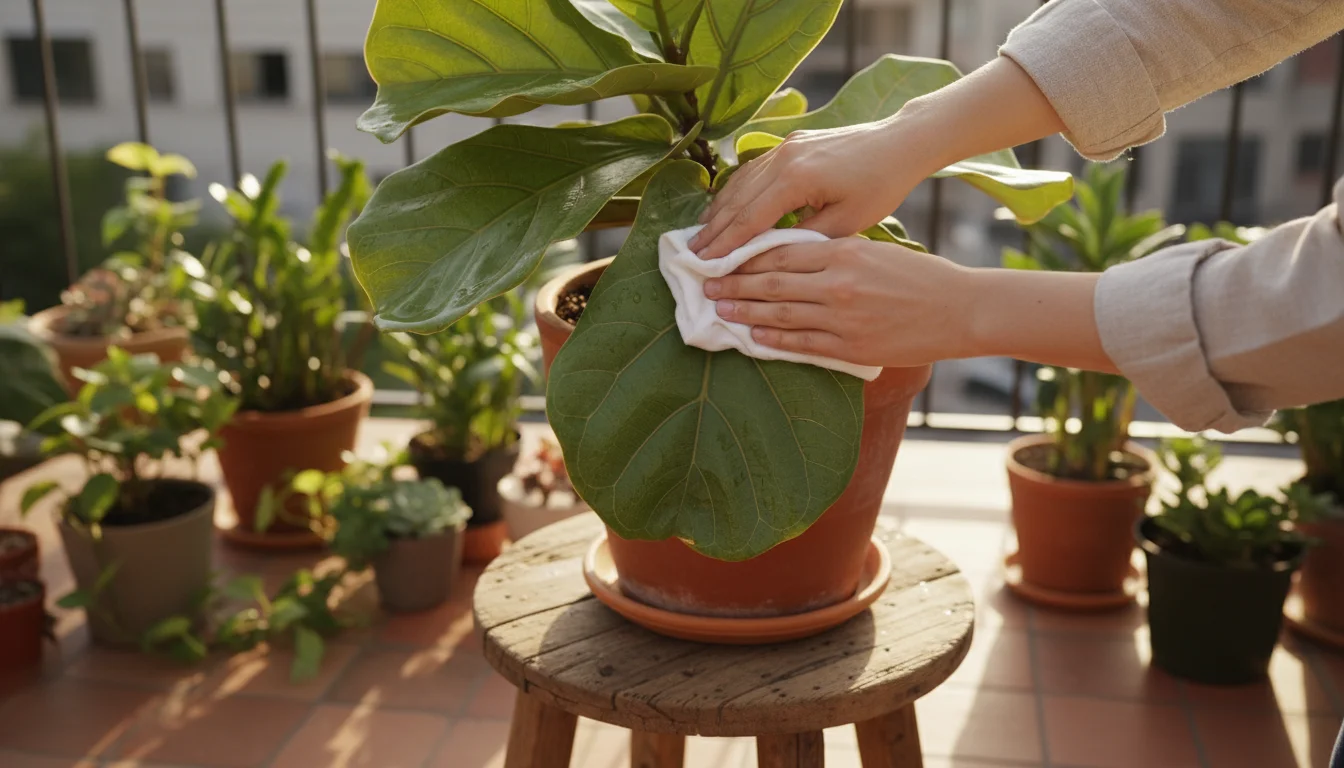
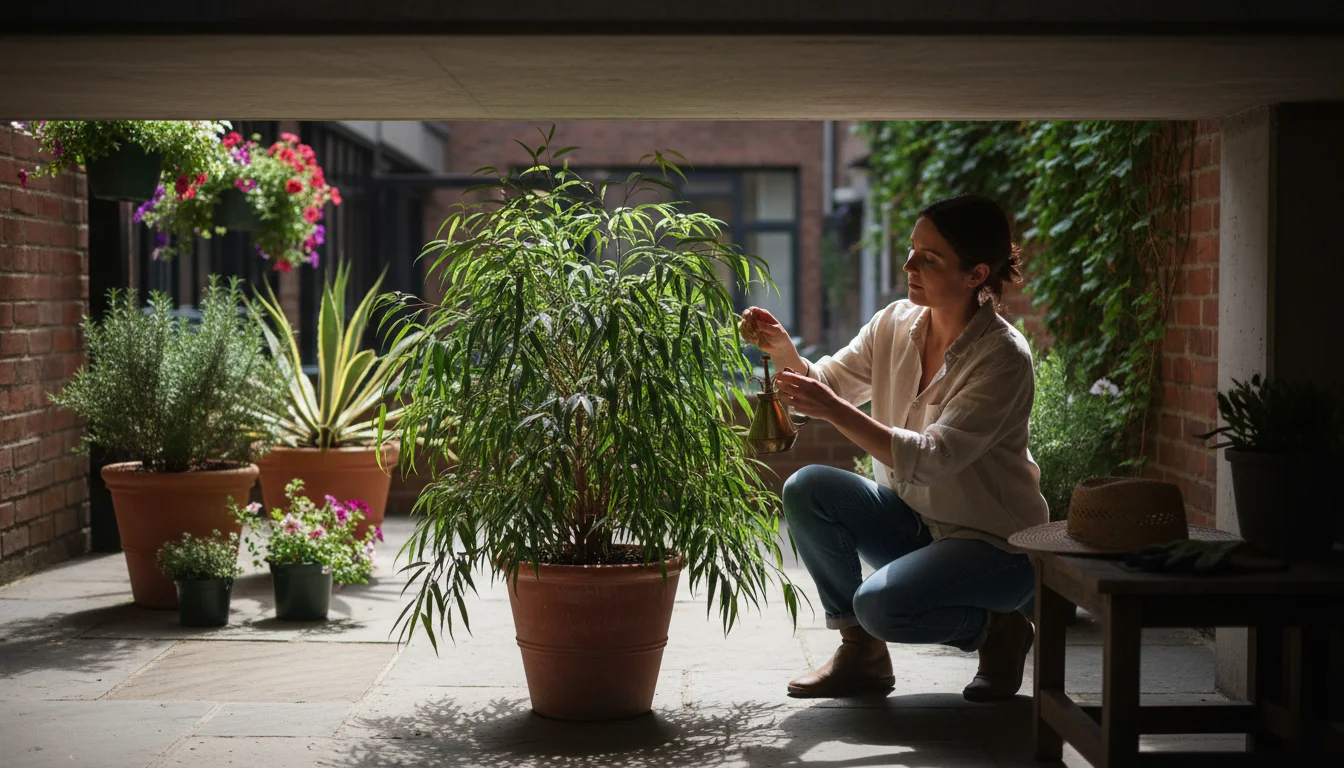
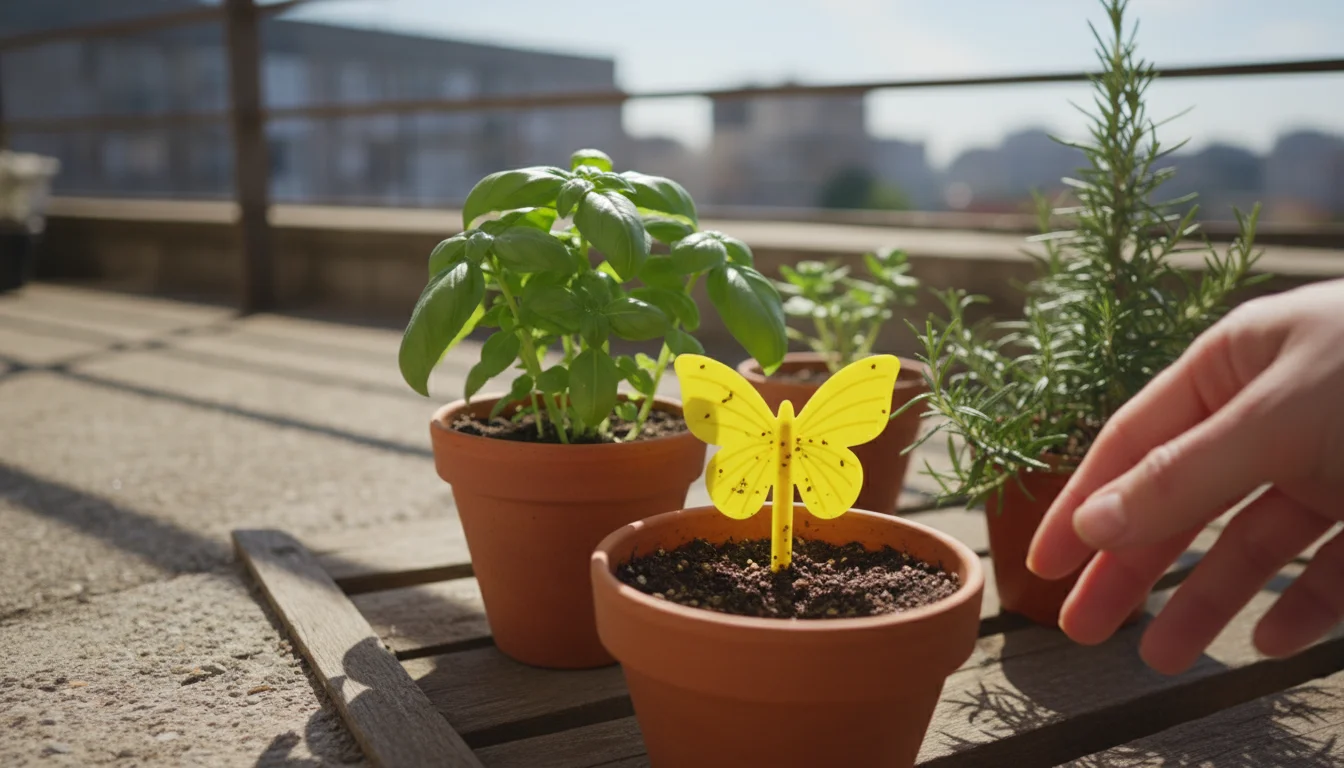
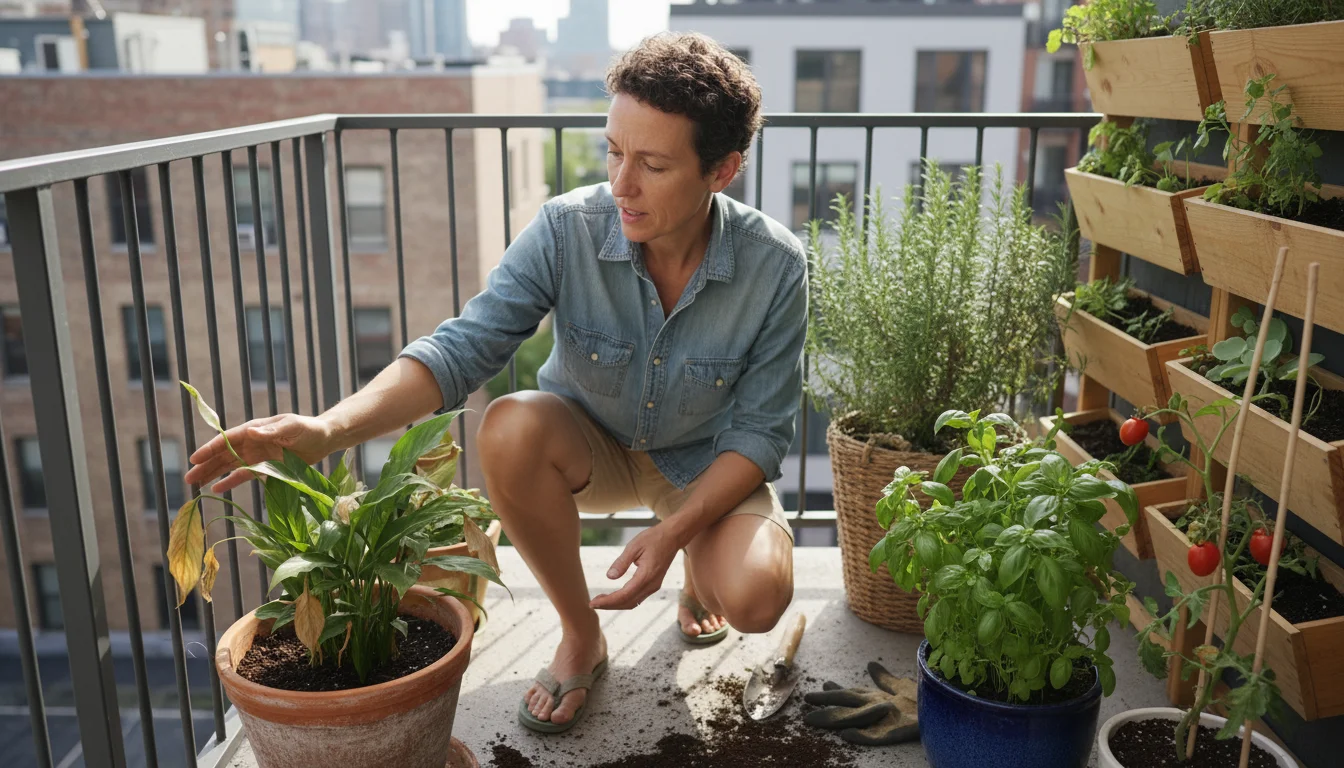
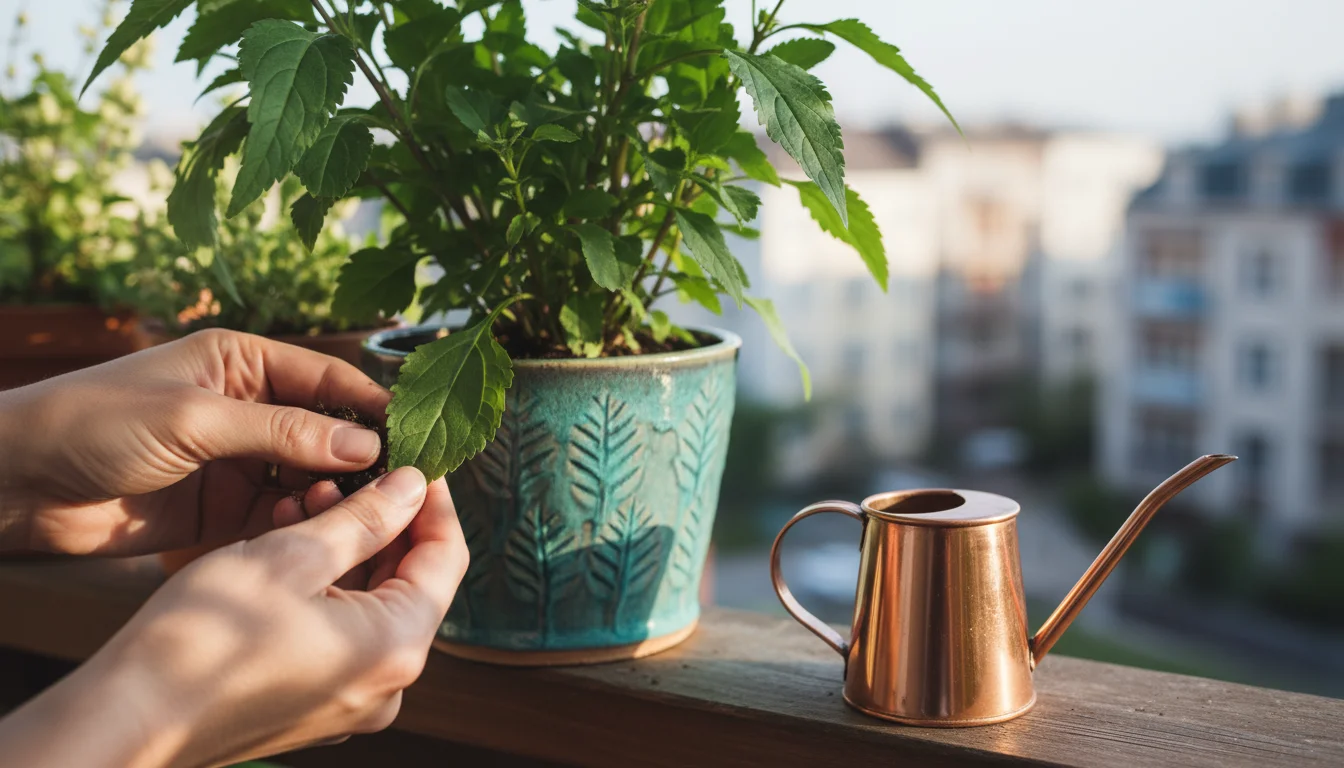
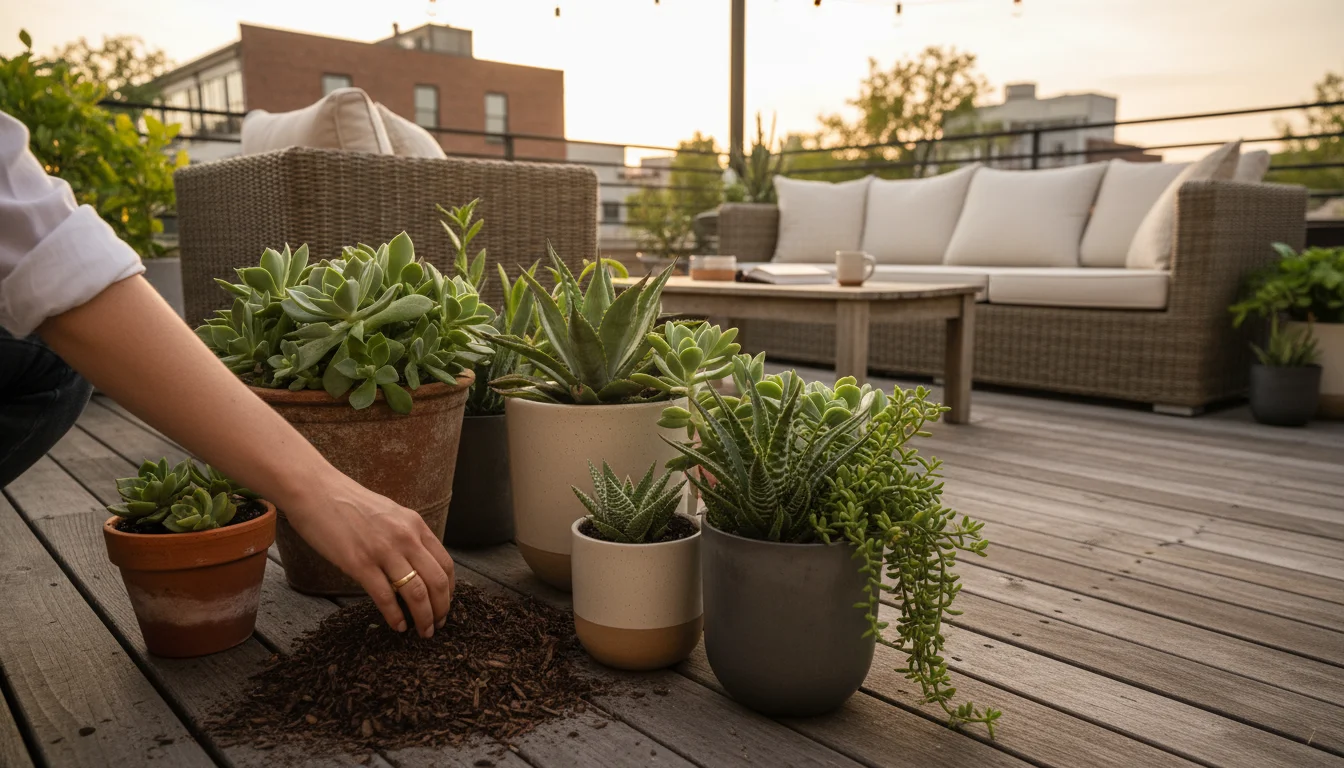
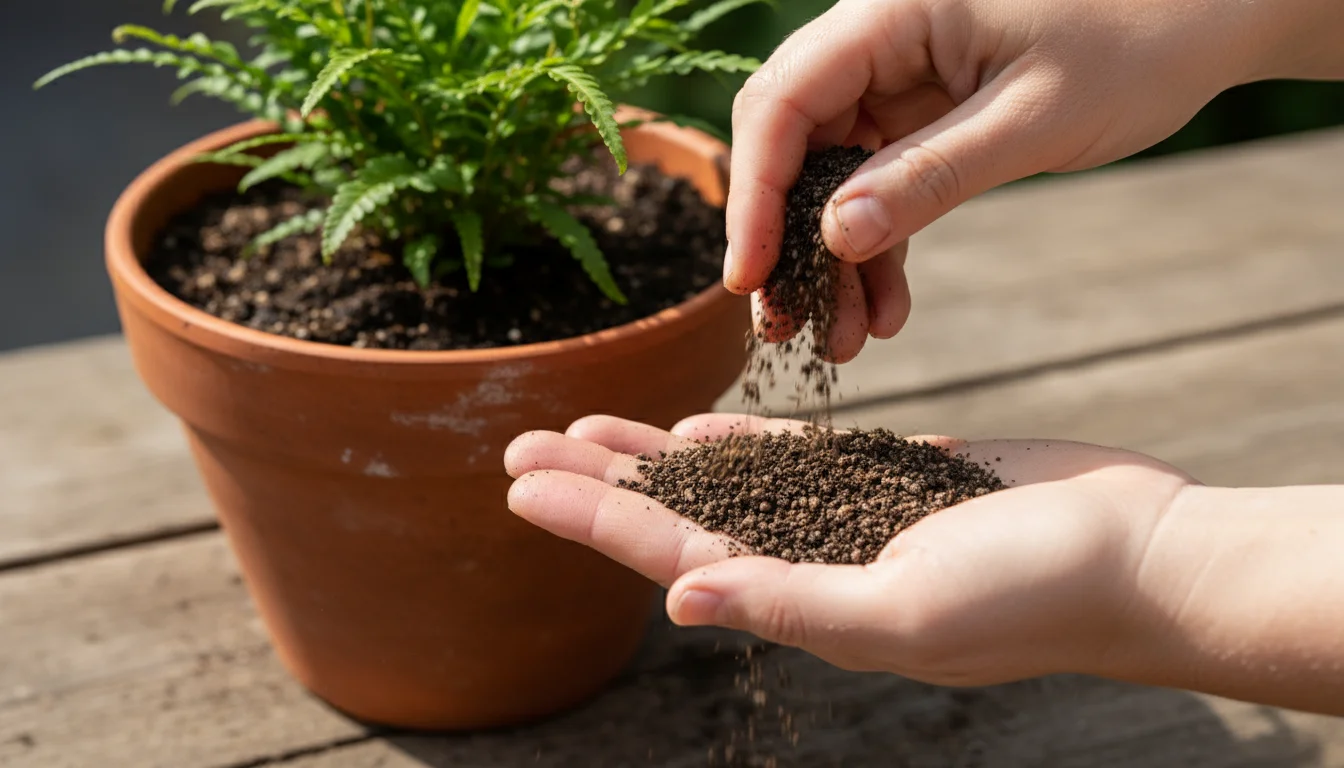
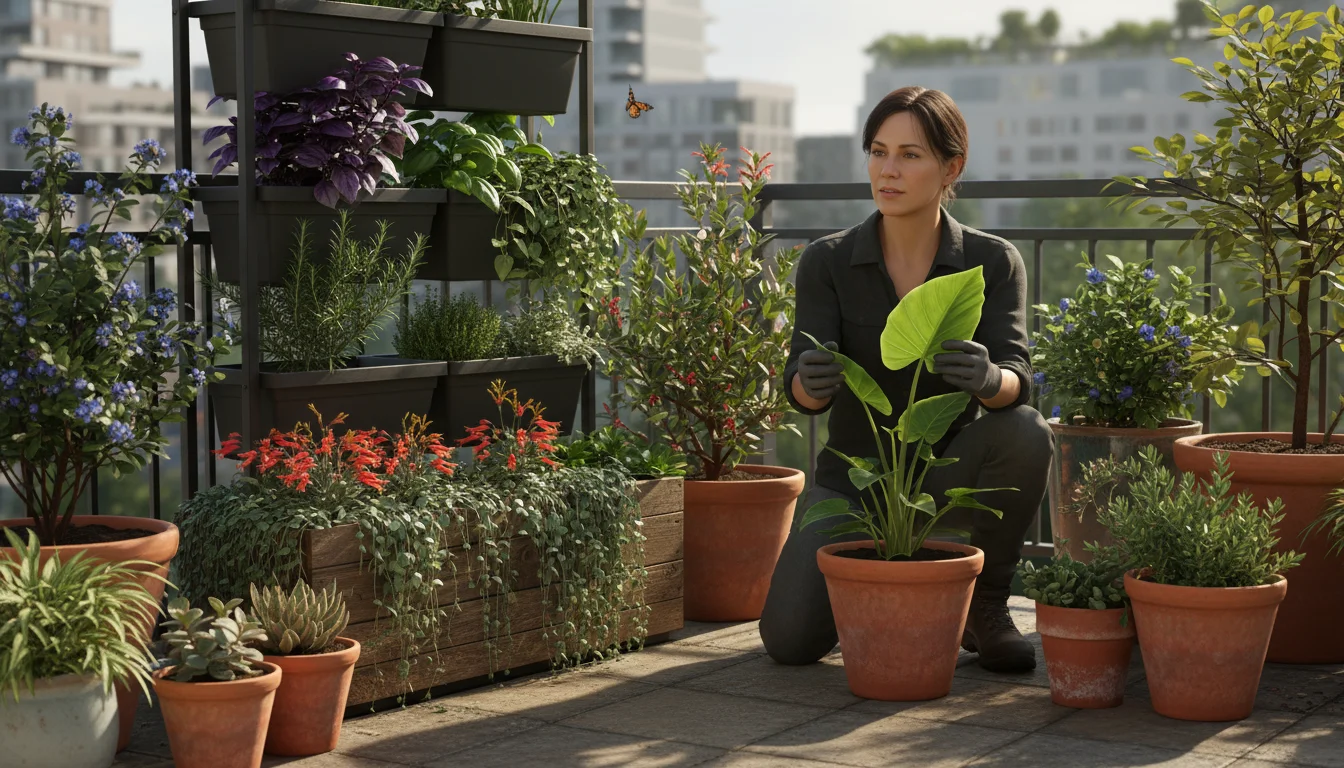
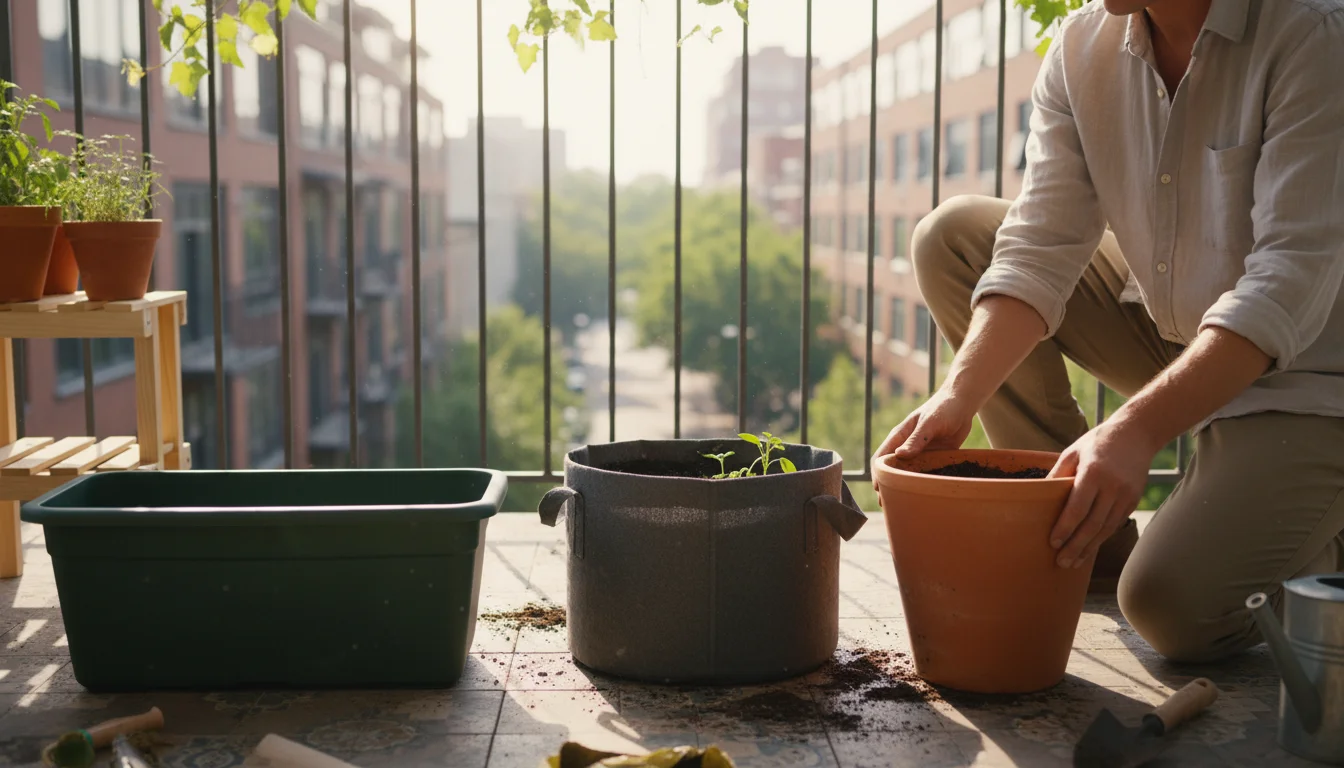
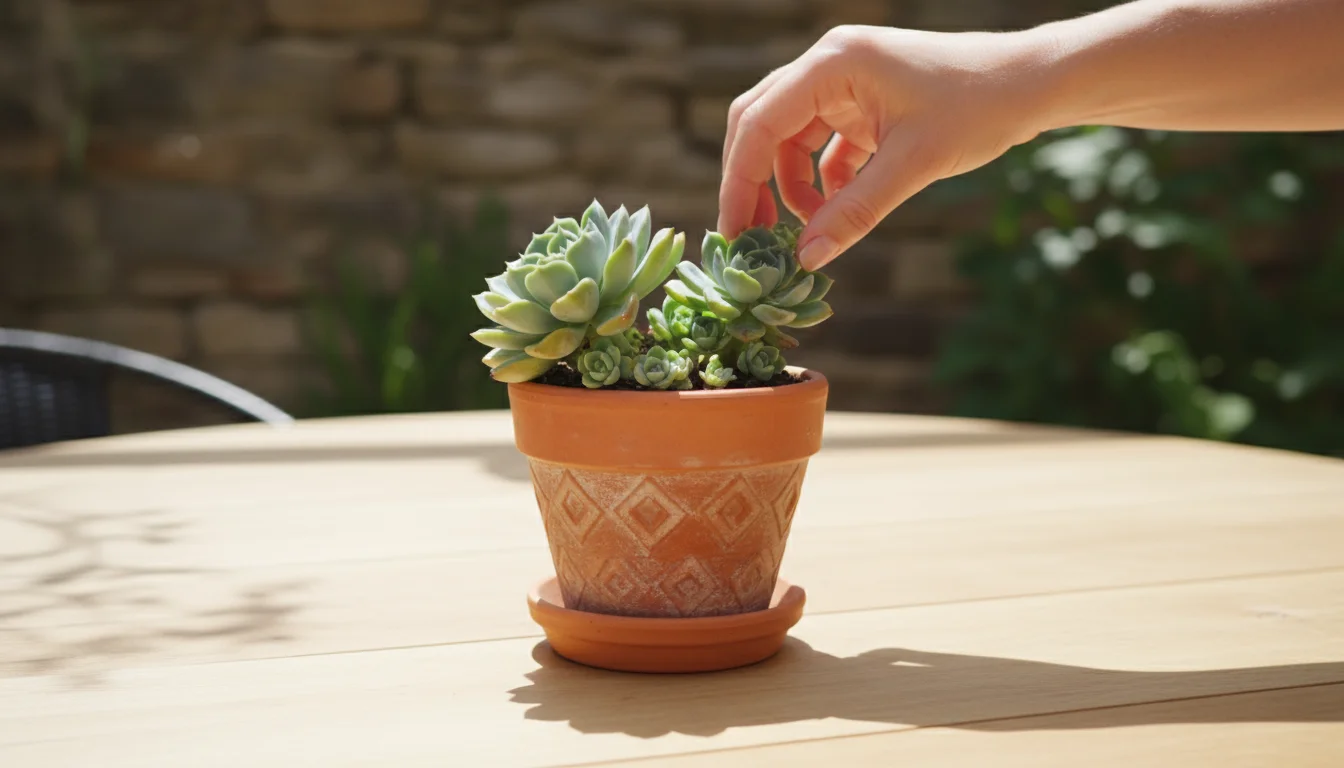
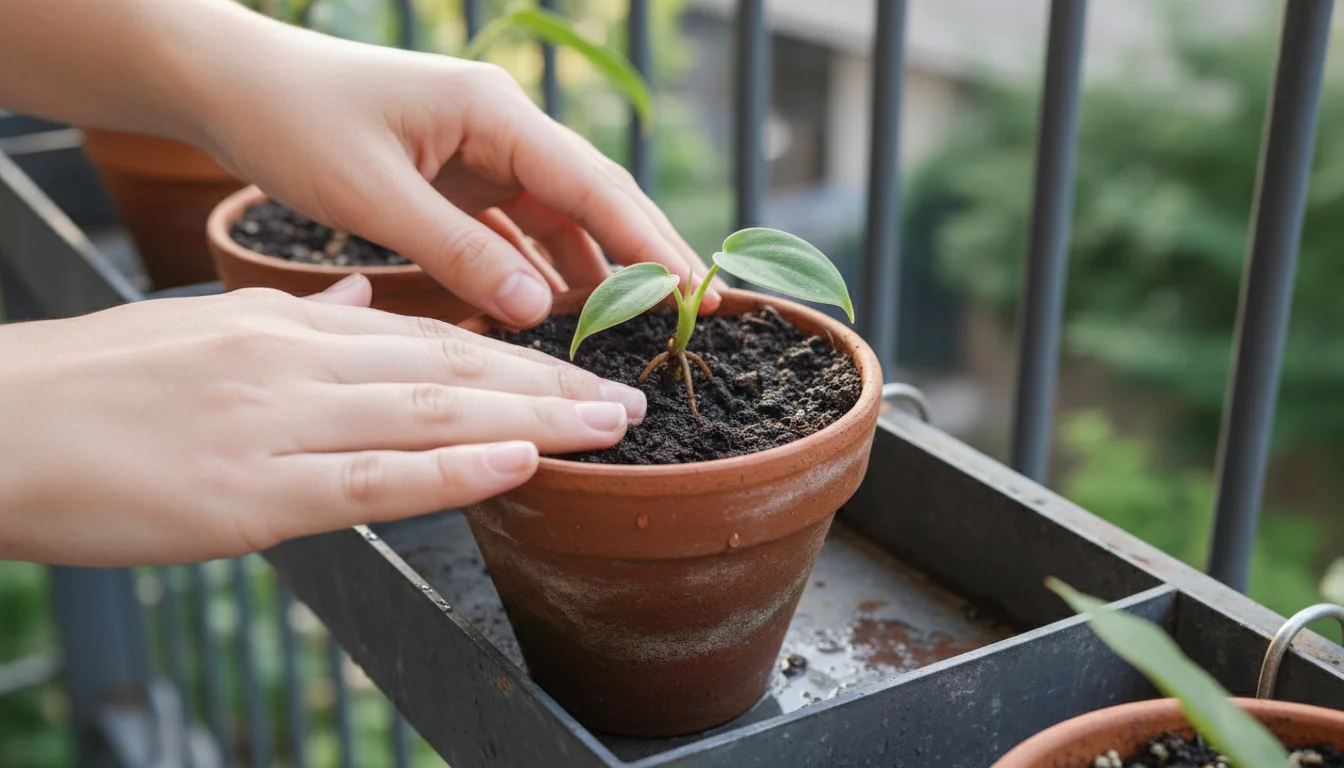
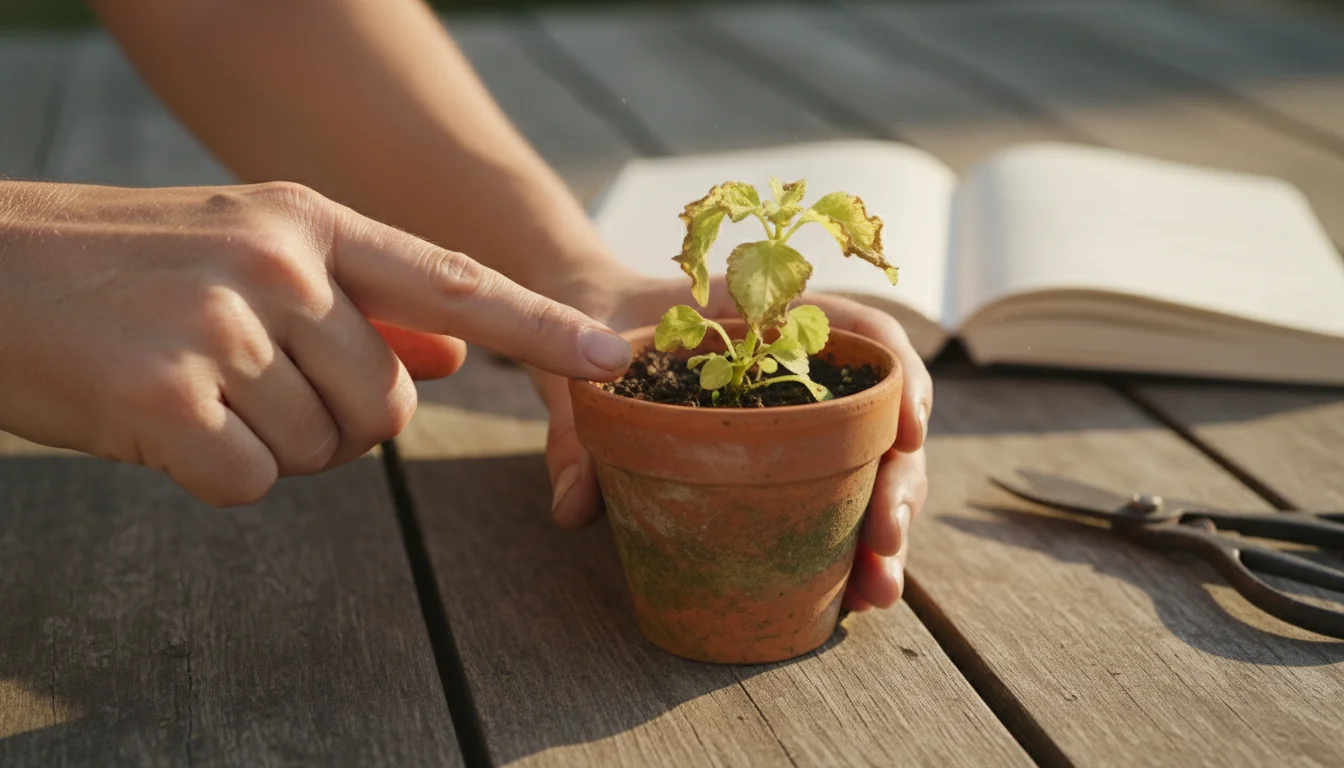
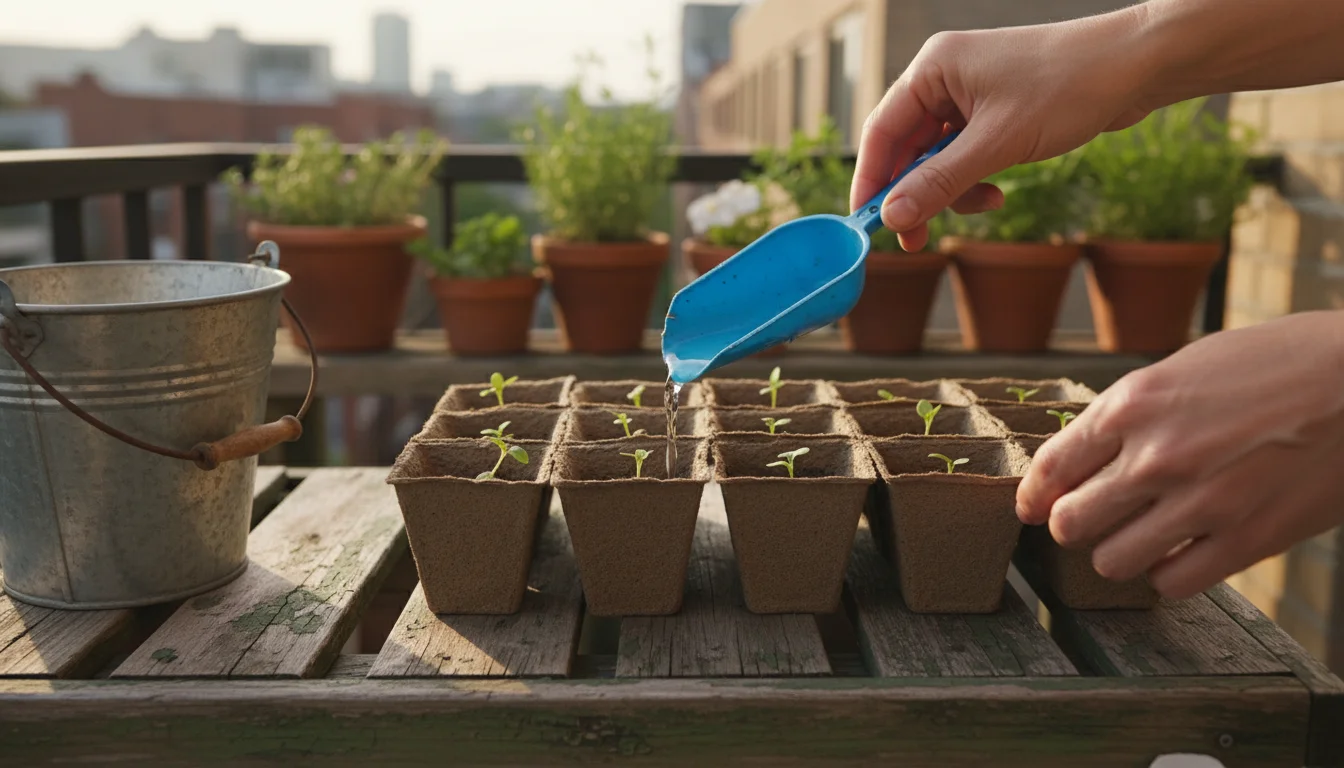
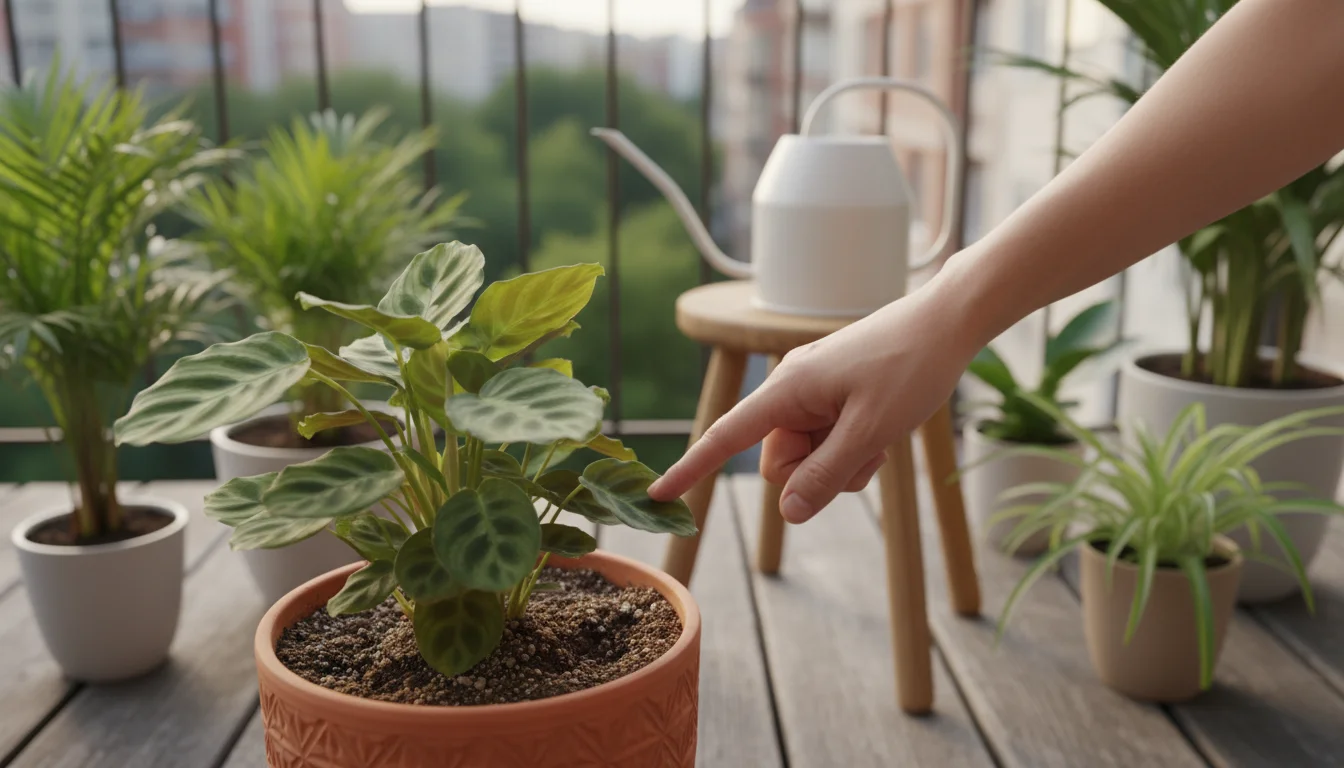
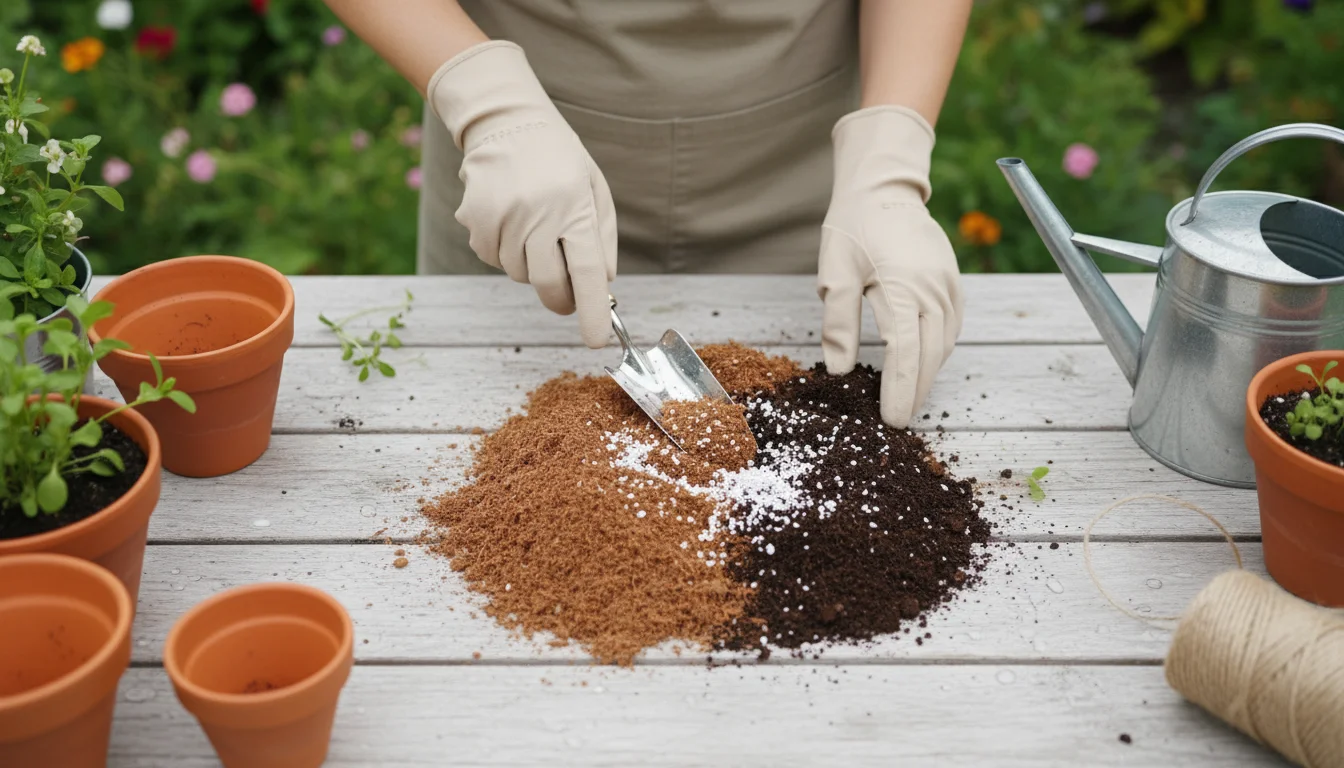
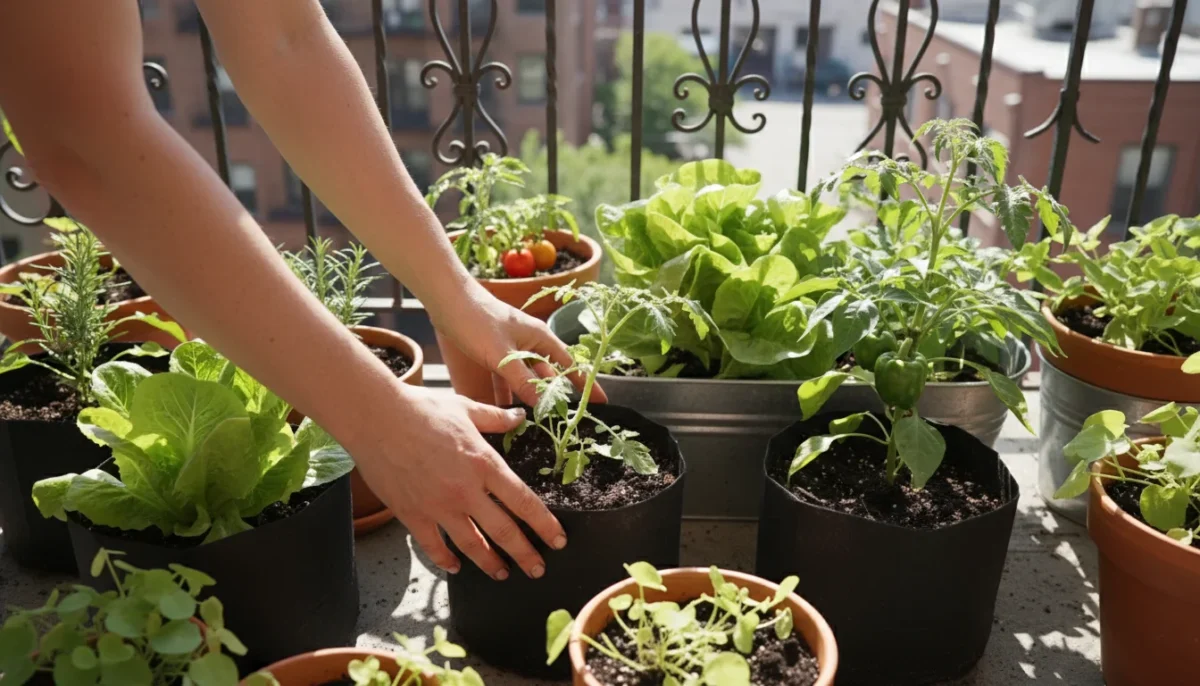
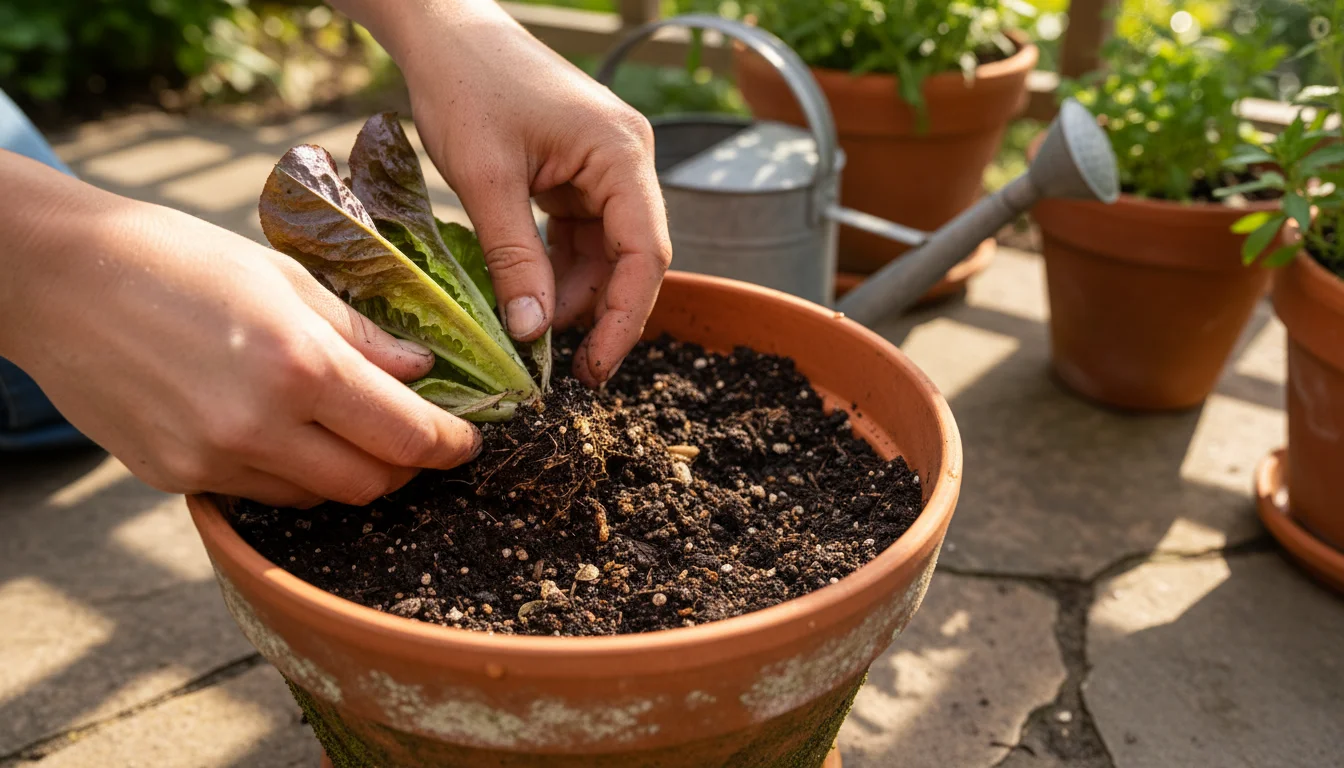
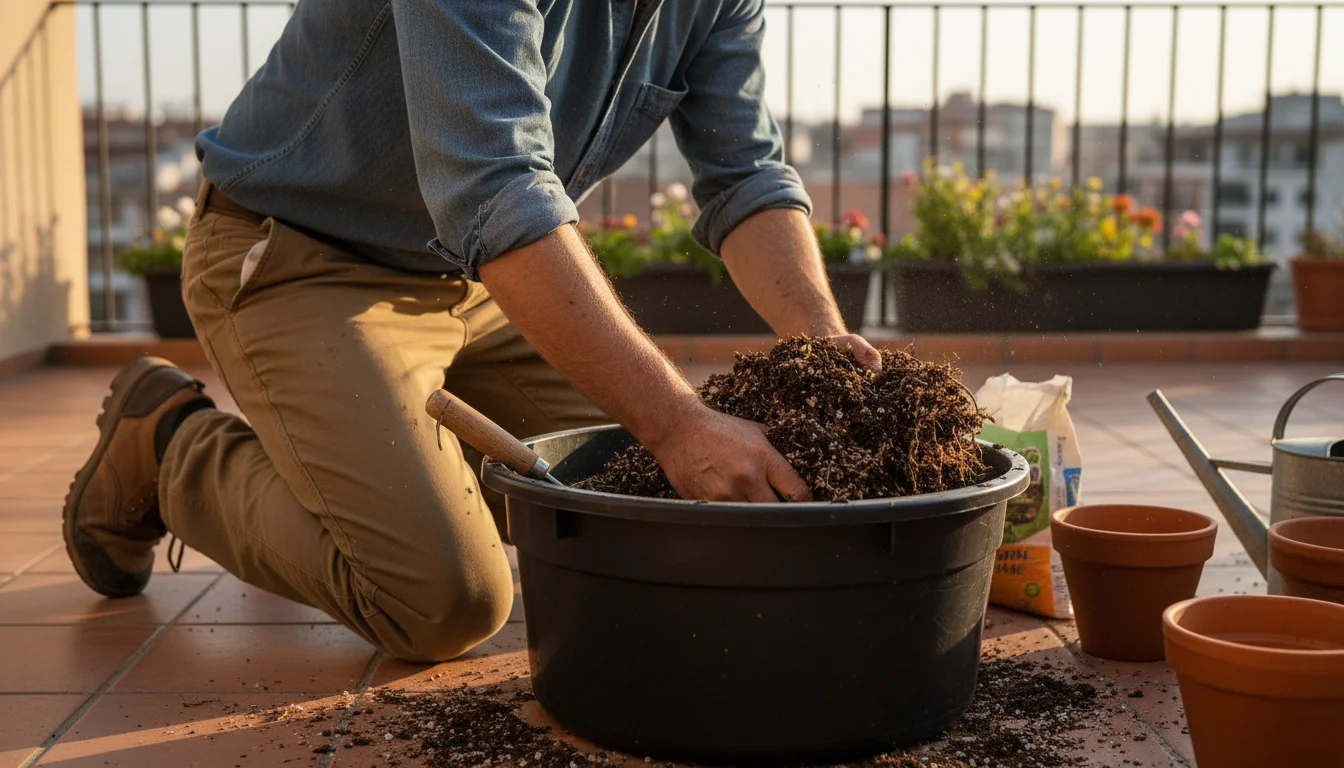
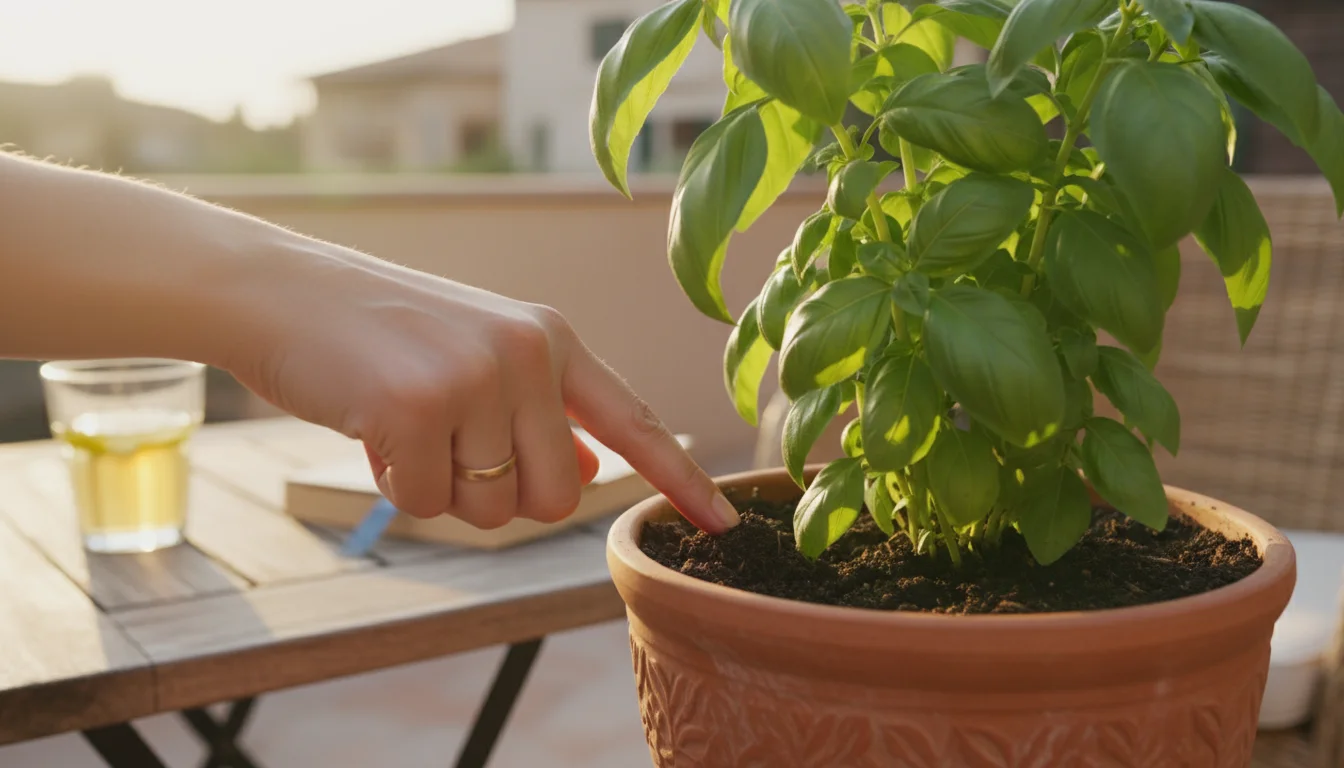
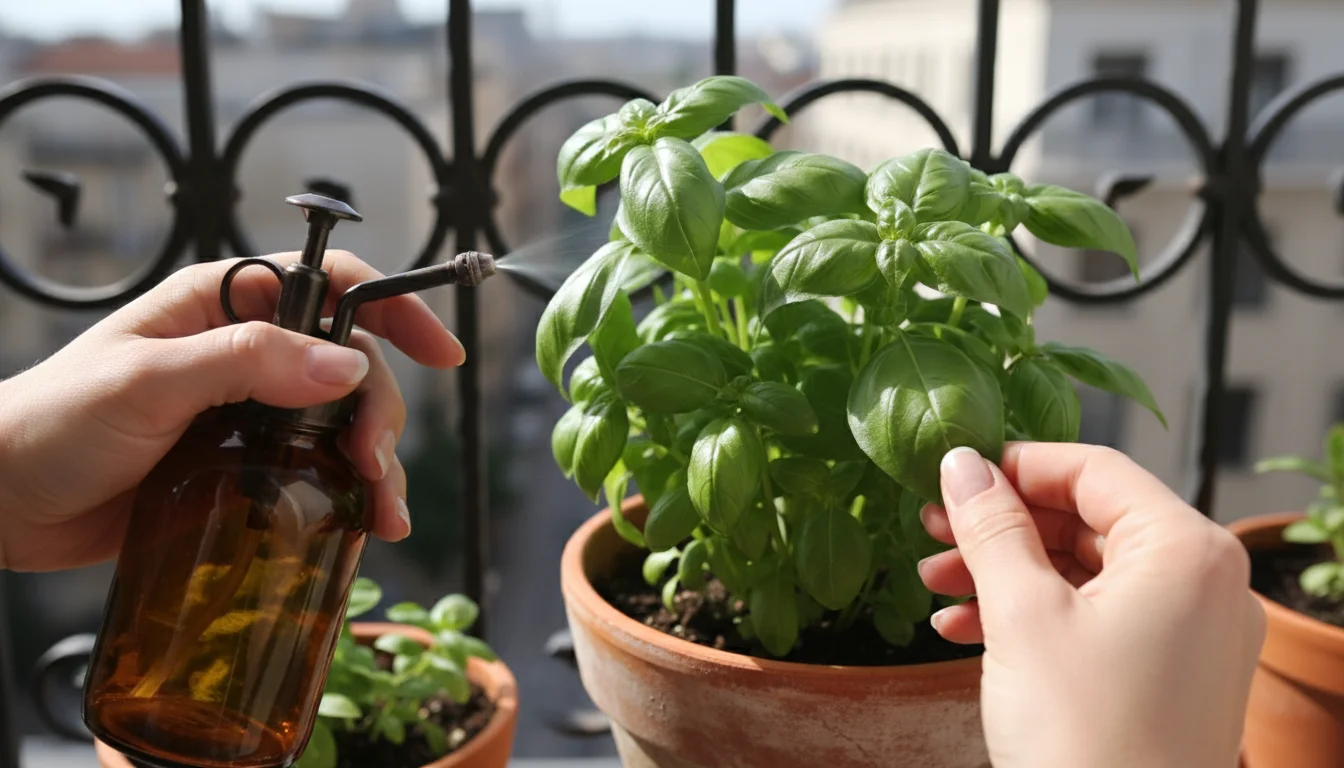
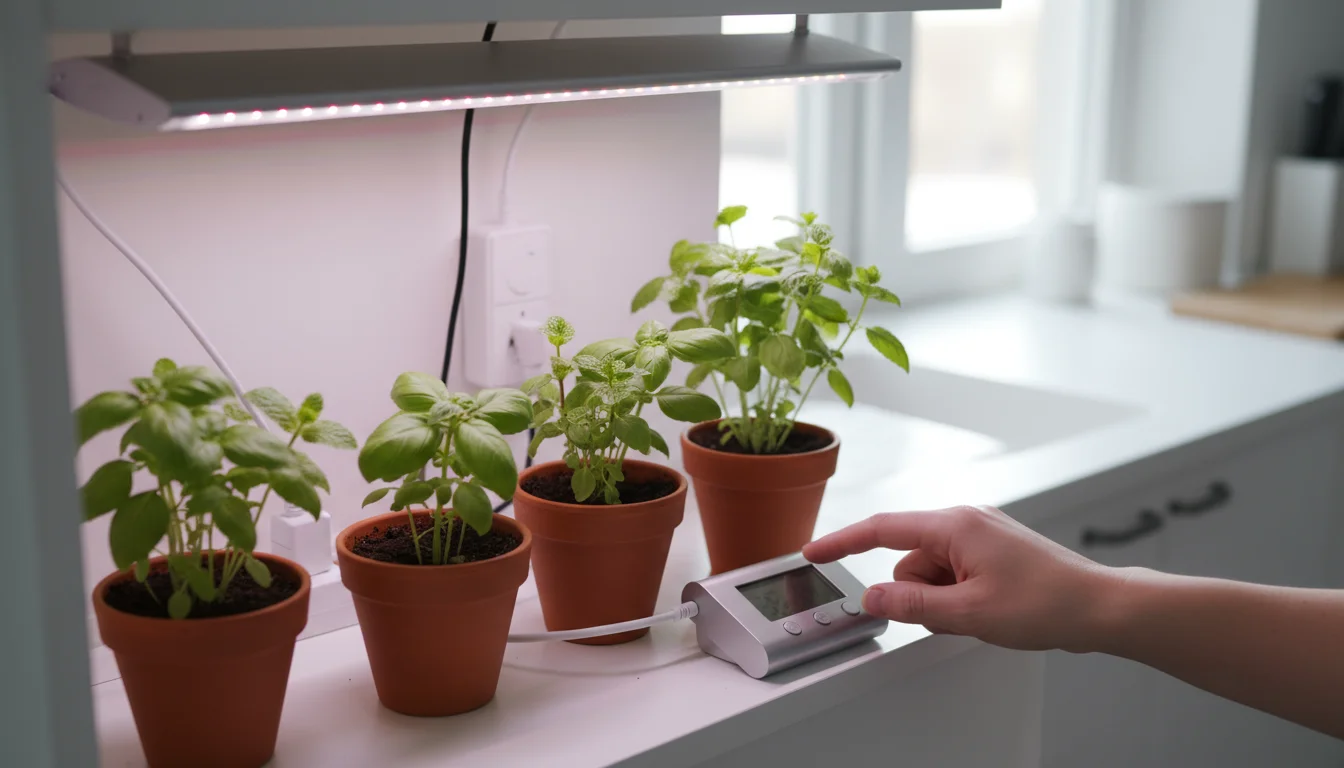
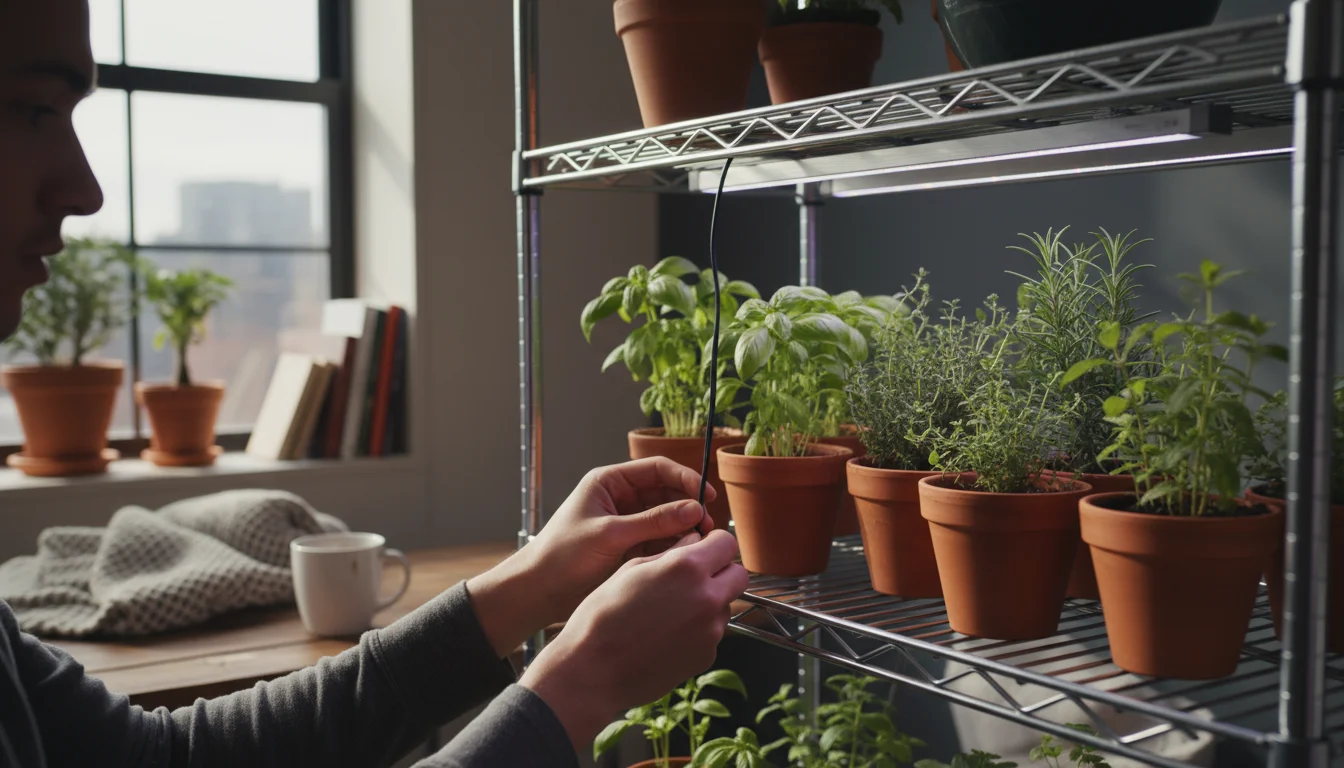
Successful herb drying begins with careful preparation. You need clean herbs and the right tools to ensure a high-quality product. Start by selecting healthy, vibrant plants that show no signs of disease or pests. Avoid harvesting any leaves that look discolored, wilted, or damaged. This step is crucial because any imperfections can compromise the quality and longevity of your dried herbs.

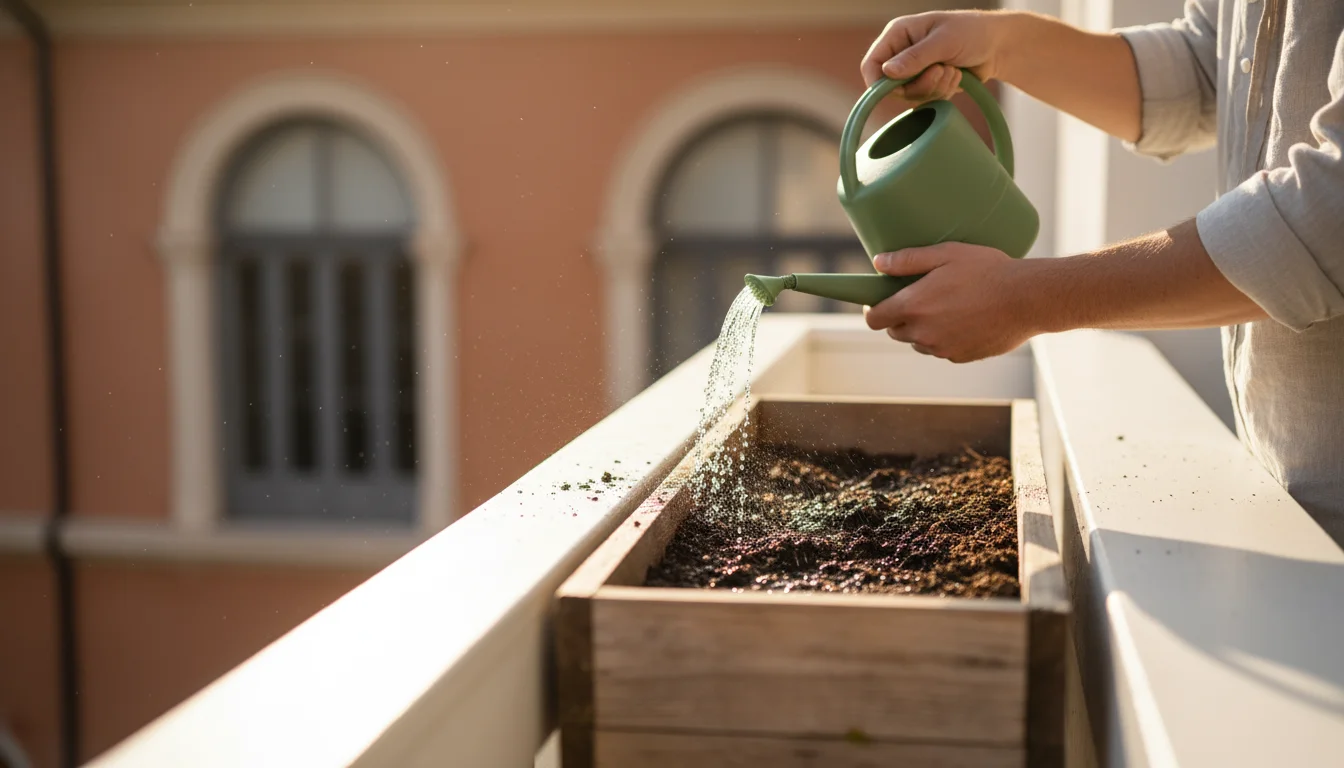
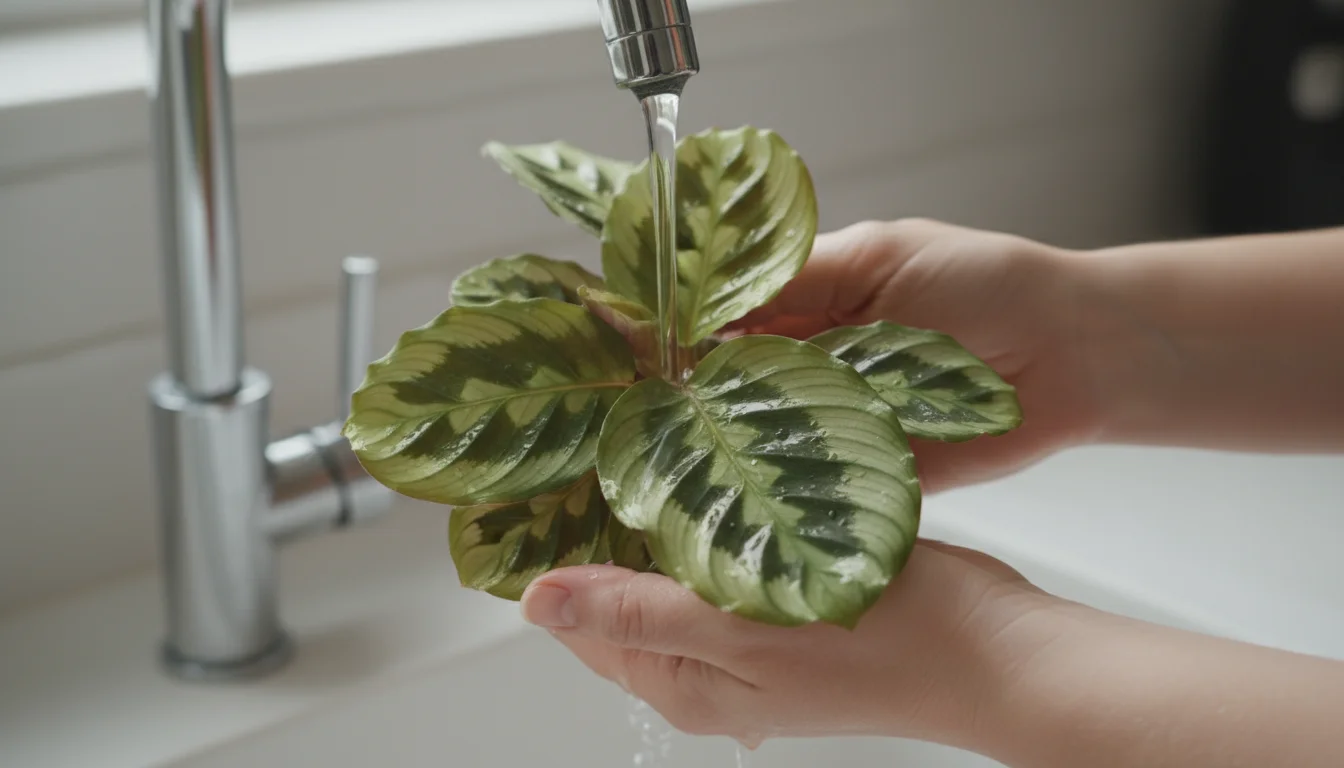
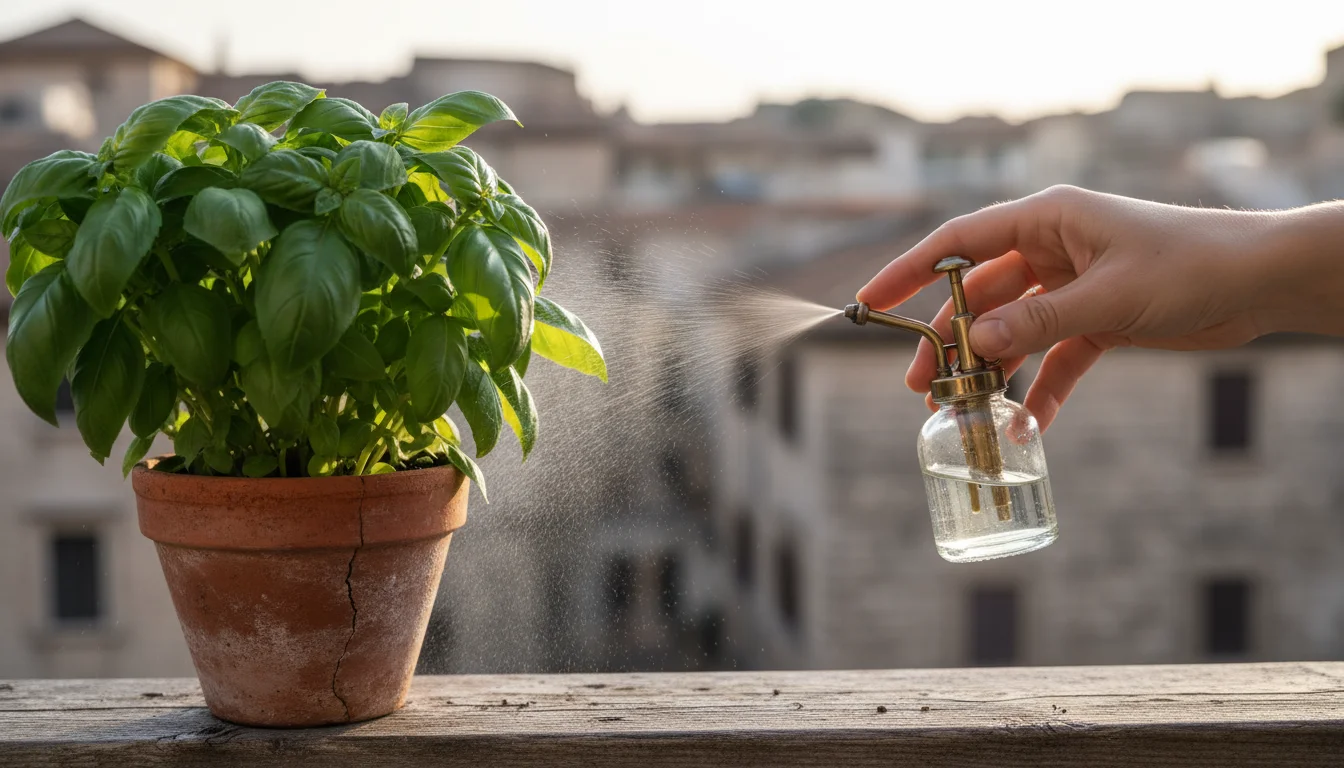
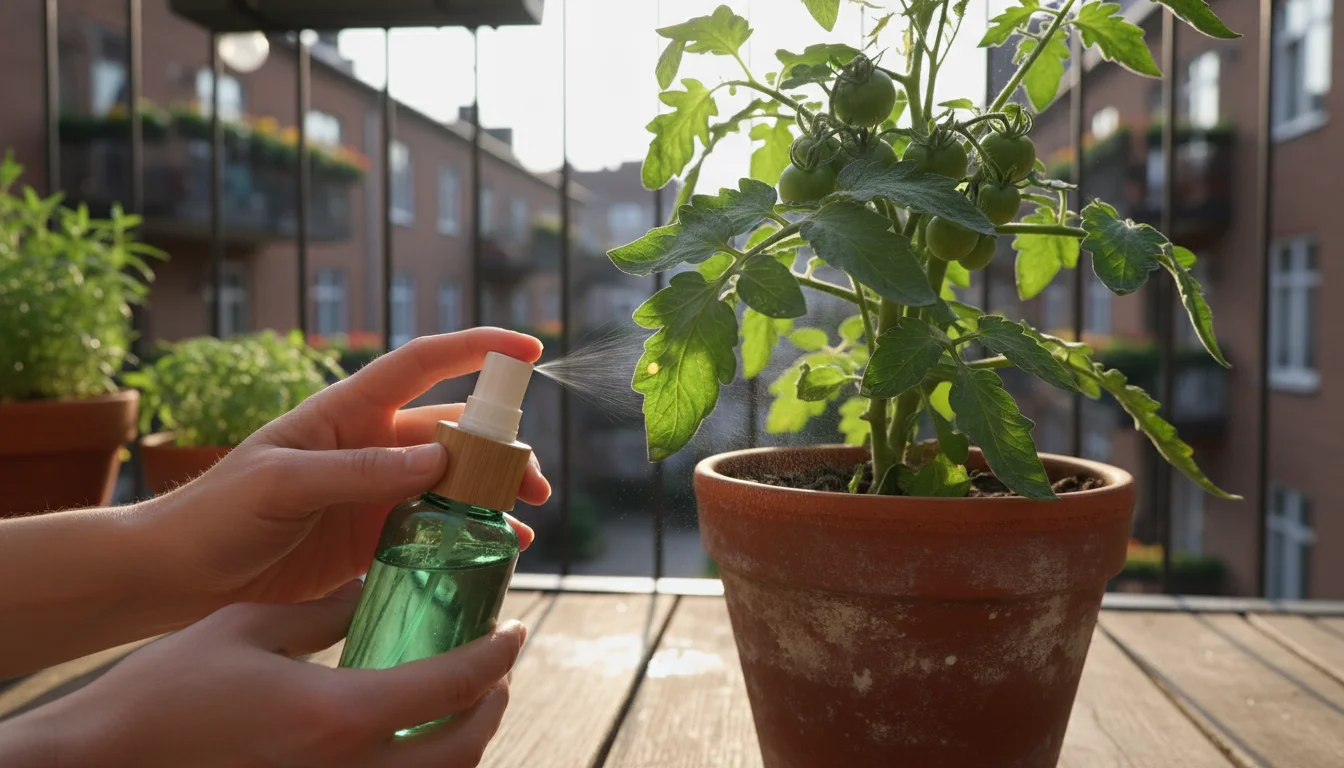
Before you begin cutting, give your herb plants a gentle rinse if they appear dusty or dirty. Do this a day or two before harvesting to allow the leaves to fully dry in the air. Excess moisture on the leaves during drying can lead to mold, which ruins your entire batch. A quick spray with water from a hose or a gentle shower in your sink will suffice. Ensure the leaves are completely dry to the touch before proceeding to harvest. This simple step contributes significantly to the success of your how to dry herbs from a container garden project.

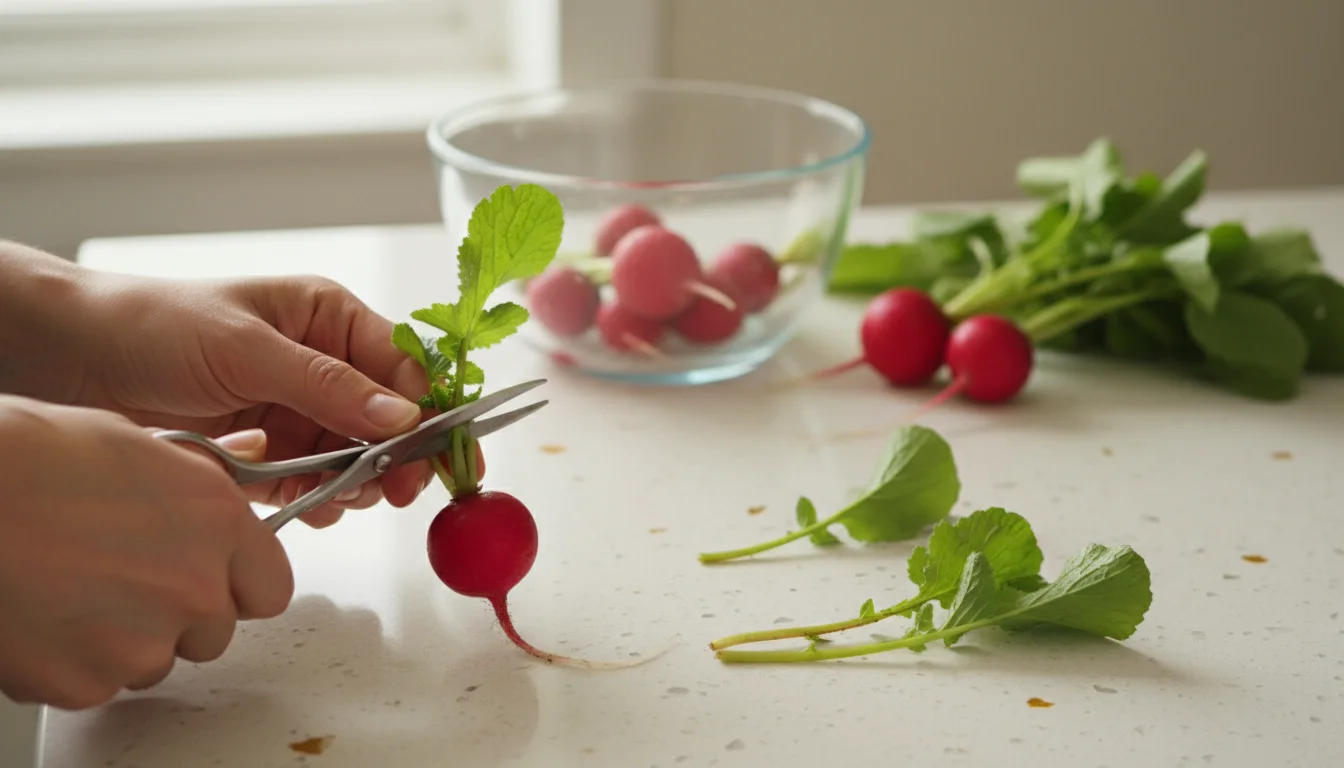
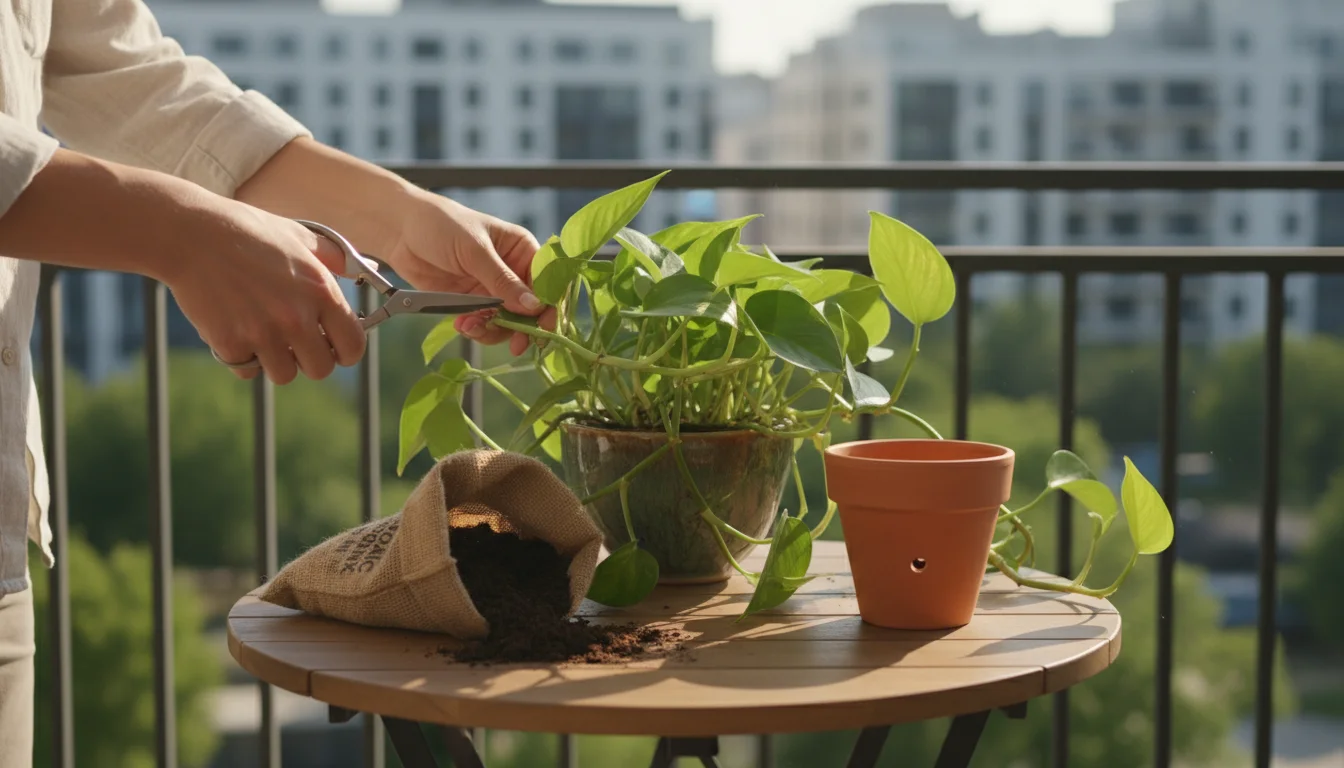
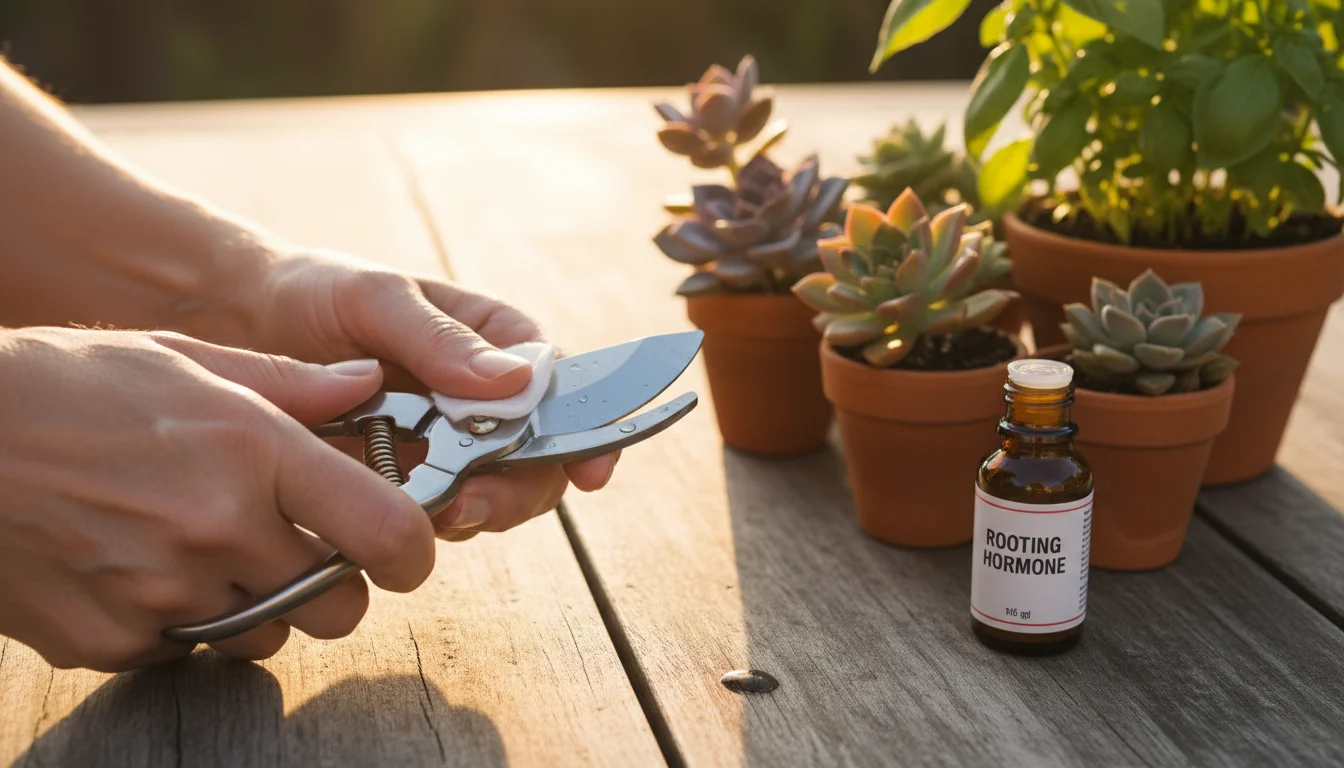
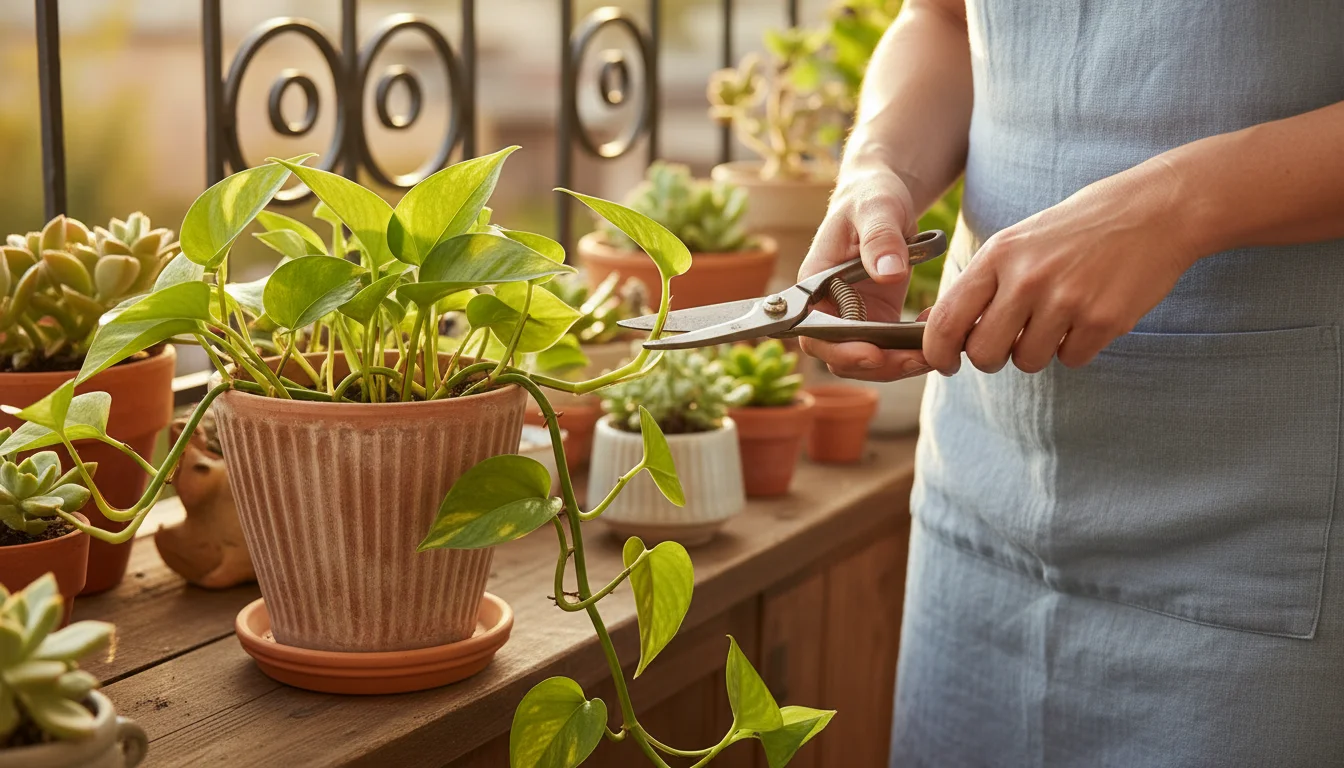
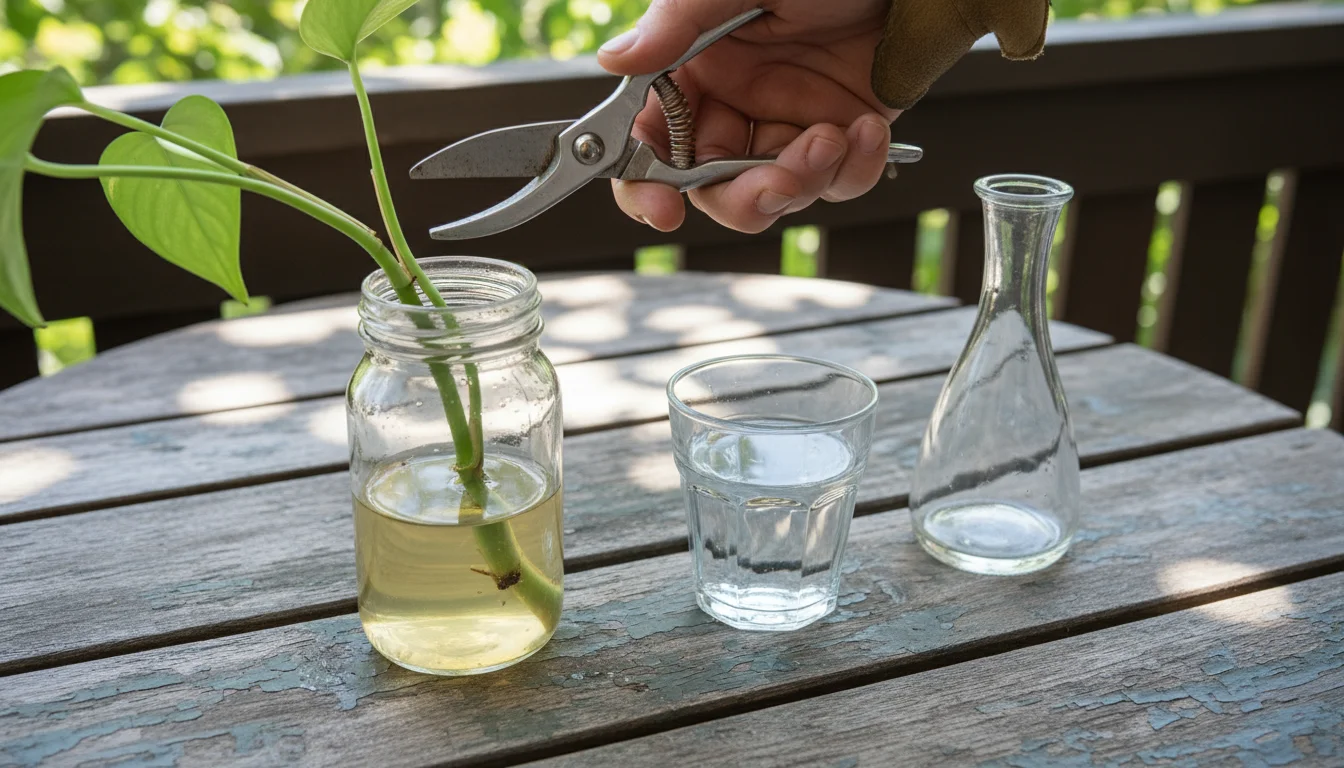
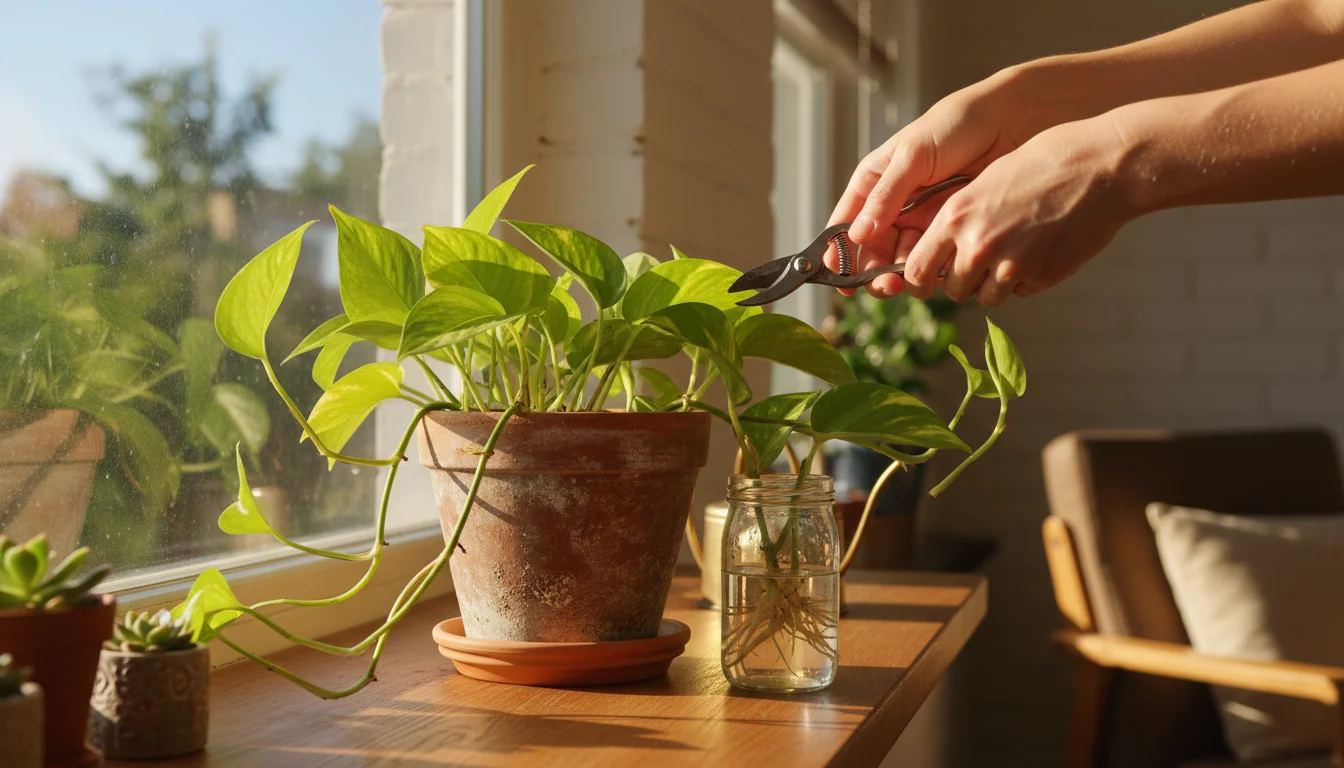
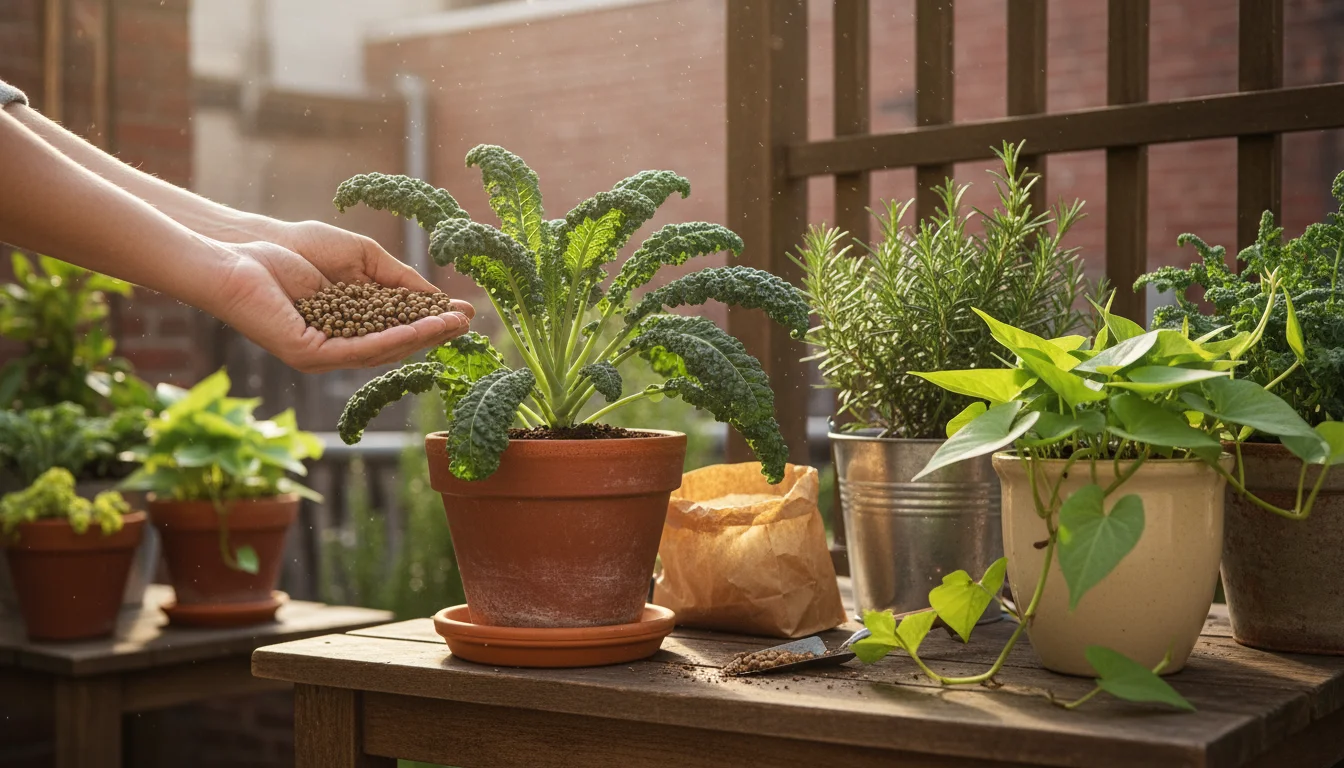
Your tools also require attention. A clean, sharp pair of scissors or pruning shears is essential for making clean cuts. Dull tools can crush stems, harming the plant and making the harvesting process more difficult. Sterilize your tools by wiping them down with rubbing alcohol before and after use. This prevents the spread of potential plant diseases between your herbs, an important aspect of overall plant health and hygiene in a compact garden space. Having a basket or a clean cloth ready to collect your harvested herbs will keep them fresh and undamaged as you work.

Woman on a balcony thoughtfully examines a thriving oregano plant in a terracotta pot, a small harvesting basket in her arm, in soft morning light.
Ready for a mindful harvest on a bright morning balcony.

The Art of Harvesting Herbs for Drying

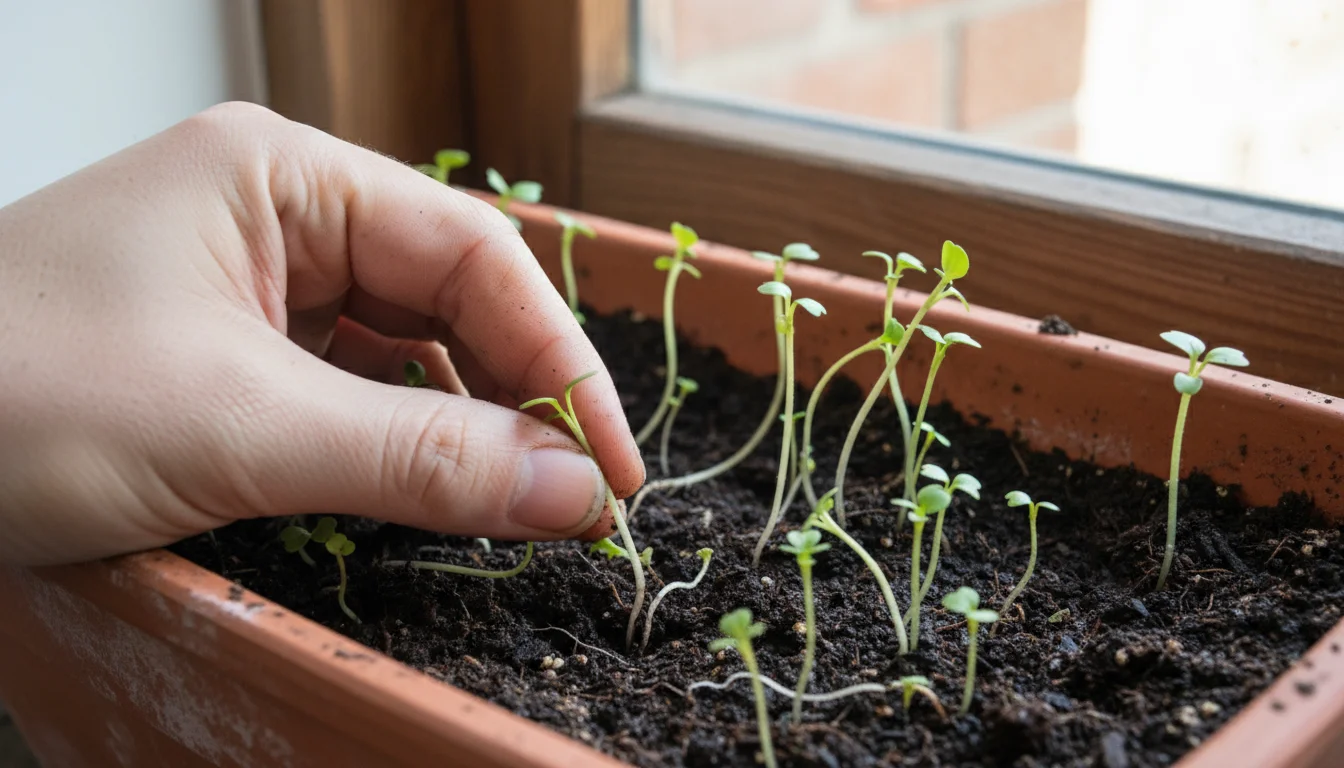
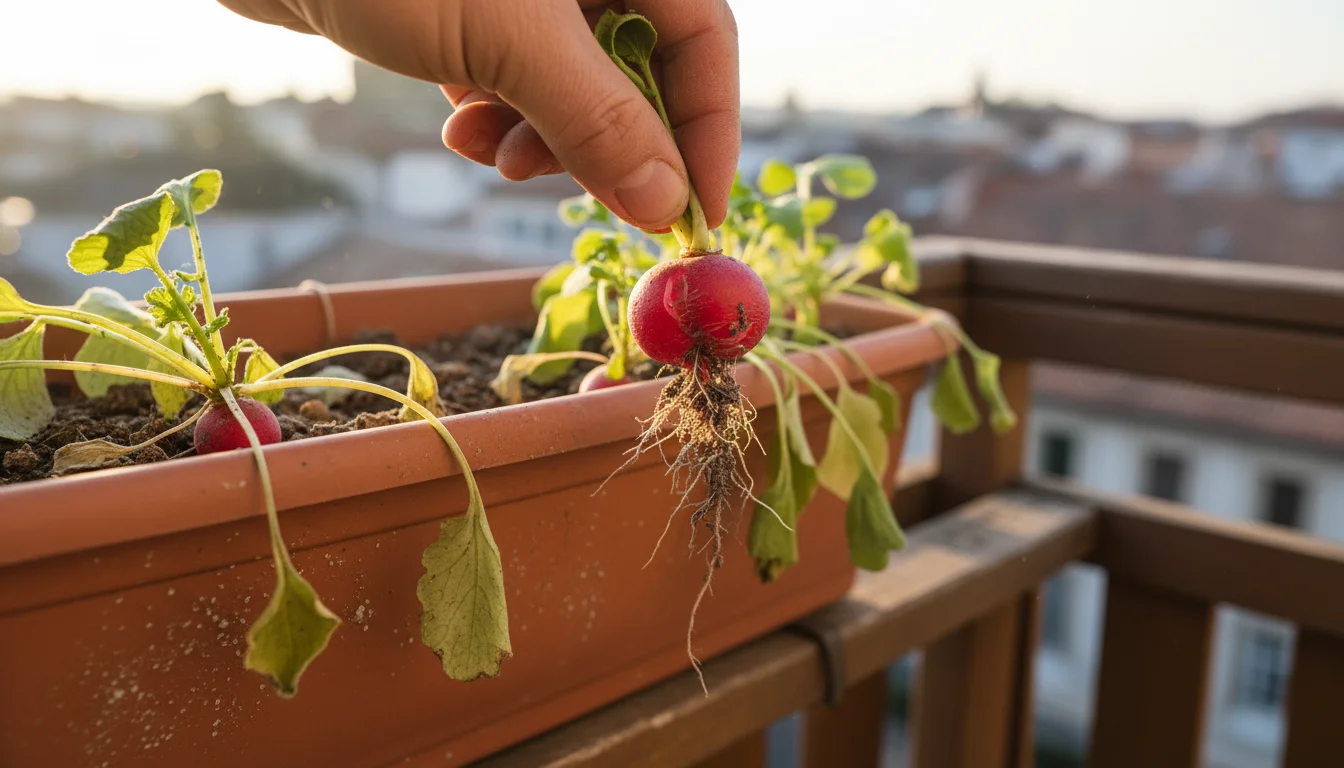
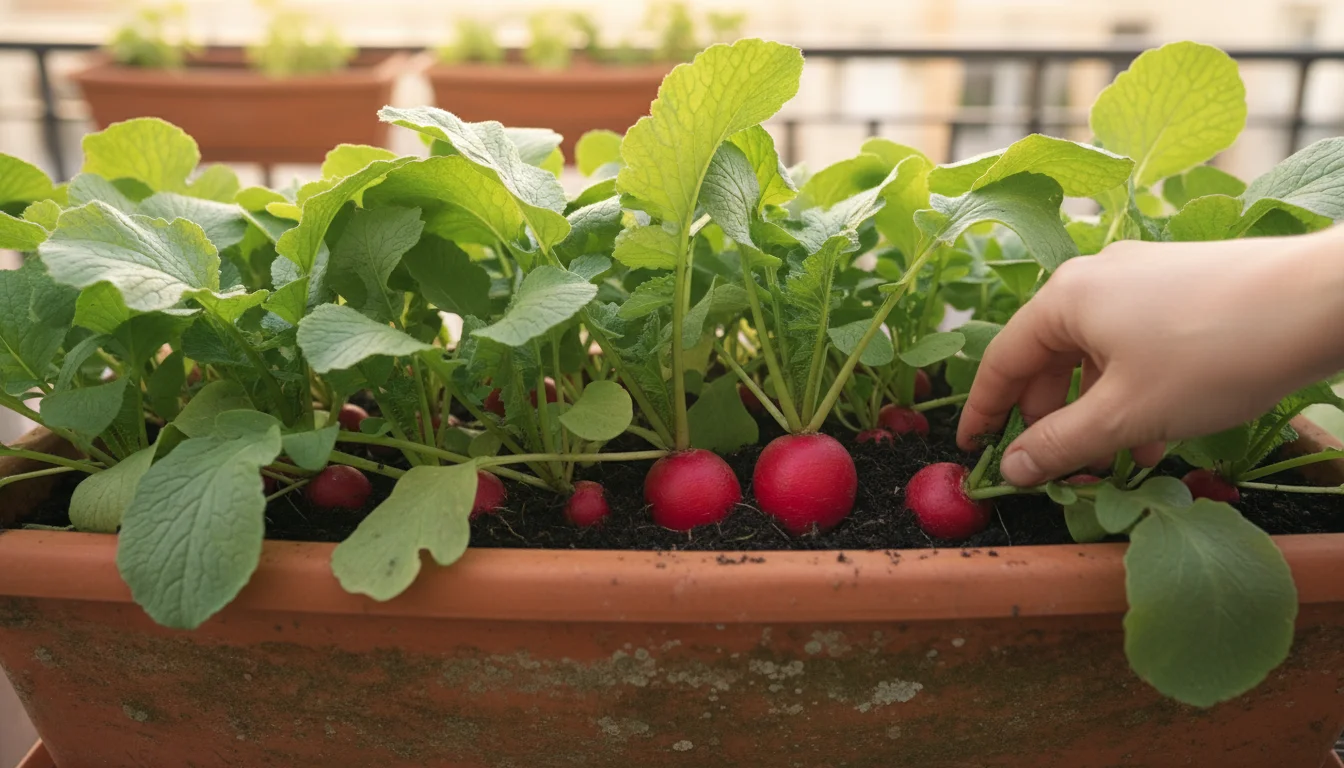
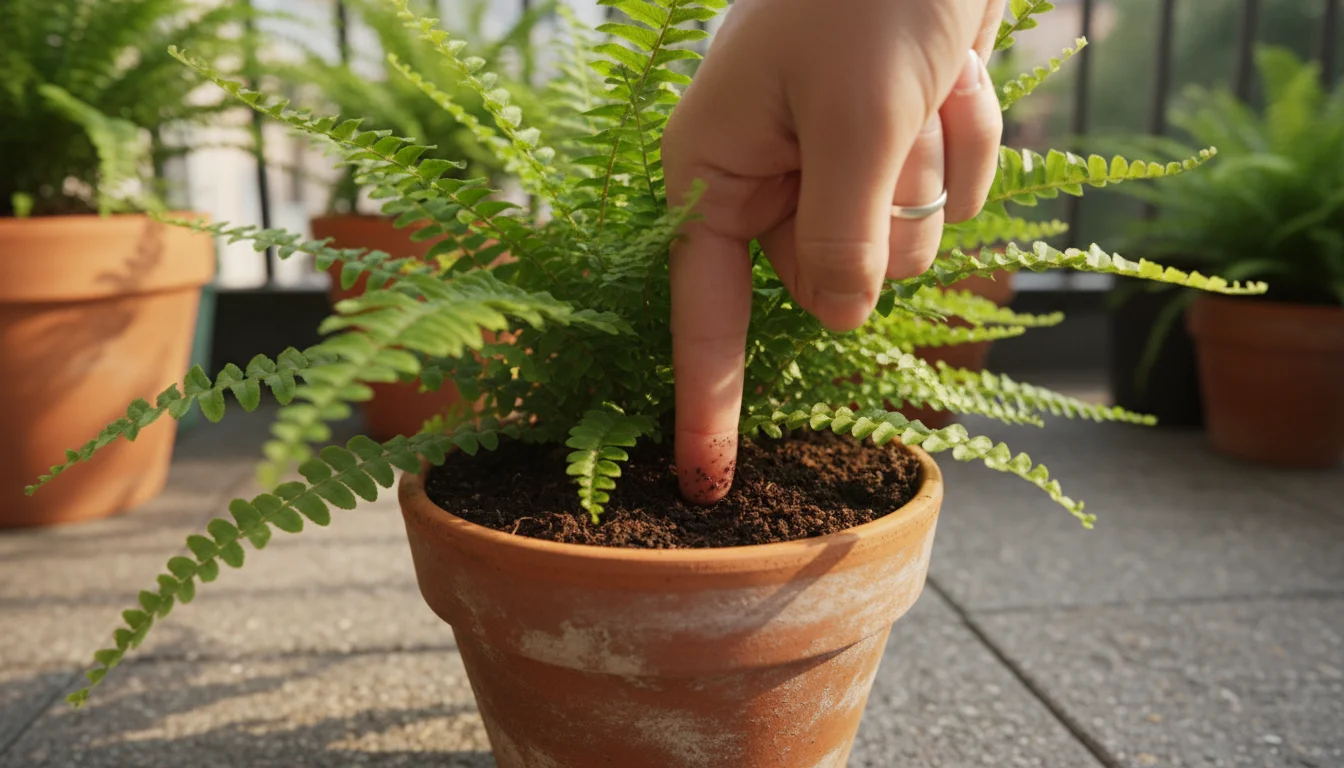
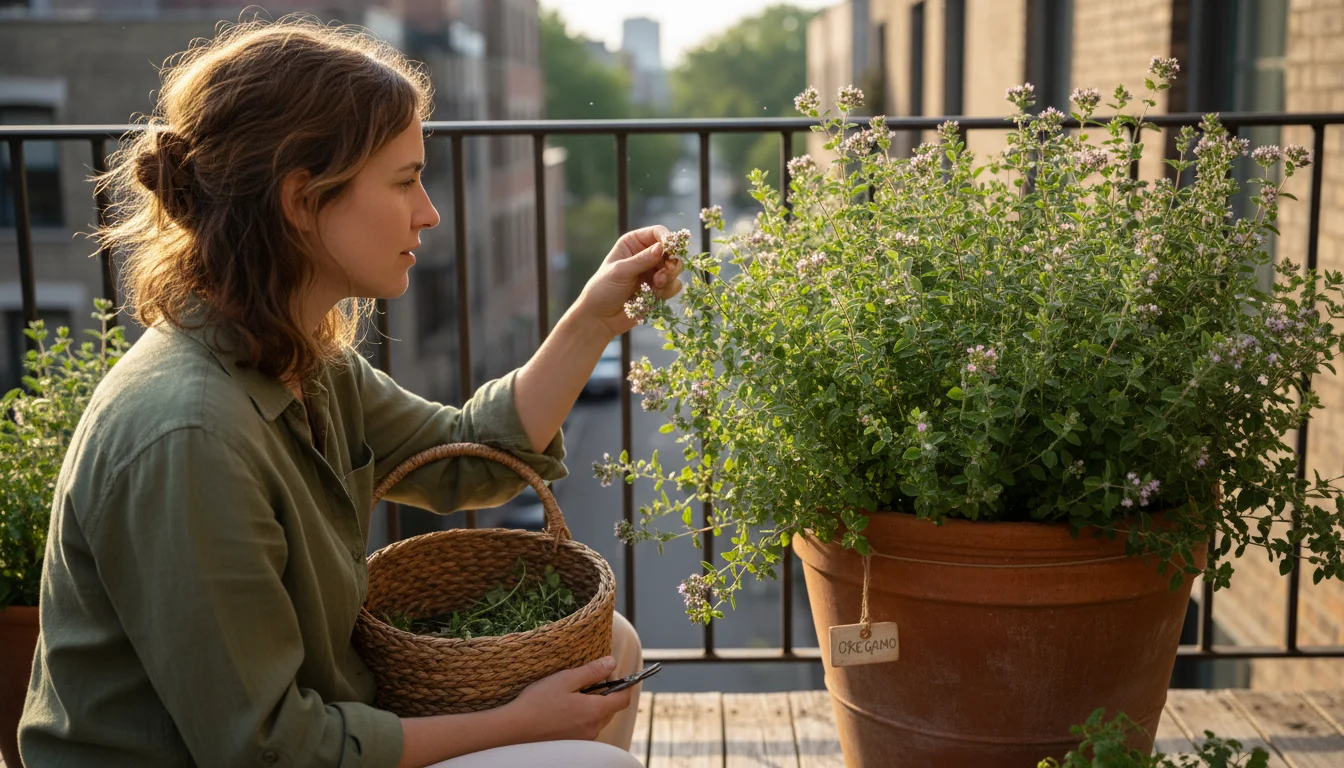
Knowing when to harvest herbs for maximum flavor is critical. For most herbs, the best time to harvest is in the morning after the dew has evaporated, but before the midday sun becomes too intense. At this point, the plant’s essential oils, which give herbs their characteristic aroma and taste, are concentrated in the leaves. Harvesting during this window ensures you capture the most potent flavor. Avoid harvesting immediately after rainfall or heavy watering, as the leaves will be saturated with water, which can hinder the drying process and encourage mold.

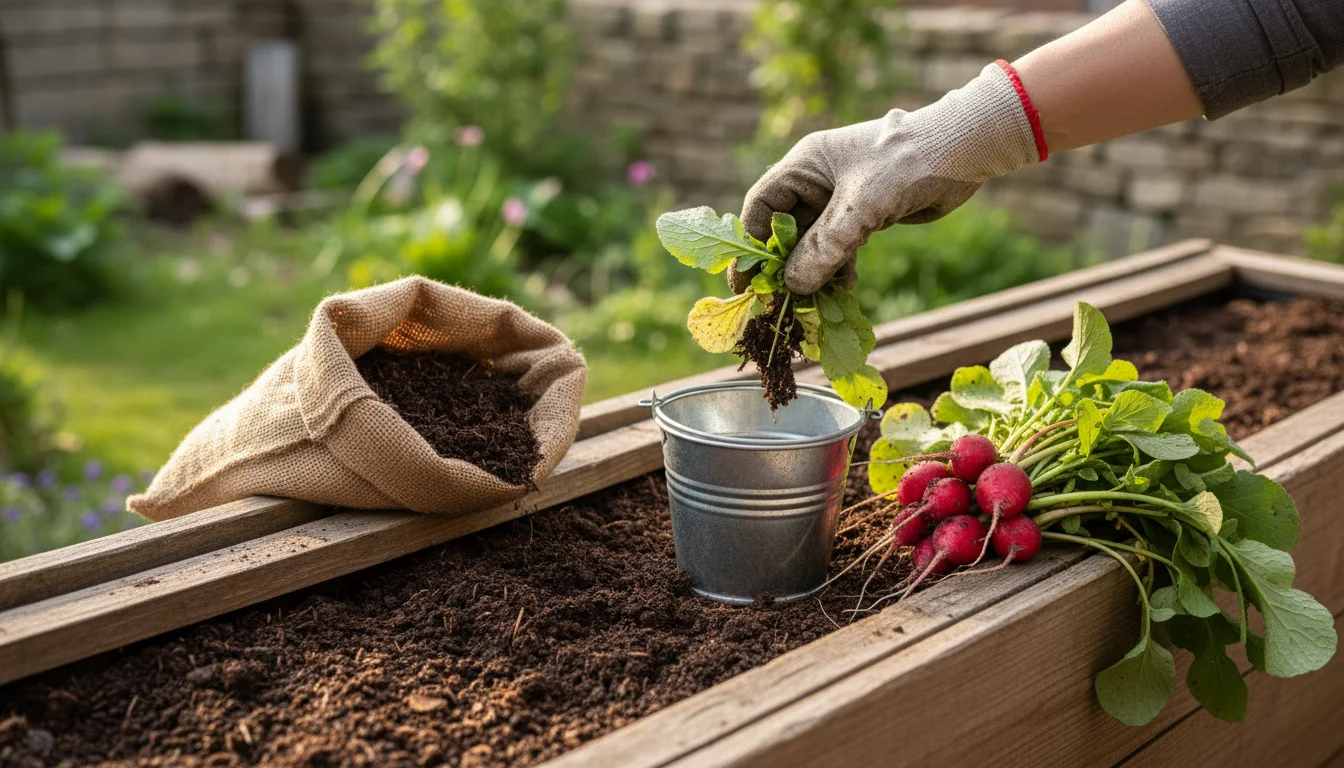
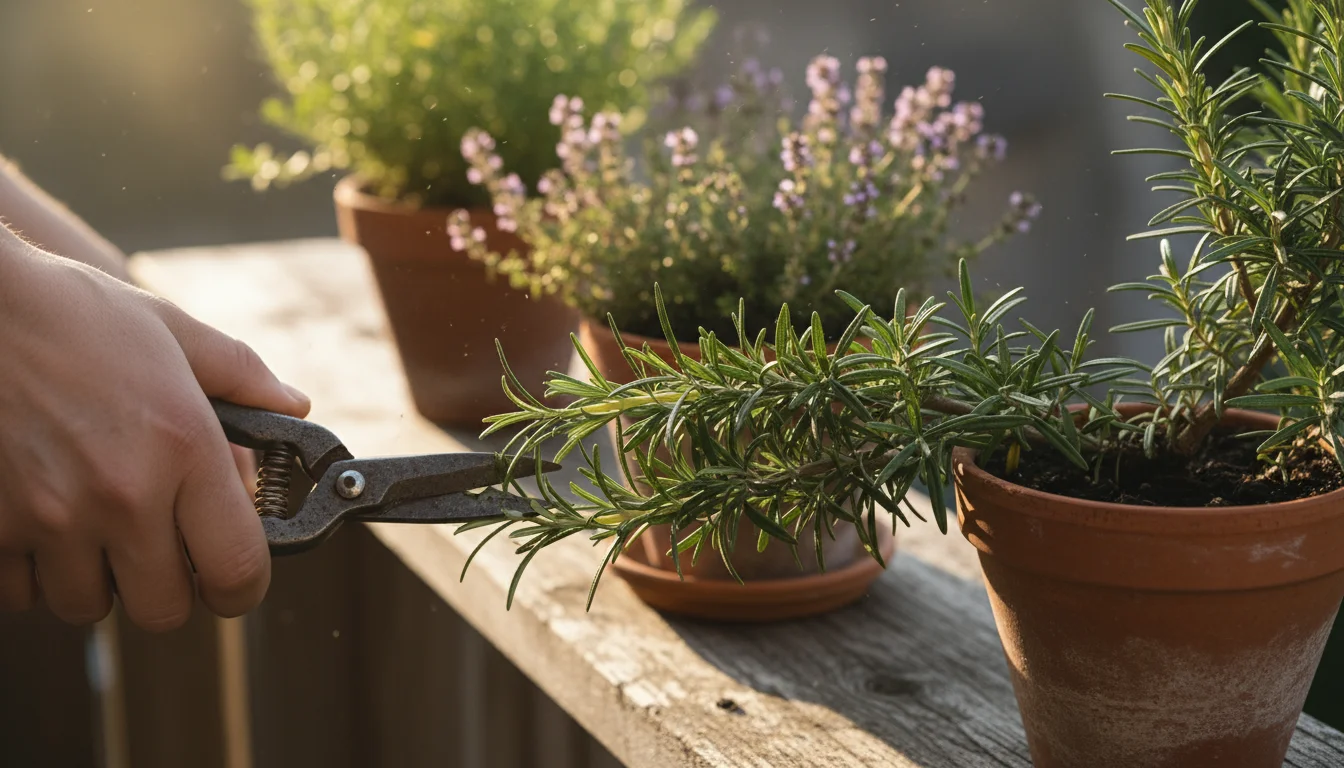
When you are ready to cut, focus on the upper parts of the plant, where the newest and most flavorful growth resides. Leave at least one-third of the plant intact to allow for continued growth and to keep the plant healthy. For annual herbs like basil and cilantro, you can often take a significant portion, as they will likely not survive the winter anyway. For perennial herbs such as rosemary, thyme, oregano, and mint, be mindful not to over-harvest. Taking too much at once can stress the plant and reduce its vigor for the following season. Make your cuts just above a leaf node, which is the point where leaves or branches emerge from the stem. This encourages the plant to branch out, resulting in a bushier, more productive plant in the future.

Here is a quick guide for specific herbs:

  • Basil: Pinch off leaves or cut stems, avoiding flowers which signal the end of its life cycle.
  • Mint: Cut stems just above a set of leaves. Mint is vigorous and tolerates heavy harvesting.
  • Oregano and Thyme: Harvest whole stems, leaving several inches of growth at the base.
  • Rosemary: Snip off woody stems, ensuring to leave plenty of growth on the main plant.
  • Sage: Harvest individual leaves or small stems. Avoid taking too much at once.

After harvesting, handle your herbs gently. Bruising the leaves can release essential oils prematurely, diminishing their potency. Place them loosely in your basket or on a clean cloth. The quicker you move from harvesting to the drying process, the better the quality of your dried herbs will be, preserving their vibrant color and robust flavor.

Small bundles of rosemary, thyme, and oregano hang upside down to air dry from a simple rack in a sunlit urban balcony corner.
Air drying rosemary and other herbs for winter use in a compact balcony space.

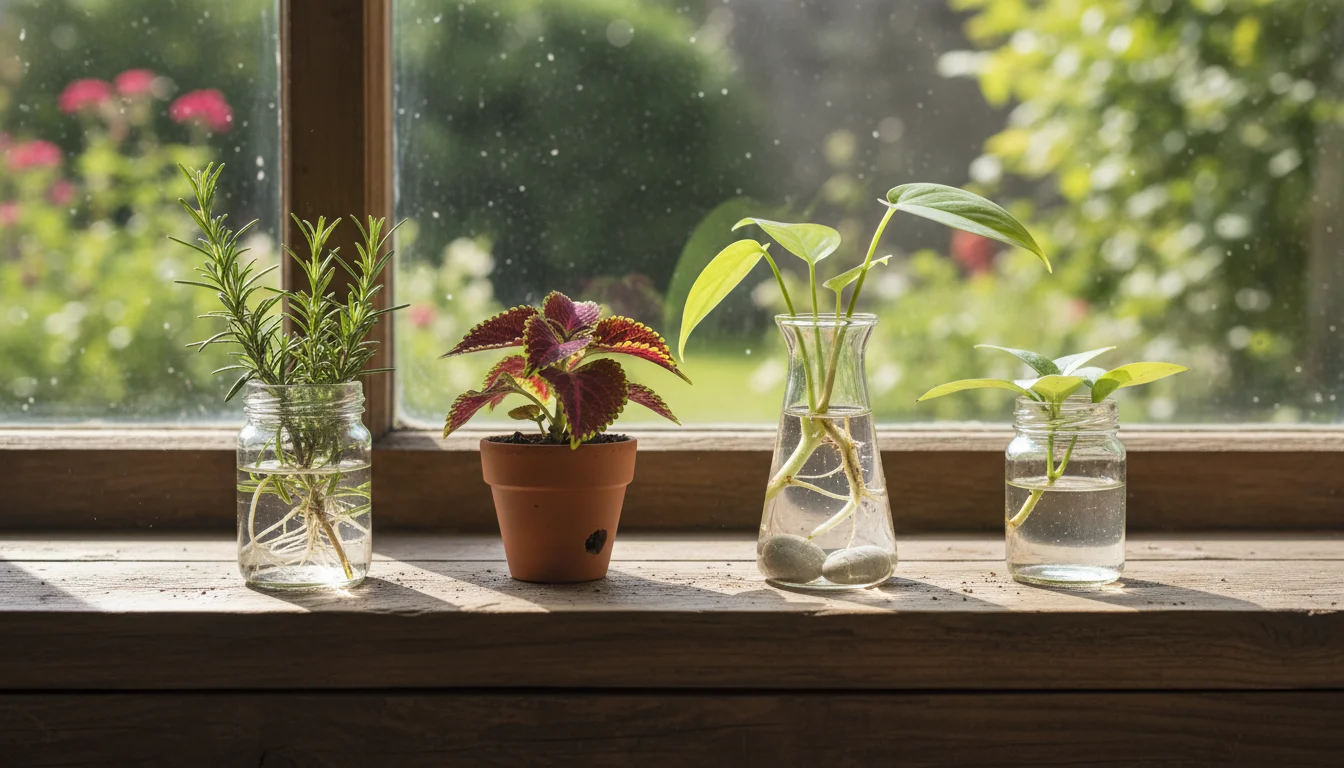
Choosing Your Drying Method: Options for Small Spaces

The method you choose for drying herbs depends on several factors: the type of herb, the humidity level in your home, and the amount of space you have available. For small-space gardeners, efficiency and effectiveness are key. The primary goal is to remove moisture from the herbs quickly and evenly, without cooking them or encouraging mold growth. Each method has its pros and cons, but all can yield excellent results with proper attention.

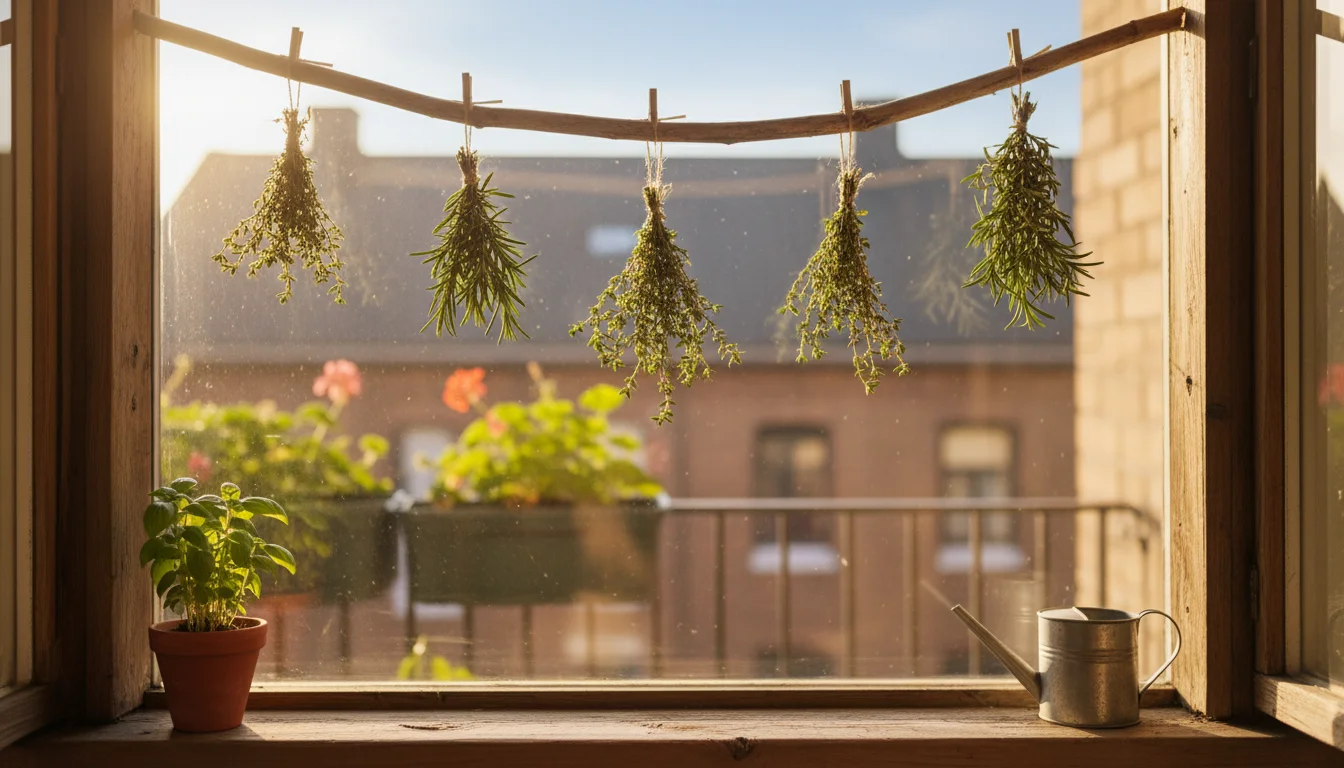
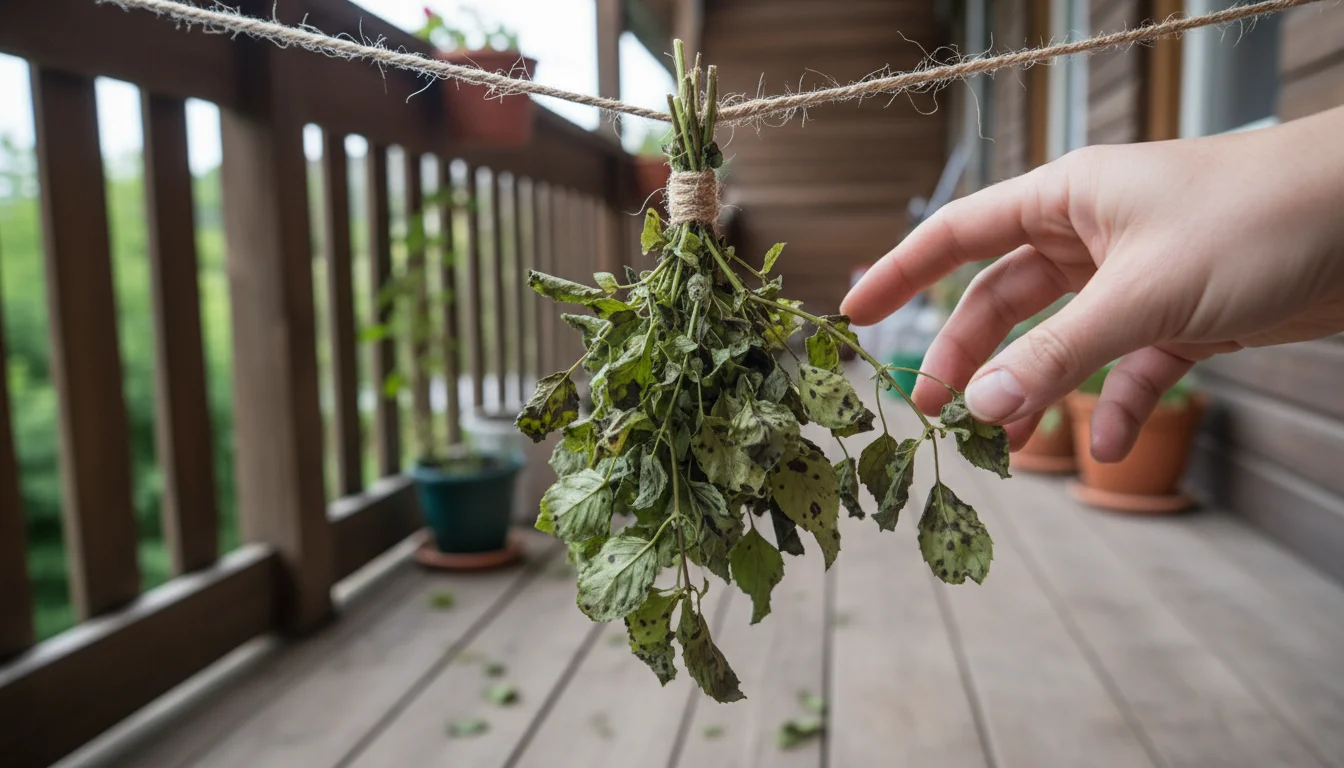
Air Drying: The Traditional, Low-Tech Approach. This is perhaps the simplest and most cost-effective method, requiring no special equipment other than some string and a well-ventilated space. Air drying works best for herbs with lower moisture content and woody stems, such as rosemary, thyme, oregano, and sage. It is also suitable for mint and basil if your environment is dry enough. The slow, natural drying process can help retain many of the essential oils, leading to highly aromatic herbs. This method is excellent for those looking for the best way to store dried herbs for winter without investing in appliances.

Oven Drying: Fast but Fussy. Using your oven can speed up the drying process considerably, making it a good option if you have a large batch of herbs and limited time. However, it requires careful temperature control, as too much heat can cook the herbs, destroying their flavor and color. This method is more challenging to master and is generally not recommended for beginners due to the risk of scorching. If you do opt for oven drying, choose the lowest possible temperature setting, ideally below 100°F (38°C), and keep the oven door ajar.

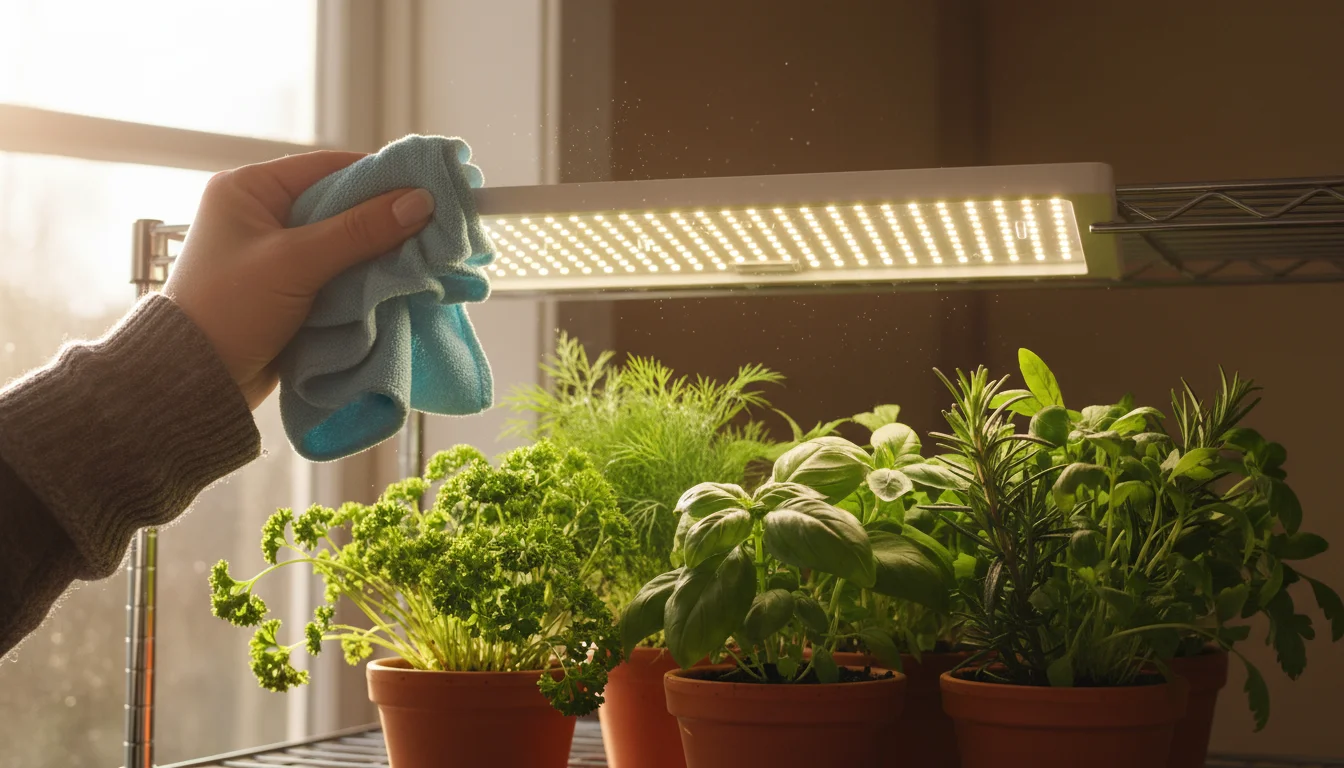
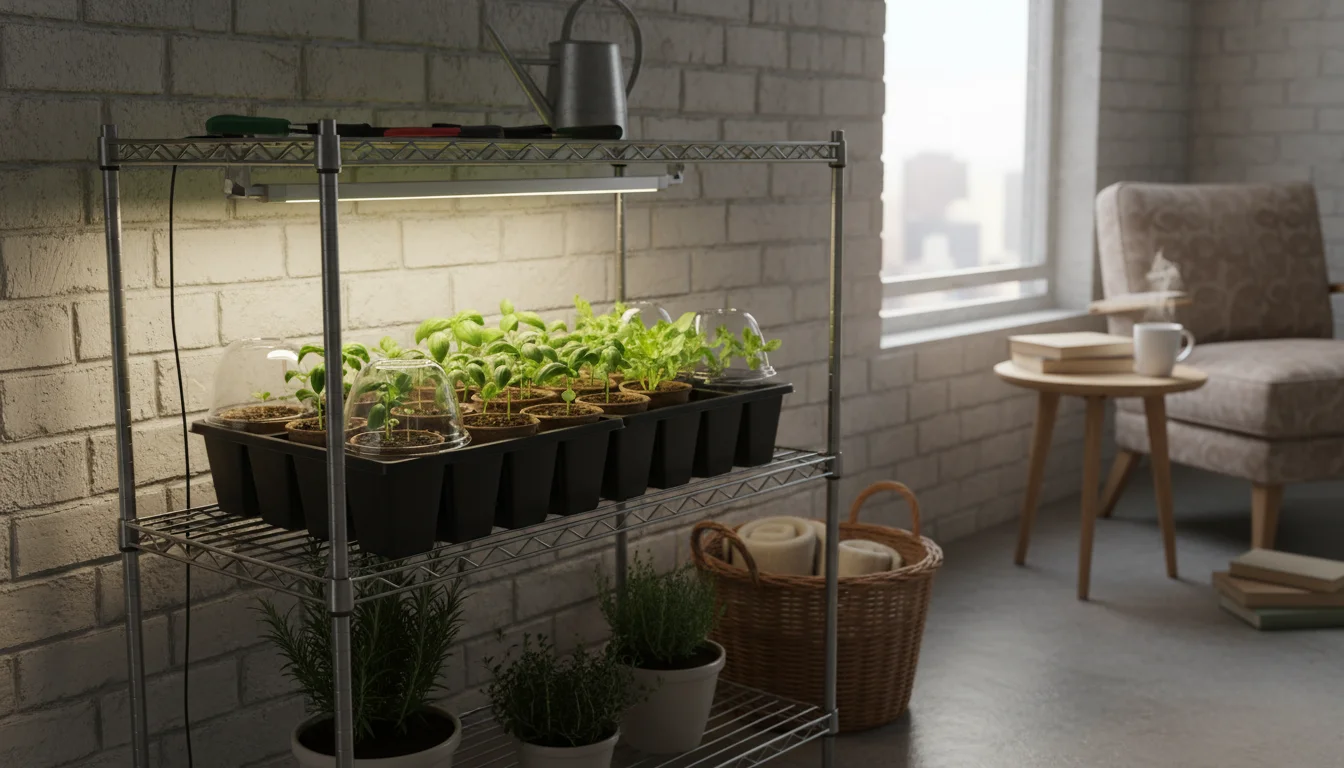
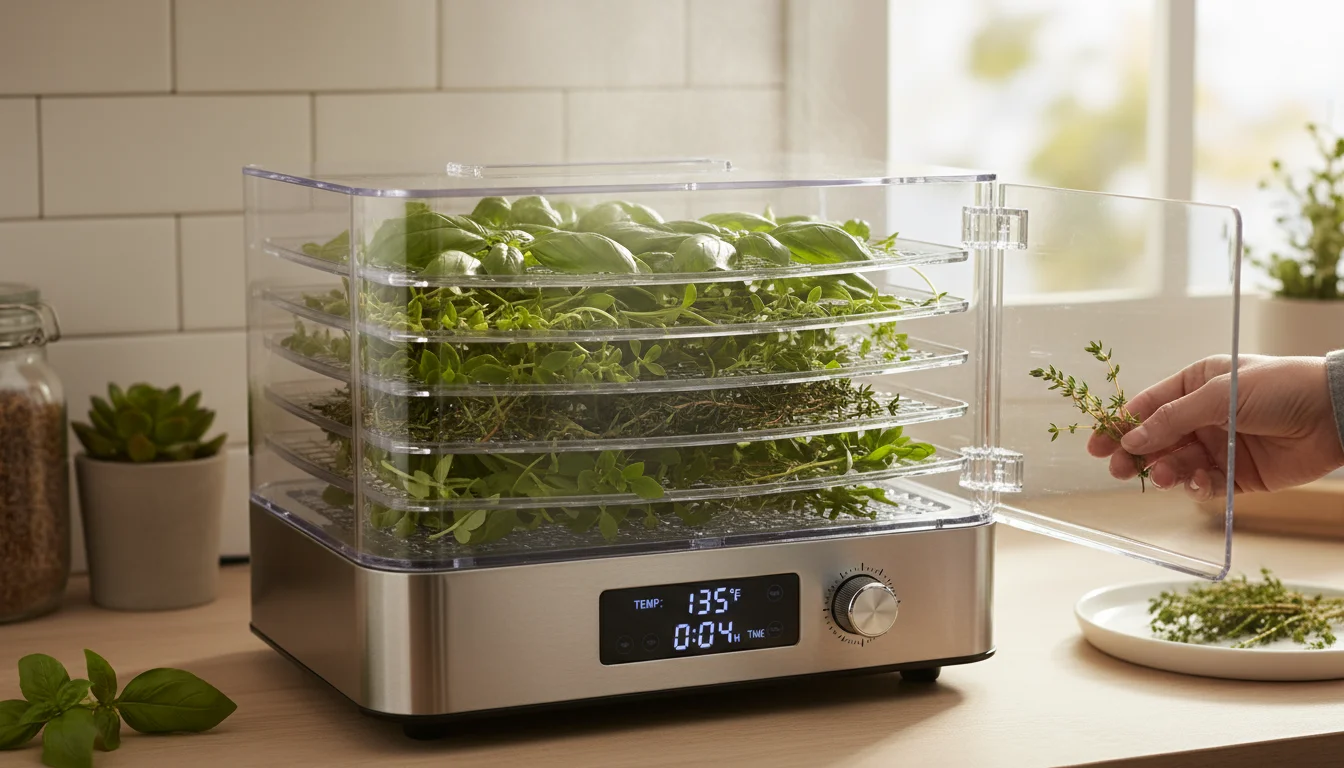
Dehydrator Drying: Consistent and Efficient. A food dehydrator offers the most controlled and efficient drying environment. It circulates warm air at a low, consistent temperature, ensuring even drying and significantly reducing the risk of mold or scorching. While it requires an initial investment, a dehydrator is a fantastic tool for any serious gardener looking to preserve a wide variety of produce, including herbs. It is particularly effective for herbs with high moisture content like basil, cilantro, and mint, helping them retain more of their vibrant color and flavor. This is an excellent solution for how to dry herbs from a container garden when you have a consistent supply.

When selecting your method, consider the humidity in your home. If you live in a very humid climate, air drying might be slow and lead to mold. In such cases, a dehydrator or a carefully managed oven might be a better choice. Regardless of the method, ensure good air circulation around the herbs. Stagnant air is the enemy of successful drying.

Hands gather fresh rosemary stems into a small bundle on a balcony table, with other herbs and twine nearby.
Bundling fresh rosemary to dry for winter.

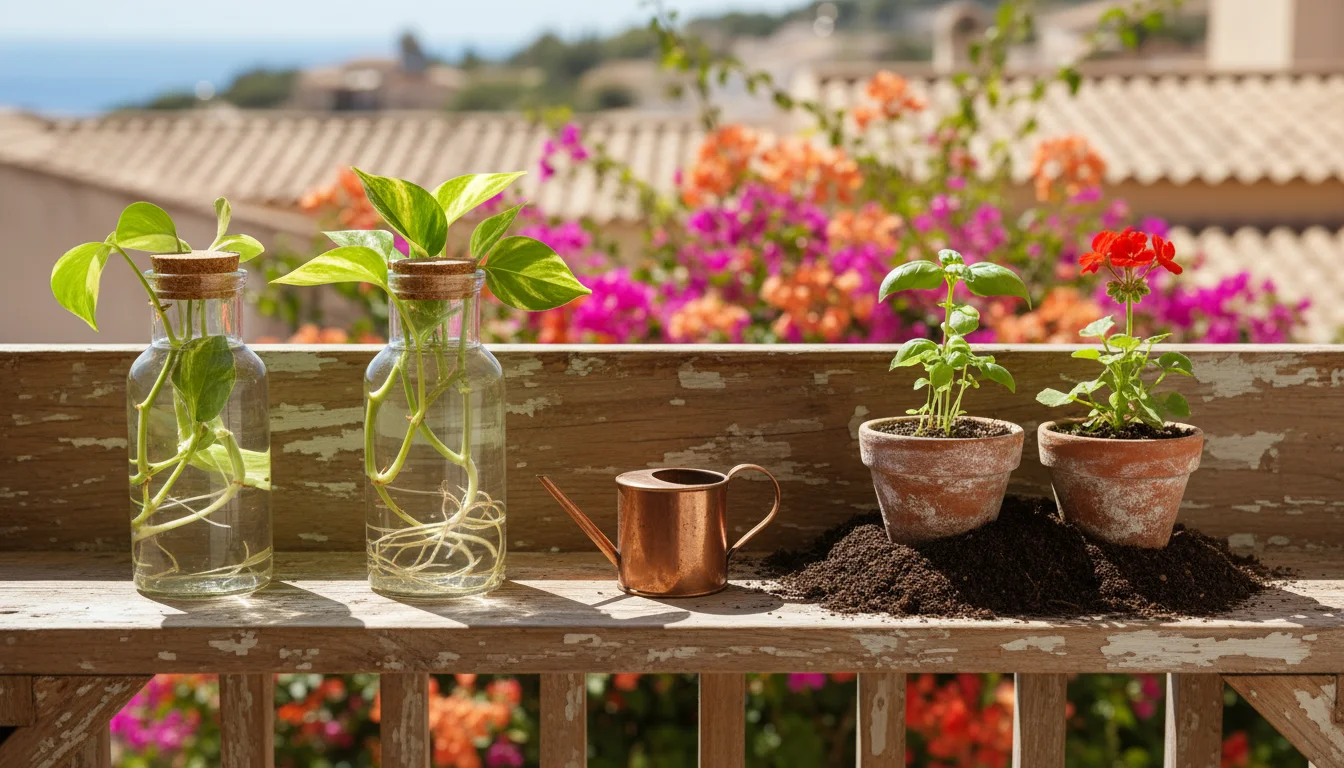
Step-by-Step Air Drying Your Balcony Herbs

Air drying is a time-honored method for preserving herbs, perfect for the small-space gardener looking for a simple, natural approach. It is particularly effective for herbs with relatively low moisture content and sturdy stems. Here is how to achieve beautifully dried herbs using this method:

  1. Prepare Your Herbs: As discussed, ensure your freshly harvested herbs are clean and thoroughly dry to the touch. Remove any yellowed or damaged leaves. Gently shake off any loose dirt or insects.
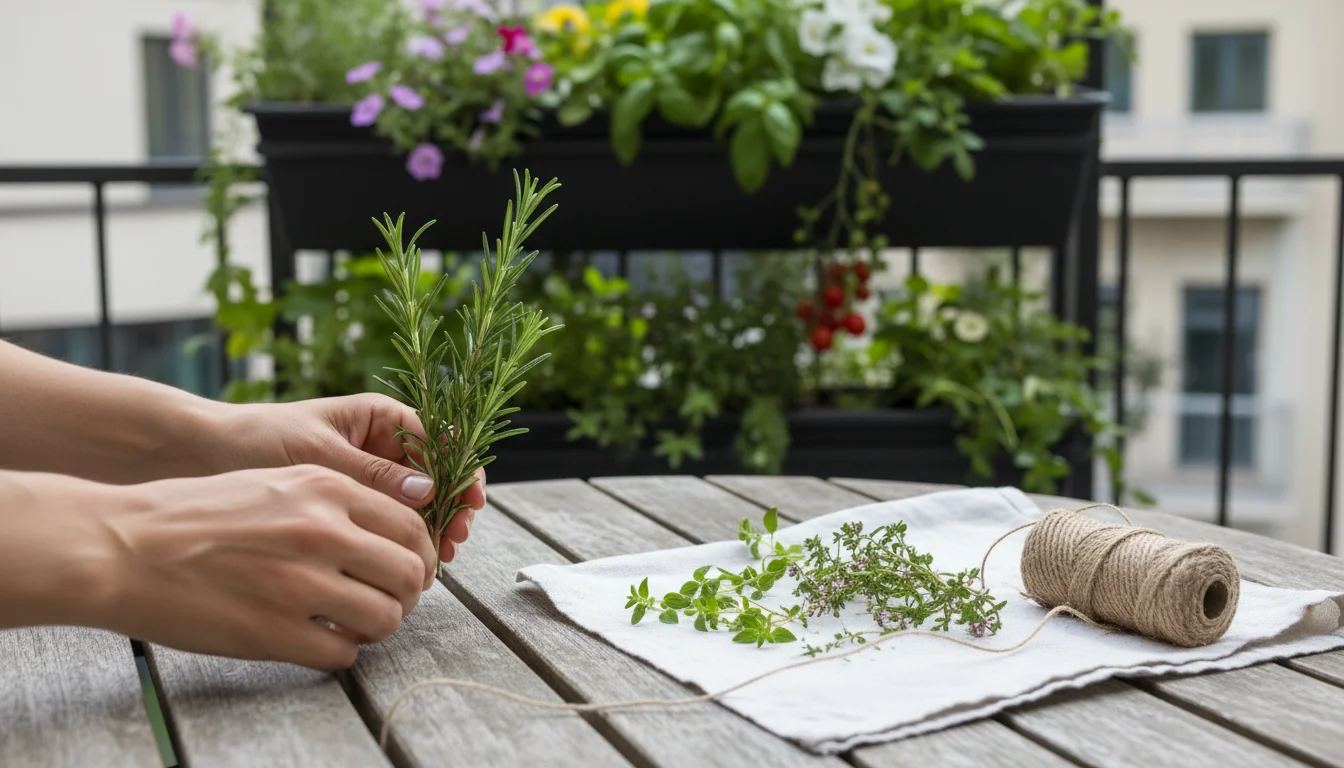
  2. Create Small Bundles: Gather a few stems of the same herb into a small bunch. Do not make the bundles too large, as this can impede air circulation and lead to mold. Aim for bundles that are easy to hold in one hand, roughly 4 to 6 stems depending on the herb’s density.
  3. Secure the Bundles: Use natural twine, rubber bands, or a clothespin to tie the stems together at the cut end. If using rubber bands, be aware that stems shrink as they dry, so you may need to tighten the band periodically to prevent herbs from falling out. Twine is often preferred for its natural qualities and ease of adjustment.
  4. Find the Right Spot: Hang your bundles upside down in a warm, dry, and well-ventilated area away from direct sunlight. A pantry, a corner of a spare room, or even a protected spot on your balcony, if it is dry and breezy, can work. The key is good air circulation. Direct sunlight can bleach the herbs, causing them to lose color and flavor. Aim for a temperature between 60-80°F (15-27°C) with low humidity.
  5. Monitor and Wait: Drying times vary depending on the herb and environmental conditions. Leafy herbs like basil or mint might take 1-2 weeks, while woody herbs like rosemary or thyme could take 2-4 weeks. Check your herbs periodically. They are fully dry when the leaves are brittle and easily crumble between your fingers. Stems should snap cleanly.
  6. Prepare for Storage: Once completely dry, remove the leaves from the stems. You can gently rub them between your palms over a bowl or carefully strip them. Discard any tough stems. For herbs like rosemary or thyme, you might prefer to leave them on the stem until ready to use, then strip them as needed.

This method is a fantastic, energy-efficient way for drying herbs and truly embodies the spirit of how to dry herbs from a container garden with minimal fuss. Patience is a virtue here, as rushing the process can result in improperly dried herbs that will not store well.

Compact food dehydrator on a kitchen counter, drying vibrant green herbs like basil, oregano, and thyme. A hand adjusts the settings.
Quick and easy! Drying homegrown herbs from the balcony in a compact dehydrator.

Alternative Drying Methods: When Space or Time is Limited

While air drying is ideal for many, it is not always the most practical or efficient method for every gardener or every herb. For those with limited space, higher humidity, or simply a desire for quicker results, alternative drying methods offer excellent solutions for how to dry herbs from a container garden.

Hands gently turn drying herb leaves on parchment paper on a baking sheet, with a low-temperature oven in the background.
Carefully turning herbs to ensure even drying in a low oven.

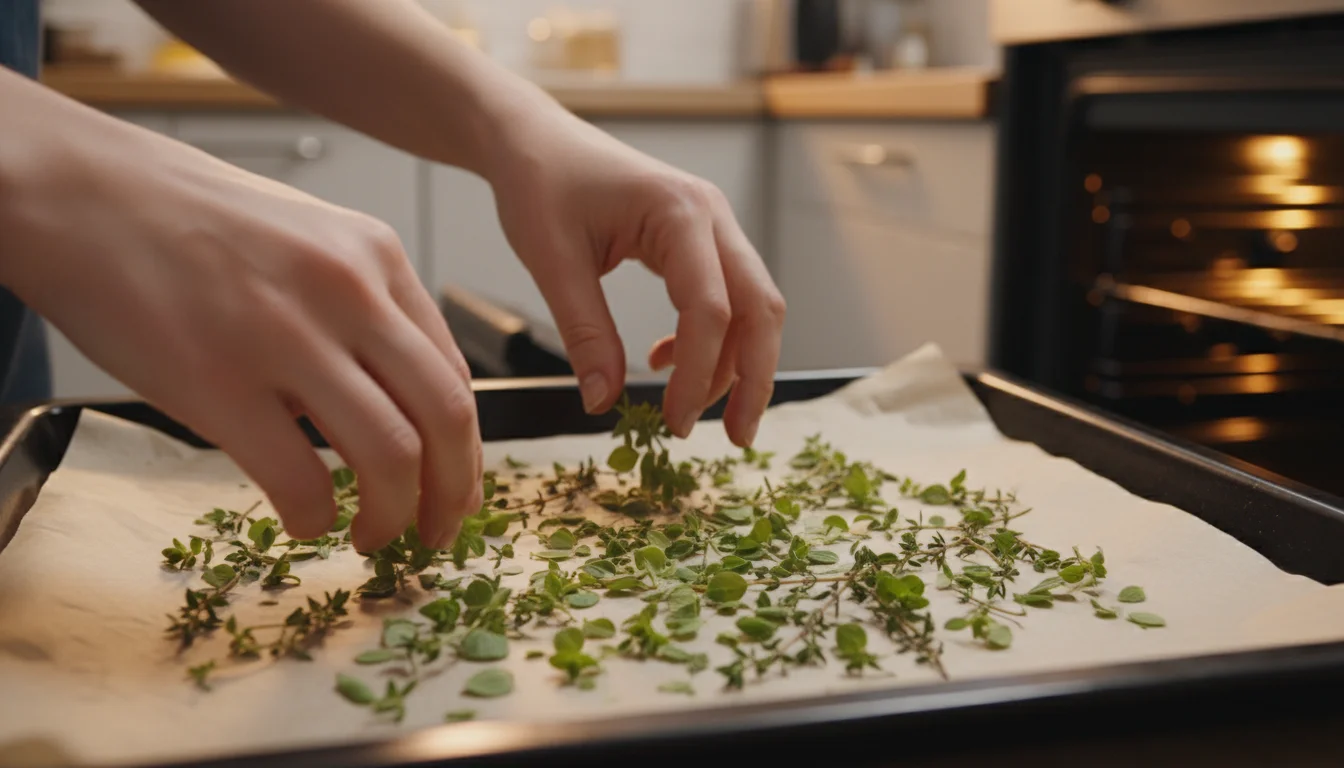
Oven Drying Herbs (Use with Caution)

Oven drying can be a fast way to dry herbs, but it requires vigilance to prevent cooking them. This method works best for herbs with less moisture, but can be adapted for others if you are careful.

  1. Prepare Herbs: Wash and thoroughly dry your herbs. Remove leaves from stems, as this will help them dry more evenly. Lay them in a single layer on baking sheets lined with parchment paper.
  2. Set Oven Temperature: Preheat your oven to its absolute lowest setting, typically around 100-150°F (38-65°C). If your oven does not go that low, consider leaving the oven door slightly ajar to prevent excessive heat buildup.
  3. Dry in Batches: Place the baking sheets in the oven. Turn the herbs every 15-30 minutes to ensure even drying. The total drying time can range from 1 to 4 hours, depending on the herb and your oven’s temperature.
  4. Check for Dryness: Herbs are dry when they are brittle and crumble easily. Be cautious not to over-dry or scorch them.
  5. Cool and Store: Allow the herbs to cool completely before storing them.

Remember, the goal is to gently warm and circulate air, not to bake. This method is a last resort if air drying is impossible, due to the high risk of compromising flavor and essential oils.

Close-up of hands carefully spreading green mint leaves in a single layer on a clear dehydrator tray on a light kitchen counter.
Spreading fresh mint leaves evenly on the dehydrator tray for consistent drying.

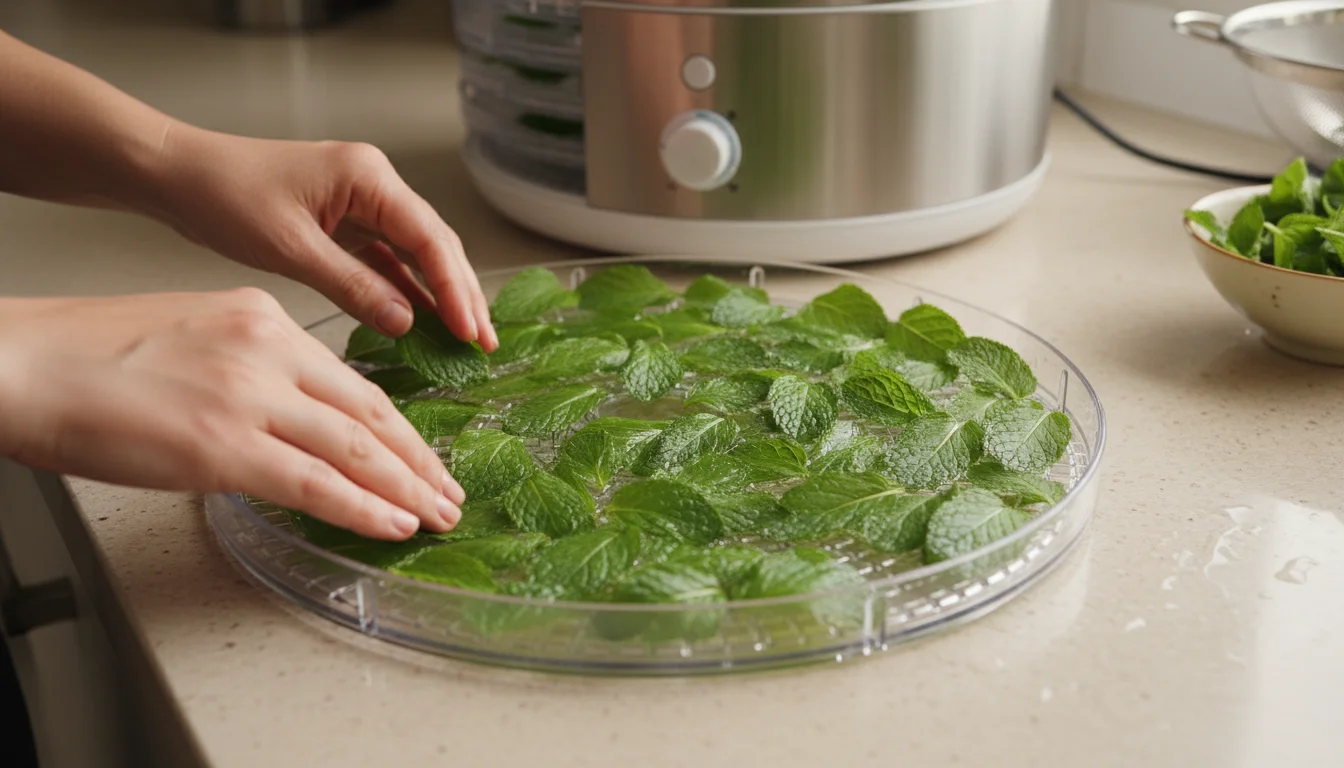
Dehydrator Drying Herbs (Recommended for Consistency)

A food dehydrator is often considered the best way to store dried herbs for winter for gardeners who want speed and consistency, especially for high-moisture herbs. Dehydrators offer controlled airflow and temperature, making them very reliable.

  1. Prepare Herbs: Wash and thoroughly dry your herbs. Remove the leaves from the stems, or chop larger leaves if desired. Spread the herbs in a single layer on the dehydrator trays, ensuring no overlap.
  2. Set Dehydrator: Set your dehydrator to a low temperature, typically between 95-115°F (35-46°C). The ideal temperature will often be specified in your dehydrator’s manual for herbs.
  3. Dry Until Brittle: Allow the herbs to dry until they are completely crisp and crumble easily. This usually takes 2 to 8 hours, depending on the herb and thickness. Check them periodically.
  4. Cool and Store: Once dry, remove the herbs and let them cool completely on the trays before transferring them to storage containers.

Dehydrators are a wise investment if you plan to dry herbs and other produce regularly. They provide the most consistent results, helping your herbs retain their color and potency effectively.

Clear glass jars filled with dried lavender, basil, rosemary, and thyme, securely sealed, arranged on a wooden shelf.
Dried herbs, beautifully preserved in airtight jars, ready for winter use.

Proper Storage for Long-Lasting Flavor

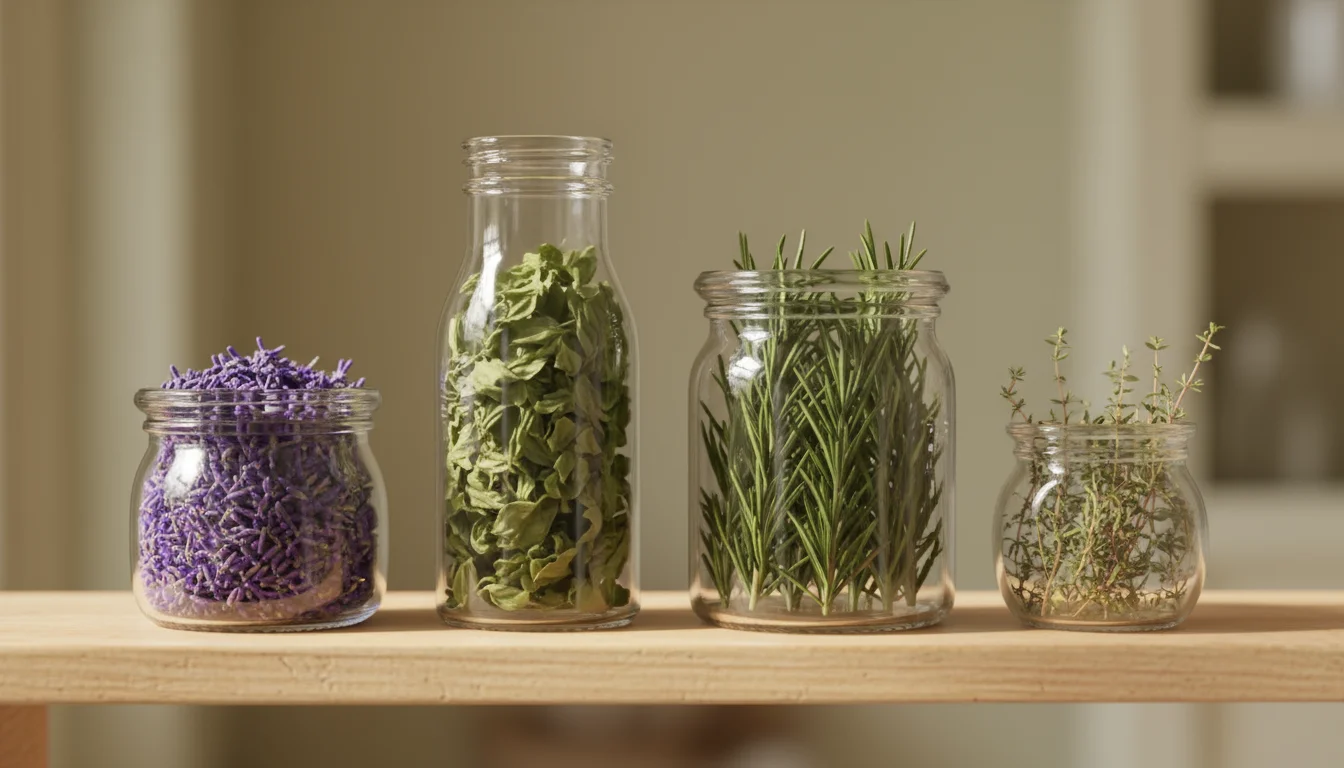
Once you have carefully harvested and dried your herbs, the final crucial step is proper storage. This ensures they maintain their flavor, aroma, and potency throughout the winter months and beyond. Incorrect storage can quickly diminish all your hard work, leading to stale or flavorless herbs. The objective is to protect them from light, air, and moisture, which are the primary enemies of dried herbs.

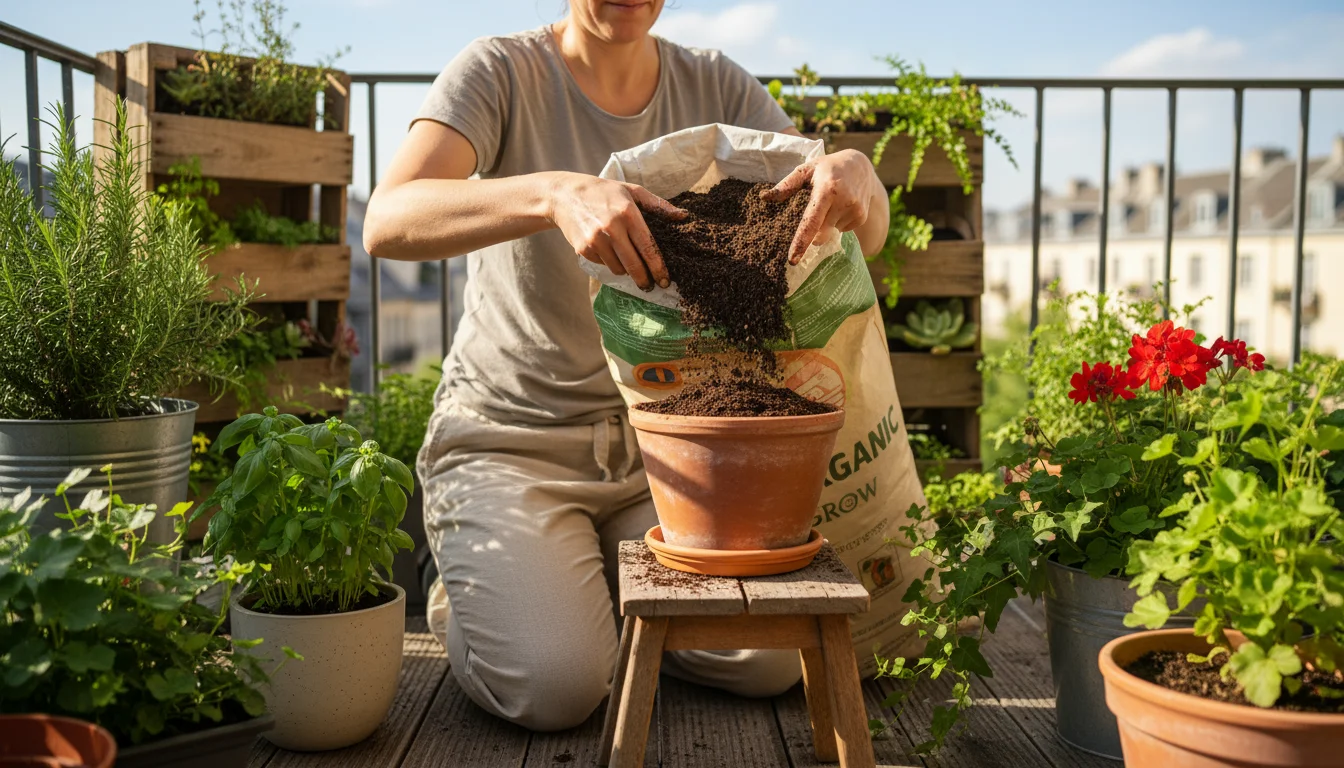
Choosing the Right Containers: The best way to store dried herbs for winter is in airtight containers. Glass jars with tight-fitting lids are an excellent choice. They are non-reactive, easy to clean, and create a good seal. Metal tins can also work, provided they are food-grade and seal securely. Avoid plastic bags or containers for long-term storage, as they may not provide a sufficient barrier against air and can sometimes impart unwanted flavors to your herbs. Always ensure your containers are completely clean and dry before adding the herbs.

Whole Leaf vs. Crushed: It is generally recommended to store herbs as whole leaves or in larger pieces rather than crushing them immediately after drying. Crushing or grinding herbs increases their surface area, exposing more of their delicate essential oils to the air. This accelerates the loss of flavor and aroma. Instead, wait until you are ready to use the herbs to crush or grind them. For example, if you are drying rosemary, store the small needles whole and crush them just before adding them to your roast chicken.

The Ideal Storage Location: Find a cool, dark, and dry place in your home for your stored herbs. A pantry, a cupboard away from the stove, or a dark shelf in a cool basement are all excellent options. Avoid storing herbs near heat sources like ovens, dishwashers, or direct sunlight, as heat and light degrade their quality. Humidity is also a concern, so steer clear of damp areas. Consistent, moderate temperatures will help preserve your herbs for the longest possible time.

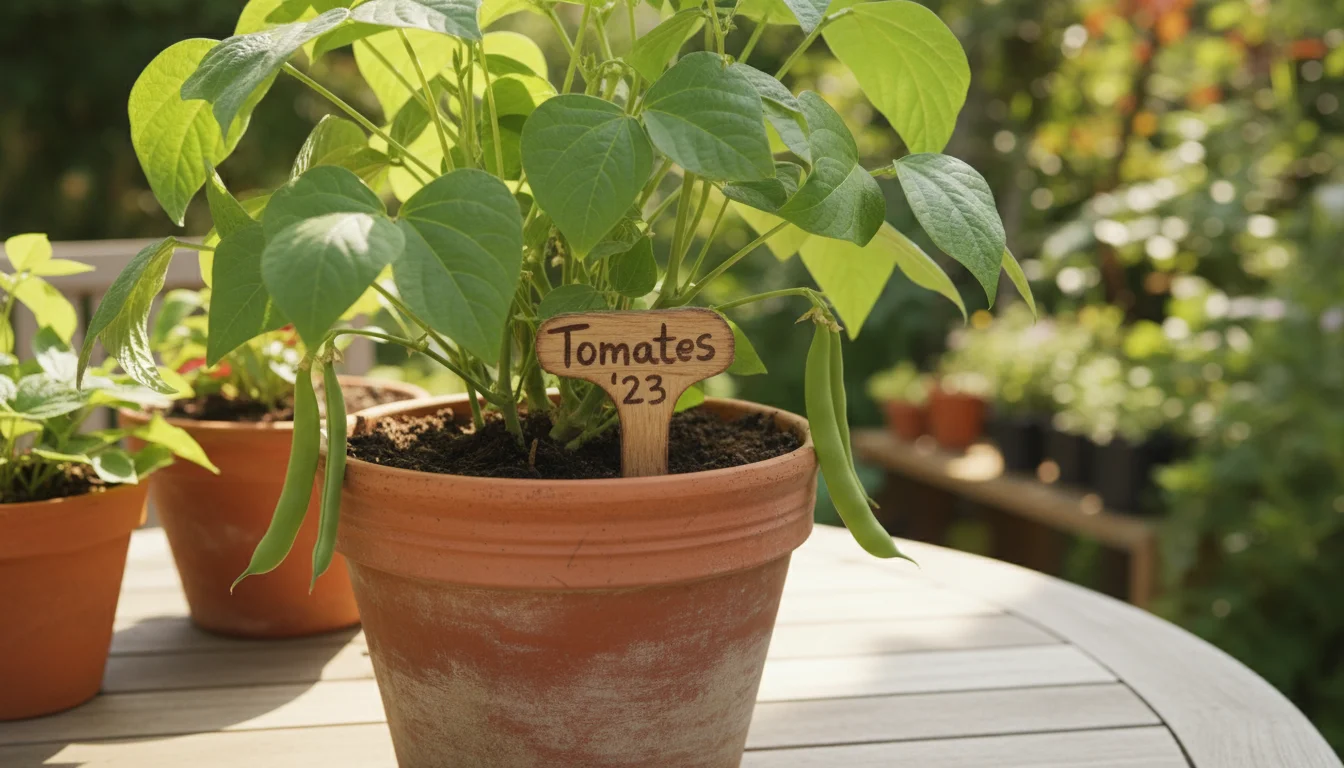
Labeling is Essential: Always label your containers with the name of the herb and the date it was harvested and dried. This simple practice helps you keep track of your inventory and ensures you use the oldest herbs first, preventing waste. While well-stored dried herbs can last up to a year, their potency gradually declines over time. Regular rotation ensures you are always cooking with the freshest possible flavors from your balcony garden.

By following these storage guidelines, you extend the life of your homegrown herbs, allowing you to enjoy the taste of your balcony garden long after the growing season has ended. This sustainable practice ensures you get the most out of every plant you grow.

Close-up of a hand inspecting a bundle of drying herbs on a balcony, with many leaves discolored brown and black.
Inspecting discolored herbs drying on a balcony.

Troubleshooting Common Drying Challenges

Even with the best intentions, you might encounter a few hurdles when drying herbs. Understanding common issues and how to address them helps ensure your efforts result in a high-quality, flavorful product. Do not get discouraged; these are often simple fixes.

Problem: Herbs are turning brown or black instead of retaining their green color.

  • Cause: This usually indicates that the herbs were dried too slowly, exposed to too much direct sunlight during drying, or experienced too high a temperature. Slow drying can allow enzymes to break down chlorophyll, leading to discoloration.
  • Solution: Ensure your drying area has good air circulation and is relatively dark. If air drying, make smaller bundles. If using an oven, reduce the temperature or ensure the door is cracked open wider. A dehydrator, with its controlled environment, often prevents this issue. Harvest herbs in the early morning before strong sun exposure.

Problem: Herbs are developing mold or mildew.

  • Cause: Mold is the most common and frustrating issue, almost always due to insufficient air circulation or high humidity. It means the herbs were not drying fast enough or had too much moisture to begin with.
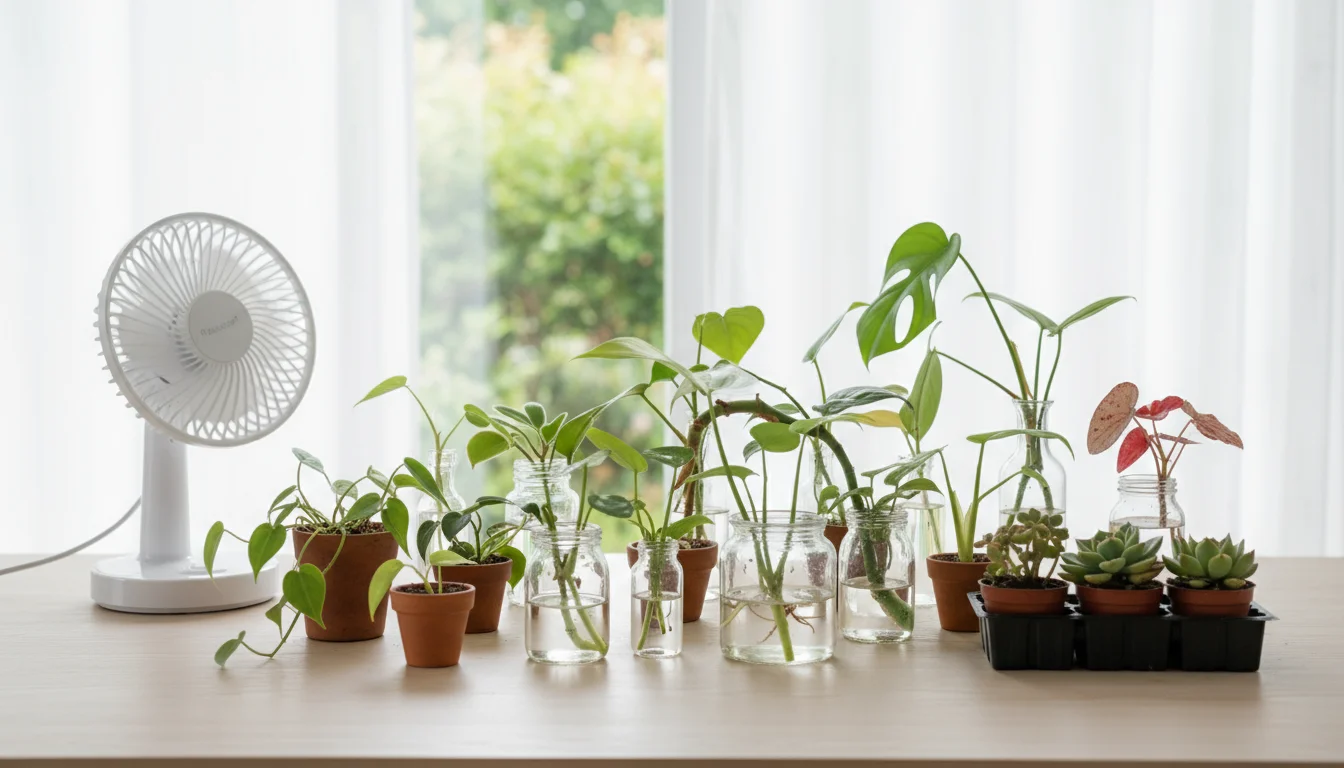
  • Solution: Crucially, make sure your herbs are absolutely dry before harvesting and that no water droplets remain on the leaves. Create smaller bundles for air drying. Increase air circulation in your drying area, perhaps by adding a small fan nearby, not blowing directly on the herbs, but creating ambient air movement. If your environment is naturally humid, consider using a dehydrator, which actively removes moisture, or oven drying with caution. Discard any molded herbs immediately to prevent contamination of others.

Problem: Dried herbs lack flavor or aroma.

  • Cause: Several factors can contribute to bland herbs: harvesting at the wrong time, drying at too high a temperature, or improper storage. Essential oils, which provide flavor, are delicate and can degrade.
  • Solution: Always harvest your herbs when their essential oil content is highest, typically in the morning after dew has dried but before intense midday sun. Dry them at low temperatures, below 100-115°F or 38-46°C, to preserve these oils. Store them whole, in airtight containers, in a cool, dark place away from light and heat. Over-drying can also reduce flavor, so remove them from the drying process as soon as they are brittle.

Problem: Herbs are not drying evenly.

  • Cause: This often happens when bundles are too large, or leaves are piled on top of each other. Inconsistent air circulation or heat distribution can also be a factor.
  • Solution: If air drying, ensure bundles are small and spaced apart. For oven or dehydrator drying, spread herbs in a single, non-overlapping layer on trays. Rotate trays or flip herbs periodically to expose all surfaces to air or heat. Remove smaller, drier pieces first if necessary to allow larger pieces more time.

By identifying and addressing these common issues, you elevate your herb drying skills and consistently produce high-quality, fragrant additions to your winter kitchen from your balcony harvest.

An open gardening journal with handwritten notes and dried rosemary sprigs on a rustic balcony table.
Handwritten notes for a bountiful balcony harvest all winter long.

Frequently Asked Questions

Can I dry all types of herbs?

While most herbs can be dried, some retain their flavor better than others. Woody-stemmed herbs like rosemary, thyme, oregano, and sage dry exceptionally well. Leafy herbs such as mint and basil also dry successfully, especially in a dehydrator. Cilantro and parsley can be dried but often lose a significant amount of their vibrant flavor. Chives are best used fresh but can be dried for texture, though their potent onion flavor diminishes. Always prioritize herbs that are known to dry effectively for the best results in your small-space garden.

How long do dried herbs last?

When stored correctly in airtight containers in a cool, dark place, most dried herbs maintain good quality for six months to a year. After this period, they will not necessarily spoil, but their potency, flavor, and aroma will gradually fade. To test if your dried herbs are still potent, crush a small amount between your fingers and smell them. If the aroma is weak, it is time to refresh your supply.

Do I need to wash herbs before drying?

Yes, it is generally a good practice to gently rinse your herbs to remove any dust, dirt, or small insects. However, it is absolutely crucial that the herbs are completely dry before you begin the drying process. Any residual moisture can lead to mold formation, ruining your entire batch. Rinse them a day before you plan to harvest and spread them on a clean towel in a well-ventilated area to air dry completely.

Can I dry herbs in the microwave?

While it is technically possible to dry herbs in a microwave, it is generally not recommended for optimal flavor and aroma. Microwaves cook with high heat, which can quickly degrade the essential oils in herbs, resulting in a less flavorful product. It is also very easy to over-dry or scorch them. For small batches, air drying or a dehydrator offers far superior results in terms of preserving quality.

What are some eco-friendly tips for drying herbs?

Air drying is the most eco-friendly method, as it uses no electricity. If using a dehydrator, fill it completely to maximize energy efficiency. Reuse glass jars for storage, avoiding single-use plastics. Compost any herb stems or unused parts. By drying your own herbs, you also reduce packaging waste associated with store-bought varieties and support a more sustainable kitchen from your own balcony.

For trustworthy gardening information, visit:
Lady Bird Johnson Wildflower Center,
Botanic Gardens Conservation International,
American Public Gardens Association and
Plant Select (Colorado). These organizations provide expert, research-based advice for gardeners at all levels.

Disclaimer: This article is for informational purposes only and is not a substitute for professional gardening advice. Always consult local extension services or horticulture experts for region-specific guidance.

Categories
Edible Gardening

The No-Fail Guide to Growing Fall Radishes in a Window Box

Imagine biting into a crisp, peppery radish, pulled fresh from your own window box. If you think growing your own vegetables requires a sprawling backyard, think again! For anyone with a balcony, patio, or even just a sunny windowsill, fall radishes offer a quick, satisfying harvest. These zesty root vegetables thrive in cooler temperatures and mature rapidly, making them an ideal choice for fall vegetable gardening, especially in small spaces.

This guide provides all the practical, actionable steps you need to succeed at growing radishes in containers. We focus on window boxes, which are perfect for maximizing space and adding a touch of edible beauty to your home. You will learn about selecting the right varieties, preparing your growing environment, and maintaining your plants for a continuous bounty. Get ready to enjoy delicious, homegrown radishes with minimal effort.

Close-up of a hand gently harvesting a small, red radish from a terracotta window box filled with green foliage on a sunny balcony.
Harvesting perfectly formed radishes from a sunlit window box.

Why Fall Radishes Are Your Perfect Window Box Crop

Radishes stand out as one of the best choices for fast growing fall vegetables for small spaces, and particularly for window boxes. They offer several compelling advantages that make them a favorite among busy gardeners and those with limited room.

Firstly, radishes grow incredibly fast. Many varieties mature in as little as 20-30 days from planting the seed, meaning you enjoy a harvest just weeks after sowing. This quick turnaround provides immense satisfaction and allows you to grow multiple batches throughout the fall season.

Secondly, radishes are compact. Their root develops underground, and the leafy tops remain relatively small, making them perfectly suited for the shallow, narrow confines of a window box. You do not need a lot of space for successful growth, which is exactly what a window box provides. This makes them ideal window box vegetables.

Thirdly, radishes prefer cooler temperatures. While spring radishes often “bolt,” meaning they go to seed prematurely in warm weather, fall conditions typically offer the ideal environment for root development. The crisp, cool air enhances their flavor and prevents them from becoming woody or overly pungent. Temperatures between 50-65°F (10-18°C) are optimal, common throughout much of the fall.

Finally, growing radishes in containers gives you precise control over their environment. You manage the soil, water, and sun exposure, leading to healthier plants and more consistent harvests. This level of control is invaluable, especially when space limitations prevent traditional in-ground gardening.

Hands carefully place a new, empty dark gray window box on a balcony railing, with a bag of potting mix on a stool.
Prepping our balcony window box for fall radishes! Choosing wisely makes all the difference.

Choosing the Ideal Window Box and Potting Mix

The success of your fall radishes begins with selecting the right window box and filling it with quality potting mix. These elements directly impact root development and overall plant health.

Hands drilling drainage holes into the bottom of a wooden window box with a power drill on a patio.
Don’t skip those drainage holes for your radishes!

Window Box Selection: Size and Material

When considering how deep do pots need to be for radishes, aim for a window box that provides at least 6 inches of depth. While radish roots are not extremely long, this depth allows ample room for their globular or cylindrical roots to develop without crowding. A box width of 6-8 inches also works well, offering enough space for proper plant spacing.

Ensure your window box has excellent drainage holes. Radishes hate “wet feet,” which means sitting in waterlogged soil. Without adequate drainage, their roots rot, and your harvest fails. If your box lacks holes, drill several 1/4-inch to 1/2-inch holes in the bottom. Consider adding a saucer or tray underneath to catch excess water, protecting your windowsill or patio. For proper aeration, elevate your window box slightly using small feet or blocks if it sits directly on a surface, further aiding drainage.

Materials vary widely. Plastic window boxes are lightweight, affordable, and retain moisture well, reducing the frequency of watering. Terracotta boxes are attractive and breathable, which helps prevent overwatering, but they dry out faster. Wooden boxes offer a rustic look; ensure they are made from rot-resistant wood like cedar or redwood, or lined with plastic to prolong their life. Regardless of material, prioritize drainage.

Close-up of hands gently sifting light, fibrous peat-free potting mix, rich with coco coir and bark, into an empty terracotta window box.
Gently sifting light, airy potting mix for your window box radishes.

Potting Mix: The Foundation for Growth

Do not use garden soil in your window box. Garden soil compacts easily in containers, impedes drainage, and may harbor weed seeds or pests. Instead, use a high-quality, well-draining potting mix specifically formulated for containers.

Look for a “peat-free” potting mix. These sustainable alternatives typically use coco coir, composted bark, and other organic materials. They offer excellent water retention while ensuring good aeration, crucial for healthy root crops like radishes. Peat-free mixes also align with environmentally conscious gardening practices.

A good potting mix provides the optimal balance of moisture, nutrients, and air for your radish roots. It should feel light and fluffy, not dense or heavy. Here’s what to look for:

  • Good Drainage: Prevents waterlogging and root rot.
  • Moisture Retention: Keeps the soil consistently moist, which is vital for tender, flavorful radishes.
  • Aeration: Allows oxygen to reach the roots.
  • Nutrient Content: Provides essential nutrients for initial growth. Many mixes include a slow-release fertilizer, which is suitable for radishes given their fast growth.

You can reuse potting mix from previous seasons, but refresh it. Over time, potting mix loses its structure and nutrients. To refresh, mix in about 20-30% new, fresh potting mix, along with some compost or worm castings. This replenishes nutrients and improves soil structure, preparing it for another successful crop. Always remove any old plant debris to prevent disease transmission.

A wooden window box on a balcony displays three different radish varieties: round red Cherry Belle, elongated French Breakfast, and red-white Sparkler
See the differences? These varieties thrive in fall window boxes.

Selecting the Best Radish Varieties for Fall Containers

Choosing the right radish variety makes a significant difference in your fall harvest. Some varieties tolerate cooler temperatures better and perform exceptionally well in containers. Focus on varieties known for fast maturity and good flavor in cooler conditions.

Here are some excellent options for fall window box vegetables:

Variety Name Days to Maturity Description Container Suitability
Cherry Belle 22-28 days Classic round, bright red radish with crisp, mild flavor. Very popular and reliable. Excellent, compact growth.
French Breakfast 23-30 days Elongated, cylindrical shape with a white tip and mild, buttery flavor. Harvest when finger-sized. Excellent, shallow root system.
Sparkler 25-30 days Round, red with a distinct white bottom. Crisp and mildly spicy. Very good, robust for containers.
White Icicle 28-35 days Long, pure white, carrot-shaped roots. Mild and tender, less pungent. Good, requires slightly more depth.
Easter Egg Blend 25-30 days A mix of purple, red, pink, and white radishes, offering visual appeal and varied flavors. Excellent, provides diversity.
Black Spanish Round 50-60 days Large, black-skinned, round radish with spicy white flesh. A longer fall crop for late season. Good, but needs more depth and patience.

When selecting your seeds, check the “days to maturity” listed on the packet. For fall planting, especially if you plan succession sowing, choose varieties that mature quickly. Also, look for descriptions that mention “cool season” or “bolt resistant,” which indicate a better tolerance for fluctuating fall temperatures.

Un-gloved hands creating parallel planting furrows in fresh potting mix within a wooden window box on a sunny balcony.
Creating perfect furrows for your fall radish seeds.

Step-by-Step: Planting Your Fall Radishes From Seed

Planting fall radishes from seed is straightforward, but careful attention to spacing and timing ensures a successful harvest. Follow these steps for optimal results in your window box.

  1. Hands gently patting dark, fluffy potting mix into a modern grey window box on a balcony railing, leaving an inch of space.
    Hands preparing the window box with fresh, light soil.

    Prepare Your Window Box:

    Fill your clean window box with the chosen potting mix, leaving about an inch of space from the rim. Gently pat the soil down to remove large air pockets, but avoid compacting it too much. You want the soil to remain light and fluffy for easy root growth.

  2. Hands creating a shallow furrow in dark potting mix in a gray window box using a wooden stick, with tiny radish seeds nearby.
    Shallow furrows are key for precise radish seed spacing in your window box.

    Sow Your Seeds:

    Radish seeds are relatively small. Create shallow furrows, about 1/2 inch deep, running the length of your window box. Space these furrows 2-3 inches apart. Alternatively, you can broadcast seeds across the surface and then thin them later.

    For precise spacing, sow seeds about 1 inch apart within the furrows. This initial spacing helps prevent overcrowding, a common issue that leads to small, undeveloped radishes. Remember, consistent spacing gives each radish room to grow its root. If you are planting larger varieties, like Black Spanish Round, increase this spacing to 2 inches.

  3. Person's hands gently water a rustic wooden window box on a white balcony railing, filled with dark soil, using a small green watering can.
    Giving those newly planted radish seeds their first gentle drink.

    Cover and Water:

    Gently cover the seeds with about 1/2 inch of potting mix. Lightly firm the soil over the seeds. Water immediately and thoroughly using a gentle shower setting on your watering can or hose. The goal is to moisten the soil deeply without dislodging the seeds. Maintain consistent moisture throughout the germination period.

  4. A person's hand with small snips carefully thinning delicate green radish seedlings in a terracotta window box on a balcony railing.
    Carefully thinning radish seedlings for strong root development.

    Germination and Thinning:

    Radishes typically germinate quickly, often within 3-7 days. Once the seedlings emerge and develop their first set of true leaves, it is crucial to thin them. Thinning means removing weaker or overcrowded seedlings to give the strongest plants enough room to thrive. For most round varieties, thin seedlings to 2-3 inches apart. For elongated varieties like French Breakfast or White Icicle, 1-2 inches apart is sufficient.

    To thin, simply snip the weaker seedlings at the soil line with small scissors, or carefully pull them out. Avoid disturbing the roots of the remaining plants. Proper thinning is critical; overcrowded radishes will not form proper roots, resulting in leafy greens and no edible radish.

  5. A person in a light long-sleeved shirt plants seeds in a window box on a balcony railing. Late afternoon sun filters through, casting soft shadows.
    Getting fall radish seeds in the soil at just the right time.

    Timing Your Planting:

    For fall radishes, begin planting seeds in late summer or early fall, typically 4-6 weeks before your average first frost date. This timing ensures they mature in cool weather but before hard freezes. In many regions, you can continue planting into mid-fall for a staggered harvest, taking advantage of the favorable cool temperatures. If your winters are mild, you may even extend planting into late fall.

By following these specific steps, you set your window box vegetables up for success, ensuring a bountiful harvest of crisp, delicious fall radishes.

Close-up of a hand checking soil moisture in a window box filled with vibrant radish greens on a sunny balcony, a small watering can nearby.
Checking the soil is key to happy radishes in your window box!

Essential Care for Thriving Fall Radishes: Sun, Water, and Nutrients

Once you have planted your radish seeds, providing the right care is paramount. Consistent attention to sun exposure, watering, and nutrients ensures healthy growth and prevents common problems that affect flavor and texture.

Young radish seedlings in a rustic wooden window box on a balcony, with one half bathed in direct sunlight and the other in partial shade.
Notice how direct sunlight brings life to these young radish plants.

Sunlight Requirements

Radishes require full sun, meaning at least 6 hours of direct sunlight per day, to produce robust roots. Place your window box in a location that receives ample sunlight. While radishes tolerate some partial shade, especially in warmer climates, insufficient light leads to small, underdeveloped roots and more leafy growth. Observe your chosen spot throughout the day to confirm it meets the minimum light requirements.

Hands checking soil moisture in a terracotta window box with young radish plants; a copper watering can is nearby.
Checking the soil moisture daily is key for crisp, flavorful radishes.

Watering: The Key to Crispness

Consistent moisture is the single most critical factor for tender, flavorful radishes. Irregular watering causes radishes to become woody, tough, or excessively spicy. They also might “bolt” or crack if the soil moisture fluctuates wildly.

  • Check Soil Moisture Daily: Stick your finger an inch or two into the soil. If it feels dry, it is time to water.
  • Water Deeply: When you water, do so thoroughly until water drains from the bottom of the window box. This encourages deep root growth. Avoid light, frequent sprinkles, which only moisten the surface.
  • Consistency is Key: Aim to keep the soil consistently moist, but not waterlogged. Window boxes, especially terracotta ones, dry out faster than in-ground gardens. You might need to water daily in warm, windy conditions, or every few days as fall temperatures drop.
  • Self-Watering Options: Consider a self-watering window box, which includes a reservoir that wicks water up into the soil. These are excellent for maintaining consistent moisture levels, reducing your watering frequency and ensuring your radishes thrive.
Hands carefully measure liquid fertilizer into a watering can, with young, healthy radish sprouts in a terracotta window box in the background.
Gently measuring nutrients for healthy radish roots in a window box.

Nutrient Management: Less Is More

Radishes are fast growers and do not require heavy feeding. Over-fertilizing, particularly with nitrogen-rich fertilizers, promotes leafy top growth at the expense of root development. If your potting mix already contains a slow-release fertilizer, you likely need no additional feeding for the entire crop cycle.

If you use a basic, unfertilized potting mix, or if your radishes appear stunted after a few weeks, you can apply a balanced liquid fertilizer (like a 5-10-10 or 10-10-10 ratio) at half strength. Apply it once, about two weeks after germination. Do not overdo it. Organic options like diluted fish emulsion or compost tea also provide a gentle nutrient boost. Remember, the focus is on root growth, so avoid high-nitrogen feeds.

Wooden window box on a patio ledge showing radishes at various growth stages, from sprouts to mature plants ready for harvest.
Fresh radishes growing in stages for a steady harvest on the patio.

Mastering Succession Sowing for a Continuous Radish Harvest

One of the joys of growing radishes, especially in a window box, is the ability to enjoy a steady supply rather than a single large harvest. This is achieved through a technique called succession sowing.

A long wooden window box displaying radish plants at three distinct stages: tiny sprouts, young plants, and mature plants with visible red radishes.
Enjoy a continuous radish harvest from one window box with succession sowing!

What is Succession Sowing?

Succession sowing simply means planting small batches of seeds every couple of weeks, ensuring your harvests keep coming. Instead of sowing your entire packet of radish seeds at once, which would result in a huge harvest all at the same time, you spread out your planting. This strategy is perfect for fall vegetable gardening and especially effective for fast-maturing crops like radishes in limited space.

A long wooden window box showcasing three distinct stages of radish growth: newly sprouted, young plants, and mature plants with visible roots.
See how succession planting keeps fresh radishes coming! Different stages in one box.

How to Implement Succession Sowing for Radishes:

  1. Divide Your Window Box: If your window box is long enough, you can mentally divide it into sections. Plant one section every 10-14 days. For example, if your window box is 24 inches long, you might divide it into two 12-inch sections.
  2. Stagger Your Planting: On week 1, plant seeds in the first section. On week 3, plant seeds in the second section. If you have multiple window boxes, dedicate one box for planting every two weeks. This way, as your first batch matures, your second batch is already growing, and your third batch is being planted.
  3. Monitor Maturity: Radishes mature quickly, usually within 3-4 weeks. By staggering your planting, you ensure that you always have a batch ready for harvest while another batch is developing. This helps you avoid gluts and ensures a continuous supply for your kitchen.
  4. Plan for Your Climate: For fall planting, continue succession sowing until about 4-6 weeks before your region’s hard frost date. This ensures your final crop has enough time to mature before freezing temperatures halt growth. In milder climates, you might extend this period further into late fall or even early winter.

Succession sowing makes growing radishes in containers incredibly rewarding. You optimize your small space, prevent waste from too many radishes maturing at once, and enjoy fresh, homegrown produce over an extended period. This method perfectly suits the “fast growing fall vegetables for small spaces” goal, providing practical, ongoing yield from your window box.

A gardener's hand inspects radish plants with small pest holes and yellowing leaves in a terracotta window box on a balcony.
Checking on the radish seedlings for any signs of trouble.

Common Challenges and Solutions for Radish Growers

Even with a “no-fail” guide, every gardener encounters challenges. Knowing how to identify and address common radish problems helps you keep your plants healthy and your harvest abundant. Here are some issues you might face and practical solutions.

A gardener's hand thinning overcrowded radish seedlings in a terracotta window box, revealing a tiny seedling with a stringy root.
Thinning out crowded radish seedlings for healthier roots.

Problem: Radishes Develop Small, Stringy Roots or Do Not Form Roots At All

Cause: This is often due to overcrowding, insufficient light, or high temperatures. If seedlings are not thinned properly, they compete for resources, leading to stunted roots. Lack of adequate sunlight also hinders root development. Warm weather (above 70°F or 21°C) encourages leafy growth at the expense of the root.

Solution:

  • Thin Ruthlessly: Ensure you thin seedlings to 2-3 inches apart. This is one of the most critical steps for radish success.
  • Provide Full Sun: Move your window box to a spot receiving at least 6 hours of direct sunlight daily.
  • Plant in Cooler Weather: Radishes are a fall crop for a reason. Plant them when temperatures are consistently cool. If an unexpected warm spell hits, ensure consistent watering to mitigate stress.
A gardener's hand gently pulls a cracked and woody red radish from visibly dry, crumbly soil in a terracotta window box on a sunny balcony.
Not all radishes are perfect! This one shows signs of a tough growing season.

Problem: Radishes Are Pungent, Woody, or Cracked

Cause: Inconsistent watering or allowing the soil to dry out between waterings is the primary culprit. When radishes do not receive steady moisture, their flavor intensifies to an unpleasant degree, and their texture becomes tough. Cracking occurs from sudden surges of water after a dry spell.

Solution:

  • Water Consistently: Maintain consistently moist soil. Check daily and water thoroughly when the top inch of soil feels dry.
  • Harvest on Time: Overly mature radishes also become woody and pungent. Harvest them promptly when they reach their optimal size.
A bolted radish plant with a tall flower stalk and tiny white flowers, contrasting with healthy green radish leaves in a terracotta window box on a ba
This radish plant is ‘bolting’ or going to seed prematurely, a common challenge.

Problem: Radishes Bolt (Go to Seed Prematurely)

Cause: Bolting is typically triggered by warm temperatures, fluctuating moisture, or sometimes by day length (though less common for fall crops). When a radish bolts, it sends up a flower stalk, and its root becomes tough and inedible as the plant focuses energy on seed production.

Solution:

  • Plant in Proper Season: Ensure you plant during the cooler fall months.
  • Provide Shade During Heatwaves: If an unseasonable warm spell occurs, provide temporary afternoon shade for your window box.
  • Maintain Consistent Moisture: Regular watering helps mitigate bolting caused by stress.
  • Choose Bolt-Resistant Varieties: Some varieties are bred for better bolt resistance; look for these if your falls tend to have unpredictable warm spells.
A woman's hand gently removes a small green caterpillar from the underside of a radish leaf in a sunny window box.
Gently hand-picking cabbage loopers from your radish plants.

Problem: Pests Attacking Radishes

Common Pests: Flea beetles, cabbage loopers, and root maggots are the most common radish pests.

  • Flea Beetles: Small, dark beetles that jump when disturbed. They chew tiny “shot holes” in radish leaves.

    Solution: Use floating row covers immediately after planting to create a physical barrier. Dust with diatomaceous earth if infestation is severe, applying it when leaves are dry. Maintain good garden hygiene to remove host plants.

  • Cabbage Loopers: Green caterpillars that chew large holes in leaves.

    Solution: Handpick caterpillars and drop them into a bucket of soapy water. Encourage natural predators like birds. Bacillus thuringiensis (Bt), an organic biological control, effectively targets caterpillars without harming other insects.

  • Root Maggots: Larvae that tunnel into radish roots, causing rot and damage.

    Solution: This is harder to control once present. Prevention is key: cover plants with fine mesh insect netting from sowing. Rotate crops and avoid planting radishes in the same window box soil year after year without refreshing it. Use beneficial nematodes, a biological control, early in the season.

Regularly inspect your radish plants for any signs of pests or disease. Early detection often allows for simpler, less invasive solutions. Integrated Pest Management (IPM) focuses on prevention, monitoring, and using the least-toxic controls first.

Content person holding a bowl of freshly harvested red and purple radishes next to a window box on a sunny balcony.
Freshly pulled radishes from the window box, ready to be enjoyed!

Harvesting and Savoring Your Crisp Fall Radishes

The moment you have been waiting for: harvesting your homegrown radishes! Knowing when and how to harvest ensures you get the best flavor and texture from your window box vegetables.

Person's fingers gently clear soil from around a developing red radish in a terracotta window box. Vibrant green leaves surround it.
Checking on radish progress in the window box for a tender, early harvest.

When to Harvest

Radishes mature quickly, typically 20-30 days from seeding, depending on the variety. The key is to harvest them promptly when they reach their optimal size. Do not wait too long; over-mature radishes become woody, pithy, and overly spicy.

  • Visual Cues: For round varieties, look for the shoulder of the radish peeking out of the soil, indicating its root is developing. The seed packet usually specifies the ideal size. For example, ‘Cherry Belle’ is ready when it is about 1 inch in diameter.
  • Gentle Tug Test: Gently pull back the soil around a developing radish to check its size. If it looks ready, harvest it.
  • Timing is Everything: Radishes taste best when harvested young and tender. Make it a routine to check your window box every few days as the plants approach their maturity date.
A pair of hands harvesting vibrant red radishes from a terracotta window box, with empty spots showing where others were just pulled.
Freshly pulled radishes, straight from the window box to your kitchen.

How to Harvest

Harvesting radishes is simple:

  1. Grasp the Leaves: Hold the base of the radish leaves firmly.
  2. Gently Pull: Give a gentle but steady pull straight up. The radish root should come out of the soil easily.
  3. Check Others: After harvesting one, check the surrounding radishes. If they are also ready, pull them.
  4. Succession Harvest: With succession sowing, you pull a few radishes at a time, leaving others to grow. This “cut-and-come-again” style of harvesting (though technically “pull-and-come-again” for roots) extends your enjoyment.
Hands snipping green tops from freshly harvested red radishes on a kitchen counter, with greens piled nearby.
Prepping your fresh radishes is key for crispness and flavor!

Post-Harvest Care and Storage

Once harvested, radishes retain their crispness and flavor best with proper handling:

  • Remove Tops Immediately: Snip off the leafy greens right away. The greens draw moisture from the roots, causing them to soften and become less crisp. However, do not discard the greens; radish greens are edible and delicious! Wash them and use them in salads, stir-fries, or pesto.
  • Wash and Dry: Wash the radishes thoroughly under cool running water to remove any soil. Gently pat them dry.
  • Store Properly: Store unpeeled radishes in a sealed container or a plastic bag in your refrigerator’s crisper drawer. For extra crispness, you can place them in a container of cold water, changing the water daily. They typically last for 1-2 weeks when stored this way.
Freshly harvested red radishes, whole and sliced, with a small dish of butter and sea salt on a wooden board.
Nothing beats fresh radishes from the garden, especially with butter and a sprinkle of salt!

Enjoying Your Radishes

Freshly harvested radishes are incredibly versatile. Add them to salads for a peppery crunch, slice them thinly for sandwiches, or serve them simply with butter and sea salt, a classic French way to enjoy them. Their vibrant color and zesty flavor elevate many dishes. Enjoy the satisfaction of knowing these delicious roots came directly from your own efforts at growing radishes in containers.

A gardener's gloved hand clearing old radish leaves from a window box. Freshly harvested radishes sit nearby with a bag of compost.
Clearing out old growth and getting ready for the next planting.

Extending Your Harvest and Prepping for Next Season

Maximizing your fall radish yield and setting your window box up for future success are crucial aspects of sustainable gardening. Here is how you can continue enjoying your radishes and prepare your growing space.

A rustic wooden window box on a patio railing contains healthy green radish plants under a homemade clear plastic cold frame, suggesting extended harv
Keep your radishes growing strong with a simple window box cold frame.

Extending Your Fall Harvest

Your fall radish harvest does not necessarily end with the first hard frost. With a little effort, you can extend the season, especially if you live in a region with mild winters.

  • Cold Frames or Row Covers: As temperatures drop, protect your window box vegetables with a simple cold frame or a row cover. A cold frame is essentially a bottomless box with a transparent lid that traps solar heat and shields plants from wind and frost. You can create a mini version for your window box. Alternatively, drape a lightweight row cover fabric over your box, securing the edges. These protections can extend your harvest by several weeks, allowing you to enjoy radishes well into early winter.
  • Bring Indoors: If you have a bright, cool spot indoors, like a sunroom or a south-facing window, you can bring smaller window boxes inside before a severe frost. While growth will slow, you might get a final harvest. Ensure good air circulation to prevent fungal issues.
  • Final Succession Planting: In areas with long, mild falls, plan a final succession planting about 6-8 weeks before your typical deep freeze. This gives the radishes time to mature before the coldest weather truly sets in.
Hands clearing spent radish plants and old soil from a wooden window box on a balcony, with a trowel and fresh potting mix nearby.
Time to refresh that window box for its next green adventure!

Preparing Your Window Box for Next Season

After your radish season concludes, take a few steps to prepare your window box for future plantings. This promotes soil health and prevents disease buildup.

  1. Clear Out Debris: Remove all spent radish plants, including any remaining roots and leaves. Do not leave plant matter in the box, as it can harbor pests and diseases.
  2. Inspect the Window Box: Check the box for any damage, cracks, or signs of wear. Clean it thoroughly with a stiff brush and a mild soap solution, especially if you experienced any pest or disease issues. Rinse well.
  3. Refresh the Potting Mix: As mentioned earlier, old potting mix needs rejuvenation. Remove a portion of the old mix, especially if it looks tired or compacted. Replenish with fresh, high-quality peat-free potting mix. Incorporate a good amount of compost or worm castings to enrich the soil and improve its structure. This step is critical for maintaining long-term soil fertility in containers.
  4. Store Properly: If you are not immediately replanting, clean and store your window box in a dry, sheltered location for the winter. This protects it from harsh weather and extends its lifespan. If you reuse the same soil, consider solarizing it if you live in a sunny, warm climate: cover the moist soil with clear plastic for a few weeks during the hottest part of the year to kill off pathogens.

By following these steps, you maximize your current harvest and ensure your window box remains a productive and healthy growing space for future seasons of growing radishes in containers and other small-space edibles.

An un-gloved hand gently hovers over young green radish plants in a weathered wooden window box on a sunny patio.
Gently checking on the progress of your fall radishes in the window box.

Frequently Asked Questions

Can I grow radishes indoors in a window box?

Yes, you can grow radishes indoors, but they need ample sunlight, ideally a south-facing window with at least 6 hours of direct sun daily. Use a good quality potting mix and ensure consistent watering. Indoor radishes might grow slower and sometimes be less robust than outdoor ones, but they are still a viable option.

Why are my radish greens growing vigorously, but the roots are tiny?

This common issue, often called “all tops, no bottoms,” usually results from overcrowding, insufficient light, or excessively warm temperatures. Ensure you thin your seedlings to 2-3 inches apart, provide at least 6 hours of direct sun, and plant during cooler fall temperatures (ideally 50-65°F or 10-18°C). Too much nitrogen fertilizer also encourages leafy growth.

How often should I water my radishes in a window box?

Water frequently enough to keep the soil consistently moist, but not waterlogged. In a window box, this could mean daily or every other day, depending on the weather, the size of your box, and the material. Stick your finger an inch into the soil; if it feels dry, water thoroughly until it drains from the bottom. Consistent moisture prevents woody or overly pungent radishes.

Do I need to fertilize radishes in a window box?

Radishes are fast growers and generally do not require heavy fertilization, especially if your potting mix contains a slow-release fertilizer. Over-fertilizing, particularly with nitrogen, can promote leafy growth at the expense of root development. If your soil is unfertilized and growth seems slow, a single application of a balanced liquid fertilizer (like 5-10-10) at half strength, about two weeks after germination, is usually sufficient.

When is the best time to plant fall radishes?

Plant fall radishes from late summer to early fall, about 4-6 weeks before your average first hard frost. This timing ensures they mature in cool weather, which improves their flavor and texture. In regions with mild winters, you can often continue succession planting into mid-fall for an extended harvest.

For research-based guidance on edible gardening, visit
Oregon State Extension — Gardening,
Royal Horticultural Society (RHS),
UF/IFAS Gardening Solutions and
University of Illinois Extension — Gardening.

Disclaimer: This article is for informational purposes only and is not a substitute for professional advice. Consult local extension services for region-specific recommendations.

Categories
Indoor Plants

Bringing Houseplants Indoors for Fall: Your Pest-Free Transition Checklist

As the crisp air of fall approaches, many gardeners face the annual task of bringing their beloved houseplants back inside. Your outdoor plants, which thrived in the summer sun, often carry hidden guests: pests. These unwelcome hitchhikers can quickly infest your entire indoor plant collection, turning a cozy autumn transition into a frustrating battle. This guide provides a practical, step-by-step checklist to ensure your plants move indoors pest-free, healthy, and ready to brighten your home throughout the cooler months. You will learn how to identify common outdoor pests, effectively remove them, and acclimate your plants to their new indoor environment, minimizing stress and maximizing their chances of survival and continued growth.

Person's hands gently carrying a potted peace lily from a small patio into a home, surrounded by other container plants.
Transitioning cherished plants indoors for their winter protection.

Why Bring Them Inside? Protecting Your Investment

Many of your favorite houseplants, like peace lilies, ferns, and tropical foliage, cannot withstand cold temperatures. They thrive outdoors in summer, benefiting from increased light, humidity, and fresh air, but fall brings a threat of frost that can quickly damage or kill them. Bringing these plants indoors protects them from freezing temperatures, strong winds, and sudden environmental shifts. Beyond survival, it allows you to extend your gardening season, keeping vibrant greenery in your home when the outdoor landscape turns dormant. Consider the financial investment you have made in your plants, along with the joy and beauty they add to your living space. Protecting them from winter’s harshness ensures they continue to flourish for years, providing clean air and a touch of nature indoors.

When you bring plants inside, you also protect your home environment. Pests that thrive outdoors, such as aphids, spider mites, or mealybugs, will seek refuge indoors as temperatures drop. If you introduce them without proper inspection and treatment, these pests will quickly spread to your existing indoor plants. This creates an infestation that is far harder to control once established in the controlled environment of your home. A proactive approach saves you significant effort, expense, and potential loss of plants later on. Your diligence ensures a healthier, pest-free indoor garden, maintaining the ecological balance of your home’s ecosystem.

A hand holds a smartphone displaying a weather forecast showing cool nighttime temperatures, in front of various potted houseplants on a balcony.
Checking the forecast before bringing these beauties inside for fall.

Timing is Everything: When to Start the Transition

The success of bringing plants indoors largely depends on timing. You want to move your plants inside before temperatures drop too low, but not so early that you cut short their beneficial outdoor growing season. A good rule of thumb is to start the process when nighttime temperatures consistently fall below 50-55°F (10-13°C). For many tropical plants, temperatures below 45°F (7°C) can cause significant stress, leading to leaf drop or even death. Monitor local weather forecasts closely; a sudden cold snap can occur unexpectedly, so plan to move your plants a week or two before the first predicted frost in your area.

Transitioning too late risks exposure to cold damage, which manifests as wilting, browning leaves, or stunted growth. Conversely, moving them indoors too early means they miss out on the beneficial light and air circulation of the outdoor environment. This balance ensures your plants maximize their outdoor growth period while avoiding the shock of sudden temperature drops. Aim for a gradual transition, if possible, where plants spend a few days in a protected, semi-shaded spot outdoors before their final move. This eases the shock of reduced light intensity and humidity indoors, preparing them for their winter quarters.

A woman closely inspects the underside of a large monstera leaf on a sunny balcony, surrounded by other potted plants.
A thorough check of every leaf before houseplants come indoors for fall.

The Essential Pest Patrol: Debugging Before Entry

This is arguably the most critical step in bringing plants indoors: a thorough pest inspection and removal process. Skipping this step often leads to frustrating infestations that spread rapidly through your indoor collection. Dedicate ample time to this, examining every part of each plant meticulously. The goal is to eradicate any existing pests and their eggs before they cross your threshold.

A gardener kneels on a patio, using a magnifying glass to inspect a potted houseplant's leaves for pests. Other plants are in the background.
Time to get up close and personal with your plants before bringing them inside.

Step 1: Isolate and Inspect

  1. Isolate each plant: Before bringing any plant near your house, take it to a separate, well-lit area, perhaps a garage or a shaded spot on your patio. This prevents pests from jumping onto other plants while you work.
  2. Examine thoroughly: Carefully inspect all parts of the plant. Look under leaves, along stems, in leaf axils (where leaves meet stems), and on the soil surface. Pay close attention to new growth, as pests often target tender tissues. Use a magnifying glass for tiny pests like spider mites.
  3. Common pests to identify:
    • Spider Mites: Tiny, reddish-brown or green mites. Look for fine webbing, especially on leaf undersides and where stems meet leaves. Leaves may appear stippled or speckled.
    • Aphids: Small, pear-shaped insects, often green, black, or red. They cluster on new growth, stems, and leaf undersides, sucking sap.
    • Mealybugs: White, cottony masses found in leaf axils and along stems. They secrete a sticky honeydew.
    • Scale Insects: Small, immobile, dome-shaped bumps on stems and leaves. They can be brown, black, or white and are often mistaken for part of the plant.
    • Whiteflies: Tiny, white, winged insects that flutter when disturbed, typically found on leaf undersides.
    • Fungus Gnats: Small, dark, mosquito-like flies that hover around the soil surface. Their larvae feed on organic matter and fine roots in moist soil.
A person's hands gently wipe a large, green Fiddle Leaf Fig leaf with a damp cloth on a sunlit patio.
Give your houseplants a good wipe-down before bringing them inside.

Step 2: Physical Removal and Cleaning

  1. Rinse plants thoroughly: Use a strong stream of water from a hose to dislodge pests. Focus on the undersides of leaves and stems. For plants with delicate foliage, use a gentler spray or a handheld sprayer.
  2. Wipe down leaves: For plants with sturdy leaves, wipe both sides with a damp cloth or sponge. You can add a drop of mild dish soap to the water for extra cleaning power, ensuring you rinse thoroughly afterward. This removes dust, dirt, and any lingering pests or eggs.
  3. Remove visible pests: For larger pests like mealybugs or scale, use a cotton swab dipped in rubbing alcohol to directly remove them. The alcohol dissolves their waxy coating, making them vulnerable. Physically scrape off scale insects with your fingernail or a soft brush.
Person's hands carefully repotting a leafy houseplant into a new terracotta pot with fresh soil, roots visible.
Giving a houseplant a fresh start in new soil for fall.

Step 3: Soil Treatment and Repotting

The soil itself can harbor eggs, larvae, and adult pests. Treating the soil is crucial for a truly pest-free transition.

  1. Inspect the soil surface: Look for any signs of activity, like tiny insects crawling, or even worms.
  2. Consider repotting: For many plants, a fresh start with new potting mix is the best defense against soil-borne pests. Gently remove the plant from its current pot, shaking off as much old soil as possible without damaging the roots. Inspect the roots for any signs of disease or pests. Repot into a clean pot with fresh, sterile potting mix. Ensure the new pot has adequate drainage holes; good drainage is vital for root health and preventing waterlogged soil, which attracts fungus gnats.
  3. Soil drench for persistent pests: If repotting is not feasible or if you suspect persistent soil pests, consider a systemic insecticide drench (follow product instructions carefully) or a natural alternative like neem oil solution applied to the soil. For fungus gnats, a top dressing of diatomaceous earth or horticultural sand can help prevent adults from laying eggs and larvae from emerging. Beneficial nematodes, microscopic worms that prey on soil pests, offer another excellent eco-friendly solution for larger collections.

Perform this pest patrol at least a week, ideally two weeks, before the final indoor move. This allows you time for follow-up treatments if you discover any lingering pests. Remember, persistence pays off in preventing a full-blown infestation later on.

Hands gently moving a potted pothos plant from a sunny balcony spot to a shaded area for acclimation, surrounded by other container plants.
Gently shifting a potted plant to a shadier spot, easing its transition indoors.

Acclimating Your Plants: Easing the Indoor Shock

Moving a plant from a bright, humid outdoor environment to a dimmer, drier indoor setting can be a significant shock. Without proper acclimation, your plants may drop leaves, wilt, or simply struggle to adjust. Gradual adjustment is key to minimizing stress and ensuring a smooth transition.

A potted coleus plant on a windowsill, partly in bright outdoor sun, partly in softer indoor light through an open window.
That light shift from vibrant outdoors to cozy indoors is real!

Understanding the Environmental Shift

  • Light: Outdoor light is significantly more intense than indoor light, even near a bright window. A plant accustomed to full sun outdoors will find indoor conditions comparatively dim.
  • Humidity: Outdoor humidity is generally higher than typical indoor home humidity, especially once your heating system kicks in.
  • Temperature: While you are moving them indoors to avoid cold, the indoor temperature might be consistently warmer or fluctuate less than outdoor temperatures.
  • Air Circulation: Outdoor plants benefit from constant fresh air movement, which strengthens stems and helps prevent fungal issues. Indoor air is often stagnant.
Person kneels by a large potted houseplant in soft shade on a patio, gently inspecting its leaves for stress.
Moving plants to shadier spots helps them adjust to indoor light.

The Acclimation Process

  1. Gradual Light Reduction: Over a period of 7-10 days, slowly move your plants to shadier outdoor locations. Start by placing them under a tree, then under a covered patio, and finally in a garage or porch with indirect light. This prepares them for the lower light levels indoors. Avoid moving them directly from full sun to a dimly lit room, which causes severe shock.
  2. Introduce to Indoor Conditions: Once the plants have had their pest patrol and light adjustment, bring them into an indoor space that mimics their final winter spot. Initially, choose a room with moderate light and consistent temperatures. Do not immediately place them in the darkest corner.
  3. Monitor for Stress: Over the first few weeks indoors, watch for signs of stress: yellowing leaves, leaf drop, wilting, or stunted growth. Some leaf drop is normal as the plant adjusts to lower light, but excessive shedding indicates deeper issues.
  4. Increase Humidity (Optional but Recommended): For humidity-loving plants, place them near a humidifier, group them with other plants, or use pebble trays filled with water. As the water evaporates, it creates a localized pocket of humidity around the plants.
  5. Ventilation: While indoor air circulation is limited, occasionally opening a window (if temperatures allow) or using a small fan on a low setting can provide beneficial air movement, but avoid direct drafts.

This careful, step-by-step approach prevents drastic environmental changes, allowing your plants to adapt their physiology to the new conditions. You invest time upfront to save your plants from significant stress, ensuring they continue to thrive and grow indoors.

Hands trimming a leafy houseplant with shears on a small balcony table, next to potting soil and an empty pot.
Time to give these beauties a trim and fresh home for fall!

Potting and Pruning for Indoor Success

Repotting and pruning are integral parts of preparing your plants for their indoor stay. These practices address root health, plant size, and overall vigor, contributing to a healthy transition. You want to ensure your plants are in suitable containers with good soil and have an appropriate growth habit for indoor living.

Hands gently unpotting a root-bound Pothos, revealing circling roots, next to a larger terracotta pot with fresh soil on a wooden table.
Time for a bigger home! Fresh soil and a little extra room make all the difference.

Repotting Considerations

  • Evaluate Pot Size: If a plant has outgrown its current pot, meaning roots are circling the bottom or emerging from drainage holes, now is the time to repot. Choose a pot only one size larger (e.g., from 6-inch to 8-inch). Too large a pot holds excess moisture, leading to root rot.
  • Fresh Potting Mix: As mentioned in the pest patrol section, fresh, sterile potting mix is crucial. It minimizes the risk of bringing in soil-borne pests or diseases. A good potting mix provides aeration, drainage, and nutrients. Drainage refers to how easily water moves through the soil, preventing roots from sitting in stagnant water. Ensure your chosen mix is appropriate for your specific plant type; succulents prefer fast-draining gritty mixes, while ferns need moisture-retentive but still well-draining soil.
  • Clean Pots: Always use clean pots, whether they are new or previously used. Sterilize old pots with a 10% bleach solution (1 part bleach to 9 parts water) to kill any lingering pathogens or pest eggs.
  • Root Health Check: When repotting, inspect the roots. Trim off any rotten, mushy, or damaged roots with clean, sharp shears. Healthy roots appear firm and typically white or light colored.
Person in gardening gloves prunes an overgrown Pothos plant with hand pruners on a sunny balcony, with clipped stems beside the pot.
Thoughtfully trimming an unruly Pothos before bringing it indoors.

Strategic Pruning

Pruning before moving indoors offers several benefits:

  1. Remove Damaged Growth: Cut off any dead, diseased, or yellowing leaves and stems. This prevents the spread of disease and directs the plant’s energy towards healthy growth.
  2. Reduce Size: Large plants can become cumbersome indoors. Pruning back excessive growth helps manage their size, making them fit better in your living space. It also reduces the plant’s overall demand for light and water, which are typically less abundant indoors.
  3. Shape the Plant: Use pruning to improve the plant’s shape, encouraging bushier growth or directing its form. Cut just above a node (where a leaf or branch emerges) to stimulate new growth from that point.
  4. Minimize Pest Hiding Spots: Dense foliage provides excellent hiding spots for pests. Thinning out the plant improves air circulation and makes future pest inspections easier.
  5. Manage Flowering: For some flowering plants, you might prune off spent blooms or even some developing buds to encourage the plant to put energy into root and leaf development during the transition, rather than expending energy on flowers that may not fully develop indoors due to changing conditions.

Use clean, sharp pruning shears or scissors to make clean cuts, preventing damage that could invite disease. Sterilize your tools between plants to avoid transmitting any pathogens. These efforts ensure your plants are in their best possible shape to thrive in their new indoor environment.

A person's hand touches soil of a fern among houseplants under a grow light and near a pebble tray on a shelf.
Checking on our indoor plant friends, making sure they’re happy with their new fall routine.

Watering, Light, and Humidity: New Indoor Routines

Once your plants are indoors, their care routine must change significantly from their outdoor summer schedule. Indoor conditions, especially during fall and winter, differ greatly from the bright, airy, and often more humid outdoors. Adjusting your watering, light, and humidity strategies is crucial for their survival and health.

Person's hand tipping a terracotta plant saucer to empty excess water, with a green houseplant in its pot on a wooden surface.
Emptying excess water from plant saucers prevents root rot.

Watering Wisdom

The most common mistake gardeners make with indoor plants is overwatering. Indoors, plants typically use less water because of lower light levels, reduced air circulation, and often cooler temperatures. Their growth slows down, requiring less moisture. Water deeply but infrequently.

  • Check Soil Moisture: Do not water on a fixed schedule. Instead, feel the soil. Stick your finger about an inch or two into the soil. If it feels dry, it is time to water. For larger pots, a moisture meter can provide a more accurate reading.
  • Drainage is Key: Always ensure your pots have drainage holes. When you water, allow water to flow freely from the bottom of the pot. Empty any excess water from the saucer after 15-30 minutes. This prevents roots from sitting in standing water, which leads to root rot.
  • Adjust for Dormancy: Many plants enter a period of semi-dormancy in winter. They require even less water during this time.
  • Water Temperature: Use room-temperature water. Cold water can shock roots.
A brightly lit indoor corner with diverse houseplants. A tall Fiddle Leaf Fig near a sunny window, smaller plants under a sleek LED grow light.
Brighten up your indoor plants with natural light and a little help from a grow light.

Light Considerations

Indoor light is often insufficient, especially during shorter fall and winter days. Most homes offer far less natural light than plants receive outdoors.

  • Assess Available Light: Identify the brightest spots in your home. South-facing windows offer the most intense light, followed by east and west. North-facing windows provide the least.
  • Rotate Plants: To ensure even growth, rotate your plants every week or two. This prevents them from leaning towards the light source.
  • Supplement with Grow Lights: If natural light is inadequate, especially for light-loving plants or during exceptionally dark winters, consider using artificial grow lights. Modern LED grow lights are energy-efficient and effective, providing the full spectrum of light plants need. Position them according to the manufacturer’s instructions, typically 12-24 inches above the plant canopy, for 10-14 hours daily.
  • Clean Leaves: Dust accumulates on leaves, blocking light absorption. Gently wipe leaves clean with a damp cloth every few weeks.
Grouped tropical houseplants on a wooden shelf, with a small humidifier gently misting and one plant sitting on a pebble tray.
Helping houseplants thrive indoors with pebble trays and humidifiers.

Humidity Hacks

Indoor heating systems drastically reduce humidity, which can stress many tropical houseplants. Symptoms of low humidity include brown leaf tips, wilting, and increased susceptibility to spider mites.

  • Humidifiers: The most effective way to increase ambient humidity is to use a room humidifier.
  • Pebble Trays: Place pots on trays filled with pebbles and water, ensuring the bottom of the pot does not sit in the water. As the water evaporates, it raises humidity around the plant.
  • Group Plants: Plants release moisture through transpiration. Grouping them together creates a microclimate with slightly higher humidity.
  • Avoid Misting (mostly): While misting provides a temporary boost, it often raises humidity for only a few minutes and can encourage fungal diseases if water sits on leaves for too long. Focus on more consistent methods.

By carefully adjusting these three crucial factors, you provide your indoor plants with the best possible conditions to thrive, ensuring they stay healthy and vibrant throughout the colder months.

Small potted houseplants on a sunny balcony, one with a yellow sticky trap in the soil. A hand hovers over another plant.
Keeping a watchful eye on our green companions, especially when they come inside.

Preventing Fungus Gnats and Other Indoor Pests

Even with thorough debugging, indoor environments present new challenges and attract different types of pests. Fungus gnats are perhaps the most common and annoying indoor pest, but others can also emerge. Proactive prevention is always easier than eradication.

Hands apply a white powder, like diatomaceous earth, to dry soil in a small terracotta pot with a green Pothos plant.
Top dressing helps keep fungus gnats away from your indoor plants.

Understanding Fungus Gnats

Fungus gnats are small, dark, mosquito-like flies that hover around the soil surface of houseplants. The adults are harmless to plants, but their larvae, which live in the top layers of moist soil, can feed on delicate roots, especially in seedlings or stressed plants. They thrive in consistently wet soil.

Fungus gnat diagram: 30cm pot, soil, larvae. Arrows show water flow. Adult gnats hover above. Labels indicate key parts.

  • Prevention: Water Control: The best prevention is to avoid overwatering. Allow the top inch or two of soil to dry out completely between waterings. This creates an inhospitable environment for fungus gnat larvae.
  • Prevention: Top Dressing: You can apply a layer of horticultural sand, fine gravel, or diatomaceous earth (a natural, abrasive powder) on the soil surface. This creates a physical barrier that prevents adult gnats from laying eggs in the soil and emerging larvae from reaching the surface.
  • Treatment: Yellow Sticky Traps: Place yellow sticky traps near your plants. Adult fungus gnats are attracted to the color yellow and will get stuck, helping to reduce the adult population and interrupt their breeding cycle.
  • Treatment: BTI (Bacillus thuringiensis israelensis): This naturally occurring bacterium, available in various products (like Mosquito Bits), can be steeped in your watering can. When applied to the soil, the larvae ingest it and die. It is safe for humans, pets, and beneficial insects.
A person's hands gently rinse a patterned Calathea plant under running water at a modern kitchen sink, treating it for pests.
Giving a beloved houseplant a refreshing rinse to wash away tiny pests.

Dealing with Other Common Indoor Pests

Despite your best efforts, sometimes pests resurface or new ones appear.

  • Spider Mites: These tiny pests thrive in dry, warm conditions. Increase humidity around affected plants. Rinse foliage with water frequently. Use insecticidal soap or neem oil spray, ensuring you cover the undersides of leaves. Repeat applications are necessary to break their life cycle.
  • Mealybugs and Scale: Continue to use rubbing alcohol on a cotton swab for direct removal. For larger infestations, insecticidal soap or neem oil applied thoroughly can help. Systemic insecticides may be considered for severe, recurring problems, but use them cautiously and always follow label directions.
  • Aphids: Often less common indoors unless brought in, aphids are easily controlled with strong water sprays to dislodge them, or insecticidal soap.
A hand removes a dry leaf from a potted fern on a tiered plant stand. A new ZZ plant sits isolated on a small stool in a balcony garden.
Caring for plants means regular checks and smart quarantines.

General Pest Management Strategies

  1. Regular Inspection: Make checking your plants for pests a weekly habit. Early detection makes eradication much easier.
  2. Quarantine New Plants: Always isolate any new plant you bring into your home for a few weeks before introducing it to your existing collection. This prevents any hidden pests from spreading.
  3. Good Air Circulation: Proper air circulation can deter some pests and prevent fungal issues that weaken plants, making them more susceptible to infestations.
  4. Cleanliness: Remove fallen leaves or debris from the soil surface and around pots. These can provide hiding spots for pests.

Your consistent vigilance and appropriate responses will ensure your indoor garden remains a healthy and thriving sanctuary, free from persistent pest problems. You empower yourself to maintain a vibrant living space without resorting to harsh chemicals if you understand these preventative and reactive measures.

Person's hands gently tip a droopy Pothos plant from its terracotta pot to inspect exposed roots and soil for problems.
Checking on a plant’s roots helps uncover hidden problems.

Troubleshooting Common Indoor Houseplant Problems

Even with the best intentions and meticulous care, your houseplants might show signs of distress indoors. Understanding these common problems and their solutions allows you to quickly diagnose and address issues, keeping your plants healthy.

Potted Pothos plant with yellowing lower leaves on a patio table next to an unused watering can.
Is your houseplant’s yellowing a mystery? Time to investigate!

Yellowing Leaves

  • Cause: Overwatering. This is the most frequent culprit. Roots deprived of oxygen begin to rot, preventing water and nutrient uptake.
    • Solution: Allow the soil to dry out more between waterings. Check the soil moisture depth before watering. Ensure good drainage.
  • Cause: Underwatering. While less common for overall yellowing, severely underwatered plants can show yellow, crispy lower leaves.
    • Solution: Water thoroughly until water drains from the bottom. Establish a consistent watering rhythm based on soil dryness.
  • Cause: Nutrient Deficiency. Yellowing, especially in older leaves, can indicate a lack of nitrogen or other essential nutrients.
    • Solution: Fertilize sparingly during the growing season (spring and summer) with a balanced houseplant fertilizer. Reduce or stop fertilizing in fall and winter when growth slows.
  • Cause: Light Deficiency. Plants moved to a much darker spot can yellow as they shed leaves no longer efficient in low light.
    • Solution: Move the plant to a brighter location or supplement with a grow light.
A Calathea houseplant with brown leaf tips and edges sits on a wooden shelf next to a pebble tray and another potted plant.
Dry air causing crispy leaves? A pebble tray can help boost humidity.

Brown Leaf Tips or Edges

  • Cause: Low Humidity. Indoor heating dries out the air, leading to brown, crispy leaf tips.
    • Solution: Increase humidity around the plant using a humidifier, pebble tray, or grouping plants together.
  • Cause: Underwatering. Insufficient water supply prevents moisture from reaching the extremities of leaves.
    • Solution: Check soil moisture and water thoroughly when the top few inches are dry.
  • Cause: Mineral Buildup. Salts and minerals from tap water or fertilizer can accumulate in the soil, causing brown tips.
    • Solution: Flush the soil periodically by watering thoroughly until water drains freely for several minutes. Consider using filtered water or rainwater.
Person kneeling on a balcony, gently touching the wilted leaves of a Peace Lily in a terracotta pot amidst other healthy plants.
Uh oh, this Peace Lily looks sad. Time to figure out why!

Drooping or Wilting Leaves

  • Cause: Underwatering. The plant lacks sufficient water to keep its cells turgid.
    • Solution: Water thoroughly. The plant should perk up within a few hours.
  • Cause: Overwatering (Root Rot). Ironically, root rot prevents roots from absorbing water, leading to wilting despite moist soil.
    • Solution: Inspect roots; if mushy, repot in fresh, well-draining soil after trimming diseased roots. Adjust watering frequency.
  • Cause: Temperature Stress. Sudden cold drafts or extreme heat can cause wilting.
    • Solution: Move the plant away from windows, doors, or heating vents where temperatures fluctuate.
Hands gently remove a Fiddle Leaf Fig from its terracotta pot, revealing a healthy root ball on a sunlit urban balcony.
Giving this fig some much-needed room to grow! Happy repotting.

Stunted Growth or No New Growth

  • Cause: Insufficient Light. Plants need light for photosynthesis, which fuels growth.
    • Solution: Move to a brighter location or use a grow light.
  • Cause: Nutrient Deficiency. Lack of essential nutrients inhibits growth.
    • Solution: Fertilize during the active growing season (spring/summer).
  • Cause: Pot-Bound. Roots have filled the pot, restricting growth.
    • Solution: Repot into a slightly larger container.
  • Cause: Dormancy. Many plants naturally slow or stop growth in fall and winter.
    • Solution: This is normal. Reduce watering and stop fertilizing during this period.

By learning to read your plants’ signals, you can quickly become an expert at addressing their needs. Your ability to troubleshoot these common issues will keep your indoor garden flourishing, providing continuous joy and beauty throughout the year.

Person thoughtfully examining an indoor fig tree surrounded by diverse houseplants and a gardening journal in a cozy, sunlit porch.
Finding answers and checking on plants as they settle into their indoor home.

Frequently Asked Questions

Woman gently mists a vibrant fern amidst other healthy houseplants in terracotta and ceramic pots on a wooden table and windowsill.
Your indoor oasis is ready to bring warmth and life through fall and winter.

Q: Can I bring outdoor annuals indoors?

A: Most outdoor annuals are genetically programmed to complete their life cycle in one growing season and typically do not transition well indoors for the winter. Plants like petunias, impatiens, and marigolds usually decline quickly indoors due to insufficient light and humidity, and they are often prone to bringing in heavy pest loads. While you can attempt to overwinter some, such as geraniums or coleus, by taking cuttings or providing exceptional conditions, it is generally more practical to compost them and start fresh with new plants in spring.

Q: Do all houseplants need to be repotted when brought inside?

A: No, not all houseplants require repotting when moved indoors. Repot only if the plant has clearly outgrown its current container, meaning roots are emerging from drainage holes or circling tightly within the pot, or if you suspect significant soil-borne pest issues that a full soil change would resolve. Otherwise, leave the plant in its existing pot. Repotting can be stressful, and combining it with the stress of an environmental change might be too much for the plant. A general rule is to repot in spring when the plant enters its active growing phase, not right before or during its dormant period.

Q: How often should I fertilize my plants once they are indoors for winter?

A: Reduce or completely stop fertilizing your plants once they are indoors for the fall and winter months. Most houseplants naturally enter a period of slower growth or dormancy due to decreased light levels and cooler temperatures. Fertilizing during this time can lead to a buildup of salts in the soil, which can burn roots and cause damage. Resume a regular fertilizing schedule in spring when you observe new, active growth. If you use a slow-release fertilizer, its effectiveness will naturally wane over the winter period, aligning with your plant’s needs.

Q: What if I find pests after bringing plants indoors?

A: If you discover pests after your plants are already indoors, immediately isolate the affected plant to prevent further spread. Begin with physical removal: wipe leaves, pick off larger pests, or spray with a strong stream of water in a sink or shower. For persistent pests, apply an insecticidal soap or neem oil spray, ensuring thorough coverage, especially on leaf undersides. Repeat treatments every 7-10 days for several weeks to break the pest’s life cycle. For fungus gnats, let the soil dry out significantly between waterings and use yellow sticky traps. Consistent monitoring and quick action are essential to control infestations.

Q: Is it safe to use chemical pesticides indoors?

A: Using chemical pesticides indoors requires extreme caution. Many products are not formulated for indoor use and can release harmful fumes, posing risks to humans and pets. Prioritize non-chemical methods like manual removal, water sprays, insecticidal soaps, neem oil, and sticky traps. If you must use a chemical pesticide, choose one specifically labeled for indoor use, apply it in a well-ventilated area (or even take the plant outdoors temporarily), wear appropriate protective gear, and follow all label instructions precisely. Always check if the product is safe for use around children and pets. For trustworthy information regarding pet safety and plants, you can visit ASPCA Animal Poison Control.

A person's hand gently touching a healthy houseplant in a terracotta pot in a sunlit indoor space with other potted plants.
Enjoying the quiet routine of checking in on your indoor plants.

Enjoying Your Indoor Oasis This Fall and Winter

Bringing your houseplants indoors for fall is more than just a chore; it is an opportunity to cultivate a vibrant, living space that combats the grays of winter. By following this comprehensive checklist, you have taken significant steps to ensure a pest-free transition and set your plants up for success. You have proactively protected your garden investment, preventing common indoor gardening frustrations like pest outbreaks and plant decline.

Remember, your role as a gardener shifts slightly indoors. It becomes less about rapid growth and more about consistent care, observation, and providing stable conditions. Pay attention to your plants’ subtle cues; they will communicate their needs through their leaves, growth patterns, and overall vigor. Adjust your watering based on the plant’s actual needs, rather than a rigid schedule. Monitor light levels and supplement if necessary. Prioritize humidity, especially for tropical varieties, to prevent common winter ailments.

As you settle into your indoor gardening routine, you will find immense satisfaction in watching your plants thrive. They will continue to purify your air, add beauty, and bring a sense of calm and connection to nature, even when snow blankets the ground outside. Enjoy the peace and greenery your indoor oasis provides, knowing you have created a healthy environment for both your plants and your home. Your thoughtful efforts now guarantee a flourishing indoor garden throughout the colder months, a testament to your dedication and care.

For trustworthy gardening information, visit:
New York Botanical Garden,
ASPCA Animal Poison Control and
Michigan State University Extension — Gardening. These organizations provide expert, research-based advice for gardeners at all levels.

Disclaimer: This article is for informational purposes only and is not a substitute for professional gardening advice. Always consult local extension services or horticulture experts for region-specific guidance.

Categories
Sustainable & Eco-Friendly

The Case for Native Plants in Urban Gardens

Your urban balcony, patio, or compact yard offers more than just a small patch of green. It represents a vital opportunity to foster biodiversity, conserve resources, and reconnect with nature right where you live. Many urban gardeners aspire to create spaces that are both beautiful and beneficial to the environment. This means embracing sustainable gardening practices that minimize waste, conserve water, and support local ecosystems.

This guide will show you how integrating native plants into your small-space garden transforms it into a thriving habitat. We will explore the compelling reasons to choose native plants, provide practical steps for selecting and caring for them, and offer actionable advice on how to build an eco-friendly garden that benefits both your community and the planet. Discover how native plants urban gardening offers a powerful solution for greener living, even in the smallest spaces.

Vibrant native plants like coneflowers and milkweed thrive in various pots on an urban balcony, with a bumblebee pollinating a flower.

Why Choose Native Plants for Your Urban Garden?

Opting for native plants in your small garden delivers a cascade of benefits, making it a cornerstone of sustainable gardening. These are plants that grow naturally in your local region, evolving alongside your climate, soil, and wildlife. By choosing them, you tap into an inherent resilience and efficiency that non-native species often lack.

Close-up of a striped monarch caterpillar feeding on a vibrant green milkweed plant in a terracotta pot on an urban patio, softly lit.

Ecological Impact: A Thriving Local Ecosystem

Native plants form the foundation of local food webs. They provide essential food, shelter, and breeding grounds for a wide array of insects, birds, and other small animals. For instance, specific native plants serve as host plants for butterfly and moth larvae. Monarch butterflies, for example, rely exclusively on various milkweed species (Asclepias spp.) for their caterpillars. Without milkweed, monarch populations decline drastically. Research from the University of Delaware found that gardens with a higher percentage of native plants support significantly more insect biomass, which in turn feeds local bird populations. A single oak tree, a common native species in many regions, can host over 500 species of caterpillars.

The decline in pollinator populations is a critical environmental concern. Bees, butterflies, and other pollinators are responsible for pollinating roughly 75% of the world’s flowering plants and about 35% of the world’s food crops. Native plants supply the precise nectar, pollen, and habitat these crucial creatures require for survival. Creating an eco-friendly garden with native species directly counters this decline, turning your urban space into a vital refueling station and nursery.

Person relaxing on a patio, surrounded by thriving native plants in various containers, bathed in golden afternoon light.

Low Maintenance: Less Work, More Enjoyment

Because native plants naturally adapt to your local conditions, they require less intervention from you. They withstand regional weather patterns better, whether it is periods of drought, heavy rain, or temperature fluctuations. You spend less time on tasks like watering, fertilizing, and pest control. For example, a study by the Lady Bird Johnson Wildflower Center showed that native landscapes require up to 80% less water than traditional lawns and gardens once established. This translates into significant water savings for you and reduced demands on municipal water supplies.

Native plants also rarely need chemical fertilizers. They thrive in the existing soil conditions, often benefiting from the natural nutrient cycles without external amendments. This eliminates the environmental impact associated with fertilizer production and runoff, which can pollute local waterways. You also reduce exposure to synthetic chemicals in your garden space, creating a healthier environment for your family and pets.

Close-up of a healthy native perennial in a terracotta pot on a patio, soil intact with rain droplets, showing resilience.

Climate Resilience: Adapting to Change

As urban areas face increasing challenges from extreme weather events, native plants offer a degree of resilience that imported species cannot match. Their deep root systems improve soil structure, enhancing water infiltration during heavy rains and increasing drought tolerance. These robust root systems also help prevent soil erosion in containers and raised beds. This inherent hardiness means your garden fares better during heatwaves or unexpected cold snaps, contributing to overall urban climate resilience. You create a garden that is not only beautiful but also robust in the face of a changing climate.

A vibrant arrangement of diverse native plants like purple coneflower and Little Blue Stem grass in mixed pots on an urban patio.

Aesthetic Appeal and Regional Identity

Native plants offer a unique beauty that reflects your region’s natural heritage. They provide a sense of place, connecting your garden to the broader landscape. From vibrant wildflowers to graceful grasses and sturdy shrubs, native options offer diverse textures, colors, and forms. Many bloom sequentially, ensuring continuous interest and a steady food supply for pollinators throughout the growing season. Your eco-friendly garden becomes a living tapestry, showcasing the distinctive flora of your local area and providing continuous visual delight.

A person's hands on a balcony, one gently touching a native aster in a terracotta pot, the other holding a smartphone displaying a plant identificatio

Understanding Your Local Ecosystem: The First Step

Building a successful native plant urban garden begins with understanding your specific local environment. Choosing the right native plants requires knowing what thrives naturally in your area. This involves looking beyond generalized advice and focusing on your regional specifics.

Woman on a sun-dappled balcony looking at a hardiness zone map on a tablet, surrounded by native container plants.

Identify Your Hardiness Zone and Ecoregion

First, pinpoint your USDA Plant Hardiness Zone. This zone tells you the average annual extreme minimum winter temperature for your location. You can easily find this information online. While the hardiness zone helps determine if a plant can survive your winters, it only tells part of the story. For native plants, you also want to consider your ecoregion.

An ecoregion is a larger geographic area defined by its shared climate, geology, hydrology, and vegetation. Understanding your ecoregion helps you choose plants adapted to your specific soil types, rainfall patterns, and pest pressures. For example, a plant native to a dry prairie ecoregion will behave very differently in a humid forest ecoregion, even if they are in the same hardiness zone. You can often find resources from your state’s native plant society or local cooperative extension office that detail native plants specific to your ecoregion.

A nursery specialist, wearing an apron, points to a native plant in a pot while talking to a customer with a notebook, surrounded by potted plants.

Connect with Local Resources

Local nurseries specializing in native plants, botanical gardens, and university extension programs are invaluable resources. These experts understand the nuances of local ecosystems and can guide you toward appropriate selections for your specific urban microclimate. Many offer plant lists tailored to different light conditions, soil types, and moisture levels common in urban settings. They can also advise on sourcing plants that are genetically appropriate for your region, ensuring the greatest ecological benefit.

Be wary of plants labeled simply “native” without further qualification. A plant might be native to your country but not to your specific state or ecoregion. Always seek out plants that are truly native to your local area. This ensures you select plants that are best adapted and provide the most robust ecological support for your specific urban ecosystem. You also avoid inadvertently introducing potentially aggressive or less beneficial species.

An urban balcony garden filled with thriving container plants. In the background corner, English Ivy aggressively creeps from an adjacent space.

Avoiding Invasive Species

When selecting plants, it is crucial to avoid invasive species. These are non-native plants that aggressively spread, outcompeting native flora and disrupting local ecosystems. Common examples include English Ivy, Vinca, and Bradford Pear in many parts of North America. These plants can quickly escape cultivation, spreading into natural areas and causing significant ecological harm. Always cross-reference your plant choices with lists of invasive species for your region, often available through state natural resource departments or native plant societies. You ensure your eco-friendly garden does no harm to the surrounding environment.

A vibrant, well-designed corner of a small urban patio with diverse native plants in various containers and a full vertical garden.

Designing a Thriving Native Space in Small Areas

Transforming a small balcony, patio, or compact yard into a vibrant native plant oasis is entirely achievable with thoughtful design. You can create significant ecological impact even in limited square footage. The key lies in strategic planning and maximizing your available space.

A woman's hand touches a sun-baked brick wall on a small urban balcony, observing intense light and shadows on container plants.

Assess Your Site Conditions

Before buying any plants, understand your site’s specific conditions. Observe how much sun your area receives throughout the day. Is it full sun (6+ hours), partial sun (3-6 hours), or shade (less than 3 hours)? Note any prevailing winds, which can be amplified on balconies, and how rainfall affects your containers or ground. Consider factors like heat reflection from concrete or brick walls, which create a warmer microclimate. You empower yourself to choose plants that will truly thrive.

Urban patio's tiered plant stand displaying various pots (glazed, plastic, terracotta) with native plants and wall-mounted planters, emphasizing verti

Container Choices and Placement

For urban gardeners, containers are often the primary planting medium. Choose pots that are appropriately sized for the mature plant. Larger containers hold more soil, offer better insulation for roots, and retain moisture longer. Materials like terracotta can dry out quickly, while plastic or glazed ceramic retain moisture more effectively. Consider self-watering containers for reduced maintenance, especially during warmer months. Ensure all containers have adequate drainage holes to prevent waterlogging, which can harm native plant roots. You select containers that best support your plants’ needs.

When arranging containers, think vertically. Tiered plant stands, hanging baskets, and wall planters allow you to cultivate more plants in a compact footprint. Cluster containers to create mini-ecosystems. This not only looks aesthetically pleasing but also creates microclimates that reduce evaporation and provide shelter for beneficial insects. You maximize your planting area without expanding its physical footprint.

Close-up view of a large terracotta pot showcasing layered native plants: tall grass, purple asters with a bee, and trailing sedum.

Layering for Biodiversity

Even in small spaces, you can mimic natural plant communities by layering different plant heights. This layering strategy provides diverse habitats and visual interest. Start with taller plants in the back or center, such as native grasses or small shrubs. Add mid-height perennials and then groundcovers or trailing plants around the edges. This creates visual depth and provides different niches for various pollinators and beneficial insects.

For example, in a large container, you might plant a native aster (mid-height) with a shorter native sedum (groundcover) and a small native grass (tall accent). This approach boosts biodiversity and enhances the aesthetic appeal of your eco-friendly garden. The complex structure provides more hiding places and food sources for wildlife.

Layered container diagram: Tall grass, wildflower, & groundcover in pot. Labels indicate plant height & root depth. On patio.

Sunny native succulents in terracotta pots contrasting with shady native ferns in dark ceramic pots on a small urban patio.

Strategic Plant Grouping

Group plants with similar light and water requirements together. This simplifies watering and maintenance. For instance, drought-tolerant native succulents and cacti thrive in sunny, well-drained containers, while native ferns and foamflowers prefer shadier, moister conditions. By matching plants to their preferred conditions, you reduce plant stress and create a more harmonious, low-maintenance garden. This strategic grouping allows each plant to flourish optimally, leading to a healthier, more vibrant display.

Established native plants in terracotta and ceramic pots thrive on a balcony, their healthy foliage contrasting with dry topsoil, demonstrating water

Water-Wise Practices for Native Plant Gardens

One of the most compelling advantages of choosing native plants for your urban garden is their inherent water efficiency. Once established, many native species require significantly less water than their non-native counterparts, making them a cornerstone of sustainable gardening. You achieve a beautiful garden while conserving a precious resource.

Close-up of hands gently checking soil and leaves of a vibrant native plant in a ceramic pot on a sunny balcony, with a copper watering can nearby.

Understand Native Plant Water Needs

While native plants are generally drought-tolerant, they still need consistent watering during their establishment phase, typically the first growing season. After this, their robust root systems allow them to tap into deeper soil moisture and withstand dry spells. Monitor your plants closely. Wilting leaves are a clear sign of thirst, but overwatering can be equally detrimental, leading to root rot. You learn to read your plants’ signals, ensuring they receive just the right amount of water.

Water draining from the bottom of a concrete planter onto a patio, showing thorough watering for a native plant.

Deep and Infrequent Watering

Instead of frequent shallow sprinklings, practice deep and infrequent watering. This encourages native plants to develop those strong, deep root systems. Water thoroughly until moisture drains from the bottom of your containers or penetrates deep into the soil of your garden bed. Then, allow the top few inches of soil to dry out before watering again. You can check soil moisture by sticking your finger into the soil. This method trains plants to seek water deeper down, making them more resilient during dry periods.

A gardener's hand applies dark shredded bark mulch to a vibrant native plant in a grey pot, surrounded by other mulched containers on a sunny patio.

The Power of Mulch

Mulching is a simple yet incredibly effective water-saving technique. Apply a 2-4 inch layer of organic mulch, such as shredded bark, wood chips, or compost, around the base of your plants in containers and garden beds. Keep the mulch a few inches away from plant stems to prevent rot. Mulch suppresses weeds, which compete for water and nutrients. Crucially, it significantly reduces soil moisture evaporation, meaning you water less often. Mulch also helps regulate soil temperature, keeping roots cooler in summer and warmer in winter. You conserve water and improve soil health simultaneously.

Dark green rain barrel on an elevated stand connected to a downspout on an urban patio, surrounded by container plants. A person turns the spigot.

Rain Capture Basics for Urban Settings

Harnessing rainwater is an excellent way to supplement your watering needs and reduce reliance on municipal water, contributing significantly to your eco-friendly garden efforts. For small urban spaces, rain barrels are a practical solution. A simple rain barrel connected to a downspout can collect hundreds of gallons of water during a single rain event.

Steps for Implementing a Rain Barrel:

  1. Select a Location: Choose a spot near a downspout that is level and stable.
  2. Prepare the Downspout: You may need to cut your existing downspout and install a diverter kit.
  3. Elevate the Barrel: Place your rain barrel on a sturdy, elevated stand to allow gravity-fed watering.
  4. Connect the Overflow: Ensure the barrel has an overflow hose directed away from your foundation to prevent water damage.
  5. Secure the Lid: A secure lid is essential to prevent mosquito breeding and keep debris out.

Always check local regulations regarding rain barrel installation, as some areas have specific guidelines. Rainwater is free of chlorine and other chemicals found in tap water, making it excellent for your native plants. You collect valuable water and reduce your environmental footprint.

For research-based sustainable gardening guidance, see
EPA WaterSense — Outdoor Water Use.

Close-up of gardener's hands gently sifting rich, dark organic potting mix in a terracotta container on a balcony table, preparing for native plants.

Nurturing Soil Health for Native Containers

Healthy soil forms the bedrock of a thriving native plant garden, especially in containers where soil volume is limited. For urban gardeners aiming for sustainable gardening, focusing on soil health means selecting appropriate potting mixes and understanding how to maintain their vitality over time. You ensure your native plants receive the best possible start and sustained growth.

Hands mixing peat-free potting mix with compost, coir, and perlite in a metal trug, with native plant seedlings and containers in the background.

Peat-Free Potting Mixes: A Sustainable Choice

Traditional potting mixes often contain peat moss, a non-renewable resource harvested from peat bogs. Peat bogs are vital carbon sinks, and their destruction releases significant amounts of greenhouse gases. Opting for peat-free potting mixes supports environmental conservation. These sustainable alternatives are widely available and perform just as well, if not better, for many native plants.

Common Ingredients in Peat-Free Mixes:

  • Composted Bark or Wood Fiber: Provides structure, aeration, and some nutrients.
  • Coconut Coir: A renewable byproduct of coconut harvesting, offering excellent water retention and aeration.
  • Perlite or Vermiculite: Improves drainage and aeration, crucial for preventing compacted soil.
  • Compost: Adds a rich source of slow-release nutrients and beneficial microbes.
  • Worm Castings: Highly effective natural fertilizer and soil enhancer.

When selecting a mix, look for brands specifically labeled “peat-free” or “organic potting mix.” You choose a product that aligns with eco-friendly garden principles.

Close-up of hands gently sprinkling dark, rich compost around a healthy native plant in a terracotta pot.

Enhancing Container Soil with Organic Amendments

Over time, container soil can deplete in nutrients and lose its structure. To maintain optimal health for your native plants, regularly incorporate organic amendments. High-quality compost or worm castings are excellent choices. They slowly release nutrients, enhance microbial activity, and improve soil structure. You can top-dress containers with a thin layer of compost annually or mix it into the top few inches of soil when refreshing your pots.

Avoid synthetic, fast-release fertilizers, which can harm beneficial soil microbes and lead to nutrient runoff. Native plants generally adapt well to nutrient-poor soils, and a healthy soil food web provides most of what they need. You support a living soil system, not just a growing medium.

For research-based sustainable gardening guidance, see
USDA NRCS — Soil Health.

Urban gardener flushes a terracotta pot on a balcony, water draining, subtle salt crust visible. Lush container plants thrive nearby.

Preventing Salt Buildup

In containers, dissolved minerals from tap water and fertilizers can accumulate, leading to salt buildup. This appears as a white crust on the rim of pots or on the soil surface. High salt concentrations can damage plant roots. To prevent this, periodically flush your containers with plain water. Water thoroughly until water drains freely from the bottom for several minutes. This washes away excess salts. Using collected rainwater, which is naturally soft, also helps minimize salt accumulation. You maintain a balanced environment for your native plants, promoting their long-term health.

Monarch butterfly on a purple coneflower in an urban container garden with bee balm and a bumblebee in golden light.

Supporting Pollinators and Wildlife: Plant Selection

The primary reason to incorporate native plants into your urban garden is their unparalleled ability to support local pollinators and wildlife. Your garden transforms from a decorative space into a vital ecological hub. You create a vibrant, living ecosystem in miniature.

A vibrant Black Swallowtail caterpillar actively feeds on fresh dill in a terracotta pot on a sunny urban patio, surrounded by other native container

Host Plants: Nurseries for Native Insects

Beyond providing nectar and pollen, many native plants serve as host plants for specific insect larvae, especially butterflies and moths. These plants are crucial for completing the insect life cycle. Without host plants, these insects cannot reproduce. For example, caterpillars of the Black Swallowtail butterfly feed on plants in the carrot family, such as native parsley or dill, while Spicebush Swallowtail caterpillars rely on Spicebush and Sassafras trees. Including these specific host plants ensures you support the full life cycle of these important insects, not just the adult stage. You become a crucial part of local biodiversity conservation.

A bumblebee actively gathers pollen from a purple coneflower among diverse native plants in containers on an urban patio.

Nectar and Pollen Sources: Fuel for Foragers

Choose native plants that offer abundant nectar and pollen throughout the growing season. A diverse selection ensures a continuous food supply for different types of pollinators. Different flower shapes and colors attract different pollinators: long tubular flowers for hummingbirds, flat composite flowers for bees and flies, and large landing pads for butterflies. You provide a comprehensive menu for all local visitors.

Close-up of three native plants in pots on a balcony: a purple aster with a tiny hoverfly, a fading coneflower, and green geranium leaves.

Creating a Continuous Bloom Sequence

Plan your planting to ensure something is always in bloom from early spring through late fall. This continuous sequence provides a steady food source for pollinators throughout their active periods. Early spring blooms like native pussy willow or spring ephemerals provide critical sustenance for emerging queen bees. Mid-summer flowers attract a wide array of insects, while late-season asters and goldenrods offer essential fuel for migrating butterflies and bees preparing for winter. You sustain local wildlife throughout the entire growing season.

Example Native Plants for Pollinator Support (adjust for your region):

Bloom Season Example Plants Attracts Host Plant For
Early Spring Wild Geranium (Geranium maculatum), Virginia Bluebells (Mertensia virginica) Early bees, small butterflies
Mid-Spring Columbine (Aquilegia canadensis), Bleeding Heart (Dicentra spectabilis) Bumblebees, hummingbirds
Early Summer Milkweed (Asclepias tuberosa), Coneflower (Echinacea purpurea) Bees, butterflies, hummingbirds Monarch butterflies (milkweed)
Mid-Summer Blazing Star (Liatris spicata), Bee Balm (Monarda spp.) Bees, butterflies, hummingbirds
Late Summer/Fall Asters (Symphyotrichum spp.), Goldenrod (Solidago spp.), Ironweed (Vernonia noveboracensis) Migrating butterflies, late bees

For more research-based sustainable gardening guidance on this topic, see
Pollinator Partnership — Garden for Pollinators.

A small urban patio features a ceramic bird bath with stones, a container with bare soil for bees, and a bundle of hollow bamboo stems for insect shel

Providing Shelter and Water

Beyond plants, your garden can offer essential shelter and water sources. A shallow bird bath with stones provides a safe drinking and bathing spot for birds and small insects. Leaving some bare soil or a small patch of stems allows ground-nesting bees or overwintering insects a place to reside. Consider a small brush pile or a collection of hollow stems for cavity-nesting bees. You create a truly comprehensive habitat for local wildlife.

A brilliant red ladybug actively crawls across a vibrant green New England aster leaf in a terracotta pot on an urban balcony.

Safe Pest Management in Native Gardens

Embracing native plants in your urban garden naturally reduces pest problems, making your sustainable gardening journey simpler and more rewarding. A healthy native ecosystem inherently includes natural pest controls. You work with nature, not against it, to manage unwanted visitors.

A woman in her 40s calmly inspects a native plant's leaf in a terracotta pot on an urban patio, amidst other thriving container gardens.

Integrated Pest Management (IPM): Your First Line of Defense

Integrated Pest Management, or IPM, is a holistic approach that prioritizes prevention, monitoring, and non-chemical interventions. It is the gold standard for eco-friendly garden pest control. IPM focuses on creating a balanced environment where pests are kept in check by natural processes.

Prevention: Building a Resilient Garden

  • Choose the Right Plants: Healthy native plants, correctly sited, are naturally more resistant to pests and diseases. They are adapted to your local climate and soil conditions, reducing stress that makes them vulnerable.
  • Promote Soil Health: As discussed, healthy soil leads to healthy plants. Rich, biologically active soil helps plants fend off pests.
  • Encourage Biodiversity: A diverse array of native plants attracts a wide range of beneficial insects. These predators and parasites feed on garden pests, providing natural pest control. Think ladybugs eating aphids, lacewings consuming mealybugs, and parasitic wasps targeting caterpillars.
  • Good Sanitation: Remove diseased plant material and fallen leaves promptly to reduce overwintering sites for pests and pathogens.

Monitoring: Early Detection is Key

Regularly inspect your plants for signs of pests. Catching an infestation early makes it much easier to manage. Look for chewed leaves, sticky residues (honeydew), discolored foliage, or the presence of the pests themselves. Pay close attention to the undersides of leaves and new growth, where pests often congregate. You empower yourself to act decisively before small problems become big ones.

Mechanical and Cultural Controls: Hands-On Solutions

When pests appear, start with non-toxic, physical methods:

  • Hand-picking: For larger pests like slugs, snails, or some caterpillars, simply pick them off and remove them.
  • Strong Water Spray: A jet of water can dislodge aphids, spider mites, and whiteflies from plants. Repeat every few days until the pests are gone.
  • Barriers: Use row covers for vegetable gardens to prevent flying insects from laying eggs. Copper tape around containers can deter slugs.
  • Pruning: Remove heavily infested branches or leaves to reduce pest populations.

Woman's hand carefully sprays a fine mist onto a basil plant's leaf in a terracotta pot on a balcony railing.

Least-Toxic Options: When You Need More Help

If mechanical controls are insufficient, consider least-toxic options. Always read labels carefully and follow instructions, even for organic products.

  • Insecticidal Soaps: Effective against soft-bodied insects like aphids, mealybugs, and spider mites. They work by smothering the pests. Apply in the early morning or late evening to avoid burning foliage and to protect beneficial insects that are less active at these times.
  • Horticultural Oils: Similar to insecticidal soaps, these suffocate pests. They can also be used to control some fungal diseases.
  • Neem Oil: A botanical insecticide that disrupts insect feeding and growth. It has low toxicity to mammals and birds, but can still harm beneficial insects if applied improperly. Apply judiciously and according to label directions.

Always remember that pesticides, even organic ones, can harm beneficial insects. Use them as a last resort and target applications specifically to affected areas. You protect the delicate balance of your eco-friendly garden ecosystem.

Hands filling a fabric grow bag with organic potting mix on a wooden table, surrounded by other sustainable containers like terracotta and recycled pl

Sustainable Materials for Your Eco-Garden

Every choice you make, from your potting mix to your plant containers, impacts your garden’s overall sustainability. Embracing an eco-friendly garden means consciously selecting materials that minimize environmental harm and maximize resource efficiency. You extend your commitment to sustainable gardening beyond the plants themselves.

A sunlit urban patio corner featuring diverse upcycled planters, including a wooden crate, plastic tote, and metal olive oil tin, all holding thriving

Upcycling Containers: Give New Life to Old Items

One of the easiest ways to reduce waste in your urban garden is to upcycle everyday items into planters. Look around your home for objects that can be repurposed. Old tires, plastic storage bins, metal buckets, wooden crates, and even large food containers (like olive oil tins or coffee cans) can make excellent, unique planters. Ensure anything you use has adequate drainage holes drilled into the bottom to prevent waterlogging, which can be detrimental to your native plants.

When using repurposed materials, consider their safety. Avoid containers that held toxic chemicals. For plastic containers, choose food-grade plastics if you plan to grow edibles, though for native ornamentals, a wider range of plastics is acceptable. You reduce waste, save money, and add a unique, personal touch to your garden.

Person on an urban balcony arranging new sustainable containers: terracotta pot, fabric grow bag, recycled plastic planter, FSC wood box.

Choosing Sustainable New Containers

If you purchase new containers, prioritize sustainable options. Look for pots made from:

  • Recycled Plastic: Many manufacturers now produce planters from post-consumer recycled plastic. This diverts waste from landfills and reduces demand for virgin plastic.
  • FSC-Certified Wood: If using wooden planters or raised beds, ensure the wood is certified by the Forest Stewardship Council (FSC). This guarantees the wood comes from responsibly managed forests.
  • Terracotta or Ceramic: While production has an energy footprint, these materials are durable and natural. Glazed ceramic pots retain moisture well, making them suitable for many native plants.
  • Fabric Grow Bags: Made from breathable, recycled fabric, these are lightweight, promote air pruning of roots, and are reusable. They are particularly good for temporary setups or if you move your garden frequently.

Avoid single-use plastic pots where possible. When you do acquire plants in them, clean and reuse them for seed starting or future propagation, or find a local recycling program that accepts them. You make conscious choices that support environmental responsibility.

Hands applying natural wood oil to a slatted wooden planter box on a patio, an eco-friendly oil tin visible.

Non-Toxic Finishes and Treatments

If you build or refinish garden structures, use non-toxic or low-VOC (volatile organic compound) paints, stains, and sealants. This protects your plants, the local ecosystem, and your own health. For wooden items, consider natural oils or paints specifically designed for outdoor use with minimal environmental impact. You avoid introducing harmful chemicals into your eco-friendly garden environment.

Vibrant multi-tiered vertical planter on an urban balcony, brimming with diverse native grasses, wildflowers, and sedums in dappled light.

Frequently Asked Questions

What if my urban space is mostly shade? Can I still grow native plants?

Absolutely. Many native plants thrive in shaded conditions. Research native plants specific to your ecoregion that naturally grow in woodland understories. Examples include native ferns, wild ginger, foamflower, and various native sedges. You will find a surprising diversity of beautiful shade-loving options for your eco-friendly garden.

How do I know if a plant is truly native to my specific area?

The best way to confirm local nativity is to consult your state’s native plant society, a local university extension office, or a reputable native plant nursery. Many online databases also allow you to filter by state and ecoregion. Always prioritize plants listed as native to your specific county or ecoregion over broader “native to the continent” labels. You ensure your choices truly support local ecosystems.

Are native plants safe for pets and children?

Many native plants are perfectly safe, but some can be toxic if ingested. It is always wise to research the specific plants you choose, especially if you have curious pets or young children. Websites like the ASPCA provide comprehensive lists of toxic and non-toxic plants. When in doubt, prioritize plants known to be safe or place potentially toxic ones out of reach. You create a safe and enjoyable space for everyone.

Can I start native plants from seed in containers?

Yes, many native plants grow well from seed in containers. Some native seeds require a period of “cold stratification” (exposure to cold, moist conditions) to germinate, mimicking natural winter conditions. You can achieve this by placing seeds in moist potting mix in a refrigerator for a few weeks or by planting them outdoors in containers in late fall for natural stratification over winter. You enjoy the rewarding process of growing your own native plants.

For research-based sustainable gardening guidance, see
Pollinator Partnership — Garden for Pollinators, EPA WaterSense — Outdoor Water Use and USDA NRCS — Soil Health.

Disclaimer: This article is for informational purposes only and is not a substitute for professional advice. Check local regulations before installing rain capture, using greywater, or composting food scraps outdoors.

Categories
Indoor Plants

Propagation 101: How to Multiply Your Plants

Expanding your indoor plant collection does not require constant trips to the nursery. You can easily multiply your favorite houseplants, creating new specimens from existing ones. This practice, known as plant propagation, offers a rewarding, sustainable, and budget-friendly way to fill your home with greenery, especially for those living in compact spaces. It allows you to share plants with friends, replace declining specimens, or simply grow new plants for yourself, all while deepening your understanding of plant life cycles.

Learning how to propagate plants transforms you into a more confident and self-sufficient plant parent. You will discover the resilience of your plants and unlock an endless supply of green companions. This guide provides practical, actionable insights for beginner and intermediate plant keepers, ensuring your efforts to grow new plants are successful and enjoyable.

Person's hands gently potting a rooted houseplant cutting into a small pot on a patio table, surrounded by various propagated plants.

Why Propagate Your Houseplants?

Propagating your houseplants offers numerous benefits beyond simply increasing your plant count. You gain a deeper connection to your plants by observing their growth cycles and assisting in their reproduction. This process helps you understand your plants at a fundamental level, making you a more knowledgeable and intuitive gardener.

  • Cost Savings: Instead of buying new plants, you create them for free. This significantly reduces your gardening expenses, allowing you to grow a vibrant collection without financial strain.
  • Sharing and Gifting: Propagated plants make thoughtful, personalized gifts. Share your plant bounty with friends, family, or fellow plant enthusiasts, spreading green joy and fostering community.
  • Replacing and Refreshing: When a favorite plant becomes leggy, overgrown, or shows signs of decline, you can take cuttings to create a rejuvenated version. This ensures the plant’s legacy continues, even if the parent plant eventually fades. It also helps manage plant size in small spaces.
  • Learning and Experimentation: Propagation is a hands-on learning experience. You experiment with different methods, observe root development, and gain a practical understanding of plant biology. This builds confidence and provides a rewarding sense of accomplishment.
  • Environmental Sustainability: By propagating existing plants, you reduce the demand for commercially grown plants, which often travel long distances and contribute to carbon emissions. You also decrease waste by using cuttings that might otherwise be discarded. Using recycled materials for propagation further enhances this sustainable approach.
  • Space Management: For apartment dwellers, propagation offers a clever way to keep plant sizes manageable. You can take cuttings from a large plant, creating smaller versions that fit your compact living area.

The satisfaction of watching a tiny cutting develop roots and grow into a full-fledged plant is immense. This simple act transforms you into a creator, connecting you more intimately with the natural world right inside your home. It proves that gardening does not require vast outdoor spaces. You can cultivate a thriving, expanding garden right on your windowsill or shelf.

A sunlit patio table showcasing plant propagation: Pothos plant, Philodendron stem cutting in water, succulent leaves on soil, and snips.

Understanding Propagation Methods

Various methods exist for propagating plants, each suited to different plant types and offering unique advantages. Understanding these methods helps you choose the most effective approach for your specific plant. Most houseplants fall into categories that respond well to vegetative propagation, which involves taking a piece of the parent plant to grow a genetically identical new one.

  • Stem Cuttings: This is arguably the most common and easiest method for many houseplants. It involves taking a section of a stem that includes at least one node, the point where leaves or branches emerge. Many popular plants like Pothos, Philodendron, and Monstera root readily from stem cuttings.
  • Leaf Cuttings: Certain plants can grow an entirely new plant from a single leaf. Succulents, such as Sedum and Echeveria, are excellent candidates for leaf propagation, as are African Violets and Sansevieria. This method often requires more patience, but yields charming results.
  • Division: For plants that grow in clumps, like Snake Plants (Sansevieria) or certain Ferns, dividing the root ball is a straightforward way to create new plants. You simply separate the plant into smaller sections, ensuring each section has roots and some foliage.
  • Air Layering: This method involves encouraging roots to form on a stem while it is still attached to the parent plant. It works well for larger, woody plants like Ficus or Dracaena. While more advanced, it offers a high success rate for establishing larger new plants.
  • Offsets/Pups: Some plants naturally produce “babies” or “pups” at their base or along stolons. Spider Plants, Aloe Vera, and many succulents are examples. You simply detach these offsets and plant them as new individuals.

For most indoor gardeners focused on common houseplants and ease of use, stem cuttings, leaf cuttings, and division will be your primary go-to methods. These techniques do not require specialized equipment and generally yield high success rates with minimal effort.

Essential plant propagation tools laid out on a potting bench: clean pruners, spray bottle, starter pots, seed mix, rooting hormone, labels.

Essential Tools and Supplies for Successful Propagation

Successful plant propagation begins with having the right tools and supplies. You do not need an extensive collection of expensive equipment. A few basic items ensure clean cuts, healthy rooting, and a smooth process. Prioritizing cleanliness is crucial to prevent the spread of diseases and maximize your success rate.

Hands meticulously sterilizing small pruning shears with rubbing alcohol on a sunlit patio table, with rooting hormone nearby.

Key Tools:

  • Sharp Scissors or Pruning Shears: A clean, sharp cut minimizes damage to the parent plant and the cutting, promoting faster healing and reducing the risk of infection. Use small, sharp scissors for delicate stems and pruning shears for thicker ones.
  • Rubbing Alcohol: Always sterilize your cutting tools before and after each use. A quick wipe with a cotton pad soaked in rubbing alcohol prevents the transfer of pests or diseases between plants.
  • Rooting Hormone (Optional, but Recommended): Rooting hormone, available in powder or gel form, contains auxins that encourage root development. While many plants root without it, applying a small amount to the cut end of your stem or leaf cutting can significantly increase success rates and speed up rooting, particularly for more challenging species.

Collection of clear glass jars, small pots, and peat-free potting mix on a patio table, ready for plant propagation.

Supplies for Rooting:

  • Small Containers for Water Propagation: Clear glass jars, bottles, or small vases work perfectly. Transparency allows you to monitor root development easily. Repurpose old glass food jars to practice eco-friendly propagation.
  • Small Pots or Trays for Soil Propagation: Use containers with drainage holes. Seedling trays, small plastic pots, or even repurposed yogurt cups with poked holes work well. Size matters; too large a pot holds excess moisture, inviting rot. A 2-4 inch pot is generally sufficient for a single cutting.
  • Peat-Free Potting Mix or Seed Starting Mix: Choose a well-draining, lightweight mix. Peat-free options are environmentally conscious and effective. Look for mixes containing perlite or vermiculite for aeration. A good mix prevents waterlogging, which can lead to rot. For succulents, a specialized cactus or succulent mix provides the necessary drainage. For more information on sustainable mixes, organizations like the University of Minnesota Extension offer excellent resources on soil and compost.

A small terracotta pot with green plant cuttings, covered by a clear plastic bag with condensation, sitting on a dark green heat mat on a windowsill.

Environmental Aids:

  • Humidity Dome or Clear Plastic Bag: For cuttings that require high humidity, a clear plastic dome or a Ziploc bag placed over the pot creates a miniature greenhouse effect. This helps prevent desiccation of the cutting while it focuses energy on root production.
  • Heat Mat (Optional): A propagation heat mat provides gentle bottom heat, which can accelerate root development, especially during cooler months or for plants that prefer warmer soil temperatures.

By gathering these simple items, you prepare yourself for a smooth and successful propagation journey. Remember, the key is cleanliness and creating an optimal environment for your tiny plant hopefuls.

A person's hands carefully hold a healthy, freshly cut Pothos stem, featuring a clean cut end and a visible node, set against a softly blurred backgro

Mastering Stem Cuttings: A Step-by-Step Guide

Stem cuttings represent one of the most reliable and popular methods for multiplying a wide range of common houseplants. This section guides you through the process, ensuring you make healthy cuts and provide the best chance for new roots to form.

A person's hands use small pruning shears to cut a Pothos stem below a node on a sunlit balcony, propagating the plant.

Step-by-Step Process for Stem Cuttings:

  1. Identify a Healthy Stem: Choose a vigorous, non-flowering stem from the parent plant. Look for a stem with at least 2-3 nodes. A node is where leaves or aerial roots emerge. These nodes contain dormant meristematic cells, which are crucial for root development. Avoid overly woody or extremely soft, new growth.
  2. Make the Cut: Using your sterilized sharp scissors or pruning shears, make a clean cut about 0.5 to 1 inch (1-2.5 cm) below a node. The cutting should be 4-6 inches (10-15 cm) long, though this can vary by plant. For trailing plants like Pothos or Philodendron, aim for a section with 2-3 leaves.
  3. Prepare the Cutting: Remove any leaves from the bottom 1-2 nodes. These lower leaves would be submerged in water or buried in soil and would rot, potentially causing fungal issues. If using rooting hormone, dip the cut end and the exposed nodes into the powder or gel, tapping off any excess.
  4. Choose Your Rooting Medium: Decide whether you will root in water or soil. Both methods are effective, but some plants show preference or greater success with one over the other. The “Rooting Mediums: Water Versus Soil” section later in this article offers detailed guidance on this choice.
  5. Place the Cutting:
    • For Water Propagation: Place the prepared cutting into a clean jar or glass filled with fresh water. Ensure at least one node is submerged and no leaves are in the water. Position the jar in a location receiving bright, indirect light.
    • For Soil Propagation: Gently insert the cutting into a small pot filled with moist, well-draining potting mix. Ensure at least one node is buried in the soil. Firm the soil lightly around the cutting to provide stability.
  6. Provide Optimal Conditions:
    • Light: All cuttings, regardless of medium, thrive in bright, indirect light. Direct sun can scorch delicate new growth and deplete moisture too quickly.
    • Humidity: Many cuttings benefit from increased humidity. If rooting in soil, cover the pot with a clear plastic bag or a humidity dome to create a mini-greenhouse effect. Vent it occasionally to prevent mold.
    • Temperature: Maintain a consistent room temperature, ideally between 65-75°F (18-24°C).
  7. Monitor and Maintain:
    • For Water Cuttings: Change the water every few days to prevent bacterial growth. You should see roots developing within a few weeks, depending on the plant.
    • For Soil Cuttings: Keep the soil consistently moist but not soggy. Mist the cutting periodically if not under a humidity dome. Gently tug on the cutting after a few weeks; resistance indicates root formation.
  8. Potting Up (for water-rooted cuttings): Once roots are 1-2 inches (2.5-5 cm) long, pot the cutting into a small pot with a well-draining potting mix. Transitioning water-rooted plants to soil requires careful watering initially, as water roots are different from soil roots. Keep the soil consistently moist for the first few weeks to ease the transition.

Popular plants that thrive with stem cuttings include Pothos, Philodendron, Monstera, Coleus, Tradescantia, and many types of Peperomia. With consistent care and a little patience, you will soon have a thriving new plant.

Overhead view of various succulent leaves propagating in a terracotta tray on a weathered wooden table, some showing delicate roots and new sprouts.

Leaf Cuttings and Other Techniques

While stem cuttings are versatile, some plants prefer or respond better to other propagation methods. Leaf cuttings, division, and offsets are fantastic ways to multiply specific types of houseplants, often with minimal effort.

Macro photo showing a succulent leaf cutting with new roots and a tiny plantlet growing from it in a small terracotta pot on a sunny balcony.

Leaf Cuttings:

Leaf propagation is particularly effective for plants with thick, fleshy leaves that store water and nutrients, such as succulents. The entire leaf, or a portion of it, can produce a new plant. This method requires patience, as new growth can take weeks or even months to appear.

Leaf Cutting Process:

  1. Select a Healthy Leaf: Choose a firm, undamaged leaf from the parent plant. For succulents, gently twist or snap the entire leaf off the stem, ensuring the base of the leaf remains intact. For African Violets, cut a healthy leaf with about 1-2 inches (2.5-5 cm) of petiole (leaf stem) attached.
  2. Callus (for Succulents): Allow succulent leaves to “callus over” for 2-7 days by leaving them in a dry, well-ventilated spot. This dry scab prevents rot when the leaf is exposed to moisture.
  3. Planting the Leaf:
    • For Succulents: Lay the callused leaf flat on top of a well-draining succulent potting mix. Alternatively, you can gently insert the callused end into the soil.
    • For African Violets: Insert the petiole of the leaf cutting into moist, peat-free seed starting mix or perlite, ensuring the base of the leaf blade is just above the soil surface.
  4. Provide Care:
    • Light: Place leaf cuttings in bright, indirect light.
    • Watering: Mist succulent leaves lightly every few days, or when the soil surface is dry, to encourage root formation. For African Violets, keep the medium consistently moist but not soggy.
    • Humidity: African Violet leaf cuttings benefit from a humidity dome or clear plastic bag.
  5. Observe Growth: After several weeks or months, you will see tiny roots emerging from the base of the succulent leaf, followed by a tiny “pup” or new plantlet. For African Violets, new plantlets will emerge from the base of the petiole. Once the new plant is established and the mother leaf shrivels, you can separate and pot the new plant.

Plants suitable for leaf cuttings include Sansevieria (Snake Plant), Echeveria, Sedum, Kalanchoe, and African Violets.

A gardener's hands gently divide the root ball of a purple Heuchera plant, separating it into two smaller clumps on a weathered wooden patio table.

Division:

Division is the simplest method for many clumping plants, requiring minimal preparation and offering immediate results. This method is ideal for plants that grow multiple stems from a central root system, creating natural clumps.

Division Process:

  1. Remove from Pot: Gently remove the parent plant from its pot. Loosen excess soil to expose the root ball.
  2. Identify Divisions: Look for natural sections or clumps with their own roots and foliage. For very dense plants, you might need to use a clean, sharp knife to carefully cut through the root ball. For Snake Plants, you can often snap off individual “pups” with a small section of rhizome attached.
  3. Separate: Carefully pull or cut the plant into smaller sections, ensuring each new division has a healthy portion of roots and at least a few leaves.
  4. Pot Up: Plant each division into its own pot filled with fresh, well-draining potting mix. Water thoroughly after potting.

Excellent candidates for division include Spider Plants (by detaching plantlets), Snake Plants, Peace Lilies, many Ferns, and prayer plants.

Eye-level close-up of a vibrant Echeveria succulent in a terracotta pot with multiple small 'pups' at its base, a hand gently reaching towards one.

Offsets/Pups:

Some plants conveniently produce small, miniature versions of themselves, known as offsets or pups. These are essentially pre-propagated plants ready for separation.

Offset Separation Process:

  1. Identify a Mature Offset: Wait until the offset is a reasonable size, typically at least one-third the size of the parent plant, and has developed its own root system (if visible).
  2. Separate: Use clean, sharp scissors or a knife to carefully cut the stolon (connecting stem) or detach the offset from the base of the parent plant. For plants like Aloe Vera, gently dig around the base to find the small pups and carefully sever their connection to the mother plant.
  3. Plant: Pot the offset directly into a small pot with appropriate potting mix.

Spider Plants, Aloe Vera, and various succulents frequently produce offsets ready for propagation. This method is incredibly easy and has a very high success rate.

Pothos and Coleus cuttings with visible roots in glass jars of water, next to Impatiens and Geranium cuttings in soil in terracotta pots on a sunny ba

Rooting Mediums: Water Versus Soil

When you have your cuttings prepared, the next decision involves choosing a rooting medium. The two primary options are water and soil. Each has advantages and disadvantages, and your choice often depends on the plant species, your personal preference, and the environment you can provide.

A tidy collection of Pothos, Tradescantia, and basil cuttings in clear glass jars on a modern patio table, vividly displaying healthy white roots deve

Water Propagation:

Water propagation is popular because it allows you to visibly watch roots develop, which many find highly satisfying. It is also cleaner and less prone to certain soil-borne pests. Many common houseplants root readily in water.

Advantages of Water Propagation:

  • Visual Appeal: You can observe the entire rooting process, making it an engaging and educational experience.
  • Ease of Setup: Requires only a glass container and water. It is ideal for small living spaces where minimal mess is a priority.
  • Reduced Rot Risk (initially): For some plants, water allows the cutting to focus solely on root production without the immediate challenge of adapting to soil microorganisms.
  • Convenience: Less prone to fungal issues compared to overly wet soil.

Disadvantages of Water Propagation:

  • Root Transition Challenges: Roots that develop in water are physiologically different from soil roots. They are often thinner and less robust. Transplanting a water-rooted plant into soil can be a shock, sometimes leading to “transplant melt” or stunted growth as the plant adapts.
  • Nutrient Deficiency: Water contains no nutrients. Once roots form, the cutting needs to be moved to soil to access essential minerals for sustained growth. Leaving plants in water too long can lead to nutrient deficiencies.
  • Algae Growth: Stagnant water can encourage algae, though this is usually harmless. Changing the water regularly helps prevent it.

Tips for Water Propagation:

  • Use clean, non-chlorinated water (tap water left out for 24 hours or filtered water works).
  • Change the water every 2-3 days to provide fresh oxygen and prevent bacterial buildup.
  • Place cuttings in bright, indirect light.
  • Pot up cuttings when roots are 1-2 inches (2.5-5 cm) long. Longer roots make the transition to soil harder.

Plants that do exceptionally well in water include Pothos, Philodendron, Tradescantia, Basil, and many types of mint.

A person's hands gently plant a colorful coleus cutting into a small terracotta pot on a rustic balcony table.

Soil Propagation:

Rooting cuttings directly in soil mimics their natural growth environment and can lead to stronger, more robust root systems from the start. This method often results in a smoother transition to long-term growth.

Advantages of Soil Propagation:

  • Natural Root Development: Roots formed in soil are accustomed to the soil environment, making the transition to a larger pot seamless.
  • Nutrient Access: Soil provides immediate access to nutrients, supporting healthier overall growth from the outset.
  • Stability: Cuttings are generally more stable when planted in soil, which is beneficial for plants with larger leaves or stems.

Disadvantages of Soil Propagation:

  • Monitoring Difficulty: You cannot see root development, making it harder to gauge progress.
  • Rot Risk: Overwatering or using a heavy, poorly draining soil mix significantly increases the risk of rot before roots can form.
  • Pest Potential: Soil can harbor fungus gnats or other pests, especially if kept too wet.

Tips for Soil Propagation:

  • Use a lightweight, well-draining, peat-free potting mix. A mix of equal parts potting soil, perlite, and coarse sand often works well.
  • Moisten the soil lightly before inserting cuttings.
  • Ensure at least one node is buried for root development.
  • Provide high humidity, especially for plants prone to wilting. A clear plastic bag or humidity dome helps.
  • Keep the soil consistently moist but never soggy. Use your finger to check the top inch of soil; if it feels almost dry, it is time to water.
  • Place pots in bright, indirect light and a warm spot.

Many plants succeed with soil propagation, including most succulents, Sansevieria, Dracaena, and often those that also do well in water, such as Pothos and Philodendron, if the soil conditions are ideal.

Ultimately, the best method often comes down to experimentation and observation. Try both methods with different plants and see what works best for your specific environment and plant types. Always prioritize well-draining mediums and appropriate light conditions for optimal results. The National Gardening Association offers further insights into plant propagation techniques.

Close-up of hands gently checking soil around a newly potted philodendron cutting in a small terracotta pot on a balcony shelf.

Caring for Your New Plant Babies

Once your cuttings show signs of rooting, they transition from a vulnerable state to becoming independent plants. This phase requires consistent, thoughtful care to ensure healthy establishment and vigorous growth. Think of them as delicate infants needing a gentle hand.

Newly rooted plant cuttings in small pots and jars on a wooden windowsill, illuminated by soft, bright, indirect morning light.

Light: The Foundation of Growth

All newly rooted cuttings need bright, indirect light. This means placing them near a window where they receive plenty of ambient light but no direct sunbeams hitting their leaves. Direct sunlight can scorch tender new foliage and quickly dry out the young plant, which lacks an established root system to absorb water efficiently. A north or east-facing window often provides ideal conditions, or a south/west-facing window with a sheer curtain to diffuse intense light. Data suggests that optimal light levels for rooting can significantly increase success rates, with most cuttings performing best in conditions that mimic their parent plant’s preferred indirect light environment.

A small terracotta pot with a vibrant coleus plant cutting sits in a shallow saucer of water, the soil visibly wicking up moisture from the bottom.

Watering: The Right Balance

New plants require consistent moisture but are highly susceptible to overwatering. The goal is to keep the potting mix evenly moist, like a wrung-out sponge, not soaking wet. Water when the top inch of soil feels dry to the touch. For water-rooted plants transitioning to soil, keep the soil slightly wetter for the first few weeks to help the water roots adapt to their new environment. As the plant establishes, gradually reduce watering frequency to match the needs of a mature plant.

  • Small Pots Dry Faster: Remember that small pots, often used for cuttings, dry out more quickly than larger ones. Check them frequently.
  • Drainage is Key: Ensure all pots have drainage holes. Standing water leads to root rot, especially deadly for young, fragile roots.
  • Bottom Watering: Consider bottom watering by placing the pot in a tray of water for 15-20 minutes. This encourages roots to grow downwards and helps prevent fungus gnats.

A rectangular pebble tray with small potted plant cuttings sits among lush foliage plants on a wooden stand, creating a humid microclimate on an urban

Humidity: A Helping Hand

Many young cuttings, especially those that love tropical environments, benefit from elevated humidity. High humidity reduces water loss through the leaves, allowing the plant to conserve energy for root development. If you used a humidity dome during rooting, gradually acclimate the plant to ambient room humidity by opening the dome for increasingly longer periods over a week or two.

Practical ways to boost humidity for small plants include:

  • Pebble Trays: Place pots on a tray filled with pebbles and water. As the water evaporates, it increases localized humidity.
  • Grouping Plants: Plants release moisture through transpiration. Grouping them creates a microclimate with slightly higher humidity.
  • Misting: While less effective than other methods for long-term humidity, occasional misting can provide a temporary boost, particularly in very dry environments. Ensure good airflow to prevent fungal issues.

A small white desk fan on its lowest setting gently circulates air around various plant cuttings in small pots and trays on a wooden table indoors.

Temperature and Airflow: Steady Conditions

Maintain consistent room temperatures, ideally between 65-75°F (18-24°C). Avoid extreme fluctuations or cold drafts. Good airflow is important to prevent fungal diseases, especially in humid conditions. Avoid placing plants in stagnant corners. A gentle breeze from an open window or a small fan on a low setting can be beneficial, but avoid strong, direct drafts that dry out plants quickly.

Close-up of a delicate, newly potted plant cutting with tiny unfurling leaves on a wooden balcony railing, bathed in soft morning light.

Fertilizing: Wait and Watch

Resist the urge to fertilize newly rooted cuttings. Their delicate root systems are sensitive to concentrated nutrients, which can “burn” them. Wait until the plant has put out several new leaves and is actively growing before introducing a very diluted, balanced liquid fertilizer (e.g., at quarter strength). This usually means waiting at least 4-6 weeks after potting up.

Healthy young Pothos plant thriving in a terracotta pot on a windowsill, showing lush leaves but no visible roots from drainage holes.

Repotting: Not Yet

Avoid repotting your new plant until it is visibly root-bound in its current pot, with roots emerging from the drainage holes. Frequent repotting stresses young plants. Allow them to establish fully in their current home before considering an upgrade.

By providing these attentive, consistent care conditions, you empower your newly propagated plants to grow strong and healthy, ready to become thriving members of your indoor garden.

Hands of a gardener examining a slightly yellowing coleus cutting in a terracotta pot on a patio table, with an open journal nearby.

Common Propagation Challenges and Solutions

Even with careful preparation, propagation does not always go perfectly. Encountering challenges is a normal part of the learning process. Understanding common problems and their solutions helps you quickly diagnose issues and improve your success rate. Do not get discouraged; every failed cutting teaches you something valuable.

Gardener's hand with sterilized snips poised to recut a plant cutting showing stem rot in a glass propagation jar, with fresh water ready.

Challenge 1: Cuttings Rotting

Observation: The stem or leaves of your cutting turn mushy, black, or develop a foul odor.
Cause: Overwatering, poor drainage, or bacterial/fungal infection. This is the most common reason for propagation failure.
Solution:

  • For Water Cuttings: Change the water every 2-3 days. Ensure no leaves are submerged. If part of the stem looks rotted, recut above the rot with sterilized scissors and place in fresh water.
  • For Soil Cuttings: Ensure your potting mix is very well-draining. Consider adding more perlite or coarse sand. Allow the top inch of soil to dry out before watering again. If you suspect rot, gently remove the cutting, inspect the base, and if rotted, recut to healthy tissue and try rooting in fresh, sterile medium.
  • Cleanliness: Always sterilize your tools to prevent pathogen transfer.

A shriveled basil cutting in a small terracotta pot next to a healthy basil cutting covered by a clear plastic bag on a wooden table.

Challenge 2: Cuttings Shriveling and Drying Out

Observation: Leaves turn crispy, edges brown, or the entire cutting wilts and dries up without rooting.
Cause: Low humidity, insufficient watering (for soil cuttings), or too much direct sunlight. The cutting is losing water faster than it can absorb it.
Solution:

  • Increase Humidity: Place cuttings under a humidity dome or cover them loosely with a clear plastic bag. Mist them regularly if not enclosed.
  • Adjust Watering: For soil cuttings, ensure the soil remains consistently moist but not soggy. Check soil moisture frequently.
  • Optimize Light: Move cuttings to a location with bright, indirect light. Avoid direct, intense sunlight which can dehydrate plants rapidly.

A gardener's hand lifts a green plant cutting from its pot, showing a healthy stem without roots, resting on a propagation heat mat.

Challenge 3: No Roots Forming

Observation: After several weeks, there is no sign of root development, and the cutting appears stagnant but otherwise healthy.
Cause: Insufficient warmth, incorrect cutting technique (no nodes present), wrong season, or simply a slow-rooting plant.
Solution:

  • Check for Nodes: Ensure your stem cutting includes at least one node, as this is where roots emerge. Recut if necessary.
  • Provide Warmth: A consistent room temperature of 70-75°F (21-24°C) often speeds up rooting. Consider a propagation heat mat.
  • Be Patient: Some plants are naturally slower to root. For example, some succulents can take months.
  • Rooting Hormone: Apply rooting hormone if you did not initially use it. It can provide the boost needed.
  • Seasonal Timing: Plants generally root best during their active growing season (spring and summer) when light levels are higher and temperatures are warmer.

A close-up of a Pothos cutting in a glass jar on a balcony railing, showing yellow lower leaves next to an empty terracotta pot.

Challenge 4: Leaves Turning Yellow

Observation: Leaves on the cutting turn yellow, especially lower leaves.
Cause: Natural shedding (the plant sacrificing older leaves to conserve energy for roots), nutrient deficiency (in water propagation), or occasionally overwatering/underwatering.
Solution:

  • Natural Shedding: If only one or two lower leaves yellow and fall off, this is usually normal. Remove them gently.
  • Nutrient Deficiency: For water cuttings, yellowing often indicates a need for nutrients. This means it is time to pot the cutting into soil.
  • Watering Check: Review your watering schedule for both soil and water propagation. Adjust as needed.

Close-up of a gardener's hand holding an insecticidal soap spray bottle over a coleus cutting with subtle pest damage in a terracotta pot on a modern

Challenge 5: Pests on Cuttings

Observation: Small insects, sticky residue, or distorted growth on cuttings.
Cause: Pests were present on the parent plant or introduced through contaminated soil.
Solution:

  • Inspect Parent Plant: Always inspect your parent plant for pests before taking cuttings. Treat any infestations.
  • Sterile Medium: Use fresh, sterile potting mix for soil propagation.
  • Treatment: For minor infestations, rinse cuttings thoroughly with water. For more persistent pests, a gentle application of insecticidal soap can help. For serious issues, it may be better to discard the cutting and start fresh to protect other plants. For more information on identifying and treating common plant pests, consult resources from organizations like the Clemson University Home & Garden Information Center.

Addressing these challenges proactively increases your confidence and mastery in the art of plant propagation. Persistence and observation are your best allies.

A collection of plant cuttings in various repurposed containers on a rustic wooden balcony table, bathed in warm sunlight, with a vertical garden in t

Sustainable Propagation for Small Spaces

Embracing plant propagation is inherently a sustainable act. It reduces waste, conserves resources, and encourages a deeper connection with your plants. For those in small spaces, integrating sustainable practices into propagation efforts becomes even more impactful, transforming limited areas into green, eco-conscious havens.

Hands placing a plastic dome over a plant cutting in an old ceramic mug, surrounded by diverse repurposed propagation containers on a patio table.

Reusing and Repurposing Materials:

You can significantly reduce your environmental footprint by looking beyond new purchases for propagation supplies.

  • Containers: Repurpose glass jars from food (jam, pickles), plastic takeout containers, yogurt cups, or even old ceramic mugs for rooting. Simply ensure they are thoroughly cleaned and, if needed, have drainage holes poked in them. This saves money and diverts waste from landfills.
  • Humidity Domes: Clear plastic food containers, sandwich bags, or even a cut-in-half plastic bottle can serve as effective humidity domes, creating a mini-greenhouse effect without buying specialized equipment.

Hands mixing coco coir, compost, and perlite in a plastic tub on a balcony table, preparing sustainable propagation mix.

Choosing Sustainable Growing Mediums:

The type of potting mix you use has a significant environmental impact.

  • Peat-Free Mixes: Opt for peat-free potting mixes. Peat moss harvesting degrades vital wetland ecosystems, releasing stored carbon dioxide into the atmosphere. Sustainable alternatives include coco coir, compost, aged bark, and rice hulls. These materials often offer superior aeration and water retention, benefiting your plants and the planet.
  • Homemade Mixes: Create your own propagation mix using materials like compost, perlite, and vermiculite. This allows you to control the ingredients and ensure sustainability.

Person's hands carefully water small propagation pots on a balcony shelf, using rainwater collected in a rustic bucket nearby.

Water-Wise Practices:

Water conservation remains a key aspect of sustainable gardening, even for small indoor plants.

  • Rainwater Collection: If practical, collect rainwater for watering your plants. It is naturally soft and free of chlorine, which can benefit sensitive cuttings. Even a small bucket on a balcony can gather enough for your propagation needs.
  • Avoid Overwatering: Overwatering not only harms your plants but also wastes water. Learn to read your plant’s needs and the soil moisture levels.
  • Reuse Water: If you use a pebble tray for humidity, the evaporating water goes back into the air rather than down the drain.

Sun-drenched windowsill filled with propagating plant cuttings in glass jars and seedlings in trays, alongside a heat mat with a visible timer.

Energy Efficiency:

Even small propagation efforts can be more energy-efficient.

  • Natural Light: Prioritize natural light over artificial grow lights whenever possible. Place cuttings near bright windows.
  • Optimized Warmth: If using a heat mat, ensure it is truly necessary for your plant type and consider placing it on a timer to avoid continuous use. During warmer months, use natural room temperature.

Hands snip a Pothos cutting from a potted plant on a windowsill; a new cutting roots in a glass jar nearby.

Closed-Loop Gardening:

Propagation is a core component of closed-loop gardening, where you produce new plants from existing ones, reducing the need to purchase from external sources. This approach minimizes transport emissions and supports local biodiversity within your home. When you grow new plants from indoor cuttings, you become an integral part of this sustainable cycle, fostering a thriving, self-sustaining indoor ecosystem. This practice aligns perfectly with the ethos of low-maintenance, small-space gardening, proving that impactful green living is accessible to everyone. The USDA Agricultural Research Service provides extensive research on sustainable horticulture, offering valuable context for these practices.

Woman on a sunny balcony thoughtfully examines a wilting plant cutting in a terracotta pot, holding a smartphone showing FAQs.

Frequently Asked Questions

How long does it take for cuttings to root?

Rooting time varies significantly by plant species and environmental conditions. Fast-rooting plants like Pothos or Philodendron can show roots in as little as 1-2 weeks in water. Slower propagators, such as many succulents or some woody stems, might take 4-8 weeks or even several months. Patience is crucial. Consistent warmth and bright, indirect light generally accelerate the process.

Can I mix different plant cuttings in the same propagation jar?

You can mix cuttings from different plant species in the same water jar or soil tray, but ensure they have similar light, temperature, and humidity requirements. Be aware that some plants release natural rooting hormones into the water, potentially benefiting other cuttings, while others may be more prone to rot. If one cutting shows signs of disease, it can spread to others. Separating them once roots appear or if issues arise is a good practice.

What should I do if my cutting gets moldy?

If you see mold on your cutting, especially at the cut end or on submerged leaves, it usually indicates excessive moisture and poor airflow. Immediately remove the cutting, rinse it gently, and use sterilized scissors to recut above the moldy section. Replant in fresh, sterile medium (water or soil), ensuring better airflow and reducing humidity. For soil propagation, ensure excellent drainage and allow the top layer of soil to dry out between waterings.

When should I fertilize my newly propagated plant?

Wait until your newly propagated plant has developed a robust root system and shows visible signs of new foliar growth. This typically means waiting at least 4-6 weeks after potting up from water, or until several new leaves emerge on soil-rooted cuttings. When you do fertilize, use a very diluted liquid fertilizer, perhaps at quarter strength, to avoid shocking or burning the delicate roots of your young plant.

My plant is root-bound. Can I take cuttings before repotting?

Yes, taking cuttings from a root-bound parent plant is often a good strategy. A root-bound plant may be stressed, and removing some growth for propagation can sometimes alleviate that stress. Plus, healthy cuttings ensure genetic continuity. After taking cuttings, you can then proceed with repotting the parent plant into a larger container, giving it a fresh start as well.

For research-based houseplant care and horticultural information, explore resources from reputable institutions such as the Brooklyn Botanic Garden, the New York Botanical Garden, and the Royal Horticultural Society (RHS).

Disclaimer: This article is for informational purposes only and is not a substitute for professional advice. Consult local extension services for region-specific recommendations.

Potted plant diagram: water flow arrows, 30cm pot, soil, plant, drainage.

Categories
Indoor Plants

Pet-Friendly Houseplants You Don’t Need to Worry About

Bringing nature indoors enriches your living space, but if you share your home with furry friends, selecting the right plants becomes a top priority. As a houseplant coach for SimpleGardenJoy.com, I understand your desire for a lush, green environment that remains completely safe for your beloved pets. You want peace of mind knowing your cat won’t face danger from a curious nibble, or your dog won’t encounter an issue if a leaf falls. This comprehensive guide walks you through a curated selection of pet-friendly houseplants, offering practical care advice tailored for small spaces and low-maintenance routines. You will discover how to cultivate a thriving indoor garden without compromising your pets’ safety, transforming your compact home into a harmonious haven for everyone.

You might wonder, “How do I truly know if a plant is safe?” This article demystifies common concerns, provides actionable steps for choosing and caring for pet safe houseplants, and even helps you troubleshoot common issues with pet friendly indoor plants using safe methods. Prepare to confidently expand your indoor plant collection, knowing every choice supports a safe and joyful home for you and your animal companions.

For research-based houseplant care and toxicity information, visit reputable sources such as the
Brooklyn Botanic Garden,
New York Botanical Garden,
Royal Horticultural Society (RHS),
University of Minnesota Extension, and the
ASPCA’s extensive plant list.

Disclaimer: This article is for informational purposes only and is not a substitute for professional veterinary advice. Consult your veterinarian for pet health concerns and local extension services for region-specific plant recommendations.

A relaxed ginger tabby cat naps on a rug, surrounded by pet-friendly potted houseplants in a sunlit indoor corner, showing peaceful coexistence.

Unveiling the World of Pet-Friendly Houseplants

You love your pets, and you also love the vibrancy plants bring to your home. You do not need to choose between them. Pet-friendly houseplants offer a beautiful solution, allowing you to cultivate an indoor oasis without concern for your furry companions. These plants are scientifically recognized as non-toxic to common household pets such as cats and dogs, giving you invaluable peace of mind. You can enjoy the air-purifying benefits, aesthetic appeal, and calming presence of greenery without fearing an emergency trip to the vet should your pet decide to take a curious bite.

Consider the myriad benefits of integrating pet safe houseplants into your living space. Plants naturally enhance indoor air quality by absorbing carbon dioxide and releasing oxygen. They introduce a sense of tranquility and connection to nature, which studies show can reduce stress and improve mood. For those in apartments or compact homes, cleverly chosen and placed plants can make a small space feel larger, brighter, and more inviting. When you select plants with your pets in mind, you create a truly harmonious environment where everyone, human and animal alike, can thrive.

You can create stunning plant displays on shelves, in hanging planters, or as floor accents, knowing that each green addition contributes positively to your shared home. The key lies in informed choices and simple, consistent care routines that fit seamlessly into your busy life. We guide you through plant selections that are not only safe but also resilient and forgiving, perfect for both beginner and intermediate plant enthusiasts.

A scruffy terrier mix dog investigates a Boston fern in a terracotta pot on a patio, a subtle chew mark and fallen leaf visible.

Decoding Pet Safety: What “Non-Toxic” Truly Means

When a plant is labeled “pet-friendly” or “non-toxic,” it means that ingestion typically does not result in serious systemic poisoning or life-threatening reactions for common household pets. However, even non-toxic plants can cause mild gastrointestinal upset, such as vomiting or diarrhea, if consumed in large quantities. This irritation usually stems from the plant material itself, rather than specific toxins. Your pet’s individual sensitivity can also play a role. A curious nibble on a spider plant leaf, for instance, typically poses no harm, but a large quantity might still cause a mild tummy ache.

The most authoritative resource for pet plant toxicity comes from organizations like the American Society for the Prevention of Cruelty to Animals (ASPCA). Their comprehensive database lists plants as toxic or non-toxic based on veterinary research and reported cases. You should always consult their database or a similar reputable source when considering a new plant for your home. This proactive step ensures you make truly informed decisions for your pet’s well-being.

Even with non-toxic plants, observe your pet’s behavior. Some pets are simply more prone to munching on greenery. If your pet shows excessive interest in any plant, even a safe one, consider placing it out of reach. This preventive measure reduces the likelihood of any digestive upset and protects your plant. Remember, the goal is a peaceful co-existence where both your plants and pets flourish securely.

Before bringing home any new plant, always perform a quick check. Identify the plant by its botanical name, then cross-reference it with the ASPCA’s non-toxic plant list. This simple habit guarantees you maintain a truly safe environment for your cherished animal companions.

A multi-tiered plant stand with pet-safe spider plant, prayer plant, Boston fern, and Haworthia. A small white dog subtly peeks out.

Our Top Picks: Delightful Pet-Safe Houseplants for Your Home

You want beautiful plants that thrive in your small space and offer complete peace of mind regarding your pets. Here is a curated selection of pet safe houseplants, perfect for apartments and low-maintenance lifestyles. We provide details on their ideal light, watering needs, and why they make excellent dog friendly indoor plants and cat safe plants.

A Maranta leuconeura (Prayer Plant) with leaves gently folding upwards, in a ceramic pot on a small wooden table bathed in soft lamp light.

Prayer Plant (Maranta leuconeura)

The Prayer Plant earns its name from its fascinating habit of folding its leaves upwards at night, resembling praying hands, then unfurling them again in the morning. Its striking foliage, featuring vibrant green with red or purple veins and often a darker green blotch in the center, brings a dynamic beauty to any room. This plant’s moderate growth habit and compact size make it an ideal choice for tabletops, shelves, or hanging baskets in smaller living areas.

  • Light: Prefers bright indirect light. Direct sun scorches its delicate leaves, causing them to fade or turn crispy. Place it a few feet from a north or east-facing window, or use a sheer curtain on a south or west-facing window.
  • Watering: Keep the soil consistently moist, but avoid waterlogging. Allow the top inch of soil to dry out slightly between waterings. Yellowing leaves often indicate overwatering, while crispy brown edges suggest underwatering or low humidity.
  • Humidity: Thrives in high humidity. Boost humidity by grouping it with other plants, placing it near a humidifier, or using a pebble tray with water. This helps prevent leaf edges from browning.
  • Why it’s pet-friendly: The ASPCA lists Prayer Plant as non-toxic to cats and dogs.

Three distinct Peperomia plants (Baby Rubber, Ripple, String of Turtles) in small ceramic and terracotta pots on a bright windowsill.

Peperomia Species (e.g., Peperomia obtusifolia, Peperomia caperata)

Peperomias offer incredible diversity in leaf shape, color, and texture, making them excellent collector’s plants. From the thick, waxy leaves of the Baby Rubber Plant (P. obtusifolia) to the crinkled, heart-shaped foliage of the Ripple Peperomia (P. caperata), you find a peperomia to suit your aesthetic. Most varieties remain compact, making them perfect for windowsills, desks, and small shelves. Their semi-succulent leaves store water, contributing to their low-maintenance appeal.

  • Light: Enjoys medium to bright indirect light. Avoid intense direct sun, which can bleach their leaves. They tolerate lower light conditions, but their growth slows, and colors may appear less vibrant.
  • Watering: Water thoroughly, then allow the top 50% of the soil to dry out before watering again. Their thick leaves indicate some drought tolerance. Overwatering causes root rot, a common issue, so err on the side of underwatering.
  • Soil: Use a well-draining potting mix. A standard indoor potting mix amended with perlite or orchid bark works well.
  • Why it’s pet-friendly: All Peperomia species are considered non-toxic to pets by the ASPCA, making them a fantastic and varied choice for your home.

A vibrant Spider Plant with arching, variegated leaves and trailing 'spiderettes' hangs in a macrame hanger on a sunny urban balcony.

Spider Plant (Chlorophytum comosum)

The classic Spider Plant is a staple for good reason. Its arching, variegated leaves and prolific production of “spiderettes” (baby plants) make it both beautiful and easy to propagate. It adapts to various conditions and looks stunning in hanging baskets, allowing its graceful foliage and babies to cascade downwards. This makes it an ideal pet friendly indoor plant that offers visual interest and is perfect for sharing with friends.

  • Light: Tolerates a wide range, from low to bright indirect light. Bright indirect light promotes the best variegation and more spiderettes. Direct sunlight can scorch its leaves.
  • Watering: Keep the soil consistently moist but not waterlogged. Allow the top inch of soil to dry before rewatering. They are somewhat drought-tolerant but perform best with consistent moisture.
  • Humidity: Adapts to average household humidity. Brown leaf tips often indicate low humidity or fluoride in tap water. Use distilled or filtered water if this is a recurring issue.
  • Why it’s pet-friendly: Spider Plants are famously non-toxic to cats and dogs, and many pets enjoy playfully batting at their dangling spiderettes.

Two vibrant African Violets, purple and pink, in ceramic pots on a bright kitchen windowsill, with a saucer for bottom-watering.

African Violet (Saintpaulia spp.)

These charming, compact plants produce a continuous display of delicate, velvety flowers in shades of purple, pink, white, and blue. African Violets are perfect for small spaces like windowsills or shelves, adding a touch of floral elegance. Their fuzzy leaves are also quite appealing. Despite their delicate appearance, they are surprisingly resilient with the right care.

  • Light: Requires bright indirect light for abundant blooms. An east or north-facing window works perfectly. If using a south or west window, ensure it has a sheer curtain to diffuse intense sun. Insufficient light results in leggy growth and few flowers.
  • Watering: Water from the bottom or ensure water does not touch the fuzzy leaves, as this can cause spots. Use room-temperature water. Keep the soil consistently moist but never soggy. Allow the top soil to feel slightly dry before watering again.
  • Soil: Use a specialized African Violet potting mix, which is typically lighter and well-draining.
  • Why it’s pet-friendly: African Violets are non-toxic to both cats and dogs, allowing you to enjoy their continuous blooms without worry.

A lush Boston Fern with cascading, feathery fronds hangs in a white ceramic pot in a bright, minimalist living room corner.

Boston Fern (Nephrolepis exaltata ‘Bostoniensis’)

Known for its lush, arching fronds, the Boston Fern brings a timeless, verdant elegance to any interior. It excels in hanging baskets or on pedestals where its feathery foliage can cascade freely. This fern is an excellent choice for adding texture and a natural, jungle-like feel to your home, particularly in compact spaces where its graceful form can be highlighted.

  • Light: Prefers medium to bright indirect light. Avoid direct sun, which can scorch its fronds. It can tolerate lower light, but growth may be less vigorous.
  • Watering: Requires consistently moist soil. Do not allow the soil to dry out completely. Water thoroughly when the top inch of soil feels slightly dry. Good drainage is crucial to prevent root rot.
  • Humidity: Thrives in high humidity. Mist regularly, group with other plants, or use a pebble tray to maintain moisture around the plant. Low humidity causes frond tips to turn brown and crispy.
  • Why it’s pet-friendly: Boston Ferns are completely non-toxic to cats and dogs, making them a classic and safe choice for adding lush greenery.

A blooming Christmas Cactus with red-pink flowers in a terracotta pot on a bright kitchen windowsill, bathed in soft morning light.

Christmas Cactus / Thanksgiving Cactus (Schlumbergera spp.)

These festive plants delight with colorful blooms during the cooler months, adding a cheerful splash of pink, red, white, or orange to your home. Their segmented, flattened stems grow gracefully, making them ideal for hanging baskets or bright shelves. They are surprisingly easy to care for and provide reliable seasonal cheer.

  • Light: Needs bright indirect light. A north or east-facing window is ideal. Avoid harsh afternoon sun, which can burn their stems. They appreciate consistent light exposure.
  • Watering: Water thoroughly when the top two inches of soil feel dry. Unlike desert cacti, these are tropical cacti and prefer more consistent moisture, especially when budding and blooming. Reduce watering slightly after flowering.
  • Temperature: Prefers cooler temperatures (50-65°F or 10-18°C) in fall to encourage blooming.
  • Why it’s pet-friendly: Both Christmas and Thanksgiving Cacti are listed as non-toxic by the ASPCA, allowing you to enjoy their holiday blooms worry-free.

A tall, elegant Areca Palm in a light ceramic planter in a bright apartment corner, with a subtle pet cushion nearby.

Areca Palm (Dypsis lutescens)

The Areca Palm boasts elegant, arching fronds that bring a touch of tropical grandeur to your indoor space. Its upright growth habit makes it suitable for corners or as a statement piece, even in apartments, where it can reach a manageable height of 5-7 feet indoors. It is an excellent choice for adding a lush, airy feel and is often recommended for its air-purifying qualities.

  • Light: Prefers bright indirect light. Direct sun can scorch the fronds. A location near a south or west-facing window with a sheer curtain, or a few feet from an east window, works well.
  • Watering: Keep the soil consistently moist during the growing season (spring and summer), but avoid soggy conditions. Allow the top inch or two of soil to dry out before watering again. Reduce watering slightly in winter.
  • Humidity: Benefits from high humidity. Mist regularly, group with other plants, or use a humidifier. Brown leaf tips indicate insufficient humidity.
  • Why it’s pet-friendly: Areca Palms are non-toxic to cats and dogs, providing a safe way to introduce a touch of the tropics indoors.

A healthy Money Tree (Pachira aquatica) with a braided trunk and palmate leaves in a terracotta pot, lit by natural window light in an urban living ro

Money Tree (Pachira aquatica)

Recognized by its distinctive braided trunk and lush, palmate leaves, the Money Tree is often associated with good fortune and prosperity. It makes a striking visual statement and can grow into a substantial, yet manageable, indoor tree. Its sculptural form is perfect for adding height and presence to a room, fitting well into various design aesthetics from modern to traditional.

  • Light: Thrives in bright indirect light. Direct sun can burn its leaves. It tolerates medium light, but growth may slow. Rotate the plant periodically to ensure even growth.
  • Watering: Water thoroughly when the top 2-3 inches of soil have dried out. Ensure excellent drainage. Overwatering is a common problem and can lead to root rot.
  • Humidity: Appreciates moderate to high humidity. Regular misting or placement near a humidifier can be beneficial.
  • Why it’s pet-friendly: The Money Tree is listed as non-toxic to pets, making it a safe choice for a larger statement plant in your home.

Close-up of a Haworthia fasciata succulent with white zebra-like bands in a terracotta pot on a bright windowsill.

Haworthia (Haworthia fasciata)

Haworthia, often mistaken for Aloe, is a small, striking succulent known for its architectural, rosette-forming leaves. These plants feature distinctive white bands or tubercles that give them a zebra-like appearance. Their compact size makes them ideal for windowsills, terrariums, or small desks, adding unique texture without taking up much space. They are incredibly forgiving and perfect for beginners.

  • Light: Prefers bright indirect light. Direct morning sun is usually fine, but avoid harsh afternoon sun which can cause leaf discoloration or scorching. They tolerate lower light, but their growth may become leggy.
  • Watering: As a succulent, Haworthia stores water in its leaves. Water thoroughly, then allow the soil to dry out completely between waterings, usually every 2-4 weeks depending on conditions. Reduce watering significantly in winter.
  • Soil: Requires well-draining cactus or succulent potting mix to prevent root rot.
  • Why it’s pet-friendly: Haworthia is a safe and appealing succulent for homes with pets, providing unique visual interest without toxicity concerns.

Close-up of a vibrant Fittonia 'Nerve Plant' with pink veins in a small terracotta pot on a wooden patio table, bathed in soft light.

Fittonia (Nerve Plant) (Fittonia albivenis)

The Nerve Plant, or Fittonia, is adored for its intricate, contrasting vein patterns that resemble a delicate nervous system. Available in white, pink, or red veins against a green leaf background, it adds a vibrant pop of color and texture. Its low-growing, spreading habit makes it excellent for terrariums, humidity trays, or as a charming desktop plant in a small pot.

  • Light: Thrives in medium to low indirect light. Direct sun quickly scorches its delicate leaves. Too little light, however, can cause its vibrant colors to fade.
  • Watering: Keep the soil consistently moist but never soggy. Fittonia is dramatic; it will visibly wilt when thirsty, but usually perks right back up after watering. It does not tolerate drying out completely.
  • Humidity: High humidity is essential for Fittonia. Mist daily, group with other plants, or use a pebble tray. It also excels in closed terrariums where humidity levels are naturally higher.
  • Why it’s pet-friendly: Fittonia is considered non-toxic to pets, allowing you to enjoy its striking foliage without concern.

Hands gently adjust a potted pet-friendly plant on a sunlit windowsill, surrounded by other thriving houseplants in a cozy home.

Nourishing Your Green Friends: Light Made Simple

Understanding light requirements is fundamental to successful houseplant care, even for pet safe houseplants. You do not need a degree in horticulture to master this; a few simple observations and adjustments make all the difference. Light is the primary energy source for photosynthesis, directly impacting your plant’s growth, health, and vibrancy. Providing the correct amount of light ensures your plants thrive, preventing common issues like leggy growth, pale leaves, or scorched foliage.

Warm morning light filters through a sheer curtain onto a tiered plant stand with vibrant, pet-friendly plants in a small balcony garden.

Decoding Light Levels for Your Compact Space

  • Bright Indirect Light: This is the sweet spot for most pet friendly indoor plants. Think of a location near a south or west-facing window, but far enough away that direct sunbeams do not hit the leaves, or diffused by a sheer curtain. An east-facing window often provides perfect bright indirect light during the morning. Your plant receives plenty of luminosity, but no harsh, burning rays.
  • Medium Light: A few feet away from a bright window, or in a room with good general ambient light. Plants here do not get direct sun, nor are they in deep shadow. They receive enough light to sustain themselves, though growth might be slower than in bright indirect light.
  • Low Light: This refers to an area several feet from a window, or a room with only north-facing windows. While some plants tolerate low light, no plant truly thrives in darkness. Low light often means your plants need less frequent watering, as they use water more slowly. You might notice slower growth, smaller leaves, or less vibrant coloration in these conditions.

Person's hand casts a soft-edged shadow over a potted rosemary on a balcony, demonstrating light assessment.

Practical Tips for Assessing Light

To determine the light level in your specific spot, use the “shadow test.” Hold your hand about a foot above the plant’s intended location:

  • If you see a sharp, well-defined shadow, you have bright light (likely direct sun).
  • If the shadow is soft and fuzzy, it is bright indirect light.
  • If the shadow is barely visible, it is medium light.
  • If you see no shadow, it is low light.

Remember that light intensity changes with the seasons. In winter, light levels decrease, so you might need to move plants closer to a window. In summer, intense afternoon sun might require pulling plants back or adding a sheer curtain for protection. You adapt your plant’s environment to ensure consistent, appropriate light year-round.

Close-up, slightly overhead shot of a hand using a finger to test soil moisture in a terracotta potted, pet-safe plant on a balcony.

The Art of Hydration: Watering Without Guesswork

Watering correctly is perhaps the most critical aspect of houseplant care, and also the most common source of problems for pet safe houseplants. Overwatering leads to root rot, a silent killer, while underwatering causes wilting and stress. You aim for a balance, providing enough moisture for your plant’s needs without suffocating its roots. Understanding your plant’s specific needs, alongside some general best practices, ensures healthy hydration.

Close-up, low-angle of an index finger inserted two inches deep into the soil of a Boston fern in a terracotta pot on a balcony.

Your Go-To Watering Method: The Finger Test

Forget rigid schedules. Your plant’s watering needs vary based on light, temperature, humidity, and pot size. The most reliable method for assessing soil moisture is the “finger test.”

  1. Insert Your Finger: Stick your finger about 1-2 inches deep into the soil. For larger pots, go a bit deeper, perhaps 3-4 inches.
  2. Feel the Moisture:
    • If the soil feels damp, do not water yet. Check again in a day or two.
    • If the soil feels dry, it is time to water.

This simple test prevents overwatering, which starves roots of oxygen, and ensures you only water when your plant truly needs it. Most pet friendly indoor plants prefer the top inch or two of soil to dry out between waterings. Succulents and cacti need the soil to dry out completely, while ferns and prayer plants prefer consistent moisture.

A pair of hands carefully tilts a terracotta pot saucer, pouring out accumulated excess water into a modern sink, preventing root rot for a lush house

Watering Best Practices for a Thriving Home

  • Water Thoroughly: When you do water, soak the soil until water drains from the bottom of the pot. This ensures all roots receive moisture. Discard any excess water collected in the saucer after about 15-30 minutes to prevent standing water and root rot.
  • Use Room Temperature Water: Cold water can shock your plant’s roots. Allow tap water to sit out for a few hours to reach room temperature and allow chlorine to dissipate. Some plants are sensitive to chemicals in tap water; using filtered or rainwater can be beneficial.
  • Consider Pot Type: Terracotta pots dry out faster than plastic or glazed ceramic pots due to their porous nature. Adjust your watering frequency accordingly.
  • Bottom Watering: For some plants, especially those with delicate foliage or a preference for consistent moisture, bottom watering works wonders. Place the pot in a tray of water for 20-30 minutes, allowing the soil to wick up moisture from below. Remove and let drain completely.
  • Monitor Seasonal Changes: Plants typically need less water in winter when growth slows and light levels decrease. They generally require more water in spring and summer during active growth.

By adopting the finger test and these practices, you provide optimal hydration, leading to happier, healthier pet safe houseplants.

A pet-friendly spider plant and an open bag of potting mix on a sunny patio table, ready for repotting into a larger terracotta pot.

Foundation for Flourishing: Potting Mix and Repotting

The right potting mix provides essential support, nutrients, and drainage for your pet safe houseplants. Choosing a high-quality, appropriate mix prevents many common plant problems, particularly those related to overwatering. Repotting, though daunting to some, is a crucial step in your plant’s growth journey, ensuring it has adequate space and fresh nutrients.

Woman's hands blending coco coir, perlite, and compost with a trowel on a light wooden table, surrounded by potting supplies on a balcony.

Selecting the Right Potting Mix

Most common houseplants thrive in a well-draining, airy potting mix. Avoid heavy garden soil, which compacts easily and retains too much moisture, leading to root rot. Here’s what you need to know:

  • Peat-Free Mixes: You can choose sustainable peat-free potting mixes, which reduce environmental impact. These often use coco coir, compost, and wood fibers as their base. They perform just as well as peat-based mixes and align with environmentally conscious gardening practices.
  • Good Drainage is Key: A good general-purpose indoor potting mix is a solid starting point. However, many pet friendly indoor plants benefit from amendments to improve drainage and aeration.
  • Amendments to Consider:
    • Perlite: White, lightweight, volcanic rock that improves drainage and aeration. It keeps soil from compacting too much.
    • Pumice: Similar to perlite but heavier and less prone to floating. Also excellent for drainage.
    • Orchid Bark: Provides large air pockets and helps with drainage, great for plants that like a chunkier mix, such as epiphytic cacti or some aroids.
    • Coarse Sand: Use for succulents and cacti to enhance drainage. Ensure it is coarse horticultural sand, not fine play sand.

A good general mix for many pet safe houseplants is two parts high-quality potting mix, one part perlite, and one part orchid bark or coco coir. Adjust this ratio based on your specific plant’s needs; succulents prefer even more grit, while ferns appreciate slightly more moisture retention.

Close-up of a spider plant in a terracotta pot on a patio, showing white mineral buildup and roots emerging from the drainage hole.

When and How to Repot

Repotting gives your plant fresh nutrients and more room to grow. You should repot when your plant exhibits these signs:

  • Roots Emerging from Drainage Holes: This is a clear indicator that your plant is root-bound and needs more space.
  • Stunted Growth: If your plant has stopped growing or appears unhealthy despite adequate light and water, it might be hungry for fresh soil.
  • Water Drains Too Quickly or Not at All: If water runs straight through, the soil might be too compacted. If it sits on top, the soil is hydrophobic and needs replacement.
  • Visible Salt or Mineral Buildup: A white crust on the soil surface or pot rim indicates mineral buildup from watering, which can harm roots.

Step-by-Step Repotting Guide:

  1. Choose the Right Size Pot: Select a new pot only one size larger (e.g., from a 4-inch to a 6-inch pot). Too large a pot holds excess moisture, increasing the risk of root rot. Ensure it has drainage holes.
  2. Gather Supplies: Potting mix, new pot, newspaper or tarp for mess, gardening gloves if desired.
  3. Remove the Plant: Gently tip the plant on its side, supporting the base, and carefully slide it out. If stubborn, you might need to tap the pot’s sides.
  4. Inspect Roots: Untangle any circling roots gently. Trim away any mushy, dark, or foul-smelling roots (signs of rot) with clean shears. Healthy roots are typically white or tan.
  5. Add New Soil: Place a layer of fresh potting mix at the bottom of the new pot. Center your plant, ensuring the top of the root ball is at the same level as it was in the old pot, about an inch below the rim.
  6. Fill and Settle: Fill around the root ball with more potting mix, gently tamping it down to remove large air pockets. Do not compact the soil too tightly.
  7. Water Thoroughly: Water your newly repotted plant until water drains from the bottom. This helps settle the soil around the roots.

You typically repot in spring or early summer when plants are actively growing, allowing them to recover quickly. Most houseplants need repotting every 1-2 years, but some slower growers might need less frequent attention.

A fluffy Cavalier King Charles Spaniel dog rests on a rug, observing a multi-tiered plant stand and a wall-mounted vertical planter on a small balcony

Smart Placement and Styling: Keeping Plants and Pets Happy

Integrating pet safe houseplants into your home is not just about choosing the right plant; it is also about smart placement and thoughtful styling. For those in compact homes, maximizing space while ensuring pet safety requires a creative approach. You can achieve beautiful displays that both enhance your decor and keep your furry friends out of harm’s way.

Bright urban living room corner with a ginger cat looking up at a hanging Boston fern, a spider plant on a wall shelf, and a Prayer plant on a stand.

Elevate for Safety and Style

One of the simplest ways to protect your plants and pets is to elevate your greenery. This approach is particularly effective for cat safe plants, as cats are often skilled climbers. Dog friendly indoor plants benefit from being above ground level, especially if your dog is prone to sampling things off the floor.

  • Hanging Planters: Suspend plants from ceilings, curtain rods, or wall-mounted hooks. This not only keeps plants out of reach but also adds a dynamic, space-saving element to your decor. Spider plants, Boston ferns, and Prayer plants are excellent candidates for hanging.
  • High Shelves: Utilize wall-mounted shelves or tall bookshelves. Ensure shelves are securely fastened to prevent tipping. Place smaller, lighter pots on higher shelves.
  • Plant Stands and Pedestals: Tall plant stands lift plants off the floor, making them less accessible to ground-level pets. Choose sturdy stands that are difficult to knock over.

Pet-friendly plants grouped on an urban balcony. A spider plant, prayer plant, and fern surround a glass terrarium protecting a delicate Fittonia.

Strategic Groupings and Barriers

You can also create visual and physical barriers to deter overly curious pets:

  • Grouping Plants: Arrange several non-toxic plants together. Sometimes, the sheer volume of foliage can make it less appealing for a pet to single out a specific leaf. Ensure the grouping does not create a hideaway for pets to get stuck in.
  • Terrariums and Cloches: For very small, delicate plants or particularly persistent pets, a closed terrarium or glass cloche provides an attractive, protective enclosure. This also helps maintain humidity for humidity-loving pet safe houseplants like Fittonia.
  • Designated Plant Zones: If you have a room or a specific area your pets rarely access, consider designating it as your “plant zone.” This provides a safe space for any plant, even if it is not explicitly pet-friendly, though this article focuses on safe plants for all areas.

A tabby cat calmly rubs against a large, stable cream ceramic pot with a spider plant on a sunny urban balcony floor.

Consider Pot Stability and Material

Active pets can easily knock over lightweight pots. Choose heavier, sturdier pots, especially for floor plants or those on low stands. Ceramic or terracotta pots offer more stability than plastic. For hanging plants, ensure the hanger and pot are well-secured and can bear the weight of the plant, soil, and water. You prevent accidents and potential messes by prioritizing stability.

By thoughtfully considering placement and styling, you create a beautiful, plant-filled home that coexists harmoniously with your beloved pets. Your focus on pet safety does not mean sacrificing aesthetic appeal.

Gentle hands inspect a Boston fern leaf for pests on a sunny urban balcony, with a pet-safe spray bottle nearby and a small dog resting in the backgro

Common Challenges and Pet-Safe Solutions

Even the most diligent plant parent encounters challenges. Yellowing leaves, wilting, or unwelcome pests can be frustrating. The good news is that most issues have straightforward solutions. When you have pets, however, ensuring these solutions are non-toxic to your animal companions becomes paramount. This section guides you through common problems with pet safe houseplants and offers practical, pet friendly indoor plant care strategies.

Close-up of a hand gently touching soil in a terracotta pot, diagnosing a wilting plant with yellowing lower leaves on a small wooden patio table.

Decoding Plant Symptoms

Your plants communicate their needs through their appearance. Learning to interpret these signs helps you act quickly.

  • Yellow Leaves: Often a sign of overwatering. Root rot, caused by consistently wet soil, prevents roots from absorbing nutrients effectively, leading to yellowing. It can also signify underwatering if the lower leaves turn yellow and then drop off. Check soil moisture before watering.
  • Wilting or Drooping Leaves: Most commonly points to underwatering. Your plant is thirsty. Water thoroughly until it drains from the pot. It can also indicate overwatering (root rot prevents water uptake) or sometimes too much direct sun.
  • Brown, Crispy Leaf Tips: Typically caused by low humidity, underwatering, or mineral buildup in the soil or water. Increase humidity, water more consistently, or consider using filtered water.
  • Leggy Growth: Stretched-out stems with sparse leaves indicate insufficient light. Move your plant to a brighter spot.

Woman gently wiping houseplant leaf on sunny balcony, small terrier dog relaxing nearby, showcasing pet-safe pest management.

Pet-Safe Pest Management

Pests are an inevitable part of gardening, even indoors. The key is early detection and using solutions that are safe for your pets. Avoid harsh chemical pesticides entirely. Integrated Pest Management (IPM) focuses on prevention and eco-friendly treatments.

Prevention First:

  • Inspect New Plants: Always thoroughly check any new plant for pests before bringing it into your home. Isolate new plants for a few weeks to monitor for outbreaks.
  • Good Airflow: Ensure adequate air circulation around your plants. Stagnant air encourages fungal issues and some pests.
  • Quarantine Sick Plants: If you spot pests, immediately move the affected plant away from your other plants.
  • Cleanliness: Regularly wipe down leaves with a damp cloth. This removes dust and can dislodge tiny pests before they become an infestation.

Pet-Safe Treatment Options:

If you discover pests, reach for these non-toxic remedies:

  • Neem Oil Spray: Neem oil is a natural, botanical insecticide and fungicide. Mix pure cold-pressed neem oil with a few drops of mild, unscented liquid soap (as an emulsifier) and water according to package directions. Spray affected plants thoroughly, ensuring you cover the undersides of leaves. Neem oil is generally considered safe for pets once dry, but prevent pets from ingesting it while wet. Reapply every 5-7 days until pests are gone.
  • Insecticidal Soap: A non-toxic solution that smothers soft-bodied pests like aphids, spider mites, and mealybugs. You can purchase pre-made insecticidal soap or make your own with a few drops of mild dish soap (ensure it is free of harsh chemicals or degreasers) diluted in water. Spray affected areas generously. This is safe for pets once it dries.
  • Manual Removal: For larger pests like mealybugs or scale, use a cotton swab dipped in rubbing alcohol to gently wipe them off. For fungus gnats, reduce watering, allow the topsoil to dry completely, and use yellow sticky traps to catch adults. You can also sprinkle a layer of horticultural sand or fine gravel on the soil surface to deter them.

You can effectively manage common plant problems and pest issues by understanding plant signals and employing pet-safe remedies. Your commitment to pet friendly indoor plants extends to how you care for them, creating a truly safe and thriving environment.

Person on balcony reading on tablet surrounded by pet-safe container plants and a sleeping cat, in soft afternoon light.

Frequently Asked Questions

Are all ferns pet-friendly?

No, not all ferns are pet-friendly. While many common indoor ferns like the Boston Fern (Nephrolepis exaltata), Maidenhair Fern (Adiantum spp.), and Staghorn Fern (Platycerium spp.) are generally considered non-toxic to cats and dogs, others are toxic. For example, the Asparagus Fern (Asparagus setaceus) is toxic to pets, causing gastrointestinal upset and dermatitis. Always verify a specific fern species with the ASPCA database before bringing it home.

Can I put cat grass with my other pet-safe houseplants?

Yes, you absolutely can. Cat grass (typically barley, oat, wheat, or rye grass) is grown specifically for cats to munch on and is completely safe. Placing it alongside your other cat safe plants offers your feline friend a designated, attractive, and healthy alternative to nibbling on other foliage. This often redirects their chewing behavior to an appropriate outlet.

What should I do if my pet eats a piece of a non-toxic plant?

If your pet ingests a non-toxic plant, observe them closely. Minor gastrointestinal upset like mild vomiting or diarrhea can occur, but serious issues are unlikely. If symptoms are severe, persistent, or cause you concern, contact your veterinarian. In most cases, a non-toxic plant ingestion requires no more than monitoring your pet for a day or two.

How can I make sure my indoor plants are truly pet-friendly?

To ensure your indoor plants are truly pet-friendly, always identify plants by their botanical (scientific) names, then cross-reference these names with a reputable resource like the ASPCA’s non-toxic plant list before purchasing. You can also opt for only plants explicitly labeled as pet-safe by reputable nurseries. Consistent verification is your best defense.

Categories
Seasonal Tips

Seasonal Rotation for Container Vegetables

You love growing your own food, even in a small space, and container gardening provides an incredible opportunity for fresh, homegrown produce. Yet, you might wonder how to keep your container plants thriving season after season without your soil getting tired or pests taking over. The secret lies in a practice often associated with large farms but equally powerful for your patio garden: seasonal rotation for container vegetables.

Crop rotation in containers means you change the type of vegetable you grow in a specific pot each season or year. This simple technique revitalizes your soil, outsmarts common pests and diseases, and ensures your plants receive the nutrients they need without complicated routines. This guide delivers practical steps and actionable insights to implement effective crop rotation in your containers, making your seasonal vegetable gardening efforts more productive and sustainable. You will discover how to maintain robust plant health and enjoy bountiful harvests, all while nurturing a healthier garden ecosystem.

Close-up of hands rearranging diverse container vegetable pots on a small urban balcony, illustrating seasonal crop rotation.

Understanding Container Crop Rotation

You might associate crop rotation with vast fields and complicated agricultural schedules. In reality, it simplifies container gardening. Seasonal rotation for container vegetables involves systematically moving different types of plants to different pots each growing season. This prevents the same plant family from depleting specific nutrients or encouraging particular pests in the same container repeatedly. Think of it as giving your soil and your plants a fresh start in a new location.

For small-space gardeners like you, this practice is particularly impactful. While you cannot move your garden beds around, you can easily move your containers. This simple act reaps significant benefits for your entire gardening system. You create a dynamic environment for your vegetables, improving their health and your harvest yield.

The core principle is to avoid planting the same crop or crops from the same family in the same soil pot season after season. Instead, you introduce a new family of plants, allowing the previous pot’s soil to recover or benefit from a different nutrient profile. This deliberate shift helps you maintain a balanced soil ecosystem within your limited container space.

A vibrant container garden on a patio featuring healthy tomatoes, lettuce, and beans, with a person enjoying the plants in the background.

Why Crop Rotation Matters for Your Containers

Crop rotation offers several compelling advantages for your container garden, making your seasonal vegetable gardening more resilient and productive. These benefits directly impact your plants’ health and your overall gardening success.

A healthy bush bean plant thriving in a terracotta pot on a patio table, with a small wooden stake marked

Pest and Disease Management

Many garden pests and diseases are host-specific, meaning they target particular types of plants. If you grow tomatoes in the same pot every year, the pathogens or insect eggs that affect tomatoes can build up in that soil. By rotating your crops, you break the life cycle of these persistent problems. For example, if you had a problem with early blight on your tomatoes one year, planting beans or lettuce in that same pot the next season starves the blight fungi, significantly reducing its presence when you eventually return tomatoes to that spot. This proactive approach minimizes the need for chemical treatments, aligning with your desire for low-maintenance and eco-friendly gardening.

Lush spinach and lettuce in a trough, a tomato plant with green fruit in a terracotta pot, and a refilled ceramic pot with a trowel, on a small urban

Nutrient Management

Different plants have different nutritional needs. Leafy greens like spinach and lettuce are heavy nitrogen feeders, promoting lush foliage. Fruiting vegetables such as tomatoes and peppers require more phosphorus and potassium for flower and fruit development. Root crops like carrots use a balanced nutrient profile. When you plant the same crop in the same container repeatedly, that plant continuously extracts the same nutrients, quickly depleting the soil. Crop rotation allows you to balance nutrient usage. For instance, following a heavy feeder with a lighter feeder or a nitrogen-fixing plant (like beans) helps replenish specific soil components naturally. This strategy reduces your reliance on external fertilizers and promotes overall soil vitality. A study published by the University of Minnesota Extension highlights how crop rotation can improve soil structure and nutrient cycling in various gardening contexts, including raised beds which share similarities with large containers in terms of soil management.

Gardener's hands gently lift a spent plant from a terracotta pot, revealing rich, crumbly soil and healthy, intertwined roots.

Soil Structure and Health

Constant growth of one type of plant can affect soil structure. Some plants develop shallow roots, while others have deeper, more extensive systems. Alternating crops helps maintain a diverse root network throughout the pot, which contributes to better soil aeration and drainage. This varied root activity prevents compaction and encourages a healthier microbial community. A robust soil microbiome is crucial for nutrient availability and plant immunity, acting as your plants’ first line of defense against stress.

Elevated view of a vibrant small patio container garden featuring diverse vegetable plants in various pots, including tomatoes, peppers, Swiss chard,

Key Plant Families for Effective Rotation

To effectively rotate your container vegetables, you need to understand plant families. Grouping plants by family helps you avoid planting related crops in the same spot, as they often share similar nutrient requirements, pests, and diseases. Here are the most common vegetable families and their characteristics, which will be essential for your seasonal vegetable gardening plan:

  • Solanaceae (Nightshade Family):

    Includes tomatoes, potatoes, peppers, and eggplants. These are often heavy feeders, especially needing phosphorus and potassium for fruit production. They are susceptible to similar fungal diseases like blight and insect pests such as tomato hornworms and potato beetles. You should avoid planting any of these crops in the same pot for at least two to three seasons.

  • Brassicaceae (Cabbage Family or Cole Crops):

    Includes broccoli, cabbage, kale, collards, radishes, turnips, and mustard greens. These are generally heavy nitrogen feeders and can suffer from clubroot disease and pests like cabbage worms and flea beetles. Rotate these crops carefully to prevent pathogen buildup.

  • Cucurbitaceae (Gourd Family):

    Includes cucumbers, squash (summer and winter), melons, and pumpkins. These vining plants require consistent moisture and nutrients and are prone to powdery mildew, squash bugs, and cucumber beetles. Their large leaves can create humid microclimates, so proper spacing and rotation are key.

  • Fabaceae (Legume Family):

    Includes beans (bush, pole, snap) and peas. These plants are unique because they “fix” nitrogen from the air into the soil through a symbiotic relationship with soil bacteria. This makes them excellent choices to follow heavy feeders, as they naturally enrich the soil with nitrogen. They generally require less external fertilization. Pests like aphids and bean beetles can be an issue.

  • Apiaceae (Carrot Family):

    Includes carrots, celery, parsley, and cilantro. These root and leaf crops generally prefer well-drained soil and a consistent moisture level. They are often less demanding nutritionally than fruiting plants but can attract pests like carrot rust flies. They typically make good rotational crops, as their nutrient demands differ significantly from the nightshades or brassicas.

  • Chenopodiaceae (Beet Family):

    Includes beets, chard, and spinach. These crops are often moderate feeders, requiring good soil fertility but not as intensely as nightshades or brassicas. They are generally resistant to many common pests but can suffer from leaf miners. They adapt well to various spots in a rotation schedule.

  • Poaceae (Grass Family):

    Includes corn. While less common in typical small container gardening, if you grow dwarf corn varieties, recognize its heavy feeding nature, especially for nitrogen. Corn benefits greatly from rotation, often following legumes.

You do not need to memorize every single family member. Focus on the main groups you grow. Knowing these families empowers you to create an intelligent and beneficial seasonal rotation plan for your container garden.

Urban gardener observing a diverse container garden on a sunlit balcony, featuring thriving plants and pots prepared for seasonal rotation.

Designing Your Seasonal Rotation Plan

Creating a container crop rotation plan might sound complex, but it can be surprisingly simple for your small space. The goal is to avoid repeating the same plant family in the same pot for at least 2-3 growing seasons. Here’s how you can design an effective plan:

Eye-level shot of a person kneeling on a small urban balcony, thoughtfully assessing their diverse collection of empty and half-empty garden container

Assess Your Container Inventory

First, list all your containers, noting their sizes. You might have large grow bags, medium terracotta pots, and smaller window boxes. Assign a number or label to each unique container location (e.g., “Patio Pot 1,” “Balcony Box A”). This helps you track which plant goes where.

Gardener's hands arranging grouped vegetable seed packets (tomato, beans) on a small table with a notebook and coffee mug on a patio.

Identify Your Target Vegetables

Next, list the vegetables you plan to grow in the upcoming season. Group them by their plant family using the information above. For example, ‘Tomato,’ ‘Pepper,’ ‘Eggplant’ go under Solanaceae. ‘Bush Beans,’ ‘Pole Beans’ go under Fabaceae.

A vertical garden planter showcasing a diverse rotation of plants: ripe tomato, bush beans, lettuce, and carrot tops, bathed in golden light.

Create a Simple Rotation Cycle

A common and effective rotation strategy involves a four-group cycle. You can categorize your plants broadly into:

  1. Fruiting/Root Crops (Heavy Feeders): Tomatoes, peppers, potatoes, squash, cucumbers, corn.
  2. Leafy Greens (Nitrogen Hogs): Lettuce, spinach, kale, cabbage, broccoli.
  3. Legumes (Nitrogen Fixers): Beans, peas.
  4. Others/Root Crops (Moderate Feeders): Carrots, radishes, beets, herbs.

The ideal sequence in a single container would be to follow a heavy feeder with a nitrogen fixer, then perhaps a leafy green, and finally a root crop before returning to a heavy feeder. For example:

  • Season 1: Tomato (Fruiting, Solanaceae)
  • Season 2: Bush Beans (Legume, Fabaceae)
  • Season 3: Lettuce (Leafy Green, Brassicaceae/Chenopodiaceae)
  • Season 4: Carrots (Root, Apiaceae)
  • Season 5: Return to Tomato

You can adapt this based on your specific plants. The key is to ensure that a plant from the same family does not occupy the same pot within this 3-4 season cycle.

A hand-drawn container gardening plan on graph paper, with a pencil, seed packets, and empty terracotta pots on a weathered table.

Map Your Containers to Your Plan

Create a simple chart or spreadsheet. List your containers down one side and the seasons across the top. Fill in what you plan to grow in each container for each season. This visual tool helps you keep track and ensures you are rotating correctly. For instance, if you have three containers that you use year-round, you could have a small diagram for each:

Container 1: Spring – Lettuce, Summer – Bush Beans, Fall – Spinach

Container 2: Spring – Carrots, Summer – Tomatoes, Fall – Kale

Container 3: Spring – Peas, Summer – Bell Peppers, Fall – Beets

The next year, you would shift everything, ensuring Container 1 does not get lettuce, Container 2 avoids carrots, and Container 3 avoids peas. This ensures diversity in each pot over time.

Vibrant urban patio with a thriving cherry tomato plant in a terracotta pot and fresh lettuce in a balcony planter, showing diverse seasonal container

Consider Seasonal Needs

Integrate your rotation plan with the specific needs of each season. Cool-season crops like lettuce and spinach thrive in spring and fall, while warm-season crops like tomatoes and peppers need summer heat. Your rotation plan should naturally accommodate these seasonal shifts, allowing you to maximize your harvests throughout the year. For detailed regional planting calendars, consult resources like the Cornell Garden-Based Learning program, which offers excellent guidance for various climates.

Hands clearing a spent basil plant from a terracotta pot on a patio, with a small garden journal and pencil nearby, signifying end-of-season container

Step-by-Step: Implementing Container Rotation

Once you have a plan, implementing seasonal rotation for container vegetables becomes a straightforward process. Follow these steps to ensure a smooth transition and healthy plants:

  1. Record Keeping: Start by noting what you planted in each specific container during the current season. A simple label on the pot or a small journal entry works. Include the plant type and the season (e.g., “Tomato, Summer 2023, Pot A”). This record is invaluable for planning future rotations.
  2. Harvest and Clear: As each season ends, harvest your crops thoroughly. Remove all plant debris, including roots. Leaving old roots can harbor pests or diseases from the previous crop. Dispose of diseased plant material to prevent spread; do not compost it.
  3. Evaluate and Refresh Soil: Before planting the next crop, evaluate the soil in each container. Has it compacted? Does it smell fresh and earthy? You will likely need to amend or partially replace the soil, especially after a heavy-feeding crop. This is a critical step for successful seasonal vegetable gardening in containers. You can learn more about this in the “Revitalizing Your Container Soil” section.
  4. Select the Next Crop: Consult your rotation plan. Choose a plant from a different family than the previous crop for that specific pot. For instance, if you grew tomatoes (Solanaceae) in Pot A, consider planting beans (Fabaceae) or lettuce (Brassicaceae) there next.
  5. Prepare Your Container: Ensure containers are clean, especially if you suspect disease. A simple wash with soapy water and a rinse can make a big difference. Ensure drainage holes are clear.
  6. Plant and Monitor: Plant your chosen vegetable according to its specific needs for light, water, and space. Monitor its growth, checking for signs of pests or nutrient deficiencies. Your rotation efforts should lead to more robust plants, but vigilance remains important.
  7. Iterate Annually: Repeat this process for every growing season. Over time, you will develop a rhythm for your seasonal vegetable gardening, and crop rotation will become a natural and integrated part of your routine. Consistency builds a stronger, more resilient container garden.

A person kneels on a patio, hands actively mixing dark potting soil and compost in a large black tub, surrounded by empty containers.

Revitalizing Your Container Soil for Each Season

Your container soil is the lifeline for your vegetables. Unlike garden beds where soil can naturally rejuvenate, container soil depletes more quickly. Refreshing it between rotations is essential for robust seasonal vegetable gardening. This practice ensures your plants receive the nutrients and support they need, maintaining the vitality of your small garden.

Close-up of compacted, dry soil in a terracotta pot, with white salt crust on the surface and rim.

Why Refresh?

Over time, container soil loses its structure, becoming compacted. Nutrients deplete, and salt buildup from fertilizers or hard water can occur. These factors hinder root growth, nutrient uptake, and drainage, all of which directly impact your plants’ health. A proactive approach to soil health is far more effective than trying to rescue struggling plants later.

A person scoops fresh potting mix into a terracotta pot on an urban balcony, surrounded by other container plants and city views.

How to Revitalize Your Soil: A Step-by-Step Guide

When you prepare for the next crop rotation, follow these steps to give your soil a fresh start:

  1. Remove Old Soil: For small to medium pots, you can remove about one-third to one-half of the old soil mix. For larger containers or if you have a known disease issue, consider replacing all the old soil. Do not reuse soil from pots that had diseased plants; discard it responsibly to prevent spreading pathogens.
  2. Break Up Clumps: Use a trowel or your hands to break up any large clumps of remaining soil. This helps aerate the mix and improves drainage.
  3. Add Fresh Potting Mix: Incorporate new, high-quality, peat-free potting mix. Look for mixes designed for containers, offering good drainage and aeration. Peat-free options are more environmentally sustainable. The Royal Horticultural Society (RHS) actively promotes peat-free growing for its environmental benefits, emphasizing responsible sourcing.
  4. Amend with Organic Matter: Mix in a few handfuls of well-rotted compost or worm castings. These amendments introduce beneficial microorganisms, improve soil structure, and provide a slow release of nutrients. Compost is a cornerstone of sustainable gardening, enriching soil naturally.
  5. Add Balanced Organic Fertilizer: Incorporate a slow-release granular organic fertilizer appropriate for vegetables. Follow the package instructions for application rates. This provides a baseline of nutrients for your new crop.
  6. Consider pH Adjustment: Most vegetables prefer a slightly acidic to neutral pH (6.0-7.0). If you suspect your soil pH is off (e.g., plants show persistent nutrient deficiencies despite fertilizing), you can use a simple pH test kit. Adjust with horticultural lime to raise pH or elemental sulfur to lower it, if necessary, but this is often less critical in well-maintained container mixes.
  7. Moisten and Plant: Lightly moisten the refreshed soil mix before planting. This helps settle the soil and provides a welcoming environment for your new plant’s roots.

By consistently revitalizing your container soil, you create an optimal environment for each new crop, significantly enhancing the effectiveness of your seasonal rotation and the overall health of your container garden.

Slightly elevated candid shot of a person carefully liquid feeding a container tomato plant on a vibrant urban patio garden with diverse plants.

Optimizing Watering and Feeding in a Rotational System

Successful seasonal vegetable gardening in containers demands attentive watering and feeding, especially when practicing crop rotation. Your plants’ needs shift with their growth stage, the season, and the specific crop you are growing. Adapt your routine to match these demands for optimal health and yield.

Close-up of a woman's hand testing soil moisture with her finger in a terracotta pot with a basil plant on a sunny patio.

Smart Watering Practices

Containers dry out faster than garden beds, and inconsistent watering stresses plants. Here is how you can optimize your watering:

  • Check Soil Moisture: Do not water on a strict schedule. Instead, check the soil moisture. Stick your finger about two inches deep into the soil. If it feels dry, it is time to water. You can also use a moisture meter for accuracy.
  • Water Deeply: When you water, water thoroughly until you see drainage from the bottom of the pot. This encourages deep root growth and flushes out any accumulated salts. Shallow, frequent watering leads to shallow roots and thirsty plants.
  • Seasonal Adjustments:

    • Summer: Hot, sunny weather increases water evaporation. You might need to water daily, sometimes even twice a day for smaller pots or thirsty plants like tomatoes.
    • Spring/Fall: Cooler temperatures and more moderate sunlight mean less frequent watering.
    • Winter: If you grow cool-season crops or overwinter plants, water much less frequently, only when the soil is dry to the touch, to prevent root rot.
  • Time of Day: Water in the early morning. This allows plants to absorb water before the heat of the day, and foliage has time to dry, reducing the risk of fungal diseases.
  • Mulch: Apply a layer of organic mulch, like straw or shredded leaves, to the soil surface. Mulch helps retain soil moisture, regulates soil temperature, and suppresses weeds, reducing your watering frequency.

Hands applying organic granular fertilizer to a thriving kale plant in a pot on a patio, with other specialized liquid fertilizers and container veget

Targeted Feeding for Rotational Success

Even with refreshed soil, container plants often need supplemental feeding. Your rotational schedule influences your fertilizing approach:

  • Start with a Good Base: As discussed, incorporate compost and a slow-release organic granular fertilizer into your soil at the start of each new rotation. This provides foundational nutrients.
  • Understand Plant Needs:

    • Leafy Greens (e.g., lettuce, spinach, kale): Benefit from higher nitrogen fertilizers for lush growth.
    • Fruiting Vegetables (e.g., tomatoes, peppers, squash): Require more phosphorus and potassium once flowering and fruiting begin. Switch to a fertilizer formulated for “blooming and fruiting.”
    • Legumes (e.g., beans, peas): Need less external nitrogen due to their nitrogen-fixing capabilities. Over-fertilizing with nitrogen can reduce pod production.
  • Use Liquid Feeds: Supplement with a diluted liquid organic fertilizer every 2-4 weeks during the active growing season. This provides a quick boost of nutrients. Seaweed or fish emulsion are excellent organic choices. Always follow dilution instructions carefully.
  • Avoid Over-Fertilizing: More is not better. Excess fertilizer can burn roots or lead to lush foliage at the expense of fruit production. Signs of over-fertilization include yellowing or browning leaf tips.

By tailoring your watering and feeding practices to your seasonal rotation and specific crops, you ensure your container vegetables have everything they need to flourish, reducing waste and maximizing your harvests.

Gardener intently inspecting yellowing leaves on a container basil plant on a sunny patio, with other potted plants in background.

Troubleshooting Common Container Gardening Challenges

Even with the best seasonal vegetable gardening practices, you might encounter challenges. Knowing how to quickly identify and address common issues keeps your container plants healthy and productive. Crop rotation significantly reduces many problems, but vigilance remains key.

Overhead view of fingers checking soil moisture in a terracotta pot with a container vegetable plant showing yellowing lower leaves.

Yellowing Leaves

  • Possible Cause: Often indicates a nutrient deficiency (e.g., nitrogen, iron), overwatering, or underwatering. Lower leaves yellowing first can suggest nitrogen deficiency or overwatering. New leaves yellowing might point to an iron deficiency.
  • Action:

    • Nutrient Deficiency: Apply a balanced liquid organic fertilizer. For iron deficiency, consider a chelated iron supplement. Ensure your refreshed soil mix contained compost.
    • Watering Issues: Check soil moisture before watering. Allow the top two inches of soil to dry out between waterings. Ensure good drainage.

A visibly wilting tomato plant with droopy leaves in a terracotta pot, showing dry soil, on a sunny urban balcony with a watering can nearby.

Wilting Plants

  • Possible Cause: Usually a sign of underwatering or, less commonly, root rot from overwatering. Extreme heat can also cause temporary wilting during the hottest part of the day.
  • Action:

    • Underwatering: Water immediately and deeply until water drains from the bottom. Ensure the pot has not become “root-bound,” where roots circle tightly around the pot, preventing water absorption.
    • Overwatering/Root Rot: Reduce watering frequency. If root rot is suspected (soggy soil, foul smell), repotting with fresh, well-draining soil and trimming affected roots might be necessary, though this is difficult for established plants.
    • Heat Stress: Provide afternoon shade for plants on very hot days. Ensure consistent moisture.

A spindly pepper plant in a terracotta pot sits in a deep shadow on an urban patio, showing no fruit or flowers, contrasting with vibrant herbs thrivi

Stunted Growth or No Flowers/Fruit

  • Possible Cause: Lack of adequate light, insufficient nutrients (especially phosphorus for flowering/fruiting), incorrect watering, or excessively high nitrogen encouraging leafy growth at the expense of fruit.
  • Action:

    • Light: Move the container to a location receiving at least 6-8 hours of direct sunlight daily for most vegetables.
    • Nutrients: Apply a fertilizer higher in phosphorus and potassium for fruiting plants. For leafy greens, ensure sufficient nitrogen. Refer to specific plant family needs.
    • Watering: Ensure consistent, deep watering.
    • Temperature: Some plants (e.g., tomatoes, peppers) will not set fruit in extremely high temperatures (above 90°F / 32°C). Provide some afternoon shade if possible.

A person's hands gently spray insecticidal soap onto the underside of a tomato plant leaf in a pot on a sunny balcony.

Pest Infestations

  • Possible Cause: Common pests include aphids, spider mites, whiteflies, and cabbage worms. Stress plants are more susceptible.
  • Action:

    • Regular Inspection: Check your plants regularly, especially the undersides of leaves. Early detection is crucial.
    • Manual Removal: For small infestations, pick off larger pests or spray aphids off with a strong jet of water.
    • Organic Treatments: Use insecticidal soap or neem oil for persistent issues. Always follow label directions. These are effective, environmentally friendly options.
    • Beneficial Insects: Encourage predatory insects like ladybugs and lacewings by planting flowers nearby or purchasing them.
    • Crop Rotation: Your seasonal rotation efforts significantly reduce pest buildup by breaking their life cycles in the soil. Consistent rotation is your best preventative tool.

A hand prunes a lower tomato leaf in a pot, clearly showing brown leaf spot disease. Patio containers in background.

Disease Symptoms (Spots, Mildew)

  • Possible Cause: Fungal or bacterial infections like powdery mildew, blight, or leaf spot. Often exacerbated by high humidity, poor air circulation, or contaminated soil.
  • Action:

    • Improve Air Circulation: Space containers adequately. Prune lower leaves on vining plants like tomatoes to improve airflow.
    • Watering Practices: Water at the base of the plant, avoiding wetting foliage, especially in the evening.
    • Remove Affected Parts: Prune and discard diseased leaves or stems immediately. Do not compost diseased material.
    • Fungicides: For severe fungal issues, use an organic fungicide (e.g., copper or sulfur-based).
    • Sanitation and Rotation: Clean containers thoroughly between crops. Crop rotation prevents the buildup of disease spores in the soil, which is a major advantage for disease prevention.

By understanding these common challenges and implementing timely, appropriate solutions, you maintain a robust and thriving container garden. Your consistent effort in seasonal vegetable gardening pays off with healthy plants and abundant harvests.

A gardener's hands mix dark compost into depleted potting soil in a terracotta pot on a sunny deck, surrounded by other container plants.

Sustainable Practices for Long-Term Container Health

Your passion for gardening extends beyond just growing food; you also want to do it responsibly. Integrating sustainable practices into your seasonal vegetable gardening enhances the health of your plants and contributes positively to the environment. Crop rotation is inherently sustainable, and these additional habits amplify its benefits.

Close-up of ungloved hands sifting through dark, fibrous peat-free potting mix with coir and bark pieces on a wooden bench.

Embrace Peat-Free Potting Mixes

Peat is harvested from peat bogs, which are crucial carbon sinks and unique ecosystems. Opting for peat-free potting mixes helps protect these vital habitats. Modern peat-free alternatives, often made from coir (coconut fiber), composted bark, and other organic materials, perform exceptionally well for container vegetables. They offer excellent drainage, aeration, and water retention, providing a superb environment for root development. Many reputable brands offer high-quality peat-free options that support robust plant growth.

A person adds kitchen scraps to a compact, multi-tiered worm composting bin on a sun-dappled urban patio amidst container plants.

Compost Your Scraps

Start a small-scale composting system for your kitchen scraps and garden waste. Even a worm farm (vermicomposting) works wonderfully in a small space. The compost you create is a powerful soil amendment, rich in nutrients and beneficial microbes. Incorporating homemade compost into your container soil at each rotation reduces your need for external fertilizers and enriches your growing medium naturally. This practice turns waste into a valuable resource, closing the loop on your organic gardening efforts.

A hand fills a metal watering can from a compact rain barrel on an urban balcony, surrounded by mulched container plants.

Conserve Water

Water is a precious resource. In container gardening, evaporation can be high. Implement these water-wise strategies:

  • Mulch Containers: A layer of straw, shredded leaves, or wood chips on top of your container soil significantly reduces water loss through evaporation.
  • Group Similar Plants: Group plants with similar water needs together. This simplifies watering and prevents over or under-watering specific plants.
  • Drip Irrigation/Self-Watering Pots: For larger collections of containers, consider a simple drip irrigation system or use self-watering pots. These systems deliver water directly to the roots, minimizing waste.
  • Collect Rainwater: A small rain barrel or collection system provides free, chlorine-free water for your plants.

Close-up of hands applying organic spray to a vibrant basil plant in a terracotta pot on an urban balcony, with blurred background.

Use Organic Fertilizers and Pest Control

Choose organic fertilizers over synthetic ones. Organic options feed the soil, not just the plant, fostering a healthier microbial ecosystem. Similarly, when pests or diseases arise, reach for organic, non-toxic solutions like insecticidal soap, neem oil, or manual removal. Avoid broad-spectrum pesticides that harm beneficial insects and the environment. Your crop rotation efforts already reduce the reliance on chemical interventions, and these choices further strengthen your sustainable approach.

Hands placing a clean plastic nursery pot into a repurposed yogurt container with drainage holes, alongside other recycled pots and young herb seedlin

Recycle and Reuse Containers

Give old plastic containers a new life as plant pots. Ensure they have drainage holes. Plastic nursery pots from purchased plants can serve for starting seeds or growing smaller herbs. Clean and disinfect containers between uses, especially if previous plants had disease, to maintain hygiene in your seasonal vegetable gardening.

By integrating these sustainable practices with your seasonal rotation for container vegetables, you cultivate a garden that is not only productive but also environmentally conscious. You create a thriving ecosystem in your small space, benefiting your plants and the planet.

Sun-drenched urban patio corner with diverse container vegetables: tomatoes, greens, herbs. Golden light, watering can visible.

Frequently Asked Questions

What is the easiest way to start crop rotation in containers?

The easiest way is to group your most frequently grown vegetables into broad categories like “fruiting crops” (tomatoes, peppers), “leafy greens” (lettuce, spinach), and “legumes” (beans, peas). Then, ensure you never follow a fruiting crop with another fruiting crop in the same container. For example, if you grew tomatoes in Pot A this summer, plant beans or lettuce in Pot A next season. Keep a simple record of what you plant in each pot each season.

How often should I refresh the soil in my containers with crop rotation?

You should refresh your container soil at the start of each new growing season, especially after a heavy-feeding crop. This involves removing about one-third to one-half of the old soil, breaking up clumps, and mixing in fresh, peat-free potting mix, well-rotted compost, and a balanced organic fertilizer. For small pots, or if you had disease issues, consider completely replacing the soil.

Can I really grow potatoes in containers and rotate them?

Absolutely! Potatoes thrive in large containers like grow bags or large plastic tubs. They belong to the Solanaceae family. To rotate effectively, follow potatoes with a legume like bush beans, which will help replenish nitrogen. Avoid planting other Solanaceae crops (tomatoes, peppers) in that same pot for at least 2-3 seasons after your potato harvest.

Do herbs need crop rotation in containers?

Most perennial herbs (rosemary, thyme, oregano) do not require strict rotation since they remain in the same pot for years. Annual herbs (basil, cilantro, dill) can benefit from rotation, especially if you grow them in the same spot for multiple seasons. Treat them as leafy greens or “other” categories in your rotation plan to maintain soil health and deter specific pests.

What if I only have a few containers? Is crop rotation still worth it?

Yes, even with only a few containers, crop rotation provides significant benefits. It prevents the rapid depletion of specific nutrients and reduces pest and disease buildup, which is even more critical in limited space. A simple three-pot, three-crop rotation (e.g., fruiting crop, leafy green, legume) still makes a big difference to your seasonal vegetable gardening success and overall plant health.

For research-based plant care guidance, visit
New York Botanical Garden,
Royal Horticultural Society (RHS),
University of Minnesota Extension,
Cornell Garden-Based Learning and
UF/IFAS Gardening Solutions.

Disclaimer: This article is for informational purposes only and is not a substitute for professional advice. Consult local extension services for region-specific recommendations.

Categories
Tools & Gear

Do You Really Need Grow Lights? A Complete Guide

You love the idea of fresh herbs on your kitchen counter, vibrant flowers brightening a dim corner, or starting vegetable seedlings long before spring arrives. This dream is achievable, even if your home lacks abundant natural sunlight. Many small-space gardeners wonder if artificial light sources, specifically grow lights, are a necessity or a luxury. The answer depends on your plants, your goals, and your available natural light.

This complete guide empowers you to make informed decisions about indoor garden lighting. We will break down how light fuels plant growth, explore different types of grow lights, and provide practical advice for selecting, setting up, and maintaining the best grow lights for your unique small garden. You will learn when grow lights are essential, when they offer a valuable boost, and how to use them safely and efficiently to cultivate a thriving indoor oasis.

Person's hands gently touch a leggy basil seedling in a terracotta pot on a balcony, next to a healthy marigold.

Do You Really Need Grow Lights? The Core Question

Deciding if you need grow lights involves evaluating your plant’s needs and your home’s natural light conditions. Plants convert light energy into chemical energy through photosynthesis, a process vital for their survival and growth. Without adequate light, plants become weak, leggy, and unproductive.

Robust tomato, pepper, and herb seedlings thrive under LED grow lights on a minimalist three-tiered shelf in an apartment corner.

When Grow Lights are Essential

Grow lights become a critical component of your indoor garden when natural light is insufficient for your chosen plants. Consider these scenarios:

  • Seed Starting: Young seedlings require bright, consistent light to develop strong stems and leaves. A windowsill often provides weak, uneven light, causing seedlings to stretch excessively, a condition known as etiolation. Grow lights prevent this, promoting robust starts for your outdoor garden or healthy growth for indoor plants.
  • Growing High-Light Plants Indoors: Many popular garden plants, such as tomatoes, peppers, and fruiting herbs, demand intense, prolonged light exposure. If you aim to grow these plants indoors, even a sunny south-facing window may not provide enough. Grow lights supplement natural light, ensuring these plants receive the energy they need to produce fruit.
  • Winter Gardening: As daylight hours shorten and light intensity diminishes significantly in winter, even formerly bright windows may become inadequate. Grow lights allow you to continue growing herbs, leafy greens, and even some flowering plants through the darker months, maintaining your harvest or extending your bloom season.
  • Low-Light Locations: If your preferred growing space is in a room with minimal windows, or only north-facing windows, artificial indoor garden lighting becomes a non-negotiable requirement for almost all plants. You simply cannot rely on ambient room light for successful plant cultivation.
  • Specialized Plant Needs: Some plants, like certain succulents or orchids, have very specific light requirements that are difficult to meet with natural light alone. Grow lights offer precise control over light intensity and duration, catering to these unique demands.

Vibrant red coleus plant thriving under a modern supplemental grow light on a cozy urban balcony at dusk, natural light fading.

When Grow Lights are Optional or Supplemental

In other situations, grow lights might not be strictly necessary, but they can significantly enhance your plants’ health and vigor:

  • Boosting Growth: Even with decent natural light, a grow light can accelerate growth, deepen coloration, and increase yields for many plants. If you want your herbs to produce more prolifically or your foliage plants to show off richer hues, supplemental lighting can help.
  • Extending Daylight Hours: When your natural light is generally good but the days are short, a grow light can extend the “on” period for your plants, allowing them to photosynthesize for longer and accumulate more energy.
  • Aesthetic Appeal: Modern grow lights are increasingly discreet and even decorative. You might choose a stylish light fixture to highlight your plants and integrate your indoor garden lighting into your home decor, providing both functional light for plants and ambiance for your space.

Ultimately, assessing your plant’s specific light needs against your home’s natural light availability guides your decision. You avoid investing in equipment you do not need, and you ensure your plants receive optimal conditions for thriving.

Golden hour sunlight illuminates a small urban balcony garden with potted tomatoes, basil, and nasturtiums, casting long shadows.

Understanding Light: Your Plants’ Fuel

To effectively use grow lights, you need to understand how plants perceive and utilize light. It is more complex than simply “bright” or “dim.” Light has several properties crucial for plant growth: spectrum, intensity, and duration.

Compact basil and dwarf chili plants thrive under a subtle pink-purple LED grow light on a modern kitchen counter in a small urban home.

Light Spectrum: The Colors Plants Use

Sunlight, often perceived as white, is actually a full spectrum of colors, each with a different wavelength. Plants primarily use specific parts of this spectrum for different functions:

  • Blue Light (400-500nm): This wavelength drives vegetative growth, promoting strong, compact stems and healthy leaf development. It is crucial for seedlings and foliage plants. Too little blue light leads to leggy, stretched plants.
  • Red Light (600-700nm): Red light is essential for flowering and fruiting. It also influences stem elongation and seed germination. Combined with blue light, it encourages robust overall plant health.
  • Green Light (500-600nm): Plants reflect most green light, which is why we see them as green. While less critical for photosynthesis than red and blue, recent research suggests green light penetrates deeper into the plant canopy and contributes to overall growth, particularly in dense foliage.
  • Far-Red Light (700-800nm): Beyond the visible spectrum, far-red light influences flowering, stem elongation, and helps regulate plant responses like germination and dormancy. It works in conjunction with red light.

Most grow lights aim to provide a “full spectrum” light that mimics sunlight, or they offer specific “grow spectrums” tailored to emphasize blue and red wavelengths, maximizing photosynthesis for plant growth. The “best grow lights” for your situation often provide a balanced spectrum appropriate for your plant’s life stage.

A hand holds a digital PAR meter over a lush green herb plant in a pot on a sunlit balcony, measuring light intensity for plant growth.

Light Intensity: How Much Light

Light intensity refers to the amount of light reaching your plants. It is measured in a few ways:

  • Lumens: A measure of light visible to the human eye. While useful for general room lighting, lumens are a poor indicator for plant growth because plants see light differently than humans.
  • PAR (Photosynthetically Active Radiation): This refers to the range of light wavelengths (400-700nm) that plants use for photosynthesis. It is a more relevant metric than lumens for plant lighting.
  • PPF (Photosynthetic Photon Flux): Measures the total amount of PAR light produced by a light source per second. This is a measure of the light fixture’s total output.
  • PPFD (Photosynthetic Photon Flux Density): Measures the amount of PAR light that actually reaches a specific surface area per second. This is the most crucial metric for gardeners, as it tells you how much usable light your plants are receiving at canopy level. Higher PPFD values indicate more intense light. Different plants have different PPFD requirements for optimal growth.

When selecting indoor garden lighting, pay attention to PPFD measurements provided by manufacturers, often at various distances from the light source. This helps you determine the appropriate hanging height for your specific plants.

Close-up of a compact seedling station with a bright LED grow light above young basil, tomato, and flower plants in pots. A digital timer is visible.

Light Duration: How Long Plants Get Light

Photoperiod, or the duration of light and dark periods, influences plant growth and development, particularly flowering. Plants are often categorized by their photoperiodic responses:

  • Long-Day Plants: Require long periods of light (typically 14-18 hours) to flower, like many summer vegetables and annual flowers.
  • Short-Day Plants: Require long periods of darkness (typically 12+ hours) to flower, such as chrysanthemums and poinsettias. They need short light periods.
  • Day-Neutral Plants: Flower regardless of light duration, as long as they receive sufficient overall light intensity, like tomatoes and many common houseplants.

Most indoor gardeners aiming for continuous growth or seedling production will use a longer light duration, often 14-16 hours per day, followed by 8-10 hours of darkness. Darkness is crucial for plants to process energy and perform other metabolic functions. Always avoid leaving grow lights on 24/7, as this stresses plants and inhibits proper development.

A multi-tiered indoor garden shelf in an urban apartment, featuring a T5 fluorescent light over herb seedlings and an LED bar over mature greens.

Types of Grow Lights: What’s Right for Your Space?

The market offers several types of indoor garden lighting, each with distinct advantages and disadvantages. For small-space and low-maintenance gardening, factors like energy efficiency, heat output, size, and cost are paramount. You will primarily encounter LEDs and fluorescent lights.

Vibrant indoor herb garden on a kitchen counter, illuminated by a sleek, low-profile LED grow light positioned close to basil, mint, and chives.

LED (Light Emitting Diode) Grow Lights

LEDs are the most popular and versatile option for modern indoor gardening, particularly for small spaces. They represent the current standard for efficient grow lights.

  • Pros:
    • Energy Efficiency: LEDs consume significantly less power than older technologies, reducing your electricity bill.
    • Low Heat Output: They run much cooler, minimizing the risk of heat stress to plants and reducing the need for elaborate ventilation in small setups. This also saves space, as you do not need as much clearance.
    • Long Lifespan: High-quality LEDs can last 50,000 hours or more, meaning years of use without bulb replacement.
    • Tunable Spectrum: Many LEDs offer full spectrum light, while advanced models allow you to adjust the spectrum to favor blue for vegetative growth or red for flowering.
    • Compact and Versatile: Available in many forms, from small bars to clip-on lights and panels, making them ideal for shelves, carts, or desktop gardens.
  • Cons:
    • Higher Upfront Cost: The initial investment for good quality LED grow lights is generally higher than for fluorescent fixtures.
    • Quality Varies: A wide range of quality exists. Cheaper LEDs may lack sufficient intensity or proper spectrum, leading to disappointing results. Research reputable manufacturers.

A T5 fluorescent grow light fixture illuminates a tray of bright green pea shoots and emerging basil seedlings on a wooden shelf in a small apartment.

Fluorescent Grow Lights (T5/T8)

Fluorescent lights, particularly T5 and T8 varieties, have long been a go-to for seed starting and growing leafy greens. The “T” refers to the tubular shape, and the number indicates diameter in eighths of an inch (T5 is 5/8 inch, T8 is 1 inch).

  • Pros:
    • Affordable: Generally less expensive upfront than LEDs, making them a budget-friendly entry point for indoor garden lighting.
    • Good for Seedlings and Low-Light Plants: T5s, especially, provide excellent light for starting seeds, propagating cuttings, and growing leafy greens or herbs that do not require extremely high intensity.
    • Lower Heat Than HIDs: While hotter than LEDs, they are manageable for most small indoor setups compared to older HID lights.
  • Cons:
    • Lower Intensity: Fluorescents typically do not offer enough intensity for fruiting plants like tomatoes or peppers unless placed very close to the canopy.
    • Shorter Lifespan: Bulbs need replacement more frequently than LEDs, usually every 10,000-20,000 hours, as their intensity degrades over time.
    • Less Energy Efficient: They consume more electricity than LEDs for comparable light output.
    • Bulkier Fixtures: Tubes are longer and require more space for the fixture itself.

A woman on a plant-filled balcony looks at a tablet displaying a large, industrial HID grow light, contrasting it with her small garden.

Other Types (Less Common for Small Spaces)

  • Incandescent Lights: Inefficient, produce too much heat, and lack the correct spectrum for plants. Avoid these for growing plants.
  • HID (High-Intensity Discharge) Lights: This category includes Metal Halide (MH) and High-Pressure Sodium (HPS) lights. They are very powerful and used by commercial growers or for large-scale operations. However, they produce significant heat, consume a lot of electricity, and are too large and intense for most small-space home gardens.

Here is a quick comparison of the main types of grow lights relevant for home gardeners:

Feature LED Grow Lights Fluorescent (T5/T8)
Energy Efficiency Excellent (lowest consumption) Good (better than incandescent, worse than LED)
Heat Output Very Low Low to Moderate
Lifespan (Bulbs/Diodes) Very Long (50,000+ hours) Moderate (10,000-20,000 hours)
Upfront Cost Moderate to High Low to Moderate
Intensity for Plants Variable, from low to very high (ideal for all plants) Low to Moderate (best for seedlings, greens, herbs)
Spectrum Options Full spectrum, specific plant growth spectrums, tunable Cool white, warm white, or specific grow spectrums
Best Use for Small Spaces All indoor plants, seedlings, fruiting plants, year-round growing Seed starting, leafy greens, herbs, supplemental light

Woman in her 40s comparing compact LED grow lights on a tray next to potted herbs in a small apartment, assessing size and details.

Choosing the Best Grow Lights for Your Needs

Selecting the best grow lights involves balancing your plants’ needs with your space constraints, budget, and energy considerations. You want a light that provides adequate power without unnecessary expense or bulk.

Multi-tiered urban balcony plant shelf showing a flowering plant under LED, herbs under T5, and low-light plants in ambient light.

Assess Your Plants’ Light Requirements

Different plants have varying light needs. Identify what you plan to grow:

  • Low-Light Plants (e.g., peace lily, pothos, many ferns): Often thrive with ambient room light or a low-intensity LED or T5 fluorescent. They do not need powerful grow lights.
  • Medium-Light Plants (e.g., most herbs, leafy greens, African violets): Benefit greatly from supplemental light. A T5 fluorescent or a moderate-intensity LED panel works well.
  • High-Light Plants (e.g., tomatoes, peppers, citrus, most flowering plants, succulents): Absolutely require significant artificial lighting to thrive indoors. You need powerful LED grow lights with high PPFD values.
  • Seedlings and Cuttings: Need consistent, bright light to prevent stretching. T5 fluorescents are a classic choice, but full-spectrum LED bars also work exceptionally well.

Indoor growing setup featuring a shelf with bar LED light, windowsill with clip-on LED, and a subtly glowing grow tent in an apartment corner.

Consider Your Growing Space

Your physical space dictates the size and form factor of your indoor garden lighting:

  • Shelves or Racks: Long bar-style LEDs or fluorescent tubes fit neatly under shelves. Ensure enough vertical clearance between shelves for both the light fixture and plant growth.
  • Windowsills or Desktops: Clip-on grow lights or small, compact LED panels with stands are excellent for individual plants or small groupings.
  • Grow Tents or Cabinets: If you are dedicating an enclosed space, you can use more powerful LED panels that efficiently cover the entire footprint. These are ideal if you want to control environmental factors precisely.

Close-up of vibrant basil and leafy greens thriving in pots under a modern LED grow light, with a hand holding a tablet displaying a PPFD map.

Evaluate Light Specifications

When comparing different grow lights, look for these key specifications:

  • Spectrum: For general growing, “full spectrum” LEDs are a safe bet. If growing specific plants, ensure the spectrum supports their needs (e.g., more red for flowering, balanced for leafy greens).
  • PPFD Output: This is critical. Manufacturers should provide PPFD maps or charts at different hanging heights. Aim for:
    • 100-250 PPFD for seedlings/cuttings.
    • 250-400 PPFD for leafy greens, herbs, and low-light houseplants.
    • 400-800 PPFD for flowering, fruiting, and high-light plants.
  • Wattage: While not a direct measure of plant growth efficacy, wattage indicates power consumption. More efficient lights provide higher PPFD per watt.
  • Coverage Area: The manufacturer specifies the effective footprint a light can cover. Match this to your growing area. For small spaces, you often need a narrow, focused light.

A low-angle view of a compact indoor plant shelf. A T5 fluorescent light brightens young lettuce seedlings on the lower tier, while a sleeker LED bar

Budget and Energy Efficiency

Your budget influences your initial purchase, but remember to consider long-term energy costs.

  • Upfront Cost: Fluorescents are cheaper to buy, but LEDs offer better long-term value due to lower energy consumption and longer lifespan. If your budget is tight, start with T5 fluorescents for seedlings and upgrade to LEDs later.
  • Operating Cost: LEDs win hands down here. Their energy efficiency means lower electricity bills, which adds up over months and years of use.

By carefully considering these factors, you can select the best grow lights that precisely meet the needs of your plants and fit seamlessly into your small-space gardening setup.

A woman's hands carefully adjust a slim LED grow light suspended by cables over thriving potted herbs and microgreens on a kitchen counter.

Setting Up Your Indoor Garden Lighting System

Proper setup is just as important as choosing the right grow lights. Incorrect placement or inadequate support can harm your plants, waste energy, or even create safety hazards. Follow these steps for a successful indoor garden lighting system.

Capable hands use a cordless screwdriver to secure a slim LED grow light under a wooden kitchen shelf, above potted herbs and seedlings.

Step 1: Secure Your Light Fixture

Mounting your grow light securely prevents accidental falls, which could damage your plants or fixture. For small setups:

  • Under-Shelf Mounting: Many bar-style LEDs and slim fluorescents come with clips or screws for attaching directly to the underside of a shelf. Ensure the shelf is sturdy enough to support the light’s weight.
  • Hanging Systems: For panels or larger lights, use adjustable rope hangers or chains. These typically attach to eye bolts screwed into a sturdy ceiling joist or the top frame of a grow rack. Adjustable hangers are crucial for raising and lowering the light as plants grow.
  • Clip-On Lights: These are ideal for single plants. Ensure the clip attaches firmly to a stable surface, like a shelf edge or pole, and that the gooseneck arm holds the light head steadily.

An adult hand measures the distance between a suspended LED grow light and vibrant basil plants in terracotta pots on a kitchen counter.

Step 2: Determine Optimal Hanging Height

The distance between your grow light and your plants is critical for light intensity. Too close, and you scorch your plants; too far, and they stretch.

  • Consult Manufacturer Guidelines: Always start with the recommended hanging height provided by the grow light manufacturer, especially if they include PPFD charts.
  • Seedlings/Cuttings: Generally need lights very close, often 6-12 inches (15-30 cm) from the plant canopy. Fluorescents can be even closer (4-6 inches) due to their lower heat output.
  • Vegetative Growth (Greens, Herbs): Typically 12-24 inches (30-60 cm) for LEDs, 8-12 inches (20-30 cm) for T5 fluorescents.
  • Flowering/Fruiting Plants: These often require more intense light, so LEDs might be 12-18 inches (30-45 cm) away, but always monitor your plants for signs of stress.

Observe your plants closely. If leaves yellow, crisp, or develop bleached spots, your light is too close. If plants stretch, become pale, and develop weak stems, the light is too far away or not intense enough.

Diagram illustrating proper grow light distance from plants, with adjustable hangers for seedlings (closer) and mature plants (further), showing even light coverage over the canopy.

Hands plugging a compact LED grow light's cord into a white digital timer on a shelf above potted herbs.

Step 3: Connect to a Timer

A simple mechanical or digital timer is an indispensable tool for managing your indoor garden lighting. It ensures consistent light cycles, which plants prefer, and frees you from manually turning lights on and off.

  • Consistency: Plants thrive on routines. A timer provides the consistent light duration necessary for healthy growth and proper photoperiodic responses.
  • Energy Savings: Prevents accidentally leaving lights on too long, saving electricity.
  • Ease of Use: Set it once, and your lights operate automatically.

Ensure the timer is rated for the wattage of your grow light. For most small grow lights, a standard household timer works well. Plug the light into the timer, then plug the timer into the wall outlet.

A compact clip-on fan gently oscillates over various potted plants on a wooden shelf in a bright, small indoor container garden.

Step 4: Ensure Proper Air Circulation

Even low-heat LEDs can create a warm microclimate around your plants. Good air circulation prevents stagnant air, reduces humidity, and helps strengthen plant stems. A small clip-on fan positioned to gently oscillate near your plants is often sufficient for small indoor gardens. This simple addition mimics natural breezes, discourages pests, and prevents fungal issues. Proper air circulation is a key aspect of healthy indoor growing environments, often overlooked by beginners.

Person's hands adjusting the height of a suspended LED grow light over small container plants on a vertical shelving unit.

Optimizing Light Schedules and Intensity

Once your indoor garden lighting is set up, you need to fine-tune the light schedule and intensity to match your plants’ specific growth stages. This approach maximizes growth and avoids common issues like stretching or scorching.

Healthy container herbs and leafy greens on a kitchen counter under an off LED grow light, with a digital timer visible.

Adjusting Light Duration (Photoperiod)

The “on” time for your grow lights typically ranges from 12 to 18 hours per day, depending on the plant and its growth stage. A period of darkness is essential for plants to carry out metabolic processes and rest.

  • Seedlings and Cuttings: Provide 16-18 hours of light per day. This long duration encourages rapid initial growth and prevents stretching.
  • Vegetative Growth (Leafy Greens, Herbs, Houseplants): Maintain 14-16 hours of light. This supports continuous foliage development and vigorous growth.
  • Flowering and Fruiting Plants (Tomatoes, Peppers, Strawberries): These often benefit from a slightly shorter photoperiod, typically 12-14 hours of light, especially if they are day-neutral. Some plants are “short-day” and require a consistent 12 hours of darkness to initiate flowering. Research your specific plant’s needs.

Use your timer to manage these cycles precisely. Consistency is key for plant health. Avoid irregular light schedules.

A person's hand reaches to adjust a compact LED grow light above container basil showing subtle light burn on a natural wood shelf.

Managing Light Intensity and Distance

Light intensity, measured by PPFD, varies significantly with the distance from the light source. As plants grow, you must adjust the light’s height.

  • Monitor Plant Response: The best indicator of correct intensity is your plants themselves.
    • Signs of Too Little Light: Plants stretch towards the light, stems are thin and weak, leaves are pale or small, lower leaves may yellow and drop.
    • Signs of Too Much Light (Light Burn): Leaves may curl upwards, develop bleached or yellow patches, appear scorched or crisp, growth may stunt. This is more common with powerful LED grow lights placed too close.
  • Adjusting Height: Most grow lights for small spaces come with adjustable hangers or can be moved on shelves. Raise the light as plants grow taller to maintain optimal distance, ensuring the entire canopy receives even light. Lower the light if plants show signs of stretching.
  • Dimmable Lights: Some advanced LED grow lights feature dimmers. This allows you to adjust intensity without changing the physical distance, offering precise control. Start with lower intensity for seedlings and gradually increase it as plants mature.

Remember that the edges of your growing area receive less intense light than the center directly under the fixture. Rotate your plants periodically to ensure all sides receive adequate exposure, promoting balanced, even growth across your indoor garden. The Oregon State University Extension Service offers additional resources on plant light requirements.

Hand adjusting a digital timer for an LED grow light over container herbs on a kitchen shelf, showing efficient small-space gardening.

Maintenance, Safety, and Energy Efficiency

Proper care and safe operation of your indoor garden lighting system extend its lifespan, protect your plants, and keep your home safe. Additionally, smart practices help you manage energy consumption efficiently.

Hands gently wipe dust from an LED grow light panel above potted herbs, in a sunlit small-space garden.

Regular Maintenance for Your Grow Lights

  • Keep Fixtures Clean: Dust and debris can accumulate on light surfaces, blocking light output and reducing efficiency. Gently wipe down bulbs, LED lenses, and reflectors with a soft, dry cloth periodically. Avoid abrasive cleaners or excessive moisture.
  • Check Connections: Regularly inspect all electrical connections for looseness or signs of wear. A secure connection prevents flickering and ensures consistent power delivery.
  • Replace Old Bulbs (Fluorescents): Fluorescent bulbs lose intensity over time, even if they still light up. For optimal plant growth, replace them every 12-18 months of active use, or as recommended by the manufacturer. LEDs have a much longer lifespan and do not require regular bulb changes.
  • Monitor Hangers and Supports: Ensure hanging chains, rope ratchets, and shelf mounts remain secure. Over time, vibration or plant growth can stress these components. Re-tighten or replace as needed.

Person carefully waters container plants under an LED grow light on a balcony, meticulously avoiding electrical components.

Prioritizing Electrical Safety

Working with electricity near water and plants requires vigilance. You must prioritize safety:

  • Water and Electricity Do Not Mix: Always handle grow lights with dry hands. Avoid spraying water directly onto fixtures or power cords. If you use a watering can, be careful not to splash. Electrical safety in home and garden environments is paramount to prevent accidents.
  • Use Grounded Outlets and Extension Cords: Plug your grow lights into grounded (three-prong) outlets. If using an extension cord, ensure it is rated for outdoor use or heavy-duty indoor use and can handle the light’s wattage. Avoid overloading outlets.
  • Avoid Damaged Cords: Regularly inspect power cords for fraying, cuts, or exposed wires. Immediately replace any damaged cords or fixtures.
  • Proper Ventilation: While LEDs produce less heat, ensuring good air circulation around the fixture prevents heat buildup. This extends the life of the light and reduces any potential fire risk.
  • Keep Out of Reach: Position grow lights and cords out of reach of children and pets. Chewing on cords presents a severe electrocution hazard.

Vibrant herbs in a white-backed vertical garden, illuminated by a sleek, energy-efficient LED grow light, highlighting an optimized small-space setup.

Maximizing Energy Efficiency

Even with energy-efficient LED grow lights, you can still implement practices to minimize your carbon footprint and electricity bill:

  • Choose Efficient Lights: As discussed, LEDs are the most energy-efficient option. Invest in quality fixtures with high PPFD per watt ratings.
  • Use Reflective Surfaces: Painting walls white or using reflective materials like Mylar or white foam core around your growing area significantly increases light efficiency. These surfaces bounce stray light back towards your plants, meaning less light escapes and is wasted.
  • Optimize Your Light Schedule: Do not run lights longer than necessary. Stick to the recommended light durations for your plants. A precise timer is your best friend here.
  • Position Lights Correctly: Maintain the optimal distance from your plants. Light intensity drops off rapidly with distance, so a light too far away wastes energy trying to reach plants that are not receiving adequate intensity.
  • Monitor for Degradation: For fluorescent lights, remember they lose intensity over time. Replacing old bulbs ensures your plants are always getting sufficient light without you having to compensate by running the lights longer.

Person adjusts small LED grow light above slightly leggy potted herbs on an indoor shelf, troubleshooting plant growth.

Common Challenges and Troubleshooting Your Grow Lights

Even with the best grow lights and careful setup, you might encounter issues. Knowing how to identify and address common problems helps keep your indoor garden thriving.

A person's hand lowers a compact LED grow light closer to a container of tall, thin, stretched seedlings on an indoor shelf.

Plant Stretching and Legginess

If your plants are tall, thin, and reaching excessively towards the light, they are telling you they are not getting enough light intensity.

  • Solution:
    • Lower the Light: Gradually move your grow light closer to the plant canopy.
    • Increase Intensity: If your light has a dimmer, turn it up.
    • Add More Lights: For a larger area, you may need additional fixtures to achieve even coverage and sufficient PPFD.
    • Check Bulb Age: If using fluorescents, old bulbs lose intensity. Replace them.

Close-up of a container basil plant with severely bleached, yellowed, and crisping leaves directly under a low-hanging LED grow light.

Scorched or Bleached Leaves (Light Burn)

Symptoms include yellow or white patches on leaves, crisping, or leaf edges curling upwards. This indicates too much light intensity or that the light is too close.

  • Solution:
    • Raise the Light: Move your grow light further away from the plants.
    • Reduce Intensity: If your light is dimmable, turn the intensity down.
    • Monitor for Recovery: Damaged leaves will not heal, but new growth should appear healthy.

A young bell pepper plant in a terracotta pot shows uneven growth, one side lush, the other sparse, under an off-center LED grow light.

Uneven Growth

If some plants or parts of plants grow better than others, your light coverage might be inconsistent.

  • Solution:
    • Rotate Plants: Periodically turn your plant pots to expose all sides to the light.
    • Adjust Fixture Placement: Ensure the light is centered over your growing area.
    • Add Supplemental Side Lighting: For tall, bushy plants, consider adding smaller, lower-intensity LED bars to provide light to the lower canopy.

Close-up, overhead view of vibrant green algae covering the damp soil surface in a small terracotta pot with a compact herb and a few light gravel peb

Algae Growth on Soil Surface

A green film on the soil surface indicates excess moisture and too much light reaching the soil. While usually harmless to plants, it suggests conditions ripe for fungal gnats and other issues.

  • Solution:
    • Reduce Watering: Allow the top inch or two of soil to dry out between waterings.
    • Improve Air Circulation: A small fan can help dry the soil surface.
    • Mulch: Cover the soil with a layer of fine gravel, perlite, or an inert mulch to block light from reaching the soil surface.

Hands check a compact LED grow light's power cord over small potted herbs on a metal shelf in an apartment.

Flickering Lights or Complete Failure

This points to an electrical issue or a failing component.

  • Solution:
    • Check Connections: Ensure all plugs and connections are secure.
    • Test Outlet: Plug another appliance into the outlet to confirm it works.
    • Replace Bulbs (Fluorescents): A flickering fluorescent often means the bulb is at the end of its life.
    • Inspect for Damage: Look for any visible damage to cords or the fixture itself. If damaged, discontinue use and replace.
    • Consult Manufacturer: If the light is under warranty and troubleshooting does not resolve the issue, contact the manufacturer.

By actively observing your plants and your indoor garden lighting system, you can quickly diagnose and resolve most issues, ensuring your plants continue to thrive under optimal conditions. The Missouri Botanical Garden provides valuable insights on plant health and care.

A small LED grow light illuminates young basil and lettuce seedlings on a compact wire shelf, with an open gardening notebook displaying handwritten q

Frequently Asked Questions

How close should my grow light be to my plants?

The ideal distance varies significantly based on the light type and intensity, as well as the plant’s needs. For seedlings or low-light plants under fluorescent lights, you can place them 4-6 inches away. For powerful LED grow lights with mature plants, the distance might be 12-24 inches. Always start with the manufacturer’s recommendations and observe your plants. Raise the light if you see scorching, or lower it if plants appear leggy.

Can I leave grow lights on 24 hours a day?

No, you should not leave grow lights on 24 hours a day. Plants, like most living organisms, require a period of darkness to complete essential metabolic processes, such as respiration. A continuous light cycle can stress plants, inhibit proper development, and reduce yields. Most plants thrive on a schedule of 12-18 hours of light followed by 6-12 hours of darkness.

Do grow lights use a lot of electricity?

Modern LED grow lights are very energy-efficient, using significantly less electricity than older grow light technologies like HID lights. While there is an ongoing cost, the amount is often manageable for small indoor setups. Using a timer to ensure lights are only on for the required duration, and choosing efficient full-spectrum LEDs, helps minimize your electricity bill. Fluorescent lights use more power than LEDs but less than HIDs.

What is “full spectrum” and why is it important?

“Full spectrum” grow lights aim to mimic natural sunlight, providing a balanced output of light across the visible spectrum, including essential red and blue wavelengths. This is important because plants use different wavelengths for various physiological processes, from vegetative growth (blue light) to flowering and fruiting (red light). A full spectrum light supports overall healthy growth from seedling to maturity, rather than just one specific stage.

How many grow lights do I need for my small space?

The number of grow lights you need depends on the size of your growing area, the intensity of your chosen lights, and the light requirements of your plants. For small shelves, a single bar-style LED or a T5 fixture might cover 2-3 square feet adequately for herbs or seedlings. For fruiting plants in a larger area, you might need a more powerful, larger LED panel or multiple smaller lights to achieve sufficient and even coverage. Calculate the square footage you need to cover and compare it to the light’s specified coverage area.

For reliable tool and safety guidance, see
UF/IFAS — Microirrigation for Home Landscapes,
Oregon State Extension — Cleaning & Sharpening Tools,
Missouri Botanical Garden — Watering Tips and
National Safety Council — Home & Garden Safety.

Disclaimer: Follow manufacturer instructions and local regulations. Wear appropriate protection, store blades safely, and keep tools away from children and pets.