Categories
Edible Gardening

The Underground Harvest: A Beginner’s Guide to Planting Fall Carrots in Deep Containers

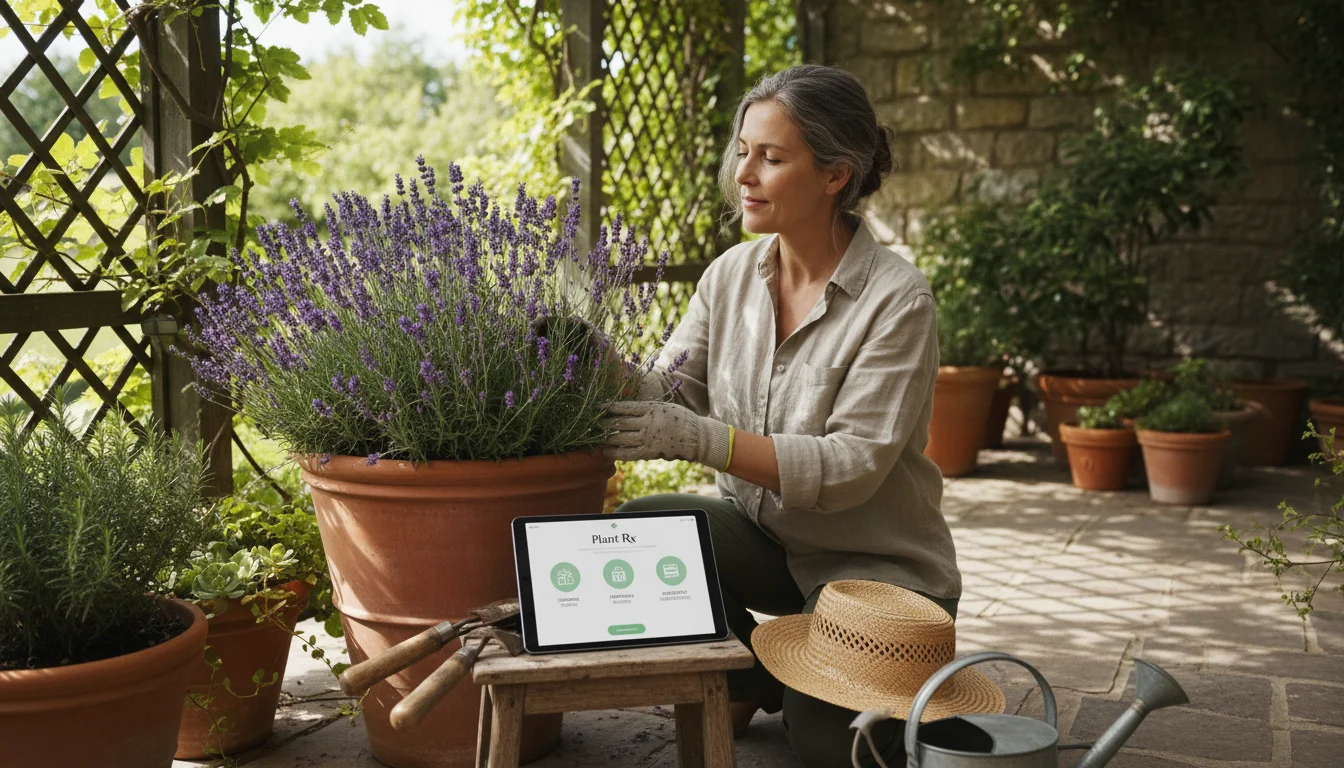
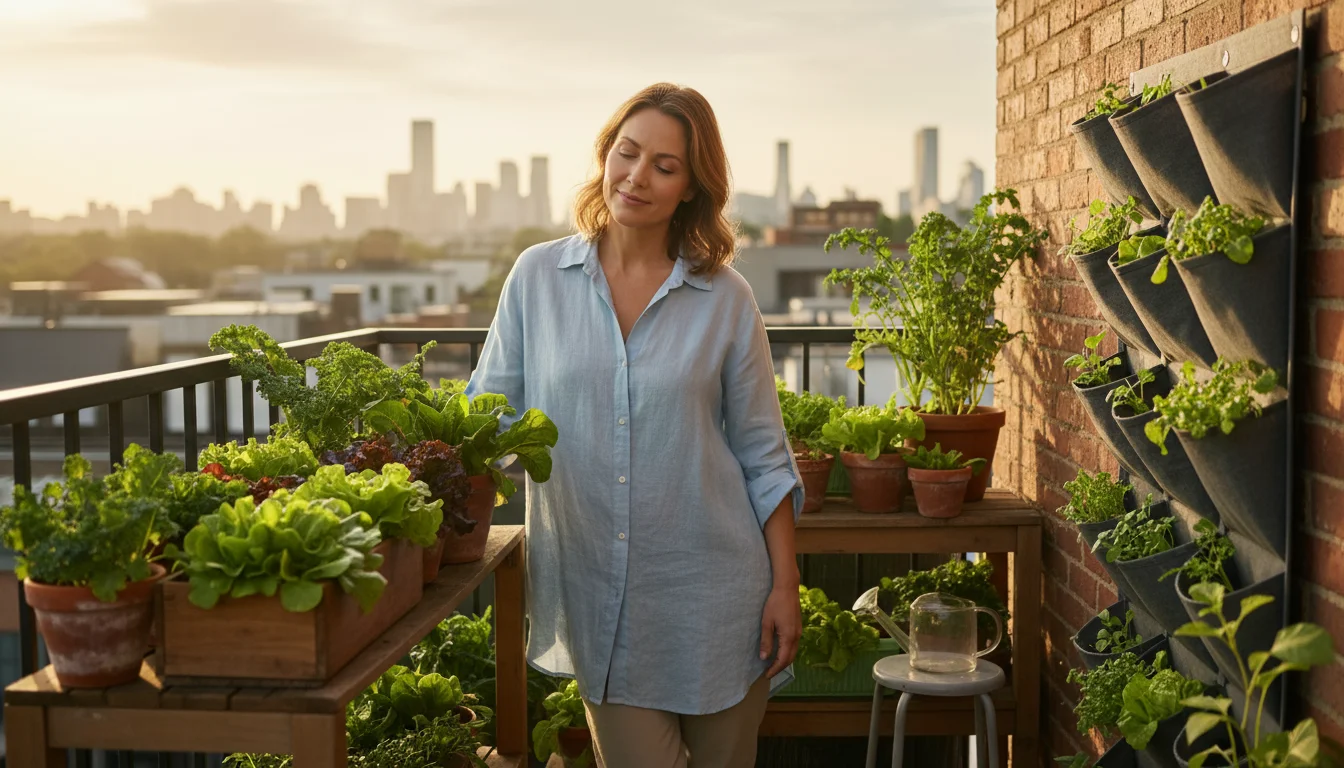
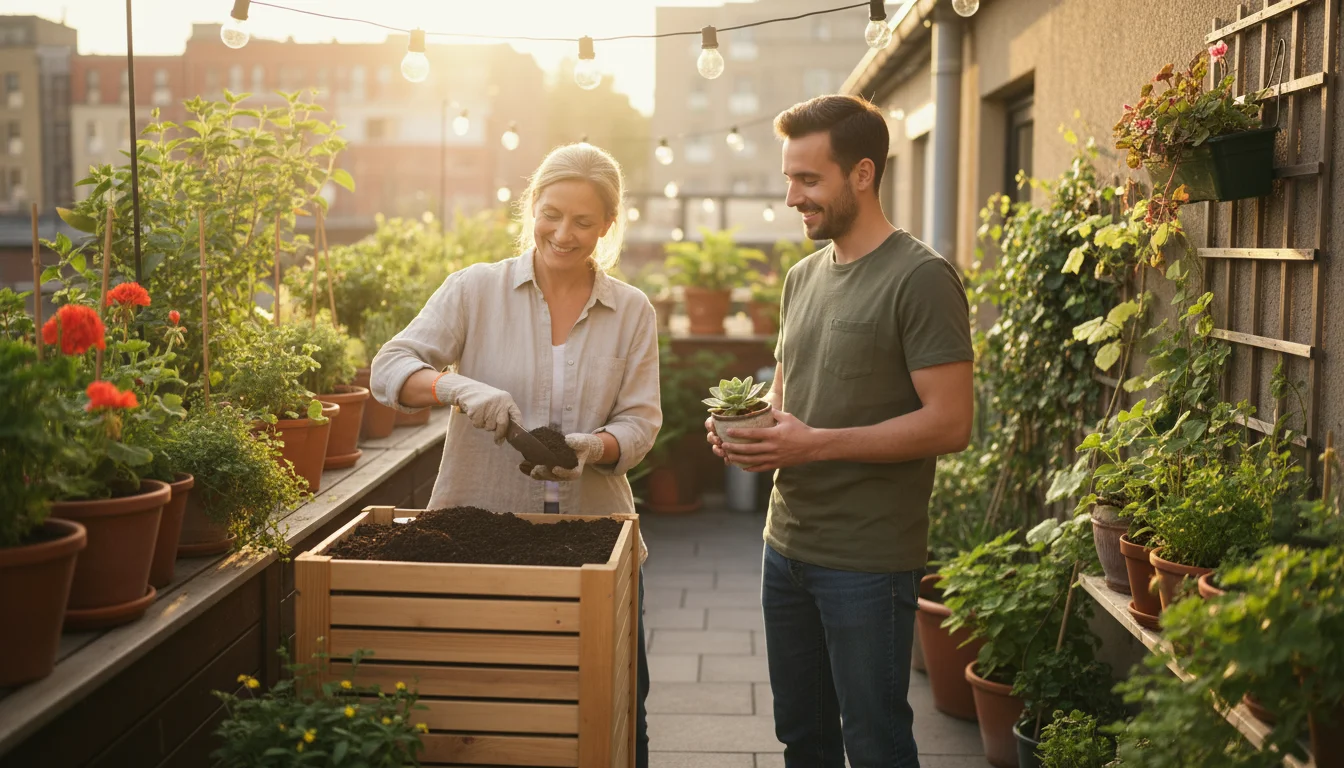
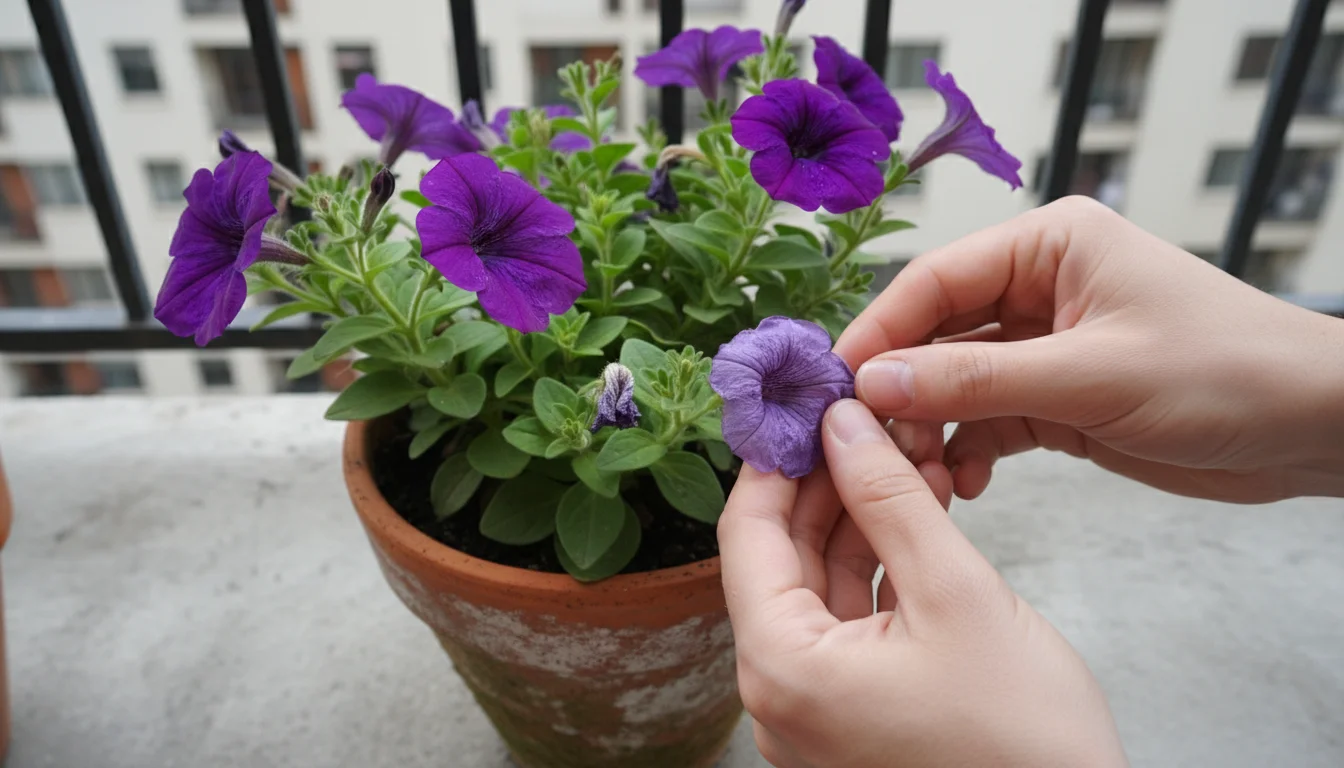
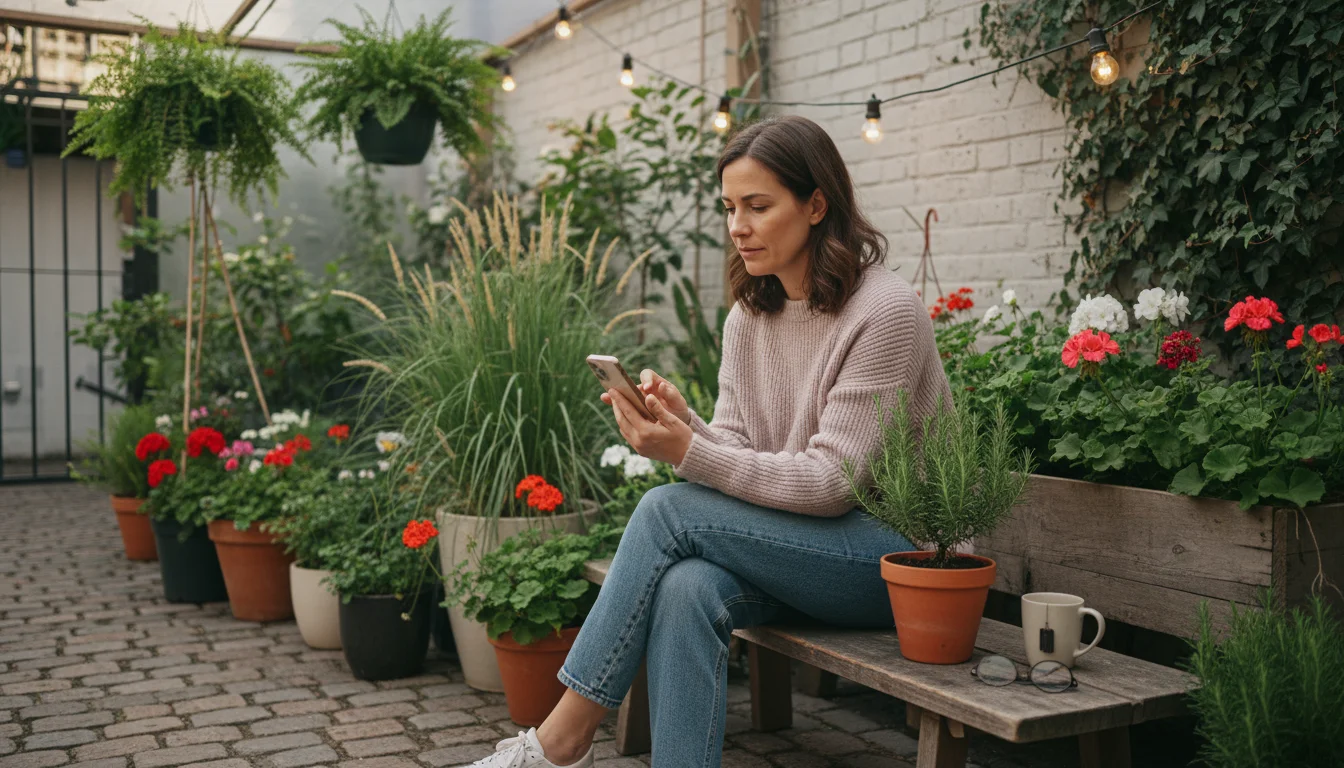
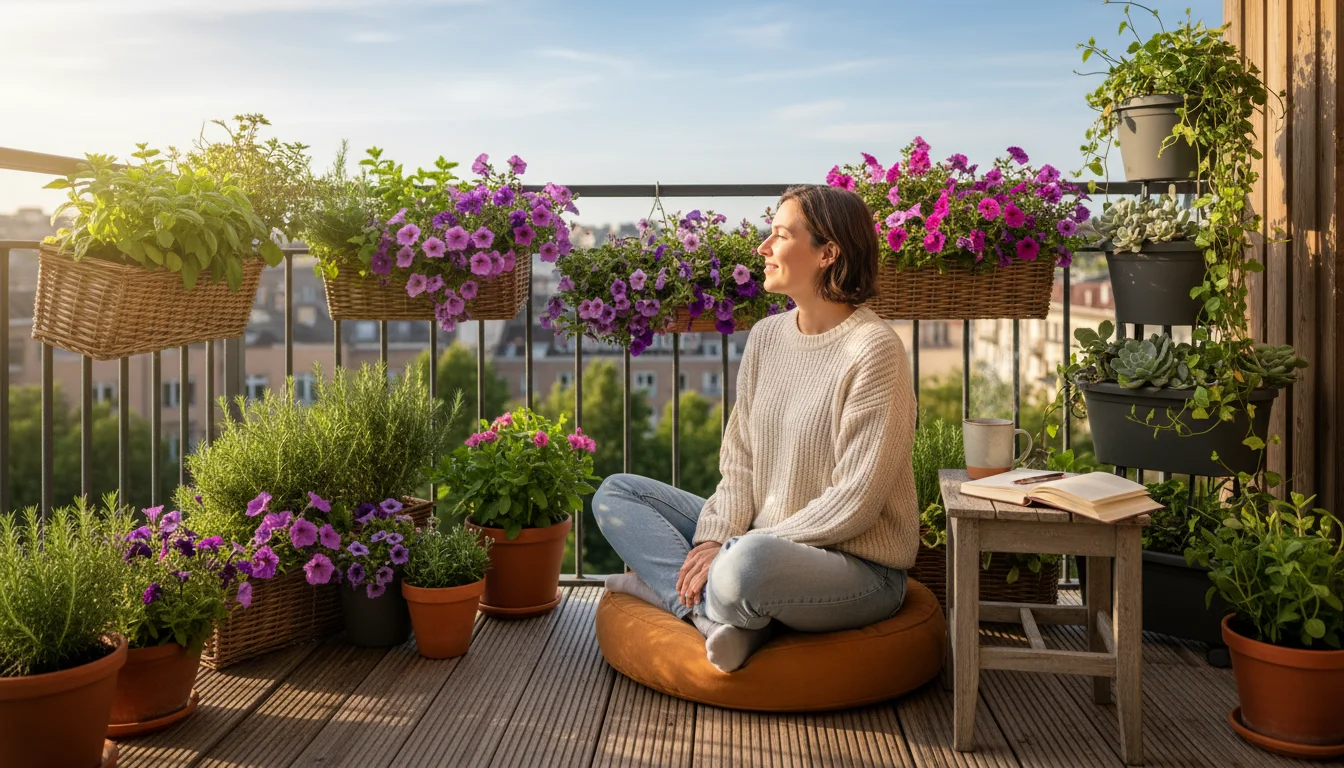
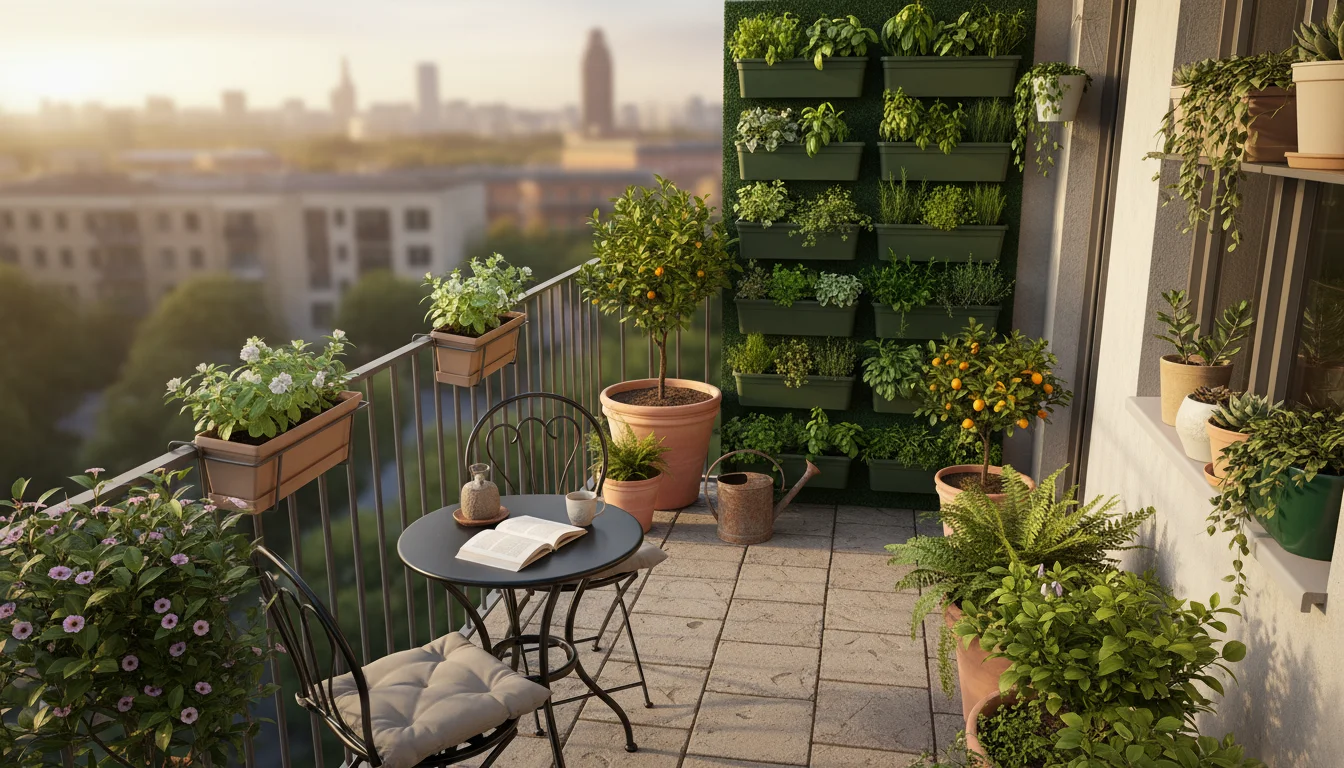
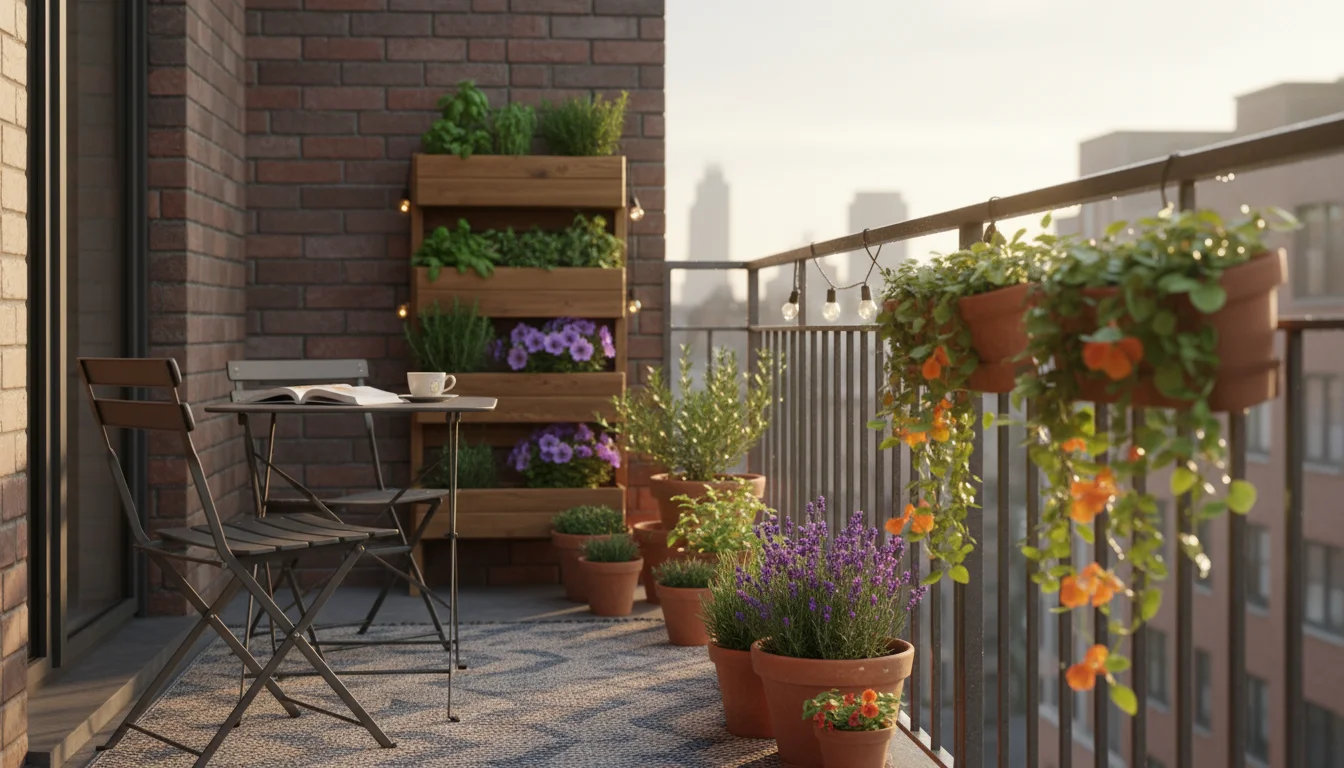
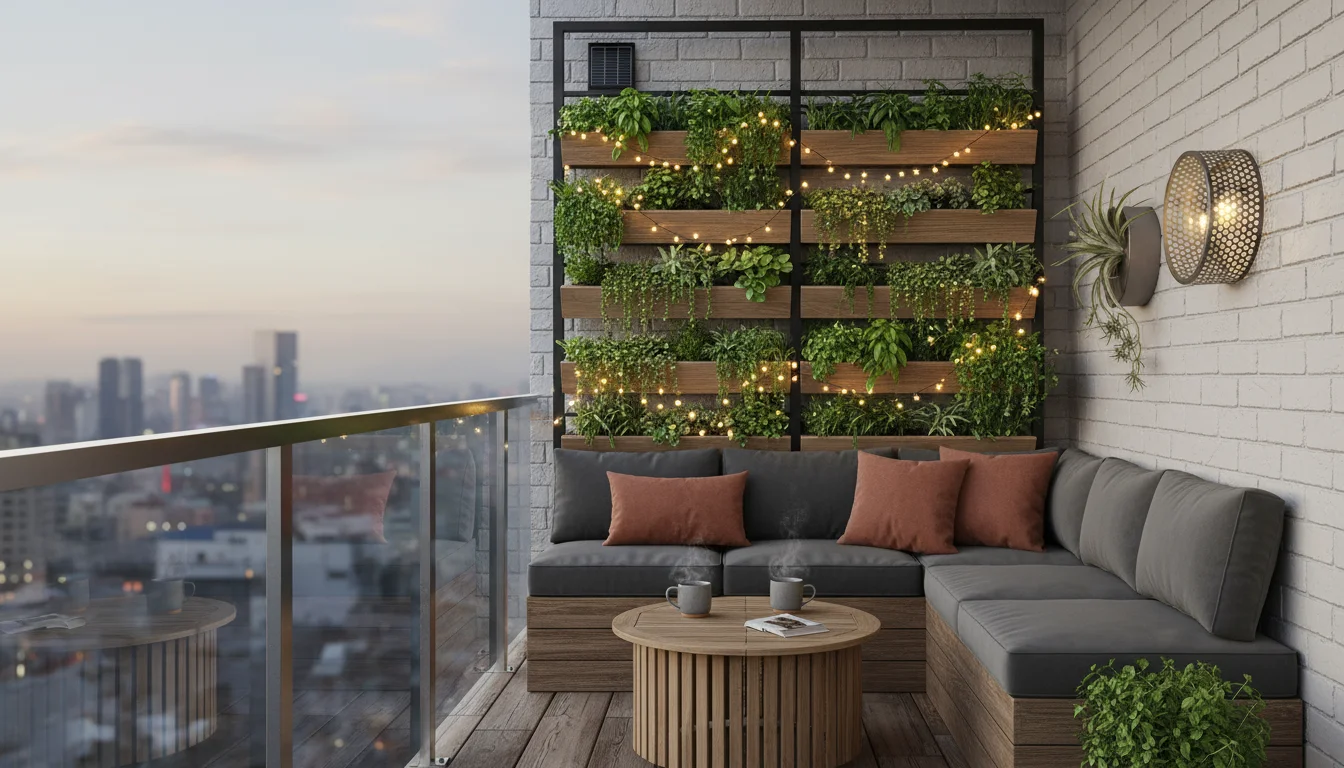
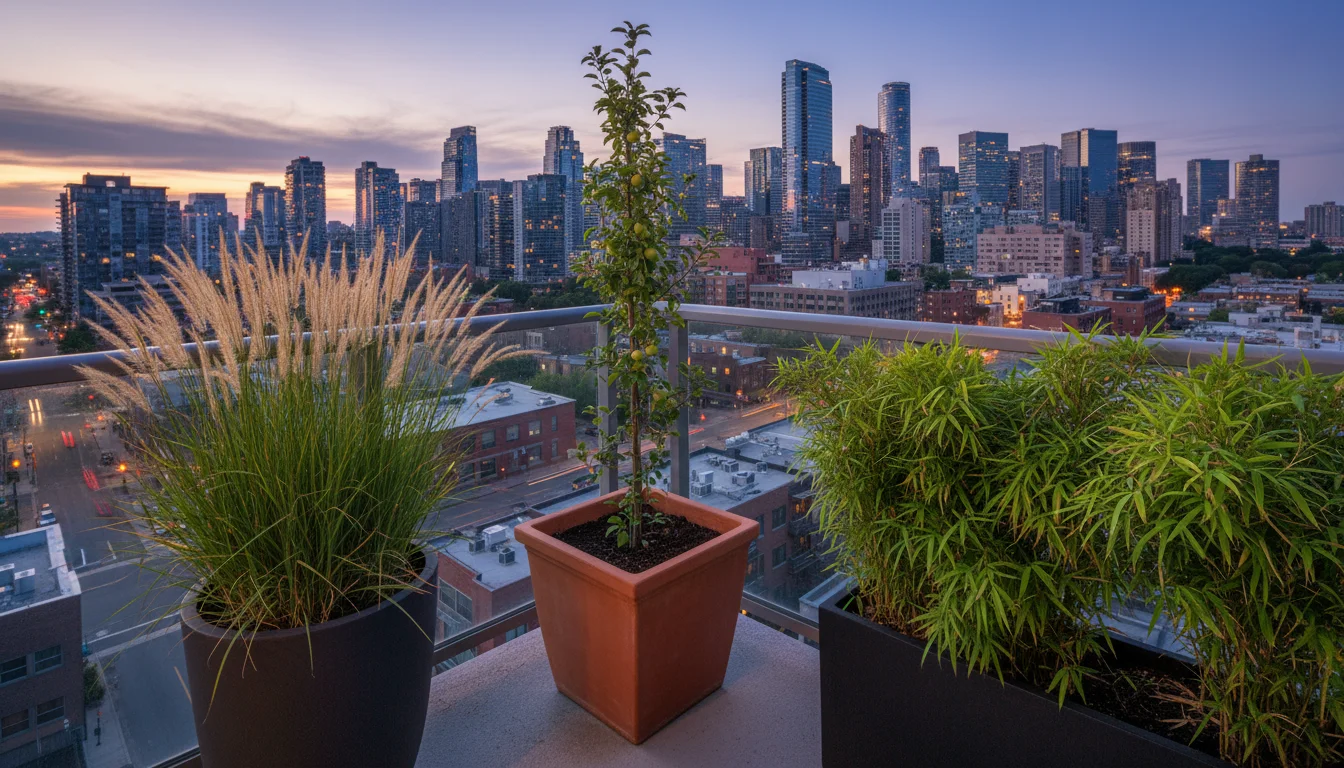
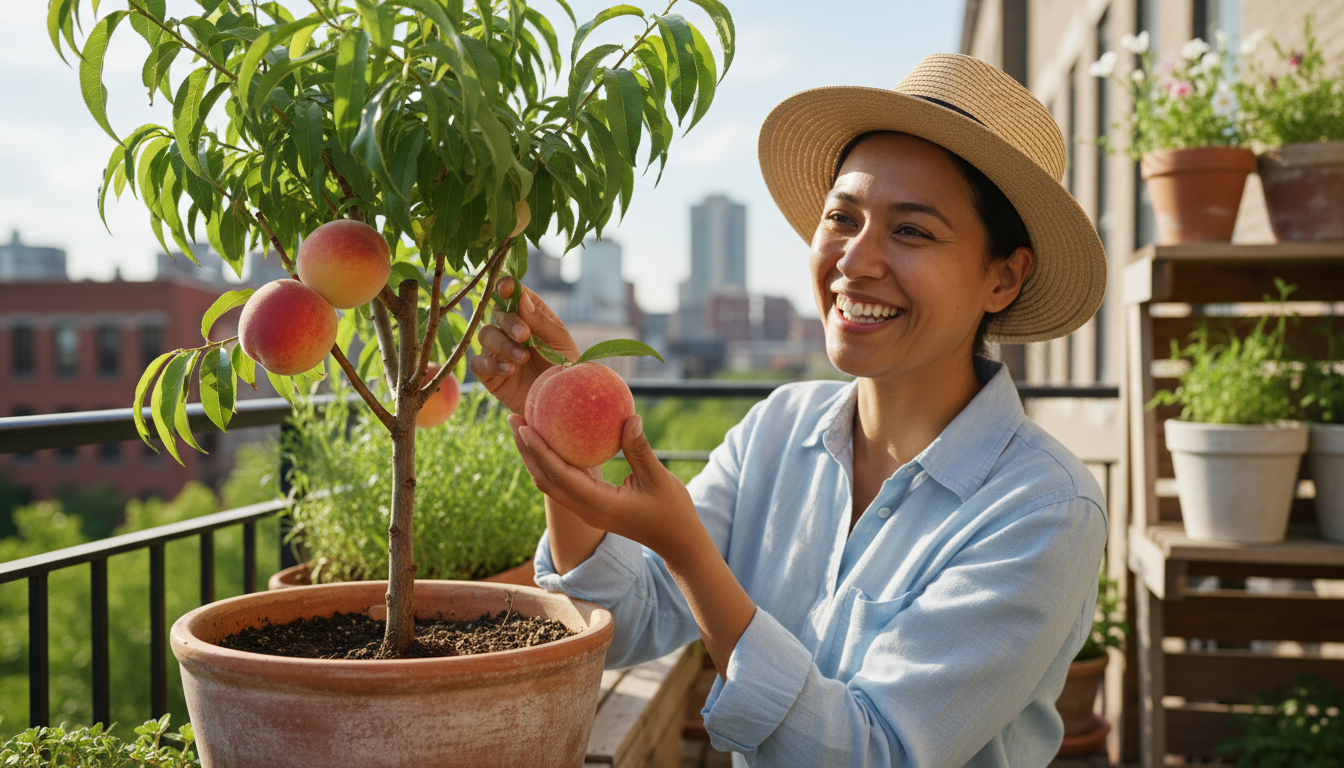
Imagine pulling vibrant, sweet carrots from your very own containers, even as the summer heat fades and autumn leaves begin to fall. This isn’t a dream reserved for sprawling gardens. You can absolutely achieve a rewarding harvest of fall carrots right on your balcony, patio, or small yard. Growing carrots in containers offers incredible flexibility and allows you to enjoy fresh, homegrown produce with minimal space and effort. This guide will walk you through every step, transforming your small space into a productive root vegetable haven.

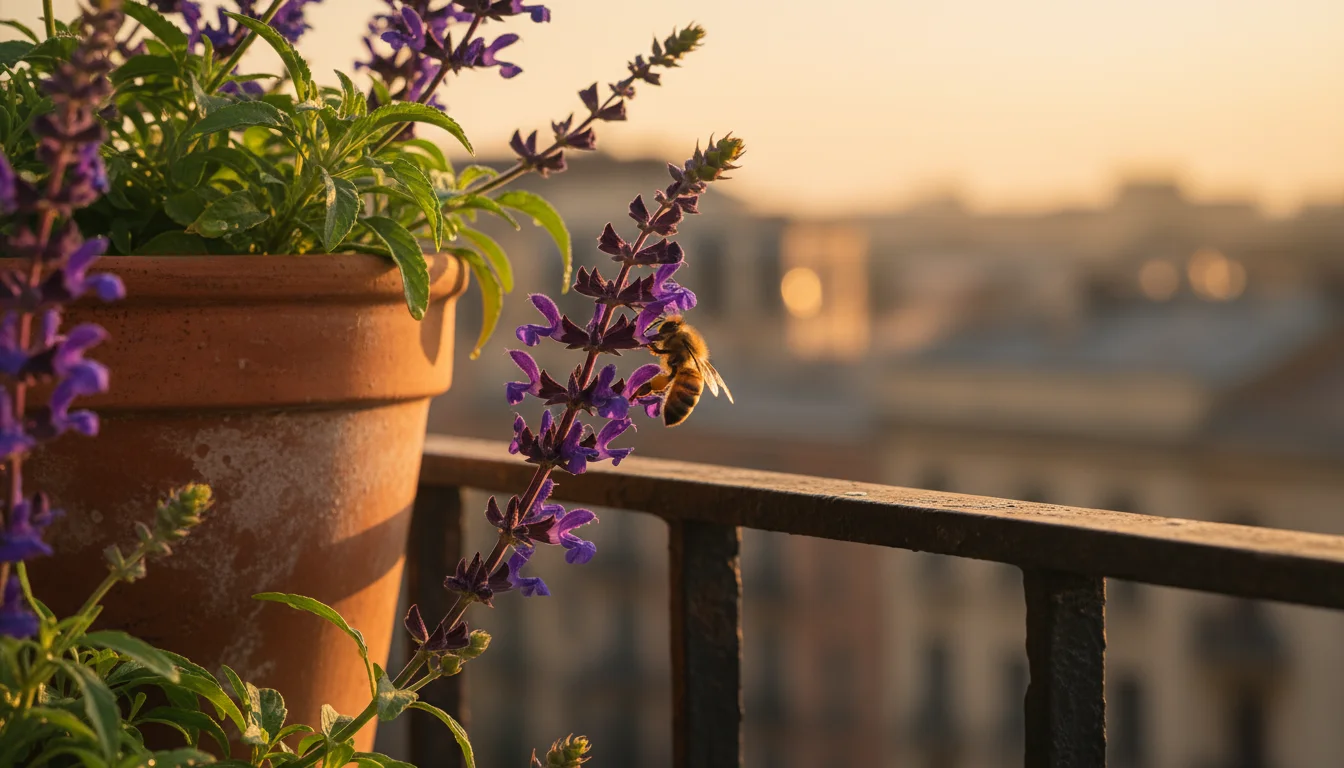
Fall planting brings unique advantages for carrots. Cooler soil temperatures often result in sweeter, more tender roots, and pest pressure typically decreases as the season progresses. By understanding a few key principles of deep pot gardening, you will be well on your way to enjoying the crisp delight of your own fall root vegetables.

Why Grow Fall Carrots in Containers? The Benefits for Small Spaces

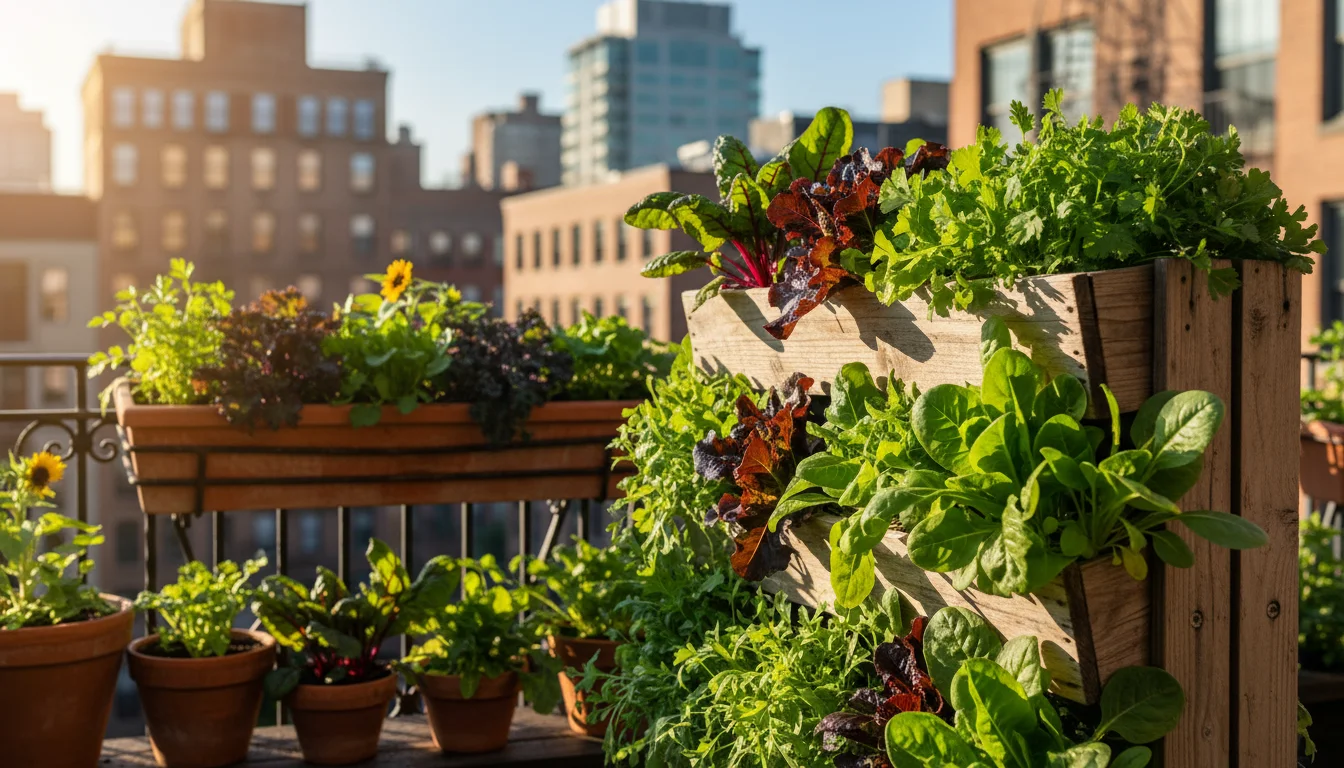
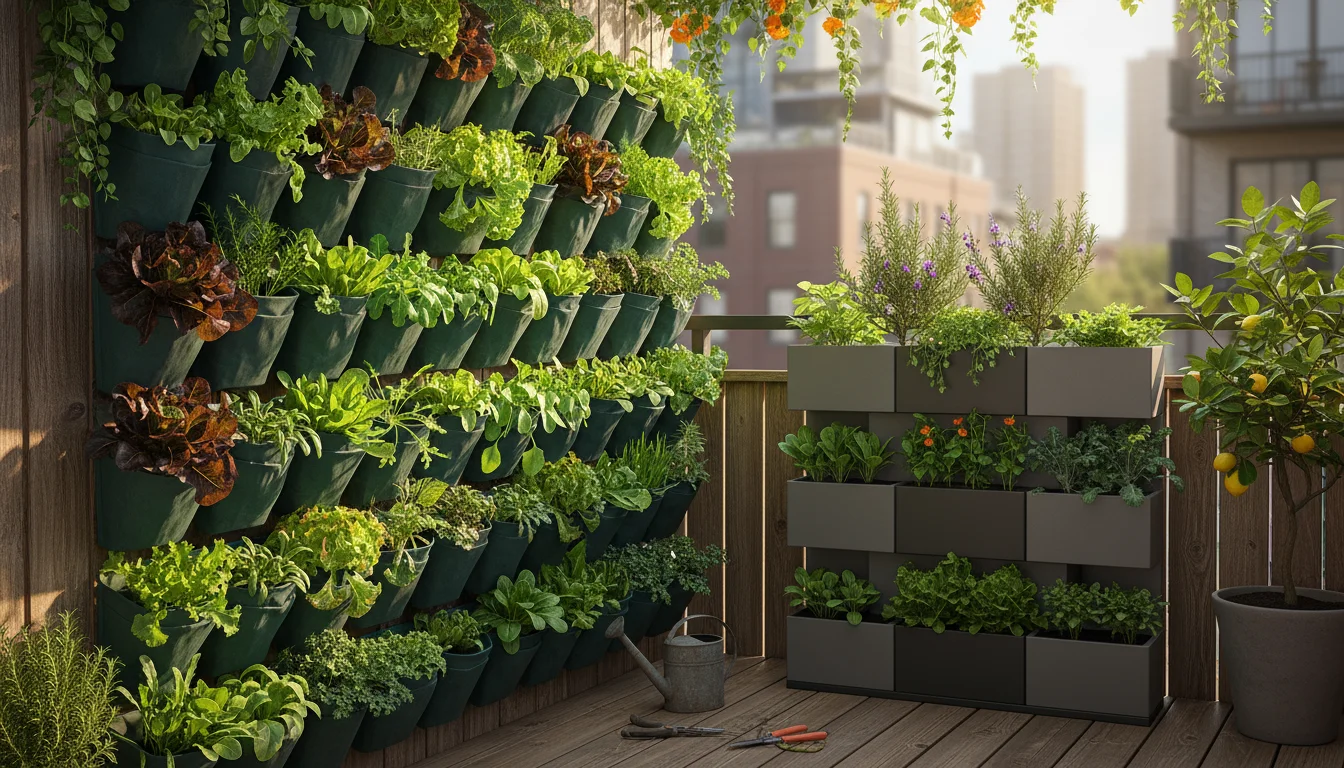
You might associate carrot growing with large garden beds, but container gardening opens up this rewarding experience to everyone, regardless of yard size. Here are compelling reasons to start growing carrots in containers this fall:

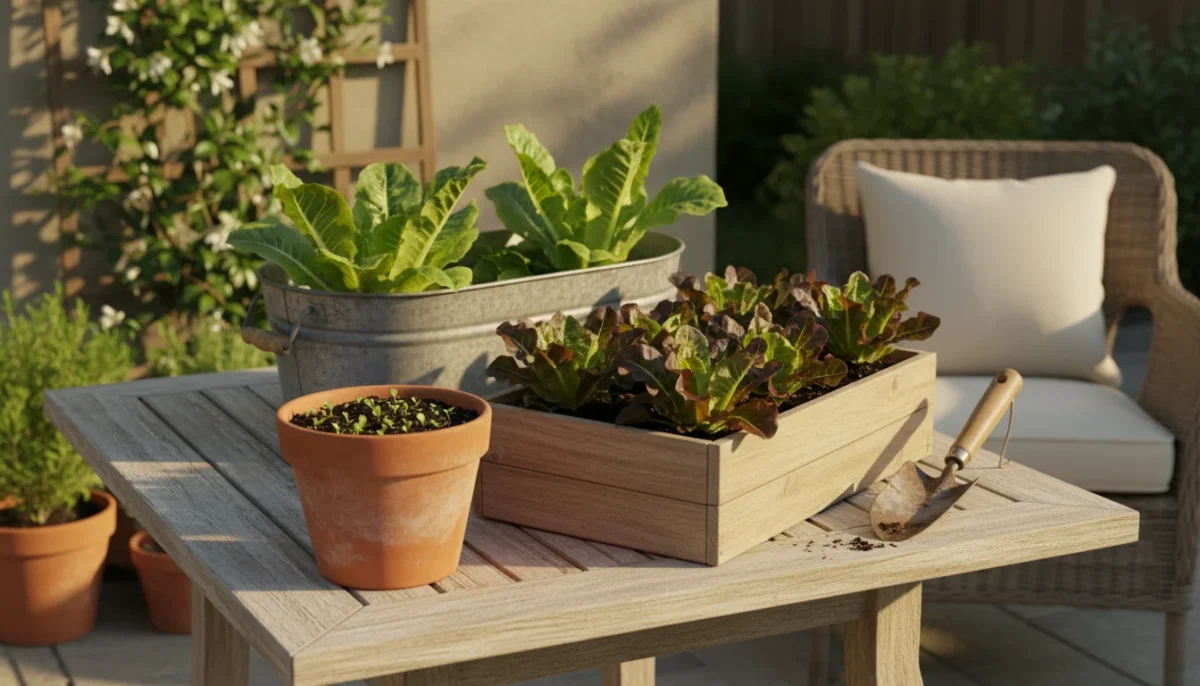
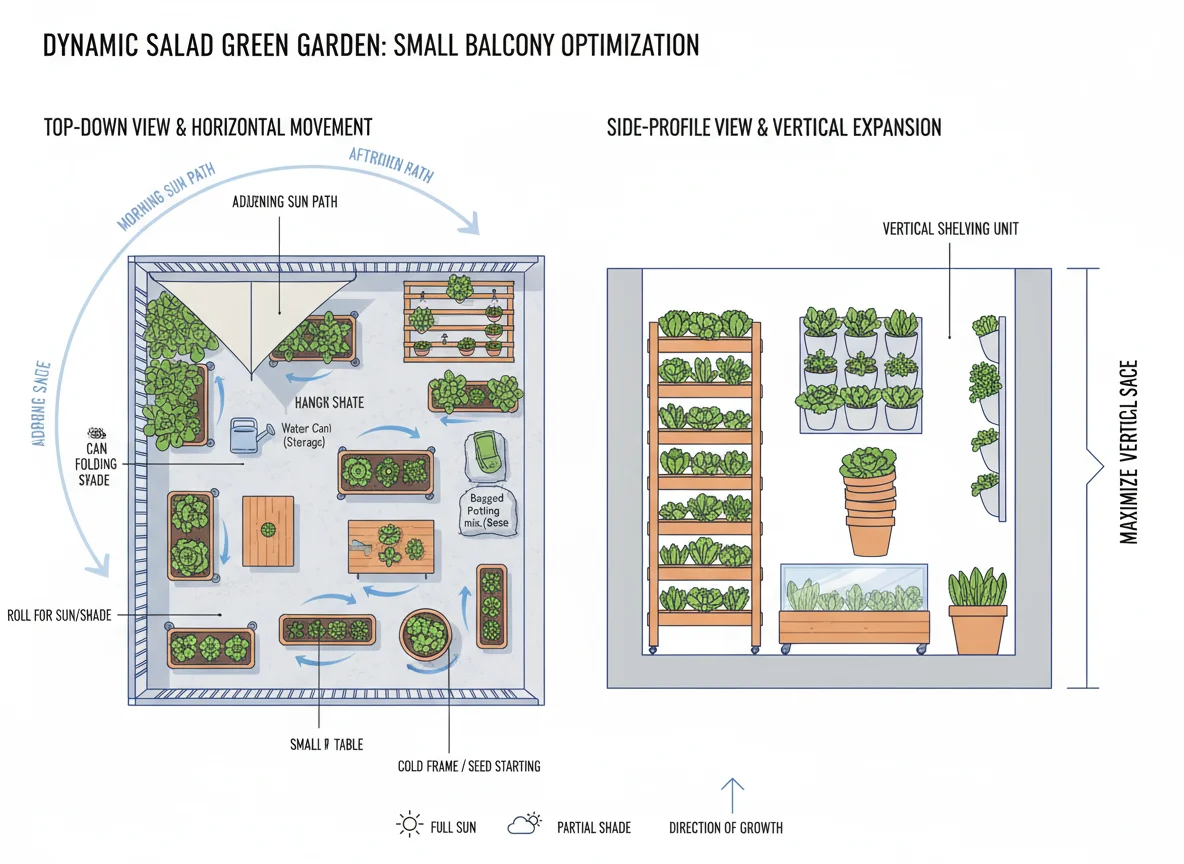
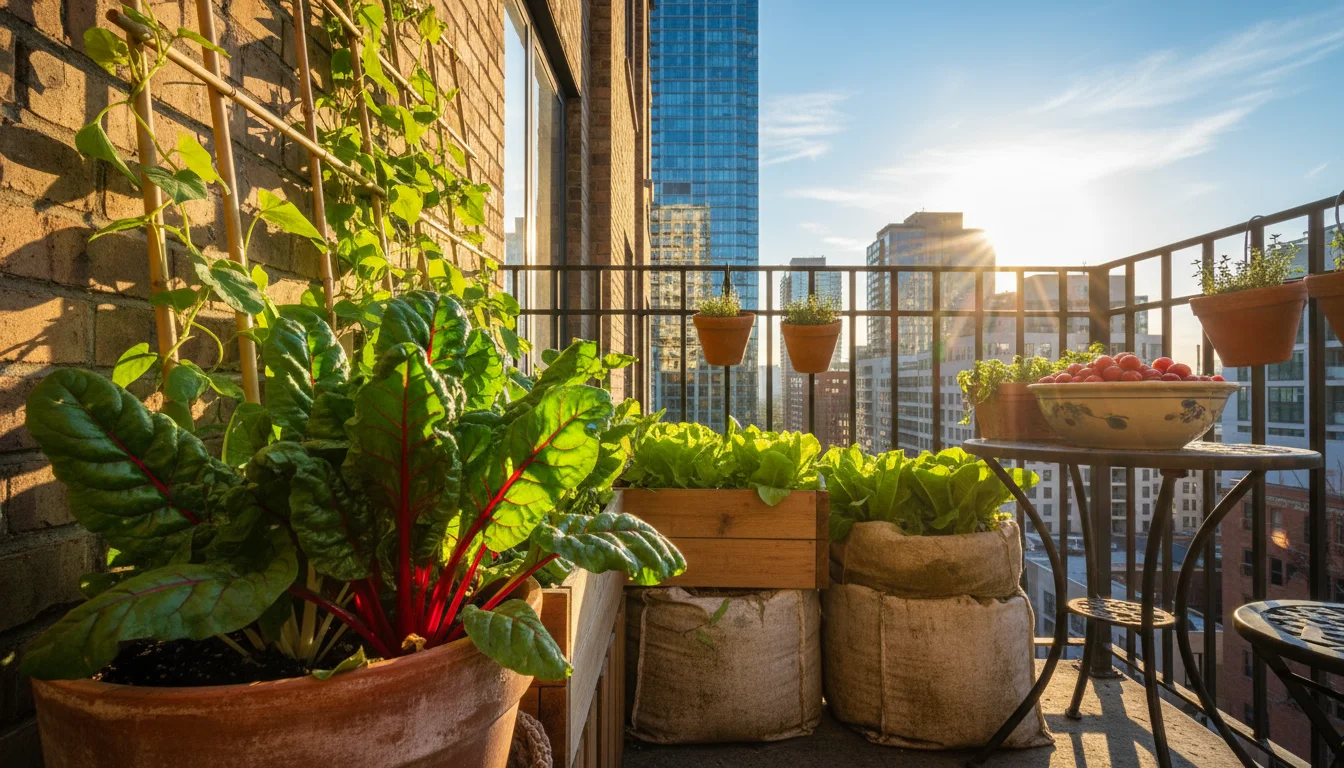
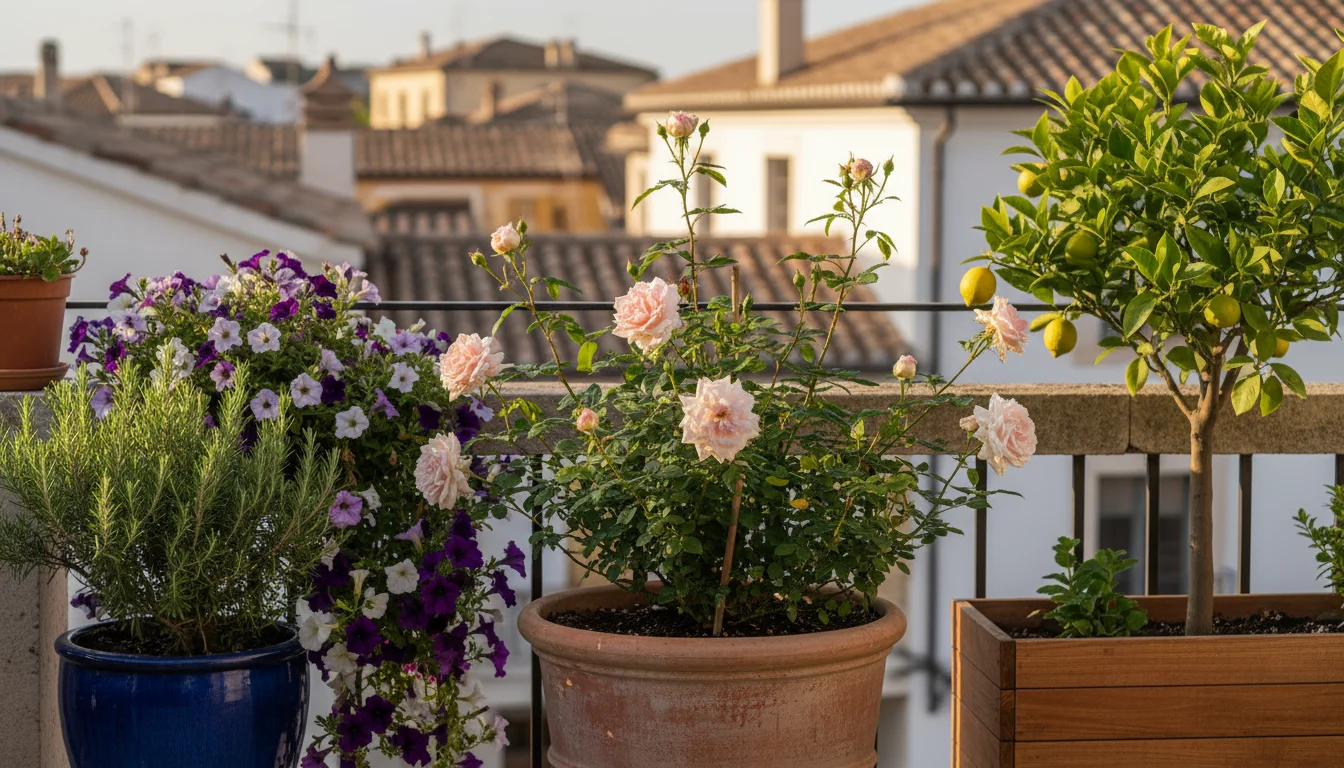
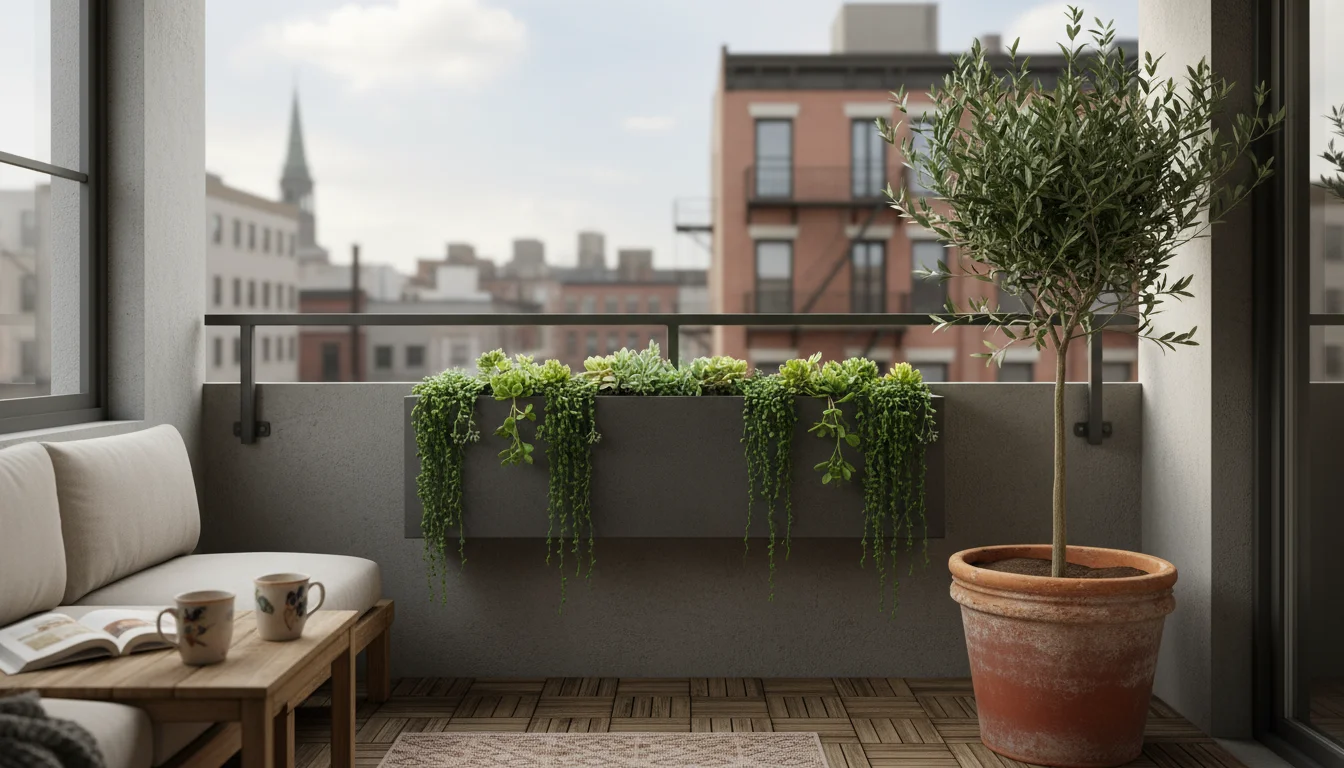
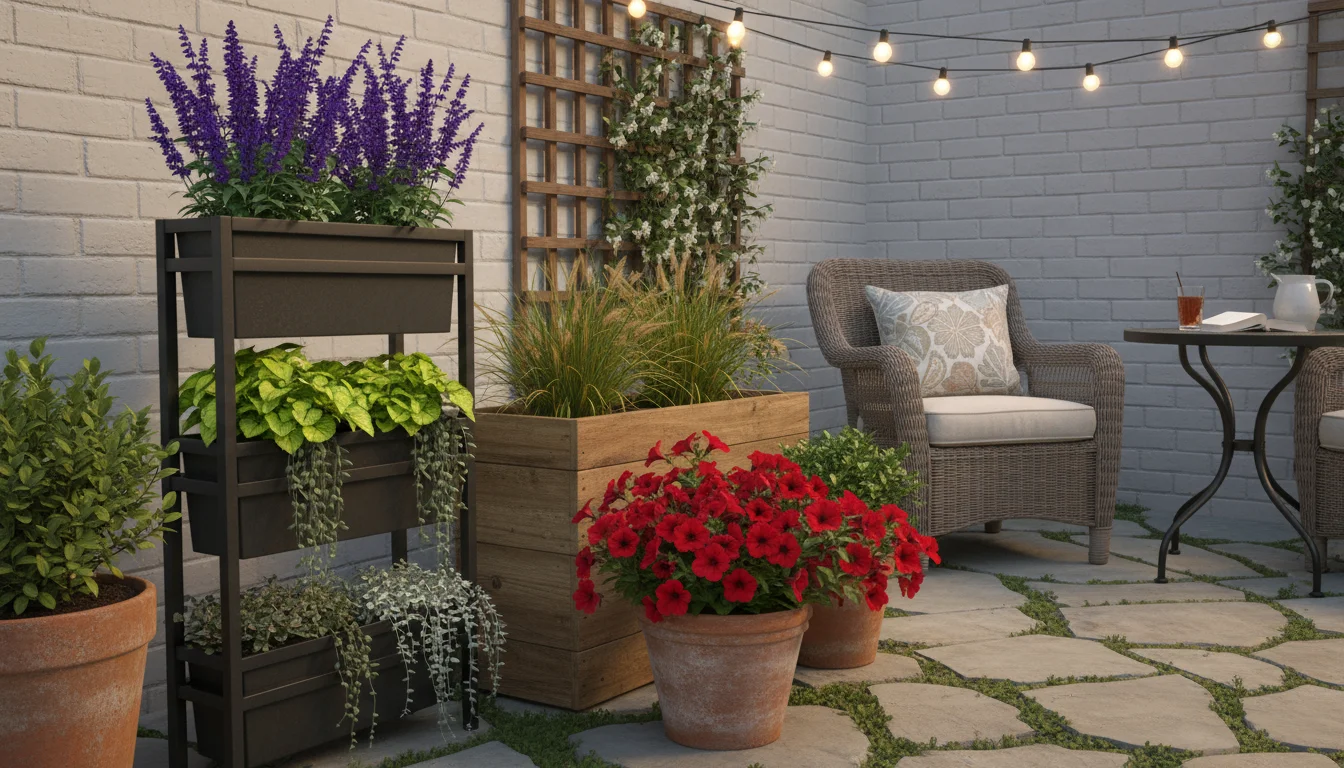
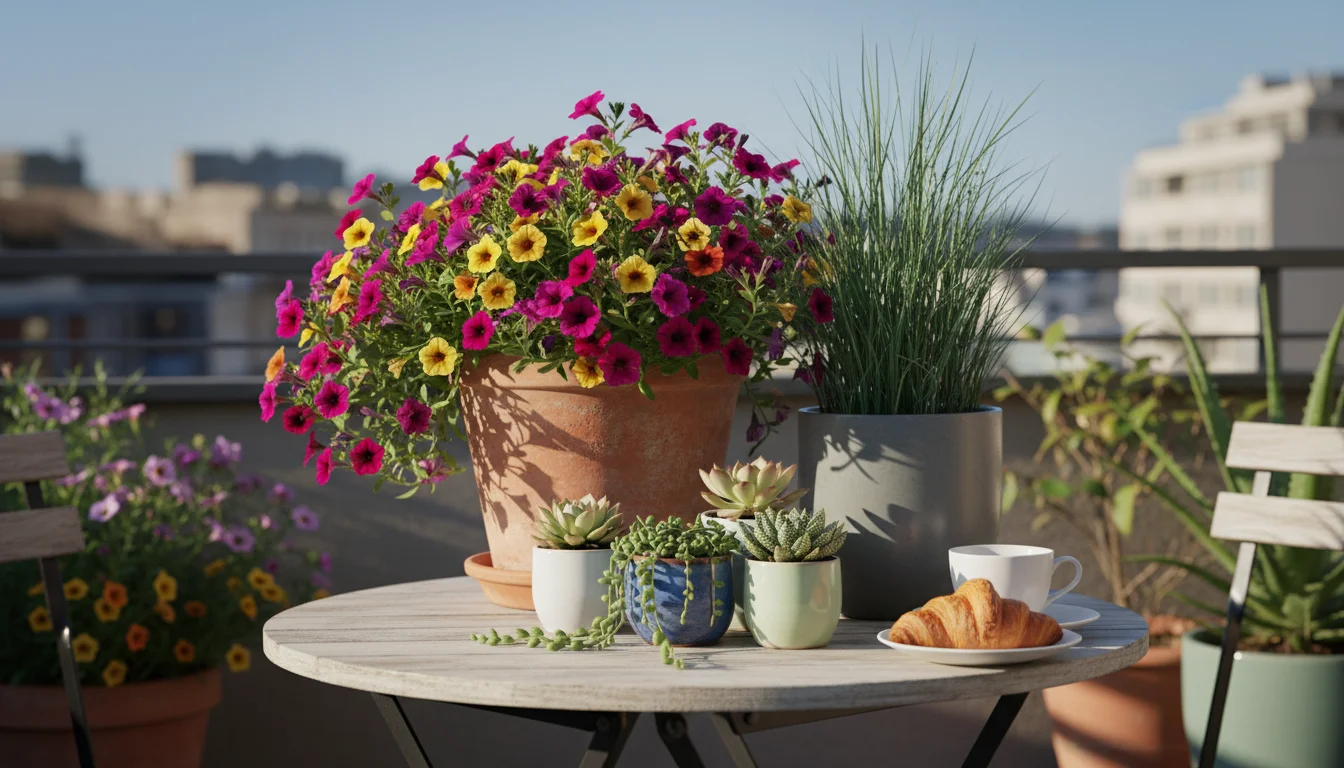
  • Space Efficiency: Containers fit perfectly on balconies, patios, and even sunny windowsills. You can cultivate a significant harvest in a compact footprint, proving that you do not need a sprawling garden to grow your own food.
  • Soil Control: When you plant in containers, you completely control the soil. This eliminates issues like compacted garden soil, heavy clay, or rocky ground, which often hinder root vegetable development. You provide the ideal loose, well-draining environment carrots crave.
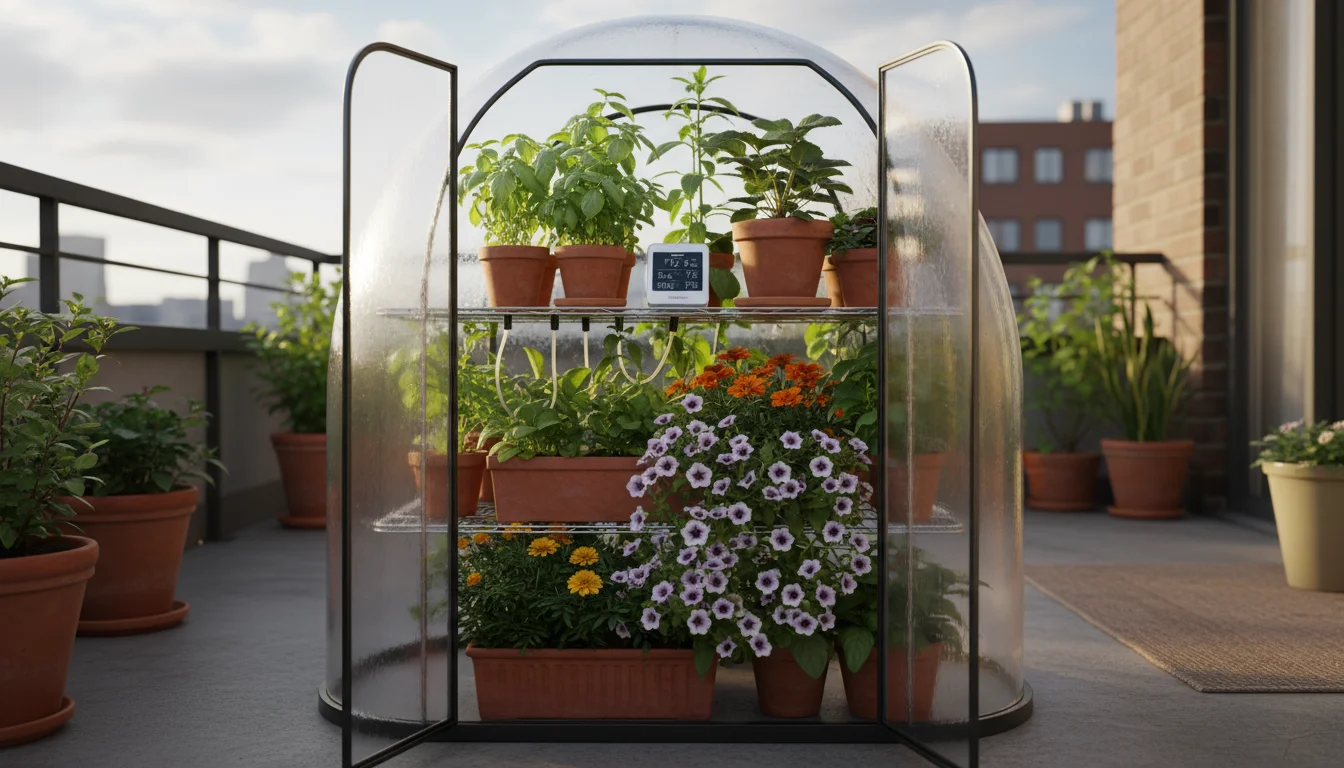
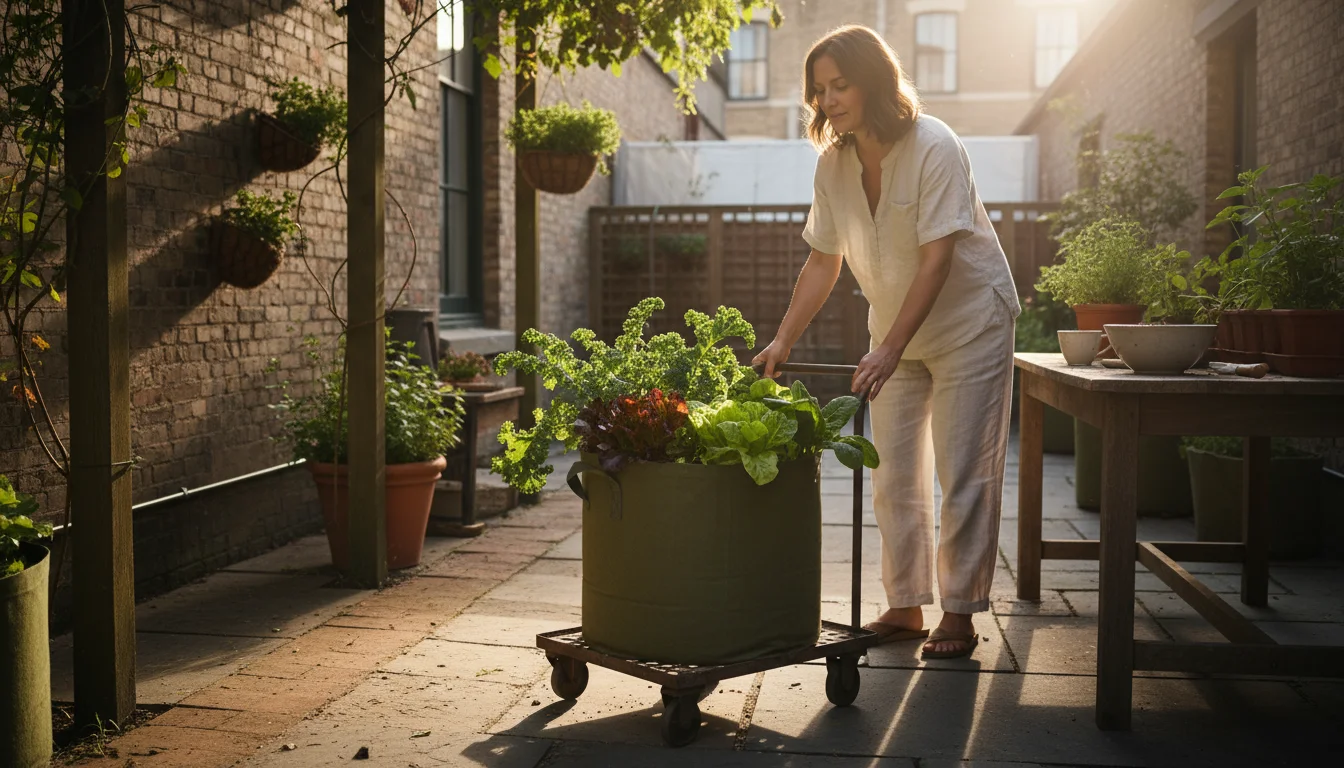
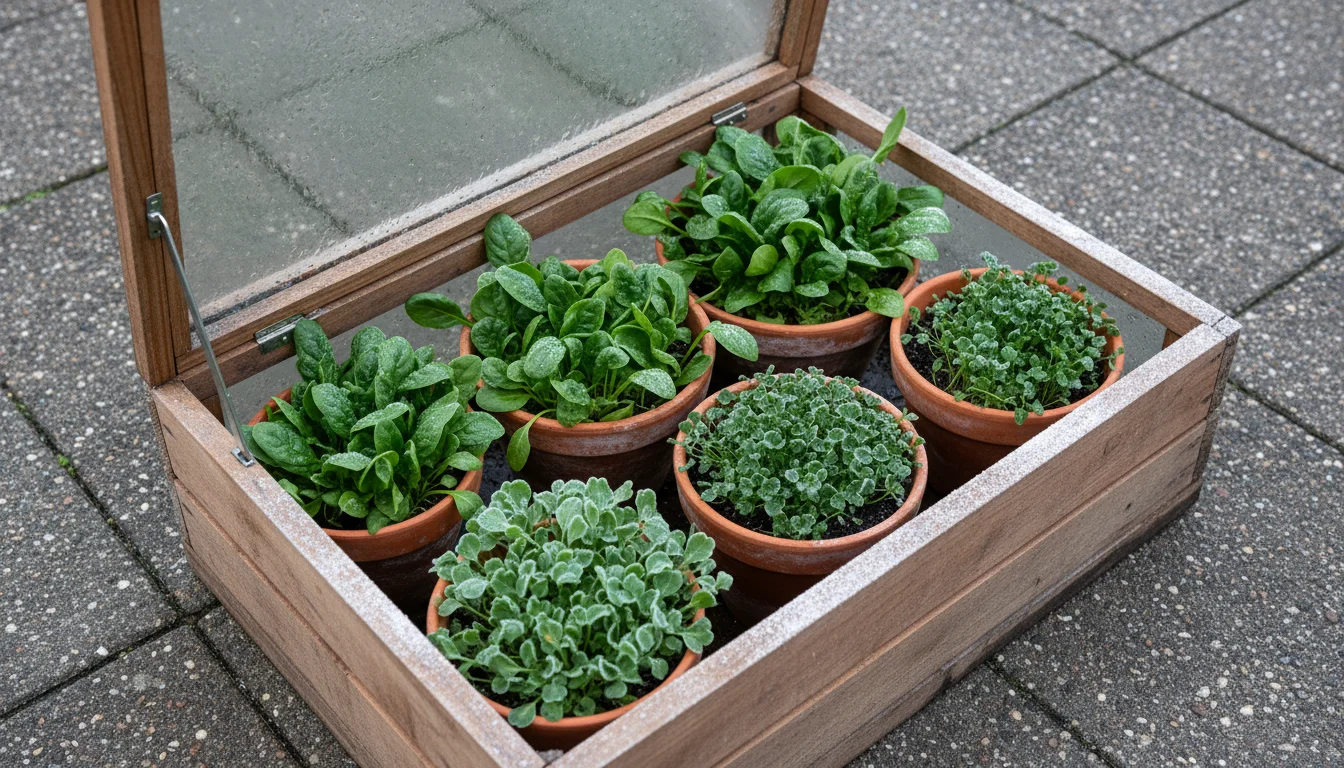
  • Portability: Move your containers to chase the sun or protect plants from harsh weather. This flexibility is invaluable, especially as autumn weather becomes unpredictable. You can bring them indoors or under cover during an early cold snap, extending your season.
  • Reduced Pests and Weeds: Elevated containers often deter ground-dwelling pests more effectively than in-ground beds. Weeding becomes a minor task, saving you time and effort compared to traditional gardening.
  • Optimized Growing Conditions for Fall: Fall offers excellent conditions for cool-season crops like carrots. The decreasing temperatures enhance their sweetness. By choosing varieties suited for containers and understanding how to plant carrots in pots in autumn, you capitalize on this natural advantage. This ensures your fall root vegetables develop excellent flavor and texture.

Embracing container gardening for fall carrots means you harness these advantages, turning potential limitations into strengths. You gain fresh, delicious produce and the satisfaction of a successful harvest, all within your existing small space.

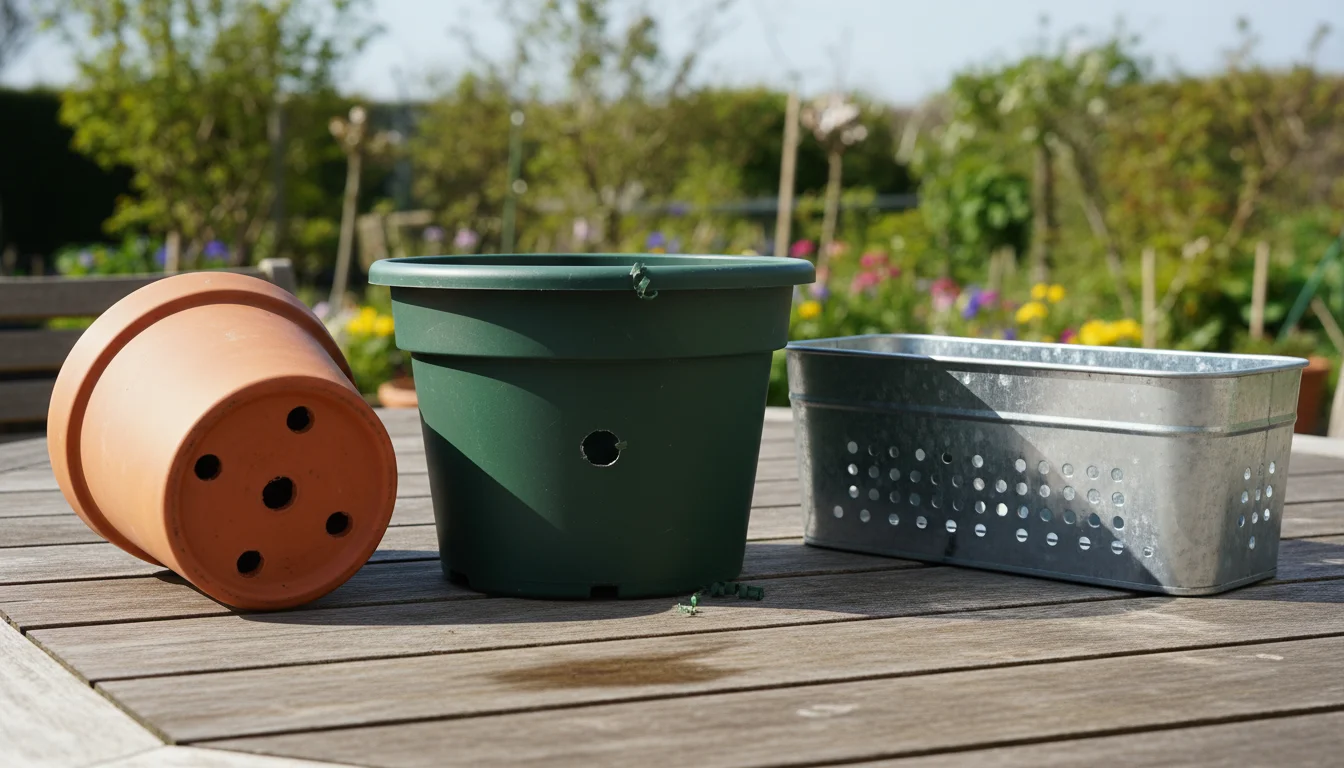
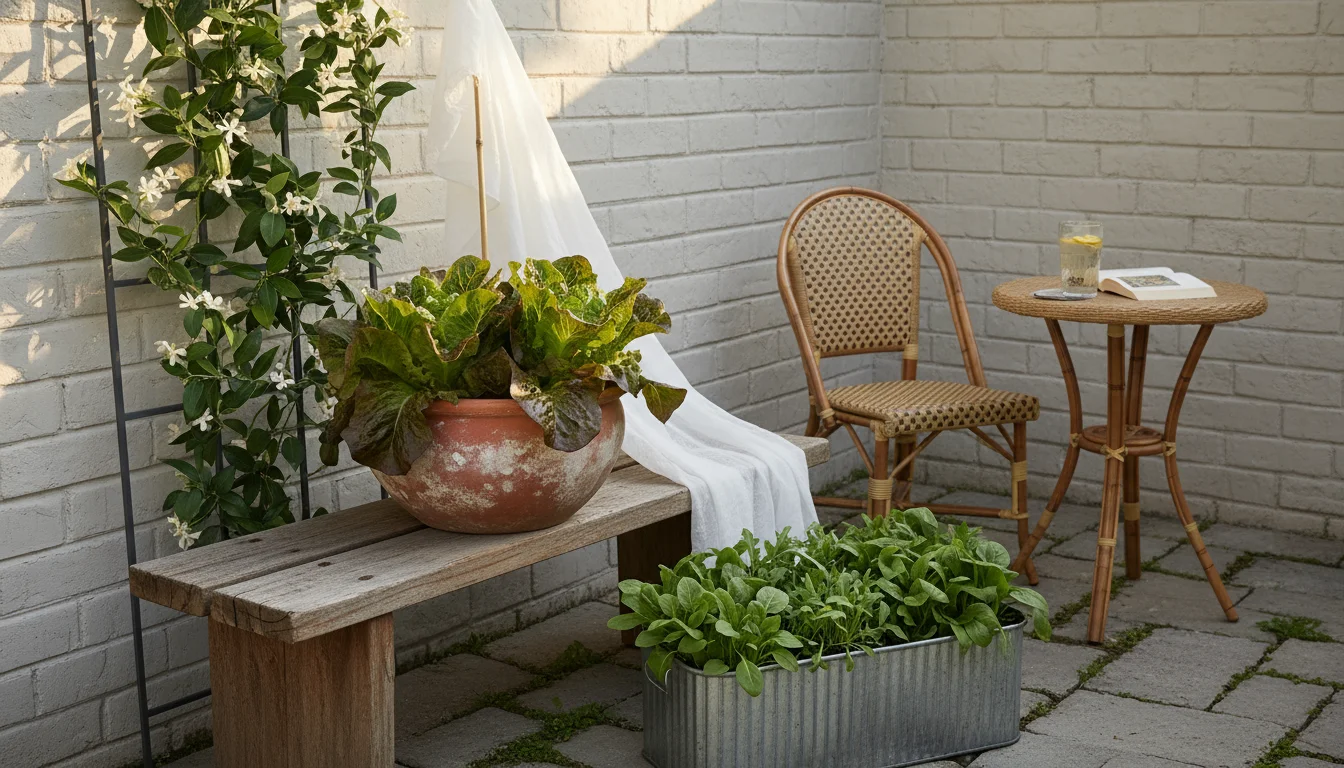
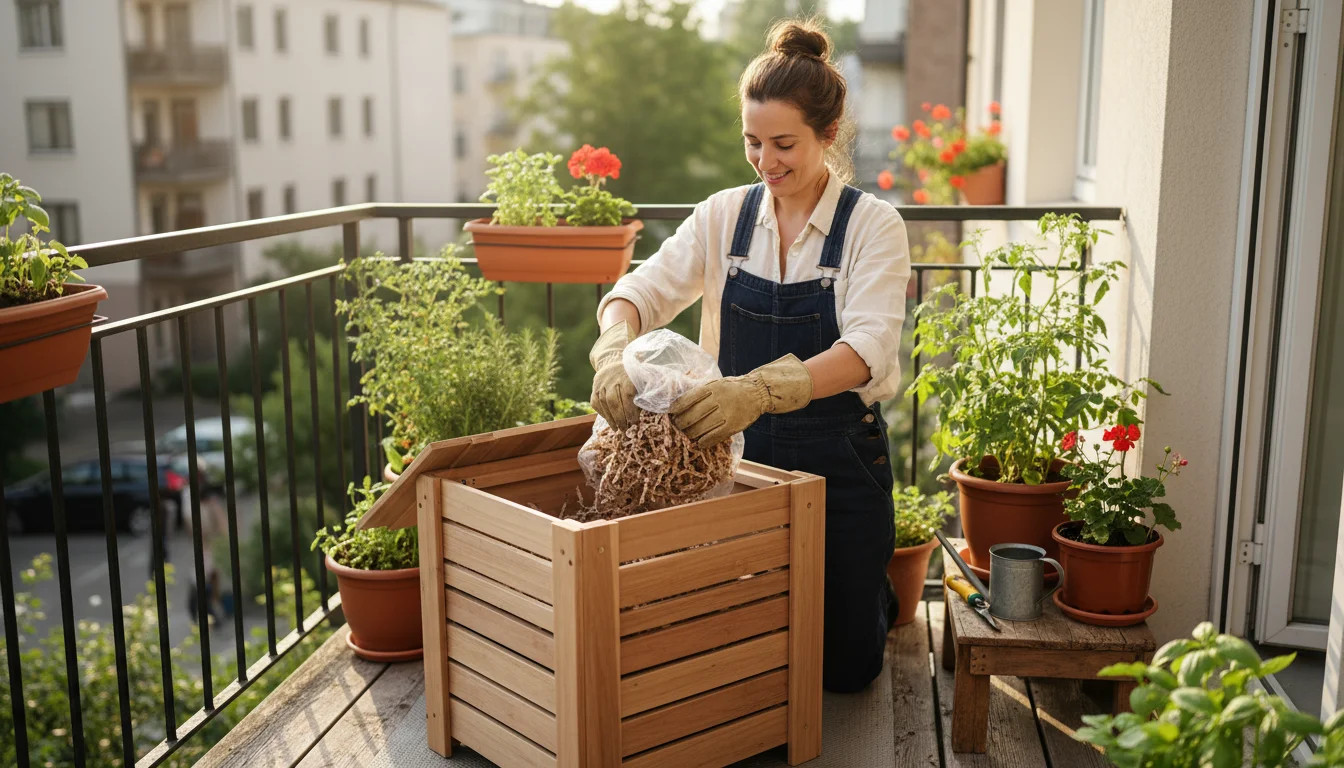
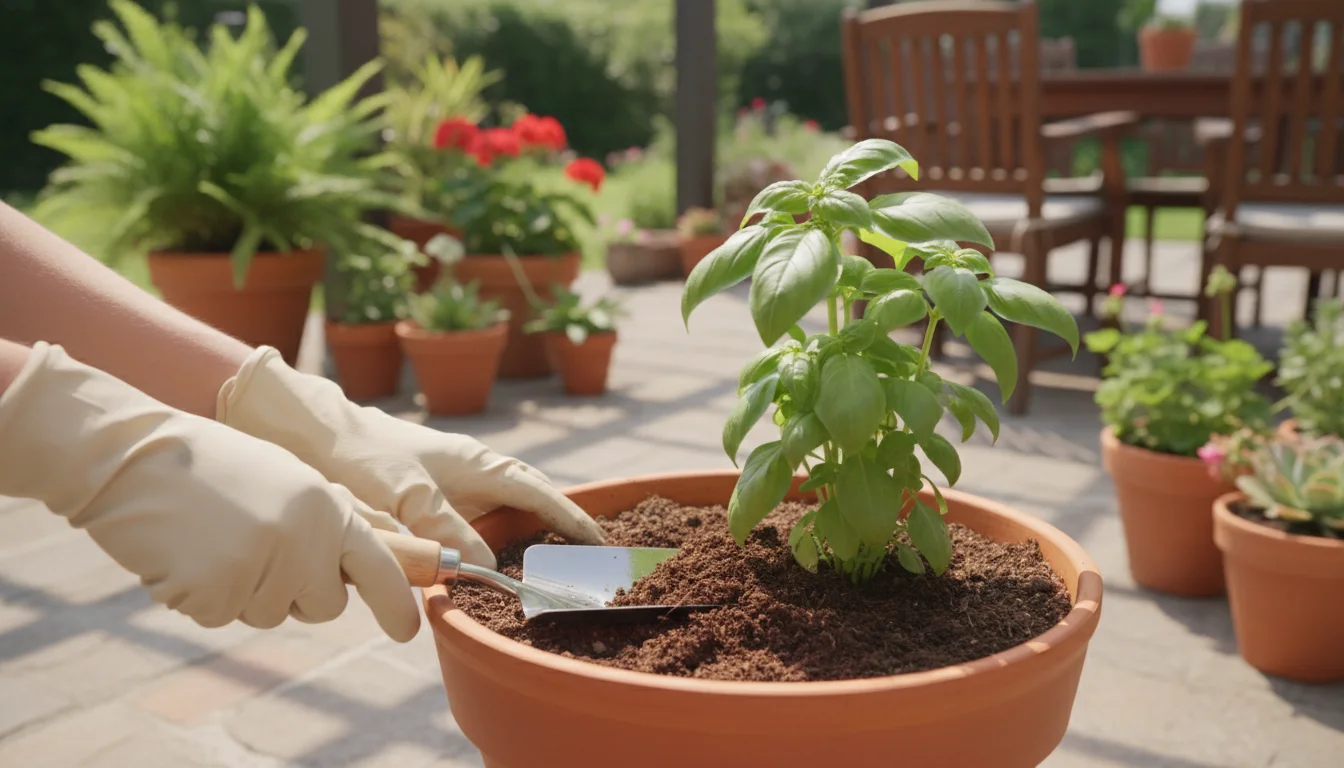
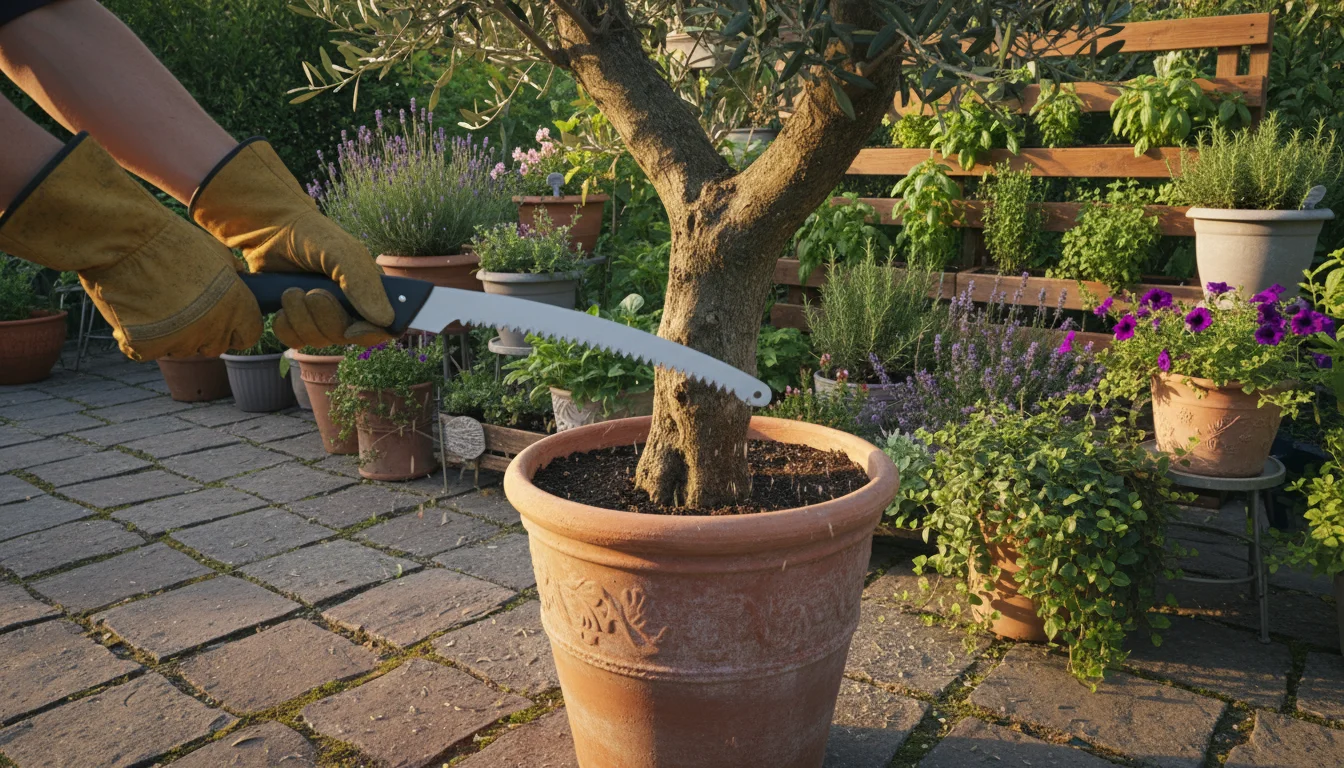
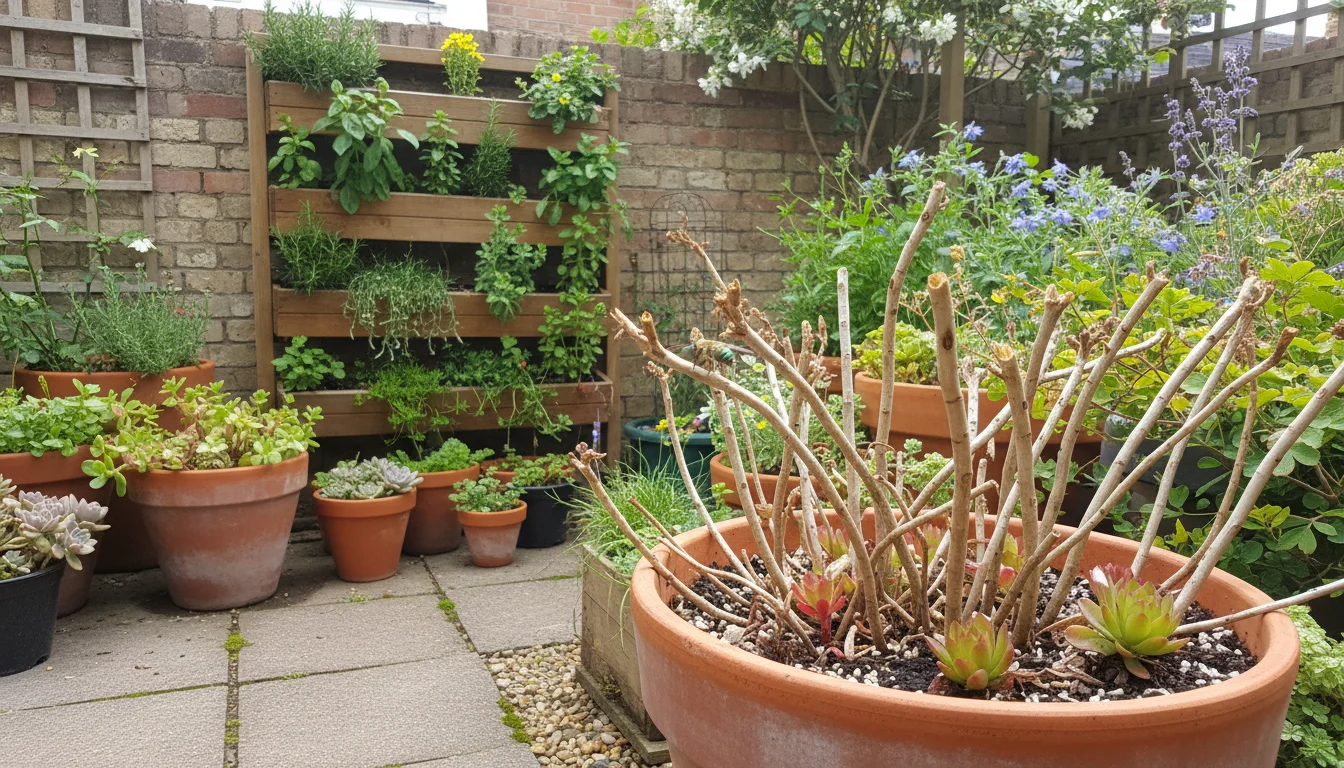
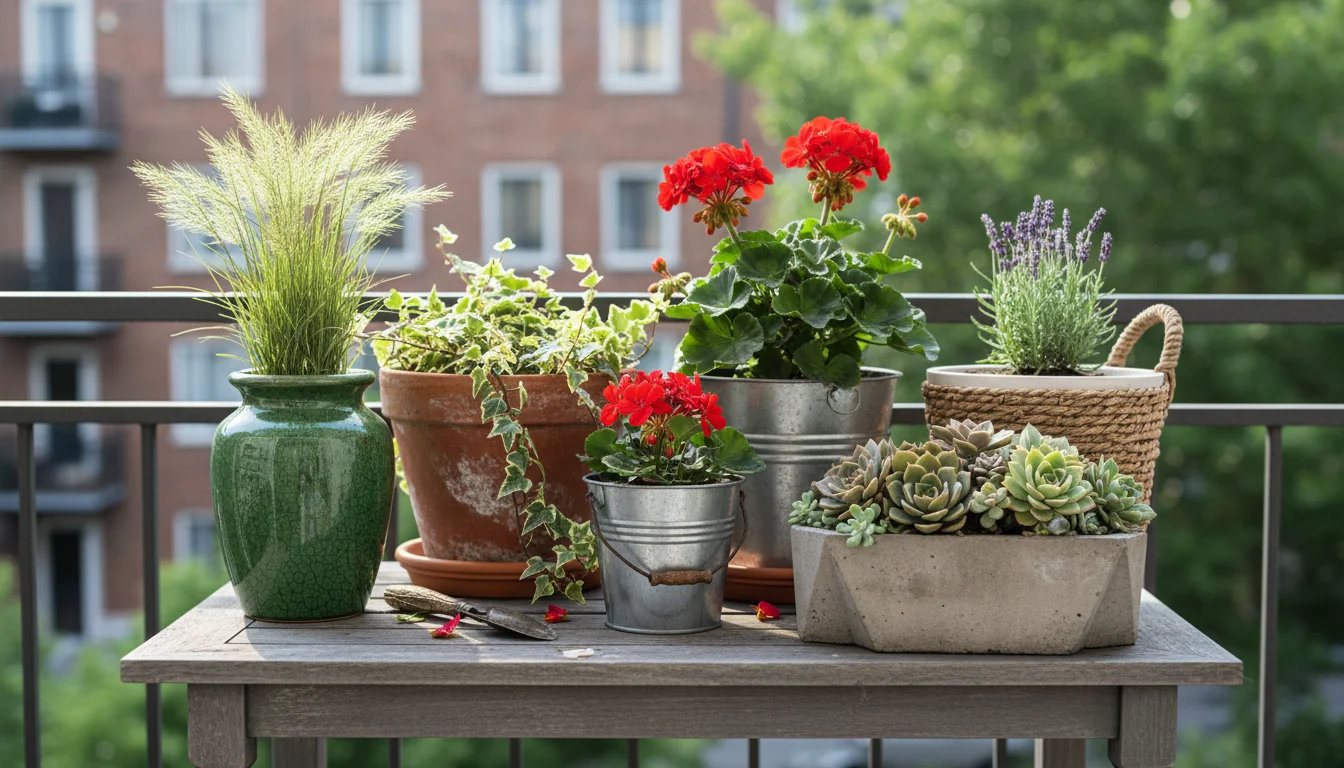
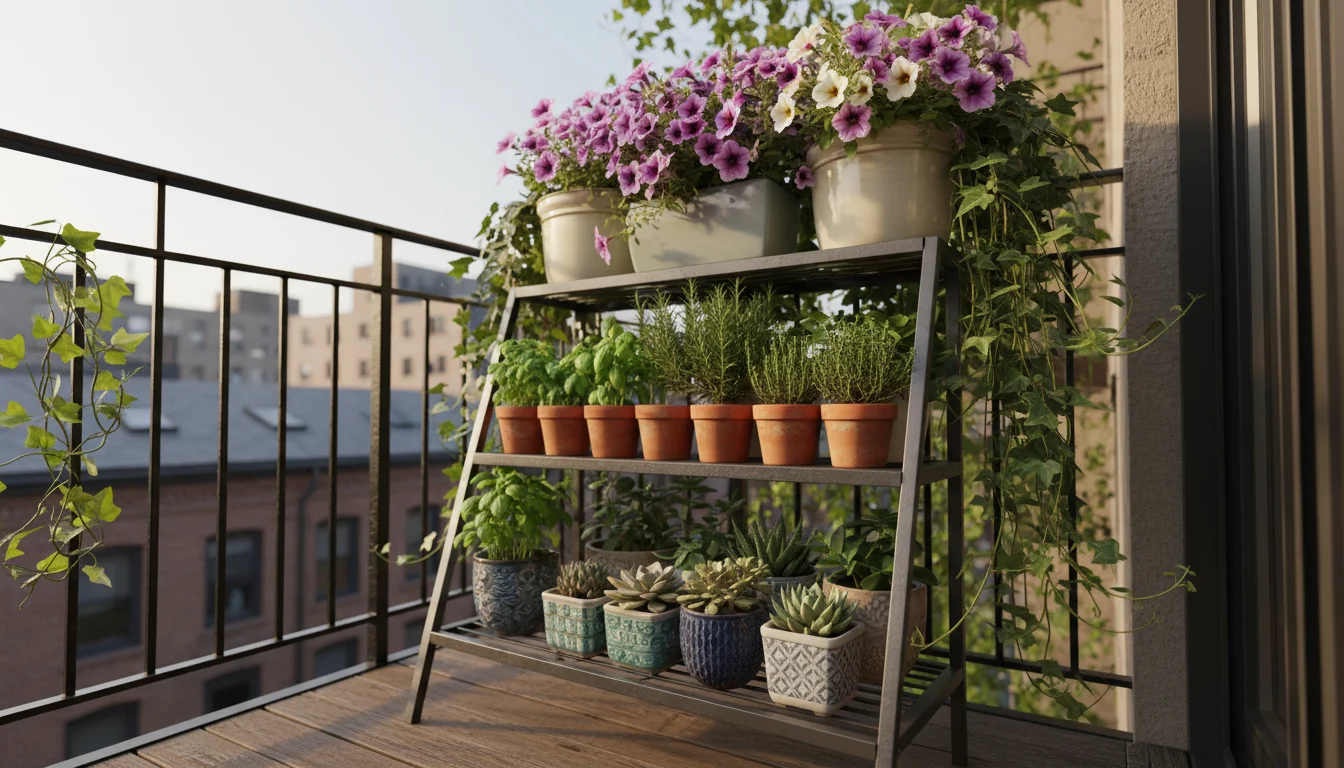
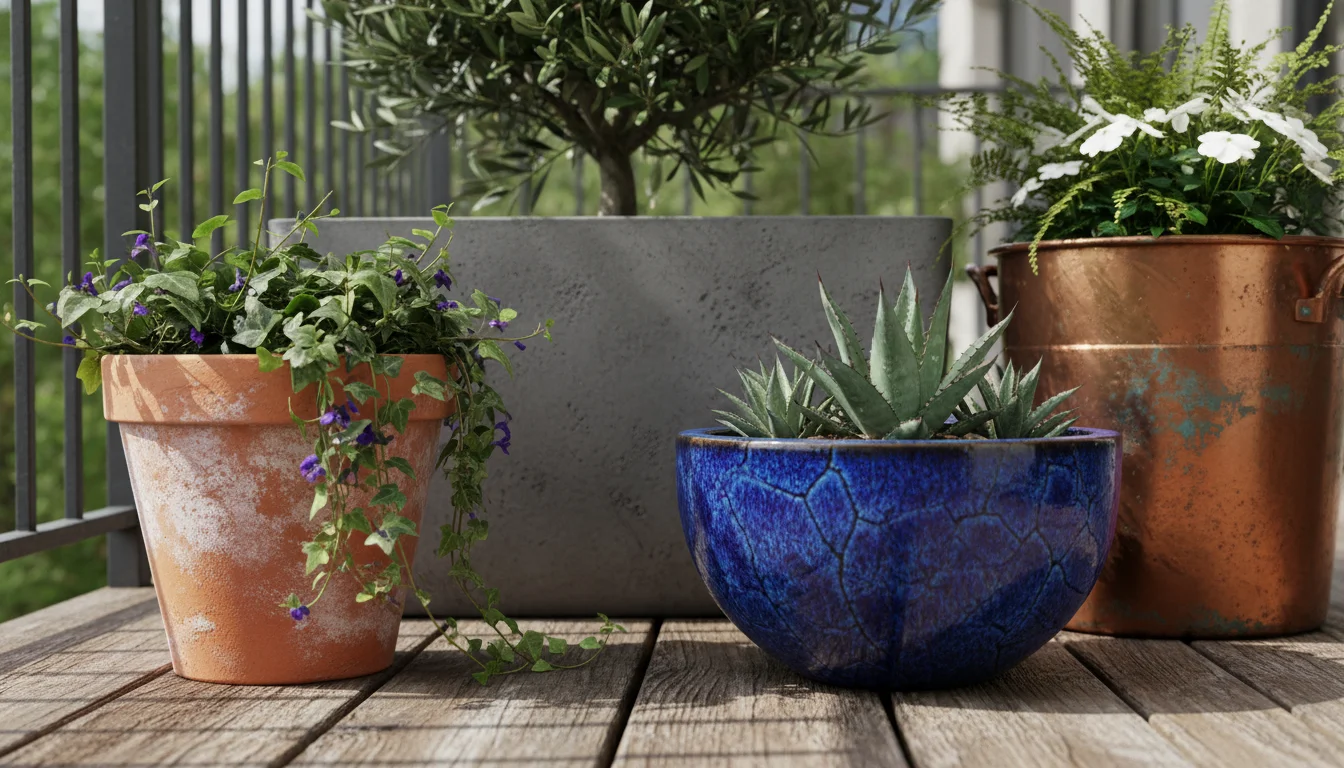
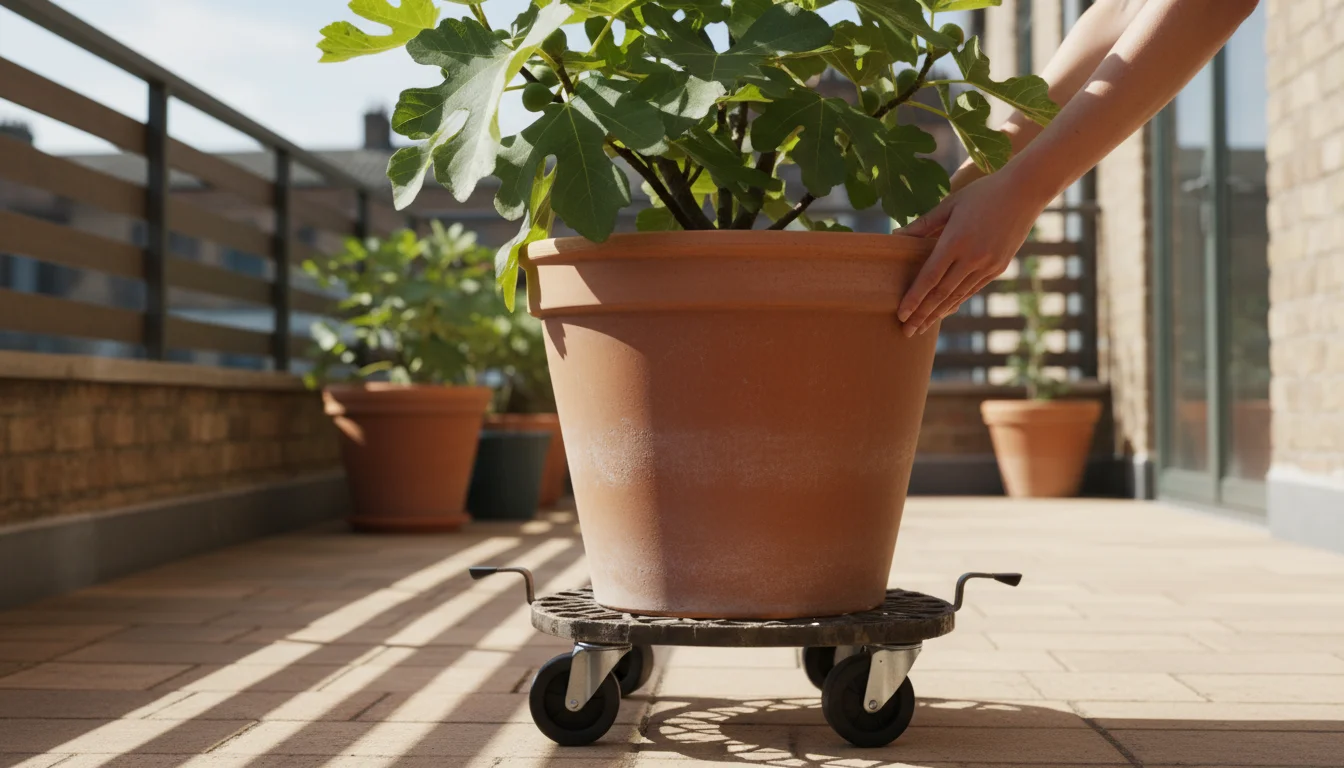
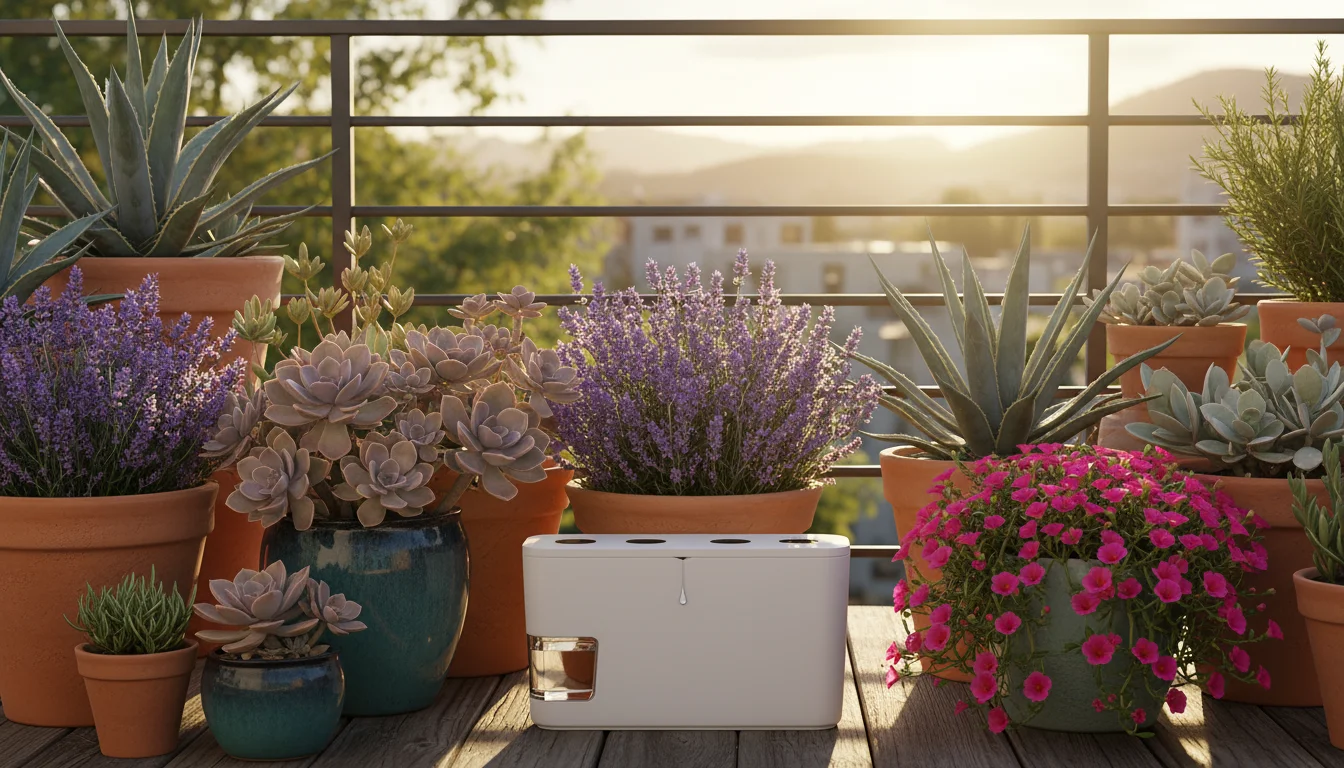
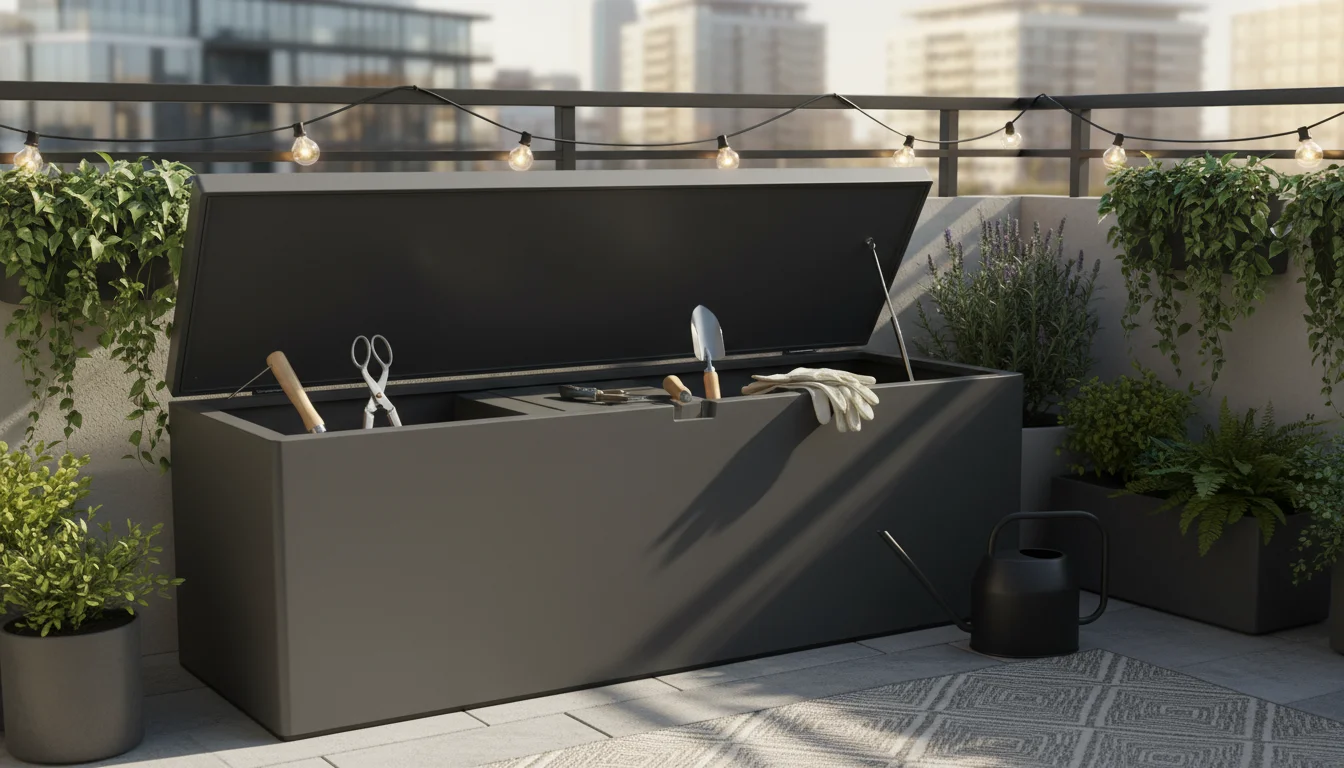
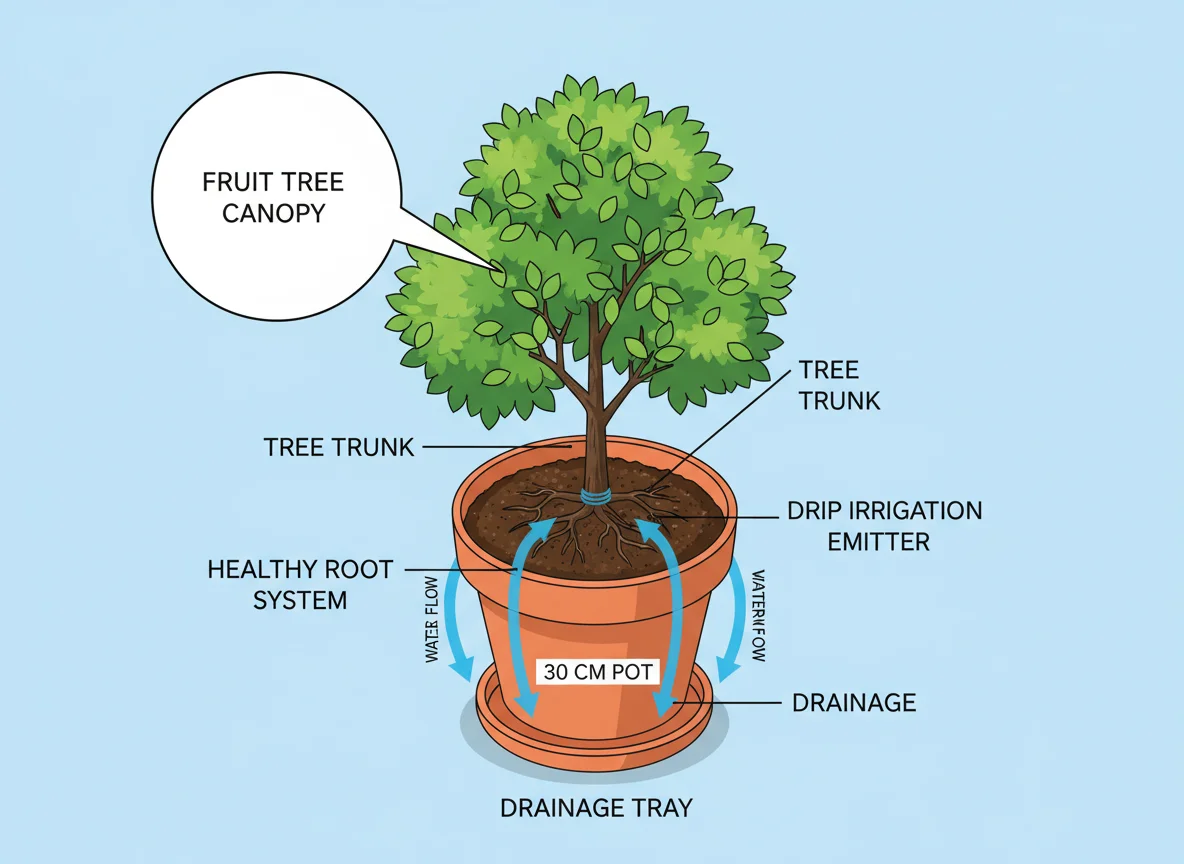
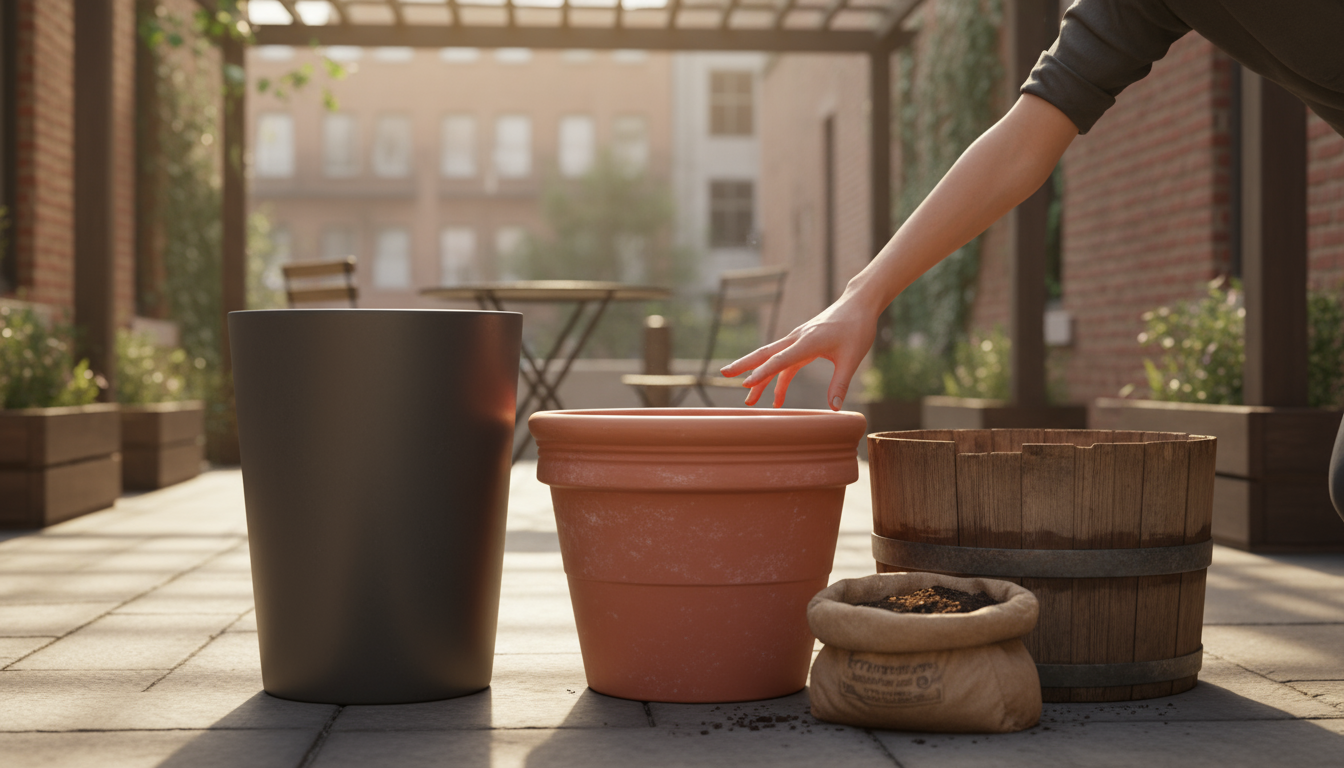
Choosing Your Underground Home: Selecting the Right Deep Containers

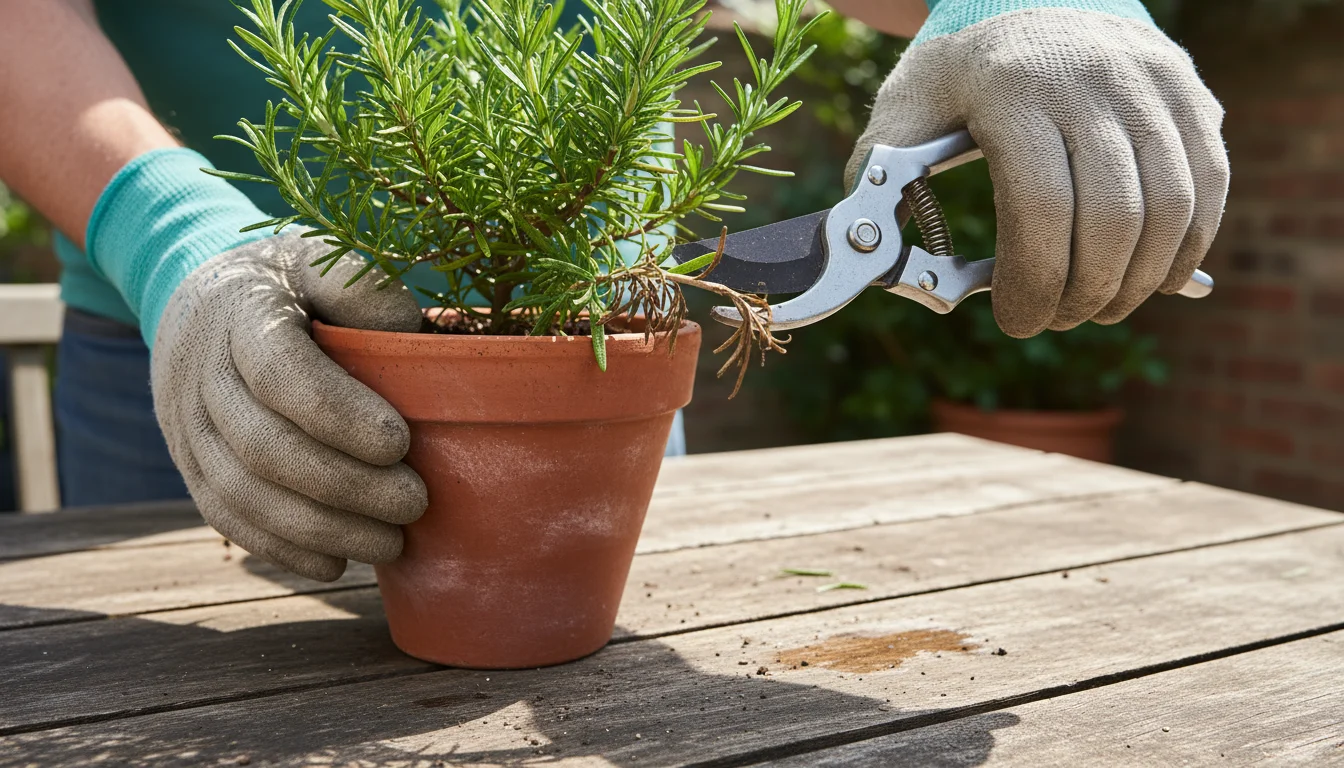
The success of growing carrots in containers largely depends on providing enough depth for their roots to develop properly. Carrots are taproots, meaning they grow straight down. Choosing the right “underground home” for them is paramount.

Depth is Key

A common mistake is selecting containers that are too shallow. For most carrot varieties, aim for a container that is at least 10-12 inches deep. If you plan to grow longer varieties, increase that depth to 15-18 inches. The width of the container is less critical than its depth, but wider pots allow you to plant more carrots, maximizing your harvest.
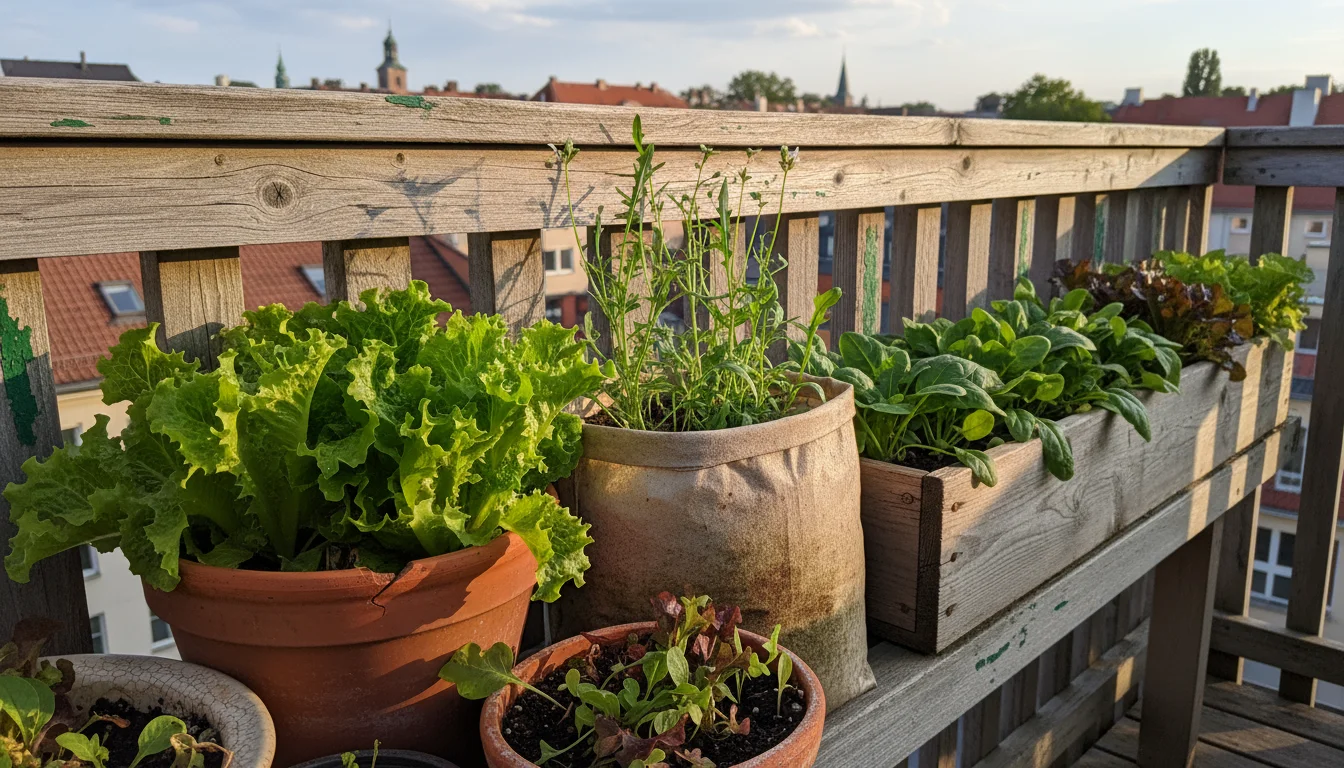
Material Matters

You have several excellent options for container materials, each with pros and cons:

  • Terracotta or Clay Pots: These are attractive and breathe well, allowing excess moisture to evaporate. However, they can dry out quickly, requiring more frequent watering, especially in warmer fall climates or sunny spots.
  • Plastic Pots: Lightweight, affordable, and retain moisture well. Choose food-grade plastic if possible. Ensure they have adequate drainage holes.
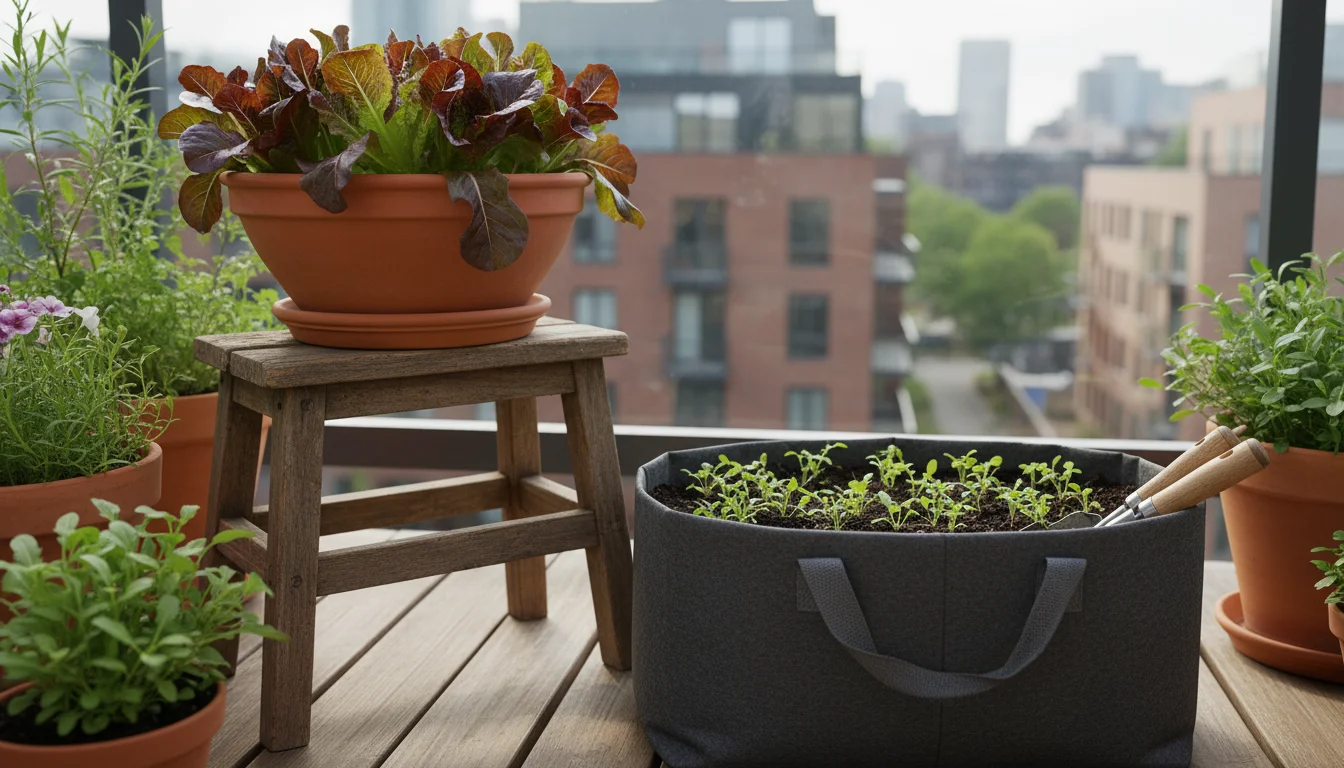
  • Fabric Grow Bags: An increasingly popular choice for deep pot gardening. These breathable bags promote excellent air circulation around the roots (air pruning), preventing root circling and encouraging stronger growth. They also offer superior drainage and are easy to store when not in use. They come in various sizes, making them perfect for growing fall root vegetables.
  • Wooden Planters: Sturdy and attractive, often providing good insulation. Ensure the wood is untreated or sealed with a food-safe sealant to prevent chemicals from leaching into your soil. Like fabric bags, they should have drainage.
  • Repurposed Items: Think outside the box. Old galvanized tubs, deep laundry baskets (lined with landscape fabric), or even sturdy five-gallon buckets can work. Always ensure they are clean, have sufficient depth, and include drainage holes.

Essential Drainage

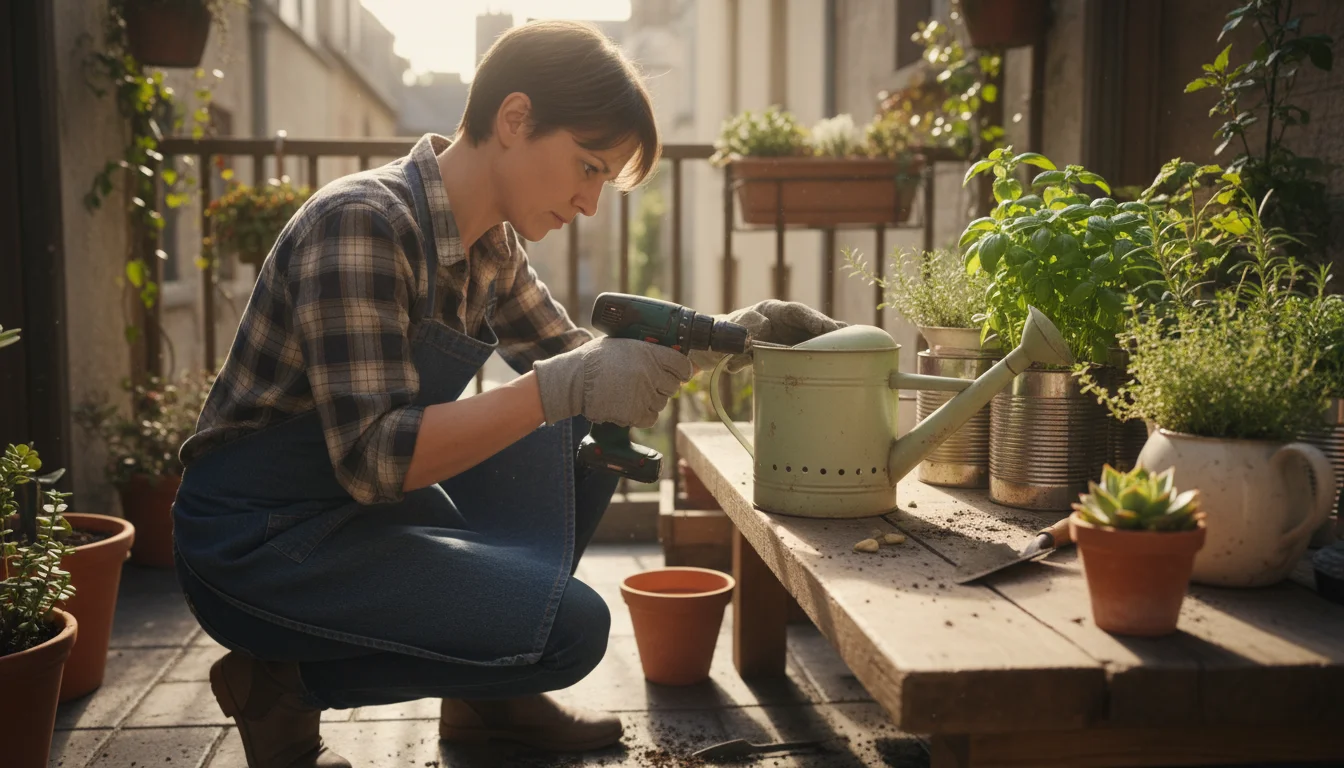
Regardless of the material, every container absolutely must have drainage holes at the bottom. Carrots detest soggy feet. Without proper drainage, which means water can easily move through the soil and exit the bottom of the pot, their roots will rot. If your chosen container lacks holes, drill several 1/2-inch holes yourself before planting.

Choosing the right deep containers sets the stage for a thriving fall carrot patch. Prioritize depth and drainage, then select a material that fits your budget and aesthetic preferences.

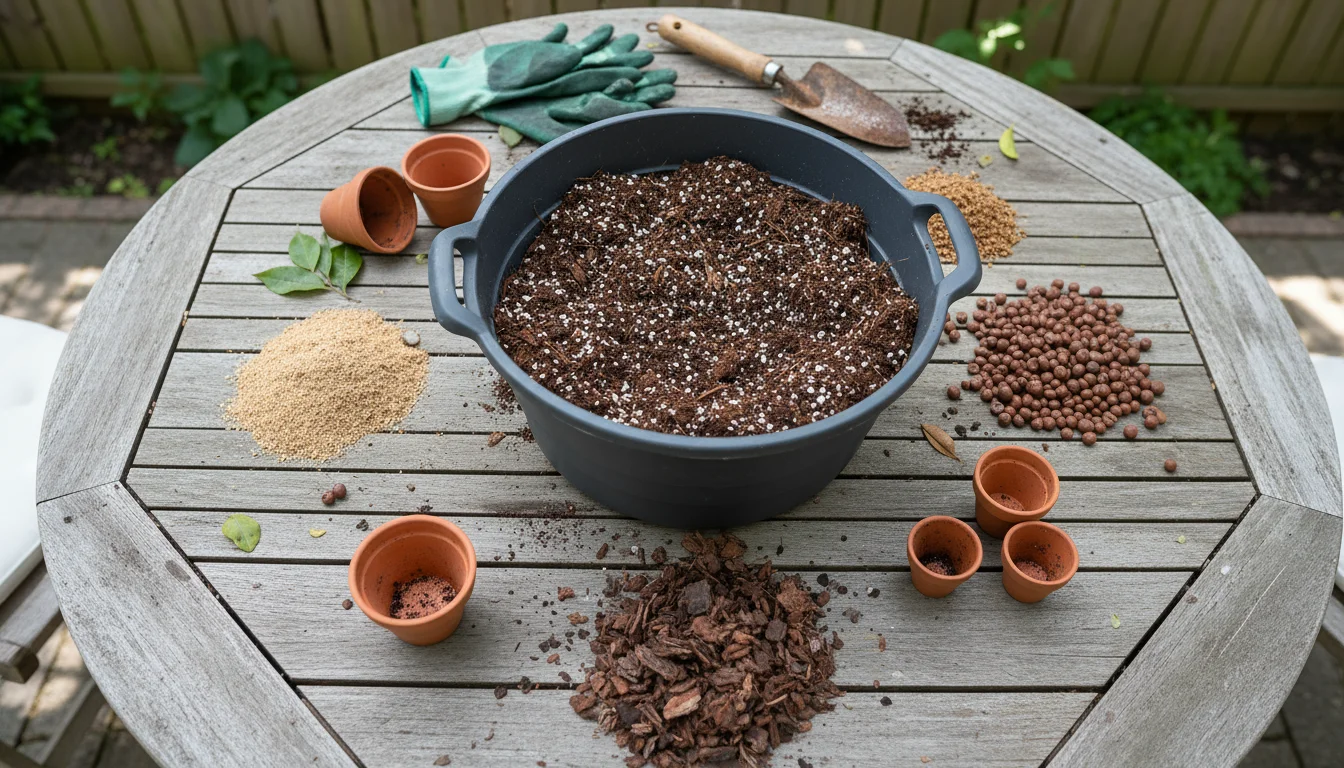
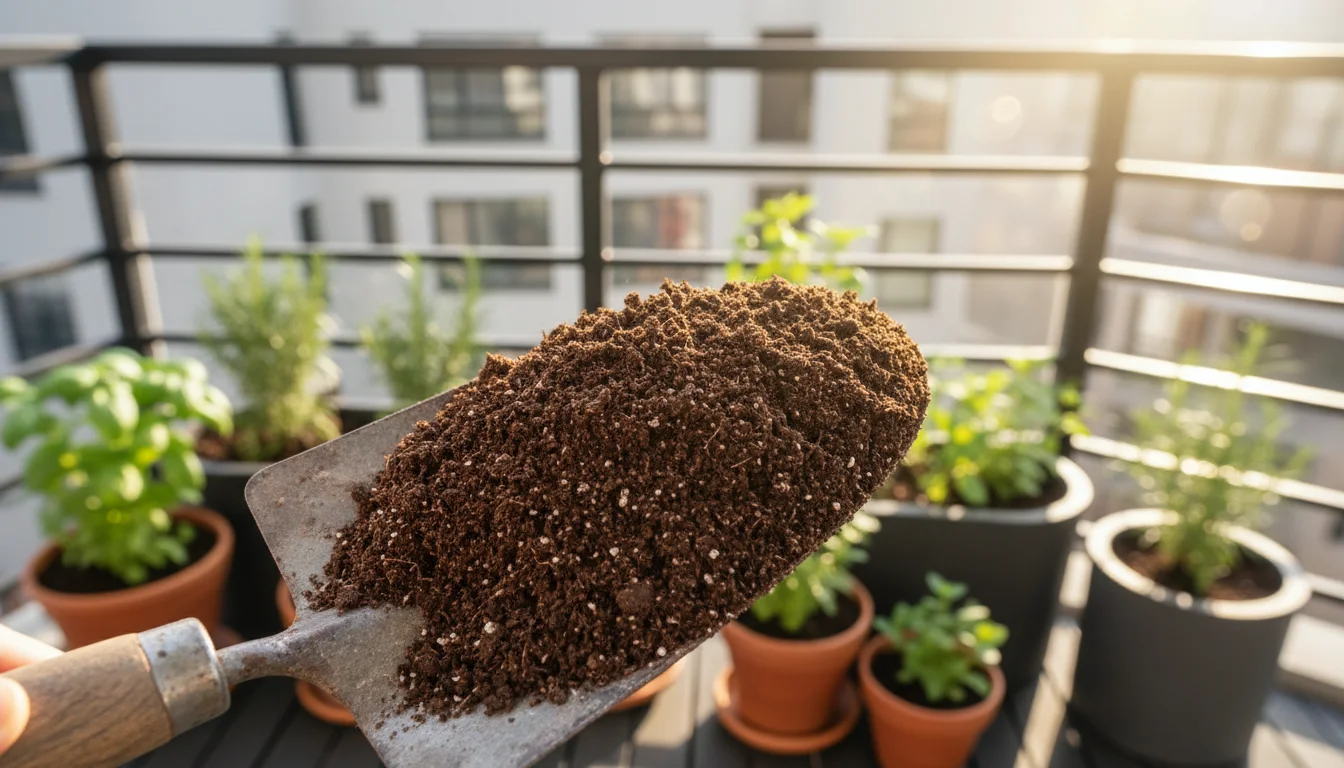
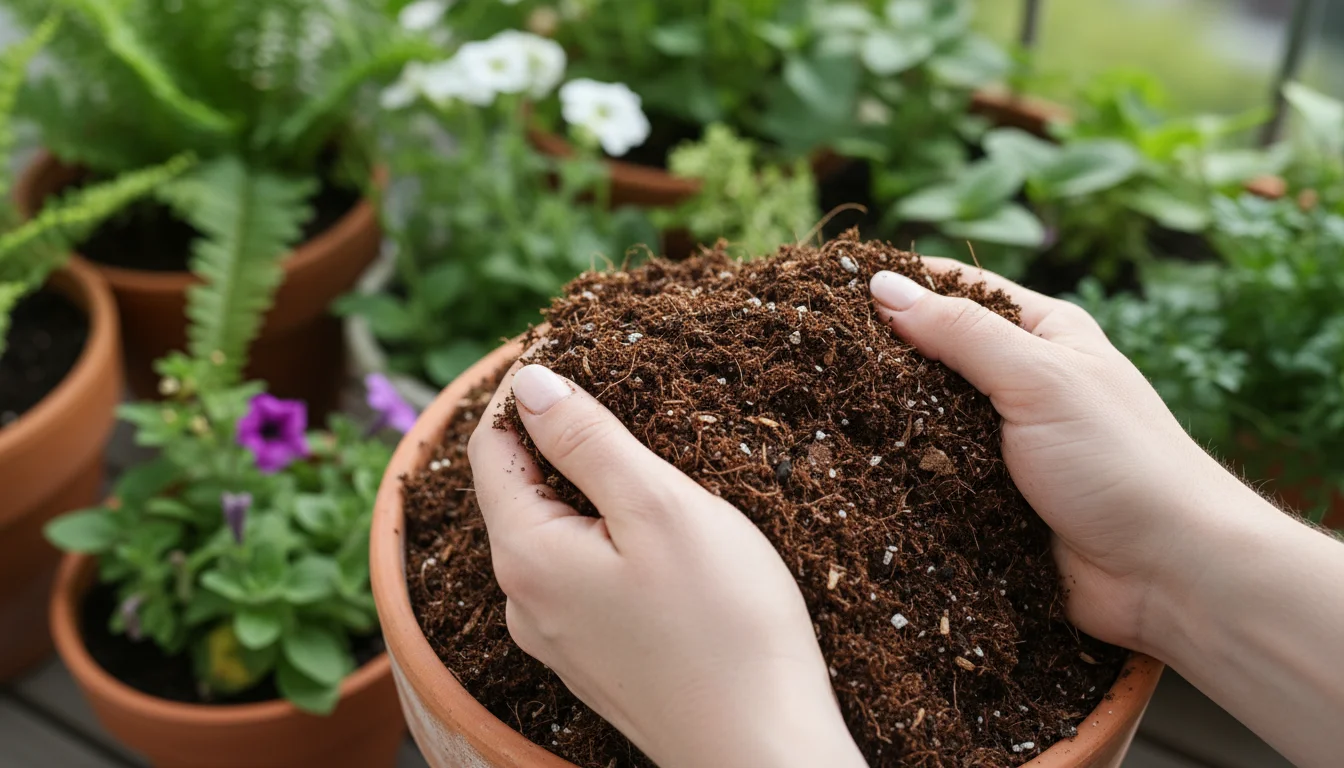
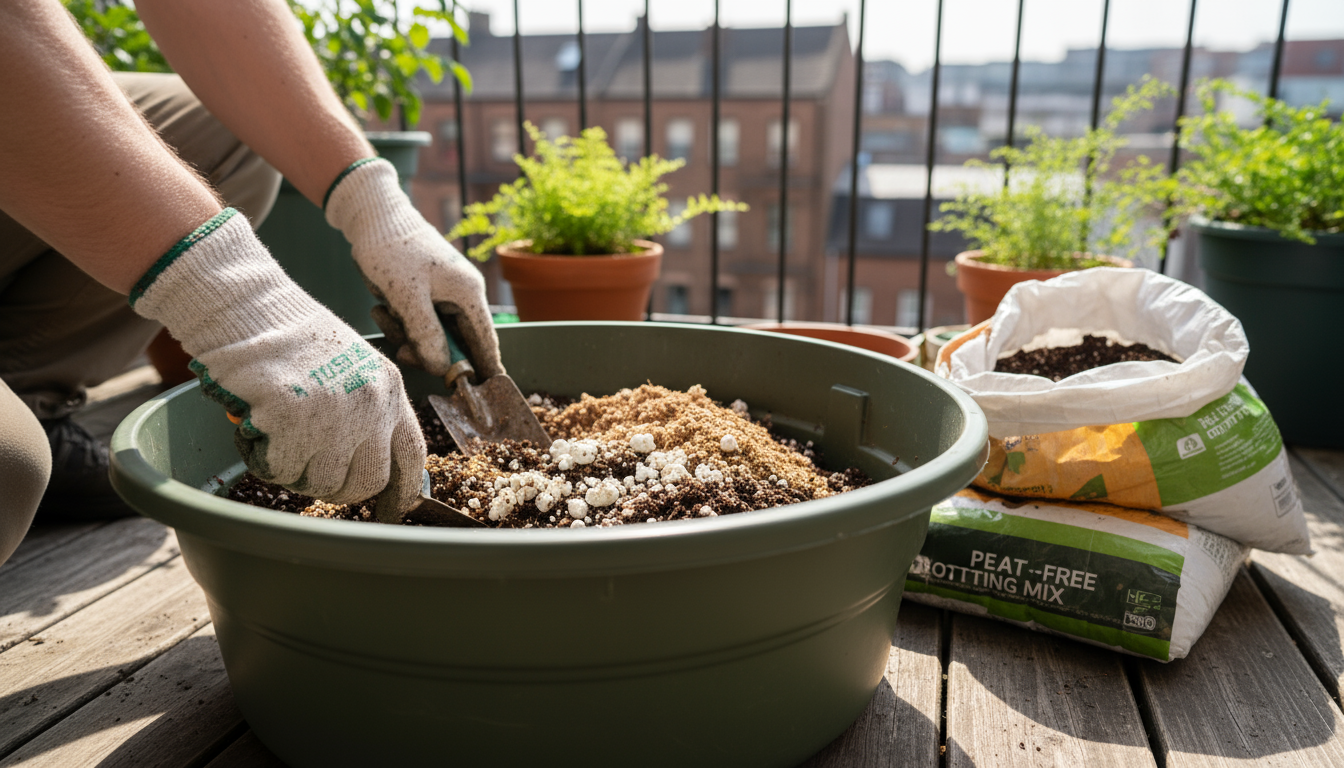
The Perfect Bed: Crafting Ideal Soil for Container Carrots

Carrots are not fussy plants, but they are particular about their soil. Because their roots grow directly into it, the soil quality dictates their shape, size, and even flavor. In containers, you have the unique opportunity to create the perfect growing medium, free from the compaction and obstacles often found in garden beds. This is a critical step for successful deep pot gardening.

Why Soil Structure Matters

Carrots need loose, friable soil. “Friable” means the soil crumbles easily in your hand. This allows their delicate taproots to push down unimpeded, resulting in straight, well-formed carrots. Heavy, compacted soil or soil with rocks and debris will cause carrots to fork, become stubby, or develop odd shapes. Aim for a mix that is light, airy, and well-draining, but also capable of holding essential moisture and nutrients.

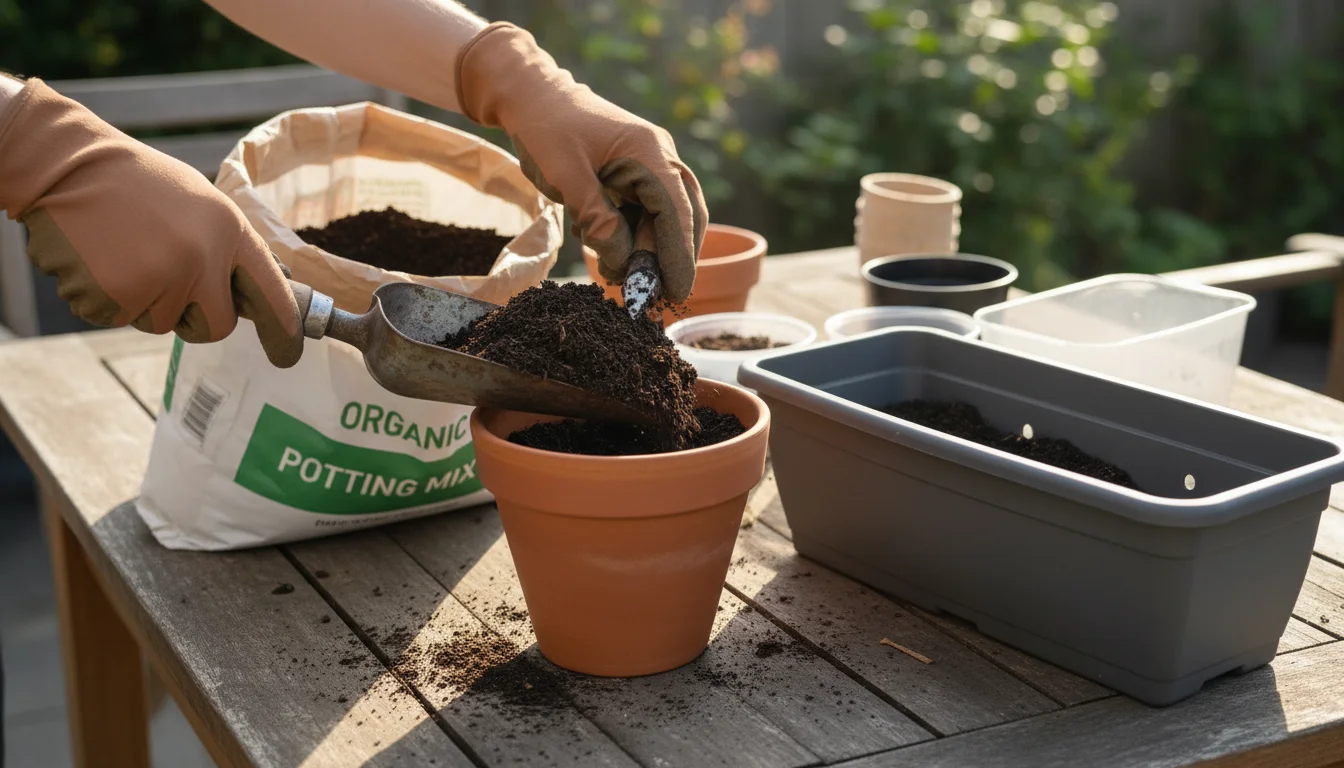
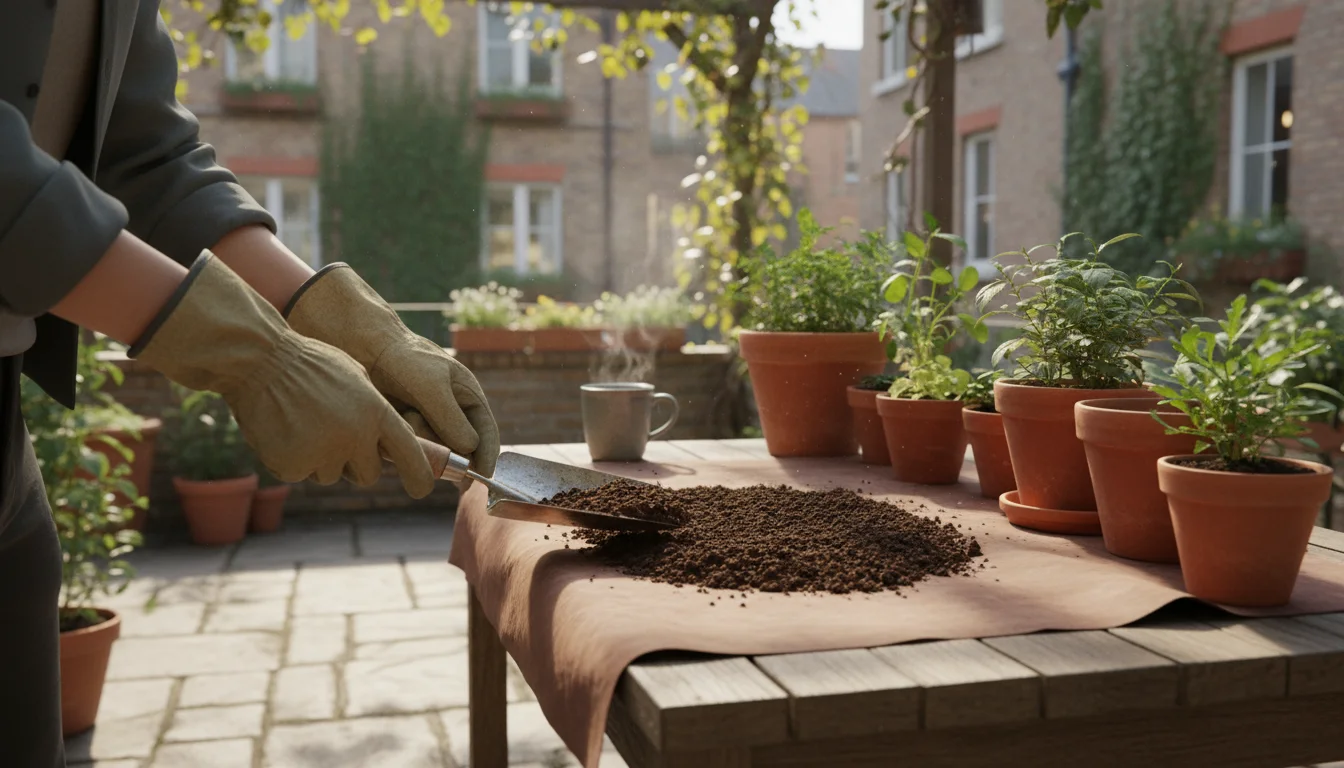
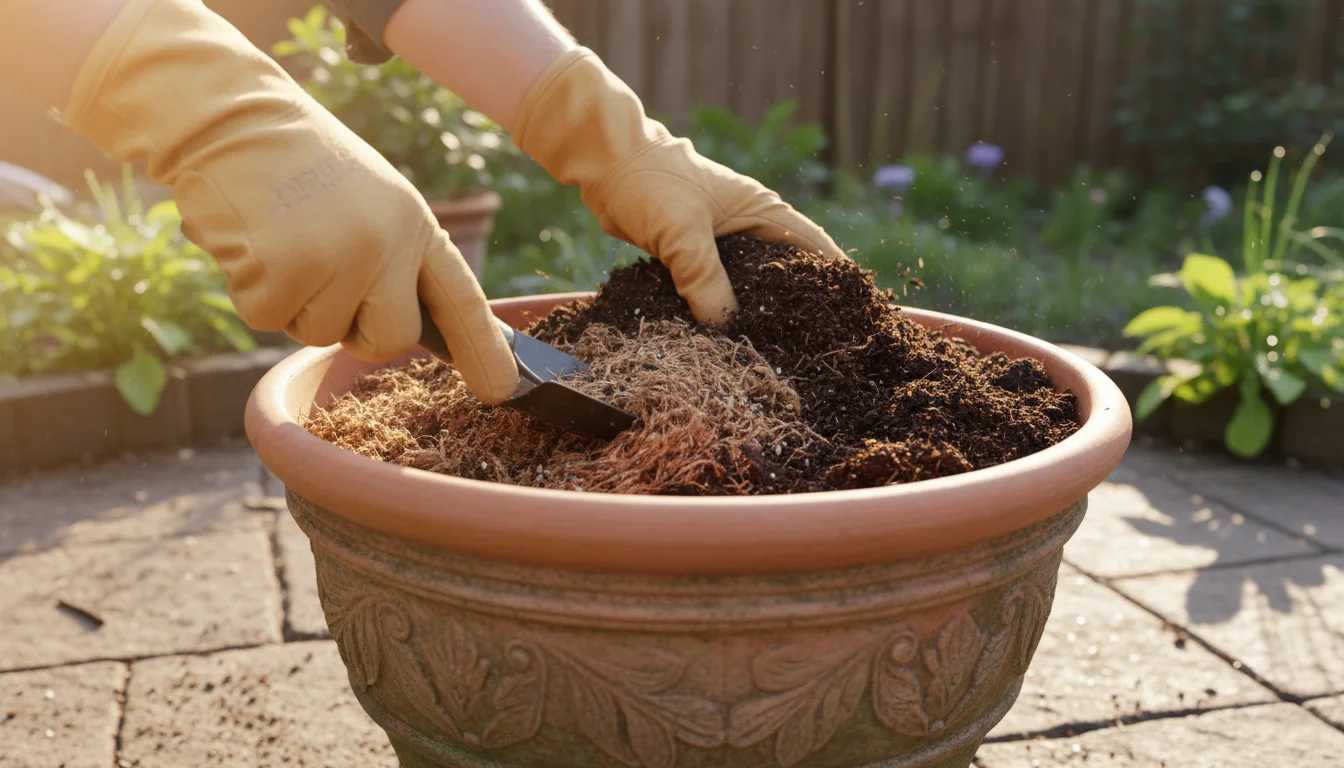
The Ideal Container Soil Mix

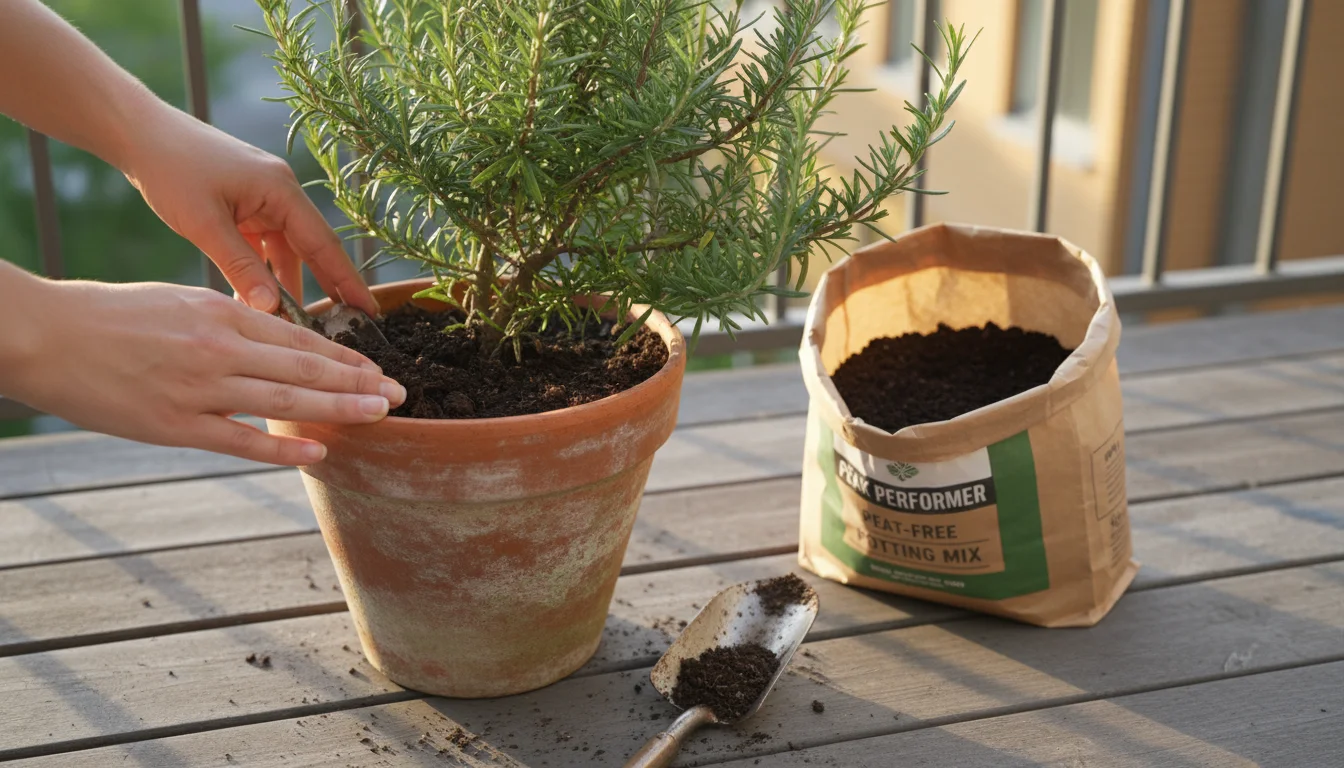
Forget garden soil for containers. Garden soil tends to compact in pots, hindering root growth and drainage. Instead, create a specialized potting mix:

  1. High-Quality Potting Mix (Base): Start with a premium, all-purpose potting mix. Look for brands that specify “for containers” or “lightweight.” These mixes usually contain a blend of peat moss or coco coir, perlite or vermiculite, and compost.
  2. Add Perlite or Vermiculite (10-20%): To enhance drainage and aeration, mix in an extra 10% to 20% perlite or vermiculite. Perlite helps keep the soil loose and airy, while vermiculite also aids in moisture retention, a beneficial quality for deep pot gardening.
  3. Compost (10-20%): Enrich your mix with a good quality compost. Compost provides a slow release of essential nutrients, improves soil structure, and introduces beneficial microorganisms. Avoid fresh manure, which can cause carrots to “fork” and can be too strong for young seedlings.
  4. Balanced Organic Fertilizer (Optional, but Recommended): Incorporate a balanced, slow-release organic granular fertilizer at the rate recommended on the product packaging. This provides a steady supply of nutrients throughout the growing season, eliminating the need for frequent liquid feedings later on.

Mix these components thoroughly until they are uniformly blended. The result should be a light, fluffy, and dark mixture. When you squeeze a handful, it should hold its shape slightly but crumble easily when poked. This is the perfect environment for your fall root vegetables to thrive.

Ensuring your soil mix is just right is a foundational step in how to plant carrots in pots in autumn. It directly impacts the quality and quantity of your underground harvest.

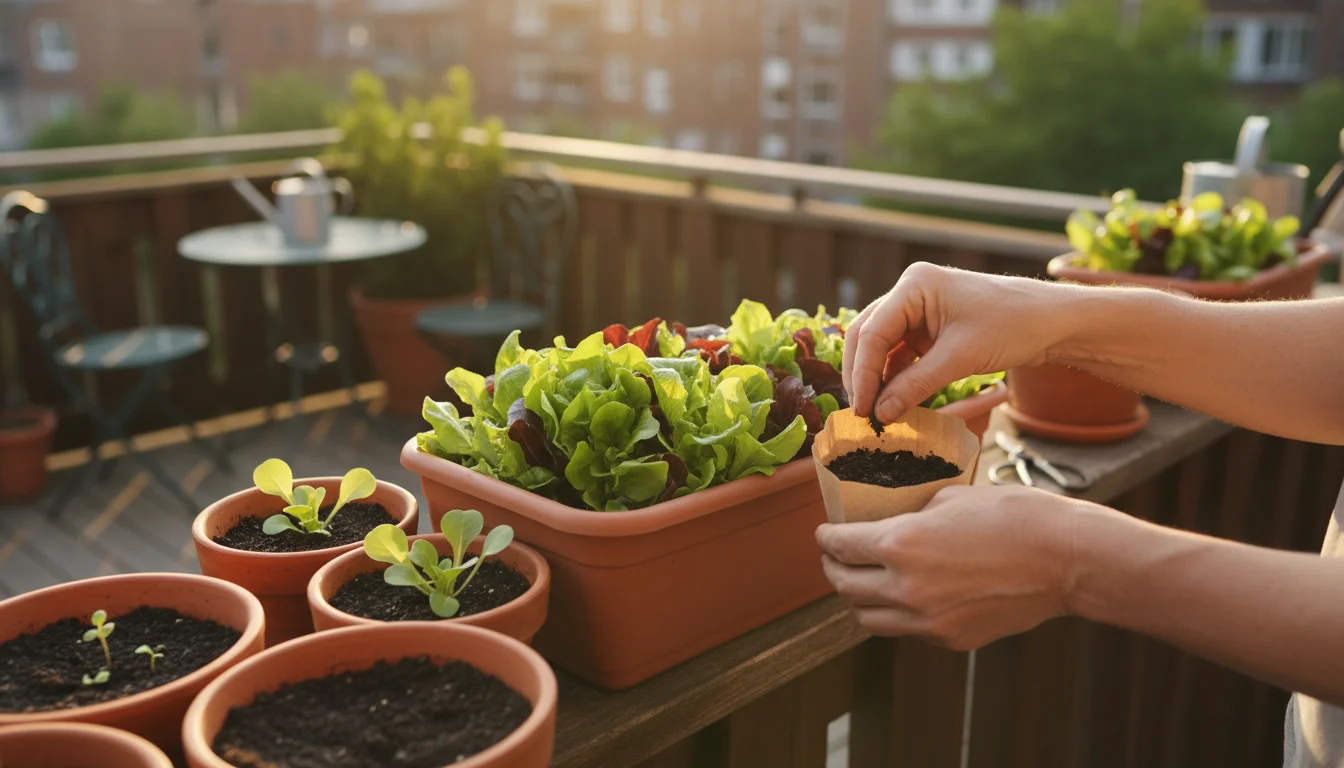
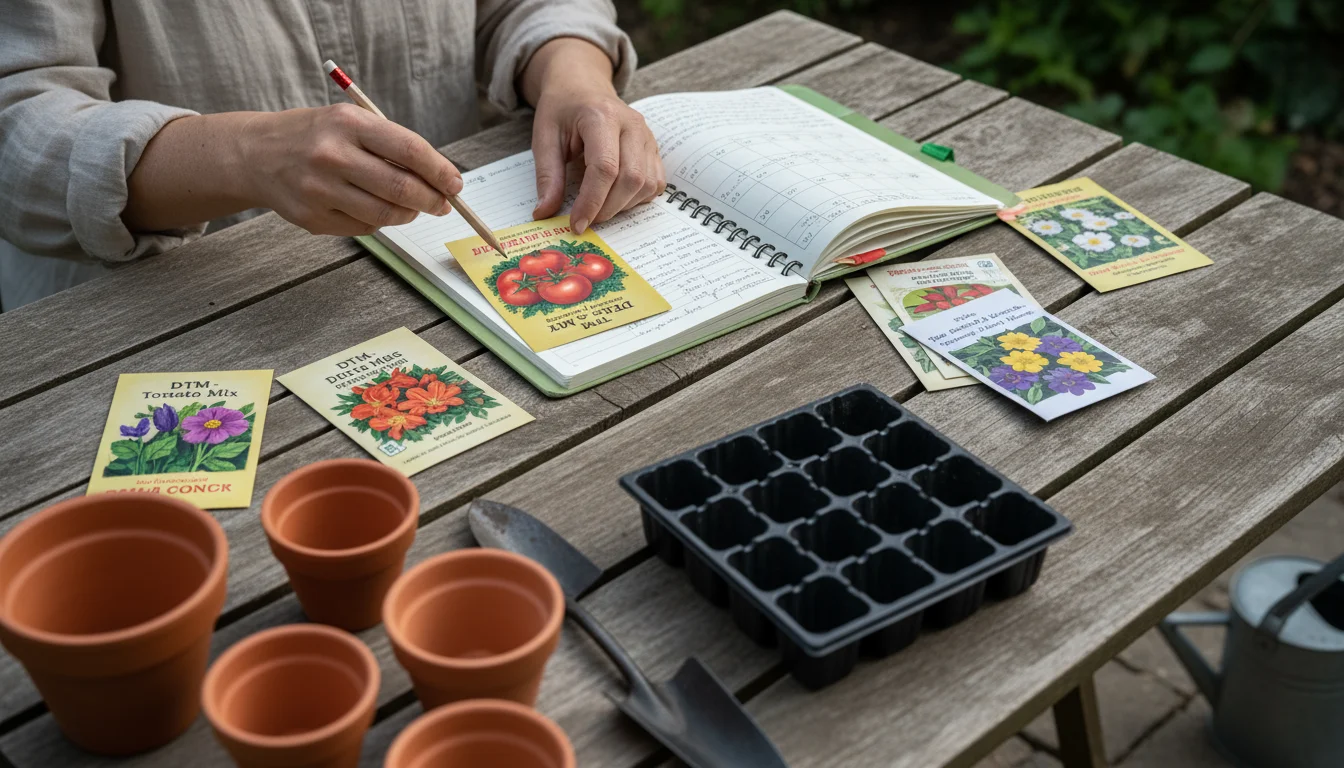
Seed Selection and Sowing Success: How to Plant Carrots in Pots in Autumn

With your deep containers and perfect soil ready, it’s time for the exciting part: planting your carrot seeds. The right seed choice and careful sowing technique are crucial for a successful harvest of fall root vegetables.

Choosing the Best Carrot Variety for Container Gardening

Not all carrots are created equal when it comes to container suitability. Look for varieties described as “short,” “stubby,” “round,” or “container-friendly.” These types mature faster and do not require as much depth, making them ideal for growing carrots in containers. Some excellent choices include:

  • ‘Danvers Half Long’: A classic, versatile choice that performs well in slightly shallower containers, reaching about 6-7 inches.
  • ‘Chantenay Red Core’: Similar to Danvers, these are broad-shouldered and tapered, usually growing 5-6 inches.
  • ‘Paris Market’: Small, round, gourmet carrots that are perfect for containers as shallow as 6-8 inches. They mature quickly.
  • ‘Little Finger’: Slender, sweet, and about 3-4 inches long, ideal for smaller pots and quick harvests.
  • ‘Thumbelina’: Another excellent round variety, great for dense plantings.

Check the “days to maturity” on the seed packet. For fall planting, you need varieties that can mature before your first hard frost. Most container-friendly varieties mature in 60-75 days.

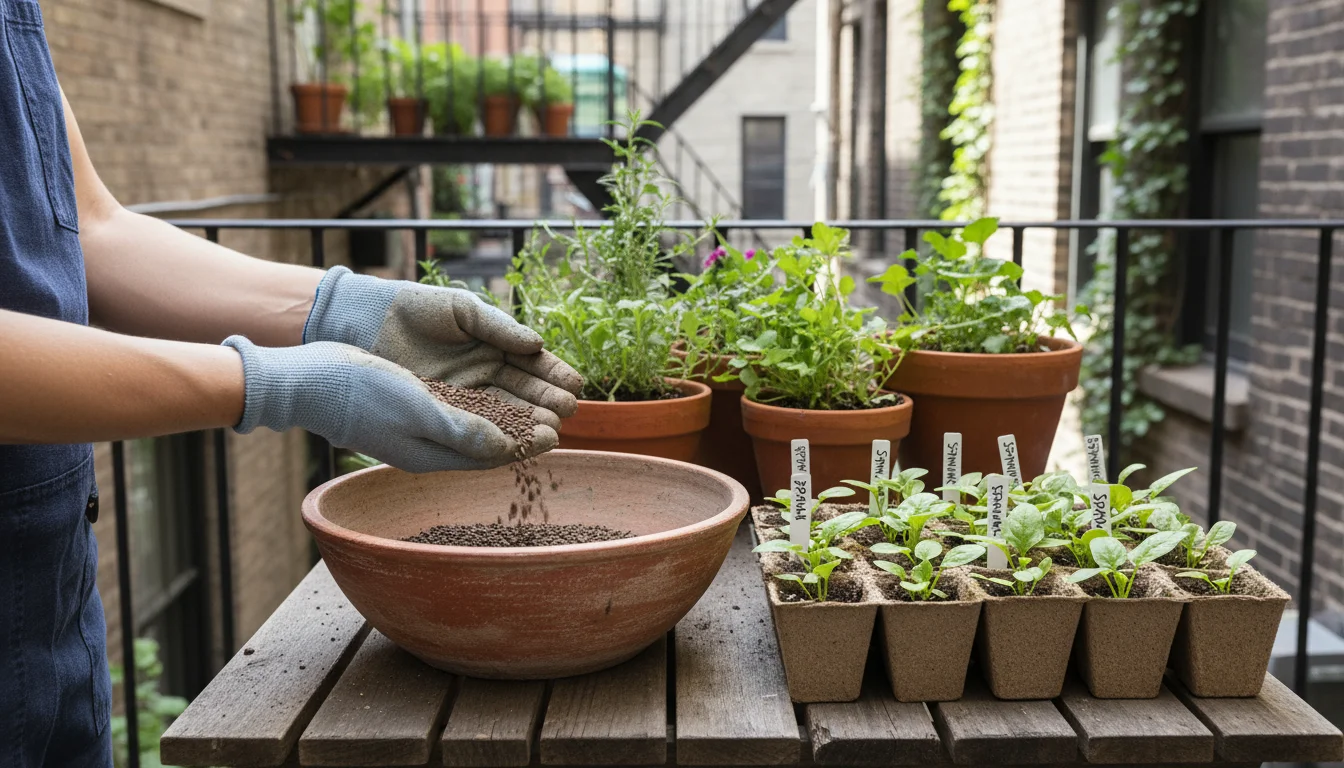
The Sowing Process: Step-by-Step

  1. Fill Your Containers: Fill your chosen deep containers with your prepared potting mix, leaving about an inch of space from the rim. Gently tap the container to settle the soil, but avoid compacting it.
  2. Moisten the Soil: Water the soil thoroughly until it is evenly moist and water drains from the bottom. This prevents the tiny seeds from washing away when you water after sowing.
  3. Distribute Seeds Evenly: Carrot seeds are tiny, making even spacing challenging. You can sprinkle them thinly across the surface, aiming for about 1/2 to 1 inch apart. Alternatively, use seed tape or mix your carrot seeds with fine sand to help distribute them more evenly. Planting them closer together will necessitate thinning later, but do not be afraid of this.
  4. Cover Lightly: Cover the seeds with a very thin layer (about 1/4 inch) of fine potting mix or vermiculite. Avoid burying them too deeply, as they need light to germinate.
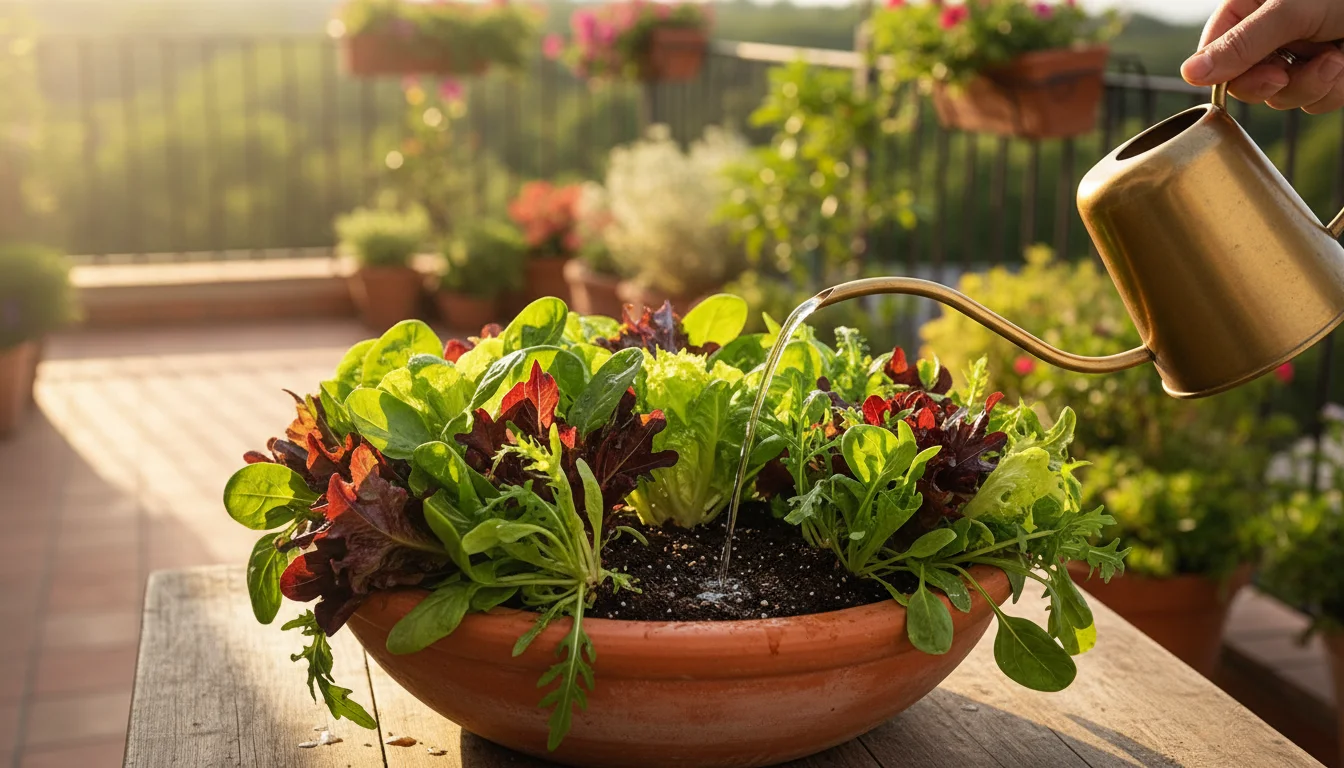
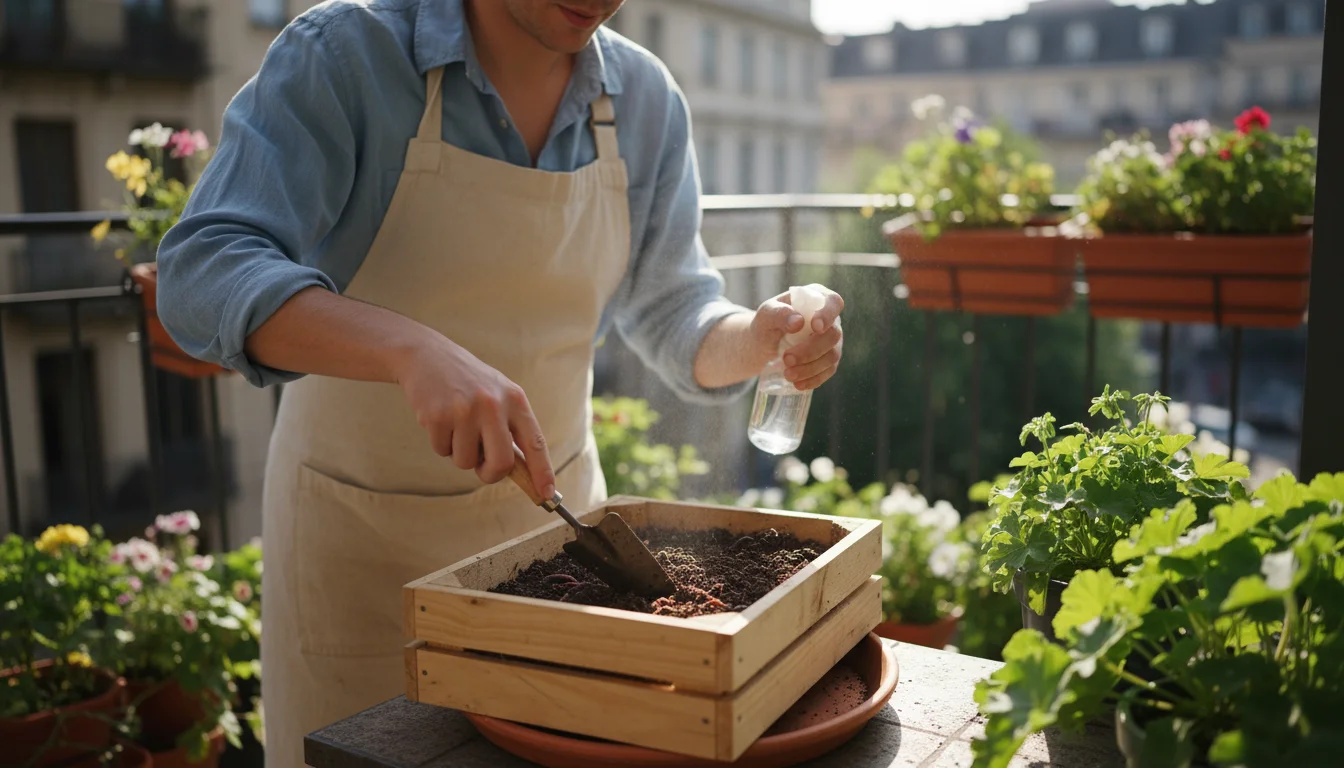
  5. Gentle Watering: Mist the surface gently with a spray bottle or use a watering can with a very fine rose attachment to avoid displacing the seeds. Keep the soil consistently moist but not waterlogged during germination.
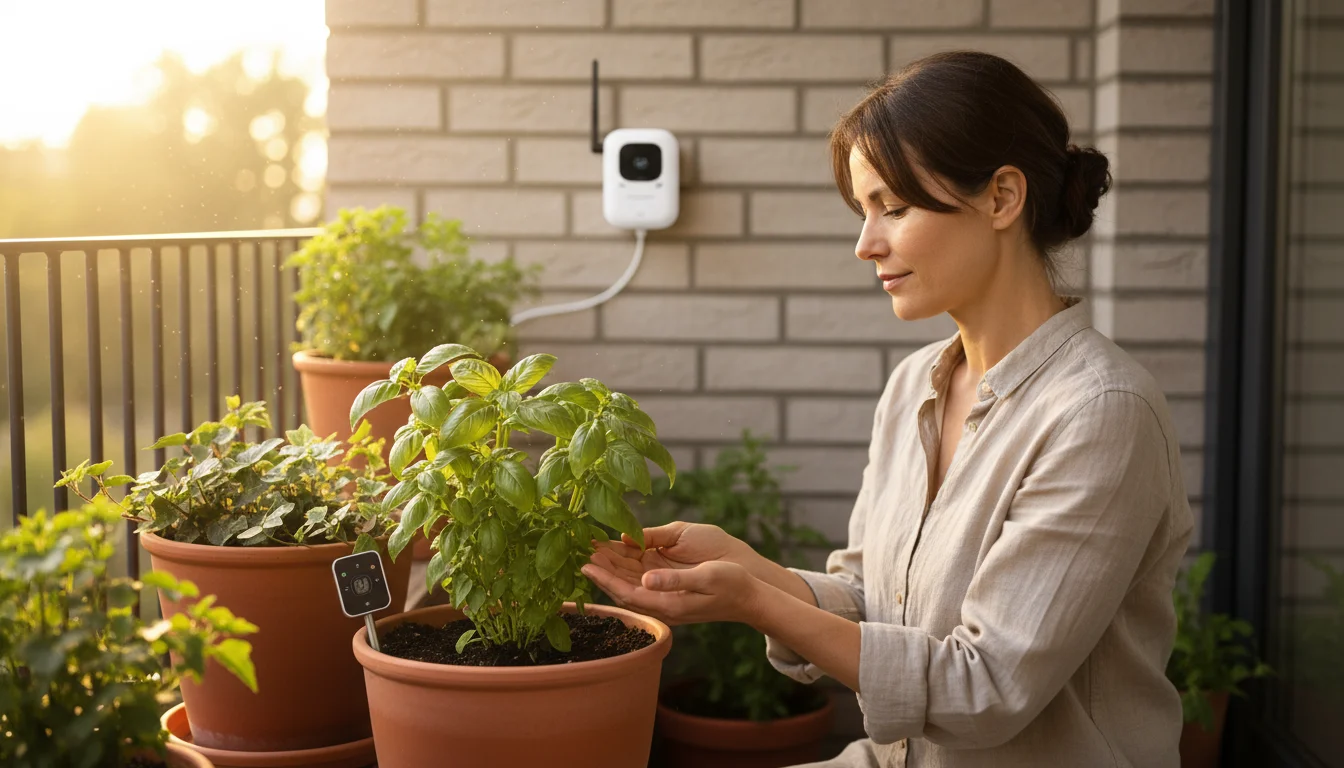
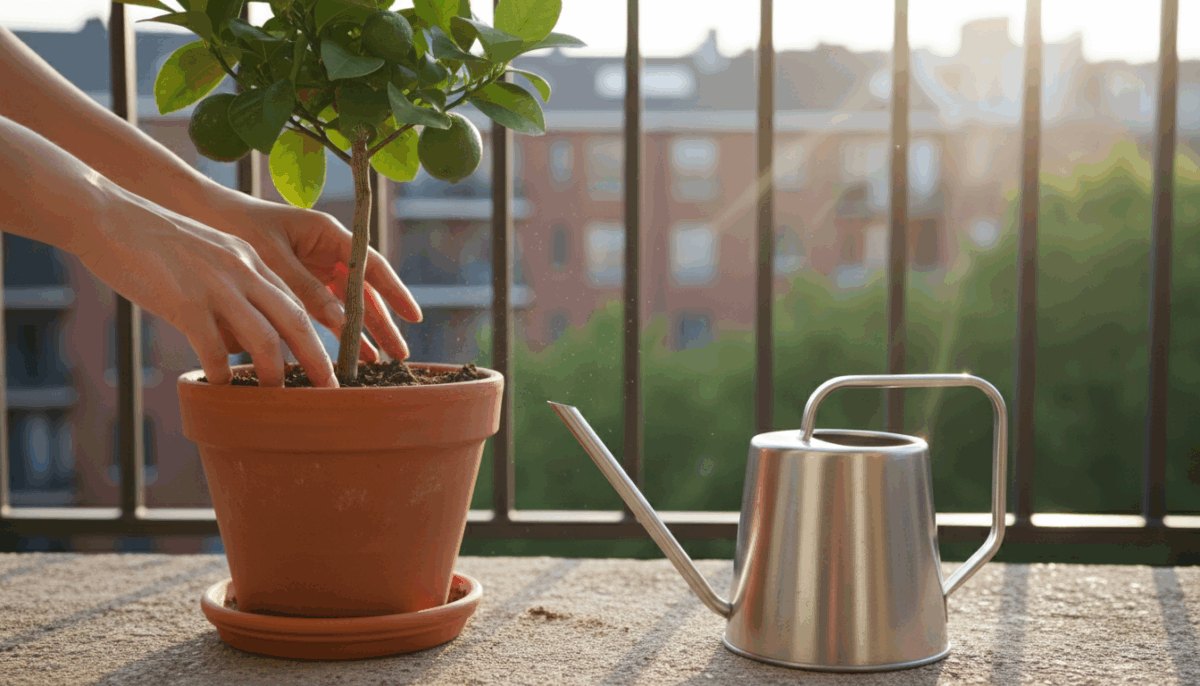
  6. Location: Place your containers in a spot that receives at least 6 hours of direct sunlight per day. Good light is crucial for healthy root development.

Carrot seeds can take 14-21 days to germinate, sometimes longer if temperatures are cool. Be patient and maintain consistent moisture. This careful attention to how to plant carrots in pots in autumn ensures a strong start for your crop.

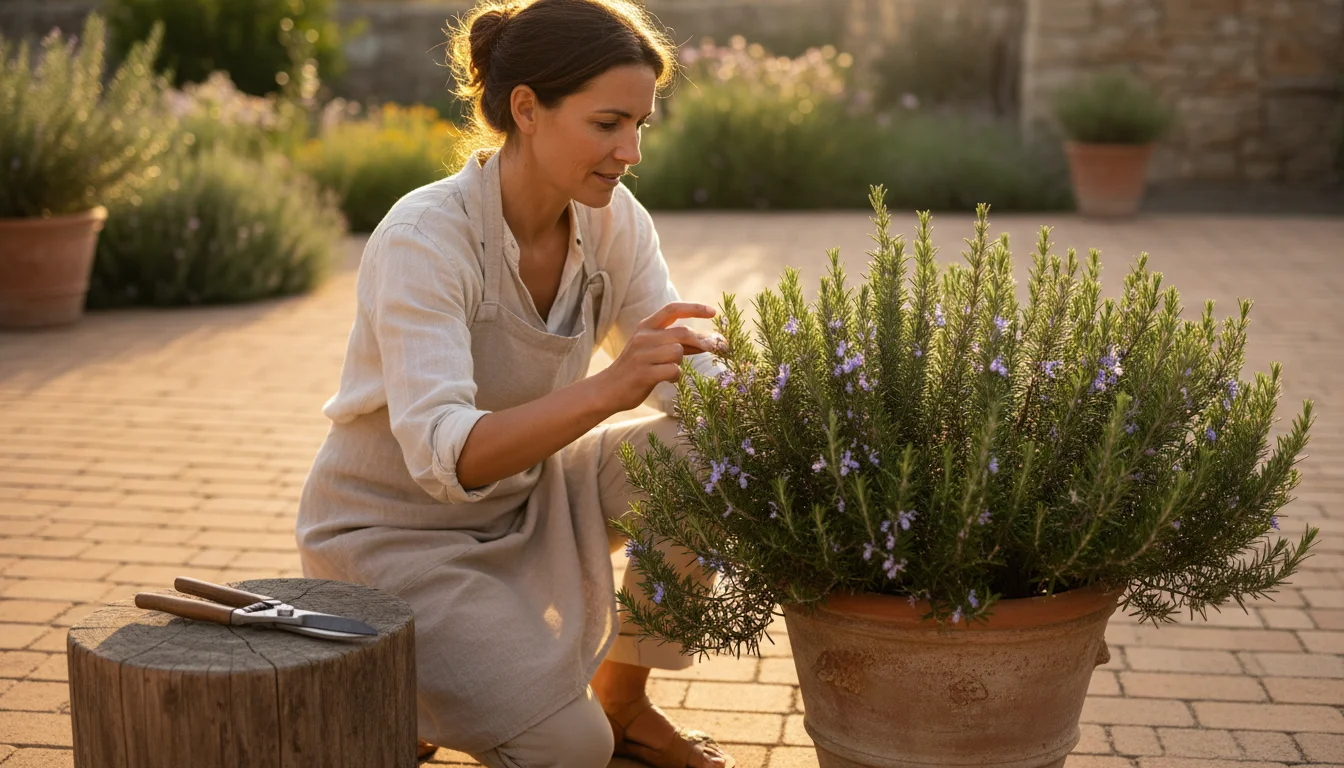
Nurturing Your Roots: Essential Care for Thriving Fall Carrots

Once your tiny carrot seedlings emerge, their journey to becoming delicious fall root vegetables truly begins. Consistent care is essential to ensure they develop long, straight, and flavorful roots. This section covers the critical aspects of maintenance for growing carrots in containers.

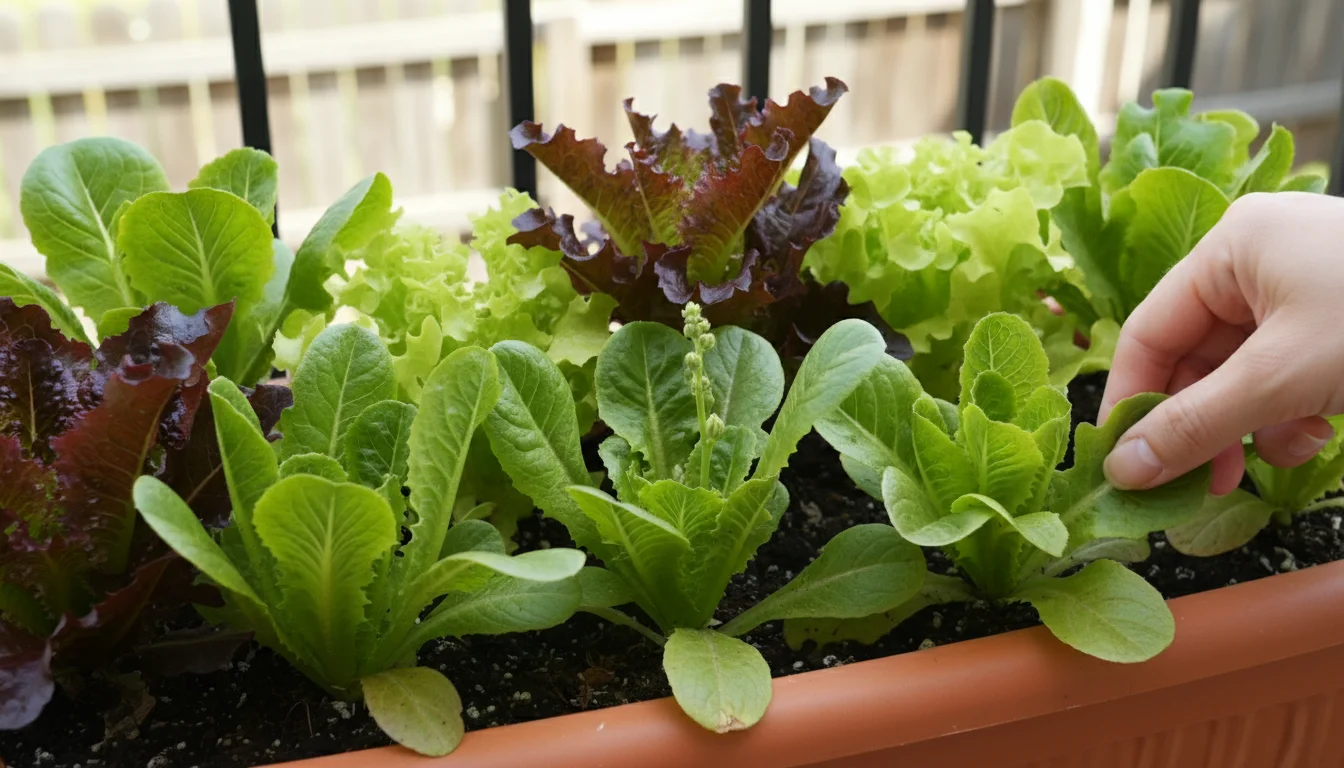
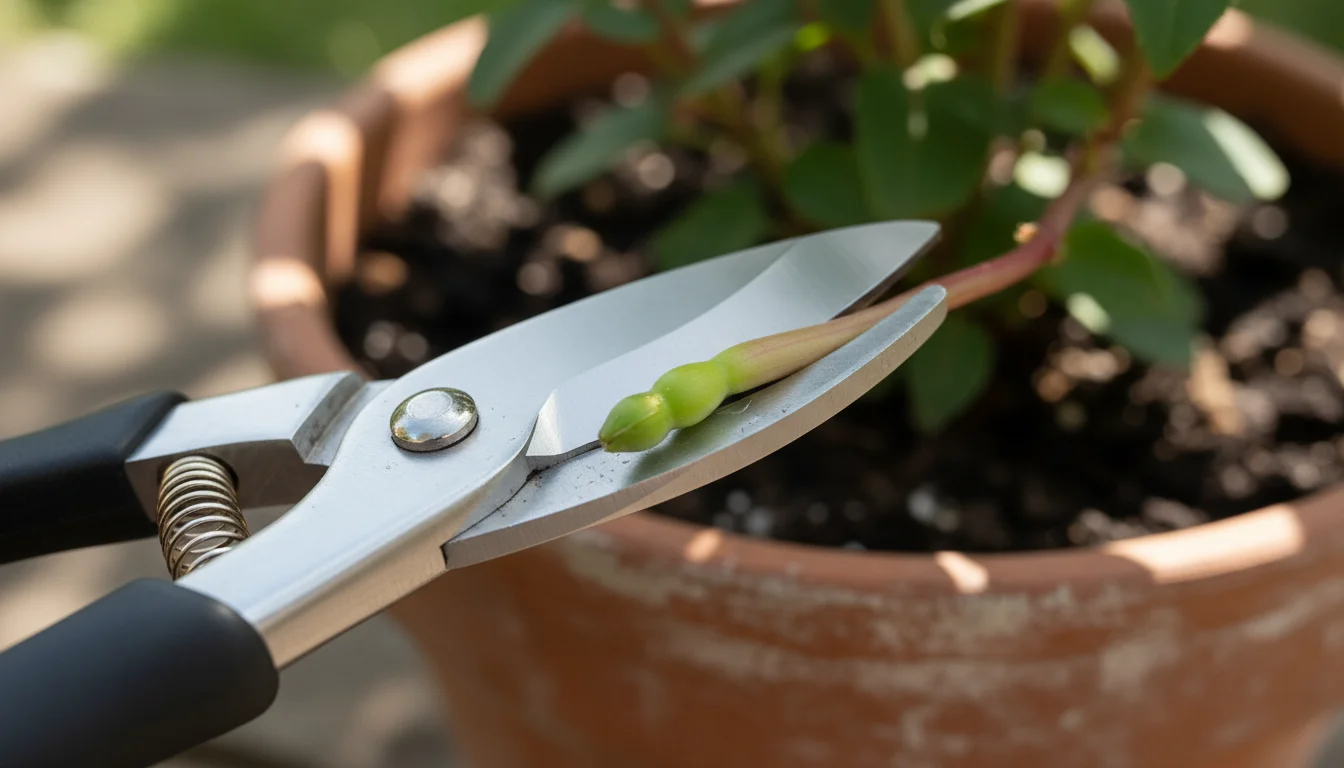
Thinning for Success

This is arguably the most crucial step after germination. If you sowed your seeds densely, you will see a carpet of tiny green shoots. Carrots need space to grow. If they are too crowded, their roots will intertwine, become stunted, or fail to develop properly. This can lead to a harvest of small, misshapen carrots.

How to Thin:

  1. Timing: Thin when seedlings are about 1-2 inches tall and have developed a couple of true leaves (the second set of leaves that look distinctly like a carrot leaf).
  2. Spacing: Gently pull out weaker seedlings, leaving the strongest ones spaced about 2-3 inches apart. For smaller varieties, you can aim for 1-2 inches. Take care not to disturb the roots of the remaining seedlings.
  3. Water After Thinning: Water immediately after thinning to help settle the soil around the undisturbed roots.

It might feel counterintuitive to remove healthy-looking seedlings, but thinning is vital for maximizing your yield of quality carrots.
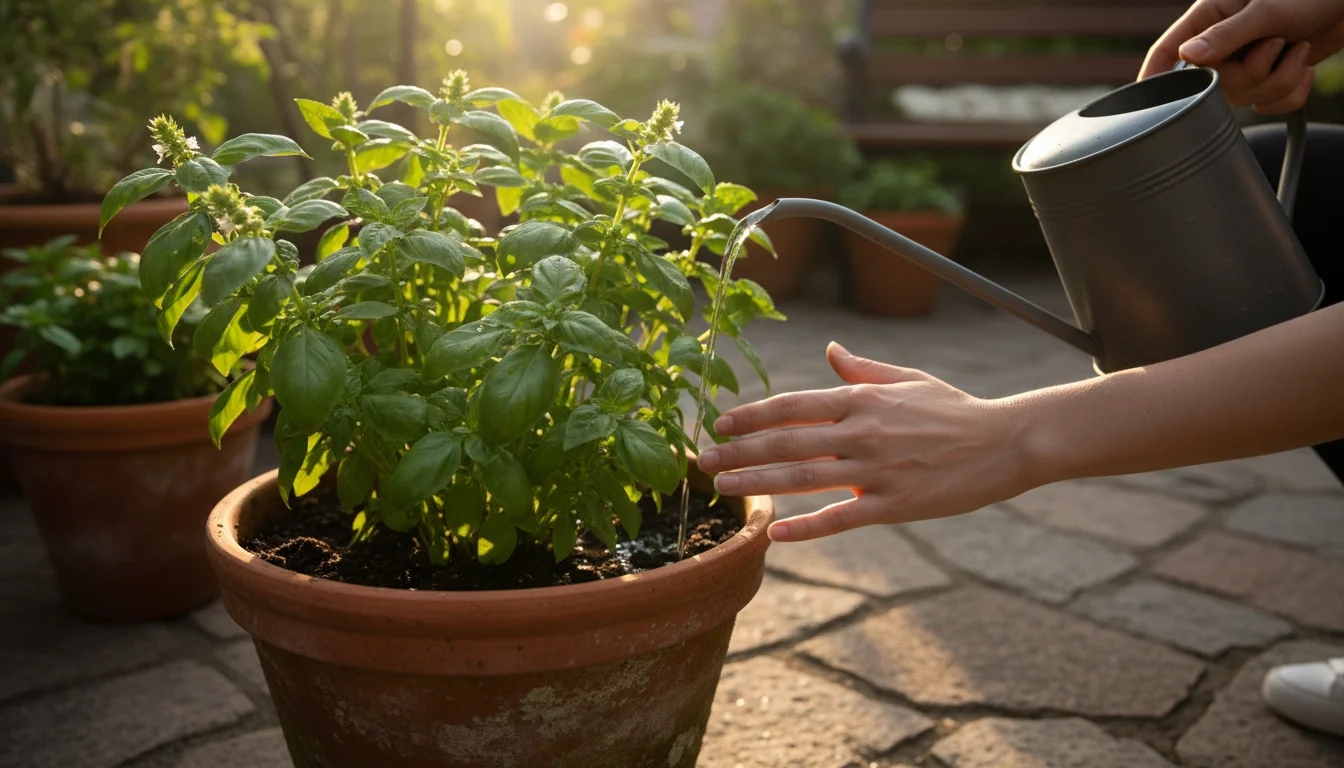
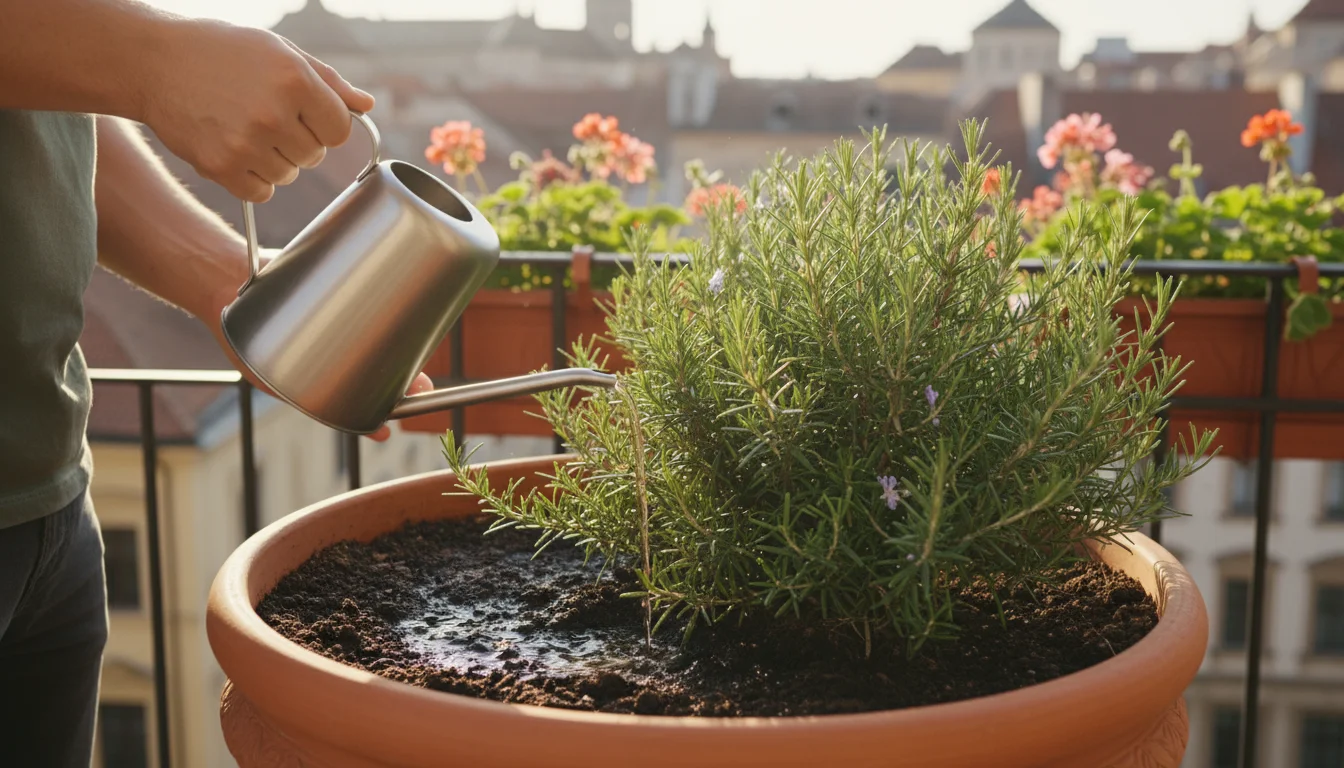
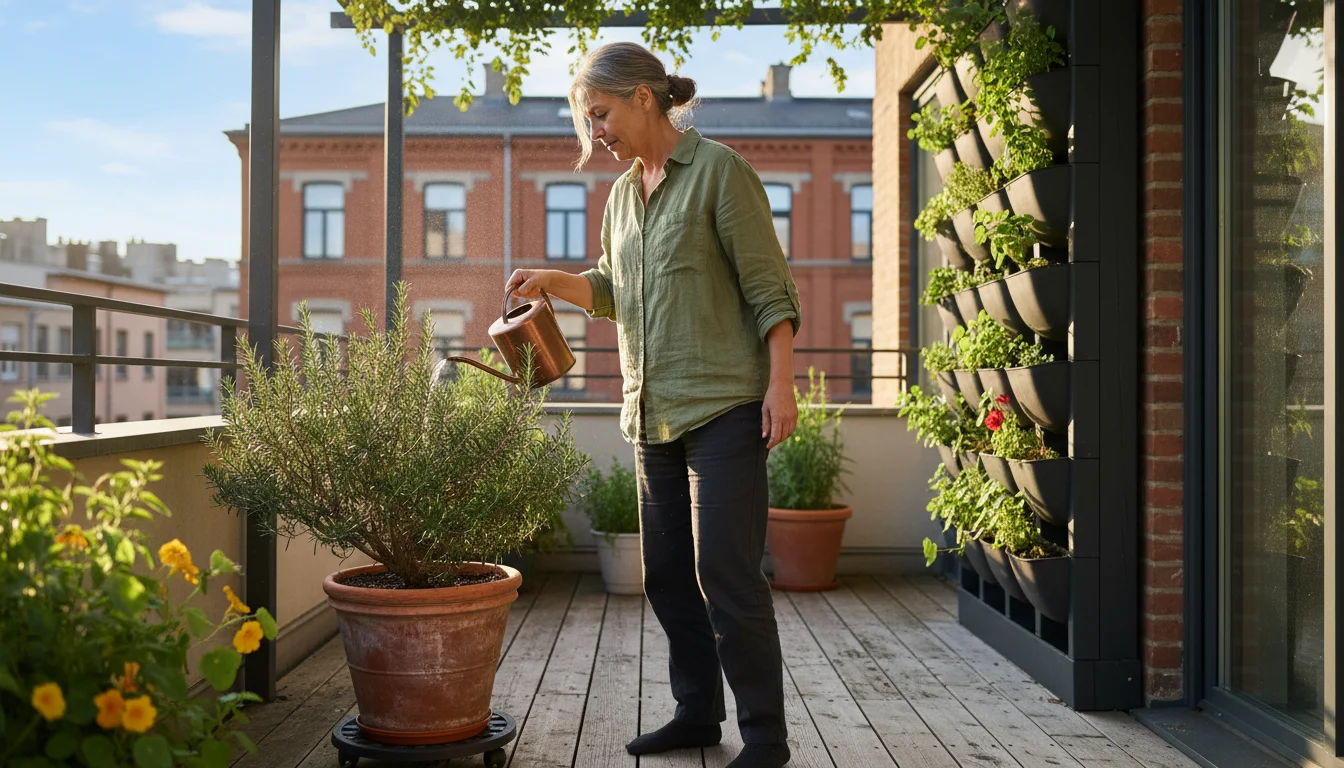
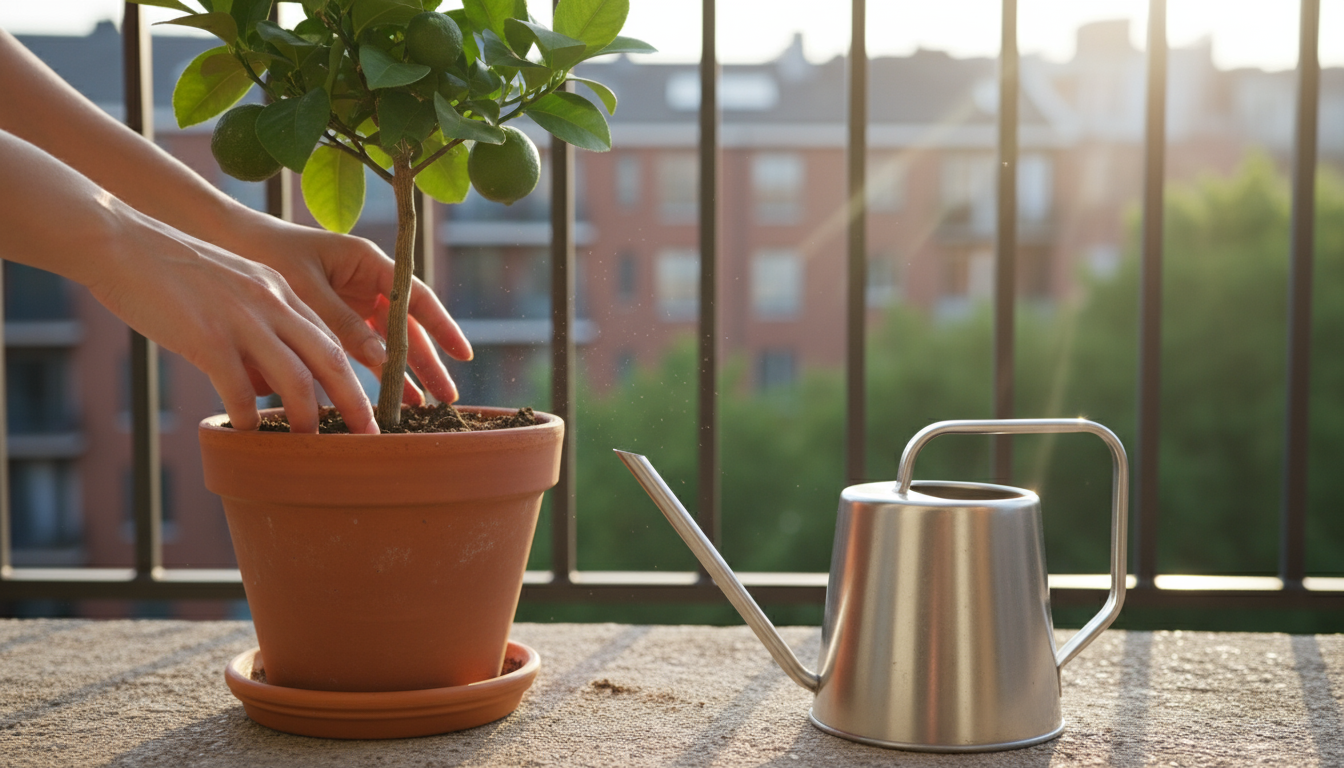
Watering Wisely

Container plants generally dry out faster than in-ground gardens. Carrots need consistent moisture to grow well and prevent cracking or bitterness. However, they also hate sitting in soggy soil.

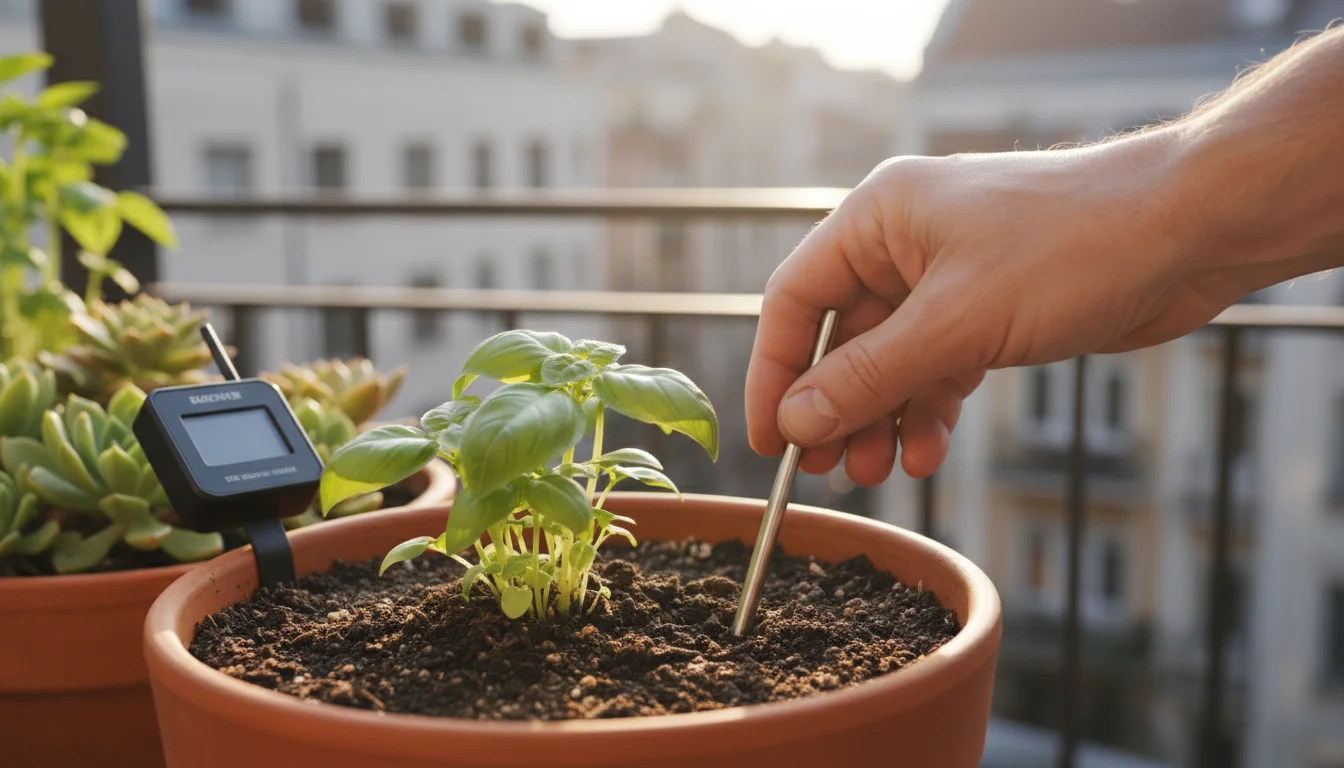
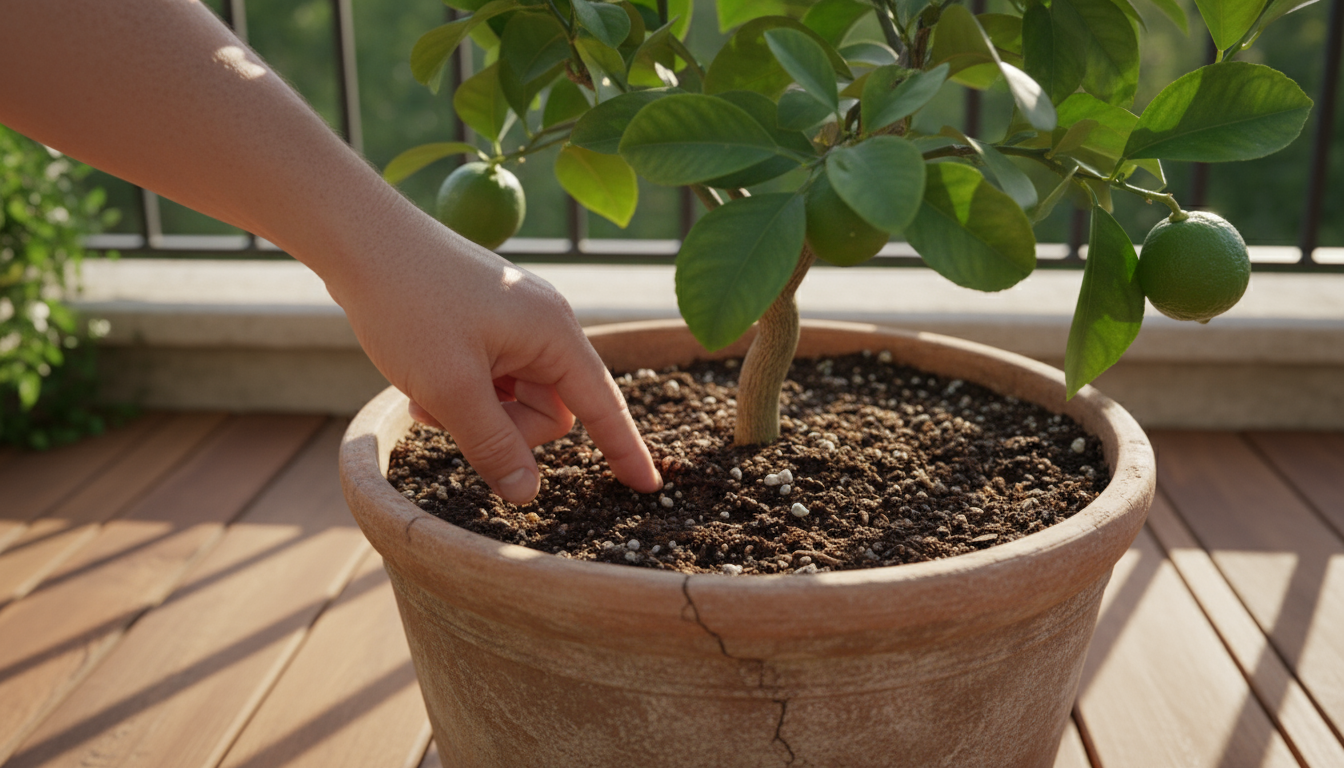
  • Frequency: Check your soil moisture daily by sticking your finger about an inch into the potting mix. If it feels dry, it is time to water. In cooler fall weather, you might water less frequently than in summer.
  • Technique: Water deeply until you see water draining from the bottom of the pot. This ensures moisture reaches the entire root zone. Avoid shallow, frequent watering, which encourages shallow root growth.
  • Avoid Extremes: Erratic watering, where the soil goes from bone dry to soaking wet, can cause carrots to crack or split. Aim for consistent moisture.

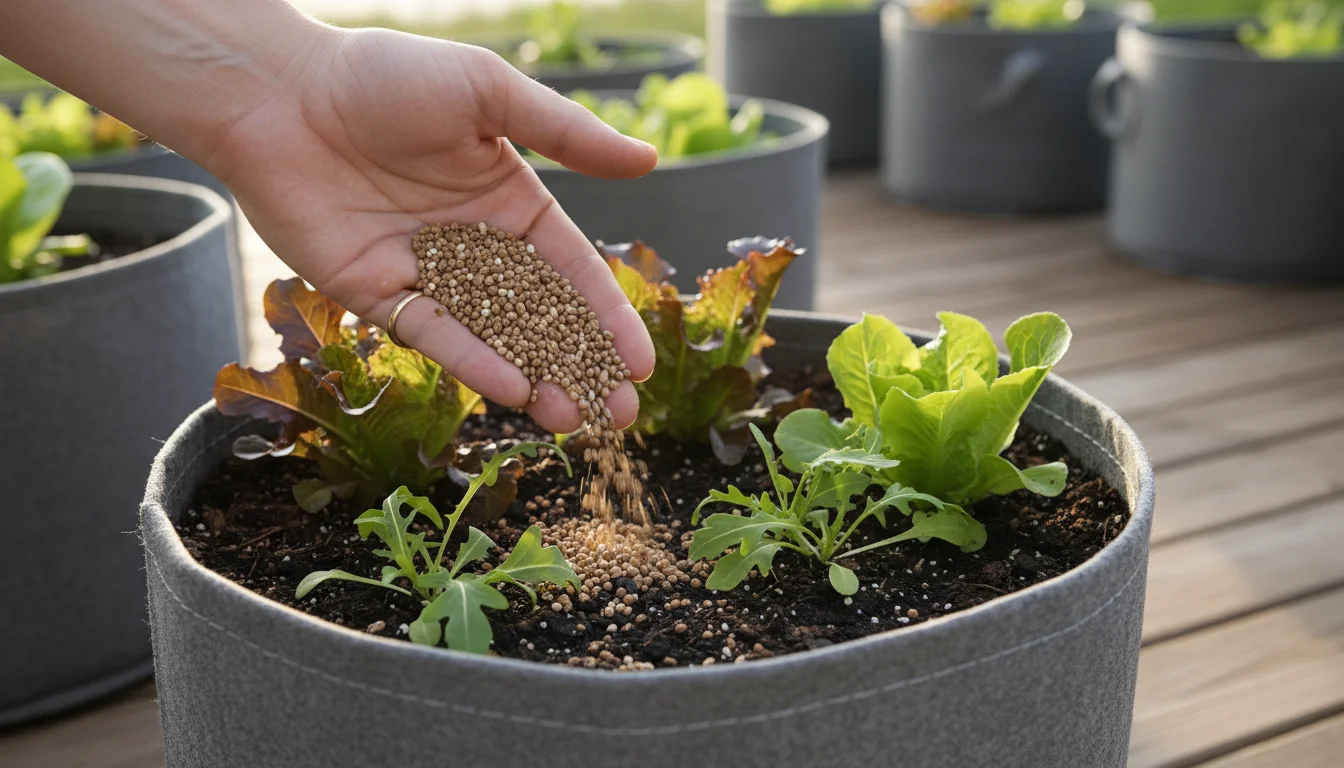
Feeding Your Fall Carrots

If you incorporated a slow-release organic fertilizer into your potting mix at the beginning, your carrots might not need much additional feeding. However, if your soil mix was unfertilized or if you notice slow growth, a light feed can be beneficial.

  • Type: Use a balanced liquid organic fertilizer, or one slightly lower in nitrogen and higher in phosphorus and potassium. Excessive nitrogen encourages leafy top growth at the expense of root development.
  • Frequency: Apply liquid fertilizer at half strength every 3-4 weeks, starting about 4-6 weeks after germination. Always follow product instructions.

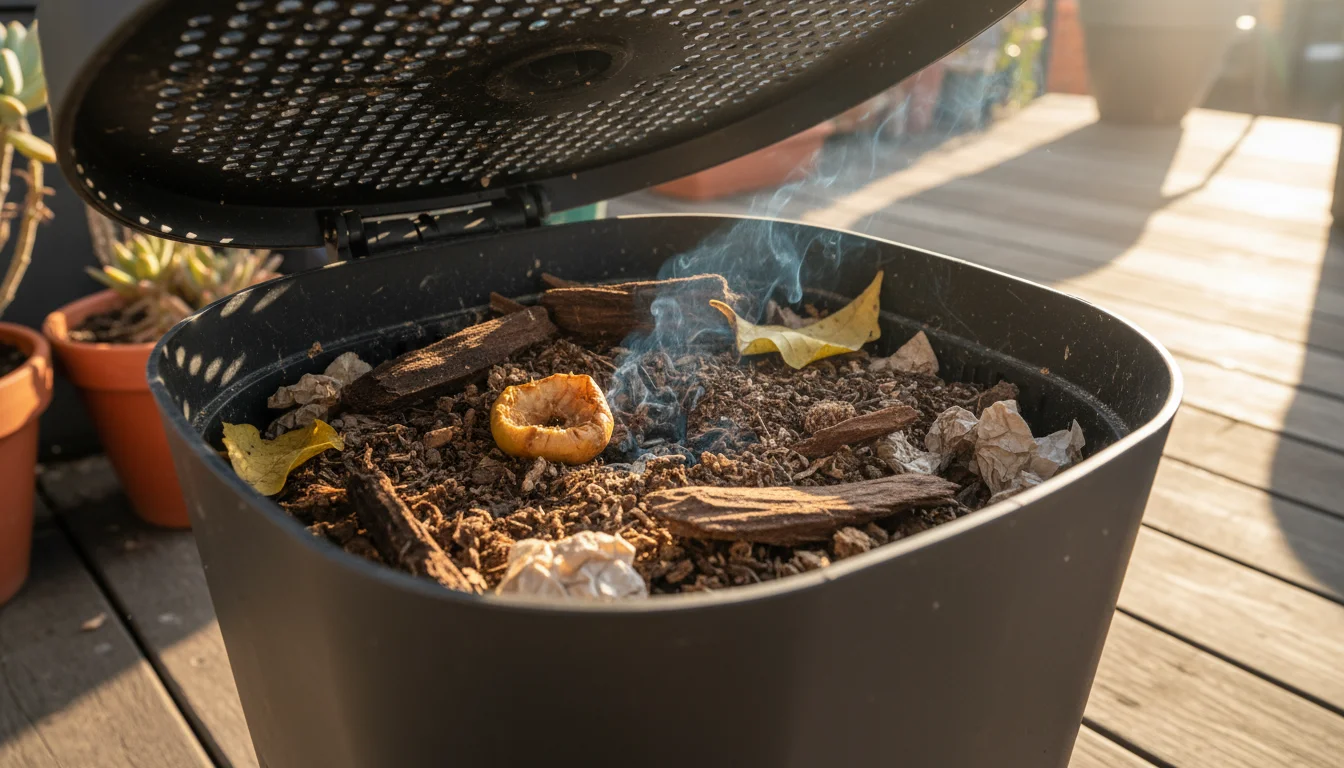
Mulching (Optional, but Beneficial)

A thin layer of organic mulch (like coco coir, shredded leaves, or straw) on the soil surface can help retain moisture, suppress weeds, and regulate soil temperature. This is especially useful in deep pot gardening, where exposed soil can dry out quickly or experience temperature fluctuations.

By providing consistent care, especially when it comes to thinning and watering, you set your container carrots up for optimal growth, promising a delicious underground harvest.

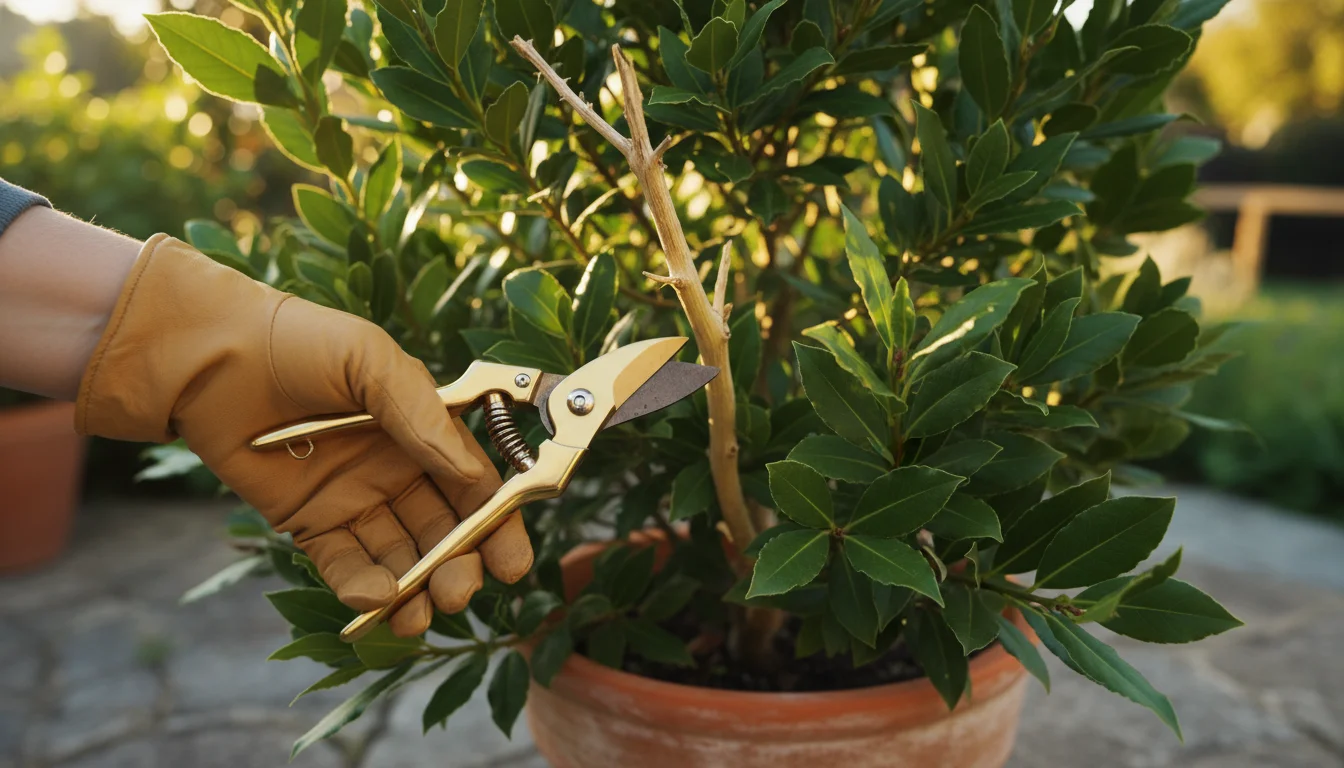
Protection and Patience: Overcoming Challenges and Ensuring Growth

Even with the best preparation, gardening can present a few challenges. Understanding potential issues and knowing how to respond ensures your fall carrots continue their journey toward a successful harvest. This section focuses on common problems, eco-friendly solutions, and the importance of patience in deep pot gardening.

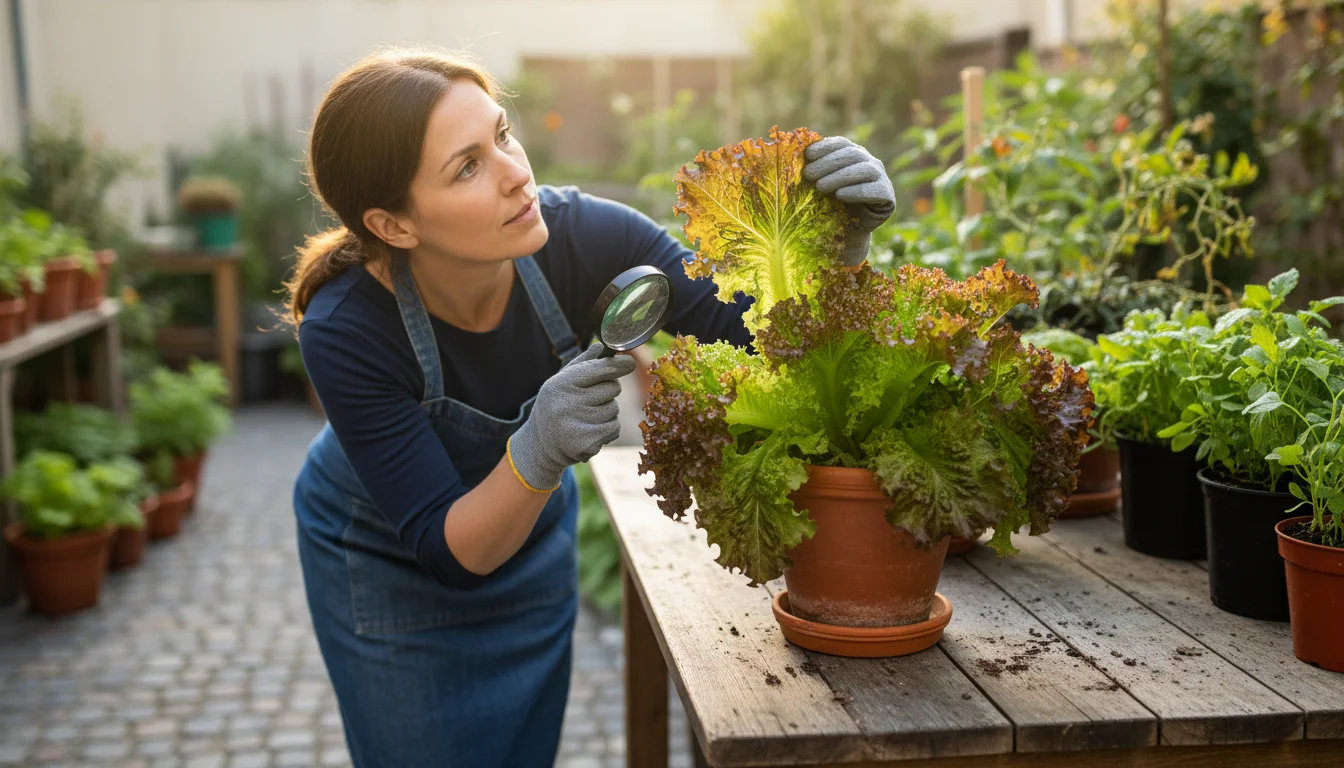
Common Carrot Challenges in Containers

  • Forked or Deformed Carrots: This is almost always due to compacted soil, obstacles (like small stones or clumps in your potting mix), or fresh manure. Ensure your soil mix is loose and free of debris. Erratic watering can also contribute.
  • Small or Stunted Carrots: Overcrowding (insufficient thinning) is the primary culprit. Lack of sufficient sunlight or nutrients can also play a role. Ensure plants are properly spaced, receive at least 6 hours of sun, and have adequate soil fertility.
  • Green Shoulders: If the top part of the carrot root turns green, it means it was exposed to sunlight. This doesn’t harm the carrot, but the green part can taste bitter. Gently mound a little more soil or mulch around the exposed shoulders as the carrots grow.
  • Pests: While container gardening reduces pest pressure, common culprits like aphids or carrot rust flies can still appear.
    • Aphids: These tiny insects cluster on young leaves. A strong spray of water can dislodge them. For heavier infestations, apply an insecticidal soap, ensuring thorough coverage.
    • Carrot Rust Fly: This pest lays eggs near the soil line, and the larvae tunnel into the roots, causing rust-colored tunnels. Fall planting often avoids the peak activity of the first generation. For protection, consider covering your containers with a fine mesh insect netting, or grow strongly scented companion plants like marigolds or rosemary nearby.
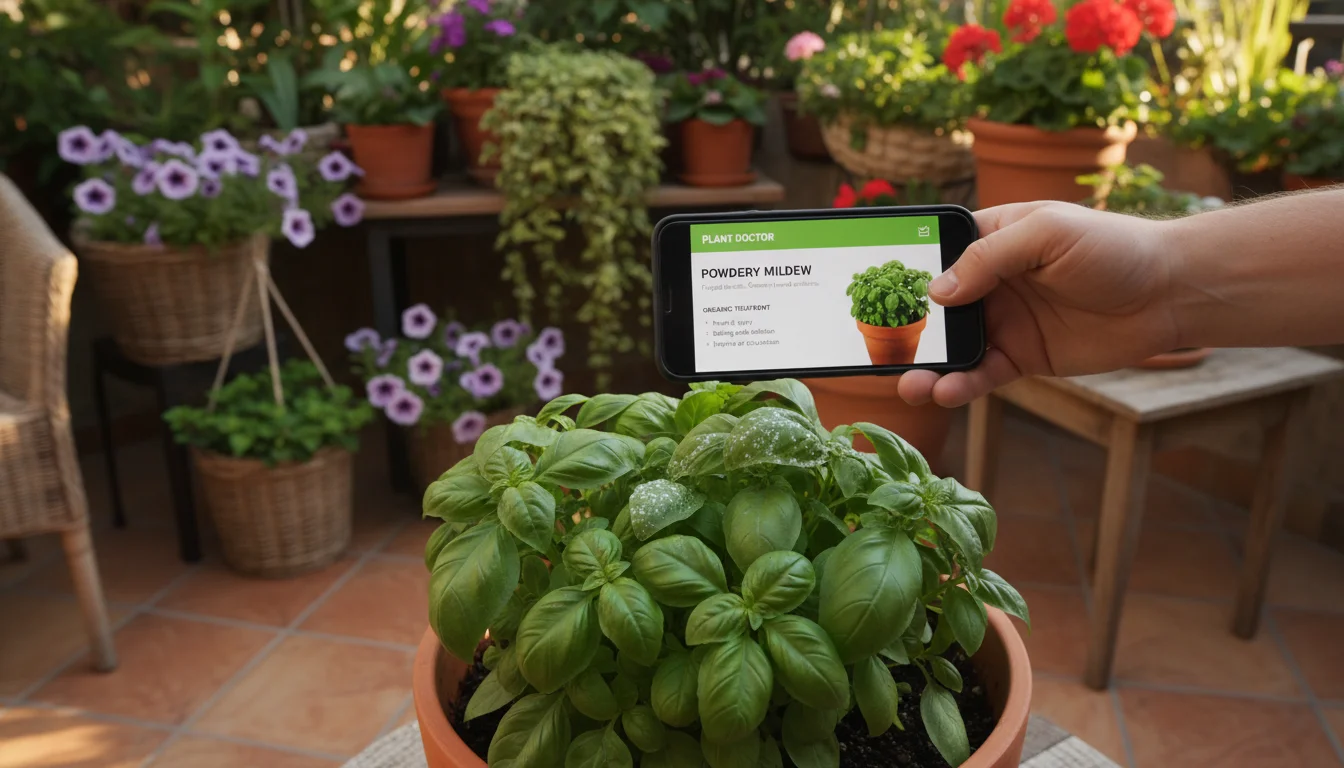
  • Diseases: Carrots are generally hardy, but root rot can occur in overly wet, poorly draining soil. Ensure your containers have excellent drainage holes and you do not overwater.

Environmental Considerations and Eco-Friendly Practices

As a supportive and environmentally conscious gardener, you can integrate sustainable practices into your deep pot gardening:

  • Water Conservation: Use watering cans instead of hoses where possible to better gauge water usage. Group containers together to create a microclimate that reduces evaporation. Consider using a drip tray to catch excess water and allow the plant to reabsorb it, but do not let pots sit in standing water for extended periods.
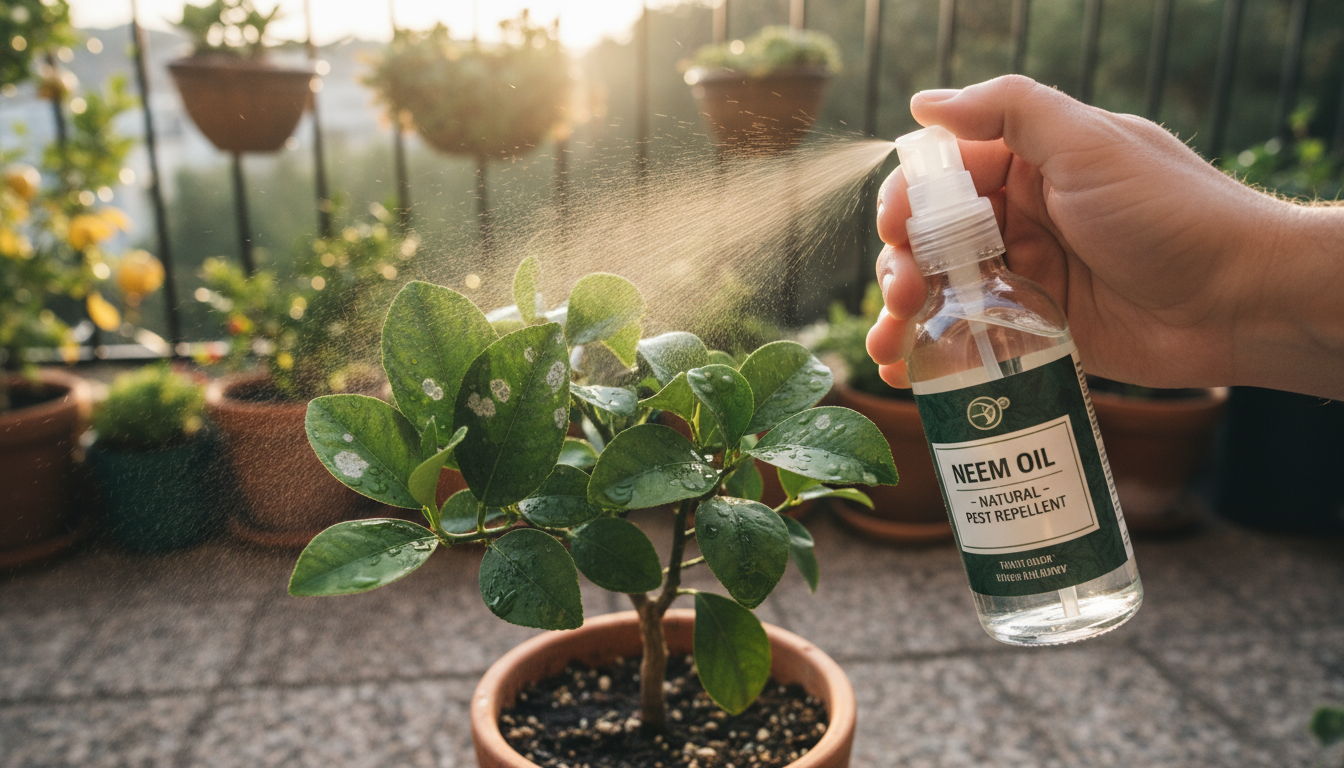
  • Organic Pest Control: Rely on natural methods first. Hand-picking pests, using neem oil, or encouraging beneficial insects (e.g., by planting flowers nearby) are excellent eco-friendly strategies.
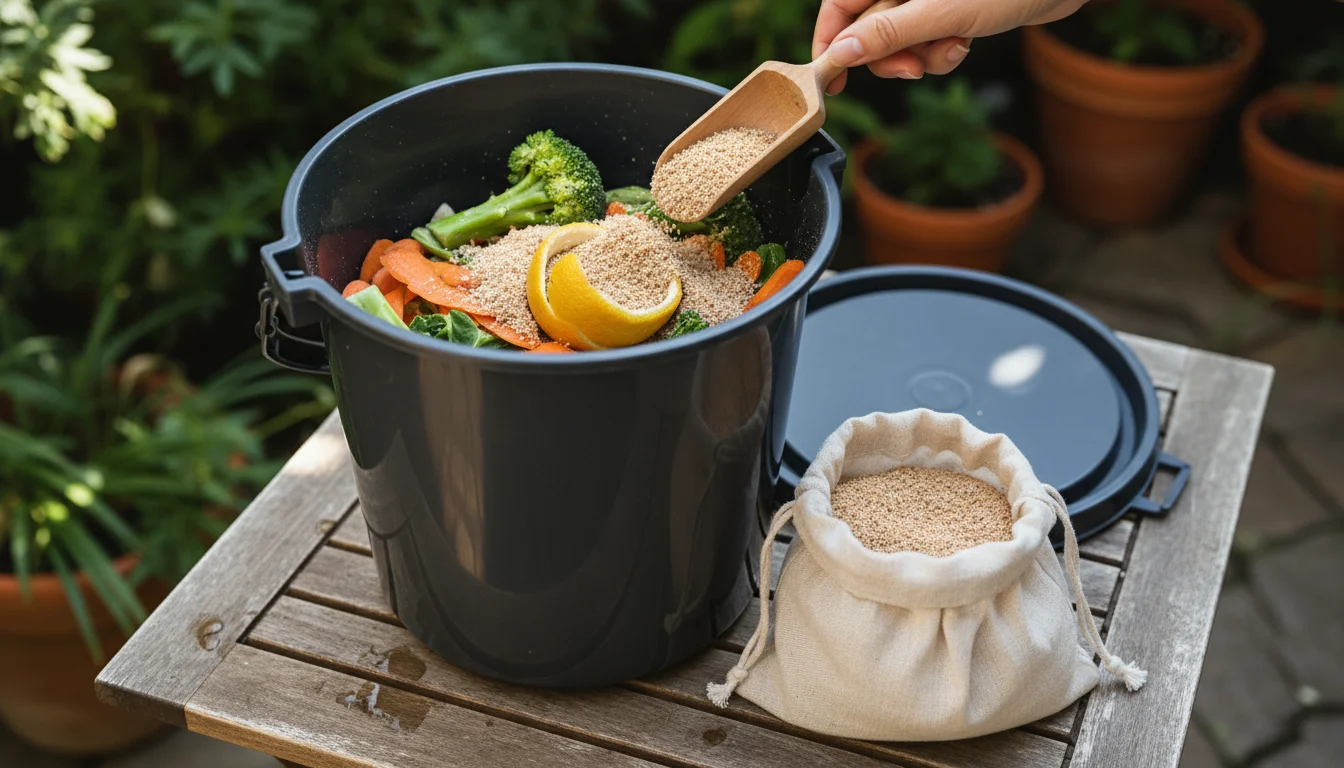
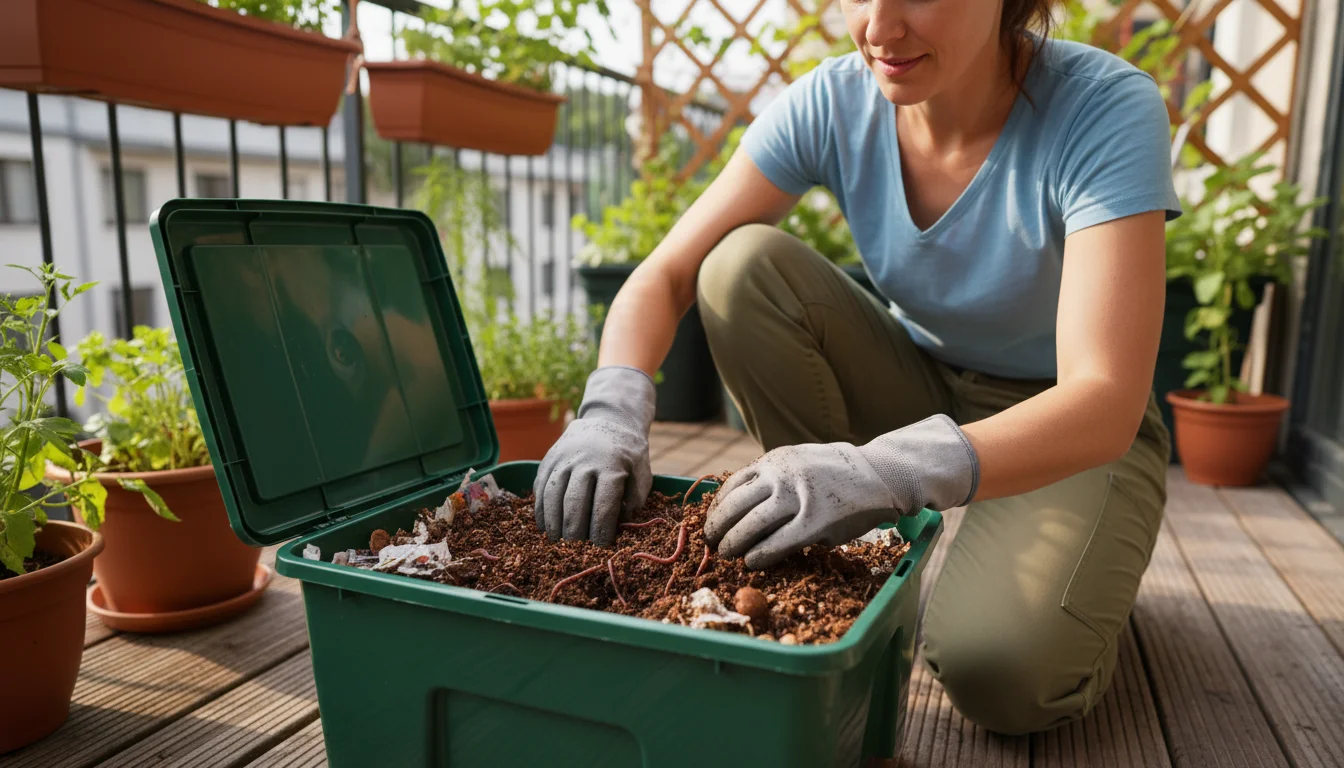
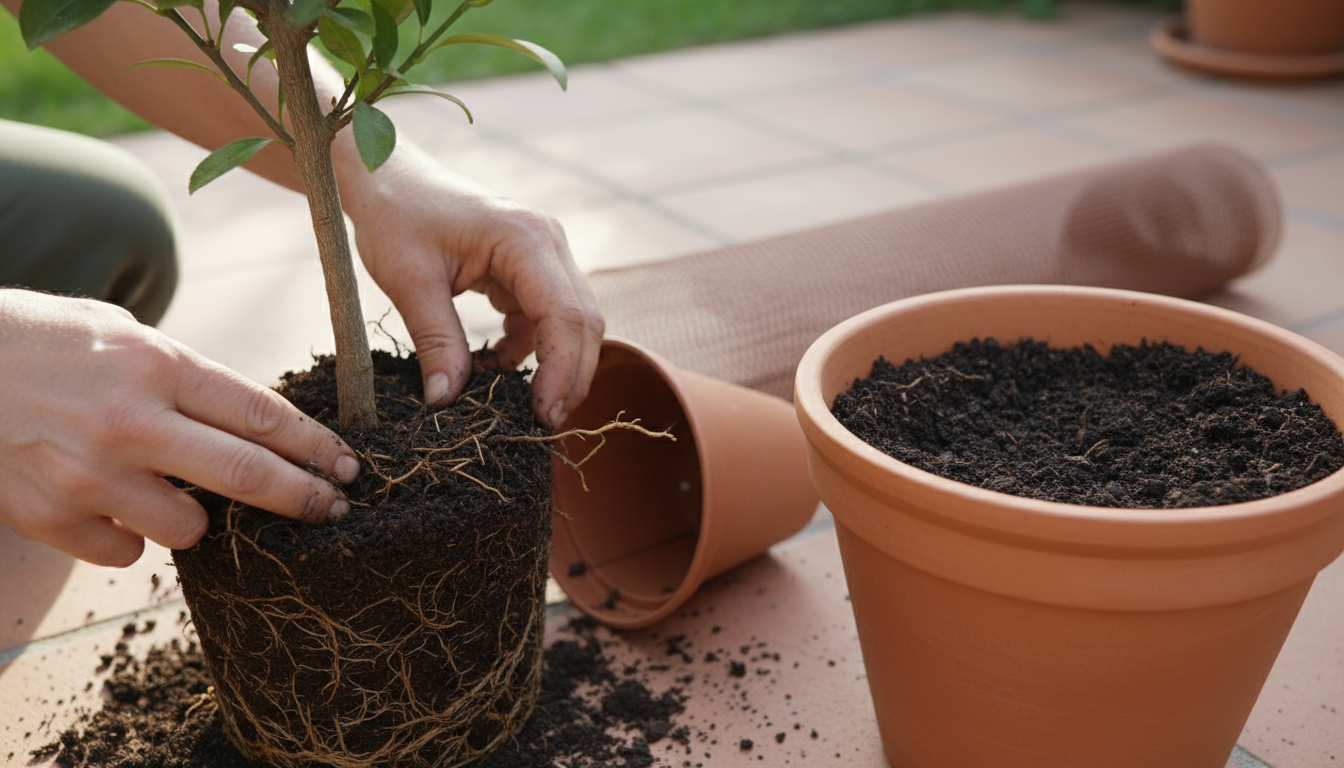
  • Soil Reuse: At the end of the season, do not discard your potting mix. While it might be depleted of nutrients, it still has good structure. Amend it with fresh compost and a slow-release organic fertilizer for your next planting cycle. This reduces waste and saves money.
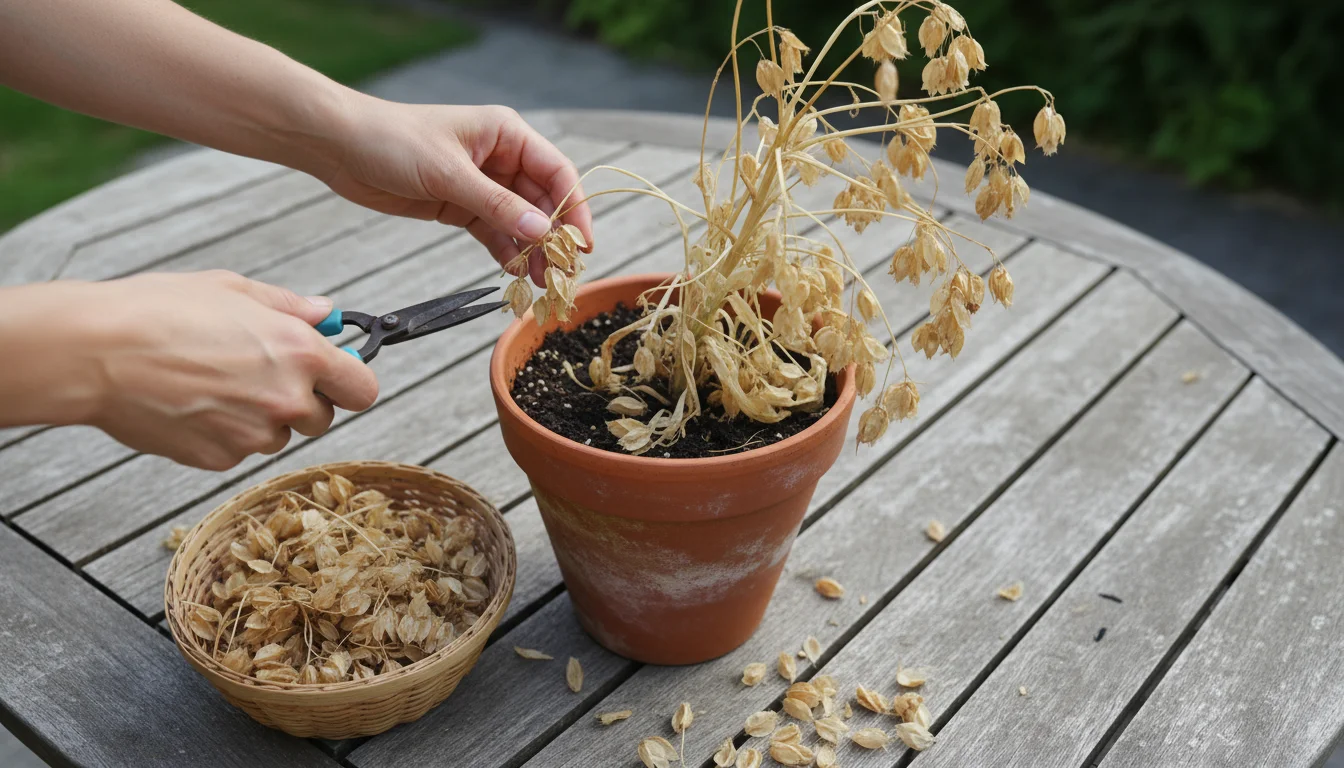
  • Seed Saving (for open-pollinated varieties): If you grow open-pollinated carrot varieties, you could consider allowing a few to go to seed for the following year, though carrots are biennials and will only flower in their second year. This is an advanced technique but reduces reliance on purchased seeds.

The Virtue of Patience

Carrots are not the fastest growing vegetables above ground. Much of their action happens out of sight. Be patient. Consistent care, especially maintaining soil moisture and thinning, will pay off. Resist the urge to frequently pull up carrots to “check” on them, as this disturbs their delicate root system. Trust the process, and your deep pot gardening efforts will be rewarded.

The Moment of Truth: Harvesting Your Container Carrots Before First Frost

After weeks of careful nurturing, the most exciting part of growing fall carrots arrives: the harvest! Knowing when and how to harvest ensures you get the sweetest, most tender roots from your deep pot gardening efforts. You also need to keep a keen eye on the weather to harvest your container carrots before first frost.

When Are Your Carrots Ready?

Several indicators tell you it is time to harvest:

  1. Days to Maturity: Refer to your seed packet for the “days to maturity.” This gives you a general timeline. For fall crops, this usually falls between 60 and 75 days from sowing.
  2. Root Diameter: Gently brush away a little soil from the top of a few carrots. You can often see the “shoulder” of the carrot poking out of the soil. When this visible portion reaches a diameter you prefer (typically 1/2 inch to 1 inch, depending on the variety), your carrots are ready. You can harvest some earlier for baby carrots.
  3. Taste Test: If unsure, pull one or two carrots to taste. If they are sweet and crisp, the rest are likely ready.
  4. Approaching Frost: This is critical for fall crops. While carrots can tolerate light frosts, a hard freeze will damage the roots, turning them soft and mushy. Plan to harvest all your container carrots before first frost, or at least before temperatures consistently drop below freezing.

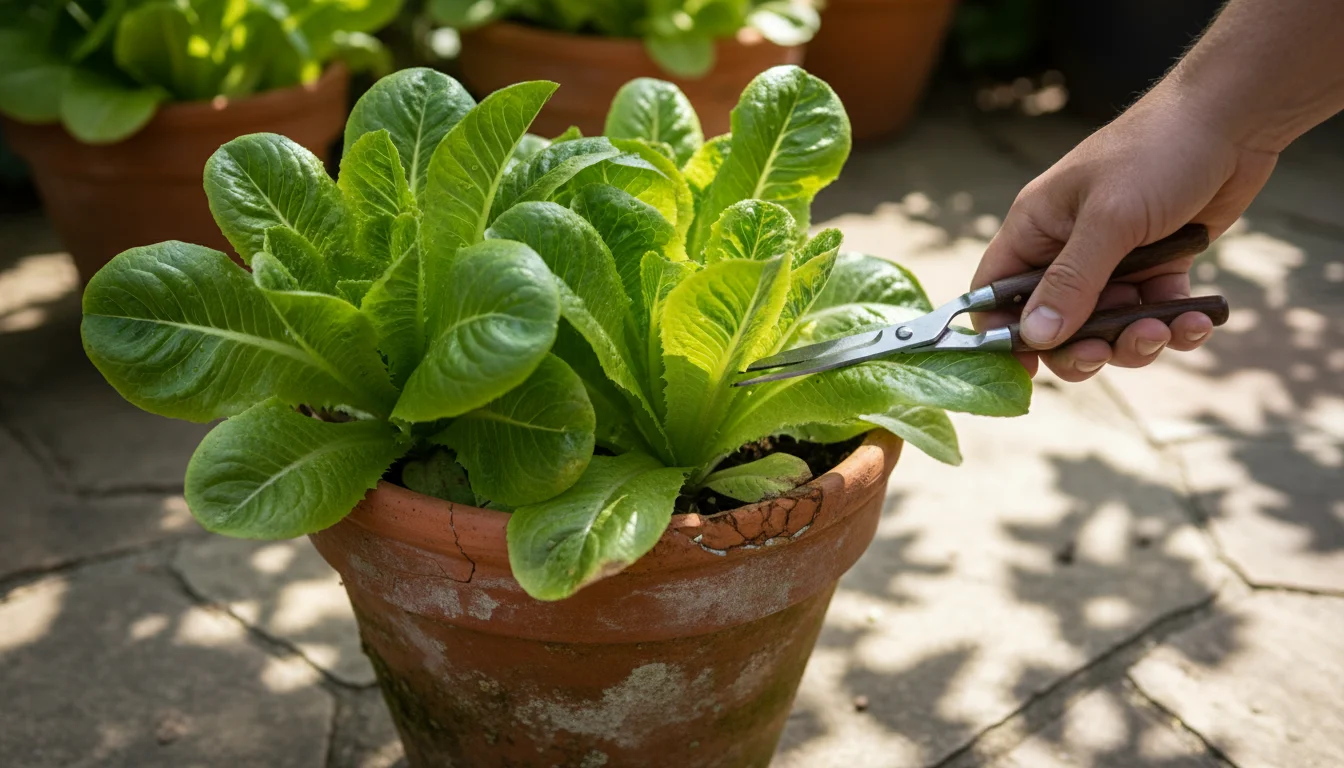
The Art of Harvesting Container Carrots

Harvesting from containers is often easier than from garden beds, as the soil tends to be looser. Here is a simple step-by-step guide:

  1. Water the Container: Water the container thoroughly a few hours before harvesting. Moist soil makes it much easier to pull carrots without breaking them.
  2. Grasp and Twist (Gently): Select a carrot and grasp the base of its foliage where it meets the soil. Gently twist and pull straight upward. In loose container soil, they should slide out relatively easily.
  3. Use a Trowel (If Needed): If a carrot resists, use a small hand trowel to loosen the soil around it, then pull again. Be careful not to damage adjacent carrots you plan to leave in the ground longer.
  4. Succession Harvesting: You do not have to harvest all your carrots at once. You can practice succession harvesting, pulling larger carrots as they mature and leaving smaller ones to grow a bit longer. This extends your harvest period.

Post-Harvest Care

Once harvested:

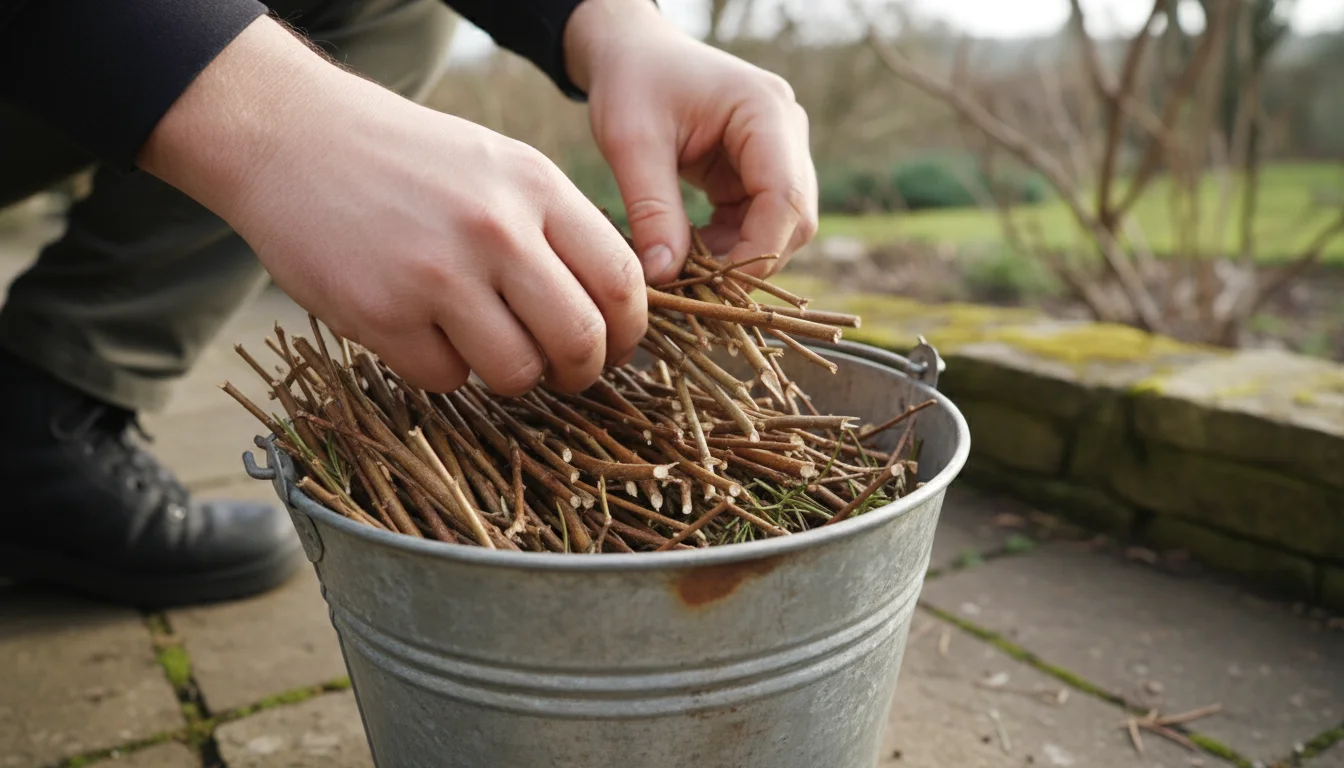
  • Remove Greens: Immediately twist off or cut the green tops, leaving about an inch of stem. This prevents the greens from drawing moisture and nutrients from the root, which can make the carrot rubbery. You can use the greens in pesto or salads if they are tender and healthy.
  • Clean: Gently brush off excess soil. Avoid washing them until just before you use them, as moisture can encourage spoilage.
  • Storage: Store unwashed carrots in a plastic bag in the crisper drawer of your refrigerator. They can last for several weeks this way.

The satisfaction of pulling your own vibrant fall root vegetables from a container is immense. Enjoy the fruits of your labor, knowing you achieved a successful underground harvest right in your small space.

Enjoying Your Harvest: From Pot to Plate

You have dedicated time and effort to growing carrots in containers, and now you have a beautiful, fresh harvest. The flavor of homegrown fall root vegetables is unparalleled, often sweeter and more tender than store-bought options. This final section encourages you to savor your success and get creative with your kitchen bounty.

The Versatility of Fresh Carrots

Your container carrots are incredibly versatile. They are not just for roasting or salads, though they excel in those roles. Their freshness means you can truly appreciate their natural flavor in various preparations:

  • Raw and Crisp: Enjoy them as a simple snack, sliced for a crudité platter, or shredded into vibrant salads and slaws.
  • Roasted Perfection: Toss whole or chopped carrots with a little olive oil, salt, pepper, and herbs (like thyme or rosemary) for a naturally sweet side dish. Roasting caramelizes their sugars beautifully.
  • Soups and Stews: Carrots are a foundational ingredient in countless comforting fall recipes, adding depth and sweetness.
  • Juicing: For a nutrient-packed beverage, juice your fresh carrots, perhaps combining them with apples or ginger.
  • Pickled Delights: Preserve your harvest by pickling carrots. They make a fantastic tangy addition to sandwiches and charcuterie boards.
  • Desserts: Do not forget carrot cake or carrot muffins, where the fresh flavor truly shines.

Sharing the Bounty and Knowledge

There is immense satisfaction in sharing what you have grown. Offer your extra carrots to friends, neighbors, or family. Better yet, share your deep pot gardening journey with others. Inspire them to try growing fall root vegetables in their own small spaces. You can be a resource, sharing tips on how to plant carrots in pots in autumn or discussing your favorite best carrot variety for container gardening.

Reflecting on Your Success

Take a moment to appreciate what you have accomplished. You transformed a small space into a productive garden, harvested delicious food, and gained valuable gardening experience. This success builds confidence and encourages further experimentation with container gardening and other fall crops. Your underground harvest is a testament to your patience and care.

Remember, gardening is a continuous learning process. Each season offers new insights and opportunities. With your successful fall carrot harvest under your belt, you are well-equipped to continue your small-space gardening adventures. Enjoy every bite of your homegrown goodness!

Frequently Asked Questions

Can I grow carrots year-round in containers?

In most temperate climates, growing carrots year-round is challenging due to temperature extremes. Carrots prefer cool conditions for optimal root development, thriving in spring and fall. You can extend the season by bringing containers indoors or providing protection during light frosts. However, summer heat often leads to bitter, woody carrots and encourages bolting (flowering), which ends root growth. Focus on spring and especially fall plantings for the best results.

How many carrots can I grow in one deep container?

The number of carrots you can grow depends on the container size and the variety. For a typical 12-inch deep and 12-inch wide pot, you can comfortably grow 10-15 carrots, spaced about 2-3 inches apart after thinning. Wider containers allow for more rows. Round varieties like ‘Paris Market’ can be planted more densely than longer, slender types. Always ensure adequate spacing for healthy root development.

What if my carrot seeds do not germinate?

Carrot seeds can be slow to germinate, sometimes taking up to three weeks, especially in cooler soil. Common reasons for non-germination include dry soil, planting seeds too deep, or very old seeds with low viability. Ensure consistent moisture, cover seeds very lightly, and use fresh seeds. Some gardeners pre-germinate seeds indoors by moistening them between layers of paper towel for a few days before planting to speed up the process.

Can I start carrot seeds indoors and transplant them?

Transplanting carrots is generally not recommended. Carrots develop a taproot, which is very sensitive to disturbance. Any damage to this taproot during transplanting can lead to forked, twisted, or stunted carrots. It is always best to direct-sow carrot seeds directly into their final container to ensure straight, well-formed roots. This is particularly true when you are learning how to plant carrots in pots in autumn.

My carrots are growing small and stubby, what is wrong?

Small, stubby carrots are often a sign of insufficient thinning or compacted soil. Overcrowding prevents roots from expanding. Ensure you thin your seedlings to the recommended spacing of 2-3 inches apart. Additionally, review your soil mix to confirm it is loose, airy, and free of obstacles like clumps or stones. Adequate depth in your deep pot gardening setup is also critical, as roots need space to push down freely.

For trustworthy gardening information, visit:
University of Delaware Extension — Gardening, University of Vermont Extension — Gardening, University of New Hampshire Extension — Yard & Garden, University of Maine Cooperative Extension — Gardening and University of Rhode Island Cooperative Extension — Gardening. These organizations provide expert, research-based advice for gardeners at all levels.

Disclaimer: This article is for informational purposes only and is not a substitute for professional gardening advice. Always consult local extension services or horticulture experts for region-specific guidance.

Categories
Sustainable & Eco-Friendly

Leaf Mold for the Masses: How to Make ‘Black Gold’ for Your Pots Using Just One Bag

Imagine a rich, dark, earthy material that dramatically improves your container garden soil. It costs you nothing, uses fallen leaves, and asks for very little effort. This isn’t a gardener’s fantasy. It is leaf mold, often called “black gold” by those who understand its value. For small-space gardeners, apartment dwellers, or anyone focused on low-maintenance solutions, making leaf mold offers an unparalleled opportunity to create a powerful, sustainable soil amendment.

You can turn a pile of autumn leaves, destined for the curb, into a precious resource for your potted plants. This simple, one-bag method takes advantage of natural processes, requiring minimal space and effort. You will enhance soil structure, boost water retention, and provide a slow-release nutrient source for your beloved containers. Let’s dig into how you can make your own leaf mold and transform your container gardening.

Leaf Mold: Nature’s Secret Weapon for Container Gardeners

Leaf mold is a specific type of decomposed organic matter, distinct from traditional compost. While compost relies on a balance of “greens” and “browns” and microbial activity to heat up and break down rapidly, leaf mold forms through a slower, fungal decomposition process. It consists almost entirely of fallen leaves. This process, which happens naturally on forest floors, breaks down leaves into a dark, crumbly material that smells like fresh earth. Its unique properties make it an exceptionally valuable addition to your container garden soil.

For gardeners working with limited space, the idea of large compost bins or piles is often impractical. This is where making leaf mold truly shines. The single-bag method allows you to create this beneficial amendment without taking up significant space. You can easily tuck a bag of leaves behind a shed, on a balcony corner, or in an unused spot in your yard. This method effectively brings a piece of the forest floor’s natural cycle into your urban or suburban gardening environment, turning what many consider waste into a horticultural treasure.

The beauty of leaf mold lies in its simplicity and effectiveness. You harness nature’s own recycling system. Leaves, which typically fall in abundance during autumn, contain a wealth of trace minerals absorbed by trees throughout their growing season. Instead of sending these valuable resources to a landfill, you divert them into a productive cycle, improving your garden and reducing waste. This practice aligns perfectly with environmentally conscious gardening principles, emphasizing sustainability and resourcefulness. Consider the ecological impact. Disposing of yard waste, including leaves, often involves transportation and processing that consumes energy and contributes to emissions. By keeping leaves on your property and transforming them into leaf mold, you actively participate in a closed-loop system. You enrich your garden soil, reduce your carbon footprint, and foster a healthier micro-environment right in your own backyard or balcony. This small change makes a big difference for your plants and the planet, providing a tangible example of apartment composting with leaves.

Why Leaf Mold is Your Potting Mix’s Best Friend

Your container plants rely entirely on the soil you provide for their nutrients, water, and structural support. Unlike garden beds where roots can spread wide, pots restrict root growth and can quickly deplete resources. This makes the quality of your potting mix absolutely critical. Leaf mold improves your potting mix in several profound ways, addressing key challenges faced by container gardeners.

Superior Water Retention

One of the most significant benefits of leaf mold is its exceptional ability to hold water. Research consistently shows that leaf mold can absorb and retain 300 to 500 percent of its own weight in water. To put that into perspective, a cubic foot of leaf mold can hold over 10 gallons of water. This is crucial for container plants, which tend to dry out much faster than plants in the ground. Incorporating leaf mold into your potting mix means you water less frequently, saving you time and water resources. For busy gardeners, this translates directly into reduced maintenance and healthier, less stressed plants. It mitigates the common problem of containers drying out rapidly on hot days or during busy periods when you cannot water as often as needed. This significantly boosts your success in container gardening by ensuring consistent moisture availability for your plants.

Enhanced Soil Structure and Drainage

While holding water, leaf mold simultaneously improves drainage. This seems contradictory, but it is one of leaf mold’s superpowers. Its spongy, crumbly texture creates air pockets within the soil. These pockets allow excess water to drain away freely, preventing soggy conditions that can lead to root rot. At the same time, the porous structure acts like a sponge, holding onto moisture within those pockets, releasing it slowly as the soil dries. This balanced approach to water management ensures your plant roots receive consistent moisture without becoming waterlogged. Proper drainage means how well water moves through soil, preventing it from sitting stagnant and suffocating roots. For example, a study by Cornell University Extension notes that organic amendments like leaf mold improve soil aggregation, which directly impacts both water retention and aeration. This perfect balance is especially vital in containers where soil can easily become compacted, leading to poor plant health.

Slow-Release Nutrients and Microbial Activity

Leaf mold is not a primary source of nitrogen, phosphorus, or potassium, the main nutrients found in synthetic fertilizers. Instead, it provides a wealth of trace minerals and micronutrients essential for plant health. As fungi and other microorganisms continue to break down the leaf material over time, they slowly release these nutrients, providing a steady, gentle feeding for your plants. This slow-release mechanism reduces the risk of nutrient leaching, a common issue in container gardening where frequent watering washes nutrients out of the pot. Furthermore, leaf mold introduces beneficial fungal and bacterial populations to your potting mix. These microbes play a vital role in nutrient cycling, disease suppression, and overall soil health, creating a living soil environment that supports robust plant growth. It enhances the biological richness of your container soil, contributing to truly thriving plants.

Cost-Effective and Environmentally Friendly

Making leaf mold costs nothing but your time and a plastic bag. Commercial potting mixes, especially high-quality ones, can be expensive, and their production often involves mining peat moss, a non-renewable resource. By using fall leaves for container garden soil, you create a premium soil amendment for free, reducing your reliance on purchased products. You also divert valuable organic matter from landfills, contributing to a more sustainable gardening practice. This makes leaf mold an incredibly practical and eco-conscious choice for any small-space gardener looking to save money and reduce their environmental impact.

Gathering Your Fall Treasure: The Best Leaves for Leaf Mold

The success of your leaf mold project begins with the right raw material: leaves. While most deciduous leaves will eventually break down into leaf mold, some are better choices than others, especially for the single-bag method. Understanding which leaves to collect and how to prepare them ensures a faster, more efficient decomposition process.

Ideal Leaves for Leaf Mold

  • Oak Leaves: These are excellent. While they break down slower due to their waxy coating and higher tannin content, the resulting leaf mold is exceptionally rich and long-lasting. If you have access to oak leaves, gather them. They provide a dense, moisture-retentive product.
  • Maple Leaves: A fantastic choice. Maple leaves are soft, break down relatively quickly, and are abundant in many areas. They are a staple for making leaf mold, yielding a fluffy, dark product.
  • Poplar, Birch, Ash, Cherry, Elm Leaves: These also decompose readily and make excellent leaf mold. Their softer texture allows for quicker breakdown compared to tougher leaves, giving you usable leaf mold sooner.
  • Fruit Tree Leaves (Apple, Pear, etc.): Generally good, assuming they are free of active disease. If your fruit trees had significant fungal or pest issues during the growing season, avoid using their leaves to prevent spreading problems to your container plants.

Leaves to Use with Caution or Avoid

  • Black Walnut Leaves: Avoid these. Black walnut trees produce juglone, a natural herbicide that can inhibit the growth of many plants. While juglone breaks down over time, it is safer to exclude these leaves from your leaf mold pile, especially for container gardens where plant sensitivity can be higher.
  • Eucalyptus Leaves: These are very slow to break down due to their waxy coating and natural oils. They can also have allelopathic effects, similar to black walnuts, inhibiting other plant growth. Their oils also make them resistant to fungal decomposition.
  • Conifer Needles (Pine, Fir, Spruce): These decompose very slowly due to their waxy coating and acidic nature. While they eventually break down, they are better suited for specific acid-loving plants or as a long-term mulch rather than a primary component of quick leaf mold. If you use them, mix them in very sparingly with other, softer leaves.
  • Diseased Leaves: If your plants suffered from significant fungal diseases, like powdery mildew or rust, or bacterial infections during the growing season, avoid using those specific leaves. While the leaf mold process can kill some pathogens, it is better to err on the side of caution to prevent reintroducing disease to your precious container garden.

Collecting and Preparing Your Leaves

The key to successful leaf mold is increasing the surface area for decomposition and ensuring adequate moisture. Shredding your leaves dramatically speeds up the process, potentially cutting the decomposition time in half. You can shred leaves in several ways:

  1. Lawn Mower: The easiest method. Rake leaves into a pile on your lawn, then run over them multiple times with a mulching lawn mower. A bag attachment will collect the shredded leaves for you. This is highly efficient and creates ideal material for your leaf mold bag.
  2. Leaf Shredder/Vacuum: If you have one, these tools are designed for shredding leaves into fine pieces, perfect for this project. They offer excellent control over shred size.
  3. Manual Shredding: For smaller quantities, you can put leaves in a sturdy container and use a string trimmer to chop them up. Always wear safety glasses and exercise caution during this process.

If you cannot shred your leaves, do not worry. Unshredded leaves will still decompose, but it will take longer. Whole leaves tend to mat together, reducing airflow and slowing the fungal breakdown. Shredding prevents this matting and allows moisture to penetrate more uniformly, leading to a quicker and more consistent final product.

The Single Bag Method: Step-by-Step for Small Spaces

This method is perfect for anyone with limited space, a small yard, a patio, or a balcony. It requires minimal equipment and turns autumn’s bounty into a valuable resource for your container soil amendment with ease. Follow these steps to create your own “black gold” using how to make leaf mold in a trash bag for small spaces.

Materials You Will Need:

  • Heavy-Duty Black Plastic Trash Bags: Large, thick contractor bags work best. They are durable, resist tearing, and the black color absorbs sunlight, which helps maintain a slightly warmer temperature for decomposition. Clear bags will also work, but black bags offer better heat retention.
  • Shredded Leaves: As discussed, shredded leaves speed up the process. If you only have whole leaves, that is fine, but expect a longer decomposition time.
  • Water: A garden hose or watering can, essential for moistening your leaves.
  • Drill or Sharp Object: To make drainage and aeration holes in the bag.

Step-by-Step Instructions:

  1. Prepare Your Leaves:

    Gather your deciduous leaves. Shred them using a lawn mower, leaf shredder, or string trimmer if possible. Shredded leaves decompose faster and prevent matting inside the bag. If you are using whole leaves, consider tearing some by hand to break them down a bit. Smaller pieces mean more surface area for fungi to colonize.

  2. Moisten the Leaves:

    Spread a layer of shredded leaves on a tarp or in a wheelbarrow. Lightly moisten them with water. The goal is for the leaves to feel like a damp sponge, not soaking wet. If they are too dry, decomposition will slow down significantly. If they are too wet, they can become anaerobic and smell unpleasant due to bacterial activity, which is not what you want for leaf mold. You want consistent moisture throughout the batch before bagging.

  3. Fill the Bag:

    Carefully transfer the moistened, shredded leaves into your heavy-duty black trash bag. Fill the bag about three-quarters full. This leaves enough space to tie it off and allows for some air circulation. Do not pack the leaves down too tightly at this stage; a loose fill promotes better air exchange and prevents excessive compaction which hinders fungal growth.

  4. Add More Water (if needed) and Tie the Bag:

    Once the bag is filled, add a bit more water if necessary to ensure all leaves are uniformly damp. You can gently mix the contents by rolling the bag a bit to distribute moisture. Then, loosely tie the top of the bag, leaving some air space. This loose tie is critical. You do not want an airtight seal; air circulation, even minimal, is important for the fungi that break down the leaves. An airtight bag will lead to rot, not fungal decomposition.

  5. Puncture for Airflow and Drainage:

    Using a drill with a small bit (1/4 to 1/2 inch) or a sharp object like a sturdy stick, poke 10 to 15 holes around the sides and bottom of the bag. These holes are vital for both aeration and drainage. They allow a small amount of oxygen to enter, supporting aerobic fungal activity, and enable any excess water to escape, preventing the leaves from becoming waterlogged. Ensure some holes are near the bottom to drain any accumulation, especially if your bag sits on a hard surface.

  6. Find a Spot and Let Nature Work:

    Place your filled and punctured bag in an out-of-the-way spot. A shady area is often recommended to prevent the bag from drying out too quickly, though a sunny spot can sometimes speed up the process slightly by maintaining warmth, as long as you monitor moisture levels closely. Ensure it is not blocking pathways or exposed to strong winds that could tear the bag. The leaves will now begin their slow transformation. For apartment composting with leaves, a discreet corner of a balcony or patio works perfectly, keeping the process unobtrusive and effective.

Patience and Observation: Monitoring Your Black Gold in Progress

Making leaf mold is not a sprint; it is a marathon. The beauty of this method lies in its hands-off nature, but a little periodic checking ensures success. Understanding what to look for and when to intervene helps guide your leaves towards becoming that coveted “black gold.”

Timeline for Transformation

The time it takes for leaves to fully decompose into leaf mold varies significantly based on several factors:

  • Leaf Type: Softer leaves like maple, birch, and poplar can break down in 6 to 12 months. Tougher leaves like oak or sycamore might take 18 to 24 months.
  • Shredding: Shredded leaves typically reduce decomposition time by 30 to 50 percent compared to whole leaves due to increased surface area.
  • Moisture and Temperature: Consistent moisture is key. Warmer temperatures generally speed up decomposition, but extreme heat can dry out the bag too quickly, requiring more frequent moisture checks.

If you start your bags in the fall, you can expect usable leaf mold by the following fall, or even by late spring for softer, shredded leaves. Plan accordingly for your planting needs, perhaps starting multiple bags with different leaf types for a staggered supply.

Signs of Progress

You will not see dramatic changes overnight, but here is what indicates your leaf mold is on track:

  • Shrinking Volume: The most obvious sign. Over time, the volume of leaves in the bag will significantly decrease. This compaction indicates the breakdown of plant material. You may need to add more moist leaves to a shrinking bag to maximize your yield, creating a more dense final product.
  • Darkening Color: The leaves will gradually turn a darker brown, eventually becoming deep, rich black. This color change is a clear indicator of decomposition and organic matter transformation.
  • Earthy Smell: A healthy leaf mold bag will smell like a forest floor after rain: sweet, earthy, and fresh. There should be no foul or sour odors. A pleasant, clean scent indicates healthy fungal activity.
  • Change in Texture: The leaves will become increasingly crumbly and soft. When fully mature, leaf mold resembles coarse, dark soil. You may still see some recognizable leaf fragments, which is normal and desirable, providing continued slow-release organic matter as they break down further.

Checking Moisture Levels

The single most important factor for successful leaf mold is consistent moisture. Periodically, every 1 to 2 months, check the moisture inside your bag. Untie the top, reach in, and grab a handful of leaves. They should feel damp, like a wrung-out sponge, not dripping wet or completely dry.

  • If too dry: Add more water. You can do this by pouring a few cups of water into the bag, then resealing and gently turning the bag to distribute the moisture. If your bag is in a sunny, exposed spot, consider moving it to a shadier location to prevent rapid drying. Dry leaves simply will not decompose.
  • If too wet: This is less common if you poked sufficient drainage holes. If the leaves are soggy and emit a foul odor, the environment might be too anaerobic. Add more holes, gently mix the contents to introduce air, and if possible, spread the leaves out to dry slightly before returning them to the bag.

Turning and Aeration (Optional, but Recommended)

While not strictly necessary for simple leaf mold, occasionally turning or shaking the bag, every 2 to 3 months, helps mix the contents, introduces more air, and ensures uniform decomposition. This is especially helpful for larger bags or if you used whole leaves, as it prevents matting and helps fungi spread more effectively. Simply roll the bag around or lift and gently drop it a few times to redistribute the leaves and refresh the air within. This small effort can noticeably accelerate the process and improve consistency.

Integrating Leaf Mold into Your Container Gardening Strategy

Once your “black gold” is ready, the real fun begins: putting it to work in your container garden. Leaf mold is incredibly versatile and benefits almost any potted plant. Its unique properties make it an ideal choice for enhancing store-bought potting mixes or for creating custom blends tailored to your plants’ needs. Using fall leaves for container garden soil actively improves your gardening outcomes by boosting soil quality.

Mixing Ratios for Potting Media

Leaf mold is a soil amendment, not a standalone potting mix. It is too rich in organic matter and lacks the structural integrity or balanced nutrient profile required for pure potting. Aim to incorporate it into your existing or new potting mixes at various ratios:

  • General Purpose Mix (for most vegetables, annuals, herbs): Mix 1 part leaf mold with 2 to 3 parts high-quality potting mix. This provides excellent water retention and improved structure without over-saturating the mix. This is a great starting point for making leaf mold a regular component of your container soil. For example, if you are filling a 10-inch pot, use about 3-4 cups of leaf mold blended into your potting mix.
  • Moisture-Loving Plants (e.g., ferns, impatiens, some tropicals): Increase the leaf mold ratio to 1 part leaf mold with 1 to 2 parts potting mix. These plants appreciate the extra moisture-holding capacity, reducing their chances of drying out between waterings.
  • Seed Starting Mixes: For seed starting, you want a lighter, more sterile mix. Use leaf mold very sparingly, if at all, perhaps 1 part leaf mold to 4 to 5 parts seed starting mix. Ensure the leaf mold is fully decomposed and fine in texture to avoid chunky bits that could hinder delicate seedlings. It adds a gentle boost without overwhelming the delicate environment.
  • Potting Up Established Plants: When moving plants to larger containers, you can use a higher ratio, such as 1 part leaf mold to 1 part potting mix, especially if the plant has developed a robust root system. This gives them a significant boost of organic matter as they establish themselves.
  • Top Dressing: Apply a 1 to 2 inch layer of finished leaf mold as a top dressing around established plants in containers. This acts as a slow-release amendment, helps retain moisture, and suppresses weeds. It slowly works its way into the soil with watering, continuously enriching the top layer.

Specific Plant Benefits

Virtually all plants benefit from the improved soil structure and moisture regulation that leaf mold provides. However, some plants particularly thrive with its addition:

  • Flowering Annuals: Plants like petunias, marigolds, and calibrachoa, which demand consistent moisture and bloom heavily throughout the season, benefit greatly from leaf mold’s water retention. This leads to more vibrant, continuous flowering and reduces wilting on hot days.
  • Vegetables: Tomatoes, peppers, lettuce, and herbs grown in containers appreciate the steady moisture and the introduction of beneficial microbes. This contributes to healthier root systems, better nutrient uptake, and often higher yields. For instance, a pepper plant in a container with a 25 percent leaf mold mix will likely show fewer signs of stress compared to one in standard potting mix alone.
  • Acid-Loving Plants (e.g., blueberries, azaleas in pots): While leaf mold is generally neutral, it provides a beneficial organic matter boost. If using primarily oak leaves, the resulting leaf mold can be slightly acidic, which is perfect for these plants that prefer a lower pH.
  • Houseplants: Incorporate a small amount of leaf mold (1 part leaf mold to 3-4 parts houseplant potting mix) when repotting to improve moisture retention and aeration for indoor plants. This prevents common houseplant problems like compacted soil and uneven watering.

Application Tips

  1. Mix Thoroughly: Always mix the leaf mold thoroughly with your potting mix. Do not layer it. Even distribution ensures uniform benefits throughout the root zone, giving all roots access to the enhanced properties.
  2. Consider Finer Leaf Mold: For smaller containers or delicate seedlings, you might want to screen your leaf mold to remove larger, undigested pieces. This creates a finer texture suitable for sensitive roots and ensures a uniform seed bed or potting environment.
  3. Rejuvenating Old Potting Mix: Leaf mold is excellent for revitalizing tired, used potting mix. After a growing season, old potting mix often loses its structure and organic matter. Mixing in 25 to 50 percent fresh leaf mold can breathe new life into it, saving you money on buying entirely new bags and reducing waste.

By actively using leaf mold, you are not only nurturing your plants but also engaging in a cycle of sustainability, turning what was once perceived as waste into a vital component of your flourishing small-space garden.

Troubleshooting Your Leaf Mold Project: Common Hurdles

While making leaf mold in a trash bag is generally a straightforward process, you might encounter a few common issues. Do not get discouraged! Most problems are easily remedied with a bit of observation and adjustment. Your goal is to keep the leaves consistently damp and allow fungal decomposition to proceed without interruption, ensuring you produce high-quality container soil amendment.

Problem 1: Foul Odor (Rotten Egg or Sour Smell)

Cause: This usually indicates anaerobic conditions, meaning too little oxygen and too much moisture. The leaves are putrefying rather than decomposing through fungi. This is a common issue with apartment composting with leaves if not managed correctly, as anaerobic bacteria produce unpleasant gases.

Solution:

  • Increase Aeration: Add more holes to the bag, especially along the bottom and sides. Use a drill or sturdy stick to create new openings, allowing oxygen to penetrate deeper into the leaf mass.
  • Reduce Moisture: If the leaves are visibly waterlogged, untie the bag, spread the leaves out on a tarp for a few hours to air dry slightly. Then, return them to the bag, ensuring they feel like a damp sponge.
  • Mix Contents: Gently shake or roll the bag vigorously to introduce air and redistribute moisture. If the bag is large, you can open it and use a small hand trowel or stick to carefully turn the contents, breaking up any dense, wet clumps.

Problem 2: No Decomposition (Leaves Look the Same After Many Months)

Cause: Lack of moisture is the most frequent culprit. Fungi need a damp environment to thrive. Insufficient shredding or a very cold storage location can also slow things down considerably, as fungi are less active in extreme cold.

Solution:

  • Add Water: Untie the bag and add a few cups of water. Mix or gently shake the bag to distribute the moisture evenly. The leaves should feel like a damp sponge. Repeat as needed every few weeks if the bag feels light and dry. A simple check every month prevents this issue.
  • Shredding: If you used whole leaves, consider emptying the bag and shredding them with a lawn mower. This dramatically speeds up the process by creating more surface area for fungal colonization. It is often worth the extra effort.
  • Relocate: If your bag is in a very cold, shaded spot, moving it to a location that receives some indirect warmth, but not direct, intense sun that would dry it out quickly, can help. Fungi prefer moderate temperatures.

Problem 3: White or Green Mold on Leaves

Cause: This is generally a good sign! White, fuzzy mold is often beneficial fungi working to break down the leaves. This is exactly what you want to see. Green mold might indicate some surface mildew, but it is usually harmless in this context and simply part of the natural breakdown. These are visual cues that the process is working.

Solution: Usually, no action is needed. These are natural parts of the decomposition process. If the green mold appears slimy or smells bad, refer to the “Foul Odor” solution above, as it might indicate too much moisture in that specific area needing correction.

Problem 4: Pests (Insects, Rodents)

Cause: Leaf mold should not attract rodents or common garden pests if done correctly, as it does not contain food scraps or other readily digestible materials. However, if the bag is damaged or leaves are too dry, providing shelter, small insects might take residence. An intact, moist bag typically deters most unwanted visitors.

Solution:

  • Ensure Bag Integrity: Use heavy-duty bags and inspect them for tears or holes. Patch any small holes with strong duct tape or transfer contents to a new bag if damage is extensive. A secure bag prevents entry.
  • Maintain Moisture: Damp leaves are less appealing to many pests looking for dry shelter. A moist environment is less hospitable for nesting.
  • Location: Place the bag in a location that is less accessible to rodents if they become an issue, though this is rare for pure leaf mold. Ensure you are only adding leaves and nothing else. Food scraps are the primary attractant for larger pests.

The key to preventing most problems is consistent moisture, adequate aeration, and using only leaves. By paying attention to these factors, you ensure a smooth journey to creating your own high-quality container soil amendment with minimal fuss.

Beyond the Bag: Storing and Sustaining Your Leaf Mold Supply

Once you have successfully produced a batch of leaf mold, you will quickly realize its value and want to keep a steady supply. Storing your finished product properly ensures its longevity and maintains its beneficial properties. Furthermore, adopting a routine for fall garden cleanup turns this into a sustainable, annual practice, providing a continuous source of this incredible soil amendment for your small-space garden.

Storing Finished Leaf Mold

Mature leaf mold is relatively stable, but proper storage helps preserve its quality and beneficial microbial life. You have a few options:

  • In the Bag: If you have not used all of your leaf mold, you can keep it in the original trash bag. Just ensure the bag is still intact, tie it loosely, or leave some air holes, and store it in a cool, shady spot. Monitor moisture levels periodically. If it dries out, re-moisten slightly. This is the simplest storage method.
  • Storage Bins or Totes: For a tidier solution, transfer finished leaf mold to sturdy plastic storage bins with lids. Drill a few small holes in the bottom and sides of the bins for minimal aeration and drainage. This keeps it contained, protected from the elements, easily accessible, and visually appealing for a patio or balcony.
  • Dedicated Pile (if space allows): If your “small space” has a discreet corner in a yard, you can start a small, open leaf mold pile for ongoing decomposition and storage. Keep it covered with a tarp during dry spells to maintain moisture, and uncover it for rain. This method allows for larger volumes if you expand your leaf mold production.

The goal is to prevent it from completely drying out, which can harm the beneficial fungal networks, and to protect it from becoming waterlogged. Properly stored leaf mold can last for several years, retaining its effectiveness as a container soil amendment, ready for when you need it.

Sustaining Your Supply: An Annual Cycle

The most practical way to ensure you always have “black gold” on hand is to make it an annual fall ritual. Think of your fall garden cleanup not as a chore, but as an opportunity to harvest future soil wealth. This systematic approach guarantees a continuous supply for your container soil amendment needs.

  1. Early Fall: Collect Leaves: As deciduous trees begin to shed their leaves, gather them. Prioritize the softest leaves first for quicker decomposition, allowing you to use them sooner in your containers.
  2. Shred and Bag: Shred the collected leaves and begin new leaf mold bags. You can have multiple bags going at once, perhaps one with softer leaves for quicker results and another with tougher oak leaves for a longer-term supply. This creates a staggered harvest.
  3. Monitor and Maintain: Throughout the year, periodically check your bags as described in the previous section, especially for moisture levels and signs of progress. This includes checking moisture and giving them an occasional turn or shake.
  4. Harvest and Use: By the following late spring or fall, your first batches will be ready. Harvest the finished leaf mold and immediately start new bags with the next season’s fallen leaves. This continuous cycle ensures you always have a fresh batch of nutrient-rich, moisture-retaining material for your container garden.

Embrace this simple, sustainable practice. Your plants, your wallet, and the environment will thank you for making leaf mold a staple of your small-space gardening efforts. You will see a noticeable difference in the vitality and resilience of your container plants, all thanks to this free, natural resource.

Frequently Asked Questions

Can I use evergreen needles or diseased leaves for leaf mold?

It is best to avoid using evergreen needles (like pine or fir) as they decompose very slowly due to their waxy coating and can make the leaf mold more acidic, which not all plants prefer. Diseased leaves should also be avoided to prevent introducing pathogens to your healthy container plants. Stick to deciduous leaves free of apparent disease for the best and safest results for your container garden soil.

How long does it typically take to make leaf mold in a trash bag?

The process generally takes 6 months to 2 years. Shredded, softer leaves (like maple or birch) can break down in about 6 to 12 months. Whole, tougher leaves (like oak) may take 18 to 24 months. Consistent moisture and occasional turning can help speed up decomposition. Patience is key, but the minimal effort makes it worthwhile.

Does leaf mold attract pests or rodents?

Pure leaf mold, made solely from leaves, does not typically attract pests or rodents because it contains no food scraps. If you maintain proper moisture and ensure the bag is intact, it should remain undisturbed by unwelcome critters. If you notice pests, check if any food waste inadvertently made its way into the bag or if the bag is severely damaged. Leaves themselves are not generally appealing to pests.

Is leaf mold the same as compost?

No, leaf mold is distinct from traditional compost. Compost relies on a diverse mix of “greens” (nitrogen-rich) and “browns” (carbon-rich) and typically heats up during decomposition due to bacterial activity. Leaf mold consists almost exclusively of “browns” (leaves) and decomposes slowly through fungal activity, without significant heat generation. Both are valuable soil amendments, but they offer different benefits to the soil and different methods of creation, with leaf mold being simpler for small spaces.

Can I add other materials to my leaf mold bag?

For true leaf mold, stick only to leaves. Adding other organic materials, like grass clippings or food scraps, would turn your project into a traditional composting system, which typically requires a different approach to aeration and moisture balance. The simplicity and success of the “one bag” method for making leaf mold relies on its singular ingredient. Keep it simple and pure for the best leaf mold.

For trustworthy gardening information, visit:
Virginia Cooperative Extension — Lawn & Garden,
University of Maryland Extension — Home & Garden and
Rutgers New Jersey Agricultural Experiment Station. These organizations provide expert, research-based advice for gardeners at all levels.

Disclaimer: This article is for informational purposes only and is not a substitute for professional gardening advice. Always consult local extension services or horticulture experts for region-specific guidance.

Categories
Tools & Gear

Tech for Gardeners: Apps and Sensors Worth Using

Gardening in small spaces like balconies, patios, or compact yards presents unique joys and challenges. You nurture life in a contained environment, maximizing every inch and drop of water. This means you need efficiency, precision, and reliable information. While traditional hand tools form the foundation of your gardening efforts, modern technology offers powerful allies, transforming how you understand your plants and their environment.

Today, you find a growing array of smart garden sensors and garden apps designed to simplify tasks, provide critical data, and even automate routines. These tools do not replace the joy of getting your hands dirty, but they empower you with insights previously reserved for large-scale operations. From identifying mystery plants to optimizing watering schedules, integrating the best gardening tech into your routine can lead to healthier plants and less guesswork. This guide explores the practical applications of these innovations, helping you choose compact, affordable options that genuinely enhance your small-space gardening experience. You will discover how to leverage these tools for better plant health, water conservation, and overall gardening success.

Hands holding a smartphone with a plant app, identifying a container tomato with a yellow leaf on a sunny balcony.

Essential Garden Apps for Small Spaces

Your smartphone is already a powerful tool. Transform it into a gardening assistant with the right garden apps. These digital companions offer immediate access to vast databases, expert advice, and personalized insights. They help you make informed decisions, especially when you are new to a plant or encounter an unfamiliar problem. Beginners and intermediates alike benefit significantly from these readily available resources.

Person on a sunny balcony identifies a vibrant container plant using a smartphone app, surrounded by other potted plants.

Plant Identification Apps

Imagine seeing a beautiful plant, either in a nursery or on a neighbor’s patio, and wishing you knew its name. Plant identification apps fulfill this need instantly. You simply take a picture of a leaf, flower, or overall plant, and the app uses image recognition technology to suggest possible matches. Many apps provide detailed information on care requirements, light needs, watering frequency, and potential pests. This means you can research a plant before bringing it home, ensuring it suits your small-space conditions. For example, you can confirm if a stunning perennial will thrive in a container on your sunny balcony or if it requires more shade and ground space than you possess.

When selecting a plant identification app, look for features such as a large, regularly updated database, community forums for peer support, and offline access for when you lack an internet connection in your garden. Some popular options offer free basic identification with premium features for advanced diagnostics. Consider how often you encounter unknown plants and if the additional features justify a subscription.

A person sits on a balcony chair, using a tablet displaying a garden planning app, surrounded by diverse thriving container plants and a vertical plan

Garden Planning and Journaling Apps

Successful small-space gardening requires planning. Every square inch counts, and optimizing plant placement for light and companion planting benefits your harvest. Garden planning apps allow you to digitally design your garden layout, even creating virtual container gardens. You drag and drop plants into your design, viewing their mature sizes and potential shade patterns. This helps you avoid overcrowding and ensures each plant receives adequate sunlight. Some apps even track crop rotation, advising you on where to plant certain vegetables next season to maintain soil health.

Small-space garden diagram: 30cm pot, soil, plant, water flow arrows, emphasizing planning for efficient use of every square inch.

Journaling features within these apps help you record crucial information. Document planting dates, fertilizer applications, pest sightings, and harvest yields. This data becomes invaluable over time, enabling you to identify successful growing patterns and learn from past mistakes. For instance, if your patio tomatoes consistently underperform in a specific spot, your journal might reveal inadequate sunlight or persistent pest issues in that location. This historical data helps you refine your strategy year after year. For gardeners utilizing limited space, understanding these patterns is key to maximizing productivity.

A woman on an urban patio secures a potted rosemary plant, looking up at a partly cloudy sky, with a smartphone on a nearby table.

Weather Tracking and Plant Care Reminder Apps

Understanding local weather patterns is fundamental to healthy gardening. While you check the forecast, specialized gardening weather apps go a step further. They integrate hyper-local weather data with your plant’s specific needs. Some apps alert you to upcoming frost warnings, high heat advisories, or extended dry spells, prompting you to cover delicate plants or increase watering. This proactive approach prevents weather-related stress on your plants. For balcony gardeners, knowing about strong winds can also be crucial, allowing you to secure pots or move plants to a sheltered spot.

Plant care reminder apps ensure you never forget to water, fertilize, or prune. You input your plants, set their individual care schedules, and the app sends timely notifications. This proves particularly useful for gardeners with many different plants, each with unique requirements. Imagine you have succulents that need infrequent watering and thirsty annuals that require daily attention. The app keeps track of it all, eliminating the need for mental checklists. This consistent care translates directly to healthier, more robust plants. The convenience these apps offer frees up your mental energy, allowing you to focus on enjoying your garden.

A hand gently presses a white soil moisture sensor into the potting mix of a vibrant basil plant in a balcony herb planter.

Smart Watering Solutions: Sensors and Controllers

Water is a precious resource, especially in container gardening where soil can dry out quickly. Efficient watering is not just about conservation; it is about providing your plants with exactly what they need, when they need it, preventing both underwatering and overwatering. Smart garden sensors and smart irrigation controllers revolutionize how you manage water in your small garden, reducing waste and improving plant health.

A smart soil moisture sensor probe in a weathered terracotta pot with a rosemary plant on a sunny patio, a smartphone next to it displaying real-time

Soil Moisture Sensors

A soil moisture sensor measures the water content in your soil. These small devices, often probes you insert directly into the potting mix, send data to an app on your phone or a smart controller. Instead of guessing if your plant needs water, or sticking your finger in the soil, you receive precise, real-time information. This data tells you exactly when the soil moisture drops below an optimal level, triggering a notification or even an automatic watering cycle if linked to a smart controller.

For container gardeners, soil moisture sensors are invaluable. Pots dry out at different rates depending on their material, plant size, sunlight exposure, and ambient temperature. A terracotta pot in full sun might need daily watering, while a plastic pot in partial shade might only need water every few days. Sensors eliminate the guesswork, preventing the common pitfalls of overwatering, which leads to root rot, or underwatering, which causes stress and wilting. By reacting to actual soil conditions, you save water and ensure your plants receive consistent, appropriate hydration.

A person relaxes on a balcony lounge chair, looking at a phone, surrounded by container plants with micro-drip lines and a smart controller.

Rain Sensors and Smart Irrigation Controllers

While soil moisture sensors focus on individual plant needs, rain sensors and smart irrigation controllers manage overall watering schedules. A rain sensor detects rainfall and communicates with your irrigation system or smart controller, preventing unnecessary watering cycles. If it rains, your system pauses, conserving water and preventing waterlogged plants.

Smart irrigation controllers take this a step further. They connect to your home Wi-Fi and use hyper-local weather forecasts, historical data, and even data from your soil moisture sensors to create dynamic watering schedules. You can program zones, set plant types, and the controller adjusts watering duration and frequency automatically. For a small balcony garden with a micro-drip system, a smart controller can manage different zones for thirsty annuals versus drought-tolerant herbs, ensuring each section receives tailored irrigation. You control and monitor your watering from an app, adjusting schedules remotely or simply trusting the system to optimize water use based on real-time conditions. This level of automation ensures consistency and significant water savings over time.

A sleek soil sensor embedded in a matte green ceramic planter with a thriving rosemary plant, a hand gently reaching towards it on patio pavers.

Decoding Your Soil: What Sensors Tell You

Soil is the foundation of your garden. Healthy soil supports vigorous plant growth, while nutrient deficiencies or imbalances can stunt development and invite disease. While a traditional soil test provides a comprehensive snapshot, smart garden sensors offer ongoing, localized insights into your potting mix or garden bed. These sensors provide immediate feedback, allowing you to make timely adjustments without waiting for lab results.

Close-up of a digital pH and nutrient sensor displaying a 7.8 pH reading, inserted into potting mix in a terracotta pot, with blurred lavender foliage

pH and Nutrient Sensors

Many plants thrive within a specific pH range, which measures soil acidity or alkalinity. For instance, blueberries prefer acidic soil, while lavender thrives in alkaline conditions. pH sensors provide real-time readings, allowing you to monitor and adjust your soil pH as needed. If your sensor indicates your soil is too acidic for your planned crop, you can amend it with lime to raise the pH. Conversely, if it is too alkaline, adding peat moss or elemental sulfur can lower it. Maintaining the correct pH ensures your plants can access the essential nutrients present in the soil. Without this balance, nutrients can become “locked up,” even if they exist in abundance.

Some advanced sensors also measure macronutrients like Nitrogen (N), Phosphorus (P), and Potassium (K), which are vital for plant growth. Nitrogen promotes leafy growth, phosphorus supports root and flower development, and potassium aids overall plant vigor and disease resistance. While not as precise as a lab test, these NPK sensors provide general indicators, alerting you to potential major deficiencies. If your sensor consistently shows low nitrogen, for example, you know to consider a nitrogen-rich fertilizer or compost application. This immediate feedback enables you to respond quickly to your plant’s nutritional needs, preventing prolonged stress or poor harvests.

A gardener's hand uses a digital soil temperature sensor in a terracotta pot of basil on a sunny balcony, with a light sensor nearby.

Soil Temperature and Light Sensors

Beyond pH and nutrients, soil temperature and light availability significantly impact plant health. Soil temperature influences seed germination, root growth, and nutrient uptake. Most plants have optimal soil temperature ranges for different stages of their life cycle. A soil temperature sensor helps you decide when to plant seeds or transplants. Planting too early into cold soil can stunt growth or lead to rot, while planting too late into overly warm soil can stress cool-season crops. Monitoring soil temperature ensures you plant at the most opportune time, promoting robust early development.

Light sensors measure the intensity and duration of sunlight your plants receive. This is especially critical in small spaces where buildings, fences, or other structures can cast shadows throughout the day. You might assume a spot gets “full sun,” but a light sensor can confirm if it truly receives the 6+ hours of direct sunlight required for many vegetables. If the sensor reveals insufficient light, you might need to move containers, choose different plant varieties better suited for shade, or explore supplemental lighting options. Accurate light data helps you match the right plant to the right place, maximizing its potential. You can also use this data to rotate plants, ensuring even growth.

For more detailed information on soil testing and amendments, consult resources such as the
USDA’s Natural Resources Conservation Service,
which offers extensive guides on soil health principles.

Gardener on balcony reviewing plant health app on smartphone, with a discreet soil sensor in a potted basil plant, surrounded by containers.

Advanced Plant Health Monitoring

Traditional plant health monitoring relies on your eyes, looking for yellowing leaves, spots, or wilting. While direct observation remains crucial, technology offers additional layers of insight, helping you catch problems earlier and understand underlying causes. Advanced garden tech acts as an early warning system, allowing you to intervene before issues become severe.

Woman's hand holding smartphone displaying

Disease and Pest Identification Apps

Identifying plant diseases and pests quickly saves your plants. Many garden apps specialize in this area. Similar to plant identification, you upload photos of affected leaves, stems, or pests. The app uses AI to analyze the images and suggest potential diseases or pests. It then provides information on symptoms, life cycles, and most importantly, organic and chemical treatment options. For example, if you notice tiny white spots on your basil, an app might quickly identify powdery mildew and recommend an organic fungicidal spray or improved air circulation.

The benefit here is speed and access to a vast knowledge base. Instead of spending hours sifting through gardening forums, you get instant, actionable advice. These apps empower you to act decisively, which is critical in small spaces where pests and diseases can spread rapidly from one plant to another. You protect your entire container garden by addressing localized outbreaks promptly.

Compact plastic mini-greenhouse on a balcony with potted plants, a small environmental sensor, and a clip-on fan; a hand reaches in.

Environmental Sensors for Climate Control

While often associated with greenhouses, compact environmental sensors find application in sheltered balconies or mini-greenhouses. These sensors monitor ambient air temperature and humidity. High humidity can encourage fungal diseases, while extreme temperature swings stress plants. By tracking these factors, you can take preventative measures. If humidity levels consistently stay high, you might increase air circulation by strategically placing plants or adding a small fan. If temperatures regularly drop too low at night, you can use row covers or move sensitive plants indoors.

Some systems integrate these sensors with automated vents or misters, maintaining optimal microclimates. While full automation might be overkill for a single patio container, knowing the specific environmental conditions helps you understand why a plant thrives or struggles. For example, if your sensor shows high afternoon temperatures on your balcony, you know to provide afternoon shade for heat-sensitive plants. This proactive approach supports robust growth and prevents environmental stress from becoming a major issue.

A gardener gently checks basil leaves in a pot on a balcony, with a smart soil sensor and watering hub subtly visible nearby.

Power or Patience? Balancing Tech with Hands-On Gardening

Integrating technology into your garden does not mean sacrificing the tactile, mindful experience of gardening. Instead, it means augmenting your efforts with data and automation where it makes sense. The choice between manual methods and smart tech often comes down to balancing convenience, cost, and your personal gardening philosophy. You do not need to automate everything; select tools that address your biggest challenges and enhance your enjoyment.

Close-up, low-angle shot of hands gently hand-watering a potted basil plant on a sunny patio, fingertips touching its leaves.

When Manual is Best

Many aspects of small-space gardening remain best done by hand, fostering a deeper connection with your plants. Hand-watering allows you to observe each plant individually, feeling the soil, inspecting leaves for pests, and appreciating its growth. Manual weeding by hand ensures you remove unwanted plants without disturbing delicate roots nearby. Pruning with bypass pruners, which use two curved blades that slice cleanly through live stems, requires a precise eye and a steady hand, promoting plant health and shaping. These hands-on activities are meditative, engaging your senses, and building your intuitive gardening knowledge. For example, you learn to recognize the subtle signs of thirst in your basil long before a sensor might alert you. Small-space gardeners often embrace this intentionality, finding joy in the direct interaction with their plants.

Young woman relaxes on an urban patio, sipping tea amidst lush container plants and a vertical garden, checking a gardening app on her smartphone, a s

When to Embrace Smart Tech

Smart tech shines when it solves repetitive problems, provides crucial data you cannot easily gather otherwise, or offers convenience for busy gardeners. If you frequently forget to water, leading to stressed plants, a smart watering system with soil moisture sensors can be a game-changer. If you struggle to identify diseases, a plant diagnostic app offers instant expertise. If you travel frequently, remote monitoring of your garden’s conditions provides peace of mind. Technology excels at consistency and data collection. It frees you from basic chores, allowing you more time for enjoyable activities like harvesting, pruning for shape, or simply relaxing in your green space. For example, knowing your soil pH through a sensor eliminates the need for repeated manual tests, allowing you to focus on adjusting amendments.

Consider your personal pain points and what aspects of gardening you find most challenging or time-consuming. A smart sensor for monitoring light might be invaluable if your balcony has complex light patterns. An app that reminds you to fertilize might save your heavy feeders. Integrate tech strategically, using it to complement your existing skills, not replace them. The goal is to enhance your gardening, making it more successful and less stressful, while still preserving the hands-on satisfaction. You balance the tactile joy with the efficiency of modern tools.

Person on a patio meticulously cleaning a white smart garden sensor with a microfiber cloth, surrounded by vibrant container plants.

Keeping Your Garden Tech Optimal: Maintenance Tips

Just like your traditional hand tools, your smart garden sensors and apps require a little attention to perform their best. Proper maintenance ensures accuracy, extends the lifespan of your devices, and safeguards your data. Neglecting these steps can lead to inaccurate readings, system failures, and ultimately, less effective gardening. You protect your investment and maintain the reliability of your gardening support system through consistent care.

Gardener's hands calibrate a soil sensor over a vial on a sunlit patio table, with lush container plants blurring in the background.

Sensor Calibration and Cleaning

Many sensors, especially those measuring pH or NPK, benefit from periodic calibration. Over time, environmental factors can cause sensors to drift, leading to inaccurate readings. Follow the manufacturer’s instructions for calibration, which often involves placing the sensor in a known solution (calibration solution) and adjusting its readings. Calibrate new sensors before their first use and then typically once or twice a growing season, or if you suspect inaccurate data. You ensure the data you rely on for decisions is trustworthy.

Cleaning sensors is equally important. Soil particles, mineral deposits from water, and algae can accumulate on probes, impairing their ability to take accurate measurements. Gently wipe probes with a soft, damp cloth after each use or at least weekly during active growing seasons. For stubborn deposits, a soft brush and distilled water work well. Avoid harsh chemicals or abrasive materials, which can damage the sensor’s delicate components. Store sensors in a clean, dry place, ideally with a protective cap if provided, to prevent damage to the probes.

Hands on a patio table, preparing to replace batteries in a smart soil sensor, with a garden app visible on a tablet.

Battery Management and Software Updates

Most smart garden sensors are battery-powered. Monitor battery levels regularly, either through their companion app or by checking indicator lights on the device. Replace batteries proactively rather than waiting for them to fail, which can interrupt data collection at critical times. Use the type of batteries recommended by the manufacturer to ensure optimal performance and avoid damage. If storing devices for the off-season, remove batteries to prevent corrosion. You extend the life of your devices significantly by practicing good battery hygiene.

Software and firmware updates for both apps and smart devices are crucial for security, performance, and accessing new features. Enable automatic updates on your apps whenever possible. For smart controllers and sensors, regularly check the manufacturer’s website or app for available firmware updates. These updates often fix bugs, improve sensor accuracy, enhance security features, and add compatibility with newer operating systems. Neglecting updates can leave your devices vulnerable to security threats or cause them to function poorly. You ensure your tech remains reliable and secure by staying current.

Hand holding a smartphone displaying a smart gardening app's 'Data Privacy' settings, with a blurred container garden background.

Data Privacy and Security in Smart Gardening

As you integrate more smart devices into your garden, you also introduce data collection and connectivity. Understanding data privacy and security practices becomes essential. You want the benefits of smart tech without compromising your personal information or opening your home network to vulnerabilities. Protecting your data allows you to fully enjoy the convenience and insights these devices offer.

Woman on patio chair reviewing a tablet with a privacy policy, surrounded by container plants like herbs and a hanging basket.

Understanding What Data is Collected

Before purchasing any smart garden device or downloading an app, understand its data collection policies. Most smart sensors collect environmental data (soil moisture, temperature, light) which is usually anonymized and aggregated to improve services. Some apps might request access to your location for hyper-local weather. Others might ask for personal details during registration. Review the privacy policy for each device and app. You need to know what information they gather, how they use it, and if they share it with third parties. If a privacy policy seems vague or overly permissive, consider an alternative product. You make informed choices about your data by reading the fine print.

Person's hand near a Wi-Fi router on a console table, with smart garden devices and a container garden visible through a glass door.

Securing Your Devices and Network

Your smart garden devices connect to your home Wi-Fi network. Treat them like any other connected device in your home. Ensure your Wi-Fi network uses a strong, unique password. If your router has a guest network feature, consider connecting your smart garden devices to the guest network, which can provide an extra layer of isolation from your main home network. Regularly update your router’s firmware, as these updates often include critical security patches. You create a secure environment for all your smart devices, including those in your garden, by maintaining strong network security practices.

For individual devices, change default passwords immediately if they come with one. Use strong, unique passwords for any online accounts associated with your garden apps or controllers. If a device offers two-factor authentication (2FA), enable it. This adds a crucial second layer of security, making it significantly harder for unauthorized individuals to access your accounts. You significantly reduce the risk of security breaches by taking these simple, proactive steps.

For additional guidance on smart device security, refer to resources like the
Federal Trade Commission’s (FTC) guidance on IoT device security.

A compact, dark grey soil moisture sensor discretely inserted into a terracotta pot with thriving basil and thyme on a sunlit urban balcony.

Choosing Durable and Compact Garden Tech

Small-space gardening means every tool, physical or digital, must earn its spot. When selecting garden tech, consider not only its features but also its physical footprint, durability, and suitability for outdoor conditions. You need devices that withstand the elements, fit neatly into your limited space, and provide long-term value.

Sleek dark-grey soil moisture sensor in a terracotta pot with herbs on a rainy urban balcony, showing visible raindrops.

Weather Resistance and Build Quality

Garden sensors live outdoors. This means they face sun, rain, wind, and temperature fluctuations. Look for devices with an IP (Ingress Protection) rating, which indicates their resistance to dust and water. An IP65 rating, for example, means the device is dust-tight and protected against water jets from any direction. An even higher rating, like IP67, signifies protection against temporary immersion in water. You ensure your sensors continue to function reliably through various weather conditions by choosing appropriately rated devices.

Beyond ratings, assess the build quality. Are the materials robust? Is the casing sealed? Do wires have adequate protection? Read reviews specifically mentioning durability and performance in real-world outdoor environments. A flimsy sensor might be cheaper initially, but it costs more in replacements and lost data over time. You save money and frustration by prioritizing robust construction from the outset.

Urban balcony garden with lush potted plants. A tiny, dark soil sensor is barely visible in one pot; a minimalist light-grey controller blends into a

Compact Design and Battery Life for Small Spaces

In a small garden, size matters. Choose sensors and controllers that are discreet and do not take up valuable space or look obtrusive. Many modern soil moisture sensors are small probes that blend into the pot. Smart controllers are often wall-mounted or can sit unobtrusively near your watering source. You maintain the aesthetic appeal of your small garden by selecting compact designs.

Battery life is another critical factor. You do not want to constantly replace batteries or recharge devices, especially if they are placed in hard-to-reach areas. Look for sensors with long battery lives, measured in months or even a year, using energy-efficient wireless protocols like Bluetooth Low Energy or specialized garden network protocols. Solar-powered options are also excellent for continuous operation without battery changes. You minimize maintenance chores and ensure continuous data collection by prioritizing extended battery life.

When you consider these factors – weather resistance, build quality, compact design, and battery life – you select garden tech that not only performs its function well but also integrates seamlessly and durably into your small-space gardening environment. You invest in tools that simplify your life, rather than adding new hassles.

A gardener on a sun-dappled balcony looks at a tablet displaying a garden planning app, with a smart soil sensor in a nearby pot.

Garden Tech Feature Comparison

Choosing between different types of garden tech can feel overwhelming. This table helps you compare common features and use cases for the most popular garden apps and smart garden sensors, allowing you to identify what best suits your needs and budget. You can quickly see which technology addresses your specific gardening challenges.

Tech Type Primary Function Key Features Best For Considerations
Plant ID Apps Identify unknown plants, get care info Image recognition, species database, care guides, community forum Quick identification, learning new plants, troubleshooting diseases/pests Accuracy varies, some features paywalled, requires good photo quality
Garden Planning Apps Design layouts, track progress, set reminders Virtual garden design, planting calendars, journaling, crop rotation advice Optimizing small spaces, remembering tasks, tracking harvest data Learning curve for complex features, regular data entry needed
Soil Moisture Sensors Measure water content in soil Real-time data, app integration, alerts, often battery-powered Preventing over/under-watering, water conservation, precise hydration Placement critical, requires calibration, battery replacement
pH/NPK Sensors Measure soil acidity/alkalinity and key nutrients Digital readings, data logging, specific plant pH ranges Diagnosing nutrient deficiencies, optimizing soil for specific plants Less precise than lab tests, requires calibration, often more expensive
Light Sensors Measure light intensity and duration PAR/Lux readings, daily light integral (DLI), shade mapping Optimizing plant placement, matching plants to light conditions, assessing sun exposure Shadows can skew readings, accurate placement necessary
Smart Irrigation Controllers Automate watering schedules Wi-Fi connectivity, weather integration, remote control, zone management Automated watering, water conservation, managing multiple watering zones Requires existing irrigation setup, initial setup complexity, Wi-Fi reliability
Environmental Sensors (Air Temp/Humidity) Monitor ambient air conditions Temperature, humidity readings, historical data logging, alerts Optimizing microclimates, preventing fungal issues, protecting sensitive plants Best for enclosed spaces (mini-greenhouses), battery life varies

A gardener inspects a potted lavender plant on a sunny patio, with a tablet displaying a gardening app on a stool nearby.

Frequently Asked Questions

Do I need all these garden apps and sensors for my small garden?

No, you do not need every piece of tech available. Start by identifying your biggest gardening challenges. If you struggle with watering, a soil moisture sensor is a great first step. If you cannot identify pests or diseases, a plant diagnostic app offers significant value. Choose one or two tools that directly address your pain points and expand as you find what truly helps your specific gardening style. You integrate tech strategically, focusing on practical benefits.

Are smart garden sensors difficult to set up?

Most modern smart garden sensors and apps are designed for user-friendliness. Setup typically involves inserting batteries, downloading a companion app, and following on-screen instructions to pair the device via Bluetooth or Wi-Fi. While some smart irrigation controllers might require basic wiring knowledge, many soil sensors are plug-and-play. You can generally expect a straightforward setup process, often completed within minutes.

How accurate are these sensors compared to professional lab tests?

Smart garden sensors provide excellent real-time data for ongoing monitoring and quick decision-making. However, they are generally less precise than professional lab tests, especially for complex nutrient analysis. Think of them as giving you a good general indication of trends and immediate issues. For highly detailed and precise measurements, especially before starting a new garden or addressing persistent, severe problems, a professional soil test remains the gold standard. You use sensors for daily insights and lab tests for foundational understanding.

Can smart tech really save me water in a small space?

Absolutely. Overwatering is a common problem in small-space gardening, leading to wasted water and unhealthy plants. Soil moisture sensors ensure you water only when needed, while smart irrigation controllers adjust schedules based on weather and plant types. This precision prevents unnecessary watering cycles and reduces runoff. Studies, such as those by the
U.S. Environmental Protection Agency’s WaterSense program,
demonstrate that smart irrigation can reduce outdoor water use by significant amounts. You conserve water effectively by leveraging these technologies.

What is the most important feature to look for in a plant identification app?

The most important feature is a large, accurate, and regularly updated plant database. This directly impacts the app’s ability to correctly identify plants. Look for apps with a strong user community, as collective input often improves accuracy. Offline functionality is also beneficial, allowing you to identify plants even without an internet connection. You ensure reliable identification by prioritizing database quality and accessibility.

For reliable gardening information and safety guidance, see
Oregon State Extension — Garden & Home Publications,
Missouri Botanical Garden — Watering Tips, and
National Safety Council — Home & Garden Safety.

Disclaimer: Follow manufacturer instructions and local regulations. Protect your digital privacy, secure your devices, and handle any physical components of smart tech carefully. Keep all garden tools, smart or traditional, away from children and pets.

Categories
Edible Gardening

The Best Salad Greens for Succession Planting

If you have limited space but dream of fresh, homegrown salads, succession planting your salad greens is your secret weapon. This strategy ensures a continuous supply of tender leaves, preventing gluts and empty patches in your garden. You transform a small balcony, patio, or yard into a productive, ever-yielding salad bar.

Imagine stepping outside to snip vibrant lettuce, spicy arugula, or crisp spinach whenever you desire. This article guides you through selecting the best leafy greens for small spaces, setting up your containers, creating an efficient sowing schedule, and mastering the art of cut-and-come-again harvesting. You will learn how to keep your salad bowl full from spring through fall, even in the smallest urban garden.

For research-based guidance on edible gardening, visit
Washington State University Hortsense,
Texas A&M AgriLife Extension — Horticulture and
University of Illinois Extension — Gardening.

Disclaimer: This article is for informational purposes only and is not a substitute for professional advice. Consult local extension services for region-specific recommendations.

Three containers of salad greens at different growth stages on a patio table, illustrating succession planting.

Understanding Succession Planting for Continuous Harvest

Succession planting is a smart gardening strategy where you plant small batches of seeds or seedlings at regular intervals, typically every two to three weeks, instead of planting your entire crop all at once. This ensures a staggered harvest, providing a consistent supply of fresh produce throughout the growing season. For instance, you avoid a massive flush of lettuce all maturing at the same time, which often leads to waste. Instead, you enjoy tender, young leaves week after week.

This method is particularly powerful for salad greens because they grow quickly and tend to bolt, or go to seed, in warmer weather. By planting in succession, you always have new, young plants developing as older ones mature or finish their productive cycle. This maximizes your yield in a small space, keeping your salad bowl full and your garden productive from spring through fall.

Consider the benefits: you reduce waste by harvesting only what you need, you maintain the quality of your greens by picking them at their peak tenderness, and you enjoy a greater variety by rotating different types of leafy greens through your containers. It transforms a small garden into an efficient, sustainable food source.

Woman's hands harvesting red and green loose-leaf lettuce from a terracotta pot on a balcony, with arugula and other lettuce pots visible.

Choosing Your Greens: Top Performers for Small Spaces

Selecting the right salad greens is crucial for successful succession planting, especially in limited spaces. You need varieties that grow quickly, tolerate frequent harvesting, and adapt well to container life. Here are some of the best leafy greens for your small-space garden:

  • Loose-Leaf Lettuce: These varieties do not form a tight head, making them perfect for cut-and-come-again harvesting. They mature quickly, often in 30-45 days, and offer diverse textures and colors. Popular choices include ‘Black Seeded Simpson,’ ‘Salad Bowl,’ ‘Red Sails,’ and ‘Buttercrunch’ (which you can grow as a loose-leaf type).
  • Arugula: Known for its peppery flavor, arugula thrives in cool weather and grows rapidly, often ready for harvest in just 20-30 days. Plant it in successive batches every two weeks to enjoy its spicy kick throughout spring and fall. Heat causes it to bolt quickly, so focus your plantings in cooler periods.
  • Spinach: Rich in nutrients, spinach prefers cooler temperatures and moist soil. Varieties like ‘Tyee’ or ‘Bloomsdale Long Standing’ perform well in containers. Harvest the outer leaves to encourage continuous growth. It typically matures in 30-45 days.
  • Swiss Chard: While often considered a cooking green, young Swiss chard leaves add a mild, earthy flavor and beautiful color to salads. It is highly productive and tolerates a wider range of temperatures than many other greens. Harvest outer leaves regularly; it continues producing for a long season.
  • Kale (Baby Leaf): For salad use, focus on baby kale leaves. Varieties such as ‘Red Russian’ or ‘Tuscan (Lacinato/Dinosaur)’ kale offer tender, slightly peppery greens when picked young. Baby kale matures in about 25-30 days and tolerates cool weather, extending your harvest into colder months.
  • Radicchio: If you enjoy a touch of bitterness, radicchio adds a beautiful deep red hue and crisp texture to salads. While some varieties form heads, you can also grow loose-leaf types or harvest young leaves for quick succession.
  • Mustard Greens: These vibrant greens provide a spicy, pungent flavor. They grow quickly, often within 20-30 days, and thrive in cooler temperatures. ‘Red Giant’ offers stunning color. Be mindful of their rapid bolting in heat.
  • Mache (Corn Salad): This cold-hardy green has a delicate, nutty flavor and a tender texture. It performs exceptionally well in cool weather and is a fantastic choice for late-season or early-spring plantings, maturing in 40-60 days.

When selecting seeds, look for “fast-growing,” “heat-tolerant” (for summer succession), or “cold-hardy” (for extended fall/winter harvests) labels. Experiment with different types to discover what grows best in your specific conditions and what flavors you prefer. Your goal is to create a diverse and resilient salad garden.

Person's gloved hands filling a terracotta pot with potting mix on a patio table, surrounded by various empty containers and an open soil bag.

Setting Up Your Salad Garden: Containers, Soil, and Light

A successful container salad garden starts with the right foundation. You need appropriate containers, a high-quality potting mix, and adequate sunlight. Planning these elements ensures your leafy greens thrive.

Three empty gardening containers – terracotta and plastic – on a wooden table, showcasing drainage holes and a measuring tape, on a patio.

Choosing the Right Containers

Salad greens generally have shallow root systems, making them excellent candidates for containers. You have many options, but focus on depth, drainage, and material:

  • Depth: Aim for containers at least 6-8 inches deep. This provides enough room for roots and helps retain moisture. Wider containers are better than deeper ones for many greens, as you can plant more individual plants.
  • Drainage: Every container must have drainage holes. Root rot is a common issue for container plants without proper drainage. If your chosen container lacks holes, drill several ¼-inch to ½-inch holes in the bottom.
  • Materials:
    • Plastic: Lightweight, inexpensive, and retains moisture well. Choose food-grade plastic if possible.
    • Terracotta/Clay: Attractive and allows soil to breathe, which prevents overwatering. However, it dries out faster, requiring more frequent watering.
    • Fabric Grow Bags: Excellent for aeration and drainage, preventing root circling. They are lightweight and easy to store.
    • Wooden Planters: Can be aesthetically pleasing. Ensure the wood is untreated or treated with food-safe sealants.

Self-watering containers can be a game-changer for busy gardeners, as they provide a consistent water supply to plant roots, reducing the frequency of manual watering.

Overhead shot on a patio table, showing a trug of high-quality potting mix surrounded by piles of coco coir, perlite, and compost.

The Importance of Quality Potting Mix

Your potting mix is the lifeblood of your container garden. Do not use garden soil, as it compacts in containers, restricts root growth, and may contain pests or diseases. A high-quality, peat-free potting mix provides the ideal environment for your salad greens:

  • Good Drainage: Prevents waterlogging. Look for mixes containing perlite or vermiculite.
  • Water Retention: Holds enough moisture without becoming soggy. Coconut coir is an excellent sustainable alternative to peat.
  • Nutrient Content: Many potting mixes include a slow-release fertilizer or compost, providing initial nutrients.
  • Aeration: Allows oxygen to reach the roots.

You can create your own mix using equal parts compost, coco coir, and perlite. This ensures you control the ingredients and promote sustainable practices. For more detailed information on creating an ideal potting mix, refer to resources like the Oregon State University Extension on Potting Mixes.

A woman on a sun-dappled patio gently pushes a wheeled fabric grow bag filled with salad greens towards a sunny spot, optimizing light.

Sunlight Requirements

Most salad greens thrive with at least 4-6 hours of direct sunlight per day. More sun usually means faster growth and better flavor. However, during hot summer months, some greens, particularly lettuce and spinach, benefit from partial shade during the hottest part of the afternoon. This prevents bolting and keeps leaves tender. Observe your space throughout the day to identify the sunniest spots for your containers.

Balcony layout diagram showing containers for salad greens, indicating sunniest spots, shaded areas, and vertical planters for optimal growth.

Placing containers on casters or using lightweight fabric bags allows you to move them easily to optimize sun exposure or provide afternoon shade as needed. This flexibility is a key advantage of container gardening.

Close-up of hands sowing seeds in a terracotta pot on a balcony railing, next to containers of salad greens at different growth stages, in golden ligh

The Sowing Schedule: Your Blueprint for Continuous Salad

The core of succession planting lies in a well-planned sowing schedule. This strategy ensures you always have young plants maturing as older ones are harvested, providing an endless supply of fresh salad greens. You implement a staggered planting approach rather than a single large planting.

A gardener's hand with a pencil taps a seed packet on a small wooden patio table. An open journal with a sowing calendar, other seed packets, and empt

Developing Your Sowing Calendar

Your specific schedule depends on your climate, the greens you choose, and their typical days to maturity (DTM). Here is a general framework:

  1. Determine Your Last Frost Date: This marks the start of your main planting season. You can begin planting cool-season greens a few weeks before this date, as they tolerate light frost.
  2. Identify Days to Maturity (DTM): Check your seed packets. Fast-growing greens like arugula and loose-leaf lettuce often mature in 20-45 days.
  3. Plan Intervals: For most salad greens, sow a new batch every 2-3 weeks. This interval prevents all plants from maturing simultaneously. If a specific green matures very quickly (e.g., 20 days), you might sow it more frequently.
  4. Calculate Sowing Quantities: Plant only what you can realistically consume in a 2-week period. For small spaces, this might mean a few rows in a wide container or one small pot per sowing. Remember, you want consistent small harvests, not a massive overflow.
  5. Adjust for Season:
    • Spring: Start earlier and plant more frequently as temperatures warm.
    • Summer: Focus on heat-tolerant varieties or plant in partial shade. Reduce frequency or take a break if temperatures are consistently above 85°F (29°C), as many greens bolt.
    • Fall: As temperatures cool, you can resume more frequent plantings. Extend the season with cold frames or cloches.

Woman on a sunlit balcony inspecting diverse container salad greens in various growth stages, demonstrating succession planting.

A Sample Succession Planting Schedule for Container Salad Greens

This table provides a general guide. Adjust planting dates based on your local climate and specific varieties.

Green Type Sowing Interval Typical DTM Notes for Succession
Loose-Leaf Lettuce Every 2-3 weeks 30-45 days Plant small batches. Choose heat-tolerant varieties for summer.
Arugula Every 2 weeks 20-30 days Sow frequently in spring/fall. Bolts quickly in heat.
Spinach Every 2-3 weeks 30-45 days Prefers cool weather. Harvest outer leaves.
Baby Kale Every 3 weeks 25-35 days Very hardy. Good for extending season into colder months.
Mustard Greens Every 2 weeks 20-30 days Sow frequently in spring/fall. Bolts quickly in heat.
Swiss Chard (Baby) Every 3-4 weeks 30-50 days Very productive. Tolerates some heat.

A gardener's hands sow seeds directly into a ceramic container, next to a tray of labeled spinach seedlings on a patio.

Direct Sowing vs. Starting Indoors

  • Direct Sowing: Many salad greens, especially loose-leaf lettuce, arugula, and spinach, do well when sown directly into their final containers. This minimizes transplant shock. Plant seeds thinly and lightly cover them with soil, following package directions for depth.
  • Starting Indoors: For some greens, or if you want to get a jump start on the season, you can start seeds indoors in small cell trays. Transplant them into your containers once they have developed a few true leaves and your outdoor conditions are suitable. This is particularly useful for maximizing your succession efficiency, ensuring seedlings are ready to go as soon as a spot opens up.

Label your containers with the planting date and green type. This simple habit helps you track your schedule and know when to expect harvests or when to plant the next batch. Staying organized ensures your continuous flow of fresh greens.

A gardener's hand sprinkles granular fertilizer into a grey fabric grow bag overflowing with healthy, mixed salad greens on a sunny patio.

Cultivation Care: Nurturing Your Leafy Greens

Consistent care ensures your salad greens remain healthy, tender, and productive. Focusing on proper watering, intelligent feeding, and proactive pest management helps you achieve abundant harvests.

Close-up of a hand watering a container of salad greens at soil level on a sunlit patio, emphasizing careful, deep hydration.

Water: The Lifeline of Leafy Greens

Salad greens consist primarily of water, so consistent moisture is paramount. Erratic watering leads to bitterness, tough leaves, or premature bolting.

  • Deep and Regular Watering: Water deeply until you see water draining from the bottom of your containers. This encourages roots to grow deeper. Check soil moisture daily, especially during warm weather. Stick your finger about an inch into the soil; if it feels dry, it is time to water.
  • Morning Watering: Water in the morning to allow leaves to dry before evening. This reduces the risk of fungal diseases.
  • Avoid Overhead Watering: Aim water at the soil level, not on the leaves, especially if you water in the evening. This minimizes water waste and discourages diseases.
  • Wicking Systems: For busy gardeners, consider self-watering containers or wicking systems. These provide a consistent moisture level to the roots, preventing both over and under-watering.

Gardener's hand gently pouring liquid organic fertilizer into a terracotta pot of vibrant lettuce on a sunlit urban balcony.

Fertilizing: Gentle Nudges for Growth

Leafy greens are light feeders, but container-grown plants deplete soil nutrients faster than those in garden beds. A balanced, organic approach works best.

  • Initial Nutrients: A good quality potting mix provides initial nutrients for 3-4 weeks.
  • Liquid Organic Fertilizer: After the initial period, feed your greens every 2-3 weeks with a diluted liquid organic fertilizer. Look for an NPK ratio balanced for leafy growth (e.g., 2-1-2 or 5-2-2). Fish emulsion, kelp meal, or a balanced all-purpose organic liquid feed work well.
  • Compost Tea: As a sustainable alternative, use compost tea. It provides gentle nutrients and beneficial microbes, enhancing soil health.
  • Avoid Over-Fertilizing: Too much nitrogen, while promoting leafy growth, can sometimes lead to excessive bitterness or soft, disease-prone foliage. Follow package directions for dilution carefully.

A gardener closely inspecting the underside of a vibrant green lettuce leaf growing in a terracotta pot on a small patio table, bathed in soft morning

Pest and Disease Management: Prevention is Key

Healthy plants are more resistant to pests and diseases. Regular monitoring helps you catch problems early, allowing for least-toxic interventions.

  • Regular Inspection: Every time you water or harvest, visually inspect your plants. Look for discolored leaves, chewed edges, or the presence of small insects like aphids or slugs.
  • Common Pests:
    • Aphids: Small, pear-shaped insects often found on new growth. Blast them off with a strong stream of water or apply insecticidal soap.
    • Slugs and Snails: Leave slimy trails and ragged holes in leaves. Hand-pick them in the early morning or evening. Beer traps or copper tape can also deter them.
    • Flea Beetles: Create small “shot-hole” damage. Floating row covers can protect young seedlings. Neem oil can also be effective.
  • Disease Prevention:
    • Good Air Circulation: Space your plants adequately to allow air to flow, which reduces humidity and fungal disease risk.
    • Cleanliness: Remove any dead or diseased leaves promptly. Keep your containers and gardening tools clean.
    • Resistant Varieties: If you repeatedly face disease issues, choose varieties known for disease resistance.

Embrace integrated pest management (IPM) by starting with prevention and moving to least-toxic solutions only when necessary. This protects your plants and the beneficial insects in your garden. The Environmental Protection Agency provides further details on IPM principles.

Hand harvesting large outer leaves from a vibrant mixed salad green plant in a terracotta pot on a patio, showing new growth for future harvests.

Harvesting for Longevity: The Cut-and-Come-Again Method

One of the most rewarding aspects of growing salad greens, particularly with succession planting, is the ability to harvest repeatedly from the same plant. This “cut-and-come-again” method maximizes your yield and extends the life of your plants. You get more salads from fewer plants, optimizing your small space.

Close-up of a hand with small snips about to cut an outer leaf of loose-leaf lettuce in a terracotta pot, leaving the core intact.

How to Implement Cut-and-Come-Again

This technique relies on harvesting only the outer or upper leaves, leaving the plant’s core or growing point intact to produce more foliage. This is particularly effective for loose-leaf lettuces, spinach, arugula, kale, mustard greens, and Swiss chard.

  1. Timing: Begin harvesting when leaves are young and tender, usually after the plant has developed at least 4-6 true leaves. Harvesting at this stage ensures the best flavor and texture.
  2. Technique: Use clean scissors or snips.
    • Outer Leaves: For most greens, snip the larger, outer leaves near the base of the plant, leaving the central growing point undisturbed. This encourages the plant to continue producing new leaves from the center.
    • Across the Top (for dense plantings): If you have densely sown a patch of greens (like a “cut-and-come-again” mix), you can shear the entire patch about an inch or two above the soil line. The plants will regrow, providing another harvest in a few weeks. This works well for arugula or mesclun mixes.
  3. Frequency: Harvest regularly, typically every 1-2 weeks. Frequent harvesting encourages new growth. If you wait too long, leaves can become tough or bitter, and the plant may start to bolt.
  4. Avoid Over-Harvesting: Never remove more than one-third to one-half of the plant’s leaves at a time. The remaining leaves are essential for photosynthesis, which fuels new growth.

By using the cut-and-come-again method, you continuously stimulate your plants to produce. This means you do not need to wait for a plant to fully mature before enjoying a harvest, and you extend the productive life of each plant significantly.

A hand holds gardening snips, poised to harvest lush loose-leaf lettuce from a terracotta window box. One plant shows a subtle, emerging central stalk

Bolting Prevention and Management

Bolting occurs when a leafy green plant shifts its energy from producing leaves to forming a flower stalk and setting seeds. This happens naturally in response to warming temperatures and longer daylight hours. Once a plant bolts, its leaves become bitter and tough, and its productivity declines.

  • Early Intervention: If you see a central stalk starting to emerge, harvest all usable leaves immediately. While they might have a hint of bitterness, they are often still palatable.
  • Shade During Heat: In summer, provide partial shade for your cool-season greens. Moving containers to a shadier spot or using shade cloth reduces stress.
  • Consistent Moisture: Keep the soil consistently moist. Water stress can trigger bolting.
  • Succession Planting: This method inherently helps manage bolting. As one batch bolts, your next succession of younger plants is ready to take its place, ensuring a continuous supply of tender leaves.
  • Embrace the Flowers: Some bolted greens, like arugula and mustard, produce edible flowers that add a peppery garnish to salads. You can also allow some plants to go to seed for future plantings, though this reduces leaf production.

Understanding and managing bolting is crucial for maximizing your salad green yield. Your thoughtful succession plan allows you to stay ahead of this natural process, ensuring you always have prime, tender greens ready for your table.

Compact patio garden with lettuce under shade cloth and spinach in a mini-hoop house, showcasing seasonal adaptation for year-round greens.

Seasonal Adaptations for Year-Round Greens

Extending your salad green harvest beyond the typical spring and early summer involves adapting your approach to seasonal changes. You manage heat, frost, and light availability to keep your containers productive throughout the year.

Vibrant young salad greens in various containers on a sunny balcony railing, showing different stages of growth for succession planting.

Spring and Early Summer: The Prime Season

This is when most salad greens thrive. Temperatures are mild, and daylight hours are increasing. You focus on frequent succession plantings of fast-growing varieties.

  • Sow Aggressively: Begin planting cool-season greens like lettuce, spinach, arugula, and mustard greens as soon as the danger of hard frost passes. Continue sowing every 2-3 weeks.
  • Diverse Varieties: Experiment with various loose-leaf types to find your favorites.
  • Monitor for Pests: Spring often sees an increase in pest activity. Regular checks help you manage any outbreaks proactively.

Lush heat-tolerant greens, including Swiss chard and Buttercrunch lettuce, thrive in various pots under dappled shade on a sunny urban balcony.

Mid-Summer: Battling the Heat

High temperatures are the biggest challenge for many leafy greens. Heat often triggers bolting and bitterness.

  • Heat-Tolerant Varieties: Shift your focus to greens that handle heat better. Examples include ‘Black Seeded Simpson’ or ‘Buttercrunch’ lettuce, New Zealand spinach (not true spinach, but a heat-tolerant substitute), Malabar spinach, Swiss chard, and some varieties of kale.
  • Provide Shade: Move containers to a location that receives morning sun but is shaded during the hottest part of the afternoon. You can also use shade cloth (often 30-50% shade) draped over a simple frame to protect your plants.
  • Increase Watering: Plants in containers dry out quickly in summer. You might need to water daily, sometimes twice a day. Maintain consistent soil moisture.
  • Slow Down Succession: You may reduce your sowing frequency or pause planting some varieties during peak summer heat.

Vibrant fall salad greens like spinach, red-leaf lettuce, and arugula thrive in various containers on a small balcony, with new Mache sprouts and a cl

Fall: Embracing the Cool-Down

As temperatures drop, many cool-season greens rebound. Fall can be a second prime season, often producing even sweeter leaves due to cooler nights.

  • Resume Frequent Sowing: Start new successions of lettuce, spinach, arugula, Mache, and mustard greens. The slightly shorter days and cooler temperatures reduce bolting risk.
  • Cold-Hardy Varieties: Focus on cold-tolerant options like Mache, Claytonia, kale, and some spinach varieties.
  • Prepare for Frost: As autumn progresses, be ready to protect your plants from early frosts.

Vibrant spinach and mache thriving in terracotta pots inside a rustic wooden cold frame on a frosted patio, lid partially open.

Winter: Extending the Harvest in Cold Climates

While challenging, harvesting greens through winter in cold climates is possible with protection. In milder climates, you may enjoy fresh greens all winter with minimal effort.

  • Cold Frames and Cloches: These simple structures create microclimates, raising the temperature by several degrees and protecting plants from wind and snow. You can purchase or build them for your containers.
  • Row Covers: Floating row covers provide a few degrees of frost protection and help retain soil warmth.
  • Indoor Growing: For truly cold areas, consider moving containers indoors to a sunny window or under grow lights. Varieties like microgreens or small leaf lettuce do well indoors.
  • Focus on Hardiest Greens: Mache, spinach, and cold-tolerant kale varieties are excellent choices for winter production.

By understanding your local climate and making these seasonal adjustments, you significantly extend your harvesting window, enjoying fresh salad greens almost year-round from your small garden space.

Vibrant, sun-drenched urban patio with a multi-tiered vertical planter and various pots overflowing with diverse salad greens.

Beyond the Basics: Maximizing Small-Space Salad Production

Once you master the fundamentals of succession planting, you can implement advanced techniques to squeeze even more productivity from your limited gardening area. These strategies help you grow a wider variety and increase overall yield.

Lush fabric pocket planters and a tiered stackable system overflowing with various salad greens on a sunny urban balcony wall.

Vertical Gardening Integration

Vertical gardening is a game-changer for small spaces. It allows you to grow upwards, utilizing walls, fences, or vertical structures, freeing up valuable ground or patio space.

  • Stackable Planters: These tiered systems are perfect for salad greens. Each tier provides space for a different succession or variety. They are efficient with water and space.
  • Pocket Planters/Wall Gardens: Fabric pocket planters or wall-mounted systems attach to fences or balcony railings. Plant individual salad greens in each pocket for easy access and diverse plantings.
  • DIY Vertical Structures: Repurpose palettes, create stepped shelving, or use rain gutters mounted vertically. Ensure proper drainage for each level.

When implementing vertical gardening, consider sun exposure. The top tiers generally receive more sun, while lower tiers might need shade-tolerant varieties, especially during summer.

Vibrant salad greens, chives, marigolds, and nasturtiums growing together in a large patio planter box, showcasing companion planting.

Companion Planting Benefits

Companion planting involves growing specific plants together for mutual benefit. This can deter pests, attract beneficial insects, improve soil health, or enhance growth.

  • Pest Deterrence:
    • Marigolds: Planted near salad greens, marigolds can deter nematodes and other pests with their strong scent.
    • Nasturtiums: Act as a trap crop, drawing aphids away from your greens. You can harvest their peppery leaves and flowers for your salads too.
    • Chives/Garlic: Their pungent odor confuses pests and can deter aphids.
  • Attracting Beneficial Insects: Planting small flowering herbs like dill, cilantro (allowed to flower), or chamomile nearby attracts predatory insects like ladybugs and hoverflies, which feast on aphids.
  • Shade and Support: Taller plants can provide beneficial afternoon shade for heat-sensitive greens during summer. However, ensure they do not compete too much for nutrients in a container.

Experiment with a few companion plants in your containers. Observing their effects helps you create a balanced and resilient ecosystem in your mini garden.

Close-up of hands snipping dry, golden-brown seed heads from a bolted romaine lettuce plant in a terracotta pot on a patio table. A kraft paper bag ho

Efficient Seed Saving Basics for Salad Greens

Saving seeds from your favorite salad greens is a cost-effective and rewarding practice. It allows you to preserve specific varieties that thrive in your garden and promotes genetic diversity.

  1. Choose Open-Pollinated Varieties: Only save seeds from open-pollinated (OP) or heirloom varieties. Hybrid (F1) seeds will not reliably produce plants true to the parent.
  2. Allow to Bolt: Select a few healthy, vigorous plants from which you will not harvest leaves. Let them go to flower and form seeds.
  3. Collect Seeds: Once seed heads are dry and brittle (often turning brown), carefully snip them off. Place them in a paper bag or on a tray to dry completely in a cool, dark, well-ventilated area.
  4. Clean and Store: Separate the seeds from the chaff. Store them in airtight containers (jars or envelopes) in a cool, dark, dry place. Label clearly with the plant type and date.

Saving your own seeds connects you more deeply to the gardening cycle and makes your small-space garden even more sustainable and self-sufficient. Remember to maintain genetic purity by separating different varieties if they can cross-pollinate, especially with leafy greens like lettuce.

Small urban balcony garden corner with red lettuce in terracotta pot, arugula seedlings in fabric grow bag, and spinach in metal pot.

Frequently Asked Questions

How much sun do salad greens really need?

Salad greens generally need 4-6 hours of direct sunlight daily for optimal growth. In hotter climates or during peak summer, they benefit from partial shade during the intense afternoon hours. This prevents bolting and keeps leaves tender. Less than 4 hours often results in leggy growth and reduced yields.

Can I grow salad greens indoors during winter?

Yes, you can grow many salad greens indoors. Choose a sunny south-facing window or use supplemental grow lights. Ensure consistent temperatures, good air circulation, and proper watering. Loose-leaf lettuce, spinach, arugula, and microgreens are excellent choices for indoor cultivation, providing fresh greens even when it is cold outside.

Why are my salad greens bitter?

Bitterness in salad greens is primarily caused by stress. Common factors include hot weather, inconsistent watering (especially allowing the soil to dry out too much), and bolting (the plant sending up a flower stalk). To prevent bitterness, harvest leaves when they are young, provide adequate and consistent moisture, offer afternoon shade in summer, and plant heat-tolerant varieties for warm-season growing.

What is the best way to water container salad greens?

Water container salad greens deeply and regularly until water drains from the bottom. This encourages deep root growth. Check the soil moisture daily by sticking your finger an inch deep; water if it feels dry. Watering in the morning is ideal, as it allows foliage to dry, reducing disease risk. Avoid overhead watering to prevent fungal issues and ensure water reaches the roots directly.

When should I fertilize my container salad greens?

Begin fertilizing your container salad greens about 3-4 weeks after planting, once they have established themselves. Use a diluted liquid organic fertilizer balanced for leafy growth (e.g., a balanced NPK like 2-1-2) every 2-3 weeks. High-quality potting mixes often provide initial nutrients, so avoid over-fertilizing, which can also contribute to bitterness or weak growth.

With these strategies, your small space transforms into a highly productive salad garden. You enjoy fresh, homegrown greens year-round, minimizing waste and maximizing flavor. Embrace the cycle of planting, nurturing, and harvesting, and savor the simple joy of your own abundant salad bowl.

Categories
Sustainable & Eco-Friendly

Composting in Small Spaces: A Beginner’s Guide

You want to reduce waste and enrich your garden, even with limited space. Composting transforms kitchen and garden scraps into nutrient-rich soil amendment, a powerhouse for your plants. Many gardeners believe composting requires a large backyard, but you can successfully compost on a balcony, patio, or in a compact yard. This guide provides practical, actionable steps for anyone looking to embrace small-space composting, turning your everyday waste into garden gold.

Composting dramatically reduces landfill waste. Data from the Environmental Protection Agency shows that food scraps and yard waste constitute over 30% of what we throw away, a significant portion that could instead benefit your garden. Beyond waste reduction, compost improves soil structure, retains moisture, and suppresses plant diseases. You will discover how simple and rewarding composting can be, even with a mini compost bin or a compact balcony composting setup.

For research-based sustainable gardening guidance, see
Pollinator Partnership — Garden for Pollinators,
EPA WaterSense — Outdoor Water Use,
USDA NRCS — Soil Health,
Royal Horticultural Society (RHS) — Gardening Sustainably and
University of Minnesota Extension — Composting.

Disclaimer: This article is for informational purposes only and is not a substitute for professional advice. Check local regulations before installing rain capture, using greywater, or composting food scraps outdoors.

Hands adding coffee grounds and fruit peels to a compact compost bin on a sunlit urban balcony, surrounded by lush container plants.

Why Compost in a Small Space?

Your commitment to a greener lifestyle translates powerfully into small-space composting. You might think your balcony or tiny yard limits your composting options, but this is far from true. Many innovative systems allow you to efficiently process organic waste, yielding incredible benefits for your container garden and the environment.

Consider the impact you make. Every apple core or coffee ground you divert from the landfill reduces greenhouse gas emissions. When organic waste decomposes in landfills, it creates methane, a potent greenhouse gas. Composting, an aerobic process, produces significantly less methane. By choosing a mini compost bin, you directly contribute to mitigating climate change, a measurable environmental improvement.

Beyond environmental benefits, composting creates superior plant food. Your homemade compost improves soil structure, helping sandy soils retain water and nutrients, and loosening heavy clay soils for better drainage and root growth. It introduces beneficial microorganisms that enhance nutrient availability to your plants, leading to healthier, more robust growth. You save money on commercial soil amendments and potting mixes, a practical benefit for any gardener on a budget.

Finally, composting fosters a deeper connection with your garden. You see the full cycle of growth and decay, understanding how organic matter transforms into life-giving nutrients. This hands-on process empowers you to take control of your waste stream and directly impact your plants’ health. You transform what some consider trash into a valuable resource, proving that even in a small space, your sustainable choices have a big impact.

Three distinct mini compost bins on a patio – a bokashi, vermicomposter, and aerobic bin – with a hand gently resting on one, surrounded by small plan

Choosing Your Mini Compost Bin: Options for Every Small Space

Selecting the right small-space composting system depends on your living situation, comfort level with certain methods, and the amount of waste you generate. You have several excellent choices for balcony composting or compact yard setups. Each offers unique advantages, helping you find the perfect fit for your home.

Close-up of a hand gently revealing active red wiggler worms and decomposing food scraps in the top tray of a multi-tiered worm composting bin.

Worm Composting (Vermicomposting)

Vermicomposting uses specific types of worms, typically red wigglers (Eisenia fetida), to break down food scraps. It is an excellent option for apartments and balconies because it generates very little odor when managed correctly and produces nutrient-rich castings and “worm tea” (liquid leachate). A typical worm bin consists of stacked trays, allowing worms to migrate upwards as you add new food. You can place these bins indoors or outdoors in a shaded, protected spot. A standard worm bin, measuring about 1.5 to 2 cubic feet, easily handles the food scraps of a small household.

Compact 5-gallon Bokashi bin on a kitchen counter with a hand turning the spigot, draining amber liquid into a glass jar.

Bokashi Composting

Bokashi is an anaerobic (oxygen-free) fermentation process that pickles food scraps using a special bran inoculated with beneficial microbes. It breaks down all types of food waste, including meat, dairy, and cooked foods, which are typically avoided in traditional composting. Bokashi bins are compact, usually 5-gallon buckets with a spigot for draining liquid. This system is ideal for indoor use because it does not produce unpleasant odors. After fermentation, you bury the pickled scraps in your garden soil or mix them into a conventional compost pile to fully break down. This method excels at processing a wider range of food waste in a very small footprint.

A compact dark compost tumbler on its stand, nestled on a small paved patio surrounded by container herbs and flowers, under warm late afternoon light

Small Tumbler Composters

If you have a compact patio or a small yard, a mini compost bin in the form of a tumbler offers a convenient option. Tumblers are sealed, rotating drums mounted on a stand, making turning the compost easy and efficient. The sealed design helps control odors and prevents pests. They come in various sizes, with smaller models perfect for limited spaces. Tumblers require a balance of “greens” and “browns” and need regular turning. They heat up quickly, accelerating decomposition, and you can produce finished compost in as little as 4-6 weeks under ideal conditions.

A DIY static compost bin made from light wooden pallets sits on a paver patio, surrounded by potted plants, with an aerator leaning against it.

DIY Static Bins

For those with a bit more space, perhaps a corner of a patio or a small shed, you can construct a simple static bin. Use materials like old pallets, chicken wire, or even sturdy plastic storage bins with drilled holes for aeration. While these bins require manual turning with a pitchfork or aerator, they offer a cost-effective and flexible solution. You layer greens and browns and let nature do its work. Ensure proper ventilation and moisture levels for optimal decomposition. This option works well if you have a mix of kitchen scraps and some yard waste like dried leaves.

Consider your personal circumstances when making your choice. If you live in an apartment with no outdoor space, bokashi or vermicomposting are your best bets. If you have a small balcony, a compact tumbler or a well-managed worm bin works effectively. Each method helps you achieve your goal of sustainable, small-space composting.

A hand gently lifts the lid of a compact, dark-toned worm composting bin on a small balcony, showing worms and damp bedding among lush container plant

Balcony Composting with Worms: Your Vermicomposting Starter Kit

Vermicomposting, or worm composting, provides an elegant and efficient solution for balcony composting. It creates nutrient-rich castings, often called “black gold,” that significantly boost your container plants. Setting up a worm bin is straightforward, and with proper care, your worms will happily transform your food scraps into valuable fertilizer.

Hands gently release red wiggler worms onto moist, shredded paper bedding inside a compact, opaque DIY worm bin on a patio table.

Getting Started with Your Worm Bin

  1. Choose Your Bin: Purchase a multi-tray worm bin system or build one from opaque plastic storage containers. Ensure your bin has drainage holes at the bottom and a spigot for collecting leachate, the “worm tea.” Opaque materials keep light out, which worms dislike.
  2. Prepare Bedding: Fill the bottom tray with moist, shredded newspaper or cardboard. This bedding provides a habitat and carbon source for your worms. Aim for the consistency of a wrung-out sponge, moist but not dripping wet.
  3. Introduce Worms: Purchase red wigglers (Eisenia fetida), not common garden earthworms. You typically need about one pound of worms for a household of 1-2 people, which can process about half a pound of food scraps per day. Gently place them on top of the bedding.
  4. Acclimation Period: Let the worms settle into their new home for a few days before adding food. This allows them to explore and become comfortable.

Close-up of hands using a small trowel to bury finely chopped vegetable scraps into dark worm bin bedding on a patio.

Feeding Your Worms

Worms are surprisingly efficient eaters. They consume their body weight in food each day under ideal conditions. You want to feed them in small amounts, burying the food scraps under the bedding to prevent fruit flies and odors. Start with small quantities and gradually increase as your worm population grows and their consumption rate increases.

What to Feed Your Worms (Greens):

  • Fruit and vegetable scraps (excluding citrus in large quantities, as it can be too acidic)
  • Coffee grounds and filters
  • Tea bags (remove staples)
  • Crushed eggshells (adds grit for their gizzards)

What to Avoid (or add sparingly):

  • Meat, dairy, oily foods: These attract pests and create foul odors.
  • Citrus peels: Too acidic in large amounts; use sparingly.
  • Onion and garlic: Worms dislike these in large quantities.
  • Processed foods, bread, pasta: These can attract pests and mold quickly.
  • Diseased plants or pet waste: Avoid introducing pathogens.

Person on a balcony gently aerating bedding in a compact worm bin with a trowel, surrounded by container plants in dappled sunlight.

Maintaining Your Worm Bin

  • Moisture: Keep the bedding consistently moist. If it dries out, spritz with water. If too wet, add more dry shredded newspaper.
  • Aeration: Gently fluff the bedding periodically to ensure good airflow. Worms need oxygen.
  • Temperature: Maintain a temperature between 55-77°F (13-25°C). Extreme temperatures can harm or kill your worms. On a balcony, protect the bin from direct sun in summer and freezing temperatures in winter.
  • Odor Control: A healthy worm bin smells earthy. If you notice foul odors, you likely added too much food or too many “wet” materials, leading to anaerobic conditions. Reduce feeding, add more dry bedding, and gently aerate.

Vermicomposting offers a rewarding way to manage food waste and produce excellent compost directly on your balcony. You will find that these tiny engineers contribute immensely to your sustainable gardening efforts.

Modern light-gray bokashi bucket on a clean kitchen counter. A hand empties fruit peels and coffee grounds from a white ceramic scrap pail into it. Po

Bokashi Composting: Fermenting Food Scraps Indoors

Bokashi composting presents an innovative and odor-free method for processing food scraps directly in your kitchen or on your balcony, particularly useful for those who want to include meat, dairy, and cooked foods in their composting efforts. Unlike traditional composting, bokashi is a fermentation process, effectively pickling your food waste with beneficial microorganisms.

Elevated view into an open bokashi bucket on a patio table, kitchen scraps being layered with light brown bokashi bran. Small-space composting.

Understanding the Bokashi Process

Bokashi uses an anaerobic system, meaning it operates without oxygen. You layer your food scraps with a special bokashi bran, which is typically wheat bran inoculated with a mix of effective microorganisms (EM). These microbes ferment the food waste, breaking it down into a pre-compost material. This process does not create finished compost directly; instead, it prepares the food waste for rapid decomposition once introduced to soil or a traditional compost pile.

Close-up of hands sprinkling bokashi bran over food scraps inside a dark green bokashi bin on a weathered patio table, with potted plants in the soft

Setting Up Your Bokashi System

  1. Acquire a Bokashi Bin: Purchase a purpose-built bokashi bin, usually a 5-gallon bucket with an airtight lid and a spigot at the bottom. The spigot allows you to drain “bokashi tea,” a nutrient-rich liquid.
  2. Gather Bokashi Bran: Obtain a supply of bokashi bran, available from garden stores or online. This is the crucial ingredient that kickstarts the fermentation.
  3. Start Layering: Begin by sprinkling a layer of bokashi bran at the bottom of the bin.
  4. Add Food Scraps: Place your food scraps into the bin, pressing them down to remove as much air as possible. The less air, the better the fermentation.
  5. Sprinkle More Bran: After each addition of food scraps, sprinkle another layer of bokashi bran over them, ensuring good coverage.
  6. Seal and Ferment: Keep the lid tightly sealed between additions. Once the bin is full, seal it completely and let it ferment for 10-14 days. During this time, drain the “bokashi tea” every few days.

A rustic wooden cutting board holds a neat collection of diverse kitchen scraps: banana peel, apple core, coffee grounds, cooked chicken bone, pasta,

What You Can Compost with Bokashi

Bokashi’s strength lies in its ability to handle a broader range of food waste:

  • All fruit and vegetable scraps
  • Cooked and uncooked meat and fish
  • Bones (small bones break down, larger ones may remain)
  • Dairy products (cheese, yogurt)
  • Cooked grains, pasta, bread
  • Coffee grounds and tea bags

Person's hands gently water a rosemary plant in a terracotta pot on a sunny balcony with diluted bokashi tea.

Using Bokashi Tea and Fermented Scraps

The “bokashi tea” you drain is a potent liquid fertilizer. Dilute it with water at a ratio of 1:100 (1 part tea to 100 parts water) and use it to water your plants. Do not apply it undiluted, as it can be too strong. You can also use it to clean drains, as the microbes help break down organic buildup.

After the 10-14 day fermentation period, your food scraps will look mostly unchanged, but they will have a sweet, pickled smell. This is the “pre-compost.” You have several options for its final decomposition:

  • Bury in Garden Beds: Dig a trench in your garden, bury the bokashi pre-compost, and cover it with at least 6-8 inches of soil. It will break down completely within a few weeks.
  • Add to Container Gardens: Create a soil pocket in a large container, bury the bokashi, and cover it with soil. Allow a few weeks for decomposition before planting.
  • Incorporate into a Traditional Compost Pile: Mix the bokashi pre-compost into an existing hot or cold compost pile. It will accelerate the decomposition of other materials.

Bokashi offers a clean, efficient, and comprehensive approach to managing food waste, making it an excellent choice for anyone in a small space who wants to compost almost everything from their kitchen.

Eye-level view of a compact compost tumbler on a balcony with distinct piles of vibrant vegetable scraps (greens) and shredded paper/dry leaves (brown

What to Compost and What to Avoid: Balancing Your Bin

Achieving successful composting, especially in a mini compost bin, hinges on understanding the right balance of “greens” and “browns.” These terms refer to materials rich in nitrogen and carbon, respectively. A proper ratio ensures efficient decomposition, minimizes odors, and prevents pests. You want to aim for roughly a 2:1 or 3:1 ratio of browns to greens by volume for optimal results.

Person's hands tipping a bowl of fruit/vegetable scraps and coffee grounds into a small patio composting crock.

Understanding Greens (Nitrogen-Rich Materials)

Greens are generally fresh, moist materials that provide nitrogen. This element fuels the microorganisms that break down organic matter. Too many greens can make your pile wet and smelly, as excess nitrogen can lead to anaerobic conditions.

  • Fruit and vegetable scraps (peels, cores, wilted produce)
  • Coffee grounds and filters
  • Tea bags
  • Fresh grass clippings (use sparingly to avoid matting and odor)
  • Garden trimmings (non-diseased, fresh plant material)
  • Manure (from herbivores like rabbits, chickens, or horses, if available)

A stylish galvanized tub on a patio deck, holding a textured collection of composting browns: dry leaves, shredded cardboard, straw, pine needles.

Understanding Browns (Carbon-Rich Materials)

Browns are dry, woody materials that provide carbon. Carbon serves as an energy source for microbes and creates the necessary structure for air circulation within your compost pile. Without enough browns, your compost can become dense, oxygen-deprived, and stinky. With too many browns, decomposition slows down significantly.

  • Dry leaves
  • Shredded newspaper and cardboard (non-glossy, cut into small pieces)
  • Sawdust and wood shavings (from untreated wood, use sparingly)
  • Straw or hay
  • Pine needles
  • Dryer lint (from natural fibers)

Rustic patio table with compostable materials: fruit/veg scraps, coffee grounds (greens), dry leaves, shredded paper, eggshells (browns).

Compostable Materials Table

This table summarizes common compostable materials and their classification:

Greens (Nitrogen-Rich) Browns (Carbon-Rich)
Fruit & vegetable scraps Dry leaves
Coffee grounds & filters Shredded newspaper & cardboard
Tea bags Straw & hay
Fresh grass clippings Sawdust (untreated wood)
Spent plants & garden trimmings Pine needles
Eggshells (provide minerals & grit) Paper towels (non-chemical)

A small, green tumbling composter on a patio, with a plate of materials to avoid, including a chicken bone, diseased leaves, and weeds, next to it.

Materials to Avoid in Your Compost Bin

Certain materials can cause problems in a small-space compost bin, from attracting pests to introducing pathogens or chemicals. You must avoid these to maintain a healthy and efficient composting process.

  • Meat, bones, fish, and dairy products: These attract rodents and flies, create foul odors, and can carry pathogens. Bokashi composting offers an exception for these items.
  • Oils, fats, and greasy foods: They slow down decomposition, create anaerobic conditions, and attract pests.
  • Diseased plants: You risk spreading plant diseases to your healthy garden.
  • Weeds with seeds: Many small-space compost bins do not reach temperatures high enough to kill weed seeds, leading to new weed growth in your garden.
  • Pet waste (from carnivores): Dog and cat feces can contain harmful pathogens that are not reliably killed in home compost systems.
  • Treated wood or sawdust from treated wood: Chemicals in treated wood can be toxic to plants and soil organisms.
  • Coal or charcoal ash: Can contain heavy metals harmful to your plants.
  • Glossy paper or magazines: Often contain heavy metal inks and coatings you do not want in your compost.

By carefully selecting what goes into your compost bin and maintaining a good balance of greens and browns, you ensure a smooth, efficient process, producing high-quality compost for your small-space garden.

A woman kneels on a balcony, gently inspecting her open worm composting bin, assessing its contents for common issues.

Troubleshooting Common Composting Problems

Even seasoned composters encounter issues, and in a small space, effective troubleshooting becomes even more critical for maintaining a pleasant and productive system. You can easily address most common problems with a few practical adjustments.

Woman on a small balcony adding shredded cardboard to an open wooden compost bin containing damp kitchen scraps, next to potted plants.

1. Odors

Unpleasant smells are the most frequent concern, especially with balcony composting or indoor bins. You typically encounter two main types of odors:

  • Rotten egg/ammonia smell: This indicates too much nitrogen (greens) and not enough carbon (browns), or insufficient aeration. The pile is too wet and turning anaerobic.
  • Sour/pickled smell: Often characteristic of bokashi if the fermentation is too strong, or if liquid is not drained regularly.

Solutions:

  1. Add Browns: Mix in more dry, carbon-rich materials like shredded newspaper, dry leaves, or sawdust. This absorbs excess moisture and balances the carbon-nitrogen ratio.
  2. Increase Aeration: Turn your compost more frequently. For worm bins, gently fluff the bedding. For tumblers, rotate daily. This introduces oxygen, which is crucial for aerobic decomposition.
  3. Reduce Wet Scraps: Temporarily cut back on adding high-moisture food scraps.
  4. Drain Bokashi Tea: If using bokashi, ensure you drain the liquid every few days.

Hands drop cooked chicken skin into a waste bin, while a sealed countertop compost pail sits nearby, demonstrating proper food separation.

2. Pests (Fruit Flies, Ants, Rodents)

Attracting unwanted visitors is a major concern for small-space composting. You can prevent most pests with good management practices.

  • Fruit Flies: These often appear with exposed food scraps.
  • Ants: Attracted to sweet or sugary food waste.
  • Rodents (mice, rats): Drawn to meat, dairy, fats, and large food chunks.

Solutions:

  1. Bury Food Scraps: Always bury fresh food scraps deep within the compost pile or under worm bin bedding. This hides them from pests and helps them break down faster.
  2. Avoid Problematic Foods: Do not add meat, dairy, or oily foods to traditional compost bins. Bokashi handles these, but the fermented material should then be buried or processed further.
  3. Keep Bin Sealed: Ensure your compost bin or tumbler has a tight-fitting lid. Worm bins usually have lids that deter pests.
  4. Maintain Moisture: Keep the compost moist but not soggy. Excessively dry conditions can attract ants seeking water.
  5. Clean Exterior: Keep the area around your bin clean, free of spilled food.

Low-angle close-up of dry, chunky compost in a dark grey bin on a patio, with water being added from a small copper watering can, surrounded by blurre

3. Slow Decomposition

Your compost might seem to sit there without breaking down, taking much longer than expected.

Solutions:

  1. Check Moisture: Your compost needs to be consistently moist, like a wrung-out sponge. If it is too dry, decomposition slows significantly. Add water gradually. If too wet, add browns.
  2. Adjust Carbon/Nitrogen Ratio: An imbalance stalls decomposition. If it is too dry and woody, add greens. If it is soggy and smelly, add browns.
  3. Increase Aeration: Turning the pile regularly introduces oxygen, which is vital for the microbes that do the work. Small pieces break down faster.
  4. Chop Materials Smaller: The smaller the pieces of food scraps and browns, the faster they decompose. This increases surface area for microbial activity.
  5. Temperature: Traditional hot compost piles need to reach temperatures of 130-160°F (54-71°C) for rapid decomposition. Small-space bins might not reach these temperatures but should still feel warm. Ensure your bin is in a suitable temperature range.

By actively monitoring your compost and implementing these solutions, you can overcome common challenges and ensure a thriving small-space composting system that consistently produces valuable soil amendment for your garden.

Hands in gardening gloves gently mix dark, crumbly compost into a terracotta pot with a thriving basil plant on a sunny patio.

Harvesting and Using Your Small-Space Compost

After your diligent efforts in maintaining your mini compost bin, the exciting part arrives: harvesting your nutrient-rich compost. This “black gold” represents a significant achievement in sustainable gardening and provides immense benefits to your plants. Knowing when and how to harvest, then effectively using your compost, maximizes its impact on your small-space garden.

A close-up of dark, finely crumbled compost on a metal trowel, with blurry potted plants on an urban balcony in golden light.

Recognizing Finished Compost

You know your compost is ready when it exhibits these characteristics:

  • Appearance: It has a dark brown, crumbly texture, resembling rich soil. You should not see recognizable food scraps or plant materials, aside from possibly a few stubborn bits like avocado pits or corn cobs that take longer to break down.
  • Smell: It smells earthy and fresh, like forest floor soil. There should be no foul or sour odors.
  • Temperature: A mature compost pile will have cooled down to ambient temperature. If it still feels warm, it continues to actively decompose.

Person on a sunlit patio gently scraping dark, rich worm compost from a small pile on a tarp, with visible worms burrowing down.

Harvesting Methods for Different Bins

The harvesting process varies slightly depending on your compost system:

  1. Worm Bins (Vermicomposting):
    • Tray Method: In stacked tray systems, once the top tray is full of finished compost and worms have migrated to the new food in the tray above, you can remove the bottom tray’s contents.
    • Migration Method: Stop feeding one side of the bin and only add new food to the other. Worms will move to the food source. After a few weeks, you can harvest the finished compost from the unfed side.
    • Light Method: Spread finished compost on a tarp in the sun. Worms will burrow down to escape the light, allowing you to scrape off layers of compost from the top.

    You can gently pick out any remaining worms and return them to your bin.

  2. Tumbler Composters:

    Many tumblers have a hatch or door. Once the contents appear finished, simply open the hatch and shovel or pour out the compost. If you use a continuous batch tumbler, you will have finished compost at the bottom while newer material processes at the top.

  3. Bokashi Bins:

    Bokashi produces “pre-compost” rather than finished compost. As discussed, you will bury this material in soil or add it to a traditional compost pile for final decomposition. Allow several weeks after burying before planting directly into that spot.

Gloved hands gently mixing rich, dark compost into a lighter potting mix inside a large terracotta pot on a warm patio, surrounded by blurred containe

Using Your Harvested Compost in Small Spaces

Your finished compost is a versatile and valuable amendment for all your small-space gardening needs. You can integrate it in several ways to enhance plant health and soil vitality:

  • Potting Mix Amendment: Mix 10-20% compost into your peat-free potting mixes for container plants. This boosts nutrient content, improves water retention, and introduces beneficial microbes. For example, if you are filling a 10-gallon pot, use 1-2 gallons of compost mixed with your base potting medium.
  • Top Dressing: Apply a thin layer (0.5 to 1 inch) of compost around the base of your established container plants or in small raised beds. The nutrients will slowly leach into the soil with watering.
  • Seed Starting: While pure compost can be too rich for seed starting, you can mix a small amount (5-10%) into your seed-starting mix to provide gentle nutrients.
  • Compost Tea: Steep finished compost in water for a day or two to create a “compost tea.” Strain the liquid and use it as a nutrient boost for watering plants. You can also spray it on foliage as a mild foliar feed.

Regularly incorporating your homemade compost into your small garden creates a closed-loop system, where your waste continuously enriches your plants. You build healthier soil, reduce your ecological footprint, and cultivate a truly sustainable growing space.

Person drilling drainage holes into a vintage metal watering can on a sunny patio, surrounded by herbs in upcycled containers.

Composting Beyond the Bin: Other Waste Reduction Habits

Your commitment to composting in a small space demonstrates a broader dedication to waste reduction and sustainability. Extending this mindset beyond your compost bin amplifies your positive environmental impact. You can adopt several low-waste habits that complement your composting efforts, fostering a truly circular and eco-friendly garden.

Hands gently save dried tomato seeds into an envelope next to basil cuttings rooting in water on a small balcony table.

Seed Saving and Cuttings

Reducing waste in the garden starts with propagation. Instead of buying new plants every season, you can:

  • Save Seeds: Collect seeds from your favorite open-pollinated vegetables, herbs, and flowers. Dry them properly and store them in airtight containers for the next growing season. This reduces packaging waste and saves money. For instance, saving tomato seeds means you avoid buying new seed packets or seedlings.
  • Take Cuttings: Propagate many plants from cuttings. Herbs like rosemary, mint, and basil, and even some shrubs and succulents, root easily in water or moist soil. This creates new plants from existing ones, eliminating the need to purchase more. You can share extra cuttings with friends, further reducing overall consumption.

Variety of clean, upcycled containers like a labeled 5-gallon bucket, yogurt cups, and milk jugs arranged on a patio, ready for small-space gardening.

Upcycling Containers and Materials

Give new life to items that might otherwise end up in the recycling bin or landfill. You have many opportunities to creatively reuse materials in your small garden:

  • Repurpose Food Containers: Yogurt containers, milk jugs, and plastic clam shells make excellent temporary seed-starting pots or small plant protectors. Punch drainage holes in the bottom before use.
  • DIY Planters: Transform old tires, wooden crates, metal buckets (ensure no rust or sharp edges), or even sturdy fabric bags into unique and functional planters. Ensure they have adequate drainage. For example, a sturdy 5-gallon food-grade bucket becomes a perfect potato planter.
  • FSC-Certified Wood and Recycled Plastics: When purchasing new materials, opt for sustainably sourced options. Look for Forest Stewardship Council (FSC) certified wood for raised beds or trellises, ensuring responsible forestry practices. Choose planters made from recycled plastic, which reduces demand for virgin plastics and supports recycling initiatives.

Compact balcony with a decorative copper rain chain channeling water into a small rain barrel, surrounded by lush container plants on damp patio stone

Efficient Watering and Rain Capture

Water conservation significantly reduces your environmental footprint. Your efforts complement composting by reducing overall resource consumption:

  • Rain Capture: Install a small rain barrel or simple rain chain system on your balcony or patio to collect rainwater. This provides a free, chlorine-free water source for your plants. Even a modest setup can collect dozens of gallons during a single rain event, significantly reducing your reliance on municipal water.
  • Greywater Basics: Consider using lightly used household water, known as greywater, for non-edible plants. Greywater typically comes from sinks and showers (not toilets). Check local regulations before implementing a greywater system. Always use biodegradable, plant-safe soaps and detergents if you plan to use greywater in your garden.
  • Efficient Watering: Practice deep, infrequent watering to encourage strong root growth. Use mulch in containers to reduce evaporation. Drip irrigation or soaker hoses are ideal for efficient water delivery, minimizing waste compared to overhead sprinklers.

Two neighbors on a compact patio sharing compost from a small bin and a tray of herb seedlings, bathed in warm sunlight.

Sharing and Community Networks

Cultivate a sense of community to reduce waste and enhance your gardening experience:

  • Plant Swaps: Participate in local plant or seed swap events. You can exchange excess seedlings, cuttings, or saved seeds, ensuring nothing goes to waste and diversifying your garden for free.
  • Tool Lending: Share garden tools with neighbors to avoid unnecessary purchases. This reduces manufacturing and consumption of infrequently used items.
  • Compost Sharing: If you have excess compost, offer it to neighbors who might not be able to compost. This creates a local circular economy for organic materials.

By integrating these waste reduction habits, you extend your composting efforts into a comprehensive sustainable lifestyle, proving that even in a small space, you can make a substantial difference.

Hands gently lift the dark wooden lid of a compact vermicomposter on a light stone patio, with blurred container plants in golden hour light.

Frequently Asked Questions

How long does it take to make compost in a small space?

The composting timeline varies significantly by method and conditions. Vermicomposting can yield castings in 2-3 months. Small tumblers, if managed actively with good heat, can produce finished compost in 4-6 weeks. Static bins or passive balcony composting might take 3-6 months or longer. Factors like particle size, moisture, and the balance of greens and browns all influence the speed. Smaller pieces break down faster.

Does small-space composting attract pests or rodents?

Properly managed small-space composting generally does not attract pests. Burying food scraps under bedding or within the pile prevents fruit flies and eliminates odors that attract larger pests like rodents. Avoiding meat, dairy, and oily foods in traditional compost bins also deters unwanted visitors. Bokashi bins, being airtight, are especially good at preventing pest access during the fermentation stage.

Can I compost cooked food in a small apartment?

Yes, you can compost cooked food in a small apartment using a bokashi system. Bokashi effectively ferments cooked foods, including meat and dairy, without producing unpleasant odors. After fermentation, you then bury the bokashi pre-compost in garden soil or add it to an outdoor compost pile for final breakdown. Traditional worm bins or static piles are generally not recommended for cooked foods due to pest attraction and odor potential.

What do I do with the “worm tea” or “bokashi tea”?

“Worm tea” (liquid leachate from vermicomposting) and “bokashi tea” (liquid drained from bokashi bins) are both nutrient-rich liquids. You must dilute them before applying to plants. Dilute “worm tea” to a 1:10 ratio with water, and “bokashi tea” to an even weaker 1:100 ratio. Use these diluted solutions to water your plants for a beneficial nutrient boost. You can also use diluted bokashi tea to clean drains.

How often should I turn my small compost tumbler?

You should turn a small compost tumbler at least once every 2-3 days, or even daily for faster decomposition. Frequent turning aerates the compost, distributes moisture, and helps break down materials evenly. This regular aeration is crucial for maintaining aerobic conditions, which prevents odors and encourages rapid microbial activity. Consistency in turning will significantly accelerate the composting process.

Categories
Plant Care & Maintenance

Pruning Basics: How to Shape and Maintain Plants

Discover the art of plant pruning, a fundamental skill for any gardener, from beginner to experienced enthusiast. Pruning might seem intimidating, but you actually empower your plants to grow stronger, healthier, and more beautifully. You will find that simple, strategic cuts transform unruly growth into a vibrant, flourishing display. This guide demystifies plant pruning, offering practical, actionable insights for small-space and low-maintenance gardening.

Your garden, whether a tiny balcony or a compact backyard, benefits immensely from thoughtful plant pruning. You create optimal conditions for flowering, fruiting, and overall plant vigor. You also learn to manage plant size effectively. This approach not only enhances aesthetic appeal but also contributes to the longevity and productivity of your green companions. You are about to unlock the secrets to successful garden maintenance and cultivation.

Disclaimer: This article is for informational purposes only and is not a substitute for professional advice. Consult local extension services for region-specific recommendations.

Vibrant container tomato plant on a sunlit patio, heavily laden with ripe red tomatoes, showcasing robust health and abundant yield.

Why Pruning Matters for Your Plants

You engage in plant pruning for several vital reasons, all contributing to healthier, more robust plants and more effective garden maintenance. These benefits extend beyond simple aesthetics, impacting everything from yield to disease resistance. Understanding these fundamental benefits helps you approach pruning with confidence and purpose.

A vibrant balcony box of calibrachoa with dense new growth, numerous flower buds, and a hand gently touching fresh foliage.

Encourages New Growth

Pruning stimulates plants to produce new growth. When you remove old or spent stems, the plant redirects its energy to developing fresh foliage, flowers, or fruit. This process is particularly evident in many flowering shrubs and perennial plants. Removing the tips of branches, for example, encourages dormant buds further down the stem to activate and branch out, resulting in a bushier, fuller plant. For many plants, this also means more flowers or fruit, as new growth often bears these. Data from horticultural studies consistently shows that strategic pruning significantly increases the number of flowering sites on ornamental plants and the yield of many fruit-bearing plants.

A hand with pruners about to remove a dry, yellowing branch from a healthy bay laurel in a terracotta pot on a sunny patio.

Improves Plant Health and Vigor

You directly influence plant health through pruning. Removing dead, diseased, or damaged branches prevents the spread of pathogens and pests. A dead branch, for instance, serves as an entry point for disease and a haven for pests like borers. By eliminating these weak points, you protect the entire plant. You also improve air circulation within the plant canopy. Dense, overgrown foliage traps moisture and creates ideal conditions for fungal diseases like powdery mildew. Good air circulation dries leaves quickly, reducing disease risk. Proper air flow also allows more light to reach inner parts of the plant, promoting healthier growth throughout.

A perfectly shaped dwarf olive tree in a terracotta pot on a sun-drenched patio, demonstrating controlled growth and size.

Shapes and Maintains Desired Size

Pruning allows you to control the size and shape of your plants, essential for small-space gardening. You prevent plants from outgrowing their allocated space, whether in a container or a compact garden bed. Regular pruning helps maintain a desired form, from a neat, rounded shrub to a formal hedge. For example, a tomato plant benefits from consistent pruning to manage its vining habit and encourage fruit production, keeping it manageable in a small raised bed. You direct the plant’s growth, encouraging a balanced structure. This is particularly crucial for container plants, as it prevents them from becoming top-heavy and unstable. The Chicago Botanic Garden offers excellent resources on shaping various plant types for optimal display and health.

A potted dwarf blueberry bush on a sunny patio, abundant with ripe, glossy blueberries and fresh green growth.

Enhances Flowering and Fruiting

You can significantly boost flower and fruit production with correct pruning. Many flowering plants, especially those that bloom on new wood (like some roses or hydrangeas), benefit from dormant season pruning that encourages vigorous new growth. For fruit trees and bushes, selective pruning improves light penetration and air circulation, both critical for fruit development and ripening. You remove unproductive wood, allowing the plant to channel energy into the most promising branches. This practice can increase both the quantity and quality of your harvest. For instance, pruning blueberry bushes encourages larger, sweeter berries by removing older, less productive canes.

A recently hard-pruned Hydrangea shrub in a terracotta pot on a balcony, showing vibrant new green growth from its base.

Addresses Specific Plant Needs

Pruning also addresses unique issues your plants face. You correct imbalances in growth, remove crossing branches that rub and create wounds, or rejuvenate an old, overgrown plant that has become unproductive. Rejuvenation pruning, for example, involves cutting back a plant hard to stimulate entirely new growth from the base. This method transforms an old, leggy shrub into a compact, vigorous specimen. You adapt your pruning strategy to the specific plant and its current condition, ensuring targeted care for optimal results.

Woman kneeling on a patio, thoughtfully observing a rosemary plant in a terracotta pot before pruning, with pruners nearby.

Understanding Your Pruning Goals and Types

Before you make any cut, understand your specific objective. Different pruning techniques serve different purposes. You select the right method based on what you want to achieve for your plant’s health, appearance, and productivity. This strategic approach ensures you deliver beneficial rather than detrimental plant pruning.

Hands gently pinching off a faded purple petunia flower from a terracotta pot, vibrant new blooms surround it on an urban balcony.

Deadheading: Encouraging More Blooms

Deadheading involves removing spent flowers from a plant. When you deadhead, you prevent the plant from putting energy into seed production. Instead, it redirects that energy toward producing more flowers. This simple act often extends the blooming season significantly. Many annuals and perennials, such as petunias, marigolds, and coneflowers, respond well to deadheading, rewarding you with continuous flushes of color. You simply pinch or snip off the faded flower head just above a set of healthy leaves or a developing side shoot. This is one of the easiest and most impactful garden maintenance tasks you perform.

Sunlight pierces the thinned canopy of a dense dwarf olive tree in a terracotta pot on a patio, illuminating inner leaves. Freshly cut branches lay ne

Thinning: Improving Airflow and Light

Thinning removes entire branches or stems back to their point of origin, or to a main branch. You use this technique to reduce the density of the plant canopy, improving air circulation and allowing more light to penetrate the inner parts of the plant. Better airflow reduces the risk of fungal diseases, while increased light exposure promotes healthier growth and better flowering or fruiting. For instance, thinning the center of a dense shrub prevents fungal issues and allows the entire plant to thrive. You carefully select branches that are crossing, rubbing, or growing inward. The New York Botanical Garden provides excellent visual guides for thinning techniques on various plant structures.

A gardener's hands hold secateurs, poised to cut a lavender stem just above an outward-facing bud in a terracotta pot on a patio.

Shaping: Maintaining Form and Size

Shaping, also known as heading back, involves cutting back branches or stems to a lateral bud or branch. You use this to control the plant’s size, maintain a desired shape, or encourage bushier growth. When you cut back to a bud, that bud typically grows into a new branch, creating a denser plant. This technique is common for hedges, topiary, and maintaining the form of ornamental shrubs. You always cut just above an outward-facing bud to direct growth away from the center of the plant, promoting an open, healthy structure. This methodical approach ensures you keep your plants neat and compact, perfect for small spaces.

Severely pruned deciduous shrub in a terracotta pot on a balcony, with tiny new green shoots emerging from its woody base.

Rejuvenation Pruning: Revitalizing Old Plants

Rejuvenation pruning, sometimes called renewal pruning, involves severe cutting back of an old, overgrown, or unproductive plant. You perform this to stimulate vigorous new growth from the base or main stems. This method is effective for many deciduous shrubs that have become leggy, sparse, or stopped flowering well. You cut the entire plant back to within 6-12 inches of the ground or remove a third of the oldest, thickest stems each year over a three-year period. While drastic, this process often revitalizes the plant, resulting in a more compact, healthier, and more floriferous specimen. This technique requires patience, as the plant needs time to recover and regrow. Always research if your specific plant tolerates such drastic measures.

A person in gardening gloves carefully positions clean pruners above a distinct brown, diseased stem on a potted rosemary plant on a sunlit patio tabl

Removing Dead, Damaged, or Diseased Wood: Health First

This is arguably the most critical type of pruning for plant health. You remove any branches or stems that appear dead, broken, or show signs of disease. Deadwood offers no benefit to the plant and can harbor pests or diseases. Damaged branches are weak points susceptible to breakage and pathogen entry. Diseased wood, identified by cankers, discolored spots, or unusual growths, requires immediate removal to prevent the spread of the ailment to healthy parts of the plant. Always cut back into healthy wood, ensuring you remove all affected tissue. You disinfect your tools between cuts when dealing with diseased material to prevent spreading pathogens. This fundamental aspect of garden maintenance ensures your plants remain robust and vital.

A practical hand cleans bypass pruners on a wooden patio table, alongside other small garden tools and hygiene supplies.

Essential Pruning Tools and Hygiene

You need the right tools to prune effectively and safely. Using dull or incorrect tools causes damage to your plants and makes the task harder for you. Proper tool hygiene is equally critical for preventing the spread of diseases. Invest in quality tools; they are an investment in your garden’s health and your own efficiency.

Hands using bypass pruners to deadhead a pink fuchsia in a terracotta pot on a balcony, with anvil pruners in soft focus on a shelf.

Hand Pruners (Bypass and Anvil)

  • Bypass Pruners: These pruners feature two blades that bypass each other, much like scissors. They make clean, precise cuts that heal quickly. You use bypass pruners for live stems up to 3/4 inch thick. They are your go-to tool for most routine pruning tasks, including deadheading and shaping.
  • Anvil Pruners: Anvil pruners have a sharp blade that closes against a flat surface, or anvil. They are better suited for dead or woody stems, as they tend to crush rather than slice. You might use these for removing tough, dry branches but exercise caution on live wood to avoid damaging plant tissue.

Always choose bypass pruners for live plant material to ensure clean, healthy cuts. Quality hand pruners often last for years with proper care and sharpening.

Gardener pruning a dense rosemary bush in a terracotta pot on a sunny patio using long-handled bypass loppers, surrounded by container plants.

Loppers

Loppers resemble large hand pruners with long handles. You use them for branches too thick for hand pruners but too small for a saw, typically up to 1 1/2 to 2 inches in diameter. The long handles provide leverage, making it easier to cut through tougher branches. Loppers are excellent for thinning out dense shrubs or removing larger unwanted growth. Like hand pruners, bypass loppers are preferable for live wood.

Gardener's gloved hands using a folding pruning saw to cut a thick branch from a dwarf olive tree in a large patio container.

Pruning Saw

For branches thicker than 2 inches in diameter, you need a pruning saw. These saws come in various forms, including folding saws and bow saws. They are designed to cut through thick, woody material efficiently. You operate them with care to avoid injury and damage to surrounding branches. Always ensure the blade is sharp to make clean cuts, which minimizes stress on the plant and speeds up healing. For significant tree pruning, especially involving large branches, you might consider consulting a certified arborist.

Gloved hand carefully navigates thorny miniature rose branches in a terracotta pot on a sunlit patio, demonstrating protection and dexterity.

Gloves

Protect your hands from thorns, sap, and blisters by wearing sturdy gardening gloves. Look for gloves that offer good dexterity while still providing ample protection. Materials like leather or thick synthetic fabrics work well for pruning tasks.

Close-up of gardener's bare hands wiping silver bypass pruner blades with a white cloth and disinfectant solution on a patio.

Tool Hygiene: Preventing Disease Spread

Clean tools prevent the spread of diseases from one plant to another or from diseased parts to healthy parts of the same plant. You practice tool hygiene consistently:

  1. Clean Debris: After each use, wipe off sap, soil, and plant debris from your tools. A stiff brush or a rag works well.
  2. Disinfect Regularly: Disinfect your tools after pruning any diseased plant material or between pruning different types of plants. A solution of 70% isopropyl alcohol or a 10% bleach solution (1 part bleach to 9 parts water) works effectively. Dip or wipe the blades thoroughly and allow them to air dry or wipe them clean.
  3. Sharpen Blades: Sharp blades make clean cuts that heal quickly. Dull blades tear and crush plant tissue, leaving open wounds susceptible to pests and diseases. Sharpen your pruners and loppers regularly or have them professionally sharpened.
  4. Lubricate Moving Parts: Apply a light oil to the pivot points of your pruners and loppers to keep them moving smoothly and prevent rust.

These simple steps in tool care extend the life of your equipment and safeguard the health of your garden. Consistent garden maintenance includes caring for your tools.

A vibrant, sun-drenched balcony container garden with a rose bush displaying faded and new buds, alongside other thriving plants.

When to Prune: A Seasonal Guide for Optimal Growth

Timing is crucial in plant pruning. Pruning at the wrong time stresses your plants, potentially reducing flowering, fruiting, or even harming their health. You align your pruning schedule with your plants’ natural growth cycles to achieve the best results.

Gardener pruning a dormant 'Little Lime' Hydrangea in a terracotta pot on a brick patio, showing clear view of bare branches.

Late Winter to Early Spring (Dormant Season)

This period, before new growth begins, is often the best time for general plant pruning for many deciduous trees and shrubs. The plants are dormant, minimizing stress. You easily see the plant’s structure without leaves obstructing your view, allowing for more strategic cuts. This is an ideal time for:

  • Structural Pruning: Removing dead, damaged, or crossing branches.
  • Shaping and Size Reduction: For plants that bloom on new wood (e.g., Hydrangea paniculata, many roses, butterfly bush, crape myrtle). Pruning them now encourages vigorous new growth that will produce flowers later in the season.
  • Rejuvenation Pruning: For overgrown shrubs that tolerate hard cutting back.
  • Fruit Trees: Many fruit trees benefit from dormant pruning to improve structure and promote fruit production.

Avoid pruning spring-flowering plants (like lilacs, forsythia, rhododendrons) during this period, as you would cut off their flower buds formed on old wood from the previous year.

A person in gloves prunes a containerized Hydrangea macrophylla with spent blue blooms and new leaves on a sunlit urban patio.

Late Spring to Early Summer (After Spring Bloom)

After spring-flowering shrubs finish blooming, you can prune them without sacrificing their flowers for the current season. This window allows the plant enough time to recover and set buds for the following year. Examples include:

  • Spring-Flowering Shrubs: Lilacs, forsythia, azaleas, rhododendrons, and some hydrangeas (e.g., Hydrangea macrophylla, which blooms on old wood).
  • Deadheading: Many perennials and annuals benefit from deadheading throughout their blooming period to encourage continuous flowering.
  • Light Shaping: You can perform light shaping on evergreens to maintain their form.

You still focus on removing any dead or diseased wood whenever you notice it, regardless of the season. The Royal Horticultural Society (RHS) provides detailed pruning calendars for various plant species, ensuring you prune at the optimal time.

A gardener's hands pinch back vibrant basil in a terracotta pot on a sun-dappled patio, with other container plants in soft focus.

Mid-Summer to Late Summer

During this period, you typically perform lighter pruning. You might:

  • Deadhead: Continue deadheading to prolong bloom cycles.
  • Light Shaping: Pinch back leggy annuals or perennials for bushier growth.
  • Remove Suckers and Water Sprouts: These are vigorous, often unsightly, growths that divert energy from the main plant. You remove them promptly when you see them.
  • Pinch Herbs: Pinching back herbs encourages more bushy growth and prevents them from flowering too early, which often diminishes leaf flavor.

Avoid heavy pruning in late summer, especially for woody plants. New growth stimulated by late pruning might not harden off before winter frosts, leading to damage. This is a crucial point for garden maintenance in colder climates.

A gardener, seen from a slight distance, prunes dried perennial foliage in a large terracotta pot on a compact fall patio, with other containers nearb

Fall

For most plants, fall is generally the least ideal time for heavy pruning, particularly in regions with cold winters. Heavy pruning stimulates new growth, which is tender and vulnerable to frost damage. You risk plant injury or death when new shoots are hit by freezing temperatures. However, some exceptions exist:

  • Removing Dead or Diseased Wood: You can always remove dead, damaged, or diseased wood when you observe it, regardless of the season.
  • Perennial Cutbacks: Many herbaceous perennials benefit from being cut back to the ground after they die back naturally in the fall. This cleans up the garden and removes potential overwintering sites for pests.

For a detailed seasonal pruning guide tailored to specific plant types and regions, consult resources like the University of Minnesota Extension, which offers localized advice.

Close-up of bypass pruners making a clean, diagonal cut on a basil stem in a terracotta pot on a sunny balcony.

How to Prune: Step-by-Step Techniques for Healthy Cuts

Making the right cut is as important as choosing the right time. Your goal is to make clean cuts that minimize damage to the plant and promote quick healing. Master these techniques for effective plant pruning.

Gardener's gloved finger gently traces the branch collar on a container rose bush stem, highlighting the swollen joint before pruning.

Understand the Plant’s Anatomy

Before you make a cut, observe your plant. Identify the main stem, lateral branches, buds, and branch collars. The branch collar is the swollen area at the base of a branch where it attaches to a larger stem. This collar contains specialized cells that help the plant heal over the wound. You must avoid cutting into or removing this collar.

Close-up of sharp secateurs making a precise 45-degree heading cut just above an outward-facing bud on a fuchsia plant in a terracotta pot.

Making the Cut: General Principles

  1. Use Sharp, Clean Tools: As discussed, sharp tools make clean cuts. Dull tools tear and bruise plant tissue, creating ragged wounds that are slow to heal and invite disease.
  2. Cut at the Right Angle:
    • For heading cuts (cutting back to a bud): You cut at a 45-degree angle, about 1/4 inch above an outward-facing bud. The angle ensures water sheds off the cut surface, preventing rot. Ensure the bud faces the direction you want new growth to go.
    • For thinning cuts (removing an entire branch): You cut back to the branch collar. Avoid flush cuts (cutting too close to the main stem) or leaving stubs. The branch collar facilitates wound closure.
  3. Avoid Damaging the Branch Collar: The branch collar is vital for wound healing. You must not cut into it. When removing a branch, locate the collar and make your cut just outside it, ensuring the collar remains intact.
  4. Consider the Three-Cut Method for Large Branches: For branches larger than an inch in diameter, use the three-cut method to prevent bark tearing.
    1. First Cut (Undercut): You make an undercut on the bottom side of the branch, about 6-12 inches away from the trunk. Cut about one-third of the way through the branch. This prevents the bark from tearing down the trunk when the branch falls.
    2. Second Cut (Top Cut): You make a top cut a few inches further out from the undercut. Cut completely through the branch. The branch will fall, leaving a short stub.
    3. Third Cut (Final Cut): You carefully remove the remaining stub by cutting just outside the branch collar, without damaging it.

    This method ensures a clean, healthy final cut.

  5. Remove Dead, Damaged, or Diseased Wood First: Prioritize these cuts to improve plant health immediately. Cut into healthy wood, ensuring no diseased material remains.
  6. Step Back and Assess: After a few cuts, step back and evaluate the plant’s overall shape. This helps you make informed decisions about subsequent cuts, maintaining balance and desired form.

A gardener observes diverse container plants, including rosemary, fuchsia, and petunias, on a sunlit patio, holding pruners thoughtfully.

Pruning Different Plant Types: Specific Considerations

While general principles apply, specific plant types require tailored pruning strategies. You adapt your techniques to suit the unique growth habits and flowering patterns of your plants. This ensures optimal results for each species in your garden.

Close-up of hands gently pinching a growth tip on a cascading Pothos plant in a terracotta pot on a sunny indoor shelf.

Indoor Plants

Indoor plants often benefit from light, regular pruning to maintain their size and shape, encourage bushiness, and remove yellowing or damaged leaves. You:

  • Pinch Back: For plants like Pothos, Philodendron, or coleus, pinch back the growing tips to encourage branching and a fuller appearance.
  • Remove Dead/Yellowing Leaves: You regularly remove any discolored or dead leaves at their base to improve aesthetics and prevent potential pest or disease issues. This also frees up the plant’s energy for healthy growth.
  • Shape: If your plant becomes leggy (long stems with sparse leaves), you can cut back stems to a leaf node to encourage new growth from that point. You control the plant’s overall size and spread, essential for small indoor spaces.
  • Air Pruning (for roots): For plants that tend to become root-bound (roots circling tightly around the pot), consider root pruning during repotting. You gently loosen and trim off some of the outer, circling roots to encourage fresh root growth.

Indoor plant pruning is often a continuous, light garden maintenance task rather than a seasonal event.

Person kneeling on a patio, pruning a bare Hydrangea in a large terracotta pot with bypass pruners.

Shrubs

Shrub pruning depends heavily on their flowering time:

  • Spring-Flowering Shrubs (e.g., Lilac, Forsythia, Azalea): These bloom on old wood (growth from the previous year). You prune them immediately after they finish flowering in late spring or early summer. Pruning too late in the season removes their flower buds for the next year. You remove the oldest, least productive stems at the base to encourage new, vigorous growth.
  • Summer-Flowering Shrubs (e.g., Hydrangea paniculata, Rose of Sharon, Butterfly Bush): These bloom on new wood (growth from the current year). You prune them in late winter or early spring before new growth begins. This encourages strong new shoots that will bear flowers.
  • Evergreen Shrubs (e.g., Boxwood, Holly): You generally prune these for shaping and size control. Light pruning can occur throughout the growing season. Heavy pruning is best done in late winter or early spring before new growth or in mid-summer after a flush of growth, allowing time for new growth to harden off before winter.

For more detailed shrub-specific guidance, consult resources from botanical gardens like the Chicago Botanic Garden, which often publish guides for local climates and plant types.

Person carefully pruning a small, vibrant dwarf Meyer lemon tree in a terracotta pot on a sunlit urban patio, using hand pruners.

Small Trees

For small trees suitable for home gardens, you focus on structural integrity and removing problematic branches.

  • Young Trees: You establish a strong central leader (main trunk) and well-spaced scaffold branches (main lateral branches). You remove competing leaders, weak or narrow-angled branches, and any crossing or rubbing branches.
  • Mature Trees: You primarily remove dead, diseased, or damaged limbs. You also address branches that interfere with structures, pathways, or utility lines.
  • Fruit Trees: Fruit trees require specific pruning techniques to balance vegetative growth with fruit production. This often involves thinning out branches to improve light penetration and air circulation, and cutting back vigorous shoots to encourage fruiting spurs. Pruning typically occurs during dormancy for most deciduous fruit trees.

For significant tree work, especially on larger trees or those near power lines, always consider hiring a certified arborist. They possess the expertise and equipment for safe and effective tree pruning.

Close-up, high-angle shot of clean pruners snipping a faded purple Verbena flower from a terracotta pot on a sunny balcony.

Perennials

Perennials generally require less complex pruning than woody plants, but specific practices enhance their performance.

  • Deadheading: As mentioned, removing spent flowers encourages more blooms and prevents unwanted self-seeding (e.g., delphiniums, coreopsis, cosmos).
  • Pinching Back: For taller or leggy perennials like asters or chrysanthemums, pinching back the growing tips in early summer promotes bushier growth and more flowers, often delaying bloom slightly but resulting in a stronger plant less prone to flopping.
  • Cutback: Many herbaceous perennials benefit from being cut back to the ground after they die back in the fall or in early spring before new growth emerges. This removes old foliage that might harbor pests or diseases and clears the way for fresh growth.
  • Divide: While not strictly pruning, dividing overgrown perennial clumps every few years rejuvenates the plant and manages its size. You dig up the clump, divide it into smaller sections, and replant.

Understanding the specific needs of each perennial helps you apply the most effective pruning tips for a thriving garden.

Close-up of a container shrub on a sunny balcony, showing a dried pruning stub. A hand hovers above, observing the past mistake.

Common Pruning Mistakes and How to Avoid Them

Even experienced gardeners make mistakes. Recognizing common pruning pitfalls helps you avoid them, ensuring your plants remain healthy and vigorous. You prevent unnecessary stress and damage to your beloved garden specimens.

Close-up of freshly pruned shrub branches with undeveloped flower buds lying on a wooden patio table next to bypass pruners, with a sparse container p

Cutting at the Wrong Time

Mistake: Pruning spring-flowering shrubs in late winter or fall.
Impact: You remove the flower buds that formed on last year’s growth, resulting in no flowers for the current season.
Solution: Prune spring-flowering shrubs immediately after they finish blooming. For summer-flowering shrubs that bloom on new wood, prune in late winter or early spring before new growth emerges. You always consult a plant-specific pruning guide to confirm optimal timing.

Close-up of a hand pointing to correct, stub, and flush pruning cuts on a potted plant branch on a sunlit patio.

Leaving Stubs or Making Flush Cuts

Mistake: Leaving a short stub of a branch or cutting a branch flush (too close) to the main stem.
Impact: Stubs die back and become entry points for pests and diseases, as the plant cannot effectively seal off the wound. Flush cuts remove the branch collar, which contains healing tissue, leaving a larger, slower-healing wound.
Solution: Always locate the branch collar, the slightly swollen area where a branch meets a larger branch or the trunk. You make your cut just outside this collar, preserving it so the plant can compartmentalize (seal off) the wound effectively. For smaller stems, cut 1/4 inch above an outward-facing bud.

A gardener's hands carefully clean a bypass pruning shear blade with a cloth on a sunlit wooden potting bench amidst patio container plants.

Using Dull or Dirty Tools

Mistake: Pruning with dull, unsharpened tools or contaminated tools.
Impact: Dull blades tear and crush plant tissue, creating ragged wounds that are difficult for the plant to heal and more susceptible to disease. Dirty tools spread pathogens from one plant to another.
Solution: You ensure your pruning tools are always sharp and clean. Sharpen blades regularly and disinfect them, especially between plants or after cutting diseased material. This proactive garden maintenance prevents many problems.

A sparse, over-pruned lavender plant in a terracotta pot on a patio, contrasting with lush, healthy container plants in the background.

Over-Pruning (Removing Too Much)

Mistake: Removing too much of the plant’s canopy at once. A common rule of thumb is not to remove more than 25-30% of a plant’s total foliage in a single season.
Impact: Over-pruning stresses the plant, reducing its ability to photosynthesize (produce food). This can weaken it, make it more vulnerable to pests and diseases, or even cause its death.
Solution: You approach pruning gradually. Assess the plant before you start, and make strategic, thoughtful cuts. Spread heavy pruning over several seasons if significant reduction is necessary. For rejuvenation pruning, ensure the plant type tolerates such drastic measures.

A container shrub on a patio, severely sheared into an unnatural, dense ball, showing no flowers and hinting at a sparse, unhealthy interior.

Shearing Instead of Selective Cuts

Mistake: Shearing shrubs uniformly like a hedge, especially those not meant for formal shaping.
Impact: Shearing promotes dense growth on the outside of the plant, shading out the interior. This results in a thick, unproductive outer shell and a sparse, dead interior. It also removes all potential flower buds on many shrubs.
Solution: You use selective pruning techniques like thinning and heading back to individual buds or branches. This maintains a natural shape, promotes healthy growth throughout the plant, and encourages better flowering. While shearing works for formal hedges, most ornamental shrubs benefit from more thoughtful, selective cuts.

Person's hand adds green plant trimmings to a small wooden compost bin on a sunny urban balcony, surrounded by vibrant container plants.

Sustainable Pruning Practices for a Healthier Garden

Your gardening habits impact the environment. Adopting sustainable plant pruning practices benefits your plants and contributes to a healthier ecosystem. You reduce waste, conserve resources, and support biodiversity in your garden.

A compact compost tumbler on an urban patio, with a small pile of green pruning waste and spent flowers on a paver next to it.

Composting Pruning Waste

Instead of sending pruning debris to the landfill, you can compost most of it. Small branches, leaves, and spent flowers are excellent additions to your compost pile. They decompose, returning valuable nutrients to your garden as rich, organic compost. You avoid composting diseased material, as pathogens can survive the composting process and spread back into your garden. Woody stems benefit from being chopped into smaller pieces to speed up decomposition. This simple act reduces waste and creates a valuable soil amendment, aligning with environmentally conscious garden maintenance.

Close-up of hands organizing dry, thin woody prunings into a galvanized bucket on a patio, with a fire pit blurred in background.

Using Prunings for Mulch or Kindling

Larger woody prunings, unsuitable for composting, find other uses. You can chip branches to create mulch, which conserves soil moisture, suppresses weeds, and moderates soil temperature. This repurposes garden waste into a beneficial resource. Alternatively, clean, dry woody stems make excellent kindling for fire pits or fireplaces, providing warmth and reducing your reliance on purchased fire starters. You turn waste into a resource, closing the loop in your garden’s ecosystem.

Gardener's hands gently prune a vibrant dwarf rose in a terracotta pot on a sun-dappled patio, showing proactive plant care.

Minimizing Chemical Use

Healthy, properly pruned plants are more resilient to pests and diseases. This reduces your reliance on chemical pesticides and fungicides. When you prune effectively, you improve air circulation and light penetration, creating an environment less hospitable to many common plant problems. If you encounter disease, you prune out affected parts and disinfect tools, often eliminating the need for chemical treatments. You prioritize prevention through good cultural practices, minimizing your environmental footprint.

A small native bee explores dried stems of a Sedum plant in a terracotta pot, surrounded by other diverse containers and a vertical herb garden on a s

Supporting Pollinators and Wildlife

Consider the impact of your pruning on local wildlife. For instance, some beneficial insects and birds use old stems as nesting sites or for overwintering. You can leave some hollow stems standing over winter for native bees or delay cutting back perennials until early spring. When you prune, you assess if the removal is truly necessary or if a slightly less manicured appearance benefits the local ecosystem. You create a more biodiverse and resilient garden by making informed decisions that consider both your plants and the creatures that depend on them.

Well-pruned rosemary bush in a terracotta pot on a sunny balcony, its open canopy and moist soil indicating efficient water use.

Water-Wise Pruning

Proper pruning also contributes to water conservation. By maintaining a healthy plant structure, you reduce unnecessary vegetative growth that requires additional water. Thinning dense canopies can also improve the efficiency of watering, allowing moisture to reach the root zone more directly. Furthermore, healthy, unstressed plants tolerate periods of drought better than weak, overgrown ones. Your careful plant pruning helps your garden become more water-wise and resilient.

Woman on patio reads phone, glancing at potted rosemary. Container plants & vertical garden in background.

Frequently Asked Questions

What is the difference between pinching and pruning?

Pinching involves removing the soft, growing tip of a stem, typically with your fingers. You do this to encourage bushier growth or more flowers, common for annuals and some perennials. Pruning, on the other hand, involves removing larger, woody stems or branches using tools like pruners, loppers, or saws. Pruning aims to shape, maintain health, or remove significant portions of a plant.

Should I prune a newly planted tree or shrub?

For newly planted trees and shrubs, you generally limit initial pruning to removing only dead, damaged, or crossing branches. You allow the plant to establish its root system and settle into its new environment before performing significant shaping or structural pruning. Heavy pruning immediately after planting can stress the plant and hinder establishment. The exception is sometimes for bare-root plants, where you might trim roots or thin out some top growth to balance the root-to-shoot ratio.

What are suckers and water sprouts, and should I remove them?

Suckers are vigorous shoots that grow from the roots or base of a plant, often from below the graft union on grafted plants (where the desired plant is joined to a different rootstock). Water sprouts are fast-growing, upright shoots that emerge from latent buds on older wood of trees or shrubs, often due to stress or improper pruning. You generally remove both suckers and water sprouts because they divert energy from the main plant, can be unsightly, and often produce inferior fruit or flowers. Cut them back flush to their point of origin to prevent regrowth.

How can I tell if a branch is dead or alive?

You can usually identify a dead branch by its appearance. It often looks brittle, lacks buds, and appears gray or brown. You can perform a scratch test: gently scratch a small bit of bark off the stem. If you see green underneath, the branch is alive. If it’s brown and dry, the branch is dead. For very small stems, you can try bending it; a dead stem snaps easily, while a live one is more flexible.

Is it okay to prune in winter?

Yes, winter, specifically late winter while plants are dormant, is often the ideal time for significant pruning of many deciduous trees and shrubs. The absence of leaves allows you to see the plant’s structure clearly, and the plant experiences less stress during dormancy. You typically prune plants that flower on new wood in winter. However, you avoid pruning spring-flowering plants at this time, as you would remove their developing flower buds.

Categories
Garden Design & Ideas

How to Design a Balcony Garden That Feels Like a Room

Your balcony, patio, or compact yard offers more than just outdoor space. It represents an incredible opportunity to extend your living area, creating a true outdoor room. Instead of a collection of scattered pots, envision a cohesive, inviting space that functions as an integral part of your home. This approach transforms a simple gardening spot into an outdoor living space, enhancing your enjoyment and potentially even your property value.

Designing a balcony garden to feel like a room requires thoughtful planning, much like decorating an indoor space. You define zones, choose furniture, select a color palette, and consider lighting. The key lies in applying interior design principles to your outdoor area, making it feel intentional, comfortable, and beautiful. This guide equips you with practical, actionable insights to achieve that harmonious balance, focusing on small-space solutions and low-maintenance strategies. We will help you create a container design that provides beauty and functionality, allowing you to relax and thrive in your personalized green oasis.

A person sits on a balcony with a journal and mug, surrounded by diverse container plants, envisioning their outdoor room's purpose.

Envisioning Your Outdoor Room: Starting with Purpose

Before you choose a single plant or pot, define the primary purpose of your balcony garden. This initial step shapes every subsequent design decision. Are you dreaming of a tranquil reading nook, an al fresco dining spot, a lively entertaining area, or a productive edible garden? Your answer dictates the type of furniture, the necessary clearances, and even the plant choices you make.

Begin by asking yourself a few key questions:

  • What activities do you want to do here? Consider relaxing with a coffee, dining with a partner, working on a laptop, practicing yoga, or simply enjoying the quiet.
  • How many people will typically use the space? This impacts seating arrangements and table sizes.
  • What time of day will you use it most? Morning sun might call for different plant choices than afternoon shade. Evening use necessitates effective lighting.
  • What is your current view like? Do you want to enhance a pleasant vista or screen an unsightly one?
  • What is your budget? Set realistic expectations for furniture, containers, and plants.
  • How much maintenance are you willing to commit? Be honest about the time and effort you can realistically dedicate to watering, pruning, and general care. This will heavily influence your plant selection and irrigation strategy.

For example, if you envision a peaceful retreat, you might prioritize comfortable seating, soft lighting, and fragrant plants. If dining is your goal, a sturdy table, comfortable chairs, and maybe some culinary herbs become central. Documenting these preferences provides a clear roadmap for your balcony garden design, ensuring the final result truly feels like an extension of your indoor life.

Elevated view of a small urban balcony at golden hour, featuring distinct zones: a bistro table and chair in one corner, and a vertical herb garden wi

Small-Space Layouts and Zoning: Defining Your Balcony’s Function

Even the smallest balcony benefits from strategic layout planning, much like an efficient kitchen or cozy bedroom. The goal is to define functional areas, or “zones,” that serve your desired activities while maintaining clear circulation. This thoughtful approach prevents a cluttered look and maximizes usability.

A narrow urban balcony organized into distinct zones, featuring a cozy bistro set on a rug and a lush planting area with vertical planters and pots.

Defining Zones

Mentally divide your balcony into distinct areas. A typical small balcony might feature two primary zones:

  1. The Living/Seating Zone: This is where you place your furniture. Choose pieces scaled to your space. Bistro sets, compact loveseats, or foldable chairs work well. Ensure comfortable seating forms the core of your outdoor room.
  2. The Planting Zone: This area holds your containers, trellises, and vertical gardens. It provides the lush backdrop and green ambiance.

For larger spaces, you might add a third zone for storage, a small water feature, or even a compact grilling station. The key is to avoid overstuffing your balcony. Less is often more in small spaces.

A woman walks along a clear, wide pathway between container plants and a bistro chair on a sunlit urban balcony, carrying a watering can.

Ensuring Smooth Traffic Flow

Just as you navigate your home, you need clear paths on your balcony. Obstructions make a space feel cramped and unwelcoming. Aim for a minimum of 24 to 30 inches (60-75 cm) for comfortable passage between furniture pieces and planting areas. Test your layout by walking through it before making permanent decisions. Can you easily access all your plants for watering? Can guests move without bumping into pots?

Five varied potted plants—tall grass, trailing ivy, flowering plant, coleus, succulents—grouped artfully on a balcony side table at golden hour.

Strategic Container Groupings

Avoid scattering individual pots randomly. Instead, group containers together. Grouping creates visual impact and makes watering more efficient. Think of these groupings as mini-arrangements or vignettes. For a balanced, aesthetically pleasing look, gardeners often group containers in odd numbers, such as three or five. Vary the heights and sizes within each grouping to add dynamism and depth, preventing a flat, uninteresting display.

A person seated and another standing at a bistro table on a small urban balcony, demonstrating comfortable chair-to-table clearance amidst container p

Seating Clearances

Consider the space you need around seating. If you have a table, allow at least 18 to 24 inches (45-60 cm) from the table edge to the back of a chair for comfortable dining. For lounge chairs, ensure enough space to fully recline or extend your legs without hitting a plant or railing. Planning these clearances ensures your outdoor room feels genuinely functional, not just decorative.

View from an apartment looking onto a small balcony garden. A striking Bird of Paradise plant in a white ceramic pot serves as the clear focal point.

Focal Points and Sightlines: Guiding the Eye

Every well-designed room, indoors or out, benefits from a focal point. This is the first thing your eye notices upon entering the space, or when looking out from your indoor living area onto the balcony. A strong focal point provides visual interest, anchors the design, and prevents the space from feeling chaotic or undefined.

A dwarf olive tree in a terracotta pot anchors the far end of a narrow urban balcony with a wicker armchair and warm wood decking.

Creating Your Balcony’s Star Attraction

Your focal point could be:

  • A striking plant: A tall, architectural plant like a dwarf bamboo, an olive tree, or a vibrant bougainvillea.
  • A piece of art: A weather-resistant sculpture, a unique wall hanging, or a decorative mirror.
  • A water feature: A small, recirculating fountain offers both visual appeal and a soothing sound element.
  • A comfortable seating arrangement: A stylish chair with inviting cushions, positioned to overlook a pleasant view.

Position your chosen focal point strategically. It should draw the eye without overwhelming the small space. Often, placing it at the far end of a narrow balcony creates a sense of depth and makes the space appear longer.

View from inside a bright living room, looking through a glass door to a balcony with a curated grouping of container plants and an outdoor lantern.

Designing from the Inside Out

Consider how your balcony garden looks from inside your home. This internal view is often your most frequent interaction with the space, especially during cooler months. Design the balcony to be an attractive visual extension of your interior. Place a beautiful container grouping, a captivating plant, or a piece of outdoor art directly in line with a window or door, ensuring a pleasant view year-round.

Tall potted dwarf olive tree and wall-mounted planter creating eye-level interest on a small, urban balcony, defining the outdoor 'room'.

Eye-Level Anchors

While floor-level pots are essential, incorporating elements at eye level adds another layer of interest. Use wall-mounted planters, hanging baskets, or tall containers to bring plants up. This not only creates vertical interest but also helps define the “walls” of your outdoor room. An eye-level plant or decorative element can act as a secondary anchor, drawing attention and enhancing the room-like feel.

Asymmetrical container garden on a small urban balcony, featuring a tall plant balancing a cluster of lower pots and a teal bistro chair.

Symmetry Versus Asymmetry

You can approach your layout with either symmetry or asymmetry, depending on your desired aesthetic:

  • Symmetry: Achieves a formal, balanced, and orderly look. Place identical or similar elements on opposite sides of a central axis, for example, two matching tall planters flanking a doorway or a bench. Symmetry brings a sense of calm and structure, making a small space feel more composed.
  • Asymmetry: Creates a more natural, dynamic, and relaxed feel. It balances elements of different sizes, shapes, and textures to achieve equilibrium without mirroring. For instance, a tall, slender plant on one side could balance a wider, lower grouping of pots on the other. Asymmetry adds visual intrigue and can make a small space feel less rigid.

Neither approach is inherently superior; the best choice depends on the architectural style of your home and your personal taste. Whatever you choose, ensure balance so the space does not feel lopsided.

Elevated view of a lush, multi-layered urban balcony garden featuring dense vertical wall planters, overflowing railing boxes, and hanging plants.

Vertical Gardening and Layering: Maximizing Your Dimensions

In a small outdoor space, thinking vertically is not just an option, it’s a necessity. Your balcony walls, railings, and even the air above your head offer valuable real estate for planting. Harnessing these “third dimensions” allows you to pack more greenery into a compact area, creating a lush, immersive garden that truly feels like a room.

A balcony wall with a dark wooden trellis supporting purple clematis next to a grey felt modular wall planter filled with herbs and flowers.

Utilizing Walls with Trellises and Wall Planters

Walls provide an excellent canvas for greenery. Consider these options:

  • Trellises: Install a sturdy trellis against a wall or along a railing. Choose fast-growing climbing plants like clematis, jasmine, or edible options like cucumbers or peas. Trellises add height, create living privacy screens, and bring a soft, organic texture to hard surfaces. Ensure your trellis is securely mounted and can support the weight of mature plants.
  • Wall Planters: These range from individual pots that hook onto railings or wall grids to elaborate modular pocket systems. Wall planters allow you to grow herbs, small edibles, succulents, or flowering annuals without consuming precious floor space. Arrange them in a pattern or a cascading design for visual impact.

A bustling, multi-tiered metal plant stand on a small urban balcony, packed with colorful flowers, herbs, and trailing plants in varied pots.

Tiered Stands and Shelving: Elevating Your Plants

Tiered plant stands, shelving units, or even repurposed step ladders offer fantastic ways to display multiple pots in a compact footprint. These structures:

  • Add varied heights: They prevent your garden from looking like a flat sea of pots.
  • Improve light exposure: Plants on higher tiers receive more light.
  • Create visual depth: A tiered arrangement guides the eye up and down, making the space feel more dynamic.
  • Maximize planting density: You can place many plants in a small area.

Choose stands made from durable, weather-resistant materials like powder-coated metal, treated wood, or robust plastic. Ensure stability, especially if you live in a windy area.

A lush, layered balcony garden featuring tall ornamental grass, bushy petunias and lavender, and trailing petunias cascading from planters.

Height Transitions: Building Visual Layers

Think of your balcony garden in layers, much like a natural landscape or a well-arranged floral display. This technique creates a sense of depth and makes the space feel larger and more inviting. Combine plants of varying heights:

  1. Tall Layer (Thrillers): These are your vertical anchors. Think upright grasses, small trees, or climbers on trellises. They form the “walls” and ceiling of your outdoor room.
  2. Mid-Layer (Fillers): Bushy, mounding plants that fill the space between the tall elements and the ground. These provide volume and continuity.
  3. Low Layer (Spillers): Trailing plants that cascade over the edges of pots or hang from baskets. They soften hard lines and add a luxurious, overflowing feel.

By intentionally varying the heights of your plants and containers, you create a rich, layered environment that surrounds you, truly embodying the feeling of an outdoor room. This layering also helps to guide the eye through the space, making it feel more expansive and thoughtfully designed.

Elevated view of diverse matte gray, beige, and concrete containers holding green plants, artfully arranged on a small wooden balcony deck.

Container Strategy for Cohesion: Unifying Your Design

Your choice of containers profoundly influences the overall aesthetic and success of your balcony garden. It is not just about holding soil; containers are design elements themselves. A cohesive container strategy creates a polished, intentional look, transforming a collection of pots into a unified outdoor living space.

Close-up, slightly elevated view of a large charcoal ceramic pot on a wooden balcony, brimming with purple fountain grass, pink impatiens, and sweet p

Thoughtful Container Sizes

Do not shy away from large containers, even in small spaces. A few well-chosen large pots create more impact than many small, disparate ones. Large pots offer several practical advantages:

  • Stability: They are less likely to tip over in windy conditions.
  • Moisture retention: Larger soil volumes dry out slower, reducing watering frequency, which is a major advantage for busy gardeners.
  • Plant health: They provide ample root room for plants to thrive and grow larger, reducing the need for frequent repotting.

Balance large statement pots with medium and smaller containers for variety. A good rule of thumb is to use one “thriller” plant in a large pot, surrounded by “filler” and “spiller” plants in complementary smaller or medium containers, creating a lush, layered look.

Low-angle close-up of diverse garden containers: classic terracotta, vibrant indigo glazed ceramic, modern gray resin, and galvanized steel trough on

Material Matters for Your Aesthetic

The material of your containers dictates much of your balcony’s style. Consider:

  • Terracotta: Classic, breathable, and rustic. Excellent for plants that prefer well-drained soil, but they dry out quickly. Unglazed terracotta can show salt deposits.
  • Ceramic/Glazed Pottery: Elegant, vibrant, and retains moisture well. Heavier and can be expensive. Ensure they are frost-proof if left outside in cold climates.
  • Lightweight Resin/Plastic: Affordable, durable, and excellent for moisture retention. Many modern designs mimic the look of terracotta, stone, or metal without the weight. They are ideal if weight is a concern for your balcony structure.
  • Metal (Galvanized Steel, Copper): Modern, sleek, and industrial. Can heat up in direct sun, potentially stressing plant roots. Use lighter-colored metals or add insulation for best results.
  • Wood (Cedar, Treated Pine): Natural, insulative, and integrates well with natural aesthetics. Requires liners to prevent rot and can be heavy.

Choose materials that complement your home’s exterior and your indoor decor, creating a seamless transition.

A sleek urban balcony features a cohesive design with dark gray rectangular planters and round pots holding vibrant green and purple foliage plants, c

Color and Finish Cohesion

To achieve a unified and sophisticated look, select containers with a consistent color palette or finish. For example:

  • All black or dark gray pots provide a contemporary, minimalist backdrop that allows the plants to shine.
  • Varying shades of natural terracotta or stone offer an earthy, rustic feel.
  • Matching brightly colored pots in a single hue (e.g., all blues or all yellows) create a bold, playful statement.

Avoid a chaotic mix of too many different container colors and styles. Limiting your palette creates visual harmony and makes the space feel more intentional and less haphazard.

Person's hands gently move a large terracotta pot on a dark wheeled caddy across a sunny balcony floor, showing robust, locking wheels.

Wheeled Bases for Flexibility

For larger, heavier pots, invest in wheeled bases, also known as plant caddies. These simple additions offer immense flexibility:

  • Easy repositioning: Move plants to optimize sun exposure, accommodate guests, or simply change your layout.
  • Cleaning: Easily move pots to sweep or clean the balcony floor.
  • Winter protection: Roll frost-sensitive plants indoors or to a more sheltered spot.

Ensure the wheeled bases are robust enough for the weight of your filled containers and have locking wheels for stability.

Elevated view of a lush balcony garden corner, showcasing varied container plants in diverse pots. Greens, purples, and silver foliage create a serene

Color and Texture Palettes: Engaging the Senses

Just like an interior designer uses color and texture to create mood and interest, you can apply these principles to your balcony garden design. A well-considered palette prevents visual chaos and transforms your garden into a harmonious, sensory experience. The goal is to create continuity and visual intrigue without overwhelming a small space.

A serene balcony corner featuring various container plants in a limited palette of white, cream, silver, and pale green, creating a harmonious look.

A Limited Color Palette for Harmony

In a compact area, restraint with color is key. Choose two to three primary colors for your flowers and foliage. This creates a cohesive look and allows individual plants to stand out without competing for attention. Consider:

  • Monochromatic: Varying shades of a single color (e.g., different blues, purples, or whites) create a serene and sophisticated atmosphere.
  • Analogous: Colors next to each other on the color wheel (e.g., yellows, oranges, and reds for a vibrant, warm feel; blues, purples, and greens for a calm, cool effect).
  • Complementary accents: Use a complementary color (opposite on the color wheel, like blue and orange) sparingly for a pop of drama, rather than as a dominant theme.

White, silver, and pale pink flowers often create a sense of spaciousness and glow beautifully in evening light. Deep reds and purples can make a space feel more intimate and rich.

Close-up of vibrant foliage contrast: chartreuse Sedum, silvery Lamb's Ear, dark Heuchera, and green fern in containers on a balcony shelf.

Foliage Contrast: Your Year-Round Interest

While flowers are beautiful, their blooms are often fleeting. Foliage, however, provides consistent texture and color throughout the growing season, and often into winter. Rely heavily on foliage to create lasting interest:

  • Vary leaf shapes and sizes: Pair broad-leaved plants like hostas or caladiums with fine-textured ferns or grasses.
  • Contrast colors: Combine plants with dark green, chartreuse, silver, variegated, or burgundy leaves. For example, a silvery ‘Lamb’s Ear’ (Stachys byzantina) next to a dark-leaved Heuchera creates stunning contrast.
  • Look for interesting patterns: Striped, spotted, or variegated foliage adds depth without relying on blooms.

Foliage provides the enduring structure and beauty of your balcony garden, making it attractive even when flowers are not in bloom.

Lush balcony garden with red petunias, ornamental grass, purple salvia, and chartreuse coleus in diverse containers.

Seasonal Interest and Bloom Sequence

Plan for continuous interest by selecting plants with staggered bloom times or those that offer seasonal changes beyond just flowers. Consider:

  • Early spring: Pansies, primroses, bulbs.
  • Late spring/early summer: Petunias, calibrachoa, geraniums.
  • Mid-summer: Salvias, coleus (for foliage), impatiens.
  • Fall: Chrysanthemums, ornamental grasses, plants with colorful berries.

Some plants, like certain salvias or fuchsias, bloom for extended periods, providing consistent color. Others offer attractive seed heads or vibrant fall foliage, extending your garden’s appeal well into the cooler months. This ensures your outdoor room never looks empty or past its prime.

A balcony garden vignette showcasing textural contrast with fleshy Echeveria, delicate fern, wispy grass, and fuzzy Lamb's Ear in varied pots.

Textural Intrigue

Texture adds another layer of sensory engagement to your balcony garden. Contrast fine textures with coarse ones to create visual excitement:

  • Fine textures: Delicate ferns, wispy grasses, tiny-leaved herbs. These create a light, airy feeling.
  • Medium textures: Most common annuals and perennials.
  • Coarse textures: Large-leaved plants like hostas, elephant ears, or succulents with thick, fleshy leaves. These create bold statements.

Do not forget the texture of your containers and furniture. A smooth, glazed pot next to a rough, porous terracotta pot, or a sleek metal chair contrasted with a fuzzy lamb’s ear plant, all contribute to the rich sensory experience of your outdoor room.

An urban balcony at twilight, illuminated by warm string lights and a solar lantern, creating a cozy outdoor room.

Lighting and Evening Ambiance: Extending Your Outdoor Hours

To truly feel like an outdoor room, your balcony must be inviting after sunset. Thoughtful lighting transforms the space, extends its usability into the evening hours, and creates a magical, intimate ambiance. Think about how you light your indoor rooms; apply similar principles to your balcony garden design.

Urban balcony at twilight with warm string lights along railing, a solar lantern on a table, and solar stakes illuminating container plants.

Creating Mood with Ambient Lighting

Ambient lighting forms the foundation of your evening atmosphere. It provides a general glow without being harsh. Consider:

  • String Lights: Often called “fairy lights” or bistro lights, these are perhaps the most popular choice. Drape them along railings, weave them through trellises, or crisscross them overhead. They cast a warm, inviting glow that instantly signals “cozy outdoor room.” Look for solar-powered options for ease of installation or low-voltage LED strings for energy efficiency.
  • Solar Lanterns and Stakes: Place solar-powered lanterns on tables or hang them from hooks. Solar stakes can illuminate pathways or highlight specific plants. These charge during the day and automatically turn on at dusk, providing effortless illumination.
  • LED Strip Lights: For a more modern, subtle effect, adhere LED strips under railings, along the base of planters, or beneath seating. They offer a continuous, soft light that defines the edges of your space.

Use warm white light (around 2700K) for a cozy, inviting feel, rather than bright, cool white light, which can feel harsh and clinical.

Person's hands holding a book on a container-filled urban balcony at twilight, illuminated by a focused rechargeable table lamp. Soft string lights gl

Incorporating Task Lighting for Functionality

If you plan to read, dine, or engage in other activities on your balcony after dark, you will need more focused task lighting. This complements your ambient lighting without overpowering it.

  • Battery-Operated Lamps: Portable lamps designed for outdoor use can be placed on a side table for reading or on a dining table for meals. Choose rechargeable models for sustainability.
  • Wall Sconces: If your balcony has an outdoor electrical outlet and allows for permanent fixtures, small outdoor wall sconces can provide directed light.

Position task lights strategically so they illuminate your activity area without creating harsh shadows or glare.

Subtle uplighting illuminates a fern, while a diffused lantern casts a soft glow on succulents on a balcony at dusk, ensuring no glare.

Controlling Glare for Comfort and Courtesy

Glare detracts from comfort and can disturb neighbors. Position all lights carefully to avoid shining directly into your eyes, adjacent windows, or neighboring balconies. Uplighting plants from below or directing lights downwards creates a softer effect. Use shades or diffusers on brighter light sources if needed. The goal is a gentle, inviting glow, not a spotlight.

Elevated view of a modern urban balcony garden at early dusk, featuring vertical planters with solar LED string lights and an outdoor-rated wall sconc

Prioritizing Safety and Sustainability

  • Outdoor-Rated Fixtures: Always ensure any electrical lighting fixtures or extension cords you use are rated for outdoor use and damp conditions. Look for IP (Ingress Protection) ratings appropriate for outdoor environments (e.g., IP44 or higher).
  • Low-Voltage Options: Solar and battery-operated lights are the safest and easiest to install, requiring no complex wiring. If using mains power, opt for low-voltage systems where possible, as they reduce electrical hazards.
  • LED Technology: LEDs are energy-efficient, long-lasting, and generate minimal heat, making them a sustainable choice for your balcony lighting.
  • Weight Limits: Be mindful of any weight limits for hanging lights, especially if draping heavy strings across a wide span.

By thoughtfully layering ambient and task lighting, you transform your balcony into a functional, inviting outdoor room that extends your enjoyment well into the evening hours.

Lush urban balcony garden with tall container plants and a wooden privacy screen creating a secluded, intimate outdoor room.

Privacy and Screening: Creating Your Secluded Retreat

A true outdoor room provides a sense of enclosure and intimacy. If your balcony is exposed to neighbors, street views, or strong winds, privacy and screening become essential design elements. These additions define your boundaries and create a secluded, comfortable retreat, making you feel truly at home in your balcony garden.

Hands touching a vertical garden panel on a balcony, with potted plants on the floor and a blurred neighbor's window in the background.

Defining Your Personal Boundaries

The first step is to identify where you need privacy most. Is it from direct sightlines of neighbors, a busy street, or simply to create a more enclosed feeling? Your chosen screening method should address these specific needs while enhancing the aesthetic.

Eye-level view of an urban balcony's dark wooden lattice screen densely covered in thriving star jasmine with white flowers, blurring the city beyond.

Living Screens with Lattice and Trellis

Living screens are both beautiful and environmentally friendly. They soften hard architectural lines and absorb some sound.

  • Lattice Panels: Install wooden or PVC lattice panels along railings or walls. These provide immediate partial screening and act as a support structure for climbing plants. Choose weather-resistant materials.
  • Trellises with Climbers: Mount trellises and train vigorous climbing plants to grow over them. Excellent choices include star jasmine (fragrant and evergreen in many climates), clematis (beautiful flowers), or edible options like pole beans or passionfruit. Check with your landlord or building management about attaching structures to your balcony.

A living screen evolves with the seasons, offering dynamic interest throughout the year.

An urban balcony corner featuring a natural bamboo roll screen tied to a dark railing, creating a private backdrop for various container plants and a

Instant Screening with Bamboo Frames and Panels

For quick and often removable privacy, consider:

  • Bamboo Screens: Rolls of natural bamboo fencing can be tied to railings or attached to a simple frame. They offer a rustic, tropical feel and provide effective, immediate screening.
  • Wood or Composite Panels: Freestanding or attachable panels made from wood or composite materials offer more solid privacy. These can be custom-built or purchased pre-made. They come in various designs, from slatted to decorative.

These options are particularly good if you cannot permanently alter your building’s structure.

Three large planters with ornamental grass, columnar apple tree, and clumping bamboo strategically screen an urban balcony, providing privacy.

Tall Planters with Upright Plants: Strategic Placement

Strategic placement of tall planters filled with upright plants creates effective, flexible screening. This method allows you to move your screens as needed.

  • Dense Shrubs or Ornamental Grasses: Choose plants like dwarf bamboo (clumping varieties, not running), columnar conifers, or tall ornamental grasses (e.g., Karl Foerster feather reed grass) that grow vertically with dense foliage.
  • Fruiting Plants: Dwarf fruit trees like columnar apples or citrus can provide both screening and edibles.
  • Placement: Position these large planters along exposed edges or in areas where you need to block a specific sightline. Ensure the containers are heavy and stable enough to prevent tipping, especially in windy conditions.

Dense, broad-leafed container plants and a small, trickling water feature create a tranquil, sound-softening nook on an urban balcony.

Softening Sound with Plants and Water Features

While physical screens block sight, plants also help absorb some ambient noise from a busy street or neighbors. Densely planted areas, especially those with larger, softer leaves, contribute to a quieter environment. For additional sound softening, consider a small, recirculating water feature. The gentle sound of trickling water can mask unwanted noise, creating a more peaceful and secluded atmosphere.

Always check your building’s rules and regulations regarding modifications to your balcony, attachment of screens, and weight limits before installing any permanent or large screening solutions.

Close-up of a woman's hands deadheading a purple petunia in a terracotta pot, surrounded by diverse container plants and a hovering bee.

Planting Concepts for Impact and Sustainability

The plants you choose breathe life into your balcony garden, transforming it into a vibrant outdoor room. Selecting plants strategically, with an eye toward both aesthetic impact and environmental responsibility, ensures your garden thrives and provides continuous joy. Focus on sustainable practices that benefit both your garden and the planet.

Vibrant Thriller-Filler-Spiller container garden on a balcony, featuring ornamental grass, purple petunias, and trailing sweet potato vine.

The Thriller-Filler-Spiller Method for Stunning Containers

This classic container design principle creates dynamic, full, and visually appealing arrangements. Each element plays a distinct role:

  1. Thriller: This is your vertical focal point, a tall, dramatic plant that draws the eye upward. Choose something with striking foliage or vibrant blooms. Examples include ornamental grasses, cannas, upright fuchsias, or a dwarf citrus tree. Place the thriller in the center of a pot viewed from all sides, or at the back if viewed against a wall.
  2. Filler: These are mounding or bushy plants that fill out the middle of the container, providing volume and cohesion. They typically grow to about two-thirds the height of the thriller. Good choices include impatiens, petunias, coleus, or herbs like basil or thyme. Use several filler plants around the thriller to create a full look.
  3. Spiller: These are trailing plants that cascade over the edges of the pot, softening hard lines and adding a luxurious, overflowing effect. Examples include sweet potato vine, calibrachoa, lobelia, or creeping jenny. Position spillers near the edges of the container so they can drape downwards.

By combining these three elements, you create a complete and captivating mini-ecosystem within each pot, providing visual depth and continuous interest. The Missouri Botanical Garden offers extensive plant search tools to help you find suitable thrillers, fillers, and spillers for your climate. For more information, visit Missouri Botanical Garden.

A close-up shot of a honeybee pollinating vibrant purple Salvia flowers in a terracotta pot on a sunlit urban balcony.

Embracing Native and Pollinator-Friendly Plants

Beyond aesthetics, your plant choices can contribute positively to your local ecosystem, even in a small balcony garden. Incorporating native and pollinator-friendly plants offers numerous benefits:

  • Support Local Ecosystems: Native plants provide food and habitat for local birds, bees, butterflies, and other beneficial insects.
  • Easier Maintenance: Native plants are naturally adapted to your local climate and soil conditions, often requiring less water, fertilizer, and pest control once established.
  • Pollinator Haven: Balcony gardens can serve as crucial stepping stones for pollinators in urban environments. Choose flowering plants that attract bees and butterflies, such as salvias, coneflowers, or lavender.

Consult your local extension service or a native plant society for a list of plants indigenous to your region that thrive in containers. Resources like the Royal Horticultural Society also provide valuable guidance on pollinator-friendly gardening; explore their recommendations at Royal Horticultural Society (RHS).

Sun-drenched balcony garden featuring diverse water-wise plants like succulents, lavender, and portulaca in various self-watering containers.

Water-Wise Choices: Sustainable Watering

Water conservation is vital, especially in container gardening where pots can dry out quickly. Select drought-tolerant plants that thrive with less water:

  • Succulents and Cacti: A vast array of shapes, sizes, and colors that require minimal watering.
  • Mediterranean Herbs: Lavender, rosemary, thyme, and oregano are beautiful, fragrant, and tolerant of dry conditions.
  • Many Annuals and Perennials: Look for plants labeled as drought-tolerant, such as portulaca, verbena, gaillardia, or sedum.

Using self-watering planters or incorporating water-retentive crystals into your potting mix also helps reduce watering frequency. Grouping plants with similar water needs together simplifies your care routine.

Gardener's hands scooping textured peat-free potting mix, rich with coir and wood, into a terracotta pot on a sunny urban balcony.

Prioritizing Peat-Free Potting Mixes

Choose peat-free potting mixes for environmental reasons. Peat harvesting damages peatlands, which are vital carbon sinks and delicate ecosystems. Modern peat-free alternatives, often made from coir, compost, and wood fiber, perform just as well, if not better, for container plants. They offer excellent drainage and aeration, supporting healthy root development. Selecting peat-free options aligns your gardening practices with broader sustainability goals.

A person relaxing in a cozy balcony garden armchair, surrounded by low-maintenance container plants and a vertical herb garden.

Maintenance by Design: Enjoying Your Low-Effort Oasis

A beautiful balcony garden should be a source of joy, not a chore. “Maintenance by design” means making deliberate choices during the planning phase to minimize future upkeep. By selecting the right plants, containers, and systems, you create an outdoor room that remains stunning with minimal effort, allowing you more time to relax and enjoy your space.

Close-up of a balcony bistro table with pots of vibrant calibrachoa, ornamental grass, and succulents, showcasing low-upkeep plants.

Low-Upkeep Plant Choices

The biggest factor in reducing maintenance is selecting resilient, low-needs plants. Avoid overly fussy varieties or those highly susceptible to pests and diseases in your specific microclimate. Opt for:

  • Drought-tolerant plants: As mentioned, these require less frequent watering. Succulents, Mediterranean herbs, and many ornamental grasses are excellent choices.
  • Slow-growing varieties: They require less frequent pruning. Consider dwarf shrubs or compact perennials.
  • Pest-resistant plants: Some plants naturally deter common pests. Research local recommendations for your region.
  • Self-cleaning annuals: Many modern petunias, calibrachoa, and impatiens are “self-cleaning,” meaning they drop spent flowers and do not require deadheading, saving you considerable time.

Remember to match plants to your balcony’s light conditions. A shade-loving plant in full sun will struggle, requiring more intervention.

Urban balcony garden showing efficient irrigation: a self-watering planter in foreground, with drip lines feeding grouped container plants.

Establishing an Efficient Irrigation Rhythm

Consistent watering is crucial for container plants, but it does not have to be time-consuming. Design your watering strategy for efficiency:

  • Self-Watering Planters: These containers have a built-in reservoir that wicks water up to the soil, significantly extending the time between waterings. They are excellent for busy gardeners.
  • Drip Irrigation Systems: For larger balcony gardens, a small, automated drip irrigation system can be a game-changer. These systems deliver water directly to the plant roots, reducing waste and ensuring consistent moisture. Many kits are available for small spaces and are relatively easy to install.
  • Grouping Plants: Arrange plants with similar water needs together. This prevents overwatering some plants while underwatering others.
  • Morning Watering: Water early in the morning. This allows plants to absorb water before the heat of the day, minimizing evaporation and reducing the risk of fungal diseases.

Even without automated systems, establishing a consistent schedule and checking soil moisture daily with your finger ensures your plants receive what they need.

Hands top-dressing a thriving rosemary plant in a terracotta pot with fresh peat-free potting mix on a sun-dappled balcony table.

Potting Mix Refresh for Continued Vitality

Container plants deplete nutrients and compact their soil over time. Regular potting mix maintenance keeps your plants healthy and minimizes issues:

  • Annual Top-Dressing: Each spring, remove the top few inches of old potting mix from your containers and replace it with fresh, nutrient-rich compost or new potting mix. This replenishes nutrients and improves soil structure.
  • Repotting: Every 1-3 years, depending on the plant, repot into a slightly larger container with fresh potting mix. For plants that have reached their maximum container size, root prune and return them to the same pot with new soil.

Using high-quality, peat-free potting mix from the start provides a strong foundation for plant health.

Woman in her 50s watering a Rosemary on a wheeled caddy on a sunlit urban balcony, accessible vertical planter behind her.

Designing for Accessibility

Ensure your balcony layout allows easy access to all your plants for routine care. Avoid placing pots in corners or behind heavy furniture where you struggle to reach them. If you use vertical planters, ensure they are at a comfortable height for watering and pruning. Wheeled plant caddies (as discussed earlier) significantly improve accessibility and flexibility for heavier containers.

Stylish dark grey outdoor storage bench on an urban balcony, lid ajar revealing gardening tools, next to a matte black watering can and potted plants.

Integrated Tool Storage

Keep essential gardening tools handy but out of sight. A small, weather-resistant storage bench or a decorative garden caddy can discreetly hold pruning shears, a trowel, gloves, and a watering can. Having tools readily available encourages small, consistent maintenance tasks, preventing them from becoming overwhelming chores.

By integrating these maintenance considerations into your balcony garden design, you create an outdoor room that not only looks beautiful but also remains a source of relaxation and enjoyment, not endless work.

Vibrant golden-hour balcony garden designed as a cozy outdoor room, featuring diverse container plants, a bistro set, and vertical planter.

Frequently Asked Questions

How do I know if my balcony can support the weight of many pots?

Balcony weight limits vary significantly by building code and construction. Most modern balconies can safely support typical residential loads, but a large number of heavy, wet pots filled with soil can add substantial weight. A cubic foot of wet soil weighs roughly 80-100 pounds. It is always best to consult your building management or a structural engineer if you plan a very extensive container garden, especially with large, heavy ceramic or concrete planters. As a general rule, distribute weight evenly, and place the heaviest items closer to the building structure rather than along the outer edge.

What are the best plants for a shady balcony?

Many beautiful plants thrive in shade. For foliage, consider hostas, ferns (like maidenhair or autumn fern), coleus (with its vibrant leaf colors), impatiens, and ivy. For flowers, fuchsias, begonia (tuberous or wax), pansies, and lobelia perform well in shadier spots. Some herbs, such as mint and cilantro, also tolerate partial shade. The New York Botanical Garden offers excellent plant guides for various conditions; visit New York Botanical Garden for inspiration.

How often should I water my balcony plants?

There is no one-size-fits-all answer, as watering frequency depends on plant type, pot size, potting mix, weather, and sun exposure. Generally, container plants dry out faster than in-ground plants. Check the soil moisture daily by sticking your finger about an inch or two into the soil. If it feels dry, it is time to water. Water thoroughly until you see water drain from the bottom of the pot. Using larger pots, water-retentive potting mix, and self-watering planters can significantly reduce watering frequency.

Can I grow vegetables on a balcony?

Absolutely! Many vegetables thrive in containers. Choose compact or dwarf varieties suitable for pots. Ideal choices include cherry tomatoes, bush beans, leafy greens (lettuce, spinach), radishes, carrots (in deep pots), peppers, and herbs. Ensure your balcony receives at least 6-8 hours of direct sunlight per day for most fruiting vegetables. Even in partial shade, you can successfully grow leafy greens and some herbs. For detailed plant information, including growing conditions, check resources like Kew Science’s Plants of the World Online database at Kew Science – Plants of the World.

How do I protect my plants during winter?

Winter protection depends on your climate and plant hardiness. For tender annuals, you typically remove and compost them. For perennial plants, consider moving them indoors if they are in pots and small enough. For larger, hardier perennials and shrubs, insulate pots with bubble wrap, burlap, or a thick layer of mulch to protect roots from freezing. Ensure pots have excellent drainage to prevent waterlogging and subsequent root rot during cold, wet periods. In extremely cold climates, bringing containers into an unheated garage or shed can offer sufficient protection.

Categories
Edible Gardening

Dwarf Fruit Trees for Patios and Balconies

Imagine stepping onto your patio or balcony and plucking a ripe, juicy apple or a sweet fig directly from a tree you grew yourself. This dream is entirely achievable, even if your garden space is limited to a small balcony or a cozy patio. Dwarf fruit trees offer an incredible opportunity to enjoy homegrown produce, transforming confined urban spaces into productive edible oases. These compact versions of traditional fruit trees thrive in containers, bringing the joy of an orchard to your doorstep without requiring vast acreage.

Growing your own fruit offers numerous rewards. You gain control over what goes into your food, enjoy the freshest possible taste, and connect with nature on a daily basis. For small-space gardeners, selecting the right dwarf fruit trees and providing them with proper care makes all the difference. This comprehensive guide equips you with the knowledge and practical steps to successfully cultivate a mini-orchard of container fruit trees, ensuring bountiful harvests for years to come.

A dwarf Meyer lemon tree, laden with ripe yellow lemons and white blossoms, in a terracotta pot on a sunny urban balcony.

Why Choose Dwarf Fruit Trees for Small Spaces?

Dwarf fruit trees are a game-changer for anyone gardening with limited room. Their primary advantage lies in their compact size, typically reaching heights of 6 to 10 feet when mature, making them perfectly suited for containers on patios, balconies, or small urban yards. You gain all the benefits of growing fruit without needing a large plot of land. These trees often produce fruit at a younger age than their standard counterparts, sometimes within one to two years of planting, giving you quicker gratification for your gardening efforts.

Beyond their size, dwarf fruit trees offer incredible flexibility. You can move them to optimize sun exposure throughout the day or shift them indoors during harsh winter weather. This portability proves invaluable for protecting your investment from extreme conditions. Moreover, tending to container fruit trees is physically less demanding. You work at a comfortable height, simplifying tasks like pruning, watering, and harvesting. This accessibility makes fruit growing enjoyable for gardeners of all ages and physical abilities.

Consider the environmental benefits as well. Growing your own fruit reduces your carbon footprint by minimizing transportation and packaging. You also support local pollinator populations by providing nectar sources, contributing to a healthier ecosystem right outside your door. Many gardeners find immense satisfaction in nurturing a living plant from bloom to harvest, fostering a deeper connection with nature and the food they consume.

A woman gently touches ripe red apples on a dwarf tree in a patio pot, visually contrasted by the towering branches of a standard tree in the backgrou

Understanding Dwarf vs. Standard Fruit Trees

The key distinction between dwarf and standard fruit trees lies in their rootstock. Most fruit trees are grafted, meaning a desired fruiting variety (scion) is joined onto a root system (rootstock) from another plant. The rootstock largely determines the tree’s ultimate size, disease resistance, and adaptability to soil conditions. Standard rootstocks produce full-sized trees that can reach 20 feet or more, requiring significant space and making harvesting difficult without specialized equipment.

Dwarf fruit trees, conversely, utilize dwarfing rootstocks. These rootstocks inhibit vigorous growth, keeping the tree compact while allowing the scion to produce full-sized fruit. For example, an apple tree grafted onto a M27 or B9 rootstock will remain small, typically 6-8 feet tall, compared to an apple tree on a standard rootstock which might grow to 25 feet. This genetic engineering allows you to enjoy Gala or Honeycrisp apples from a tree no taller than you are.

Here is a comparison outlining the practical differences:

Feature Dwarf Fruit Trees Standard Fruit Trees
Mature Height Typically 6-10 feet 15-30+ feet
Space Requirement Small, ideal for containers, patios, balconies Large garden plots, orchards
Fruiting Age Often 1-3 years after planting 3-7+ years after planting
Maintenance Easier to prune, spray, and harvest due to height Requires ladders or specialized equipment for maintenance
Portability Can be moved, brought indoors for winter Stationary, cannot be moved
Rootstock Dwarfing rootstocks (e.g., M27, B9 for apples) Vigorous rootstocks
Lifespan Generally shorter (15-25 years) Longer (30-50+ years)
Yield per Tree Lower than standard, but multiple trees fit in small space High per tree, but fewer trees overall

Understanding these differences empowers you to make an informed choice for your specific gardening needs and available space. Dwarf fruit trees are not simply smaller versions of their larger relatives; they represent a distinct category with specific advantages for container gardening.

A gardener on a sunny urban balcony examines a dwarf apple tree's plant tag, selecting varieties from small saplings in nursery pots.

Selecting the Best Dwarf Fruit Tree Varieties for Containers

The success of your container fruit orchard begins with choosing the right trees. Factors such as your USDA plant hardiness zone, available sunlight, and the tree’s pollination requirements all play crucial roles. Most fruit trees need at least 6-8 hours of direct sunlight daily to produce fruit. Check if your chosen variety is self-fertile or requires a pollinator. Some trees, like many apple and pear varieties, need a different variety planted nearby to produce fruit.

Container fruit tree diagram: 30cm pot, tree, soil, water flow arrows, and legible labels.

A child's hand reaches for a ripe nectarine on a patio, surrounded by thriving dwarf pear and apple trees in terracotta pots.

Top Dwarf Fruit Tree Varieties for Patios and Balconies:

  • Dwarf Apple Trees: Look for varieties on ultra-dwarfing rootstock (like M27 or B9). Popular choices include ‘Honeycrisp’, ‘Gala’, ‘Fuji’, and ‘Granny Smith’. Many require a second apple variety for cross-pollination.
  • Dwarf Pear Trees: ‘Dwarf Anjou’ and ‘Dwarf Bartlett’ are excellent choices. Pears often need a pollinator, so consider planting two different compatible varieties.
  • Dwarf Peach and Nectarine Trees: Self-fertile varieties like ‘Bonanza’ peach or ‘Necta Zee’ nectarine are ideal. They are bred specifically for compact growth and heavy fruit production in small spaces.
  • Dwarf Cherry Trees: ‘North Star’ and ‘Romeo’ are self-fertile tart cherries that do well in containers. Sweet cherries often require a pollinator.
  • Fig Trees: Figs are incredibly well-suited for containers and are generally self-fertile. Varieties like ‘Brown Turkey’, ‘Chicago Hardy’, and ‘Black Mission’ thrive and produce abundant fruit. You can often move them indoors for winter in colder climates.
  • Dwarf Citrus Trees: Lemons (‘Meyer Lemon’), limes, oranges, and kumquats are excellent container fruit trees. They are self-fertile and bring an exotic touch to your patio. In most zones, they require winter protection indoors.
  • Pomegranate Trees: Dwarf varieties like ‘Nana’ are ornamental and fruit-bearing. They tolerate heat and some drought, making them suitable for sunny, warm patios. They are self-fertile.
  • Blueberry Bushes: While technically shrubs, dwarf blueberry varieties like ‘Top Hat’ or ‘Sunshine Blue’ are perfect for containers. Blueberries require acidic soil (pH 4.5-5.5) and often produce better with a second variety for cross-pollination.
  • Mulberry Trees: Dwarf varieties like ‘Issai’ or ‘Gerardi Dwarf’ are productive and easy to grow. They are self-fertile and produce sweet, blackberry-like fruit.

When purchasing, select a healthy specimen from a reputable nursery. Look for strong, evenly spaced branches, healthy foliage, and no signs of pests or diseases. A vigorous root system is key for containerized plants, so check the drainage holes if possible. Avoid trees with circling roots or those that appear pot-bound.

Three empty plant containers (grey, terracotta, wooden half-barrel) of varying sizes on a patio with a bag of potting mix and a hand selecting.

Choosing the Right Container and Potting Mix

The success of your dwarf fruit tree depends heavily on its home. Selecting the correct container size and material, along with a high-quality potting mix, provides the essential foundation for healthy growth and prolific fruiting.

A woman kneels on a patio, comparing a large terracotta pot to a smaller ceramic pot holding a dwarf fig tree, with a half-whiskey barrel nearby.

Container Selection:

Start with a container that is appropriately sized for your young tree, but plan to repot as it grows. A 10-15 gallon pot (around 18-20 inches in diameter) works well for a young dwarf tree. Within 2-3 years, you will likely need to move it to a 20-25 gallon container (24-30 inches in diameter). The final pot size should be at least 25 gallons, and some larger dwarf varieties, like apples or pears, may benefit from 30-gallon or even half-whiskey barrel-sized containers. The larger the pot, the more stable the root temperature and moisture levels will be, reducing watering frequency.

  • Material Matters:
    • Terracotta or Clay: These are attractive and allow excellent air circulation to the roots, which helps prevent root rot. However, they are heavy, dry out quickly, and can crack in freezing temperatures.
    • Plastic: Lightweight, affordable, and retains moisture well. Look for sturdy, UV-resistant plastic to prevent degradation. Choose lighter colors to reflect heat and prevent roots from overheating in direct sun.
    • Wood (Whiskey Barrels): Visually appealing and offers good insulation. Ensure the wood is untreated or treated with food-safe materials. These are heavy and durable.
    • Fabric “Grow Bags”: Excellent for root health, preventing root circling, and promoting air pruning. They are lightweight, flexible, and offer superior drainage. They do dry out faster than plastic pots.
  • Drainage is Non-Negotiable: Every container must have ample drainage holes at the bottom. Fruit trees absolutely cannot tolerate standing water, which leads to root rot. If your pot does not have enough holes, drill more.

Gloved hands mixing dark compost, light peat-free potting mix, and white perlite in a trug on a sunny urban balcony.

Potting Mix for Edibles:

Do not use garden soil in containers; it compacts, lacks drainage, and often harbors pests and diseases. Instead, use a high-quality, well-draining potting mix specifically formulated for containers. Opt for peat-free or coir-based mixes to promote sustainable gardening practices. A good potting mix provides aeration, retains moisture, and supplies initial nutrients.

You can create your own robust potting mix by combining the following:

  • 40-50% high-quality peat-free potting mix: This forms the base.
  • 30-40% compost: Adds essential nutrients, beneficial microbes, and improves water retention. Use well-rotted, mature compost.
  • 10-20% perlite or coarse sand: Enhances drainage and aeration, preventing compaction.
  • Slow-release organic fertilizer: Incorporate according to package directions to provide sustained nutrition.

This customized blend ensures your container fruit trees receive the ideal environment for root development and nutrient uptake. For blueberries, adjust the mix to be more acidic, incorporating pine bark fines or specific acidic potting mixes.

Hands gently untangling roots of a dwarf fruit tree for container planting, with potting mix and an empty pot visible.

Planting Your Dwarf Fruit Tree: A Step-by-Step Guide

Proper planting sets the stage for a healthy, productive tree. Follow these steps carefully to ensure your dwarf fruit tree establishes successfully in its new container home.

  1. Prepare Your Container: Place a piece of mesh screen or a coffee filter over the drainage holes to prevent soil loss while allowing water to escape freely. Do not add gravel or broken pottery at the bottom; this actually impedes drainage and creates a perched water table, which can lead to root rot.
  2. Add Potting Mix: Fill the container with a few inches of your chosen potting mix. Create a small mound in the center.
  3. Inspect the Tree: Carefully remove the tree from its nursery pot. Gently loosen any circling roots at the bottom of the root ball with your fingers. If the roots are severely root-bound, you may need to make a few vertical cuts down the sides of the root ball to encourage outward growth.
  4. Position the Tree: Place the tree on the mound of soil in the container. The goal is to ensure the graft union (the swollen knob where the scion meets the rootstock, usually a few inches above the soil line) remains above the soil surface. This prevents the scion from developing its own roots, which would negate the dwarfing effect of the rootstock. Adjust the soil level so the graft union sits 1-2 inches above the final soil line.
  5. Fill with Potting Mix: Backfill around the root ball with more potting mix, gently tamping it down to remove large air pockets. Leave about 1-2 inches of space between the soil surface and the rim of the container. This “head space” is crucial for efficient watering, allowing water to soak in rather than run off.
  6. Water Thoroughly: Water the tree slowly and deeply until water drains freely from the bottom of the pot. This settles the soil around the roots and eliminates any remaining air pockets. You may need to add a little more potting mix after the initial watering if the soil settles significantly.
  7. Stake if Necessary: Young dwarf fruit trees, especially those on very dwarfing rootstocks, can be top-heavy or have weak trunks. Insert a sturdy stake close to the trunk, taking care not to damage the root ball, and loosely tie the tree to the stake with soft material (such as old strips of cloth or specialized tree ties) to provide support during its first year of establishment.

Place your newly planted dwarf fruit tree in its final sunny location. Provide consistent moisture during the establishment phase, which typically lasts several weeks to a few months. Remember, the first few months are critical for root development and overall plant health.

Close-up of gardener's fingers testing soil moisture in a terracotta pot with a dwarf citrus tree on a sunny urban balcony.

Essential Care: Watering and Fertilizing for Fruitful Harvests

Consistent watering and appropriate fertilization are the cornerstones of successful container fruit tree cultivation. Because they are confined to a pot, these trees rely entirely on you for their nutritional and hydration needs.

Hand checking soil moisture with finger 2-3 inches deep in a potted dwarf Meyer lemon tree on a sunny balcony.

Watering Rhythm:

Container plants dry out much faster than those planted in the ground. You must check the soil moisture frequently. Stick your finger 2-3 inches into the potting mix; if it feels dry, it is time to water. Do not wait until the leaves wilt, as this stresses the tree.

  • Deep Watering: When you water, do so thoroughly until water drains from the bottom of the pot. This encourages deep root growth and flushes out accumulated salts. Watering lightly and frequently leads to shallow root systems, making the tree more susceptible to drought stress.
  • Frequency: In hot, sunny, or windy conditions, you might need to water daily or even twice a day. During cooler weather or after rainfall, you may water every few days. The size of your pot and the tree’s stage of growth also influence frequency. Larger pots retain moisture longer.
  • Monitor and Adjust: Pay close attention to your tree and its environment. A moisture meter can provide a more accurate reading than just your finger, especially for larger pots.
  • Sustainable Watering: Consider using a drip irrigation system with a timer for multiple container plants. This delivers water directly to the root zone, reducing evaporation and ensuring consistent moisture. Collecting rainwater for irrigation is another excellent sustainable practice.

Person's hands applying organic granular fertilizer to a dwarf lemon tree in a terracotta pot on a patio.

Fertilizing for Success:

Container potting mixes typically have limited nutrients. Therefore, regular fertilization becomes essential for fruit production. Aim for a balanced organic fertilizer, or one slightly higher in phosphorus and potassium for fruiting, rather than nitrogen which promotes leafy growth.

  • Early Spring: Apply a balanced slow-release organic granular fertilizer or a liquid feed once new growth begins. Follow the product’s instructions for dosage.
  • Late Spring/Early Summer: Reapply a lighter dose of fertilizer, especially if you see signs of nutrient deficiency (yellowing leaves, poor growth).
  • Avoid Late Season Fertilization: Stop fertilizing by late summer or early fall. New growth stimulated by late-season fertilizer applications may not harden off before winter, making it vulnerable to frost damage.
  • Compost Tea and Worm Castings: Supplement your feeding regimen with compost tea or a top dressing of worm castings. These provide a gentle, slow release of nutrients and introduce beneficial microbes to the soil, improving overall soil health.
  • Specific Needs: Blueberries require acidic fertilizers, often containing ammonium sulfate or specific “acid-loving plant” formulas. Citrus trees benefit from specialized citrus fertilizers that contain micronutrients like iron and zinc.

Always follow the manufacturer’s instructions for any fertilizer product you use. Over-fertilizing can harm your tree, leading to burnt roots or excessive vegetative growth at the expense of fruit.

Gardener's gloved hands prune an overcrowded branch of a dwarf Meyer lemon tree in a terracotta pot on a balcony.

Pruning and Training for Health and Yield

Pruning is not about removing branches; it is about shaping your dwarf fruit tree, promoting health, and maximizing fruit production. For container fruit trees, pruning also helps manage size, keeping them compact and aesthetically pleasing for your patio or balcony.

A person's hands hold pruning shears next to a well-pruned dwarf fig tree on a sunny patio, with small green fruits visible and snipped branches.

The Goals of Pruning:

  • Maintain Size: Keep the tree at a manageable height and width for container growing.
  • Promote Air Circulation and Light Penetration: Remove crossing or overcrowded branches to allow light and air into the canopy, reducing disease risk and improving fruit quality.
  • Remove Dead, Diseased, or Damaged Wood: Prevent the spread of disease and encourage new, healthy growth.
  • Encourage Fruit Production: Prune to stimulate the development of fruiting spurs (short branches that bear fruit) or to encourage new growth that will fruit in subsequent seasons.
  • Shape the Tree: Create an open, vase-like shape or a central leader system, depending on the tree type and your preference.

Person observing the bare branches of a dwarf apple tree in a pot on a patio, assessing its structure for late winter pruning.

When to Prune:

The timing of pruning depends on the type of fruit tree:

  • Deciduous Fruit Trees (Apples, Pears, Peaches, Plums): The best time for major structural pruning is in late winter or early spring, before new growth begins but after the threat of severe frost has passed. This allows you to see the tree’s structure clearly. Summer pruning can be done to control size or remove water sprouts, but avoid heavy summer pruning as it can reduce the current year’s crop.
  • Evergreen Fruit Trees (Citrus, Figs, Olives): Prune these as needed to maintain shape, remove dead wood, or thin the canopy. Generally, light pruning can occur any time, but heavier pruning is best done after harvesting or during their dormant period, typically late winter or early spring.

Gloved hands precisely prune a vigorous water sprout from a dwarf citrus tree in a terracotta pot using clean shears.

Basic Pruning Techniques:

  • Thinning Cuts: Remove an entire branch back to its point of origin or to another main branch. This opens up the canopy and encourages fruit production on remaining branches.
  • Heading Cuts: Shorten a branch, cutting just above a bud or side branch. This encourages bushier growth and can stimulate the formation of fruiting wood.
  • Remove Suckers and Water Sprouts: Suckers grow from the rootstock below the graft union; water sprouts are vigorous, vertical shoots that grow from main branches. Both consume energy without producing good fruit and should be removed as soon as you see them.

Always use sharp, clean pruning shears to make clean cuts. Sterilize your tools with rubbing alcohol between trees to prevent disease transmission.

Hands gently tying a branch of a dwarf lemon tree in a terracotta pot to train it horizontally on a sunny patio.

Training Your Tree:

Training refers to guiding the tree’s growth into a desired shape. For container fruit trees, this often means encouraging an open, strong structure. Spreading branches horizontally can encourage more fruit production than vertical growth. You can gently tie branches down with soft ties or use branch spreaders to achieve this.

For research-based guidance on pruning, visit
Missouri Botanical Garden Extension or
USDA ARS Fruit Tree Pruning.

Close-up of a gardener's hand gently turning a dwarf fruit tree leaf to inspect its underside for pests or disease, on a sunny patio.

Pest and Disease Management for Container Trees

Even in a small space, your dwarf fruit trees can encounter pests and diseases. The good news is that container gardening offers advantages for managing these issues. Your trees are more accessible for close inspection, and their limited numbers mean you can often address problems quickly and effectively without resorting to harsh chemicals. Employ an Integrated Pest Management (IPM) approach, focusing on prevention and early intervention.

A person closely inspects a leaf on a potted dwarf lemon tree on a sunlit patio, embodying proactive plant care.

Prevention is Key:

  • Healthy Trees: A healthy, well-nourished tree is more resistant to pests and diseases. Provide optimal watering, fertilization, and sunlight.
  • Inspect Regularly: Make it a habit to inspect your trees weekly. Look under leaves, along stems, and at new growth for any signs of trouble. Early detection allows for easier control.
  • Good Sanitation: Remove any fallen leaves, fruit, or debris from around the base of the tree and from the container. This eliminates potential hiding spots for pests and fungal spores.
  • Quarantine New Plants: Before introducing any new plants to your patio, keep them separate for a week or two to ensure they are pest- and disease-free.
  • Encourage Beneficial Insects: Plant pollinator-friendly flowers nearby. Ladybugs, lacewings, and parasitic wasps are natural predators that help control common pests like aphids.
  • Provide Air Circulation: Proper pruning, as discussed, ensures good air flow through the canopy, which helps prevent fungal diseases like powdery mildew.

Hands gently adjusting a white floating row cover over a dwarf apple tree in a terracotta pot on a sunny balcony, protecting it from pests.

Common Pests and Solutions:

  • Aphids: Small, pear-shaped insects that cluster on new growth, sucking plant sap. They cause distorted leaves.
    • Solution: Blast them off with a strong stream of water, crush them by hand, or apply insecticidal soap.
  • Spider Mites: Tiny, almost invisible arachnids that cause stippling on leaves and fine webbing. They thrive in hot, dry conditions.
    • Solution: Increase humidity, spray leaves with water, or use insecticidal soap or neem oil.
  • Scale Insects: Small, immobile bumps on stems and leaves, often covered by a protective shell. They also suck plant sap.
    • Solution: Scrape them off with a fingernail or soft brush, or apply horticultural oil during dormancy.
  • Fruit Worms/Maggots: Larvae that tunnel into developing fruit.
    • Solution: Use floating row covers to exclude adult insects, or employ pheromone traps. Practice good sanitation by removing infested fruit.

A hand gently mists dwarf fruit tree leaves showing subtle powdery mildew with natural neem oil on a patio.

Common Diseases and Solutions:

  • Powdery Mildew: White, powdery spots on leaves and stems.
    • Solution: Improve air circulation, apply neem oil or a horticultural fungicide.
  • Leaf Spot (various fungi): Dark spots on leaves, often leading to defoliation.
    • Solution: Remove affected leaves, improve air circulation, and practice good sanitation. Fungicides can be used in severe cases.
  • Root Rot: Caused by overwatering or poor drainage. Leaves may yellow, wilt, and the tree declines.
    • Solution: Ensure excellent drainage in your container. Allow soil to dry slightly between waterings.

Always identify the specific pest or disease before applying any treatment. Organic solutions like neem oil, horticultural oil, and insecticidal soaps are generally safe and effective when used correctly. Read product labels carefully and apply according to instructions.

Person kneeling on a patio, actively wrapping a large terracotta pot holding a dormant dwarf apple tree with burlap and twine for winter insulation.

Overwintering Your Patio Fruit Trees

For gardeners in regions with cold winters, protecting your container fruit trees from freezing temperatures is paramount. Unlike trees planted in the ground, which benefit from the insulating properties of surrounding soil, containerized trees have exposed root systems vulnerable to freezing and thawing cycles. Your overwintering strategy depends on your climate zone and the cold hardiness of your specific fruit tree.

A woman kneels on a patio, tucking straw insulation around a potted dwarf apple tree near other burlap-wrapped fruit trees against a brick wall.

Hardy Deciduous Trees (Apples, Pears, Cherries, Peaches):

If you live in a zone where your tree is hardy (e.g., a Zone 5 tree in Zone 5), but you grow it in a container, its roots are still more vulnerable than if planted in the ground. The general rule is that a container plant’s effective hardiness zone is two zones colder than its actual hardiness. A Zone 5 tree in a pot essentially becomes a Zone 7 tree in terms of root hardiness.

  • Insulate the Pot: Wrap the container with burlap, bubble wrap, or blankets. You can also place the pot inside a larger insulated container, filling the gap with straw or leaves.
  • Group Pots: Cluster your container trees together against a warm wall of your house. This creates a microclimate and provides collective insulation.
  • Move to a Sheltered Location: Shift trees to an unheated garage, shed, or covered porch once temperatures consistently drop below freezing. They need protection from wind and direct freezing. Ensure they receive some light if possible, though dormancy means less light is needed.
  • Minimal Watering: While dormant, trees need far less water. Check the soil every few weeks and water lightly only if the top few inches are dry. Do not let the pot dry out completely, but avoid overwatering.

A dwarf lemon tree in a terracotta pot on a wooden stool near a bright south-facing window, with a pebble tray, illustrating indoor winter care.

Less Hardy or Evergreen Trees (Citrus, Figs, Pomegranates, some Mulberries):

These trees require more significant protection in zones colder than their hardiness rating.

  • Bring Indoors: The safest option is to bring these trees indoors before the first hard frost.
    • Location: Choose a bright, cool spot if possible (50-60°F or 10-15°C). An unheated sunroom, cool greenhouse, or a south-facing window in a cool room works well.
    • Humidity: Indoor air can be very dry. Provide humidity with a pebble tray (a tray filled with pebbles and water, ensuring the pot sits above the water level) or a humidifier.
    • Pest Watch: Indoor conditions can sometimes encourage pests like spider mites. Inspect trees carefully before bringing them inside and monitor them regularly throughout winter.
    • Watering: Water less frequently indoors, allowing the top few inches of soil to dry out between waterings.
  • Dormancy for Figs: Some fig varieties are hardy, but in colder zones, they can be brought indoors into an unheated garage or basement where they will go fully dormant. They lose their leaves and require very little light or water, essentially just enough to prevent the roots from drying out completely.

Remember to gradually acclimate your trees when moving them indoors or back outside. Sudden changes in light, temperature, or humidity can stress the plant. For instance, when moving trees outdoors in spring, slowly expose them to increasing sunlight over a week or two to prevent leaf scorch.

A person on a sunny balcony holds a freshly picked, ripe blush peach from a dwarf tree in a terracotta pot, with other containers visible.

Harvesting and Enjoying Your Homegrown Fruit

The culmination of your hard work is the sweet reward of fresh, homegrown fruit. Knowing when and how to harvest ensures you capture the best flavor and extend your enjoyment.

Close-up of a hand gently twisting a ripe, blushing peach from a dwarf tree branch, with other peaches showing different ripeness stages.

Timing the Harvest:

The timing of harvest varies greatly by fruit type and variety. However, general indicators signal ripeness:

  • Color: The fruit develops its characteristic ripe color. A green apple turns red, a lime turns yellow, a peach develops a blush.
  • Softness/Firmness: Gently squeeze the fruit. Peaches, apricots, and many plums soften slightly when ripe. Apples and pears remain firm but feel less rock-hard.
  • Ease of Separation: Ripe fruit often separates easily from the branch with a gentle twist and lift. If you have to tug, it likely needs more time.
  • Taste and Aroma: This is the ultimate test. A ripe fruit emits a distinct, sweet aroma and tastes delicious.

For most fruit, harvesting is a process, not a one-time event. You will pick fruit over several days or weeks as individual pieces ripen. This allows you to enjoy a continuous supply.

Close-up of a gardener's hand using small pruning shears to snip a ripe purple fig from a dwarf tree in a pot.

Harvesting Techniques:

  • Gentle Handling: Always handle fruit gently to avoid bruising, which reduces storage life.
  • Twist and Lift: For apples, pears, peaches, and plums, gently twist the fruit upwards. If it is ready, the stem will detach cleanly from the branch. Try to leave the stem attached to the fruit if possible, as this improves storage.
  • Snip for Figs/Citrus: For figs and some citrus, use clean pruning shears or scissors to snip the stem, leaving a small piece attached to the fruit. This prevents tearing the fruit or damaging the branch.
  • Blueberries: Pick individually when they turn fully blue and release easily.
  • Mulberries: Wait until they are dark, plump, and fall easily into your hand.

Overhead shot of a small bowl of fresh dwarf fruit (apples, currants, plums) on a rustic counter, a hand adding a plum. A jam jar and frozen berries a

Storage and Enjoyment:

The best way to enjoy homegrown fruit is fresh off the tree. However, you can extend your harvest:

  • Refrigeration: Most ripe fruit, especially berries and stone fruit, will last longer in the refrigerator.
  • Countertop Ripening: Some fruit, like pears, benefit from a few days on the counter to fully ripen after picking.
  • Preservation: Consider preserving excess fruit through freezing, canning, or drying. This allows you to savor your harvest long after the season ends.

Remember that dwarf fruit trees often produce a manageable amount of fruit, perfect for personal consumption and sharing with friends and family without overwhelming you with a huge harvest.

Two healthy dwarf fruit trees, an apple with developing fruit and a fig, in different sized containers on a patio, with empty pots and potting mix nea

Frequently Asked Questions

How much fruit can I expect from a dwarf fruit tree in a container?

While yields vary by tree type and age, a mature dwarf apple or peach tree in a 25-gallon container might yield 10-20 pounds of fruit annually. Smaller trees like blueberries or dwarf figs can produce several pounds each. The specific variety and your care regimen directly impact the amount of fruit your tree yields.

Do I need to repot my dwarf fruit tree? If so, how often?

Yes, you need to repot your dwarf fruit tree as it grows. Start with a 10-15 gallon pot for a young tree, then typically repot every 2-3 years into a larger container, moving up to a final size of 25-30 gallons or more. This provides fresh potting mix and more room for root development. When repotting, gently prune some of the outer roots to encourage new growth.

Can I grow dwarf fruit trees from seed?

While you can grow fruit trees from seed, it is not recommended for reliable fruit production. Trees grown from seed are rarely true to the parent plant, meaning they may not produce the same quality or type of fruit. They also take much longer to fruit, often 7-10 years, and will not have the dwarfing characteristics provided by specific rootstocks. Purchase grafted dwarf trees from reputable nurseries for best results.

My dwarf fruit tree flowers but does not produce fruit. What could be wrong?

Several factors can cause a lack of fruit set. The most common reasons include insufficient pollination (if your tree requires a pollinator and you only have one tree, or if pollinators are scarce), late spring frosts damaging blossoms, or inadequate sunlight. Ensure your tree receives at least 6-8 hours of direct sun daily and consider if it needs a compatible pollinator nearby. You can hand-pollinate with a small paintbrush if natural pollinators are absent.

How do I know if my dwarf fruit tree is getting enough sunlight?

Observe your patio or balcony throughout the day. Track how many hours of direct sunlight the area receives. Direct sunlight means the sun’s rays are shining directly on the plant, not filtered through a window or tree canopy. If your tree is not thriving or flowering, lack of sufficient sunlight is a likely culprit. Most fruit trees require a minimum of six hours of direct sun for good fruit production.

For research-based guidance on edible gardening, visit
Cornell Garden-Based Learning,
UF/IFAS Gardening Solutions,
Penn State Extension — Gardening, and
Royal Horticultural Society on Growing Fruit in Containers.

Disclaimer: This article is for informational purposes only and is not a substitute for professional advice. Consult local extension services for region-specific recommendations.