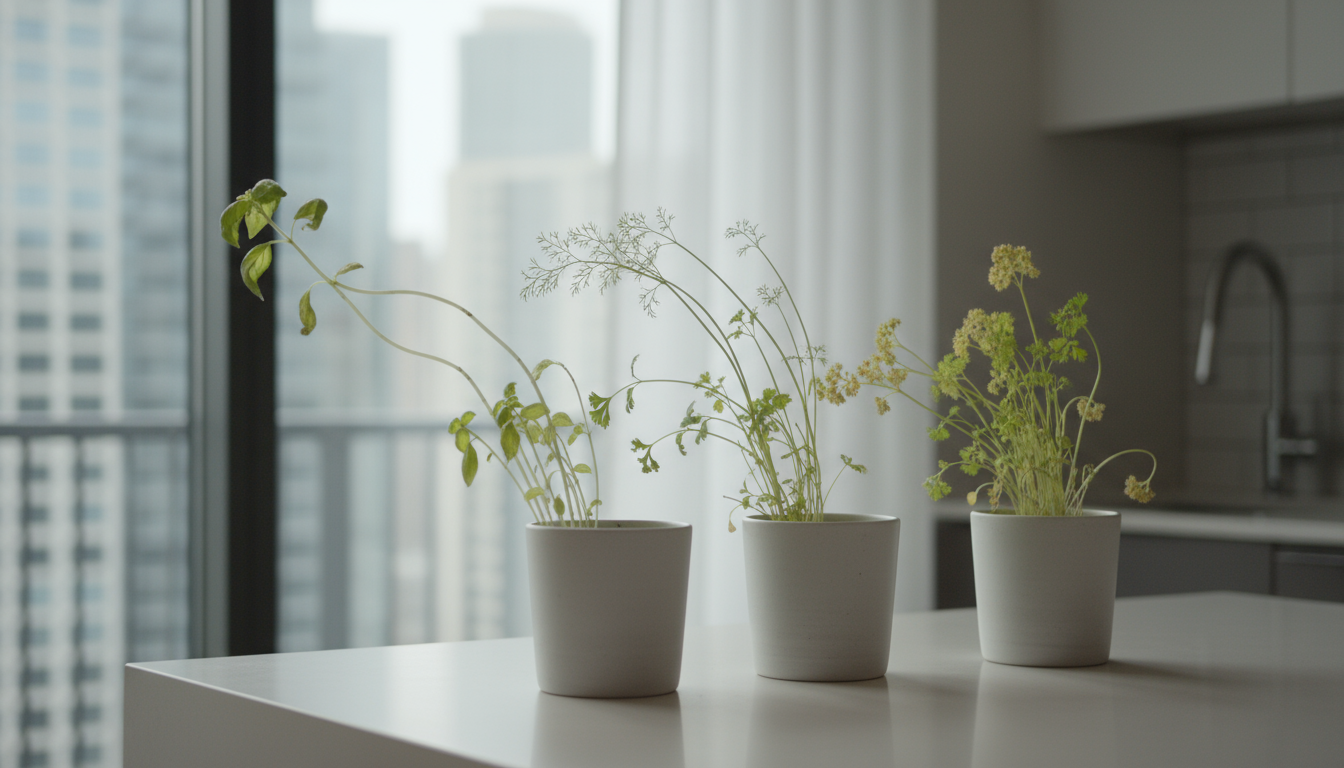
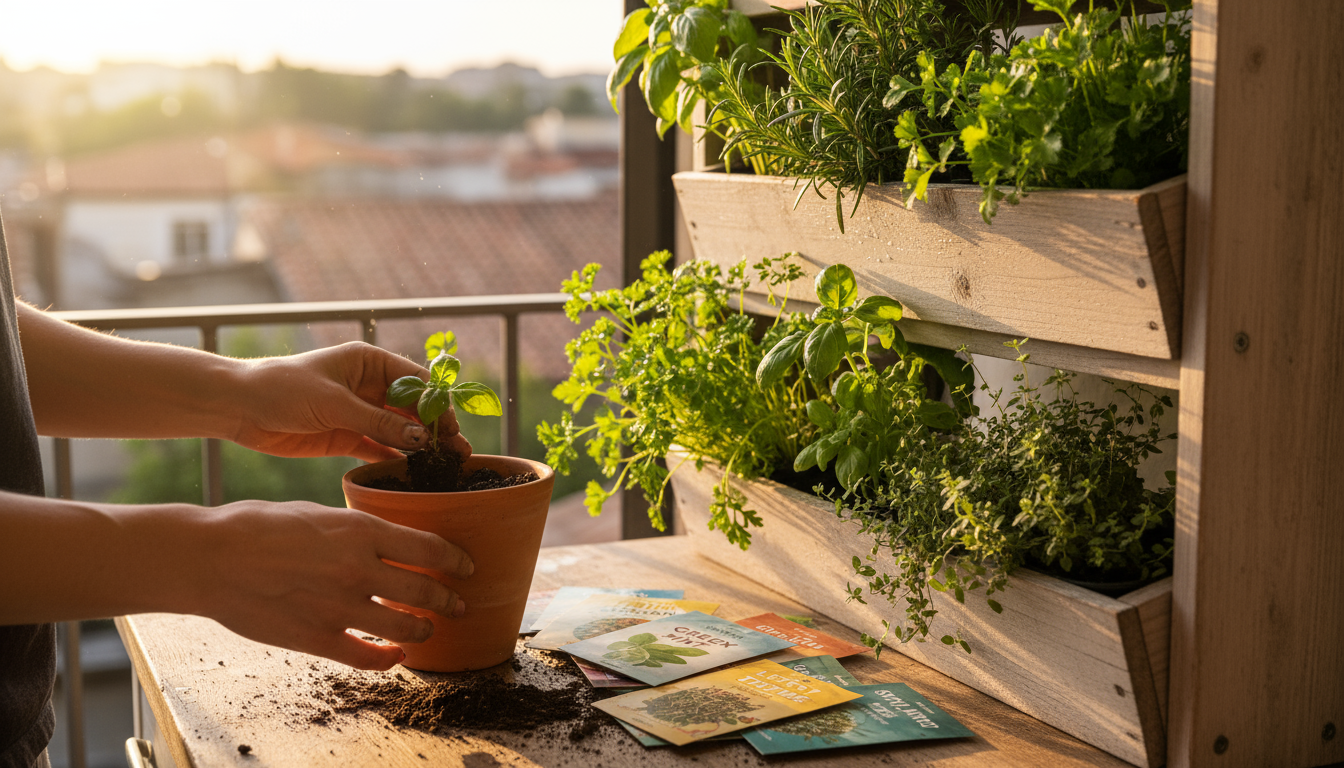
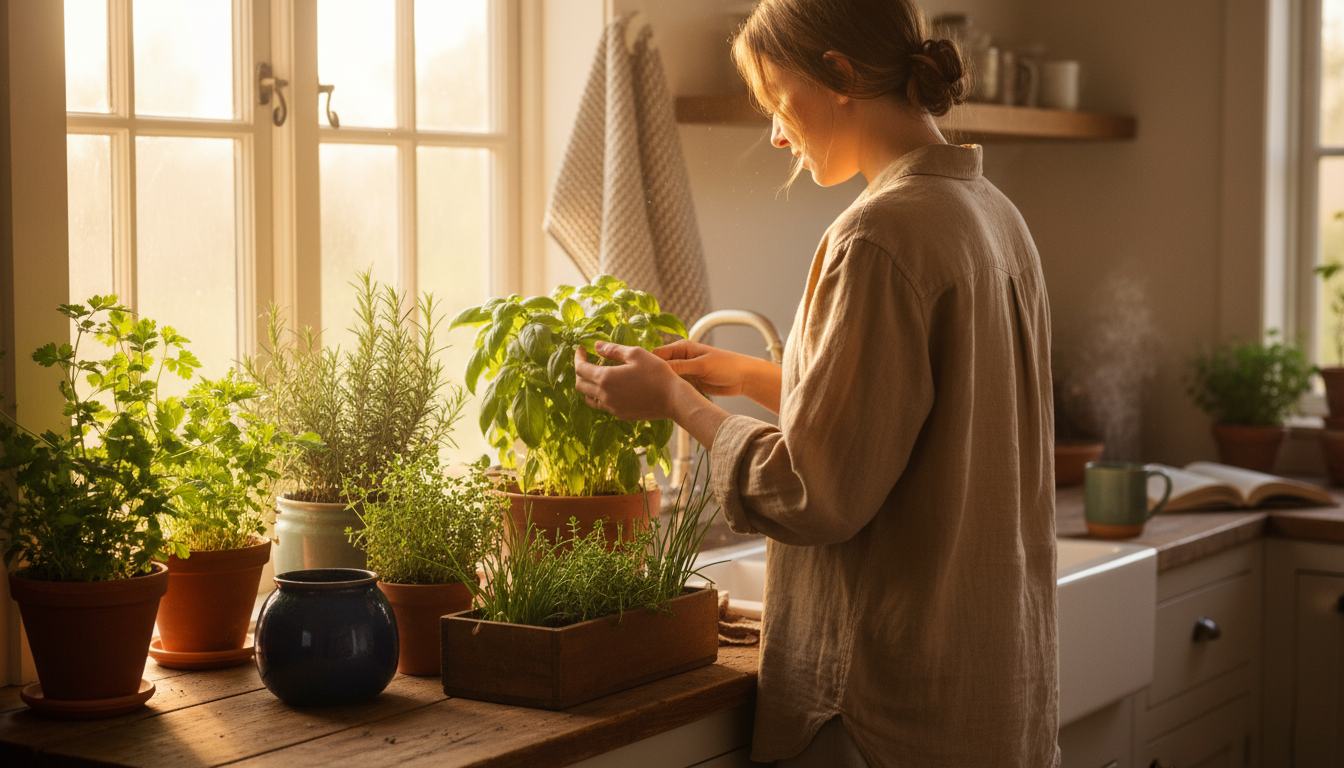
Imagine fresh basil for your pasta in December, bright mint for a summer drink in February, or fragrant rosemary for roasted vegetables any day you choose. You can enjoy year-round fresh flavors directly from your kitchen, no matter the season or the size of your outdoor space. Growing herbs indoors offers a simple, rewarding solution for every gardener, from complete beginners to seasoned green thumbs looking for a convenient harvest.
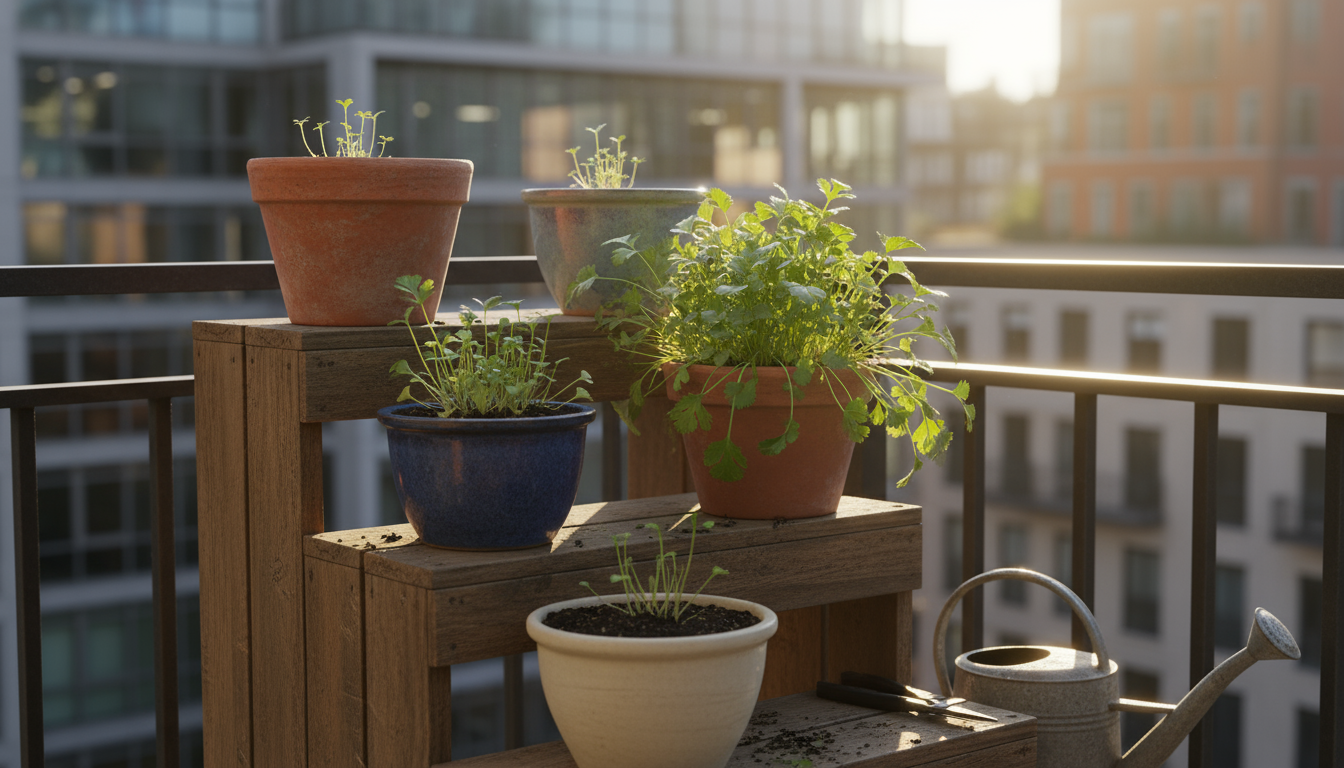
Many people believe gardening requires a sprawling backyard, but that simply is not true. Your balcony, a sunny windowsill, or even a well-lit corner provides ample opportunity to cultivate a thriving indoor herb garden. This article empowers you to transform your indoor spaces into productive zones, ensuring you always have flavorful kitchen herbs at your fingertips. We cover everything from selecting the right plants and containers to mastering light, water, and nutrient needs, allowing you to confidently grow herbs indoors.
For research-based guidance on edible gardening, visit
Oregon State Extension — Gardening,
Washington State University Hortsense,
Texas A&M AgriLife Extension — Horticulture,
University of Illinois Extension — Gardening and
University of Minnesota Extension.
Disclaimer: This article is for informational purposes only and is not a substitute for professional advice. Consult local extension services for region-specific recommendations.
Small-Space Planning for Indoor Herbs
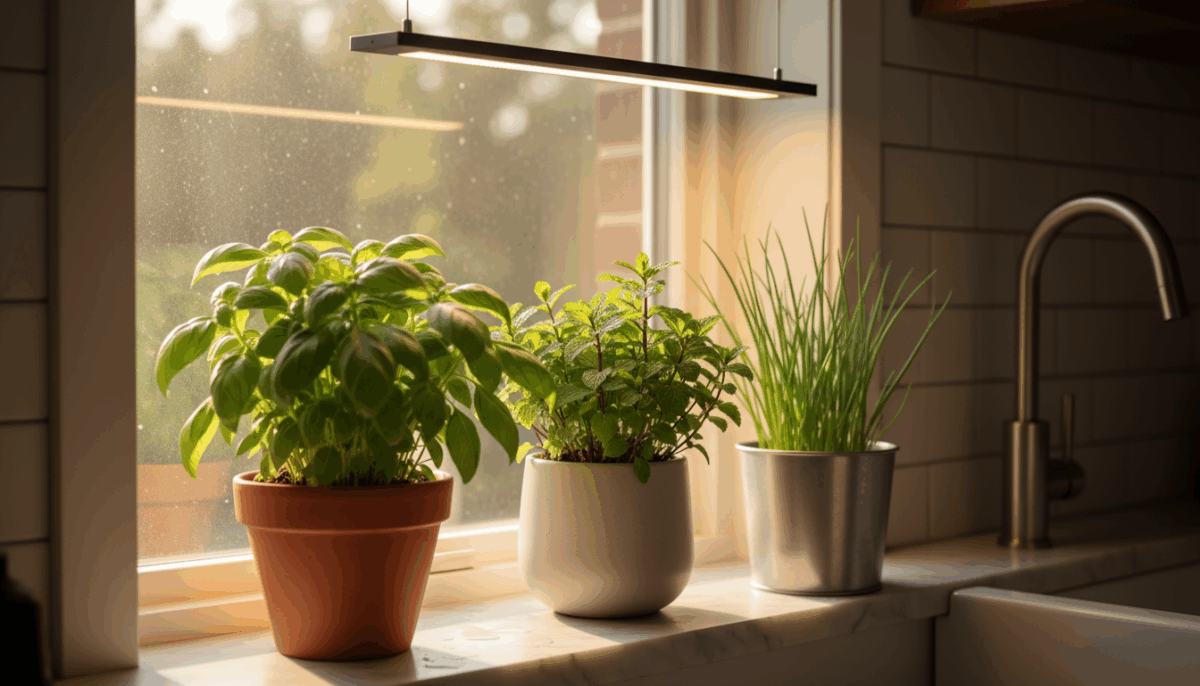
Successful indoor herb gardening begins with thoughtful planning. Your primary consideration is sunlight, the lifeblood of nearly all plants. Most herbs, especially common kitchen herbs, thrive with at least six hours of direct sunlight daily. A south-facing window typically offers the best natural light exposure, while west or east-facing windows provide moderate light. North-facing windows rarely supply enough light for robust herb growth without supplemental lighting.
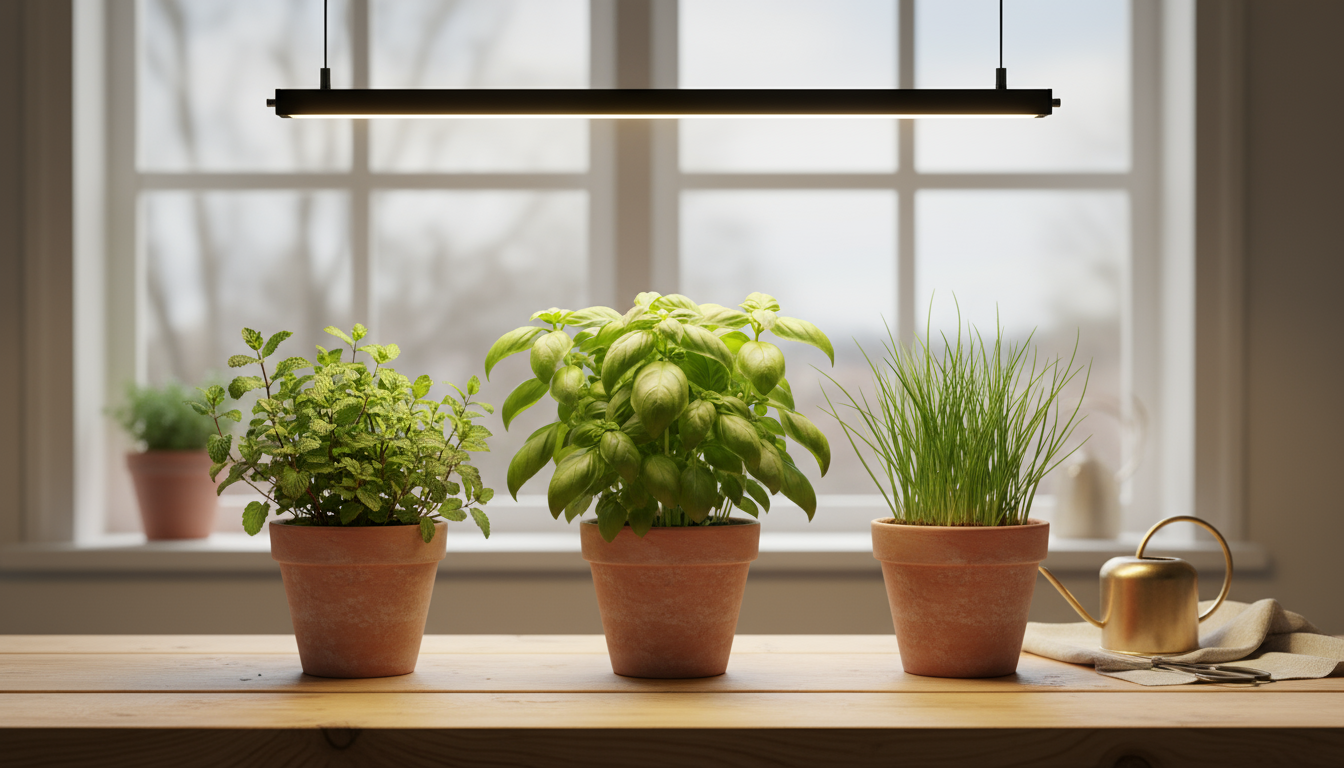
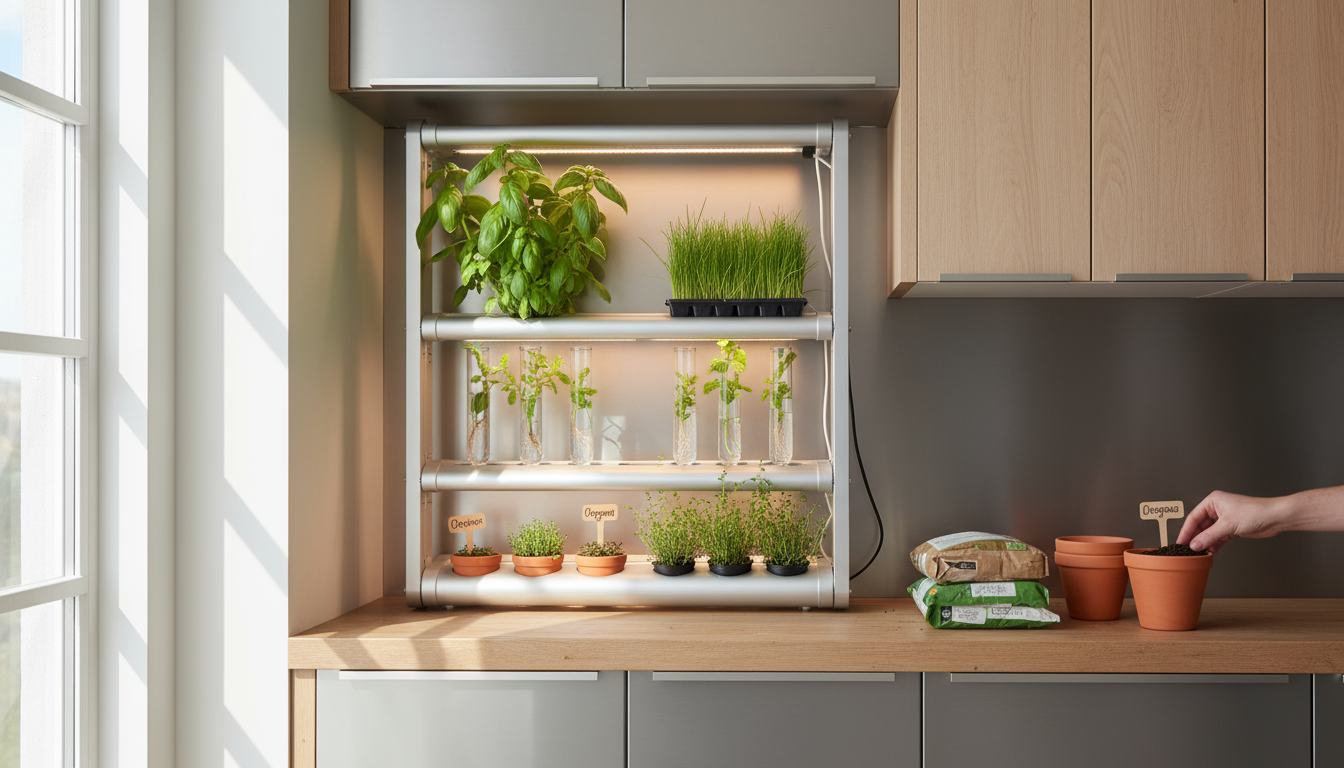
If natural light is limited, artificial grow lights become essential. You do not need expensive, elaborate setups. Simple LED grow lights, available as strips or bulbs, provide the necessary spectrum for plant growth. Position these lights approximately 6-12 inches above your plants, adjusting the height as they grow. Most herbs benefit from 12-16 hours of artificial light per day, mimicking a long summer day. Smart timers simplify this process, ensuring consistent light cycles.
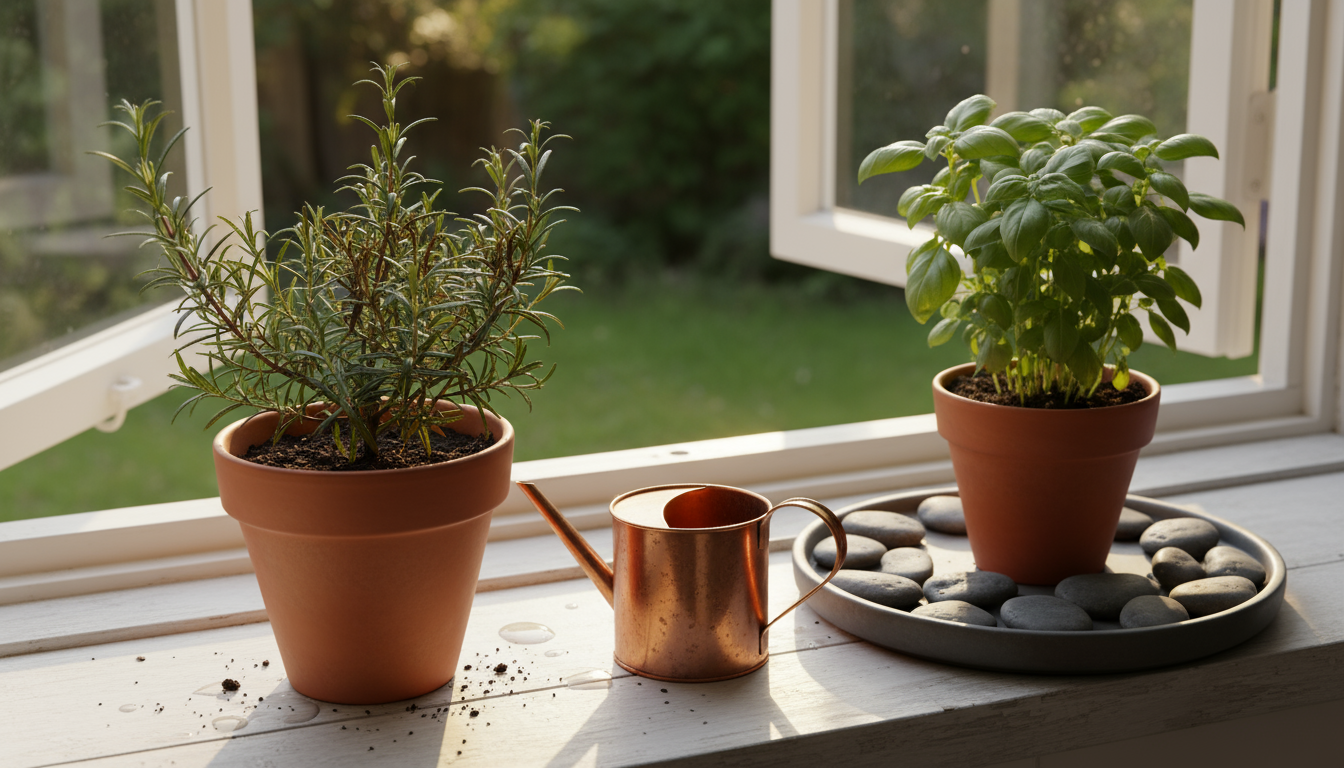
Beyond light, consider temperature and humidity. Most herbs prefer temperatures between 65-75°F (18-24°C), mirroring comfortable indoor conditions. Avoid placing herbs near drafty windows, air conditioning vents, or heat registers, as extreme temperature fluctuations stress plants. Humidity is another factor. Your home’s air might be drier than what many herbs prefer, especially in winter. Grouping plants together slightly increases local humidity, as does placing pots on a pebble tray filled with water. As the water evaporates, it adds moisture to the air around your plants. Regular misting can also help, though ensure proper air circulation to prevent fungal issues.
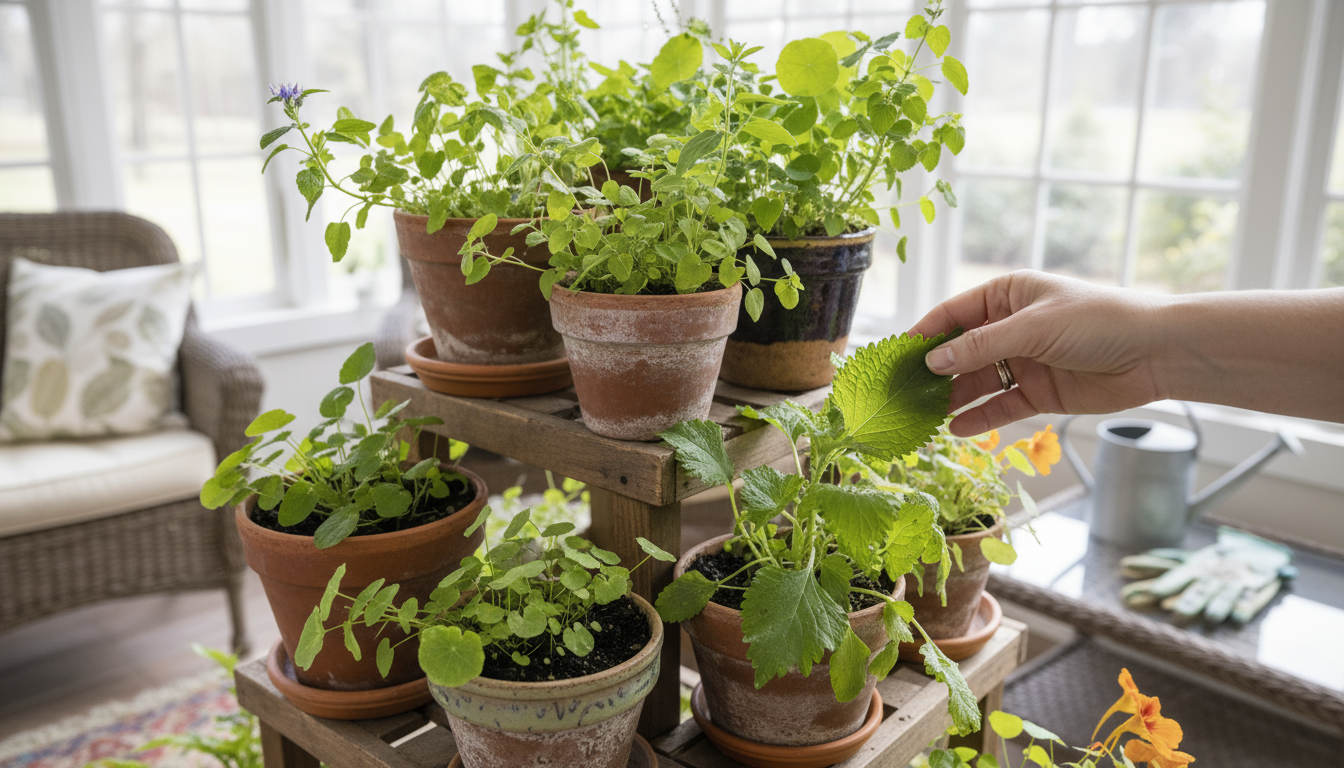
Finally, think about accessibility. Place your herbs where you can easily reach them for watering, harvesting, and observation. A kitchen countertop, a sturdy shelf, or a dedicated plant stand works well. Ensure adequate airflow around your plants to deter pests and diseases. Crowding plants limits air circulation and light penetration, leading to weaker growth and increased susceptibility to problems. Aim for at least 2-4 inches between pots, depending on the mature size of your herbs, to allow for good air movement and light exposure.
When selecting your indoor gardening spot, assess the physical space, natural light availability, and environmental conditions. If a spot lacks sufficient natural light, commit to using supplemental grow lights. This proactive approach sets your indoor herb garden up for consistent success and bountiful harvests, ensuring your kitchen herbs flourish.
Choosing Your Containers and Potting Mix
Selecting the right containers and potting mix establishes a strong foundation for your indoor herbs. These choices directly impact drainage, aeration, and nutrient availability, all critical for healthy root development and vigorous plant growth.
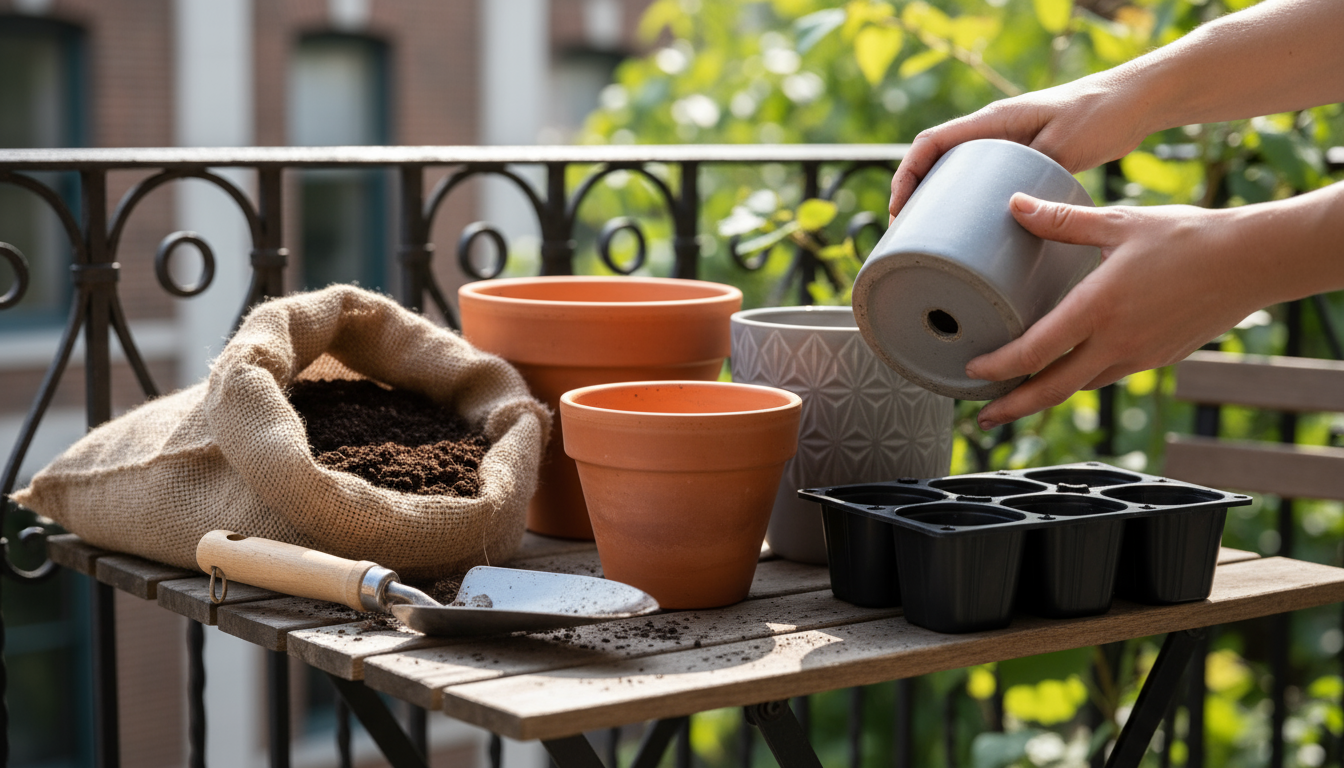
Containers: Size, Material, and Drainage
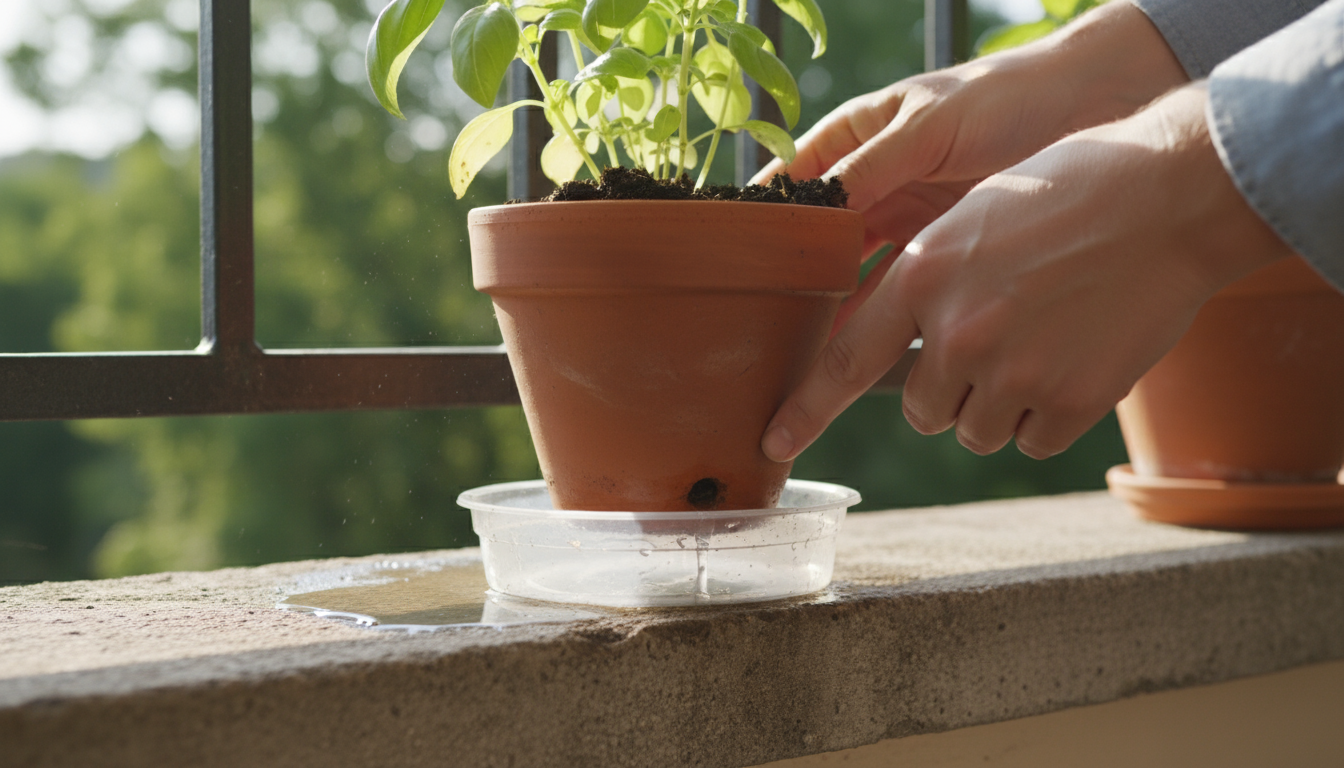
The ideal container size depends on the herb you plan to grow. As a general rule, a pot with a diameter of 6-8 inches (15-20 cm) accommodates most individual herbs like basil, mint, or parsley comfortably. Larger herbs, such as rosemary or bay laurel, benefit from pots 10-12 inches (25-30 cm) in diameter to support their more extensive root systems. While starting small is tempting, remember that herbs quickly outgrow tiny pots, leading to stunted growth and constant watering needs. Choose a pot that allows for some root expansion, minimizing the need for frequent repotting.
Container materials offer various benefits. Terracotta pots are porous, allowing air and moisture to move through their walls. This makes them excellent for herbs that prefer slightly drier conditions, such as rosemary, thyme, or oregano, as they reduce the risk of overwatering. However, terracotta dries out faster, requiring more frequent watering. Plastic pots retain moisture more effectively, which suits herbs that prefer consistently moist soil, like mint or parsley. They are also lighter and less expensive. Ceramic pots offer aesthetic appeal but are non-porous and heavy, similar to plastic in their moisture retention. Whatever material you choose, ensure the pot has drainage holes at the bottom. Without proper drainage, water collects, leading to root rot and plant death.
Self-watering planters or sub-irrigation planters (SIPs) provide a convenient option for busy gardeners. These containers feature a water reservoir at the bottom and a wicking system that draws moisture up into the soil as needed. This reduces watering frequency and provides consistent moisture, ideal for herbs like mint, chives, or parsley that do not tolerate drying out. While SIPs require an initial investment, they save time and reduce the risk of both overwatering and underwatering, making them an excellent choice for a productive indoor gardening setup.
Potting Mix: The Foundation of Health
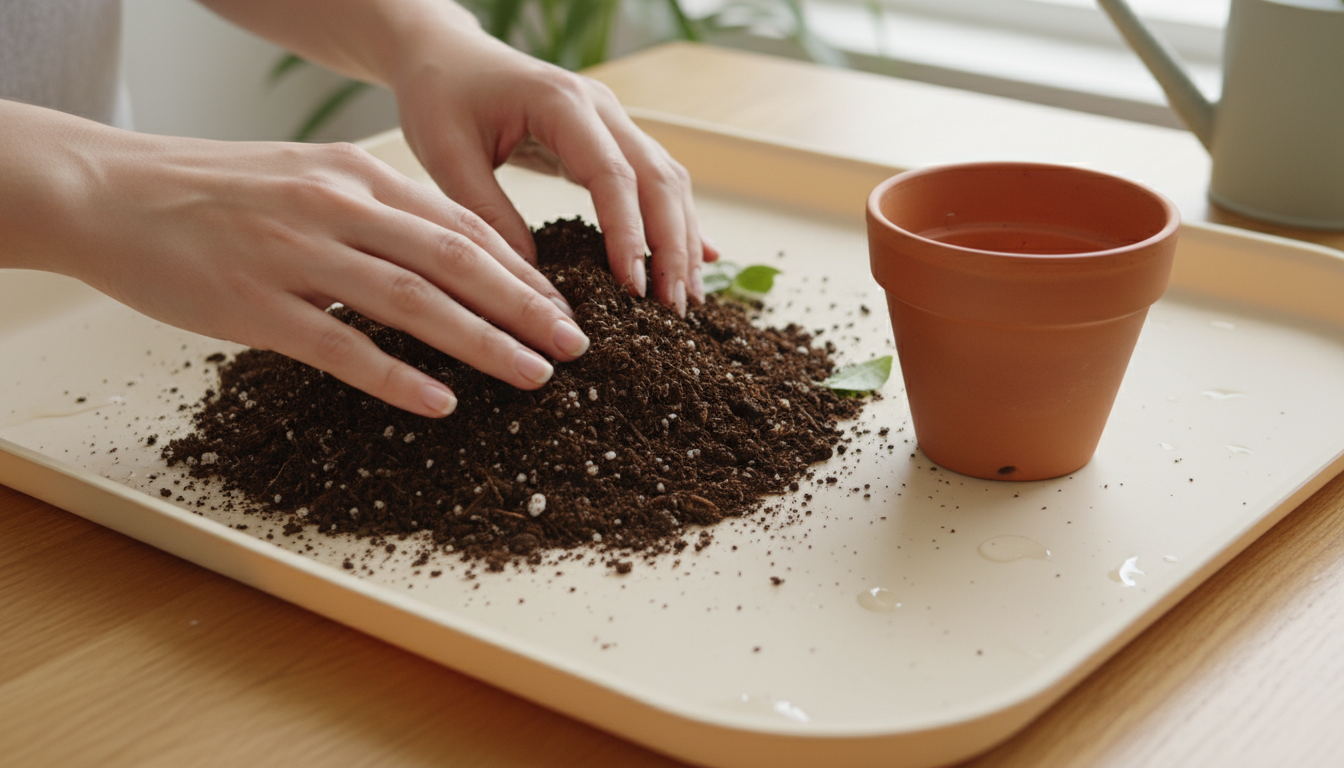
The right potting mix is crucial for indoor herbs. Garden soil, which compacts easily and often harbors pests or diseases, is unsuitable for containers. Instead, use a high-quality, lightweight potting mix designed for container plants. Look for mixes that are “all-purpose” or specifically formulated for “herbs and vegetables.”
An ideal potting mix offers several key characteristics:
- Good Drainage: It allows excess water to pass through quickly.
- Aeration: It provides air pockets for roots to breathe.
- Moisture Retention: It holds enough moisture to keep roots hydrated between waterings.
- Nutrient Content: It supplies initial nutrients for plant growth.
Many conventional potting mixes contain peat moss, a non-renewable resource. For environmentally conscious gardening, seek out peat-free alternatives. These mixes often use coir (coconut fiber), compost, pine bark fines, or rice hulls as their base. Coir, in particular, offers excellent water retention and aeration properties, mimicking peat moss effectively while being more sustainable.
To enhance your potting mix, consider adding amendments:
- Perlite or Vermiculite: A handful of either improves drainage and aeration, especially in dense mixes. Perlite brightens the mix, while vermiculite also improves water retention.
- Compost: A small amount of well-rotted compost (about 10-20% of the total volume) enriches the mix with beneficial microbes and slow-release nutrients, reducing the need for immediate fertilization.
You can reuse potting mix, but do so carefully. After a plant finishes its cycle, remove any large root balls and allow the spent mix to dry out. While it lacks significant nutrients, you can refresh it by adding fresh compost, a slow-release organic fertilizer, and some new perlite or coir. This revitalized mix works well for less demanding plants or as a base for new seedlings, supporting your sustainable indoor gardening ideas.
Essential Care: Light, Water, and Nutrients
Mastering light, water, and nutrient management forms the cornerstone of a thriving indoor herb garden. These three elements are interconnected, and understanding their rhythm ensures your kitchen herbs remain healthy and productive throughout the year.
Light: The Energy Source
As previously mentioned, light is paramount. Most culinary herbs demand bright conditions. Aim for a minimum of 6 hours of direct sunlight, ideally 8-10 hours, to foster vigorous growth and strong flavor development. Without sufficient light, herbs become leggy, pale, and produce fewer, weaker leaves. This leggy growth indicates the plant is stretching to find more light, a common symptom in dim indoor environments.
If natural light falls short, invest in full-spectrum LED grow lights. These lights emit the specific wavelengths of light that plants need for photosynthesis, providing a powerful substitute for sunshine. Place your grow lights 6 to 12 inches (15-30 cm) above the foliage, adjusting the height as your herbs grow. Maintain a consistent light schedule, typically 12-16 hours per day, using a timer. This consistency prevents stress and encourages steady growth, ensuring your indoor gardening ideas translate into vibrant plants.
Water: The Balancing Act
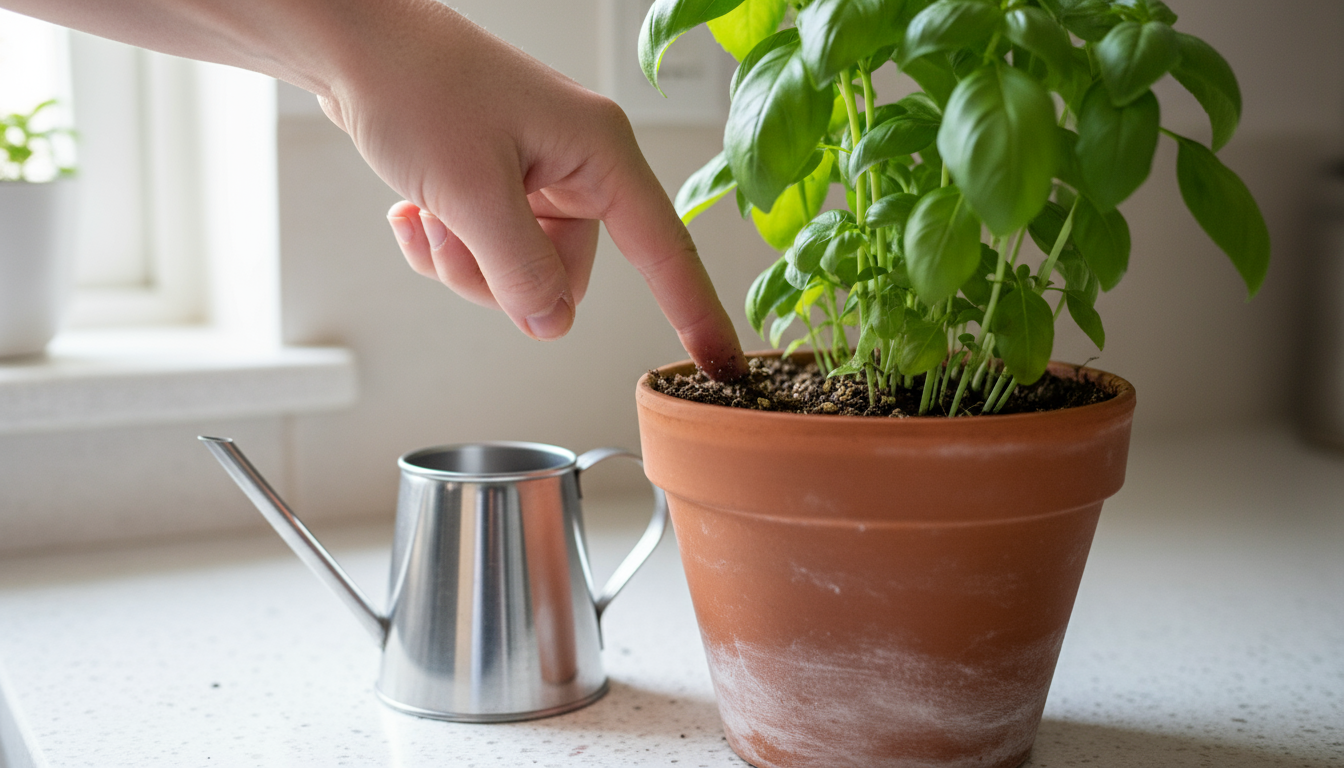
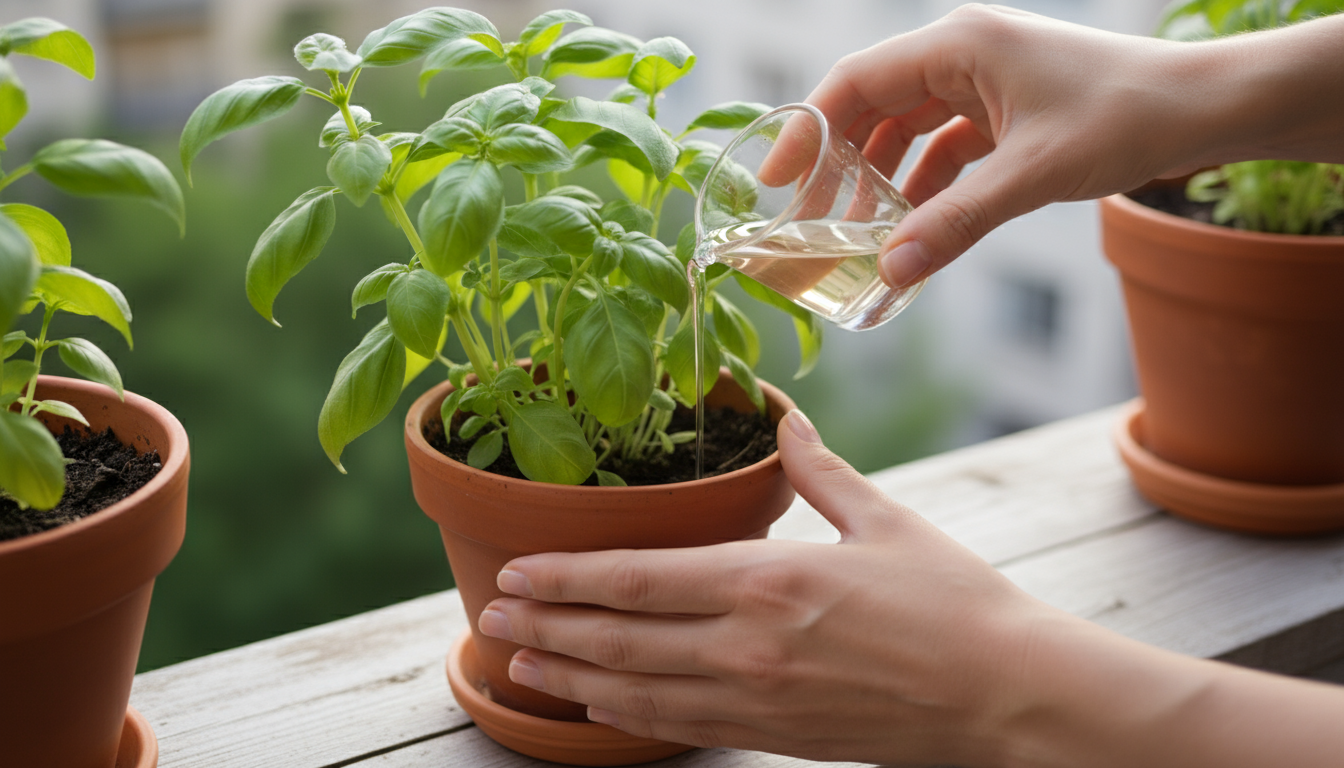
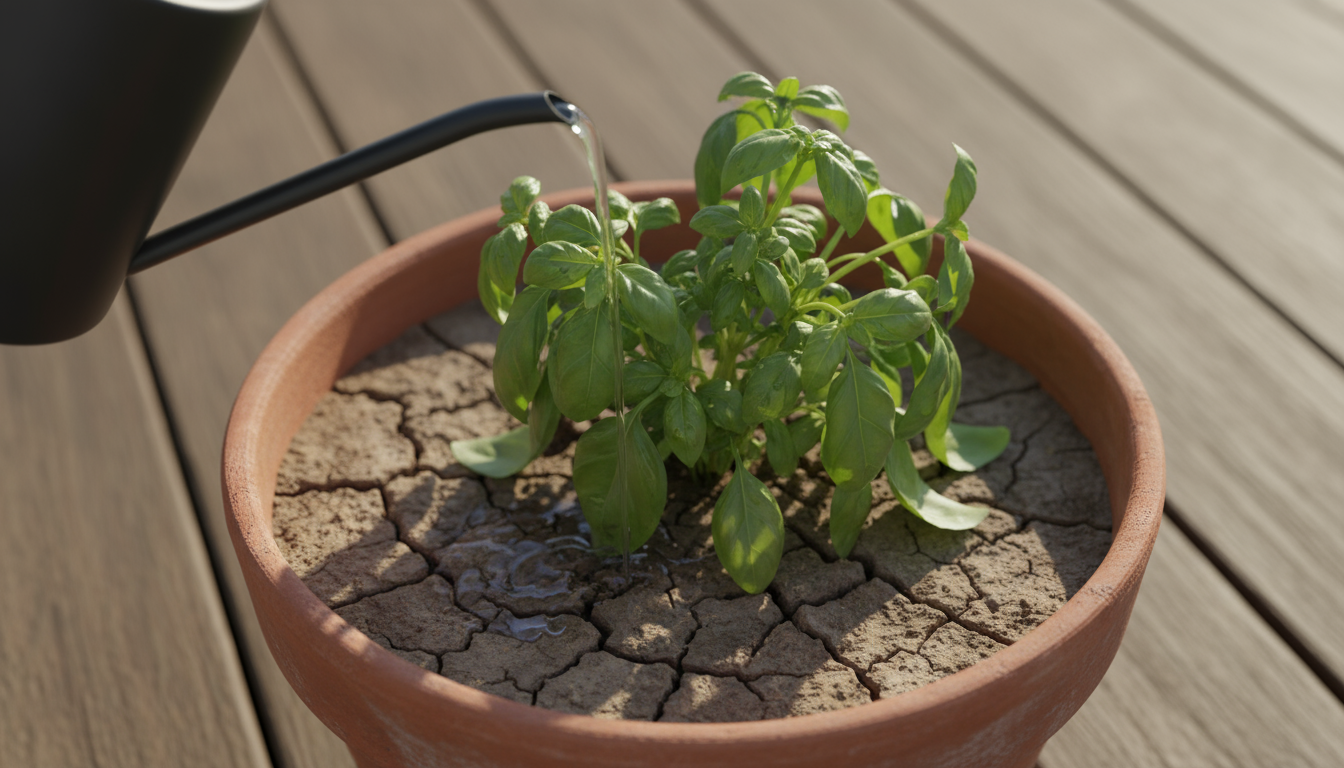
Proper watering is perhaps the most challenging aspect of indoor plant care. Both overwatering and underwatering harm your herbs. Overwatering leads to root rot, a fungal disease that suffocates roots, while underwatering causes wilting and nutrient lockout. The key is to water thoroughly when the plant needs it, allowing the top inch or two (2.5-5 cm) of soil to dry out between waterings. Use your finger to check the soil moisture level. If it feels dry to the touch, it is time to water.
When you water, do so deeply. Apply water slowly until it begins to drain from the pot’s bottom holes. This ensures the entire root ball receives moisture. Empty any collected water from the saucer after about 15-20 minutes to prevent roots from sitting in standing water, which can lead to root rot. Wicking mats or self-watering pots, as discussed earlier, offer alternative watering methods that provide a consistent moisture supply, reducing the risk of human error.
Water quality also matters. If your tap water is heavily chlorinated, let it sit out in an open container for 24 hours before using it. This allows the chlorine to dissipate. Alternatively, use filtered water or collected rainwater. The temperature of the water is also important. Use room-temperature water rather than cold water, as cold water can shock plant roots.
Nutrients: Feeding Your Herbs
Potting mixes provide initial nutrients, but these deplete over time, especially with frequent watering. Indoor herbs, confined to containers, require supplemental feeding to sustain their growth. However, herbs do not need heavy fertilization; too much can lead to excessive leafy growth with less intense flavor. Think of it as an organic feeding cadence.
Opt for a balanced, organic liquid fertilizer or a slow-release granular organic fertilizer. A common NPK ratio for herbs is around 2-2-2 or 3-2-2, indicating a balanced supply of nitrogen (N) for foliage, phosphorus (P) for roots and flowers, and potassium (K) for overall plant health. Follow the product’s instructions for dilution and application, typically feeding every 2-4 weeks during active growth. Reduce feeding in winter or during periods of slow growth. For instance, if a fertilizer suggests feeding every two weeks, you might dilute it to half strength and apply every two weeks, or full strength every four weeks, depending on the herb’s specific needs and growth rate. Young seedlings generally do not need fertilizer until they develop a few sets of true leaves.
Compost tea or worm castings offer gentle, natural nutrient boosts. Steep a handful of worm castings in water for a day to create a nutrient-rich liquid feed, or simply top-dress your pots with a thin layer of worm castings. These organic amendments provide a slow release of nutrients and introduce beneficial microbes to the soil, supporting a healthy root environment and boosting your indoor gardening ideas.
By attentively managing light, perfecting your watering technique, and providing balanced, gentle nutrients, you create an optimal environment for your indoor herbs to flourish. Consistent care prevents common problems and ensures a steady supply of flavorful kitchen herbs, making your indoor garden a constant source of joy and culinary delight.
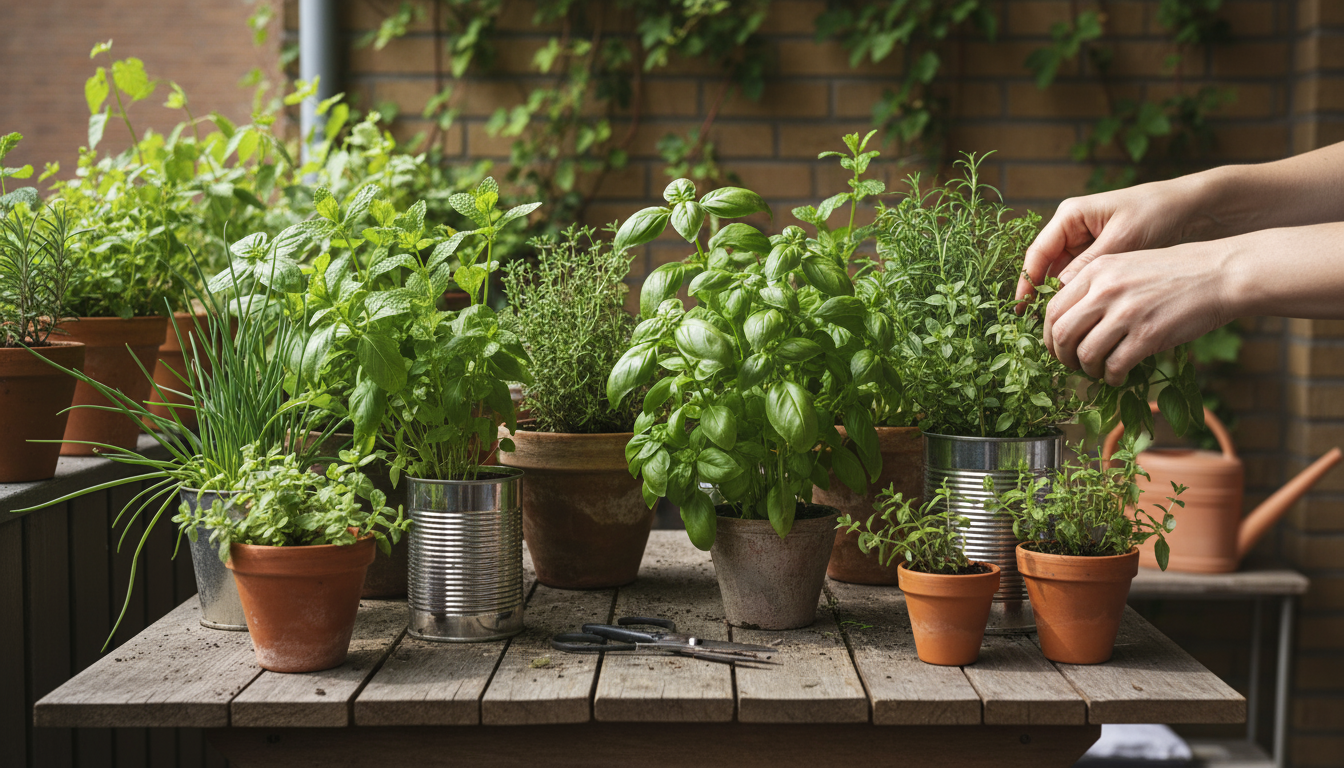
Best Herbs for Indoor Success
Choosing the right herbs significantly impacts your indoor gardening success. While many herbs tolerate indoor conditions, some genuinely thrive, offering abundant harvests with minimal fuss. Focus on varieties that remain relatively compact and have lower light requirements compared to their sun-loving counterparts, or prepare to supplement with grow lights. Here is a selection of excellent choices for your indoor kitchen herb garden, along with specific tips for each:
| Herb | Light Needs | Watering | Tips for Indoor Growth |
|---|---|---|---|
| Basil | High (6-8 hours direct light or grow light) | Consistently moist, but not soggy | Pinch off flowers to encourage leaf production. Harvest often by snipping just above a leaf node. Keep away from cold drafts. ‘Dwarf Bush’ or ‘Genovese’ varieties perform well. |
| Mint | Moderate to High (4-6 hours direct light) | Consistently moist | Extremely vigorous, so grow in its own pot to prevent it from taking over. Propagate easily from cuttings. Trim regularly for bushier growth. |
| Chives | Moderate to High (4-6 hours direct light) | Consistently moist | Harvest by snipping outer leaves at the base. Divide clumps every few years to rejuvenate. Tolerates cooler temperatures. |
| Parsley | Moderate to High (4-6 hours direct light) | Consistently moist | ‘Curled’ and ‘Flat-leaf’ (Italian) varieties grow well. Harvest outer stems. Can be slow to germinate from seed, consider a starter plant. |
| Oregano | High (6-8 hours direct light) | Allow soil to dry slightly between waterings | Prefers well-draining soil. Pinch back regularly to promote branching. Less watering needed than basil or mint. |
| Thyme | High (6-8 hours direct light) | Allow soil to dry thoroughly between waterings | Loves sun and good drainage. Be careful not to overwater. Trim woody stems to encourage new growth. |
| Rosemary | High (6-8 hours direct light) | Allow soil to dry thoroughly between waterings | Needs bright light and excellent drainage. Can be prone to powdery mildew in high humidity. Mist rarely. ‘Arp’ is a resilient variety. |
| Cilantro | Moderate (4-6 hours direct light) | Consistently moist | Tends to “bolt” (go to seed) in warm conditions. Harvest outer leaves frequently. Plant small batches every 2-3 weeks for continuous supply (succession sowing). |

Starting Your Indoor Herb Garden
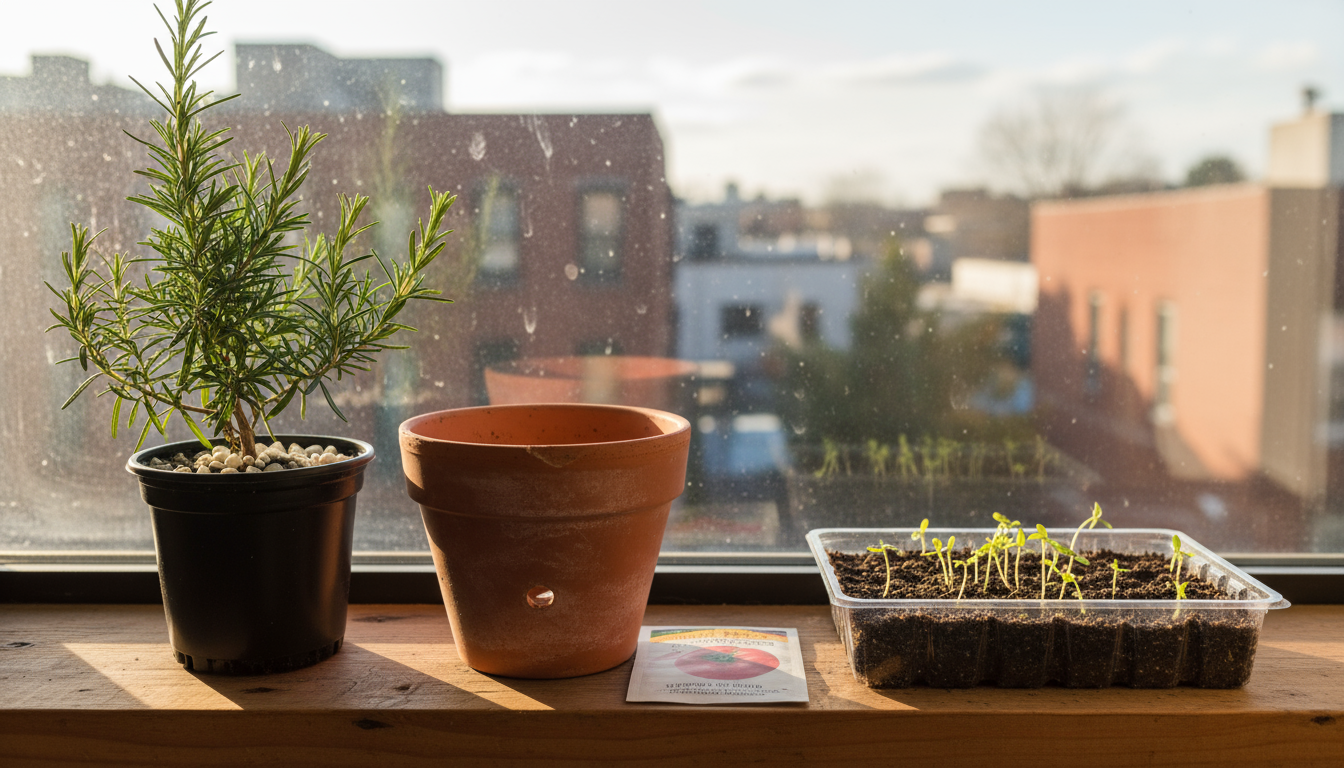
You can start your indoor herb garden from seeds, small nursery plants, or cuttings. Each method offers distinct advantages:
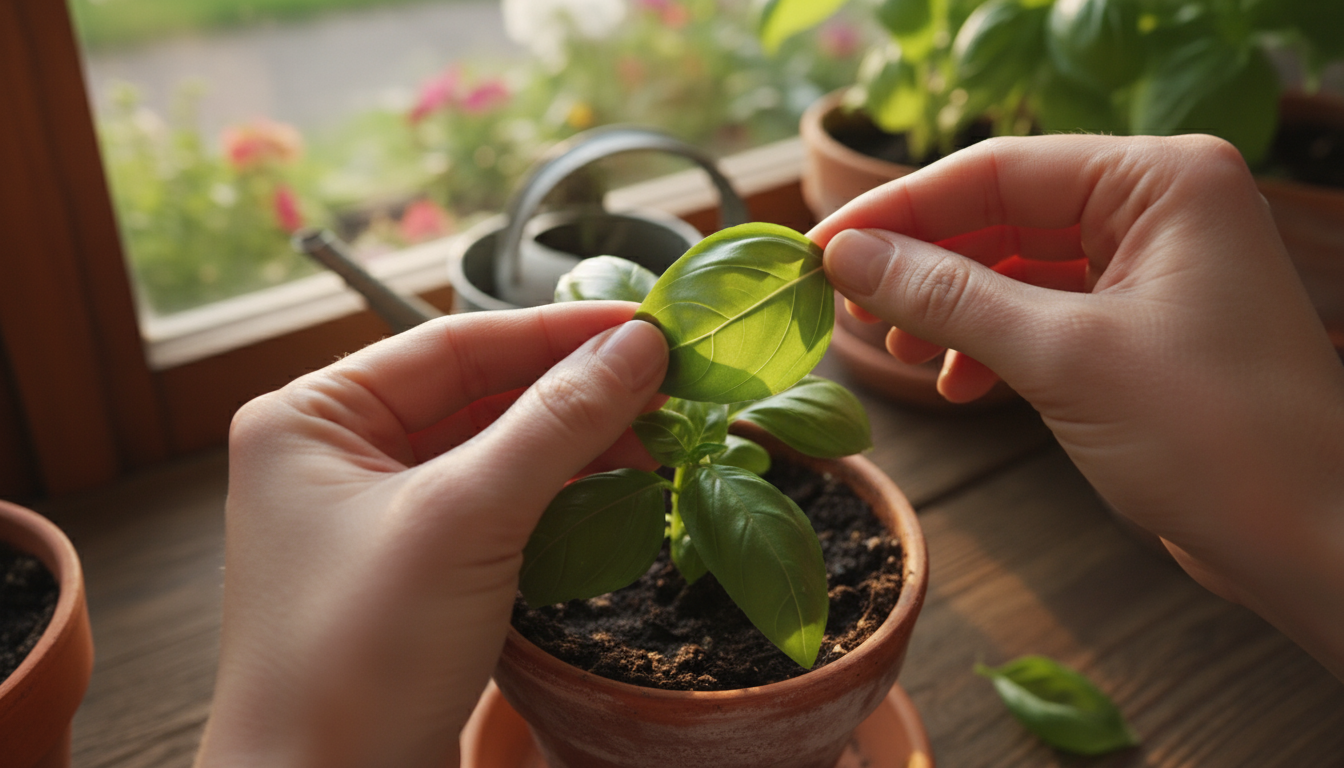
- Seeds: This is the most economical option and offers the widest variety. However, germination can be slow for some herbs like parsley, and requires patience. Plant seeds in a shallow tray or small pots filled with seed-starting mix. Cover lightly with soil, mist gently, and keep warm. A clear dome or plastic wrap creates a mini-greenhouse effect, maintaining humidity.
- Nursery Plants: Purchasing small plants from a garden center provides an instant garden. Choose healthy plants with vibrant green leaves, strong stems, and no signs of pests or disease. Repot them into slightly larger containers with fresh potting mix upon bringing them home.
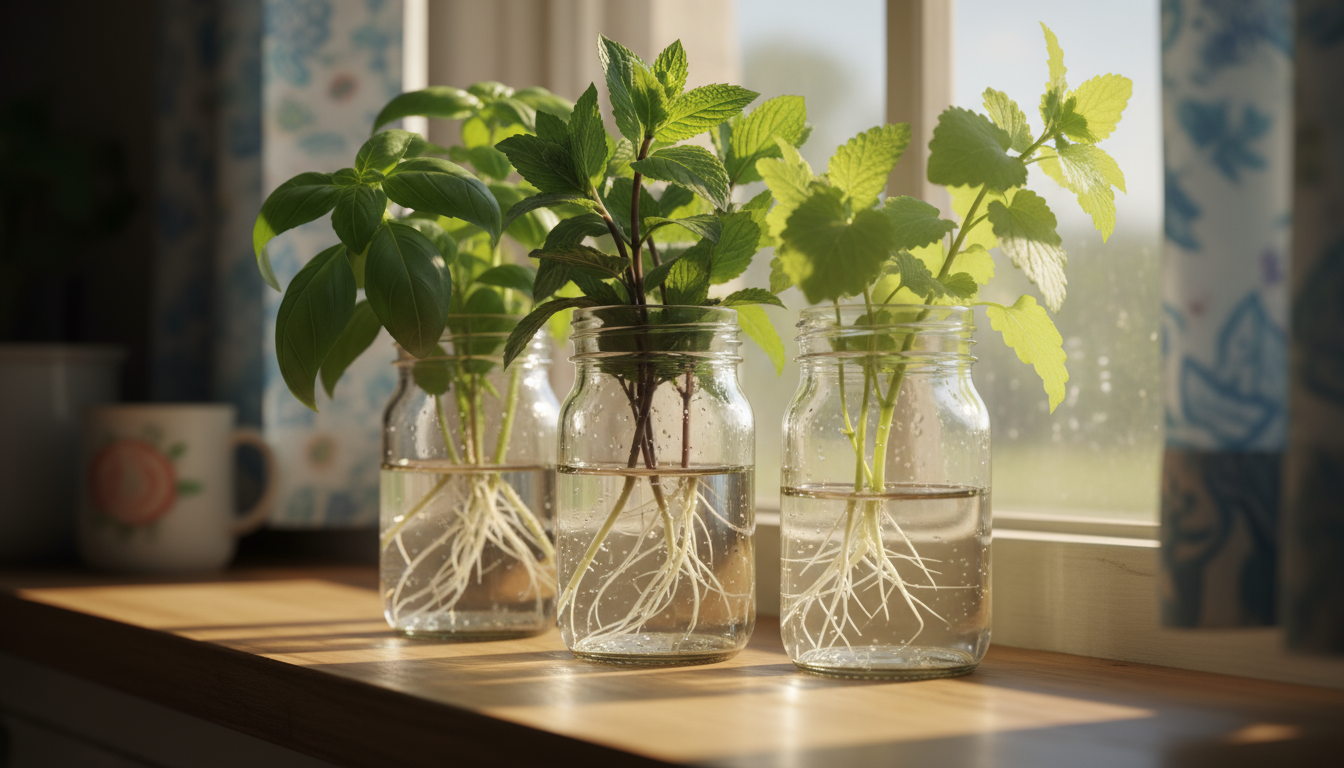
- Cuttings: Many herbs, especially mint, basil, rosemary, and oregano, root easily from cuttings. Snip a 4-6 inch (10-15 cm) stem section from a healthy plant, just below a leaf node. Remove the lower leaves and place the cutting in a glass of water, changing the water every few days. Roots typically form within 1-3 weeks. Once roots are about an inch long, plant the cutting into soil. This is an excellent way to expand your collection or share with friends.
Regardless of your starting method, ensure you provide consistent care. The specific needs of each herb, particularly regarding light and water, dictate their success. By matching the right herb to your indoor conditions and care routine, you cultivate a thriving and flavorful grow herbs indoors experience.
Pruning, Harvesting, and Maintaining Health
Regular pruning and harvesting are not just about collecting fresh flavors; they are crucial practices for maintaining the health, vigor, and productivity of your indoor herbs. Think of these actions as encouraging your plants to grow fuller, produce more leaves, and develop better flavor. This proactive approach supports robust kitchen herbs, transforming them from simple plants into flourishing sources of culinary delight.
Pruning for Bushiness and Yield
Many herbs benefit from frequent pruning, which prevents them from becoming leggy and encourages them to branch out, resulting in a bushier, more productive plant. When you prune, you remove the growing tips of the plant, signaling it to send energy to dormant buds lower down the stem. These buds then activate, producing new stems and leaves.
Here’s how to prune effectively:
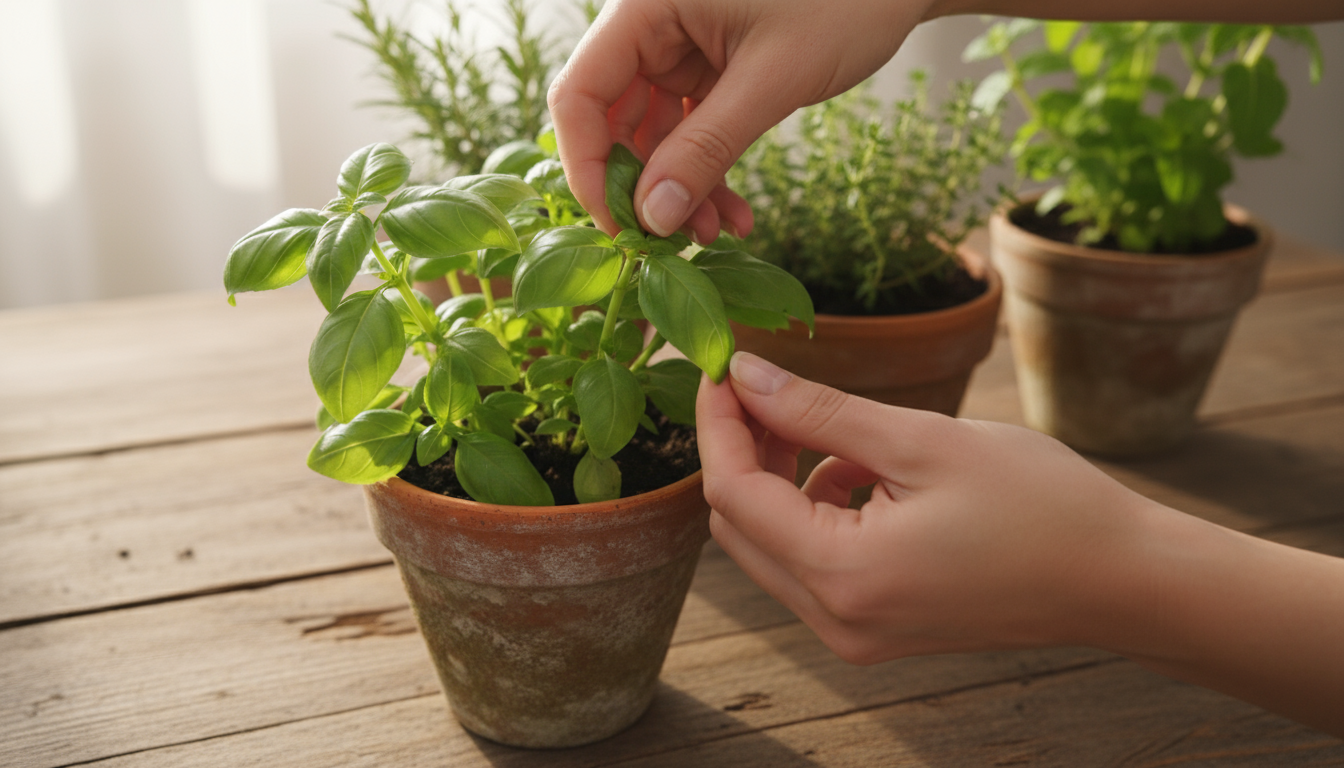
- Pinch Back Regularly: For herbs like basil, mint, oregano, and marjoram, consistently pinch off the top 1-2 inches (2.5-5 cm) of the stem, just above a set of leaves or a leaf node. This is a primary strategy for promoting bushiness.
- Remove Flower Buds: If your goal is leafy production, pinch off any flower buds as soon as they appear. Flowering signals the plant to shift its energy from leaf production to seed production, often resulting in diminished leaf flavor and vigor. Cilantro, for example, quickly goes to seed or “bolts” when it gets too warm or starts to flower, making its leaves bitter.
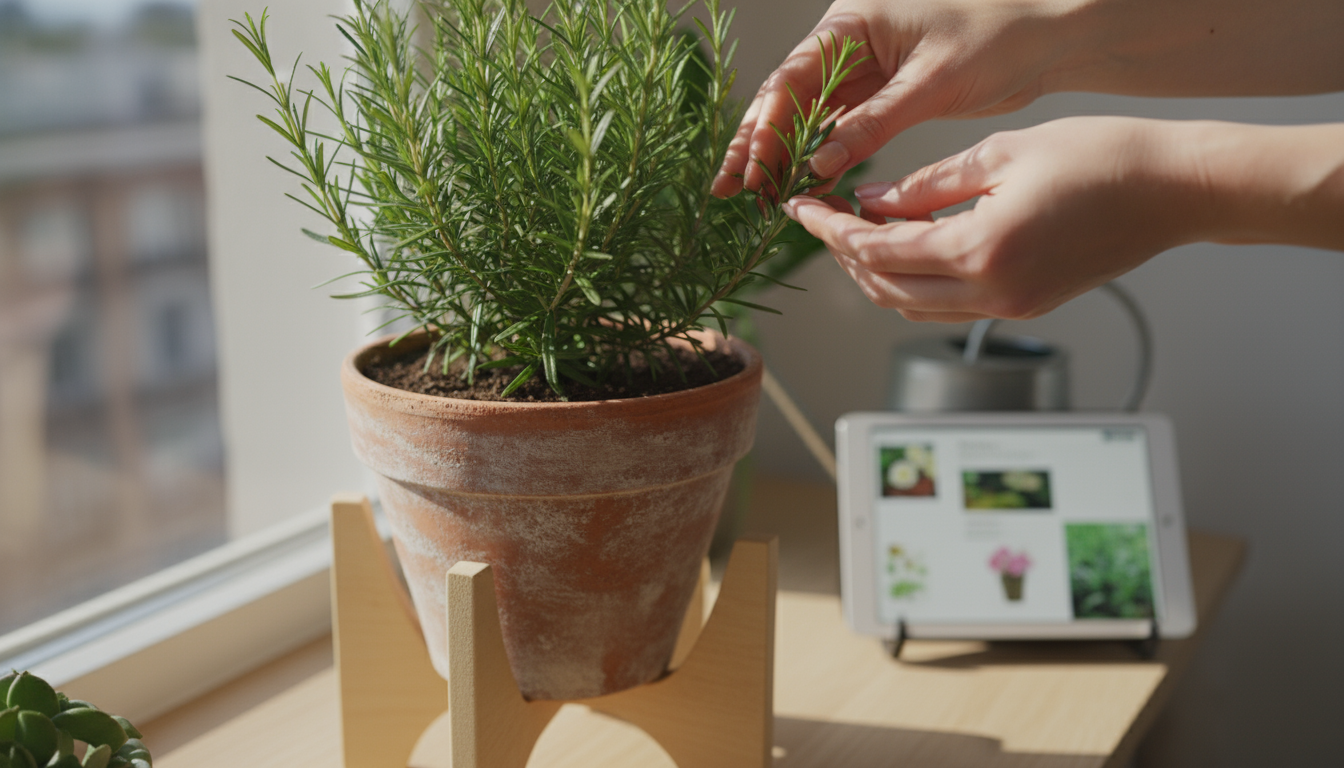
- Trim Woody Stems: For woody herbs like rosemary, thyme, or sage, occasionally trim back older, woody stems to encourage new growth from lower down the plant. Avoid cutting into the completely woody sections, as these may not re-sprout.
- Remove Damaged or Yellowing Leaves: Regularly inspect your plants and remove any leaves that appear yellow, spotted, or damaged. This improves air circulation and prevents potential disease spread, contributing to the overall health of your indoor gardening ideas.
A good rule of thumb is to never remove more than one-third of the plant’s foliage at any one time, allowing the plant enough leaves for photosynthesis and recovery.
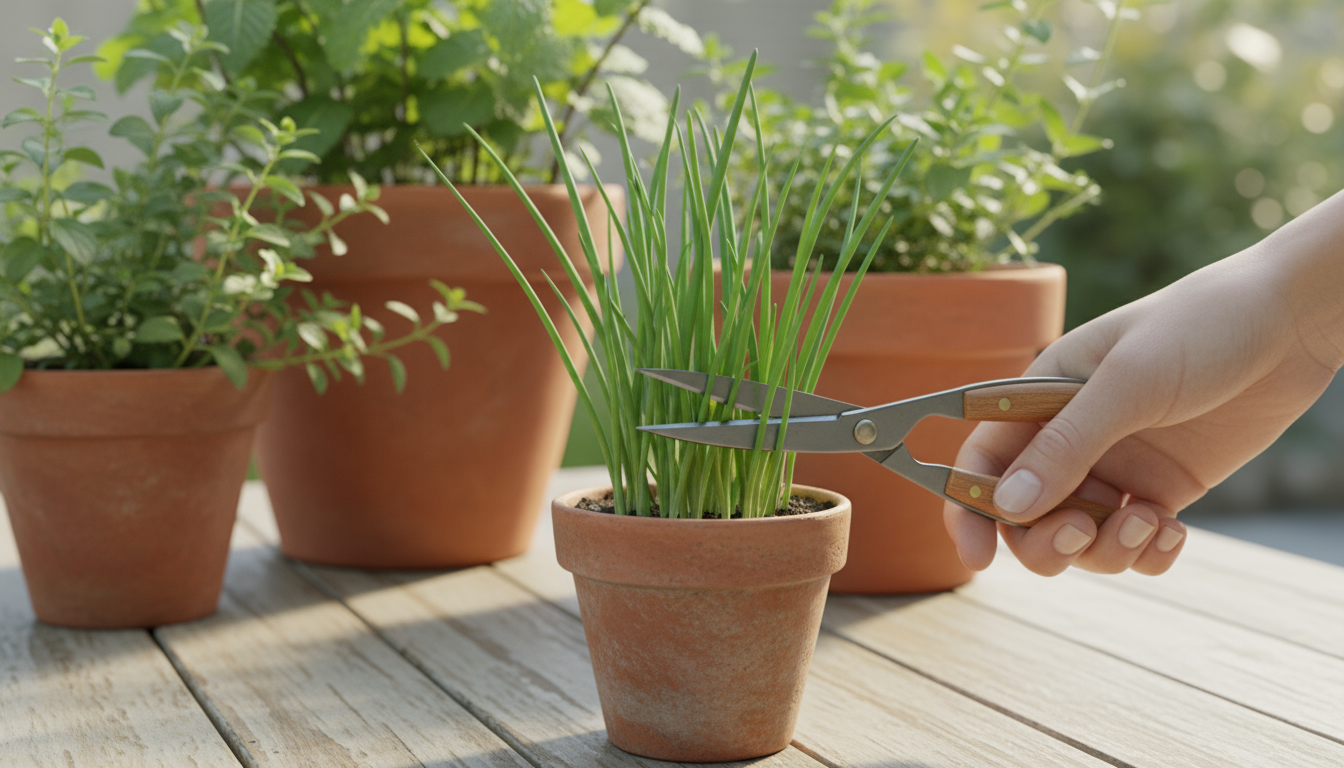
Harvesting for Continuous Flavor
Harvesting is essentially an extension of pruning. Many herbs are “cut-and-come-again” plants, meaning they produce new growth after you harvest. The more you harvest properly, the more they produce, ensuring a continuous supply of fresh kitchen herbs.
Specific harvesting techniques:
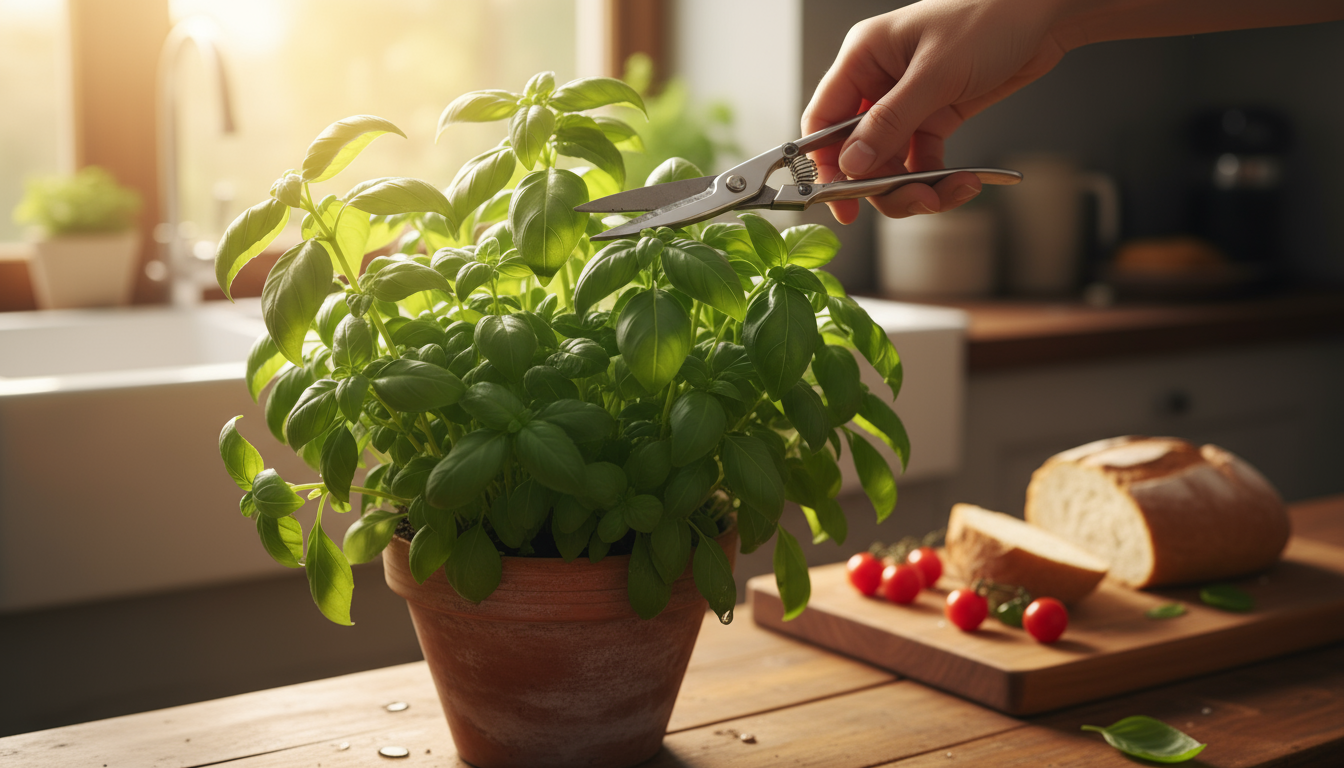
- Basil: Snip stems just above a pair of leaves. This encourages two new stems to grow from that point, making the plant bushier.
- Mint and Parsley: Harvest outer stems first, close to the base of the plant. This allows the inner, younger leaves to continue growing.
- Chives: Snip off the outer blades about an inch (2.5 cm) above the soil line. They regrow quickly.
- Oregano, Thyme, Rosemary, Sage: Snip off leafy stems as needed. For larger harvests, take 4-6 inch (10-15 cm) sections of the stem.
- Cilantro: Harvest outer leaves as needed. For larger harvests, cut about one-third of the plant, leaving the center to regrow. Consider succession sowing for cilantro, planting small batches every couple of weeks to ensure a steady supply before older plants bolt.
Harvesting in the morning, after the dew has dried but before the sun is too strong, often yields the most aromatic leaves. Handle harvested herbs gently to prevent bruising.
Pest Prevention and Least-Toxic Controls
Even indoors, pests can sometimes find their way to your herbs. The best defense is prevention and early detection, an integrated pest management (IPM) approach. Regularly inspect your plants, especially the undersides of leaves, for any signs of trouble.
Common indoor herb pests include:
- Aphids: Small, soft-bodied insects often found on new growth.
- Spider Mites: Tiny pests that create fine webbing, usually on the undersides of leaves, causing yellow stippling.
- Fungus Gnats: Small, dark flies often seen flying around the soil, indicating overly wet conditions.
- Whiteflies: Tiny, white, winged insects that fly up when disturbed.
Strategies for prevention and control:
- Inspect New Plants: Before bringing any new plant into your home, thoroughly inspect it for pests. Isolate new plants for a week or two to ensure no hidden hitchhikers appear.
- Good Airflow: Ensure adequate spacing between plants and good air circulation to deter fungal diseases and some pests.
- Proper Watering: Avoid overwatering. Fungus gnats, in particular, thrive in consistently wet soil surfaces.
- Manual Removal: For small infestations, simply pick off larger pests or blast smaller ones (like aphids) off with a strong stream of water from your kitchen sprayer.
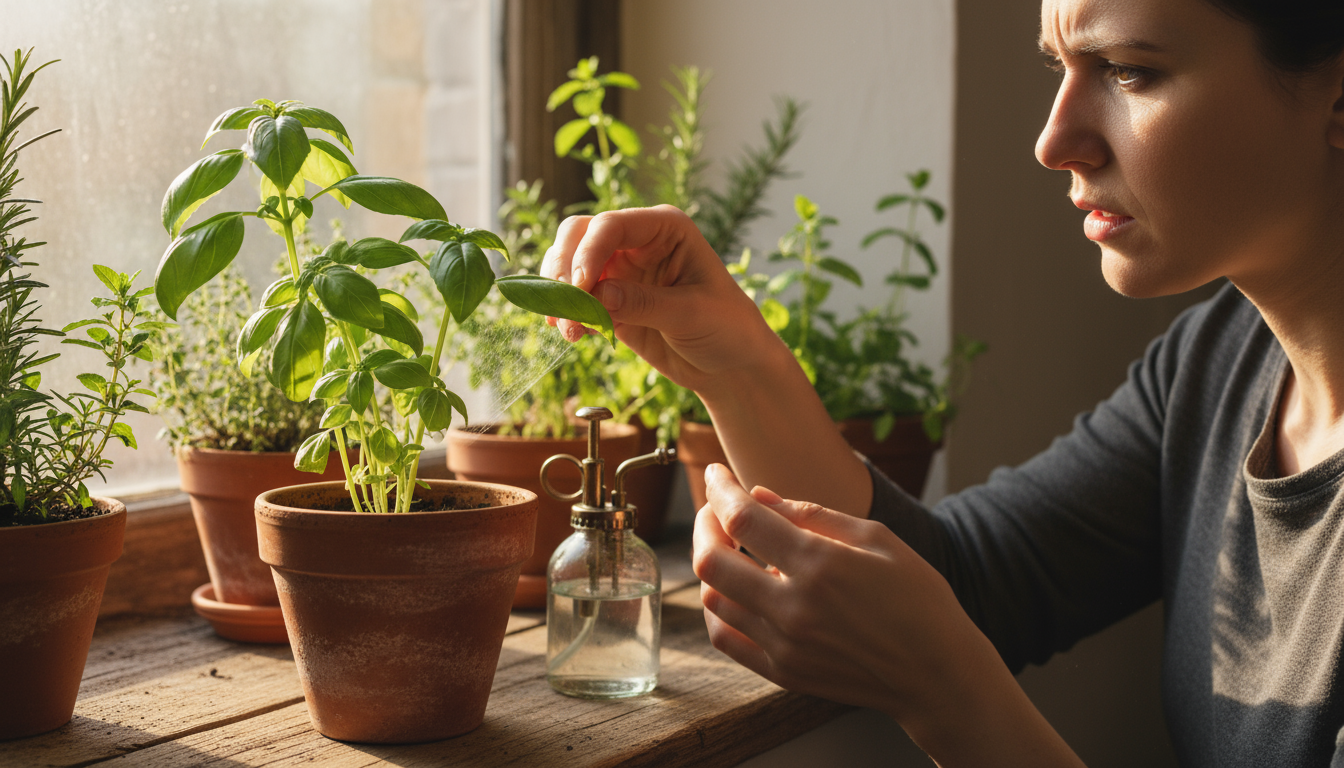
- Insecticidal Soap: A readily available, least-toxic option for many soft-bodied pests. Mix according to package directions and spray all affected plant surfaces, including undersides of leaves. Repeat every 5-7 days until the infestation clears. Always test a small area first to ensure your herb tolerates the spray.
- Neem Oil: An organic pesticide and fungicide that disrupts pest life cycles. Use as a preventative or for active infestations, following product instructions carefully.
- Sticky Traps: Yellow sticky traps effectively catch adult fungus gnats, whiteflies, and thrips, helping you monitor and reduce populations.
By implementing consistent pruning, harvesting, and proactive pest management, you ensure your indoor herbs remain vigorous, healthy, and ready to contribute their fresh flavors to your culinary creations.
Troubleshooting Common Indoor Herb Issues
Even the most diligent indoor gardeners encounter issues from time to time. Recognizing the signs of common problems and understanding their causes helps you respond quickly and keep your kitchen herbs flourishing. Most issues stem from imbalances in light, water, nutrients, or the environment.
Leggy, Stretched Growth
If your herbs appear tall, spindly, and pale with widely spaced leaves, they are “leggy.” This is a clear indicator of insufficient light. Plants stretch and reach for any available light source, elongating their stems in the process. This growth is weak and unproductive, leading to sparse foliage and diminished flavor.
- Solution: Move your herbs to a brighter location, ideally a south-facing window with at least 6-8 hours of direct light. If natural light is limited, invest in a full-spectrum LED grow light and provide 12-16 hours of supplemental light daily. Prune back the leggy growth to encourage bushier, stronger new growth.
Yellowing Leaves
Yellow leaves indicate various issues, requiring careful observation to diagnose the root cause:
- Overwatering: This is the most common cause. Constantly wet soil deprives roots of oxygen, leading to root rot. Leaves turn yellow, often starting at the bottom, and may feel soft or mushy.
- Solution: Allow the top 1-2 inches (2.5-5 cm) of soil to dry out between waterings. Ensure your pots have drainage holes and empty excess water from saucers. Repotting into fresh, well-draining soil and a clean pot can sometimes save an overwatered plant.
- Underwatering: While less common for yellowing, extreme underwatering causes leaves to first wilt, then crisp and turn yellow or brown.
- Solution: Water thoroughly until water drains from the bottom. Establish a consistent watering schedule based on soil moisture, not just calendar days.
- Nutrient Deficiency: A lack of essential nutrients, particularly nitrogen, also causes leaves to yellow, typically older leaves first.
- Solution: Begin a regular feeding schedule with a balanced organic liquid fertilizer, as described in the “Essential Care” section. Ensure proper pH in your soil, as extreme pH levels can lock out nutrient availability.
- Lack of Light: As with leggy growth, inadequate light can cause lower leaves to yellow and drop as the plant prioritizes energy for newer growth.
- Solution: Increase light exposure as described above.
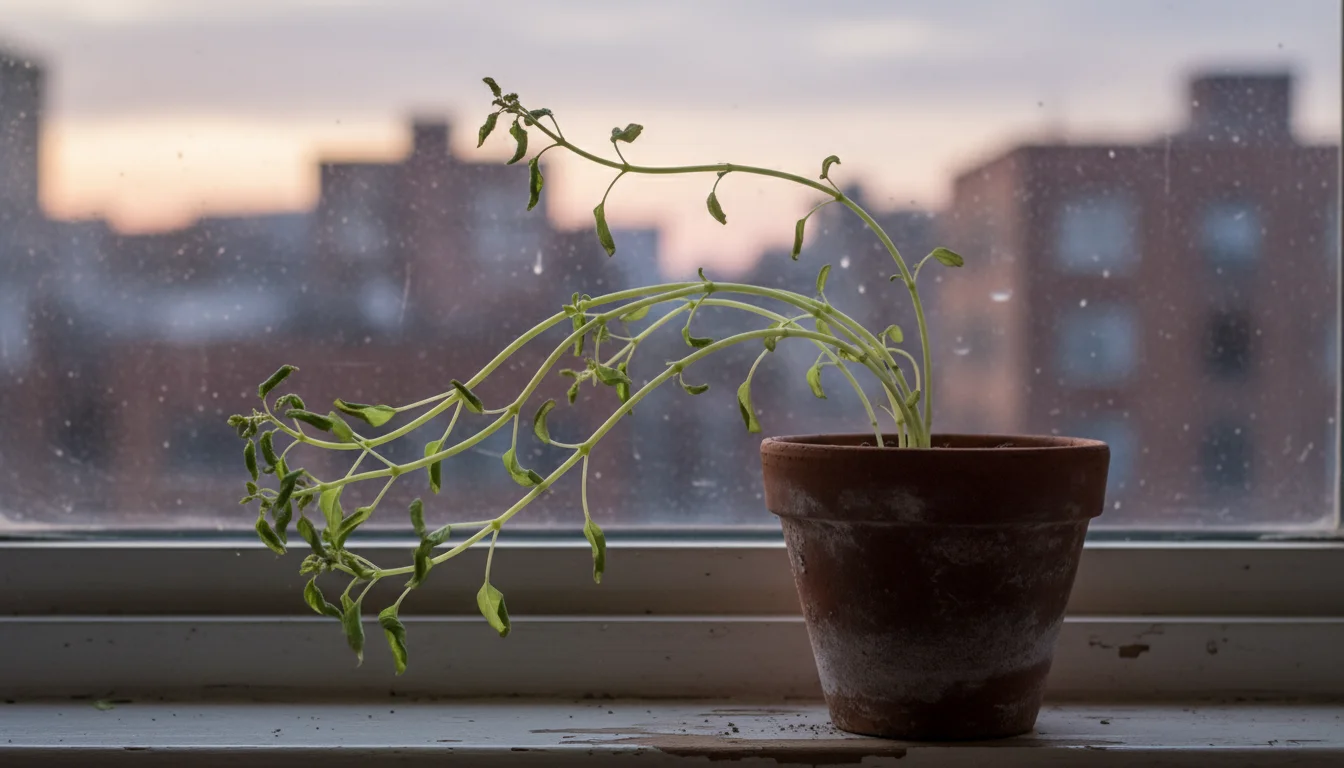
Wilting or Drooping Leaves
Wilting typically points to issues with water uptake or root health:
- Underwatering: The most common reason for wilting. The plant lacks sufficient water pressure in its cells.
- Solution: Water immediately and thoroughly. The plant should perk up within a few hours.
- Overwatering/Root Rot: Ironically, overwatering can also cause wilting. Damaged roots cannot absorb water efficiently, mimicking underwatering symptoms. The key difference is that the soil remains wet.
- Solution: If the soil is wet and the plant is wilting, immediately stop watering. Assess root health by gently pulling the plant from its pot; healthy roots are white and firm, while rotted roots are brown and mushy. If root rot is extensive, the plant may not recover.
- Temperature Stress: Extreme heat or cold drafts can cause wilting.
- Solution: Move plants away from vents, drafty windows, or heat sources. Maintain consistent room temperatures.
Brown or Crispy Leaf Edges
This symptom often suggests low humidity or inconsistent watering:
- Low Humidity: Indoor air, especially in winter with heating, is often very dry.
- Solution: Group plants together, use a pebble tray, or consider a small room humidifier. Misting helps temporarily but does not significantly increase ambient humidity.
- Underwatering: If the soil repeatedly dries out completely, leaf edges turn brown and crispy.
- Solution: Establish a more consistent watering routine, ensuring the plant receives adequate moisture before it becomes severely stressed.
Small Bugs or Webbing on Leaves
Pests are an unfortunate reality, but manageable:
- Spider Mites: Fine webbing and tiny yellow dots on leaves.
- Solution: Isolate the plant. Use a strong spray of water to dislodge mites. Apply insecticidal soap or neem oil every 5-7 days for several weeks, ensuring complete coverage. Increase humidity around the plant if possible, as spider mites thrive in dry conditions.
- Aphids: Clustered on new growth, often green or black.
- Solution: Wipe them off with a damp cloth or blast with water. Apply insecticidal soap.
- Fungus Gnats: Small, flying insects around the soil, indicating overwatering.
- Solution: Allow the top inch of soil to dry out between waterings. Yellow sticky traps catch adults. For severe infestations, consider beneficial nematodes or a soil drench with diluted hydrogen peroxide.
Diligent observation remains your best tool for identifying and addressing issues promptly. Regularly checking your plants for changes in appearance or the presence of pests allows you to intervene early, preventing minor problems from escalating into serious threats to your indoor herb garden. Through consistent monitoring and appropriate adjustments, you maintain healthy, productive kitchen herbs, ensuring a continuous supply of fresh flavor.
Expanding Your Indoor Herb Garden
Once you master the basics of growing your initial batch of kitchen herbs, you naturally look for ways to expand your green sanctuary. Expanding your indoor herb garden means exploring new varieties, propagating existing plants, and implementing smart strategies like succession sowing to ensure a continuous, diverse harvest. These indoor gardening ideas make your space more productive and rewarding.
Propagating Your Favorite Herbs
Propagation, creating new plants from existing ones, is a cost-effective and satisfying way to expand your collection. Many popular herbs root readily from cuttings, offering a simple method to multiply your favorite varieties or replace aging plants.
- Softwood Cuttings: Herbs like basil, mint, oregano, and lemon balm easily root in water. Take a 4-6 inch (10-15 cm) cutting from a healthy, non-flowering stem. Remove leaves from the bottom 2 inches (5 cm) and place the cutting in a glass of water, ensuring a leaf node is submerged. Change the water every few days. Roots typically appear in 1-3 weeks. Once roots are about an inch long, transplant the cutting into a small pot with fresh potting mix.
- Semi-hardwood Cuttings: Woody herbs like rosemary, thyme, and sage also root from cuttings, though often more slowly and sometimes benefit from rooting hormone. Take a 4-6 inch cutting from a mature stem, removing the lower leaves. Dip the cut end in rooting hormone powder (optional, but helpful) and plant it in a moist, well-draining seed-starting mix. Cover the pot with a plastic bag or dome to create a humid environment, checking moisture regularly. Roots can take several weeks to a few months to form.
Propagating is an excellent way to keep your indoor garden vibrant, ensuring you always have young, vigorous plants ready to produce.
Succession Sowing for Continuous Harvests
Succession sowing means planting small batches of the same crop every couple of weeks. This technique ensures a continuous harvest rather than one large flush followed by a gap. It is particularly useful for annual herbs with a shorter lifespan or a tendency to “bolt” (go to seed) quickly, like cilantro and dill.
- Cilantro and Dill: Plant a small pot of seeds every 2-3 weeks. As one batch matures and starts to flower, another younger batch is ready for harvest. This provides a steady supply of fresh leaves.
- Lettuce and other greens: While not herbs, this technique is great for salad greens too.
For perennial herbs, like chives or mint, succession sowing is less critical, but you can still propagate new plants to replace older, less productive ones. This strategic planting ensures your grow herbs indoors efforts consistently yield fresh ingredients.
Trying New Varieties and Less Common Herbs
Do not limit yourself to the usual suspects. Explore a wider range of herbs to add diversity to your kitchen and your indoor garden:
- Lemon Verbena: Offers a delightful citrus scent and flavor, perfect for teas or desserts. It needs bright light and good drainage.
- Stevia: A natural sweetener. It requires ample light and consistent moisture.
- Bay Laurel: A slow-growing shrub that thrives indoors with bright light. Its leaves are essential for many savory dishes.
- Lovage: Tastes like a stronger celery. It can grow quite large but tolerates pruning.
- Scented Geraniums: While not culinary herbs in the traditional sense, their leaves release various fragrances (rose, lemon, peppermint) and some varieties are edible, making unique teas or garnishes.
Experimenting with different herbs keeps your indoor gardening journey exciting and continually expands your culinary repertoire. Always research the specific light, water, and soil needs of any new herb before bringing it into your home, ensuring it matches your environment and care capabilities. This proactive approach minimizes disappointment and maximizes the success of your new indoor gardening ideas.
Frequently Asked Questions
How often should I water my indoor herbs?
Watering frequency varies based on the herb, pot size, temperature, and humidity. A reliable method is to check the soil moisture. Stick your finger about 1-2 inches (2.5-5 cm) into the soil. If it feels dry, it is time to water thoroughly until water drains from the bottom of the pot. Ensure you empty any excess water from the saucer to prevent root rot. Some herbs, like mint and parsley, prefer consistently moist soil, while others, like rosemary and thyme, prefer the soil to dry out more between waterings.
Do I need special grow lights for my herbs?
If you have a very sunny south-facing window that provides at least 6-8 hours of direct sunlight daily, you might not need supplemental grow lights for all herbs. However, for most indoor settings, especially during shorter winter days or in less ideal window exposures, full-spectrum LED grow lights are highly beneficial. They ensure your herbs receive the necessary light spectrum and intensity to grow vigorously, prevent leggy growth, and develop robust flavor. Position lights 6-12 inches (15-30 cm) above plants for 12-16 hours per day.
Why are my indoor herbs getting leggy and thin?
Leggy, stretched, and thin growth indicates that your herbs are not receiving enough light. Plants instinctively “reach” for light when it is insufficient, causing stems to elongate and leaves to become sparse. To fix this, move your herbs to a brighter location, such as a south-facing window, or provide supplemental light with a full-spectrum grow light. Prune back the leggy growth to encourage new, bushier development from the base. Rotating your plants regularly also helps ensure all sides receive adequate light.
Can I use garden soil for my indoor herb pots?
No, you should not use garden soil for indoor herb pots. Garden soil is dense, heavy, and compacts easily in containers, which prevents proper drainage and aeration. This leads to root suffocation and root rot. Additionally, garden soil can contain weed seeds, pests, and diseases that you do not want to introduce into your home. Always use a high-quality, lightweight potting mix specifically formulated for container plants, ideally a peat-free option for sustainability, to ensure good drainage, aeration, and a healthy growing environment for your indoor gardening ideas.
How often should I fertilize my indoor herbs?
Indoor herbs benefit from regular but light fertilization, as the nutrients in potting mix deplete over time. Use a balanced, organic liquid fertilizer (e.g., NPK 2-2-2 or 3-2-2) diluted to half strength, and apply every 2-4 weeks during the active growing season (spring and summer). Reduce or stop fertilizing in fall and winter when plant growth naturally slows. Over-fertilization can harm plants and reduce the flavor intensity of herbs, so always err on the side of caution and follow product instructions carefully. Organic compost tea or a thin layer of worm castings can also provide gentle, slow-release nutrients.