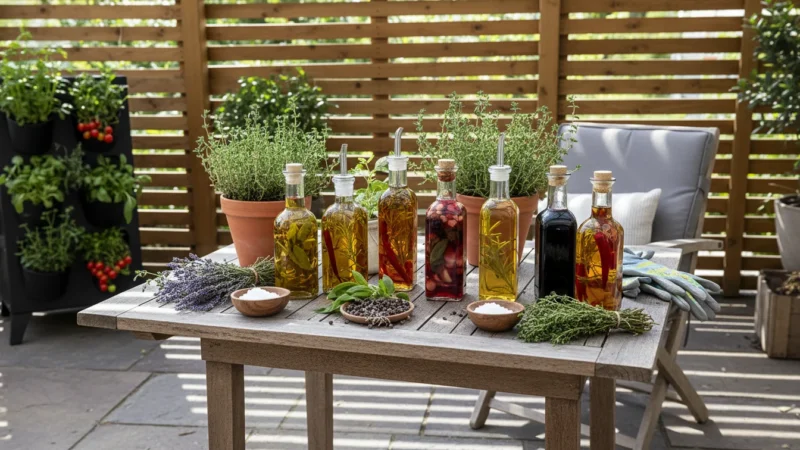
Categories
Edible Gardening

How to Grow Tomatoes in Containers Without Failure

Growing your own juicy, sun-ripened tomatoes feels like a gardening superpower, even with limited space. If you think lush tomato plants are only for sprawling gardens, think again. You can absolutely grow tomatoes in pots and achieve abundant harvests right on your balcony, patio, or small yard. This comprehensive container tomato guide equips you with the practical steps and insider tips you need to succeed, ensuring your tomato-growing journey is filled with triumphs, not failures.

We break down everything from choosing the right varieties to providing optimal care, all designed to help you confidently grow tomatoes small space gardeners dream of. Prepare to enjoy the unmatched flavor of homegrown tomatoes.

A sun-drenched determinate tomato plant in a terracotta pot on a bright urban patio, ripening red tomatoes visible.

Site Selection: Your Tomato’s Perfect Home

Selecting the right spot for your container tomatoes establishes the foundation for their success. Tomatoes are sun-worshippers, demanding abundant light to produce their sweet, flavorful fruit. Lack of adequate sunlight is one of the primary reasons for disappointing harvests, so this step deserves your full attention.

A person intently observing sunlight and distinct shadows falling across a small urban balcony filled with empty pots, assessing optimal light for con

Assessing Sunlight Exposure

Tomatoes require at least 6 to 8 hours of direct sunlight per day. Direct sunlight means the sun’s rays hit the plant without obstruction from buildings, trees, or fences. Observe your intended growing area throughout the day. Track how many hours of direct sun it receives. An area that gets morning sun and some afternoon sun is often ideal, as intense afternoon sun in very hot climates can sometimes stress plants. If your space offers less than 6 hours, opt for smaller, determinate varieties that might still yield a respectable crop, though their production will likely be less than plants with full sun exposure. The University of Minnesota Extension provides excellent resources on sunlight requirements for various vegetables, underscoring the importance of this factor for robust plant growth and fruit development.

Healthy tomato plants in varied containers grouped against a sturdy balcony wall, thriving in ample sun with natural wind protection on an urban patio

Considering Wind Protection

While sunlight is paramount, you also need to consider wind. Strong winds can damage tomato plants, snapping stems, stressing leaves, and even blowing over containers. Balconies and exposed patios are particularly vulnerable. Position your containers in a spot that offers some natural windbreak, such as near a wall or a sturdy railing. If no natural protection exists, consider erecting a temporary screen or placing containers closer together to provide mutual support. Just make sure the windbreak does not compromise their sun exposure.

Hands gently rotate a container with a healthy tomato plant, which sits on a wheeled caddy on a patio, for easy access.

Ensuring Easy Access for Care

Your tomatoes will need regular watering, fertilizing, pruning, and harvesting. Place your containers where you can easily reach them without straining or navigating obstacles. This makes daily care much simpler and encourages you to attend to your plants consistently. If you can only reach one side of a plant, it becomes challenging to prune effectively or check for pests on all surfaces. Accessibility means you can rotate containers if needed, ensuring all sides of the plant receive adequate light and air circulation.

Vibrant container tomatoes basking in direct sun against a light-colored wall on a patio, contrasting with a nearby shaded corner.

Practical Placement Tips

  • South-facing locations: These generally offer the most sun exposure throughout the day in the Northern Hemisphere.
  • Wall proximity: A south-facing wall can reflect heat and light, benefiting tomatoes, but monitor soil moisture closely as these spots can dry out faster.
  • Avoid shaded corners: Do not place your containers in shaded nooks, even if they seem convenient. Tomatoes will stretch and become leggy, producing minimal fruit.
  • Consider rotation: If you have limited sunny spots, you might rotate different crops through them over the season, but once a tomato plant is established, moving it frequently can cause stress. Choose its permanent spot carefully.

Hands comparing a large fabric grow bag and a terracotta pot on a balcony potting station, with a smaller pot nearby.

Choosing the Right Container for Thriving Tomatoes

The container you select significantly impacts the health and productivity of your tomato plant. Too small, and your plant will become root-bound and stressed; too large, and watering becomes inefficient. The key is finding a balance that supports robust root development and consistent moisture levels.

A thriving determinate tomato plant, laden with green fruit, growing in a large 15-gallon fabric grow bag on an urban balcony.

Minimum Size Requirements

Tomatoes are heavy feeders and drinkers with extensive root systems. Do not underestimate their need for space. For most determinate, bush, or dwarf varieties, a container holding at least 5 gallons (approximately 19 liters) of potting mix is the absolute minimum. This translates to a pot roughly 12-14 inches (30-35 cm) in diameter. For larger indeterminate varieties, which continue to grow and produce throughout the season, aim for containers 15-20 gallons (57-76 liters) or larger, with a diameter of at least 18-24 inches (45-60 cm). Investing in larger containers prevents common issues like wilting, nutrient deficiencies, and reduced yields.

Three small determinate tomato plants in light grey plastic, terracotta, and dark brown fabric pots on a weathered wooden patio, highlighting soil moi

Material Matters

Container materials influence soil temperature and moisture retention. Each has advantages and disadvantages:

  • Plastic Pots: Lightweight, inexpensive, and excellent at retaining moisture, reducing the frequency of watering. However, dark plastic pots can absorb excessive heat, potentially overheating roots in hot climates. Choose lighter colors if possible, or shade them.
  • Terracotta or Clay Pots: Visually appealing and breathable, allowing roots to access more oxygen. Their porous nature, however, means they dry out much faster, requiring more frequent watering, sometimes daily in hot, sunny conditions. They are also heavy and can break easily.
  • Fabric Grow Bags: An increasingly popular choice. These breathable bags air-prune roots, preventing circling and encouraging a denser, healthier root ball. They also prevent overheating and offer excellent drainage, reducing the risk of root rot. They are lightweight, flexible, and often reusable. Fabric grow bags typically require more frequent watering than plastic pots due to their breathability.
  • Wooden Planters: Attractive and provide good insulation. Ensure the wood is naturally rot-resistant (like cedar) or treated without harmful chemicals. Line the inside with a breathable landscape fabric to prolong the life of the wood and prevent soil from escaping.

Close-up of hands drilling new drainage holes into a dark grey plastic container on a worn wooden surface, with a blurred tomato plant in background.

Essential Drainage

Regardless of the material, proper drainage is non-negotiable. Your container must have drainage holes at the bottom to prevent waterlogging, which suffocates roots and leads to fungal diseases. If a pot lacks sufficient holes, drill more. Place a saucer or tray underneath to catch excess water, but make sure the pot is not sitting directly in standing water for extended periods. Elevate the pot slightly if necessary to allow air circulation beneath it.

Vibrant tomato plant with small fruit in a dark grey self-watering container with visible fill tube, on a small urban balcony patio.

Self-Watering Options

For busy gardeners or those in very hot climates, self-watering containers (also known as sub-irrigated planters) offer a significant advantage. These systems feature a water reservoir at the bottom and a wicking system that draws moisture up into the potting mix as needed. This provides a consistent water supply, reduces watering frequency, and promotes deeper root growth. While they might be a larger initial investment, they can be a game-changer for tomato success, especially for growers of tomatoes in pots on small spaces.

Various potting mix ingredients including dark soil, perlite, and coco coir, neatly arranged on a patio tarp next to an empty self-watering planter.

Crafting the Ideal Potting Mix for Container Tomatoes

The quality of your potting mix dictates nutrient availability, moisture retention, and aeration for your container tomatoes. Unlike garden soil, which compacts easily in pots, a specialized potting mix provides the optimal environment for root growth. Do not use garden soil directly in containers.

Close-up of premium potting mix in a terracotta pot, showing perlite, coir, and dark compost, highlighting drainage and moisture.

Key Characteristics of a Good Potting Mix

  • Excellent Drainage: Prevents waterlogging and root rot.
  • Good Moisture Retention: Holds enough water between waterings without becoming soggy.
  • Aeration: Allows oxygen to reach roots, crucial for healthy growth.
  • Nutrient Content: Provides initial nutrients and holds onto added fertilizers.
  • Lightweight: Makes containers easier to move and reduces compaction.

Close-up of three distinct piles of peat-free potting mix ingredients: dark coir, bright white perlite, and rich compost, on a wooden bench with a han

Ingredients for a High-Quality, Peat-Free Mix

We advocate for environmentally conscious choices, so prioritize peat-free potting mixes. Peat harvesting damages delicate wetland ecosystems. Excellent alternatives exist:

  1. Composted Bark or Coir (Coconut Fiber): These form the bulk of your mix. Coir is a highly sustainable, renewable resource that retains water exceptionally well while still offering good drainage. Composted bark provides structure and slowly releases nutrients. Aim for about 50-60% of your mix to be either of these components.
  2. Perlite or Pumice: Incorporate 20-30% perlite or pumice. These lightweight, inert materials are crucial for improving drainage and aeration, preventing compaction, and ensuring roots get enough oxygen.
  3. Compost or Worm Castings: Add 10-20% high-quality compost or worm castings. These organic powerhouses slowly release a broad spectrum of nutrients, introduce beneficial microbes, and enhance soil structure and moisture retention. They are essential for a thriving, living potting mix.
  4. Organic Fertilizers: Incorporate a slow-release granular organic fertilizer specifically formulated for tomatoes or vegetables. Look for NPK ratios like 5-7-3 or similar, indicating higher phosphorus and potassium for flowering and fruiting. Follow package directions for application rates. Bone meal, kelp meal, and alfalfa meal are good organic amendments.

You can purchase high-quality pre-mixed peat-free potting mixes, which are convenient and reliable. Look for bags specifically labeled for “containers,” “vegetables,” or “organic gardening.” These often contain a balanced blend of the components mentioned above. Cornell Garden-Based Learning offers detailed information on creating optimal soil mixes for container gardening, reinforcing the importance of proper ingredients.

Close-up of gardener's hands mixing old potting mix with fresh compost and new soil in a wide trug on a patio.

Reusing and Refreshing Potting Mix

You can often reuse potting mix for another season, but it requires refreshing. Over time, potting mix loses its structure, nutrients, and beneficial microbes. To refresh:

  • Remove old plant roots and debris.
  • Add 20-30% fresh, new potting mix to restore structure.
  • Incorporate a generous amount of fresh compost or worm castings (10-20% by volume) to replenish nutrients and microbial life.
  • Add a dose of slow-release organic fertilizer.
  • If the mix feels too dense, add more perlite or pumice.

Avoid reusing potting mix if your previous plants showed signs of significant disease, as pathogens can linger. It is generally safer to use fresh mix for tomatoes each year to mitigate disease risks.

Three different compact tomato plants (Micro Tom, Patio Princess, Yellow Pear) thriving in stylish pots on a sunny urban balcony.

Selecting Tomato Varieties for Small Spaces

Not all tomato varieties are created equal, especially when it comes to container gardening. Choosing the right type is paramount for success in limited spaces. Focus on varieties known for their compact growth habit and prolific fruit production.

A compact determinate tomato plant with clustered red fruit beside a tall, vining indeterminate tomato plant on a patio.

Determinate vs. Indeterminate Tomatoes

Understanding these two growth habits is crucial:

  • Determinate Tomatoes: These are often called “bush” tomatoes. They grow to a specific height, set their fruit all at once over a shorter period (usually 2-3 weeks), and then stop growing. This makes them ideal for containers because their size is manageable, and their concentrated harvest is great for canning or making sauce. Many popular varieties like ‘Roma’ or ‘Celebrity’ have determinate versions.
  • Indeterminate Tomatoes: These are vining tomatoes. They continue to grow, flower, and produce fruit throughout the entire growing season until frost kills them. They can reach heights of 6-10 feet (1.8-3 meters) or more. While they offer a continuous harvest, they require very large containers and substantial support structures. If you have the space and commitment, some indeterminate cherry varieties can perform well.

Three distinct container tomato plants ('Tiny Tim', 'Patio Princess', 'Bush Early Girl') on an urban patio, illustrating different sizes and suitable

Best Types for Containers and Small Spaces

For grow tomatoes small space gardeners, focus on determinate, dwarf, and patio varieties. Cherry tomatoes are also often excellent choices due to their smaller fruit size, which requires less plant energy. Here are some reliable options:

Variety Name Type (Determinate/Indeterminate) Fruit Size Container Size (Min.) Notes for Container Growing
‘Patio Princess’ Determinate Cherry/Small Slicer 5 Gallon (19L) Very compact, high yield for its size, excellent for grow tomatoes in pots.
‘Bush Early Girl’ Determinate Medium Slicer 7-10 Gallon (26-38L) Reliable producer, good flavor, needs sturdy support.
‘Tiny Tim’ Determinate (Dwarf) Cherry 2-3 Gallon (7.5-11L) Extremely compact, perfect for windowsills or very small containers. Lower yield.
‘Roma VF’ (Bush Type) Determinate Paste/Plum 7 Gallon (26L) Excellent for sauces, relatively compact bush habit.
‘Celebrity’ Determinate Medium Slicer 10 Gallon (38L) Disease resistant, heavy producer, needs strong staking.
‘Better Bush’ Determinate Large Slicer 10 Gallon (38L) Good flavor, fairly compact for a slicer, requires good support.
‘Sungold’ Indeterminate Cherry 15 Gallon (57L) Exceptional flavor, highly productive, but needs tall, strong support and consistent pruning to manage size. A top pick if you have the space for a large pot and can commit to extensive training.
‘Sweet Million’ Indeterminate Cherry 15 Gallon (57L) Another prolific cherry variety, similar to ‘Sungold’ in care needs.

Close-up of hands gently planting a small tomato seedling into a terracotta pot filled with fresh potting mix on a sunlit patio.

Planting Your Tomato: A Step-by-Step Guide

Proper planting ensures your tomato starts strong and establishes a healthy root system. Follow these steps for a successful start to your container tomato journey.

A gardener's gloved hands hold a healthy 7-inch tomato seedling with visible roots, ready for transplanting into a terracotta pot on a sunny balcony.

Timing Your Planting

Tomatoes are warm-season plants. Plant them outdoors after all danger of frost has passed and night temperatures consistently stay above 50°F (10°C). Planting too early risks cold damage, which stunts growth and delays fruiting. If you start seeds indoors, aim to transplant seedlings when they are 6-8 inches (15-20 cm) tall and have developed several sets of true leaves.

Young tomato seedlings in small pots on a patio bench, with dappled sunlight. A hand adjusts a pot.

Hardening Off Seedlings

If you’ve grown seedlings indoors or bought them from a greenhouse, they need to gradually acclimate to outdoor conditions. This process is called “hardening off.” Over 7-10 days, expose them to increasing periods of outdoor sun, wind, and cooler temperatures. Start with a few hours in a sheltered, shady spot, gradually increasing sun exposure and time outdoors until they spend a full day and night outside before planting. This prevents transplant shock.

A gardener's hand gently firms soil around a deeply planted tomato seedling in a terracotta pot on a patio. Two-thirds of its stem is buried.

The Planting Process

  1. Prepare Your Container: Ensure your chosen container is clean and has adequate drainage holes. Place a coffee filter or a piece of landscape fabric over the drainage holes to prevent soil from washing out, but allow water to flow freely.
  2. Add Potting Mix: Fill your container with your high-quality, peat-free potting mix, leaving about 2-3 inches (5-7.5 cm) of space from the rim. Lightly moisten the mix before planting.
  3. Prepare the Plant: Gently remove the tomato seedling from its nursery pot. Handle it by the root ball or leaves, not the stem. If roots are circling the bottom, gently tease them apart.
  4. Plant Deeply: Tomatoes are unique because they can grow roots from their stem. Plant your seedling deeply, burying 2/3 of the stem. Remove any leaves that would be below the soil line. This encourages a stronger, more extensive root system, which is crucial for container tomatoes.
  5. Backfill and Firm: Backfill around the buried stem with potting mix, gently firming it down to remove air pockets. Do not pack it too tightly, as this can compact the soil.
  6. Water Thoroughly: Immediately after planting, water the tomato deeply until water drains from the bottom of the container. This settles the soil and provides initial moisture.
  7. Initial Support: For taller seedlings, insert a small stake or support structure at planting time. This prevents root disturbance later on.

A person kneels on an urban balcony, carefully pouring liquid fertilizer into the soil of a thriving container tomato plant in a fabric grow bag.

Watering, Fertilizing, and Essential Care for Peak Production

Consistent watering and a thoughtful feeding rhythm are non-negotiable for producing a bountiful crop of tomatoes in pots. Container plants rely entirely on you for their sustenance, so establishing a reliable care routine prevents stress and promotes healthy fruit development.

Close-up of a hand checking soil moisture two inches deep in a terracotta pot with a healthy tomato plant on a sunny urban balcony.

The Art of Deep Watering

Container tomatoes dry out much faster than garden-grown plants. Daily watering, sometimes twice a day in hot weather, is often necessary. The key is deep, consistent watering, not shallow sprinkles.

  • Check Moisture Daily: Stick your finger 2 inches (5 cm) into the potting mix. If it feels dry, it is time to water. Do not wait for the plant to wilt significantly, as this stresses it.
  • Water Slowly and Deeply: Apply water until it flows freely from the drainage holes. This ensures the entire root ball is saturated. Watering slowly allows the mix to absorb moisture thoroughly.
  • Avoid Foliage Watering: Water at the base of the plant to keep leaves dry. Wet foliage, especially overnight, promotes fungal diseases like early blight.
  • Consider Wicking Systems: Self-watering containers are excellent for consistent moisture. For traditional pots, you can create a simple wicking system by placing a grow bag inside a slightly larger plastic pot with a reservoir below.
  • Morning is Best: Water in the morning so plants can absorb moisture before the heat of the day. This also allows any splashed water on leaves to dry quickly.

Inconsistent watering, especially letting the soil dry out excessively between drenchings, contributes to blossom end rot, a common issue where the bottom of the fruit turns black and leathery. This disorder is caused by a calcium deficiency in the fruit, often due to irregular water uptake, not a lack of calcium in the soil.

Close-up of various organic fertilizers (fish emulsion, granular) on a patio table next to a fruiting container tomato, with a hand preparing to apply

Organic Fertilizing Cadence

Your potting mix provides initial nutrients, but tomatoes are heavy feeders and quickly deplete these reserves. A regular feeding schedule, adjusted as the plant grows, is vital.

  • Initial Growth (first 2-4 weeks): If you incorporated a slow-release granular organic fertilizer into your potting mix at planting, your plant has enough nutrients for initial growth. If not, apply a balanced organic liquid fertilizer (e.g., NPK 5-5-5) at half strength every two weeks.
  • Flowering and Fruiting (after first blossoms appear): Shift to a fertilizer higher in phosphorus (P) and potassium (K) and lower in nitrogen (N). Nitrogen promotes leafy growth at the expense of fruit. Look for ratios like 2-5-3 or 3-4-6. Fish emulsion, kelp meal, and bone meal are good organic options. Apply liquid fertilizers every 1-2 weeks or top-dress with granular organic amendments every 3-4 weeks. Follow product instructions carefully. For example, a common recommendation for liquid feed is to dilute to half strength and apply weekly.
  • Monitor Your Plants: Yellowing lower leaves can indicate nitrogen deficiency. Stunted growth or poor fruiting might point to other nutrient needs. Adjust your feeding schedule based on plant vigor and production.

UF/IFAS Gardening Solutions offers practical guidelines on fertilizing container plants, emphasizing the importance of a balanced approach to nutrient management for optimal plant health.

A gardener's hands carefully pinch a small sucker from a healthy tomato plant growing in a terracotta pot on a sunny balcony.

Pruning for Yield and Airflow

Pruning encourages better air circulation, reduces disease risk, and can direct the plant’s energy into fruit production. However, pruning strategies differ for determinate and indeterminate types.

  • Determinate Tomatoes: These “bush” types require minimal pruning. Remove any suckers (shoots that grow in the crotch between the main stem and a leaf branch) below the first flower cluster. Beyond that, allow them to grow. Over-pruning determinate varieties reduces their yield. Remove any yellowing or diseased lower leaves throughout the season.
  • Indeterminate Tomatoes: These vining types benefit significantly from regular pruning. Remove suckers regularly, especially those growing between the main stem and a fruit-bearing branch. You can choose to train them to one or two main stems. This directs energy into developing fruit on those stems, though it might reduce the total number of fruits, they are often larger and ripen more quickly. Again, remove any yellowing or diseased leaves.

A gardener's hands gently guide a fruit-laden tomato branch through a sturdy wire cage, supporting a thriving container plant on a sunlit patio.

Providing Sturdy Support for Bountiful Harvests

Most tomato plants, especially those grown in containers, need robust support to prevent sprawling, stem breakage, and fruit from touching the ground. This support system ensures your plant can bear the weight of its fruit, improves air circulation, and keeps your grow tomatoes in pots tidy.

A heavy stem of red and green tomatoes bends precariously low in a container, nearly touching a sunlit patio, showing the urgent need for support.

Why Support is Essential

  • Prevents Stem Breakage: Heavy fruit can easily snap stems, especially during windy conditions or after rain.
  • Keeps Fruit Off the Ground: Fruit resting on the soil is more susceptible to pests, diseases, and rot.
  • Improves Air Circulation: Proper support opens up the plant canopy, allowing air to move freely, which helps prevent fungal diseases.
  • Facilitates Harvesting: Supported plants are easier to navigate for pruning and picking.
  • Maximizes Space: Vertical growth is crucial for small space gardening.

A healthy determinate tomato plant growing into a sturdy dark green square cage in a large terracotta pot on a sunny patio.

Support Options for Container Tomatoes

Choose a support system that matches your tomato variety’s expected size and your container’s stability.

  1. Tomato Cages:
    • Description: These are wire structures that enclose the plant, providing all-around support.
    • Best For: Determinate (bush) varieties.
    • Tips: Choose strong, heavy-gauge cages. The flimsy cages often sold at garden centers are rarely sufficient for a full-grown tomato plant. Look for conical or square cages with wide openings that allow you to reach in for harvesting. Install the cage at planting time so the plant grows into it. For larger determinate varieties, you might need to reinforce the cage by tying it to a heavier stake or a nearby structure.
  2. Staking:
    • Description: A single, sturdy stake driven into the potting mix next to the main stem. As the plant grows, you tie the main stem to the stake.
    • Best For: Determinate or indeterminate varieties that you prune to one or two main stems.
    • Tips: Use heavy-duty stakes made of wood, metal, or strong bamboo, at least 1 inch (2.5 cm) in diameter and 5-7 feet (1.5-2.1 meters) tall. Drive the stake deep into the container, ideally reaching the bottom for stability. Use soft ties (old pantyhose, garden tape, twine) to secure the stem to the stake every 10-12 inches (25-30 cm). Avoid tight ties that could girdle the stem.
  3. Trellising:
    • Description: A more elaborate system involving horizontal wires, netting, or a grid structure for plants to climb. This is excellent for training indeterminate varieties.
    • Best For: Indeterminate (vining) varieties, especially if you have multiple plants.
    • Tips: For balcony or patio gardening, consider an A-frame trellis or a vertical panel trellis that attaches to a wall or railing. Ensure the trellis is firmly anchored. Train the main stem(s) by weaving them through the trellis or tying them to it as they grow. This method allows for good air circulation and easy harvesting, especially valuable for a robust container tomato guide.
  4. Spiral Stakes:
    • Description: Metal rods twisted into a spiral. As the tomato grows, you gently wind the main stem through the spirals.
    • Best For: Smaller determinate or semi-determinate varieties.
    • Tips: These are convenient as they eliminate the need for tying. However, they are often not strong enough for very large or heavy-fruiting varieties.

Regardless of the method, install your support system early, ideally at planting time. Waiting until the plant is large and sprawling risks damaging the roots or stems.

A gardener's hands gently inspect the underside of a container tomato leaf on a sunny patio, checking for pests.

Integrated Pest Management: Keeping Your Tomatoes Healthy

Even with the best care, pests and diseases can occasionally threaten your container tomatoes. Adopting an Integrated Pest Management (IPM) approach means focusing on prevention, monitoring, and using the least toxic controls first. This environmentally conscious strategy protects your plants and beneficial insects.

A gardener kneels on a sunny balcony, gently removing a yellowed leaf from a healthy container tomato plant, with other pots in the background.

Prevention is Key

  • Healthy Plants: Strong, well-nourished plants are more resistant to pests and diseases. Provide adequate sunlight, water, and nutrients.
  • Air Circulation: Proper spacing and pruning (as discussed previously) improve airflow, reducing humidity around leaves and making them less hospitable for fungal diseases.
  • Sanitation: Remove any diseased leaves, fallen fruit, or plant debris from and around your containers. This eliminates hiding spots for pests and spores.
  • Crop Rotation (Container Style): Even in containers, avoid planting tomatoes in the same potting mix or container if previous plants had significant disease issues. Rotate your crops by planting something else in that container next season, or refresh the potting mix entirely.
  • Inspect New Plants: Before introducing any new plant to your collection, inspect it thoroughly for pests or diseases. Isolate it for a few days if you notice anything suspicious.

Macro close-up of the underside of a green tomato leaf, revealing a small cluster of tiny green aphids and glistening honeydew.

Regular Monitoring

Catching problems early makes them easier to manage. Make it a habit to inspect your tomato plants regularly, ideally daily or every other day. Look for:

  • Chewed leaves or holes: Indicates chewing insects.
  • Tiny insects: Check the undersides of leaves, especially.
  • Sticky residue (honeydew): A sign of sap-sucking insects like aphids.
  • Distorted growth: Curling, yellowing, or stunted leaves can signal disease or pest activity.
  • Spots or discoloration: Could indicate fungal or bacterial diseases.

Close-up of gardener's hands actively misting a container tomato plant with water from a spray bottle on a sunlit patio, controlling common pests.

Common Pests and Least-Toxic Controls

  • Aphids: Small, soft-bodied insects that cluster on new growth.
    • Control: Blast them off with a strong stream of water. For heavier infestations, use insecticidal soap, ensuring complete coverage. Introduce beneficial insects like ladybugs if the problem persists.
  • Tomato Hornworms: Large, green caterpillars that can rapidly defoliate a plant.
    • Control: Hand-pick them off and drop them into a bucket of soapy water. They are camouflaged, so look for their droppings (dark pellets) on leaves.
  • Spider Mites: Tiny arachnids that cause stippling on leaves and fine webbing. They thrive in hot, dry conditions.
    • Control: Increase humidity around plants. Spray with insecticidal soap or neem oil. A strong stream of water can also dislodge them.
  • Whiteflies: Small, white, moth-like insects that fly up when disturbed. They also cause honeydew and sooty mold.
    • Control: Use yellow sticky traps. Spray with insecticidal soap, ensuring coverage of leaf undersides.

Gardener's hands pruning a subtly spotty, yellowing lower leaf from a container tomato plant on a sunny patio.

Common Diseases and Management

  • Early Blight / Late Blight: Fungal diseases causing dark spots on leaves, often with concentric rings (early blight) or water-soaked lesions (late blight).
    • Control: Prevention is key: maintain good air circulation, avoid overhead watering, remove lower leaves touching the soil, and remove diseased foliage promptly. Fungicides can be used as a last resort, but cultural practices are often more effective.
  • Blossom End Rot: Not a disease, but a physiological disorder (as discussed in the watering section).
    • Control: Ensure consistent, deep watering and avoid extreme fluctuations in soil moisture. Mulching also helps maintain even moisture.

For research-based guidance on identifying and managing garden pests, visit the University of Minnesota Extension or Royal Horticultural Society (RHS) websites for region-specific information and best practices in integrated pest management.

Person on sunny urban balcony picking ripe cherry tomato from a container plant, terracotta pot visible, satisfied smile.

Harvesting and Enjoying Your Homegrown Tomatoes

The moment you’ve been waiting for: picking your first ripe, warm-from-the-sun tomato. Harvesting at the right time ensures maximum flavor and encourages your plants to produce even more. Understanding how to harvest and store your bounty prolongs your enjoyment.

Adult hands gently hold three perfectly ripe, freshly picked tomatoes (two red, one yellow/orange) with a blurred container tomato plant in the backgr

When to Harvest

The ideal time to harvest tomatoes depends on the variety, but generally, pick them when they are fully colored, firm, and easily detach from the vine with a gentle twist. Tomatoes continue to ripen slightly after picking, but their best flavor develops on the plant.

  • Color is Key: For red varieties, wait until they are a deep, uniform red. Yellow and orange varieties should reach their specific vibrant hue.
  • Feel for Firmness: A ripe tomato feels firm but yields slightly to gentle pressure. Overripe tomatoes will feel mushy.
  • Easy Release: When you gently twist a ripe tomato, it should separate from the stem easily. If it clings tightly, it needs more time.

If frost threatens or you have green tomatoes near the end of the season, you can harvest them and ripen them indoors. Place them in a paper bag with an apple or banana (which release ethylene gas, a natural ripening agent) in a cool, dark spot. Check them every few days.

Top-down view of a hand with pruning shears about to snip a ripe red tomato from a plant in a terracotta pot on a sunny patio.

Harvesting Techniques

Use clean pruning shears or scissors to snip the stem just above the calyx (the green leafy part) of the tomato. This prevents damaging the plant and reduces the risk of tearing the fruit. If the stem comes off with the fruit, that is fine. Handle tomatoes gently to avoid bruising.

A hand reaches for ripe, vibrant red and yellow tomatoes overflowing from a rustic basket on a clean kitchen counter. A small potted basil plant is so

Storage for Peak Flavor

Never store ripe tomatoes in the refrigerator. Cold temperatures break down the cell walls, causing a mealy texture and diminishing their exquisite flavor. Store ripe tomatoes at room temperature, out of direct sunlight, on your counter. They will typically last for several days to a week. If they are slightly underripe, storing them stem-side down can help them ripen evenly.

If you have an abundance of tomatoes, consider preserving them. You can freeze them whole, diced, or pureed, or transform them into sauces, salsas, or sun-dried tomatoes. These methods allow you to enjoy your homegrown bounty long after the growing season ends.

Close-up of hands pruning a yellowing leaf from a container tomato plant on a patio, showing bare fruit stems and new growth.

Pruning for Continued Yield (Post-Harvest)

After harvesting a flush of ripe fruit, especially on indeterminate varieties, you can encourage continued production through light pruning. Remove any spent flower clusters, yellowing leaves, or any suckers that have grown excessively large. This directs the plant’s energy towards developing new flowers and fruit, ensuring your container tomato guide provides consistent success.

A person with a thoughtful expression kneels, inspecting a container tomato plant on an urban balcony, pointing at developing fruit or a leaf.

Frequently Asked Questions

How much water do container tomatoes need?

Container tomatoes need consistent and deep watering. In warm weather, this often means daily, sometimes twice a day. Check the soil moisture by sticking your finger two inches deep; if it feels dry, water thoroughly until water drains from the bottom. Avoid shallow, frequent watering, which leads to weak roots.

Can I grow large slicing tomatoes in containers?

Yes, you can grow large slicing tomatoes in containers, but you need a very large container, at least 15-20 gallons (57-76 liters), and a very sturdy support system like a heavy-duty stake or robust cage. Choose determinate varieties if possible, as their growth is more manageable. Indeterminate slicers require more effort and consistent pruning to thrive in a pot.

Why are my tomato leaves turning yellow?

Yellowing leaves on your container tomato can indicate several issues. Yellowing lower leaves often point to a nitrogen deficiency. Yellowing between veins or uniformly yellow leaves could signal other nutrient deficiencies like magnesium or iron. Overwatering or underwatering can also cause yellowing, as can certain diseases. Assess your watering schedule, fertilizer routine, and check for pests to diagnose the exact cause.

How can I prevent blossom end rot on my container tomatoes?

Blossom end rot is primarily caused by inconsistent watering, which impacts calcium uptake, not necessarily a lack of calcium in the soil. To prevent it, ensure you water deeply and consistently, avoiding extreme fluctuations in soil moisture. Maintain even moisture by mulching the top of your container with a layer of straw or wood chips. Good quality potting mix and appropriate container size also help.

What is the ideal NPK ratio for container tomatoes?

For initial growth, a balanced NPK (nitrogen, phosphorus, potassium) ratio like 5-5-5 or 5-10-5 is good. Once flowers begin to form and fruit sets, switch to a fertilizer higher in phosphorus and potassium and lower in nitrogen, such as 2-5-3 or 3-4-6. This encourages fruit production over excessive leafy growth. Always follow product instructions for dosage.

With these practical, actionable insights, you are well-equipped to grow tomatoes in pots that will amaze you with their flavor and abundance. Remember, consistency in care and attention to detail are your best allies. Enjoy the rewarding journey of nurturing your container tomato plants, from tiny seedlings to bountiful harvests, and savor the unmatched taste of your homegrown efforts.

For research-based guidance on edible gardening, visit
University of Minnesota Extension,
Royal Horticultural Society (RHS),
Cornell Garden-Based Learning and
UF/IFAS Gardening Solutions.

Disclaimer: This article is for informational purposes only and is not a substitute for professional advice. Consult local extension services for region-specific recommendations.

Categories
Edible Gardening

The Best Salad Greens for Succession Planting

If you have limited space but dream of fresh, homegrown salads, succession planting your salad greens is your secret weapon. This strategy ensures a continuous supply of tender leaves, preventing gluts and empty patches in your garden. You transform a small balcony, patio, or yard into a productive, ever-yielding salad bar.

Imagine stepping outside to snip vibrant lettuce, spicy arugula, or crisp spinach whenever you desire. This article guides you through selecting the best leafy greens for small spaces, setting up your containers, creating an efficient sowing schedule, and mastering the art of cut-and-come-again harvesting. You will learn how to keep your salad bowl full from spring through fall, even in the smallest urban garden.

For research-based guidance on edible gardening, visit
Washington State University Hortsense,
Texas A&M AgriLife Extension — Horticulture and
University of Illinois Extension — Gardening.

Disclaimer: This article is for informational purposes only and is not a substitute for professional advice. Consult local extension services for region-specific recommendations.

Three containers of salad greens at different growth stages on a patio table, illustrating succession planting.

Understanding Succession Planting for Continuous Harvest

Succession planting is a smart gardening strategy where you plant small batches of seeds or seedlings at regular intervals, typically every two to three weeks, instead of planting your entire crop all at once. This ensures a staggered harvest, providing a consistent supply of fresh produce throughout the growing season. For instance, you avoid a massive flush of lettuce all maturing at the same time, which often leads to waste. Instead, you enjoy tender, young leaves week after week.

This method is particularly powerful for salad greens because they grow quickly and tend to bolt, or go to seed, in warmer weather. By planting in succession, you always have new, young plants developing as older ones mature or finish their productive cycle. This maximizes your yield in a small space, keeping your salad bowl full and your garden productive from spring through fall.

Consider the benefits: you reduce waste by harvesting only what you need, you maintain the quality of your greens by picking them at their peak tenderness, and you enjoy a greater variety by rotating different types of leafy greens through your containers. It transforms a small garden into an efficient, sustainable food source.

Woman's hands harvesting red and green loose-leaf lettuce from a terracotta pot on a balcony, with arugula and other lettuce pots visible.

Choosing Your Greens: Top Performers for Small Spaces

Selecting the right salad greens is crucial for successful succession planting, especially in limited spaces. You need varieties that grow quickly, tolerate frequent harvesting, and adapt well to container life. Here are some of the best leafy greens for your small-space garden:

  • Loose-Leaf Lettuce: These varieties do not form a tight head, making them perfect for cut-and-come-again harvesting. They mature quickly, often in 30-45 days, and offer diverse textures and colors. Popular choices include ‘Black Seeded Simpson,’ ‘Salad Bowl,’ ‘Red Sails,’ and ‘Buttercrunch’ (which you can grow as a loose-leaf type).
  • Arugula: Known for its peppery flavor, arugula thrives in cool weather and grows rapidly, often ready for harvest in just 20-30 days. Plant it in successive batches every two weeks to enjoy its spicy kick throughout spring and fall. Heat causes it to bolt quickly, so focus your plantings in cooler periods.
  • Spinach: Rich in nutrients, spinach prefers cooler temperatures and moist soil. Varieties like ‘Tyee’ or ‘Bloomsdale Long Standing’ perform well in containers. Harvest the outer leaves to encourage continuous growth. It typically matures in 30-45 days.
  • Swiss Chard: While often considered a cooking green, young Swiss chard leaves add a mild, earthy flavor and beautiful color to salads. It is highly productive and tolerates a wider range of temperatures than many other greens. Harvest outer leaves regularly; it continues producing for a long season.
  • Kale (Baby Leaf): For salad use, focus on baby kale leaves. Varieties such as ‘Red Russian’ or ‘Tuscan (Lacinato/Dinosaur)’ kale offer tender, slightly peppery greens when picked young. Baby kale matures in about 25-30 days and tolerates cool weather, extending your harvest into colder months.
  • Radicchio: If you enjoy a touch of bitterness, radicchio adds a beautiful deep red hue and crisp texture to salads. While some varieties form heads, you can also grow loose-leaf types or harvest young leaves for quick succession.
  • Mustard Greens: These vibrant greens provide a spicy, pungent flavor. They grow quickly, often within 20-30 days, and thrive in cooler temperatures. ‘Red Giant’ offers stunning color. Be mindful of their rapid bolting in heat.
  • Mache (Corn Salad): This cold-hardy green has a delicate, nutty flavor and a tender texture. It performs exceptionally well in cool weather and is a fantastic choice for late-season or early-spring plantings, maturing in 40-60 days.

When selecting seeds, look for “fast-growing,” “heat-tolerant” (for summer succession), or “cold-hardy” (for extended fall/winter harvests) labels. Experiment with different types to discover what grows best in your specific conditions and what flavors you prefer. Your goal is to create a diverse and resilient salad garden.

Person's gloved hands filling a terracotta pot with potting mix on a patio table, surrounded by various empty containers and an open soil bag.

Setting Up Your Salad Garden: Containers, Soil, and Light

A successful container salad garden starts with the right foundation. You need appropriate containers, a high-quality potting mix, and adequate sunlight. Planning these elements ensures your leafy greens thrive.

Three empty gardening containers – terracotta and plastic – on a wooden table, showcasing drainage holes and a measuring tape, on a patio.

Choosing the Right Containers

Salad greens generally have shallow root systems, making them excellent candidates for containers. You have many options, but focus on depth, drainage, and material:

  • Depth: Aim for containers at least 6-8 inches deep. This provides enough room for roots and helps retain moisture. Wider containers are better than deeper ones for many greens, as you can plant more individual plants.
  • Drainage: Every container must have drainage holes. Root rot is a common issue for container plants without proper drainage. If your chosen container lacks holes, drill several ¼-inch to ½-inch holes in the bottom.
  • Materials:
    • Plastic: Lightweight, inexpensive, and retains moisture well. Choose food-grade plastic if possible.
    • Terracotta/Clay: Attractive and allows soil to breathe, which prevents overwatering. However, it dries out faster, requiring more frequent watering.
    • Fabric Grow Bags: Excellent for aeration and drainage, preventing root circling. They are lightweight and easy to store.
    • Wooden Planters: Can be aesthetically pleasing. Ensure the wood is untreated or treated with food-safe sealants.

Self-watering containers can be a game-changer for busy gardeners, as they provide a consistent water supply to plant roots, reducing the frequency of manual watering.

Overhead shot on a patio table, showing a trug of high-quality potting mix surrounded by piles of coco coir, perlite, and compost.

The Importance of Quality Potting Mix

Your potting mix is the lifeblood of your container garden. Do not use garden soil, as it compacts in containers, restricts root growth, and may contain pests or diseases. A high-quality, peat-free potting mix provides the ideal environment for your salad greens:

  • Good Drainage: Prevents waterlogging. Look for mixes containing perlite or vermiculite.
  • Water Retention: Holds enough moisture without becoming soggy. Coconut coir is an excellent sustainable alternative to peat.
  • Nutrient Content: Many potting mixes include a slow-release fertilizer or compost, providing initial nutrients.
  • Aeration: Allows oxygen to reach the roots.

You can create your own mix using equal parts compost, coco coir, and perlite. This ensures you control the ingredients and promote sustainable practices. For more detailed information on creating an ideal potting mix, refer to resources like the Oregon State University Extension on Potting Mixes.

A woman on a sun-dappled patio gently pushes a wheeled fabric grow bag filled with salad greens towards a sunny spot, optimizing light.

Sunlight Requirements

Most salad greens thrive with at least 4-6 hours of direct sunlight per day. More sun usually means faster growth and better flavor. However, during hot summer months, some greens, particularly lettuce and spinach, benefit from partial shade during the hottest part of the afternoon. This prevents bolting and keeps leaves tender. Observe your space throughout the day to identify the sunniest spots for your containers.

Balcony layout diagram showing containers for salad greens, indicating sunniest spots, shaded areas, and vertical planters for optimal growth.

Placing containers on casters or using lightweight fabric bags allows you to move them easily to optimize sun exposure or provide afternoon shade as needed. This flexibility is a key advantage of container gardening.

Close-up of hands sowing seeds in a terracotta pot on a balcony railing, next to containers of salad greens at different growth stages, in golden ligh

The Sowing Schedule: Your Blueprint for Continuous Salad

The core of succession planting lies in a well-planned sowing schedule. This strategy ensures you always have young plants maturing as older ones are harvested, providing an endless supply of fresh salad greens. You implement a staggered planting approach rather than a single large planting.

A gardener's hand with a pencil taps a seed packet on a small wooden patio table. An open journal with a sowing calendar, other seed packets, and empt

Developing Your Sowing Calendar

Your specific schedule depends on your climate, the greens you choose, and their typical days to maturity (DTM). Here is a general framework:

  1. Determine Your Last Frost Date: This marks the start of your main planting season. You can begin planting cool-season greens a few weeks before this date, as they tolerate light frost.
  2. Identify Days to Maturity (DTM): Check your seed packets. Fast-growing greens like arugula and loose-leaf lettuce often mature in 20-45 days.
  3. Plan Intervals: For most salad greens, sow a new batch every 2-3 weeks. This interval prevents all plants from maturing simultaneously. If a specific green matures very quickly (e.g., 20 days), you might sow it more frequently.
  4. Calculate Sowing Quantities: Plant only what you can realistically consume in a 2-week period. For small spaces, this might mean a few rows in a wide container or one small pot per sowing. Remember, you want consistent small harvests, not a massive overflow.
  5. Adjust for Season:
    • Spring: Start earlier and plant more frequently as temperatures warm.
    • Summer: Focus on heat-tolerant varieties or plant in partial shade. Reduce frequency or take a break if temperatures are consistently above 85°F (29°C), as many greens bolt.
    • Fall: As temperatures cool, you can resume more frequent plantings. Extend the season with cold frames or cloches.

Woman on a sunlit balcony inspecting diverse container salad greens in various growth stages, demonstrating succession planting.

A Sample Succession Planting Schedule for Container Salad Greens

This table provides a general guide. Adjust planting dates based on your local climate and specific varieties.

Green Type Sowing Interval Typical DTM Notes for Succession
Loose-Leaf Lettuce Every 2-3 weeks 30-45 days Plant small batches. Choose heat-tolerant varieties for summer.
Arugula Every 2 weeks 20-30 days Sow frequently in spring/fall. Bolts quickly in heat.
Spinach Every 2-3 weeks 30-45 days Prefers cool weather. Harvest outer leaves.
Baby Kale Every 3 weeks 25-35 days Very hardy. Good for extending season into colder months.
Mustard Greens Every 2 weeks 20-30 days Sow frequently in spring/fall. Bolts quickly in heat.
Swiss Chard (Baby) Every 3-4 weeks 30-50 days Very productive. Tolerates some heat.

A gardener's hands sow seeds directly into a ceramic container, next to a tray of labeled spinach seedlings on a patio.

Direct Sowing vs. Starting Indoors

  • Direct Sowing: Many salad greens, especially loose-leaf lettuce, arugula, and spinach, do well when sown directly into their final containers. This minimizes transplant shock. Plant seeds thinly and lightly cover them with soil, following package directions for depth.
  • Starting Indoors: For some greens, or if you want to get a jump start on the season, you can start seeds indoors in small cell trays. Transplant them into your containers once they have developed a few true leaves and your outdoor conditions are suitable. This is particularly useful for maximizing your succession efficiency, ensuring seedlings are ready to go as soon as a spot opens up.

Label your containers with the planting date and green type. This simple habit helps you track your schedule and know when to expect harvests or when to plant the next batch. Staying organized ensures your continuous flow of fresh greens.

A gardener's hand sprinkles granular fertilizer into a grey fabric grow bag overflowing with healthy, mixed salad greens on a sunny patio.

Cultivation Care: Nurturing Your Leafy Greens

Consistent care ensures your salad greens remain healthy, tender, and productive. Focusing on proper watering, intelligent feeding, and proactive pest management helps you achieve abundant harvests.

Close-up of a hand watering a container of salad greens at soil level on a sunlit patio, emphasizing careful, deep hydration.

Water: The Lifeline of Leafy Greens

Salad greens consist primarily of water, so consistent moisture is paramount. Erratic watering leads to bitterness, tough leaves, or premature bolting.

  • Deep and Regular Watering: Water deeply until you see water draining from the bottom of your containers. This encourages roots to grow deeper. Check soil moisture daily, especially during warm weather. Stick your finger about an inch into the soil; if it feels dry, it is time to water.
  • Morning Watering: Water in the morning to allow leaves to dry before evening. This reduces the risk of fungal diseases.
  • Avoid Overhead Watering: Aim water at the soil level, not on the leaves, especially if you water in the evening. This minimizes water waste and discourages diseases.
  • Wicking Systems: For busy gardeners, consider self-watering containers or wicking systems. These provide a consistent moisture level to the roots, preventing both over and under-watering.

Gardener's hand gently pouring liquid organic fertilizer into a terracotta pot of vibrant lettuce on a sunlit urban balcony.

Fertilizing: Gentle Nudges for Growth

Leafy greens are light feeders, but container-grown plants deplete soil nutrients faster than those in garden beds. A balanced, organic approach works best.

  • Initial Nutrients: A good quality potting mix provides initial nutrients for 3-4 weeks.
  • Liquid Organic Fertilizer: After the initial period, feed your greens every 2-3 weeks with a diluted liquid organic fertilizer. Look for an NPK ratio balanced for leafy growth (e.g., 2-1-2 or 5-2-2). Fish emulsion, kelp meal, or a balanced all-purpose organic liquid feed work well.
  • Compost Tea: As a sustainable alternative, use compost tea. It provides gentle nutrients and beneficial microbes, enhancing soil health.
  • Avoid Over-Fertilizing: Too much nitrogen, while promoting leafy growth, can sometimes lead to excessive bitterness or soft, disease-prone foliage. Follow package directions for dilution carefully.

A gardener closely inspecting the underside of a vibrant green lettuce leaf growing in a terracotta pot on a small patio table, bathed in soft morning

Pest and Disease Management: Prevention is Key

Healthy plants are more resistant to pests and diseases. Regular monitoring helps you catch problems early, allowing for least-toxic interventions.

  • Regular Inspection: Every time you water or harvest, visually inspect your plants. Look for discolored leaves, chewed edges, or the presence of small insects like aphids or slugs.
  • Common Pests:
    • Aphids: Small, pear-shaped insects often found on new growth. Blast them off with a strong stream of water or apply insecticidal soap.
    • Slugs and Snails: Leave slimy trails and ragged holes in leaves. Hand-pick them in the early morning or evening. Beer traps or copper tape can also deter them.
    • Flea Beetles: Create small “shot-hole” damage. Floating row covers can protect young seedlings. Neem oil can also be effective.
  • Disease Prevention:
    • Good Air Circulation: Space your plants adequately to allow air to flow, which reduces humidity and fungal disease risk.
    • Cleanliness: Remove any dead or diseased leaves promptly. Keep your containers and gardening tools clean.
    • Resistant Varieties: If you repeatedly face disease issues, choose varieties known for disease resistance.

Embrace integrated pest management (IPM) by starting with prevention and moving to least-toxic solutions only when necessary. This protects your plants and the beneficial insects in your garden. The Environmental Protection Agency provides further details on IPM principles.

Hand harvesting large outer leaves from a vibrant mixed salad green plant in a terracotta pot on a patio, showing new growth for future harvests.

Harvesting for Longevity: The Cut-and-Come-Again Method

One of the most rewarding aspects of growing salad greens, particularly with succession planting, is the ability to harvest repeatedly from the same plant. This “cut-and-come-again” method maximizes your yield and extends the life of your plants. You get more salads from fewer plants, optimizing your small space.

Close-up of a hand with small snips about to cut an outer leaf of loose-leaf lettuce in a terracotta pot, leaving the core intact.

How to Implement Cut-and-Come-Again

This technique relies on harvesting only the outer or upper leaves, leaving the plant’s core or growing point intact to produce more foliage. This is particularly effective for loose-leaf lettuces, spinach, arugula, kale, mustard greens, and Swiss chard.

  1. Timing: Begin harvesting when leaves are young and tender, usually after the plant has developed at least 4-6 true leaves. Harvesting at this stage ensures the best flavor and texture.
  2. Technique: Use clean scissors or snips.
    • Outer Leaves: For most greens, snip the larger, outer leaves near the base of the plant, leaving the central growing point undisturbed. This encourages the plant to continue producing new leaves from the center.
    • Across the Top (for dense plantings): If you have densely sown a patch of greens (like a “cut-and-come-again” mix), you can shear the entire patch about an inch or two above the soil line. The plants will regrow, providing another harvest in a few weeks. This works well for arugula or mesclun mixes.
  3. Frequency: Harvest regularly, typically every 1-2 weeks. Frequent harvesting encourages new growth. If you wait too long, leaves can become tough or bitter, and the plant may start to bolt.
  4. Avoid Over-Harvesting: Never remove more than one-third to one-half of the plant’s leaves at a time. The remaining leaves are essential for photosynthesis, which fuels new growth.

By using the cut-and-come-again method, you continuously stimulate your plants to produce. This means you do not need to wait for a plant to fully mature before enjoying a harvest, and you extend the productive life of each plant significantly.

A hand holds gardening snips, poised to harvest lush loose-leaf lettuce from a terracotta window box. One plant shows a subtle, emerging central stalk

Bolting Prevention and Management

Bolting occurs when a leafy green plant shifts its energy from producing leaves to forming a flower stalk and setting seeds. This happens naturally in response to warming temperatures and longer daylight hours. Once a plant bolts, its leaves become bitter and tough, and its productivity declines.

  • Early Intervention: If you see a central stalk starting to emerge, harvest all usable leaves immediately. While they might have a hint of bitterness, they are often still palatable.
  • Shade During Heat: In summer, provide partial shade for your cool-season greens. Moving containers to a shadier spot or using shade cloth reduces stress.
  • Consistent Moisture: Keep the soil consistently moist. Water stress can trigger bolting.
  • Succession Planting: This method inherently helps manage bolting. As one batch bolts, your next succession of younger plants is ready to take its place, ensuring a continuous supply of tender leaves.
  • Embrace the Flowers: Some bolted greens, like arugula and mustard, produce edible flowers that add a peppery garnish to salads. You can also allow some plants to go to seed for future plantings, though this reduces leaf production.

Understanding and managing bolting is crucial for maximizing your salad green yield. Your thoughtful succession plan allows you to stay ahead of this natural process, ensuring you always have prime, tender greens ready for your table.

Compact patio garden with lettuce under shade cloth and spinach in a mini-hoop house, showcasing seasonal adaptation for year-round greens.

Seasonal Adaptations for Year-Round Greens

Extending your salad green harvest beyond the typical spring and early summer involves adapting your approach to seasonal changes. You manage heat, frost, and light availability to keep your containers productive throughout the year.

Vibrant young salad greens in various containers on a sunny balcony railing, showing different stages of growth for succession planting.

Spring and Early Summer: The Prime Season

This is when most salad greens thrive. Temperatures are mild, and daylight hours are increasing. You focus on frequent succession plantings of fast-growing varieties.

  • Sow Aggressively: Begin planting cool-season greens like lettuce, spinach, arugula, and mustard greens as soon as the danger of hard frost passes. Continue sowing every 2-3 weeks.
  • Diverse Varieties: Experiment with various loose-leaf types to find your favorites.
  • Monitor for Pests: Spring often sees an increase in pest activity. Regular checks help you manage any outbreaks proactively.

Lush heat-tolerant greens, including Swiss chard and Buttercrunch lettuce, thrive in various pots under dappled shade on a sunny urban balcony.

Mid-Summer: Battling the Heat

High temperatures are the biggest challenge for many leafy greens. Heat often triggers bolting and bitterness.

  • Heat-Tolerant Varieties: Shift your focus to greens that handle heat better. Examples include ‘Black Seeded Simpson’ or ‘Buttercrunch’ lettuce, New Zealand spinach (not true spinach, but a heat-tolerant substitute), Malabar spinach, Swiss chard, and some varieties of kale.
  • Provide Shade: Move containers to a location that receives morning sun but is shaded during the hottest part of the afternoon. You can also use shade cloth (often 30-50% shade) draped over a simple frame to protect your plants.
  • Increase Watering: Plants in containers dry out quickly in summer. You might need to water daily, sometimes twice a day. Maintain consistent soil moisture.
  • Slow Down Succession: You may reduce your sowing frequency or pause planting some varieties during peak summer heat.

Vibrant fall salad greens like spinach, red-leaf lettuce, and arugula thrive in various containers on a small balcony, with new Mache sprouts and a cl

Fall: Embracing the Cool-Down

As temperatures drop, many cool-season greens rebound. Fall can be a second prime season, often producing even sweeter leaves due to cooler nights.

  • Resume Frequent Sowing: Start new successions of lettuce, spinach, arugula, Mache, and mustard greens. The slightly shorter days and cooler temperatures reduce bolting risk.
  • Cold-Hardy Varieties: Focus on cold-tolerant options like Mache, Claytonia, kale, and some spinach varieties.
  • Prepare for Frost: As autumn progresses, be ready to protect your plants from early frosts.

Vibrant spinach and mache thriving in terracotta pots inside a rustic wooden cold frame on a frosted patio, lid partially open.

Winter: Extending the Harvest in Cold Climates

While challenging, harvesting greens through winter in cold climates is possible with protection. In milder climates, you may enjoy fresh greens all winter with minimal effort.

  • Cold Frames and Cloches: These simple structures create microclimates, raising the temperature by several degrees and protecting plants from wind and snow. You can purchase or build them for your containers.
  • Row Covers: Floating row covers provide a few degrees of frost protection and help retain soil warmth.
  • Indoor Growing: For truly cold areas, consider moving containers indoors to a sunny window or under grow lights. Varieties like microgreens or small leaf lettuce do well indoors.
  • Focus on Hardiest Greens: Mache, spinach, and cold-tolerant kale varieties are excellent choices for winter production.

By understanding your local climate and making these seasonal adjustments, you significantly extend your harvesting window, enjoying fresh salad greens almost year-round from your small garden space.

Vibrant, sun-drenched urban patio with a multi-tiered vertical planter and various pots overflowing with diverse salad greens.

Beyond the Basics: Maximizing Small-Space Salad Production

Once you master the fundamentals of succession planting, you can implement advanced techniques to squeeze even more productivity from your limited gardening area. These strategies help you grow a wider variety and increase overall yield.

Lush fabric pocket planters and a tiered stackable system overflowing with various salad greens on a sunny urban balcony wall.

Vertical Gardening Integration

Vertical gardening is a game-changer for small spaces. It allows you to grow upwards, utilizing walls, fences, or vertical structures, freeing up valuable ground or patio space.

  • Stackable Planters: These tiered systems are perfect for salad greens. Each tier provides space for a different succession or variety. They are efficient with water and space.
  • Pocket Planters/Wall Gardens: Fabric pocket planters or wall-mounted systems attach to fences or balcony railings. Plant individual salad greens in each pocket for easy access and diverse plantings.
  • DIY Vertical Structures: Repurpose palettes, create stepped shelving, or use rain gutters mounted vertically. Ensure proper drainage for each level.

When implementing vertical gardening, consider sun exposure. The top tiers generally receive more sun, while lower tiers might need shade-tolerant varieties, especially during summer.

Vibrant salad greens, chives, marigolds, and nasturtiums growing together in a large patio planter box, showcasing companion planting.

Companion Planting Benefits

Companion planting involves growing specific plants together for mutual benefit. This can deter pests, attract beneficial insects, improve soil health, or enhance growth.

  • Pest Deterrence:
    • Marigolds: Planted near salad greens, marigolds can deter nematodes and other pests with their strong scent.
    • Nasturtiums: Act as a trap crop, drawing aphids away from your greens. You can harvest their peppery leaves and flowers for your salads too.
    • Chives/Garlic: Their pungent odor confuses pests and can deter aphids.
  • Attracting Beneficial Insects: Planting small flowering herbs like dill, cilantro (allowed to flower), or chamomile nearby attracts predatory insects like ladybugs and hoverflies, which feast on aphids.
  • Shade and Support: Taller plants can provide beneficial afternoon shade for heat-sensitive greens during summer. However, ensure they do not compete too much for nutrients in a container.

Experiment with a few companion plants in your containers. Observing their effects helps you create a balanced and resilient ecosystem in your mini garden.

Close-up of hands snipping dry, golden-brown seed heads from a bolted romaine lettuce plant in a terracotta pot on a patio table. A kraft paper bag ho

Efficient Seed Saving Basics for Salad Greens

Saving seeds from your favorite salad greens is a cost-effective and rewarding practice. It allows you to preserve specific varieties that thrive in your garden and promotes genetic diversity.

  1. Choose Open-Pollinated Varieties: Only save seeds from open-pollinated (OP) or heirloom varieties. Hybrid (F1) seeds will not reliably produce plants true to the parent.
  2. Allow to Bolt: Select a few healthy, vigorous plants from which you will not harvest leaves. Let them go to flower and form seeds.
  3. Collect Seeds: Once seed heads are dry and brittle (often turning brown), carefully snip them off. Place them in a paper bag or on a tray to dry completely in a cool, dark, well-ventilated area.
  4. Clean and Store: Separate the seeds from the chaff. Store them in airtight containers (jars or envelopes) in a cool, dark, dry place. Label clearly with the plant type and date.

Saving your own seeds connects you more deeply to the gardening cycle and makes your small-space garden even more sustainable and self-sufficient. Remember to maintain genetic purity by separating different varieties if they can cross-pollinate, especially with leafy greens like lettuce.

Small urban balcony garden corner with red lettuce in terracotta pot, arugula seedlings in fabric grow bag, and spinach in metal pot.

Frequently Asked Questions

How much sun do salad greens really need?

Salad greens generally need 4-6 hours of direct sunlight daily for optimal growth. In hotter climates or during peak summer, they benefit from partial shade during the intense afternoon hours. This prevents bolting and keeps leaves tender. Less than 4 hours often results in leggy growth and reduced yields.

Can I grow salad greens indoors during winter?

Yes, you can grow many salad greens indoors. Choose a sunny south-facing window or use supplemental grow lights. Ensure consistent temperatures, good air circulation, and proper watering. Loose-leaf lettuce, spinach, arugula, and microgreens are excellent choices for indoor cultivation, providing fresh greens even when it is cold outside.

Why are my salad greens bitter?

Bitterness in salad greens is primarily caused by stress. Common factors include hot weather, inconsistent watering (especially allowing the soil to dry out too much), and bolting (the plant sending up a flower stalk). To prevent bitterness, harvest leaves when they are young, provide adequate and consistent moisture, offer afternoon shade in summer, and plant heat-tolerant varieties for warm-season growing.

What is the best way to water container salad greens?

Water container salad greens deeply and regularly until water drains from the bottom. This encourages deep root growth. Check the soil moisture daily by sticking your finger an inch deep; water if it feels dry. Watering in the morning is ideal, as it allows foliage to dry, reducing disease risk. Avoid overhead watering to prevent fungal issues and ensure water reaches the roots directly.

When should I fertilize my container salad greens?

Begin fertilizing your container salad greens about 3-4 weeks after planting, once they have established themselves. Use a diluted liquid organic fertilizer balanced for leafy growth (e.g., a balanced NPK like 2-1-2) every 2-3 weeks. High-quality potting mixes often provide initial nutrients, so avoid over-fertilizing, which can also contribute to bitterness or weak growth.

With these strategies, your small space transforms into a highly productive salad garden. You enjoy fresh, homegrown greens year-round, minimizing waste and maximizing flavor. Embrace the cycle of planting, nurturing, and harvesting, and savor the simple joy of your own abundant salad bowl.

Categories
Edible Gardening

Grow Microgreens on Your Kitchen Counter

Imagine fresh, vibrant, nutrient-packed greens gracing your meals every day, harvested directly from your kitchen. This is not a distant dream for large garden owners. You can achieve this convenient, healthy reality right now by growing microgreens on your kitchen counter. This practice brings immediate freshness and powerful nutrition to your home, regardless of your garden size. Even with a small balcony or patio, your kitchen counter offers prime real estate for a thriving indoor garden.

Microgreens are young vegetable greens, harvested when they are just a few inches tall, typically after their first true leaves appear. They are distinct from sprouts, which you eat root, seed, and all, and baby greens, which grow larger before harvest. These miniature powerhouses offer intense flavor and significantly higher concentrations of vitamins, minerals, and antioxidants compared to their mature counterparts. Research from the USDA National Nutrient Database highlights, for instance, that red cabbage microgreens can contain up to six times more Vitamin C than mature red cabbage. Growing these tiny treasures provides you with direct control over their quality and freshness, making them a superb addition to your small-space, low-maintenance gardening efforts.

For research-based guidance on edible gardening, visit UF/IFAS Gardening Solutions, Penn State Extension — Gardening, Missouri Botanical Garden and Kew Science — Plants of the World.

Disclaimer: This article is for informational purposes only and is not a substitute for professional advice. Consult local extension services for region-specific recommendations.

Vibrant green microgreens with cotyledon and true leaves growing densely in a black tray on a sunlit kitchen counter, a hand poised to harvest.

What Are Microgreens? Your Tiny Powerhouse Garden

Microgreens are edible young seedlings of various vegetables and herbs, harvested when they develop their cotyledon leaves and possibly the first pair of true leaves. These small plants are typically one to three inches tall when you cut them. They burst with flavor, ranging from spicy to earthy, and offer a concentrated dose of nutrients. You eat the stem and leaves of microgreens. This is a significant difference from sprouts, which you consume whole, root and all, often just a few days after germination, before any leaves fully develop. Baby greens, on the other hand, are harvested at a more mature stage, after growing for several weeks, and they usually become part of a larger salad mix.

The nutritional benefits of microgreens are impressive. Scientists have extensively researched these tiny greens, finding that they often contain higher levels of vital nutrients than their mature counterparts. For example, a study published in the Journal of Agricultural and Food Chemistry revealed that microgreens can contain up to five times more vitamins and carotenoids than their fully grown equivalents. This nutritional density means you receive a potent health boost in every bite. When you grow microgreens at home, you ensure maximum freshness, which preserves these delicate nutrients and flavors. Your kitchen gardening effort contributes directly to your family’s health and culinary enjoyment.

Woman gently trimming fresh radish microgreens from a white tray on her sunlit kitchen counter, with other microgreen trays in the background.

Why Grow Microgreens at Home? Freshness, Flavor, and Fulfillment

Choosing to grow microgreens at home offers a multitude of benefits that extend beyond simply having fresh produce. You gain control over your food source, experience gardening enjoyment, and save money. Let us explore the compelling reasons to embark on this simple, yet rewarding, kitchen gardening journey.

Hands snip vibrant green pea shoots from a kitchen counter grow tray directly onto a slice of avocado toast, highlighting fresh harvesting.

Unmatched Freshness and Flavor

Store-bought microgreens, while convenient, often travel long distances, impacting their freshness, nutritional value, and flavor. When you grow microgreens on your kitchen counter, you cut them just moments before you eat them. This immediate farm-to-fork experience means maximum nutrient retention and the most vibrant flavor. Imagine adding peppery radish microgreens or sweet pea shoots to your sandwich seconds after harvesting them. The difference is palpable, elevating your meals with a crispness and intensity commercial options rarely match.

A full, vibrant tray of home-grown microgreens sits next to a small, nearly empty plastic grocery store container on a sunlit kitchen counter.

Cost-Effectiveness

Microgreens can be expensive at grocery stores, often selling for several dollars per small plastic container. These costs quickly add up if you consume them regularly. Growing microgreens at home drastically reduces this expense. A packet of microgreen seeds, typically costing a few dollars, yields multiple trays of greens, providing a significantly lower cost per serving. Your initial investment in trays and growing medium quickly pays for itself, making fresh, healthy greens an affordable luxury.

Hands opening a packet of organic microgreen seeds on a kitchen counter, with peat-free growing mix and a planting tray.

Control Over Quality and Sustainability

When you grow microgreens, you decide what goes into them. You choose organic, untreated seeds and high-quality, peat-free growing mixes. This eliminates concerns about pesticides, herbicides, or unknown additives often associated with conventionally grown produce. Your `kitchen gardening` efforts promote environmental consciousness by reducing packaging waste and your carbon footprint from transportation. You contribute to a more sustainable food system right from your countertop.

A multi-tiered shelf unit on a kitchen counter holds vibrant microgreen trays under a compact LED grow light and natural window light, a hand watering

Ease and Accessibility for Small Spaces

One of the most appealing aspects of microgreens is their suitability for small spaces. They require minimal room, flourishing on a sunny windowsill, a small shelf, or under a compact grow light setup. This makes `grow microgreens` an ideal activity for urban dwellers, apartment residents, or anyone with limited outdoor gardening space. The process is straightforward, requiring no complex tools or extensive gardening knowledge, making it perfect for beginners and seasoned gardeners alike.

Close-up of hands gently touching vibrant green microgreens in a white ceramic tray, bathed in soft morning light on a kitchen counter.

A Therapeutic and Rewarding Hobby

Engaging with nature, even on a small scale, provides significant mental health benefits. Watching your seeds germinate and quickly grow into vibrant greens offers a sense of accomplishment and connection. The simple act of tending to your `microgreens at home` can be a meditative, calming activity, a welcome break from daily stresses. This hands-on experience provides immense satisfaction and a continuous source of fresh, healthy food.

Eye-level view of various microgreen trays on a kitchen counter. A hand hovers over vibrant pea shoots, reddish radish, and delicate broccoli microgre

Choosing Your Microgreens: Top Varieties for Beginners

The world of microgreens offers a diverse palette of flavors, textures, and colors. For those new to `kitchen gardening`, selecting easy-to-grow varieties ensures a positive and rewarding experience. Here are some excellent choices for your first foray into growing microgreens on your kitchen counter.

Overhead view of vibrant radish, broccoli, and kale microgreens in ceramic trays on a sunlit kitchen counter, with a hand holding shears above.

Excellent Choices for First-Time Growers

  • Radish: These microgreens are among the fastest growers, often ready to harvest in 5-10 days. They offer a delightful peppery kick, similar to mature radishes, and come in various colors, adding visual appeal to your dishes. Look for varieties like ‘Sango’ (purple) or ‘China Rose’ (pink stems).
  • Broccoli: A classic and highly nutritious choice, broccoli microgreens have a mild, slightly bitter, yet fresh flavor. They are robust growers and reliable, typically ready in 7-12 days. Studies have shown they contain high levels of sulforaphane, a potent health compound.
  • Kale: With a mild, slightly earthy flavor, kale microgreens are tender and versatile. They grow reliably, reaching harvest size in 8-14 days. Varieties like ‘Lacinato’ (Dinosaur Kale) or ‘Red Russian’ offer attractive colors.
  • Arugula: If you enjoy a peppery, spicy note, arugula microgreens are an excellent choice. They grow quickly, often ready in 7-12 days, and add a zesty punch to salads and sandwiches.
  • Mustard: Similar to arugula but often with a more intense spice, mustard microgreens are vibrant and fast-growing, ready for harvest in 6-12 days. Choose ‘Red Giant’ for beautiful color.
  • Pea Shoots: Technically not microgreens but often grouped with them due to similar growing methods, pea shoots are incredibly popular. They offer a sweet, fresh, pea-like flavor and a satisfying crunch. These take a bit longer, usually 10-20 days, but you can get multiple harvests from a single planting. Look for ‘Dun Pea’ or ‘Sugar Snap’ varieties.
  • Sunflower: Another slightly larger option, sunflower microgreens have a distinct nutty flavor and a satisfying crunchy texture. They take 7-14 days and are very popular for their versatility in various dishes. Ensure you buy hull-less sunflower seeds specifically for microgreens, as hulled seeds can cause issues.

Person's hands examine organic radish microgreen seeds on a plate, with a bulk seed bag and a blurred standard garden seed packet on a bright kitchen

Considerations for Seed Selection

When you select seeds for growing microgreens, always choose seeds specifically labeled for microgreen production or untreated, organic seeds. Standard garden seeds might be treated with fungicides or other chemicals unsuitable for consumption in their young, raw form. Reputable seed suppliers offer bulk microgreen seeds, which are more economical for continuous growing. You find numerous online retailers specializing in microgreen seeds, or check local garden centers for organic options.

A pair of hands gently arranges basic microgreen planting supplies on a sunlit kitchen counter, including trays, soil, and seeds.

Essential Supplies for Your Countertop Microgreen Garden

Growing microgreens on your kitchen counter requires only a few basic supplies, most of which are readily available and reusable. Gathering these items before you begin ensures a smooth and successful `kitchen gardening` experience. You do not need fancy equipment, just functional tools to support your tiny greens.

Two clear plastic repurposed take-out containers nested on a kitchen counter, showing drainage holes in the top tray and water in the bottom.

Growing Trays

  • Seed Starting Trays: You need two types of trays. The first is a shallow tray with drainage holes, typically 10×20 inches, to hold your growing medium and seeds. The drainage holes are crucial to prevent waterlogging, which leads to mold.
  • Bottom/Drip Trays: The second type is a solid tray, without holes, designed to fit underneath the holed tray. This bottom tray catches excess water and allows for bottom watering, keeping the delicate greens dry.
  • Material: Choose food-safe, durable plastic trays. Many gardeners reuse plastic take-out containers or shallow bakery trays, but ensure they are clean and have appropriate drainage holes if necessary.

Hands scooping fluffy, light-brown peat-free seed starting mix into a clear repurposed container for microgreens.

Growing Medium

Microgreens do not require a nutrient-rich potting mix because they draw most of their initial energy from the seed itself. A sterile, fine-textured medium promotes good germination and root development. Avoid heavy garden soil, which can compact and harbor pests or diseases.

  • Peat-Free Seed Starting Mix: Look for organic, peat-free seed starting mixes. These mixes are typically composed of coco coir, perlite, and vermiculite. Coco coir, a sustainable alternative to peat moss, retains moisture well and provides excellent aeration.
  • Hemp Mats or Burlap: Some growers use inert growing mats, such as hemp fiber or burlap, particularly for “soil-less” microgreens. These require diligent watering but offer a clean harvest. For beginners, a fine seed starting mix is often easier to manage.

Overhead view of a rustic bowl brimming with microgreen seeds, surrounded by three distinct, high-quality seed packets on a sunlit kitchen counter.

High-Quality Seeds

As mentioned, select seeds specifically intended for microgreens or untreated, organic seeds. The quantity you need is higher than for traditional gardening, as you sow seeds densely. Purchase from reputable suppliers to ensure good germination rates and healthy plants.

Two trays of vibrant microgreens grow on a modern kitchen counter under a simple hanging LED grow light, with natural light from a nearby window.

Light Source

Adequate light is paramount for healthy, colorful microgreens. While a sunny south-facing window can work, many indoor gardeners find that supplemental lighting produces better results, especially during darker winter months or if your natural light is limited.

  • Sunny Window: A bright window that receives at least 4-6 hours of direct sunlight per day is a good starting point. Rotate your trays daily to ensure even growth.
  • LED Grow Lights: For optimal growth and year-round consistency, consider a basic LED grow light. Look for full-spectrum lights that mimic natural sunlight. A simple shop light fixture with LED bulbs works effectively. Hang the light a few inches above your trays using adjustable chains or stands.

A hand gently mists germinating microgreens with a spray bottle, alongside a small watering can and a tray of microgreens bottom watering on a bright

Watering Tools

  • Spray Bottle: A fine-mist spray bottle is essential for gently moistening the seeds and growing medium during the initial stages without dislodging them.
  • Small Watering Can with a Fine Rose: Once your microgreens germinate, a small watering can with a gentle shower head attachment helps water the soil without flattening your delicate plants. Bottom watering, where you pour water into the bottom tray, is also highly recommended.

Close-up of a hand using sharp kitchen shears to harvest vibrant radish microgreens from a tray on a sunlit kitchen counter.

Harvesting Tools

A sharp, clean tool ensures a quick, damage-free harvest.

  • Sharp Scissors or a Knife: Kitchen scissors or a sharp paring knife work perfectly. Clean them before and after each use to prevent disease.

Close-up, slightly overhead view of hands gently scattering tiny microgreen seeds onto damp seed starting mix in a dark grey tray on a kitchen counter

Step-by-Step Guide: Sowing and Growing Microgreens

Growing microgreens is a straightforward process, broken down into a few simple steps. Follow this guide to successfully `grow microgreens` on your kitchen counter, from seed to harvest.

  1. Prepare Your Growing Medium:

    Fill your drainage tray (the one with holes) with about one to two inches of your chosen peat-free seed starting mix. Gently level the soil surface without compacting it too much. You want the surface relatively flat for even seed distribution. Lightly moisten the soil using your spray bottle until it feels consistently damp but not soggy. Excess water can lead to mold and damping off.

  2. Sow Your Seeds Densely and Evenly:

    This is a critical step for a thick, full microgreen harvest. Scatter your microgreen seeds generously and uniformly across the entire surface of the moistened soil. Aim for density. For example, for a standard 10×20 inch tray, you might use approximately 1 ounce (about 28 grams) of smaller seeds like broccoli or radish, and more for larger seeds like peas or sunflowers (up to 4-6 ounces or 113-170 grams). Avoid clumping, as this can lead to poor air circulation and mold. Do not bury the seeds; simply let them rest on the surface.

  3. Lightly Mist and Cover (Blackout Period):

    After sowing, gently mist the seeds with water from your spray bottle to ensure good seed-to-soil contact. Then, place your solid bottom tray directly on top of the seeds, acting as a “blackout dome.” This mimics the soil environment, encouraging germination by keeping the seeds dark and moist. For heavier seeds like peas or sunflowers, you can place a small weight (a brick, another tray with a few pounds of weight) on top of the cover tray. This encourages the roots to grow downwards and helps the seedlings shed their hulls. Leave the seeds in blackout for 2-5 days, checking daily for moisture and early germination.

  4. Uncover and Provide Light:

    Once you see most of your seeds germinating and showing their initial cotyledon leaves, usually after 2-5 days, remove the cover tray. Immediately move your tray to your light source. If using a grow light, position it 2-4 inches above the seedlings. If using a windowsill, ensure it receives maximum light. Rotate the tray daily to promote even, upright growth and prevent leaning toward the light source. Insufficient light at this stage leads to “legginess,” where stems are long and weak.

  5. Watering and Airflow:

    Water your microgreens consistently. The best method is bottom watering: pour water into the solid bottom tray, allowing the growing medium to absorb it from below. This keeps the foliage dry, reducing the risk of fungal issues. Water only when the top of the soil appears slightly dry. A simple test: lift the tray; if it feels light, it needs water. Good air circulation is also vital. If your growing area is enclosed or humid, consider a small fan set on a low setting to gently circulate air around your plants. This helps prevent damping off and mold.

  6. Monitor and Grow:

    Over the next 5-15 days, watch your microgreens grow. They will quickly develop their first set of true leaves after the cotyledons. Keep an eye on moisture levels, light exposure, and air circulation. This active monitoring ensures healthy development. The duration to harvest depends on the variety, typically 7-21 days from sowing.

Modern kitchen counter setup with vibrant microgreen trays under a sleek LED grow light, with ample space for airflow.

Optimizing Your Microgreen Environment: Light, Water, Airflow

Creating the ideal environment ensures your `microgreens at home` thrive, providing you with a consistent supply of healthy, vibrant greens. You must manage light, water, and airflow to prevent common issues and maximize your harvest.

An overhead view of two microgreen trays on a kitchen counter: one leggy and pale, the other healthy under an LED grow light being adjusted by a hand.

Mastering Light Exposure

Light plays a pivotal role in microgreen development, affecting stem strength, leaf color, and nutrient content. You aim for strong, consistent light after the blackout period.

  • Intensity Matters: Insufficient light causes microgreens to stretch, becoming tall, pale, and weak, a condition known as “legginess.” If you notice your greens reaching excessively for the light, they need more intensity.
  • Grow Lights for Consistency: A dedicated LED grow light provides the most reliable and intense light source. Position a full-spectrum LED light 2-4 inches above your microgreen trays. This close proximity ensures maximum light absorption without generating excessive heat. Use a timer to provide 12-16 hours of light per day, mimicking natural daylight cycles.
  • Natural Light Limitations: A sunny south-facing window offers a decent option, especially if you lack a grow light. However, window light varies greatly with seasons, weather, and window cleanliness. Rotate your trays daily to ensure all sides receive equal exposure, preventing plants from leaning significantly toward the light source.

Hands lift a lush microgreen tray from a bottom watering reservoir on a kitchen counter; excess water drains, leaving foliage dry and soil moist.

Efficient Watering Practices

Correct watering is critical. Both overwatering and underwatering harm microgreens, but overwatering, leading to fungal issues, poses a greater risk.

  • Bottom Watering is Best: After germination, switch to bottom watering. Place your drainage tray (with microgreens) into a solid bottom tray containing about half an inch of water. Let the growing medium absorb the water from below for 10-20 minutes, or until the top surface appears moist. Then, remove the drainage tray from the water, allowing any excess to drain completely. This method keeps the delicate foliage dry, minimizing the risk of mold and damping off.
  • Gentle Top Misting for Germination: During the initial blackout period and immediately after sowing, use a fine-mist spray bottle to moisten the seeds and top layer of soil. This gentle application prevents you from displacing the small seeds or delicate sprouts.
  • Feel the Weight: To determine if your microgreens need water, lift the tray. If it feels significantly lighter than when fully watered, it is time to re-water. Consistency is key; avoid letting the soil completely dry out.

Compact kitchen counter with several trays of vibrant microgreens spaced out, and a small oscillating fan gently circulating air nearby.

Ensuring Good Airflow

Stagnant, humid air is an open invitation for mold and fungal diseases like damping off, a common killer of young seedlings. You need good air circulation around your microgreens.

  • Open Space: Do not crowd your trays. Leave some space between them to allow air to move freely. If you stack trays during the blackout period, ensure you remove the covers and spread them out once germination occurs.
  • Small Fan: If you grow in a humid environment or a small, enclosed space, a small oscillating fan set on its lowest setting can work wonders. Position it to gently circulate air above and around your trays, not directly on the plants, which could dry them out too quickly.
  • Preventing Mold: Good airflow, combined with bottom watering, significantly reduces the conditions favorable for mold growth. If you notice any fuzzy white growth, which could be mold or root hairs, assess your watering and airflow immediately. Healthy root hairs typically appear fine and white, clinging to the root, whereas mold often appears fuzzy and spreads across the soil surface or around decaying seeds.

A close-up of hands using small kitchen shears to harvest vibrant microgreens from a white tray on a sunlit kitchen counter, with a bowl of collected

Harvesting Your Microgreens: Timing, Tools, and Storage

The exciting moment arrives when your `microgreens at home` are ready for harvest. Knowing when and how to cut them, along with proper storage, maximizes their flavor, nutrients, and shelf life. You get to enjoy the literal fruits of your `kitchen gardening` labor.

Three trays of microgreens on a sunlit kitchen counter: vibrant radish with true leaves, younger broccoli, and taller pea shoots. A hand rests on the

Optimal Harvest Timing

Most microgreens are ready for harvest between 7 and 21 days after sowing. The exact timing depends on the variety. You primarily look for the development of the cotyledon leaves, which are the first embryonic leaves, and often the first set of true leaves. True leaves resemble the mature plant’s leaves, just in miniature form. Harvesting at this stage ensures peak flavor and nutritional density. If you wait too long, microgreens can become tougher, less flavorful, and transition into baby greens, which have different characteristics. For example:

  • Fast Growers (5-10 days): Radish, Arugula, Mustard
  • Medium Growers (10-14 days): Broccoli, Kale, Kohlrabi, Cabbage
  • Slower Growers (14-21 days): Beets, Swiss Chard, Cilantro, Basil, Pea Shoots, Sunflower

Extreme close-up of hands using sharp kitchen shears to precisely cut vibrant green microgreens just above the soil line in a small tray.

Tools and Technique for Harvest

A clean, sharp tool ensures a quick and efficient harvest without damaging the delicate plants or causing undue stress. Dull tools can crush stems, leading to quicker spoilage.

  • Tools: Use sharp kitchen shears or a clean, sharp paring knife. Sterilize your tools with rubbing alcohol before and after each harvest to prevent the spread of any potential pathogens.
  • Technique: Grasp a small bunch of microgreens gently. Cut the stems just above the soil line, approximately half an inch to one inch above the medium. Avoid cutting into the soil, as this introduces soil particles into your harvest and can dull your blade. Try to harvest only what you plan to use immediately for the freshest experience. If you need a larger quantity, harvest entire trays.

Two microgreen trays on a counter: regrowing pea shoots with new growth contrasted by sparse, depleted radish microgreens next to seeds and soil.

Single Harvest vs. Cut-and-Come-Again

Most microgreens are a one-time harvest crop. You cut them once, and they do not regrow significantly. However, a few varieties offer a “cut-and-come-again” option, allowing for a second or even third harvest. This typically applies to:

  • Pea Shoots: You can often get a second harvest if you cut them above the lowest leaf node. The plant will regrow from there. The second harvest might be slightly less vigorous but still yields tasty greens.
  • Wheatgrass: Known for multiple harvests, wheatgrass readily regrows after cutting.

For most other microgreens, the energy reserves in the seed deplete after the first growth, and the effort to get a meager second flush usually outweighs the benefit. It is more efficient to start a new tray.

Close-up of hands gently placing vibrant, thoroughly dried microgreens into a clear glass airtight container lined with a paper towel on a clean kitch

Post-Harvest Handling and Storage

Proper post-harvest care extends the life of your freshly cut microgreens.

  • Gentle Washing (Optional): Many growers choose not to wash microgreens if they are cut cleanly, as washing can reduce their shelf life. If you do wash them, do so very gently in a bowl of cool water to remove any stray soil particles.
  • Thorough Drying: This is the most crucial step for storage. After washing, or if they feel damp, gently dry your microgreens completely. Use a salad spinner or carefully pat them dry with paper towels. Any residual moisture accelerates spoilage.
  • Airtight Storage: Once dry, store your microgreens in an airtight container lined with a dry paper towel. The paper towel absorbs any remaining moisture, keeping the greens crisp.
  • Refrigeration: Place the airtight container in the crisper drawer of your refrigerator. Stored correctly, most microgreens last 5-7 days, with some varieties lasting longer.

Person leaning in, inspecting a microgreen tray on a kitchen counter, hand gently parting seedlings to check for issues.

Troubleshooting Common Microgreen Problems

Even with careful planning, you might encounter a few challenges when growing `microgreens at home`. Recognizing and addressing these issues promptly ensures your `kitchen gardening` success. Here are some common problems and practical solutions.

Extreme macro close-up of white fuzzy mold and collapsing, wilting microgreen seedlings in a small rectangular tray.

Mold or Damping Off

This is perhaps the most common and disheartening issue. Mold appears as white or grayish fuzzy growth on the soil surface, seeds, or stems. Damping off causes seedlings to suddenly wilt and collapse at the soil line, often with a constricted stem base.

  • Cause: Overwatering, poor air circulation, overly dense sowing, non-sterile growing medium, or high humidity.
  • Solution:
    1. Reduce watering frequency and ensure you bottom-water to keep foliage dry.
    2. Improve air circulation with a small fan or by increasing spacing between trays.
    3. Ensure you sow seeds with enough space for air movement. While dense, avoid clumping.
    4. Use a fresh, sterile, peat-free seed starting mix for each planting.
    5. If mold appears, isolate the affected tray. For a small patch, you might try sprinkling a tiny bit of cinnamon, a natural fungicide, or a very dilute hydrogen peroxide spray (1 part 3% H2O2 to 10 parts water). However, often starting fresh is the most effective approach.

Leggy, pale green radish microgreens stretching from a tray on a kitchen counter, with a human hand lowering an overhead LED grow light closer to them

Leggy, Pale, or Stretched Microgreens

If your microgreens appear tall, spindly, and pale with small leaves, they are “leggy.”

  • Cause: Insufficient light or the light source is too far away. Plants stretch to reach light.
  • Solution:
    1. Move your trays to a brighter location or closer to your grow light. For grow lights, position them 2-4 inches above the seedlings.
    2. Increase the duration of light exposure to 12-16 hours per day.
    3. Rotate trays daily to ensure all sides receive equal light, promoting even growth.

An elevated view of a microgreen tray showing uneven germination, with bare patches and sparse seedlings, next to an old seed packet and a spray bottl

Poor or Uneven Germination

Some seeds do not sprout, or they sprout inconsistently across the tray.

  • Cause: Old or low-quality seeds, inconsistent moisture during germination, temperature fluctuations, or inadequate blackout period.
  • Solution:
    1. Use fresh, high-quality seeds from reputable suppliers. Always check seed viability if you suspect old seeds.
    2. Maintain consistent moisture in the growing medium during the blackout phase; it should be damp, not soggy.
    3. Ensure a stable room temperature, ideally between 65-75°F (18-24°C), which is optimal for most seeds.
    4. Confirm the blackout period is sufficient, typically 2-5 days, to encourage strong initial growth before light exposure.

A hand gently parts vibrant green microgreen stems in a terracotta tray, revealing delicate white root hairs on the dark soil.

Root Hairs vs. Mold

Sometimes, what appears to be mold on the soil surface might actually be healthy root hairs.

  • Distinction: Root hairs appear as very fine, fuzzy white filaments extending from the roots into the soil. They are uniform and cling tightly to the root. Mold, conversely, often looks cottony or slimy, spreads across the soil or decaying seeds, and may have a grayish or darker hue. Mold also often has a distinct musty odor.
  • Solution: If you suspect mold, improve airflow and check watering. If you identify root hairs, continue normal care; they indicate healthy root development.

A tray of vibrant microgreens on a kitchen counter with a yellow sticky trap visible against a white tile backsplash.

Pests

Pests are rare in indoor microgreen setups due to the short growth cycle and controlled environment. However, fungus gnats can sometimes appear.

  • Cause: Overly wet soil, often introduced through contaminated potting mix.
  • Solution:
    1. Allow the top layer of soil to dry out slightly between waterings.
    2. Use sticky traps near your trays to catch adult gnats.
    3. Ensure your growing medium is sterile and pest-free.

Four small trays on a kitchen counter show microgreens from newly sown seeds to a full, ready-to-harvest batch, with a hand poised to snip.

Succession Sowing for a Continuous Microgreen Harvest

One of the greatest joys of `kitchen gardening` with microgreens is the ability to enjoy a continuous, fresh supply. You achieve this through succession sowing, a simple but effective technique. Succession sowing means planting small batches of seeds at regular intervals, rather than planting an entire large crop all at once. This practice ensures you always have microgreens at various stages of growth, ready for harvest when you need them, preventing gluts and gaps in your supply.

Three small microgreen trays on a kitchen counter, showing distinct stages of growth from sprout to mature, with a hand hovering over the ready tray.

Understanding Succession Sowing

Think of it as staggering your plantings. Instead of sowing three trays of radish microgreens on Monday, you sow one tray on Monday, another on Thursday, and a third on Sunday. By the time your first tray is harvested and consumed, your second tray is ready, and your third tray is well on its way. This method aligns perfectly with the rapid growth cycle of microgreens, which are typically ready to harvest within 7-21 days.

Close-up of hands sowing microgreen seeds into a small tray on a kitchen counter, flanked by two other trays showing different growth stages (sprouts,

How to Implement a Succession Sowing Schedule

You need to establish a planting rhythm that suits your consumption rate and the growth speed of your chosen microgreens. Here is a practical approach:

  1. Determine Your Consumption: Estimate how much microgreens your household consumes per week. Do you use one tray’s worth, or do you need two or three?
  2. Choose Your Varieties: Consider the harvest time for each microgreen. Fast growers like radish and arugula will require more frequent sowing. Slower growers like pea shoots or cilantro can have slightly longer intervals.
  3. Establish a Planting Interval: For most fast-growing microgreens, sowing a small tray every 3-5 days works well. For slower varieties or if your consumption is lower, you might extend this to once a week.
  4. Dedicated Trays: Have multiple trays on hand. For example, if you want a continuous supply of radish microgreens, you might have three trays in rotation: one just sown, one growing, and one ready for harvest.

Three microgreen trays on a rustic counter in morning light, showing different growth stages, with a hand reaching for a mature tray.

Example Succession Sowing Schedule for a Standard 10×20 Inch Tray

This table illustrates a hypothetical schedule for continuous `grow microgreens` production, assuming you use one tray per harvest for small daily additions to meals.

Week Day Activity Microgreen Type (Example) Status of Previous Tray
1 Monday Sow Tray A Radish N/A
1 Thursday Sow Tray B Broccoli Tray A germinating
2 Monday Sow Tray C Arugula Tray A ready for harvest, Tray B growing
2 Wednesday Harvest Tray A Radish Tray B nearing harvest, Tray C growing
2 Thursday Sow Tray D Radish (repeat) Tray B ready for harvest, Tray C growing
3 Monday Harvest Tray B Broccoli Tray C nearing harvest, Tray D growing
3 Tuesday Sow Tray E Broccoli (repeat) Tray C nearing harvest, Tray D growing

This cycle continues, providing you with fresh microgreens every few days. Adjust the number of trays and sowing intervals based on your personal needs and the growth rates of your chosen varieties. You quickly find a rhythm that works for your `kitchen gardening` efforts.

Hands sprinkle fresh microgreens onto avocado toast on a kitchen counter, with a small bowl of extra greens nearby.

Incorporating Your Harvest: Delicious Ways to Use Microgreens

You have successfully cultivated your vibrant `microgreens at home` on your kitchen counter. Now comes the exciting part: enjoying your fresh harvest! Microgreens are incredibly versatile, adding a burst of flavor, texture, and nutrition to a wide array of dishes. Their intense flavors mean a little goes a long way, elevating everyday meals into gourmet experiences.

Hands adding fresh, vibrant broccoli microgreens to a turkey and avocado sandwich on a wooden board in a sunlit kitchen.

Enhance Your Everyday Meals

Microgreens are not just a garnish, they are a powerful ingredient that can transform simple dishes. Here are some practical ways to incorporate them into your daily diet:

  • Salads: The most obvious use. Instead of plain lettuce, mix in a handful of spicy radish microgreens or sweet pea shoots to create a more dynamic and nutritious salad. You can also use a generous bed of microgreens as the base for a light, vibrant side salad.
  • Sandwiches and Wraps: Replace or supplement traditional lettuce with microgreens for added crunch, flavor, and a nutritional boost. Broccoli microgreens in a turkey sandwich, or spicy arugula microgreens in a veggie wrap, add a fresh twist.
  • Soups and Stews: Stir a handful of microgreens into your bowl of soup or stew just before serving. The residual heat gently wilts them, releasing their flavor and adding a fresh element without overcooking. Pea shoots or kale microgreens work wonderfully here.
  • Scrambled Eggs and Omelets: Fold microgreens into your eggs just as they finish cooking, or sprinkle them on top. Their fresh flavor brightens up any egg dish, offering a savory contrast.
  • Smoothies and Juices: For a hidden nutritional kick, blend mild-flavored microgreens like broccoli, kale, or wheatgrass into your morning smoothie or fresh juice. They integrate seamlessly, boosting your intake of vitamins and minerals.
  • Pizzas and Flatbreads: Add a layer of microgreens on top of your pizza or flatbread immediately after it comes out of the oven. The warmth wilts them slightly, bringing out their flavor. Arugula or basil microgreens are excellent choices.

Bright kitchen counter with a bowl of vibrant microgreen pesto, avocado toast topped with microgreens, and a microgreen vinaigrette bottle.

Creative Culinary Applications

Do not limit yourself to the basics. Experiment with your microgreens in more adventurous ways:

  • Garnish for Main Courses: Elevate roasted meats, grilled fish, or pasta dishes with a vibrant topping of microgreens. They provide both visual appeal and a fresh counterpoint to richer flavors. Consider cilantro microgreens for Mexican or Asian-inspired dishes.
  • Pesto: While traditional pesto uses basil, you can create unique pestos with microgreens. Try a blend of sunflower microgreens and basil, or an all-arugula microgreen pesto for a peppery kick.
  • Dressings and Dips: Finely chop microgreens and blend them into homemade salad dressings, vinaigrettes, or creamy dips. They add depth of flavor and a beautiful green hue.
  • Loaded Toast and Avocado Toast: A simple slice of avocado toast becomes a gourmet treat with a generous pile of mixed microgreens on top, perhaps with a sprinkle of sea salt and red pepper flakes.

The key is to add microgreens at the very end of cooking, or use them raw. Their delicate structure and concentrated nutrients are best preserved when exposed to minimal heat. Your `grow microgreens` effort pays off in delicious, healthy, and visually appealing meals every time.

Home gardener thoughtfully observes a small tray of mixed microgreens on her kitchen counter, perhaps noting a minor detail.

Frequently Asked Questions

Can I reuse the soil after harvesting microgreens?

While some adventurous gardeners try, we generally do not recommend reusing the soil for successive batches of microgreens. Microgreens exhaust many of the available nutrients in the small amount of growing medium during their rapid growth cycle. Additionally, spent soil can harbor mold spores or other pathogens from the previous crop, increasing the risk of issues for your next batch. For best results and to minimize problems, use fresh, sterile, peat-free seed starting mix for each planting. You can compost the spent soil and root mats, returning the organic matter to the earth sustainably.

Do I need special seeds to grow microgreens?

Yes, you absolutely need specific seeds for `grow microgreens`. Always purchase seeds labeled for microgreen production or untreated, organic seeds. Standard garden seeds are often treated with fungicides or pesticides to protect them during longer outdoor germination periods. These chemicals are not safe for consumption, especially when you eat the young, raw plant. Reputable seed suppliers offer bulk quantities of untreated seeds suitable for dense microgreen sowing. This ensures your `microgreens at home` are safe and healthy.

What if my microgreens get moldy?

Mold is a common issue, typically caused by overwatering, insufficient airflow, or overly dense sowing. If you notice mold, first isolate the affected tray to prevent spread. Increase air circulation by using a small fan or giving your trays more space. Ensure you are bottom-watering to keep the foliage dry, and let the top layer of soil dry slightly between waterings. For a mild case, you can try spraying a very dilute hydrogen peroxide solution (1 part 3% H2O2 to 10 parts water). However, often, the most effective solution is to discard the moldy crop and thoroughly clean your trays before starting a fresh batch, implementing preventive measures from the beginning.

How long do microgreens last after harvest?

With proper handling, most microgreens last 5-7 days in the refrigerator. The key to extending their shelf life is to harvest them cleanly, wash them gently only if necessary, and most importantly, dry them thoroughly. Any residual moisture significantly shortens their storage time. Store completely dry microgreens in an airtight container lined with a dry paper towel in your refrigerator’s crisper drawer. For maximum flavor and nutrient density, we recommend consuming them within 2-3 days of harvest.

Can I grow microgreens without grow lights?

Yes, you can `grow microgreens` without grow lights if you have access to a very bright, sunny windowsill, ideally south-facing, that receives at least 4-6 hours of direct sunlight daily. However, natural light conditions can vary greatly with seasons and weather, potentially leading to leggy or less vibrant growth. For consistent results, especially during winter months or in homes with limited natural light, a simple LED grow light setup is highly recommended. Grow lights provide controlled intensity and duration, resulting in stronger, more robust microgreens.

Categories
Edible Gardening

Fast-Growing Herbs You’ll Use Every Day

Imagine stepping onto your balcony or into your small yard and snipping fresh, fragrant herbs just moments before dinner. This dream is entirely achievable, even if your gardening experience is minimal or your space is limited. Growing your own herbs means you enjoy unparalleled freshness, save money, and elevate your cooking with vibrant flavors. Many herbs thrive in containers, require little fuss, and grow incredibly quickly, offering continuous harvests.

This guide empowers you to cultivate a thriving herb garden, no matter how small your space. We focus on the best fast-growing herbs, providing practical steps and actionable advice to ensure your success. You will learn about selecting the right containers, preparing the ideal soil, and mastering the simple rhythms of watering and harvesting. Get ready to transform your kitchen and outdoor space with your very own fresh, delicious herbs.

Person observing morning sun patterns on a small urban balcony with empty terracotta pots and a vertical planter, planning their garden layout.

Small-Space Planning for Herb Success

Successful small-space gardening begins with smart planning. Before you sow a single seed, assess your environment. You need to understand the sunlight patterns, consider air circulation, and ensure easy access for daily care. These foundational steps ensure your fast-growing herbs flourish, providing you with abundant harvests.

A woman on a sunny patio observes distinct light and shadow patterns on potted herbs and plants in late afternoon, mapping sunlight.

Mapping Your Sunlight

Most fast-growing herbs, especially the popular kitchen herbs like basil, cilantro, and dill, require at least six hours of direct sunlight daily to thrive. This means measuring the sunlight your chosen spot receives. Observe your balcony, patio, or windowsill throughout the day. Mark down which areas receive full sun, partial sun (3-6 hours), or shade (less than 3 hours). Place sun-loving herbs in the brightest spots, and consider rotating containers to maximize light exposure if necessary. Remember, insufficient light leads to leggy, weak plants with less flavor, making your effort less rewarding.

Heavy terracotta herb pots (rosemary, thyme, basil) grouped for wind protection in a balcony corner on an overcast day.

Considering Wind and Exposure

Wind can be a significant challenge for container gardens, especially on balconies or exposed patios. Strong winds can dehydrate plants quickly, damage delicate foliage, and even knock over containers. If your space is particularly windy, consider placing containers in a sheltered corner, against a wall, or near a railing that offers some protection. You can also group containers together to create a microclimate, where plants shield each other. Choose heavier pots or add weights to prevent tipping. Adequate air circulation is important to prevent fungal diseases, but extreme wind is detrimental.

Person comfortably waters waist-high herb planter on a patio; nearby tap with coiled hose for easy access.

Accessibility and Water Source

Easy access to your herbs makes daily care a pleasure, not a chore. Place your containers where you can easily reach them for watering, harvesting, and pest checks. If you have limited mobility, raised planters or vertical garden systems can bring your herbs to a comfortable height. Also, consider your water source. Hauling a heavy watering can across a large space becomes tiresome. Position your herb garden near a tap or make sure your watering system is convenient. Efficient watering is a cornerstone of low-maintenance gardening.

Hands inspecting the drainage of a terracotta pot, surrounded by a variety of empty gardening containers on a small balcony workbench.

Choosing the Right Containers for Your Herbs

The container you select directly impacts your herb’s health and growth. For fast-growing herbs, choose pots that accommodate their root systems and support vigorous growth. You want durability, proper drainage, and often, portability. You have many excellent options, from traditional terracotta to modern self-watering designs.

Hands holding a thriving basil plant with visible roots between an undersized nursery pot and a larger, suitable terracotta pot on a wooden surface.

Size Matters for Root Development

While many herbs start small, they grow quickly and establish robust root systems. A pot that is too small restricts root growth, leading to stunted plants and frequent watering. Aim for containers that are at least 6-8 inches in diameter for individual herb plants like basil or mint. For grouping several herbs, a planter box 12-18 inches long and 8-10 inches deep works well. Deeper pots (10-12 inches) are preferable for herbs with extensive root systems or for supporting larger plants. Adequate space translates directly to healthier, more productive kitchen herbs.

Close-up of terracotta, glazed ceramic, and plastic pots, each holding herbs, with visible drainage holes and saucers on a wooden bench.

Materials and Drainage

Container materials influence moisture retention and temperature. Terracotta pots, for example, are porous and allow soil to dry out faster, which is beneficial for herbs that prefer drier conditions, but they require more frequent watering. Plastic or glazed ceramic pots retain moisture longer, reducing watering frequency, making them a good choice for busy gardeners. Whatever material you choose, ensure every container has drainage holes. Without proper drainage, roots sit in waterlogged soil, leading to root rot and plant death. You can add a layer of gravel or broken pottery at the bottom, but the primary function is to prevent soil from washing out, not to enhance drainage itself; the drainage hole is paramount. Saucers are useful to catch excess water but remember to empty them to prevent standing water.

Potted plant drainage diagram: arrows show water flowing from soil, through drainage layer, and out of pot's drainage holes. 30 cm pot indic
Potted plant drainage diagram: arrows show water flowing from soil, through drainage layer, and out of pot’s drainage holes. 30 cm pot indic

Eye-level shot of modern self-watering planters on an urban balcony, with a watering can filling a basil pot's reservoir.

Self-Watering Options for Busy Gardeners

Self-watering containers offer an excellent solution for low-maintenance herb gardening. These pots feature a reservoir at the bottom that wicks water up into the soil as needed. This system ensures consistent moisture, reduces watering frequency, and helps prevent both overwatering and underwatering. They are particularly beneficial for thirsty herbs like basil, or if you travel frequently. You fill the reservoir, and the plant draws water as it requires, often for several days or even a week. This innovative approach simplifies care and keeps your fast-growing herbs hydrated and thriving.

Gardener's hands mixing rich potting soil with perlite in a black trug on a sunny balcony table, preparing for container herbs.

Crafting the Perfect Potting Mix for Thriving Herbs

The foundation of a successful container herb garden is the potting mix. It provides physical support, retains moisture, and supplies essential nutrients to your fast-growing herbs. Do not use garden soil directly in containers, as it compacts easily and lacks adequate drainage and aeration. A high-quality, well-draining potting mix is crucial for healthy root development and robust plant growth.

Close-up, slightly overhead shot of distinct potting mix ingredients (coco coir, perlite, vermiculite, worm castings) in scoops on a wooden bench, han

Key Ingredients for Success

A good potting mix for herbs typically contains a blend of components that serve different functions:

  • Peat Moss or Coco Coir: These materials retain moisture and nutrients while providing structure. Coco coir, derived from coconut husks, is a sustainable alternative to peat moss, which is harvested from sensitive bog ecosystems. Coco coir holds water efficiently and provides excellent aeration.
  • Perlite or Vermiculite: These lightweight minerals improve drainage and aeration, preventing soil compaction and ensuring roots receive adequate oxygen. Perlite offers more drainage, while vermiculite retains more moisture and nutrients. A combination often works best.
  • Compost or Worm Castings: Organic matter is vital for nutrient supply. Compost enriches the soil with a slow-release source of nutrients, promotes beneficial microbial activity, and improves soil structure. Worm castings are particularly rich in readily available plant nutrients.
  • Coarse Sand (Optional): For herbs that prefer very sharp drainage, such as rosemary or thyme, a small amount of coarse horticultural sand can further improve drainage, though perlite often suffices.

Look for potting mixes labeled “container mix” or “potting mix for edibles.” These are typically formulated to provide the right balance for healthy plant growth.

Hands pouring light, fibrous peat-free potting mix from a branded bag into a small terracotta pot on an urban balcony, with another peat-free bag near

Why Peat-Free Matters

When selecting your potting mix, actively choose peat-free options. Peat moss is harvested from peat bogs, which are unique and important wetlands that store vast amounts of carbon and provide critical habitats. Peat harvesting releases carbon dioxide into the atmosphere, contributing to climate change, and destroys these valuable ecosystems. Sustainable alternatives like coco coir, composted bark, and wood fiber perform just as well, if not better, for container gardening. By choosing peat-free, you make an environmentally conscious decision that supports healthy ecosystems while still providing excellent growing conditions for your fast-growing herbs.

Hands prepare to add compost, perlite, and fertilizer to used potting mix in a tub on a patio table, surrounded by empty pots.

Reusing and Refreshing Potting Mix

You can often reuse potting mix for another season, which saves money and resources. However, fresh nutrients are essential. After a growing season, the potting mix typically depletes its nutrient reserves and may show some compaction. To refresh it, remove any old roots and debris. Then, incorporate fresh compost or worm castings, a handful of perlite or vermiculite to improve aeration, and a slow-release organic fertilizer. This rejuvenates the mix, making it suitable for new plantings of your kitchen herbs. This practice aligns with sustainable gardening principles, reducing waste and maximizing resource use.

A woman's hands harvesting fresh basil from a terracotta pot, surrounded by other container herbs on a sunny patio.

The Best Fast-Growing Herbs You’ll Use Every Day

Selecting the right herbs is the first step toward a productive garden. For small spaces and daily culinary use, you want herbs that establish quickly, offer continuous harvests, and adapt well to containers. Here are some of the best fast-growing herbs you can easily cultivate:

Diverse basil plants in various containers on sunlit stone steps, thriving in a compact patio garden setting.

Basil (Ocimum basilicum)

Basil is the quintessential summer herb, essential for pesto, Caprese salads, and countless Italian and Asian dishes. It is incredibly fast-growing from seed, often ready for its first harvest in 3-4 weeks. Basil thrives in full sun and consistently moist, well-drained soil. Pinching back the growing tips regularly encourages bushier growth and prevents it from flowering too early, extending your harvest. There are many varieties, including ‘Genovese’ for classic pesto, ‘Thai’ for a hint of anise, and ‘Lemon’ for a citrusy twist.

Lush spearmint plant overflowing a terracotta pot on a wooden stand in a sun-dappled urban balcony corner.

Mint (Mentha spp.)

Mint is notoriously vigorous and exceptionally fast-growing. Its refreshing flavor elevates teas, desserts, and cocktails. Because mint spreads aggressively through underground runners, growing it in a container is almost mandatory to prevent it from taking over your garden. Mint tolerates partial shade but prefers full sun and consistently moist soil. Popular varieties include ‘Spearmint,’ ‘Peppermint,’ and ‘Chocolate Mint.’ Harvest frequently to keep it productive and flavorful.

Three small terra cotta pots on a balcony railing, showing cilantro from tiny sprouts, to lush leaves, to an older plant beginning to bolt.

Cilantro (Coriandrum sativum)

Cilantro, or coriander, is a staple in Mexican, Indian, and Southeast Asian cuisines. It germinates quickly and offers its first tender leaves within 3-4 weeks. Cilantro prefers cooler temperatures and partial shade, especially in warmer climates, as it tends to “bolt” (go to seed) quickly in hot weather. To ensure a continuous supply, practice succession sowing, planting small batches every 2-3 weeks. This strategy provides fresh leaves while older plants go to seed, giving you coriander seeds.

A low-angle shot of a lush, feathery dill plant in a tall terracotta pot on a sunny balcony, backlit by golden hour light.

Dill (Anethum graveolens)

Dill’s feathery leaves and distinctive flavor complement fish, pickles, and potato dishes. It is another fast-growing herb, often ready for harvest in 6-8 weeks from seed. Dill prefers full sun and well-drained soil. It has a taproot, so choose a deeper pot to accommodate its growth. Like cilantro, dill can bolt in hot weather, so plant it in succession for a continuous supply of fresh foliage. Allow some plants to flower to attract beneficial insects and collect seeds.

A hand gently snips fresh flat-leaf parsley from a terracotta pot on a sunny wooden balcony railing, highlighting its everyday use.

Parsley (Petroselinum crispum)

Parsley is a biennial herb, meaning it grows for two years, but you harvest its leaves in the first year. It offers a fresh, clean flavor, perfect for garnishes, sauces, and stews. While seeds can be slow to germinate, once established, parsley is a fast and prolific grower. It thrives in full sun to partial shade and moist, rich soil. Flat-leaf parsley (‘Italian’) offers a more robust flavor, while curly parsley provides an attractive garnish. Consistent harvesting encourages new growth.

Vibrant chives with green leaves and purple flowers in a weathered terracotta pot on a sun-dappled flagstone patio, with a blurred wicker chair in the

Chives (Allium schoenoprasum)

Chives are a member of the onion family, offering a delicate oniony flavor without the pungency. They are incredibly easy to grow from seed or divisions and produce quickly. Chives form clumps of slender, grass-like leaves and produce beautiful purple flowers, which are also edible. They prefer full sun to partial shade and well-drained soil. Chives are perennial, returning year after year, making them a low-maintenance staple. Snip the leaves from the base for continuous harvests.

A hand harvests vibrant lemon balm from a terracotta pot on a patio table, next to a glass carafe of lemon-infused water.

Lemon Balm (Melissa officinalis)

Lemon balm is a vigorous, fast-growing member of the mint family, offering a distinct lemony fragrance and flavor. It is fantastic for teas, infused water, and desserts. Like mint, it can spread enthusiastically, so container growing is ideal. Lemon balm tolerates partial shade but grows bushier in full sun with consistent moisture. Harvest leaves frequently to encourage new growth and prevent it from flowering too early. Its leaves are ready for harvest in just a few weeks after planting.

Characteristics of Fast-Growing Kitchen Herbs
Herb Sunlight Needs Water Needs Container Size (Min. Diameter) Time to First Harvest (from seed) Growth Habit
Basil Full Sun (6+ hours) Consistently Moist 8 inches 3-4 weeks Bushy
Mint Full Sun to Partial Shade Consistently Moist 10 inches (to contain spread) 2-3 weeks (from plant) Spreading
Cilantro Full Sun (cool), Partial Shade (warm) Consistently Moist 6-8 inches 3-4 weeks Upright, bushy
Dill Full Sun (6+ hours) Well-drained, Moderate 8-10 inches (deep) 6-8 weeks Upright, feathery
Parsley Full Sun to Partial Shade Consistently Moist 8 inches 6-8 weeks (from seed) Bushy
Chives Full Sun to Partial Shade Well-drained, Moderate 6-8 inches 3-4 weeks (from division) Clumping
Lemon Balm Full Sun to Partial Shade Consistently Moist 10 inches (to contain spread) 3-4 weeks Spreading, bushy

This table offers a quick reference for matching specific fast-growing herbs to your available space and care routine, ensuring you choose the best herbs to grow for your needs.

Person's hands check soil moisture in a basil pot on an urban balcony among other flourishing herbs.

Mastering Light, Water, and Nutrient Rhythm for Herbs

Understanding the interplay of light, water, and nutrients establishes a robust growing environment for your fast-growing herbs. While specific needs vary, a general rhythm ensures consistent health and productivity. Getting this balance right is key to success in small-space gardening.

Close-up of three vibrant herb pots (rosemary, thyme, oregano) under a sleek LED grow light on a wooden shelf, supplemented by natural window light.

Optimizing Light Exposure

As discussed, most kitchen herbs require at least six hours of direct sunlight. If your primary spot does not provide this, you have options. Consider rotating your containers throughout the day to maximize sun exposure. For example, move a pot from a morning sun spot to an afternoon sun spot. If natural light is insufficient, especially indoors, supplemental grow lights can make a significant difference. LED grow lights are energy-efficient and effective, providing the necessary spectrum for healthy herb growth. Positioning the light 6-12 inches above the plant canopy for 12-14 hours a day mimics ideal conditions and promotes vigorous growth.

A basil plant in a terracotta pot absorbing water from a weathered metal tray on a sun-dappled patio table, demonstrating efficient bottom watering.

The Art of Efficient Watering

Proper watering is critical, and overwatering is a common mistake that leads to root rot. The general rule for most herbs is to water deeply when the top inch or two of soil feels dry to the touch. Stick your finger into the soil to check moisture levels before watering. When you water, do so slowly and thoroughly until water drains from the bottom of the pot. This deep watering encourages roots to grow downward, making the plant more resilient. For plants in saucers, empty any excess water within 30 minutes to prevent roots from sitting in standing water.

Another efficient watering method is bottom watering. Place your container in a tray of water and allow the soil to absorb moisture from the drainage holes upwards. This ensures the entire root ball gets saturated and prevents soil compaction from overhead watering. It is also an excellent way to rehydrate very dry potting mixes. Self-watering containers, as mentioned earlier, are fantastic for maintaining consistent moisture without daily intervention, especially for thirsty herbs like basil and mint.

Hands pour liquid organic fertilizer from a watering can into a healthy potted basil on a sunny urban patio, with a fertilizer bottle nearby.

Nourishing with Organic Fertilizers

Fast-growing herbs in containers deplete soil nutrients more quickly than in-ground plants because they have limited soil volume. Regular feeding with organic fertilizers replenishes these nutrients, supporting continuous growth and maximizing yields. Start with a rich potting mix that includes compost. Then, every 2-4 weeks during the active growing season, provide a balanced liquid organic fertilizer. Look for products with an NPK ratio around 5-1-1 or 2-3-1, indicating a higher nitrogen content for leafy growth. Examples include diluted fish emulsion, kelp meal, or a balanced organic vegetable fertilizer. Always follow the manufacturer’s instructions for dilution and application rates. Over-fertilizing can burn roots and harm your plants.

Hands harvesting mature basil from a vertical planter, with younger herb seedlings visible in lower pockets, demonstrating succession.

Succession Sowing and Smart Spacing for Continuous Harvests

To ensure a continuous supply of fresh fast-growing herbs, you need to employ smart strategies for planting and spacing. Succession sowing prevents gluts and gaps in your harvest, while proper spacing ensures each plant has the room it needs to thrive and produce abundantly.

Three rustic terracotta pots on a sunlit patio table: one with tiny cilantro seedlings, one with lush mature cilantro, and one with cilantro starting

Understanding Succession Sowing

Succession sowing means planting small batches of seeds every couple of weeks, rather than planting an entire packet all at once. This strategy staggers your harvests, so you always have young, tender plants ready for picking as older plants reach maturity or begin to bolt. It is particularly effective for fast-growing herbs like cilantro, dill, and basil, which can quickly produce a large crop, then slow down or go to seed. For example, plant a small pot of cilantro every two weeks. When the first batch starts to bolt, your next batch will be ready for harvest. This provides a steady supply of fresh kitchen herbs throughout the growing season, maximizing your container space and effort.

Hands thinning cilantro seedlings for optimal spacing in a long balcony planter, bathed in soft sunlight.

Optimal Spacing for Herb Health

Proper spacing ensures adequate air circulation, light penetration, and nutrient availability for each plant. Overcrowding leads to competition for resources, reduced yields, and increased susceptibility to diseases. While specific spacing requirements vary by herb, a general guideline is to give each plant enough room to reach its mature size without touching its neighbors.

  • Basil: Plant individual basil plants 6-8 inches apart in a container.
  • Mint and Lemon Balm: As vigorous spreaders, plant one mint or lemon balm plant per 8-10 inch pot to prevent them from choking out other plants.
  • Cilantro and Dill: Sow seeds thinly, then thin seedlings to 4-6 inches apart. You can sow denser and harvest the thinnings as baby greens.
  • Parsley: Space parsley plants 6-8 inches apart.
  • Chives: Plant chive clumps 6-8 inches apart.

When planting, consider the mature size of the herb, not just its initial seedling size. Good airflow around plants is a key component of preventing fungal diseases, especially in humid conditions or small, enclosed spaces like balconies.

Hands placing freshly harvested basil and mint into a small glass jar of water, with potted herbs blurred in the background on a patio.

Harvesting, Pruning, and Storing Your Kitchen Herbs

Knowing how and when to harvest your fast-growing herbs ensures you maximize their flavor and encourage continuous production. Proper pruning techniques extend the life of your plants, and smart storage methods preserve their freshness, so you get the most out of your kitchen herbs.

Close-up of a hand with shears snipping vibrant green chive blades near the base of the plant in a terracotta pot on a sunny patio.

The Art of Cut-and-Come-Again Harvesting

Many fast-growing herbs benefit from a “cut-and-come-again” harvesting method. This technique involves taking only what you need, rather than harvesting the entire plant. By doing so, you stimulate new growth, ensuring a continuous supply of fresh leaves. For herbs like basil, mint, and lemon balm, pinch off individual leaves or snip stems above a leaf node. This encourages the plant to branch out, becoming bushier and more productive. For chives, snip the outer leaves near the base of the plant. For cilantro and parsley, harvest the outer leaves first, leaving the inner growth to mature. Regular, light harvesting is a form of pruning that keeps your herbs vibrant and flavorful.

A person's hand pinches the central stem of a bushy basil plant in a terracotta pot on a sunny balcony, with other herbs blurred in the background.

Pruning for Yield and Health

Beyond daily harvesting, occasional pruning enhances plant health and yield. For basil, once the plant grows to 6-8 inches tall, pinch off the central growing stem just above a set of leaves. This prevents the plant from bolting prematurely and encourages side shoots, leading to a bushier, more productive plant. When basil or dill starts to form flower buds, pinch them off immediately if you want to prolong leaf production. Allowing plants to flower directs energy into seed production, often reducing leaf flavor and yield. For mint and lemon balm, which can become leggy, cut back stems by about one-third every few weeks to promote fresh, tender growth.

Fresh basil stems in a glass of water and cilantro wrapped in a damp paper towel in a container on a kitchen counter, with a patio herb garden visible

Extending Freshness: Storage Tips

Fresh herbs are best used immediately, but you can extend their freshness with proper storage:

  • Basil: Treat basil like a cut flower. Place the stems in a glass of water on your kitchen counter, away from direct sunlight. Cover loosely with a plastic bag. Change the water daily. Avoid refrigerating basil, as it turns black and loses flavor. It can last up to a week this way.
  • Cilantro, Parsley, Dill, Chives: Rinse the herbs, pat them dry, and wrap them loosely in a damp paper towel. Place this bundle in a plastic bag or an airtight container in the refrigerator’s crisper drawer. They can stay fresh for 1-2 weeks. For chives, you can also stand them upright in a glass of water in the fridge, covered.
  • Mint and Lemon Balm: Store similarly to cilantro and parsley, wrapped in a damp paper towel in a bag in the refrigerator.

For longer-term storage, consider freezing or drying. Freezing herbs in olive oil ice cubes (for savory herbs) or drying them are excellent ways to preserve their flavor for months.

Close-up of a hand gently inspecting a basil leaf in a terracotta pot on a balcony, revealing a tiny chew mark.

Troubleshooting Common Herb Issues and Pests

Even the most attentive gardeners encounter occasional challenges. Recognizing common issues and knowing how to address them quickly helps keep your fast-growing herbs healthy and productive. Integrated Pest Management (IPM) principles guide us toward prevention and least-toxic solutions.

A person kneels on a sunny patio, intently inspecting a potted basil plant with subtle yellowing leaves, a watering can nearby.

Recognizing and Preventing Problems

Many herb problems stem from improper environmental conditions. Yellowing leaves often indicate overwatering or nutrient deficiency. Drooping leaves might mean underwatering or heat stress. Brown, crispy leaf edges suggest underwatering or too much sun for sensitive herbs. Prevention is always the best defense:

  • Right Plant, Right Place: Ensure your herbs receive appropriate sunlight and are in well-draining pots.
  • Good Air Circulation: Space plants adequately to prevent fungal issues.
  • Proper Watering: Water deeply when the topsoil is dry, avoiding extremes.
  • Healthy Soil: Use a high-quality potting mix and replenish nutrients regularly.

Regularly inspect your plants. A quick visual check during daily watering can catch problems early, making them much easier to manage.

A person's hands gently mist the underside of a potted basil plant on a sun-dappled balcony railing, with other container herbs in the background.

Common Herb Pests and Least-Toxic Controls

Even in small spaces, pests can find their way to your delicious kitchen herbs. Here are some common culprits and how to manage them:

  • Aphids: These tiny, soft-bodied insects cluster on new growth and the undersides of leaves, sucking plant sap.
    • Control: Spray them off with a strong jet of water. For persistent infestations, use insecticidal soap, ensuring complete coverage of the affected areas.
  • Spider Mites: These microscopic pests create fine webbing on plants and cause stippling (tiny dots) on leaves. They thrive in hot, dry conditions.
    • Control: Increase humidity around plants. Spray with insecticidal soap or neem oil, focusing on the undersides of leaves.
  • Whiteflies: Small, white, winged insects that fly up when disturbed from the undersides of leaves. They also suck plant sap.
    • Control: Use yellow sticky traps to catch adults. Spray with insecticidal soap or neem oil.

Always identify the pest accurately before applying treatments. Start with the least toxic method first. Encourage beneficial insects like ladybugs and lacewings by avoiding broad-spectrum pesticides, or introduce them if problems persist. You can learn more about identifying and managing common garden pests through resources like the UC IPM (University of California Integrated Pest Management) program.

A person on an urban balcony admiring a diverse, thriving container garden of basil, mint, cilantro, and chives in golden hour light.

Frequently Asked Questions

Are fast-growing herbs suitable for beginners?

Absolutely. Fast-growing herbs like basil, mint, and cilantro are ideal for beginners because they germinate quickly and show noticeable growth within weeks. This rapid progress provides immediate gratification and builds confidence, making them some of the best herbs to grow when you are starting your gardening journey. They adapt well to containers and generally have straightforward care requirements.

Can I grow different kitchen herbs in the same container?

Yes, you can, but with careful consideration. Pair herbs with similar light, water, and nutrient requirements. For example, basil, parsley, and chives often grow well together. Avoid planting vigorous, spreading herbs like mint or lemon balm with other herbs in the same pot, as they quickly outcompete their neighbors for resources. Dedicate a separate container for these enthusiastic growers to ensure their success and prevent them from stifling other plants.

How much light do fast-growing herbs need indoors?

Most fast-growing herbs, even indoors, thrive with at least 6 hours of direct sunlight. If you cannot provide this naturally through a south-facing window, supplemental lighting is beneficial. A simple LED grow light placed 6-12 inches above your plants for 12-14 hours daily will provide the necessary light spectrum for healthy, productive growth. Without sufficient light, your herbs will become leggy and produce fewer leaves.

My herbs are getting leggy. What does this mean, and how can I fix it?

Leggy herbs have long, stretched-out stems with sparse leaves. This usually indicates insufficient light. The plant stretches to reach a light source. To fix this, provide more light, either by moving the plant to a brighter location or adding supplemental grow lights. You can also prune back the leggy growth to encourage bushier development. Cut stems back to a leaf node, and new growth will emerge.

When should I start fertilizing my fast-growing herbs?

If you use a high-quality potting mix that contains compost or slow-release nutrients, your herbs may not need fertilizer for the first 4-6 weeks. After that, begin a routine of applying a balanced liquid organic fertilizer every 2-4 weeks during their active growing season. Always follow the product’s instructions for dilution. Over-fertilizing can harm your plants, so consistency and moderation are key.

You now possess the knowledge and practical steps to cultivate a thriving herb garden, even in the smallest of spaces. From selecting the perfect pot to mastering the rhythm of light, water, and nutrients, you are well-equipped to grow the best fast-growing herbs for your kitchen. Embrace these low-maintenance techniques, and soon you will enjoy a constant supply of fresh, flavorful kitchen herbs, ready to elevate every meal. Happy gardening!

For additional research-based guidance on edible gardening, visit
University of Illinois Extension — Gardening,
University of Minnesota Extension,
Royal Horticultural Society (RHS),
National Garden Association, and
Purdue University Extension’s guide on container gardening.

Disclaimer: This article provides general information and guidance. Always adapt advice to your specific local conditions and consult local agricultural extension services for tailored recommendations.

Categories
Edible Gardening

Dwarf Fruit Trees for Patios and Balconies

Imagine stepping onto your patio or balcony and plucking a ripe, juicy apple or a sweet fig directly from a tree you grew yourself. This dream is entirely achievable, even if your garden space is limited to a small balcony or a cozy patio. Dwarf fruit trees offer an incredible opportunity to enjoy homegrown produce, transforming confined urban spaces into productive edible oases. These compact versions of traditional fruit trees thrive in containers, bringing the joy of an orchard to your doorstep without requiring vast acreage.

Growing your own fruit offers numerous rewards. You gain control over what goes into your food, enjoy the freshest possible taste, and connect with nature on a daily basis. For small-space gardeners, selecting the right dwarf fruit trees and providing them with proper care makes all the difference. This comprehensive guide equips you with the knowledge and practical steps to successfully cultivate a mini-orchard of container fruit trees, ensuring bountiful harvests for years to come.

A dwarf Meyer lemon tree, laden with ripe yellow lemons and white blossoms, in a terracotta pot on a sunny urban balcony.

Why Choose Dwarf Fruit Trees for Small Spaces?

Dwarf fruit trees are a game-changer for anyone gardening with limited room. Their primary advantage lies in their compact size, typically reaching heights of 6 to 10 feet when mature, making them perfectly suited for containers on patios, balconies, or small urban yards. You gain all the benefits of growing fruit without needing a large plot of land. These trees often produce fruit at a younger age than their standard counterparts, sometimes within one to two years of planting, giving you quicker gratification for your gardening efforts.

Beyond their size, dwarf fruit trees offer incredible flexibility. You can move them to optimize sun exposure throughout the day or shift them indoors during harsh winter weather. This portability proves invaluable for protecting your investment from extreme conditions. Moreover, tending to container fruit trees is physically less demanding. You work at a comfortable height, simplifying tasks like pruning, watering, and harvesting. This accessibility makes fruit growing enjoyable for gardeners of all ages and physical abilities.

Consider the environmental benefits as well. Growing your own fruit reduces your carbon footprint by minimizing transportation and packaging. You also support local pollinator populations by providing nectar sources, contributing to a healthier ecosystem right outside your door. Many gardeners find immense satisfaction in nurturing a living plant from bloom to harvest, fostering a deeper connection with nature and the food they consume.

A woman gently touches ripe red apples on a dwarf tree in a patio pot, visually contrasted by the towering branches of a standard tree in the backgrou

Understanding Dwarf vs. Standard Fruit Trees

The key distinction between dwarf and standard fruit trees lies in their rootstock. Most fruit trees are grafted, meaning a desired fruiting variety (scion) is joined onto a root system (rootstock) from another plant. The rootstock largely determines the tree’s ultimate size, disease resistance, and adaptability to soil conditions. Standard rootstocks produce full-sized trees that can reach 20 feet or more, requiring significant space and making harvesting difficult without specialized equipment.

Dwarf fruit trees, conversely, utilize dwarfing rootstocks. These rootstocks inhibit vigorous growth, keeping the tree compact while allowing the scion to produce full-sized fruit. For example, an apple tree grafted onto a M27 or B9 rootstock will remain small, typically 6-8 feet tall, compared to an apple tree on a standard rootstock which might grow to 25 feet. This genetic engineering allows you to enjoy Gala or Honeycrisp apples from a tree no taller than you are.

Here is a comparison outlining the practical differences:

Feature Dwarf Fruit Trees Standard Fruit Trees
Mature Height Typically 6-10 feet 15-30+ feet
Space Requirement Small, ideal for containers, patios, balconies Large garden plots, orchards
Fruiting Age Often 1-3 years after planting 3-7+ years after planting
Maintenance Easier to prune, spray, and harvest due to height Requires ladders or specialized equipment for maintenance
Portability Can be moved, brought indoors for winter Stationary, cannot be moved
Rootstock Dwarfing rootstocks (e.g., M27, B9 for apples) Vigorous rootstocks
Lifespan Generally shorter (15-25 years) Longer (30-50+ years)
Yield per Tree Lower than standard, but multiple trees fit in small space High per tree, but fewer trees overall

Understanding these differences empowers you to make an informed choice for your specific gardening needs and available space. Dwarf fruit trees are not simply smaller versions of their larger relatives; they represent a distinct category with specific advantages for container gardening.

A gardener on a sunny urban balcony examines a dwarf apple tree's plant tag, selecting varieties from small saplings in nursery pots.

Selecting the Best Dwarf Fruit Tree Varieties for Containers

The success of your container fruit orchard begins with choosing the right trees. Factors such as your USDA plant hardiness zone, available sunlight, and the tree’s pollination requirements all play crucial roles. Most fruit trees need at least 6-8 hours of direct sunlight daily to produce fruit. Check if your chosen variety is self-fertile or requires a pollinator. Some trees, like many apple and pear varieties, need a different variety planted nearby to produce fruit.

Container fruit tree diagram: 30cm pot, tree, soil, water flow arrows, and legible labels.

A child's hand reaches for a ripe nectarine on a patio, surrounded by thriving dwarf pear and apple trees in terracotta pots.

Top Dwarf Fruit Tree Varieties for Patios and Balconies:

  • Dwarf Apple Trees: Look for varieties on ultra-dwarfing rootstock (like M27 or B9). Popular choices include ‘Honeycrisp’, ‘Gala’, ‘Fuji’, and ‘Granny Smith’. Many require a second apple variety for cross-pollination.
  • Dwarf Pear Trees: ‘Dwarf Anjou’ and ‘Dwarf Bartlett’ are excellent choices. Pears often need a pollinator, so consider planting two different compatible varieties.
  • Dwarf Peach and Nectarine Trees: Self-fertile varieties like ‘Bonanza’ peach or ‘Necta Zee’ nectarine are ideal. They are bred specifically for compact growth and heavy fruit production in small spaces.
  • Dwarf Cherry Trees: ‘North Star’ and ‘Romeo’ are self-fertile tart cherries that do well in containers. Sweet cherries often require a pollinator.
  • Fig Trees: Figs are incredibly well-suited for containers and are generally self-fertile. Varieties like ‘Brown Turkey’, ‘Chicago Hardy’, and ‘Black Mission’ thrive and produce abundant fruit. You can often move them indoors for winter in colder climates.
  • Dwarf Citrus Trees: Lemons (‘Meyer Lemon’), limes, oranges, and kumquats are excellent container fruit trees. They are self-fertile and bring an exotic touch to your patio. In most zones, they require winter protection indoors.
  • Pomegranate Trees: Dwarf varieties like ‘Nana’ are ornamental and fruit-bearing. They tolerate heat and some drought, making them suitable for sunny, warm patios. They are self-fertile.
  • Blueberry Bushes: While technically shrubs, dwarf blueberry varieties like ‘Top Hat’ or ‘Sunshine Blue’ are perfect for containers. Blueberries require acidic soil (pH 4.5-5.5) and often produce better with a second variety for cross-pollination.
  • Mulberry Trees: Dwarf varieties like ‘Issai’ or ‘Gerardi Dwarf’ are productive and easy to grow. They are self-fertile and produce sweet, blackberry-like fruit.

When purchasing, select a healthy specimen from a reputable nursery. Look for strong, evenly spaced branches, healthy foliage, and no signs of pests or diseases. A vigorous root system is key for containerized plants, so check the drainage holes if possible. Avoid trees with circling roots or those that appear pot-bound.

Three empty plant containers (grey, terracotta, wooden half-barrel) of varying sizes on a patio with a bag of potting mix and a hand selecting.

Choosing the Right Container and Potting Mix

The success of your dwarf fruit tree depends heavily on its home. Selecting the correct container size and material, along with a high-quality potting mix, provides the essential foundation for healthy growth and prolific fruiting.

A woman kneels on a patio, comparing a large terracotta pot to a smaller ceramic pot holding a dwarf fig tree, with a half-whiskey barrel nearby.

Container Selection:

Start with a container that is appropriately sized for your young tree, but plan to repot as it grows. A 10-15 gallon pot (around 18-20 inches in diameter) works well for a young dwarf tree. Within 2-3 years, you will likely need to move it to a 20-25 gallon container (24-30 inches in diameter). The final pot size should be at least 25 gallons, and some larger dwarf varieties, like apples or pears, may benefit from 30-gallon or even half-whiskey barrel-sized containers. The larger the pot, the more stable the root temperature and moisture levels will be, reducing watering frequency.

  • Material Matters:
    • Terracotta or Clay: These are attractive and allow excellent air circulation to the roots, which helps prevent root rot. However, they are heavy, dry out quickly, and can crack in freezing temperatures.
    • Plastic: Lightweight, affordable, and retains moisture well. Look for sturdy, UV-resistant plastic to prevent degradation. Choose lighter colors to reflect heat and prevent roots from overheating in direct sun.
    • Wood (Whiskey Barrels): Visually appealing and offers good insulation. Ensure the wood is untreated or treated with food-safe materials. These are heavy and durable.
    • Fabric “Grow Bags”: Excellent for root health, preventing root circling, and promoting air pruning. They are lightweight, flexible, and offer superior drainage. They do dry out faster than plastic pots.
  • Drainage is Non-Negotiable: Every container must have ample drainage holes at the bottom. Fruit trees absolutely cannot tolerate standing water, which leads to root rot. If your pot does not have enough holes, drill more.

Gloved hands mixing dark compost, light peat-free potting mix, and white perlite in a trug on a sunny urban balcony.

Potting Mix for Edibles:

Do not use garden soil in containers; it compacts, lacks drainage, and often harbors pests and diseases. Instead, use a high-quality, well-draining potting mix specifically formulated for containers. Opt for peat-free or coir-based mixes to promote sustainable gardening practices. A good potting mix provides aeration, retains moisture, and supplies initial nutrients.

You can create your own robust potting mix by combining the following:

  • 40-50% high-quality peat-free potting mix: This forms the base.
  • 30-40% compost: Adds essential nutrients, beneficial microbes, and improves water retention. Use well-rotted, mature compost.
  • 10-20% perlite or coarse sand: Enhances drainage and aeration, preventing compaction.
  • Slow-release organic fertilizer: Incorporate according to package directions to provide sustained nutrition.

This customized blend ensures your container fruit trees receive the ideal environment for root development and nutrient uptake. For blueberries, adjust the mix to be more acidic, incorporating pine bark fines or specific acidic potting mixes.

Hands gently untangling roots of a dwarf fruit tree for container planting, with potting mix and an empty pot visible.

Planting Your Dwarf Fruit Tree: A Step-by-Step Guide

Proper planting sets the stage for a healthy, productive tree. Follow these steps carefully to ensure your dwarf fruit tree establishes successfully in its new container home.

  1. Prepare Your Container: Place a piece of mesh screen or a coffee filter over the drainage holes to prevent soil loss while allowing water to escape freely. Do not add gravel or broken pottery at the bottom; this actually impedes drainage and creates a perched water table, which can lead to root rot.
  2. Add Potting Mix: Fill the container with a few inches of your chosen potting mix. Create a small mound in the center.
  3. Inspect the Tree: Carefully remove the tree from its nursery pot. Gently loosen any circling roots at the bottom of the root ball with your fingers. If the roots are severely root-bound, you may need to make a few vertical cuts down the sides of the root ball to encourage outward growth.
  4. Position the Tree: Place the tree on the mound of soil in the container. The goal is to ensure the graft union (the swollen knob where the scion meets the rootstock, usually a few inches above the soil line) remains above the soil surface. This prevents the scion from developing its own roots, which would negate the dwarfing effect of the rootstock. Adjust the soil level so the graft union sits 1-2 inches above the final soil line.
  5. Fill with Potting Mix: Backfill around the root ball with more potting mix, gently tamping it down to remove large air pockets. Leave about 1-2 inches of space between the soil surface and the rim of the container. This “head space” is crucial for efficient watering, allowing water to soak in rather than run off.
  6. Water Thoroughly: Water the tree slowly and deeply until water drains freely from the bottom of the pot. This settles the soil around the roots and eliminates any remaining air pockets. You may need to add a little more potting mix after the initial watering if the soil settles significantly.
  7. Stake if Necessary: Young dwarf fruit trees, especially those on very dwarfing rootstocks, can be top-heavy or have weak trunks. Insert a sturdy stake close to the trunk, taking care not to damage the root ball, and loosely tie the tree to the stake with soft material (such as old strips of cloth or specialized tree ties) to provide support during its first year of establishment.

Place your newly planted dwarf fruit tree in its final sunny location. Provide consistent moisture during the establishment phase, which typically lasts several weeks to a few months. Remember, the first few months are critical for root development and overall plant health.

Close-up of gardener's fingers testing soil moisture in a terracotta pot with a dwarf citrus tree on a sunny urban balcony.

Essential Care: Watering and Fertilizing for Fruitful Harvests

Consistent watering and appropriate fertilization are the cornerstones of successful container fruit tree cultivation. Because they are confined to a pot, these trees rely entirely on you for their nutritional and hydration needs.

Hand checking soil moisture with finger 2-3 inches deep in a potted dwarf Meyer lemon tree on a sunny balcony.

Watering Rhythm:

Container plants dry out much faster than those planted in the ground. You must check the soil moisture frequently. Stick your finger 2-3 inches into the potting mix; if it feels dry, it is time to water. Do not wait until the leaves wilt, as this stresses the tree.

  • Deep Watering: When you water, do so thoroughly until water drains from the bottom of the pot. This encourages deep root growth and flushes out accumulated salts. Watering lightly and frequently leads to shallow root systems, making the tree more susceptible to drought stress.
  • Frequency: In hot, sunny, or windy conditions, you might need to water daily or even twice a day. During cooler weather or after rainfall, you may water every few days. The size of your pot and the tree’s stage of growth also influence frequency. Larger pots retain moisture longer.
  • Monitor and Adjust: Pay close attention to your tree and its environment. A moisture meter can provide a more accurate reading than just your finger, especially for larger pots.
  • Sustainable Watering: Consider using a drip irrigation system with a timer for multiple container plants. This delivers water directly to the root zone, reducing evaporation and ensuring consistent moisture. Collecting rainwater for irrigation is another excellent sustainable practice.

Person's hands applying organic granular fertilizer to a dwarf lemon tree in a terracotta pot on a patio.

Fertilizing for Success:

Container potting mixes typically have limited nutrients. Therefore, regular fertilization becomes essential for fruit production. Aim for a balanced organic fertilizer, or one slightly higher in phosphorus and potassium for fruiting, rather than nitrogen which promotes leafy growth.

  • Early Spring: Apply a balanced slow-release organic granular fertilizer or a liquid feed once new growth begins. Follow the product’s instructions for dosage.
  • Late Spring/Early Summer: Reapply a lighter dose of fertilizer, especially if you see signs of nutrient deficiency (yellowing leaves, poor growth).
  • Avoid Late Season Fertilization: Stop fertilizing by late summer or early fall. New growth stimulated by late-season fertilizer applications may not harden off before winter, making it vulnerable to frost damage.
  • Compost Tea and Worm Castings: Supplement your feeding regimen with compost tea or a top dressing of worm castings. These provide a gentle, slow release of nutrients and introduce beneficial microbes to the soil, improving overall soil health.
  • Specific Needs: Blueberries require acidic fertilizers, often containing ammonium sulfate or specific “acid-loving plant” formulas. Citrus trees benefit from specialized citrus fertilizers that contain micronutrients like iron and zinc.

Always follow the manufacturer’s instructions for any fertilizer product you use. Over-fertilizing can harm your tree, leading to burnt roots or excessive vegetative growth at the expense of fruit.

Gardener's gloved hands prune an overcrowded branch of a dwarf Meyer lemon tree in a terracotta pot on a balcony.

Pruning and Training for Health and Yield

Pruning is not about removing branches; it is about shaping your dwarf fruit tree, promoting health, and maximizing fruit production. For container fruit trees, pruning also helps manage size, keeping them compact and aesthetically pleasing for your patio or balcony.

A person's hands hold pruning shears next to a well-pruned dwarf fig tree on a sunny patio, with small green fruits visible and snipped branches.

The Goals of Pruning:

  • Maintain Size: Keep the tree at a manageable height and width for container growing.
  • Promote Air Circulation and Light Penetration: Remove crossing or overcrowded branches to allow light and air into the canopy, reducing disease risk and improving fruit quality.
  • Remove Dead, Diseased, or Damaged Wood: Prevent the spread of disease and encourage new, healthy growth.
  • Encourage Fruit Production: Prune to stimulate the development of fruiting spurs (short branches that bear fruit) or to encourage new growth that will fruit in subsequent seasons.
  • Shape the Tree: Create an open, vase-like shape or a central leader system, depending on the tree type and your preference.

Person observing the bare branches of a dwarf apple tree in a pot on a patio, assessing its structure for late winter pruning.

When to Prune:

The timing of pruning depends on the type of fruit tree:

  • Deciduous Fruit Trees (Apples, Pears, Peaches, Plums): The best time for major structural pruning is in late winter or early spring, before new growth begins but after the threat of severe frost has passed. This allows you to see the tree’s structure clearly. Summer pruning can be done to control size or remove water sprouts, but avoid heavy summer pruning as it can reduce the current year’s crop.
  • Evergreen Fruit Trees (Citrus, Figs, Olives): Prune these as needed to maintain shape, remove dead wood, or thin the canopy. Generally, light pruning can occur any time, but heavier pruning is best done after harvesting or during their dormant period, typically late winter or early spring.

Gloved hands precisely prune a vigorous water sprout from a dwarf citrus tree in a terracotta pot using clean shears.

Basic Pruning Techniques:

  • Thinning Cuts: Remove an entire branch back to its point of origin or to another main branch. This opens up the canopy and encourages fruit production on remaining branches.
  • Heading Cuts: Shorten a branch, cutting just above a bud or side branch. This encourages bushier growth and can stimulate the formation of fruiting wood.
  • Remove Suckers and Water Sprouts: Suckers grow from the rootstock below the graft union; water sprouts are vigorous, vertical shoots that grow from main branches. Both consume energy without producing good fruit and should be removed as soon as you see them.

Always use sharp, clean pruning shears to make clean cuts. Sterilize your tools with rubbing alcohol between trees to prevent disease transmission.

Hands gently tying a branch of a dwarf lemon tree in a terracotta pot to train it horizontally on a sunny patio.

Training Your Tree:

Training refers to guiding the tree’s growth into a desired shape. For container fruit trees, this often means encouraging an open, strong structure. Spreading branches horizontally can encourage more fruit production than vertical growth. You can gently tie branches down with soft ties or use branch spreaders to achieve this.

For research-based guidance on pruning, visit
Missouri Botanical Garden Extension or
USDA ARS Fruit Tree Pruning.

Close-up of a gardener's hand gently turning a dwarf fruit tree leaf to inspect its underside for pests or disease, on a sunny patio.

Pest and Disease Management for Container Trees

Even in a small space, your dwarf fruit trees can encounter pests and diseases. The good news is that container gardening offers advantages for managing these issues. Your trees are more accessible for close inspection, and their limited numbers mean you can often address problems quickly and effectively without resorting to harsh chemicals. Employ an Integrated Pest Management (IPM) approach, focusing on prevention and early intervention.

A person closely inspects a leaf on a potted dwarf lemon tree on a sunlit patio, embodying proactive plant care.

Prevention is Key:

  • Healthy Trees: A healthy, well-nourished tree is more resistant to pests and diseases. Provide optimal watering, fertilization, and sunlight.
  • Inspect Regularly: Make it a habit to inspect your trees weekly. Look under leaves, along stems, and at new growth for any signs of trouble. Early detection allows for easier control.
  • Good Sanitation: Remove any fallen leaves, fruit, or debris from around the base of the tree and from the container. This eliminates potential hiding spots for pests and fungal spores.
  • Quarantine New Plants: Before introducing any new plants to your patio, keep them separate for a week or two to ensure they are pest- and disease-free.
  • Encourage Beneficial Insects: Plant pollinator-friendly flowers nearby. Ladybugs, lacewings, and parasitic wasps are natural predators that help control common pests like aphids.
  • Provide Air Circulation: Proper pruning, as discussed, ensures good air flow through the canopy, which helps prevent fungal diseases like powdery mildew.

Hands gently adjusting a white floating row cover over a dwarf apple tree in a terracotta pot on a sunny balcony, protecting it from pests.

Common Pests and Solutions:

  • Aphids: Small, pear-shaped insects that cluster on new growth, sucking plant sap. They cause distorted leaves.
    • Solution: Blast them off with a strong stream of water, crush them by hand, or apply insecticidal soap.
  • Spider Mites: Tiny, almost invisible arachnids that cause stippling on leaves and fine webbing. They thrive in hot, dry conditions.
    • Solution: Increase humidity, spray leaves with water, or use insecticidal soap or neem oil.
  • Scale Insects: Small, immobile bumps on stems and leaves, often covered by a protective shell. They also suck plant sap.
    • Solution: Scrape them off with a fingernail or soft brush, or apply horticultural oil during dormancy.
  • Fruit Worms/Maggots: Larvae that tunnel into developing fruit.
    • Solution: Use floating row covers to exclude adult insects, or employ pheromone traps. Practice good sanitation by removing infested fruit.

A hand gently mists dwarf fruit tree leaves showing subtle powdery mildew with natural neem oil on a patio.

Common Diseases and Solutions:

  • Powdery Mildew: White, powdery spots on leaves and stems.
    • Solution: Improve air circulation, apply neem oil or a horticultural fungicide.
  • Leaf Spot (various fungi): Dark spots on leaves, often leading to defoliation.
    • Solution: Remove affected leaves, improve air circulation, and practice good sanitation. Fungicides can be used in severe cases.
  • Root Rot: Caused by overwatering or poor drainage. Leaves may yellow, wilt, and the tree declines.
    • Solution: Ensure excellent drainage in your container. Allow soil to dry slightly between waterings.

Always identify the specific pest or disease before applying any treatment. Organic solutions like neem oil, horticultural oil, and insecticidal soaps are generally safe and effective when used correctly. Read product labels carefully and apply according to instructions.

Person kneeling on a patio, actively wrapping a large terracotta pot holding a dormant dwarf apple tree with burlap and twine for winter insulation.

Overwintering Your Patio Fruit Trees

For gardeners in regions with cold winters, protecting your container fruit trees from freezing temperatures is paramount. Unlike trees planted in the ground, which benefit from the insulating properties of surrounding soil, containerized trees have exposed root systems vulnerable to freezing and thawing cycles. Your overwintering strategy depends on your climate zone and the cold hardiness of your specific fruit tree.

A woman kneels on a patio, tucking straw insulation around a potted dwarf apple tree near other burlap-wrapped fruit trees against a brick wall.

Hardy Deciduous Trees (Apples, Pears, Cherries, Peaches):

If you live in a zone where your tree is hardy (e.g., a Zone 5 tree in Zone 5), but you grow it in a container, its roots are still more vulnerable than if planted in the ground. The general rule is that a container plant’s effective hardiness zone is two zones colder than its actual hardiness. A Zone 5 tree in a pot essentially becomes a Zone 7 tree in terms of root hardiness.

  • Insulate the Pot: Wrap the container with burlap, bubble wrap, or blankets. You can also place the pot inside a larger insulated container, filling the gap with straw or leaves.
  • Group Pots: Cluster your container trees together against a warm wall of your house. This creates a microclimate and provides collective insulation.
  • Move to a Sheltered Location: Shift trees to an unheated garage, shed, or covered porch once temperatures consistently drop below freezing. They need protection from wind and direct freezing. Ensure they receive some light if possible, though dormancy means less light is needed.
  • Minimal Watering: While dormant, trees need far less water. Check the soil every few weeks and water lightly only if the top few inches are dry. Do not let the pot dry out completely, but avoid overwatering.

A dwarf lemon tree in a terracotta pot on a wooden stool near a bright south-facing window, with a pebble tray, illustrating indoor winter care.

Less Hardy or Evergreen Trees (Citrus, Figs, Pomegranates, some Mulberries):

These trees require more significant protection in zones colder than their hardiness rating.

  • Bring Indoors: The safest option is to bring these trees indoors before the first hard frost.
    • Location: Choose a bright, cool spot if possible (50-60°F or 10-15°C). An unheated sunroom, cool greenhouse, or a south-facing window in a cool room works well.
    • Humidity: Indoor air can be very dry. Provide humidity with a pebble tray (a tray filled with pebbles and water, ensuring the pot sits above the water level) or a humidifier.
    • Pest Watch: Indoor conditions can sometimes encourage pests like spider mites. Inspect trees carefully before bringing them inside and monitor them regularly throughout winter.
    • Watering: Water less frequently indoors, allowing the top few inches of soil to dry out between waterings.
  • Dormancy for Figs: Some fig varieties are hardy, but in colder zones, they can be brought indoors into an unheated garage or basement where they will go fully dormant. They lose their leaves and require very little light or water, essentially just enough to prevent the roots from drying out completely.

Remember to gradually acclimate your trees when moving them indoors or back outside. Sudden changes in light, temperature, or humidity can stress the plant. For instance, when moving trees outdoors in spring, slowly expose them to increasing sunlight over a week or two to prevent leaf scorch.

A person on a sunny balcony holds a freshly picked, ripe blush peach from a dwarf tree in a terracotta pot, with other containers visible.

Harvesting and Enjoying Your Homegrown Fruit

The culmination of your hard work is the sweet reward of fresh, homegrown fruit. Knowing when and how to harvest ensures you capture the best flavor and extend your enjoyment.

Close-up of a hand gently twisting a ripe, blushing peach from a dwarf tree branch, with other peaches showing different ripeness stages.

Timing the Harvest:

The timing of harvest varies greatly by fruit type and variety. However, general indicators signal ripeness:

  • Color: The fruit develops its characteristic ripe color. A green apple turns red, a lime turns yellow, a peach develops a blush.
  • Softness/Firmness: Gently squeeze the fruit. Peaches, apricots, and many plums soften slightly when ripe. Apples and pears remain firm but feel less rock-hard.
  • Ease of Separation: Ripe fruit often separates easily from the branch with a gentle twist and lift. If you have to tug, it likely needs more time.
  • Taste and Aroma: This is the ultimate test. A ripe fruit emits a distinct, sweet aroma and tastes delicious.

For most fruit, harvesting is a process, not a one-time event. You will pick fruit over several days or weeks as individual pieces ripen. This allows you to enjoy a continuous supply.

Close-up of a gardener's hand using small pruning shears to snip a ripe purple fig from a dwarf tree in a pot.

Harvesting Techniques:

  • Gentle Handling: Always handle fruit gently to avoid bruising, which reduces storage life.
  • Twist and Lift: For apples, pears, peaches, and plums, gently twist the fruit upwards. If it is ready, the stem will detach cleanly from the branch. Try to leave the stem attached to the fruit if possible, as this improves storage.
  • Snip for Figs/Citrus: For figs and some citrus, use clean pruning shears or scissors to snip the stem, leaving a small piece attached to the fruit. This prevents tearing the fruit or damaging the branch.
  • Blueberries: Pick individually when they turn fully blue and release easily.
  • Mulberries: Wait until they are dark, plump, and fall easily into your hand.

Overhead shot of a small bowl of fresh dwarf fruit (apples, currants, plums) on a rustic counter, a hand adding a plum. A jam jar and frozen berries a

Storage and Enjoyment:

The best way to enjoy homegrown fruit is fresh off the tree. However, you can extend your harvest:

  • Refrigeration: Most ripe fruit, especially berries and stone fruit, will last longer in the refrigerator.
  • Countertop Ripening: Some fruit, like pears, benefit from a few days on the counter to fully ripen after picking.
  • Preservation: Consider preserving excess fruit through freezing, canning, or drying. This allows you to savor your harvest long after the season ends.

Remember that dwarf fruit trees often produce a manageable amount of fruit, perfect for personal consumption and sharing with friends and family without overwhelming you with a huge harvest.

Two healthy dwarf fruit trees, an apple with developing fruit and a fig, in different sized containers on a patio, with empty pots and potting mix nea

Frequently Asked Questions

How much fruit can I expect from a dwarf fruit tree in a container?

While yields vary by tree type and age, a mature dwarf apple or peach tree in a 25-gallon container might yield 10-20 pounds of fruit annually. Smaller trees like blueberries or dwarf figs can produce several pounds each. The specific variety and your care regimen directly impact the amount of fruit your tree yields.

Do I need to repot my dwarf fruit tree? If so, how often?

Yes, you need to repot your dwarf fruit tree as it grows. Start with a 10-15 gallon pot for a young tree, then typically repot every 2-3 years into a larger container, moving up to a final size of 25-30 gallons or more. This provides fresh potting mix and more room for root development. When repotting, gently prune some of the outer roots to encourage new growth.

Can I grow dwarf fruit trees from seed?

While you can grow fruit trees from seed, it is not recommended for reliable fruit production. Trees grown from seed are rarely true to the parent plant, meaning they may not produce the same quality or type of fruit. They also take much longer to fruit, often 7-10 years, and will not have the dwarfing characteristics provided by specific rootstocks. Purchase grafted dwarf trees from reputable nurseries for best results.

My dwarf fruit tree flowers but does not produce fruit. What could be wrong?

Several factors can cause a lack of fruit set. The most common reasons include insufficient pollination (if your tree requires a pollinator and you only have one tree, or if pollinators are scarce), late spring frosts damaging blossoms, or inadequate sunlight. Ensure your tree receives at least 6-8 hours of direct sun daily and consider if it needs a compatible pollinator nearby. You can hand-pollinate with a small paintbrush if natural pollinators are absent.

How do I know if my dwarf fruit tree is getting enough sunlight?

Observe your patio or balcony throughout the day. Track how many hours of direct sunlight the area receives. Direct sunlight means the sun’s rays are shining directly on the plant, not filtered through a window or tree canopy. If your tree is not thriving or flowering, lack of sufficient sunlight is a likely culprit. Most fruit trees require a minimum of six hours of direct sun for good fruit production.

For research-based guidance on edible gardening, visit
Cornell Garden-Based Learning,
UF/IFAS Gardening Solutions,
Penn State Extension — Gardening, and
Royal Horticultural Society on Growing Fruit in Containers.

Disclaimer: This article is for informational purposes only and is not a substitute for professional advice. Consult local extension services for region-specific recommendations.

Categories
Edible Gardening

Harvest More in Less Space: Succession Planting Guide

Dreaming of a continuous supply of fresh vegetables and herbs, even with a small garden? You can achieve abundant harvests in containers, raised beds, or compact yard spaces. The secret lies in a powerful technique called succession planting. This method transforms your gardening approach, allowing you to maximize harvest potential and enjoy fresh produce throughout the entire growing season. You will learn practical strategies to keep your garden producing, avoid gluts, and efficiently use every square inch of your valuable planting area. Get ready to turn your small garden into a highly productive food source.

Container garden with mature lettuce ready for harvest and young radish sprouts emerging, showing different plant stages on a sunny balcony.

What is Succession Planting?

Succession planting involves staggering your plantings throughout the growing season instead of sowing all your seeds or setting out all your transplants at once. Think of it as a rolling harvest schedule. Instead of a single, overwhelming bounty of lettuce in late spring, you will enjoy fresh lettuce week after week. Gardeners employ this technique to ensure a continuous supply of fresh vegetables, herbs, and even some fruits, moving beyond the “feast or famine” cycle often experienced with traditional gardening.

You essentially replant an area or sow seeds every few weeks, creating a continuous crop rotation within a single season. This strategy is incredibly effective for small garden tips because it leverages every inch of available space. You do not need a sprawling farm to implement succession planting, a small balcony container garden or a compact backyard plot works perfectly. It means you always have something new growing, something ready to harvest, and something coming along soon.

Consider the alternative: planting all your tomatoes or all your lettuce at the same time. You end up with a huge flush of produce, which often leads to waste unless you have a plan for preserving it. Succession planting prevents this. It spaces out your labor and your yields, making gardening a more manageable and rewarding experience.

A small patio container garden featuring mature romaine lettuce next to newly sprouted radish seedlings, illustrating succession planting.

Why Succession Planting Benefits Your Small Garden

Embracing succession planting offers a multitude of advantages, particularly when you work with limited space. You will find your small garden transforms into a highly efficient, productive ecosystem. Here are the key benefits you will experience:

  • Maximize Harvest in Limited Space: This is the cornerstone benefit for any small-space gardener. By continually replanting as crops finish, you ensure your containers and beds never sit idle. You are effectively multiplying your garden’s output without increasing its physical footprint. For example, after harvesting a quick crop of radishes, you can immediately sow more radishes or switch to a different, equally fast-growing vegetable. This constant turnover dramatically boosts your overall yield from the same plot.
  • Reduce Gluts and Waste: How often have you faced an overwhelming abundance of zucchini or lettuce, struggling to eat it all before it spoils? Succession planting eliminates this problem. By planting smaller batches more frequently, you produce a steady, manageable supply of fresh produce. This means less food waste and more enjoyment of your garden’s bounty as you need it.
  • Extend the Growing Season: You can start certain cool-season crops early, follow them with warm-season crops, and then return to cool-season varieties as autumn approaches. This strategic timing stretches your harvest window significantly. With careful planning, you might harvest fresh greens in early spring, tomatoes and peppers in summer, and then another round of leafy greens or root vegetables well into fall, effectively extending your gardening season by months.
  • Mitigate Pest and Disease Risk: Planting diverse crops at different times helps break pest and disease cycles. If an early crop succumbs to an issue, your subsequent plantings may escape, or you will have time to implement preventative measures. This natural form of crop rotation reduces the buildup of pathogens and insect populations specific to certain plants, leading to healthier crops overall.
  • Provide Continuous Fresh Produce: Imagine stepping outside to gather ingredients for dinner, knowing that something fresh and vibrant awaits you, regardless of the season’s peak. Succession planting makes this a reality. You will enjoy a steady stream of fresh, homegrown vegetables and herbs, elevating your meals and connecting you more deeply with your food source.

The beauty of succession planting lies in its adaptability. You can tailor it precisely to your garden’s size, your climate, and your preferred crops, ensuring you get the most out of every precious square foot.

A hand harvests lettuce from a terracotta pot amidst other container-grown leafy greens and radish plants on a patio.

Choosing the Right Crops for Continuous Harvest

Not all crops are equally suited for succession planting. The best choices are those that mature quickly, offer “cut-and-come-again” harvesting, or have a relatively short harvest window. Focusing on these types of edibles ensures you can swiftly replant areas and keep your garden producing. Here are some top contenders for your succession planting strategy:

  • Leafy Greens: These are the superstars of succession planting.
    • Lettuce (Loose-leaf varieties): Sow small batches every 2-3 weeks. Many varieties allow you to harvest outer leaves, letting the plant continue to grow.
    • Spinach: Quick to mature, ideal for multiple small plantings. Harvest outer leaves or entire plants.
    • Arugula: Grows rapidly, offering peppery greens. Responds well to frequent small sowings.
    • Mizuna & Mustard Greens: Similar to arugula, these spicy greens provide quick harvests and tolerate cooler temperatures.
  • Root Vegetables: Many root crops mature quickly and lend themselves well to staggered planting.
    • Radishes: Perhaps the fastest-growing vegetable, maturing in 20-30 days. Plant every 1-2 weeks.
    • Carrots: Sow small sections every 3-4 weeks. Choose smaller, faster-maturing varieties like ‘Paris Market’ or ‘Danvers Half Long’ for containers.
    • Beets: Harvest both the greens and the roots. Sow every 3 weeks for a steady supply.
  • Bush Beans: Unlike pole beans, bush beans produce their harvest all at once, making them perfect for succession.
    • Plant a new batch every 2-3 weeks for a continuous supply of snap beans. Look for compact varieties like ‘Provider’ or ‘Contender’.
  • Herbs: Many herbs thrive with a cut-and-come-again approach or respond well to staggered sowings.
    • Cilantro & Dill: These bolt (go to seed) quickly in warm weather. Sow small amounts every 2-3 weeks to ensure fresh leaves.
    • Basil: Plant new basil every 3-4 weeks to replace older, woody plants and ensure tender, flavorful leaves.
  • Compact Cucumbers: Bush or compact vining varieties produce over a shorter window, making them suitable for sequential planting.
    • Consider varieties like ‘Bush Pickle’ or ‘Spacemaster’. Plant a second round a month after the first for extended harvests.
  • Small Squash: Certain compact summer squash varieties, such as ‘Pattypan’ or ‘Eight Ball’, produce prolifically.
    • Start a second plant or two a few weeks after your first set to ensure fresh zucchini or squash throughout the season without an overwhelming glut.

When selecting varieties, always check the “days to maturity” listed on seed packets. This crucial piece of data informs your planting schedule, allowing you to plan when one crop finishes and the next can begin. Choosing varieties adapted to your specific climate also significantly improves your success rate. Your local extension service can offer excellent, tailored recommendations for your region’s optimal growing conditions.

Three terracotta window boxes on a balcony railing show radishes at sprout, young, and mature stages, with a new cilantro sprout in the last box.

Types of Succession Planting Techniques

Succession planting is not a one-size-fits-all approach. Several distinct techniques exist, and you can combine them to create a highly efficient and personalized gardening system. Understanding these methods empowers you to choose the best strategy for your specific crops and garden space.

  1. Staggered Planting (Time-Based):This is the most common and straightforward method. You plant small batches of the same crop every one to three weeks. For example, instead of sowing an entire packet of lettuce seeds in April, you sow a quarter of the packet in April, another quarter in early May, and so on. This ensures a continuous supply rather than a single large harvest. It works exceptionally well for quick-maturing crops like radishes, leafy greens, bush beans, and cilantro. The key here is consistent, small-scale sowing.
  2. Relay Planting (Space-Based):Relay planting involves following one crop immediately with another in the same spot. As soon as you harvest one vegetable, you prepare the soil and plant the next. This maximizes the use of every square inch. A typical example involves planting early spring peas, harvesting them, and then immediately sowing bush beans or compact cucumbers in the same area. This technique requires careful planning to ensure the second crop is ready to go as the first finishes.
  3. Catch Cropping:Catch cropping involves planting a very fast-growing crop in the space between two slower-growing main crops. These “catch crops” mature and get harvested before the main crops need the full space. For instance, you might sow radishes or leafy greens between young tomato plants. By the time the tomatoes grow large enough to require more room, the catch crop is already harvested. This method effectively fills temporary gaps in your garden, yielding an extra harvest. According to gardening experts at the University of Wisconsin-Madison Extension, catch cropping significantly boosts overall productivity in limited spaces.
  4. Cut-and-Come-Again Harvesting:While not a planting technique in itself, cut-and-come-again harvesting complements succession planting perfectly. Many leafy greens like lettuce, spinach, kale, and even some herbs (basil) allow you to harvest only the outer leaves or the top portion of the plant. The plant then regrows, providing another harvest in a week or two. This extends the productivity of individual plants, reducing the need for immediate replanting and spacing out your efforts. You effectively turn one plant into multiple harvests.

By integrating these methods, you can develop a dynamic planting schedule that keeps your small garden constantly producing. You might use staggered planting for lettuce, follow it with relay planting of bush beans, and intersperse catch crops of radishes, all while practicing cut-and-come-again on your existing kale plants.

A person making notes in a garden planner, observing their sun-dappled container garden with various pots, a railing planter, and a vertical trellis.

Planning Your Succession Planting Strategy

Successful succession planting relies on thoughtful planning. You are essentially choreographing your garden’s performance throughout the season. A well-laid plan ensures you get the most out of your space and effort. Here are the steps to create your personalized strategy:

  1. Assess Your Space:Begin by understanding your garden’s unique characteristics.
    • Light: How many hours of direct sunlight do different areas receive? Most edibles need at least 6-8 hours. Map out sun exposure for various spots.
    • Containers & Beds: Note the size and depth of your containers or raised beds. This determines how many plants you can accommodate and what types of roots can thrive.
    • Vertical Options: Do you have trellises, arbors, or walls for vertical gardening? Maximize space by growing vining plants upwards.
    • Access: Ensure you can easily reach all your plants for planting, watering, and harvesting.
  2. Know Your Frost Dates:Your average last spring frost date and first fall frost date are critical. They define your region’s true growing season. Succession planting schedules revolve around these benchmarks, dictating when you can safely start tender plants and when you need to switch to cold-hardy varieties. Local extension services provide precise dates for your area.
  3. Research Crop Maturity:Before sowing, check the “days to maturity” on your seed packets or plant tags. This crucial information tells you how long it takes for a crop to be ready for harvest. For example, radishes mature in 20-30 days, while lettuce might take 45-60 days. This data helps you schedule your next planting. For continuous harvests, you plant the next batch 1-3 weeks before the previous batch finishes, ensuring a seamless transition.
  4. Record Keeping:A simple garden journal or calendar is an invaluable tool. Record your planting dates, varieties, days to harvest, and any observations (successes, failures, pest issues). This historical data helps you refine your strategy year after year. You will learn what works best in your specific garden environment.
  5. Soil Preparation and Amendment:Each time you harvest a crop and prepare to replant, you need to replenish the soil nutrients.
    • Potting Mix: For containers and raised beds, use a high-quality, peat-free potting mix. Look for mixes containing compost, coco coir, and perlite for good drainage and aeration.
    • Organic Matter: After each harvest, amend the soil with a generous top-dressing of compost or worm castings. This restores essential nutrients and improves soil structure.
    • Balanced Fertilizer: Incorporate a balanced organic granular fertilizer (e.g., 5-5-5 NPK) or a liquid feed (diluted fish emulsion or seaweed extract) during planting and throughout the growing season, following product instructions. Healthy soil drives healthy, continuous production.

With careful planning, you transform your small garden from a seasonal producer into a year-round provider, maximizing every plant’s potential. This strategic thinking is fundamental to a successful succession planting journey.

Overhead view of a patio table with seed packets, a notebook, and small pots being prepared for succession planting by a woman's hands.

Step-by-Step Guide to Succession Sowing

Now that you understand the principles, let’s break down the practical steps for implementing succession sowing in your small garden. This methodical approach ensures you keep your harvest pipeline full.

  1. Select Your Crops and Varieties:Review the list of suitable crops for succession planting. Choose compact, fast-maturing varieties specifically for small spaces. Consider what you and your family enjoy eating most frequently.
  2. Determine Your Sowing Intervals:Based on the “days to maturity” and your desired harvest frequency, decide how often to plant. For very quick crops like radishes, sow every 1-2 weeks. For leafy greens, every 2-3 weeks often works well. Longer-season crops, like bush beans, may only need a new batch every 3-4 weeks.
  3. Prepare Your Planting Area:Whether it is a container, a section of a raised bed, or a small in-ground plot, ensure the soil is ready. If replanting an area, remove spent plants, weed thoroughly, and replenish nutrients with a layer of compost and a balanced organic fertilizer. Loosen the soil to facilitate root growth.
  4. Sow Seeds or Transplant Seedlings in Small Batches:Do not sow an entire packet of seeds at once. Sow only the amount you can reasonably consume over a 1-2 week period.
    • Direct Sowing: For seeds like radishes, carrots, and bush beans, sow directly into the prepared garden bed or container at the recommended depth and spacing.
    • Starting Indoors/Transplanting: For crops like lettuce or basil, you might start a small tray of seeds indoors every few weeks. Once they develop true leaves, transplant them into the garden as the previous batch finishes.
  5. Label Clearly:Label each planting with the crop name and the date you sowed or transplanted. This simple step is critical for tracking your succession plan and helps you learn what works best. For example, “Lettuce – May 1st” and “Lettuce – May 15th.”
  6. Water Consistently:Immediately after planting, water gently but thoroughly. Consistent moisture is vital for seed germination and seedling establishment. Avoid letting the soil dry out, especially during the early stages of growth.
  7. Repeat the Process:Stick to your schedule. Every 1-3 weeks, depending on your chosen crops, prepare another small section of your garden and sow or transplant your next batch. This continuous cycle ensures your garden always has new crops developing.

Here is an example succession planting schedule for a small garden, focusing on popular quick-turnaround crops. Adjust timings based on your local climate and specific varieties:

Crop Days to Maturity (Avg.) Sowing Interval Approx. Batch Size (Small Garden)
Radishes 20-30 days Every 1-2 weeks 10-15 seeds
Loose-leaf Lettuce 45-60 days Every 2-3 weeks 5-8 seeds or seedlings
Arugula 25-40 days Every 2 weeks Small patch (e.g., 6 inches square)
Spinach 30-45 days Every 2-3 weeks 5-8 seeds or seedlings
Bush Beans 50-60 days Every 3-4 weeks 4-6 seeds
Cilantro 30-50 days Every 2-3 weeks Small patch (e.g., 4 inches square)
Carrots (compact) 60-75 days Every 3-4 weeks 10-15 seeds

Remember, this table provides general guidance. Experiment with different intervals and batch sizes to discover what works best for your specific garden and consumption needs. The goal remains a continuous, manageable yield.

A person's hand checks the soil moisture of a vibrant container tomato plant on a sun-drenched patio, with a copper watering can nearby.

Essential Care for Continuous Yields

Maintaining a steady stream of harvests requires consistent and thoughtful care. Each successive planting drains nutrients from the soil, and healthy plants are less susceptible to pests and diseases. Focus on these core elements of plant care to support your continuous yields:

  1. Watering Consistency:Proper watering is paramount. Irregular watering stresses plants, reduces yield, and can lead to problems like blossom end rot in tomatoes or bitterness in leafy greens.
    • Deep Watering: Water deeply and less frequently rather than shallowly and often. This encourages roots to grow deeper, making plants more resilient. Aim to moisten the soil to a depth of 6-8 inches for most vegetables.
    • Monitor Soil Moisture: Stick your finger 1-2 inches into the soil. If it feels dry, it is time to water. Containers dry out much faster than in-ground beds, often requiring daily watering in hot weather.
    • Efficient Methods: Use a watering can with a fine rose, a soaker hose, or drip irrigation to deliver water directly to the plant roots, minimizing evaporation and fungal issues on foliage. Consistent moisture ensures continuous growth for your succession crops, as detailed by the University of California, Davis Home Orchard website.
  2. Nutrient Management:As you repeatedly harvest and replant, your soil’s nutrient reserves deplete. You must replenish them to maintain vigorous growth.
    • Compost: Regularly top-dress your beds and containers with a layer of rich compost or worm castings. Compost slowly releases nutrients and improves soil structure.
    • Organic Fertilizers: Supplement with organic fertilizers. For leafy greens and early growth, use a nitrogen-rich feed (e.g., blood meal, fish emulsion). For fruiting plants (peppers, bush beans), a balanced NPK or one slightly higher in phosphorus and potassium supports flowering and fruit development. Follow package instructions carefully to avoid over-fertilizing, which can burn plants. Consider a liquid seaweed or fish emulsion feed every 2-4 weeks for a quick nutrient boost.
    • Reusing Potting Mix: You can reuse potting mix for several seasons. However, rejuvenate it by removing old roots, adding fresh compost, a slow-release organic fertilizer, and perhaps some perlite or coco coir to improve drainage and aeration.
  3. Pest and Disease Monitoring:Early detection and intervention prevent small issues from becoming major problems.
    • Regular Inspections: Inspect your plants daily or every few days. Look for discolored leaves, chewed foliage, or visible pests.
    • Integrated Pest Management (IPM): Start with prevention. Support beneficial insects, ensure good air circulation, and practice crop rotation.
    • Least-Toxic Controls: If pests appear, use physical removal (hand-picking), strong sprays of water, or organic solutions like insecticidal soap or neem oil, following label directions. Address diseases by removing affected parts and ensuring good cultural practices.
  4. Harvesting Techniques:Proper harvesting encourages more production and extends the life of your plants.
    • Cut-and-Come-Again: For leafy greens, harvest outer leaves regularly. This prompts the plant to produce more new leaves from the center.
    • Prompt Harvesting: Harvest vegetables like bush beans, cucumbers, and summer squash frequently. Leaving mature fruits on the plant signals it to stop producing and instead focus energy on ripening seeds.
    • Pruning: For indeterminate tomatoes or basil, strategic pruning can encourage bushier growth and more production, making them suitable for small spaces.

By diligently applying these essential care practices, you ensure your succession crops remain healthy, vigorous, and consistently productive, delivering a steady flow of fresh ingredients from your small garden.

Hands gently placing a transparent cloche over spinach seedlings in a terracotta pot on an autumn balcony, with other covered container plants nearby.

Seasonal Adjustments and Advanced Tips

To truly master succession planting, you need to adapt your strategy as the seasons change. Different crops thrive in different temperatures, and understanding these transitions allows you to extend your harvest even further. You can also incorporate more sophisticated techniques to enhance your garden’s overall health and productivity.

  1. Cool-Season Transitions:As summer heat fades and autumn approaches, shift your focus back to cool-season crops.
    • Late Summer/Early Fall Plantings: Start seeds for leafy greens (lettuce, spinach, kale), radishes, beets, and carrots in late summer for fall and even early winter harvests. These plants appreciate cooler temperatures and often become sweeter after a light frost.
    • Season Extension: Use row covers, cold frames, or cloches to protect fall plantings from early frosts. These simple structures trap heat and can extend your harvest of greens by several weeks, sometimes into winter, even in colder climates. For instance, the National Garden Association provides resources on extending the growing season with various protective covers.
    • Hardy Herbs: Plant hardy herbs like parsley or cilantro in succession into the fall.
  2. Warm-Season Strategies:Summer brings abundant growth, but also intense heat that can cause some plants to bolt or struggle.
    • Heat-Tolerant Varieties: Choose heat-tolerant varieties of lettuce (e.g., ‘Slobolt’, ‘Oakleaf’) or spinach (e.g., ‘Malabar Spinach’ which is actually a different plant but thrives in heat) for summer succession.
    • Partial Shade: Provide afternoon shade for cool-season crops during hot spells. Move containers to shadier spots or use shade cloth to protect plants from scorching sun, preventing bolting in greens.
    • Succession of Warm-Season Crops: While many warm-season crops like tomatoes and peppers have longer harvest windows, you can still apply succession principles. For example, plant a second round of bush beans, or a compact cucumber or zucchini, a few weeks after the first to ensure a continuous supply without overwhelming plants.
  3. Crop Rotation in Small Spaces:Even in containers or small beds, rotating where you plant certain crop families helps prevent the buildup of specific soil-borne pests and diseases. Try not to plant the same crop, or crops from the same family (e.g., all brassicas like kale, broccoli, cabbage), in the exact same spot year after year. For example, if you grow lettuce in a container one season, plant bush beans or radishes in it the next. This simple practice keeps your soil healthier. University of Florida IFAS Extension offers valuable advice on maximizing garden productivity in small footprints, including rotation strategies.
  4. Companion Planting for Enhanced Growth:Integrate companion planting to naturally deter pests, attract beneficial insects, and potentially enhance plant growth.
    • Marigolds: Plant marigolds among your vegetables to deter nematodes and other pests.
    • Basil with Tomatoes: Many gardeners believe basil planted near tomatoes improves their flavor and deters some flying insects.
    • Nasturtiums: Act as a trap crop for aphids, drawing them away from your main vegetables, while also providing edible flowers and leaves.
    • Pollinator Attractors: Incorporate flowering herbs like dill, cilantro (allowed to flower), or borage to attract essential pollinators, crucial for fruiting vegetables like cucumbers and bush beans.

By making these seasonal adjustments and incorporating advanced techniques, you elevate your succession planting game. Your small garden becomes a dynamic, resilient, and incredibly productive space, providing fresh food for an extended period.

A gardener thoughtfully inspects a young lettuce plant in a terracotta pot on a compact patio, surrounded by other container gardens.

Frequently Asked Questions

What is the minimum space required for succession planting?

You can begin succession planting with as little as a single large container or a 2×2 foot raised bed. The key is consistent, small batch plantings, not vast acreage. Even a window box can produce a steady supply of cut-and-come-again greens with this method.

Can I succession plant in pots and containers?

Absolutely, containers are ideal for succession planting. As one crop finishes, you easily refresh the potting mix and replant with the next batch. This method gives you maximum flexibility to move crops according to sunlight needs or to rotate planting areas effectively.

How do I know when to plant the next batch of seeds?

Your “days to maturity” listed on seed packets guides your schedule. Plant your next batch approximately 1-3 weeks before your current crop is expected to finish harvesting. For example, if lettuce matures in 45 days, plant a new batch every 2-3 weeks to maintain a continuous supply.

What happens if I forget to plant a batch?

Do not worry. Missing a planting simply creates a small gap in your harvest. You can always jump back in with your next scheduled planting. The beauty of gardening is its forgiving nature, and you learn and adjust with each season.

Is succession planting only for fast-growing crops?

While fast-growing crops are easiest, you can apply succession principles to many plants. For slower crops like tomatoes or peppers, you might plant a second, slightly later set of plants if your season is long enough. You can also use relay planting to follow a fast crop with a slower one, ensuring the bed remains productive.

For research-based guidance on edible gardening, visit
Penn State Extension — Gardening,
Missouri Botanical Garden,
Kew Science — Plants of the World,
University of California ANR — Home Gardening and
Oregon State Extension — Gardening.

Disclaimer: This article is for informational purposes only and is not a substitute for professional advice. Consult local extension services for region-specific recommendations.

Categories
Edible Gardening

Companion Planting for Small Spaces: What Works Together

For research-based guidance on edible gardening, visit
Kew Science — Plants of the World, University of California ANR — Home Gardening, Oregon State Extension — Gardening, Washington State University Hortsense and Texas A&M AgriLife Extension — Horticulture.

Disclaimer: This article is for informational purposes only and is not a substitute for professional advice. Consult local extension services for region-specific recommendations.

Your small garden, whether it is a balcony, a patio, or a compact backyard, offers immense potential for growing delicious, fresh produce. Maximizing every square inch is key when space is limited, and companion planting provides an elegant, effective solution. This age-old gardening technique involves strategically placing different plant species near each other to foster mutual benefits, enhance growth, deter pests, and even improve flavor. For your small garden, companion planting transforms individual containers and raised beds into thriving, synergistic ecosystems, ensuring you get the most out of every plant pair.

A rustic wooden planter box on a sunny balcony filled with thriving basil, marigolds, and a small tomato plant.

What Is Companion Planting and Why It Matters for Small Spaces

Companion planting is the practice of growing specific plants close to one another for their beneficial interactions. These interactions can include pest deterrence, attraction of beneficial insects, improved growth, enhanced flavor, and better soil health. Think of it as creating a community garden on a miniature scale, where each member contributes to the well-being of its neighbors. This traditional method relies on observation and understanding the natural world, allowing gardeners to leverage nature’s own strategies for healthier, more productive plants.

For your small garden, companion planting moves beyond a mere gardening curiosity; it becomes a fundamental strategy. With limited soil volume in containers and restricted root space in raised beds, every plant needs to pull its weight. Companion planting helps you achieve this by:

  • Optimizing Space: You can interplant crops that have different growth habits, like a shallow-rooted lettuce underneath a taller tomato plant, making efficient use of vertical and horizontal space.
  • Natural Pest Control: Many companion plants release compounds or scents that repel common pests, reducing your reliance on chemical treatments. This is especially valuable in a small garden where infestations can quickly spread.
  • Attracting Beneficial Insects: Certain flowers and herbs act as magnets for pollinators and predatory insects that control destructive pests. Your small garden becomes a vibrant hub for helpful wildlife.
  • Improving Soil and Nutrient Cycling: Some plants, like legumes, fix nitrogen in the soil, making it available to hungry neighbors. Others can break up compacted soil or act as living mulches, conserving moisture.
  • Enhancing Plant Vigor and Flavor: Anecdotal evidence, supported by some scientific observations, suggests certain plant pairs grow stronger and even taste better when grown together. Imagine basil enhancing the flavor of your container tomatoes.

Embracing companion planting allows you to transform a few pots into a productive, resilient small garden ecosystem. You achieve better yields, healthier plants, and a more vibrant, pest-resistant growing environment without adding chemicals or significant effort.

Close-up, slightly elevated view of a small container garden with orange marigolds, a tomato plant, mint, and rosemary in varied pots on a patio.

The Science of Plant Partnerships: How Your Garden Thrives Together

While some companion planting folklore dates back centuries, modern horticulture increasingly understands the scientific mechanisms behind these plant partnerships. You are not just planting randomly; you are orchestrating a complex biological interaction. Here are the primary ways plants benefit each other:

  • Pest Deterrence and Repellence:
    • Volatile Organic Compounds (VOCs): Many aromatic herbs, like mint, rosemary, and marigolds, release compounds that confuse or repel pests. For example, the strong scent of marigolds masks the smell of host plants, making it harder for pests like nematodes and root-knot nematodes to locate their targets. Research published in journals like the Journal of Chemical Ecology has documented the pest-deterring effects of specific plant extracts.
    • Trap Cropping: Some plants, known as trap crops, attract pests away from your main crops. Nasturtiums, for instance, are highly attractive to aphids, luring them away from your prized vegetables.
  • Beneficial Insect Attraction:
    • Nectar and Pollen Sources: Flowering plants, especially those with small, open flowers like dill, cilantro (when allowed to bolt), and marigolds, provide nectar and pollen for pollinators such as bees and butterflies. They also attract beneficial predators like ladybugs, lacewings, and parasitic wasps, which feed on common garden pests like aphids and cabbage worms.
    • Shelter: Denser, multi-layered plantings can create microclimates and shelter for these helpful insects, encouraging them to stay in your garden.
  • Nutrient Cycling and Soil Health:
    • Nitrogen Fixation: Legumes, including beans and peas, have symbiotic relationships with bacteria in their root nodules. These bacteria convert atmospheric nitrogen into a form usable by plants, enriching the soil for nearby companions.
    • Dynamic Accumulators: Some deep-rooted plants, often referred to as dynamic accumulators, draw minerals from deeper soil layers, making them available to shallower-rooted plants when their leaves decompose or are chopped and dropped as mulch. Comfrey is a classic example, though its size makes it less practical for very small spaces.
    • Physical Soil Improvement: Root systems of various plants can improve soil structure, aeration, and water penetration.
  • Physical Support and Microclimate Modification:
    • The “Three Sisters” Guild: The classic Native American planting of corn, beans, and squash exemplifies physical support. Corn provides a stalk for beans to climb, beans fix nitrogen for the heavy-feeding corn and squash, and squash leaves provide ground cover, suppressing weeds and conserving moisture. While full-size corn may be too large for tiny spaces, dwarf varieties or other tall plants can serve similar roles.
    • Shade and Shelter: Taller plants can provide beneficial shade to sun-sensitive companions during hot periods, preventing bolting in greens or sunscald on fruits.
  • Allelopathy:
    • This is where plants release biochemicals that affect the growth of other plants. While often discussed in the context of negative interactions (e.g., black walnut inhibiting growth), some allelopathic interactions are beneficial. For example, marigolds release compounds that suppress nematodes. Understanding these chemical communications helps you choose optimal plant pairs. For further reading on plant interactions, consider resources from universities like Texas A&M AgriLife Extension – Horticulture.

By understanding these scientific principles, you gain confidence in selecting the right companions, transforming your small garden into a resilient and productive growing space.

Person kneeling on a sun-dappled patio, thoughtfully arranging empty and partially-filled containers, notebook, and seed packets for a small garden de

Designing Your Tiny Ecosystem: Planning for Success

Successful companion planting in small spaces begins with thoughtful planning. Your compact growing area, whether a container, a raised bed, or a small patch of ground, demands efficient design. You want to create a miniature ecosystem where plants thrive together. Here’s how you can approach your design:

Thoughtfully arranged urban balcony garden showing light, wind, and water considerations with grouped plants and sturdy containers, a person observing

Assess Your Space: Light, Wind, and Water

  • Sunlight: Track your sunlight patterns. Most edible plants, especially fruits like tomatoes and peppers, need 6-8 hours of direct sun daily. Leafy greens tolerate less, often 4-6 hours. Position sun-lovers where they get maximum exposure, and tuck sun-sensitive companions into their shade.
  • Wind Exposure: Balconies and open patios can experience strong winds. Taller companion plants can offer some windbreak for more delicate neighbors. Consider sturdy containers and trellis systems for support.
  • Water Access: Plan your layout so plants with similar watering needs are grouped together. This prevents overwatering drought-tolerant plants or underwatering moisture-loving ones.

A vibrant tomato, basil, and marigold 'guild' thriving in a large fabric grow bag on a sunlit patio, with other varied containers in the blurred backg

Container Considerations for Companion Planting

Containers are the backbone of many small gardens. Choosing the right ones and arranging them strategically makes a significant difference:

  • Size Matters: Opt for the largest containers your space and budget allow. Larger pots hold more soil, offer more root room for multiple companions, and retain moisture longer. A single deep container can host a “guild” of plants, like a tomato, basil, and marigold.
  • Drainage: Ensure all containers have adequate drainage holes. Companion plants need good drainage to prevent root rot.
  • Materials: Terra cotta pots dry out faster than plastic or glazed ceramic. Grouping similar moisture-preference companions in appropriate pots simplifies watering. Fabric grow bags are excellent for air pruning roots and promoting healthy growth for root vegetables and larger plants.

A close-up of a sun-drenched tiered planter with herbs and leafy greens, a trellis with a cucumber, and a hanging nasturtium basket on a small urban b

Maximize Vertical Space

Companion planting shines when you integrate vertical elements. This strategy significantly increases your growing area:

  • Trellises and Stakes: Use trellises, stakes, or obelisks for climbing plants like pole beans, cucumbers, and small squash varieties. Plant shallow-rooted companions at their base, benefiting from the shade and improving soil health.
  • Tiered Planters: Tiered planters allow you to grow different companions at various levels, optimizing light exposure and creating a diverse environment. Place sun-loving, taller plants at the top and shade-tolerant greens below.
  • Hanging Baskets: Use hanging baskets for herbs or trailing flowers (like nasturtiums) that can repel pests or attract beneficials to plants below.

Terracotta pot on an urban patio with a tomato plant, basil, radish leaves, and trailing nasturtium, demonstrating interplanting.

Interplanting for Efficiency

Interplanting involves growing multiple crops in the same space at the same time. This is a core concept in companion planting for small garden setups:

  • Staggered Planting: Plant fast-growing, short-season crops (like radishes or lettuce) between slower-growing, long-season plants (like broccoli or peppers). You harvest the fast crop before the slower one needs the space.
  • Growth Habit Diversity: Combine plants with different root depths and canopy sizes. For example, a deep-rooted tomato plant can share a container with shallow-rooted basil and a trailing nasturtium, each occupying a different niche.

By thoughtfully designing your small garden space with these principles, you create a robust and productive environment where companion plants support each other, making the most of every precious inch.

Close-up of a wooden raised planter on an urban balcony, showcasing a vibrant orange marigold next to lush green basil and young tomato plants.

Top Plant Pairs for Your Small Edible Garden

Now that you understand the “why” and “how” of companion planting, let’s explore specific plant pairs that deliver excellent results for your small garden. These combinations are chosen for their proven benefits and their suitability for container or raised bed environments. You’ll find these pairings help deter pests, attract beneficial insects, and enhance growth and flavor.

Container garden with companion plants: tomato and basil in one pot, mint and cabbage in separate pots on a sunny patio.

Herbs as Hardworking Allies in Small Spaces

Aromatic herbs are among the best companions you can choose for your small edible garden. Their strong scents and essential oils often deter pests, while their flowers attract beneficial insects. They also fit well into containers.

  • Basil and Tomatoes: This is a classic pairing. Basil reputedly improves the flavor of tomatoes and helps deter tomato hornworms and flies. Plant a basil plant at the base of each tomato plant in a large container or raised bed.
  • Mint and Cabbage/Brassicas: Mint’s strong scent can confuse cabbage moths and other brassica pests. Be cautious, though; mint is incredibly vigorous and can quickly take over. Grow it in its own pot next to your cabbage or broccoli containers to prevent it from overwhelming its neighbors.
  • Rosemary and Beans/Carrots: Rosemary’s woody scent deters bean beetles and carrot rust flies. Place a rosemary plant in a pot near your bean or carrot containers.
  • Thyme and Cabbage/Cauliflower: Thyme acts as a repellent for cabbage worms. Its low-growing habit also acts as a living mulch, suppressing weeds and conserving moisture.
  • Chives and Carrots/Apples (if you have dwarf trees): Chives deter carrot rust flies and aphids. They also help improve the growth and flavor of carrots. For dwarf fruit trees, chives can help deter apple scab.
  • Cilantro (Coriander) and Potatoes/Anise: When allowed to flower, cilantro attracts beneficial insects like lacewings and parasitic wasps, which prey on potato beetles and aphids.
  • Dill and Cabbage/Lettuce/Corn: Dill attracts parasitic wasps, lacewings, and ladybugs, all of which feast on aphids and cabbage worms. It can also improve the flavor of cabbage and repel spider mites.

Close-up, low-angle shot of a multi-tiered vertical planter. Orange nasturtiums cascade near a cucumber plant, while yellow marigolds bloom among dwar

Flowers for Function and Beauty: More Than Just Pretty Faces

Don’t underestimate the power of flowers in your edible garden. They offer beauty, but more importantly, they perform crucial tasks like pest deterrence and beneficial insect attraction, especially in a compact setting where every plant needs a purpose.

  • Marigolds (Tagetes spp.) and almost everything: French marigolds (Tagetes patula) are famous for deterring nematodes in the soil, particularly effective if you are reusing container soil. They also repel whiteflies and other pests. Plant them generously among your tomatoes, peppers, beans, and greens.
  • Nasturtiums and Squash/Cucumbers/Radishes: Nasturtiums are excellent trap crops for aphids, luring them away from your main vegetables. They also repel squash bugs and cucumber beetles. Their leaves and flowers are edible, adding a peppery kick to salads.
  • Calendula (Pot Marigold) and Tomatoes/Asparagus: Calendula attracts beneficial insects like hoverflies (whose larvae eat aphids) and parasitic wasps. It also helps deter asparagus beetles and tomato hornworms. Its petals are edible, adding color to dishes.
  • Borage and Tomatoes/Squash/Strawberries: Borage attracts bees, improving pollination for fruits and vegetables. It also deters tomato hornworms and cabbage worms. Some gardeners believe it improves the flavor of tomatoes and strawberries.
  • Cosmos and a variety of vegetables: Cosmos, particularly varieties with single flowers, are excellent for attracting pollinators and beneficial insects like lacewings and hoverflies to your garden, helping with pest control.

A dirt-smudged hand gently supports a branch of a compact cherry tomato plant, growing with basil and marigolds in a terracotta pot on a sunny balcony

Vegetable Virtuosos: Smart Pairings for Maximizing Yield

Certain vegetable combinations work wonders together, whether it is for pest control, growth enhancement, or efficient use of space. These plant pairs become highly effective partners in a small garden.

Here is a table summarizing some highly effective vegetable companion pairings for your small-space garden:

Primary Crop Companion Plants Benefits
Tomatoes Basil, Marigolds, Carrots, Chives, Parsley, Nasturtiums Basil improves flavor, deters hornworms. Marigolds deter nematodes, whiteflies. Carrots benefit from tomato shade. Chives deter aphids. Nasturtiums are a trap crop for aphids.
Beans (Bush & Pole) Corn (dwarf), Marigolds, Rosemary, Savory, Carrots, Cucumbers Beans fix nitrogen for heavy feeders. Marigolds deter nematodes. Rosemary deters bean beetles. Savory deters bean beetles. Carrots, cucumbers enjoy the nitrogen.
Cabbage & Brassicas (Broccoli, Kale, Kohlrabi) Dill, Thyme, Mint (in separate pot), Rosemary, Nasturtiums, Marigolds, Chamomile Dill attracts beneficials, deters cabbage worms. Thyme deters cabbage worms. Mint repels cabbage moths. Nasturtiums are a trap crop for aphids. Marigolds deter various pests. Chamomile can improve growth.
Carrots Rosemary, Chives, Lettuce, Radishes, Marigolds, Tomatoes Rosemary and Chives deter carrot rust fly. Lettuce and radishes are fast-growing interplants. Marigolds help with soil nematodes. Tomatoes offer light shade.
Cucumbers Radishes, Corn (dwarf), Marigolds, Nasturtiums, Beans Radishes can be interplanted. Dwarf corn provides climbing structure. Marigolds repel cucumber beetles. Nasturtiums are a trap crop. Beans fix nitrogen.
Lettuce & Greens Chives, Mint (in separate pot), Marigolds, Radishes, Carrots, Taller crops (for shade) Chives deter aphids. Mint deters slugs. Marigolds deter nematodes. Radishes can be interplanted for quick harvest. Taller crops provide beneficial shade in heat.
Peppers (Bell & Hot) Basil, Marigolds, Onions, Carrots, Spinach Basil improves flavor, deters some pests. Marigolds deter nematodes, whiteflies. Onions deter aphids. Carrots and spinach can be underplanted for efficient space use.
Radishes Lettuce, Spinach, Carrots, Nasturtiums, Chives Fast-growing, they loosen soil for companions. Lettuce and spinach benefit from quicker harvest. Nasturtiums can trap aphids. Chives deter some root maggots.
Potatoes Beans, Marigolds, Coriander, Horseradish (large, use caution) Beans fix nitrogen. Marigolds deter nematodes. Coriander attracts beneficial insects that prey on potato beetles. Horseradish can deter potato beetles (use in large pots only due to vigorous spread).

Rustic wicker basket overflowing with fresh produce (tomatoes, basil, peppers) on a stool, surrounded by lush companion-planted containers on a small

Maximizing Harvests in Limited Space with Companion Planting

In your small garden, maximizing every harvest is a priority. Companion planting contributes significantly to increased yields by creating a healthier, more productive environment. You can take several steps to ensure your companion planting strategies translate into abundant baskets of fresh produce.

Close-up of a hand harvesting red radishes from a rectangular wooden planter box also containing young lettuce seedlings and a thriving young tomato p

Strategic Interplanting for Continuous Harvests

Interplanting involves growing multiple crops in the same space, often with different growth rates or requirements. This method helps you get more from your small garden beds and containers throughout the season.

  • Succession Sowing: This means planting small batches of a crop every couple of weeks, ensuring harvests keep coming rather than all at once. For example, plant a short row of lettuce every two weeks alongside your main companions. As one batch finishes, the next is ready.
  • Fast-Growing Companions: Utilize fast-growing companions like radishes or leafy greens. Plant them alongside slower-growing main crops. You will harvest the radishes within a month, creating space and enriching the soil before the main crop fully matures. For instance, sow radishes around the base of developing pepper plants.
  • Utilizing Vertical and Horizontal Space: Combine plants with different growth habits. Plant shallow-rooted herbs like basil or thyme around the base of a trellised cucumber or pole bean. The vine uses vertical space, while the herb uses horizontal ground space and offers pest protection.

A bumblebee collects pollen from bright orange calendula flowers in a patio container garden, near a compact tomato plant with green fruits.

Enhancing Pollination and Fruit Set

Many edible plants, especially those that produce fruits like tomatoes, peppers, squash, and beans, rely on pollinators. Attracting these beneficial insects directly impacts your yield.

  • Flowering Companions: Incorporate flowering herbs and annuals. Plants like borage, calendula, dill (when allowed to flower), and cosmos are excellent magnets for bees, butterflies, and other essential pollinators. Place these flowers strategically near your fruiting vegetables.
  • Continuous Blooms: Choose companion flowers that bloom throughout the growing season to provide a consistent food source for pollinators. This encourages them to take up residence in your garden, improving fruit set for all your edibles.

A fabric grow bag on a patio containing a healthy kale plant, companion bush beans, and creeping thyme acting as living mulch.

Healthy Soil, Healthy Yields

Companion planting often leads to improved soil health, which directly translates to stronger plants and bigger harvests, even in the confines of a container.

  • Nitrogen Fixers: Plant legumes like bush beans or peas as companions. They replenish nitrogen in the soil, a vital nutrient for leafy growth and overall plant vigor, benefiting heavy feeders like corn or brassicas. You will see healthier growth in your neighboring plants.
  • Living Mulch: Low-growing companion plants, such as thyme or even lettuce, act as a living mulch. They cover the soil, reduce evaporation, keep soil temperatures consistent, and suppress weeds. This conserves moisture and nutrients for your primary crops, leading to more robust growth.

Vibrant nasturtium with aphids next to a healthy bean plant in containers on a patio, with marigolds in background, demonstrating pest management.

Integrated Pest Management (IPM) through Companions

A reduced pest load means less damage to your plants and more energy directed towards producing fruits and vegetables.

  • Repellent Plants: Use strong-scented companions like marigolds, rosemary, or mint (in its own pot) to deter common pests. Fewer pests mean your plants can put all their energy into producing, rather than recovering from damage.
  • Trap Cropping: Plant nasturtiums near your squash or beans. They will attract aphids away from your main crops, sacrificing themselves to save your harvest. Monitor the trap crop and manage the pests there as needed, often by simply removing infested plants.

By implementing these companion planting strategies, you transform your small garden into an incredibly efficient and productive food factory, enjoying maximum yields from every square inch you cultivate.

Close-up of hands examining a pale basil plant overshadowed by a robust calendula in a terracotta pot on a balcony.

Common Companion Planting Myths and Mistakes to Avoid

While companion planting offers fantastic benefits for your small garden, it also comes with its share of misconceptions and potential pitfalls. Avoiding these common mistakes ensures your efforts are productive and do not inadvertently hinder your plants.

Close-up of hands inspecting a tomato plant leaf for aphids, one hand holding a water spray bottle, with companion plants in the background.

Mistake 1: Relying Solely on Companion Planting for Pest Control

Myth: Companion planting eliminates all pests.
Reality: Companion planting is a powerful tool in an integrated pest management (IPM) strategy, but it is not a magic bullet. While certain plants deter specific pests or attract beneficial insects, a severe infestation may still require additional intervention. You still need to monitor your plants regularly. If you spot a problem, consider physical removal (hand-picking caterpillars), water sprays (for aphids), or least-toxic organic solutions as needed. Companion planting reduces the likelihood and severity of outbreaks, but it does not guarantee a completely pest-free garden.

Close-up of pest-damaged kale and cabbage plants growing too close in narrow balcony planters, with a green cabbage worm visible on a kale leaf.

Mistake 2: Ignoring Plant Families and Their Interactions

Myth: All plants are good companions for at least something.
Reality: Plants within the same family often share common pests and diseases. For instance, while basil is great with tomatoes, growing different members of the brassica family (cabbage, broccoli, kale) too close can sometimes concentrate pests like cabbage worms. Additionally, some plants, like members of the mint family, can be aggressive spreaders. Always research specific plant families and their known interactions, both positive and negative, to avoid unintended consequences in your small garden.

An overcrowded large terracotta pot on an urban balcony, showing a leggy, pale tomato plant competing with dense basil and other herbs.

Mistake 3: Overcrowding Containers and Beds

Myth: More plants in a small space equals more yield with companion planting.
Reality: While companion planting encourages efficient space use, it does not mean cramming as many plants as possible into a container. Overcrowding leads to competition for light, water, and nutrients, weakening plants and making them more susceptible to pests and diseases. Ensure each plant, even companions, has adequate room to grow. For example, a tomato needs significant space; planting one basil plant is beneficial, but planting three might be too much. Refer to recommended plant spacing, even when companion planting, and choose compact varieties for small gardens.

A hand holding a marker observes a slightly struggling tomato plant next to basil in a pot, contrasting it with a thriving pepper and calendula pairin

Mistake 4: Believing All “Traditional” Pairings Are Universally Effective

Myth: Every traditional companion planting guide is scientifically proven and works everywhere.
Reality: Many companion planting recommendations are based on anecdotal evidence passed down through generations. While many are effective, some lack scientific backing or may not perform as expected in every microclimate or soil condition. Experiment in your own garden. What works for one gardener in a different region may not be ideal for your specific container setup or local pest pressure. Observe your plants and adjust your strategies based on what you see working.

Close-up of hands mixing dark, moist, peat-free potting mix into a terracotta pot on a patio, emphasizing healthy soil.

Mistake 5: Neglecting Soil Health and Water Needs

Myth: Companion planting eliminates the need for good soil and proper watering.
Reality: Companion planting complements good basic gardening practices; it does not replace them. Healthy soil, rich in organic matter, and consistent, appropriate watering remain fundamental to plant success. Ensure your containers have well-draining, nutrient-rich potting mix (preferably peat-free). Group plants with similar water requirements to simplify irrigation. Even the best companion pair will struggle in poor soil or with inconsistent watering.

By understanding and avoiding these common mistakes, you can harness the true power of companion planting, ensuring a thriving and productive small garden.

A person mists herbs in a thriving urban balcony garden with diverse companion plants in repurposed containers and a vertical planter.

Sustainable Practices and Your Companion Garden

Embracing companion planting naturally aligns with sustainable gardening principles, which are particularly important in small spaces. You can create a low-impact, environmentally friendly garden by focusing on resource efficiency and ecological balance. Your companion garden contributes to a healthier planet by reducing waste, conserving resources, and fostering biodiversity.

Hands adding nutrient-rich worm castings to a container plant on a patio, with a peat-free potting mix bag and vermicompost bin in the soft background

Optimizing Soil Health Sustainably

  • Peat-Free Potting Mixes: Choose potting mixes that do not contain peat. Peat harvesting damages vital wetland ecosystems. Look for mixes made with coir, compost, or rice hulls. Healthy soil is the foundation for strong plants, making them more resistant to pests and diseases, a core tenet of companion planting.
  • Composting and Vermicomposting: Create your own nutrient-rich compost from kitchen scraps and garden waste. For small spaces, a worm bin (vermicompost) is an excellent way to turn food waste into highly fertile worm castings, which you can use to enrich your container soil. This reduces waste and provides free, organic fertilizer.
  • Mulching with Living Companions: As discussed, low-growing companion plants act as a living mulch, conserving soil moisture, suppressing weeds, and keeping soil temperatures stable. This reduces your need for external mulching materials and watering.

Person watering container herbs on a small urban balcony from a rustic can, with a slim rainwater barrel nearby amongst lush pots.

Efficient Water Management

  • Deep, Infrequent Watering: Encourage deep root growth by watering thoroughly but less frequently. This makes plants more resilient to dry spells, which is crucial in containers that can dry out quickly.
  • Grouping by Water Needs: Plant companions with similar water requirements together. This prevents overwatering drought-tolerant plants or underwatering moisture-loving ones, optimizing water use and reducing waste.
  • Rainwater Harvesting: If feasible, collect rainwater in a small barrel or container. Rainwater is free of chlorine and beneficial for your plants.

Bumblebee on vibrant calendula and delicate lacewing on dill in a diverse container garden on a sunlit urban balcony, showcasing biodiversity.

Supporting Biodiversity and Pollinators

  • Plant for Pollinators: Intentionally include flowering companions like calendula, borage, cosmos, and dill (let some go to seed). These provide nectar and pollen for bees, butterflies, and other vital pollinators. Pollinators ensure your fruiting plants produce abundant harvests.
  • Create Habitats for Beneficial Insects: A diverse companion garden with different plant heights and structures offers shelter for beneficial predators like ladybugs, lacewings, and predatory wasps. These insects naturally control pests, reducing your need for sprays.
  • Avoid Chemical Pesticides and Herbicides: Companion planting is a natural form of pest control. Avoiding synthetic chemicals protects pollinators, beneficial insects, and the overall ecosystem of your garden. Embrace organic pest control methods when necessary.

Hands carefully pour diverse heirloom seeds into a labeled paper envelope on a wooden patio table, surrounded by other saved seeds and container plant

Seed Saving and Heirloom Varieties

  • Choose Open-Pollinated Seeds: Opt for open-pollinated or heirloom varieties. These allow you to save seeds from your healthiest plants at the end of the season, maintaining genetic diversity and providing free seeds for future seasons. It is a true act of gardening self-reliance.
  • Support Local Seed Companies: Purchasing seeds from local, organic, or small-scale seed companies helps support sustainable agriculture and regional biodiversity.

By weaving these sustainable practices into your companion planting strategy, you create a garden that is not only productive and beautiful but also environmentally responsible. You contribute to a healthier ecosystem, one small garden space at a time.

Young adult gardener intently observing basil and marigolds in a terracotta pot on a balcony railing, thoughtful expression.

Frequently Asked Questions

Q: Can I use companion planting in every single container in my small garden?

A: Yes, you absolutely can and should integrate companion planting into every container or raised bed in your small garden. The principles apply universally, even if it is just a single basil plant next to a tomato in one pot. Each pairing helps create a micro-ecosystem, maximizing benefits for your plants. You might use a marigold to deter nematodes in one pot and borage to attract pollinators to another.

Q: What if I do not have space for all the recommended companion flowers and herbs?

A: Focus on versatility. Choose multi-functional plants. For example, nasturtiums are edible, beautiful, and act as a trap crop for aphids. Basil improves tomato flavor and deters pests. Prioritize those plants that offer the most benefits for your specific edible crops and fit your aesthetic. Even one or two well-chosen companion plants can make a significant difference. Consider growing herbs in smaller pots that you can move around to different areas as needed.

Q: How do I know if a companion pairing is actually working?

A: Observation is key. Monitor your plants for signs of improved health, fewer pests, and better growth compared to previous seasons or similar plants grown without companions. Look for an increase in beneficial insects like ladybugs or hoverflies. Notice if certain pests are less prevalent on your main crops when specific companions are nearby. Companion planting is an ongoing experiment, so keep notes and adjust as you learn what works best in your unique garden environment.

Q: Can I overdo companion planting, making my small garden too crowded?

A: Yes, you can overdo it. The goal is strategic planting, not simply stuffing more plants into a small space. Overcrowding leads to competition for nutrients, water, and sunlight, and can reduce air circulation, increasing disease risk. Always ensure adequate spacing for each plant to reach its mature size, even when companion planting. Use companions that complement, not compete with, your main crops for resources. Opt for compact varieties of both edibles and companions where space is extremely limited.

Q: Are there any universal “bad” companion pairings I should always avoid?

A: Yes, some plants do not get along. Avoid planting members of the brassica family (cabbage, broccoli, kale) near strawberries, as they can inhibit strawberry growth. Fennel is generally considered a poor companion for most plants, often inhibiting growth due to allelopathic compounds. Also, some plants like mint are so vigorous they can outcompete and overwhelm neighbors if not contained in their own pots. Always research specific plant interactions if you are unsure about a pairing.

Categories
Edible Gardening

The Easiest Vegetables for Small Raised Beds

Your journey into the rewarding world of home gardening begins here, especially if you envision a thriving vegetable patch but face limited space. Small raised beds offer an ideal solution, transforming compact areas like balconies, patios, or small yards into productive food gardens. These elevated structures provide numerous advantages, making gardening accessible and enjoyable for everyone, from absolute beginners to those with some experience looking for a low-maintenance approach.

Raised beds give you exceptional control over soil quality, drainage, and even pest management, simplifying the gardening process significantly. They warm up faster in spring, extending your growing season, and eliminate the need for stooping or heavy digging, making gardening a less physically demanding activity. Building a successful garden in a small raised bed is entirely within your reach, and you will soon harvest fresh, delicious produce right outside your door.

This comprehensive guide walks you through every step of creating and maintaining a vibrant small raised bed garden, focusing specifically on the easiest vegetables that thrive in these environments. We cover planning, soil preparation, watering strategies, pest prevention, and how to get the most out of your harvests, ensuring your gardening efforts yield abundant, satisfying results.

For research-based guidance on edible gardening, visit
Penn State Extension — Gardening,
Missouri Botanical Garden,
Kew Science — Plants of the World and
University of California ANR — Home Gardening.

Disclaimer: This article is for informational purposes only and is not a substitute for professional advice. Consult local extension services for region-specific recommendations.

Person sitting on a patio bench, looking contemplatively at an empty wooden raised garden bed with a notebook on their lap.

Planning Your Small Raised Bed Garden

Successful gardening, even in small spaces, starts with thoughtful planning. Before you build or fill your raised bed, consider a few critical factors that significantly impact your garden’s success. This initial assessment ensures your efforts yield the freshest, most abundant harvests.

Woman on a sunny urban balcony using her smartphone to track morning light patterns over empty terracotta pots and a planter box.

Assessing Sunlight: The Fuel for Growth

Sunlight represents the single most important factor for growing most edible plants. Vegetables typically require at least six to eight hours of direct sunlight per day to thrive and produce well. Less sun results in spindly plants, lower yields, and increased susceptibility to pests and diseases.

  • Track the Sun: Spend a day observing your potential garden spot. Note how long direct sunlight hits the area during different times of day. Morning sun, from 9 AM to 1 PM, is generally less intense and very beneficial for plant growth, drying dew and reducing fungal issues. Afternoon sun, from 1 PM to 5 PM, is hotter and more intense.
  • Optimal Placement: Position your raised bed in the sunniest available spot. If you have choices, a south-facing location often provides the most consistent sunlight throughout the day in the Northern Hemisphere. East-facing locations are excellent for morning sun. West-facing spots receive intense afternoon sun, which some plants tolerate better than others.
  • Consider Obstructions: Trees, fences, buildings, or even your own home can cast shadows that limit sunlight. Account for these shadows, which change with the seasons. A shadow in spring may not be there in summer when the sun is higher.

Gloved hand waters a small wooden raised garden bed filled with lettuce and herbs, positioned directly beside a compact rain barrel on a bright patio.

Water Source Accessibility

Vegetables need consistent watering, especially in raised beds, which tend to dry out faster than in-ground gardens. Locating your raised bed near a water source, such as a spigot or rain barrel, saves you significant effort and encourages regular watering. Hauling heavy watering cans across your yard quickly becomes a chore, leading to neglected plants.

Compact dark wood raised planter with dwarf tomatoes and climbing nasturtiums, shielded by a wooden lattice screen on a paved patio.

Protection from Wind and Foot Traffic

Strong winds can damage delicate plants, especially those growing vertically or with heavy fruit. Wind also accelerates soil moisture evaporation. Position your raised bed in a relatively sheltered spot or consider a low fence or hedge nearby for protection. Additionally, ensure your raised bed is in an area that avoids heavy foot traffic, preventing accidental damage to plants or compaction of the surrounding soil.

A person kneels beside an empty, light-colored wooden raised bed (2x6 ft, 10 inches high) on a patio, demonstrating easy reach across its width.

Defining Your Space: Size and Shape

Small raised beds generally offer easier management. For beginners, a bed that is 2 feet wide and 4-6 feet long provides ample space for a good variety of vegetables without becoming overwhelming. A width of 2 to 4 feet allows you to reach the center of the bed comfortably from either side, preventing you from stepping on the soil and compacting it. The ideal height for a raised bed is typically 6 to 12 inches, which accommodates the root systems of most easy-to-grow vegetables.

Close-up of hands layering gravel and terracotta into a compact galvanized steel raised bed on a patio, preparing it for planting.

Choosing and Preparing Your Raised Bed

Once you have a plan, the next step involves selecting the right type of raised bed and preparing it for planting. The choices you make here impact its longevity, aesthetics, and how well your plants thrive.

Two empty compact raised beds side-by-side on a modern patio: one crafted from natural cedar wood, the other from gleaming corrugated galvanized steel

Selecting Your Raised Bed Material

A variety of materials are available for constructing raised beds, each with its own advantages. Your choice depends on your budget, aesthetic preferences, and the desired lifespan of your bed.

  • Untreated Wood: Cedar, redwood, and cypress are naturally rot-resistant and do not leach harmful chemicals into your soil. They are durable and offer a classic, natural look. Pine can also work but will decompose faster unless treated. Always ensure the wood you choose is untreated, especially when growing edibles. Treated lumber contains chemicals designed to prevent rot, which can leach into your garden soil.
  • Metal: Galvanized steel or corrugated metal beds offer a sleek, modern aesthetic and exceptional durability. They resist rot and pests. Metal beds can heat up quickly in direct sun, which can sometimes impact soil temperature, but this is usually manageable with proper watering and mulching.
  • Stone or Concrete Blocks: These materials provide a very durable and long-lasting raised bed. They are often more labor-intensive to construct initially but require minimal maintenance. They also help retain warmth, which benefits plants during cooler periods.
  • Recycled Plastic: Made from post-consumer plastics, these beds offer an environmentally friendly and extremely durable option. They resist rot, pests, and never need painting or sealing.
  • Fabric Grow Bags: For the ultimate in flexibility and portability, especially on balconies or patios, large fabric grow bags serve as excellent raised beds. They are lightweight, allow for excellent drainage and air circulation to roots, and fold away for storage. Choose bags that are at least 10-15 gallons for most vegetables.

Middle-aged woman comfortably reaches across a 2.5-foot wide raised garden bed on a patio, tending young lettuce.

Determining Bed Dimensions

The ideal dimensions for your small raised bed balance functionality with plant health:

  • Width: Keep beds no wider than 4 feet. A 2 to 3-foot width is often more comfortable for reaching the center without straining. This prevents you from stepping into the bed, which compacts the soil and reduces aeration for roots.
  • Length: You can make the length as long as your space allows, but consider breaking very long beds into shorter sections (e.g., 6-8 feet) for easier access and management.
  • Depth: For most easy-to-grow vegetables, a depth of 6 to 12 inches is sufficient. This depth provides enough room for root development for crops like lettuce, spinach, radishes, bush beans, and even compact tomatoes. If you plan to grow deeper root vegetables like full-sized carrots or potatoes, aim for 12 inches or more. Even shallow beds offer superior drainage and soil quality compared to many in-ground options.

Gloved hands carefully placing cardboard sheets as a weed barrier on a cleared patio patch, with unassembled raised bed panels nearby.

Preparing the Site and Building the Bed

  1. Clear the Area: Remove any existing weeds, grass, or debris from the footprint of your raised bed. Level the ground as much as possible to ensure your bed sits evenly.
  2. Install a Weed Barrier: Lay down a layer of cardboard or several layers of newspaper at the bottom of your raised bed. This smothers existing weeds and grass, eventually decomposing and adding organic matter to the soil. Avoid using plastic sheeting, as it can hinder drainage and airflow to the soil.
  3. Assemble the Bed: Construct your chosen raised bed according to the manufacturer’s instructions or your design. Ensure it is sturdy and level. If your bed has an open bottom, which is common, the cardboard layer acts as your initial weed barrier. For beds with solid bottoms (like some large containers), ensure adequate drainage holes are present and clear.

This preparation sets the stage for healthy plant growth, providing a clean, contained, and well-drained environment for your chosen vegetables.

Close-up of hands mixing dark, nutrient-rich soil with perlite and compost in a small wooden raised bed on a sunny patio.

The Perfect Soil Mix for Raised Beds

The soil you fill your raised bed with represents the lifeblood of your garden. Unlike traditional in-ground gardens where you might amend existing native soil, raised beds require you to bring in or create a high-quality growing medium from scratch. This gives you complete control over providing your plants with the ideal environment for root development and nutrient uptake.

Close-up of gloved hands struggling to break up dense, clumpy garden soil with a trowel in a small raised bed on a patio.

Why Regular Garden Soil Is Not Enough

You cannot simply shovel soil from your existing yard into a raised bed. Garden soil, especially heavy clay or compacted types, does not perform well in a contained raised bed environment. It compacts easily, drains poorly, and lacks the necessary aeration for robust root growth. The ideal raised bed soil is light, fluffy, well-draining, and rich in organic matter.

Close-up of rich compost, coconut coir, and a metal trowel on a patio. A gloved hand reaches towards the coir, a small raised bed blurred in backgroun

Components of an Excellent Raised Bed Mix

A superior soil mix provides a balance of structure, water retention, and nutrition. Here are the key components:

  • High-Quality Compost: This forms the cornerstone of your raised bed soil. Compost is decomposed organic matter, teeming with beneficial microbes and essential nutrients. It improves soil structure, aeration, drainage, and water-holding capacity. Use well-rotted compost from a reputable source, or make your own from kitchen scraps and yard waste.
  • Peat-Free Growing Mix (Coconut Coir or Aged Pine Bark): These materials add structure, improve drainage, and enhance water retention without using peat moss. Peat moss is harvested from irreplaceable peat bogs, making it a less environmentally friendly choice. Coconut coir, derived from coconut husks, is a sustainable alternative that holds water effectively and provides excellent aeration. Aged pine bark fines also improve drainage and lighten heavy mixes.
  • Perlite or Vermiculite: These lightweight, porous minerals are crucial for aeration and drainage. Perlite brightens the mix and prevents compaction, while vermiculite also helps retain moisture and nutrients. Both are excellent choices for ensuring your roots can breathe.
  • Organic Amendments (Optional, but Recommended): Once your base mix is established, you can enrich it with specific organic amendments for long-term fertility:
    • Worm Castings: A natural, slow-release fertilizer rich in micronutrients and beneficial microbes.
    • Bone Meal: Provides phosphorus, beneficial for root development and flowering.
    • Kelp Meal: Offers a broad spectrum of micronutrients and plant hormones, boosting overall plant health.

Person using a shovel to mix dark compost, light coconut coir, and white perlite on a blue tarp on a sunny patio, next to an empty raised bed.

A Recommended Soil Mix Ratio

You can create an excellent and cost-effective raised bed mix by combining these elements. A common and highly effective ratio is:

  • 50% High-Quality Compost: This provides the bulk of the nutrients and beneficial biology.
  • 30% Peat-Free Growing Mix (Coconut Coir or Aged Pine Bark): This adds structure and improves water holding and drainage.
  • 20% Perlite or Vermiculite: Ensures excellent aeration and prevents compaction.

Mix these components thoroughly before adding them to your raised bed. You can purchase these ingredients in bulk from local garden centers or soil suppliers, which often proves more economical than buying numerous bags of pre-mixed potting soil.

Hands gently mix dark compost into the topsoil of a small wooden raised bed on a light patio.

Reusing and Refreshing Your Raised Bed Soil

One of the beauties of a raised bed is that you don’t need to completely replace the soil every year. Instead, you replenish its nutrients and refresh its structure:

  • Annual Top-Dressing: Each spring, before planting, add a fresh 2-4 inch layer of high-quality compost to the top of your bed. Gently work it into the top few inches of the existing soil. This replenishes nutrients, improves structure, and encourages microbial activity.
  • Mid-Season Boost: For heavy feeders or long-season crops, a mid-season application of compost or a balanced organic granular fertilizer provides additional nutrients.
  • Crop Rotation: Even in a small raised bed, practicing some form of crop rotation helps prevent nutrient depletion and disease buildup. Avoid planting the same type of crop (e.g., tomatoes) in the exact same spot year after year.

By investing in good soil from the start and maintaining it with annual additions of compost, you ensure your raised bed remains a fertile and productive environment for many years of abundant harvests.

A gardener's hand checks a tomato leaf in a sunny raised bed on a patio, with a watering can nearby.

Mastering Sun, Water, and Nutrients

Once your raised bed is in place and filled with rich soil, mastering the essentials of sun, water, and nutrient delivery ensures your easy crops not only survive but truly flourish. These three elements form the core rhythm of successful plant care.

Vibrant container garden on a patio bathed in late afternoon sun, with long shadows illustrating light movement and a hand holding a watering can.

Harnessing the Sun’s Power

As discussed during planning, most edible plants demand ample sunlight. Continually observe how light hits your garden throughout the day and as seasons change. If you notice plants struggling in a spot that previously received enough sun, re-evaluate potential new obstructions or seasonal shifts. Remember, more sun generally translates to more robust growth and higher yields for vegetables.

A gloved hand uses a silver moisture meter in dark soil at the base of a pepper plant in a small wooden raised bed on a sunny patio.

Efficient Watering Practices

Raised beds, due to their elevated nature and well-draining soil, tend to dry out faster than in-ground gardens. Proper watering is crucial for preventing plant stress and ensuring nutrient uptake.

  • Deep and Infrequent: Water deeply rather than frequently. This encourages roots to grow deeper, making plants more resilient to dry spells. Aim to moisten the soil to the full depth of your raised bed with each watering.
  • Check Soil Moisture: Do not water on a fixed schedule. Instead, check the soil moisture. Stick your finger about two inches into the soil. If it feels dry at that depth, it is time to water. A simple moisture meter also provides an accurate reading.
  • Water at the Base: Direct water to the base of your plants, soaking the soil directly. Avoid overhead watering, especially on foliage, as wet leaves can promote fungal diseases, particularly in humid conditions.
  • Early Morning Watering: The best time to water is in the early morning. This allows the water to penetrate before the sun gets too hot, minimizing evaporation, and gives any splashed foliage time to dry during the day.
  • Watering Systems for Efficiency: Consider a soaker hose or drip irrigation system for consistent and efficient watering. These systems deliver water directly to the root zone, reducing waste and minimizing effort. For container-style raised beds, self-watering systems with a reservoir can be incredibly effective at maintaining consistent moisture.

Insufficient watering causes wilting and bolting (premature flowering) in greens, and blossom end rot in tomatoes and peppers. Overwatering leads to root rot and nutrient leaching.

Close-up of hands sprinkling granular organic fertilizer around a vibrant basil plant in a terracotta pot on a sunny patio.

Nourishing Your Plants: The Nutrient Rhythm

Even with excellent initial soil, your plants will consume nutrients as they grow and produce. Replenishing these nutrients is vital for continuous vigor and yield.

  • Start with Rich Soil: As covered, a good base of compost-rich soil provides initial nutrients. This is your foundation.
  • Organic Fertilizers: For small raised beds, organic granular or liquid fertilizers are ideal. Granular options typically offer slow-release nutrients, while liquid feeds provide a quicker boost. Look for fertilizers specifically labeled for vegetables or all-purpose organic gardening.
  • Understanding NPK: Fertilizer labels display three numbers, representing the percentage by weight of Nitrogen (N), Phosphorus (P), and Potassium (K).
    • Nitrogen (N): Promotes leafy green growth. Essential for crops like lettuce, spinach, and kale.
    • Phosphorus (P): Supports root development, flowering, and fruiting. Important for tomatoes, peppers, and beans.
    • Potassium (K): Contributes to overall plant health, disease resistance, and fruit quality.

    A “balanced” fertilizer has similar numbers (e.g., 5-5-5 or 4-6-2).

  • Fertilization Cadence:
    • Pre-Planting: Incorporate a balanced organic granular fertilizer into your soil mix or as a top-dressing when you first prepare the bed.
    • Mid-Season Boost: For most vegetables, especially heavy feeders like tomatoes, peppers, and cucumbers, apply a second dose of granular fertilizer or a liquid feed (like fish emulsion or compost tea) when plants begin to flower or set fruit. Follow package directions for application rates.
    • Foliar Feeding: Liquid fertilizers or compost tea can also be applied directly to plant leaves (foliar feeding) for a quick nutrient boost, especially during periods of stress.
  • Compost Tea: A fantastic organic option, compost tea is made by steeping compost in water, creating a nutrient-rich liquid that you can use to water plants or apply as a foliar spray. It boosts plant health and feeds beneficial soil microbes.

By maintaining a consistent rhythm of appropriate sun exposure, efficient watering, and timely nutrient replenishment, you empower your plants to reach their full potential, guaranteeing a bountiful harvest from your small raised bed.

A woman gently touches a lettuce leaf in a compact raised bed on an urban patio, showcasing easy-to-grow vegetables.

Top Easy Vegetables for Beginner Raised Bed Gardeners

Choosing the right vegetables forms the cornerstone of a successful beginner garden, especially in a raised bed where space is a valuable commodity. This section highlights the easiest crops that thrive in small raised beds, offering high yields with minimal fuss. Focus on varieties known for their compact growth habits or “cut-and-come-again” harvesting, which maximizes your bed’s productivity.

A close-up, low-angle shot of a hand gently harvesting fresh salad greens from a ceramic container on a sun-dappled patio.

1. Salad Greens: Lettuce, Spinach, Arugula, and Mesclun

Salad greens are the quintessential easy crop for raised beds. They grow quickly, tolerate partial shade, and offer a continuous harvest through the “cut-and-come-again” method, where you harvest outer leaves and allow the plant to produce more.

  • Why they are easy: Fast-growing, shallow root systems, tolerant of cooler temperatures, and require minimal intervention.
  • Planting: Sow seeds directly in the bed every 2-3 weeks for a continuous supply. Plant about 1/2 inch deep.
  • Spacing: Plant densely, about 4-6 inches apart for head lettuce, or even closer for loose-leaf and cut-and-come-again varieties (e.g., 9-16 plants per square foot).
  • Care: Keep soil consistently moist. Provide some afternoon shade in hot climates to prevent bolting (going to seed prematurely).
  • Harvest: Begin harvesting outer leaves when plants reach a few inches tall.

A hand harvesting a bright red radish from a densely packed terracotta pot on a patio table, with other radishes visible.

2. Radishes

Radishes represent the ultimate quick gratification crop, maturing from seed to harvest in as little as three to four weeks. They are ideal for filling small gaps or planting between slower-growing crops.

  • Why they are easy: Extremely fast, compact, and tolerant of various conditions.
  • Planting: Sow seeds directly 1/2 inch deep, 1 inch apart, in rows or grids.
  • Spacing: Plant 16-25 radishes per square foot.
  • Care: Keep soil consistently moist to prevent them from becoming woody or overly spicy.
  • Harvest: Pull when the root reaches desired size, usually visible just above the soil line.

Close-up of a hand harvesting crisp green snap beans from a lush, compact bush bean plant in a small wooden raised bed.

3. Bush Beans (Snap Beans)

Bush beans are highly productive, self-supporting, and add nitrogen to your soil, benefiting neighboring plants. Unlike pole beans, bush varieties do not require trellising, making them perfect for small raised beds.

  • Why they are easy: Vigorous, self-pollinating, and nitrogen-fixing (improves soil fertility).
  • Planting: Sow seeds directly 1 inch deep, 3-4 inches apart, after all danger of frost passes and soil warms.
  • Spacing: Plant 9-12 plants per square foot.
  • Care: Provide consistent moisture, especially during flowering and pod development.
  • Harvest: Pick pods regularly when young and tender to encourage more production.

Hands harvest round 'Paris Market' carrots from a shallow wooden planter on a patio, showcasing small-space container gardening.

4. Carrots (Short and Round Varieties)

While traditional long carrots can be challenging in shallower beds, specific “short” or “round” varieties like ‘Paris Market’ or ‘Danvers Half Long’ thrive in raised beds 6-8 inches deep, provided the soil is loose and free of obstructions.

  • Why they are easy: Relatively low maintenance once established; good for succession planting.
  • Planting: Sow seeds directly, thinly spaced, 1/4 inch deep. Gently pat the soil. Keep the seedbed consistently moist until germination, which can take up to two weeks.
  • Spacing: Plant 16 carrots per square foot. Thin seedlings to 2-3 inches apart.
  • Care: Maintain consistent moisture. Do not let the soil dry out, which can cause cracking or bitterness.
  • Harvest: Harvest when the tops of the carrots show color and reach desired size.

Vibrant Swiss Chard and curly Kale thriving in a rectangular wooden planter on a sunny patio, perfect for small-space gardening.

5. Swiss Chard and Kale

These leafy greens are incredibly resilient, beautiful, and offer a continuous harvest. They tolerate a wider range of temperatures than lettuce and continue producing for months, even into light frosts.

  • Why they are easy: Tolerant of heat and cold, productive, and ornamental.
  • Planting: Sow seeds 1/2 inch deep, or transplant seedlings.
  • Spacing: Plant 1-2 plants per square foot for large mature plants, or closer for smaller, continuous harvests.
  • Care: Consistent moisture. Fertilize with a nitrogen-rich organic feed every 4-6 weeks for continuous production.
  • Harvest: Use the cut-and-come-again method, harvesting outer leaves when they reach desirable size.

A compact bush cucumber plant with a bamboo trellis in a terracotta pot on a sunny patio, laden with green cucumbers.

6. Bush Cucumbers (Compact Varieties)

Traditional cucumber vines can quickly overwhelm a small space, but compact bush varieties or those bred for containers perform wonderfully in raised beds, often with minimal trellising needed, or easily managed vertical support.

  • Why they are easy: Prolific producers, excellent for fresh eating.
  • Planting: Sow seeds directly 1 inch deep after the last frost, or transplant seedlings.
  • Spacing: Plant 1-2 bush cucumber plants per square foot, providing a compact cage or small trellis for support.
  • Care: Provide consistent and ample water, especially during fruit development. Fertilize with a balanced organic feed when flowering begins.
  • Harvest: Pick cucumbers regularly when they reach desired size to encourage more fruit.

A vibrant bell pepper plant in a wooden planter box on a sunny patio, supported by a small cage, laden with ripe red and orange peppers.

7. Peppers (Bell and Chili)

Peppers are heat-loving and productive plants that remain relatively compact, making them excellent choices for raised beds. They are less prone to disease than tomatoes and offer a long harvest season.

  • Why they are easy: Relatively compact, long harvest season, few serious pest issues.
  • Planting: Start with healthy transplants after all danger of frost has passed and soil temperatures consistently stay above 60°F (15°C).
  • Spacing: Plant 1 pepper plant per square foot, providing light staking or a small cage for support as fruits develop.
  • Care: Consistent watering and full sun. Fertilize with a balanced organic feed during flowering and fruiting.
  • Harvest: Pick peppers when they reach their desired size and color. Regular harvesting encourages more fruit production.

A vibrant, compact determinate cherry tomato plant, laden with ripe red and yellow fruits, in a terracotta pot on a sunny patio, supported by a stake.

8. Cherry Tomatoes (Determinate or Dwarf Varieties)

While many tomatoes grow quite large, determinate (bush) or specifically bred “dwarf” cherry tomato varieties are perfectly suited for raised beds. They produce a generous yield of small, sweet fruits without becoming sprawling giants.

  • Why they are easy: High yield for their size, delicious, and relatively easy to manage.
  • Planting: Plant healthy transplants after the last frost, when soil has warmed. Bury two-thirds of the stem to encourage stronger root growth.
  • Spacing: Plant 1 determinate or dwarf cherry tomato plant per 1-2 square feet, immediately installing a sturdy cage or stake for support.
  • Care: Full sun and consistent, deep watering. Fertilize with an organic tomato-specific fertilizer (higher P and K) when flowers appear and fruits set.
  • Harvest: Pick ripe cherry tomatoes regularly.

Hand with snips tending lush basil in a terracotta pot, surrounded by cilantro and parsley on a sunlit urban patio.

9. Herbs: Basil, Cilantro, Parsley

Herbs are invaluable additions to any raised bed, providing flavor for your kitchen and often attracting beneficial insects. They are generally low maintenance and thrive in well-drained soil.

  • Why they are easy: Adaptable, aromatic, and excellent for companion planting.
  • Planting: Sow seeds or plant nursery starts. Basil and cilantro prefer warm weather, while parsley tolerates cooler conditions.
  • Spacing: Plant 1-4 plants per square foot, depending on mature size.
  • Care: Regular harvesting encourages bushier growth. Keep basil pinched back to prevent flowering. Cilantro tends to bolt in hot weather, so plant in succession.
  • Harvest: Snip leaves as needed.

Here is a quick reference table for spacing and estimated time to harvest for these easy crops:

Vegetable Spacing (per sq ft) Days to Harvest (from seed) Notes for Raised Bed
Salad Greens (Lettuce, Spinach, Arugula) 9-16 plants 21-45 days (cut-and-come-again) Shallow roots, continuous harvest.
Radishes 16-25 plants 21-30 days Very fast, good for interplanting.
Bush Beans 9-12 plants 50-60 days Self-supporting, nitrogen fixer.
Carrots (Short/Round) 16 plants 60-80 days Requires loose, deep soil (6-12 inches).
Swiss Chard / Kale 1-2 plants 50-60 days (cut-and-come-again) Tolerant, long production.
Bush Cucumbers 1-2 plants 50-70 days Compact varieties need minimal support.
Peppers 1 plant 60-90 days (from transplant) Heat-loving, productive.
Cherry Tomatoes (Determinate/Dwarf) 1 plant (per 1-2 sq ft) 60-80 days (from transplant) Requires staking/caging.
Herbs (Basil, Cilantro, Parsley) 1-4 plants 30-70 days (cut-as-needed) Aromatic, good companions.

A thriving small wooden raised garden bed on a patio, showing mature lettuce next to newly sprouted spinach seedlings and mid-growth radishes.

Smart Planting: Spacing and Succession for Continuous Harvests

Maximizing yield in a small raised bed requires thoughtful planting strategies. You can grow more food in less space by optimizing plant spacing and employing succession sowing. These techniques ensure you make the most of your available area and enjoy fresh produce throughout the growing season.

Overhead view of a small wooden raised bed on a patio, showing a square foot gardening grid with varied plant densities; a hand tends plants.

Optimizing Plant Spacing

Traditional row gardening often spaces plants widely, leaving significant bare ground. In raised beds, with their excellent soil and drainage, you can plant more intensively, often using a method inspired by square foot gardening. This means you plant crops in a grid pattern rather than long rows, placing plants closer together than conventional guidelines suggest.

  • Square Foot Gardening Principles: Visualize your raised bed as a grid of 1-foot by 1-foot squares. Within each square, you plant a specific number of plants based on their mature size. For example:
    • One large plant (e.g., a determinate tomato, a small cabbage) per square.
    • Four medium plants (e.g., peppers, bush beans) per square.
    • Nine small plants (e.g., spinach, Swiss chard) per square.
    • Sixteen very small plants (e.g., radishes, carrots, onions) per square.

    This method ensures each plant receives adequate light and nutrients without wasting space. The table in the previous section provides guidance for specific crops.

  • Benefits of Intensive Spacing:
    • Increased Yield: You harvest more produce from the same footprint.
    • Weed Suppression: Plants grow to form a canopy that shades the soil, naturally reducing weed growth.
    • Reduced Water Loss: The plant canopy also helps keep the soil cooler and reduces evaporation, leading to more efficient water use.

Overhead view of three terracotta pots on a sunny patio, showing mature lettuce, young plants, and tiny seedlings, illustrating succession.

The Power of Succession Sowing

Succession sowing means planting small batches of seeds every few weeks rather than planting an entire crop at once. This strategy prevents gluts of produce and ensures a steady supply of fresh vegetables throughout the season.

  • How it Works: Instead of planting all your lettuce seeds in April, plant a small patch in April, another in mid-May, and another in early June. As the first planting matures and gets harvested, the next batch is ready to take its place.
  • Ideal Crops for Succession:
    • Lettuce and other salad greens: Plant every 2-3 weeks.
    • Radishes: Plant every 1-2 weeks.
    • Bush Beans: Plant every 3-4 weeks.
    • Cilantro: Tends to bolt in heat, so frequent, small plantings are best.
    • Carrots: Plant every 3-4 weeks for a continuous supply.
  • Benefits:
    • Continuous Harvests: Enjoy fresh produce for a longer period.
    • Reduced Waste: You harvest only what you can eat, preventing spoilage.
    • Even Distribution of Labor: Spreads out planting and harvesting tasks.

A vibrant dark wooden vertical planter on a patio, showing interplanted leaf lettuce, young tomatoes, radishes, and carrot greens in warm light.

Interplanting: Companion Planting for Space Efficiency

Interplanting involves growing different types of plants together in the same space, often taking advantage of different growth habits or beneficial interactions. This is a form of companion planting that focuses on spatial efficiency.

  • Combine Fast and Slow Growers: Plant quick-maturing crops like radishes between slower-growing plants like carrots. The radishes will be harvested before the carrots need the full space.
  • Utilize Vertical Space: Plant shallow-rooted greens beneath taller, trellised plants like bush cucumbers or determinate tomatoes. The greens receive some dappled shade during hot periods, and both plants utilize different layers of the bed.
  • Beneficial Companions:
    • Lettuce and Tomatoes: Lettuce benefits from the partial shade of taller tomato plants during summer heat.
    • Radishes and Carrots: Radishes loosen the soil, making it easier for carrots to grow.
    • Bush Beans and Corn (if space allows for dwarf corn): The beans fix nitrogen for the corn, and corn can provide a natural trellis.
    • Herbs (Basil, Marigolds) with Tomatoes/Peppers: These can deter certain pests and attract pollinators.

By implementing these smart planting techniques, you will find your small raised bed yields far more than you thought possible, providing a continuous bounty of fresh, homegrown vegetables.

Vibrant cucumber vines heavy with fruit climb a dark metal trellis attached to a small wooden raised bed on a patio, demonstrating vertical gardening.

Supporting Your Plants: Vertical Growing in Raised Beds

In small raised beds, extending your garden upwards represents a brilliant strategy for maximizing your harvest. Vertical growing systems allow you to cultivate climbing plants that would otherwise sprawl, freeing up valuable ground space for other crops. This not only increases your yield but also improves air circulation around plants, reduces disease, and makes harvesting easier.

A hand gently plucks a bright red cherry tomato from a lush, multi-tiered wooden vertical garden thriving on a small urban balcony.

Why Go Vertical?

  • Space Efficiency: The primary benefit. You grow more food in the same horizontal footprint.
  • Improved Air Circulation: Lifting plants off the ground increases airflow, which reduces humidity around foliage and helps prevent fungal diseases.
  • Easier Harvesting: Fruits and vegetables growing at eye level are much simpler to pick.
  • Cleaner Produce: Keeping fruits like cucumbers and tomatoes off the soil prevents them from rotting or getting damaged by pests.
  • Aesthetics: A well-trellised garden can look beautiful and add vertical interest to your small space.

A light wooden raised bed on a paver patio showing a staked tomato plant, a pepper plant within a wire cage, and cucumber vines climbing an A-frame tr

Choosing the Right Vertical Support

Several types of vertical supports work well in small raised beds:

  • Stakes: Simple and effective for individual plants like determinate tomatoes, peppers, or eggplants. Use sturdy wooden or metal stakes driven deep into the soil immediately after planting to avoid root damage later. Secure the plant to the stake with soft ties or twine as it grows.
  • Cages: Ideal for bushier plants that need all-around support, such as determinate tomatoes, peppers, or even compact bush cucumbers. Tomato cages come in various sizes; choose a sturdy, tall option for raised beds.
  • Trellises: Versatile structures for true climbing plants.
    • A-Frame Trellis: Consists of two hinged panels that form an “A” shape, providing support on both sides. Excellent for pole beans, cucumbers, and even small squash.
    • Netting or Mesh Trellis: Sturdy nylon netting or metal mesh stretched between posts. Provides many attachment points for climbing tendrils. Great for peas, pole beans, and vining cucumbers.
    • Obelisk or Tower Trellis: A tall, conical or square structure that offers support on all sides. Works well for pole beans, sweet peas, or even small vining gourds.
  • Arches or Pergolas (if space allows): For larger raised beds or if your garden design extends beyond the bed itself, an arch or pergola can support vigorous climbers like larger squash or certain types of grapes, creating a beautiful edible tunnel.

Close-up of pole beans climbing a dark metal obelisk trellis in a terracotta pot on a patio, with a hand guiding a tendril. A young cucumber vine is a

Crops That Love to Climb (and are easy for raised beds)

  • Pole Beans: Unlike bush beans, pole beans grow upwards, producing over a longer season. Varieties like ‘Kentucky Wonder’ or ‘Blue Lake’ are highly productive climbers.
  • Cucumbers (Vining Varieties): While bush varieties are compact, vining cucumbers, when trellised, yield more fruit and are easier to harvest. Look for slicers or pickling varieties.
  • Peas: Both shelling peas and snap/snow peas are excellent climbers, quickly attaching to trellises with their tendrils. They are cool-season crops, perfect for spring and fall.
  • Determinate Tomatoes: Even though they are “bushy,” determinate tomatoes benefit significantly from staking or caging to keep their heavy fruit off the ground and improve air circulation.
  • Small Squash or Gourds: Compact vining varieties of summer squash (like certain zucchini or pattypan) or even small winter squash can be trained up a strong trellis if given adequate support for their developing fruits.

Hands gently tying a young tomato plant to a dark wooden obelisk trellis with a soft fabric strip in a terracotta pot on a patio.

Tips for Successful Vertical Growing

  1. Install Supports Early: Place stakes, cages, or trellises at planting time. Driving them into the soil later risks damaging delicate root systems.
  2. Train Plants Gently: As climbing plants grow, gently guide their tendrils or stems onto the support. For non-climbing plants like tomatoes, use soft ties (fabric strips, velcro plant ties) to attach the main stem to the support, being careful not to constrict growth.
  3. Ensure Stability: Vertical structures, especially those supporting heavy plants, must be securely anchored. Strong winds can easily topple unstable supports, damaging your plants.
  4. Consider Sunlight: Position taller trellises on the north side of your raised bed (in the Northern Hemisphere) so they do not shade out shorter plants.

By incorporating vertical elements, you unlock the full potential of your small raised bed, transforming it into a multi-layered, highly productive garden that yields an impressive bounty of easy-to-grow vegetables.

Gloved hands mist organic pest solution onto leafy greens in a ceramic pot on a patio, demonstrating proactive care.

Keeping Pests and Problems at Bay Organically

Even the easiest vegetables sometimes encounter challenges, from nibbling insects to fungal spots. The key to maintaining a healthy raised bed garden involves proactive prevention and quick, organic responses to any issues. Embracing Integrated Pest Management (IPM) principles means focusing on prevention first, then using the least toxic controls only when necessary.

Medium, low-angle shot of healthy, well-spaced basil and leafy greens in a terracotta balcony planter, receiving targeted watering to the soil.

Proactive Prevention: Your First Line of Defense

A healthy plant grown in optimal conditions is naturally more resistant to pests and diseases. Focus on these preventative measures:

  • Healthy Soil: Nutrient-rich, well-draining soil (as discussed) fosters strong root systems and vigorous plants that can better withstand attacks.
  • Proper Spacing: Adequate spacing, even with intensive planting methods, ensures good air circulation. This helps leaves dry quickly after watering or rain, significantly reducing the likelihood of fungal diseases like powdery mildew.
  • Water Wisely: Water at the base of plants in the morning. Avoid overhead watering, which can spread fungal spores. Consistent moisture prevents plant stress, which can make plants more attractive to pests.
  • Choose Resistant Varieties: When selecting seeds or starts, look for varieties labeled “disease-resistant” or “pest-resistant” for an added layer of protection.
  • Inspect Regularly: Make it a habit to inspect your plants daily or every few days. Turn over leaves to check the undersides, where many pests hide. Early detection makes control much easier.
  • Crop Rotation: Even in a small raised bed, avoid planting the same family of plants in the exact same spot year after year. This helps break the life cycles of soil-borne pests and diseases that might accumulate.
  • Sanitation: Remove any diseased leaves, fallen fruit, or plant debris promptly. These can harbor pests or fungal spores. Dispose of diseased material away from your garden, not in your compost pile.

Close-up of a red ladybug on a green pepper plant leaf with tiny aphids, on a patio container garden.

Common Pests and Organic Solutions

If pests do appear, start with the least-toxic control methods first.

Aphids: Small, soft-bodied insects that cluster on new growth, sucking plant sap. They can cause distorted leaves and excrete sticky honeydew.

  • Control:
    • Hose Off: A strong spray of water dislodges them.
    • Hand-Picking: For small infestations.
    • Insecticidal Soap: A commercial organic solution that smothers soft-bodied insects. Ensure full coverage, especially the undersides of leaves. Repeat every 5-7 days until gone.
    • Beneficial Insects: Encourage ladybugs and lacewings, natural predators of aphids, by planting flowers like dill, cilantro, and marigolds nearby.

Slugs and Snails: Chew irregular holes in leaves, especially on seedlings. Most active at night or during damp conditions.

  • Control:
    • Hand-Picking: Go out at dusk or early morning with a flashlight and remove them.
    • Beer Traps: Bury shallow dishes filled with beer near affected plants. Slugs are attracted to the yeast, fall in, and drown.
    • Diatomaceous Earth: A fine, abrasive powder that cuts their soft bodies. Sprinkle around plants. Reapply after rain.
    • Copper Tape: Create a barrier around the bed or individual plants, as slugs dislike crossing copper.

Cabbage Worms (Cabbage Loopers): Green caterpillars that chew large holes in the leaves of brassicas (cabbage, kale, broccoli, radish). Often mistaken for the leaves themselves.

  • Control:
    • Hand-Picking: Inspect leaves daily and remove caterpillars.
    • Floating Row Covers: Fine mesh covers placed over crops prevent the white cabbage butterflies from laying eggs on the leaves. Secure the edges to prevent access.
    • Bt (Bacillus thuringiensis): An organic bacterial spray specific to caterpillars. It is non-toxic to humans, pets, and beneficial insects. Apply as soon as damage appears.

Close-up of a gardener's hands with pruning shears, snipping a lower leaf from a tomato plant in a terracotta pot on a patio.

Dealing with Fungal Diseases

Most common fungal issues, like powdery mildew or blight, thrive in humid conditions and can be minimized with good cultural practices.

  • Prevention:
    • Air Circulation: Proper spacing and pruning (e.g., lower leaves of tomatoes) improve airflow.
    • Watering: Water at the soil level, not overhead.
    • Resistant Varieties: Choose resistant varieties when possible.
  • Control:
    • Remove Affected Leaves: Prune off diseased leaves immediately to prevent spread.
    • Baking Soda Spray: A homemade solution (1 teaspoon baking soda, 1 teaspoon horticultural oil or dish soap, 1 gallon water) can help inhibit fungal growth, though it does not cure existing severe infections.
    • Organic Fungicides: Neem oil or copper-based fungicides can be used for more persistent issues, always following label instructions carefully.

By staying vigilant, observing your plants closely, and employing these organic strategies, you can keep your small raised bed thriving and productive, minimizing chemical inputs and enjoying healthy, natural harvests.

A person's hands gently harvest ripe cherry tomatoes from a potted plant on a sunlit balcony, with other vibrant container vegetables and a basket of

Harvesting Your Bounty and Extending the Season

The moment of harvest is the gardener’s greatest reward. Knowing when and how to pick your vegetables ensures the best flavor and encourages your plants to produce even more. With some strategic thinking, you can also extend your harvest season, enjoying fresh produce for longer than you might expect from a small raised bed.

Hands harvest romaine lettuce from a balcony container, with freshly pulled radishes and bush beans visible nearby on a sunny patio.

Mastering the Art of Harvesting

Proper harvesting techniques not only give you delicious produce but also promote continued plant health and yield:

  • Cut-and-Come-Again Greens: For lettuce, spinach, arugula, Swiss chard, and kale, harvest the outer, mature leaves first, leaving the inner, younger leaves to continue growing. Use clean scissors or snips. This method allows the plant to keep producing for weeks, sometimes months.
  • Radishes: Harvest when the root reaches its desired size, typically 1 inch or more in diameter. If you leave them too long, they become woody and overly spicy.
  • Bush Beans: Pick pods when they are young, tender, and snap easily. Regular picking encourages the plant to produce more flowers and beans. If you let them fully mature on the plant, production slows.
  • Carrots: Harvest when the tops of the carrot show above the soil and reach a desirable diameter (check variety descriptions). Gently loosen the soil around them before pulling to avoid breakage.
  • Cucumbers: Pick them when they reach the size appropriate for their variety. Overly large cucumbers become seedy and less flavorful. Regular picking prevents the plant from putting all its energy into just a few fruits.
  • Peppers: Harvest bell peppers when they reach full size, regardless of color, though many sweet varieties develop more sweetness as they change color (e.g., from green to red). Chili peppers are often harvested when fully colored for maximum heat.
  • Cherry Tomatoes: Pick when fruits are fully colored and feel slightly soft when gently squeezed. Handle carefully to avoid bruising. Regular harvesting helps the plant allocate energy to ripening remaining fruits.
  • Herbs (Basil, Cilantro, Parsley): Snip off leaves or sprigs as needed. For basil, pinch off flower buds as they form to encourage bushy growth and prevent the plant from going to seed, which often makes leaves bitter.

The best time to harvest most vegetables is in the early morning after the dew has dried. At this time, plants are most hydrated, resulting in crisper, more flavorful produce. Use clean, sharp tools to avoid damaging plants and ensure a clean cut.

Hands gently placing fresh leafy greens into an airtight container on a kitchen counter, with unwashed tomatoes and green beans nearby, bathed in soft

Basic Storage Tips for Freshness

Quick and proper storage preserves the quality of your fresh harvests:

  • Leafy Greens: Wash, dry thoroughly, and store in an airtight container or bag lined with a paper towel in the refrigerator. They typically last 5-7 days.
  • Beans: Store unwashed in a perforated plastic bag in the refrigerator for up to a week.
  • Cucumbers: Store in the crisper drawer of your refrigerator, unwashed, for up to a week.
  • Peppers: Store unwashed in a plastic bag in the refrigerator for 1-2 weeks.
  • Tomatoes: Store at room temperature on the counter, away from direct sunlight, for best flavor. Only refrigerate if they are very ripe and you need to extend their life by a few days, but expect a slight loss of flavor and texture.
  • Root Vegetables (Carrots, Radishes): Remove tops (which draw moisture from the roots), wash, dry, and store in a plastic bag in the refrigerator.
  • Herbs: For basil, put stems in a glass of water on the counter. For parsley and cilantro, wash, dry, and store in a plastic bag with a damp paper towel in the refrigerator.

A small wooden raised bed on a patio, half covered by a clear-lidded cold frame protecting young lettuce and spinach.

Extending Your Season in a Small Raised Bed

You can push the boundaries of your growing season in a raised bed with a few simple techniques:

  • Early Spring Planting: Raised beds warm up faster than in-ground gardens. Use this to your advantage by planting cool-season crops (like lettuce, spinach, radishes, peas) a few weeks earlier in spring.
  • Cold Frames or Row Covers: A simple cold frame (a bottomless box with a clear lid) or floating row covers (lightweight fabric draped over hoops) placed over your raised bed can protect plants from late frosts in spring and early frosts in fall. These structures trap solar heat, raising the temperature inside by several degrees.
  • Succession Planting for Fall: As summer crops fade, sow new seeds for cool-season vegetables in late summer or early fall. Crops like spinach, lettuce, kale, and radishes thrive in the cooler temperatures of autumn.
  • Overwintering (in some climates): In milder climates, some hardy greens (like kale or certain varieties of spinach) can overwinter in a protected raised bed, providing fresh harvests even in winter.

By carefully harvesting and employing season-extending tools, your small raised bed transforms into a year-round source of fresh produce, providing enjoyment and nourishment far beyond the traditional growing months.

Person sits on a patio deck, holding a gardening notebook, thoughtfully observing thriving container vegetables in soft, late-afternoon light.

Frequently Asked Questions

How deep should my raised bed be for easy vegetables?

For most easy-to-grow vegetables, a raised bed depth of 6 to 12 inches works very well. This range accommodates the root systems of crops like lettuce, spinach, radishes, bush beans, peppers, and even compact tomatoes. If you plan to grow deeper root vegetables like full-sized carrots, aim for the upper end of that range, or slightly deeper, ensuring the soil is consistently loose and free of obstructions.

Can I use regular garden soil in my raised bed?

You should not fill your raised bed with regular garden soil alone. Garden soil often compacts too easily, drains poorly in a confined space, and lacks the optimal balance of nutrients and aeration required for container or raised bed gardening. Instead, use a specialized raised bed mix composed of high-quality compost, a peat-free growing medium like coconut coir or aged pine bark, and perlite or vermiculite for aeration. This creates a fluffy, nutrient-rich environment where plant roots can thrive.

What is the best way to water a small raised bed?

The best way to water a small raised bed is deeply and less frequently. This encourages plants to develop strong, deep root systems. Aim to soak the soil to its full depth. Avoid light, frequent sprinkles, which only moisten the surface. Water at the base of your plants in the early morning to minimize evaporation and prevent fungal diseases on foliage. Consider a soaker hose or drip irrigation system for efficient, consistent moisture delivery directly to the roots.

Proactive Prevention: Your First Line of Defense

Do I need to fertilize my raised bed every year?

Yes, you need to replenish nutrients in your raised bed annually. As plants grow and produce, they consume the nutrients in the soil. Each spring, before planting, add a fresh 2-4 inch layer of high-quality compost to the top of your bed and gently work it into the existing soil. You can also apply a balanced organic granular fertilizer at planting time and provide a mid-season boost with compost tea or a liquid organic feed for heavy feeders, following product instructions.

How do I prevent weeds in a raised bed?

Preventing weeds in a raised bed begins with a quality weed barrier at the bottom (like cardboard or newspaper) and filling it with a sterile, weed-free soil mix. Once planted, apply a layer of organic mulch, such as straw or shredded leaves, to the soil surface. This suppresses weed seeds, conserves moisture, and regulates soil temperature. Additionally, practice intensive planting to create a dense canopy that shades out weeds, and be vigilant with hand-weeding any stray weeds as soon as you spot them.

Categories
Edible Gardening

Grow Herbs Indoors: Year-Round Fresh Flavors

Imagine fresh basil for your pasta in December, bright mint for a summer drink in February, or fragrant rosemary for roasted vegetables any day you choose. You can enjoy year-round fresh flavors directly from your kitchen, no matter the season or the size of your outdoor space. Growing herbs indoors offers a simple, rewarding solution for every gardener, from complete beginners to seasoned green thumbs looking for a convenient harvest.

Many people believe gardening requires a sprawling backyard, but that simply is not true. Your balcony, a sunny windowsill, or even a well-lit corner provides ample opportunity to cultivate a thriving indoor herb garden. This article empowers you to transform your indoor spaces into productive zones, ensuring you always have flavorful kitchen herbs at your fingertips. We cover everything from selecting the right plants and containers to mastering light, water, and nutrient needs, allowing you to confidently grow herbs indoors.

For research-based guidance on edible gardening, visit
Oregon State Extension — Gardening,
Washington State University Hortsense,
Texas A&M AgriLife Extension — Horticulture,
University of Illinois Extension — Gardening and
University of Minnesota Extension.

Disclaimer: This article is for informational purposes only and is not a substitute for professional advice. Consult local extension services for region-specific recommendations.

Indoor herb garden on a kitchen counter with an LED grow light illuminating potted basil, mint, and chives near a window.

Small-Space Planning for Indoor Herbs

Successful indoor herb gardening begins with thoughtful planning. Your primary consideration is sunlight, the lifeblood of nearly all plants. Most herbs, especially common kitchen herbs, thrive with at least six hours of direct sunlight daily. A south-facing window typically offers the best natural light exposure, while west or east-facing windows provide moderate light. North-facing windows rarely supply enough light for robust herb growth without supplemental lighting.

If natural light is limited, artificial grow lights become essential. You do not need expensive, elaborate setups. Simple LED grow lights, available as strips or bulbs, provide the necessary spectrum for plant growth. Position these lights approximately 6-12 inches above your plants, adjusting the height as they grow. Most herbs benefit from 12-16 hours of artificial light per day, mimicking a long summer day. Smart timers simplify this process, ensuring consistent light cycles.

Beyond light, consider temperature and humidity. Most herbs prefer temperatures between 65-75°F (18-24°C), mirroring comfortable indoor conditions. Avoid placing herbs near drafty windows, air conditioning vents, or heat registers, as extreme temperature fluctuations stress plants. Humidity is another factor. Your home’s air might be drier than what many herbs prefer, especially in winter. Grouping plants together slightly increases local humidity, as does placing pots on a pebble tray filled with water. As the water evaporates, it adds moisture to the air around your plants. Regular misting can also help, though ensure proper air circulation to prevent fungal issues.

Finally, think about accessibility. Place your herbs where you can easily reach them for watering, harvesting, and observation. A kitchen countertop, a sturdy shelf, or a dedicated plant stand works well. Ensure adequate airflow around your plants to deter pests and diseases. Crowding plants limits air circulation and light penetration, leading to weaker growth and increased susceptibility to problems. Aim for at least 2-4 inches between pots, depending on the mature size of your herbs, to allow for good air movement and light exposure.

When selecting your indoor gardening spot, assess the physical space, natural light availability, and environmental conditions. If a spot lacks sufficient natural light, commit to using supplemental grow lights. This proactive approach sets your indoor herb garden up for consistent success and bountiful harvests, ensuring your kitchen herbs flourish.

Hands inspecting drainage on an empty terracotta pot, surrounded by potting mix and various planters on a balcony table.

Choosing Your Containers and Potting Mix

Selecting the right containers and potting mix establishes a strong foundation for your indoor herbs. These choices directly impact drainage, aeration, and nutrient availability, all critical for healthy root development and vigorous plant growth.

Indoor plant shelf displaying herbs in varied pots: terracotta (basil, rosemary), ceramic (parsley), and plastic (mint), illustrating container size a

Containers: Size, Material, and Drainage

The ideal container size depends on the herb you plan to grow. As a general rule, a pot with a diameter of 6-8 inches (15-20 cm) accommodates most individual herbs like basil, mint, or parsley comfortably. Larger herbs, such as rosemary or bay laurel, benefit from pots 10-12 inches (25-30 cm) in diameter to support their more extensive root systems. While starting small is tempting, remember that herbs quickly outgrow tiny pots, leading to stunted growth and constant watering needs. Choose a pot that allows for some root expansion, minimizing the need for frequent repotting.

Container materials offer various benefits. Terracotta pots are porous, allowing air and moisture to move through their walls. This makes them excellent for herbs that prefer slightly drier conditions, such as rosemary, thyme, or oregano, as they reduce the risk of overwatering. However, terracotta dries out faster, requiring more frequent watering. Plastic pots retain moisture more effectively, which suits herbs that prefer consistently moist soil, like mint or parsley. They are also lighter and less expensive. Ceramic pots offer aesthetic appeal but are non-porous and heavy, similar to plastic in their moisture retention. Whatever material you choose, ensure the pot has drainage holes at the bottom. Without proper drainage, water collects, leading to root rot and plant death.

Self-watering planters or sub-irrigation planters (SIPs) provide a convenient option for busy gardeners. These containers feature a water reservoir at the bottom and a wicking system that draws moisture up into the soil as needed. This reduces watering frequency and provides consistent moisture, ideal for herbs like mint, chives, or parsley that do not tolerate drying out. While SIPs require an initial investment, they save time and reduce the risk of both overwatering and underwatering, making them an excellent choice for a productive indoor gardening setup.

Close-up of hands sifting rich, aerated potting mix on a light mat, with an empty terracotta herb pot nearby, under bright natural light.

Potting Mix: The Foundation of Health

The right potting mix is crucial for indoor herbs. Garden soil, which compacts easily and often harbors pests or diseases, is unsuitable for containers. Instead, use a high-quality, lightweight potting mix designed for container plants. Look for mixes that are “all-purpose” or specifically formulated for “herbs and vegetables.”

An ideal potting mix offers several key characteristics:

  • Good Drainage: It allows excess water to pass through quickly.
  • Aeration: It provides air pockets for roots to breathe.
  • Moisture Retention: It holds enough moisture to keep roots hydrated between waterings.
  • Nutrient Content: It supplies initial nutrients for plant growth.

Many conventional potting mixes contain peat moss, a non-renewable resource. For environmentally conscious gardening, seek out peat-free alternatives. These mixes often use coir (coconut fiber), compost, pine bark fines, or rice hulls as their base. Coir, in particular, offers excellent water retention and aeration properties, mimicking peat moss effectively while being more sustainable.

To enhance your potting mix, consider adding amendments:

  • Perlite or Vermiculite: A handful of either improves drainage and aeration, especially in dense mixes. Perlite brightens the mix, while vermiculite also improves water retention.
  • Compost: A small amount of well-rotted compost (about 10-20% of the total volume) enriches the mix with beneficial microbes and slow-release nutrients, reducing the need for immediate fertilization.

You can reuse potting mix, but do so carefully. After a plant finishes its cycle, remove any large root balls and allow the spent mix to dry out. While it lacks significant nutrients, you can refresh it by adding fresh compost, a slow-release organic fertilizer, and some new perlite or coir. This revitalized mix works well for less demanding plants or as a base for new seedlings, supporting your sustainable indoor gardening ideas.

A person gently checks thriving basil and rosemary in various pots by a sunlit kitchen window, a watering can nearby, embodying holistic plant care.

Essential Care: Light, Water, and Nutrients

Mastering light, water, and nutrient management forms the cornerstone of a thriving indoor herb garden. These three elements are interconnected, and understanding their rhythm ensures your kitchen herbs remain healthy and productive throughout the year.

Lush basil, mint, and oregano growing vibrantly in pots on a counter under the bright, specific glow of a full-spectrum LED grow light.

Light: The Energy Source

As previously mentioned, light is paramount. Most culinary herbs demand bright conditions. Aim for a minimum of 6 hours of direct sunlight, ideally 8-10 hours, to foster vigorous growth and strong flavor development. Without sufficient light, herbs become leggy, pale, and produce fewer, weaker leaves. This leggy growth indicates the plant is stretching to find more light, a common symptom in dim indoor environments.

If natural light falls short, invest in full-spectrum LED grow lights. These lights emit the specific wavelengths of light that plants need for photosynthesis, providing a powerful substitute for sunshine. Place your grow lights 6 to 12 inches (15-30 cm) above the foliage, adjusting the height as your herbs grow. Maintain a consistent light schedule, typically 12-16 hours per day, using a timer. This consistency prevents stress and encourages steady growth, ensuring your indoor gardening ideas translate into vibrant plants.

A person's finger checks the soil moisture in a thriving potted basil plant on a kitchen counter, ready for watering.

Water: The Balancing Act

Proper watering is perhaps the most challenging aspect of indoor plant care. Both overwatering and underwatering harm your herbs. Overwatering leads to root rot, a fungal disease that suffocates roots, while underwatering causes wilting and nutrient lockout. The key is to water thoroughly when the plant needs it, allowing the top inch or two (2.5-5 cm) of soil to dry out between waterings. Use your finger to check the soil moisture level. If it feels dry to the touch, it is time to water.

When you water, do so deeply. Apply water slowly until it begins to drain from the pot’s bottom holes. This ensures the entire root ball receives moisture. Empty any collected water from the saucer after about 15-20 minutes to prevent roots from sitting in standing water, which can lead to root rot. Wicking mats or self-watering pots, as discussed earlier, offer alternative watering methods that provide a consistent moisture supply, reducing the risk of human error.

Water quality also matters. If your tap water is heavily chlorinated, let it sit out in an open container for 24 hours before using it. This allows the chlorine to dissipate. Alternatively, use filtered water or collected rainwater. The temperature of the water is also important. Use room-temperature water rather than cold water, as cold water can shock plant roots.

Close-up of hands pouring diluted organic liquid fertilizer into a small terracotta pot containing a vibrant basil plant on a wooden surface.

Nutrients: Feeding Your Herbs

Potting mixes provide initial nutrients, but these deplete over time, especially with frequent watering. Indoor herbs, confined to containers, require supplemental feeding to sustain their growth. However, herbs do not need heavy fertilization; too much can lead to excessive leafy growth with less intense flavor. Think of it as an organic feeding cadence.

Opt for a balanced, organic liquid fertilizer or a slow-release granular organic fertilizer. A common NPK ratio for herbs is around 2-2-2 or 3-2-2, indicating a balanced supply of nitrogen (N) for foliage, phosphorus (P) for roots and flowers, and potassium (K) for overall plant health. Follow the product’s instructions for dilution and application, typically feeding every 2-4 weeks during active growth. Reduce feeding in winter or during periods of slow growth. For instance, if a fertilizer suggests feeding every two weeks, you might dilute it to half strength and apply every two weeks, or full strength every four weeks, depending on the herb’s specific needs and growth rate. Young seedlings generally do not need fertilizer until they develop a few sets of true leaves.

Compost tea or worm castings offer gentle, natural nutrient boosts. Steep a handful of worm castings in water for a day to create a nutrient-rich liquid feed, or simply top-dress your pots with a thin layer of worm castings. These organic amendments provide a slow release of nutrients and introduce beneficial microbes to the soil, supporting a healthy root environment and boosting your indoor gardening ideas.

By attentively managing light, perfecting your watering technique, and providing balanced, gentle nutrients, you create an optimal environment for your indoor herbs to flourish. Consistent care prevents common problems and ensures a steady supply of flavorful kitchen herbs, making your indoor garden a constant source of joy and culinary delight.

A close-up, low-angle shot of a hand with herb snips about to harvest leaves from a bushy basil plant on a kitchen windowsill.

Best Herbs for Indoor Success

Choosing the right herbs significantly impacts your indoor gardening success. While many herbs tolerate indoor conditions, some genuinely thrive, offering abundant harvests with minimal fuss. Focus on varieties that remain relatively compact and have lower light requirements compared to their sun-loving counterparts, or prepare to supplement with grow lights. Here is a selection of excellent choices for your indoor kitchen herb garden, along with specific tips for each:

Herb Light Needs Watering Tips for Indoor Growth
Basil High (6-8 hours direct light or grow light) Consistently moist, but not soggy Pinch off flowers to encourage leaf production. Harvest often by snipping just above a leaf node. Keep away from cold drafts. ‘Dwarf Bush’ or ‘Genovese’ varieties perform well.
Mint Moderate to High (4-6 hours direct light) Consistently moist Extremely vigorous, so grow in its own pot to prevent it from taking over. Propagate easily from cuttings. Trim regularly for bushier growth.
Chives Moderate to High (4-6 hours direct light) Consistently moist Harvest by snipping outer leaves at the base. Divide clumps every few years to rejuvenate. Tolerates cooler temperatures.
Parsley Moderate to High (4-6 hours direct light) Consistently moist ‘Curled’ and ‘Flat-leaf’ (Italian) varieties grow well. Harvest outer stems. Can be slow to germinate from seed, consider a starter plant.
Oregano High (6-8 hours direct light) Allow soil to dry slightly between waterings Prefers well-draining soil. Pinch back regularly to promote branching. Less watering needed than basil or mint.
Thyme High (6-8 hours direct light) Allow soil to dry thoroughly between waterings Loves sun and good drainage. Be careful not to overwater. Trim woody stems to encourage new growth.
Rosemary High (6-8 hours direct light) Allow soil to dry thoroughly between waterings Needs bright light and excellent drainage. Can be prone to powdery mildew in high humidity. Mist rarely. ‘Arp’ is a resilient variety.
Cilantro Moderate (4-6 hours direct light) Consistently moist Tends to “bolt” (go to seed) in warm conditions. Harvest outer leaves frequently. Plant small batches every 2-3 weeks for continuous supply (succession sowing).

Sunlit windowsill: a rosemary plant in a nursery pot, an empty terracotta pot, and delicate green sprouts emerging from a seed tray.

Starting Your Indoor Herb Garden

You can start your indoor herb garden from seeds, small nursery plants, or cuttings. Each method offers distinct advantages:

  1. Seeds: This is the most economical option and offers the widest variety. However, germination can be slow for some herbs like parsley, and requires patience. Plant seeds in a shallow tray or small pots filled with seed-starting mix. Cover lightly with soil, mist gently, and keep warm. A clear dome or plastic wrap creates a mini-greenhouse effect, maintaining humidity.
  2. Nursery Plants: Purchasing small plants from a garden center provides an instant garden. Choose healthy plants with vibrant green leaves, strong stems, and no signs of pests or disease. Repot them into slightly larger containers with fresh potting mix upon bringing them home.
  3. Cuttings: Many herbs, especially mint, basil, rosemary, and oregano, root easily from cuttings. Snip a 4-6 inch (10-15 cm) stem section from a healthy plant, just below a leaf node. Remove the lower leaves and place the cutting in a glass of water, changing the water every few days. Roots typically form within 1-3 weeks. Once roots are about an inch long, plant the cutting into soil. This is an excellent way to expand your collection or share with friends.

Regardless of your starting method, ensure you provide consistent care. The specific needs of each herb, particularly regarding light and water, dictate their success. By matching the right herb to your indoor conditions and care routine, you cultivate a thriving and flavorful grow herbs indoors experience.

Hands gently tend to lush potted basil, mint, and chives on a sun-dappled weathered patio table, showcasing a thriving small-space herb garden.

Pruning, Harvesting, and Maintaining Health

Regular pruning and harvesting are not just about collecting fresh flavors; they are crucial practices for maintaining the health, vigor, and productivity of your indoor herbs. Think of these actions as encouraging your plants to grow fuller, produce more leaves, and develop better flavor. This proactive approach supports robust kitchen herbs, transforming them from simple plants into flourishing sources of culinary delight.

A person's hands gently pinch the top growing tip of a lush green basil plant in a terracotta pot, promoting bushiness.

Pruning for Bushiness and Yield

Many herbs benefit from frequent pruning, which prevents them from becoming leggy and encourages them to branch out, resulting in a bushier, more productive plant. When you prune, you remove the growing tips of the plant, signaling it to send energy to dormant buds lower down the stem. These buds then activate, producing new stems and leaves.

Here’s how to prune effectively:

  • Pinch Back Regularly: For herbs like basil, mint, oregano, and marjoram, consistently pinch off the top 1-2 inches (2.5-5 cm) of the stem, just above a set of leaves or a leaf node. This is a primary strategy for promoting bushiness.
  • Remove Flower Buds: If your goal is leafy production, pinch off any flower buds as soon as they appear. Flowering signals the plant to shift its energy from leaf production to seed production, often resulting in diminished leaf flavor and vigor. Cilantro, for example, quickly goes to seed or “bolts” when it gets too warm or starts to flower, making its leaves bitter.
  • Trim Woody Stems: For woody herbs like rosemary, thyme, or sage, occasionally trim back older, woody stems to encourage new growth from lower down the plant. Avoid cutting into the completely woody sections, as these may not re-sprout.
  • Remove Damaged or Yellowing Leaves: Regularly inspect your plants and remove any leaves that appear yellow, spotted, or damaged. This improves air circulation and prevents potential disease spread, contributing to the overall health of your indoor gardening ideas.

A good rule of thumb is to never remove more than one-third of the plant’s foliage at any one time, allowing the plant enough leaves for photosynthesis and recovery.

Close-up of a hand using shears to snip fresh chives from a terracotta pot on a wooden patio table, surrounded by blurred herbs.

Harvesting for Continuous Flavor

Harvesting is essentially an extension of pruning. Many herbs are “cut-and-come-again” plants, meaning they produce new growth after you harvest. The more you harvest properly, the more they produce, ensuring a continuous supply of fresh kitchen herbs.

Specific harvesting techniques:

  • Basil: Snip stems just above a pair of leaves. This encourages two new stems to grow from that point, making the plant bushier.
  • Mint and Parsley: Harvest outer stems first, close to the base of the plant. This allows the inner, younger leaves to continue growing.
  • Chives: Snip off the outer blades about an inch (2.5 cm) above the soil line. They regrow quickly.
  • Oregano, Thyme, Rosemary, Sage: Snip off leafy stems as needed. For larger harvests, take 4-6 inch (10-15 cm) sections of the stem.
  • Cilantro: Harvest outer leaves as needed. For larger harvests, cut about one-third of the plant, leaving the center to regrow. Consider succession sowing for cilantro, planting small batches every couple of weeks to ensure a steady supply before older plants bolt.

Harvesting in the morning, after the dew has dried but before the sun is too strong, often yields the most aromatic leaves. Handle harvested herbs gently to prevent bruising.

Close-up of hands gently inspecting the underside of a basil leaf in a terracotta pot for early signs of pests.

Pest Prevention and Least-Toxic Controls

Even indoors, pests can sometimes find their way to your herbs. The best defense is prevention and early detection, an integrated pest management (IPM) approach. Regularly inspect your plants, especially the undersides of leaves, for any signs of trouble.

Common indoor herb pests include:

  • Aphids: Small, soft-bodied insects often found on new growth.
  • Spider Mites: Tiny pests that create fine webbing, usually on the undersides of leaves, causing yellow stippling.
  • Fungus Gnats: Small, dark flies often seen flying around the soil, indicating overly wet conditions.
  • Whiteflies: Tiny, white, winged insects that fly up when disturbed.

Strategies for prevention and control:

  • Inspect New Plants: Before bringing any new plant into your home, thoroughly inspect it for pests. Isolate new plants for a week or two to ensure no hidden hitchhikers appear.
  • Good Airflow: Ensure adequate spacing between plants and good air circulation to deter fungal diseases and some pests.
  • Proper Watering: Avoid overwatering. Fungus gnats, in particular, thrive in consistently wet soil surfaces.
  • Manual Removal: For small infestations, simply pick off larger pests or blast smaller ones (like aphids) off with a strong stream of water from your kitchen sprayer.
  • Insecticidal Soap: A readily available, least-toxic option for many soft-bodied pests. Mix according to package directions and spray all affected plant surfaces, including undersides of leaves. Repeat every 5-7 days until the infestation clears. Always test a small area first to ensure your herb tolerates the spray.
  • Neem Oil: An organic pesticide and fungicide that disrupts pest life cycles. Use as a preventative or for active infestations, following product instructions carefully.
  • Sticky Traps: Yellow sticky traps effectively catch adult fungus gnats, whiteflies, and thrips, helping you monitor and reduce populations.

By implementing consistent pruning, harvesting, and proactive pest management, you ensure your indoor herbs remain vigorous, healthy, and ready to contribute their fresh flavors to your culinary creations.

A person intently examines a slightly yellowing basil plant in a pot on a windowsill, troubleshooting its health amidst other indoor herbs.

Troubleshooting Common Indoor Herb Issues

Even the most diligent indoor gardeners encounter issues from time to time. Recognizing the signs of common problems and understanding their causes helps you respond quickly and keep your kitchen herbs flourishing. Most issues stem from imbalances in light, water, nutrients, or the environment.

A leggy basil plant in a terracotta pot on a windowsill, with pale, thin stems stretching and sparse leaves.

Leggy, Stretched Growth

If your herbs appear tall, spindly, and pale with widely spaced leaves, they are “leggy.” This is a clear indicator of insufficient light. Plants stretch and reach for any available light source, elongating their stems in the process. This growth is weak and unproductive, leading to sparse foliage and diminished flavor.

  • Solution: Move your herbs to a brighter location, ideally a south-facing window with at least 6-8 hours of direct light. If natural light is limited, invest in a full-spectrum LED grow light and provide 12-16 hours of supplemental light daily. Prune back the leggy growth to encourage bushier, stronger new growth.

A hand gently tilts a basil plant with yellow leaves in a terracotta pot on a sunny balcony, inspecting its overflowing drainage saucer.

Yellowing Leaves

Yellow leaves indicate various issues, requiring careful observation to diagnose the root cause:

  • Overwatering: This is the most common cause. Constantly wet soil deprives roots of oxygen, leading to root rot. Leaves turn yellow, often starting at the bottom, and may feel soft or mushy.
    • Solution: Allow the top 1-2 inches (2.5-5 cm) of soil to dry out between waterings. Ensure your pots have drainage holes and empty excess water from saucers. Repotting into fresh, well-draining soil and a clean pot can sometimes save an overwatered plant.
  • Underwatering: While less common for yellowing, extreme underwatering causes leaves to first wilt, then crisp and turn yellow or brown.
    • Solution: Water thoroughly until water drains from the bottom. Establish a consistent watering schedule based on soil moisture, not just calendar days.
  • Nutrient Deficiency: A lack of essential nutrients, particularly nitrogen, also causes leaves to yellow, typically older leaves first.
    • Solution: Begin a regular feeding schedule with a balanced organic liquid fertilizer, as described in the “Essential Care” section. Ensure proper pH in your soil, as extreme pH levels can lock out nutrient availability.
  • Lack of Light: As with leggy growth, inadequate light can cause lower leaves to yellow and drop as the plant prioritizes energy for newer growth.
    • Solution: Increase light exposure as described above.

A basil plant with dramatically drooping, wilting leaves in a terracotta pot with dry, cracked soil, as water from a matte black watering can begins t

Wilting or Drooping Leaves

Wilting typically points to issues with water uptake or root health:

  • Underwatering: The most common reason for wilting. The plant lacks sufficient water pressure in its cells.
    • Solution: Water immediately and thoroughly. The plant should perk up within a few hours.
  • Overwatering/Root Rot: Ironically, overwatering can also cause wilting. Damaged roots cannot absorb water efficiently, mimicking underwatering symptoms. The key difference is that the soil remains wet.
    • Solution: If the soil is wet and the plant is wilting, immediately stop watering. Assess root health by gently pulling the plant from its pot; healthy roots are white and firm, while rotted roots are brown and mushy. If root rot is extensive, the plant may not recover.
  • Temperature Stress: Extreme heat or cold drafts can cause wilting.
    • Solution: Move plants away from vents, drafty windows, or heat sources. Maintain consistent room temperatures.

A basil plant with crispy brown leaf edges on a sunlit windowsill, beside a pebble tray with other herbs, illustrating solutions for low humidity.

Brown or Crispy Leaf Edges

This symptom often suggests low humidity or inconsistent watering:

  • Low Humidity: Indoor air, especially in winter with heating, is often very dry.
    • Solution: Group plants together, use a pebble tray, or consider a small room humidifier. Misting helps temporarily but does not significantly increase ambient humidity.
  • Underwatering: If the soil repeatedly dries out completely, leaf edges turn brown and crispy.
    • Solution: Establish a more consistent watering routine, ensuring the plant receives adequate moisture before it becomes severely stressed.

Person closely examining a basil plant leaf for spider mite webbing on a sunny windowsill, with a spray bottle nearby.

Small Bugs or Webbing on Leaves

Pests are an unfortunate reality, but manageable:

  • Spider Mites: Fine webbing and tiny yellow dots on leaves.
    • Solution: Isolate the plant. Use a strong spray of water to dislodge mites. Apply insecticidal soap or neem oil every 5-7 days for several weeks, ensuring complete coverage. Increase humidity around the plant if possible, as spider mites thrive in dry conditions.
  • Aphids: Clustered on new growth, often green or black.
    • Solution: Wipe them off with a damp cloth or blast with water. Apply insecticidal soap.
  • Fungus Gnats: Small, flying insects around the soil, indicating overwatering.
    • Solution: Allow the top inch of soil to dry out between waterings. Yellow sticky traps catch adults. For severe infestations, consider beneficial nematodes or a soil drench with diluted hydrogen peroxide.

Diligent observation remains your best tool for identifying and addressing issues promptly. Regularly checking your plants for changes in appearance or the presence of pests allows you to intervene early, preventing minor problems from escalating into serious threats to your indoor herb garden. Through consistent monitoring and appropriate adjustments, you maintain healthy, productive kitchen herbs, ensuring a continuous supply of fresh flavor.

Person's hands planting a herb cutting on a sun-drenched table, surrounded by new seed packets, a vertical planter, and various herb pots.

Expanding Your Indoor Herb Garden

Once you master the basics of growing your initial batch of kitchen herbs, you naturally look for ways to expand your green sanctuary. Expanding your indoor herb garden means exploring new varieties, propagating existing plants, and implementing smart strategies like succession sowing to ensure a continuous, diverse harvest. These indoor gardening ideas make your space more productive and rewarding.

Close-up of herb cuttings like basil, mint, and lemon balm rooting in small glass jars on a sunny windowsill, showing visible white roots.

Propagating Your Favorite Herbs

Propagation, creating new plants from existing ones, is a cost-effective and satisfying way to expand your collection. Many popular herbs root readily from cuttings, offering a simple method to multiply your favorite varieties or replace aging plants.

  • Softwood Cuttings: Herbs like basil, mint, oregano, and lemon balm easily root in water. Take a 4-6 inch (10-15 cm) cutting from a healthy, non-flowering stem. Remove leaves from the bottom 2 inches (5 cm) and place the cutting in a glass of water, ensuring a leaf node is submerged. Change the water every few days. Roots typically appear in 1-3 weeks. Once roots are about an inch long, transplant the cutting into a small pot with fresh potting mix.
  • Semi-hardwood Cuttings: Woody herbs like rosemary, thyme, and sage also root from cuttings, though often more slowly and sometimes benefit from rooting hormone. Take a 4-6 inch cutting from a mature stem, removing the lower leaves. Dip the cut end in rooting hormone powder (optional, but helpful) and plant it in a moist, well-draining seed-starting mix. Cover the pot with a plastic bag or dome to create a humid environment, checking moisture regularly. Roots can take several weeks to a few months to form.

Propagating is an excellent way to keep your indoor garden vibrant, ensuring you always have young, vigorous plants ready to produce.

Four small pots of cilantro at various growth stages on a sunny urban balcony, with a hand harvesting mature leaves.

Succession Sowing for Continuous Harvests

Succession sowing means planting small batches of the same crop every couple of weeks. This technique ensures a continuous harvest rather than one large flush followed by a gap. It is particularly useful for annual herbs with a shorter lifespan or a tendency to “bolt” (go to seed) quickly, like cilantro and dill.

  • Cilantro and Dill: Plant a small pot of seeds every 2-3 weeks. As one batch matures and starts to flower, another younger batch is ready for harvest. This provides a steady supply of fresh leaves.
  • Lettuce and other greens: While not herbs, this technique is great for salad greens too.

For perennial herbs, like chives or mint, succession sowing is less critical, but you can still propagate new plants to replace older, less productive ones. This strategic planting ensures your grow herbs indoors efforts consistently yield fresh ingredients.

A gentle hand touches Lemon Verbena leaves on a tiered plant stand featuring diverse potted herbs like Stevia, Bay Laurel, and Lovage in soft light.

Trying New Varieties and Less Common Herbs

Do not limit yourself to the usual suspects. Explore a wider range of herbs to add diversity to your kitchen and your indoor garden:

  • Lemon Verbena: Offers a delightful citrus scent and flavor, perfect for teas or desserts. It needs bright light and good drainage.
  • Stevia: A natural sweetener. It requires ample light and consistent moisture.
  • Bay Laurel: A slow-growing shrub that thrives indoors with bright light. Its leaves are essential for many savory dishes.
  • Lovage: Tastes like a stronger celery. It can grow quite large but tolerates pruning.
  • Scented Geraniums: While not culinary herbs in the traditional sense, their leaves release various fragrances (rose, lemon, peppermint) and some varieties are edible, making unique teas or garnishes.

Experimenting with different herbs keeps your indoor gardening journey exciting and continually expands your culinary repertoire. Always research the specific light, water, and soil needs of any new herb before bringing it into your home, ensuring it matches your environment and care capabilities. This proactive approach minimizes disappointment and maximizes the success of your new indoor gardening ideas.

Close-up of hands gently inspecting vibrant rosemary in a terracotta pot on a plant stand, reflecting successful indoor herb cultivation.

Frequently Asked Questions

How often should I water my indoor herbs?

Watering frequency varies based on the herb, pot size, temperature, and humidity. A reliable method is to check the soil moisture. Stick your finger about 1-2 inches (2.5-5 cm) into the soil. If it feels dry, it is time to water thoroughly until water drains from the bottom of the pot. Ensure you empty any excess water from the saucer to prevent root rot. Some herbs, like mint and parsley, prefer consistently moist soil, while others, like rosemary and thyme, prefer the soil to dry out more between waterings.

Wilting or Drooping Leaves

Do I need special grow lights for my herbs?

If you have a very sunny south-facing window that provides at least 6-8 hours of direct sunlight daily, you might not need supplemental grow lights for all herbs. However, for most indoor settings, especially during shorter winter days or in less ideal window exposures, full-spectrum LED grow lights are highly beneficial. They ensure your herbs receive the necessary light spectrum and intensity to grow vigorously, prevent leggy growth, and develop robust flavor. Position lights 6-12 inches (15-30 cm) above plants for 12-16 hours per day.

Brown or Crispy Leaf Edges

Why are my indoor herbs getting leggy and thin?

Leggy, stretched, and thin growth indicates that your herbs are not receiving enough light. Plants instinctively “reach” for light when it is insufficient, causing stems to elongate and leaves to become sparse. To fix this, move your herbs to a brighter location, such as a south-facing window, or provide supplemental light with a full-spectrum grow light. Prune back the leggy growth to encourage new, bushier development from the base. Rotating your plants regularly also helps ensure all sides receive adequate light.

Can I use garden soil for my indoor herb pots?

No, you should not use garden soil for indoor herb pots. Garden soil is dense, heavy, and compacts easily in containers, which prevents proper drainage and aeration. This leads to root suffocation and root rot. Additionally, garden soil can contain weed seeds, pests, and diseases that you do not want to introduce into your home. Always use a high-quality, lightweight potting mix specifically formulated for container plants, ideally a peat-free option for sustainability, to ensure good drainage, aeration, and a healthy growing environment for your indoor gardening ideas.

How often should I fertilize my indoor herbs?

Indoor herbs benefit from regular but light fertilization, as the nutrients in potting mix deplete over time. Use a balanced, organic liquid fertilizer (e.g., NPK 2-2-2 or 3-2-2) diluted to half strength, and apply every 2-4 weeks during the active growing season (spring and summer). Reduce or stop fertilizing in fall and winter when plant growth naturally slows. Over-fertilization can harm plants and reduce the flavor intensity of herbs, so always err on the side of caution and follow product instructions carefully. Organic compost tea or a thin layer of worm castings can also provide gentle, slow-release nutrients.