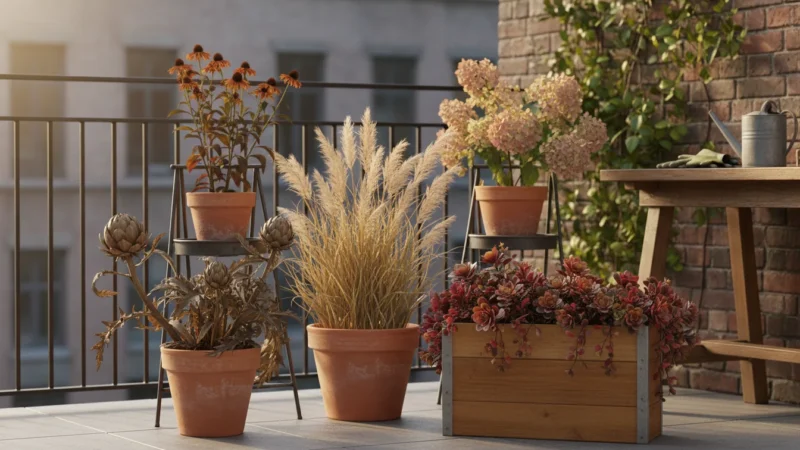
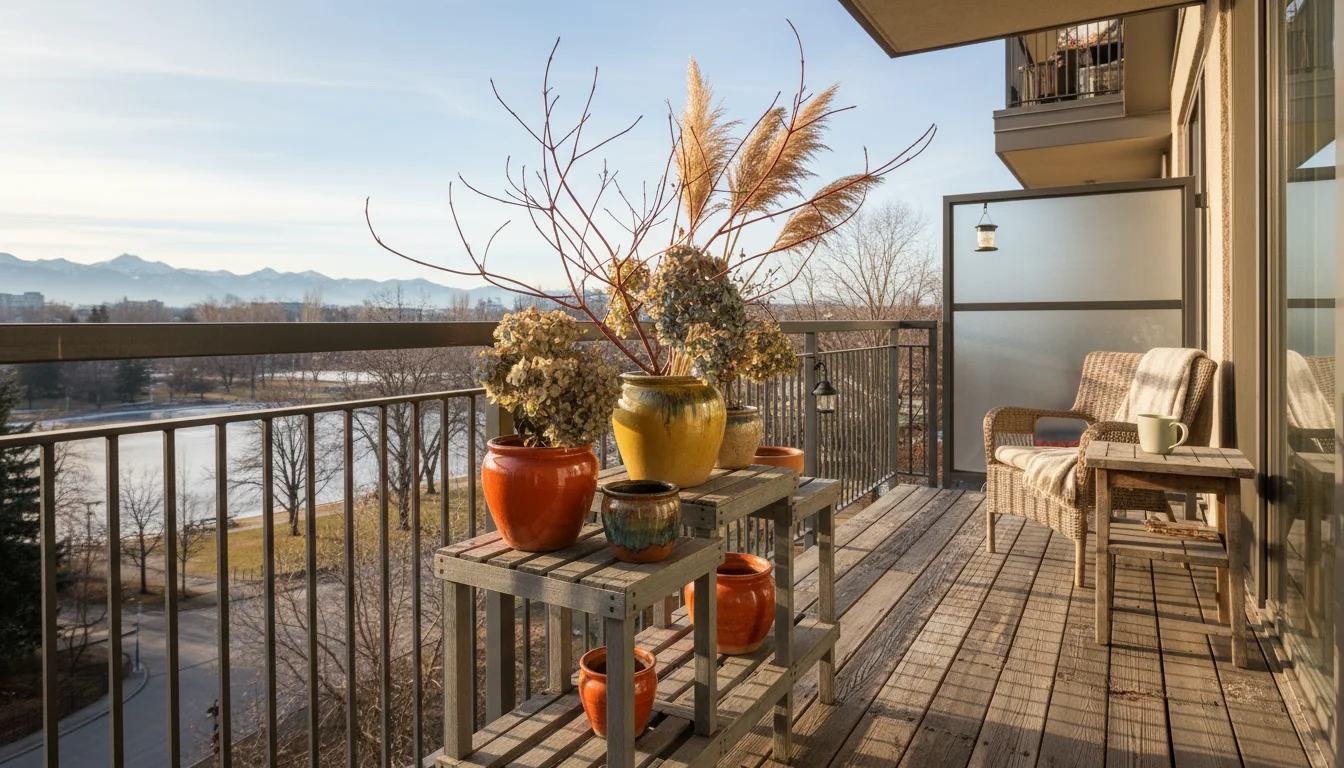
Categories
Garden Design & Ideas

From Pot to Porch: DIY Fall Decor Using Cuttings and Seed Heads from Your Container Garden

As summer’s vibrant display gently fades, your container garden offers a hidden treasure trove for autumn. You can transform the very plants you nurtured all season into stunning, unique fall decorations. This guide helps you craft beautiful, sustainable decor from your balcony, patio, or small yard, bringing the warm hues and textures of the season right to your doorstep. Forget store-bought plastics and embrace the natural bounty your garden provides. You will discover how simple it is to create eye-catching pieces that reflect your personal style and commitment to an eco-friendly home.

Why Your Garden Holds Fall Decor Gold

Your container garden, regardless of its size, provides an incredible resource for creating natural fall decorations. This approach offers numerous benefits beyond simple aesthetics. You engage in truly sustainable gardening practices, reducing waste by repurposing what you have grown. Instead of purchasing mass-produced decor that often involves plastics and extensive shipping, you utilize local, renewable materials. This commitment to sustainability impacts your carbon footprint positively, aligning with an environmentally conscious lifestyle.

Moreover, crafting with your own garden clippings results in truly unique pieces. Your decor will carry a personal touch and tell a story, reflecting the plants you diligently cared for throughout the growing season. This personal connection makes your fall arrangements more meaningful than anything you could buy. You discover the beauty in the often-overlooked spent blooms, seed heads, and foliage, appreciating the full life cycle of your plants.

Financially, creating your own decor offers significant savings. Fall decorations can quickly become an expensive seasonal expense, especially when you aim for a cohesive look across your porch or patio. By using what you already have, you drastically cut down on costs, allowing you to allocate your gardening budget to other areas, such as winter protection for your containers or seeds for next spring. This economic advantage makes beautiful fall decor accessible to everyone, regardless of budget constraints.

Finally, engaging in garden crafts provides a wonderful creative outlet. The process of designing and assembling your decor can be meditative and immensely satisfying. You work with your hands, connecting with nature and expressing your artistic side. This is more than just decorating; it is an extension of your gardening passion, a way to celebrate the changing seasons and the fruits of your labor.

Prime Candidates for Fall Decor Harvesting

Many common container garden plants transition beautifully into dried decor elements. You likely have several excellent candidates already thriving on your porch or balcony. Knowing which plants offer the best textures, shapes, and durability for drying is key to successful DIY fall decor.

  • Sedum varieties: Particularly ‘Autumn Joy’ or similar upright sedums, develop sturdy flower heads that dry exceptionally well, holding their shape and a lovely muted color. Their robust structure makes them ideal for wreaths and centerpieces.
  • Ornamental Grasses: Many varieties, like Fountain Grass (Pennisetum) or Blue Fescue (Festuca glauca), produce elegant plumes and seed heads that add wonderful texture and movement. Their feathery or architectural forms are perfect for adding height and an airy feel to arrangements.
  • Herbs: Lavender, rosemary, and even basil can dry beautifully. Lavender retains its color and fragrance, while rosemary provides structural, needle-like foliage. Dried herbs contribute both visual interest and a subtle, natural aroma to your decor.
  • Spent Annuals with interesting seed heads: Plants like Marigolds, Zinnias, and Coneflowers (Echinacea) leave behind intriguing seed pods or dried flower structures that add character. Even if their vibrant colors have faded, their skeletal forms bring a rustic charm.
  • Hydrangea Blooms: If you have hydrangeas in containers, their large, papery flower heads dry magnificently, often retaining a faded, antique hue that is perfect for fall. They provide significant visual weight and a classic autumnal feel.
  • Strawflowers (Bracteantha): These are renowned for their ability to dry perfectly, holding their color and papery texture indefinitely. While you might grow them specifically for drying, any you have in your containers are excellent for harvesting.
  • Love-in-a-Mist (Nigella): Its unique balloon-like seed pods are highly decorative and dry wonderfully, adding an interesting, whimsical element to any arrangement.
  • Celosia: The feathery or cockscomb varieties dry well, maintaining their unique shapes and often vibrant colors, providing bold texture.
  • Dusty Miller: While primarily grown for its silvery foliage, its velvety texture holds up well when dried and provides a fantastic neutral base or accent.

When selecting plants, consider not only their appearance but also their structural integrity once dried. Sturdier stems and less fleshy leaves tend to fare better. You will find that experimenting with different plants from your garden helps you discover new favorites for your natural fall decorations.

Mastering the Harvest: Responsible Cutting and Drying

Harvesting your plants for decor requires a thoughtful approach to ensure both the beauty of your clippings and the health of your container garden. You want to make cuts that benefit the plant, perhaps encouraging a final flush of growth or simply cleaning up spent material, while also providing you with ideal crafting components.

When to Harvest

The best time to harvest most plant material for drying is on a dry day, preferably in the late morning after any dew has evaporated but before the intense midday sun. Moisture on the plants can lead to mold during the drying process, compromising your decor materials.

For flowers and foliage, aim to cut them when they are at their peak or just past their prime but still hold their shape and color well. For seed heads, wait until they are fully mature and dry on the plant. This often means the seed pods have hardened and possibly begun to change color, indicating the seeds inside are fully developed. This is particularly important for `using dried seed heads for decoration` as it ensures they hold their structure.

How to Harvest

You need sharp, clean pruning shears or scissors. Dull tools can crush stems, making it harder for water to escape during drying or causing damage to the mother plant. Make clean cuts.

  1. Choose Wisely: Select stems that are healthy and free from pests or diseases. Look for interesting shapes, colors, and textures. You might also want to select stems that are a bit longer than you think you need; you can always trim them down later.
  2. Cut Strategically: When cutting stems from your plants, make your cuts just above a leaf node or a branch junction. This encourages new growth on the plant, maintains its natural shape, and prevents unsightly stubs. Never remove more than about one-third of the plant’s total foliage at one time, especially from perennial plants, to avoid stressing it. For annuals nearing the end of their life cycle, you can be more generous.
  3. Remove Excess Foliage: Once you have your cuttings, strip off any leaves from the lower portions of the stems. These leaves can trap moisture and contribute to mold, hindering the drying process. They also are often not desirable in dried arrangements.

Drying Your Harvest

Air drying is the simplest and most effective method for most garden materials. It preserves the natural look and feel of the plant, ideal for `natural fall decorations`.

  1. Bundle and Hang: Gather small bunches of 3-5 stems. Secure them tightly at the base with a rubber band or twine. Rubber bands are excellent because as the stems shrink during drying, the band contracts, keeping the bundle secure.
  2. Find the Right Spot: Hang your bundles upside down in a cool, dark, dry, and well-ventilated area. An attic, closet, or even a corner of a garage works well. Avoid direct sunlight, which can fade colors, and damp areas, which can cause mold. Good air circulation is crucial.
  3. Give Them Space: Ensure there is enough space between each bundle so air can circulate freely around them. Overcrowding inhibits proper drying and can lead to mold.
  4. Monitor and Wait: Drying times vary depending on the plant material and humidity levels, typically ranging from two weeks to a month. You know they are fully dry when the stems snap cleanly, and the flowers or seed heads feel papery and rigid.

Once dried, your garden treasures are ready to become components of beautiful `diy fall decor`. Store any excess dried materials in open containers or boxes in a dry, dark place until you are ready to use them.

Essential Tools for Your Fall Crafting Station

Setting up a basic crafting station with the right tools makes all your fall decor projects smoother and more enjoyable. You do not need an extensive collection of specialized equipment; a few key items will suffice for most `garden crafts` and natural arrangements.

  • Sharp Pruning Shears or Floral Snips: Crucial for clean cuts when harvesting and shaping your dried materials. A good pair prevents crushing stems and makes working with brittle dried items easier.
  • Floral Wire (various gauges): This is your primary structural tool. A 22-gauge wire is versatile for wrapping stems onto wreath forms, while a heavier 18-gauge might be useful for reinforcing larger elements. Green wire blends seamlessly with natural materials.
  • Floral Tape: A stretchy, adhesive tape that adheres to itself. It is invaluable for discreetly binding stems together, particularly when you want to hide the wire.
  • Hot Glue Gun and Glue Sticks: For securing delicate elements, attaching materials to non-flexible surfaces, or providing extra reinforcement where wire might not be enough. Use low-temperature settings for more delicate dried items to avoid scorching.
  • Crafting Mat or Old Newspaper: Protect your work surface from glue drips, plant debris, and wire scratches.
  • Gloves: Protect your hands from sap, thorns, or rough plant textures, especially when working with many clippings.
  • Twine or Jute String: For a rustic look, use natural twine to tie bundles, create hangers, or even wrap around elements. It is also useful for the initial bundling of materials for drying.
  • Wire Cutters: Essential for cleanly cutting floral wire to the desired lengths. Do not use your good pruning shears for wire, as it will dull them quickly.
  • Wreath Forms (optional): Grapevine, wire, or foam forms provide the base for your wreaths. Grapevine forms offer a rustic, natural aesthetic that complements garden materials beautifully.
  • Small Containers/Vases: For your `fall centerpiece ideas from my balcony garden`, have various sizes and shapes of containers ready. Clear glass, ceramic, or even repurposed tin cans can work wonderfully.

Having these tools organized and within reach transforms your crafting experience. You move efficiently from concept to creation, focusing on the artistry of your `natural fall decorations` rather than searching for the right implement.

Project 1: Charming Mini-Wreaths from Garden Clippings

Creating a mini-wreath is a fantastic way to utilize your garden clippings, resulting in adorable, personalized fall decor that is perfect for small spaces, doors, or even as part of a larger display. This project addresses `how to make a wreath from garden clippings` directly.

Materials You Will Need:

  • Dried garden clippings (sedum, ornamental grass plumes, small hydrangea heads, lavender stems, dusty miller, etc.)
  • Small grapevine wreath form (4-8 inches in diameter) or a heavy gauge wire bent into a circle
  • Floral wire (22-gauge, green)
  • Wire cutters
  • Floral snips or sharp scissors
  • Hot glue gun and glue sticks (optional, for extra security)
  • Twine or ribbon for hanging

Step-by-Step Instructions:

  1. Prepare Your Materials: Gather your dried clippings. Trim them into smaller, manageable pieces, generally 3-6 inches long. Separate them by type so you can easily access different textures and colors as you work.
  2. Attach Your First Layer (Base): Take a small bundle of your sturdiest material, such as sedum or dried herbs, and place it on the wreath form. Secure it by wrapping floral wire tightly around the stems and the wreath form a few times. Do not cut the wire yet; you will use a continuous piece of wire for the entire wreath.
  3. Layering and Overlapping: Take another small bundle of clippings. Place it slightly overlapping the first bundle, covering the visible wire. Secure this new bundle by wrapping the continuous floral wire around its stems and the wreath form. You will work in one direction around the wreath, ensuring each new bundle covers the stems and wire of the previous one. This creates a seamless, full look.
  4. Incorporate Variety: As you work your way around, incorporate different textures and colors. Add a few sprigs of ornamental grass for airiness, a small dried hydrangea bloom for fullness, or some lavender for a touch of fragrance and color. Distribute your materials evenly to achieve balance.
  5. Completing the Circle: When you are about ¾ of the way around the wreath, carefully lift the first few bundles you attached. Tuck the stems of your final bundles underneath these initial pieces. This hides the last wire wraps and creates a continuous circle. Once the final bundles are secured, cut the floral wire, leaving a small tail. Tuck this tail securely into the back of the wreath or twist it around existing wire to hide it.
  6. Refine and Secure (Optional): Gently fluff your wreath. Use your floral snips to trim any unruly pieces or reshape the wreath as needed. If any small, delicate pieces seem loose, use a tiny dot of hot glue to secure them in place on the wreath form or to other stems.
  7. Add a Hanger: Loop a piece of twine or ribbon through the top of your wreath and tie it securely. Your beautiful, handmade mini-wreath is now ready to adorn your door, wall, or a special spot on your porch.

This project allows immense creativity. Experiment with different plant combinations and sizes of wreaths. You will find that these `garden crafts` add a charming, rustic touch to any small space.

Project 2: Elegant Dried Seed Head Centerpieces

Your container garden’s dried seed heads offer an architectural beauty perfect for creating sophisticated fall centerpiece ideas from my balcony garden. These arrangements celebrate the season’s quiet elegance and bring a natural, sculptural element to your table or patio. The key to a stunning centerpiece lies in thoughtful selection and arrangement, emphasizing varying heights, textures, and forms.

Materials You Will Need:

  • Assorted dried seed heads (nigella, ornamental grass plumes, poppy pods, dried allium, spent coneflower heads, etc.)
  • Dried foliage (e.g., dusty miller, dried fern fronds, eucalyptus if available from another source)
  • Dried flower clippings (sedum, small hydrangea blooms, strawflowers)
  • A vase or container (ceramic, glass, or even a repurposed jar)
  • Floral foam (dry foam, specifically for dried arrangements) or crumpled chicken wire (for a sustainable alternative)
  • Floral snips or sharp scissors
  • Floral wire (22-gauge, optional, for reinforcing weak stems)

Step-by-Step Instructions:

  1. Prepare Your Container: If using floral foam, cut it to fit snugly into your vase. Ensure it is secure and does not wobble. If using crumpled chicken wire, form it into a loose ball that fits inside your container; this creates a grid to hold stems in place.
  2. Establish Your Foundation: Begin by inserting your tallest and most prominent seed heads or dried foliage into the center of the foam/wire. These establish the height and overall shape of your arrangement. Consider an asymmetrical design for more visual interest, with one side slightly taller than the other.
  3. Build Your Outline: Next, insert medium-height materials around your central pieces, extending outwards to define the width and depth of your centerpiece. Use longer, graceful elements like ornamental grass plumes here to create a natural flow. Think about the overall silhouette you want to achieve.
  4. Add Volume and Texture: Start filling in the gaps with your bulkier dried flowers or seed heads, such as sedum or hydrangea blooms. These add volume and help to connect the taller and shorter elements. Vary the textures; combine fluffy grass plumes with rigid seed pods and flat flower heads. This creates visual interest and depth, which is vital when `using dried seed heads for decoration`.
  5. Incorporate Detail and Contrast: Introduce smaller, more delicate seed heads or contrasting foliage. Perhaps a few small poppy pods or some dried lavender. Place these at varying depths within the arrangement to draw the eye around the piece. Consider contrasting colors, like silvery dusty miller against darker seed heads, for a dynamic effect.
  6. Refine and Balance: Step back and observe your arrangement from all angles. Adjust any stems that seem out of place. Ensure there is a sense of balance, even if it is an asymmetrical balance. Trim stems as needed to achieve desired heights. If a stem is too short, you can wire it to a longer piece of floral wire to extend its reach.
  7. Final Touches: Check that no floral foam or chicken wire is visible. You can cover any exposed areas with smaller clippings or preserved moss if desired.

These elegant centerpieces transform `using dried seed heads for decoration` into an art form. They bring a sophisticated, natural touch to any autumn gathering or simply enhance your living space with the beauty of your garden’s enduring charm. Experiment with different containers and combinations to find your perfect `fall centerpiece ideas from my balcony garden`.

Project 3: Creating Natural Garlands and Swags

Garlands and swags provide a wonderful way to drape natural beauty across a railing, mantel, or entryway, making them ideal `diy fall decor` elements for small spaces like balconies and porches. They offer a fluid, flowing aesthetic that can soften architectural lines and introduce organic charm. While garlands are continuous, swags are typically shorter, decorative bundles. Both methods effectively utilize your container garden clippings.

Materials You Will Need:

  • A selection of dried garden clippings (long stems of ornamental grass, flexible branches of herbs, sedum, small spent annuals)
  • Floral wire (22-gauge, green)
  • Floral tape (green, optional for a cleaner finish)
  • Wire cutters
  • Floral snips or sharp scissors
  • Twine or strong string (for the garland base)

Instructions for a Garland:

  1. Prepare Your Base: Cut a length of sturdy twine or string to your desired garland length, adding an extra foot for tying and securing. This forms the spine of your garland.
  2. Create Small Bundles: Group your dried clippings into small, attractive bundles. Each bundle should have a mix of textures and lengths. For example, a few stems of ornamental grass, a sedum head, and a sprig of dried lavender. Ensure the stems are at least 4-6 inches long.
  3. Attach the First Bundle: Lay your first bundle on top of one end of your twine base, with the stems facing away from the starting point. Using floral wire, tightly wrap the stems of the bundle to the twine. Do not cut the floral wire; you will use it continuously.
  4. Layer and Overlap: Take your second bundle and place it just below the first, overlapping the stems and the floral wire used to secure the previous bundle. Secure this bundle to the twine with your continuous floral wire, wrapping tightly.
  5. Continue the Pattern: Repeat this layering process, always overlapping to cover the stems and wire of the previous bundle. Work your way down the length of the twine, ensuring a consistent density and flow. Periodically step back to check for evenness and to ensure the `natural fall decorations` are balanced.
  6. Finish the Garland: When you reach the desired length, make sure your last bundle covers the stems of the previous one. Secure the floral wire tightly around the final stems and twine, then cut the wire, leaving a small tail to tuck in securely.
  7. Fluff and Hang: Gently fluff the garland, adjusting any pieces for a fuller look. Use the extra length of twine at the ends to tie your garland to a railing, banister, or hooks on your porch.

Instructions for a Swag:

  1. Gather Your Materials: Select a more concentrated collection of dried clippings. Think about a focal point for your swag, such as a large hydrangea head or a prominent seed pod cluster.
  2. Form the Base Bundle: Take your longest, sturdiest pieces and arrange them into the desired shape of your swag. Typically, swags are wider at the top and taper slightly at the bottom, or they can be symmetrical.
  3. Layer and Wire: Begin layering smaller clippings, working outwards from your central pieces. Use floral wire to tightly bind the stems together at the top, creating a secure “neck” for your swag. You can use floral tape over the wire for a neater finish, wrapping it tightly around the bound stems.
  4. Add Embellishments: Attach any focal elements or decorative pieces, like a large dried poppy pod or a cluster of vibrant strawflowers, to the top or center of the swag using smaller pieces of floral wire or a hot glue gun.
  5. Create a Hanger: Form a loop with a piece of floral wire and attach it securely to the bound “neck” of your swag. Alternatively, use a piece of twine or ribbon.
  6. Display: Hang your finished swag on a door, above a window, or as an accent piece on your porch. These `garden crafts` add a charming, welcoming touch.

Both garlands and swags bring a dynamic, flowing element to your fall decor. They are an excellent way to extend the beauty of your container garden beyond individual pots, creating a cohesive and inviting autumnal display.

Care and Longevity for Your Natural Fall Decor

While your `natural fall decorations` are inherently ephemeral, you can take steps to extend their beauty and prevent premature deterioration. Proper care ensures your handmade pieces remain vibrant and intact throughout the autumn season.

Protection from the Elements:

  • Humidity is the Enemy: Dried plant materials are highly susceptible to moisture. High humidity can cause them to reabsorb water, leading to wilting, drooping, or even mold growth. If your porch is exposed to frequent rain or fog, consider placing your decor in a more sheltered spot, such as under an overhang or in an enclosed balcony.
  • Avoid Direct Sunlight: Intense, direct sunlight, even in fall, can cause colors to fade significantly over time. Position your wreaths, centerpieces, and garlands in areas that receive indirect light or are shaded during the brightest parts of the day to preserve their hues.
  • Wind and Physical Damage: Strong winds can easily dislodge delicate components or even blow away lighter pieces of decor. Secure wreaths firmly to doors with strong hangers. Place centerpieces in sturdy containers that resist tipping. For garlands, ensure they are tightly woven and securely fastened along their entire length.

Cleaning and Maintenance:

  • Dust Gently: Dust accumulation can dull the appearance of your dried decor. Use a soft brush, a feather duster, or a can of compressed air (held at a distance on a low setting) to gently remove dust. Avoid wiping with a damp cloth.
  • Inspect for Pests: While less common with properly dried materials, occasionally small insects might find their way into your decor. Periodically inspect your pieces. If you notice any activity, remove the affected section or discard the piece to prevent further infestation.
  • Reinforce as Needed: Over time, some pieces might become loose. Keep your hot glue gun or floral wire handy to reattach any stray elements, ensuring your `garden crafts` maintain their integrity.

Storage for Future Seasons (If Applicable):

Some more robust pieces, particularly those made with very sturdy seed heads or carefully preserved blooms, can last for more than one season. If you wish to store your decor:

  • Clean Thoroughly: Ensure the piece is completely dry and free of dust.
  • Wrap Gently: Wrap delicate items in tissue paper or newspaper.
  • Store in a Dry, Dark Place: Place items in an airtight container or box to protect them from humidity, dust, and pests. Add silica gel packets to absorb any residual moisture. Store the container in a cool, dark environment like a closet or attic. Avoid plastic bags, which can trap moisture.

By following these simple care tips, you can enjoy your beautiful `diy fall decor` for weeks, if not months, extending the charm of your garden’s bounty through the entire autumn season.

Troubleshooting: Common Mistakes in Natural Decorating

Creating `natural fall decorations` from your garden is a rewarding endeavor, but like any craft, you might encounter a few challenges. Understanding common pitfalls and how to avoid them helps ensure your projects are successful and long-lasting.

  • Harvesting Too Early or Too Late:
    • Problem: Cutting flowers when they are too young results in them shriveling and losing shape upon drying. Cutting them when they are too old means they might be discolored, brittle, or fall apart easily.
    • Solution: Harvest flowers just after they reach their peak bloom but before they start to brown or drop petals. For seed heads, wait until they are fully mature and dry on the plant. Observation is key; you will learn the optimal stage for each plant in your garden over time.
  • Improper Drying Conditions:
    • Problem: Drying in a humid, poorly ventilated area leads to mold, mildew, and rotting, ruining your materials. Drying in direct sunlight causes colors to fade rapidly.
    • Solution: Always dry plant material in a cool, dark, dry place with good air circulation. Hang bundles upside down and ensure adequate space between them. If your home is very humid, consider using a dehumidifier in your drying area.
  • Overcrowding Arrangements:
    • Problem: Stuffing too many elements into a wreath or centerpiece makes it look cluttered and heavy, obscuring the beauty of individual pieces.
    • Solution: Practice restraint. Allow each element to breathe. Create focal points and negative space. Sometimes, less is more, especially for `fall centerpiece ideas from my balcony garden` where you want an elegant, not overwhelming, look.
  • Inadequate Securing of Elements:
    • Problem: Not using enough floral wire or hot glue, or not securing pieces tightly enough, leads to your decor falling apart prematurely.
    • Solution: Be generous but discreet with your floral wire. Wrap it tightly. Use hot glue as a reinforcement, especially for delicate or heavier elements that need extra adhesion. Always check for wobbles before considering a piece finished.
  • Ignoring Scale and Proportion:
    • Problem: Using very large clippings on a small wreath form, or conversely, tiny elements in a large vase, creates an imbalanced and awkward appearance.
    • Solution: Consider the final placement of your decor. A mini-wreath should have appropriately sized clippings. A centerpiece for a large table can accommodate larger elements. Match the scale of your materials to the scale of your project and its intended location. This attention to detail elevates `how to make a wreath from garden clippings` from simple assembly to thoughtful design.
  • Lack of Variety in Texture:
    • Problem: Using only one type of plant or material can make your `diy fall decor` look flat and uninteresting.
    • Solution: Strive for a mix of textures. Combine soft, feathery ornamental grasses with rigid, architectural sedum heads or smooth poppy pods. This textural interplay adds depth and visual interest, making your pieces more engaging and professional. This is especially important when `using dried seed heads for decoration` as it prevents a monotonous display.

By being mindful of these common issues, you elevate your crafting skills and create truly beautiful, durable `garden crafts` that showcase the best of your container garden.

Frequently Asked Questions

How long will my natural fall decor last?

Properly dried and cared for natural fall decor can last throughout the entire autumn season, typically 2-3 months. If kept away from direct sun, high humidity, and physical disturbance, some pieces, especially those made with robust seed heads and strawflowers, can even last for years if stored correctly during the off-season. Delicacy varies by plant material.

Can I use fresh cuttings, or do I always need to dry them first?

For most durable fall decor, drying is essential. Fresh cuttings will wilt, shrivel, and likely mold within a few days or a week, especially in arrangements without water. You want to aim for longevity, so fully dried materials are usually the best choice. Some very woody stems might temporarily hold their shape fresh, but they will not last as long as dried materials.

What if my dried clippings are too brittle to work with?

Brittle clippings are a common challenge. You can gently rehydrate them slightly by misting them with water from a fine spray bottle, or placing them in a steamy bathroom for a short period. This makes them more pliable for a few hours. However, do not over-moisten them, as this encourages mold. Work quickly after rehydration. If they are extremely brittle, they might be past their prime for crafting.

Can I spray my finished decor with anything to protect it?

You can use a clear, matte floral sealant spray, often available at craft stores, specifically designed for dried flowers. This can help to strengthen delicate pieces, reduce shedding, and offer a very minor barrier against humidity. Always test on a small, inconspicuous piece first to ensure it does not alter the color or texture in an undesirable way. Apply it in a well-ventilated area.

My container garden is very small. Will I have enough material for decor?

Absolutely! Even small container gardens yield surprising amounts of material. Focus on creating mini-wreaths, small swags, or petite centerpieces for a desk or windowsill. You might also supplement your garden’s bounty with a few found elements from nature, like pinecones or acorns, or even a few store-bought accent pieces like dried oranges. The beauty of `diy fall decor` is its adaptability to your available resources.

For trustworthy gardening information, visit:
University of Minnesota Extension, Penn State Extension — Trees, Lawns and Landscapes, Clemson University Extension — Home & Garden, Colorado State University Extension — Gardening and North Carolina State Extension — Gardening. These organizations provide expert, research-based advice for gardeners at all levels.

Disclaimer: This article is for informational purposes only and is not a substitute for professional gardening advice. Always consult local extension services or horticulture experts for region-specific guidance.

Categories
Garden Design & Ideas

Beyond Mums and Pansies: Designing a Fall Container with Ornamental Grasses for Texture and Movement

As the vibrant hues of summer gardens begin to fade, many gardeners traditionally turn to mums and pansies for their fall container displays. While these classics offer undeniable charm, there is an entire world of dynamic, graceful, and incredibly resilient plants waiting to transform your autumn arrangements. This fall, let us move beyond the expected and explore the remarkable beauty of ornamental grasses in your container designs. These plants offer unparalleled texture, captivating movement, and a sophistication that can elevate any small space, from a bustling balcony garden to a quiet patio nook. You will discover how easy it is to create stunning, low maintenance fall pots that bring long-lasting visual interest and a unique elegance to your outdoor areas.

Terracotta pot on a patio filled with coppery-red switchgrass and feathery fountain grass, illuminated by soft autumn sunlight.
Ornamental grasses bring incredible texture and movement to fall containers.

The Unsung Heroes of Fall: Why Ornamental Grasses for Your Containers?

Ornamental grasses are not just garden plants, they are living sculptures that infuse a unique dimension into your outdoor space. Unlike many annual flowers that peak and then decline, ornamental grasses often truly shine in the cooler temperatures of autumn, showcasing their most brilliant colors and seed heads. You might be wondering why you should choose these over traditional fall flowers for your fall container design. The reasons are compelling.

First, consider their incredible **texture**. From the fine, hair-like blades of some fescues to the broad, ribbon-like leaves of certain sedges, grasses offer a tactile richness that other plants struggle to match. This texture adds depth and visual interest, especially important in small-space gardening where every element counts. Imagine the contrast between a smooth, modern container and the feathery plumes of a fountain grass. This interplay creates immediate appeal.

Second, and perhaps most captivating, is their **movement**. Mums stand static, but ornamental grasses dance. Even a gentle breeze brings them to life, creating a graceful, undulating motion that is incredibly soothing and dynamic. This movement adds a lively, ever-changing element to your balcony garden ideas, making your containers feel alive and engaging. This kinetic quality is a hallmark of designing with grasses, providing a naturalistic feel that grounds your small garden in its surroundings.

Third, ornamental grasses are renowned for their **low maintenance** nature, a significant advantage for anyone seeking low maintenance fall pots. Once established, many varieties are remarkably drought tolerant, requiring less frequent watering than thirsty annuals. They generally do not demand deadheading, a task that can quickly become tedious with flowering plants. This translates to more time enjoying your garden and less time working in it. For those with busy schedules or limited gardening experience, this aspect alone makes them an excellent choice.

Fourth, their **seasonal interest** extends well beyond the typical fall blooming period. Many ornamental grasses maintain their structural integrity and beautiful seed heads deep into winter, providing continued visual appeal even after the first hard frosts. Their autumnal colors range from rich golds and coppers to deep burgundies and bronzes, often intensifying as the days shorten. These enduring qualities mean your fall planter ideas without flowers will offer enjoyment for months, not just weeks.

Finally, embracing ornamental grasses for pots allows you to explore unique aesthetics and move beyond conventional gardening. You can create sophisticated, modern, or even wild and naturalistic looks. This shift opens up a new realm of creative possibilities for your small-space gardening efforts, allowing you to craft a display that truly reflects your personal style and maximizes the beauty of every corner of your patio or balcony.

High-angle view of a compact patio showing three empty planters of varying sizes. A large, light-colored pot is next to a small ornamental grass plant
Choosing the perfect spacious pot is key for happy, thriving ornamental grasses.

Choosing Your Canvas: Selecting the Right Container for Grasses

Just as an artist selects the perfect canvas, you must choose the right container to showcase the beauty of your ornamental grasses. Your choice impacts not only the aesthetic appeal but also the health and longevity of your plants. This is a critical step in successful fall container design.

The first consideration is **size**. Ornamental grasses, even those labeled “compact,” need adequate room for their root systems to grow. A pot that is too small restricts root development, leading to a stressed plant that struggles to thrive. For a single specimen ornamental grass, aim for a container at least 12 to 18 inches in diameter. If you plan to incorporate multiple grasses or companion plants, a container 18 to 24 inches or larger will provide sufficient space. A larger pot also offers more soil volume, which helps to retain moisture and insulate roots against temperature fluctuations, beneficial for `ornamental grasses for pots`.

Next, consider the **material** of your container. Each material has distinct properties that can influence plant care and overall aesthetics:

  • Terracotta or Clay: These porous materials allow air and moisture to pass through, which helps prevent root rot. However, they also dry out faster, requiring more frequent watering, especially in warmer fall conditions. Their classic, earthy look complements most garden styles.
  • Plastic: Lightweight and affordable, plastic pots retain moisture well, reducing the need for frequent watering. They are also durable and come in a vast array of colors and styles, making them versatile for `balcony garden ideas`. Just ensure they are made from UV-resistant material to prevent degradation over time.
  • Glazed Ceramic: These pots offer excellent moisture retention and come in many decorative finishes, adding a touch of elegance. They can be heavy, however, so consider their placement carefully, particularly for larger sizes.
  • Metal (e.g., galvanized steel): Modern and sleek, metal containers can make a bold statement. Be aware that metal can heat up quickly in direct sun, potentially stressing roots. Lining the interior with insulation can help mitigate this.
  • Wood: Whiskey barrels or wooden planters offer a rustic charm and provide good insulation. Ensure the wood is rot-resistant or treated, and that the container has adequate drainage.

Regardless of the material, the most crucial feature of any container is **drainage holes**. Without them, water accumulates at the bottom of the pot, suffocating the roots and leading to root rot. Think of drainage as simply how water moves through soil. Your container needs at least one, and preferably several, holes to allow excess water to escape. If your chosen container lacks holes, you must drill them yourself before planting. While some gardeners place a layer of gravel or broken pot shards at the bottom for drainage, modern gardening practice indicates this is often unnecessary and can sometimes even impede proper drainage by creating a perched water table. Instead, focus on using a high-quality potting mix designed for containers.

Finally, consider the **aesthetic** of the container in relation to your chosen grasses and your home’s exterior. A simple, minimalist pot can highlight the intricate beauty of the grasses, while a more ornate container might compete for attention. Choose colors and textures that complement, rather than clash with, the natural hues of your fall grasses. The right container elevates your `fall container design`, turning a simple plant into a focal point.

A small patio features several container gardens. The largest pot holds Little Bluestem grass with fiery orange and red fall colors.
Fall colors and textures make container gardens shine on this cozy patio.

Picking Your Players: Best Ornamental Grasses for Containers in Fall

The world of ornamental grasses is wonderfully diverse, offering a wide array of textures, colors, and sizes perfectly suited for `ornamental grasses for pots`. When selecting varieties for your fall planter ideas without flowers, consider their mature size, light requirements, and how their fall foliage or seed heads will contribute to your design. Here are some of the best ornamental grasses for containers in fall:

  • Little Bluestem (Schizachyrium scoparium): This native North American grass is a true showstopper in fall. Its slender, blue-green blades transform into fiery shades of orange, red, and russet as temperatures drop. Growing to about 2-3 feet tall and wide, it maintains an upright, airy habit. Little Bluestem is incredibly drought-tolerant once established and thrives in full sun, making it an excellent choice for a vibrant `fall container design`. Its fine texture and striking color make it an ideal “thriller” or a strong filler.
  • Fountain Grass (Pennisetum alopecuroides ‘Hameln’ or ‘Little Bunny’): Known for its graceful, arching form and fluffy, bottlebrush-like plumes, fountain grass adds elegant movement to any container. ‘Hameln’ reaches about 2-3 feet tall and wide, while ‘Little Bunny’ is a dwarf variety, perfect for smaller pots, growing to only 1 foot. The plumes emerge in late summer, often lasting well into winter, and their foliage turns a warm golden-tan in fall. They prefer full sun and moderate water, and are a staple for `low maintenance fall pots` due to their reliable performance.
  • Japanese Forest Grass (Hakonechloa macra ‘Aureola’ or ‘All Gold’): For containers in partial to full shade, Japanese Forest Grass is an unparalleled choice. Its cascading habit creates a lush, flowing effect, spilling beautifully over the edge of a pot. ‘Aureola’ features bright green and yellow striped foliage, which often takes on pinkish hues in fall, while ‘All Gold’ offers a vibrant, uniform golden color. Reaching about 1-2 feet tall and wide, it is a fantastic “spiller” or filler, bringing delicate texture and brilliant color to shaded `balcony garden ideas`.
  • Sedge (Carex varieties): The genus Carex encompasses a vast range of grass-like plants, many of which are perfect for containers. Varieties like ‘Ice Dance’ (Carex morrowii ‘Ice Dance’) offer striking variegated foliage and remain semi-evergreen in many climates, providing year-round interest. ‘Evergold’ (Carex oshimensis ‘Evergold’) features creamy yellow and green striped leaves with a graceful, mounding habit, typically reaching about 1 foot tall and wide. Sedges generally prefer moist, well-drained soil and can tolerate a range of light conditions from partial sun to shade, making them highly versatile fillers or spillers.
  • Switchgrass (Panicum virgatum ‘Shenandoah’ or ‘Heavy Metal’): For a strong vertical element, switchgrass varieties are excellent. ‘Shenandoah’ grows to about 3-4 feet tall and wide, with foliage that starts green and develops brilliant wine-red tips and eventually deep burgundy tones in late summer and fall. ‘Heavy Metal’ offers stunning metallic blue foliage that turns golden in autumn, maintaining a very upright, architectural form. These grasses are extremely tough, drought-tolerant, and prefer full sun. They make impactful “thrillers” in larger `fall container design` arrangements.
  • Pink Muhly Grass (Muhlenbergia capillaris): If you want to make a spectacular statement in late fall, Pink Muhly Grass is a must-have. While its foliage is modest, its explosion of airy, cotton-candy pink plumes in October and November is breathtaking. It creates a soft, hazy cloud of color, especially when backlit by the low autumn sun. Growing to about 2-3 feet tall and wide, it thrives in full sun and is very drought-tolerant, providing an ethereal quality to your `fall planter ideas without flowers`.

When making your selections, consider the mature size of the plant, as grasses can grow surprisingly large. Always check the plant tag for specific sun and water requirements to ensure you are placing the right plant in the right spot, ensuring your chosen `ornamental grasses for pots` thrive throughout the fall season and beyond.

A vibrant fall container on an urban patio, featuring a tall fountain grass as the focal point surrounded by shorter grasses and trailing plants.
Designing with texture: a stunning fall container featuring a graceful ornamental grass.

Designing with Dimension: The “Thriller, Filler, Spiller” Approach for Fall

Creating a compelling fall container design with ornamental grasses involves thinking about dimension, texture, and the unique movement these plants provide. A popular and effective design principle, adaptable for small spaces, is the “Thriller, Filler, Spiller” method. This approach ensures your container has visual balance, depth, and consistent interest from all angles. While traditionally used with flowering plants, it translates beautifully to `ornamental grasses for pots`.

The Thriller: The Vertical Anchor

The “thriller” is your focal point, the tallest and most dramatic element in your container. It draws the eye upward and provides a strong vertical line. For ornamental grass containers, your thriller will typically be an upright, stately grass that stands prominently in the center or slightly off-center of your pot. Think of grasses that offer architectural interest, vibrant fall color, or striking seed heads.

  • Examples: A tall ‘Shenandoah’ Switchgrass with its burgundy foliage, a sturdy Little Bluestem turning russet, or even a ‘Heavy Metal’ Switchgrass for its blue-gray blades. These choices provide significant height and visual weight, immediately establishing the backbone of your `fall container design`. They command attention and give your arrangement a sense of grandeur.

The Filler: The Middle Ground

The “filler” plants surround the thriller, adding volume, texture, and breadth to the container. They bridge the gap between the tall thriller and the trailing spillers, creating a full, rounded appearance. With grasses, fillers can be mounding varieties, those with interesting foliage colors, or even other textures that complement your main thriller. They should be medium height, about two-thirds the height of your thriller.

  • Examples: Mounding Fountain Grass ‘Hameln’ with its soft plumes, various Carex (sedge) varieties like ‘Evergold’ for their variegated foliage, or even a smaller clump of Blue Fescue (Festuca glauca) for its icy blue color. These grasses provide lushness and visual weight without overpowering the thriller. They weave together the composition, adding layers of interest and enriching the texture palette of your `fall planter ideas without flowers`. You can use one large filler or several smaller ones to create a dense, appealing middle layer.

The Spiller: The Cascading Grace

The “spiller” plants are positioned at the edges of the container, designed to cascade and trail over the sides. They soften the hard edges of the pot, connecting the arrangement to its surroundings and creating a more natural, flowing look. For ornamental grass containers, spillers are often grasses or grass-like plants with a weeping or mounding, then trailing habit.

  • Examples: Japanese Forest Grass ‘Aureola’ with its bright, arching blades that drape beautifully, or even certain low-growing sedges that spill gently. When choosing spillers for `balcony garden ideas`, consider how they will interact with the railing or edge of your space. Their graceful descent adds a sense of abundance and movement, making the container feel less rigid and more organic.

When applying this framework, consider the interplay of textures. Combine fine-bladed grasses with broader-leaved ones. Mix upright forms with arching and cascading forms to maximize visual dynamism. Think about how the colors will change as the fall progresses. Many grasses intensify their hues with cooler temperatures, offering a evolving display. The movement of the grasses, their sway in the breeze, becomes an integral part of your design, a feature that static flowers simply cannot replicate. Aim for a harmonious blend where each element enhances the others, creating a cohesive and stunning `fall container design`.

Close-up of gloved hands mixing dark, light, and airy potting mix in a shallow grey tray, emphasizing its quality.
Creating the perfect light and airy home for your container grasses.

Soil, Water, and Light: Essential Care for Your Fall Grass Containers

Even though ornamental grasses are celebrated for their low maintenance nature, providing them with the right foundation in their container environment is crucial for their success. Understanding their needs for soil, water, and light will ensure your `ornamental grasses for pots` thrive and provide maximum visual impact throughout the fall and into winter.

The Foundation: Soil

The soil in your container is the lifeblood of your plants. For ornamental grasses, you must use a high-quality **potting mix**, not soil dug from your garden. Garden soil is too dense for containers, compacts easily, and does not provide the aeration and drainage that container plants require. Think of aeration as simply allowing air to reach the roots, which is essential for healthy growth. A good potting mix is specifically formulated to be lightweight, well-draining, and capable of retaining moisture and nutrients effectively. It will typically contain a blend of peat moss or coco coir, perlite or vermiculite for drainage, and a base of sterilized soil or compost.

If your chosen grass varieties are known for preferring exceptionally sharp drainage, you can amend your potting mix further. Incorporate an additional 10-20% perlite, small gravel, or coarse sand into the mix. This increases the porosity, ensuring water moves through even more efficiently, preventing the roots from sitting in soggy conditions, which is a common killer of container plants. This simple step helps ensure your `low maintenance fall pots` remain healthy and vibrant.

The Drink: Watering

While many ornamental grasses are drought-tolerant in the ground, containerized plants dry out much faster due to limited soil volume and exposure to air on all sides. Consistent watering is key, especially during establishment and warmer fall days. The best way to determine if your container needs water is to **check the soil moisture**. Stick your finger about two inches deep into the soil. If it feels dry, it is time to water. If it feels moist, wait a day or two and check again.

When you do water, do so thoroughly until you see water draining from the bottom of the pot. This ensures that the entire root ball receives moisture. Avoid frequent, shallow watering, as this encourages surface roots and does not adequately hydrate the deeper roots. Reduce watering frequency as temperatures cool in late fall and early winter, as plants naturally slow their growth and require less moisture. Overwatering is just as detrimental as underwatering, leading to root rot. Balance is important for `fall container design` success.

The Fuel: Light

Most ornamental grasses thrive in **full sun**, meaning at least six hours of direct sunlight per day. Full sun encourages strong, upright growth and intensifies the vibrant fall colors that many varieties develop. If your `balcony garden ideas` involve a sunny exposure, you have a wide range of grasses to choose from, including Little Bluestem, Fountain Grass, Switchgrass, and Pink Muhly Grass.

However, if your space receives partial shade (3-6 hours of sun) or even full shade (less than 3 hours of sun), you still have options. Japanese Forest Grass and many varieties of Sedge (Carex) are excellent choices for shadier locations. Always match your plant selection to the light conditions of your specific site. Attempting to grow a full-sun grass in deep shade will result in leggy, weak growth and poor color development, diminishing the aesthetic appeal of your `fall planter ideas without flowers`.

Minimal Fertilization

Ornamental grasses are generally not heavy feeders. If you use a fresh, high-quality potting mix, it will typically contain enough nutrients to sustain your plants for several weeks, or even months, especially if it includes a slow-release fertilizer. In the fall, as plants prepare for dormancy, you should avoid heavy fertilization. Excess nitrogen can encourage new, tender growth that is vulnerable to early frosts. If you feel your grasses need a boost, a light application of a balanced, all-purpose liquid fertilizer at half strength once a month in early fall is usually sufficient, but often unnecessary for established plants.

By providing the correct soil, mindful watering, and appropriate light conditions, you set your fall grass containers up for spectacular success, ensuring they remain a captivating feature of your small garden for a long season.

Gloved hands inspect the drainage holes of a terracotta pot on a rustic wooden potting bench, surrounded by gardening tools, potting mix, and young or
Getting the pots ready for beautiful fall planting.

Step-by-Step: Planting Your Fall Grass Container

Creating your stunning fall container with ornamental grasses is a straightforward process. Follow these steps for successful planting and a vibrant display that will last throughout the season. This process is designed to be easy to follow, making your `fall container design` dreams a reality.

  1. Gather Your Materials: Before you begin, assemble everything you need:

    • Your chosen container with drainage holes.
    • High-quality potting mix.
    • Your selected ornamental grasses (thriller, filler, spiller).
    • Gardening gloves.
    • A small trowel.
    • Watering can.
  2. Prepare Your Container: Ensure your container has ample drainage holes. If not, drill them now. While some traditional advice suggests a layer of gravel at the bottom for drainage, it is generally more effective to simply use a good potting mix directly. A piece of landscape fabric or a coffee filter over the drainage holes can prevent soil from washing out while still allowing water to pass through.
  3. Add Initial Potting Mix: Fill the bottom third to half of your container with fresh potting mix. Gently pat it down, but do not compress it too tightly, as roots need air to thrive. The amount of soil you add here depends on the root ball height of your tallest plant. You want the top of the plant’s root ball to be about 1-2 inches below the rim of the container once planted.
  4. Arrange Your Plants: This is where your `fall container design` vision comes to life.

    • Start with your “thriller” plant. Place it in the center for a symmetrical design, or towards the back for a container that will be viewed from one side (like against a wall or railing in `balcony garden ideas`). Remove the plant from its nursery pot, gently loosen any circling roots, and position it.
    • Next, place your “filler” plants around the thriller. Arrange them to create a full, lush base. Again, remove from nursery pots and gently loosen roots.
    • Finally, add your “spiller” plants along the edges of the container, ensuring they have room to cascade over the sides.
    • Step back and assess the arrangement from various angles. Adjust the positions of the plants until you are satisfied with the composition. Consider height, texture, and color balance.
  5. Fill with Potting Mix: Once your plants are arranged, carefully fill the remaining spaces with potting mix. Gently work the soil around and between the root balls of all the plants, ensuring there are no large air pockets. Leave about 1 inch of space between the top of the soil and the rim of the container. This “headroom” allows for easy watering without overflow.
  6. Water Thoroughly: After planting, water your container generously until you see water draining from the bottom holes. This settles the soil around the roots and eliminates any remaining air pockets. It is a critical step for initial plant establishment.
  7. Initial Placement and Ongoing Care: Place your newly planted container in its intended location, mindful of its light requirements. Over the next few days, monitor the moisture levels closely. New plantings often need more frequent watering as they adjust to their new home. Your beautifully crafted `fall planter ideas without flowers` will begin to flourish.

By following these steps, you set your ornamental grasses up for success, ensuring a vibrant and appealing display throughout the autumn and often well into the colder months. This methodical approach makes creating `low maintenance fall pots` both rewarding and enjoyable.

Vibrant fall container on an urban balcony with ornamental grass, coppery Heuchera, and a purple trailing vine in a terracotta pot.
Elevate your balcony with beautiful fall textures and colors.

Beyond the Basics: Creative Fall Combinations and Accents

While ornamental grasses are stunning on their own, pairing them with other fall-interest plants and non-plant accents can elevate your containers from beautiful to breathtaking. This approach allows you to explore deeper dimensions in your `fall container design`, creating truly unique displays for your `balcony garden ideas`.

Companion Plants for Enhanced Texture and Color:

When selecting companions, look for plants that offer contrasting textures or complementary fall colors. Remember, the goal is to enhance the grasses, not overpower them. Some excellent choices include:

  • Heuchera (Coral Bells): These perennials are fantastic for foliage color, with varieties boasting leaves in shades of burgundy, bronze, lime green, and even deep purple. Their mounding habit makes them excellent fillers, and their delicate flower spikes can add another layer of texture. They thrive in partial shade but many varieties tolerate sun, making them versatile.
  • Ornamental Kale and Cabbage: These cold-hardy annuals come into their own with cooler temperatures, developing vibrant centers in shades of pink, purple, white, and green. Their ruffled or smooth leaves provide a bold, architectural contrast to the fine blades of grasses, offering striking `fall planter ideas without flowers` options.
  • Sedum ‘Autumn Joy’ or ‘Autumn Fire’: These succulents are famous for their late-season blooms, typically pink, which gradually deepen to rusty red as fall progresses. Their sturdy, upright habit and chunky texture offer a wonderful counterpoint to the airy nature of grasses.
  • Violas or Pansies: While this article encourages moving beyond these, a small cluster of violas or pansies can act as a lovely spiller or filler around the base of a grass, offering a pop of traditional fall color without dominating the grass’s presence. Choose varieties in deep purples, oranges, or yellows to tie into the autumnal theme.
  • Creeping Jenny (Lysimachia nummularia ‘Aurea’): This vibrant chartreuse-leaved perennial is a classic spiller, offering bright, eye-catching color that cascades over the container’s edge. Its bold hue provides a cheerful contrast to the more subdued tones of many fall grasses.
  • Evergreen Groundcovers: Consider low-growing evergreen options like sedums, creeping thyme, or even small euonymus varieties. These provide continuous green or variegated color and can offer a nice textural base around your grasses, lasting through winter.

Non-Plant Accents for Seasonal Flair:

Do not underestimate the power of decorative elements to add personality and visual interest to your fall containers. These accents can reinforce the autumnal theme and provide a touch of charm, helping to complete your `low maintenance fall pots` look.

  • Decorative Rocks or Pebbles: A few strategically placed smooth river stones or decorative pebbles can add a natural element, cover bare soil, and provide a pleasing visual weight.
  • Small Gourds or Mini Pumpkins: Tucked among the base of the grasses, these quintessential fall elements instantly evoke the season. They are temporary, of course, but easy to refresh throughout autumn.
  • Pinecones and Acorns: Gathered from your yard or a local park, these natural treasures add rustic texture and a connection to the outdoor environment.
  • Branches or Twigs: For an extra vertical element or a touch of dramatic flair, insert a few decorative branches, such as curly willow or dogwood branches, which can offer interesting color and form even without leaves.
  • LED Fairy Lights: As evenings grow longer, a subtle string of battery-operated fairy lights woven through your grasses can create a magical, enchanting glow, transforming your containers into evening focal points.

When combining elements, strive for a cohesive look. Consider color palettes, contrasting forms (e.g., broad leaves next to fine blades), and how the overall arrangement fits with the style of your home and garden. By thoughtfully incorporating companion plants and accents, you can create fall containers that are truly dynamic, beautiful, and uniquely yours.

A pair of hands gently probes the soil in a terracotta pot containing ornamental grass with slightly yellowed tips.
Checking soil moisture for containerized ornamental grass with early signs of distress.

Common Challenges and Troubleshooting Your Grass Containers

Even with their reputation for being low maintenance, ornamental grasses in containers can occasionally present challenges. Understanding common issues and how to troubleshoot them will help you maintain vibrant, healthy `ornamental grasses for pots` throughout the fall season and beyond.

1. Yellowing or Browning Blades:

  • Cause: This is the most common symptom of distress and can stem from several issues.
    • Overwatering: Too much water suffocates roots, leading to root rot. Leaves turn yellow, then brown, and the plant often looks wilted despite moist soil.
    • Underwatering: Insufficient water causes leaves to crisp, turn brown, and curl.
    • Nutrient Deficiency: While grasses are not heavy feeders, prolonged container life without fresh soil or occasional feeding can lead to deficiencies.
    • Normal Senescence: In fall, many grasses naturally begin to turn yellow or brown as they enter dormancy. This is a natural part of their life cycle and generally not a cause for concern.
  • Solution:
    • Check Soil Moisture: Stick your finger 2 inches deep. If wet, reduce watering. If dry, water thoroughly. Ensure good drainage.
    • Assess Drainage: Confirm your container has adequate drainage holes and that they are not blocked.
    • Consider Nutrients: If browning is widespread and not seasonal, a light application of a balanced liquid fertilizer may help, but avoid over-fertilizing in fall.
    • Embrace Fall Colors: If the yellowing/browning is uniform and occurring as temperatures drop, simply enjoy the natural autumnal transformation.

2. Leggy or Sparse Growth:

  • Cause:
    • Insufficient Light: Grasses that prefer full sun will stretch and become sparse when they do not receive enough light, attempting to reach for more sun.
    • Container Too Small: Restricted root growth can lead to stunted or weak top growth.
  • Solution:
    • Relocate: Move your container to a location that provides the appropriate amount of sunlight for your specific grass variety. This is especially important for `balcony garden ideas` where light exposure can be very specific.
    • Repot: If the plant is severely root-bound, consider moving it to a larger container next season, or dividing it if appropriate for the species.

3. Pest or Disease Issues:

  • Cause: Ornamental grasses are generally robust and resistant to most pests and diseases. When problems do occur, they are often a symptom of underlying stress.
    • Aphids or Spider Mites: These tiny pests can sometimes appear, especially on stressed plants.
    • Fungal Diseases: Usually a result of excessive moisture, poor air circulation, or overly dense foliage.
  • Solution:
    • Pest Control: For minor infestations, a strong spray of water can dislodge pests. For persistent issues, use an insecticidal soap, ensuring thorough coverage.
    • Disease Management: Improve air circulation by lightly trimming dense foliage if necessary. Ensure proper watering and drainage. Remove affected blades promptly.
    • Prevent Stress: Healthy, well-cared-for plants are naturally more resistant to pests and diseases, supporting your goal for `low maintenance fall pots`.

4. Winter Survival Failures:

  • Cause: While some grasses are hardy in containers, many struggle to survive winter in pots, especially in colder climates, due to roots freezing more easily than in the ground.
  • Solution:
    • Choose Hardy Varieties: Select grasses that are hardy to at least two zones colder than your own.
    • Insulate Containers: Wrap containers with burlap and fill the space with leaves, or use bubble wrap. You can also place the container inside a larger, insulated container.
    • Move Indoors: For less hardy varieties or very cold zones, move pots to an unheated garage, shed, or cool basement. Reduce watering significantly during dormancy.
    • Treat as Annuals: Sometimes, the most practical approach for `fall planter ideas without flowers` in very cold regions is to simply enjoy them for the season and compost them, or plant them in the ground next spring.

By staying vigilant and addressing problems promptly, you can ensure your `fall container design` remains a source of beauty and pride throughout the autumn and often well into the winter months.

Sunlit urban patio corner with containers of native fall ornamental grasses. A bee hotel is nestled among pots, and a bee visits a flower.
Native grasses bring sustainable beauty and life to small fall spaces.

Embracing Sustainability with Your Fall Grass Displays

As gardeners, we have a unique opportunity to contribute positively to the environment, even in small spaces. Designing your fall containers with ornamental grasses lends itself beautifully to sustainable practices. By making conscious choices, you can create beautiful `fall container design`s that are also eco-friendly.

Choose Native Grass Species: Wherever possible, incorporate native ornamental grasses into your `ornamental grasses for pots`. Native plants are adapted to your local climate and soil conditions, requiring less water, fertilizer, and pest control once established. They also provide crucial habitat and food sources for local wildlife, including beneficial insects and birds, contributing to biodiversity in your `balcony garden ideas`.

  • Example: Little Bluestem (Schizachyrium scoparium) is a fantastic native grass for many regions of North America, offering stunning fall color and drought tolerance. Researching native grasses specific to your area is a rewarding step towards a more sustainable garden.

Water Conservation: Ornamental grasses are generally more drought-tolerant than many flowering plants, making them a wise choice for water-wise gardening. You can further conserve water by:

  • Mulching: Apply a thin layer of organic mulch (like shredded bark or coco coir) on top of the soil in your containers. This helps retain soil moisture, reduces evaporation, and regulates soil temperature.
  • Grouping Containers: Cluster your containers together. This creates a microclimate that can reduce water loss from individual pots.
  • Collecting Rainwater: If feasible, install a rain barrel to capture rainwater for your container plants. This free, chemical-free water is ideal for your garden.

Reusable and Recycled Containers: Invest in durable, high-quality containers made from materials like ceramic, galvanized metal, or recycled plastic. These can be reused year after year, reducing waste. Avoid single-use plastic pots whenever possible, or ensure you recycle them appropriately if you must use them. Even `low maintenance fall pots` benefit from thoughtful container choices.

Composting Spent Plants: At the end of the season, when it is time to refresh your containers, compost any spent annual grasses or plant material (unless diseased). This returns valuable nutrients to the soil and reduces landfill waste. If you do not have a compost pile, many community gardens or municipal services offer composting options.

Avoid Peat Moss (Where Possible): Peat moss is a common component in potting mixes, but its harvesting can be environmentally damaging. Look for potting mixes that use sustainable alternatives like coco coir, compost, or rice hulls. If peat moss is the only option, choose products from suppliers committed to responsible and sustainable peatland management. Your `fall planter ideas without flowers` can truly be a testament to sustainable gardening practices.

By adopting these sustainable practices, your fall grass containers become more than just beautiful displays. They become a testament to mindful gardening, contributing to the health of your local ecosystem and demonstrating how small actions in your garden can have a positive environmental impact.

A compact vertical garden on an urban balcony displaying various ornamental grasses in fall colors in different pots, with hands tending to a plant.
Your fall container questions, answered by this vibrant, space-saving display!

Frequently Asked Questions

Can I leave ornamental grasses in pots over winter?

Whether you can leave ornamental grasses in pots over winter depends on your climate zone and the hardiness of the specific grass variety. In general, plants in containers are less hardy than those planted in the ground because their roots are more exposed to freezing temperatures. If you live in a mild climate (Zones 7 and higher), many hardy grasses will survive winter in containers with minimal protection. In colder zones, you will need to choose grasses that are hardy to at least two zones colder than yours, or provide extra insulation for the pots, such as wrapping them in burlap or bubble wrap. Alternatively, you can move the pots to an unheated garage, shed, or cool basement for dormancy, significantly reducing watering.

Do ornamental grasses need a lot of sun?

Most ornamental grasses thrive in full sun, meaning they require at least six hours of direct sunlight per day. Full sun encourages robust growth and intensifies the vibrant fall colors that many varieties develop. However, there are excellent options for shadier conditions. Japanese Forest Grass (Hakonechloa macra) and many varieties of Sedge (Carex) are beautiful grasses that perform well in partial to full shade. Always check the specific light requirements for each grass species you choose to ensure optimal growth and appearance in your fall container design.

What makes ornamental grasses low maintenance?

Ornamental grasses are considered low maintenance for several reasons. Once established, many varieties are quite drought-tolerant, reducing the need for frequent watering compared to thirstier annuals. They generally do not require deadheading, unlike many flowering plants, as their seed heads often add to their visual appeal. Most grasses have minimal fertilization needs, especially in containers with fresh potting mix. Furthermore, they are often less susceptible to pests and diseases than other garden plants, leading to fewer interventions required for their care. These characteristics make them ideal for low maintenance fall pots.

How often should I water my fall grass container?

The frequency of watering your fall grass container depends on several factors: the size of the container, the type of grass, the weather, and the container material. Container plants generally dry out faster than plants in the ground. A good rule of thumb is to check the soil moisture by sticking your finger about two inches deep into the soil. If it feels dry, water thoroughly until you see water draining from the bottom. If it still feels moist, wait a day or two. As temperatures drop in late fall, grasses enter dormancy and require significantly less water, so reduce your watering frequency to prevent root rot.

Can I use garden soil for my container grasses?

No, you should not use garden soil for your container grasses. Garden soil is too dense for containers, lacks proper aeration, and compacts easily, which suffocates roots and leads to poor drainage. Container plants require a specialized potting mix that is lightweight, well-draining, and formulated to retain appropriate moisture and nutrients. Using a high-quality potting mix is crucial for the health and success of your ornamental grasses for pots, ensuring good drainage and aeration for the root system.

For trustworthy gardening information, visit:
University of Arizona Cooperative Extension — Gardening, University of Alaska Fairbanks Extension — Gardening, University of Georgia Extension — Gardening and Louisiana State University AgCenter — Lawn & Garden. These organizations provide expert, research-based advice for gardeners at all levels.

Disclaimer: This article is for informational purposes only and is not a substitute for professional gardening advice. Always consult local extension services or horticulture experts for region-specific guidance.

Categories
Garden Design & Ideas

Garden Lighting Ideas for Small Spaces

You can transform your balcony, patio, courtyard, or compact yard into a magical evening retreat with thoughtful garden lighting. Effective lighting extends the use of your outdoor area well past sunset, adds a layer of safety, and highlights the beauty of your plants and design elements. This guide offers practical, actionable insights for creating stunning and functional lightscapes in your small garden, all while keeping maintenance low and your environmental impact minimal. We focus on enhancing your outdoor living experience, ensuring your small space looks inviting and stays easy to manage.

Two friends relaxing on a cozy, string-lit patio garden filled with container plants at dusk, with subtle path lights illuminating the edge.

Why Light Your Small Garden? More Than Just Illumination

Lighting does more than simply allow you to see in the dark. For your small garden, whether it is a cozy balcony, a bustling patio, or a quiet courtyard, strategic lighting creates an entirely new dimension. You gain extended usability, meaning those warm summer evenings on your patio garden design do not end when the sun goes down. A well-lit space invites you to linger, dine, or simply relax outdoors longer.

Beyond extending your enjoyment, garden lighting significantly boosts safety. Illuminated pathways and stairs prevent trips and falls, a crucial consideration for any outdoor area, especially compact ones where obstacles might be close to walking paths. You can clearly define boundaries and steps, making your small garden more secure for everyone who uses it.

Aesthetically, light serves as a powerful design tool. You can highlight specific plants, sculptures, or architectural features, turning them into captivating focal points. A focal point is simply the first thing your eye notices. Uplighting a striking potted fern, for example, casts dramatic shadows and draws attention to its unique form. Soft, ambient lighting creates a welcoming atmosphere, transforming a simple balcony into an intimate escape. Data shows that outdoor lighting can increase home enjoyment and perceived value by enhancing curb appeal and functionality after dark. For instance, a well-planned balcony lighting scheme makes your outdoor space feel like a natural extension of your indoor living area, adding square footage to your usable home.

Thoughtful lighting enhances the visual appeal of your space, making it feel larger and more intentional. By strategically placing lights, you can guide the eye, create depth, and define distinct zones within your compact outdoor area. This attention to detail elevates a basic outdoor area into a truly designed space, offering both beauty and function.

Eye-level view of a small balcony garden at dusk, showcasing different lighting types: an LED puck light illuminating herbs, fairy lights on a railing

Understanding Light Types for Compact Spaces

Selecting the right type of lighting forms the foundation of any successful garden lighting plan. Each option offers unique benefits and challenges, especially when working with limited square footage. Understanding these differences allows you to make informed choices that fit your needs, budget, and desired aesthetic for your balcony or patio garden design.

Low-angle view of a cozy urban balcony at dusk, with warm LED bistro string lights forming a canopy above lush container plants.

String Lights

String lights, often called bistro lights or fairy lights, offer a charming and versatile solution for small spaces. They provide a soft, ambient glow that instantly creates a festive or cozy atmosphere. You can drape them along railings, weave them through trellises, or crisscross them overhead to create a canopy effect. Many string light sets now use energy-efficient LED bulbs, significantly reducing power consumption. Solar-powered options are also widely available, eliminating the need for outdoor outlets and making installation simple. For example, a 15-foot strand of LED bistro lights uses about 15 watts, which is considerably less than incandescent alternatives. Their adaptability makes them a popular choice for quick and impactful balcony lighting transformations.

Multi-tiered vertical planter at dusk on a small patio, illuminated by glowing solar fairy lights, a solar spotlight, and a hanging solar lantern.

Solar Lights

Solar lights offer an incredibly convenient and eco-friendly option. They charge during the day using small solar panels and automatically illuminate at dusk. You find them in various forms, including pathway stakes, decorative lanterns, spotlights, and even integrated into some string lights. Their primary advantage lies in their easy, wire-free installation. You simply stake them into the ground or hang them where sunlight hits. However, their brightness and duration of illumination depend heavily on the amount of direct sunlight they receive during the day. For areas with limited sun exposure, you may experience reduced performance. Quality varies widely, with higher-grade solar panels and larger batteries providing more reliable and longer-lasting light.

Low-voltage spotlight illuminates an olive tree in a pot on a small patio at golden hour, with wiring visible along the patio floor.

Low-Voltage Wired Lighting

For a more permanent and robust garden lighting solution, low-voltage wired systems provide consistent brightness and greater control. These systems involve a transformer that plugs into a standard outdoor outlet, reducing household current to a safe 12 volts. You then run low-voltage cables to various fixtures like spotlights, path lights, or floodlights. While installation requires more planning and effort, often involving burying wires and connecting fixtures, the results offer professional-grade illumination. You gain precise control over light direction and intensity, making them ideal for highlighting specific plants or architectural details with powerful, focused beams. They are particularly effective for patio garden design where you want reliable, long-term illumination without battery dependency.

Hand placing a glowing battery-operated table lamp on a small balcony with a hanging lantern, fairy lights, and container plants at dusk.

Portable and Battery-Operated Lights

Battery-operated lanterns, table lamps, and decorative luminaries offer ultimate flexibility. You can move these lights around as needed, setting them on tables, hanging them from hooks, or placing them on ledges. Many modern options are rechargeable via USB, making them even more convenient and reducing battery waste. They are perfect for adding temporary pops of light or creating dynamic arrangements for gatherings. Their portability means you can adjust your balcony lighting scheme on a whim, responding to different needs or moods without any fixed installation.

A modern dark grey wall sconce illuminates terracotta pots with herbs and petunias on a textured patio wall at twilight, defining a cozy seating area.

Wall-Mounted Fixtures

Sconces and other wall-mounted lights offer a functional and aesthetic addition, particularly for patios or courtyards with accessible walls. These fixtures provide general ambient light and can wash a wall with a soft glow or direct light downwards for pathway illumination. You typically install these with a professional electrician as they often require hardwiring. They contribute to a more finished, architectural look and work well for entrance areas or defining seating zones.

To help you choose, consider this comparison of common small-space lighting options:

Light Type Pros for Small Spaces Cons for Small Spaces Ideal Use
String Lights (LED) Easy installation, warm ambiance, flexible arrangement, energy efficient. Can look cluttered if not managed, potentially fragile bulbs. Ambient overhead lighting, railing decor, defining a cozy zone.
Solar Path/Spotlights No wiring, zero energy cost, easy to move, sustainable. Brightness varies with sun exposure, shorter duration, lower intensity. Highlighting individual plants, subtle path markers, accenting small features.
Low-Voltage Wired Consistent brightness, precise control, durable, professional look. Higher initial cost, more complex installation, requires an outlet. Strong focal point illumination, reliable pathway lighting, architectural accents.
Portable/Battery-Op Ultimate flexibility, no wiring, can move freely, instant setup. Requires battery replacement/charging, brightness may be limited. Table lighting, temporary decor, mood lighting for specific events.
Wall-Mounted Permanent, provides general or task lighting, clean aesthetic. Requires electrical installation, less flexible placement. Entryway lighting, illuminating seating areas, architectural emphasis.

Urban balcony garden at dusk, lit by string lights, an LED ground light highlighting potted herbs, and a solar lantern.

Designing with Light: Creating Ambiance and Focal Points

Effective lighting design involves more than just placing lights; it means using light to craft an experience. You can transform a flat, dark space into an engaging, multi-layered environment by consciously thinking about ambiance and focal points. This approach applies whether you are planning balcony lighting or a full patio garden design.

Cozy patio corner at twilight with layered lighting: overhead string lights, a table lantern, spotlights on container plants, and a clip-on task lamp.

Layering Light

Think about your outdoor space in terms of layers of light, just as you would layer plants in your garden. This creates depth and interest. You typically use three main layers:

  1. Ambient Lighting: This provides general illumination, allowing you to see and move around safely. String lights, softly glowing lanterns, or indirect wall washes are excellent choices for ambient light in small spaces. They create a base level of comfort and visibility.
  2. Accent Lighting: This layer highlights specific features, drawing the eye to what you want to showcase. Use small spotlights or uplights to illuminate a prized container plant, a piece of garden art, or an interesting texture on a wall. This is where your focal points truly shine.
  3. Task Lighting: If you plan to read, cook, or engage in specific activities outdoors, you need task lighting. A directed light over a small outdoor dining table or near a grilling station serves this purpose. While less common in very small balconies, it is vital for functional patios.

A dwarf Japanese maple in a grey pot, dramatically lit from below by a spotlight, casting long, elegant shadows onto a stucco wall at twilight.

Creating Focal Points with Light

A focal point is the standout element in your design, the first thing your eye settles on. In your small garden, you can use light to create or enhance these focal points. For example, if you have a particularly beautiful specimen plant, like a dwarf Japanese maple in a striking pot, direct a narrow-beam spotlight at its base. The light will illuminate the plant from below, creating dramatic shadows and emphasizing its form against the darkness. This technique adds depth and sophistication to your patio garden design. For your balcony lighting, a string of fairy lights artfully woven through a hanging basket can turn an ordinary plant into an evening showstopper.

Elevated view of a small urban patio at dusk. String lights define a seating area; path lights lead to a vibrant vertical planter.

Defining Zones and Guiding the Eye

In a compact outdoor area, light can help define different zones, even if they are only perceived. A cluster of string lights over a seating area immediately designates it as a cozy relaxation zone. A series of small path lights can subtly guide visitors along a compact walkway, even if it is just a few steps long. The way you position your lights influences how you and your guests experience the space. You can use light to draw attention to the most beautiful parts of your small garden and gently steer the eye away from less attractive elements, such as utility boxes or storage areas.

Container planting diagram: Water flows through soil in a 30cm pot, exiting drainage holes.

View from a cozy living room through a glass door onto a compact balcony with a containerized Japanese maple dramatically uplighted at twilight.

Considering Sightlines from Indoors

Remember that your small garden is often viewed from inside your home. Think about what you see when you look out your window or open your door. This is a crucial sightline. Position lights to enhance this view. For instance, you might strategically place an uplight on a plant that is visible from your living room window. This transforms your outdoor space into a living piece of art that you can enjoy even when you are indoors. Good balcony lighting design considers both the external and internal viewing experience, adding year-round appeal.

Dusk patio corner with solar path lights, an uplighting spotlight, and string lights highlighting safe, functional placement among containers.

Practical Placement: Safety and Functionality

Once you understand the types of lights and design principles, you must focus on practical placement. This ensures your garden lighting is both effective and safe, especially crucial in compact outdoor living areas. Consider the functionality of each light and its impact on comfort and safety.

Low-angle view of two illuminated garden steps and a gravel path at twilight, framed by container plants, ensuring safe passage.

Safety First: Illuminating Pathways and Steps

In a small garden, where space is at a premium, obstacles can appear quickly. Clearly illuminating pathways, steps, and any changes in elevation is paramount for safety. You can achieve this with low-level path lights that cast a soft glow along the ground, clearly marking the route without causing glare. Position path lights approximately 4-6 feet apart, focusing light downwards to avoid shining directly into someone’s eyes. For steps, integrated step lights or small, well-placed puck lights at the edge of each riser provide sufficient illumination to prevent trips. Ensure any wiring for low-voltage systems is buried safely, typically at least 6 inches deep, to prevent damage and minimize tripping hazards.

A person relaxing on a small balcony at dusk, illuminated by soft frosted string lights and a downward-angled spotlight on plants.

Controlling Glare for Comfort

Glare, or harsh, uncomfortable light, ruins the ambiance and can be disorienting. You must avoid directing bright lights towards seating areas or where people will look directly. Angle spotlights away from direct lines of sight, or use fixtures with diffusers to soften the light. Shielded fixtures, which direct light downwards, are excellent for path lighting as they illuminate the ground without blinding passersby. For string lights, choose bulbs with a lower lumen output or frosted finishes to provide a warm glow rather than an intense beam. The goal is to illuminate the features of your garden, not the eyes of your guests.

Balcony at dusk with string lights zip-tied to a railing, a wall planter with a picture light, and a container with a hidden solar spotlight.

Smart Mounting Solutions for Small Spaces

Small gardens often lack extensive ground space for traditional stake lights. Get creative with your mounting options:

  • Railings: You can attach string lights or small lanterns to balcony or patio railings using zip ties, hooks, or even small clamps. This elevates the light source, spreading illumination more effectively.
  • Walls: Utilize wall space for sconces, uplights, or downlights. These fixtures can illuminate plants below or wash a wall with ambient light, creating depth without taking up floor space. Battery-operated picture lights can highlight wall-mounted planters.
  • Planters and Containers: Integrate small, solar-powered spotlights directly into large planters to highlight the plants within. You can also hide miniature string lights within foliage to create a magical, glowing effect from the inside out. Some planters even come with integrated lighting.
  • Pergolas and Overhangs: These structures are ideal for hanging string lights or pendant fixtures, creating a ceiling of light that defines the outdoor room.

Person neatly securing a thin low-voltage wire along the base of a wooden fence on a sunny small patio with various container plants, demonstrating di

Managing Power Sources and Wires

Before installing any garden lighting, consider your power sources. Solar lights are the easiest, requiring no outlets or wiring, but their performance depends on sun exposure. Battery-operated lights offer flexibility but require regular charging or battery replacement. Low-voltage wired systems provide consistent power but need an outdoor, GFCI-protected outlet and careful wire management. You can discreetly hide wires by tucking them under deck boards, running them along fences, or burying them. For temporary setups, consider attractive cable covers or strategically place large containers to conceal wires. A well-managed power system ensures both safety and a clean aesthetic for your patio garden design.

Twilight scene on a small urban patio corner. Solar path lights, solar string lights on a vertical herb garden, and an LED lantern illuminate diverse

Sustainable Lighting Choices for Your Balcony or Patio

As a practical and environmentally conscious gardener, you want your garden lighting to be beautiful, functional, and gentle on the planet. Making sustainable choices for your balcony lighting or patio garden design helps conserve energy, reduces waste, and supports a healthier environment. Fortunately, many excellent options exist that align with these values.

A modern black LED garden spotlight illuminates a vibrant coleus plant in terracotta pots on a balcony at golden hour.

Embrace LED Technology

Light Emitting Diode, or LED, technology stands as the cornerstone of energy-efficient lighting. LED bulbs consume significantly less electricity than traditional incandescent bulbs, often using 75-80% less energy for the same light output. This translates directly into lower energy bills for you. Beyond energy savings, LEDs boast an incredibly long lifespan, often lasting 25,000 to 50,000 hours, compared to 1,000-2,000 hours for incandescents. This reduces the frequency of bulb replacement, cutting down on waste and maintenance time. When you choose garden lighting fixtures, prioritize those with integrated LEDs or ones that accept standard LED bulbs. The initial cost might be slightly higher, but the long-term savings and environmental benefits are substantial.

Sunny urban balcony garden with various container plants, including lavender and ivy, featuring two integrated solar lights catching the late afternoo

Harness the Sun with Solar Power

Solar garden lights offer the ultimate in energy independence. They operate entirely on renewable energy, charging their internal batteries during the day and illuminating at night. You pay nothing for electricity to run them. This makes them an excellent choice for balcony lighting where electrical outlets might be scarce, or for any patio garden design where you want to minimize wiring. When selecting solar lights, invest in reputable brands that use efficient solar panels and durable rechargeable batteries. Higher quality units typically offer brighter light and longer illumination times, even after partially cloudy days. While the brightness can sometimes be less intense than wired options, advancements in solar technology continue to improve performance, making them increasingly viable for accent and ambient lighting.

Urban balcony at dusk, string lights woven through a vertical herb garden and railing just beginning to glow, with a subtle smart plug visible.

Automate with Timers and Sensors

Even the most energy-efficient lights waste power if you leave them on longer than necessary. Timers and photo-sensors provide a simple, yet highly effective, solution. Timers allow you to set specific on and off times for your lights, ensuring they only operate when you need them. For example, you can program your patio garden lights to come on at sunset and turn off a few hours later, preventing them from running all night unnecessarily. Photo-sensors, or dusk-to-dawn sensors, automatically turn lights on when it gets dark and off when the sun rises. These tools prevent energy waste due to forgetfulness and ensure your garden is illuminated only when it truly enhances your evening experience. Many modern string lights and low-voltage transformers come with built-in timers or sensor capabilities, making them easy to integrate into your sustainable lighting plan.

Hands replace an LED bulb in a durable, dark bronze garden light fixture on a vibrant urban balcony with container plants.

Choose Durable, Repairable Fixtures

Durability directly impacts sustainability. Investing in well-made, weather-resistant fixtures means they will last longer, reducing the need for frequent replacements and minimizing waste. Look for materials like marine-grade aluminum, brass, or high-quality plastics that resist rust and corrosion. You also want to consider whether a fixture is repairable. Can you replace a bulb, or is it a fully sealed, disposable unit? Opt for products that allow for component replacement when possible. This thoughtful selection extends the lifespan of your garden lighting and reduces your overall environmental footprint.

For more insights into sustainable gardening practices, including responsible resource use, consider exploring resources from the University of New Hampshire Cooperative Extension or other local university extension programs. They offer region-specific advice on everything from water-wise plants to eco-friendly landscaping.

A person admires newly installed warm LED string lights draped among container plants on a small patio at dusk, creating a cozy glow.

DIY Lighting Projects to Enhance Your Outdoor Oasis

You do not need to be an electrical expert to create beautiful and effective garden lighting. Many DIY projects offer simple, cost-effective ways to illuminate your small space, adding character and warmth. These projects are often perfect for a weekend afternoon, bringing immediate enjoyment to your balcony or patio garden design.

Person on urban balcony holding LED string lights along a railing, planning installation amidst container plants in daylight.

Installing String Lights for Instant Ambiance

String lights are perhaps the easiest and most impactful DIY lighting project for small spaces. Here is a simple step-by-step guide:

  1. Measure Your Space: Determine the length of string lights you need. Consider where you want to drape them: along a railing, crisscrossed overhead, or vertically on a wall.
  2. Choose Your Lights: Opt for outdoor-rated LED string lights. Solar-powered ones are excellent for balconies without easy outlet access. Look for a warm white color temperature for a cozy feel.
  3. Plan Your Path: Sketch out where the lights will go. If you are going overhead, identify attachment points like a wall, fence, or sturdy plant stand.
  4. Secure Attachment Points: Use outdoor-rated adhesive hooks, cup hooks screwed into wood, or zip ties for railings. For overhead installations, consider using a tension wire to support the string lights and prevent sagging, especially for longer runs.
  5. Hang Your Lights: Start from your power source (outlet or solar panel) and work your way out. Gently secure the lights at regular intervals, ensuring they hang evenly.
  6. Test and Adjust: Plug them in or wait for dusk. Make any necessary adjustments to spacing or tension.

This simple project instantly elevates your balcony lighting, making it inviting for evening use.

Eye-level view of a large potted plant on an urban balcony at twilight, dramatically lit from below by an upward-shining solar spotlight, highlighting

Creating Glowing Planters with Solar Spotlights

You can transform ordinary potted plants into glowing features with mini solar spotlights. This project works wonderfully for showcasing your favorite specimens or adding depth to your patio garden design:

  1. Select Your Plants: Choose larger potted plants or groupings that you want to highlight. Plants with interesting foliage, textures, or a unique silhouette work best.
  2. Pick Your Spotlights: Purchase small, outdoor-rated solar spotlights. Look for ones with adjustable heads so you can direct the light precisely.
  3. Placement in the Pot: Insert the stake of the solar spotlight into the soil at the base of your chosen plant. Angle the light so it shines upwards into the foliage or towards a specific feature of the plant.
  4. Optimize Sun Exposure: Ensure the small solar panel on the light receives direct sunlight for several hours during the day. You might need to adjust its position slightly to maximize charging.
  5. Observe and Adjust: At night, check the effect. Adjust the angle of the light head until you achieve the desired dramatic or subtle illumination.

This trick adds sophistication without requiring any wiring or complex installation.

Close-up of three upcycled glass jar lanterns on a balcony table; two glow with fairy lights, a person's hands arrange lights in the third.

Upcycled Jar Lanterns with Fairy Lights

For a whimsical touch, repurpose glass jars into charming, battery-operated lanterns:

  1. Gather Materials: You need clean glass jars (mason jars, old pickle jars), battery-operated LED fairy lights (the tiny ones on a thin wire), and optional decorative elements like twine, ribbon, or pebbles.
  2. Insert Fairy Lights: Carefully unspool the fairy lights and place the battery pack inside the jar, often hidden at the bottom. Then, gently arrange the light strand throughout the jar.
  3. Decorate (Optional): Add a layer of decorative pebbles or small shells at the bottom to stabilize the battery pack and add visual interest. Tie twine around the rim for a rustic look, or add a handle for hanging.
  4. Place or Hang: Set your glowing jars on tables, ledges, or hang them from hooks or branches using sturdy twine or wire.

These customizable lanterns provide a soft, enchanting glow and allow you to add your personal touch to your garden lighting scheme.

Woman's hands cleaning a solar garden light among container plants on a patio, late afternoon sunlight.

Maintenance Tips for Lasting Garden Lighting

Even with low-maintenance choices, a little attention goes a long way in ensuring your garden lighting performs beautifully season after season. Regular, simple tasks keep your lights shining brightly and extend their lifespan, maximizing your investment in your small space. Consistent maintenance helps you avoid unexpected outages and maintains the aesthetic appeal of your balcony lighting and patio garden design.

A person's arm wipes a dusty solar lantern on a small balcony amidst lush potted plants in a vertical garden, bathed in morning light.

Regular Cleaning for Optimal Performance

Dirt, dust, pollen, and even bird droppings can accumulate on light fixtures, particularly on solar panels and light lenses. This accumulation directly impacts performance. A dirty solar panel cannot efficiently absorb sunlight, leading to dim lights or shorter illumination times. Similarly, a grimy lens diffuses or blocks light, reducing brightness. Make it a habit to wipe down solar panels and light lenses every few weeks with a soft, damp cloth. For more stubborn grime, use a mild soap solution. Ensure you clean the fixtures when they are cool and unplugged if they are wired. This simple act significantly boosts efficiency and light output.

Hands carefully inserting new AA NiMH batteries into a solar garden stake light on a patio table, with a blurred container garden behind.

Battery Replacement and Charging Routines

Battery-operated and solar lights rely on rechargeable batteries, which have a finite lifespan. Typically, these batteries last 1-3 years before their capacity diminishes. If you notice your solar lights becoming dimmer or staying lit for shorter periods, it is likely time to replace their internal rechargeable batteries (usually AA or AAA NiMH). For non-solar battery-operated lights, simply replace the disposable batteries as needed or establish a regular charging schedule for rechargeable units. Always use the recommended battery type for your fixtures to ensure optimal performance and safety.

Woman kneels on a sunlit patio, gently parting container garden foliage to carefully inspect a low-voltage lighting wire and its connection.

Inspecting Wiring and Connections

For low-voltage wired garden lighting systems, periodic inspection of wires and connections is essential. Over time, wires can become exposed, damaged by garden tools, or gnawed by pests. You should visually check all exposed wiring for cuts, fraying, or degradation. Ensure all connections are secure and free of corrosion. If you spot any damage, repair it promptly or consult a qualified electrician. While you might not need to do this every month, an annual check, perhaps during spring garden cleanup, helps prevent electrical issues and maintains system integrity. You can find guidelines on safe electrical practices from organizations like the National Fire Protection Association.

Close-up of hands replacing a small LED bulb in string lights on a balcony railing, with a colorful new bulb and lush container plants in soft light.

Bulb Checks and Replacements

Even long-lasting LED bulbs eventually fail. If a string light bulb goes out, replace it promptly to prevent strain on the rest of the circuit. For traditional fixtures, keep spare bulbs on hand. When replacing bulbs, ensure you use the correct wattage and type specified by the manufacturer. If you are using colored lenses or diffusers, check them for cracks or fading and replace if necessary to maintain consistent light quality.

Person carefully coiling delicate solar string lights from a vertical planter on a small patio, with a covered wall sconce visible.

Winterizing and Weather Protection

While many outdoor lights are weather-resistant, extreme conditions like heavy snow, ice, or prolonged freezing temperatures can impact their longevity. For delicate string lights or less robust solar units, consider bringing them indoors for the winter. For permanent fixtures, ensure they are securely mounted and that any drainage holes are clear to prevent water accumulation. If you live in an area with harsh winters, you might want to invest in covers for your more expensive fixtures or ensure your low-voltage system is rated for severe weather conditions. Proper winterization prevents damage and costly replacements, keeping your garden lighting ready for spring.

For general gardening and plant care advice that complements your lighting design, including tips on choosing resilient plants, you can always consult reliable resources like your local Oregon State University Extension service or similar university extension programs in your region. They provide evidence-based guidance to help your entire small garden thrive.

Low-angle view of a vertical planter filled with herbs and flowers, illuminated by warm LED string lights draped across it on a small patio at dusk.

Frequently Asked Questions

How many lights do I need for a small balcony or patio?

The number of lights you need depends on the size of your space and your desired ambiance. For ambient lighting, a good rule of thumb for string lights is to aim for about 10-20 feet of lights per 50 square feet of area. For accent lighting, you might need 1-3 spotlights for a few key plants or features. Focus on layering light rather than just adding more lights. Often, fewer, strategically placed lights create a more impactful and sophisticated look than an abundance of randomly placed ones.

Can I mix solar and electric lights in my small garden?

Yes, absolutely. Mixing solar and electric lights is an excellent way to leverage the strengths of both systems. You might use solar path lights for areas where wiring is difficult or undesirable, and then complement them with electric string lights for overhead ambiance or wired spotlights for dramatic focal points. Ensure your electric lights are on a separate circuit or timer from your solar ones, as they operate independently. This approach offers flexibility and maximizes both convenience and lighting impact.

How do I hide unsightly wires in a compact outdoor space?

Hiding wires is crucial for a clean and polished patio garden design. For low-voltage wired systems, you can bury wires discreetly along the edges of planters, under gravel, or beneath deck boards. Use wire clips to secure them neatly along fences, walls, or railings, painting them to match the surface if possible. For temporary or flexible setups with string lights, consider running wires behind furniture, through the channels of railing posts, or using decorative planters to conceal their path to an outlet. You can also use outdoor cable covers that blend with your decor, or simply choose solar or battery-operated options to eliminate wires entirely in certain areas.

What’s the best color temperature for garden lighting?

Most experts recommend a warm white color temperature for garden lighting, typically ranging from 2200K to 3000K (Kelvin). This range produces a soft, inviting glow reminiscent of candlelight or incandescent bulbs, which enhances natural colors and creates a cozy, relaxing ambiance. Cooler temperatures (above 4000K) tend to appear harsh or sterile in a garden setting, more suitable for task lighting in a workshop than for creating a comfortable outdoor retreat. Always check the Kelvin rating on light packaging to ensure you select the appropriate warmth for your desired atmosphere.

For design and plant selection guidance, visit
Chicago Botanic Garden,
Brooklyn Botanic Garden, and
New York Botanical Garden.

Disclaimer: This article is for informational purposes only and is not a substitute for professional advice. Consult local extension services for region-specific recommendations, especially concerning electrical work.

Categories
Garden Design & Ideas

How to Mix and Match Pots for a Cohesive Look

Transforming your small outdoor space into a beautiful, low-maintenance garden is entirely achievable. The secret often lies in how you arrange your containers. Simply placing individual pots can lead to a cluttered, disconnected appearance, but learning how to mix garden pots for a cohesive look elevates your design from haphazard to harmonious. This guide provides practical, actionable insights for creating stunning container design ideas that feel intentional and inviting, even in the most compact areas. You will discover how to select, arrange, and plant your containers to achieve a truly coordinated garden design.

For design and plant selection guidance, visit
Oregon State Extension — Gardening,
Chicago Botanic Garden,
Brooklyn Botanic Garden,
New York Botanical Garden and
Royal Horticultural Society (RHS).

Disclaimer: This article is for informational purposes only and is not a substitute for professional advice. Consult local extension services for region-specific recommendations.

A cohesive arrangement of terracotta, grey ceramic, and wooden container plants with green foliage and white flowers, on a sunlit small urban balcony.

Understanding Cohesive Container Design

Cohesive container design means your collection of pots and plants feels intentional, unified, and harmonious. It is about creating a visual story in your small space rather than presenting a random assortment of individual elements. When you achieve cohesion, your garden space looks larger, feels more organized, and provides a calming, inviting atmosphere. This approach moves beyond simply filling pots with plants, encouraging you to consider the overall aesthetic. You begin to think about how different elements, like materials, colors, shapes, and textures, work together.

For a small balcony or patio, cohesion prevents your space from feeling cluttered. Every item holds its place and contributes to the larger picture. For instance, imagine a balcony with five different pots: one bright red ceramic, one rough terracotta, one shiny metal, one plastic, and one mosaic. Each pot might be beautiful on its own, but together, they create visual noise. A cohesive design, by contrast, might feature pots primarily in shades of grey and white, using varying textures, which instantly brings a sense of calm and sophistication to the same small space. This thoughtful approach directly impacts your enjoyment of your garden, making it a true extension of your living area.

Empty container pots in various materials (ceramic, terracotta, composite) arranged on a patio rug with a design notebook and phone for garden plannin

Developing Your Garden’s Design Theme and Palette

Before you even choose your first plant, establish a clear design theme and palette for your container garden. A “theme” defines the overall mood or style you aim to create, such as modern, rustic, tranquil, or vibrant. Your “palette” refers to the specific range of colors and materials you use for your pots, complementing your theme. These foundational choices provide the framework for every decision you make, ensuring your mix garden pots effort results in a coordinated garden design.

Start by observing your surroundings. What is the architecture of your home or building? What colors dominate your existing outdoor furniture or decor? If your space leans contemporary, clean lines and monochrome pots might fit best. If it is more traditional, classic terracotta or ornate ceramic pots could be ideal. Your goal is to create a seamless transition from your indoor living areas to your outdoor sanctuary. For example, if your living room uses cool blues and greys, extending those colors into your outdoor pots creates an immediate sense of continuity.

Close-up of a woman's hand resting on an empty unglazed terracotta pot, surrounded by concrete, fiberglass, and glazed ceramic pots on a wooden deck,

Choosing Your Pot Materials Wisely

The material of your pots significantly impacts your garden’s aesthetic and its maintenance needs. Aim for consistency, either by using one primary material or by selecting a few materials that share similar characteristics, such as texture or finish. For example, a collection of unglazed terracotta pots creates a warm, Mediterranean feel, while sleek fiberglass or concrete pots lend a modern, minimalist vibe. Here is a comparison of common pot materials to help you make informed decisions:

Material Characteristics Pros Cons Best for Theme/Palette
Terracotta (Unglazed) Earthy, porous, natural reddish-brown Excellent drainage, breathable, classic look, affordable Dries out quickly, fragile, prone to cracking in freezes, can develop salt residue Rustic, Mediterranean, traditional, natural
Glazed Ceramic Shiny or matte finish, non-porous, wide color range Retains moisture well, vibrant colors, durable (if quality), frost resistant (some types) Heavy, can be expensive, poor drainage if no hole, prone to cracking if not frost-proof Modern, eclectic, colorful, formal
Lightweight Composites (Fiberglass, Resin, Plastic) Variety of finishes (mimic stone, metal, terra cotta), non-porous, lightweight Extremely durable, lightweight, easy to move, good moisture retention, often affordable Can look artificial if low quality, may fade in intense sun over time, less breathable Modern, minimalist, large-scale, easy-care
Concrete/Stone Heavy, industrial, natural grey or dyed colors Very durable, weather-resistant, provides stability for large plants, excellent insulation Extremely heavy, can be very expensive, can crack in extreme freezes, alkaline leaching Modern, industrial, sculptural, urban contemporary
Metal (Zinc, Steel, Copper) Sleek, often industrial, can patina over time Durable, modern look, unique character as they age Can heat up in direct sun (damaging roots), expensive, some can rust, drainage can be an issue Modern, industrial, contemporary, minimalist
Wood (Cedar, Redwood) Natural, warm, rustic appearance Insulative, blends with natural settings, good for edible gardens Can rot over time, requires liners for longevity, prone to pests, heavier than composites Rustic, cottage, natural, edible gardens

To ensure a coordinated garden design, try to select 2-3 primary materials that complement each other. For example, combine unglazed terracotta with natural wood for a rustic, earthy feel. Or, pair sleek glazed ceramics with lightweight fiberglass in similar finishes for a modern, sophisticated look. The key is a deliberate choice, not a random assembly. For instance, a small urban balcony might benefit from lightweight composite pots that mimic concrete, paired with one or two genuine concrete planters as anchors, creating a contemporary yet grounded feel.

Collection of grey and one vibrant blue pot on a weathered wooden crate, with gardening tools on a sun-dappled patio.

Establishing a Color Palette for Your Pots

Once you select your materials, decide on a pot color palette. This applies to the pots themselves, not the plants, which we will discuss later. You can achieve cohesion by:

  • Monochromatic: Using different shades of the same color, like various greys, whites, or blacks. This creates a very sophisticated and calming effect, allowing your plants to be the stars.
  • Neutral: Relying on earth tones like terracotta, stone, or natural wood. These blend seamlessly with most environments and provide a timeless look.
  • Limited Accent: Choosing mostly neutral pots and introducing one or two pots in an accent color. This adds a pop of vibrancy without overwhelming the space. For example, all grey pots with one vibrant blue pot draws the eye and injects energy.
  • Harmonious Hues: Selecting colors that are close to each other on the color wheel, such as various shades of blue and green. This creates a gentle, soothing progression.

A good starting point for a coordinated garden design is to select 60% of your pots in your dominant neutral color (e.g., grey, terracotta), 30% in a complementary neutral or darker shade (e.g., black, dark grey, deep brown), and 10% in an accent color if you choose to use one. This ratio helps balance your mix garden pots effectively.

A vibrant, layered grouping of various container plants on a small urban patio, including ground pots, a wooden bench display, and a vertical wall pla

The Power of Pot Groupings and Layouts

Arranging your pots thoughtfully makes a significant difference in how your space feels. Instead of scattering pots randomly, create deliberate groupings. This is a fundamental aspect of container design ideas for small spaces. Grouping pots creates visual weight, makes your collection look more abundant, and allows you to create mini-landscapes within your compact area. You are essentially creating “zones” in your small-space layouts.

Five mixed container pots, varying in height and shape, grouped closely on a patio. They contain herbs, flowers, and succulents.

Creating Container Groupings

Group your pots in odd numbers—three, five, or seven—for a more natural and visually appealing arrangement. Place them close together so their rims almost touch. This creates the illusion of a single, larger planting rather than individual pots. Think of a tight cluster of three pots: one tall, one medium, and one low. This variation in height adds dynamic interest and depth.

When forming groupings:

  1. Vary Heights: Use pots of different heights to create a sense of natural elevation. A tall pot acts as an anchor, while shorter pots fill the foreground. You can also use risers or overturned pots to elevate some containers.
  2. Mix Shapes: Combine round, square, or rectangular pots within a grouping to add visual interest. Ensure the materials or colors remain consistent to maintain cohesion.
  3. Consider Proportion: Ensure the sizes of the pots within a grouping are proportional to each other and to the overall space. A giant pot next to a tiny one can look unbalanced unless done with specific intent.
  4. Leave Room for Movement: While grouping is important, avoid overcrowding your space. Maintain clear “traffic flow” paths. For a small balcony, this might mean keeping a minimum of 24 inches (60 cm) clear for walkways. On a patio, ensure enough space around seating areas for comfortable movement, usually at least 36 inches (90 cm) behind chairs.

For example, you might place a large, neutral-colored pot containing a small tree or shrub at the back of a corner, flanked by two medium-sized pots with flowering plants, and then a small, low bowl of succulents at the front. This creates a multi-layered effect that draws the eye into the grouping.

Long, narrow urban balcony showing defined zones. A cozy dining nook with bistro table, chairs, and lush container plants at one end, separate from si

Strategic Placement for Small-Space Layouts

In compact areas, every inch counts. Use your container groupings to define different zones within your outdoor space. A long, narrow balcony might benefit from a grouping at one end for a small dining nook, with another smaller grouping near the door. For a courtyard, use groupings to delineate a seating area from a more functional utility zone.

Consider the “zoning” of your space. Do you need an area for relaxation, an area for eating, or a small workspace? Container groupings can subtly define these areas without needing permanent structures. For instance, a cluster of tall, leafy pots can act as a natural screen, suggesting a boundary for a cozy reading nook on a larger patio. Always keep your primary purpose for each area in mind as you place your coordinated garden design elements.

Balcony corner with mixed container sizes & shapes: tall grey, wide terracotta, rectangular wood, small blue on stand. Thoughtful arrangement.

Selecting Container Sizes and Shapes Strategically

The sizes and shapes of your containers are critical for a visually appealing and healthy container garden. They impact not only the aesthetic but also the long-term success of your plants and the perceived spaciousness of your area. Thinking strategically about these aspects contributes significantly to achieving a cohesive design with your mix garden pots.

A sunlit urban balcony corner showcasing various container sizes and shapes, including a tall olive tree in a large pot, wide sedum bowl, medium glaze

Proportion and Scale

When selecting containers, consider the scale of your space. In a small area, oversized pots can quickly overwhelm, while too many tiny pots can look messy and fussy. Aim for a mix of sizes that feel balanced. A good rule of thumb for small spaces is to have a few larger, anchor pots (perhaps 15-20 inches in diameter or height) and several medium-sized pots (10-14 inches), with only a couple of very small accent pots (under 8 inches). This creates visual hierarchy and depth.

The shape of your pots also influences the overall feel. Tall, narrow pots create vertical interest, drawing the eye upward. Wide, shallow bowls are excellent for showcasing groundcovers or succulents. Round pots offer a soft, organic look, while square or rectangular planters provide clean lines and a modern edge. Mixing these shapes within a consistent material and color palette adds dynamic interest without sacrificing cohesion. For instance, a trio of pots could include a tall square, a medium round, and a low rectangular planter, all in a charcoal grey composite material.

Eye-level view of a 'Thriller, Filler, Spiller' pot with red cordyline, coral petunias, and chartreuse sweet potato vine on a patio.

The “Thriller, Filler, Spiller” Concept for Potting

This classic planting concept helps you create dynamic and balanced arrangements within individual pots, which in turn contributes to the overall coordinated garden design. It encourages you to think about different plant roles and how they interact visually.

  • Thriller: This is your star plant. It is tall, dramatic, and provides vertical interest or a focal point. Think of ornamental grasses, small upright shrubs, cannas, or upright fuchsias. Place it in the center or back of your pot.
  • Filler: These plants are mounding or bushy and fill in the space around the thriller. They add volume and often contribute complementary colors or textures. Examples include impatiens, petunias, coleus, or calibrachoa.
  • Spiller: These plants trail over the edge of the pot, softening its hard lines and adding a cascading effect. Examples are sweet potato vine, creeping jenny, lobelia, or nasturtiums.

Using this concept consistently across your mix garden pots ensures each container is a mini-masterpiece. For example, a large terracotta pot might feature a dwarf cypress as the thriller, surrounded by a white calibrachoa filler, with a silvery dichondra spilling over the sides. The combination creates a rich, full look from a single container.

Close-up of a vibrant container trio: dark purple coleus, chartreuse sweet potato vine, silver Senecio, and pink calibrachoa on a patio bench, showcas

Mastering Color and Texture Through Foliage and Flowers

While the pots provide the structural foundation, the plants themselves bring your container garden to life. Mastering color and texture in your plant choices is essential for creating a visually rich and cohesive display. Remember, a coordinated garden design prioritizes thoughtful plant selection that complements your chosen pot palette.

Three container plants display varied foliage: chartreuse coleus, delicate maidenhair fern, and wispy silver Dichondra 'Silver Falls' on a patio.

Beyond Blooms: Foliage as a Primary Design Element

Many beginner gardeners focus solely on flower color, but foliage offers texture, shape, and long-lasting color that blooms often cannot. Foliage plants provide structure and interest even when flowers are not present. Consider plants with varied leaf shapes (broad, narrow, feathery), sizes (large hosta leaves, tiny sedum leaves), and colors (lime green, deep burgundy, variegated, silver). These elements contribute significantly to the overall texture of your planting.

For example, combine the bold, dark leaves of a coleus with the delicate, lacy fronds of a fern and the fine, wispy blades of an ornamental grass. Even if all three are green, their contrasting textures create a fascinating visual tapestry. Incorporating silver foliage plants, like lamb’s ear or dusty miller, adds a cooling element and pairs beautifully with almost any color scheme.

Sun-dappled balcony with containers demonstrating plant color palettes: analogous blue/purple/pink railing planter, monochromatic purple pot, compleme

Developing a Plant Color Palette

Just as you chose a color palette for your pots, select one for your plants. This is where you bring your coordinated garden design vision to full fruition. You can choose:

  • Monochromatic: Using different shades of a single color for your flowers and foliage. For example, a pot filled with various shades of purple petunias, calibrachoa, and verbena creates a sophisticated and unified look.
  • Analogous: Selecting colors that are next to each other on the color wheel, such as blues, purples, and pinks, or yellows, oranges, and reds. This creates a harmonious, soothing flow.
  • Complementary: Pairing colors opposite each other on the color wheel, like blue and orange, or purple and yellow. This creates high contrast and vibrant energy. Use complementary colors sparingly for strong focal points.
  • Limited Palette with Neutrals: Focus on green foliage as your dominant “color,” then introduce a limited palette of 2-3 flower colors. This allows the plants’ forms and textures to shine. For instance, a mix of green hostas, ferns, and white impatiens offers elegance and tranquility.

When you mix garden pots, consider how the plants’ colors complement your pot choices. If your pots are a neutral grey, you have freedom with plant colors. If your pots are a bold blue, you might choose plants with yellow or orange flowers for a complementary pop, or white and silver plants for a cooler, more serene feel.

Urban patio container garden featuring diverse pots with Salvia, petunias, ornamental grass, sedum, herbs, and pansies, indicating continuous seasonal

Seasonal Interest and Bloom Sequence

Plan your plantings to ensure continuous interest throughout the growing season. This involves selecting plants with different bloom times or those that offer attractive foliage for an extended period. For instance, pair spring-blooming bulbs with summer-flowering annuals and autumn-interest plants like ornamental grasses or cold-tolerant pansies. This ensures your coordinated garden design remains vibrant for months.

Prioritize water-wise choices, especially in hot climates, to reduce maintenance and conserve resources. Succulents, sedums, lavender, and many ornamental grasses thrive with less water. Incorporate native and pollinator-friendly plants whenever possible. Examples include coneflowers, salvia, bee balm, and various herbs. These plants support local ecosystems and often require less care once established, aligning perfectly with a low-maintenance ethos. Your garden becomes a haven for bees and butterflies, contributing to environmental health.

Sun-drenched urban patio path with diverse container plants creating visual flow towards a tall ornamental grass focal point. A hand waters a plant.

Creating Visual Flow and Focal Points

An effective container garden design guides the viewer’s eye through the space, creating a journey rather than a static display. This is “visual flow.” Within this flow, “focal points” are the specific elements or groupings that immediately capture your attention. Strategically using these elements elevates your mix garden pots into a truly coordinated garden design.

Urban balcony corner showing visual flow: four identical terracotta pots repeat along a railing, and three progressively taller pots with escalating f

Guiding the Eye

Visual flow is achieved by arranging your pots in a way that leads the eye from one element to the next. You can create this flow through:

  • Repetition: Repeat certain pot colors, plant types, or even a particular pot shape throughout your space. This creates a rhythm and continuity that gently moves the eye along. For instance, using the same style of medium-sized terracotta pot at regular intervals along a railing.
  • Progression: Arrange pots from smallest to largest, or from lightest color to darkest. This creates a subtle sense of movement and draws the eye deeper into a grouping or along a path. Imagine a line of three pots, gradually increasing in height, each containing a plant with an escalating burst of color.
  • Lines and Curves: Use the natural lines created by your container groupings. A straight line of pots along a wall provides a clear path, while a curved arrangement can create a more meandering, inviting feel.

From indoors, consider the view you have through your windows or doors. Your outdoor space is an extension of your indoor environment. Place anchor pots or striking plant combinations where they are most visible from key indoor vantage points. A beautiful container arrangement seen through a kitchen window can make doing dishes a much more pleasant experience, for example.

Tall, dark grey geometric planter with feather reed grass serves as a strong focal point among smaller pots on a cozy urban balcony.

Defining Focal Points

A focal point is the first thing your eye notices when you look at a specific area. In a small container garden, you do not want too many focal points, or the space will feel busy. One or two strong focal points per distinct zone are sufficient. These can be created by:

  • A Unique Pot: An unusually shaped pot, a pot in a striking accent color, or one with intricate texture naturally draws attention. For example, a large, sculptural concrete planter in a cluster of smaller, simpler pots immediately stands out.
  • A Distinctive Plant: A plant with striking foliage (e.g., a large-leafed hosta), a dramatic bloom (e.g., an orchid in a sheltered spot, a vibrant canna), or a sculptural form (e.g., a bonsai, a carefully pruned small shrub) can serve as a focal point.
  • Height: A very tall plant or a pot elevated on a stand creates an immediate focal point by drawing the eye upwards. An ornamental grass that sways gently in the breeze at eye level becomes a dynamic anchor.

You can use either symmetry or asymmetry to arrange your focal points. Symmetry, where identical elements mirror each other, creates a formal, balanced, and calming look, often used around doorways or on either side of a bench. Asymmetry uses different but balanced elements to create a more dynamic, natural, and modern feel. For example, a large pot with a striking plant on one side of a seating area might be balanced by a grouping of three smaller, varied pots on the other side, achieving equilibrium without identical mirroring.

A vibrant small urban patio with a multi-tiered plant stand, wall garden, hanging baskets, and railing planter overflowing with diverse plants in warm

Integrating Vertical Elements and Tiered Displays

In small-space gardening, thinking vertically is essential. Walls, railings, and even the air above your patio offer valuable planting real estate. Integrating vertical elements and tiered displays dramatically expands your growing capacity and adds dynamic visual interest, making your container design ideas truly impactful.

Vibrant purple clematis climbing a wooden trellis above tiered terracotta wall planters overflowing with herbs and greens on a sunny patio.

Maximizing Height in Small Spaces

Vertical gardening allows you to layer plants at different heights, creating a lush, multi-dimensional look that makes your space feel bigger and more abundant. This is particularly effective for achieving a coordinated garden design when floor space is limited.

Consider these vertical solutions:

  • Trellises: Attach a trellis to a wall or place one inside a larger pot. Grow climbing plants like clematis, morning glories, or even edible peas and beans. The trellis itself can be a design element, chosen to match your garden’s theme (e.g., ornate metal for traditional, simple wood for rustic). Ensure trellises are securely fastened to prevent tipping, especially in windy conditions.
  • Wall Planters: These come in various forms, from individual pockets to modular systems. Plant them with succulents, herbs, or small annuals. Wall planters transform a blank wall into a living work of art, freeing up floor space. Ensure the wall can support the weight of the planters when filled with wet soil and plants.
  • Tiered Stands: A tiered plant stand holds multiple pots at varying heights within a compact footprint. This creates an instant vertical grouping and offers an excellent way to display a collection of smaller plants. Choose a stand material that matches or complements your pot palette for cohesion.
  • Hanging Baskets: While common, carefully selected hanging baskets can add another layer of height. Choose baskets with a consistent liner material (e.g., coconut coir) and plant them with trailing varieties that cascade beautifully. Ensure hooks and supports can safely hold the weight of wet baskets.

Three tiered plant pots on a patio, from a wall-mounted trailing ivy to a terracotta pot on an inverted pot, to a low ceramic pot with petunias.

Creating Height Transitions

When you combine vertical elements with your floor-level pots, aim for smooth height transitions. Avoid sudden jumps from very low to very high without anything in between. Imagine a gentle slope from your tallest wall planter down to your lowest floor pot. This creates a natural, flowing visual effect rather cable-stacked containers.

For example, a tall trellis with a climbing vine can be flanked at its base by a medium-height pot containing a bushy plant, which then leads to a lower, wider pot spilling over the edge. This layering effect adds depth and complexity, drawing the eye through your entire display. You might also use an inverted pot or a sturdy plant caddy to subtly elevate a medium-sized pot, bridging the gap between a ground-level planter and a higher tiered display.

Always consider the weight and stability of your vertical structures. A wall-mounted planter full of wet soil can be very heavy. Use appropriate fasteners for your wall type. For freestanding tiered stands, place heavier pots on the bottom to improve stability. If you live in a windy area, secure any tall structures or choose heavier pots for stability. Wind can easily topple lightweight pots and tall plants.

Close-up of three healthy container plants (rosemary, sedum with gravel, ornamental grass) on a sunny urban patio, showing practical, low-maintenance

Maintenance by Design: Practical Choices for Lasting Beauty

A truly successful container garden is not just beautiful; it is also manageable. Integrating “maintenance by design” means making choices during the planning phase that reduce ongoing effort and ensure your garden remains vibrant with minimal fuss. This aligns perfectly with the Simple Garden Joy ethos of low-maintenance gardening and helps you sustain your coordinated garden design long-term.

A close-up of a turquoise glazed pot with sedum, a grey composite planter with ornamental grass, and a terracotta pot with succulents on a patio.

Selecting Low-Upkeep Pots and Plants

Your choice of containers directly impacts maintenance. Lightweight composite pots, for example, are easier to move for seasonal protection or redesign. Glazed ceramic or plastic pots retain moisture longer than unglazed terracotta, meaning less frequent watering, particularly in hot climates. If you opt for terracotta, ensure you are prepared for more frequent watering or consider using a cachepot (a decorative outer pot with the plant in a plain inner pot) to reduce moisture loss.

When choosing plants, prioritize those suited to your local climate and sun conditions. Drought-tolerant plants, like succulents, sedums, lavender, and many ornamental grasses, require less water. Opt for varieties known for disease resistance to minimize pest and disease management. Native plants are often an excellent choice as they are adapted to your region, typically requiring less water, fertilizer, and pest control once established. Pollinator-friendly plants like salvia, verbena, and coneflowers not only support local ecosystems but are also often robust and low-maintenance. They thrive in pots with proper drainage.

For example, instead of a high-maintenance rose, consider a dwarf rosemary bush for its fragrance, texture, and resilience. Replace thirsty annuals with a mix of perennial herbs (thyme, oregano) and succulents that require less attention and offer continuous interest. This mindful selection simplifies your gardening routine significantly.

Patio corner with various container plants, showcasing a self-watering pot, discreet drip irrigation system, and a decorative watering globe.

Efficient Watering Systems and Potting Mix

Proper watering is perhaps the most critical maintenance task for container gardens. Designing for efficient irrigation saves you time and ensures your plants thrive. Consider these options:

  • Self-Watering Pots: These pots have a reservoir at the bottom that wicks water up to the soil, extending the time between waterings. They are excellent for busy gardeners.
  • Drip Irrigation: For larger container collections, a simple drip irrigation system connected to a timer can automate watering. This delivers water directly to the plant’s roots, minimizing waste.
  • Watering Globes: While not fully automated, these decorative glass or plastic spheres release water slowly into the soil, providing a consistent moisture supply for several days.
  • Right-Sized Pots: Smaller pots dry out faster than larger ones. Using larger pots for substantial plants reduces watering frequency, ensuring your mix garden pots remain hydrated.

The quality of your potting mix also plays a crucial role. Always use a high-quality, peat-free potting mix specifically designed for containers. Peat-free mixes are more environmentally sustainable and often retain moisture and nutrients effectively. Refreshing the top few inches of potting mix annually, or entirely repotting every 1-2 years, provides fresh nutrients and improves drainage. This simple practice revitalizes your plants without needing constant fertilization.

When preparing your containers, ensure every pot has adequate drainage holes. Placing a layer of broken pottery or landscape fabric over the drainage hole prevents soil from washing out while allowing water to escape freely. Stagnant water causes root rot, a common killer of container plants. For very large pots, wheeled bases or dollies make moving heavy containers much easier for cleaning, rearrangement, or protecting plants from frost. This simple foresight provides flexibility and reduces physical strain, making your coordinated garden design more adaptable and enjoyable.

Eye-level shot of a hand resting on a watering can, next to a tiered vertical garden with mixed pots of herbs and flowers on an urban balcony.

Frequently Asked Questions

How many pots should I use in a small space?

Focus on quality over quantity. Instead of many tiny, disparate pots, use fewer, larger pots grouped intentionally. Aim for 3-7 substantial containers or groupings. This creates a fuller, more impactful display without cluttering your space. For instance, three well-chosen groupings of pots often look better than ten individual, scattered pots.

Can I mix different pot colors?

Yes, you absolutely can mix pot colors, but do so with intention for a cohesive look. Choose a dominant neutral color (e.g., grey, terracotta, black) for most of your pots, then introduce one or two accent colors. Alternatively, stick to a monochromatic palette of various shades of the same color, like light and dark greys, or different earthy tones. This creates variety while maintaining harmony.

What plants are best for low-maintenance container gardening?

Select plants that match your local climate and sun conditions. Succulents, sedums, ornamental grasses, herbs like rosemary and lavender, and many native perennials are excellent, low-maintenance choices. Look for plants known for drought tolerance and disease resistance. These will thrive with less frequent watering and care, ensuring your coordinated garden design remains beautiful without constant effort.

How do I make my container garden look bigger?

Use vertical space with trellises, wall planters, or tiered stands. Create cohesive groupings of pots with varied heights and sizes to add depth. Use a limited, harmonious color palette for both pots and plants to create a calm, unified feel that makes the space seem less busy. Additionally, choose larger pots over many small ones to create a sense of abundance and scale.

Categories
Garden Design & Ideas

Budget Garden Design Tips That Look Expensive

Designing a beautiful garden, especially in a small space, does not require a large budget. You can create an outdoor sanctuary that looks luxurious and feels inviting without spending a fortune. This guide provides practical strategies and actionable advice to help you achieve a stunning garden makeover that is both affordable and sustainable.

Disclaimer: This article is for informational purposes only and is not a substitute for professional advice. Consult local extension services for region-specific recommendations.

Woman kneeling on a patio, looking from a sketchbook with garden plans to empty pots, embodying thoughtful garden design.

Plan with Purpose: The Foundation of Budget Garden Design

Every successful budget garden design begins with a clear plan. Spontaneous purchases often lead to mismatched items and wasted money. Before you buy anything, assess your space, understand its limitations, and define your vision. This strategic approach ensures your affordable garden makeover looks cohesive and thoughtful.

Tape measure on a sunlit balcony floor near terracotta pots and a planter stand, with shadows highlighting sun and shade zones.

Assess Your Space

Start by observing your balcony, patio, courtyard, or compact yard throughout the day. Note how sunlight moves across the area, identifying sunny and shady spots. Understand prevailing winds and any existing features you want to keep or hide. Measure your space accurately. Knowing your dimensions helps you choose appropriately sized elements and prevents overcrowding.

Person on patio contemplating design, surrounded by container plants, a vertical garden, and notebook.

Define Your Needs and Wants

Consider how you will use your outdoor area. Do you need a cozy reading nook, an entertaining zone, or a productive edible garden? Perhaps you want a blend of all three. Listing your priorities helps you allocate your budget effectively. For instance, if entertaining is key, comfortable seating and practical surfaces take precedence over elaborate plant collections.

Person's hands sketching a compact urban balcony layout with zones and container ideas on kraft paper at a wooden patio table.

Sketch Your Layout

A simple sketch on paper transforms your vision into a practical guide. Draw the outline of your space. Mark existing permanent features like doors, windows, or railings. Experiment with different arrangements for seating, containers, and pathways. This step, sometimes called “zoning,” helps you designate areas for different activities. For example, you might create a dining zone, a quiet corner, and a planting area. Aim for clear traffic flow, ensuring pathways are wide enough for comfortable movement, generally at least 24-30 inches for a single person. Consider the view from indoors too; make sure your garden presents an appealing picture when seen from inside your home.

Hands sort through salvaged items like pallet wood, a metal bucket, and a ceramic pot on a patio for DIY gardening.

Shop Your Home and Salvage Yard First

Before buying new items, look for hidden treasures around your home. Old ladders can become vertical planters. Discarded wooden crates transform into rustic shelves or container stands. Seek out affordable garden makeover supplies at thrift stores, yard sales, or even construction salvage yards. You often find unique, character-filled pieces for a fraction of the cost of new items. For example, an old metal bucket, cleaned and drilled with drainage holes, makes a charming planter. Wooden pallets, often available for free, offer versatile material for DIY projects like privacy screens or vertical gardens.

Vibrant urban balcony garden with artfully grouped terracotta, galvanized, and painted wood containers, lush with herbs and flowers, under golden sunl

Clever Container Strategy for Affordable Elegance

Containers are the backbone of small-space gardening. A thoughtful container strategy makes a significant impact on your budget garden design, creating a polished look without expensive pots. Focus on cohesion and smart grouping.

A collection of various-textured charcoal grey pots on a patio, filled with green plants and white flowers, unified by color.

Choose Cohesive Materials and Colors

You do not need matching pots, but aim for a cohesive look. Select a limited palette of materials or colors for your containers. For example, use terracotta pots of varying sizes, or choose plastic pots in a single neutral shade like charcoal or cream. This creates a unified appearance, making your collection look intentional and well-designed rather than haphazard. A mix of textures, such as smooth ceramic and rough concrete, adds interest as long as the color scheme remains consistent.

Person spray-painting an old plastic laundry basket on a patio, surrounded by other budget-friendly containers awaiting transformation.

Thrift and Upcycle Containers

High-end containers cost a lot. Instead, hunt for pots at thrift stores, yard sales, or community plant swaps. Paint old plastic pots with spray paint designed for outdoor use to give them a fresh, uniform appearance. You can transform buckets, old tires, or even large food-grade containers into stylish planters. Always ensure containers have drainage holes. If a container lacks them, drill a few holes in the bottom to prevent root rot. This simple step protects your plants and extends the life of your budget-friendly vessels.

A lush, artfully grouped display of five container plants on a stone patio, showcasing varied heights, colors, and trailing foliage.

Group for Impact

Instead of scattering individual pots, group them together. Create clusters of three or five containers of varying heights and sizes. This arrangement creates a lush, abundant display, making the area feel more substantial and luxurious. The “thriller, filler, spiller” concept works wonderfully for container groupings: choose a tall plant (thriller) for dramatic height, medium-sized plants (fillers) to bulk out the pot, and trailing plants (spillers) to cascade over the sides. This technique creates visual interest and depth, elevating your budget garden design.

A wheeled plant caddy holds a large ceramic pot with an olive tree on a flagstone patio, next to a terracotta pot elevated by brick pot feet.

Utilize Wheeled Bases and Pot Feet

For larger containers, wheeled bases offer flexibility, allowing you to easily move plants for optimal sunlight or to rearrange your layout. Pot feet or risers lift containers slightly off the ground, improving drainage and air circulation. This prevents staining on your patio surface and helps roots stay healthier. You can create inexpensive pot feet using old bricks, flat stones, or even plastic bottle caps.

Lush, multi-tiered vertical garden on an urban patio wall, featuring ground pots and a sleek wall-mounted planter brimming with diverse plants.

Vertical Gardening and Layers: Maximize Your Small Space

When you have limited ground space, look up. Vertical gardening and layering techniques add immense visual interest and plant capacity without consuming precious floor area. These methods are crucial for an affordable garden makeover, making your small space feel larger and more dynamic.

Eye-level shot of a patio wall featuring a purple clematis on a reclaimed wood trellis and a fabric wall planter bursting with petunias, sedum, and he

Embrace Trellises and Wall Planters

Install trellises against walls or fences for climbing plants like clematis, edible peas, or small gourds. You can construct simple trellises from bamboo stakes, reclaimed wood, or even old bed frames. Wall-mounted planters, such as repurposed shoe organizers or DIY pallet planters, allow you to grow herbs, succulents, or annual flowers directly on a vertical surface. These turn a plain wall into a living work of art, enhancing your budget garden design significantly.

Hands placing a potted rosemary on a rustic wooden tiered plant stand filled with herbs on a sunny balcony, showcasing vertical gardening.

Tiered Stands and Shelving

Tiered plant stands or shelving units create multiple levels for containers. This layering technique allows you to grow more plants in a compact footprint. Look for inexpensive shelving units at hardware stores, or build your own from salvaged wood. This strategy is particularly effective for herb gardens or collections of small potted plants. The vertical arrangement adds depth and complexity, preventing the space from appearing flat or cramped.

A hand gently adjusts pink fuchsia trailing from a repurposed blue colander hanging planter on a painted brick wall.

Hanging Baskets and Planters

Hang baskets from sturdy hooks on walls, pergolas, or ceilings. These add another dimension to your planting, creating a soft, cascading effect. Choose plants that trail well, such as petunias, fuchsias, or strawberries. Use strong, secure hooks to ensure safety. You can also craft hanging planters from repurposed materials like old colanders or coconut shells, adding a unique, artisanal touch to your affordable garden makeover.

A layered arrangement of container plants on a patio, showing tall ornamental grass, colorful petunias, and trailing thyme in various pots.

Create Height Transitions with Plants

Beyond hardware, use plants of varying heights to create visual layers. Place taller plants at the back or center of groupings, medium-sized plants in the middle, and shorter, trailing plants along the edges. This natural layering creates depth and makes the space feel lush and abundant. For example, a tall ornamental grass or a slender evergreen shrub provides a backdrop, while colorful annuals fill the mid-ground, and creeping thyme spills over the front.

A blue-green Agave plant in a large terracotta pot on a wooden stool, surrounded by smaller plants on a patio in warm sun.

Creating Focal Points: Draw the Eye, Define Your Space

Every well-designed garden benefits from a focal point, which is the first thing your eye notices. A strong focal point gives your garden purpose and direction, making it feel more intentional and expensive. You can achieve this effect with minimal investment in your budget garden design.

A charming casement window in a stucco wall, enhanced by a weathered wooden bench holding various potted plants under warm afternoon light.

Utilize Existing Features

Look for existing elements in your space that can serve as a natural focal point. This could be a striking architectural feature, a mature plant, or a beautiful view. Enhance it rather than creating something new. For instance, if you have a charming window, place a small bench and a few potted plants beneath it to highlight its appeal. This approach saves money and capitalizes on your garden’s inherent character.

A vibrant electric blue bird bath repurposed as a succulent planter, surrounded by potted herbs and artfully arranged river stones on a small urban pa

DIY Art and Sculptures

Transform everyday objects into garden art. An old bird bath, painted a vibrant color, becomes a compelling centerpiece. A collection of smooth river stones arranged artfully provides a calming visual. You can also create simple sculptures from reclaimed wood or metal scraps. These DIY elements add personality and uniqueness to your affordable garden makeover, drawing the eye without breaking the bank. For inspiration, consider visiting local art fairs or community gardens to see how others use salvaged materials.

A tall, elegant Karl Foerster Feather Reed Grass in a sleek dark grey planter is the focal point of a small, sunlit patio corner with a bistro set.

Strategic Plantings

A single, striking plant in an attractive container can act as a powerful focal point. Choose a plant with interesting foliage, a unique form, or vibrant flowers. An upright ornamental grass, a dwarf evergreen, or a dramatic canna lily can command attention. Place this focal plant where it is easily seen from your main viewing areas, such as your indoor window or your outdoor seating. The surrounding plants then complement, not compete with, your chosen centerpiece.

Asymmetrically arranged container garden on a small patio featuring a tall grass planter balanced by a cluster of smaller pots.

Consider Symmetry or Asymmetry

You can create a sense of balance through either symmetry or asymmetry. Symmetrical design, where elements mirror each other, often feels formal and elegant. Place identical planters on either side of a doorway, for example. Asymmetrical design, which balances different elements by their visual weight, creates a more relaxed, natural feel. This might involve grouping a tall planter with several smaller ones to achieve visual equilibrium. Both approaches work for budget garden design, depending on the aesthetic you prefer.

Close-up of container plants on a patio at sunset, showing silvery lamb's ear, purple heuchera, and green creeping Jenny.

Mastering Color and Texture Palettes on a Budget

Color and texture are powerful design tools that profoundly influence the feel of your garden. A well-chosen palette makes your space feel cohesive and sophisticated, even with inexpensive plants and materials. Focus on creating contrast and harmony to achieve an expensive look on a budget.

A stylish container garden featuring diverse foliage: delicate maidenhair fern, bold Bergenia, variegated hosta, and deep purple Heuchera on an urban

Emphasize Foliage Over Flowers

While flowers provide bursts of color, they are often ephemeral. Focus on plants with interesting foliage textures and colors. This provides year-round appeal and a consistent design aesthetic. Consider plants with variegated leaves, deep purple hues, or silvery-green tones. Mixing fine-textured foliage (like ferns) with bold-textured leaves (like hostas) creates dynamic visual contrast. For instance, you might pair the delicate fronds of a maidenhair fern with the broad leaves of a bergenia. This strategy is cost-effective because foliage plants are often more affordable and require less maintenance than those grown purely for their blooms. The Missouri Botanical Garden offers excellent resources on selecting plants for foliage interest.

A serene urban balcony garden at dusk, featuring terracotta and gray pots filled with blue, purple, and white flowers, softly lit by fairy lights.

Limit Your Color Palette

A restricted color palette often looks more sophisticated than a riot of many colors. Choose two to three main colors for your flowers and accessories. For example, a cool palette of blues, purples, and whites creates a serene atmosphere. A warm palette of reds, oranges, and yellows offers vibrancy. Using a monochromatic scheme, featuring different shades of a single color, creates a highly elegant and tranquil garden. This intentional choice makes your budget garden design appear carefully curated.

Low-angle shot of a deep teal glazed pot and terracotta pot on a jute rug, surrounded by pebbles, stone, and driftwood on a patio.

Introduce Texture with Hardscaping and Accessories

Beyond plants, incorporate texture through your hardscaping and garden accessories. Rough-hewn stones, smooth river pebbles, weathered wood, or a textured outdoor rug add depth and interest. A ceramic pot with a glazed finish next to a terracotta pot offers pleasing contrast. These elements contribute to the overall tactile experience of your garden, making it feel richer and more complex.

Container garden on a patio in late autumn, featuring a small tree with interesting bark, evergreen herbs, and pansies.

Plan for Seasonal Interest

Consider how your garden will look throughout the year. Select plants that offer interest across multiple seasons, whether through their flowers, foliage, berries, or bark. For example, a small deciduous tree with attractive winter bark provides year-round appeal. Spring bulbs emerge early, followed by summer annuals and perennials, then plants with autumn color or winter berries. This thoughtful planning ensures your affordable garden makeover remains captivating regardless of the season.

A woman's hand gently touches a lavender plant amidst a vibrant container garden on a patio, featuring rosemary, sedum, and calendula.

Smart Planting Choices: High Impact, Low Cost, Sustainable Growth

The plants you choose form the heart of your garden. Smart planting choices save you money, reduce maintenance, and support local ecosystems. Prioritize sustainable, resilient plants for your budget garden design.

Woman's hands label small pots of green seedlings on a weathered patio table, next to plant cuttings rooting in water, with seed packets.

Start from Seed or Cuttings

Purchasing mature plants is convenient but expensive. Starting plants from seed or propagating from cuttings offers a significantly cheaper alternative. Many annuals, herbs, and even some perennials grow readily from seed. Ask friends and neighbors for cuttings from their healthy plants. This method requires patience but yields many plants for minimal cost. You can also find seed swaps at local gardening clubs.

A fuzzy bumblebee foraging nectar on a vibrant purple coneflower in a terracotta pot, bathed in warm afternoon sun on a patio.

Choose Native and Pollinator-Friendly Plants

Native plants are naturally adapted to your local climate and soil conditions, meaning they require less water, fertilizer, and pest control once established. This dramatically reduces long-term maintenance costs and environmental impact. Many native plants also support local pollinators like bees and butterflies, contributing to biodiversity. For region-specific plant recommendations, consult your local agricultural extension service or a native plant society. The New York Botanical Garden offers extensive resources on native plant gardening and ecological benefits.

Hands gently dividing a perennial plant on a weathered patio table, surrounded by small empty terracotta pots and a trowel, under soft sunlight.

Embrace Perennials and Divisions

Perennials return year after year, eliminating the need to replant annually. While initial perennial costs might be higher than annuals, their longevity makes them more cost-effective over time. Furthermore, many perennials can be divided every few years, giving you new plants for free to expand your garden or share with others. Look for perennial divisions at plant swaps or from generous gardening friends. This practice helps your affordable garden makeover grow over time without continuous expense.

An artfully arranged collection of drought-tolerant plants in various containers, including lavender, succulents, and ornamental grass, on a sunny urb

Select Water-Wise Plants

Water is a precious resource, and excessive watering costs money. Choose drought-tolerant plants, often called xeriscape plants, that thrive with minimal irrigation once established. Succulents, sedums, lavender, and many ornamental grasses are excellent choices for water-wise gardening. Group plants with similar water needs together to optimize your watering routine. This thoughtful selection reduces your water bill and conserves resources, making your budget garden design more sustainable.

Hands mixing dark, rich peat-free potting mix with compost, coir, and perlite in a green trug on a patio, an empty terracotta pot nearby.

Improve Your Soil with Composted Materials

Healthy soil is the foundation of a thriving garden. Instead of buying expensive amendments, enrich your soil with free or low-cost organic matter like homemade compost, leaf mold, or aged wood chips. Compost improves soil structure, drainage, and nutrient retention, leading to healthier, more resilient plants. Many communities offer free compost or wood chips. For container gardening, use a peat-free potting mix. Peat harvesting has environmental concerns, so choosing alternatives supports sustainable practices. A good quality potting mix often includes coir, compost, and perlite.

Cozy urban balcony at dusk with warm solar string lights draped over an ivy-covered trellis for privacy, illuminating various container plants.

Strategic Lighting and Privacy: Setting the Mood for Less

Thoughtful lighting and privacy solutions elevate your garden’s ambiance, making it feel luxurious and functional, especially in the evening. You can achieve these effects with inexpensive materials and smart placement in your budget garden design.

Cozy urban patio at twilight, illuminated by solar stake lights in planters, solar string lights on a privacy screen, and overhead LED string lights c

Affordable Lighting Solutions

Solar Lights: Solar-powered stake lights or string lights require no wiring and cost nothing to operate after the initial purchase. Place stake lights along pathways or to highlight specific plants. Drape solar string lights across railings, overhead structures, or through shrubbery for a magical glow. They create an inviting atmosphere perfect for evening enjoyment. Ensure you purchase quality solar lights that provide adequate illumination and withstand outdoor conditions.

LED String Lights: For areas with access to an outdoor outlet, low-energy LED string lights offer bright, durable illumination. Look for commercial-grade string lights with replaceable bulbs for longevity. These provide a sophisticated, café-style ambiance. Always ensure outdoor lighting is rated for outdoor use and properly installed for safety.

Repurposed Lanterns: Fill old glass jars or lanterns with battery-operated fairy lights or LED candles. These provide soft, diffused light and add a charming, rustic touch. Group them on tables, hang them from hooks, or place them along steps for gentle guidance after dark.

A small patio with a sage green painted lattice panel and climbing vine, next to a bamboo frame woven with dried branches, creating privacy.

Creative Privacy Screening

Lattice Panels: Inexpensive wooden or plastic lattice panels provide a base for climbing plants, quickly creating a green screen. You can paint lattice to match your aesthetic. Install them directly to existing fences or secure them to posts in containers for a mobile screen. This offers instant privacy and a beautiful backdrop for your budget garden design.

Bamboo Frames: Construct simple frames from bamboo poles and weave natural materials through them, such as willow branches, rushes, or even thick yarn. This creates a natural, breathable screen that adds organic texture to your space. You can often find bamboo poles affordably at garden centers or even forage for suitable branches if permitted in your area.

Tall Planters with Strategic Plants: Use tall, slender planters filled with fast-growing, dense plants like clumping bamboo (non-invasive varieties), ornamental grasses, or tall shrubs. Place these planters strategically where you need to block an undesirable view or create a sense of enclosure. This method offers flexible privacy, as you can move the planters as needed. For example, a row of three tall planters with ‘Sky Pencil’ hollies or ornamental grasses provides excellent screening for a patio.

Outdoor Fabric Screens: Hang outdoor fabric panels or inexpensive sheer curtains from a simple rod or wire to create temporary privacy. Choose weather-resistant fabrics that complement your garden’s color scheme. This option offers a soft, airy feel and can be easily removed or adjusted. For a durable option, consider repurposing canvas drop cloths.

A wide, slightly elevated view of a tidy urban balcony garden, showcasing thriving low-maintenance plants in containers and a vertical planter.

Design for Low Maintenance: Keep Your Garden Looking Pristine Easily

A garden that looks expensive is typically well-maintained. Designing for low maintenance from the start ensures your garden stays beautiful without consuming all your free time or requiring constant spending. This is a core principle of an effective budget garden design.

Vibrant Echeveria succulents, a small cactus, and trailing thyme thrive in varied terracotta pots on a sun-drenched urban balcony bistro table.

Choose the Right Plants for Your Climate and Conditions

Selecting plants appropriate for your specific microclimate, sun exposure, and soil type is the most critical step in reducing maintenance. Plants struggling in unsuitable conditions require constant intervention, such as extra watering, feeding, or pest treatment. Research plants that thrive in your area with minimal fuss. For example, if you live in a hot, dry climate, focus on succulents, cacti, and Mediterranean herbs. For reliable information, consult university extension services; the Royal Horticultural Society (RHS) website provides comprehensive plant advice.

Close-up of hands mixing dark compost into potting soil in a terracotta pot on a wooden patio surface.

Improve Soil Health

Healthy, well-draining soil leads to stronger plants that resist pests and diseases, requiring less intervention. Amend heavy clay soils with organic matter like compost to improve drainage. Add compost to sandy soils to improve water retention and nutrient availability. Optimal soil structure reduces the need for frequent watering and fertilizing.

Hands applying rustic shredded bark mulch around a vibrant basil plant in a terracotta pot on a sunny patio.

Mulch for Moisture and Weed Control

Apply a 2-3 inch layer of organic mulch, such as shredded bark, wood chips, or pine needles, around your plants. Mulch suppresses weeds by blocking sunlight, reducing competition for water and nutrients. It also helps retain soil moisture, meaning you water less frequently. Furthermore, mulch insulates plant roots from temperature extremes. Use locally available and affordable mulch materials. This simple step significantly reduces weeding and watering tasks, making your affordable garden makeover much easier to maintain.

Bright patio garden with diverse container plants showing drip irrigation, a vertical planter, and a rain barrel with a watering can.

Install Efficient Irrigation Systems

For container gardens and small beds, consider a simple drip irrigation system or soaker hoses on a timer. These systems deliver water directly to the plant roots, minimizing evaporation and waste. While there’s an initial setup cost, they save water and labor in the long run. Even a self-watering planter, which holds a reservoir of water, can significantly reduce your daily watering chores. For very small spaces, a watering can filled with rainwater from a rain barrel (a budget-friendly addition) handles most needs.

Hands gently deadheading a spent flower from a vibrant calibrachoa in a terracotta pot on a balcony, using small pruners.

Prune for Health, Not Just Aesthetics

Regular, light pruning maintains plant health, encourages bushier growth, and prevents diseases. Remove dead, damaged, or diseased branches promptly. Deadheading spent flowers also encourages plants to produce more blooms. This preventative maintenance avoids more extensive, time-consuming issues later. Understanding your plants’ growth habits helps you prune effectively without overdoing it.

A chic vertical garden on an urban patio, made from stacked charcoal gray crates filled with herbs and strawberries. A person thoughtfully observes a

Frequently Asked Questions

How can I make my small garden look bigger on a budget?

To make a small garden look larger, use large, fewer containers rather than many small ones. Group plants to create lush zones. Incorporate vertical elements like trellises or shelves to draw the eye upward. Use a consistent color palette to create harmony and a sense of expanse. Strategic placement of a mirror can also create an illusion of depth, just ensure it is weatherproof and safely secured.

What are the cheapest materials for garden landscaping?

The cheapest materials often include salvaged wood (pallets, old fence pickets), river stones or pea gravel for pathways (buy in bulk for savings), reclaimed bricks for edging, and repurposed household items for containers or decor. Look for free compost or wood chips from local municipalities to enrich soil and mulch beds. Starting plants from seed or acquiring divisions from friends also reduces plant costs significantly.

How do I create a focal point without spending much money?

You create a focal point by highlighting an existing feature, such as an interesting wall texture or a striking corner of your space. Repurpose an old bird bath, a uniquely shaped stone, or a salvaged architectural piece. Plant a single, dramatic plant in an attractive, thrifted pot. The key is to draw the eye to one specific, interesting element, not necessarily an expensive one.

Can I really grow a beautiful garden if I am a beginner?

Absolutely. Start small with easy-to-grow plants like herbs, succulents, or resilient annuals such as marigolds or zinnias. Focus on good soil and consistent watering, which are fundamental to plant health. Observe your space, learn from your experiences, and do not be afraid to experiment. Many online resources and local gardening communities offer invaluable advice for beginners. You build confidence and knowledge with each successful plant you grow.

Categories
Garden Design & Ideas

Outdoor Privacy Ideas Using Plants

Your outdoor space, no matter its size, serves as an extension of your home. It offers a place for relaxation, entertaining, and connecting with nature. Yet, often, a lack of privacy can diminish these experiences. Overlooking neighbors, busy streets, or an exposed balcony view can make your garden feel less like a sanctuary and more like a public display. Creating a private oasis transforms your patio, balcony, or compact yard into a personal retreat, fostering comfort and a sense of enclosure. Plants offer an ideal solution, providing not only effective garden screening but also beauty, fresh air, and a living, evolving backdrop.

This guide empowers you to design and implement plant-based privacy solutions for even the smallest outdoor areas. We focus on practical, low-maintenance, and environmentally conscious approaches, ensuring your green screen thrives and enhances your space for years to come. You will discover how to select the right outdoor privacy plants, utilize vertical gardening techniques, and strategically place containers to achieve the seclusion you desire.

For design and plant selection guidance, visit
University of Minnesota Extension,
Cornell Garden-Based Learning,
UF/IFAS Gardening Solutions and
Oregon State Extension — Gardening.

Disclaimer: This article is for informational purposes only and is not a substitute for professional advice. Consult local extension services for region-specific recommendations.

Woman reads peacefully in a private patio corner, surrounded by a lush plant screen of containerized bamboo, ferns, and a vertical herb garden.

Why Privacy Matters in Your Outdoor Space

Your outdoor area functions best when it feels like a true extension of your home, a secluded spot where you can unwind without feeling exposed. Privacy contributes significantly to this sense of comfort and ownership. Imagine sipping your morning coffee or reading a book outdoors, knowing you enjoy complete seclusion. This creates an inviting atmosphere, encouraging you to use your balcony, patio, or compact yard more frequently. Effective garden screening transforms an open, visible space into an intimate retreat, enhancing both its usability and your quality of life.

Privacy also helps define your outdoor room. Just as walls delineate rooms indoors, plant screens create boundaries outside. These living walls give your space structure, making it feel more intentional and cohesive. They block undesirable views, reduce visual clutter, and help soften ambient noise from neighbors or nearby streets. Psychologically, a private space reduces stress, offering a calm environment where you truly relax. You invest in your well-being when you invest in outdoor privacy plants.

Person kneeling on urban balcony, measuring railing with tape measure, notepad and empty planters nearby for privacy design.

Designing Your Privacy Oasis: Planning for Success

Effective privacy starts with a thoughtful design. Approaching your small space strategically ensures you achieve maximum seclusion and beauty without sacrificing functionality. This planning phase saves you time and resources, guaranteeing your balcony privacy garden serves your needs perfectly. Begin by understanding your space and your specific privacy requirements.

Person inside urban home looks out glass door at small balcony, observing a distant neighbor's window, highlighting a privacy need.

Identify Your Privacy Needs

Walk through your outdoor area and observe it from different vantage points, including from inside your home looking out. Note where you feel most exposed and where undesirable views intrude. This could involve direct sightlines from a neighbor’s window, an alleyway, or even a busy common area. Consider the times of day you use the space most often, as sun angles and neighbor activity can change privacy levels throughout the day.

Elevated view of a small urban balcony with distinct dining and lounge zones defined by container plants and a vertical garden. A person thoughtfully

Map Your Space and Create Zones

Draw a simple sketch of your outdoor area. Indicate existing structures, doorways, seating areas, and any potential focal points. A focal point is the first thing your eye notices when you enter a space, often a striking plant, a piece of art, or a small water feature. Think about how you use your space and define different zones: a dining area, a lounge spot, or a quiet reading nook. Zoning helps you decide where garden screening is most crucial.

Person on a patio assesses sightlines and traffic flow, looking past a tall container plant along a clear pathway with a notebook.

Assess Sightlines and Traffic Flow

Once you identify problem areas, you can strategically place outdoor privacy plants. Consider both horizontal and vertical sightlines. Do you need to block views at eye level while seated, or from an upper-story window? Maintain clear pathways, ensuring your privacy solutions do not obstruct movement. Good traffic flow ensures your small space remains functional and easy to navigate.

When planning, remember the importance of adequate clearances around seating and pathways. These measurements prevent your space from feeling cramped and ensure comfortable use:

Area Recommended Clearance Rationale
Main Pathway 36 inches (90 cm) minimum Allows comfortable passage for one person or easy navigation with small items.
Secondary Pathway 24 inches (60 cm) minimum Suitable for less frequently used paths or access between planting areas.
Behind Seating 30 inches (75 cm) minimum Allows for easy movement when pulling chairs in and out, or walking behind seated guests.
In front of Key Features (e.g., grill, storage) 36 inches (90 cm) minimum Ensures safe and comfortable operation or access.
Between Seating and Planters 18-24 inches (45-60 cm) minimum Provides space to stand up and move around without brushing against plants.

By sketching out your privacy needs, identifying critical sightlines, and considering clearances, you lay the groundwork for a successful and beautiful balcony privacy garden. This deliberate approach ensures your plant choices and placement yield maximum privacy and enjoyment.

Lush vertical garden on a small urban patio fence, featuring diverse plants in fabric pocket planters, creating an effective privacy screen.

Vertical Green Screens: Maximizing Small Spaces

Vertical gardening offers a powerful solution for creating privacy in compact areas. When horizontal space is limited, you build upwards, transforming walls, fences, or railings into lush, living screens. These vertical elements not only provide garden screening but also add significant aesthetic value, making your small space feel larger and more vibrant.

Modern black metal obelisk in a large charcoal planter on a patio, with a young clematis vine starting to climb for privacy.

Trellises and Arbors

Trellises serve as foundational structures for climbing plants. They come in various materials such as wood, metal, or bamboo, and designs like lattice, obelisks, or simple grid patterns. Position trellises strategically along a fence line, against a wall, or even as freestanding dividers in larger patios. Select a sturdy trellis that supports the mature weight of your chosen vine. For a quicker screen, combine a trellis with a fast-growing climber like a native honeysuckle or an evergreen clematis.

  • Lattice panels: Provide immediate partial screening even before plants cover them completely.
  • Obelisks: Add vertical interest in a container, supporting a single climbing plant for a narrower screen.
  • Modular trellis systems: Allow you to expand your green wall over time.

Lush fabric pocket vertical garden on a brick wall, alongside a dark tiered metal planter with cascading plants on a sunny small patio.

Wall Planters and Vertical Gardens

For true wall-mounted green screens, consider pocket systems or tiered planters. Pocket systems consist of fabric or plastic modules that attach to a wall, allowing you to grow a variety of plants in individual pockets. These work well for herbs, succulents, or smaller annuals, creating a dense green texture. Tiered stands, which offer multiple levels for pots, also contribute to vertical density. Choose plants with trailing or dense growth habits to maximize the screening effect.

Lush green climbing plants on a metal trellis create a dense privacy screen on a small urban balcony during golden hour.

Choosing Climbing Plants for Vertical Screens

The success of your vertical screen hinges on selecting the right climbing plants. Consider their growth habit, mature size, and attachment method. Some vines twine, others cling with aerial roots, and some scramble. Ensure your chosen plant matches the support structure. Prioritize perennial options for long-term screening, or use annuals for quick, seasonal coverage.

Excellent Choices for Vertical Privacy Screens:

  • Vines:
    • Clematis: Offers beautiful flowers and dense foliage. Choose evergreen varieties like ‘Armandii’ for year-round cover.
    • Honeysuckle (Lonicera sempervirens): A native, non-invasive option providing fragrant blooms and good density. Attracts hummingbirds.
    • Climbing Roses: Provide both beauty and a dense barrier. Select thornless or fewer-thorn varieties for high-traffic areas.
    • Star Jasmine (Trachelospermum jasminoides): Evergreen with fragrant white flowers, ideal for warmer climates.
    • Boston Ivy (Parthenocissus tricuspidata): Fast-growing and self-clinging, provides excellent privacy and vibrant fall color. Ensure it clings to structures you want covered, as it can damage some surfaces.
  • Shrubs trained as espaliers:
    • Pyracantha: Thorny branches and dense growth make an impenetrable screen.
    • Fruit Trees: Dwarf apple or pear varieties can be trained against a wall for a beautiful, edible screen.

When selecting plants, always consider your local climate and sun exposure. A plant thriving in full sun might struggle in a shaded balcony privacy garden.

A dense living privacy screen on an urban patio, created by tall ornamental grasses, a conifer, and shrubs in terracotta and dark grey pots.

Strategic Container Plantings for Instant Screening

Containers provide unparalleled flexibility for creating garden screening. They allow you to introduce height and density precisely where you need it, and you can rearrange them as your privacy needs evolve. This strategy is particularly effective for balcony privacy gardens and small patios where planting directly in the ground is not an option.

Three large, deep containers (terracotta, dark resin, slatted wood) on a balcony, with a hand resting on one, highlighting size and material.

Container Selection for Impact

The size and type of container significantly affect the success of your privacy planting. Choose containers large enough to accommodate the root ball of your chosen outdoor privacy plants and allow for future growth. Deeper pots generally hold more soil, providing better insulation for roots and reducing watering frequency. For tall, screen-forming plants, a minimum pot diameter of 18-24 inches (45-60 cm) and similar depth is often necessary.

Container Materials and Aesthetics:

  • Lightweight options: Resin, fiberglass, or plastic are ideal for balconies and rooftops, where weight is a concern.
  • Terra cotta or ceramic: Offer classic appeal but are heavier and can dry out faster.
  • Wood or metal: Provide a modern or rustic look. Ensure wood is rot-resistant, and metal has proper drainage to prevent rust.

Aim for cohesive materials or a complementary color palette for your containers to create a unified and attractive balcony privacy garden. Ensure every container has drainage holes to prevent root rot.

Grouped potted plants creating a layered privacy screen on a patio, featuring tall bamboo, dense ferns, and trailing vines.

The Power of Grouping and Layering

Individual tall plants provide some screening, but grouping containers creates a more solid and effective barrier. Think of groups of pots as forming a living wall. Combine different heights and plant forms to create a layered effect. Place taller plants in the back, medium-height fillers in the middle, and trailing plants along the front. This “thriller, filler, spiller” concept, often used for container arrangements, works equally well for privacy, with the “thriller” acting as your primary screen element.

For example, a tall columnar shrub (thriller) can stand behind a denser, mid-sized perennial (filler), with a trailing vine (spiller) softening the edges of the pot. This creates a multi-dimensional screen that looks full and natural.

Person's gloved hands guiding a large container pot with clumping bamboo on a wheeled caddy across a patio.

Wheeled Bases for Flexibility

Mobility is a major advantage of container gardening. Equip heavy pots with wheeled bases or casters. This allows you to easily reposition your outdoor privacy plants to block specific sightlines, chase the sun, or move plants indoors during winter. This flexibility becomes invaluable for seasonal privacy adjustments or for reconfiguring your space for gatherings.

Low-angle view looking up at a staggered arrangement of large fiber-cement planters on an urban patio. Each container holds multiple tall grasses, for

Planting Strategies for Container Privacy

  • Block planting: Arrange several identical or complementary pots in a row to form a continuous screen.
  • Staggered grouping: Place pots in an alternating pattern to create a deeper, more natural-looking screen.
  • Multi-plant containers: Plant multiple specimens of the same species in one large pot to create a denser, wider screen from a single container. For instance, three slender bamboo culms or several bushy grasses in one sizable planter can create a robust visual barrier.

Remember that container plants require more frequent watering and feeding than in-ground plants due to their limited soil volume. Use a high-quality, peat-free potting mix specifically formulated for containers to ensure proper drainage and nutrient retention.

Three diverse container plants—tall clumping bamboo, dense evergreen shrub, and vertical garden foliage—arranged on a sunny urban balcony for privacy.

Choosing the Best Outdoor Privacy Plants

Selecting the right plants is critical for creating an effective and low-maintenance privacy screen. You need plants that not only grow well in your specific conditions but also possess characteristics that make them excellent garden screening material. Focus on density, height, and year-round appeal.

Close-up of three potted evergreen plants on an urban patio: a columnar conifer, a broadleaf evergreen, and a compact shrub, all showing dense foliage

Key Characteristics for Privacy Plants

  • Dense Foliage: Look for plants with tightly packed leaves or numerous branches that create an opaque barrier.
  • Evergreen: For year-round privacy, prioritize evergreen shrubs, conifers, or broadleaf evergreens. Deciduous plants lose their leaves in winter, diminishing their screening power.
  • Mature Size: Always check the mature height and width of a plant. Choose varieties that naturally grow to your desired screening height without excessive pruning. For small spaces, consider dwarf or columnar cultivars.
  • Growth Rate: Fast-growing plants provide quicker results, but be aware they may require more frequent pruning.
  • Adaptability: Select plants suited to your climate zone (USDA Hardiness Zone), sun exposure, and soil type.
  • Low-Maintenance: Opt for plants that resist pests and diseases and do not require constant attention.

Layered container plants – ornamental grasses, bamboo, clematis on a vertical planter – forming a privacy screen in a small patio corner.

Top Outdoor Privacy Plant Recommendations for Small Spaces

Tall Grasses

Ornamental grasses offer soft, rustling sounds and elegant movement, making them perfect for natural, airy garden screening. They grow quickly and many varieties thrive in containers.

  • Fountain Grass (Pennisetum species): Varieties like ‘Hameln’ or ‘Moudry’ reach 2-4 feet tall and wide, creating soft, dense clumps.
  • Maiden Grass (Miscanthus sinensis): Taller varieties grow 5-7 feet, providing substantial screening. Choose clumping varieties to avoid invasiveness.
  • Bamboo (Fargesia species – Clumping Bamboo): Crucially, select clumping bamboo, not running bamboo, which spreads aggressively. Fargesia varieties like ‘Rufa’ or ‘Green Screen’ are non-invasive, cold-hardy, and create a beautiful, dense screen up to 10-15 feet tall. They are excellent for balcony privacy gardens.

Shrubs and Dwarf Conifers

These provide robust, often evergreen, screening. Dwarf and columnar varieties are ideal for containers and confined spaces.

  • Dwarf Conifers (e.g., Dwarf Alberta Spruce, Sky Pencil Holly): Offer dense, narrow forms perfect for tight spots. ‘Sky Pencil’ Holly (Ilex crenata ‘Sky Pencil’) grows tall and slender, reaching 6-8 feet high but only 2 feet wide.
  • Boxwood (Buxus sempervirens): Classic, dense evergreen that tolerates pruning into formal shapes. Varieties like ‘Green Mountain’ are upright.
  • Laurel (Prunus laurocerasus ‘Otto Luyken’): A dwarf English laurel, it provides glossy evergreen foliage and a dense, upright habit, reaching 3-4 feet tall and wide.
  • Arborvitae (Thuja occidentalis ‘Smaragd’ or ‘Emerald Green’): A popular choice for slender, upright evergreen screening, growing 10-15 feet tall but only 3-4 feet wide. Ideal for a continuous hedge in containers.
  • Photinia (Photinia x fraseri ‘Red Tip’): Offers vibrant red new growth and evergreen foliage, though it can get large without pruning. Smaller varieties exist.

Vines (as discussed under Vertical Screens)

Remember that vines need a support structure. Revisit the “Vertical Green Screens” section for specific recommendations.

Small Trees

For slightly larger patios or compact yards, small trees can provide excellent overhead and eye-level privacy.

  • Columnar Fruiting Trees: Apple or pear trees bred for a narrow, upright habit offer edible privacy.
  • Japanese Maple (Acer palmatum varieties): While deciduous, their elegant branching structure still provides some visual break, and specific cultivars like ‘Bloodgood’ offer dense foliage during the growing season.
  • Dwarf Citrus Trees (e.g., Meyer Lemon): In suitable climates, these evergreen trees provide fragrant blooms, fruit, and good foliage density. Bring indoors in winter in colder regions.

Hands gently plant a vibrant native perennial into a terracotta pot using peat-free potting mix on a small balcony.

Sustainable Plant Choices

When selecting your outdoor privacy plants, prioritize sustainability. Choose native plants whenever possible, as they adapt better to your local climate, require less water and fertilizer, and support local pollinators and wildlife. Utilize peat-free potting mixes to protect peat bogs, which are vital carbon sinks. Opt for water-wise varieties, especially in drought-prone areas, to conserve resources. Your balcony privacy garden can be both beautiful and environmentally responsible.

Eye-level view of a layered privacy screen on a small urban patio, featuring a tall ornamental grass, a tiered plant stand with various foliage, and a

Layers and Textures for Dynamic Screening

A successful privacy garden moves beyond a simple green wall. Incorporating layers, varied textures, and diverse foliage creates a dynamic, visually rich screen that feels natural and inviting. This approach transforms your garden screening from a utilitarian barrier into a captivating landscape feature.

Layered container garden on a small patio with tall background shrubs, mid-ground grasses, and cascading foreground plants creating visual depth.

Creating Depth with Layers

Think about your privacy screen in terms of foreground, middle ground, and background. Taller plants form the background, providing the main screening. In front, place medium-height plants that add density and interest. Finally, add lower-growing plants or trailing elements at the base to soften the edges of your containers or beds. This layering creates visual depth, making your small space feel more expansive and less like a flat wall.

  • Background: Tall shrubs, columnar trees, or climbing vines on a trellis.
  • Mid-ground: Bushy perennials, smaller evergreen shrubs, or dense ornamental grasses.
  • Foreground: Trailing annuals, compact herbs, or low-growing groundcovers that spill over container edges.

A vibrant arrangement of container plants on a balcony, featuring asparagus fern, variegated hosta, and maiden grass for diverse texture and privacy.

Varying Foliage for Texture and Interest

Foliage provides the primary visual interest in a privacy garden, especially for evergreens. Incorporate plants with different leaf shapes, sizes, and colors. A mix of fine-textured grasses, broad-leaved hostas, and feathery ferns creates a rich tapestry. Consider plants with variegated leaves, which offer bright splashes of color without relying on blooms. The contrast in textures adds a tactile quality to your garden screening, inviting closer inspection.

  • Fine texture: Maiden grass, asparagus fern, conifers with needle-like foliage.
  • Medium texture: Boxwood, laurels, most perennials with average-sized leaves.
  • Bold texture: Hostas, large-leaved tropicals (if applicable to your climate), some ornamental kale.

Vibrant late autumn balcony garden with a crimson Japanese maple, red winterberry holly, and fluffy clematis seed heads in containers.

Seasonal Interest Beyond Green

While evergreen plants provide year-round privacy, integrating deciduous plants or those with seasonal features adds dynamic interest. Choose plants that offer more than just green leaves:

  • Flowering plants: Introduce plants with blooms that appear at different times of the year. Consider spring-flowering clematis, summer-blooming hydrangeas, or fall-blooming asters.
  • Fall color: Deciduous trees or shrubs like Japanese maples offer brilliant autumn foliage before dropping their leaves.
  • Winter interest: Plants with interesting bark, berries, or persistent seed heads provide structure and color during the colder months. Think of certain dogwood varieties with colorful stems or winterberry hollies with bright red berries.

A well-designed balcony privacy garden balances continuous green screening with elements that change and evolve throughout the seasons. This keeps your outdoor space vibrant and engaging year-round.

Cozy patio corner with a dark wooden slatted privacy screen, layered container plants, and a small tabletop water fountain.

Beyond Plants: Integrating Structures and Sound

While plants form the heart of your privacy solution, combining them with structural elements and sound strategies enhances their effectiveness. These additions offer immediate screening, define your space, and contribute to a more comprehensive sense of seclusion in your balcony privacy garden or patio.

Low-angle view of a modern metal lattice panel with climbing clematis from a terracotta planter, layered with a laser-cut screen on an urban balcony.

Lattice and Decorative Panels

Lattice panels provide an excellent framework for climbing plants and offer instant, though partial, screening. They come in various patterns and materials, from classic wood lattice to more modern metal or composite panels. Install lattice as an extension of a low wall, along a railing, or as a freestanding screen. The open pattern allows light and air to pass through while still obscuring direct views. Once climbing plants grow over the lattice, it becomes an even denser, more beautiful garden screen. Decorative screens, such as laser-cut metal panels or bamboo roll fencing, offer immediate visual barriers with architectural appeal. You can position these behind or among your outdoor privacy plants to achieve faster, more complete coverage.

Small, dark grey pebble fountain on an urban balcony, water trickling over stones, surrounded by potted ferns and hostas in morning light.

Water Features for Sound Softening

The gentle sounds of trickling water from a small fountain or water feature offer more than just aesthetic appeal; they actively contribute to privacy. A soothing water sound helps mask undesirable ambient noises like traffic, distant conversations, or general city bustle. This acoustic screening creates a more peaceful and intimate atmosphere, enhancing the sense of a secluded oasis. Choose a compact, recirculating fountain suitable for your small space, ensuring it is easy to maintain and has a pleasant, consistent sound.

Cozy evening patio with string lights and solar stakes illuminating container plants, creating a private, warm ambiance.

Strategic Lighting for Evening Use

Thoughtful lighting extends the usability of your outdoor space into the evening hours and contributes to a sense of privacy. String lights draped across a trellis or overhead create a cozy, enclosed feeling, defining the boundaries of your outdoor room. Solar-powered stakes can illuminate pathways and highlight your garden screening plants. Avoid harsh, upward-shining lights that can create glare or draw attention to areas you want to keep private. Instead, opt for soft, downward-facing lights that cast a warm glow, enhancing the ambiance and creating a sense of intimacy. Position lights to illuminate your plants, showcasing their beauty even after sunset. Always prioritize low-voltage, outdoor-rated lighting for safety and efficiency.

A modern balcony privacy screen made of 'Sky Pencil' hollies and feather reed grass in dark grey container planters. An empty wood armchair with a boo

Low-Maintenance Privacy Tips for Lasting Enjoyment

The goal of any small-space garden, especially a balcony privacy garden, should include ease of care. A low-maintenance approach ensures your living screen remains beautiful and effective without demanding excessive time or effort. Designing for minimal upkeep means selecting the right plants and implementing smart gardening practices from the outset.

Vibrant clumping bamboo in a dark gray container, thriving in bright sun on a small patio, providing natural privacy.

Right Plant, Right Place

This fundamental gardening principle becomes even more critical for low-maintenance privacy. When you choose outdoor privacy plants that thrive in your specific conditions—sun exposure, soil type, and climate—they naturally resist pests and diseases, grow vigorously, and require less intervention. For example, planting a sun-loving plant in deep shade leads to weak growth and increased vulnerability to problems. Conversely, placing a shade-lover in full sun causes scorching and stress. Research your plant choices thoroughly to match them perfectly with your environment.

A small urban balcony garden showcasing efficient watering with a subtle drip irrigation line watering a rosemary and a modern self-watering planter w

Efficient Watering Systems

Container plants and vertical gardens dry out faster than in-ground plantings. An efficient watering system significantly reduces manual labor. Consider installing a simple drip irrigation system or using self-watering planters. Drip irrigation delivers water directly to the plant roots, minimizing waste and ensuring consistent moisture levels. Self-watering planters feature a reservoir that releases water as the plant needs it, extending the time between waterings. These solutions are particularly beneficial for busy individuals or during periods of travel, ensuring your garden screening stays hydrated.

Hands mixing slow-release fertilizer into dark, peat-free potting mix on a wooden bench, with an empty terracotta pot ready for planting on a small pa

Quality Potting Mixes and Fertilization

Invest in high-quality, peat-free potting mixes. Good mixes provide excellent drainage while retaining sufficient moisture and nutrients. They offer a healthier environment for roots, leading to stronger, more resilient plants. Incorporate a slow-release granular fertilizer at planting or during annual repotting. This provides a steady supply of nutrients over several months, reducing the need for frequent liquid feeding. Healthy, well-fed plants grow denser foliage, creating a more effective privacy screen and minimizing maintenance issues.

Close-up of a hand with bypass pruners making a small, precise cut on dense foliage of a containerized columnar evergreen on a patio.

Strategic Pruning

While some plants require regular pruning to maintain their shape and density, strategic choices can minimize this task. Select plants with a naturally compact or columnar growth habit that closely matches your desired screening size. When pruning, aim for selective removal of dead, damaged, or crossing branches. For shaping, a light, regular trim helps maintain density and encourages branching, making your garden screening fuller. Avoid drastic pruning, which can stress plants and reduce their vigor. Always use clean, sharp tools for pruning to prevent disease.

Close-up of a hand gently inspecting the underside of a green leaf on a container plant on a balcony, showing early signs of a pest.

Pest and Disease Management

Healthy plants are the best defense against pests and diseases. Regular observation allows you to catch problems early, when they are easier to manage. Inspect your outdoor privacy plants weekly for any signs of trouble, such as discolored leaves, sticky residue, or visible insects. Address issues promptly with organic solutions when possible, such as insecticidal soap for aphids or manual removal of slugs. A robust, low-stress plant environment significantly reduces your need for intensive pest and disease intervention, contributing to a truly low-maintenance balcony privacy garden.

Urban balcony with a multi-layered plant privacy screen featuring a vertical garden, tall bamboo, and vibrant railing planters. A person waters plants

Frequently Asked Questions

How fast can I get privacy using plants?

You can achieve privacy relatively quickly by combining fast-growing outdoor privacy plants with immediate structural elements. Select quick-growing vines like native honeysuckle or morning glory (as an annual) on a trellis, or fast-growing ornamental grasses such as maiden grass. For more immediate visual blockage, place dense evergreen shrubs like columnar arborvitae in large containers and supplement with decorative lattice panels or bamboo screens until your plants mature.

What plants work best for windy balconies?

For windy balconies, choose sturdy plants with flexible stems and compact or narrow leaves that resist wind damage. Good choices include ornamental grasses such as fountain grass or maiden grass, which sway with the wind rather than breaking. Dwarf conifers like ‘Sky Pencil’ holly or compact boxwood also tolerate wind well due to their dense structure. Ensure all containers are heavy enough or secured to prevent tipping.

Can I create privacy without blocking all light?

Absolutely. You can create effective garden screening that still allows ample light to filter through. Use plants with a more open growth habit, or choose a layered approach where taller plants are strategically placed only where direct sightlines occur. Trellises with climbing vines offer partial privacy and light filtration, as do decorative panels with open patterns. Positioning plants to block only specific angles, rather than creating a solid wall, maintains brightness in your outdoor space.

How do I choose the right container size for privacy plants?

Choose containers large enough to accommodate the plant’s mature root system. For most shrubs and tall grasses used for privacy, this means a pot with a minimum diameter and depth of 18-24 inches (45-60 cm) or larger. A larger soil volume provides better insulation for roots, reduces watering frequency, and allows the plant to develop a robust root system, which supports denser top growth. Always ensure containers have adequate drainage holes.

What is the most environmentally friendly way to create plant-based privacy?

The most environmentally friendly approach involves selecting native plants adapted to your local climate, as they require less water and support local ecosystems. Use peat-free, organic potting mixes and incorporate slow-release, organic fertilizers. Collect rainwater for irrigation if possible, and choose water-wise plant varieties. Avoid invasive species and prioritize plants that are naturally pest and disease resistant, minimizing the need for chemical treatments. This sustainable strategy benefits both your garden and the wider environment.

Categories
Garden Design & Ideas

10 Small Garden Layouts That Maximize Every Inch

Transforming a small outdoor area into a lush, functional, and inviting garden presents a unique opportunity. Whether you work with a balcony, a compact patio, a narrow courtyard, or a modest backyard, intelligent design unlocks the full potential of every square inch. As your design coach, I will guide you through practical, actionable strategies for crafting a small garden layout that looks incredible and remains easy to maintain. You will discover how to create depth, enhance usability, and bring your green vision to life, even in the tightest spaces.

A woman on an urban balcony gauges the late afternoon sun, thoughtfully planning her small container garden layout before placing any pots.

Understanding Your Small Space

Before you place a single pot, thoroughly analyze your small garden layout. This crucial first step ensures your design works with your environment, not against it. Consider factors such as sun exposure, wind patterns, existing structures, and your view from indoors. A thorough understanding helps you select appropriate plants and design elements, leading to a thriving and attractive space.

A woman on a patio kneels with a clipboard, observing strong direct sunlight on a vertical herb garden contrasting with deep shadows on shade-loving h

Mapping Sun and Shade

Sunlight represents a primary driver of plant health. Observe how the sun moves across your space throughout the day and across seasons. A simple sun map involves checking your garden every few hours for a day, noting which areas receive full sun (six or more hours), partial sun (three to six hours), or full shade (less than three hours). This data directly influences plant selection, preventing costly mistakes and plant stress. For example, a south-facing balcony will provide ample light for sun-loving vegetables, while a north-facing courtyard may excel with shade-tolerant ferns and hostas.

Urban balcony corner: sun-loving nasturtiums by a reflective wall, shade herbs in a vertical planter under an overhang, wind-resistant lavender in a h

Assessing Microclimates and Environmental Factors

Every small garden has unique microclimates, which are localized atmospheric conditions differing from the general climate. A sheltered corner might be warmer, while an open balcony experiences stronger winds. You might have reflective surfaces, like a light-colored wall, creating a heat pocket, or an overhang providing permanent shade. Account for wind, especially on upper-story balconies, as it desiccates plants quickly and topples containers. Choose wind-resistant pots and secure trellises to mitigate these challenges. For precise plant selection based on your specific conditions, consult resources like the Oregon State Extension — Gardening guides, which offer regional advice tailored to various environmental factors.

A person stands contemplatively on a compact urban patio, holding a notebook amidst various pots, a vertical herb garden, and a small bistro set, envi

Defining Your Needs and Desires

What do you want your small garden to do for you? Do you envision a quiet reading nook, an herb garden for cooking, a vibrant display of flowers, or a space for outdoor dining? Clearly define your priorities. For example, if entertaining is key, allocate more space for seating. If fresh produce tops your list, prioritize raised beds or large planters for edibles. Knowing your purpose helps you streamline your garden design small space, ensuring every element serves a function and contributes to your enjoyment.

Elevated view of a narrow urban balcony zoned into dining, lounge with tiered planter, and vertical vegetable garden areas.

The Power of Zoning: Defining Areas

Even in a compact area, creating distinct zones transforms a chaotic space into an organized and highly functional garden. Zoning involves delineating specific areas for different activities, making your small garden feel larger and more purposeful. Think of your outdoor space as an extension of your home, with “rooms” for dining, relaxing, or growing.

A compact patio's relaxation, dining, and growing zones defined by a tall planter, rug, and various container plants under soft natural light.

Creating Functional Zones

Divide your garden into imaginary sections. For instance, a small patio might have a “dining zone” with a bistro table, a “relaxation zone” with a comfortable chair, and a “growing zone” for your favorite plants. Use subtle cues to define these areas, such as a different paving material, an area rug, or a tall planter acting as a soft partition. You are not building walls, but rather suggesting boundaries that guide the eye and direct traffic flow.

Small urban patio with a bistro table, showing ample clearance behind a pulled-out chair to a vertical garden, demonstrating smart spatial design.

Ensuring Clear Traffic Flow and Clearances

Effective zoning also considers movement. You need clear pathways that allow comfortable passage without bumping into plants or furniture. A common guideline for comfortable passage is a minimum width of 24 inches for a single person, expanding to 36 inches for two people to walk side-by-side. For seating, ensure enough clearance to pull chairs out easily. A good rule of thumb for dining areas is to allow at least 30-36 inches behind each chair from the edge of the table to any obstruction. This attention to detail prevents your garden from feeling cramped and ensures practical usability. Thoughtful consideration of your traffic patterns helps you maximize garden space.

A sun-drenched patio corner showing a trellis covered in jasmine and tall planters separating a seating area from a compact utility zone.

Using Vertical Elements to Define Zones

Vertical elements excel at defining zones without taking up precious floor space. A decorative screen or a trellis covered in climbing plants can separate a seating area from a service area. A tall, narrow planter creates a soft boundary, providing both visual interest and privacy. These elements contribute to the overall aesthetics while serving a practical zoning purpose, helping you create a cohesive small garden layout.

Lush vertical garden on a brick patio wall, featuring fabric pockets of flowers/herbs, tiered edible planters, and a climbing jasmine trellis.

Vertical Gardening Unlocked: Elevate Your Design

Vertical gardening is perhaps the most impactful strategy for any small garden layout, allowing you to cultivate upwards when horizontal space runs out. It adds visual interest, boosts plant capacity, and creates a sense of enclosure and privacy. You literally grow up, transforming blank walls or fences into living tapestries.

Vibrant purple clematis climbs a black metal trellis against a weathered red brick wall on a small urban patio, softening the hard surface.

Trellises and Climbing Plants

Trellises offer a classic and elegant way to go vertical. Install them against walls, fences, or even freestanding as room dividers. Choose vining plants like clematis, jasmine, or edible options such as cucumbers and pole beans. Securely attach trellises to ensure stability, especially in windy conditions. The visual impact of a wall covered in lush foliage dramatically softens hard surfaces and adds a natural element to your garden design small space.

A sun-dappled brick wall on a small patio showcasing a fabric pocket planter with herbs and impatiens, alongside wall-mounted terracotta pots holding

Wall Planters and Pocket Systems

Wall planters come in various forms, from individual pots mounted to a frame to fabric pocket systems. These are perfect for herbs, succulents, or small flowering annuals. Ensure your wall can support the weight of the planters, especially when filled with wet soil. Proper drainage is key; avoid systems where water accumulates, as this can lead to root rot. For detailed guidance on wall planter selection and setup, the Cornell Garden-Based Learning site provides excellent resources.

A tiered dark metal and wood shelving unit on a patio, holding sun-loving herbs, cascading petunias, and shade-tolerant lettuce, bathed in golden ligh

Tiered Stands and Shelving Units

Tiered plant stands, shelving units, and ladders allow you to display multiple plants in a compact footprint. They are versatile, portable, and provide varying levels for different plant sizes and sun requirements. Place sun-loving plants on higher shelves and shade-tolerant options below. This layering adds visual depth and maximizes garden space efficiently. Consider shelving made from weather-resistant materials like treated wood, metal, or durable plastic.

Vibrant terracotta railing planters with petunias and ivy on a dark railing, complemented by wicker hanging baskets with fuchsias and lobelia overhead

Utilizing Railings and Overhangs

Do not forget railings on balconies or deck edges. Railing planters attach securely, offering additional planting space without consuming floor area. Hanging baskets suspended from overhangs or sturdy hooks also contribute to vertical layering, spilling color and foliage downwards. Always check weight limits for railings and overhangs, particularly with multiple heavy, watered planters.

Hands gently repositioning a terracotta pot with basil on a small, sunny urban balcony amidst other diverse containers.

Smart Container Strategies: Flexibility and Impact

Containers are the cornerstone of small-space gardening, providing unparalleled flexibility and design opportunities. A thoughtful container strategy allows you to experiment with different plants, adapt to changing conditions, and easily refresh your garden’s look.

A hand selects from empty large pots: a green glazed ceramic, terra cotta, and charcoal fiberglass, on a wooden surface.

Choosing the Right Sizes and Materials

Resist the urge to buy many small pots. A few larger containers create more impact and provide a better environment for plant roots, reducing the need for frequent watering. Aim for pots with a minimum diameter of 10-12 inches for most plants, and much larger for small shrubs or substantial edible crops. Regarding materials, terra cotta breathes well but dries out quickly; plastic retains moisture but can look less elegant; glazed ceramic offers excellent moisture retention and aesthetic appeal; and lightweight options like fiberglass suit balconies with weight restrictions. Choose materials that complement your overall small garden layout.

A modern patio with a cohesive grouping of container gardens in varying heights, featuring pots made of terracotta, concrete, and woven baskets with l

Cohesion in Color and Finish

While variety is good, a cohesive color or finish palette for your containers creates a more unified and sophisticated look. Choose pots in similar shades of gray, terra cotta, blue, or a mix of natural textures. This cohesion allows your plants to be the stars, rather than having the containers compete for attention. Grouping containers of varying heights but similar finishes also enhances visual appeal.

Person effortlessly guiding a large potted olive tree on a wheeled base across a sun-dappled patio, demonstrating easy plant mobility.

Wheeled Bases for Flexibility

For larger, heavier containers, invest in wheeled bases or dollies. This simple addition allows you to easily move plants to optimize sun exposure, bring tender plants indoors during cold snaps, or reconfigure your garden design small space for entertaining. Mobility offers tremendous adaptability, empowering you to adjust your small garden layout on a whim.

Modern dark grey planter on a balcony with a burgundy ornamental grass (thriller), pink petunias (filler), and purple sweet potato vine (spiller).

Container Planting Techniques: The Thriller, Filler, Spiller

For visually compelling containers, employ the “Thriller, Filler, Spiller” technique.

  • Thriller: A tall, dramatic plant placed in the center or back of the pot, providing vertical interest (e.g., ornamental grass, canna lily, small upright shrub).
  • Filler: Medium-height plants that fill out the middle ground of the container, adding volume and texture (e.g., impatiens, coleus, petunias).
  • Spiller: Trailing plants that cascade over the edge of the pot, softening the hard lines and adding movement (e.g., sweet potato vine, creeping jenny, lobelia).

This combination ensures a balanced, full, and attractive display that maximizes garden space vertically and horizontally within each pot.

A layered balcony garden with a fuchsia in the foreground, creating depth with varied pots and a vertical planter on a brick wall.

Crafting Visual Depth and Focal Points

Making a small garden feel larger involves tricking the eye. By creating visual depth and strategically placing focal points, you can transform a flat, confined space into a dynamic and expansive-feeling oasis. A focal point is simply the first thing your eye notices, drawing it into the garden.

View from a living room window onto a small, tidy container patio garden. Arranged pots create a visual path to a dwarf Japanese maple.

Establishing Clear Sightlines

Consider the view from your most frequent vantage points, such as your living room window or your primary seating area. Design your small garden layout to direct the eye through the space. Create pathways, even if symbolic, that lead the gaze towards an interesting element. Avoid placing bulky items directly in your primary sightline, which can make the space feel cluttered and visually blocked.

A vibrant red dwarf Japanese maple in a charcoal pot acts as a singular focal point at the far end of a small, well-designed urban patio garden.

Defining Focal Points

Every garden benefits from a focal point. This could be a striking plant, a piece of garden art, a small water feature, or an attractive seating arrangement. In a small space, one strong focal point is generally more effective than several competing ones. Place it at the far end of your view, drawing the eye through the garden and suggesting greater distance. For example, a vibrant red Japanese maple in a corner pot or a carefully chosen sculpture can anchor your design.

An L-shaped urban patio shows both symmetrical (identical planters flanking a stool) and asymmetrical (varied pots) container arrangements.

Symmetry Versus Asymmetry

You can achieve balance through either symmetry or asymmetry.

  • Symmetry: Creates a formal, orderly feel. This involves mirroring elements on either side of a central axis, like two identical planters flanking an entryway. It brings a sense of calm and structure to a small garden.
  • Asymmetry: Offers a more natural, dynamic, and informal look. Balance is achieved through contrast in size, texture, and placement, without direct mirroring. For instance, a large plant on one side might be balanced by a grouping of smaller pots on the other. Asymmetry often feels more relaxed and allows for greater creativity in a small garden layout.

Choose the approach that best suits your personal style and the architecture of your home.

Urban balcony with cascading petunias in a hanging basket, wall-mounted herb planter, and tall potted bamboo palm, illustrating vertical layers.

Using Eye-Level Anchors

Don’t limit visual interest to ground level. Incorporate elements at various heights to create layers and draw the eye upwards. This could include a tall plant, a hanging basket, a wall-mounted piece of art, or decorative lighting. These eye-level anchors provide visual interest and prevent the garden from feeling flat, contributing to a more dynamic small garden layout.

Close-up of diverse containers on a deck, showcasing colorful plants like violet petunias, chartreuse vine, red yucca, and burgundy coleus.

Color, Texture, and Seasonal Interest

The judicious use of color and texture, combined with planning for seasonal appeal, dramatically elevates your small garden layout. These elements create visual richness and ensure your garden remains engaging throughout the year.

Vertical garden planter on an urban balcony showcasing green foliage, white petunias, and silver-leafed plants in charcoal containers.

Crafting a Cohesive Color Palette

In small spaces, a limited color palette often works best, creating a sense of harmony and reducing visual clutter. Choose two or three primary colors and use various shades and tones within that range. For example, a palette of greens, whites, and silvers can create a serene, sophisticated look. Vibrant colors like reds, oranges, and yellows add energy but use them sparingly as accents to avoid overwhelming the space. Consider the color of your hardscaping and existing structures when developing your palette. For reliable plant color ideas, explore resources like Kew Science — Plants of the World, which offers extensive plant descriptions including bloom and foliage colors.

Medium close-up of contrasting foliage plants like hosta, coleus, and ornamental grass in various containers on a patio, highlighted by dappled mornin

The Power of Foliage Contrast

Do not rely solely on flowers for color. Foliage offers enduring interest and a wide array of greens, purples, silvers, and variegated patterns. Contrasting foliage textures—fine, feathery leaves next to broad, glossy ones—adds depth and dynamism even in the absence of blooms. Think of plants like coleus, hostas, Heuchera, and various ornamental grasses for their impressive foliage. Foliage contrast ensures your garden design small space remains appealing even during non-flowering periods.

A small patio corner featuring vibrant purple petunias, a deep purple Heuchera, and a dwarf boxwood in various containers, hinting at year-round seaso

Planning for Seasonal Interest

To ensure your small garden layout remains vibrant all year, select plants with staggered bloom times or those that offer multi-seasonal appeal. Include early spring bulbs, summer annuals, fall foliage plants, and perhaps a small evergreen for winter structure.

Consider this sample plant palette for year-round interest in a sunny, small garden:

Season Plant Type Example Plants Key Contribution
Spring Bulbs & Early Bloomers Dwarf Daffodils, Crocus, Primroses First burst of color, cheerful
Summer Annuals & Perennials Petunias, Geraniums, Salvia, Coneflower Continuous vibrant blooms, pollinator attraction
Fall Foliage & Late Bloomers Chrysanthemums, Heuchera (foliage), Ornamental Grasses Rich textures, warm colors, structural interest
Winter Evergreen Structure Dwarf Conifers, Boxwood, Hellebore Greenery, form, subtle winter blooms

This strategic selection ensures there is always something to catch your eye, enhancing the value of your garden design small space across all seasons.

Twilight view of a small patio corner with various container plants, illuminated by warm string lights and solar spotlights for ambiance.

Illuminating Your Small Garden: Lighting for Ambiance and Safety

Lighting extends the usability of your small garden into the evening hours, creating inviting ambiance and ensuring safe navigation. Thoughtful lighting transforms your outdoor space into a magical retreat after sunset.

Compact urban balcony at twilight with layered lighting: warm string lights, plant uplights, task lighting on a grill, and a glowing lantern.

Layered Lighting for Ambiance

Employ different types of lighting to create depth and interest.

  • Task Lighting: Bright enough for activities like grilling or reading.
  • Accent Lighting: Highlights specific features, such as a striking plant, a piece of art, or a water feature. Uplighting from below often creates dramatic shadows.
  • Ambient Lighting: Provides a general glow, creating a comfortable and inviting atmosphere. String lights, lanterns, or soft overhead fixtures fall into this category.

Avoid harsh, bright lights that create glare. Instead, opt for warmer color temperatures to foster a relaxing environment.

Three rustic wooden garden steps at dusk, lit by warm LED strip lights beneath each riser and a solar path light at the base, bordered by potted plant

Practical Lighting for Safety

Ensure pathways and steps are adequately lit to prevent trips and falls. Solar-powered path lights offer an easy, wire-free solution for ground-level illumination. For steps, consider recessed lights or subtle strip lighting. All outdoor electrical fixtures must be rated for outdoor use and installed according to local electrical codes. For safety guidelines regarding outdoor electrical installations, resources like the University of Minnesota Extension offer practical advice.

Cozy small patio at twilight with warm bistro string lights draped along a fence and solar stake lights illuminating a cluster of container plants.

String Lights and Solar Stakes

String lights (bistro lights) add an instant festive and cozy atmosphere. Drape them across a pergola, along a fence, or weave them through a trellis. Solar-powered stake lights are perfect for highlighting container groupings or garden beds without the need for external power sources, making them a low-maintenance choice for maximizing garden space’s evening appeal.

Cozy private patio corner with a dark rattan armchair, concrete side table with a book, and a dark wood privacy screen with climbing clematis and tall

Privacy and Comfort in Compact Spaces

In a small garden, privacy and comfort are paramount. You want your outdoor retreat to feel secluded and protected from prying eyes and harsh elements. Strategic placement of screens, plants, and comfort elements elevates the usability and enjoyment of your small garden layout.

Urban patio with a black metal trellis covered in green vine, a tall planter with ornamental grass, and a small bubbling water feature.

Creating Visual and Auditory Screening

Address privacy needs with vertical elements. Lattice panels, bamboo screens, or decorative metal panels offer immediate visual barriers. Plant fast-growing vines on these structures to create a living wall. Tall, narrow planters filled with dense shrubs or ornamental grasses also provide effective screening without occupying much ground space. To soften urban noise, consider adding a small water feature; the gentle sound of bubbling water provides pleasant auditory screening. For specific plant suggestions for privacy, UF/IFAS Gardening Solutions offers regional plant lists.

A woman reads comfortably under a retractable shade sail on a small balcony, surrounded by container plants and a vertical garden.

Controlling Microclimates for Comfort

Earlier, you assessed your garden’s microclimates. Now, actively manage them for comfort.

  • Wind Breaks: If your space is exposed, strategically place dense shrubs, sturdy screens, or even outdoor curtains to block prevailing winds.
  • Shade Sails: For sunny spots, a retractable shade sail or umbrella provides welcome relief from intense sun, making your patio or balcony usable during hot afternoons.
  • Heat Pockets: If your garden suffers from excessive heat due to reflective surfaces, introduce plants with large leaves or consider painting walls a lighter, non-reflective color to reduce heat absorption.

These adjustments make your small garden more comfortable, encouraging you to spend more time enjoying your meticulously designed space.

Elevated view of a cozy small urban balcony corner featuring a light wooden storage bench, colorful outdoor cushions, a draped throw, and various cont

Thoughtful Seating and Textiles

Comfortable seating is essential. Opt for compact, multi-functional furniture, such as benches with built-in storage or foldable bistro sets. Soften hard surfaces with outdoor cushions, pillows, and throws. These textiles add a layer of coziness and personality. Remember to choose weather-resistant materials for all outdoor furnishings to ensure longevity.

Lush, low-maintenance container garden with lavender, sedum, and nasturtiums thriving on an urban balcony, glistening with morning dew.

Sustainable Planting for Low-Maintenance Beauty

A beautiful small garden layout does not require constant effort. By embracing sustainable planting choices, you create a garden that thrives with minimal intervention, benefiting both you and the environment.

A small bee pollinates a purple coneflower in a terracotta pot on an urban patio, surrounded by other native plants in containers.

Embracing Native and Pollinator-Friendly Plants

Prioritize native plants adapted to your local climate. They require less water, fertilizer, and pest control because they naturally resist local diseases and pests. Native plants also support local ecosystems, providing vital food and habitat for pollinators like bees and butterflies. Look for regional guides from your local extension service to identify suitable native species for your area. Examples include coneflowers, milkweed, bee balm, and various native grasses.

Collection of terracotta and glazed pots with lavender, rosemary, agave, sedum, showing a visible drip irrigation system on a patio during golden hour

Water-Wise Plant Choices

Select drought-tolerant plants, especially if you live in a region with water restrictions or simply want to conserve resources. Succulents, sedums, lavender, rosemary, and many ornamental grasses are excellent choices that thrive with less water. Group plants with similar water needs together to optimize irrigation schedules. Implementing efficient watering systems, such as drip irrigation for containers, further reduces water waste and simplifies maintenance, allowing you to maximize garden space without excess water consumption.

Close-up of hands applying chunky, peat-free potting mix, rich with compost and wood fibers, to a thriving basil plant in a terracotta pot on a balcon

Using Peat-Free Potting Mixes

For container gardening, choose high-quality, peat-free potting mixes. Peat harvesting has significant environmental impacts. Sustainable alternatives often use coir, compost, or wood fibers. These mixes provide excellent drainage and aeration, crucial for healthy root development in pots. Regularly refresh the top layer of your potting mix with compost to replenish nutrients.

Vibrant container garden with purple bee balm, orange zinnias, pink pentas, and yellow calibrachoa, with a bumblebee on a flower.

The Thriller, Filler, Spiller for Pollinators

Adapt the “Thriller, Filler, Spiller” concept with pollinator-friendly plants.

  • Thriller: A tall flowering plant like a bee balm (Monarda) or a small butterfly bush (Buddleia ‘Lo & Behold’ series).
  • Filler: Mid-height flowers like zinnias, cosmos, or pentas.
  • Spiller: Trailing plants like calibrachoa or sweet alyssum.

This combination offers a continuous feast for pollinators and brings vibrant life to your small garden layout. Ensure you choose plants that are not treated with systemic pesticides harmful to bees.

Person relaxing in a modern armchair on a small patio, surrounded by diverse, low-maintenance container gardens and vertical planters.

Maintenance by Design: Making it Easy

The best small garden layout is one you genuinely enjoy, not one that burdens you with endless chores. Design for low maintenance from the outset, and you will spend more time relaxing and less time working.

A patio with several pots of low-maintenance plants: dwarf conifer, sedum, lavender, and ornamental grass.

Selecting Low-Upkeep Choices

When choosing plants, prioritize those with low maintenance requirements. Look for species that are naturally pest and disease resistant, do not require frequent deadheading, and have a tidy growth habit. Avoid plants that are known to be aggressive spreaders or require constant pruning to stay within bounds. Consider slow-growing dwarf varieties of shrubs and trees to minimize the need for frequent trimming. Selecting the right plants upfront drastically reduces future effort.

Drip irrigation line watering a basil plant in a terracotta pot on a sunny balcony, with a timer visible in the background.

Smart Irrigation Rhythm

Establish an efficient watering routine. Manual watering is often required for containers, but you can simplify it. Water deeply when the top inch or two of soil feels dry, rather than frequent, shallow watering. This encourages deeper root growth, making plants more resilient. For multiple containers, consider a simple drip irrigation system connected to a timer. This automates watering, ensures consistency, and saves you time and effort. You can find comprehensive watering guides from university extension services, such as Oregon State Extension’s gardening resources, that provide regional watering recommendations.

Hands scooping fresh compost into a balcony herb planter with fertilizer and tools, illustrating container plant care.

Potting Mix Refresh and Fertilization

Container plants deplete soil nutrients over time. To keep them thriving, plan an annual potting mix refresh. Every spring, scrape off the top few inches of old potting mix and replace it with fresh, nutrient-rich peat-free compost. You can also incorporate a slow-release granular fertilizer at this time. For liquid feed, use a balanced organic fertilizer every 2-4 weeks during the growing season. Consistent, measured feeding supports robust plant growth without excessive effort. This simple routine maintains healthy plants without the need for constant vigilance, making your garden design small space truly low-maintenance.

Person sitting on a patio chair observing a vibrant container garden with various pots, herbs, and a vertical planter on a small patio.

Frequently Asked Questions

How do I make my tiny balcony garden feel bigger?

To make your tiny balcony garden feel bigger, use vertical space extensively with wall planters and trellises. Choose a limited color palette for cohesion, incorporate reflective surfaces like mirrors to create depth, and select compact, multi-functional furniture. Ensure clear pathways and a strong focal point to draw the eye, making the space feel more expansive.

What are the best plants for a low-maintenance small garden?

For a low-maintenance small garden, choose native plants, succulents, ornamental grasses, and compact evergreen shrubs. These often require less water, fertilizer, and pest management. Examples include Sedum, Lavender, Dwarf Nandina, and various Heuchera varieties, all contributing to a beautiful small garden layout with minimal effort.

Can I grow vegetables in a small garden layout?

Absolutely. Many vegetables thrive in small garden layouts. Focus on compact, bush, or vining varieties that you can train vertically. Examples include bush beans, compact tomatoes (like ‘Patio’ or ‘Tiny Tim’), radishes, lettuce, spinach, and vining crops like cucumbers or pole beans grown on trellises. Use large containers to provide ample root space.

How do I provide privacy in a small urban garden?

To provide privacy in a small urban garden, use a combination of vertical elements. Install lattice screens with climbing vines, place tall, dense container shrubs like bamboo (in pots to control spread) or narrow evergreens, and consider outdoor curtains or shade sails for overhead privacy. These elements create visual barriers and a sense of enclosure.

What is the most common mistake in small garden design?

The most common mistake in small garden design is overstuffing the space with too many elements or oversized plants. This leads to a cluttered, cramped feel that diminishes enjoyment. Instead, focus on a few well-chosen plants and design features, ensuring each item has a purpose and sufficient room to thrive, allowing you to maximize garden space effectively.

Disclaimer: This article is for informational purposes only and is not a substitute for professional advice. Consult local extension services for region-specific recommendations.

Categories
Garden Design & Ideas

DIY Vertical Pallet Garden: Step-by-Step Tutorial

Your small outdoor space, be it a balcony, patio, or compact yard, holds untapped potential. Imagine a vibrant wall of greenery, a culinary herb station, or a burst of color in an otherwise overlooked corner. This vision becomes a reality with a DIY vertical pallet garden, a brilliant solution for maximizing limited square footage. You transform a discarded shipping pallet into a functional, beautiful planter, bringing life and fresh produce directly to your doorstep. This guide provides a detailed, step-by-step tutorial, empowering you to create a stunning vertical garden that enhances your home, benefits the environment, and simplifies your gardening efforts.

Creating a vertical garden gives you the opportunity to grow more in less space, opening up possibilities for flowers, herbs, and even vegetables. Repurposing a pallet offers an accessible, cost-effective, and sustainable approach to gardening, aligning perfectly with a low-maintenance and eco-conscious lifestyle. This project is approachable for beginners and offers satisfying results for experienced gardeners looking for new design solutions. Prepare to transform your outdoor area into a productive and visually appealing oasis.

A person mists a lush vertical garden filled with herbs and greens on a sunny urban balcony wall, surrounded by small container plants.

Embrace Vertical Gardening for Small Spaces

Vertical gardening represents a transformative approach for anyone working with limited outdoor space. You leverage vertical planes, such as walls, fences, or even the side of your home, to cultivate plants that would otherwise require significant ground area. This method is incredibly efficient, allowing you to grow a wider variety of plants in a compact footprint. For apartment dwellers, urban gardeners, or those with small courtyards, vertical gardening is a game-changer.

Consider the benefits: you maximize every square inch, create stunning visual interest, and often improve air quality. A vertical garden adds texture, color, and life to bland surfaces. It can also serve practical purposes, such as growing herbs directly outside your kitchen or creating a privacy screen from a busy neighbor. Studies show that green spaces, even small ones, contribute positively to mental well-being, reducing stress and enhancing mood. You are not simply growing plants, you are cultivating a more enjoyable and functional living environment.

This design principle extends beyond aesthetics, offering practical advantages. Vertical structures can make gardening more accessible, reducing the need for bending and kneeling. They also help elevate plants away from ground-dwelling pests. When planning your small space, consider how vertical elements draw the eye upwards, making an area feel larger and more expansive. This creates a sense of depth and dimension that flat, ground-level plantings often cannot achieve.

Hands adding soil to a natural wood pallet vertical garden on a grey balcony wall, with small herb seedlings already planted.

Why Choose a Pallet Garden? Sustainable, Stylish, and Simple

Among the many vertical gardening options, the DIY pallet garden stands out for its unique blend of sustainability, aesthetic appeal, and straightforward construction. Pallets are readily available, often free or inexpensive, making this project highly budget-friendly. You take a discarded item, destined for a landfill, and give it a new purpose, reducing waste and embracing a circular economy model. This act of repurposing aligns perfectly with environmentally conscious living.

Beyond its eco-credentials, a pallet garden offers a rustic, appealing aesthetic that complements various outdoor design styles. Its natural wood tones provide a warm backdrop for lush greenery and vibrant blooms. You can leave the wood unfinished for a natural look, or paint it to match your existing decor, offering significant customization potential. The inherent structure of a pallet naturally creates compartments, simplifying the planting process and organizing your garden.

The simplicity of constructing a pallet garden makes it an ideal DIY project for gardeners of all skill levels. You do not need specialized carpentry skills or expensive tools. The basic transformation involves minimal modifications, allowing you to focus on the exciting part: selecting and planting your chosen botanicals. With its low cost, easy assembly, and charming appearance, a repurposed pallet garden is an intelligent choice for enhancing your small outdoor space.

Close-up of hands wearing gardening gloves, pointing to an 'HT' (Heat Treated) stamp on a raw, weathered wooden pallet.

Sourcing Your Pallet: Safety and Selection

The first and most critical step in creating your DIY vertical pallet garden involves sourcing the right pallet. Not all pallets are suitable for gardening, especially if you plan to grow edible plants. Understanding pallet markings ensures your project is safe and sustainable.

A person kneels, using a flashlight to closely examine a faint 'HT' stamp on a weathered wooden pallet, on a patio.

Understanding Pallet Markings

Pallets carry stamps or brands that indicate their treatment method. Look for these codes:

  • HT (Heat Treated): This is the safest option. Heat-treated pallets undergo a process that kills pests and pathogens without using chemicals. These are ideal for gardening, especially for edibles.
  • DB (Debarked): This indicates the wood was debarked, often preceding heat treatment. You still need to look for the HT stamp.
  • MB (Methyl Bromide): Avoid pallets with this stamp. Methyl bromide is a highly toxic pesticide used to treat pallets, and its residues can leach into soil, posing health risks and harming plants.
  • EUR or EPAL: These stamps indicate a European pallet standard, typically heat-treated, making them safe.
  • No Stamp: Exercise caution with unstamped pallets. Their origin and treatment method are unknown, making them a risky choice for growing food.

Always prioritize pallets stamped ‘HT’ for safety and peace of mind. Your local extension service, such as Oregon State University Extension, offers additional resources on safe material sourcing.

A person thoughtfully observes a neat stack of heat-treated wooden pallets near a garden center's service entrance, contemplating their reuse.

Where to Find Safe Pallets

You can often find safe, heat-treated pallets for free or at a low cost. Consider these sources:

  • Local businesses: Small businesses, especially those receiving international shipments, often have heat-treated pallets. Look for furniture stores, hardware stores, pet supply shops, or nurseries. Always ask permission before taking a pallet.
  • Industrial areas: Warehouses and distribution centers might have surplus pallets. Again, always ask first.
  • Construction sites: Sometimes construction projects have pallets for materials. Inquire with the site manager.
  • Online marketplaces: Websites like Craigslist or local community groups often list free pallets.
  • Pallet recyclers: These businesses specialize in pallet collection and resale, and can often provide safe, sorted options.

Woman in linen carefully inspects an old wooden pallet for damage and contamination, leaning against a sunlit brick patio wall.

Inspecting Your Pallet

Once you locate potential pallets, inspect them thoroughly:

  • Structural integrity: Ensure the pallet is sturdy, with no rotting wood, significant cracks, or missing planks. It needs to hold soil and plants.
  • Contamination: Check for chemical spills, oil stains, or strong odors. Avoid pallets that have held hazardous materials.
  • Pest damage: Look for signs of insect infestation, such as sawdust trails or exit holes.

Selecting a clean, sound, heat-treated pallet forms the foundation of a successful and safe vertical garden. Take your time with this crucial selection process.

Overhead view of gardening tools and materials including fabric grow bags, hand trowel, potting mix, cordless drill, screws, and herb plants, neatly a

Gathering Your Tools and Materials

Before you begin the transformation, gather all necessary tools and materials. Having everything on hand streamlines the process and ensures a smooth project completion. Most items are commonly available at hardware stores or home centers.

Gloved hands reaching for a heavy-duty staple gun, with safety glasses, a drill, and staples visible on a weathered pallet board.

Tools You Will Need:

  • Safety Glasses and Gloves: Protect your eyes and hands from splinters and dust.
  • Sander or Sandpaper (medium grit): Essential for smoothing rough edges and preparing the wood.
  • Drill with Phillips Head Bit: For attaching fabric and potentially adding drainage.
  • Staple Gun and Heavy-Duty Staples (at least 1/2 inch): For securing landscaping fabric.
  • Measuring Tape: For accurate cuts and measurements.
  • Utility Knife or Scissors: For cutting fabric.
  • Crowbar or Pry Bar (optional): If you need to remove or adjust any planks.
  • Saw (optional): For cutting planks if modifications are needed.
  • Paintbrush (optional): If you plan to seal or paint the pallet.

DIY vertical pallet garden materials on a patio: a wooden pallet, landscaping fabric, potting mix, wood sealer, and a person's hands.

Materials You Will Need:

  • Sourced Pallet: Your chosen heat-treated pallet.
  • Heavy-Duty Landscaping Fabric or Weed Barrier: Choose a durable, rot-resistant, breathable fabric. This forms the pockets for your soil and plants. Approximately 3-4 yards for a standard pallet.
  • Potting Mix: Select a high-quality, lightweight, peat-free potting mix specifically designed for containers. This provides essential nutrients and good drainage. Consider mixes containing compost for added sustainability.
  • Plants: Choose plants suitable for vertical gardening and your specific light conditions. More on this in a later section.
  • Exterior Wood Sealer or Paint (optional): For protecting the wood and customizing its appearance. Look for non-toxic, eco-friendly options if growing edibles.
  • Drainage Material (optional, but recommended): Small pebbles or broken pottery shards for the bottom of each pocket to improve drainage.
  • Lag Screws or Heavy-Duty Brackets (for mounting, if applicable): If you plan to secure the pallet to a wall, ensure these are robust and appropriate for the wall material.

Ensuring you have all these items before starting saves time and prevents interruptions. This preparation phase is crucial for a smooth and enjoyable DIY experience.

Close-up of gloved hands sanding a weathered wooden pallet on a concrete patio, preparing it for a vertical garden project.

Preparing Your Pallet for Planting

With your materials gathered, you are ready to prepare your pallet. This stage focuses on cleaning, smoothing, and fortifying the structure to ensure it is plant-ready and durable.

Person actively power-washing a dirty wooden pallet on a concrete patio, water streams visibly removing grime.

Step 1: Thorough Cleaning

Begin by giving your pallet a comprehensive cleaning. Use a stiff brush or a power washer to remove all dirt, dust, spiderwebs, and any lingering debris. A mixture of mild soap and water works effectively for tougher grime. Rinse it thoroughly and allow the pallet to dry completely in the sun. This step is vital for hygiene and ensures better adhesion if you plan to seal or paint.

Close-up of a person using an electric sander to smooth the edge of a wooden pallet, with fine wood dust visible.

Step 2: Sanding and Smoothing

Pallets often have rough edges and splinters. Use a sander or sandpaper (medium grit, around 80-120) to smooth all surfaces, especially any areas you will frequently touch. Pay close attention to the edges of the slats and the tops of the support blocks. This not only prevents splinters during handling but also creates a more finished look for your garden. If you plan to paint or seal, sanding helps the finish adhere better.

Person kneeling on a patio, drilling a new support plank onto the back of a weathered wooden pallet for reinforcement.

Step 3: Structural Assessment and Reinforcement (Optional)

Examine the pallet for any loose or damaged boards. If you find any, you can:

  • Tighten: Use wood screws to re-secure loose planks.
  • Remove: Carefully pry off severely damaged planks with a crowbar.
  • Replace: If you remove a plank, you can cut a piece of scrap wood to size and screw it in place.

For heavy plants or if you foresee significant weight, you might add extra support by screwing thin, sturdy planks across the back of the pallet, perpendicular to the main slats. This reinforcement distributes weight and prevents bowing.

A person brushes clear wood sealer onto a wooden pallet slat on a sunny patio, preparing it for a vertical garden.

Step 4: Sealing or Painting (Optional, but Recommended for Longevity)

To extend the life of your pallet garden and customize its appearance, apply a wood sealer or exterior-grade paint. If you are growing edibles, choose a non-toxic, food-safe sealer or paint.

  • Sealing: A clear exterior wood sealer protects the wood from moisture, UV rays, and rot. Apply 2-3 coats, allowing adequate drying time between each.
  • Painting: Exterior paint allows you to match your garden to your home’s aesthetic. White or light colors reflect heat, beneficial in sunny locations, while darker colors absorb heat. Apply a primer first, then 2-3 coats of paint.

Ensure the pallet dries completely after this step before proceeding to assembly. This preparatory work safeguards your investment and sets the stage for a beautiful and lasting vertical garden.

Close-up of hands stapling dark landscaping fabric into a wooden pallet slat to form a planting pouch on a bright patio.

Assembly: Transforming Your Pallet into a Planter

Now, you convert your prepared pallet into functional planting pockets. This involves strategically attaching landscaping fabric to create contained sections for soil and plants. The goal is to form “pouches” along the length of the pallet.

A weathered wooden pallet lies oriented on a patio. An adult hand in a glove points to the upward-facing wide openings and narrow planting gaps.

Step 1: Orient Your Pallet

Decide which side of the pallet will be the top. Most commonly, you will lay the pallet on its back, with the wider opening facing upwards. The narrow gaps between the top planks will become your planting openings. If your pallet has different sized gaps, choose the orientation that offers the most suitable planting depth and width.

A person's gloved hands measure a dark strip of landscaping fabric with a yellow tape on a light gray patio surface, with scissors nearby.

Step 2: Measure and Cut Landscaping Fabric

You need to create pockets that hold soil securely. Measure the width of your pallet. You will cut strips of landscaping fabric that are at least twice the depth of your desired pocket, plus an extra 6-8 inches for overlap and stapling. For example, if your pallet slats are 4 inches apart and you want a 6-inch deep pocket, you would cut strips approximately 16-18 inches wide (6 inches for each side of the pocket, plus stapling allowance). The length of each strip will match the interior width of your pallet, from one side stringer to the other.

You will need one fabric strip for each planting row. A typical pallet offers 3-4 rows.

Close-up of hands stapling dark landscaping fabric to the underside of a weathered pallet's top plank, securing a planting pocket's back edge.

Step 3: Create the Planting Pockets

This is the core of the assembly. For each planting row:

  1. Position the Fabric: Lay a cut strip of landscaping fabric over the opening of one planting row. Allow one long edge to drape down into the pallet’s interior, creating the “back” of your pocket. The other long edge will form the “front” of the pocket.
  2. Secure the Back Edge: Pull the back edge of the fabric taut and staple it securely to the underside of the pallet’s top plank or to the horizontal support beam behind the planting opening. Ensure staples are close together, creating a strong seam. You want no gaps where soil can escape.
  3. Form the Bottom and Sides: Now, push the fabric down into the pallet opening, forming a U-shape or a trough. The fabric should extend downwards to create your desired pocket depth. At the sides, fold the fabric inwards, similar to wrapping a gift, to create closed ends for the pocket. Staple these side folds securely to the pallet’s side stringers.
  4. Secure the Front Edge: Bring the remaining front edge of the fabric up and over the front plank of your planting row. Pull it taut and staple it securely to the top or back of this front plank. This creates a lip, preventing soil from spilling out.
  5. Repeat for All Rows: Repeat this process for each planting row. Each pocket should be distinct, fully enclosed by the fabric and staples, and capable of holding soil.

Some vertical pallet garden designs only open one side for planting, effectively creating large, deep pockets. Other designs utilize the gaps between slats as individual pockets. Your fabric placement dictates this. For beginners, creating distinct, individual pockets per slat opening is generally easier to manage for watering and plant placement.

Gardener kneeling on a patio, holding a potted herb, deciding its spot in a partially planted vertical pallet garden.

Planting Your Vertical Garden: Design and Plant Choices

With your pallet transformed, the exciting phase of planting begins. Strategic plant selection and thoughtful arrangement ensure your vertical garden thrives and looks beautiful. Remember, plants in vertical gardens dry out faster, so choose accordingly.

A person on an urban patio assesses a wall for a vertical garden, feeling sun/breeze and observing light patterns and shadows.

Consider Your Microclimate

Before selecting plants, assess your pallet garden’s location.

  • Sunlight: How many hours of direct sun does it receive? Full sun (6+ hours), partial sun (4-6 hours), or shade (less than 4 hours)?
  • Wind: Is the area protected or exposed to strong winds? Wind increases moisture loss.
  • Temperature: Does the area experience extreme heat or cold?

These factors dictate which plants will flourish.

Vibrant close-up of a vertical pallet garden section featuring purple salvia (thriller), variegated coleus (filler), and sweet potato vine (spiller).

Selecting the Right Plants

Choose plants that do not require extensive root systems, tolerate drier conditions, and have a trailing or compact growth habit. The “thriller, filler, spiller” concept works well here:

  • Thrillers: Upright plants that provide height and a focal point. Use sparingly in a vertical garden, perhaps one per pallet or at the top. Examples: dwarf ornamental grasses, compact salvias, upright fuchsias.
  • Fillers: Bushy, mounding plants that fill out the middle of the pocket. These form the bulk of your planting. Examples: coleus, petunias, marigolds, impatiens (for shade), herbs like basil, thyme, oregano.
  • Spillers: Trailing plants that cascade over the edges, softening the lines of the pallet and adding visual interest. Examples: sweet potato vine, creeping jenny, nasturtiums, strawberries, lobelia, various sedums.

Excellent Plant Choices for Pallet Gardens:

  1. Herbs: Basil, mint (plant in its own pocket to control spread), thyme, oregano, rosemary, chives, cilantro, parsley. These are perfect for kitchen gardens.
  2. Lettuces and Greens: Loose-leaf lettuces, spinach, Swiss chard, arugula. Harvest outer leaves regularly for continuous production.
  3. Strawberries: Trailing varieties are ideal, producing fruit that hangs freely.
  4. Succulents: Sedums, hens and chicks (Sempervivum), Echeveria. These are extremely drought-tolerant and require minimal care, thriving in sunny, well-drained conditions. They are perfect for low-maintenance designs.
  5. Annual Flowers: Petunias, impatiens (shade), lobelia, calibrachoa, nasturtiums. Provide continuous color throughout the season.
  6. Perennial Flowers: Dianthus, creeping thyme, certain low-growing sedums. These return year after year.
  7. Small Vegetables: Radishes, bush beans (compact varieties), cherry tomatoes (dwarf, determinate varieties with good support).

For pollinator-friendly options, consider herbs like thyme and oregano, or flowers like lobelia and sweet alyssum. You support local ecosystems directly from your small space. For further guidance on plant selection suited to your climate, consult resources like the Chicago Botanic Garden plant finder.

Close-up of hands planting a trailing plant into a fabric pocket of a wooden pallet vertical garden, beside a colorful flower.

Planting Technique

  1. Add Drainage Layer (Optional): Place a thin layer of small pebbles or broken pottery shards at the bottom of each fabric pocket. This improves drainage and prevents soil from compacting.
  2. Fill with Potting Mix: Fill each pocket with your chosen peat-free potting mix. Leave about an inch or two of space from the top edge. Gently compact the soil.
  3. Arrange and Plant: Carefully remove plants from their nursery pots. Arrange them in the pockets, considering their mature size and growth habit. For each pocket, place thriller plants (if using) towards the back, fillers in the middle, and spillers at the front, allowing them to trail over the pallet’s edge.
  4. Backfill and Water: Once plants are in place, backfill any remaining space with potting mix, gently firming it around the plant bases. Water thoroughly until water drains from the bottom of the pockets. This settles the soil and eliminates air pockets.

Remember, the visual impact of your vertical garden is significant. Place plants with contrasting foliage textures or bloom colors next to each other to create dynamic interest. For example, the silvery foliage of lamium provides a striking contrast to the deep green of basil. The bright red of petunias pops against the sprawling green of sweet potato vine.

A person on a small patio gently adjusts a fully-planted vertical pallet garden against a light wall, optimizing its placement.

Installation and Placement: Optimizing Your Vertical Oasis

Once planted, proper installation and placement of your pallet garden ensure its stability, accessibility, and optimal plant health. Consider safety, sun exposure, and aesthetics.

A bright, sun-drenched corner of a small patio with an empty wooden pallet leaning against a brick wall, near a seating area and water spigot.

Choosing the Ideal Location

Your garden’s location dictates its success:

  • Sunlight: The primary factor. Most edible plants and flowering annuals require at least 6 hours of direct sunlight daily. If you have a shadier spot, choose shade-tolerant plants like impatiens, ferns, or some lettuces.
  • Accessibility: Place your pallet garden where you can easily reach all plants for watering, harvesting, and maintenance. Consider placing it near a water source.
  • Visibility: Position the garden where you can enjoy its beauty. A focal point from a window, patio, or seating area adds value to your outdoor living space. The first thing your eye notices defines a focal point.
  • Protection: Shelter your garden from strong winds, which can dry out plants quickly and cause structural damage. A wall or fence offers good protection.

Person in work gloves using a power drill to attach a wooden A-frame support to a heavy, partially planted vertical pallet garden on a small patio.

Securing Your Pallet Garden

A filled pallet garden becomes quite heavy. You must ensure its stability, especially if it stands upright.

  • Leaning Against a Wall: For a temporary or less permanent setup, you can lean the pallet against a sturdy wall or fence. Ensure it sits on a level surface. However, this is less secure and not recommended in windy areas or where children or pets play.
  • Freestanding with Support: If you want a freestanding pallet, you need to add a secure base or attach support legs. You can construct a wide, sturdy base from additional lumber or repurpose thick wood blocks. Another option involves creating A-frame supports that attach to the sides of the pallet, ensuring a broad and stable footprint.
  • Mounting to a Wall or Fence: This is the most secure method. Use heavy-duty lag screws or L-brackets suitable for exterior use and the weight of your filled pallet (which can exceed 100-200 pounds, depending on size and soil moisture).
    1. Locate Studs (for walls): If mounting to a house wall, use a stud finder to locate wall studs for maximum security.
    2. Mark Attachment Points: Hold the pallet in its desired position and mark the drilling points through the pallet’s frame onto the wall or fence.
    3. Drill Pilot Holes: Drill pilot holes into the wall/fence and through the pallet.
    4. Secure with Hardware: Attach the pallet using lag screws (long, heavy-duty screws designed for wood) or L-brackets, ensuring they are tightened securely. Use at least four attachment points for a standard pallet.

Regardless of your chosen installation method, regularly check the stability of your pallet garden, especially after heavy rains or strong winds. Your garden’s safety and longevity depend on a solid installation. Always prioritize stability to prevent accidents and protect your plants.

For design and plant selection guidance, visit Oregon State Extension — Gardening, Chicago Botanic Garden and Brooklyn Botanic Garden.

Close-up of a gloved hand watering thriving basil in a vertical pallet garden with a small galvanized steel watering can.

Ongoing Care and Maintenance

A vertical pallet garden, like any garden, requires consistent care to thrive. Its unique structure means specific maintenance considerations, primarily concerning watering and nutrient management.

A gardener's finger checks soil moisture in a fabric pocket of a vertical pallet garden with green herbs.

Watering Your Vertical Garden

Plants in vertical gardens, especially those in landscaping fabric pockets, tend to dry out more quickly than those in traditional garden beds. This is due to increased exposure to air and sun. You will likely need to water more frequently, possibly daily during hot, dry periods.

  • Check Soil Moisture: Stick your finger about an inch into the soil. If it feels dry, it is time to water. Do not rely solely on visual cues; the surface might look dry when deeper soil is still moist, or vice versa.
  • Water Thoroughly: Water each pocket until you see drainage from the bottom. This ensures water reaches all roots. Uneven watering leads to stressed plants.
  • Consider Drip Irrigation: For ease and efficiency, especially for busy gardeners or larger pallet gardens, consider installing a simple drip irrigation system. A micro-drip line with emitters in each pocket delivers water directly to the root zone, minimizing waste and ensuring consistent moisture. This is a highly recommended upgrade for low-maintenance care.
  • Morning is Best: Water in the morning to allow foliage to dry before nightfall, reducing the risk of fungal diseases.

Person on an urban balcony applying liquid organic fertilizer to thriving basil plants in a wooden vertical pallet garden.

Fertilization

Container plants deplete soil nutrients faster than those in the ground. Your potting mix will provide initial nutrients, but regular feeding becomes necessary.

  • Start with Rich Potting Mix: Begin with a high-quality potting mix that includes compost or slow-release fertilizer.
  • Liquid Feed Regularly: After 3-4 weeks, begin feeding with a diluted liquid organic fertilizer every 2-4 weeks, following product instructions. For edibles, choose an organic, balanced fertilizer.
  • Observe Your Plants: Yellowing leaves, stunted growth, or poor flowering often indicate a nutrient deficiency. Adjust your feeding schedule accordingly.

A gardener's hand gently lifts a vibrant green herb leaf from below, inspecting its underside in a sunlit vertical pallet garden.

Pest and Disease Management

Even in a small vertical garden, pests and diseases can appear. Early detection is key.

  • Regular Inspections: Routinely check the undersides of leaves, stems, and soil for signs of pests (aphids, spider mites, slugs) or diseases (leaf spots, mildew).
  • Manual Removal: For small infestations, physically remove pests or prune affected leaves.
  • Organic Solutions: Use insecticidal soap or neem oil for persistent pest problems. Always follow label directions. Encourage beneficial insects by planting pollinator-friendly flowers nearby.
  • Good Air Circulation: Proper spacing between plants and good air circulation around your pallet garden helps prevent fungal diseases.

Gardener's hands pinching basil from a weathered wooden vertical pallet garden, showing pruning action on a small patio.

Pruning and Harvesting

  • Deadheading: Remove spent flowers (deadhead) to encourage new blooms and maintain a tidy appearance.
  • Pinching Back: Pinch back leggy growth on herbs and flowering annuals to promote bushier, more compact plants.
  • Harvest Regularly: For herbs and leafy greens, frequent harvesting encourages more production. Do not remove more than a third of the plant at once.

Vertical pallet garden on a patio, partially covered with burlap for winter protection. Dormant plants and a basket with potting mix subtly hint at se

Seasonal Considerations

  • Winter Protection: In colder climates, bring annuals indoors or protect the entire pallet with burlap or frost cloth. For perennials, you might need to empty the pockets and store the pallet, or use cold-hardy varieties.
  • Spring Refresh: Each spring, replenish the potting mix in each pocket. Top-dress with fresh compost or replace about a third of the old soil with new, nutrient-rich mix.

Consistent, attentive care ensures your DIY vertical pallet garden remains a thriving and beautiful feature in your small space, providing you with continuous joy and harvests.

Cozy patio with a lush vertical pallet garden, an open notebook, and a steaming mug on a side table during golden hour.

Frequently Asked Questions

Can I grow vegetables in a pallet garden?

Yes, absolutely. Many compact vegetables thrive in vertical pallet gardens. Choose smaller varieties such as loose-leaf lettuces, spinach, radishes, bush beans, dwarf cherry tomatoes, and strawberries. Ensure the pallet is heat-treated (HT stamped) and use a high-quality, organic potting mix for safe consumption.

How deep should the planting pockets be?

The ideal depth for planting pockets in a vertical pallet garden is generally 4 to 6 inches. This depth accommodates the root systems of most herbs, annual flowers, and shallow-rooted vegetables. If your pallet allows for deeper pockets, even better, as it provides more room for root development and soil volume.

How do I prevent soil from washing out of the pockets when I water?

Several strategies prevent soil washout. Firstly, ensure you use a heavy-duty landscaping fabric that is securely stapled to form enclosed pockets. Secondly, avoid overfilling the pockets; leave an inch or two of space at the top. Thirdly, water gently and slowly, allowing the soil to absorb moisture gradually. Installing a drip irrigation system also minimizes direct impact on the soil surface.

What should I do with my pallet garden in winter?

Your winter strategy depends on your climate and the types of plants you grow. For annuals in colder regions, you can either empty the pockets and store the pallet, or bring the entire garden indoors if space allows. For perennial plants, consider using cold-hardhardy varieties and wrapping the pallet with burlap or frost cloth. In milder climates, some plants might survive with minimal protection. Always check the specific winter hardiness zones for your chosen plants.

Winter plant strategy diagram: climate & plant type determine approach. Arrows show water flow in 30cm pot with labels for key elements.

Can I move my vertical pallet garden once it’s planted?

Moving a fully planted vertical pallet garden is challenging due to its significant weight. A standard pallet filled with wet soil and plants can weigh well over 100-200 pounds. It is best to choose a permanent location during initial installation. If you anticipate needing to move it, consider attaching heavy-duty locking caster wheels to the base of the pallet before planting. Ensure the wheels are rated for the total estimated weight.

Disclaimer: This article is for informational purposes only and is not a substitute for professional advice. Consult local extension services for region-specific recommendations.

Categories
Garden Design & Ideas

Zen Garden Ideas for Small Spaces

You desire a tranquil escape, a place to find peace and calm, right outside your door. You might think creating a Zen garden requires expansive space, but this is a common misconception. Transforming your balcony, patio, courtyard, or compact yard into a serene Zen retreat is entirely achievable, regardless of its size. We focus on practical, actionable steps for crafting a beautiful, low-maintenance, and calming garden space. This guide empowers you to infuse the essence of Zen into your small outdoor area, providing a sanctuary where you can recharge and connect with nature.

For design and plant selection guidance, visit
Chicago Botanic Garden,
Brooklyn Botanic Garden and
New York Botanical Garden.

Disclaimer: This article is for informational purposes only and is not a substitute for professional advice. Consult local extension services for region-specific recommendations.

A person sits peacefully on a cushion on a small urban balcony, surrounded by container plants like dwarf conifers, ferns, and moss.

Zen Principles for Small-Space Serenity

A true Zen garden, whether large or small, embodies principles far beyond mere aesthetics. You create an environment that encourages contemplation, peace, and a connection to the natural world. Understanding these core principles helps you design an authentic and deeply calming garden space, even in a compact area. Embrace these ideas as you embark on your zen garden design journey.

A minimalist patio corner with a dwarf juniper bonsai in a dark grey planter and a smooth river stone on light concrete.

Kanso: Simplicity

Kanso champions simplicity, eliminating clutter and focusing on essential elements. For a small space, this means choosing only a few key features that serve a purpose. Avoid overcrowding. Each rock, plant, or decoration you include should have a deliberate place and contribute to the overall tranquility. You achieve a minimalist look that feels open and spacious, not empty.

A close-up view of an asymmetrical container garden on a patio, featuring varied pots, a dwarf conifer, river stones, and driftwood for a natural look

Shizen: Naturalness

Shizen emphasizes naturalness, preferring irregular, organic forms over perfect symmetry. You design a garden that feels as if nature created it, even with human intervention. Use natural materials like stone, wood, and plants. Arrange elements in an asymmetrical way that mimics natural landscapes, avoiding straight lines and rigid patterns. This principle helps your small backyard zen feel less manufactured and more integrated with its surroundings.

Close-up of a small ceramic bowl planter on a wooden table, featuring an asymmetrical arrangement of three river stones and a succulent.

Fukinsei: Asymmetry

Fukinsei is the principle of asymmetry and irregularity, which often creates balance more effectively than strict symmetry. You place elements unevenly to achieve visual harmony and interest. For example, arrange rocks in odd-numbered groups (three, five, seven) rather than even pairs. This approach feels dynamic and natural, guiding your eye through the space in an engaging way.

An oblique view into a small balcony garden with layered potted plants, dappled shadows, and a partially hidden water feature.

Yugen: Subtlety and Suggestion

Yugen refers to a profound, mysterious, and subtle beauty. Your garden should suggest more than it explicitly shows, inviting contemplation and imagination. You achieve this by partially obscuring elements, using shadows, or creating visual depth that draws the viewer in. A hidden path, a partially visible plant, or the sound of water can evoke Yugen, fostering a sense of wonder and calm.

A tranquil small patio garden featuring various dark grey containers with dwarf conifers, Japanese forest grass, smooth stones, and a subtle bamboo wa

Seijaku: Tranquility and Quiet

Seijaku embodies tranquility and quietude. Your Zen garden serves as a peaceful retreat, a place free from distractions. You select elements that promote stillness and relaxation. Think about soft sounds like rustling leaves or trickling water, and visually calming colors. Minimize jarring noises and bright, distracting elements to cultivate a truly serene atmosphere.

Modern rectangular charcoal planter with raked light-grey gravel, dark river stones, and a sculptural paddle plant on a wooden patio deck.

Datsuzoku: Freedom from Habit

Datsuzoku encourages freedom from convention and habits, promoting originality and breaking away from the mundane. While Zen gardens follow certain principles, you do not need to replicate traditional designs exactly. Adapt these ideas to your specific space and personal preferences. Your garden reflects your unique spirit, offering a fresh perspective. This means you can integrate modern containers or unconventional plants, provided they maintain the overarching sense of calm and naturalness.

Person kneeling, thoughtfully positioning a bonsai and sedum pots on raked pebbles, designing a small Zen patio garden.

Designing Your Miniature Layout

Effective layout design is crucial for small spaces. You want to maximize functionality, create visual interest, and maintain an open, uncluttered feel. Think of your small garden as a canvas where every element serves a purpose in creating a calming garden ideas retreat. You establish clear zones, manage traffic flow, and thoughtfully position your focal points to achieve this.

High-angle view of a small patio with raked gravel, slate pavers, a bench, and container plants defining distinct functional zones.

Defining Zones

Even in a small space, you can define functional zones. Consider areas for relaxation, contemplation, and perhaps a small display. You can delineate these zones using changes in ground material (e.g., a small patch of raked gravel next to a stepping stone path), container groupings, or low screens. A clearly defined relaxation zone with a comfortable cushion or bench invites you to sit and reflect. A simple rule of thumb suggests allowing at least 24-30 inches for comfortable passage along a path or between furniture pieces. This ensures you move freely without feeling cramped.

A gently curving flagstone path, about 30 inches wide, leads through a small container garden with a foot about to step onto it.

Traffic Flow and Circulation

Plan your paths carefully. You need clear, unobstructed routes to move through your garden without disturbing its tranquility. Use stepping stones, small sections of gravel, or a single defined path. Avoid winding paths in very tight spaces, which can feel cluttered. Instead, opt for a direct path or allow for gentle curves that lead to a specific point, like a seating area or a focal point. Ensure your main circulation paths are wide enough for comfortable movement, generally at least 24 inches for a single person to pass. You want easy access to all parts of your garden for maintenance and enjoyment.

Eye-level view of a small balcony Zen garden. A miniature Japanese maple in a black pot serves as the focal point, framed by other container plants.

Focal Points and Sightlines

Every Zen garden benefits from a focal point, the element that first captures your eye. This could be a unique rock, a miniature tree, a small water feature, or even a strategically placed lantern. You position your focal point to be visible from your main viewing areas, such as indoors looking out, or from your primary seating spot. For small spaces, a single, strong focal point often works best. You avoid multiple competing elements that can create visual clutter. Consider the sightline, the path your eye takes. You guide the viewer’s gaze through the garden by placing elements deliberately, creating depth and leading them to your chosen focal point.

Patio Zen garden plan: seating, raked gravel with rock, stepping stone path, container plants, arrows for flow/sightlines.

Asymmetrical Zen garden arrangement on a small patio: a tall black bamboo plant in a dark pot balanced by river stones and moss in a shallow terracott

Asymmetrical Balance

Embrace asymmetry, a cornerstone of Zen design. You achieve balance not by mirroring elements, but by distributing visual weight unevenly yet harmoniously. For example, a tall plant on one side can be balanced by a cluster of lower, wider rocks on the other. This creates a more dynamic and natural feel than rigid symmetry. You arrange elements to draw the eye, creating a sense of natural composition.

Elevated view of a small urban balcony Zen garden featuring a raked gravel tray, bonsai, river stones in water, and moss in ceramic pots.

Essential Elements of a Zen Garden

Traditional Zen gardens utilize specific elements to symbolize natural landscapes and evoke contemplation. You can adapt these elements beautifully for a small space, creating a rich symbolic environment.

Close-up of three natural, textured grey river stones intentionally placed in a shallow concrete planter on an urban balcony, partially buried.

Rocks: The Bones of the Garden

Rocks represent mountains, islands, or even animal forms. You select rocks with character, interesting textures, and varied shapes. Avoid highly polished or artificially shaped stones. Place rocks intentionally in groups of odd numbers, typically three or five, to create a natural, asymmetrical composition. Larger rocks anchor the design, while smaller ones add detail. For small spaces, you might choose one prominent focal rock and a few smaller companion stones. Ensure the rocks sit securely, partially buried to look as if they have always been there. You create a sense of permanence and natural integration.

Close-up of hands gently raking light tan gravel into flowing wave patterns in a contained 2x3 foot Zen garden on a modern patio.

Sand or Gravel: The Raked Sea

Sand or fine gravel symbolizes water, representing oceans, rivers, or calm ponds. You choose a neutral color, typically light gray or tan, to promote a sense of openness and purity. Raking patterns in the gravel symbolize waves or ripples. For a small patio, you might define a small, contained area, perhaps 2×3 feet, for raked gravel. You use a mini rake or even a chopstick to create simple, flowing patterns. This practice becomes a meditative act in itself, offering a moment of focused calm. Ensure the gravel is contained with a subtle border, like landscape edging or a low timber, to prevent scattering.

Close-up of a small bamboo spigot dripping water into a dark ceramic basin on a wooden stand, surrounded by potted plants on a patio.

Water Features: Sound and Reflection

While large ponds are impractical, you can incorporate small water features. A bamboo spigot gently dripping into a basin, a small tabletop fountain, or a simple bird bath provides the soothing sound of moving water. You select features that create subtle sounds, avoiding loud splashes. The reflection of light on water also adds a dynamic, calming element to your calming garden ideas. Ensure any electrical components are outdoor-rated and safely installed.

Close-up of a tranquil small balcony garden featuring a vibrant moss carpet in a ceramic dish, a delicate maidenhair fern in terracotta, and a miniatu

Moss and Small Plants: Greenery and Texture

Moss creates a lush, ancient feel and symbolizes islands or natural ground cover. You can grow moss in shallow trays or between stepping stones. For small spaces, consider moss carpets or even artificial moss if natural conditions are not ideal. Beyond moss, select small, slow-growing plants that fit the scale. Think about miniature evergreens, ground covers, or low-growing ferns. These plants introduce softness, texture, and a touch of living greenery without overwhelming the space. You select plants with subtle colors and interesting forms, rather than large, showy blooms.

Diverse natural-material containers with Zen plants (maple, moss, bamboo) artfully arranged on a patio, hands adjusting a pot.

Mastering Container Choices

Containers are your essential tools for small-space Zen garden design. They offer flexibility, allow you to create distinct plant groupings, and can move easily. You choose containers that complement the Zen aesthetic, focusing on natural materials and a cohesive look.

A harmonious collection of unglazed terracotta, concrete, and stone pots with minimalist plants on a small urban patio, unified by earth tones and gra

Material and Color Cohesion

You select containers made from natural materials like terracotta, unglazed ceramic, concrete, or stone. Avoid brightly colored or highly ornate pots. Earth tones, grays, and natural greens create a harmonious and understated palette. You do not need every pot to match exactly, but aim for a cohesive collection that shares a similar style or color family. For example, a mix of charcoal gray concrete planters and light gray stone pots creates a unified, calming look. This consistency helps to prevent visual clutter and reinforces the minimalist aesthetic.

An artfully arranged collection of various-sized container pots on a small urban balcony, featuring herbs, flowers, and grasses.

Sizing for Impact and Scale

Varying container sizes adds visual interest and depth. You use larger pots for your focal plants and smaller ones for ground covers or accents. Ensure the container size is appropriate for the plant’s mature size to minimize frequent repotting. A general rule for plant health suggests a container with a diameter at least 1-2 inches larger than the plant’s root ball for new plantings, allowing for growth. For a compact space, you avoid overly massive containers that dwarf the area. Instead, use a few medium-sized pots (10-14 inch diameter) and several smaller ones (6-8 inch diameter) to create an appealing arrangement.

Close-up of three container plants arranged on a sunlit patio: tall grass on a wheeled base, succulents on an elevated pot, moss in a shallow dish.

Arrangement and Grouping

You arrange containers in groups, rather than scattering them individually. Grouping creates a more impactful display and contributes to the visual flow. For a balanced look, arrange pots in odd numbers (three or five) at varying heights. Place taller plants in the back or center of a grouping, with shorter plants in front. You can also use risers or small overturned pots to elevate some containers, adding vertical interest. Consider placing larger, heavier containers on wheeled bases if you want the flexibility to rearrange your layout or move plants for optimal sunlight or protection from weather. This empowers you to adapt your garden’s look with ease.

Close-up of a modern black ceramic pot's interior, showing clear drainage holes as dark, high-quality potting mix begins to fall in.

Drainage is Key

Regardless of the container material, you must ensure adequate drainage. Most plants rot in standing water. Choose pots with drainage holes, and if necessary, drill additional ones. Placing a layer of coarse material, like broken pottery shards or gravel, at the bottom of the pot is a common practice, but research indicates that this does not actually improve drainage. Instead, use a high-quality, well-draining potting mix that is appropriate for your plants. You ensure plant health and longevity by providing proper drainage.

A serene urban patio corner featuring a multi-tiered wooden vertical garden, raked gravel Zen element, and potted plants.

Crafting Visual Depth with Verticality

In small spaces, you expand your garden upwards. Vertical elements draw the eye, create a sense of enclosure, and significantly increase your planting area. This approach is essential for a rich small backyard zen garden.

Minimalist dark metal trellis with small-leaved jasmine on a textured stucco wall of a compact urban balcony, terracotta pot below.

Trellises and Arbors

You install trellises against walls or fences for climbing plants. Choose simple, natural materials like bamboo, untreated wood, or dark metal. A climbing vine, such as a subtle jasmine or a small-leaved ivy, softens hard surfaces and adds greenery without taking up precious floor space. An arbor, even a miniature one over a small bench, creates an intimate, secluded feel and provides another opportunity for vertical planting. You choose lightweight structures that do not visually overpower your compact area.

Sunlit urban balcony wall with diverse vertical planters: felt pockets with succulents, wood shelf with herbs, and metal sconces with air plants.

Wall Planters and Shelves

Wall-mounted planters or shelves are excellent for displaying smaller plants, moss, or decorative objects. You can create a living wall effect with multiple small pockets, filling them with succulents, ferns, or herbs. Shelves allow you to layer elements, placing tiny pots or stones at different heights. This technique creates a dynamic visual display. You select wall planters that are easy to water and maintain. Consider a drip irrigation system for vertical gardens to simplify maintenance, especially for plants needing consistent moisture.

Dark metal tiered plant stand holding various small, low-maintenance potted plants on a calm, sunlit patio.

Tiered Stands and Plant Ladders

Tiered plant stands or plant ladders allow you to arrange multiple containers vertically, creating a tiered display. This is perfect for showcasing a collection of small plants or creating a focal point with varied heights. You select sturdy stands made from materials that complement your Zen aesthetic, such as bamboo, dark metal, or natural wood. These structures help you achieve visual depth and layered greenery without occupying a large footprint on your patio or balcony. You use these to group plants that share similar light and water requirements, simplifying their care.

A serene small patio Zen garden with layered height transitions: raked gravel foreground, mid-height maples and grasses, and tall bamboo with a climbi

Height Transitions

You create natural transitions in height, guiding the eye smoothly from low ground covers to taller plants and vertical structures. This layered approach adds interest and a sense of completeness. Place taller elements towards the back or sides of your space, with mid-height plants in the middle, and low-growing ground covers or raked gravel in the foreground. This technique mimics natural landscapes and makes your small space feel larger and more immersive.

Curated collection of small, low-maintenance plants for a Zen container garden: dwarf juniper, Irish moss, and Haworthia in elegant pots on a sun-dapp

Selecting Your Tranquil Plant Palette

Plant selection for a Zen garden prioritizes texture, form, and subtle color over flashy blooms. You choose plants that contribute to a calm atmosphere, require low maintenance, and thrive in your specific microclimate. Remember, sustainability is key, so you opt for peat-free mixes and water-wise choices.

Close-up of diverse foliage plants: Maidenhair fern, hosta, Hinoki cypress, and sedge, artfully arranged in containers on a teak bench.

Foliage Focus: Texture and Form

You emphasize foliage rather than flowers. Look for plants with interesting leaf shapes, textures, and varied shades of green. Consider plants with fine, delicate leaves contrasted with broad, sculptural ones. Examples include ferns (Maidenhair fern, Japanese painted fern), hostas (smaller varieties), dwarf conifers (Dwarf Japanese Garden Juniper, Hinoki cypress), and sedges. These plants provide year-round interest and a sense of enduring natural beauty. You use foliage to create depth and contrast, much like an artist uses different shades of paint.

Small patio garden with gray vertical planter, dwarf blue spruce, creeping thyme, and delicate purple astilbe in various pots, bathed in soft afternoo

Subtle Color and Seasonal Interest

You stick to a restrained color palette. Greens, grays, whites, and subtle purples or blues work best. Avoid bright, aggressive colors that detract from tranquility. While foliage is primary, you can introduce plants with delicate, understated blooms that appear seasonally. Consider plants like miniature astilbe, creeping thyme with tiny flowers, or small varieties of camellia for a touch of seasonal charm. These provide gentle pops of color without overwhelming the serene environment. You also consider plants that offer textural interest in winter, such as evergreens, to ensure year-round appeal.

Close-up of a vertical garden planter on a terracotta wall, showcasing drought-tolerant sedums, sempervivums, mondo grass, and a fern with dew drops.

Low-Maintenance and Water-Wise Choices

You select plants known for their resilience and minimal care requirements. Drought-tolerant succulents, sedums, specific grasses (e.g., mondo grass), and hardy ferns are excellent choices. This aligns with the low-maintenance ethos of Zen gardens. You research plants suitable for your USDA plant hardiness zone and specific growing conditions (sunlight, shade, humidity). Consider native plants that naturally thrive in your area and require less water and intervention. For water conservation, consider plants that have low to moderate water needs, such as various sedums, sempervivums, and certain ornamental grasses. More information on water-wise gardening is available from resources like the EPA WaterSense program.

Close-up of gloved hands actively mixing a rich, dark peat-free potting blend containing coir, compost, and wood fibers in a trug on a sunny balcony.

Peat-Free Potting Mixes

You choose peat-free potting mixes for your containers. Peat harvesting is environmentally damaging, contributing to carbon emissions and habitat destruction. Sustainable alternatives, such as coir, compost, and aged wood fibers, perform just as well. You ensure the mix provides good drainage and nutrients for your specific plant selections. This choice reflects an environmentally conscious approach to gardening.

A small native bee gently sips nectar from lavender flowers in a minimalist grey ceramic planter on a clean wooden deck.

Pollinator-Friendly Options (Subtle)

Even in a Zen garden, you can support local ecosystems. Select plants that attract pollinators without creating a busy, distracting atmosphere. Examples include small varieties of lavender, creeping thyme, or specific native ground covers that produce subtle flowers. These plants introduce gentle life and a quiet hum to your garden, enhancing the naturalness without detracting from the calm. You integrate these choices thoughtfully, ensuring they fit the overall serene aesthetic.

A soothing, self-contained dark grey ceramic bowl fountain with cascading water and river stones, set on a patio table amidst potted plants.

Bringing in Soothing Water Features

The sound of water instantly calms the mind, making a water feature an invaluable addition to your small Zen garden. You do not need a large pond to achieve this effect; many compact options exist.

An eye-level view of a bamboo tabletop fountain on a small weathered wooden table, trickling water into a dark stone basin on a sunny patio.

Tabletop Fountains

For the smallest spaces, a tabletop fountain provides the tranquil sound of trickling water. You choose a design that is simple and made from natural materials like ceramic, stone, or bamboo. These fountains are self-contained and easy to set up, requiring only a power source for the pump. You place it on a small table, a low pedestal, or directly on the ground in a designated contemplation zone. The subtle gurgle creates an immediate sense of peace.

Miniature bamboo shishi-odoshi tipping water into a small ceramic basin, dappled sunlight on water and plants.

Bamboo Spouts (Shishi-Odoshi)

A miniature shishi-odoshi, a traditional Japanese bamboo water feature, can be adapted for small spaces. This feature involves a bamboo arm that slowly fills with water, then tips over to empty, creating a gentle clacking sound as it resets. You can find compact versions designed for containers or small basins. The rhythmic sound and movement are deeply meditative and bring an authentic Zen element to your garden. Ensure the water collects in a leak-proof basin beneath the spout to recycle it.

Shallow cream stoneware bird bath with still water reflecting sky, river stones, and a chickadee perched on the rim, on a patio.

Bird Baths or Basins

A simple, shallow bird bath or a flat, wide basin filled with water offers a reflective surface and attracts local birds, adding subtle life and sound. You choose an understated design in stone or ceramic. The still water creates a mirror effect, reflecting the sky and surrounding plants, which adds visual depth. You place a few smooth river stones in the basin for visual interest and to provide resting spots for birds. Regular cleaning is necessary to maintain water quality for both aesthetic appeal and wildlife health.

Close-up of hands gently cleaning a minimalist light grey ceramic tiered water fountain on a sunny patio, with a green power cord in the background.

Considerations for Installation and Maintenance

You ensure any electrical water feature uses an outdoor-rated pump and power cord. You consult an electrician if you need to install new outdoor outlets. For solar-powered options, you ensure the panel receives adequate sunlight throughout the day. You regularly clean your water feature to prevent algae buildup and mosquito breeding. You also check and refill water levels frequently, especially during warm weather, to protect the pump and maintain continuous flow.

A tranquil small patio container Zen garden at twilight, illuminated by soft LED string lights, solar spotlights, and a metal lantern, creating a warm

Enhancing Your Space with Mindful Lighting

Thoughtful lighting extends the usability of your Zen garden into the evening hours and creates a magical, contemplative atmosphere. You use lighting to highlight key features and provide subtle illumination, avoiding harsh or overly bright lights.

Close-up of a snake plant in a dark pot on a patio at twilight, dramatically lit by a hidden warm LED casting long shadows on a concrete wall.

Subtle Accent Lighting

You use low-voltage LED accent lights to spotlight your focal points, such as a prized rock, a sculptural plant, or a small water feature. Strategically placed lights create shadows and depth, enhancing the garden’s drama after dusk. Position lights to graze surfaces, highlighting textures rather than broadly illuminating areas. You aim for a soft, warm glow that encourages relaxation and reflection. Avoid directing lights directly at seating areas, which can cause glare.

A tranquil small patio corner at twilight with a glowing stone-look solar stake in a pebble planter and a bamboo-look solar lantern.

Solar-Powered Stakes and Lanterns

Solar-powered garden stakes or lanterns offer an easy, energy-efficient lighting solution. You place them along a path or subtly within planting beds to provide gentle ambient light. Choose designs that are simple and blend with your Zen aesthetic, such as bamboo-look lanterns or understated stone-like fixtures. Ensure the solar panels receive direct sunlight for optimal charging throughout the day. These lights provide a soft glow without the need for complex wiring.

Warm amber LED string lights criss-cross overhead and along a railing, creating a cozy, inviting sanctuary on a small urban balcony with container pla

String Lights for Ambiance

For a cozy, intimate feel, you can drape weatherproof LED string lights across a small pergola, along a railing, or suspended overhead. Choose warm white or amber lights to create a soft, inviting glow. Avoid flashing or brightly colored lights, which would disrupt the serene atmosphere. You use string lights to define the boundaries of your outdoor room and create a sense of enclosure and warmth. Ensure all outdoor lighting is rated for exterior use to prevent electrical hazards and ensure safety. You consult local regulations regarding outdoor lighting, particularly in shared living spaces.

Twilight patio with a downward-facing LED sconce softly illuminating potted plants on pavers, ensuring safety and no glare.

Safety and Glare Control

You ensure all lighting is safely installed, particularly any electrical components. Avoid placing lights where they can cause tripping hazards or obstruct pathways. You manage glare by selecting downward-facing fixtures or using diffusers. The goal is to illuminate your garden subtly, not to overpower it with bright lights. Soft, indirect lighting enhances the tranquil atmosphere, making your garden a truly peaceful haven at any time of day or night.

A tranquil small urban patio corner with tall container plants and a modern slatted screen providing privacy. Soft light filters through foliage.

Achieving Privacy and Acoustic Calm

A Zen garden serves as a sanctuary, and part of that serenity comes from a sense of privacy and quiet. In small, often urban spaces, you intentionally design elements to minimize visual distractions and soften ambient noise.

Tall feather reed grass in dark gray rectangular planters forms a lush privacy screen on a cozy urban patio, glowing in late afternoon light.

Visual Screening with Plants

You use tall, narrow planters filled with slender, upright plants to create natural screens. Bamboo (clumping varieties, not running ones, to prevent invasive spread), tall ornamental grasses (like Karl Foerster feather reed grass), or columnar evergreens (e.g., Sky Pencil Holly) work well. Position these planters along the perimeter of your space to block unwanted views from neighbors or busy streets. The living screen also adds a lush, green backdrop. You ensure the chosen plants fit your climate and container size to thrive as screens. Visit your local nursery or extension service for regionally appropriate, non-invasive screening plant suggestions.

Sun-drenched wooden trellis with star jasmine vines on a brick wall, creating a privacy screen. Ceramic pots with herbs sit at the base.

Lattice or Trellis with Vines

You attach a simple wooden or metal lattice to an existing fence or wall. Train climbing vines, such as star jasmine, small-leaved ivy, or clematis, to grow over it. This creates a beautiful, green privacy screen that softens hard architectural lines. The foliage also absorbs some sound, contributing to acoustic calm. You choose vigorous but not overly aggressive climbers, ensuring they do not overwhelm your small space. Regular pruning helps maintain their desired shape and density.

A tranquil urban patio corner featuring dense container plants, a gently trickling water feature, deep-toned wind chimes, and plush seating, creating

Sound Softening Elements

Hard surfaces reflect sound, amplifying urban noise. You introduce elements that absorb or mask sound. Thick, dense foliage in containers and vertical gardens helps to absorb sound waves. A gently trickling water feature (as discussed earlier) masks unwanted noises with its soothing sounds. Consider adding a small wind chimes with deep, resonant tones rather than high-pitched, tinkling ones. You also place outdoor textiles, such as thick cushions on seating, to absorb sound. These elements combine to create a quieter, more enclosed atmosphere, making your space feel more private and tranquil.

Woman reads in a small, plant-enclosed balcony nook, facing a serene display of potted ferns and a water basin, under soft afternoon light.

Strategic Placement of Furniture

You position your seating area to face away from potential disturbances, directing your gaze towards the most serene part of your garden. If possible, create a slightly recessed or partially enclosed seating nook using planters or screens. This creates an intimate zone where you feel protected and enveloped by the calming garden elements. You prioritize comfort and a sense of retreat in your furniture placement.

Hands gently hold a mug on a small patio table, overlooking a minimalist container Zen garden with succulents and raked gravel in soft morning light.

Maintaining Your Serene Small Garden

A Zen garden emphasizes ease and contemplation. This means you design for low maintenance from the outset. Your goal is to spend more time enjoying your garden and less time working in it. Implementing smart maintenance strategies ensures your calming garden ideas remain a source of peace, not stress.

A vibrant 'Blue Star' juniper dwarf conifer in a terracotta pot, next to a 'Echeveria' succulent in a grey ceramic pot on a sunny patio.

Low-Upkeep Plant Choices

As discussed, you choose plants that naturally require minimal pruning, watering, and pest management. Opt for slow-growing species that maintain their form without constant intervention. For example, dwarf conifers need infrequent shaping, and many succulents thrive on neglect. You avoid plants prone to common pests or diseases, which would necessitate regular chemical treatments or extensive manual removal. Research plant resilience and select varieties known for their hardiness in your climate.

A person's hand inserts a moisture meter into a thriving basil plant, with a discreet drip irrigation system visible among other pots on a sunny urban

Efficient Watering Systems

In container gardens, consistent watering is crucial. You install a simple drip irrigation system or use self-watering containers to automate watering. This saves time and ensures your plants receive the right amount of moisture, preventing both overwatering and underwatering. For hand-watering, you establish a regular schedule, checking soil moisture levels daily or every other day, depending on the weather and plant needs. A moisture meter can help you accurately assess soil conditions. Implementing smart watering practices significantly reduces your daily maintenance burden.

Hands gently refreshing soil in a terracotta pot on an urban balcony with fresh peat-free compost, surrounded by gardening tools and thriving containe

Seasonal Potting Mix Refresh

Container plants deplete soil nutrients over time. You refresh the top few inches of potting mix annually, preferably in spring, with fresh, nutrient-rich, peat-free compost. This provides essential nutrients and improves soil structure without needing to repot all your plants every year. You also apply a slow-release granular fertilizer once a season or use a liquid feed every few weeks, following product instructions carefully. Healthy plants are more resilient and require less intervention.

Person mindfully raking a small Zen gravel garden in a container on a tidy urban patio, surrounded by minimalist potted plants.

Mindful Raking and Tidying

The practice of raking gravel is a meditative act. You perform this regularly, not as a chore, but as an opportunity for focused contemplation. Beyond raking, you quickly remove any fallen leaves or spent plant material to maintain the clean, uncluttered aesthetic. You view these tasks as part of the Zen experience, an extension of mindfulness. A small handheld brush or leaf blower can make quick work of tidying small areas. A tidy garden contributes directly to a peaceful mind.

A gardener closely inspects a basil leaf in a terracotta pot on a sunny urban balcony, surrounded by thriving container plants.

Pest and Disease Monitoring

You regularly inspect your plants for signs of pests or diseases. Early detection allows for prompt, often organic intervention, preventing widespread issues. Use organic pest control methods such as neem oil, insecticidal soap, or manual removal. You focus on prevention by ensuring good air circulation, proper watering, and selecting healthy, resilient plants. A healthy ecosystem in your garden naturally deters many problems.

Person on a balcony gently touches a river stone, contemplating a minimalist succulent garden amidst container plants.

Frequently Asked Questions

How do I create a raked gravel area on a balcony?

You can create a small raked gravel area on a balcony by using a shallow, sturdy tray or planter box. Ensure the container has drainage holes to prevent water accumulation, and place it on a protective mat to prevent scratching the balcony surface. Fill it with a thin layer of fine, light-colored gravel (1-2 inches deep). Use a small rake or even a chopstick to create simple, flowing patterns. This offers the meditative benefit of raking without needing a large space.

Can I incorporate edible plants into a Zen garden?

You can certainly incorporate edible plants, especially those with subtle forms and colors. Focus on herbs like rosemary or thyme with fine foliage, or small-leaved greens such as spinach or lettuce in minimalist containers. Avoid large, bushy, or highly flowering edibles that might detract from the serene aesthetic. You choose varieties that integrate seamlessly with your plant palette, providing both beauty and utility without compromising tranquility.

What are the best low-light plants for a shaded Zen garden?

For shaded Zen gardens, you select plants that thrive in low light conditions. Excellent choices include various ferns like Maidenhair fern or Japanese painted fern, hostas (dwarf varieties), Mondo grass, and certain mosses. You can also use compact varieties of Hellebores, which offer subtle winter blooms. These plants provide lush, green texture and form without requiring direct sun, ensuring your shaded space remains vibrant and calming.

How often should I rake the gravel in my small Zen garden?

You can rake the gravel as often as you like, making it a daily meditative practice or a weekly tidying ritual. The frequency depends on your personal preference and how quickly the patterns get disturbed by wind or activity. You treat the raking not as a chore, but as an opportunity for mindful movement and contemplation, reinforcing the tranquil atmosphere of your Zen garden.

Is it okay to use artificial elements, like faux moss or rocks?

While natural elements are preferred for authenticity, you can use high-quality artificial moss or rocks judiciously in very challenging conditions, such as extremely dense shade or areas prone to constant disturbance. You ensure these artificial elements look as realistic as possible to maintain the naturalness and serenity of your Zen garden. You blend them with real plants and stones whenever possible to achieve a harmonious blend and a more authentic feel. Your main goal is to create a calming, beautiful space, and sometimes a practical solution helps you achieve that.

Categories
Garden Design & Ideas

Seasonal Container Displays: Spring, Summer, Fall, Winter

Your small space offers incredible potential for vibrant, ever-changing garden displays. Seasonal container gardening transforms your balcony, patio, or compact yard into a dynamic canvas, bringing beauty and life throughout the year. Imagine fresh spring blooms, lush summer foliage, warm autumn tones, and serene winter evergreens, all tailored to your unique outdoor area. We guide you through creating stunning, low-maintenance, and environmentally conscious year-round displays. Embrace the opportunity to express your personal style and enjoy a thriving garden, no matter the size of your space. Cultivating beautiful garden color ideas becomes effortless when you plan for continuous interest. This article helps you master the art of year-round displays with practical tips and plant suggestions.

Close-up of hands planting a vibrant pink calibrachoa in a terracotta pot on a sunny patio, surrounded by lush, healthy container plants.

Why Seasonal Container Gardening Matters

Container gardening provides unparalleled flexibility for small spaces. You control the soil, light exposure, and placement of each plant, allowing you to optimize conditions for success. Seasonal container gardening extends this control, enabling you to refresh your outdoor aesthetic as the year progresses. This approach offers significant advantages:

  • Continuous Interest: You avoid the common problem of a garden looking spectacular for a few weeks, then fading. By planning for each season, you ensure your space always offers something visually engaging. You create dynamic garden color ideas that shift with the calendar.
  • Optimized Plant Health: You select plants suited to the current weather, reducing stress and disease. This means healthier, more vigorous plants that perform better.
  • Pest and Disease Management: Rotating plants and refreshing soil minimizes the buildup of pests and diseases specific to certain species. You effectively reset your growing conditions each season.
  • Creative Expression: Containers are like movable art installations. You experiment with new plant combinations, textures, and colors every few months, keeping your space exciting and personal. This makes achieving stunning year-round displays an enjoyable creative process.
  • Space Efficiency: You maximize every square inch. Vertical gardening structures, tiered planters, and hanging baskets extend your planting area upwards, making small spaces feel larger and more abundant.
  • Accessibility: Elevated containers reduce bending and kneeling, making gardening more accessible for everyone. You manage your garden from a comfortable standing or seated position.

Embracing seasonal container gardening means you consistently enhance your outdoor living area. You transform a compact space into a vibrant, evolving sanctuary, showcasing beautiful garden color ideas all year long.

Urban patio container garden viewed from indoors, featuring diverse pots and vertical planters with year-round greenery and flowers.

Designing Your Year-Round Container Garden

Effective design elevates your seasonal container displays from a collection of pots to a cohesive garden statement. Start with a clear vision, considering your space’s layout and how you use it. Think about the view from indoors, the path you walk, and where you like to sit. Your goal is to create year-round displays that delight the eye and feel integrated.

Aerial view of a small urban patio showcasing container garden layout. A tall 'Sky Pencil' holly is a focal point, with containers defining dining and

Defining Your Layout and Focal Points

Begin by sketching your space. Identify zones for dining, relaxation, or high traffic. Allocate container groupings to these zones. A focal point is the first thing your eye notices. This might be a particularly striking plant, a unique container, or a cluster of varied pots. Place focal points strategically to draw attention to desirable areas. For instance, a tall, sculptural evergreen in an elegant container makes a strong statement near an entry or at the end of a sightline from a window. Consider how containers define pathways or delineate “rooms” within your small outdoor area.

Container water flow diagram: water enters top, flows through soil, exits drainage holes at bottom of 30 cm pot.

Vibrant container garden with a dark coleus (thriller), fuchsia petunias (filler), and chartreuse sweet potato vine (spiller) on a patio.

The Thriller, Filler, Spiller Concept

This classic container design formula creates balanced, attractive arrangements:

  • Thriller: A tall, dramatic plant that provides vertical interest and acts as the focal point of the individual container. It commands attention. Examples include ornamental grasses, canna lilies, or a small evergreen shrub.
  • Filler: Medium-sized plants that fill the space around the thriller, adding mass, texture, and color. They provide a lush, full appearance. Think petunias, coleus, or impatiens.
  • Spiller: Plants that cascade over the edge of the container, softening its lines and adding a graceful element. They connect the pot to its surroundings. Examples include creeping Jenny, sweet potato vine, or lobelia.

Apply this formula to individual pots and also to groupings of containers. You might have a large pot with a thriller, a few medium pots with fillers, and smaller pots with spillers, all arranged to form a cohesive vignette. This helps you achieve diverse garden color ideas and dynamic compositions.

A close-up of a container garden on a patio, showing contrasting burgundy Heuchera, chartreuse grass, silver Artemisia, and a dark green fern.

Color and Texture Palettes

Thoughtful color and texture choices unify your seasonal container gardening efforts. Select a primary color palette for each season, considering how these colors interact and how they complement your home’s exterior.
Use contrasting textures, such as broad leaves next to feathery foliage, to add depth and interest. Remember foliage plants offer color and texture throughout the growing season, often outlasting blooms. Silver, chartreuse, and deep burgundy leaves provide year-round interest and serve as excellent backdrops for seasonal flowers. Data suggests that foliage plants account for a significant portion of visual interest in well-designed gardens, often providing more consistent appeal than fleeting blooms. For example, a container with purple fountain grass (thriller), ‘Wasabi’ coleus (filler), and ‘Sweet Caroline’ sweet potato vine (spiller) creates a striking summer display with rich color and varied textures. These choices deliver excellent garden color ideas beyond just flowers.

Hands planting a yellow pansy in a terracotta pot, surrounded by spring container plants on a wooden patio table.

Spring Container Displays: Fresh Starts

Spring container gardening signals renewal, bursting with fresh growth and cheerful blooms. As temperatures rise, transition your containers to reflect this awakening. Plan for early spring, when frosts might still occur, and mid-to-late spring, when more tender plants emerge.

Vibrant early spring container garden on a patio. Pansies, violas, primroses, conifer, heuchera, kale in diverse pots.

Early Spring Choices

Focus on hardy plants that tolerate cooler temperatures and even a late frost. Pansies, violas, and primroses are perfect early spring additions, offering a wide array of garden color ideas. Their vibrant faces instantly lift the mood. Combine them with small, resilient evergreens such as dwarf conifers or heuchera, also known as coral bells, which provide continuous texture and subtle color. Heuchera varieties offer foliage in shades of purple, lime green, and bronze, giving you structure that lasts beyond spring. Add texture with ornamental cabbage or kale for robust, cold-tolerant interest. Consider placing spring-flowering bulbs, like tulips or daffodils, directly into containers for a dramatic pop of color, then transplant them to the ground or a less visible spot once they fade.

  • Thrillers: Dwarf conifer, small ornamental grass like ‘Elijah Blue’ fescue, or a compact pussy willow.
  • Fillers: Pansies, violas, primroses, heuchera, cyclamen.
  • Spillers: Creeping Jenny (Lysimachia nummularia), ivy (Hedera helix), or Ajuga reptans.

Ensure containers have excellent drainage to prevent root rot during wet spring conditions. Use a high-quality, peat-free potting mix. For ongoing vibrancy, deadhead spent blooms regularly. This encourages new flower production and keeps your container displays looking tidy and productive.

Gloved hands plant a vibrant pink petunia into a terracotta pot with rosemary and thyme on a sunny patio, surrounded by diverse spring container plant

Mid to Late Spring Expansion

As the risk of frost diminishes, you introduce a broader range of plants. Consider early perennials that bloom in spring, such as dianthus, bellflowers, or bleeding hearts, which can be moved into the ground later. Introduce annuals that thrive in warming temperatures, like petunias, calibrachoa, and snapdragons, for extended bloom time. Incorporate herbs such as rosemary, thyme, and chives for both their culinary value and their attractive foliage and flowers. Rosemary, with its upright growth, can serve as a thriller, while thyme cascades beautifully as a spiller. These additions contribute diverse textures and garden color ideas to your year-round displays.

Ensure adequate watering as temperatures increase. A moisture meter can help you determine when your plants truly need water, preventing both over and under watering. You conserve water resources and keep your plants healthy. Look for slow-release fertilizers designed for containers to provide steady nutrients throughout the season.

A vibrant, lush summer container garden on a small, sun-drenched urban patio with diverse heat-tolerant plants and a copper watering can.

Summer Container Displays: Vibrant Abundance

Summer offers the most extensive palette for seasonal container gardening. Your goal is to create lush, colorful year-round displays that withstand the heat and humidity of the season. Maximize impact with bold plant choices and smart watering strategies.

Vibrant container garden on a sunny patio, featuring orange Canna lily, purple calibrachoa, lime green coleus, and purple fountain grass.

Sun-Loving Spectaculars

For sunny balconies and patios, choose heat-tolerant plants known for their vigorous growth and prolific blooms. Petunias, calibrachoa, verbena, and zinnias are all excellent choices for continuous color. Combine them with foliage plants like coleus, sweet potato vine, or dusty miller, which offer contrasting textures and shades. Coleus, in particular, comes in an astonishing array of colors, from vibrant lime green to deep burgundy, providing fantastic garden color ideas even without flowers. Ornamental grasses such as purple fountain grass add vertical elegance and movement. Consider a dwarf citrus tree or a small olive tree in a large container for a Mediterranean flair, providing both structure and potential edible yields.

  • Thrillers: Canna lily, purple fountain grass, dwarf banana plant, Mandevilla on a small trellis.
  • Fillers: Petunias, calibrachoa, verbena, impatiens (shade), coleus, begonia.
  • Spillers: Sweet potato vine, bacopa, dichondra ‘Silver Falls’, nasturtium.

A vibrant cluster of shade-tolerant container plants, including variegated hosta, pink impatiens, and a fern, arranged in a softly lit patio corner.

Shade-Tolerant Beauties

Even shady spots can host stunning summer containers. Impatiens, tuberous begonias, fuchsias, and coleus thrive in indirect light, bringing vibrant color to darker corners. Ferns, hostas, and ivy provide rich green textures and architectural form. Combine variegated hostas with bright impatiens for a dynamic display that brightens a shaded area. Hydrangeas in containers offer large, showy blooms for partial shade. Their substantial presence makes them excellent thrillers, and many dwarf varieties suit container life.

Watering is crucial in summer. Container plants dry out faster than those in the ground. Check soil moisture daily, especially during heatwaves. Use saucers or drip trays under pots to catch excess water and prevent runoff, but do not let plants sit in standing water for extended periods. Consider a slow-drip irrigation system for multiple containers. This saves you time and ensures consistent moisture, which is vital for maintaining vibrant seasonal container gardening. According to the USDA Agricultural Marketing Service, efficient watering practices significantly reduce water waste in gardening. Fertilize regularly with a balanced liquid fertilizer every two to four weeks, or use a slow-release granular product at the beginning of the season to support continuous growth and bloom.

A cluster of fall container plants: red mums in terracotta, purple kale in galvanized bucket, ivy in stone pot, on a wooden deck.

Fall Container Displays: Harvest Hues

Autumn brings a magnificent shift in color, offering rich, warm tones for your seasonal container gardening. Transitioning your year-round displays for fall means embracing cool-season plants, vibrant foliage, and rustic textures. This season celebrates the harvest and prepares for the quieter months ahead.

A natural shot of a small patio adorned with colorful autumn container plants, including a spilling red mum, ornamental kale, dwarf Alberta spruce, an

Embracing Autumnal Colors

Mums are the undisputed stars of fall containers, providing an instant burst of color in shades of red, orange, yellow, and purple. Pair them with ornamental kale and cabbage, which deepen in color as temperatures drop, offering striking foliage and texture. Pansies and violas, often available as transplants in fall, offer a cheerful reprise and can even survive mild winters to rebloom in spring. Heuchera varieties, with their evergreen foliage in deep bronzes and burgundies, provide consistent garden color ideas. Consider adding small conifers, such as dwarf Alberta spruce, or evergreens like boxwood, which provide structure and remain attractive through winter. These make excellent thrillers for fall displays.

  • Thrillers: Ornamental grasses (e.g., fountain grass, switchgrass), small conifer, kale or cabbage (tall varieties), compact evergreen shrub.
  • Fillers: Mums, pansies, violas, heuchera, gaultheria (wintergreen), ornamental peppers.
  • Spillers: Trailing ivy, creeping Jenny (foliage color changes), Ajuga, sedum ‘Autumn Joy’.

Close-up of a rustic terracotta pot on a balcony railing, filled with ornamental kale, mini pumpkins, gourds, dried corn, and a branch with red fall l

Adding Texture and Natural Elements

Beyond plants, incorporate natural elements to enhance the fall theme. Small gourds, mini pumpkins, dried corn stalks, or bundles of raffia add a rustic, harvest feel. Position these elements among your plants for a visually rich display. For additional height and drama, consider inserting branches with colorful fall leaves or vibrant berries. These non-plant elements create unique garden color ideas and seasonal accents. As temperatures cool, reduce watering frequency. Allow the top inch or two of soil to dry out between waterings. Protect tender fall plants from early frosts by covering them overnight or moving them indoors if possible. Some hardier plants, such as pansies and kale, tolerate light frost well and can continue to perform through late fall.

An elegant winter container display on a small patio featuring a dwarf juniper, red-berried Skimmia, Hellebore, and red-twig dogwood branches.

Winter Container Displays: Evergreen Elegance

Winter container gardening focuses on structure, texture, and subtle beauty. While blooms are scarce, your year-round displays can still offer significant visual appeal, providing much-needed greenery and a sense of life during the colder months. Think beyond flowers and emphasize evergreens, interesting branches, and subtle touches of color.

A vibrant winter container display on an urban balcony featuring a leafless winterberry holly with red berries, a 'Blue Star' juniper, ferns, and vari

Building with Evergreens

Dwarf conifers are your best friends for winter containers. Varieties like dwarf Alberta spruce, juniper, or mugo pine provide evergreen structure and texture. Mix different shades of green, blue, and gold foliage for contrast. Boxwood, holly (with its bright berries), and various euonymus offer reliable evergreen options. Winter-blooming heathers provide delicate flowers and interesting foliage. For something unique, try a winterberry holly, whose bare branches become adorned with bright red berries after its leaves drop, offering striking garden color ideas.

  • Thrillers: Dwarf conifer (e.g., ‘Blue Star’ juniper, dwarf Alberta spruce), slender holly, boxwood pyramid, winterberry holly.
  • Fillers: Heuchera, hellebores (Christmas rose), evergreen ferns, dwarf mondo grass, sedum ‘Angelina’.
  • Spillers: Trailing ivy, creeping juniper, ‘Wintercreeper’ euonymus.

A cozy small patio corner at dusk, showcasing winter container accents: birch branches, red berries, pinecones, and string lights around dormant plant

Adding Seasonal Accents

Beyond live plants, incorporate decorative elements that withstand cold weather. Birch branches, pinecones, seed pods, and festive ornaments can be artfully arranged. Battery-operated string lights or solar-powered lanterns add a warm glow, enhancing the ambiance during long winter nights. Consider a splash of color with artificial red berries or weather-resistant ribbons. These elements provide visual interest when the garden is dormant, maintaining your year-round displays.

Even in winter, containers require some water. Check the soil moisture periodically, especially during dry spells or mild periods. Frozen soil means plants cannot absorb water, so water when temperatures are above freezing. Avoid overwatering, which can lead to root rot. Protecting containers from extreme cold is vital. Move smaller pots to a sheltered location, like against a warm wall or near an entryway. For larger, immovable containers, wrap them with burlap or bubble wrap to insulate the roots. This prevents freeze-thaw cycles from damaging the roots and keeps your evergreen plants healthy for their vital role in seasonal container gardening. For more information on winter container care, consult resources like the Royal Horticultural Society, which offers detailed guides on protecting plants in cold weather.

A close-up of a gardener's hands arranging diverse empty containers (terracotta, plastic, ceramic, metal, wood) on a small, sun-dappled patio.

Container Strategy and Materials

Choosing the right containers is as important as selecting the right plants. Your container strategy impacts plant health, maintenance, and the overall aesthetic of your year-round displays. Consider size, material, and mobility.

Gardener's hands holding an overgrown fuchsia plant next to a 14-inch terracotta pot and an 18-inch ceramic pot on a sunny patio.

Size Matters

Larger containers generally provide more stable growing conditions. They hold more soil, which retains moisture longer and insulates roots from temperature fluctuations. While small pots might seem ideal for a compact space, they dry out quickly and require frequent watering. Aim for containers that are at least 12-15 inches in diameter for most seasonal plantings. If you must use smaller pots, group them closely together to create a microclimate that reduces moisture loss.

For thrillers or plants intended to last multiple seasons, select containers 18-24 inches or larger. The rule of thumb: the root ball should have at least 2-3 inches of space all around it for growth. This ensures your plants have ample room to develop strong root systems, supporting healthy, vigorous year-round displays.

A sun-drenched urban patio showcasing a weathered terracotta pot with succulents, a dark resin planter with petunias, and a glossy blue glazed ceramic

Container Materials and Their Benefits

The material of your container affects its weight, durability, and how quickly the soil dries. Choose materials that complement your aesthetic and practical needs:

Material Pros Cons Best Use
Terracotta/Clay Porous, promotes air circulation to roots, classic look. Dries out quickly, heavy, prone to cracking in freezing temperatures, can accumulate mineral salts. Drought-tolerant plants, rustic aesthetics, warm climates.
Plastic/Resin Lightweight, inexpensive, wide range of colors/styles, retains moisture well, durable. Can look less sophisticated, may degrade in UV over time, less breathable than clay. Beginner gardeners, large displays requiring mobility, moisture-loving plants.
Glazed Ceramic Beautiful, retains moisture well, durable, available in many colors. Heavy, expensive, can crack in freezing weather if waterlogged. Accent pieces, permanent plantings, where aesthetics are paramount.
Metal (Zinc, Steel) Modern, sleek, durable, rust-resistant (when properly treated). Can heat up quickly in direct sun, may need insulation for roots, can be expensive. Contemporary designs, heat-tolerant plants, architectural statements.
Wood Natural look, good insulation, large sizes available (barrels, raised beds). Can rot over time, needs drainage holes, can dry out faster than plastic. Large planters, herb gardens, rustic or natural settings.
Fiberglass Lightweight, strong, mimics other materials, good insulation. More expensive, color can fade over time. Rooftop gardens, high-traffic areas, where weight is a concern.

Gardener in practical gloves gently repositions a large potted fruit tree on a wheeled caddy within an artful patio grouping, showcasing clear pathway

Mobility and Groupings

Consider placing heavier containers on wheeled caddies. This allows you to easily reposition plants to optimize light, protect them from extreme weather, or simply rearrange your design. Grouping containers creates a more substantial visual impact than scattering individual pots. Aim for groupings of three or more pots of varying sizes, heights, and textures. This creates a miniature landscape within your small space, enhancing your seasonal container gardening flexibility. When arranging, remember to leave adequate space for cleaning and watering. A general guideline for pathways suggests at least 24-30 inches of clear width for comfortable movement, even with container groupings nearby.

A gardener repots a perennial into a weathered terracotta pot using peat-free compost on a small patio, surrounded by thriving container plants.

Sustainable Practices for Long-Term Success

Sustainability in seasonal container gardening means making environmentally conscious choices that benefit your plants, your wallet, and the planet. It focuses on reducing waste, conserving resources, and promoting biodiversity, all while creating beautiful year-round displays.

Close-up of gardener's hands mixing fresh peat-free potting mix, visible coir and perlite, into older soil in a tub on a compact patio.

Choosing the Right Potting Mix

Your soil is the foundation of plant health. Use a high-quality, peat-free potting mix. Peat harvesting has significant environmental impacts, contributing to greenhouse gas emissions and wetland destruction. Many excellent alternatives exist, often containing coir, compost, and perlite, which offer superior drainage and aeration. Look for mixes labeled “organic” or “sustainable.”

To refresh old potting mix, do not just discard it. Remove spent plants, break up compacted soil, and amend it with fresh compost and a slow-release granular organic fertilizer. This rejuvenates the soil, providing nutrients for new seasonal plantings and reducing waste. A healthy soil microbiome is critical for nutrient uptake and plant resilience. Learn more about sustainable soil practices from organizations like the Rodale Institute, a leader in organic agriculture research.

A compact patio corner featuring various water-wise container plants: vibrant Portulaca mulched with river stones, succulents in a modern self-waterin

Water-Wise Choices and Techniques

Water conservation is paramount in container gardening. Containers dry out faster than garden beds, increasing water demand. Implement these strategies:

  1. Choose Drought-Tolerant Plants: Many beautiful plants thrive with less water. For summer, consider succulents, sedums, Portulaca, or ornamental grasses.
  2. Use Self-Watering Containers: These pots have a built-in reservoir that wicks water up to the soil, significantly reducing how often you need to water.
  3. Mulch Your Containers: A layer of shredded bark, gravel, or even decorative stones on top of the soil reduces evaporation, keeps roots cooler, and suppresses weeds.
  4. Water Deeply, Less Frequently: When you do water, soak the container thoroughly until water drains from the bottom. This encourages deeper root growth. Allowing the top inch or two of soil to dry out between waterings prevents root rot and conserves water.
  5. Collect Rainwater: A small rain barrel provides a sustainable source of soft, chemical-free water for your plants.

A bumblebee pollinates a purple coneflower in a terracotta pot on a sunny patio, with blue salvia and verbena bonariensis in containers nearby.

Embracing Native and Pollinator-Friendly Plants

Integrate native plants into your seasonal container gardening. Native species are naturally adapted to your local climate and soil conditions, requiring less water, fertilizer, and pest control. They also provide essential food and habitat for local pollinators, such as bees, butterflies, and hummingbirds. Even in containers, a few pollinator-friendly plants make a difference. Good choices include coneflowers, salvia, verbena bonariensis, and various herbs like basil and mint, all of which offer excellent garden color ideas. By supporting local ecosystems, you contribute to broader environmental health. For local native plant recommendations, consult your regional extension service, such as the Oregon State University Extension Service.

A gardener's hands pinch leggy petunias in a terracotta pot on a sunny patio, subtly checking leaves for pests, with an organic spray bottle nearby.

Long-Term Plant Care and Pest Management

Regular maintenance keeps your year-round displays thriving. Deadhead spent flowers, pinch back leggy growth to encourage bushiness, and prune as needed. Inspect your plants regularly for signs of pests or diseases. Address issues early with organic solutions like insecticidal soap or neem oil. Avoid broad-spectrum chemical pesticides, which harm beneficial insects. Consider composting spent plant material and old potting mix, returning valuable nutrients to your garden cycle. By thinking long-term, you create a garden that is beautiful and also resilient and environmentally responsible.

Woman in linen shirt on a sun-dappled balcony, thoughtfully observing a cluster of diverse container plants in various pots.

Frequently Asked Questions

What are the best plants for year-round displays in containers?

The best plants depend on your climate zone and local conditions. However, a good strategy involves using a mix of hardy evergreens for structure (dwarf conifers, boxwood, holly), rotating seasonal annuals for color (pansies, petunias, mums), and incorporating tough perennials that can overwinter in containers (heuchera, sedum, some ornamental grasses). Always check plant tags for hardiness zones and sun requirements.

How often should I change my seasonal container plantings?

Generally, you change your primary flowering plants with each new season, approximately four times a year. Spring plantings often go in around March or April, summer plants in May or June, fall plants in September, and winter-hardy arrangements in November. However, many evergreens or long-blooming perennials can remain in place for multiple seasons or even years, forming the backbone of your year-round displays.

Can I grow edibles in seasonal container displays?

Absolutely! Many edibles thrive in containers and look beautiful. You can integrate herbs like rosemary, thyme, and basil, leafy greens such as lettuce and spinach, or even dwarf fruit trees and berry bushes. Choose varieties suited for container growth and ensure they receive adequate sunlight and nutrients. Edibles add a practical, delicious dimension to your garden color ideas.

What kind of soil mix works best for containers?

Use a high-quality, peat-free potting mix specifically formulated for containers. This provides good drainage, aeration, and nutrient retention. Avoid using garden soil, which compacts too easily in pots and can introduce pests or diseases. Amend old potting mix with fresh compost and a slow-release organic fertilizer to revitalize it for new seasonal plantings.

For design and plant selection guidance, visit
Missouri Botanical Garden,
Kew Science, Plants of the World,
University of Minnesota Extension, and
National Garden Association.

Disclaimer: This article is for informational purposes only and is not a substitute for professional advice. Consult local extension services for region-specific recommendations.