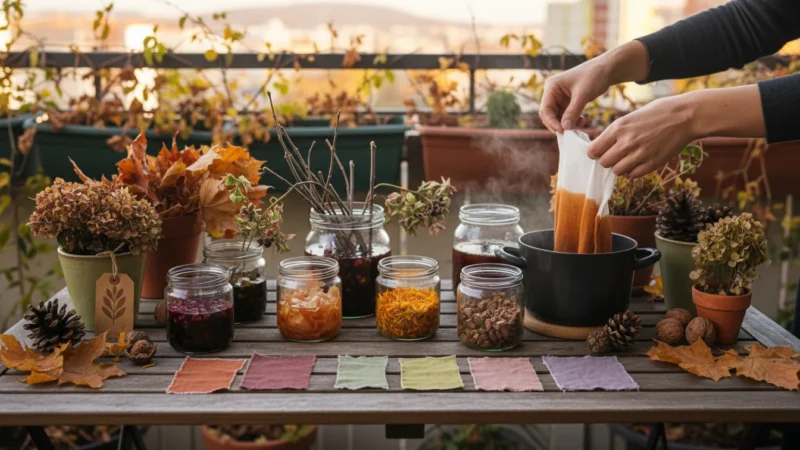
Do you look at that empty plastic jug or worn-out pair of boots and see only trash? As a small-space gardener, you possess a unique opportunity: transforming those discards into practical, charming, and sustainable homes for your plants. Upcycling for your garden means giving new life to old items, reducing waste, and saving money, all while expressing your individual style. This guide provides you with actionable insights and step-by-step advice to turn everyday objects into extraordinary garden pots and recycled planters, ensuring your gardening journey remains both joyful and eco-conscious.
To complement your new eco-friendly pots, you can also start composting in small spaces to generate your own organic fertilizer.
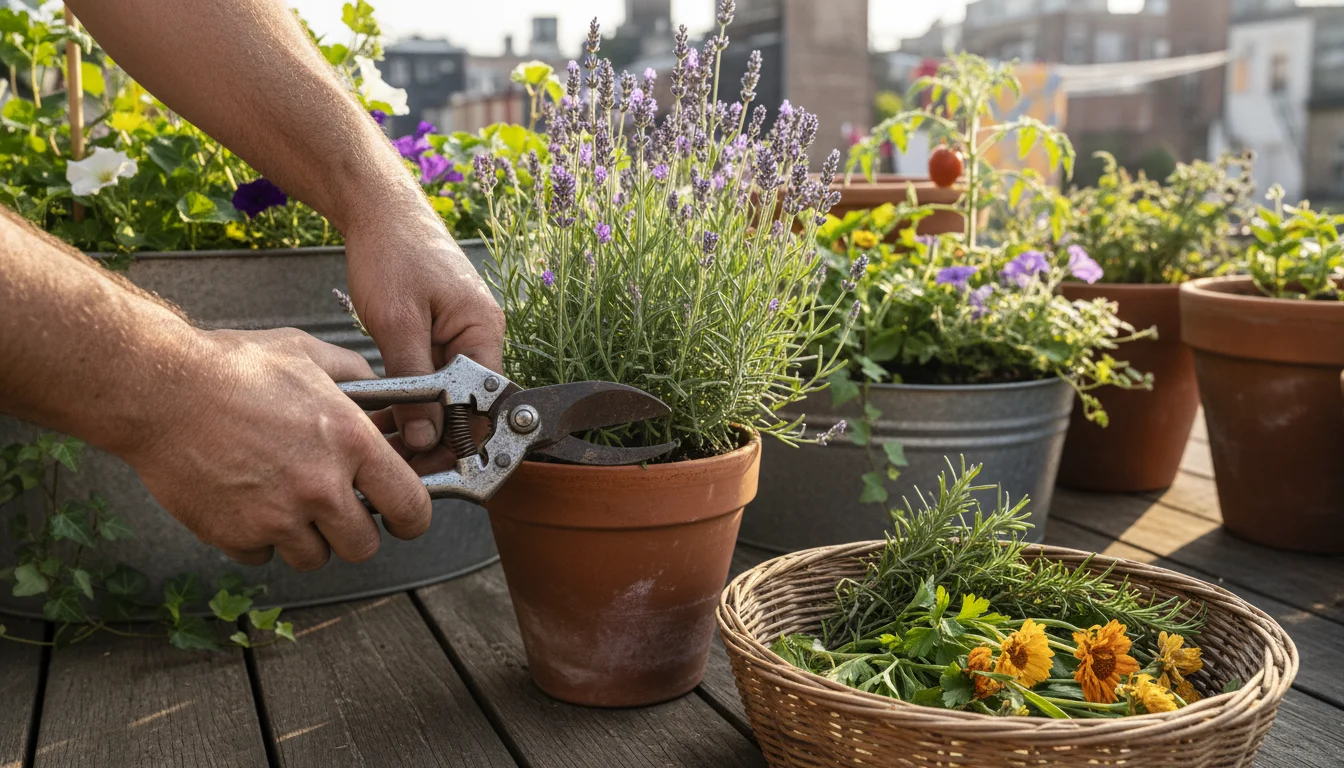
The Joy and Benefits of Upcycling for Your Garden
Upcycling offers a powerful blend of practicality, creativity, and environmental responsibility, making it an ideal approach for any gardener, especially those with limited space. When you choose to use upcycled garden containers, you embark on a rewarding journey that positively impacts your wallet, your garden’s aesthetic, and the planet.
Environmental Stewardship: Reducing Waste, Reusing Resources
One of the most compelling reasons to embrace upcycling lies in its environmental benefits. Landfills overflow with discarded items that often take centuries to decompose, if they ever do. By repurposing objects, you divert waste from these landfills, directly contributing to a cleaner, healthier environment. Consider the energy saved: creating a new plastic pot requires raw materials and manufacturing processes that consume significant resources. Transforming an existing plastic container, on the other hand, minimizes your carbon footprint. You actively participate in the circular economy, extending the life cycle of materials and reducing demand for new productions. This commitment to reuse aligns perfectly with the ethos of sustainable gardening, encouraging a mindful approach to resource consumption.
Cost Savings: Gardening on a Budget
Gardening can become an expensive hobby, particularly when you factor in the cost of new pots and planters. Upcycling offers a virtually free alternative. The materials you use already exist in your home, garage, or even your neighbor’s recycling bin. This drastically cuts down on initial setup costs, allowing you to allocate your budget to other essential gardening supplies such as quality soil, seeds, or plants. For example, instead of buying a terracotta pot for $15, you can use a sturdy old bucket for free, achieving the same functional purpose while saving money. This makes gardening more accessible and sustainable for everyone, regardless of their financial constraints.
Unleashing Creativity: Personalized and Unique Garden Aesthetics
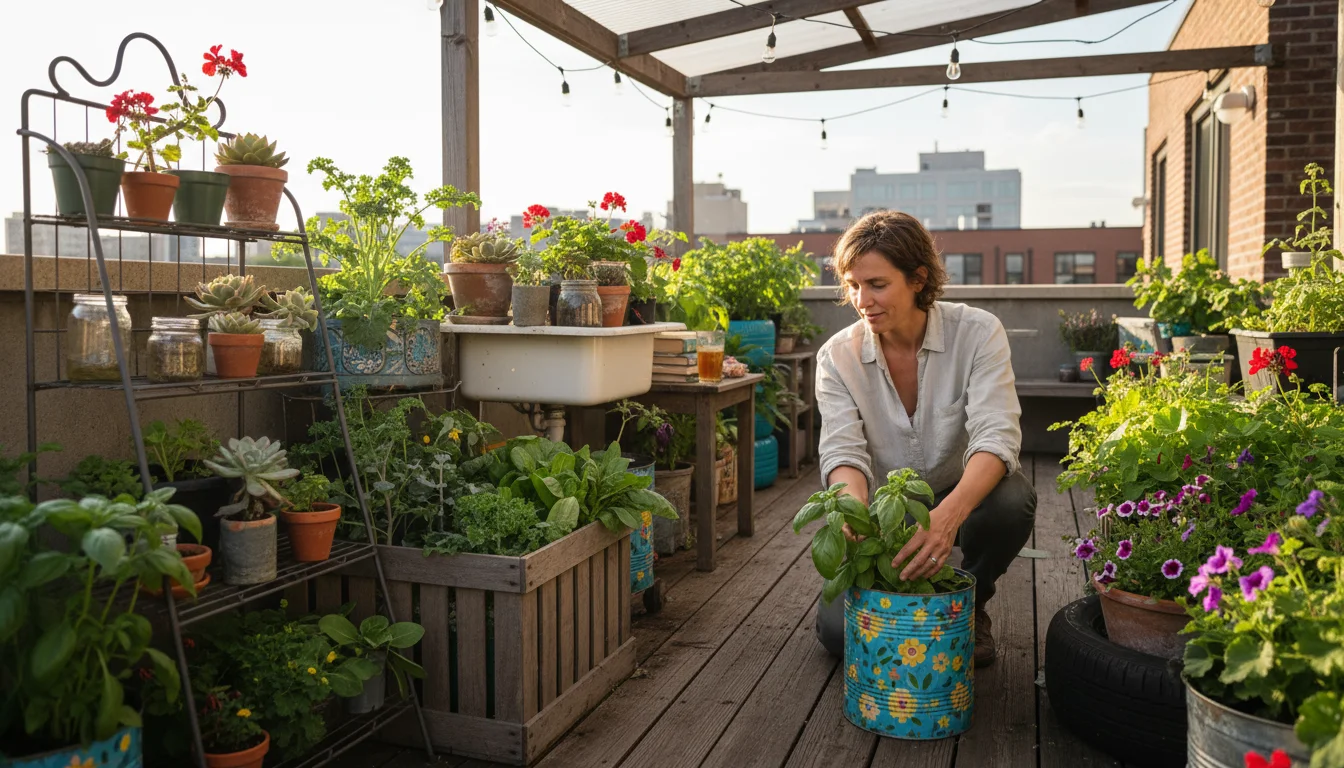
Mass-produced garden containers, while functional, often lack character. Upcycling allows you to inject personality and unique charm into your garden space. Your imagination sets the only limit. Do you want a whimsical teacup planter for succulents, a rustic tire garden for tomatoes, or a vibrant painted tin can display for herbs? Each DIY garden pot tells a story. You create a garden that reflects your style, passions, and creativity, making your small space truly one-of-a-kind. This personal touch fosters a deeper connection with your garden, turning it into a living art installation.
Practicality for Small Spaces: Optimizing Every Inch
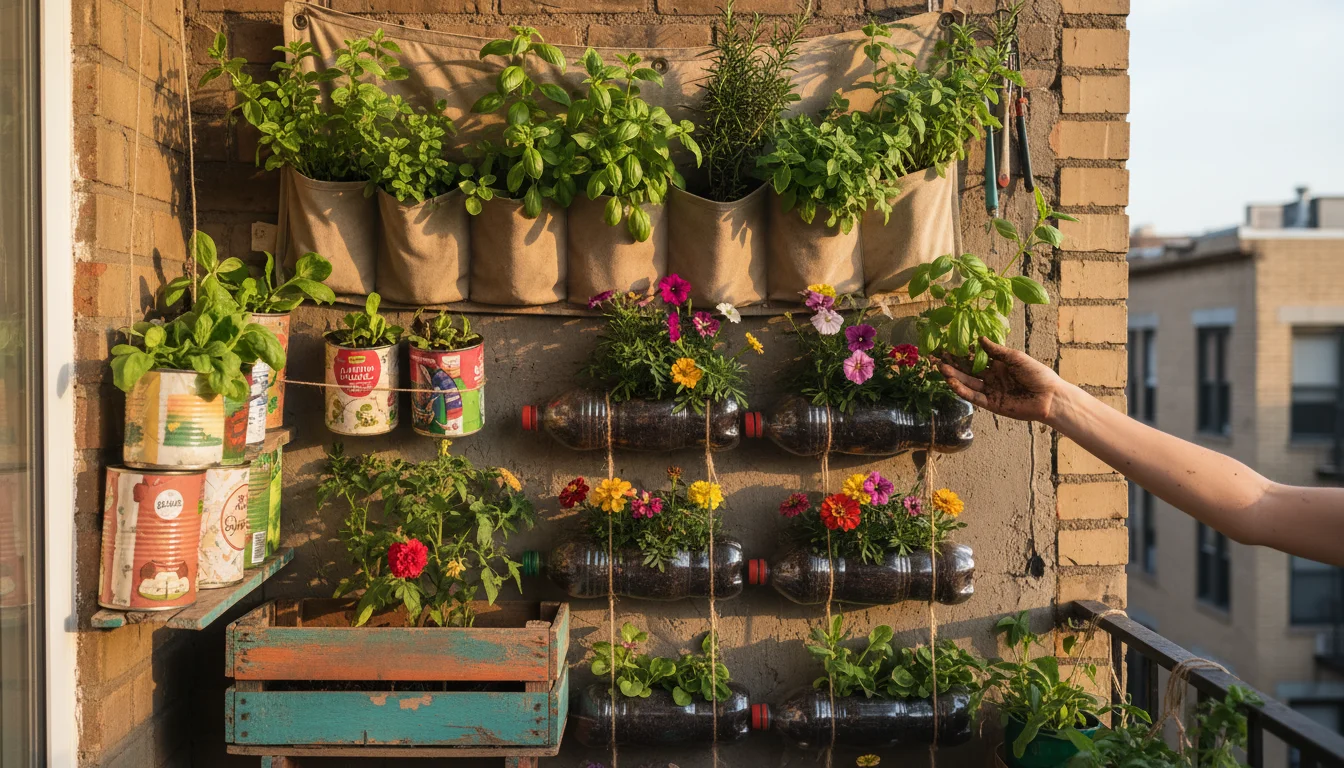
Small gardens, balconies, and patios demand smart solutions. Upcycled containers often come in diverse shapes and sizes, providing flexibility that standard pots might not. You can adapt items to fit awkward corners, hang them vertically, or stack them to maximize planting area. For instance, plastic soda bottles can become components of a vertical hydroponic system, or an old shoe organizer can transform into a hanging herb garden. This adaptability ensures you make the most of every available inch, turning compact areas into lush, productive green spaces.
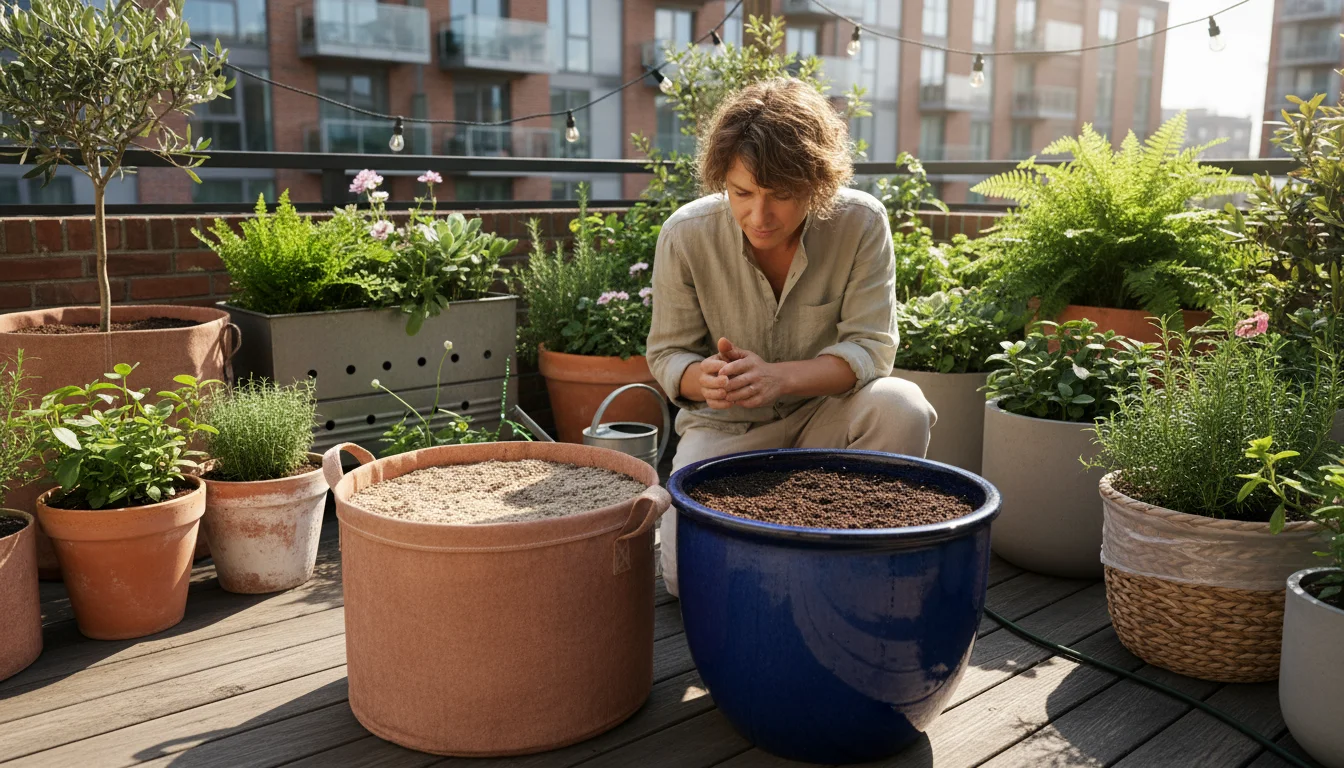
Essential Preparations for Any Upcycled Container
Before you transform a discarded item into a thriving plant home, you must complete a few crucial preparatory steps. Proper preparation ensures your plants receive the best environment for growth, promotes the longevity of your container, and addresses potential safety concerns.
While you are gathering your supplies, check out these DIY garden tool hacks to create functional gear from household leftovers.
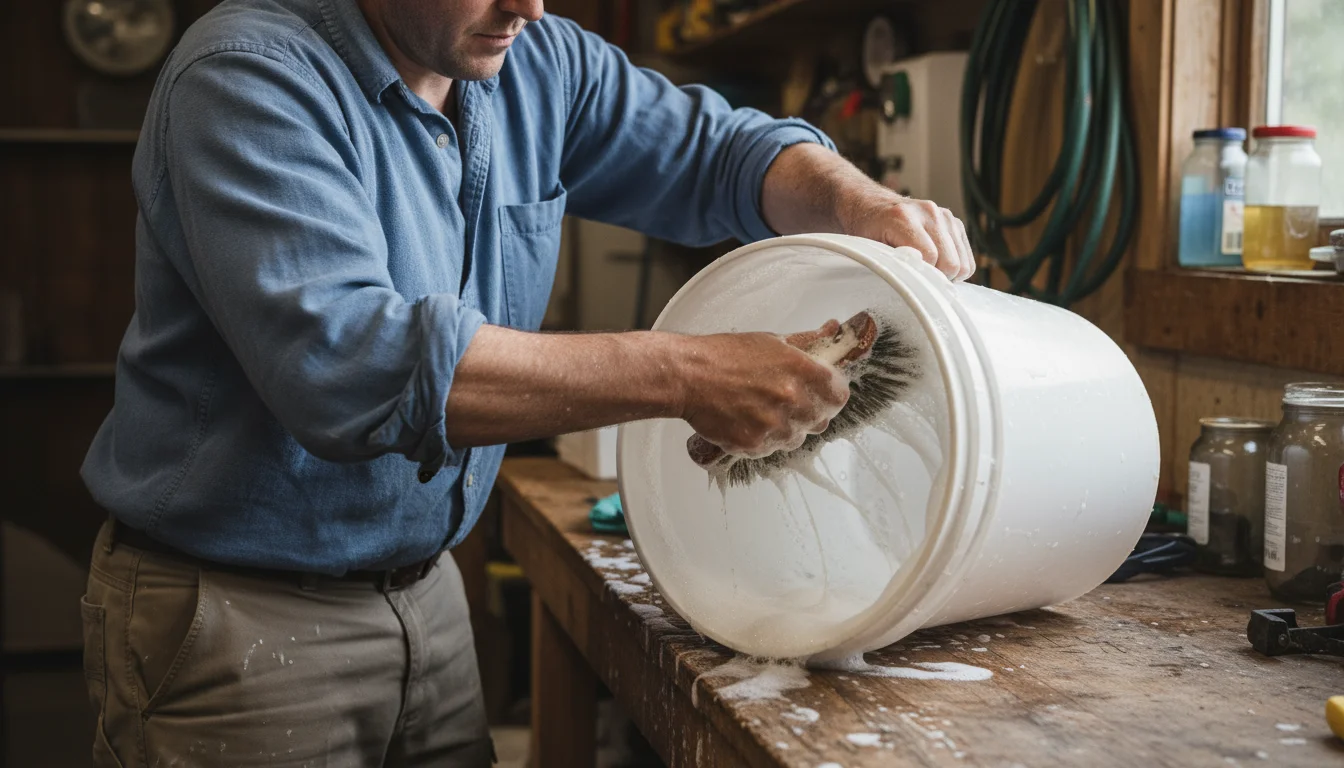
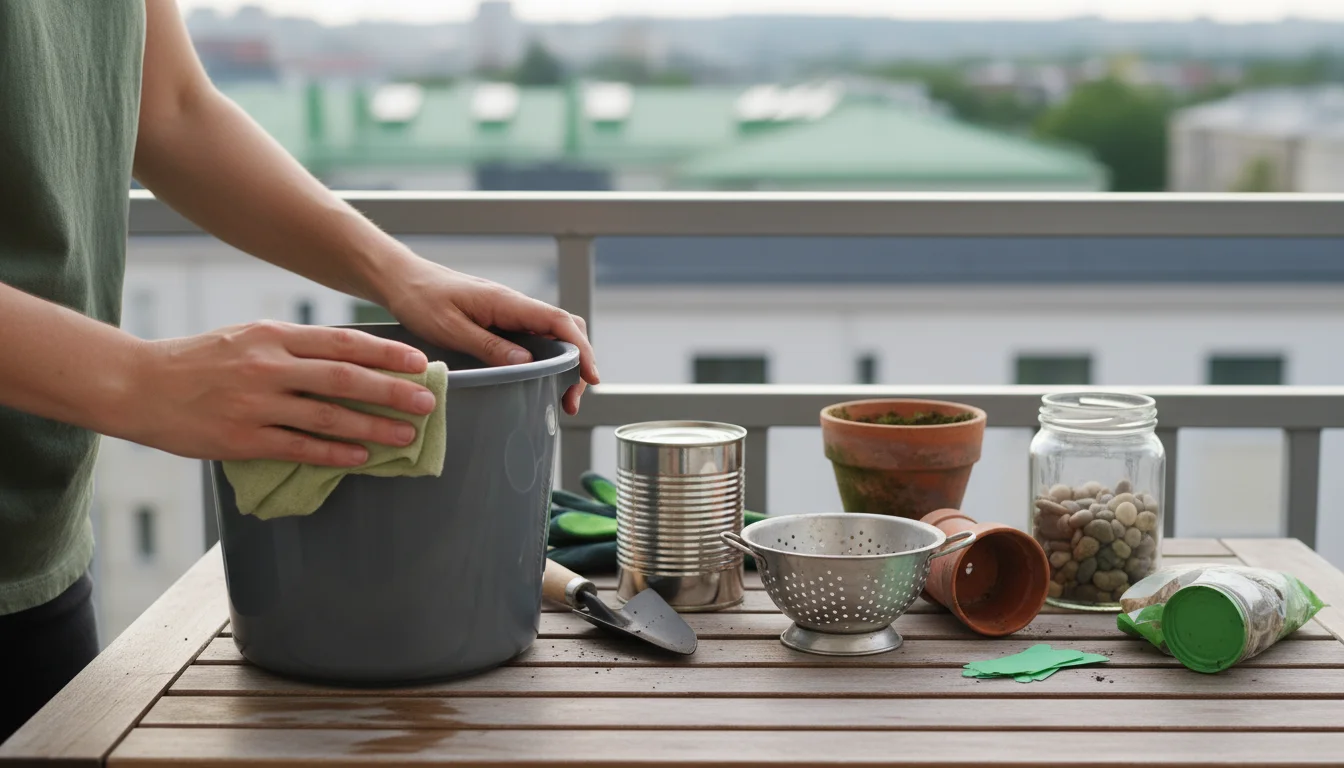
Step 1: Thorough Cleaning is Key
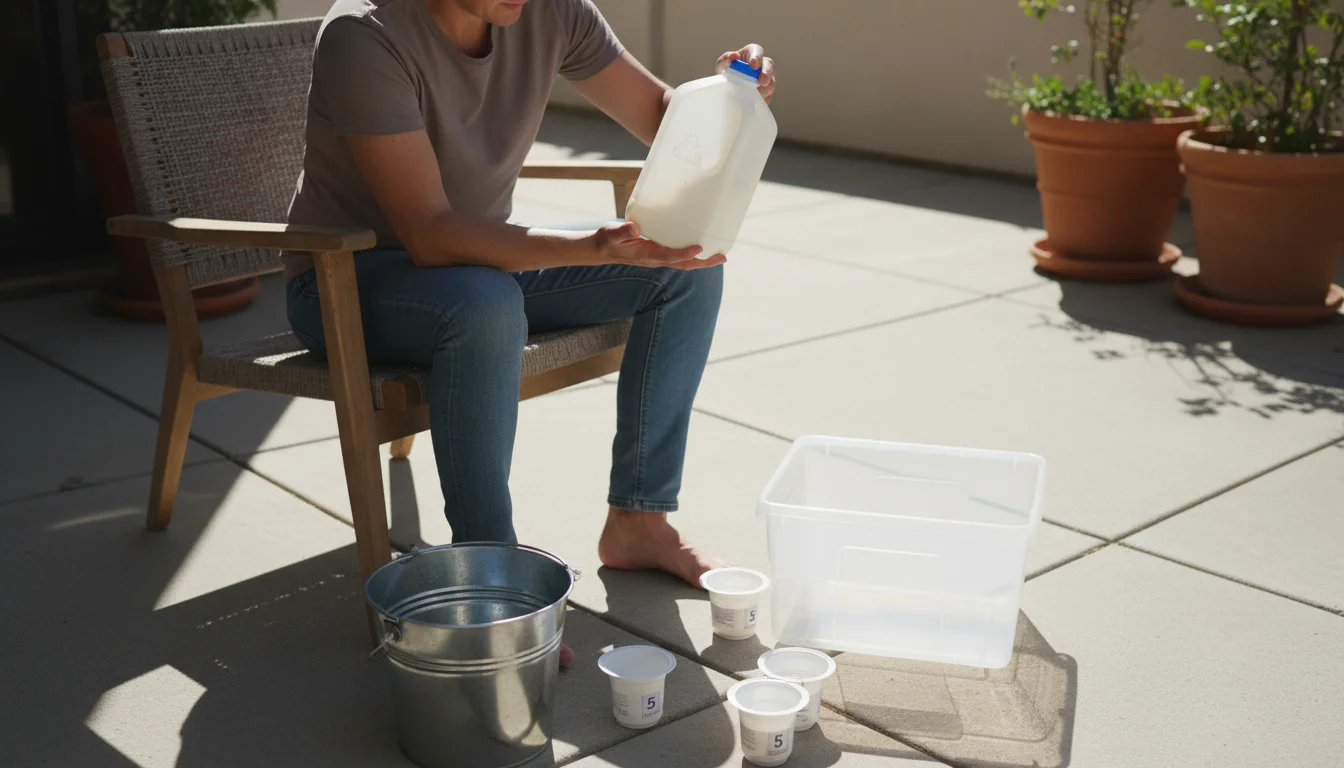
Before any planting occurs, thoroughly clean your chosen item. This removes dirt, grime, potential pathogens, and chemical residues that might harm your plants. Use warm, soapy water and a scrub brush to clean both the interior and exterior surfaces. For items that held food, particularly those with strong odors or grease, consider a diluted bleach solution (one part bleach to nine parts water) for a deep sanitize. Rinse the item thoroughly multiple times after using bleach, ensuring no chemical residue remains, as bleach can harm plant roots. Allow the container to air dry completely in the sun.
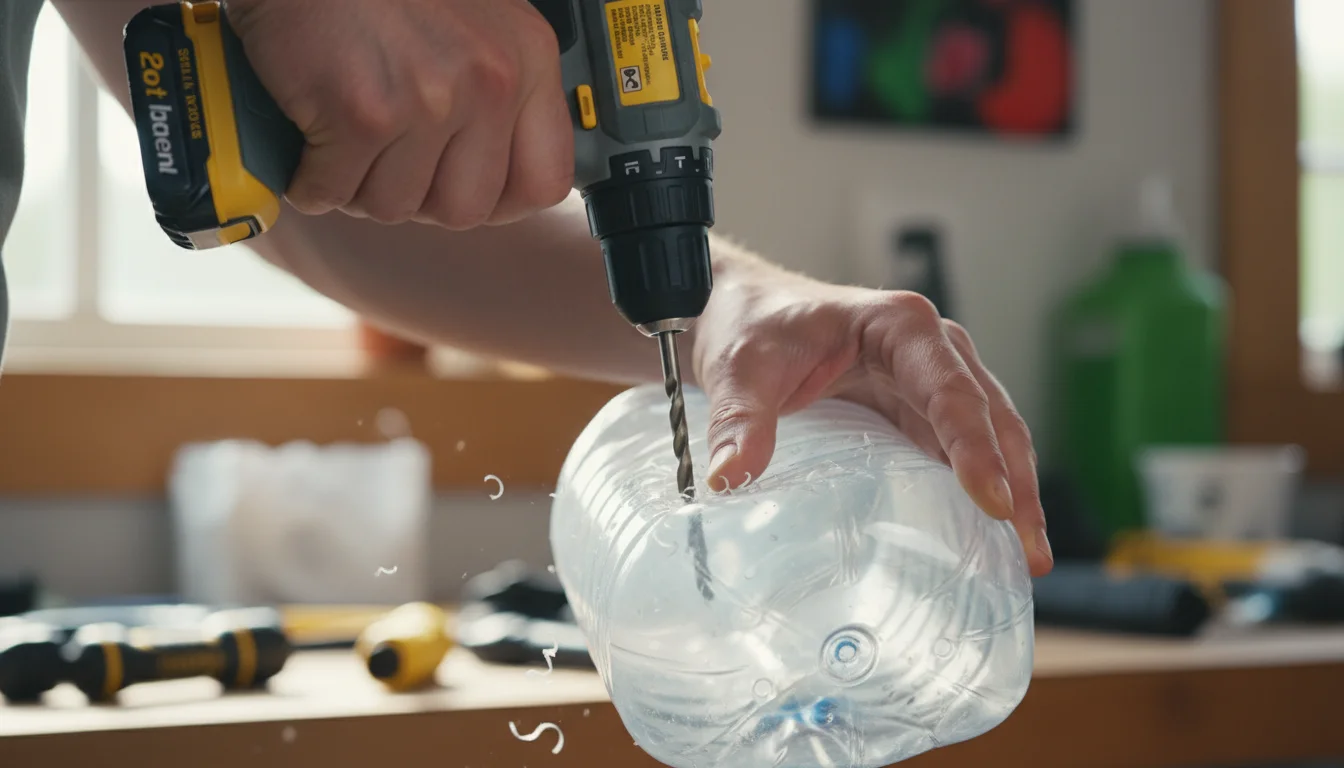
Step 2: Drainage Holes are Non-Negotiable
This constitutes the most critical step for nearly every container you upcycle. Plants require proper “drainage,” which means water needs a way to move through the soil and exit the container. Without adequate drainage, water accumulates at the bottom, leading to “waterlogged” soil. This suffocates roots, starves them of oxygen, and creates an ideal environment for root rot, a fungal disease that can quickly kill your plants. Most commercial pots have drainage holes; your upcycled containers need them too.
How to Create Drainage Holes:
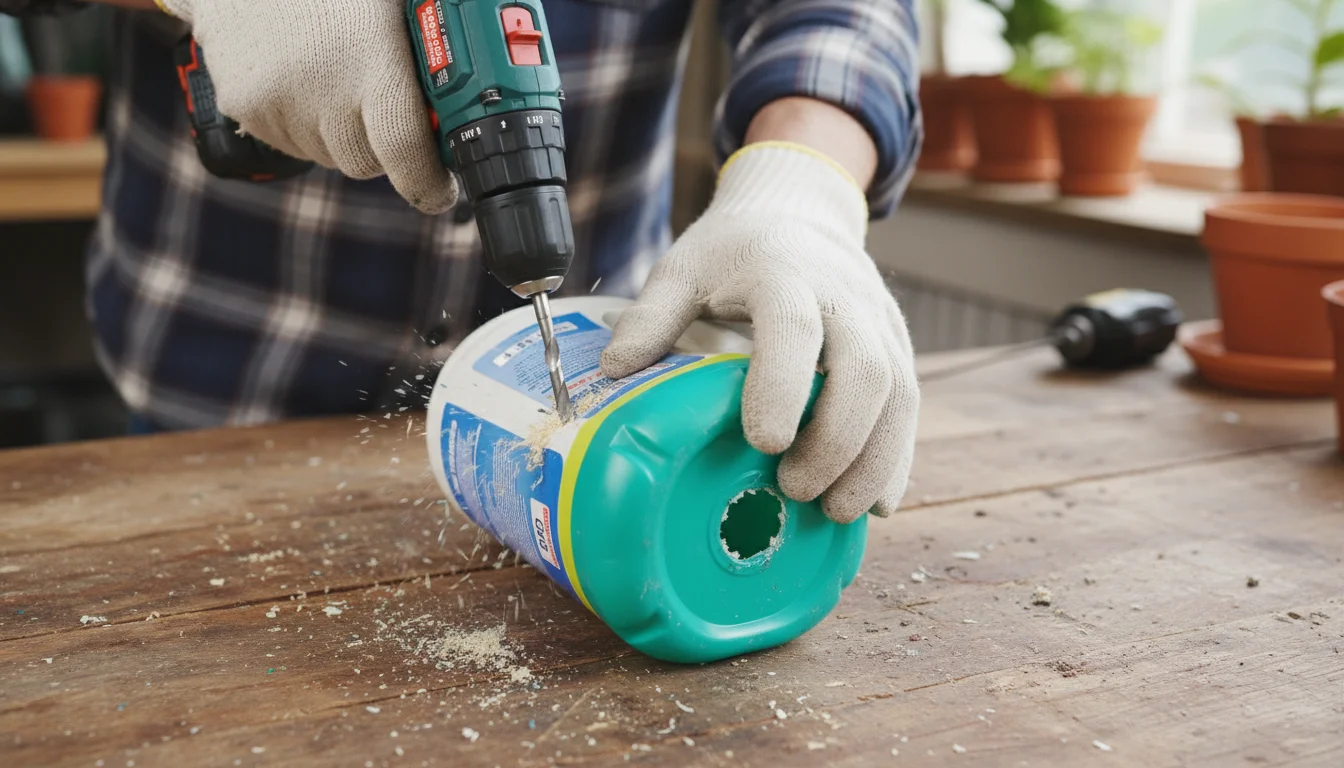
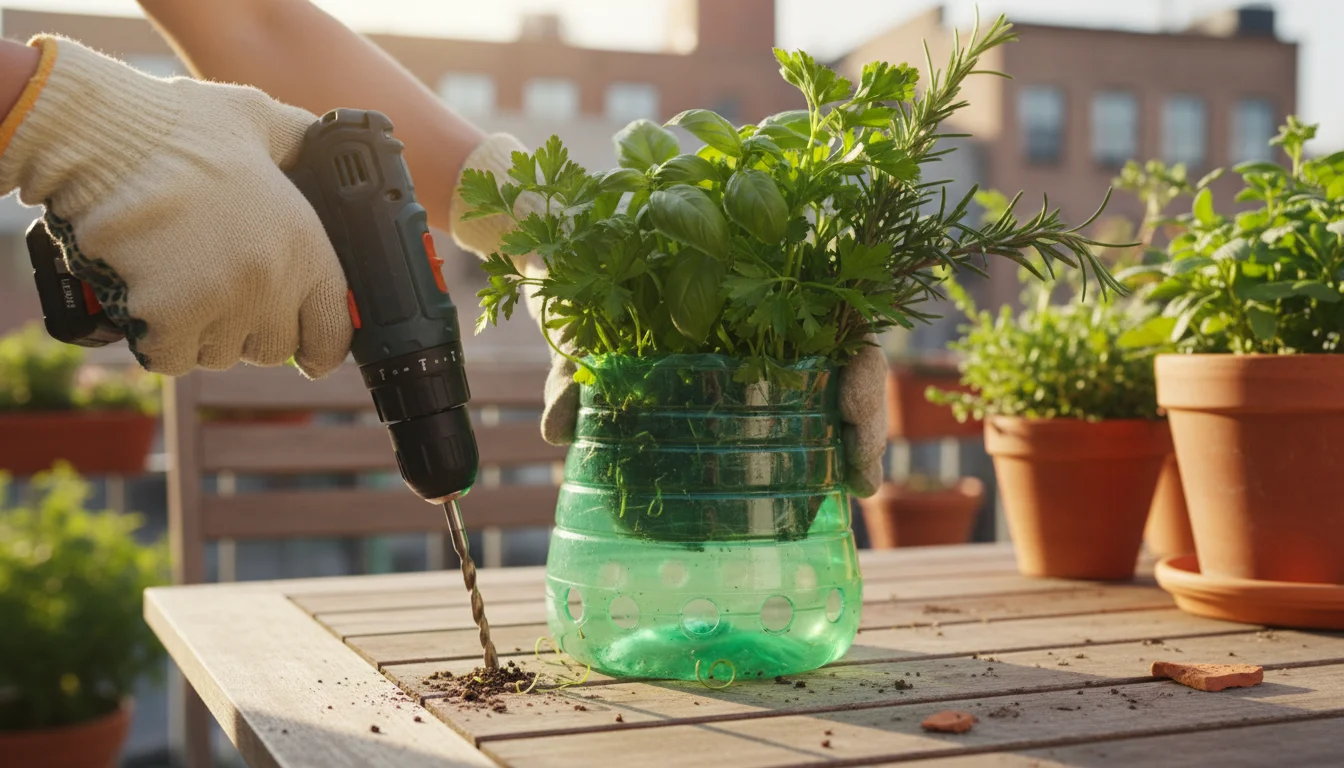
- Plastic Containers: Use a drill with a small drill bit (1/4 to 1/2 inch) or a hot soldering iron (exercise extreme caution and work in a well-ventilated area). You can also heat a metal skewer or nail with a torch or stove burner and carefully melt holes. Aim for at least three to five holes in the bottom, depending on the container size.
- Metal Containers (Tin Cans, Buckets): A metal drill bit works best. Start with a smaller pilot hole, then gradually increase the bit size. Alternatively, use a hammer and a large nail to punch several holes. Wear safety glasses to protect your eyes from metal shards.
- Ceramic or Glass: This requires a specialized tile or glass drill bit and a very slow drilling speed, often with water to keep the bit cool and prevent cracking. This method requires practice and patience. If unsure, consider placing a smaller, pre-drilled pot inside the ceramic or glass container, using the outer container as a decorative cachepot.
- Wood: Wood is generally easy to drill with standard wood bits. Ensure the holes are large enough, as wood can swell.
Position holes primarily on the bottom center and along the edges for optimal water release. For very large containers, add a few holes on the lower sides just above the bottom to ensure complete drainage.
Step 3: Material Safety Considerations
While upcycling is generally safe, consider what the item previously contained, especially if you plan to grow edible plants. Some materials might leach chemicals into the soil.
- Food-Grade Plastic: Look for recycling symbols #2 (HDPE) or #5 (PP) on plastic containers, commonly used for milk jugs, yogurt tubs, and butter containers. These plastics are generally considered safe for growing edibles. Avoid plastics without clear identification or those that held harsh chemicals (e.g., motor oil, paint thinner), even after cleaning.
- Metal: Untreated metals like galvanized steel or aluminum are generally safe. Avoid metals with rust inhibitors or unknown coatings. If an item shows extensive rust, it might not last long as a container, but superficial rust generally poses no threat to plants.
- Tires: While popular, some sources caution against growing edibles directly in tires due to potential leaching of chemicals as the rubber degrades. Use tires for ornamental plants or as an outer decorative ring for a fabric grow bag containing edibles.
- Painted Items: If an item has old paint, especially from before 1978, it might contain lead. Sanding old paint or exposing it to weather can release lead particles. Avoid using such items for edible plants, or strip the paint completely before use. Always use lead-free, non-toxic paints specifically labeled for outdoor use if you plan to paint your containers.
Transforming Everyday Items: Kitchen and Home Edition
Your kitchen and home provide a treasure trove of potential recycled planters. These items often come in convenient sizes and are easy to modify, making them perfect for small-space gardening projects.
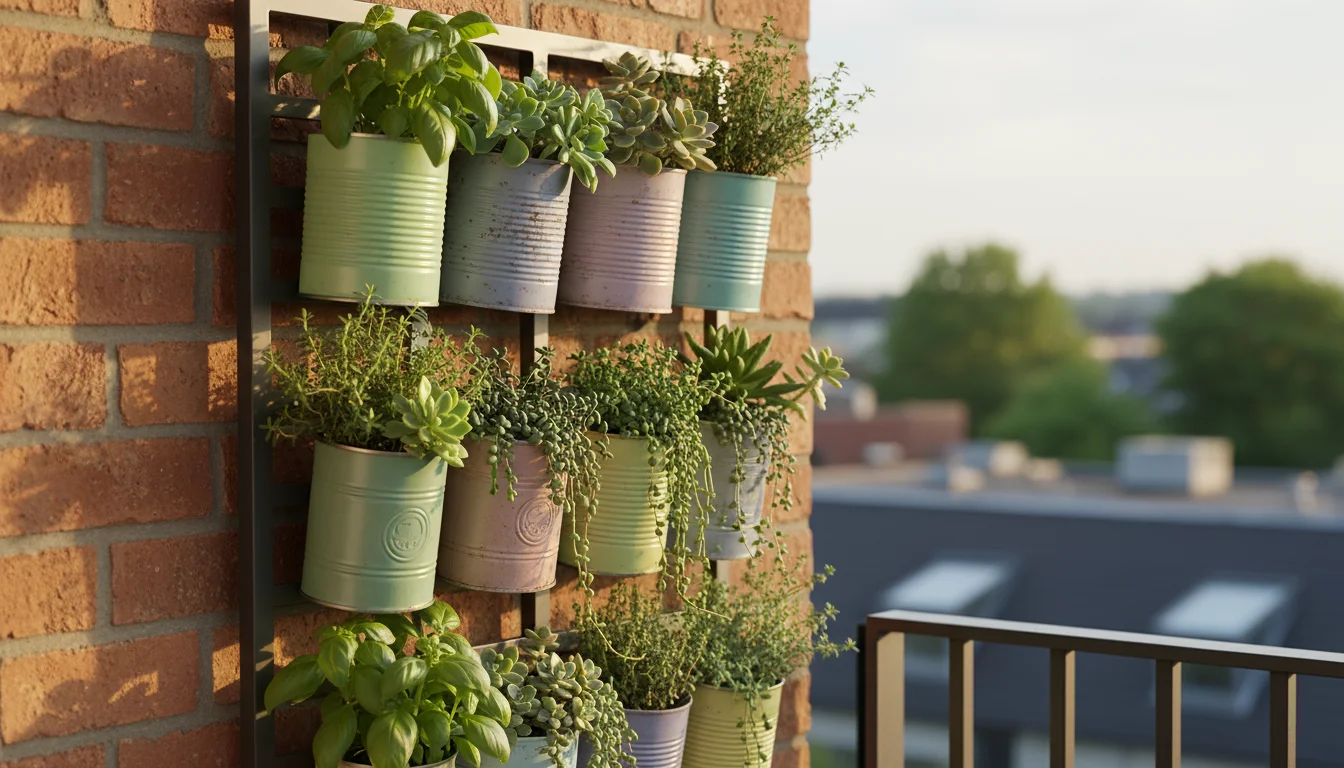
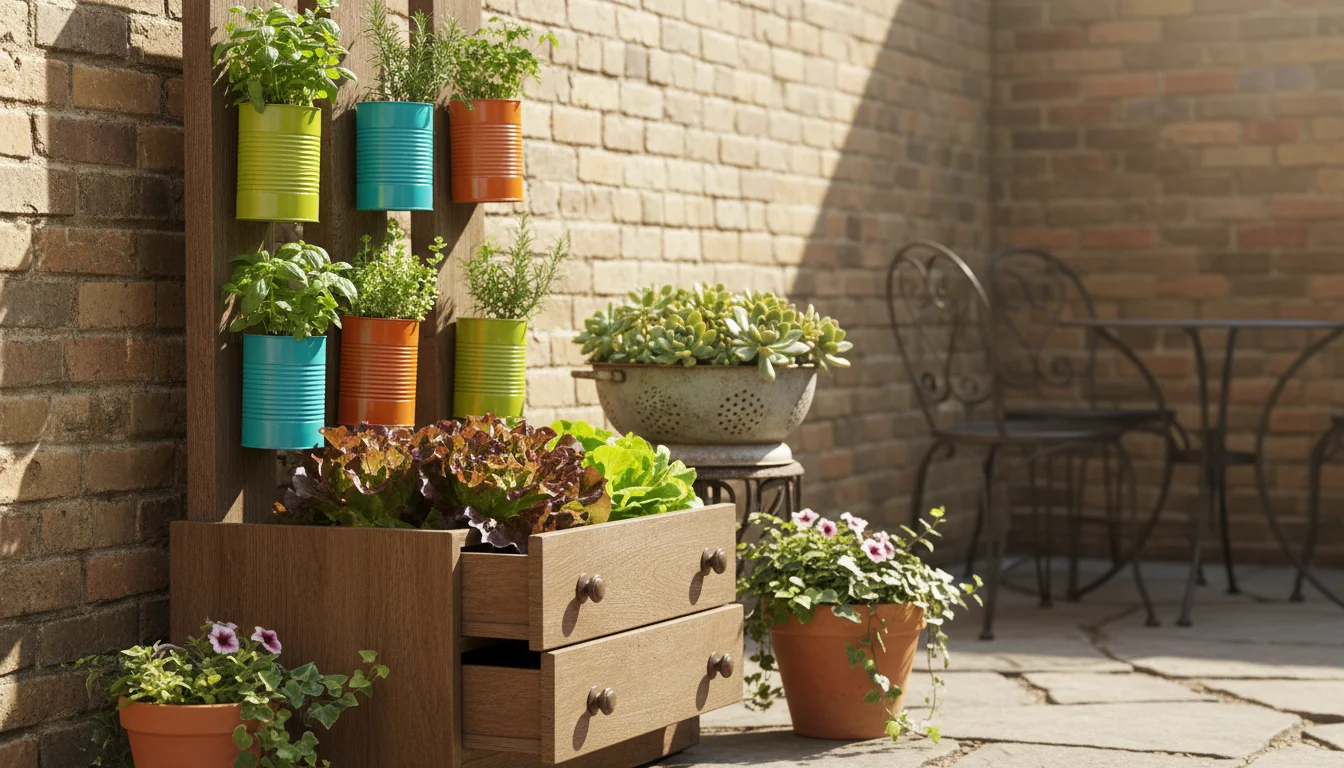
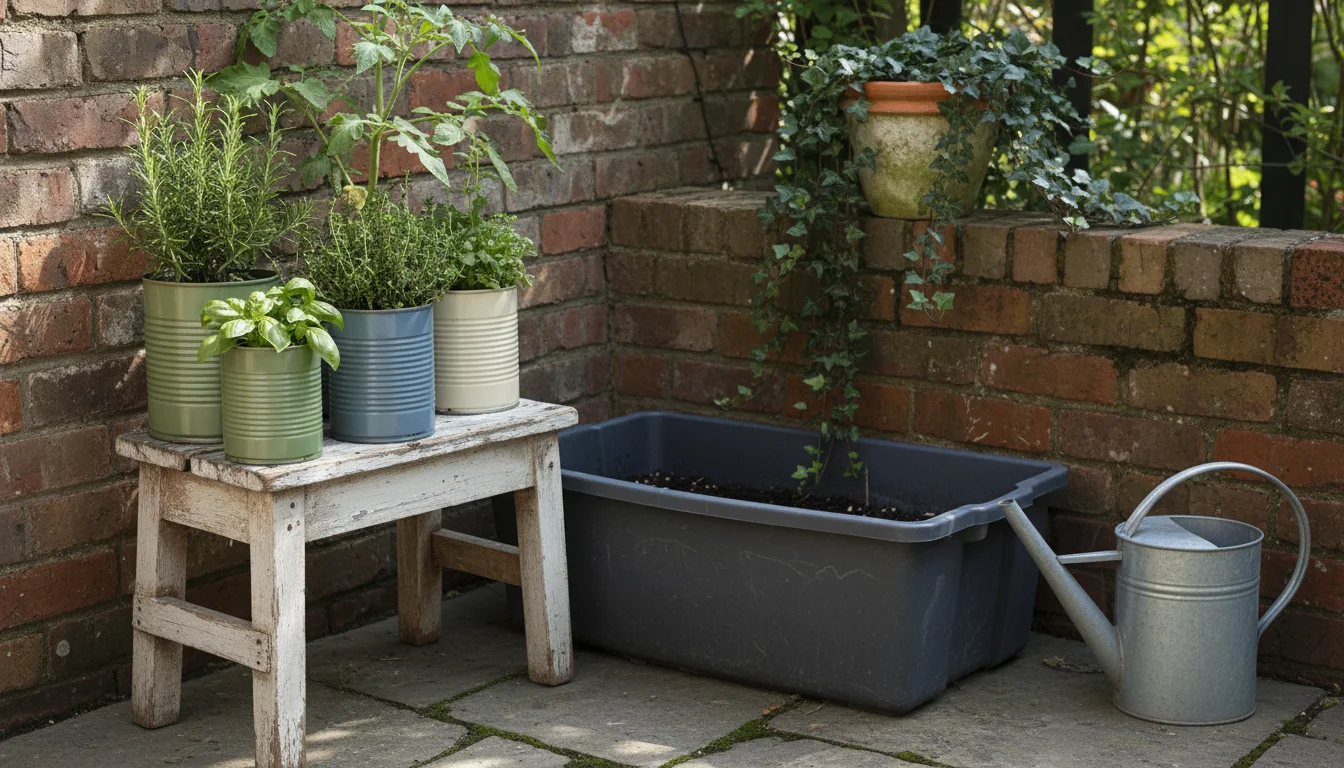
Tin Cans: Herb and Succulent Havens
Empty food cans, such as those from vegetables or pet food, make excellent small planters for herbs, succulents, or small flowering annuals. Their uniform size allows for neat grouping and easy arrangement.
How to Upcycle Tin Cans:
- Clean Thoroughly: Wash cans with hot, soapy water to remove all food residue and odors.
- Smooth Edges: Use a can opener that cuts along the side, leaving a smooth edge, or carefully file down any sharp edges on traditionally opened cans to prevent cuts.
- Add Drainage: Punch several holes in the bottom using a hammer and a large nail, or drill with a metal bit (wear safety glasses).
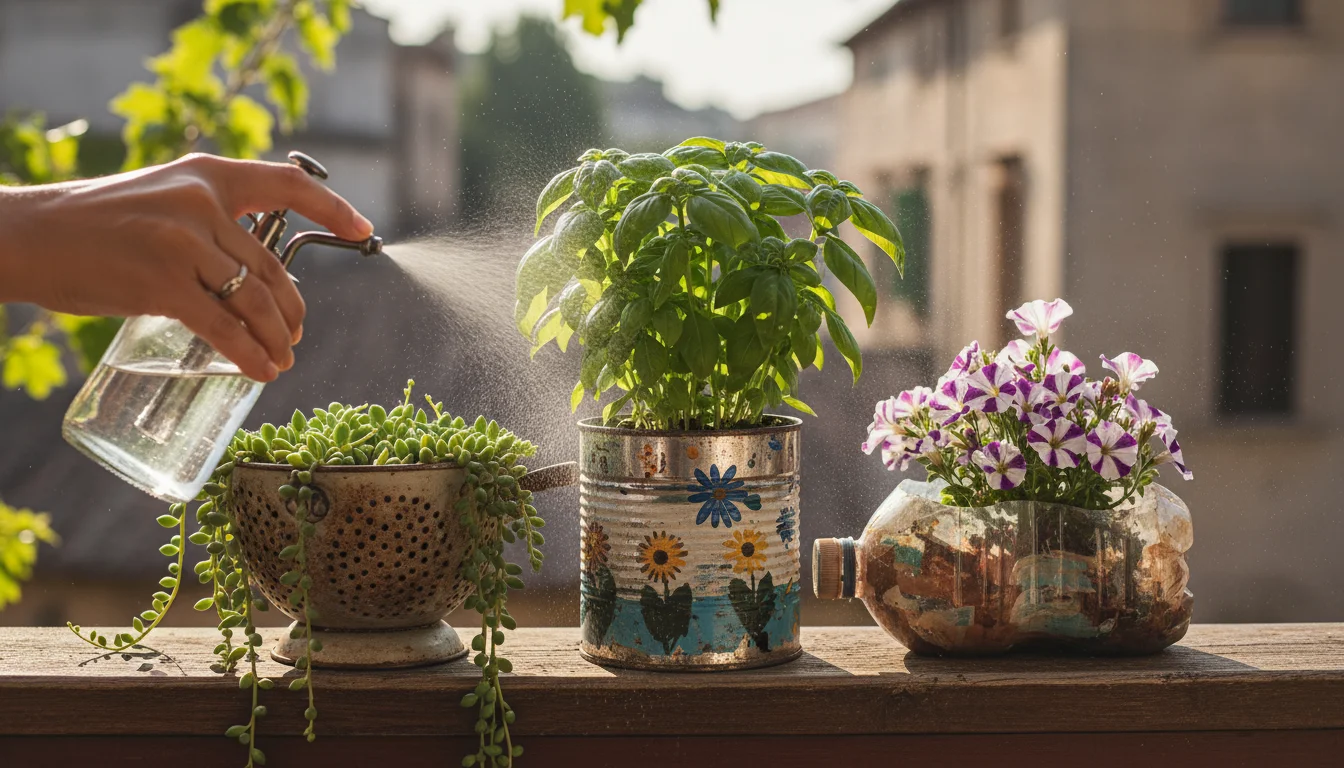
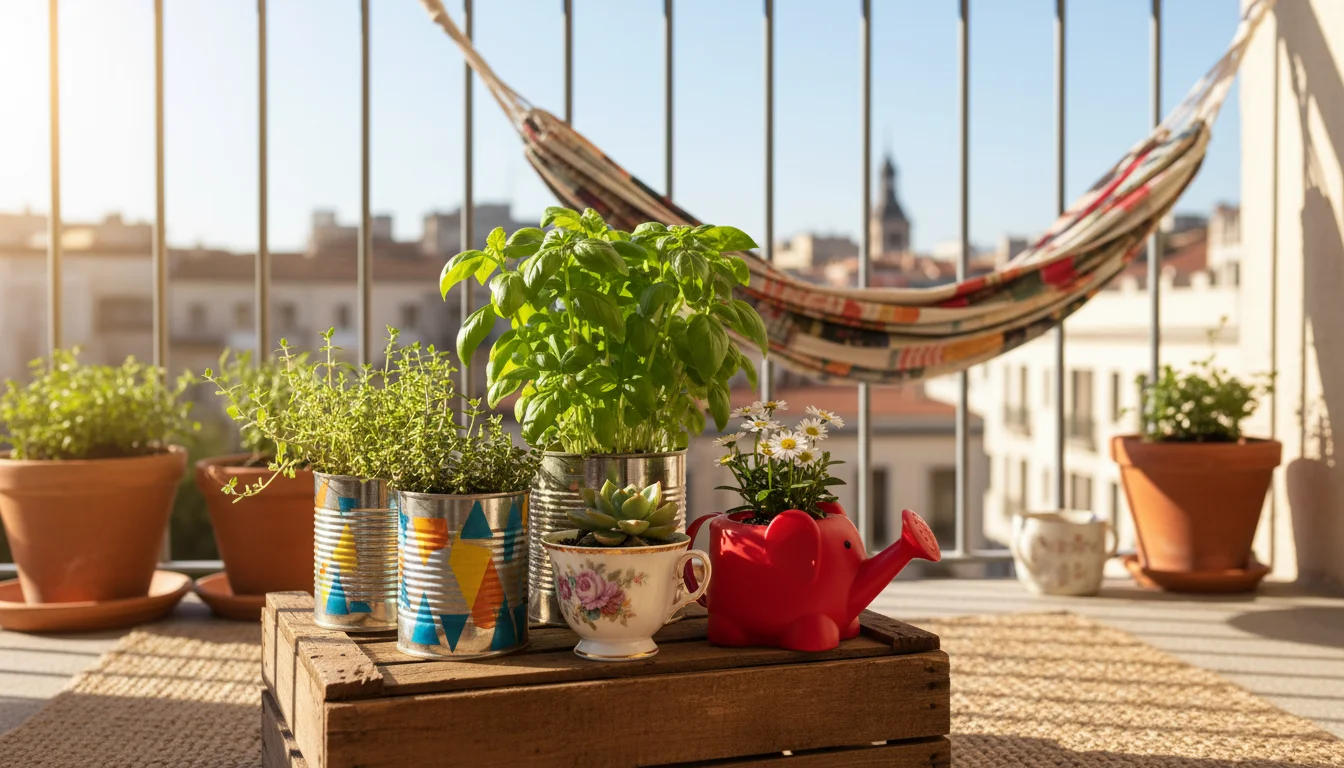
- Decorate (Optional): Paint the cans with outdoor-grade paint, wrap them in twine or burlap, or simply leave them as is for a rustic look. Bright, cheerful colors can add a pop to your balcony garden.
- Planting: Fill with appropriate potting mix. Plant small herbs like basil, thyme, or chives, or a variety of succulents.
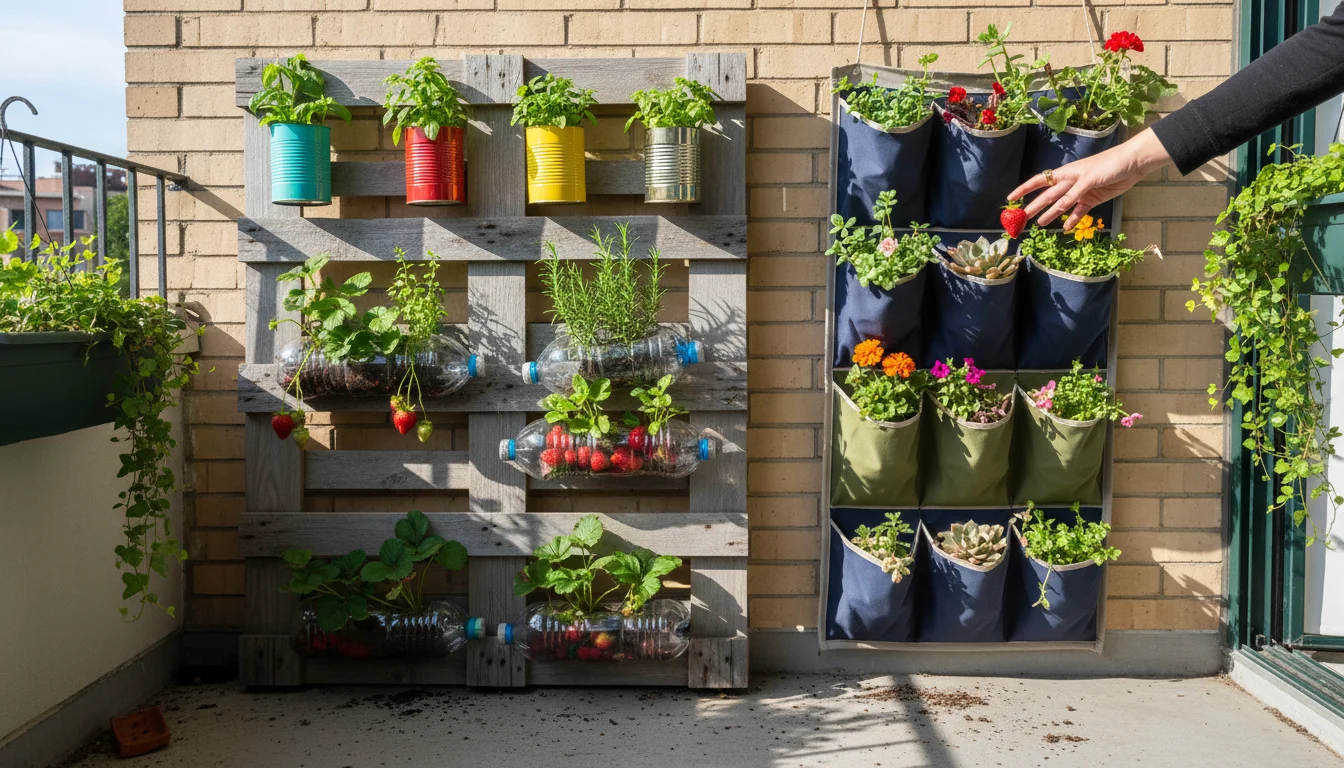
Consider creating a vertical herb garden by attaching decorated cans to a wooden pallet or fence using hose clamps or strong wire. This maximizes your planting area in a compact footprint.
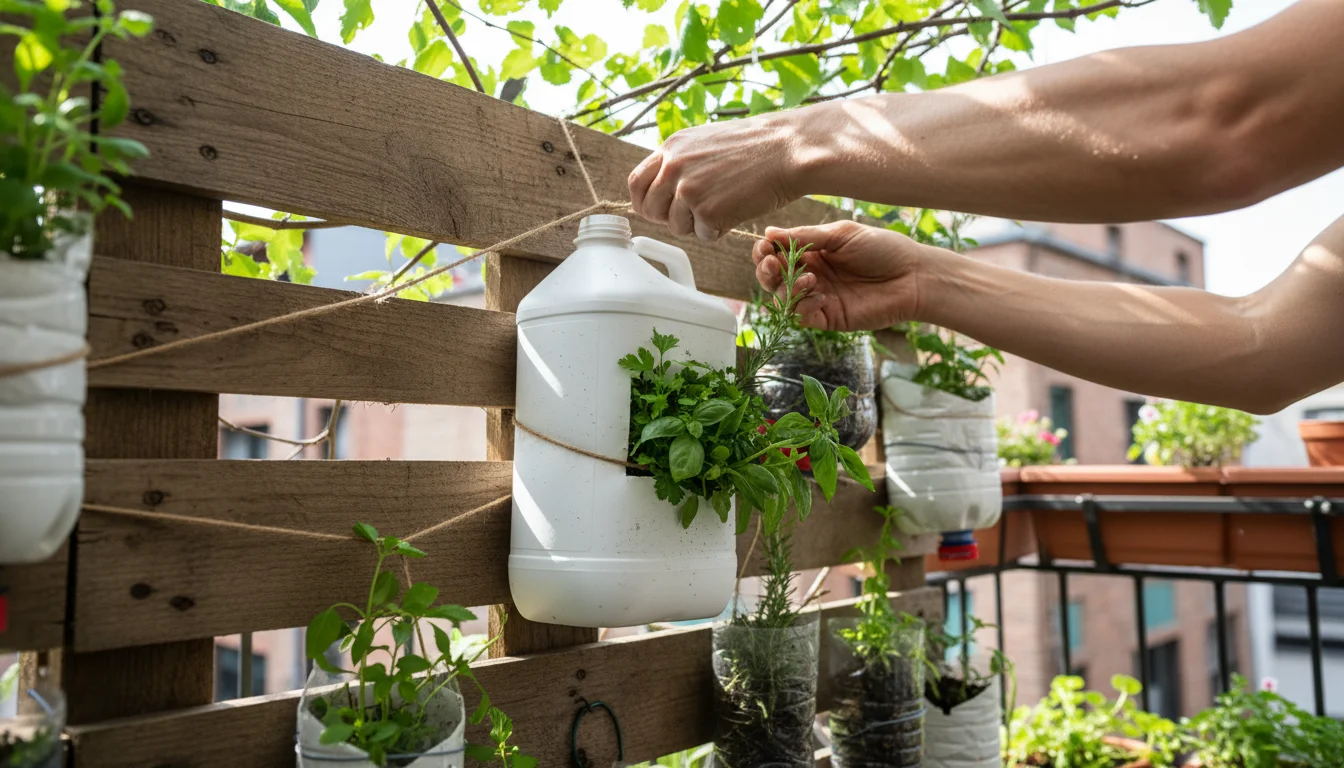
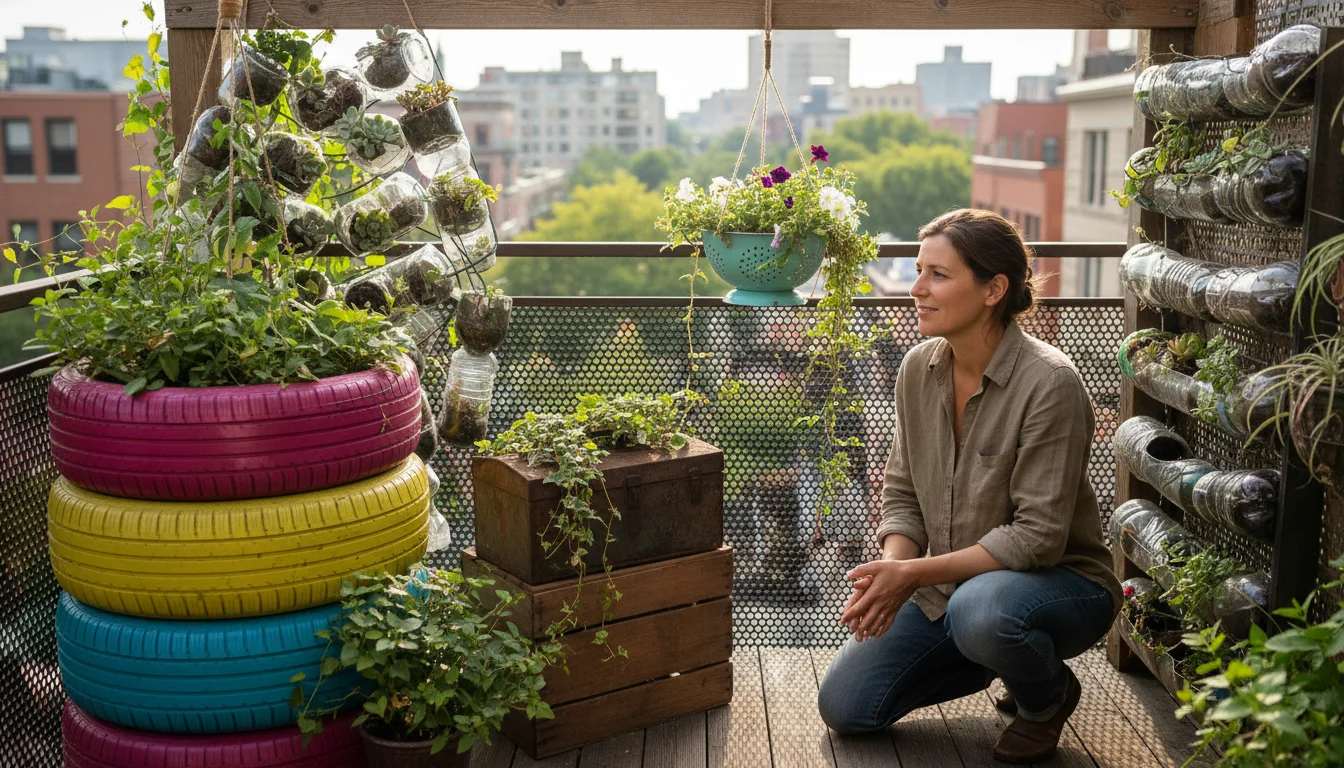
Plastic Bottles and Jugs: Versatile for Vertical Gardens
Plastic soda bottles, milk jugs, and detergent bottles offer incredible versatility for DIY garden pots, especially for vertical growing. Their lightweight nature makes them ideal for hanging.
Milk Jug Planters:
- Clean: Rinse milk jugs thoroughly.
- Cut: Use a sharp utility knife to cut a large opening along one side, leaving the handle intact for hanging. Or, cut off the top third and use the bottom two-thirds as a small pot.
- Drainage: Punch or drill multiple holes in the bottom of the jug or the lowest point of the cut-out section.
- Hang or Sit: Hang them using the handle or string through punched holes. You can also create self-watering planters by nesting a top-third upside down into a bottom-third, with a wick connecting the two.
Plastic bottles can also form a simple vertical bottle garden. Cut an opening on the side, add drainage, fill with soil, and string multiple bottles together or attach them to a frame.
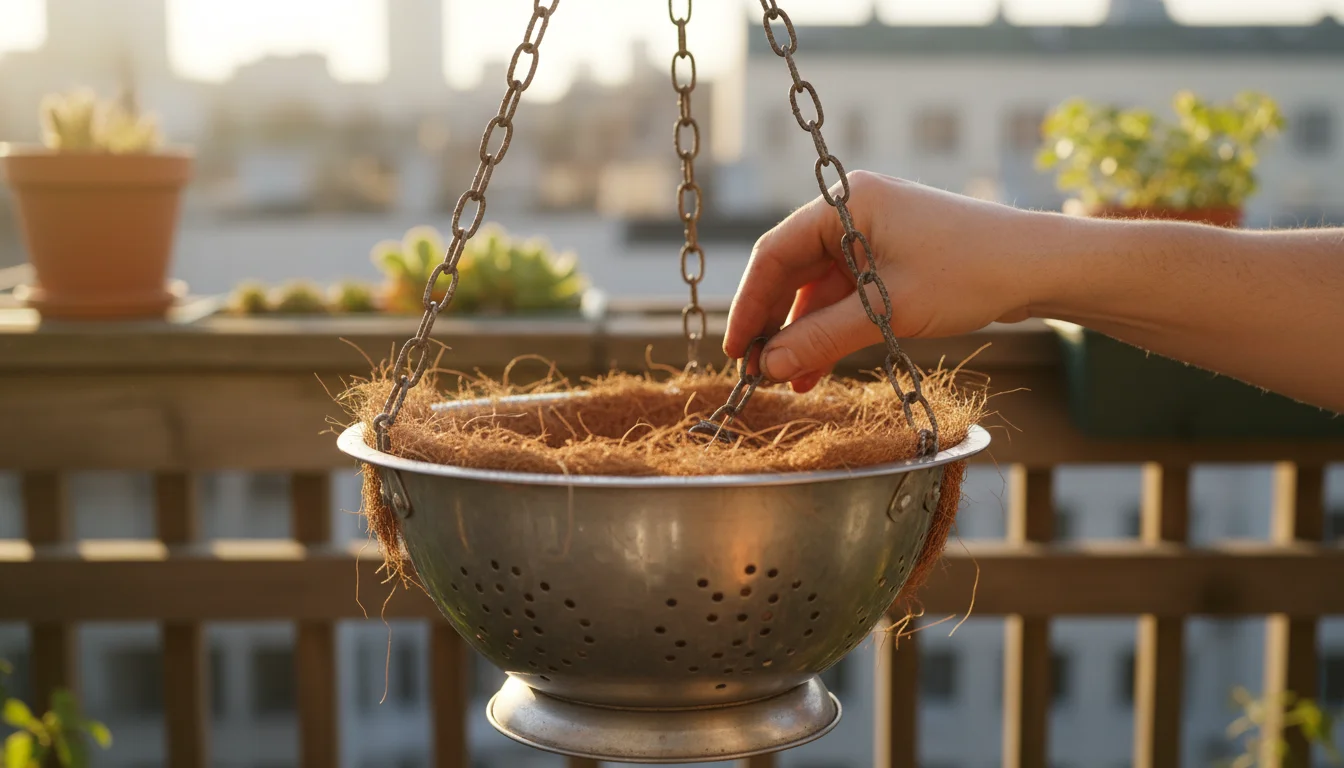
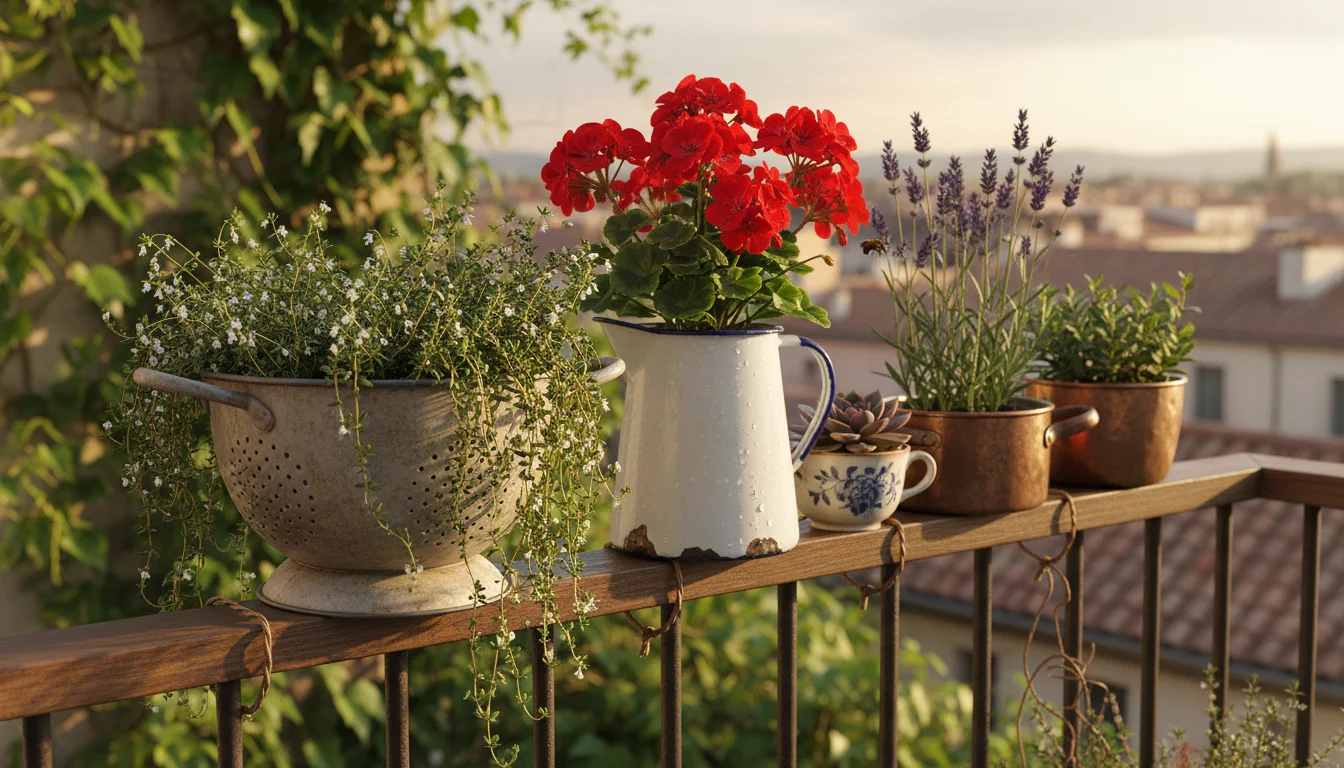
Old Colanders: Instant Hanging Baskets
An old colander, especially a metal one, offers natural, built-in drainage and makes a charming hanging basket. Its unique aesthetic adds character to your outdoor space.
How to Use a Colander:
- Clean: Wash the colander thoroughly.
- Liner: Line the colander with burlap, coconut coir, or landscape fabric to prevent soil from washing out. Ensure the liner covers the sides and bottom, allowing water to pass through the drainage holes.
- Hang: Attach three equally spaced chains or sturdy ropes to the colander’s rim, gathering them at the top to form a hanger.
- Plant: Fill with lightweight potting mix and plant trailing flowers such as petunias or nasturtiums, or compact herbs.
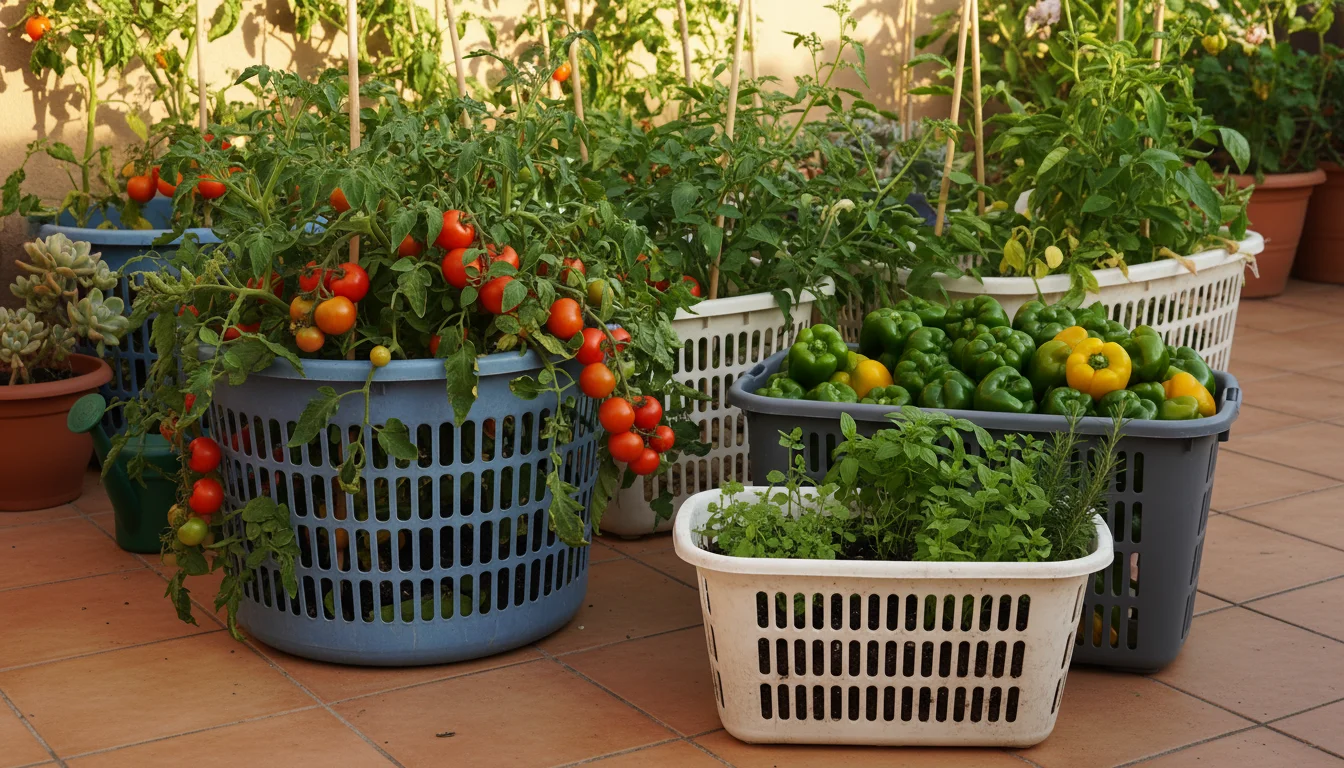
Laundry Baskets and Storage Totes: Large, Lightweight Planters
Large plastic laundry baskets or storage totes provide spacious, lightweight options for larger plants like tomatoes, peppers, or small shrubs. Their sturdy construction handles significant soil volume.
Converting Baskets/Totes:
- Clean: Wash thoroughly.
- Drainage: Drill numerous 1/2-inch holes in the bottom of the tote or basket. Aim for at least 8-10 holes for a large container.
- Reinforce (Optional): For very large totes, you can place a layer of sturdy mesh or hardware cloth at the bottom before adding soil to prevent the plastic from bowing under the soil’s weight.
- Plant: Fill with quality potting mix. These are excellent for square foot gardening techniques in a small space.
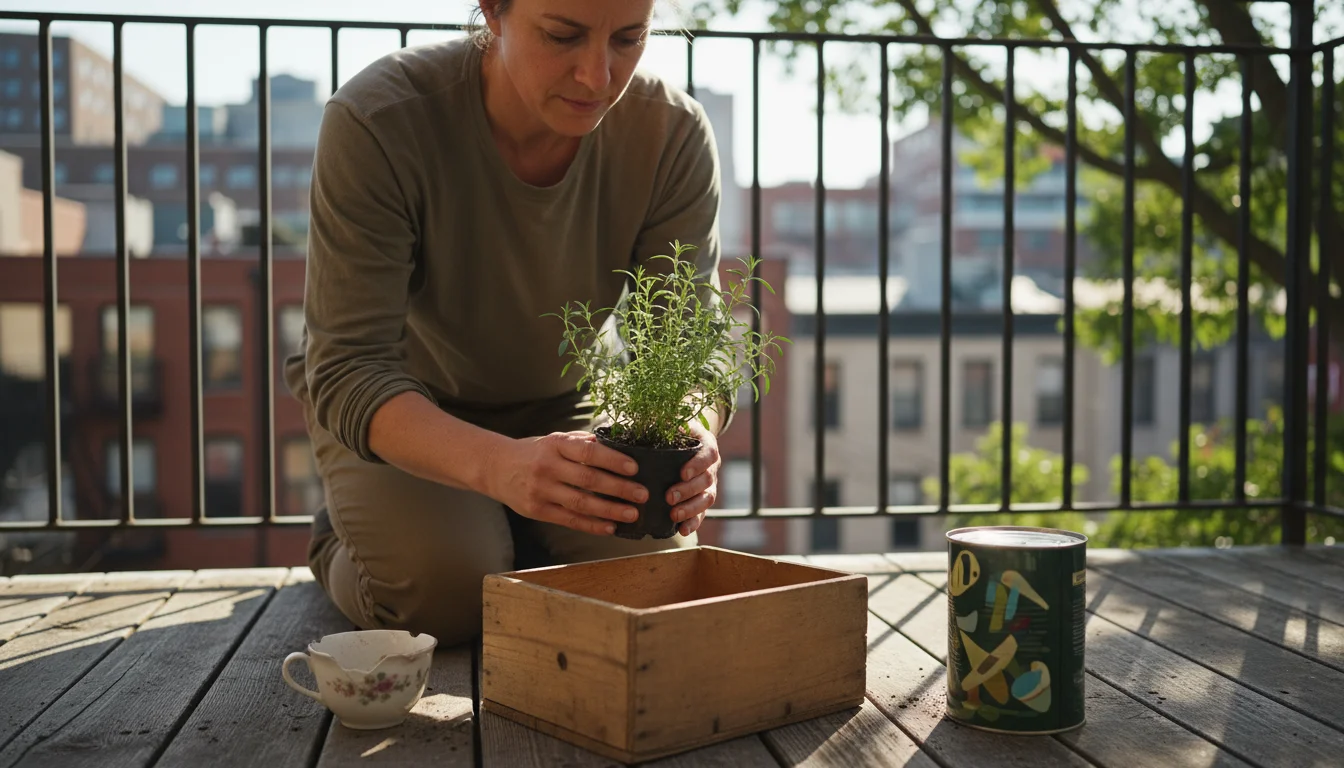
Fashioning Garden Beds from Furniture and Fixtures
Beyond the kitchen, your garage or secondhand stores offer larger items that transform into striking and functional garden beds. These pieces often become focal points in your small garden.
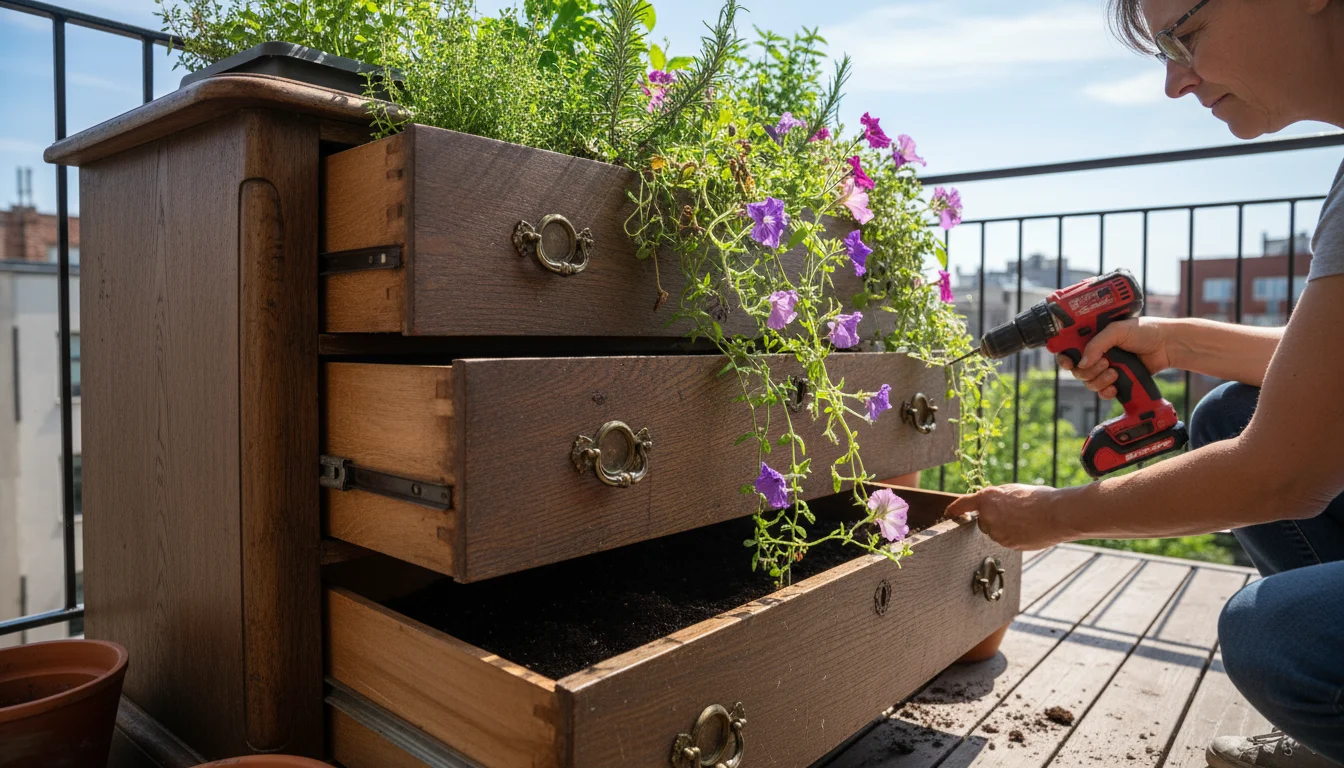
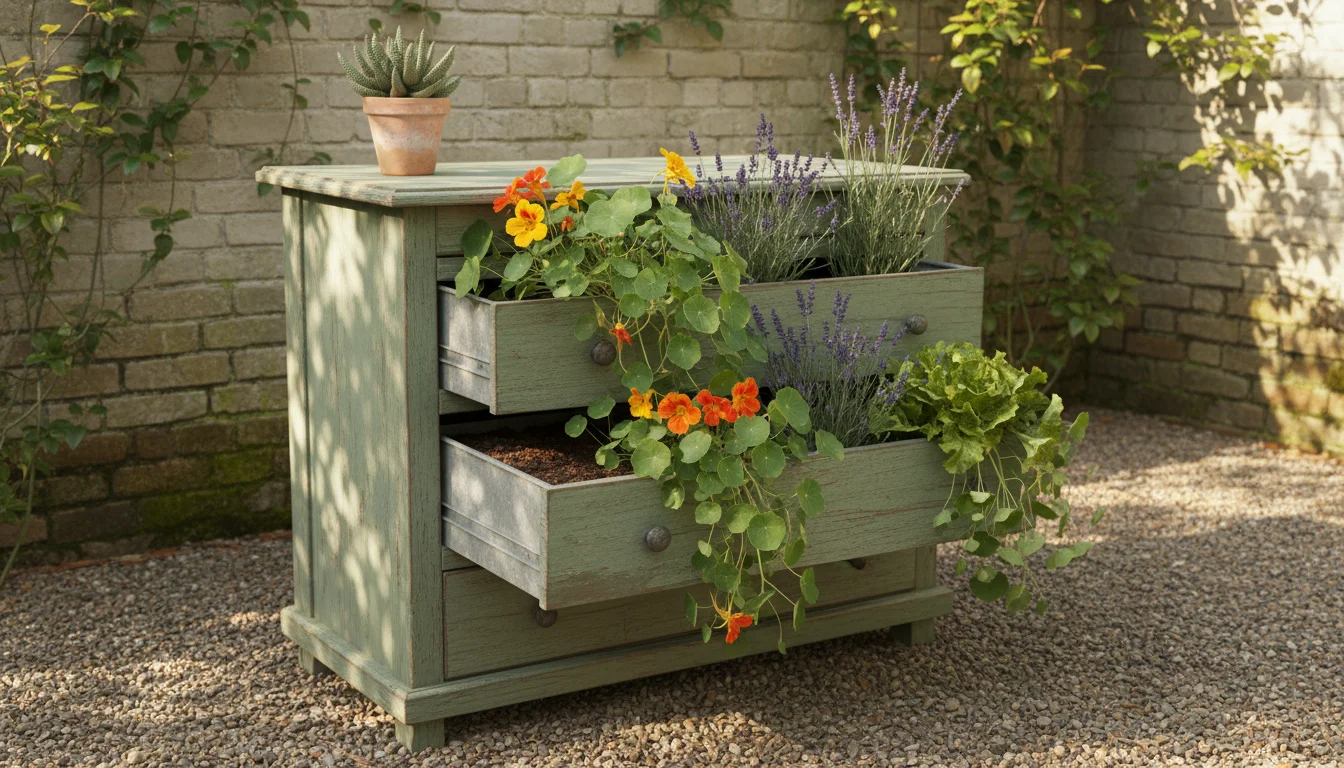
Old Dressers and Drawers: Tiered Planters and Raised Beds
An old dresser can become a magnificent tiered garden. Each drawer provides a separate planting area, allowing you to grow a variety of plants in a single, eye-catching structure.
Dresser Garden Steps:
- Prepare Dresser: Remove all drawers. Clean the dresser thoroughly. Ensure it stands stably.
- Secure Drawers: Slightly pull out each drawer to varying degrees, creating a tiered effect. Secure them in place using screws through the sides or bottom into the dresser frame. This prevents them from shifting.
- Drainage: Drill several drainage holes in the bottom of each drawer. For wooden drawers, consider lining them with heavy-duty plastic sheeting or pond liner before adding soil. This protects the wood from moisture and extends its life. Pierce holes in the liner where you drilled drainage.
- Paint (Optional): Paint the dresser with weather-resistant outdoor paint for durability and aesthetic appeal. Bright colors or a distressed look can enhance its charm.
- Planting: Fill drawers with a good quality potting mix. Plant cascading flowers, herbs, or shallow-rooted vegetables in the drawers.
For a simpler approach, use individual drawers as standalone raised beds for succulents or ground cover plants.
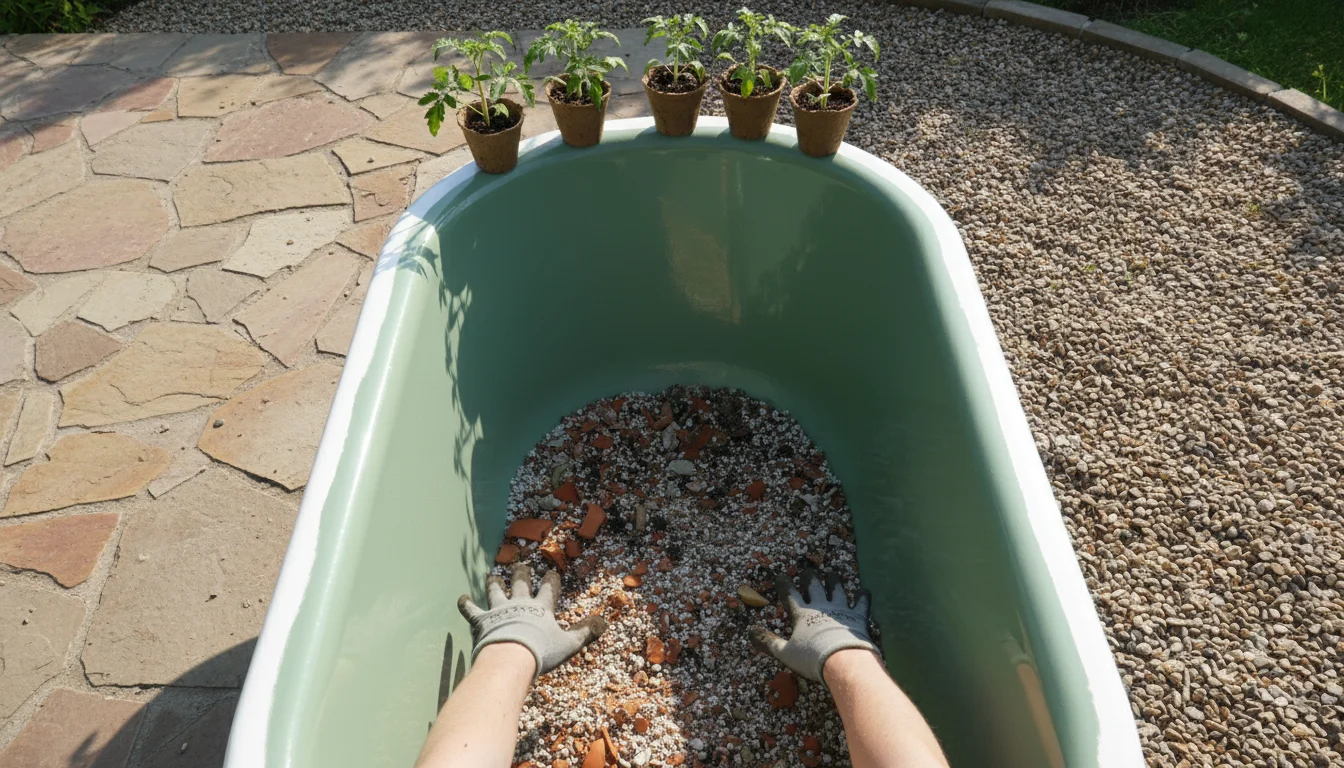
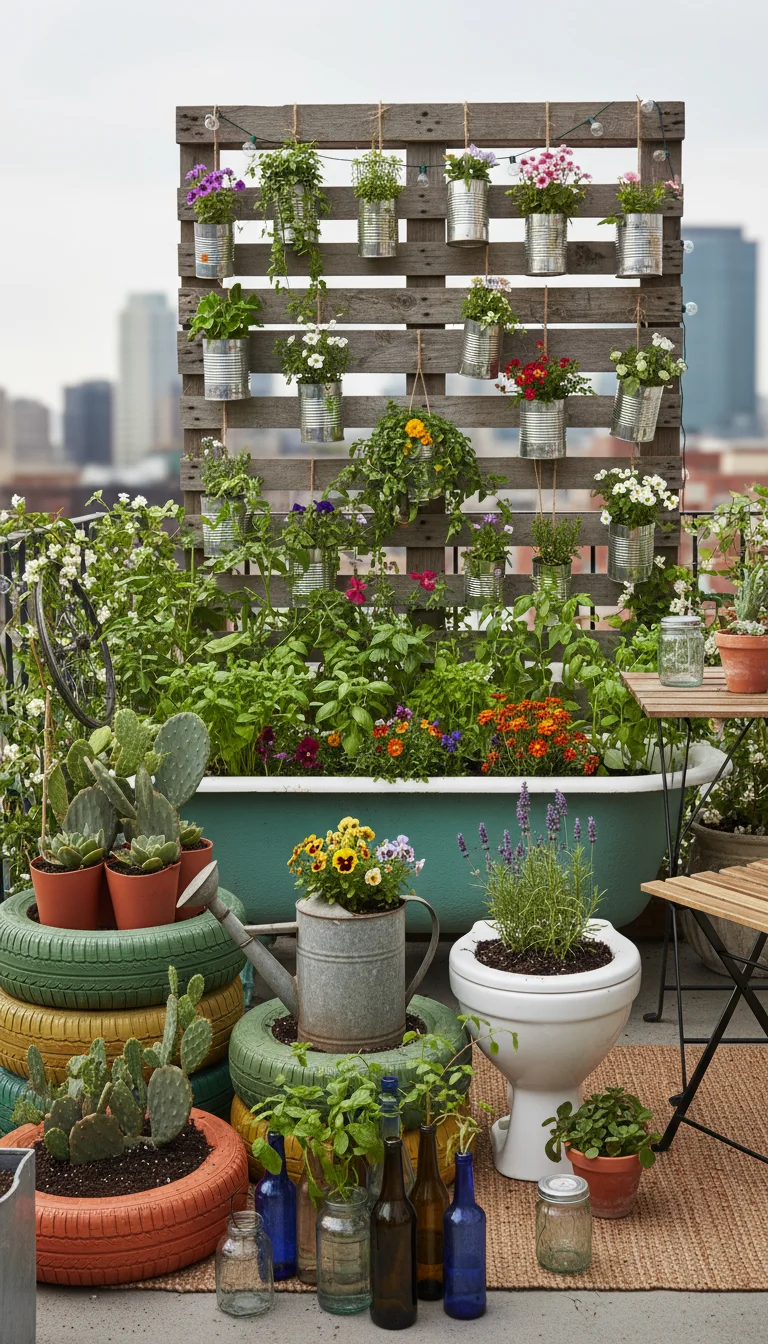
Bathtubs: Grand Raised Beds
An old bathtub, while heavy, makes an exceptional, deep raised bed. Its large volume accommodates a wide range of plants, from root vegetables to small fruit trees.
Bathtub Planter Conversion:
- Placement: Choose a permanent, level spot for your bathtub, as it becomes extremely heavy once filled.
- Drainage: The existing drain hole provides excellent drainage. If the tub sits directly on the ground, ensure the drain remains clear to prevent waterlogging. Elevating the tub slightly on bricks or pavers improves drainage.
- Prepare: Clean the tub thoroughly. You can paint the exterior with suitable outdoor paint if desired.
- Fill: Due to its depth, you can fill the bottom 6-12 inches with coarse materials like crushed concrete, gravel, or even plastic bottles to reduce the amount of soil needed. Then, fill with a high-quality potting mix.
- Planting: Grow deep-rooted vegetables, a small patio fruit tree, or a vibrant mix of flowers and trailing plants.
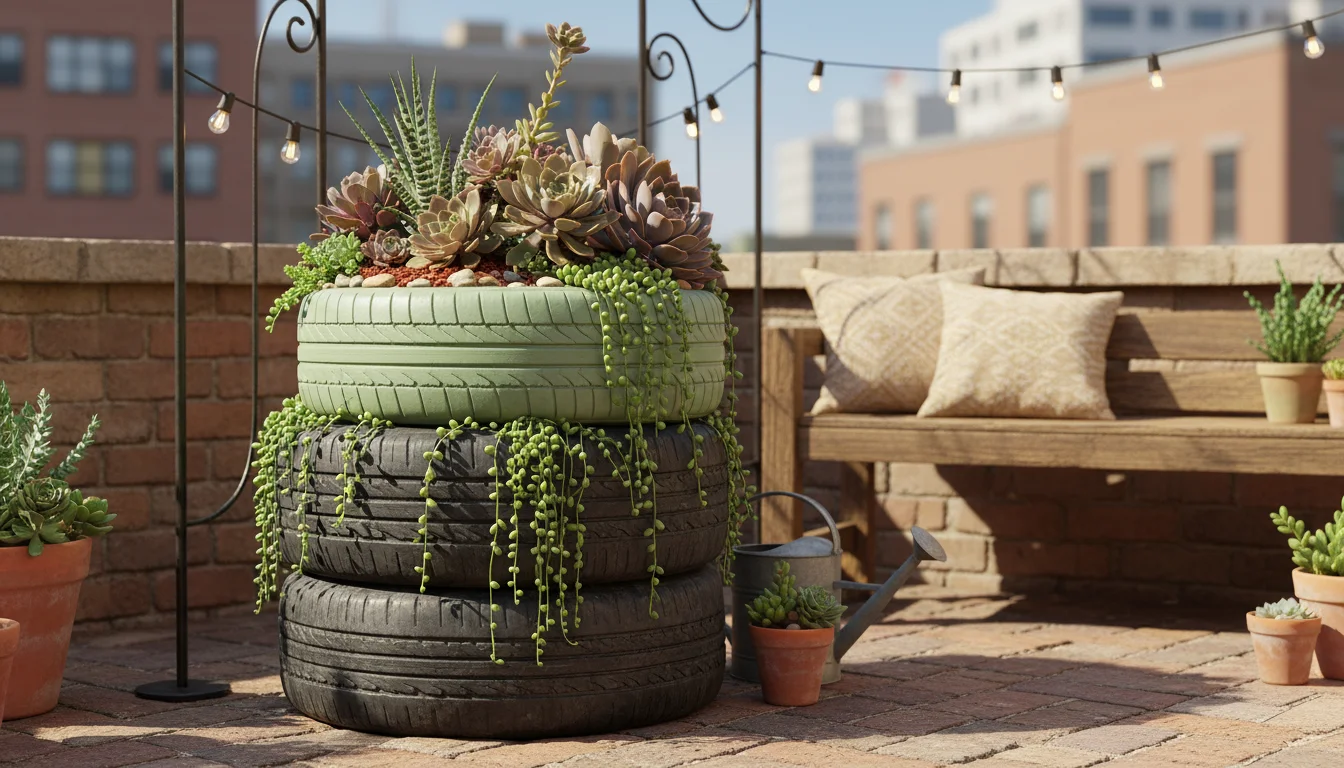
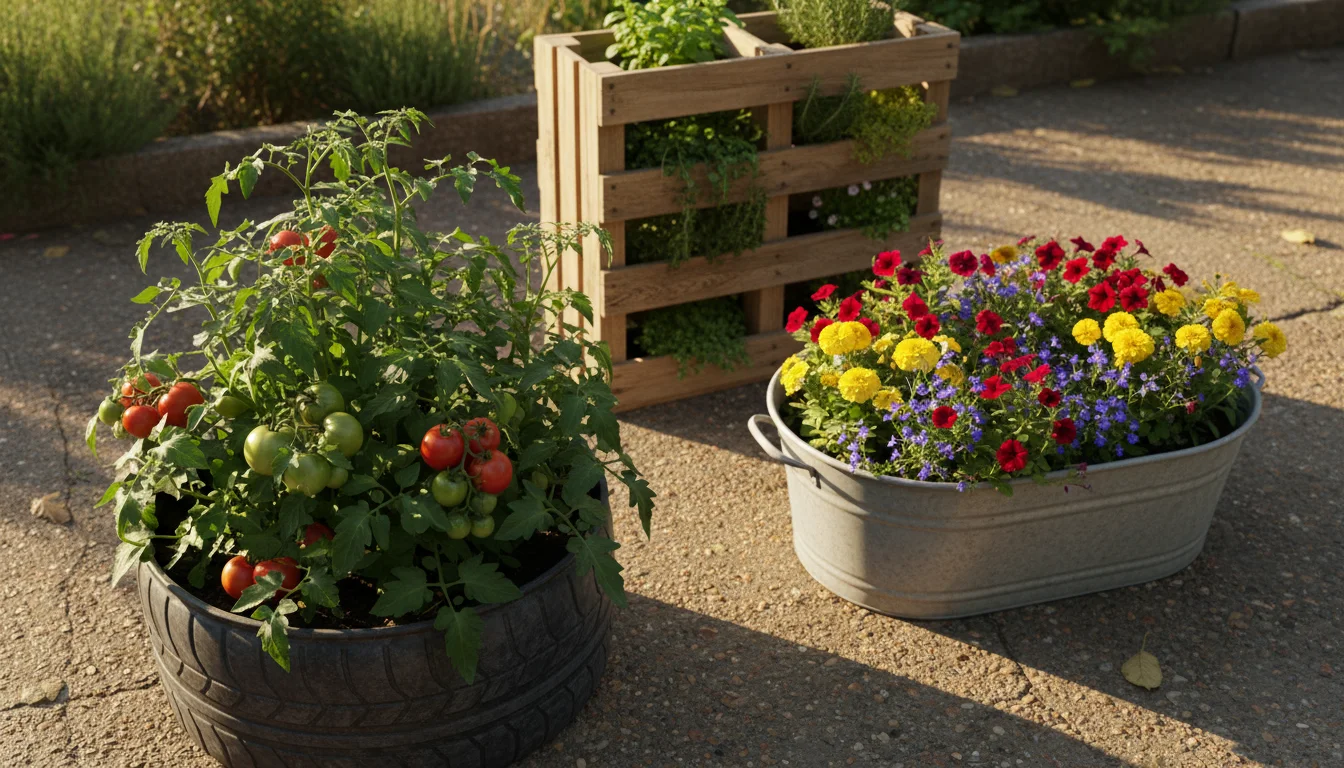
Old Tires: Bold and Economical Planters
Discarded tires offer a robust, long-lasting, and free source of planters. Their dark color absorbs heat, which can be beneficial in cooler climates, extending the growing season for some plants.
Tire Planter Tips:
- Cleaning: Wash tires thoroughly inside and out.
- Drainage: Tires naturally have an open bottom, but if you want to contain soil, cut out one side of the tire or place it on a base with drainage holes. You can also drill additional holes in the sidewall near the bottom.
- Stacking: Stack tires to create deeper planting areas. For added visual interest, stack them slightly askew.
- Paint: Painting tires with outdoor paint can reduce heat absorption if you live in a hot climate and adds a decorative touch. Light colors reflect heat.
- Safety: As mentioned, use tires for ornamental plants if you are concerned about chemical leaching into edible crops.
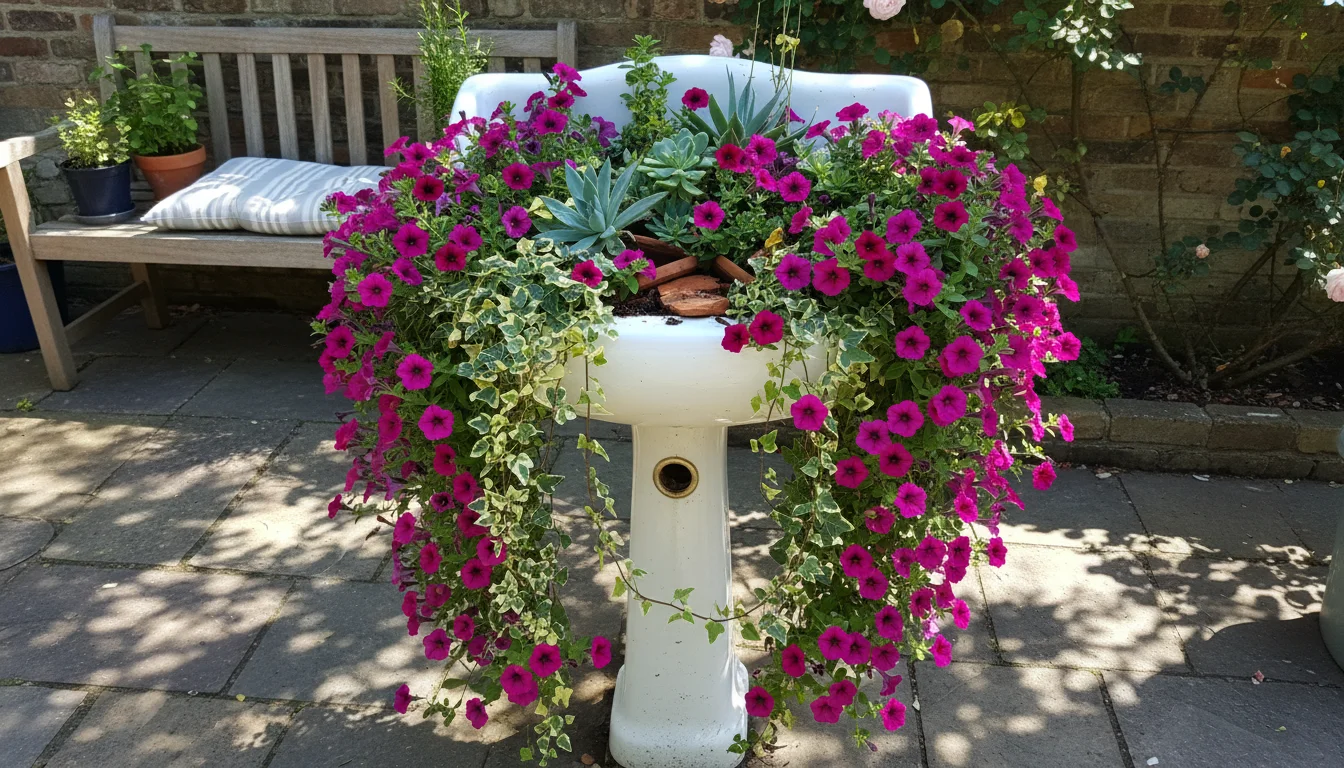
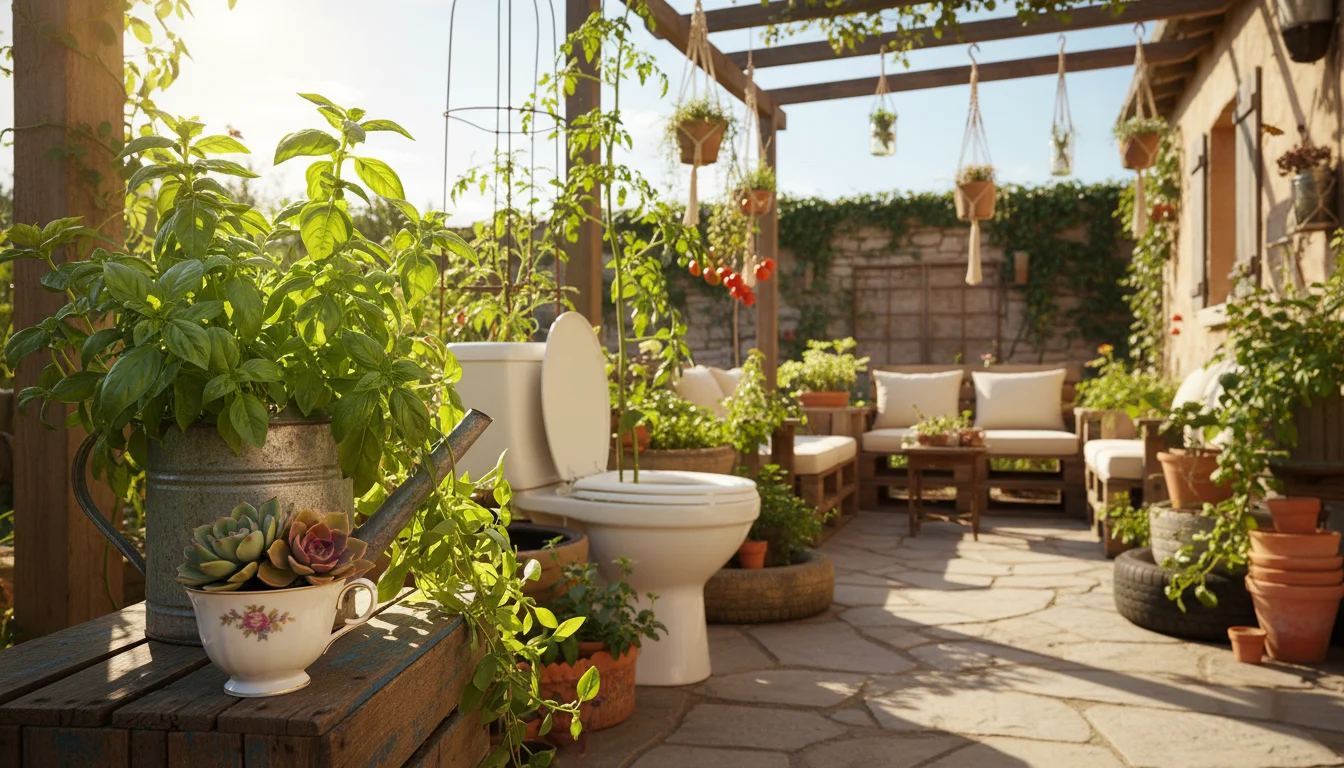
Old Sinks and Toilets: Quirky Planters with Character
For a truly unique statement, old sinks and toilets offer eccentric charm. Their existing plumbing holes provide perfect drainage.
Sink/Toilet Planters:
- Clean and Secure: Clean thoroughly. Ensure they are placed stably.
- Drainage: The drain opening functions perfectly for water egress.
- Fill and Plant: Fill the bowl or basin with potting mix. These are fantastic for growing succulents, small herbs, or vibrant annuals that spill over the edges, softening their unconventional look.
Creative Upcycling with Fabric, Burlap, and Natural Materials
Don’t overlook softer, more organic materials. Fabric and natural fibers offer flexible, breathable, and often biodegradable options for upcycled garden containers.
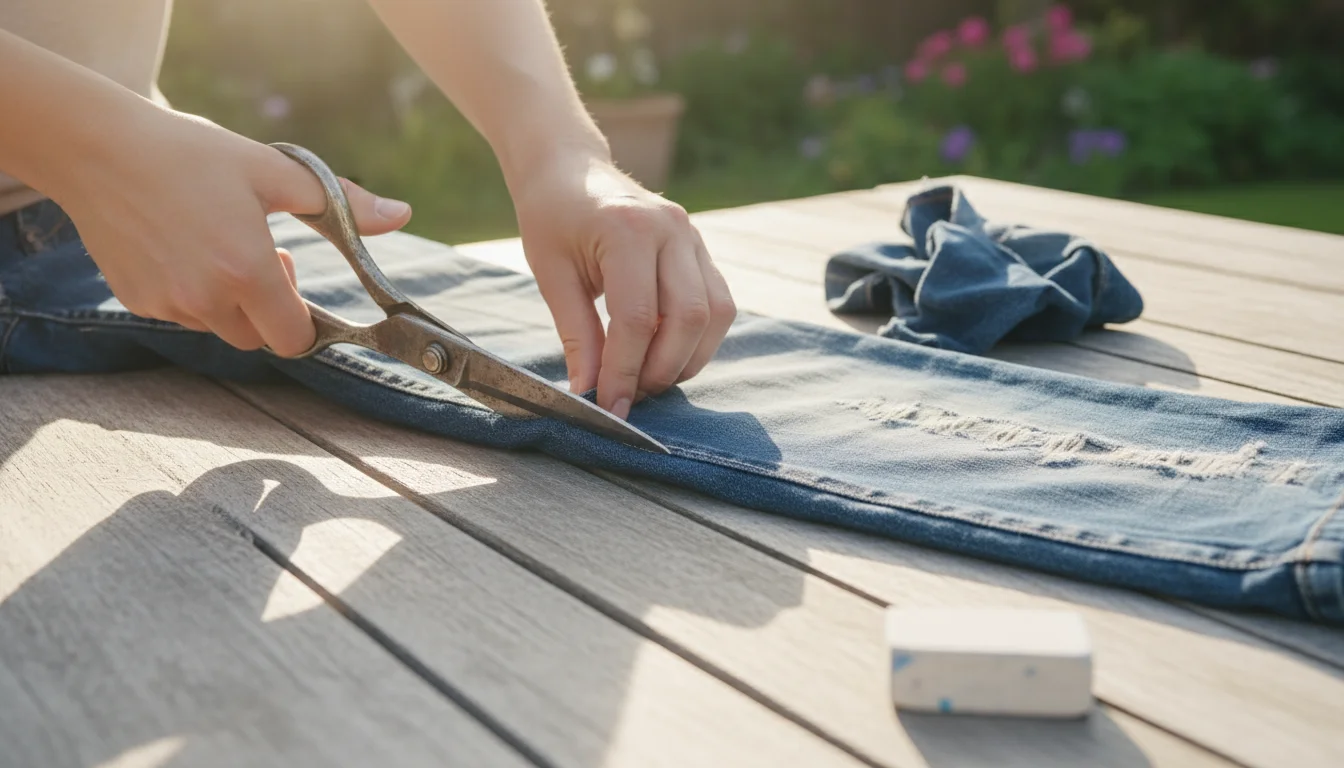
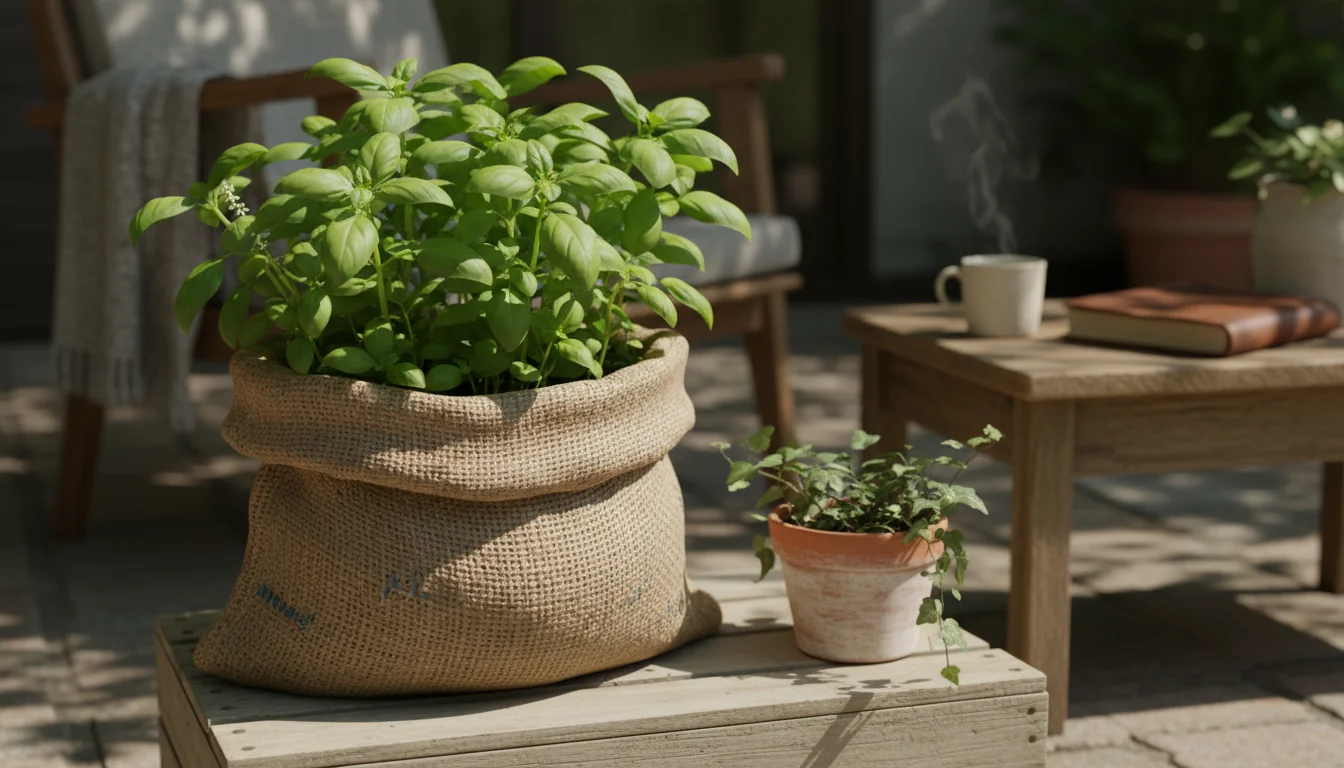
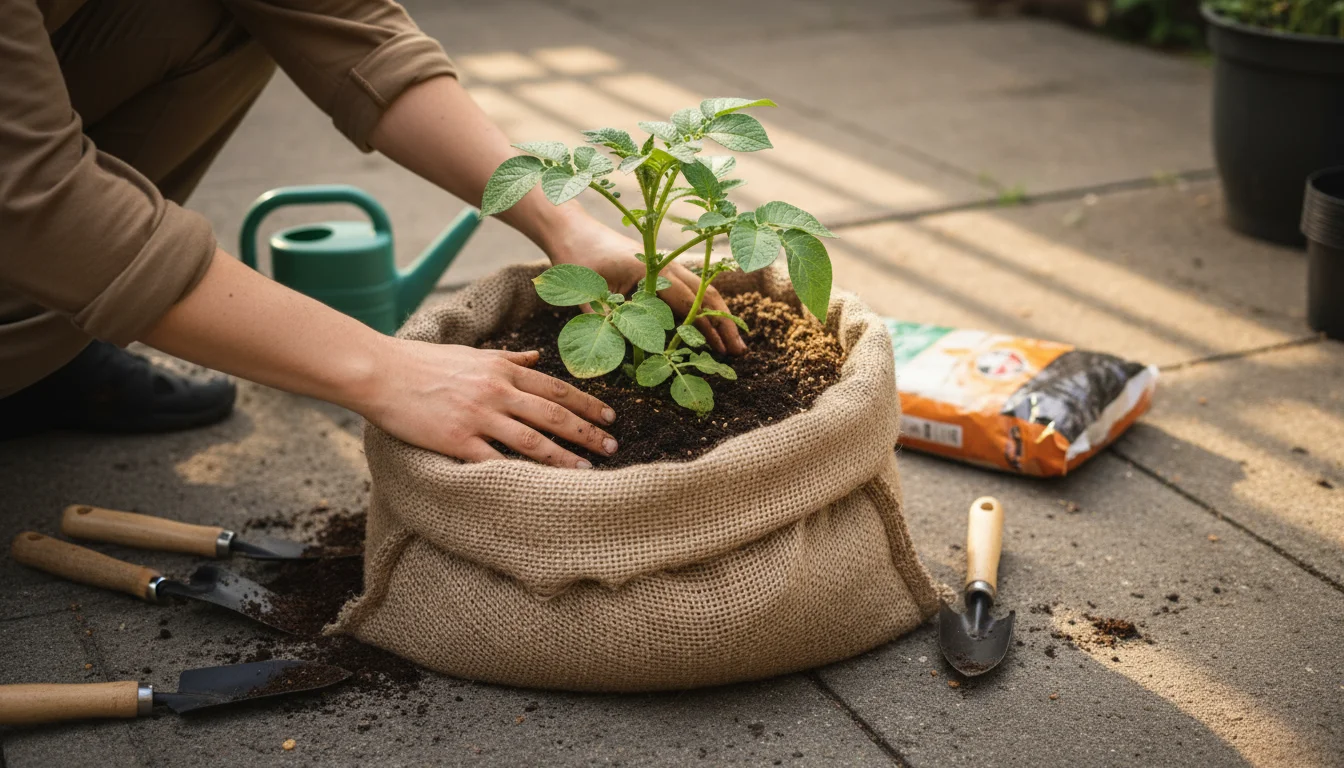
Grow Bags from Old Denim or Fabric Scraps
Old denim jeans, sturdy canvas bags, or even thick felt can be repurposed into fabric grow bags. These offer excellent aeration for roots and are lightweight, ideal for balconies.
Making Fabric Grow Bags:
- Choose Fabric: Select durable, breathable fabric. Old jeans are perfect.
- Cut and Sew: Cut the fabric into rectangular or circular shapes, depending on your desired bag size. Sew the sides and bottom together using a strong, weather-resistant thread. Leave the top open. Create a sturdy hem at the top.
- Handles (Optional): Sew on fabric handles made from reinforced strips of the same material for easy movement.
- Drainage: Fabric naturally drains, but you can add a few small slits in the bottom for extra measure.
- Planting: Fill with lightweight potting mix. These are great for potatoes, root vegetables, or even a small tomato plant.
Burlap Sacks for Potatoes and Root Vegetables
Burlap sacks, such as those used for coffee beans or rice, make excellent temporary or seasonal containers, particularly for growing potatoes. Their breathable nature prevents root diseases.
Burlap Sack Planters:
- Clean: Shake out any residue. If using coffee bean sacks, the faint smell dissipates with time and airing.
- Drainage: Burlap is porous. You can add a few small holes in the bottom if you want extra drainage.
- Rolling for Potatoes: For potatoes, start by rolling the sides down. Add about 6 inches of soil and plant your seed potatoes. As the plants grow, unroll the sides and add more soil, “hilling” the potatoes.
- Other Plants: Use burlap sacks for other root vegetables or even as decorative covers for plastic pots.
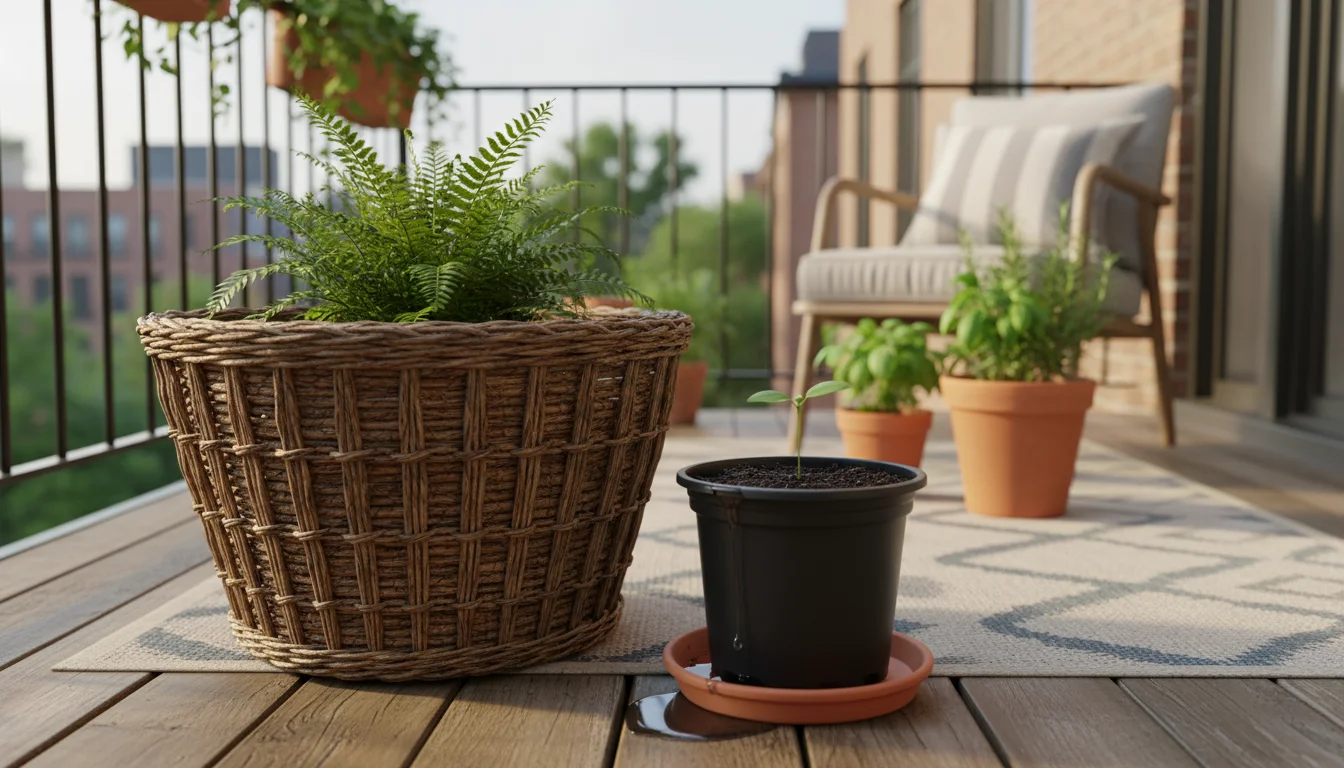
Woven Baskets: Decorative Cachepots with Liners
Attractive woven baskets, often found at thrift stores, can serve as beautiful decorative containers. Since they often lack proper drainage and degrade when directly exposed to moisture, use them as cachepots.
Using Woven Baskets:
- Select a Liner: Find a plastic pot that fits snugly inside the basket. This inner pot should have drainage holes.
- Prepare Inner Pot: Plant your desired plant in the plastic pot with potting mix.
- Nest: Place the planted plastic pot inside the woven basket.
- Watering: When watering, remove the inner pot, allow it to drain fully, then return it to the basket. This prevents moisture damage to the basket.
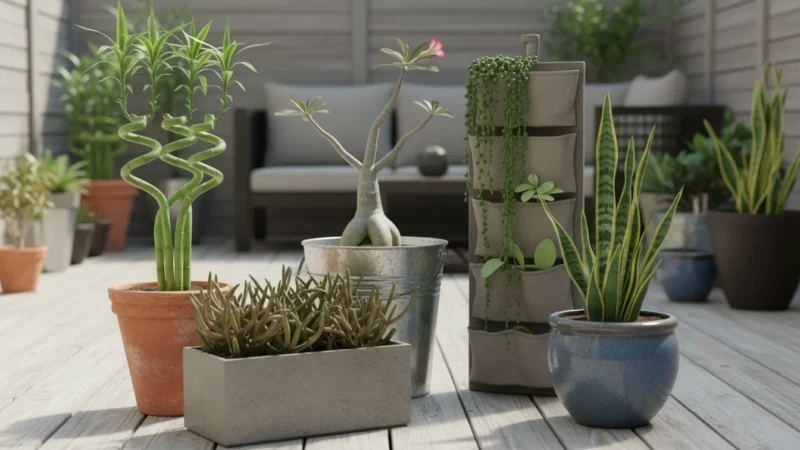
Selecting the Right Plants for Your Upcycled Planters
Choosing the correct plants for your upcycled garden containers ensures their success and complements your unique planter choices. Consider the container’s size, material, and your growing conditions.
Timing is everything when it comes to success, so consult our spring planting guide before placing your seeds in their new homes.
Container Size and Plant Needs
Match the plant’s mature size and root depth to your container. A common mistake involves putting a large plant into a small container. This restricts root growth, leads to frequent watering, and stunts plant development.
- Small Containers (Tin Cans, Teacups): Ideal for succulents, small herbs (thyme, oregano), moss, or propagation of cuttings. These plants have shallow root systems and low water requirements.
- Medium Containers (Milk Jugs, Colanders, Small Buckets): Suitable for most annual flowers, compact lettuce varieties, radishes, spinach, or individual culinary herbs like basil and cilantro.
- Large Containers (Laundry Baskets, Totes, Tires, Bathtubs): Perfect for larger vegetables such as tomatoes, peppers, bush beans, cucumbers (bush varieties), small fruit bushes, or ornamental grasses. These plants need ample root space and consistent moisture.
Material Considerations and Heat Absorption
The material of your upcycled container influences the soil temperature and moisture retention.
- Dark Materials (Tires, Dark Plastic): These absorb more solar radiation, making the soil warmer. This benefits heat-loving plants like tomatoes, peppers, and eggplants, especially in cooler climates. In very hot climates, consider painting dark containers a lighter color or providing shade to prevent root scorch.
- Light Materials (Light-Colored Plastic, Painted Metal): These reflect more light and keep the soil cooler. They suit plants that prefer cooler roots or regions with intense summer heat.
- Metal Containers: Metal conducts heat quickly, heating up and cooling down faster than other materials. This means soil in metal containers dries out quicker, often requiring more frequent watering.
- Fabric/Burlap: These porous materials offer excellent air circulation to the roots (air pruning) but also dry out quickly. Consider them for plants that tolerate slightly drier conditions or be prepared to water more frequently.
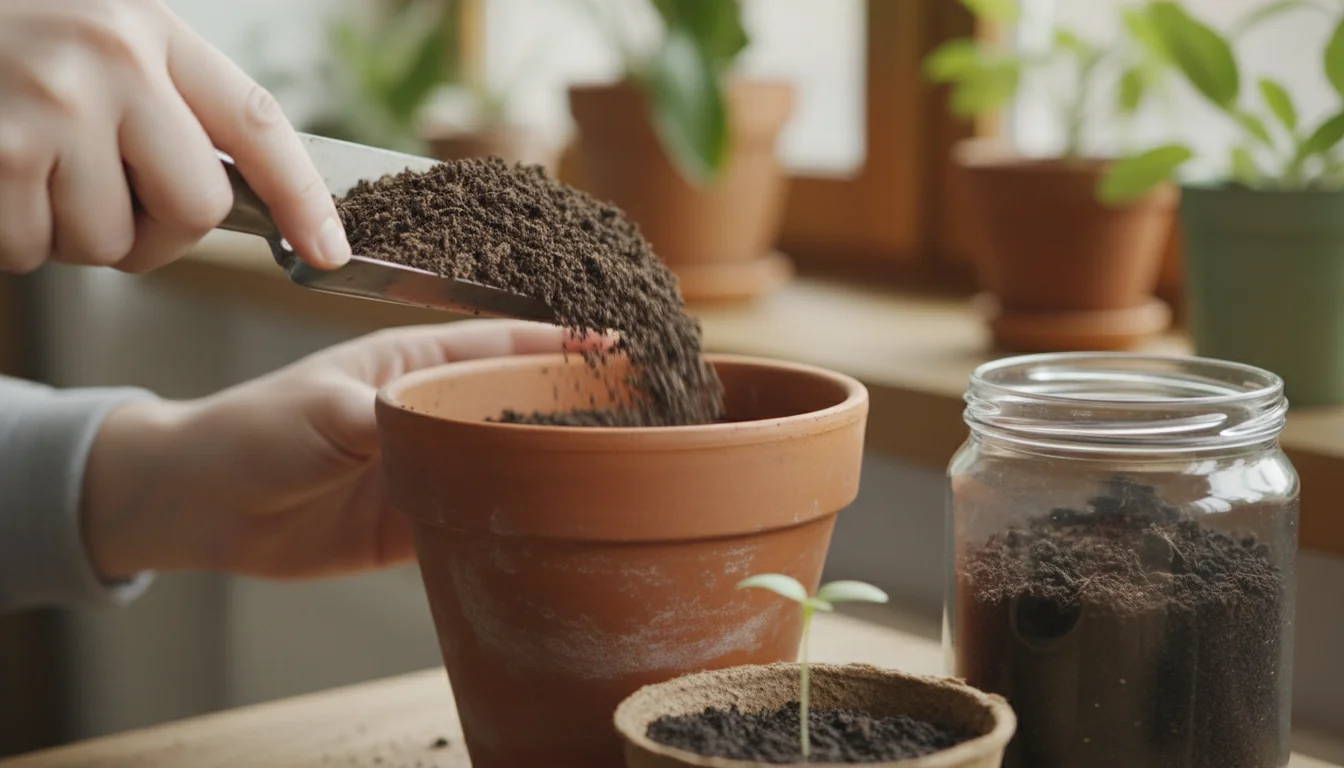
Soil Requirements for Container Gardening
Always use a high-quality potting mix specifically formulated for containers, not garden soil. Garden soil is too dense, compacts easily in pots, and does not provide adequate drainage or aeration for containerized plants. Potting mix is lighter, offers superior drainage, and retains moisture effectively. For specialized plants like succulents, use a succulent-specific potting mix with extra grit for even faster drainage.
Design Principles for Upcycled Gardens
Integrating your recycled planters into a cohesive design elevates your small space garden. Think about placement, height, and color to create visual interest.
- Transform your small space into a green oasis with these creative upcycled vertical garden ideas!
- Even the tiniest patio can bloom with a little ingenuity and some old tin cans and drawers.
- See how a little paint and repurposing can bring vibrant life to an urban outdoor space.
- Who knew discarded treasures could create such a charming and productive vertical garden?
Designing with Upcycled Containers: Aesthetics and Placement
Upcycled containers offer a unique opportunity to create a garden that reflects your personal style and maximizes your limited space. Thoughtful design transforms a collection of individual planters into a cohesive, inviting oasis.
Creating Visual Interest with Height and Grouping
Small spaces benefit immensely from varying heights. Avoid placing all your containers at a single level. Use crates, bricks, or even smaller upcycled items to elevate some planters. For instance, a small tin can herb garden could sit atop an old wooden stool, next to a larger plastic tote planted with tomatoes at ground level. This layered effect draws the eye upwards, making the space feel larger and more dynamic. Grouping containers with complementary colors or textures also creates a stronger visual impact than scattering them haphazardly. Grouping three containers of different sizes but similar materials often looks more intentional and aesthetically pleasing.
Color and Texture Coordination
Consider the natural colors of your upcycled materials. Rusty metals, weathered wood, or vibrant plastic each contribute to the overall palette. You can enhance this by painting some containers. Use a consistent color scheme, such as various shades of blue and green, or choose a few accent colors that pop against a neutral background. Textural variety also adds depth. Combine smooth plastic with rough burlap, or shiny metal with rustic wood. This interplay of color and texture creates a rich visual tapestry in your small garden.
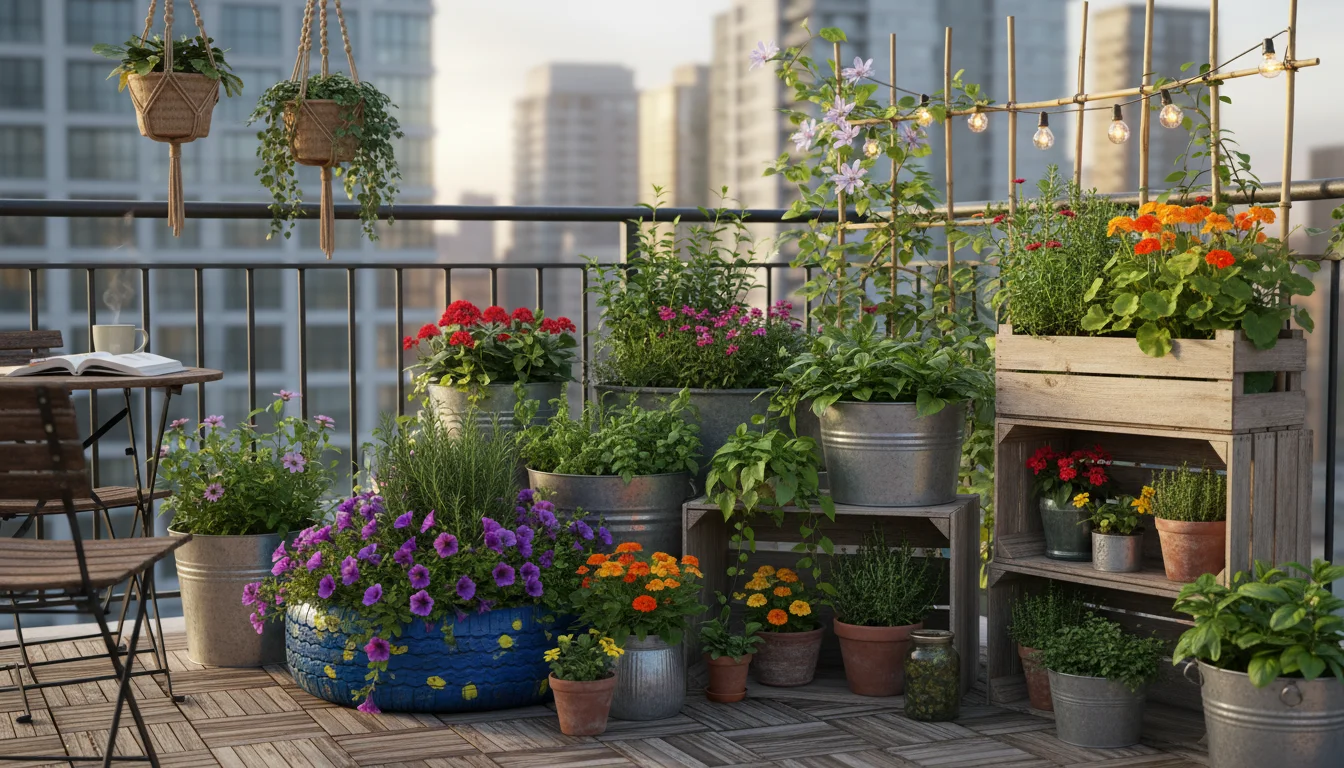
Vertical Gardening Solutions
Vertical space is invaluable in small gardens. Upcycled items excel here. An old wooden pallet leaned against a wall can become a framework for attaching small plastic bottles or tin cans, transforming into a living wall of herbs or strawberries. An over-the-door shoe organizer, with its individual pockets, becomes an instant vertical planter for succulents or small annuals. These solutions not only save precious floor space but also add a striking green backdrop to your balcony or patio.
Creating Focal Points
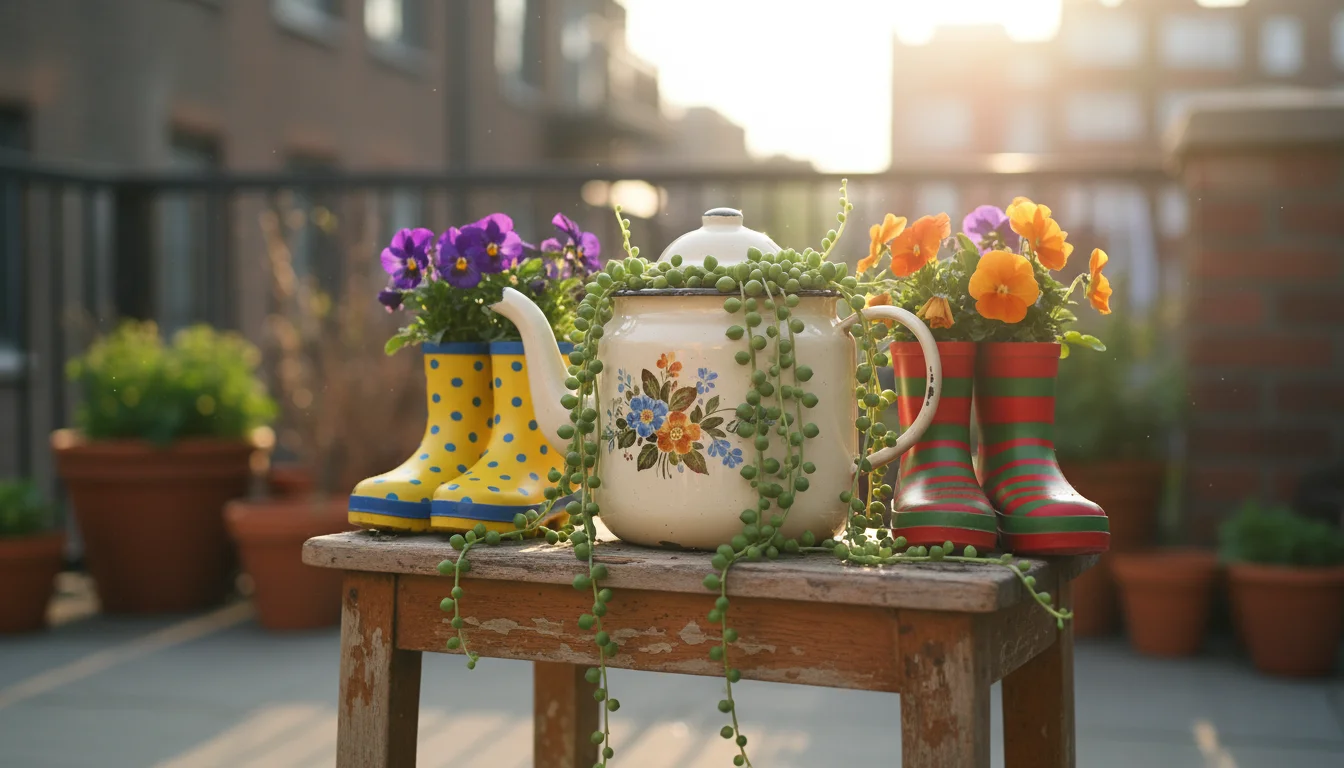
Every garden benefits from a focal point. A particularly unique or well-decorated upcycled container can serve this purpose. Perhaps it’s an elaborately painted old tire, a vintage teapot planted with delicate flowers, or a whimsical arrangement of old shoes. Place your focal point where it immediately draws attention, such as at the end of a pathway, in the center of a grouping, or directly visible from your main seating area. This creates a sense of intention and craftsmanship in your garden design.
Troubleshooting and Longevity: Keeping Your Upcycled Garden Thriving
While upcycling offers numerous advantages, specific challenges relate to using repurposed materials. Addressing these proactively ensures your recycled planters and plants remain healthy and vibrant for seasons to come.
Addressing Drainage Issues
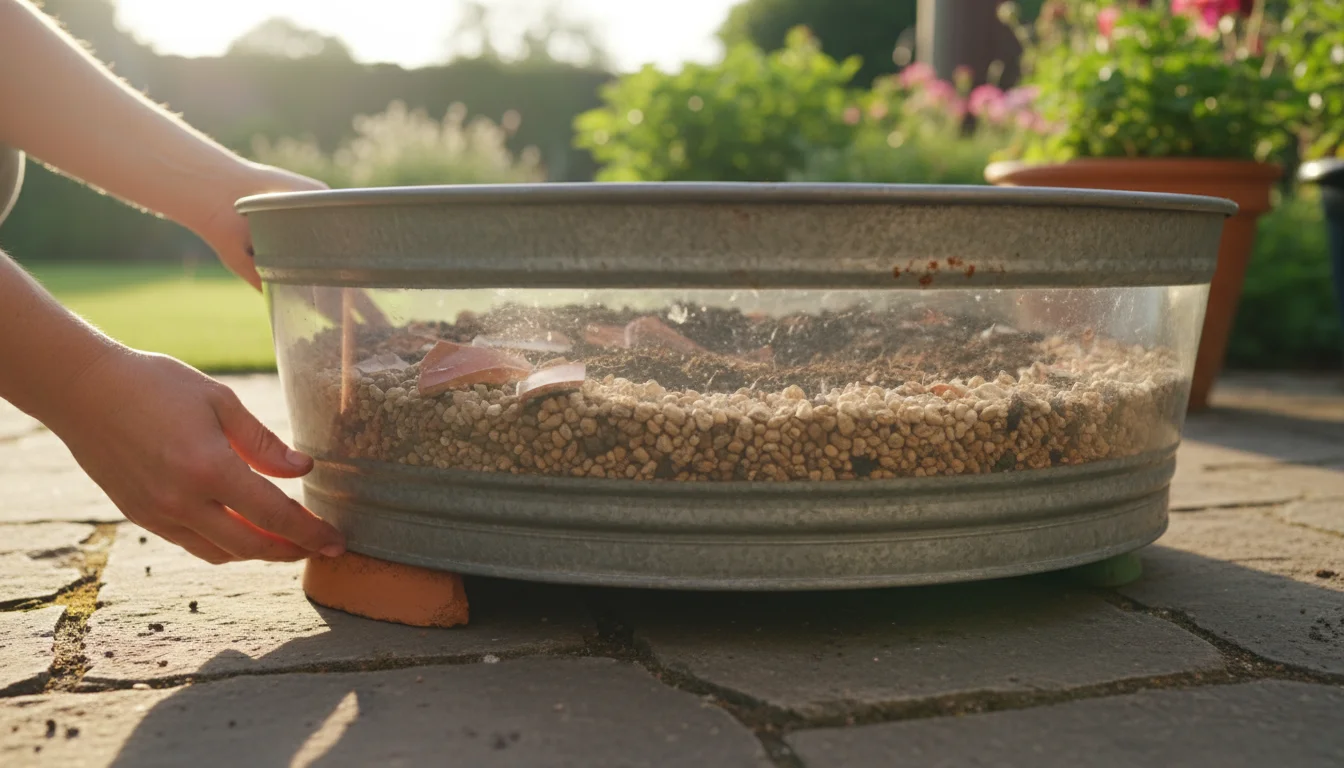
Even with drainage holes, some upcycled containers can present drainage challenges. Flat-bottomed containers may sit flush on a surface, blocking holes. Elevate them slightly using pot feet, bricks, or small pieces of wood to allow water to flow freely. For very large containers, consider adding a layer of coarse gravel or broken pottery shards at the bottom before adding soil. This creates a reservoir zone and prevents soil from washing out of the holes.
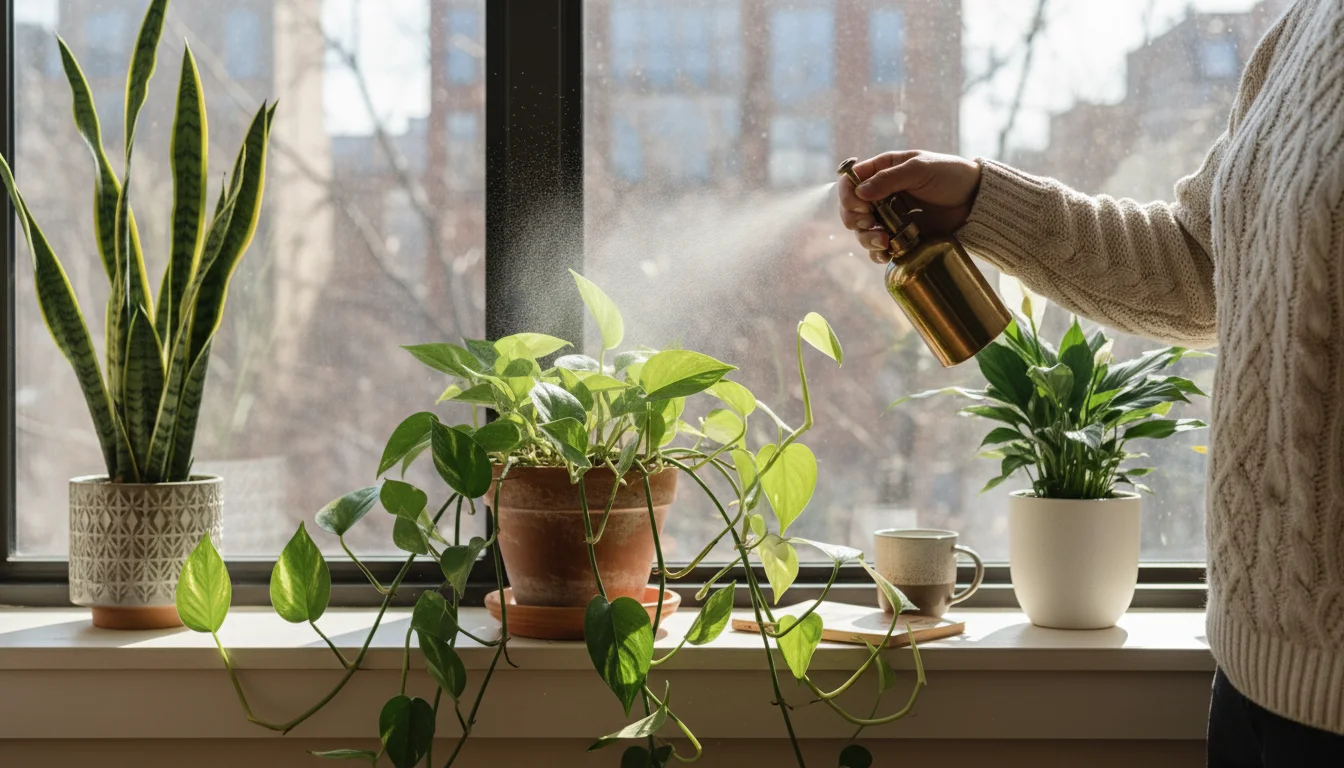
Watering Differences for Various Materials
The material of your container dictates its watering needs:
- Porous Materials (Fabric, Burlap, Wood): These materials breathe well and allow water to evaporate quickly, meaning you will need to water more frequently, sometimes daily in hot weather. They are less prone to root rot due to excellent aeration.
- Non-Porous Materials (Plastic, Metal, Glazed Ceramic): These retain moisture for longer periods, requiring less frequent watering. Monitor the soil moisture carefully to avoid overwatering, which can lead to root rot in poorly draining containers. Stick your finger 2 inches into the soil; if it feels dry, it’s time to water.
Adjust your watering schedule based on the container material, plant type, and prevailing weather conditions.
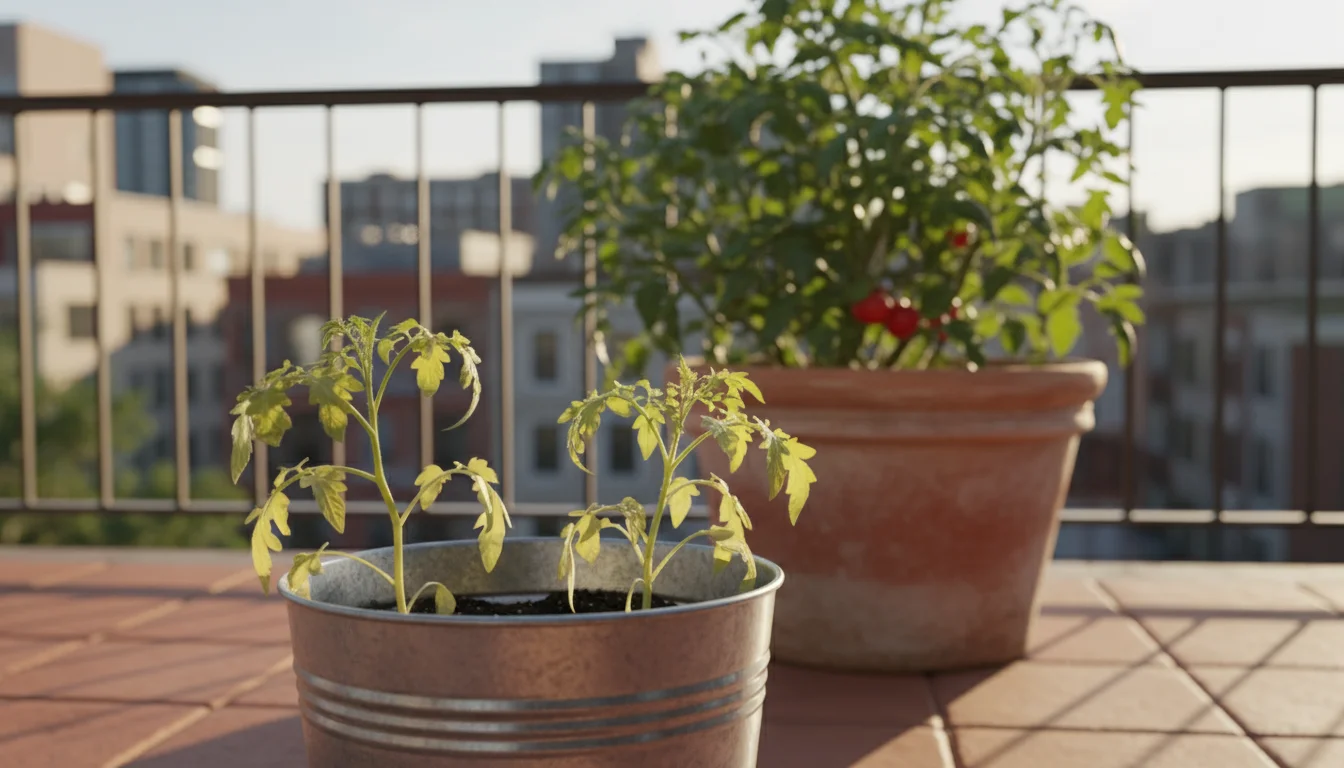
Dealing with Material Degradation
Upcycled materials are not always designed for outdoor longevity. Over time, exposure to sun, rain, and temperature fluctuations can cause degradation:
- Plastic: UV radiation makes plastic brittle, causing it to crack and break. Extend its life by painting plastic containers with UV-resistant outdoor paint.
- Wood: Untreated wood rots when constantly exposed to moisture. Line wooden containers with heavy-duty plastic sheeting or paint them with exterior wood sealant. Ensure drainage holes are also present in the liner.
- Metal: Untreated steel and iron will rust. While some rust provides a charming patina, excessive rust compromises structural integrity. Apply a rust-inhibiting primer and outdoor paint to extend the life of metal containers.
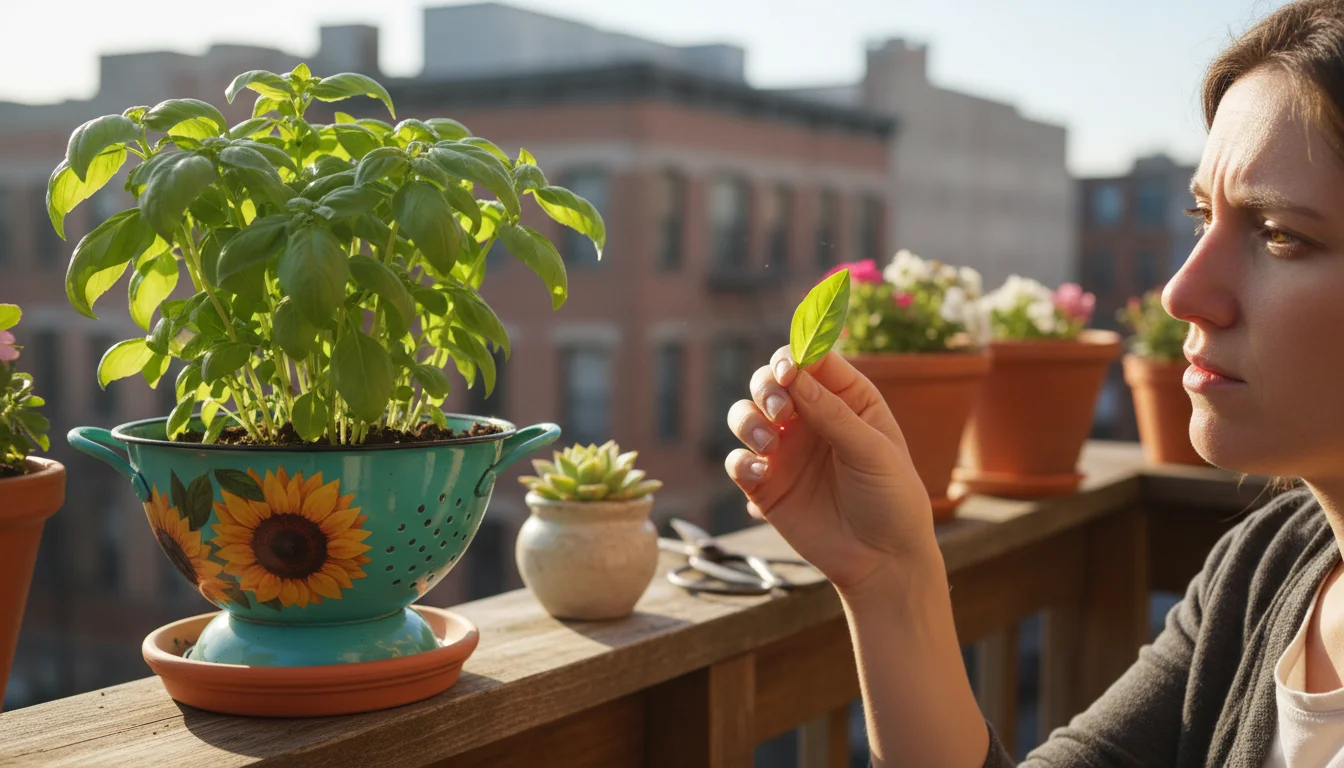
Pest Management in Upcycled Planters
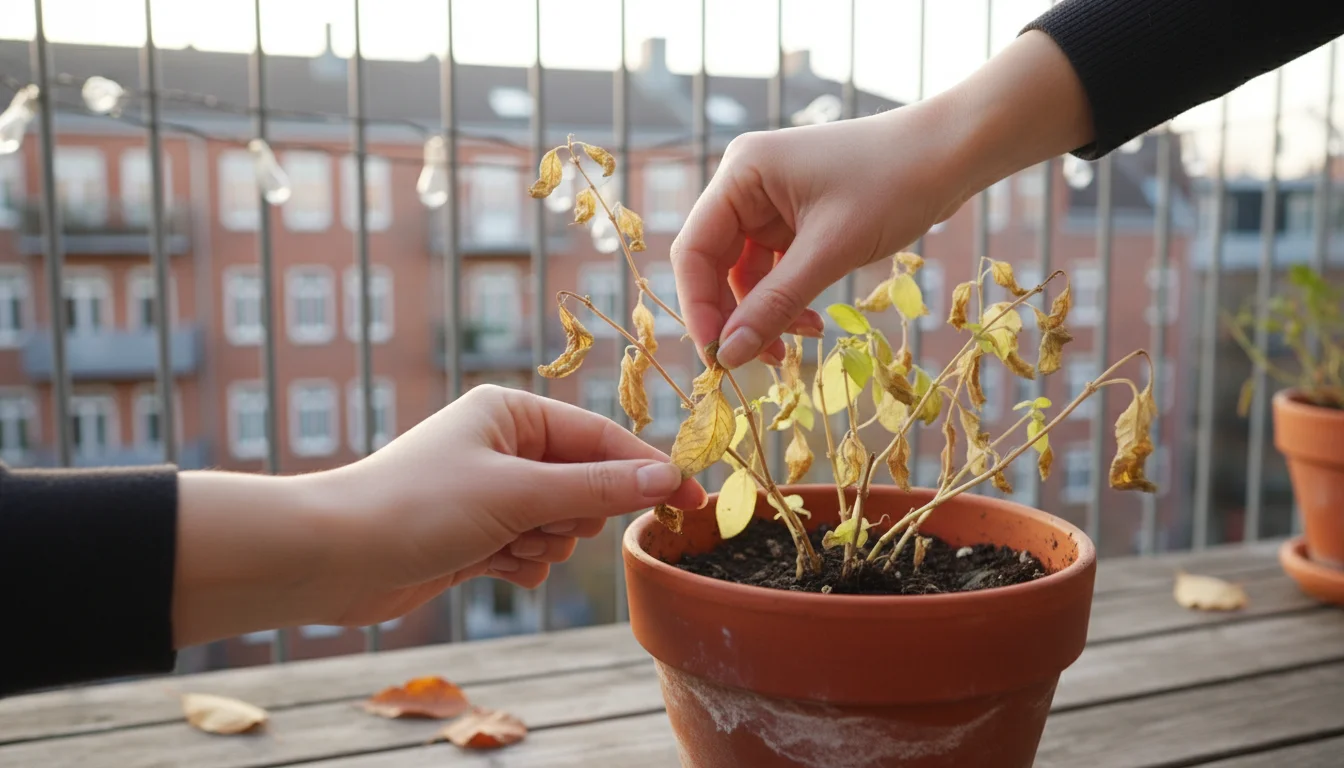
Any container garden can attract pests. Inspect your upcycled items thoroughly for existing pests before planting. Ensure you use fresh, sterile potting mix to avoid introducing soil-borne pests. Regular inspection of your plants helps catch infestations early. Use organic pest control methods such as insecticidal soap or neem oil if problems arise.
Common Mistakes to Avoid
Understanding potential pitfalls saves you time and effort:
- Lack of Drainage: As emphasized, this is the number one killer of container plants. Never skip creating drainage holes.
- Using Garden Soil: Garden soil compacts in containers, suffocating roots. Always use a purpose-made potting mix.
- Ignoring Material Safety: Do not grow edibles in containers that held toxic chemicals or have lead paint. When in doubt, stick to ornamental plants.
- Overcrowding: Giving plants adequate space ensures proper air circulation and root development. One tomato plant needs a large container, not three.
- Neglecting Cleaning: Unclean containers can harbor pathogens or chemical residues. Clean everything thoroughly.
Frequently Asked Questions
Can I grow edible plants in any upcycled container?
No, you should exercise caution when growing edible plants in upcycled containers. Prioritize containers made from food-grade plastic (recycling symbols #2 or #5), untreated metal, or natural wood. Avoid items that previously held harsh chemicals, motor oil, or lead paint, as these substances can leach into the soil and be absorbed by your plants. If you are unsure about an item’s history or material, use it for ornamental plants only.
How do I make drainage holes in tough materials like thick plastic or metal?
For thick plastic, use a power drill with a standard drill bit. Start with a smaller pilot hole, then switch to a larger bit (e.g., 1/4 to 1/2 inch). For metal, use a drill with a metal-specific drill bit. Always wear safety glasses when drilling. If you do not have a drill, a hammer and a large, sharp nail can punch holes in thinner metals like tin cans. For thick plastic, a heated metal skewer or soldering iron can melt holes, but do this in a well-ventilated area.
My upcycled wooden planter is starting to rot. How can I prevent this?
Wood naturally decomposes when exposed to constant moisture. To prevent rot, line the interior of your wooden planter with heavy-duty plastic sheeting or pond liner before adding soil. Ensure you also pierce the liner where your drainage holes are located in the wood, allowing water to escape. Painting the exterior of the wooden planter with an outdoor, weather-resistant sealant or paint also extends its life by repelling moisture.
What type of soil should I use in upcycled containers?
Always use a high-quality potting mix specifically formulated for containers. Do not use garden soil. Potting mix is lighter, provides better aeration, drains efficiently, and retains moisture appropriately for plants grown in confined spaces. Garden soil is too dense, compacts easily, and lacks the necessary drainage and air pockets crucial for healthy container plant roots.
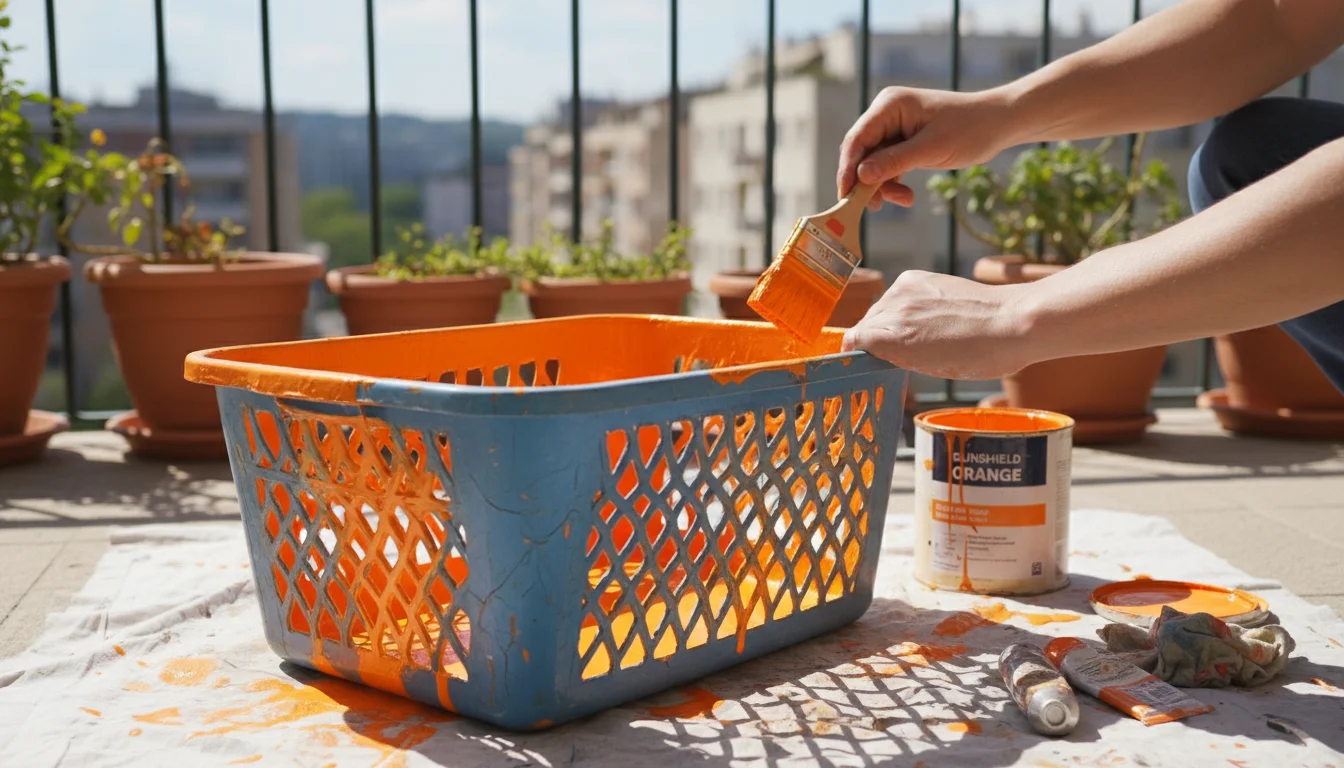
Can I paint my upcycled containers? What kind of paint is safe?
Yes, you can paint your upcycled containers to add color and extend their lifespan. Use exterior-grade, weather-resistant paints specifically designed for outdoor use. Acrylic or latex exterior paints work well. For containers that will hold edible plants, ensure the paint is labeled as non-toxic and lead-free. Painting can also protect certain materials, like plastic from UV degradation or metal from rust, if you use appropriate primers.
For trustworthy gardening information, visit: Missouri Native Plant Society, Wild Ones — Native Plants, Natural Landscapes, Pollinator Partnership and The Xerces Society for Invertebrate Conservation. These organizations provide expert, research-based advice for gardeners at all levels.
Disclaimer: This article is for informational purposes only and is not a substitute for professional gardening advice. Always consult local extension services or horticulture experts for region-specific guidance.

Leave a Reply