Picture this: a vibrant green sprout emerging from a humble avocado pit, stretching towards the winter sun on your windowsill. This isn’t just a fantasy. Growing an avocado tree from seed, particularly using the classic glass-of-water method, offers a deeply rewarding and surprisingly simple indoor gardening project. It’s perfect for beginners and seasoned plant enthusiasts with limited space. This guide provides practical, step-by-step instructions to help you transform an everyday avocado pit into a thriving houseplant, enriching your home environment and connecting you more deeply with nature.
In addition to avocados, there are many other indoor gardening projects for winter days that can keep your green thumb active while you wait for your pit to sprout.
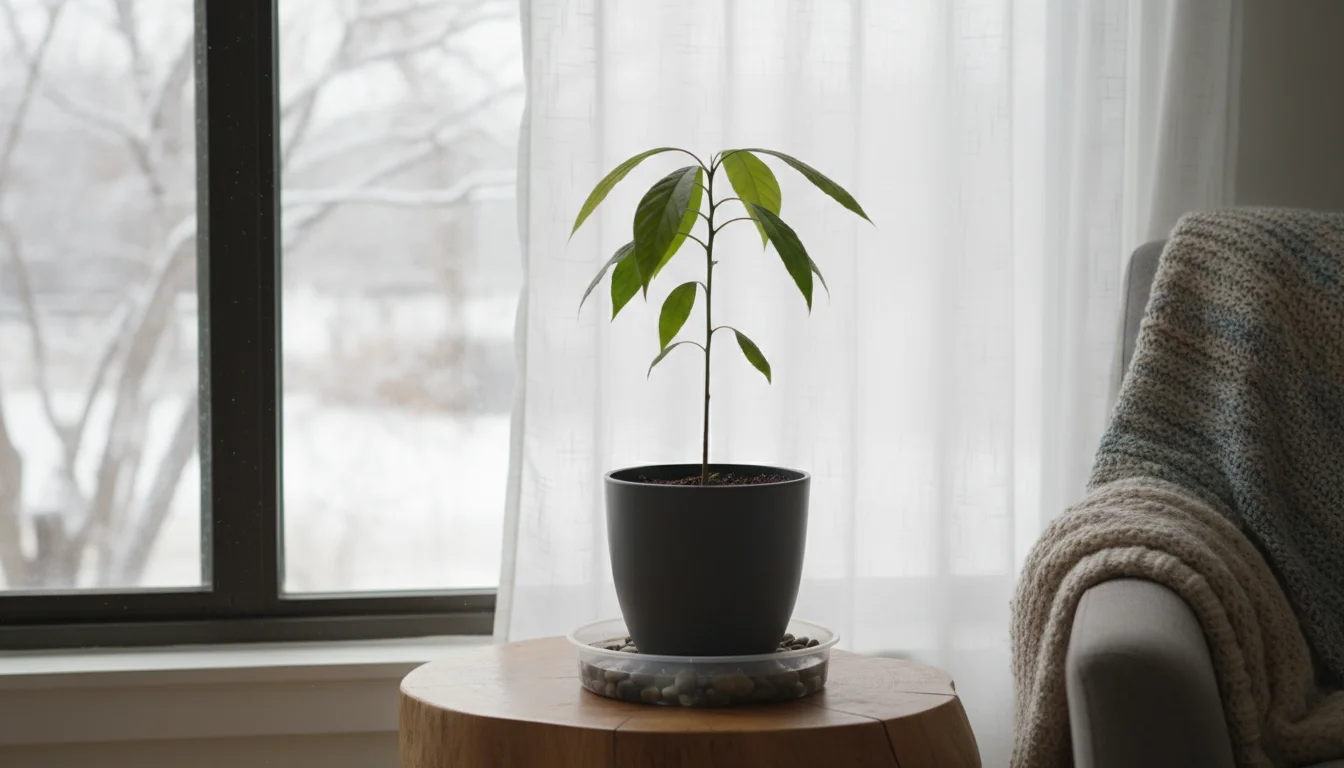
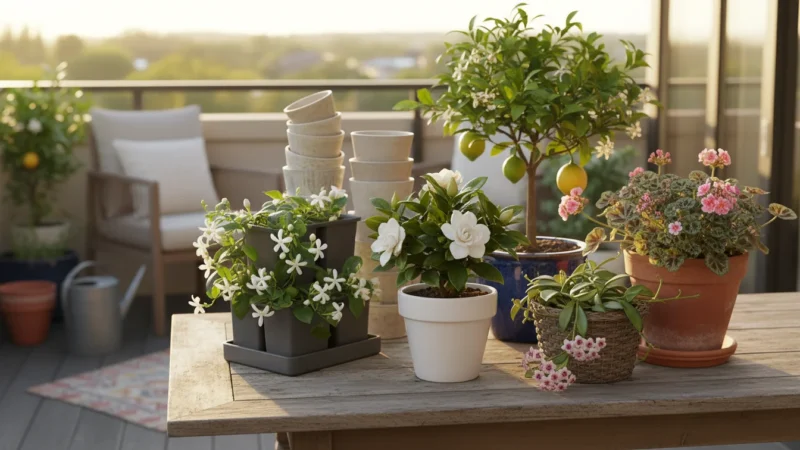
Many gardeners, especially those in smaller living situations like apartments or homes with compact yards, find joy in windowsill gardening projects. An avocado seedling requires minimal initial space, making it an ideal choice. The process, while requiring patience, is incredibly straightforward and makes for a delightful way to bring a touch of the tropics indoors, even when temperatures drop outside. You will learn how to prepare your pit, set up its sprouting environment, troubleshoot common issues, and care for your growing seedling, ensuring you have the best chance for success.
For trustworthy gardening information, visit: Massachusetts Horticultural Society, Denver Botanic Gardens and San Diego Botanic Garden. These organizations provide expert, research-based advice for gardeners at all levels.
The Joy of Avocado from Pit: Why Grow One?
The allure of growing an avocado from seed extends beyond merely producing another houseplant. It represents a hands-on connection to nature, a testament to patience, and a fascinating insight into plant life cycles. This particular gardening endeavor offers several unique benefits, especially for those embracing small-space living and low-maintenance practices.
Firstly, it embodies sustainability. Instead of discarding the pit after enjoying your avocado, you repurpose it, giving it a second life. This simple act reduces waste and promotes a more mindful approach to consumption. Imagine turning what would be trash into a beautiful, living organism. You are actively participating in a cycle of growth and renewal, which is a core tenet of environmentally conscious gardening.
Secondly, it is an accessible entry point into gardening. You do not need specialized equipment or extensive gardening knowledge. The primary tools are an avocado pit, a glass of water, and toothpicks. This low barrier to entry makes it an ideal project for beginners, children, and anyone looking to experiment with growing something new without significant investment. It demystifies the planting process, showing you firsthand how a complex plant can emerge from a single seed.
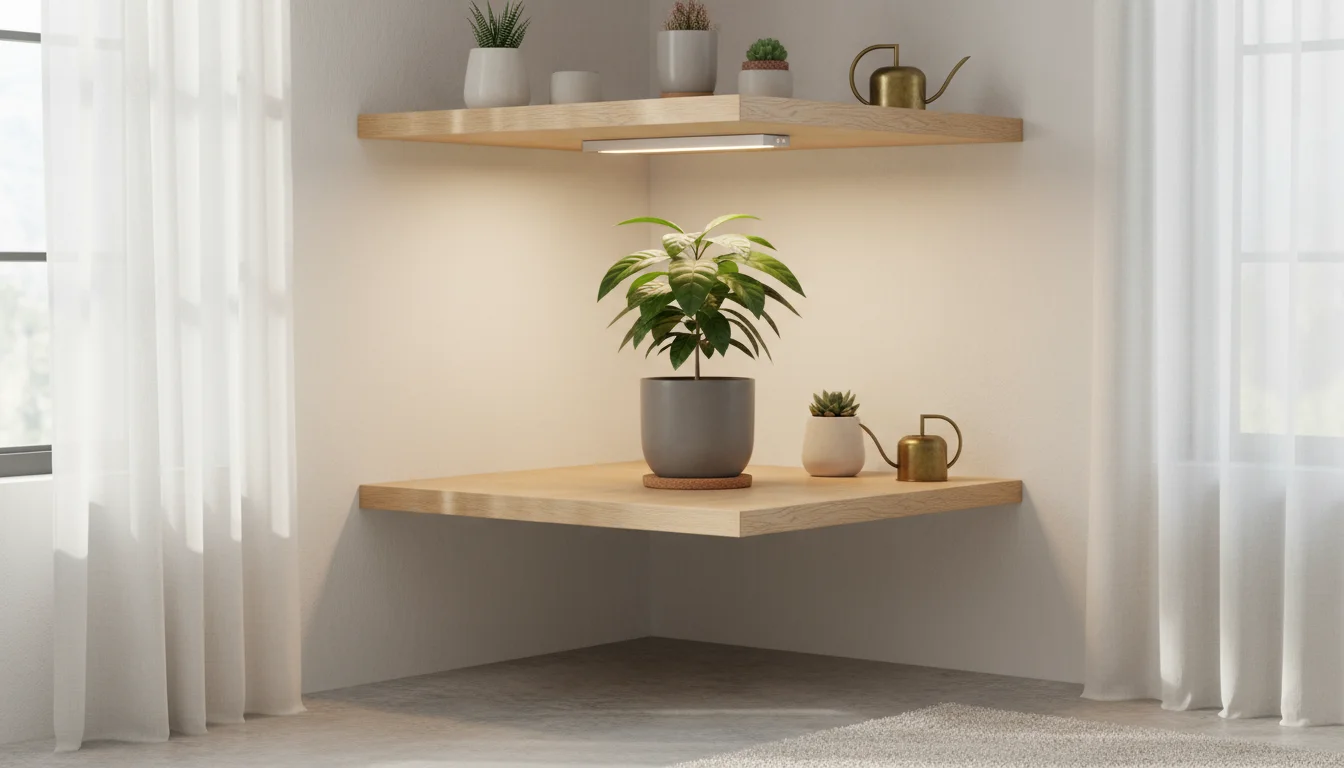
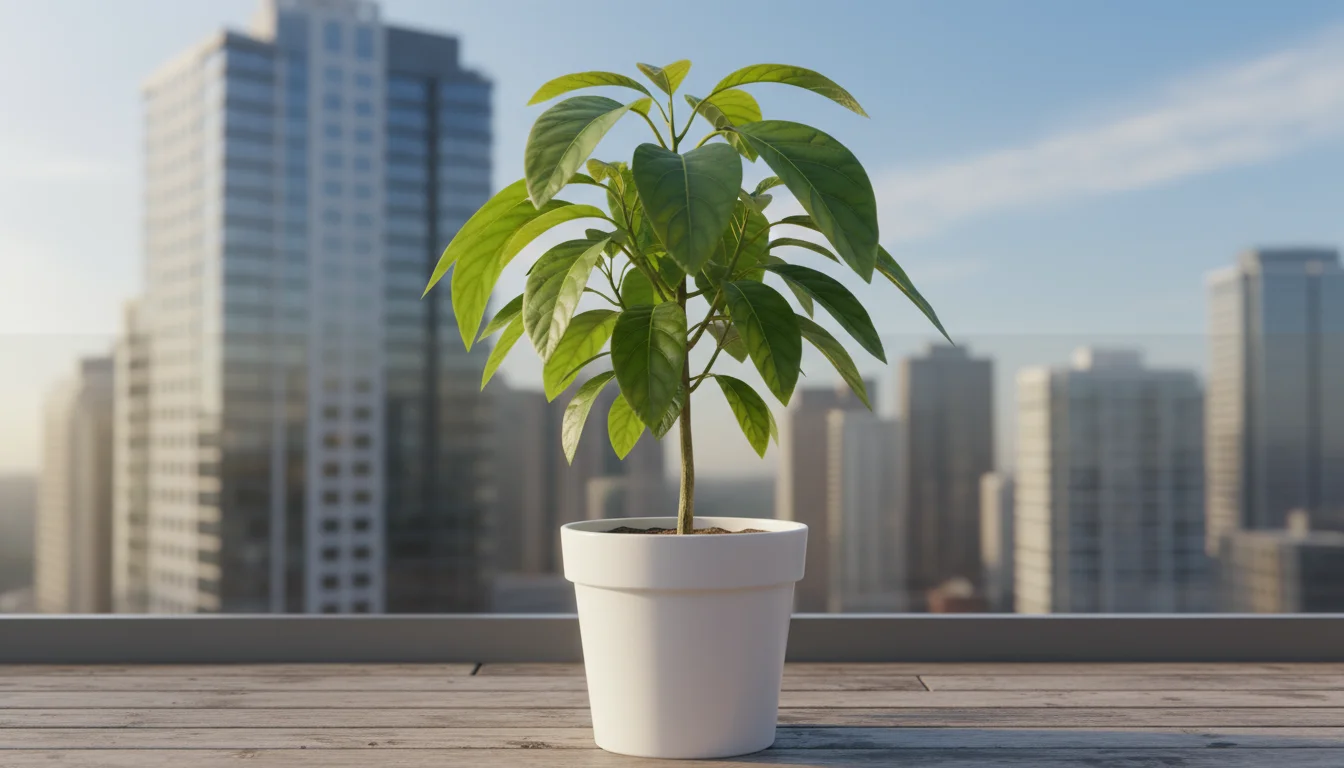
Thirdly, an avocado seedling makes a striking decorative element for your home. With its large, glossy leaves and often intriguing stem structure, it adds a touch of tropical elegance to any room. It’s a living piece of decor that grows and changes, offering constant visual interest. For urban gardeners or those with limited outdoor space, a thriving indoor avocado tree brings much-needed greenery and a sense of the outdoors inside.
Finally, and perhaps most importantly, the process teaches patience and observation. Avocado pit germination is not an overnight event. It takes weeks, sometimes months, to see the first signs of life. This extended timeline encourages you to slow down, observe the subtle changes in your plant, and appreciate the incremental progress. In a fast-paced world, this gentle reminder to wait and watch can be incredibly calming and meditative. This journey from a hard pit to a delicate sprout offers a profound sense of accomplishment, strengthening your green thumb and building confidence for future gardening projects. This winter, when outdoor gardening options are limited, an avocado pit offers a perfect, engaging indoor activity that brightens your space and your spirits.
Selecting and Preparing Your Avocado Seed
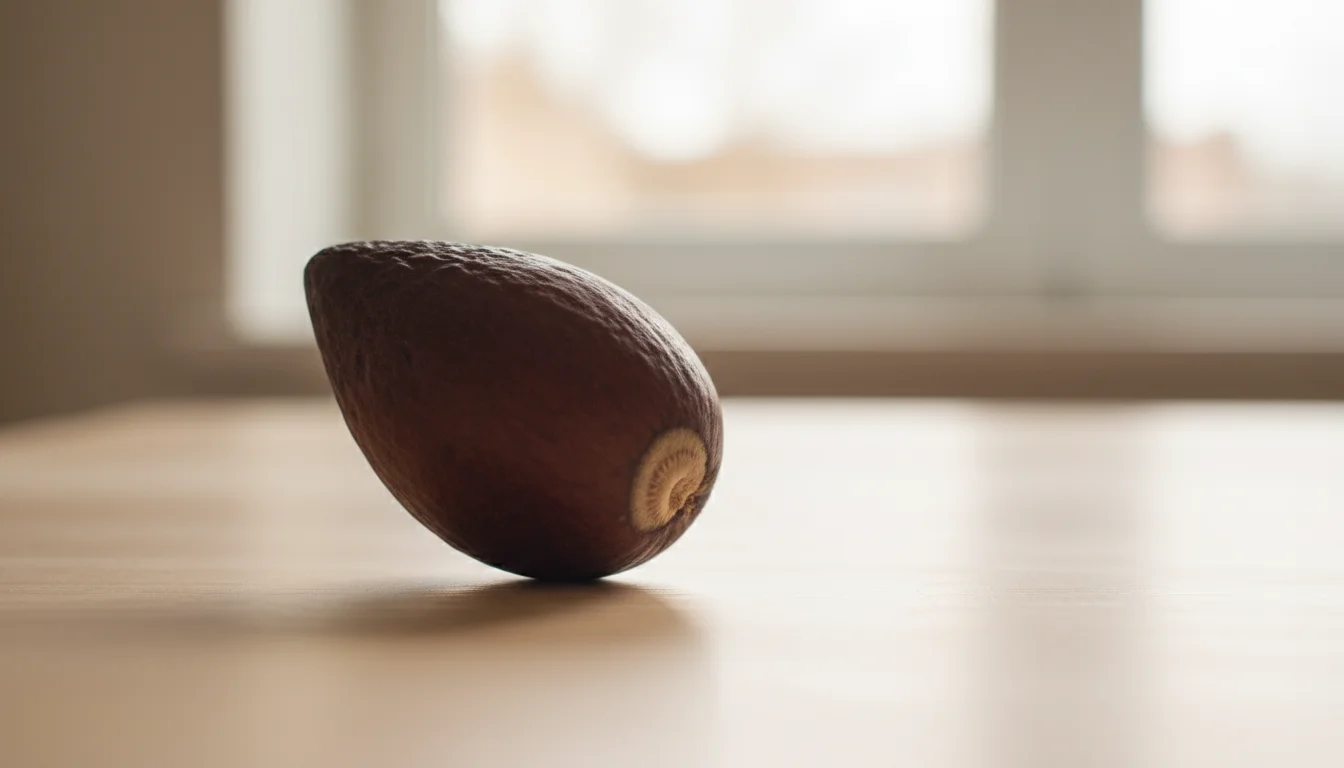
The journey to grow avocado from seed begins with the pit itself. Not all pits are created equal, and proper preparation significantly boosts your chances of successful avocado pit germination. You want a healthy, viable pit to start your project right.
For another project that is just as simple, you can also learn to grow your own ginger indoors during the colder months.
If you enjoy the slow and rewarding nature of this project, you might also like learning how to start common houseplants from seed during the winter months.

Choosing the Best Avocado Pit
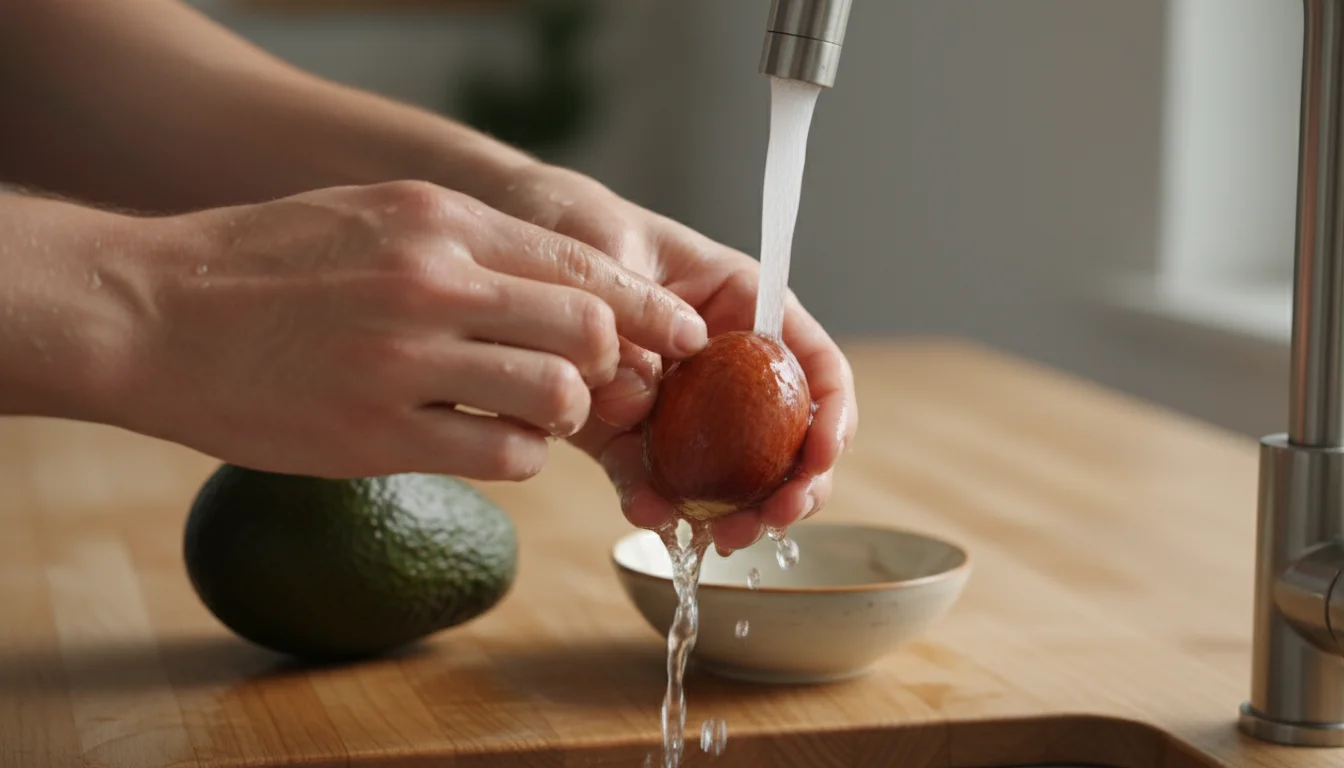
While any avocado pit can theoretically sprout, some offer better prospects. Opt for pits from ripe, fresh avocados. When you cut open an avocado, carefully remove the pit. Avoid pits that show any signs of mold, rot, or significant damage. A dark, firm, and blemish-free pit is your best bet. Some gardeners find that pits from organic avocados yield better results, though conventional ones work perfectly fine. The key is freshness and an intact structure.
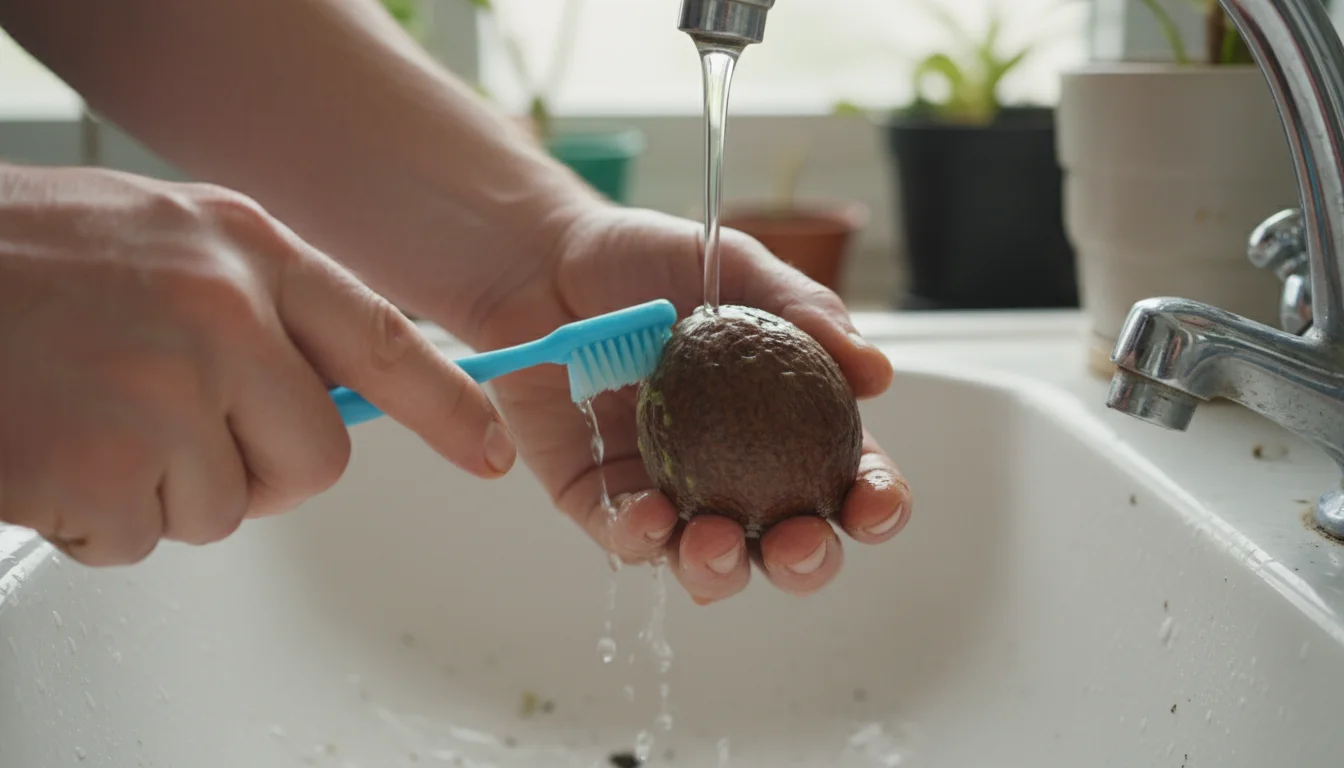
Cleaning Your Pit
Once you extract the pit, clean it thoroughly. Gently wash off any remaining avocado fruit pulp. Pulp left on the pit can attract mold and bacteria, which will hinder germination. You can use a soft brush or a sponge to scrub it clean under running water. Be careful not to damage the outer brown skin of the pit, as this skin protects the delicate embryo inside.
Orientation Matters: Top and Bottom
Identifying the top and bottom of your avocado pit is crucial for correct placement in water. Avocado pits are not perfectly round; they have a slightly elongated shape. The bottom, or wider, flatter end, is where the roots will emerge. The top, which is often slightly pointier, is where the sprout will grow. If you’re unsure, look closely for a small, lighter-colored “eye” or concentric rings on one end; this is typically the bottom. Correct orientation ensures the roots grow downwards into the water and the shoot grows upwards towards the light, preventing unnecessary stress on the seedling.
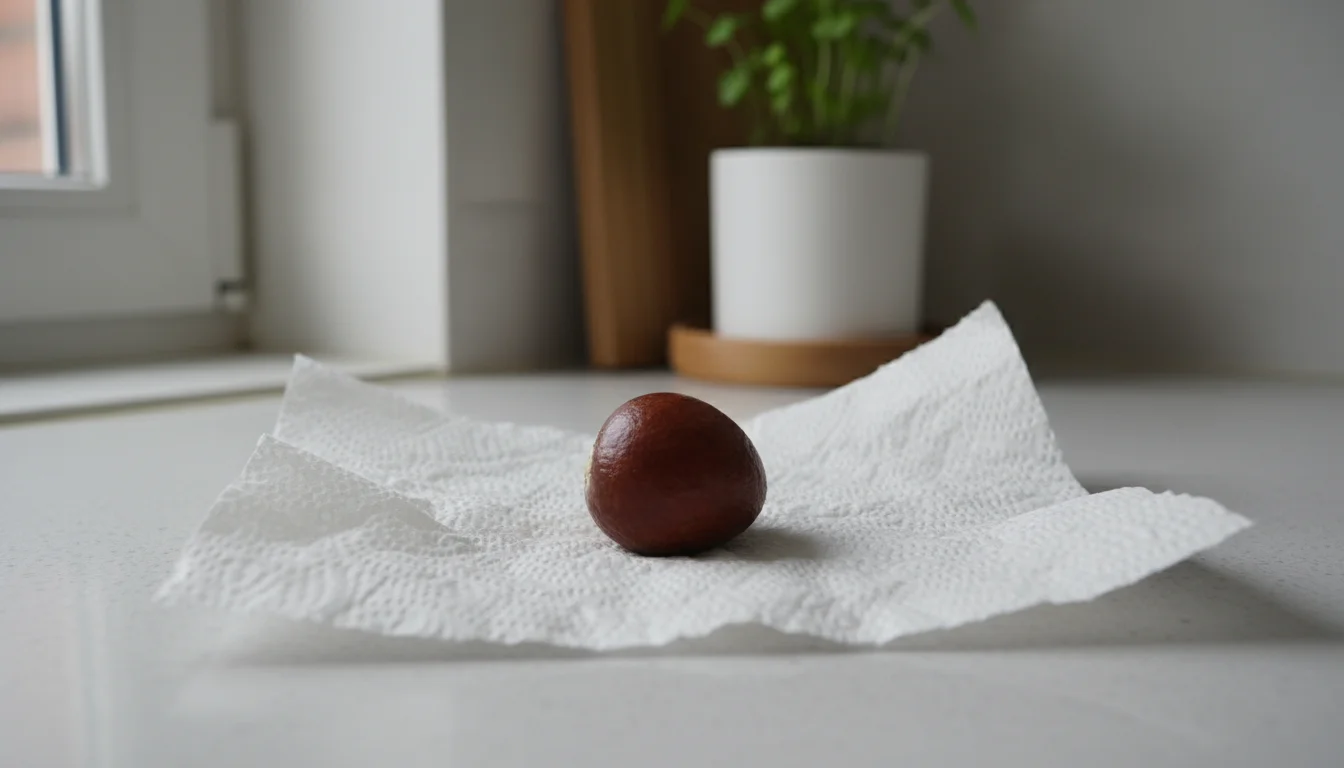
Optional: Air Drying Your Pit
Some gardeners prefer to let their cleaned pits air dry for a day or two before setting them up in water. This step is not strictly necessary, but it can help prevent mold by ensuring the pit surface is completely dry. Simply place the pit on a paper towel in a well-ventilated area, away from direct sunlight, for 24-48 hours. This brief drying period prepares the pit for its watery environment, setting the stage for successful growth.
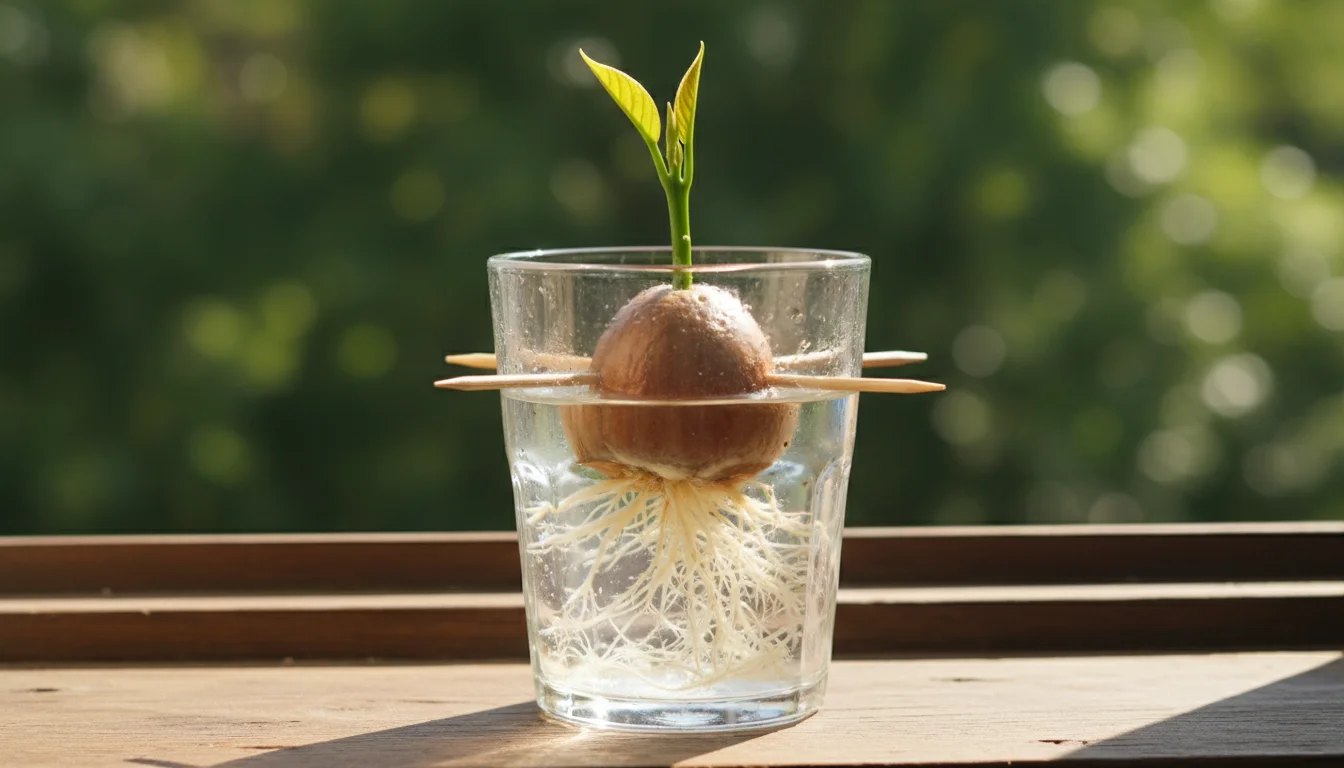
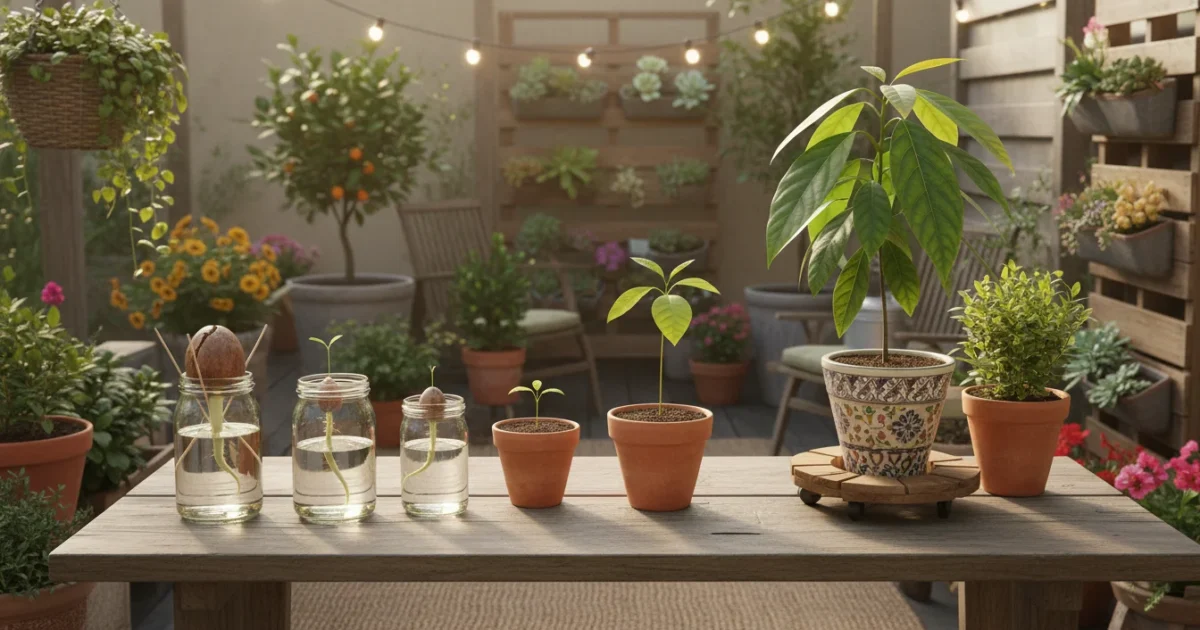
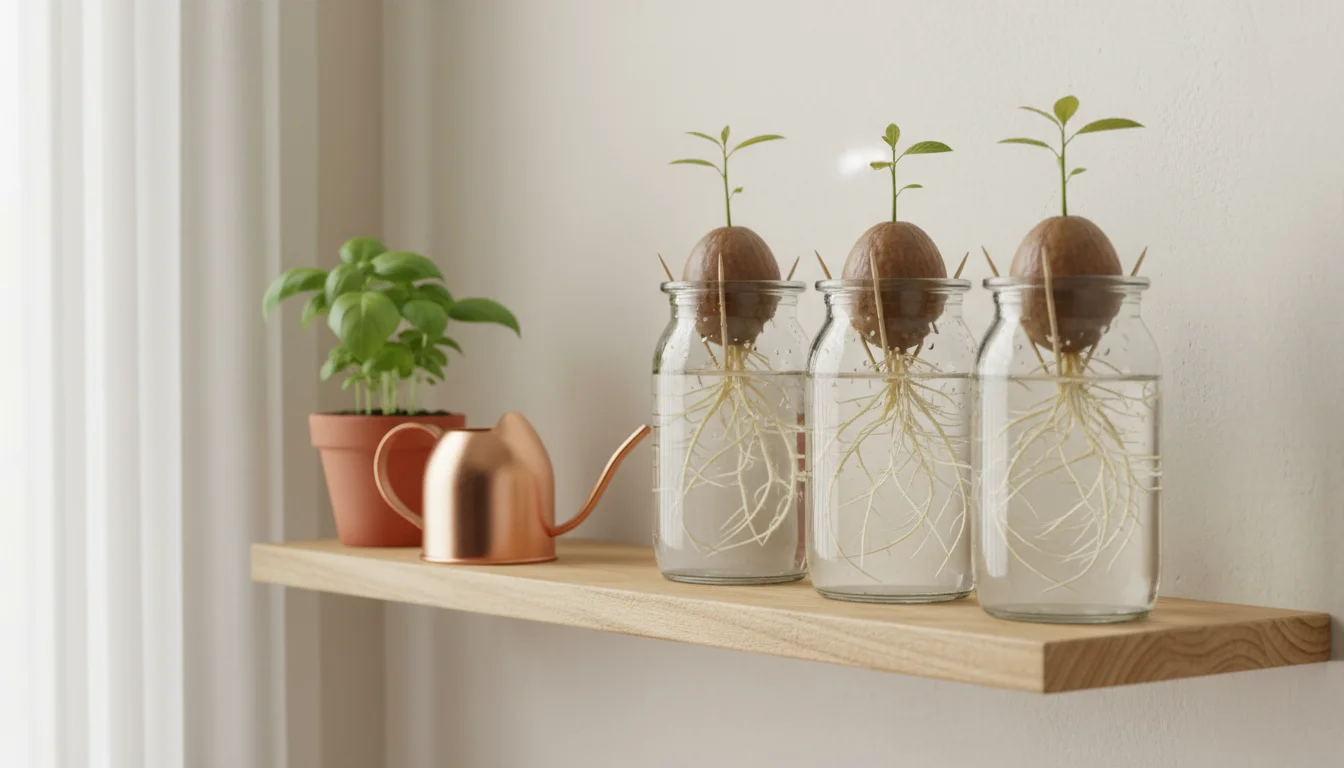
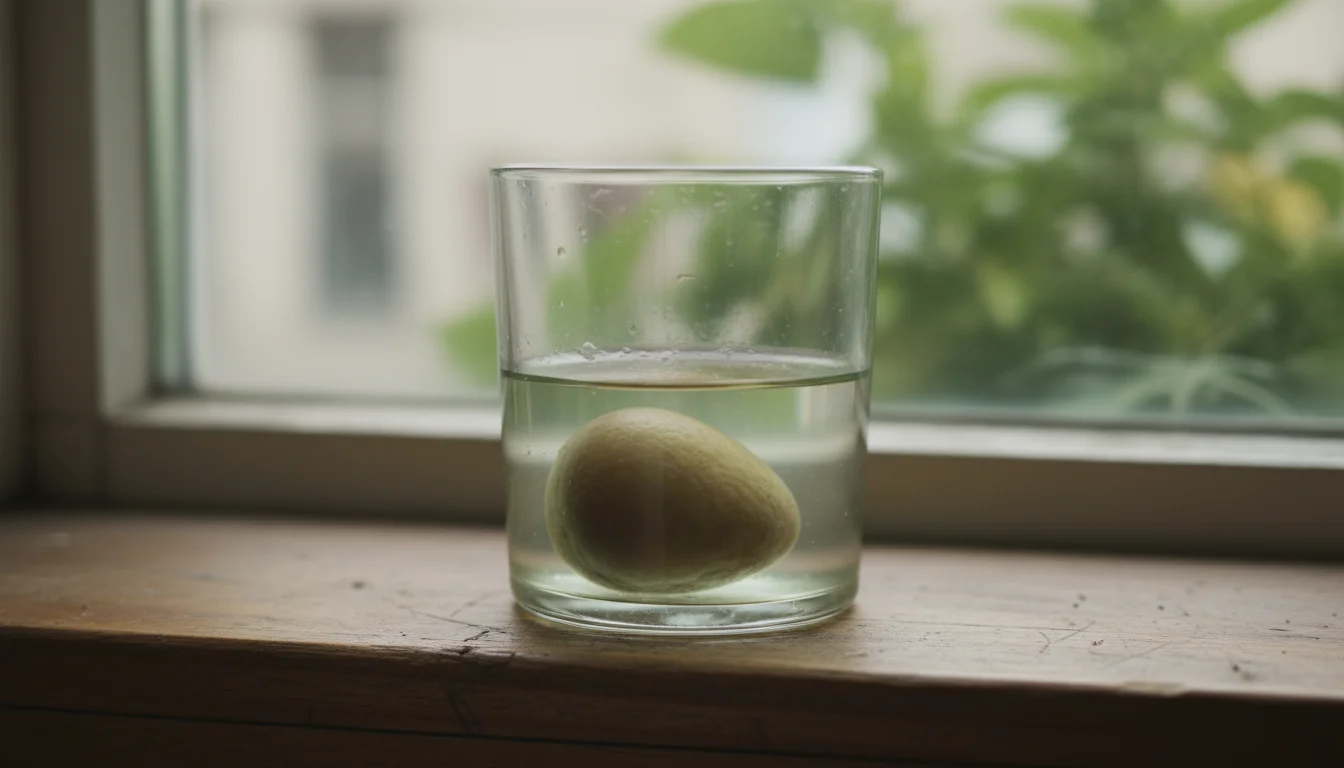
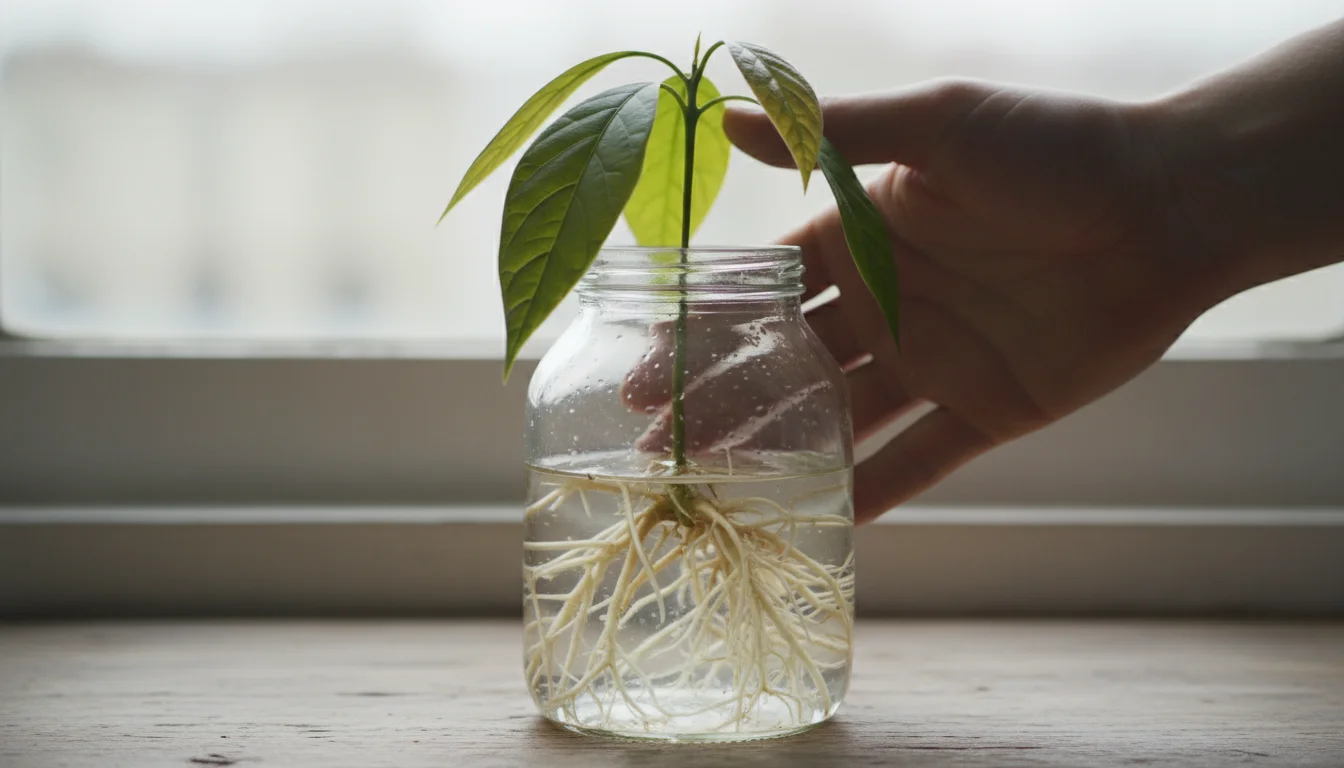
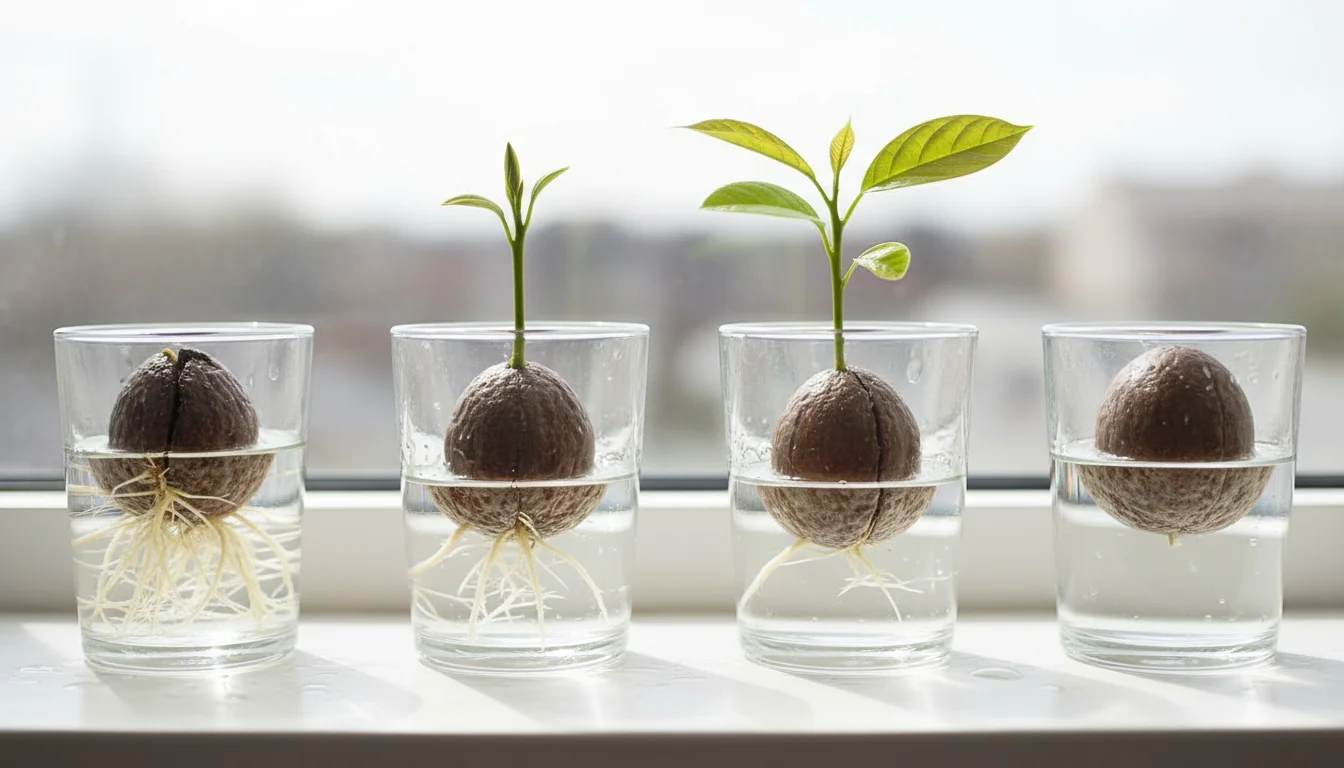
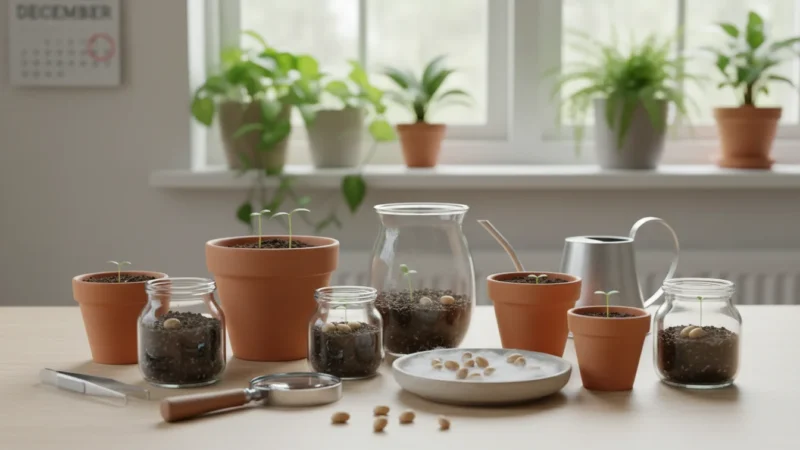
The Classic Glass Method: Step-by-Step Sprouting
The “glass method,” often called the “toothpick method,” is the most popular and visually rewarding way to grow avocado from seed. This method allows you to observe the entire germination process, from root development to sprout emergence, making it an excellent windowsill gardening project. Follow these detailed steps for successful setup.
If you find this water-based method satisfying, you can also try to grow sprouts in a jar for a quick and edible windowsill harvest.
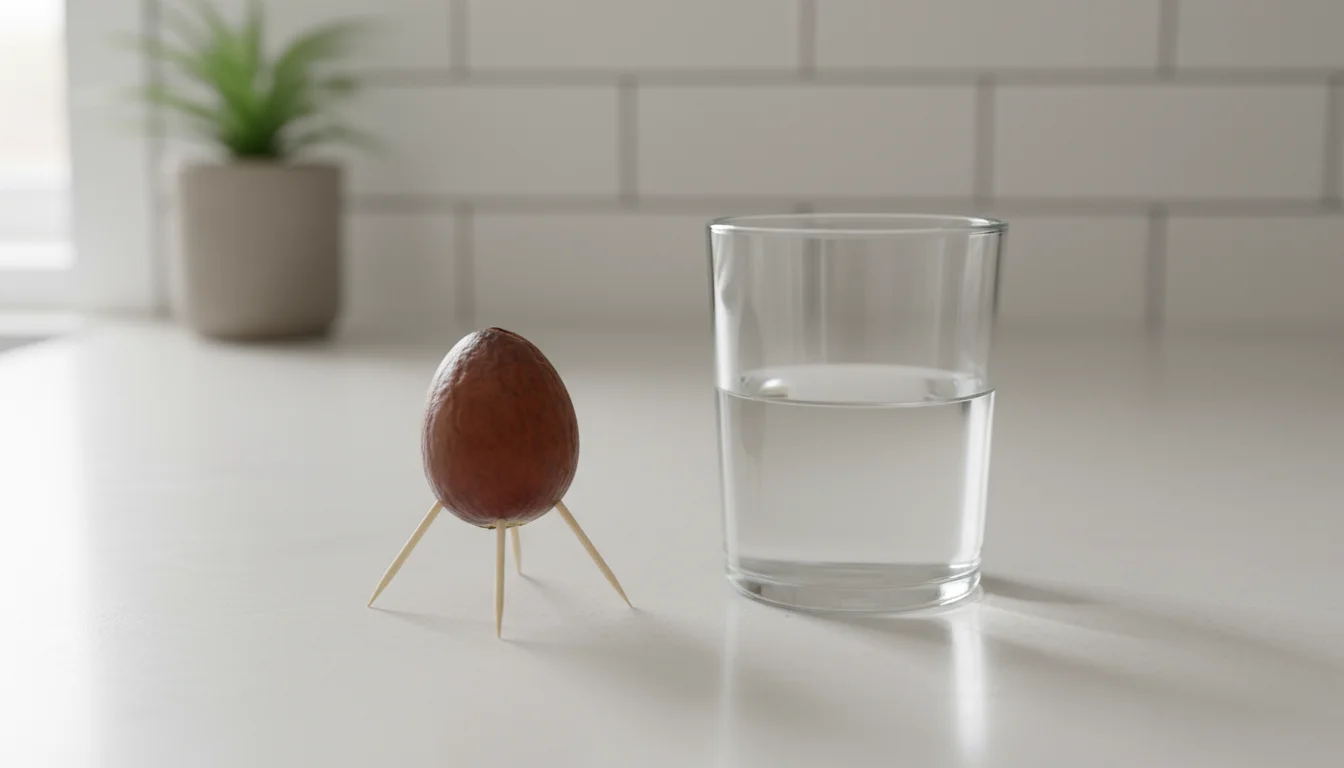
Materials You Will Need:
- One cleaned avocado pit
- Three to four toothpicks
- A clear glass or jar (a mason jar or drinking glass works well)
- Fresh water

Step-by-Step Instructions:
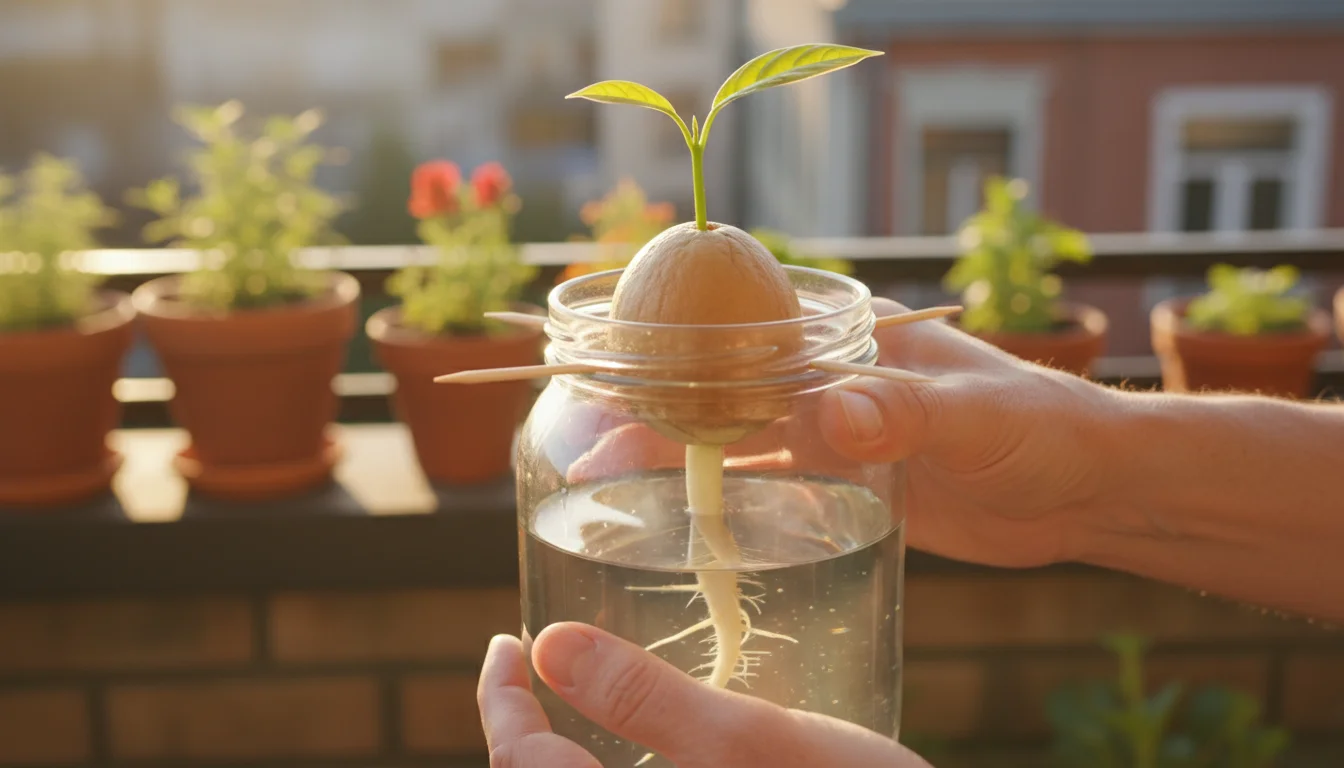
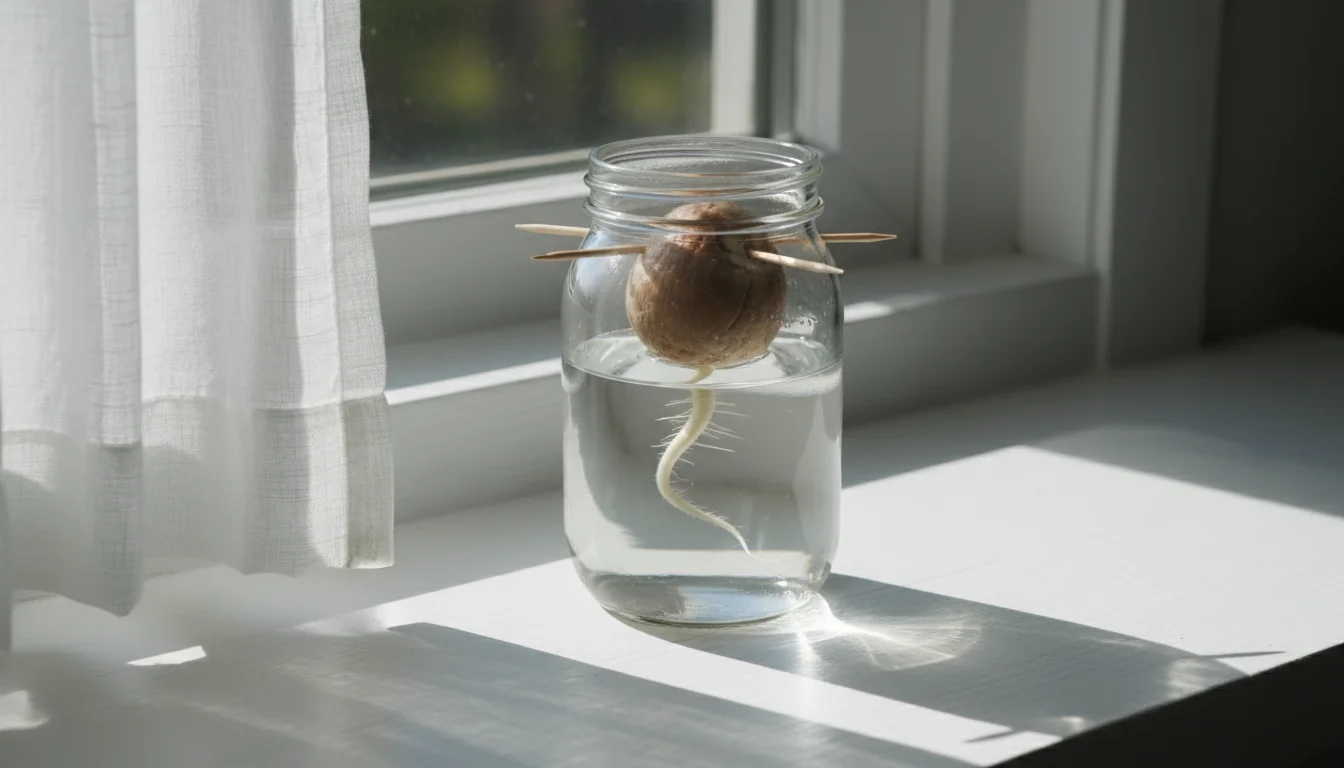
- Identify Pit Orientation: As discussed, determine the bottom (flatter, wider end) and the top (pointier end) of your avocado pit. This is critical for the roots to grow down into the water.
- Insert Toothpicks: Carefully insert three or four toothpicks evenly spaced around the equator of the avocado pit. Insert them just deep enough so they are firm and secure, but avoid pushing them in too far, which could damage the embryo inside. The toothpicks will act as a tripod, suspending the pit over the water.
- Position in Glass: Fill your clear glass or jar with fresh water. Place the avocado pit, supported by the toothpicks, onto the rim of the glass. Ensure that the bottom third to half of the pit is submerged in the water, with the top end pointing upwards. The toothpicks should rest on the rim of the glass, keeping the pit stable and suspended.
- Choose the Right Spot: Place your glass setup in a warm spot that receives bright, indirect sunlight. A south-facing or east-facing windowsill is often ideal. Avoid direct, intense sun, which can heat the water too much, and steer clear of drafts or cold windows. Consistent, gentle warmth encourages the pit to wake up and begin its growth process.
- Maintain Water Levels: Check the water level daily. As water evaporates, refill the glass to ensure the bottom of the pit remains submerged. It is crucial to keep the water level consistent.
- Change Water Regularly: Change the water completely every five to seven days, or sooner if it appears cloudy or discolored. Stagnant water can lead to mold, bacterial growth, and rot, which will prevent germination. Fresh water provides oxygen to the developing roots and helps prevent disease.
This simple setup creates the perfect conditions for your avocado pit to awaken. The warmth and moisture signal to the seed that it is time to germinate. Patience is your most important tool during this phase, as the visible changes can take several weeks to appear.
Creating the Ideal Sprouting Environment for Your Avocado
Successfully sprouting an avocado pit in water requires more than just toothpicks and a glass. You need to provide the right conditions to encourage avocado pit germination and keep your developing seedling healthy. Focusing on light, temperature, and water quality makes all the difference.
Light Requirements: Bright and Indirect
Once your avocado pit is set up in its glass, proper light exposure becomes paramount. Avocado seeds thrive in bright, indirect light. A windowsill that receives several hours of filtered sunlight each day is ideal. Think of a spot where the light is ample but not scorching. Too much direct sun, especially through a windowpane, can overheat the water and stress the emerging plant, potentially leading to algae growth in the glass. Conversely, too little light will result in slow growth and a weak, leggy seedling. Rotate the glass every few days to ensure even light exposure, which promotes symmetrical growth of both the roots and the future stem.
Temperature: Warm and Consistent
Avocados are tropical plants, so they prefer warmth. An ambient room temperature between 65-75°F (18-24°C) is perfect for encouraging germination. Avoid placing your glass in areas subject to cold drafts, such as near frequently opened doors or leaky windows, especially during winter months. Sudden temperature fluctuations can shock the pit and delay sprouting. A consistent, warm environment mimics the natural conditions where avocados typically grow, signaling to the seed that it is safe to begin its life cycle.

Water Quality and Changes: The Lifeline
The water in your glass is the lifeblood of your sprouting avocado. Maintaining its quality and freshness is non-negotiable for successful growth. Regular water changes prevent the buildup of bacteria, fungi, and algae, all of which can harm your nascent plant. As mentioned, change the water every 5-7 days, or immediately if you notice it becoming cloudy, murky, or developing an odor. Use tap water that has been allowed to sit out for 24 hours to allow chlorine to dissipate, or use filtered water. Chlorine can be detrimental to delicate young roots. The continuous supply of fresh, oxygenated water is vital for root respiration and nutrient uptake, ensuring your pit has everything it needs to begin its journey from a dormant seed to a vibrant seedling.

Patiently Waiting and Troubleshooting Common Sprouting Issues
Patience is the single most important tool in your arsenal when learning how to grow an avocado tree from a pit in water. Avocado pit germination is not a rapid process, and understanding the timeline and potential hurdles helps manage expectations and address problems effectively.
What to Expect and When
After setting up your avocado pit, the visible changes typically take time. Do not be discouraged if you see nothing for several weeks.
- Weeks 2-4: The first sign of life is often a crack appearing in the bottom of the pit. This crack forms as the pit absorbs water and the embryo inside begins to expand.
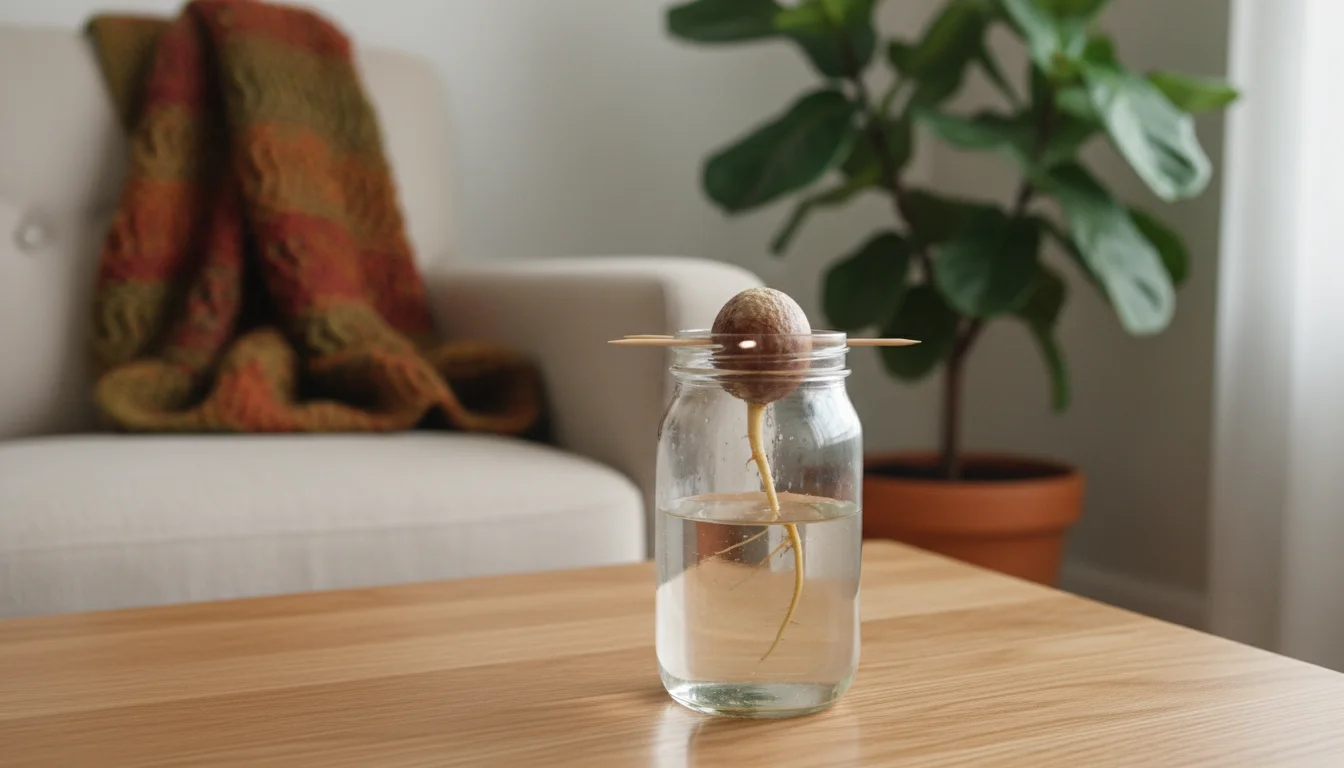
- Weeks 4-6: A taproot, a single, thick root, will emerge from the bottom of the pit and grow downwards into the water. This is a crucial development, indicating successful germination.
- Weeks 6-8: As the taproot lengthens, a sprout will begin to emerge from the top of the pit. This sprout will grow upwards, eventually forming the stem and leaves of your young plant.
- Weeks 8-12 and beyond: The sprout will continue to grow, producing leaves. The taproot will branch out, forming a more extensive root system in the water.
Remember, these timelines are averages. Some pits can sprout faster, while others might take three or even four months. Factors like the avocado variety, the pit’s health, and environmental conditions (temperature, light) influence the speed of germination. Consistent care, especially regular water changes and warmth, provides the best conditions for a timely sprout.
Why Won’t My Avocado Seed Sprout? Common Problems and Solutions
If your avocado pit seems stubborn and shows no signs of life after several weeks, consider these common reasons and troubleshooting tips:
- Incorrect Orientation: Ensure the bottom, flatter end of the pit is submerged in water. If you place the pointy end down, the roots will struggle to grow correctly.
- Insufficient Warmth: Cold temperatures significantly slow down or halt germination. Move your glass to a warmer spot, ensuring the ambient temperature is consistently above 65°F (18°C).
- Stagnant or Dirty Water: Old, cloudy water lacks oxygen and can harbor disease. Regular water changes are crucial. If the water smells, change it immediately and clean the glass.
- Damaged or Non-Viable Pit: Sometimes, the pit itself is not viable. It might have been damaged during removal, overly dry, or simply infertile. If you have waited for a long time (3+ months) with no success despite ideal conditions, consider starting over with a new pit.
- Rot or Mold: If you see fuzzy mold or the pit feels soft and mushy, it is rotting. This often happens if pulp was not completely removed or if water changes were insufficient. Unfortunately, a rotting pit usually means it is unsalvageable. Discard it and start fresh with a new, thoroughly cleaned pit.
- Patience Deficit: The most common reason! Avocado germination simply takes time. Give your pit at least 2-3 months before declaring it a lost cause, assuming you are providing ideal conditions. Continue with regular water changes and monitoring.
Addressing these issues systematically improves your chances of seeing that exciting first crack and eventually, a vibrant sprout.
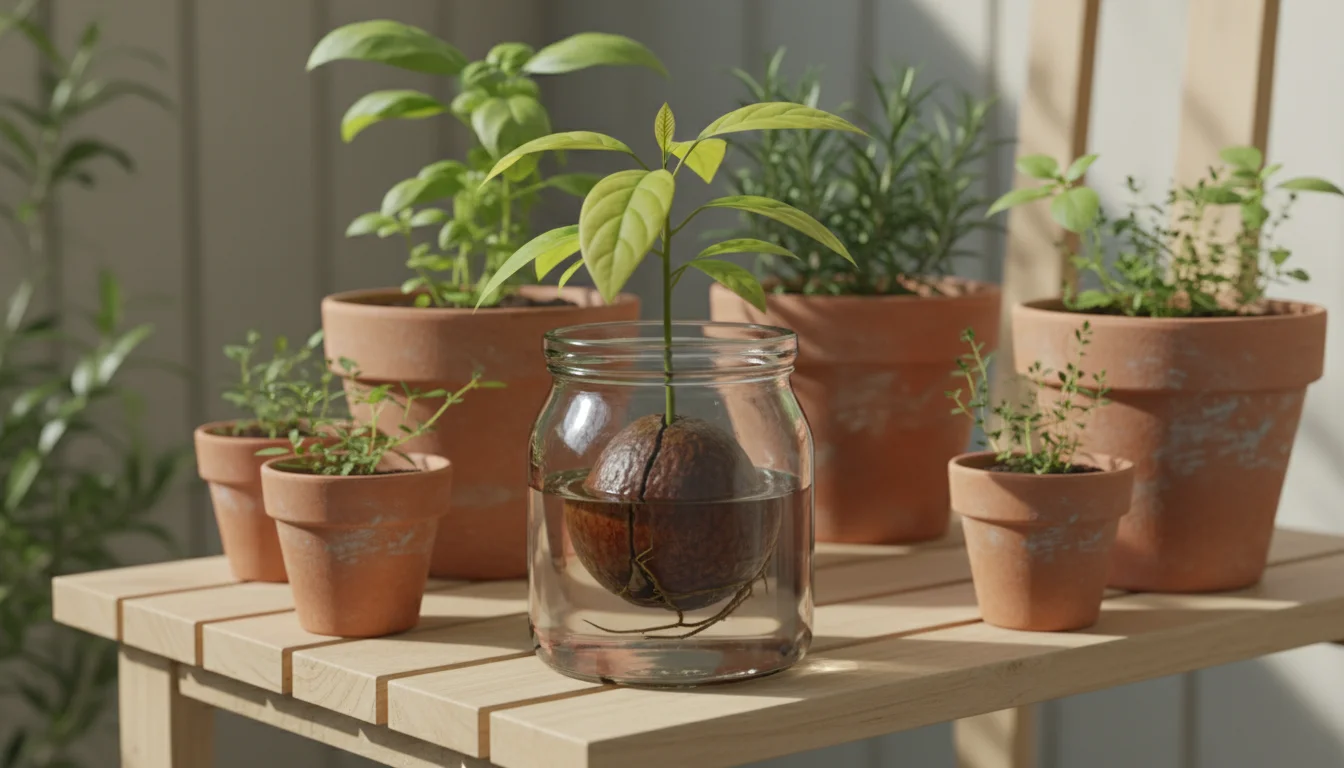
Transitioning Your Avocado Seedling to Soil
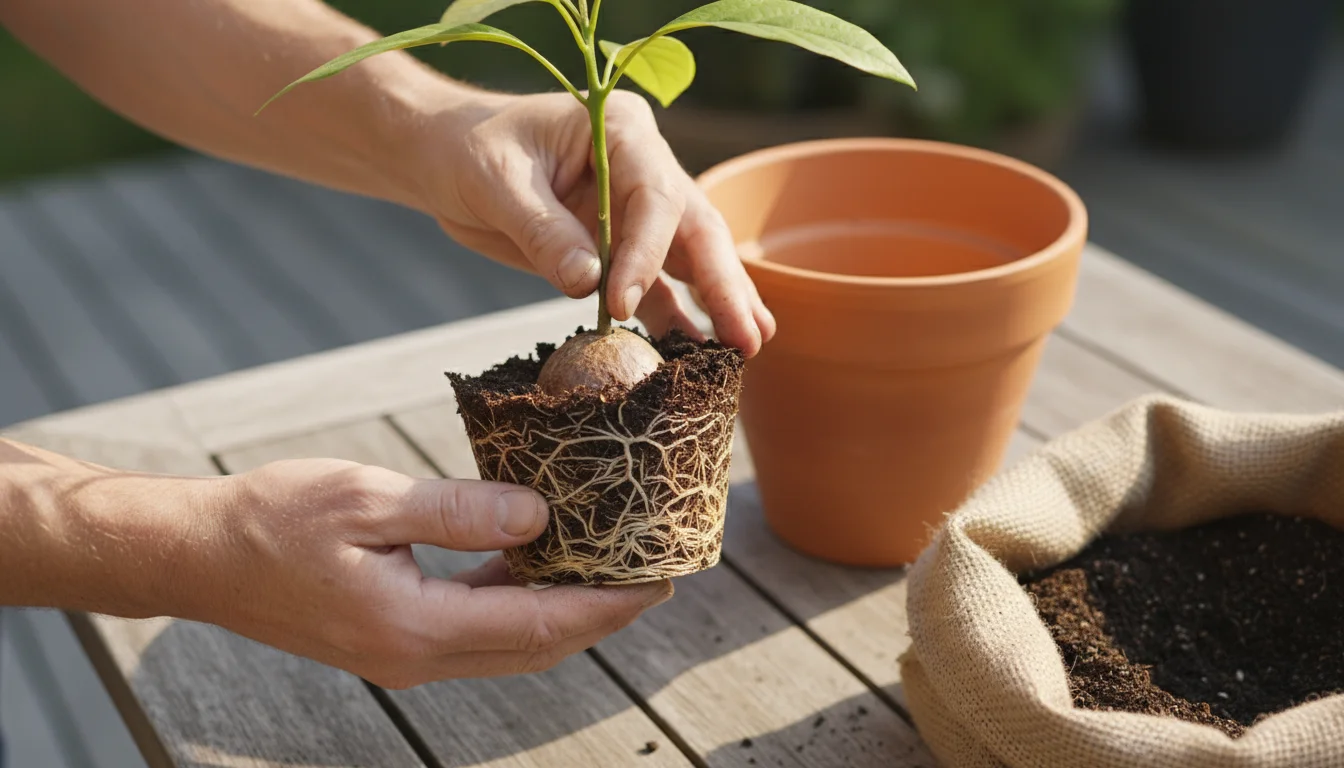
Once your avocado pit has successfully sprouted roots and developed a stem with a few leaves, it is ready for its next big step: moving from water to soil. This transition is crucial for the long-term health and growth of your young avocado tree. You will provide it with a more stable environment and access to essential nutrients not readily available in water.
When to Pot Your Seedling
Timing is important for a smooth transition. Your avocado seedling is ready for soil when its roots are well-established and robust, typically 4-6 inches long, and the stem has grown to about 6-8 inches tall with at least 2-4 mature leaves. Do not rush this step. Allowing the root system to develop adequately in water makes the transfer to soil less stressful for the plant.
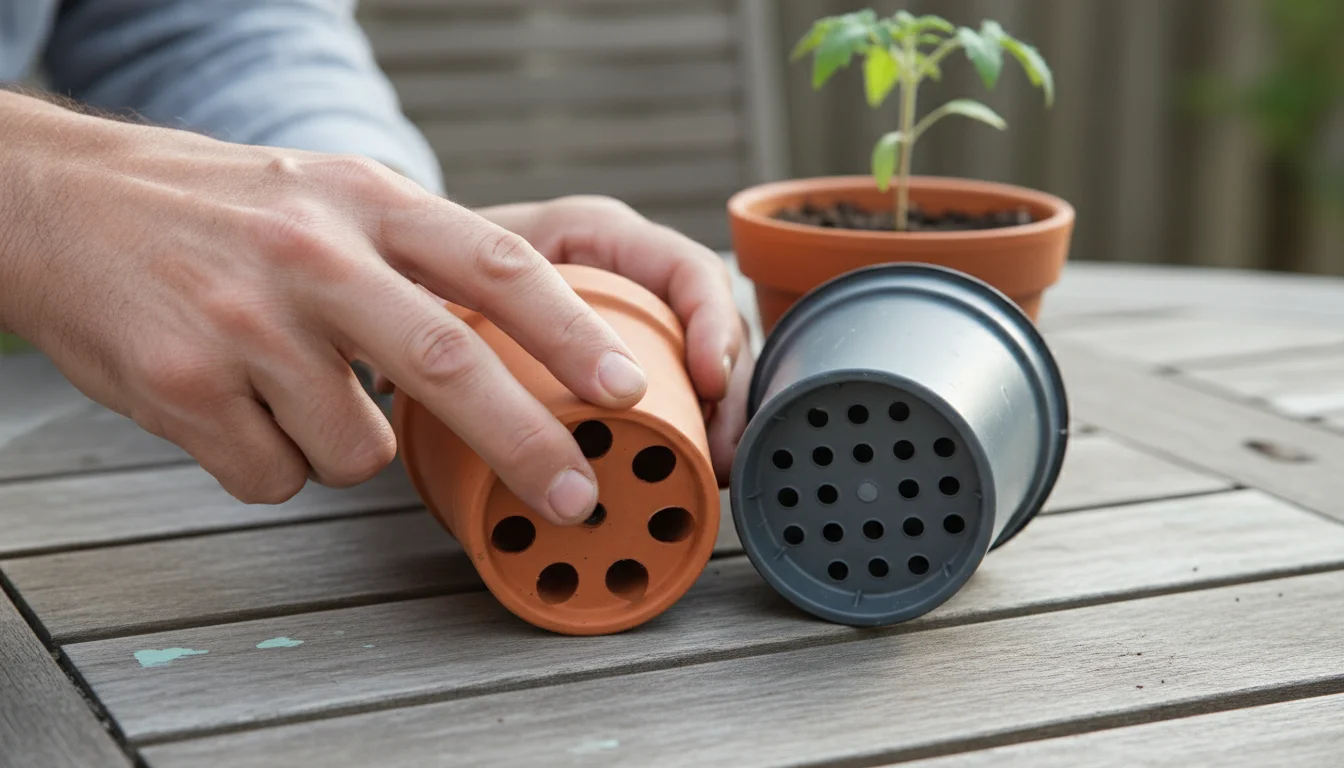
Choosing the Right Container
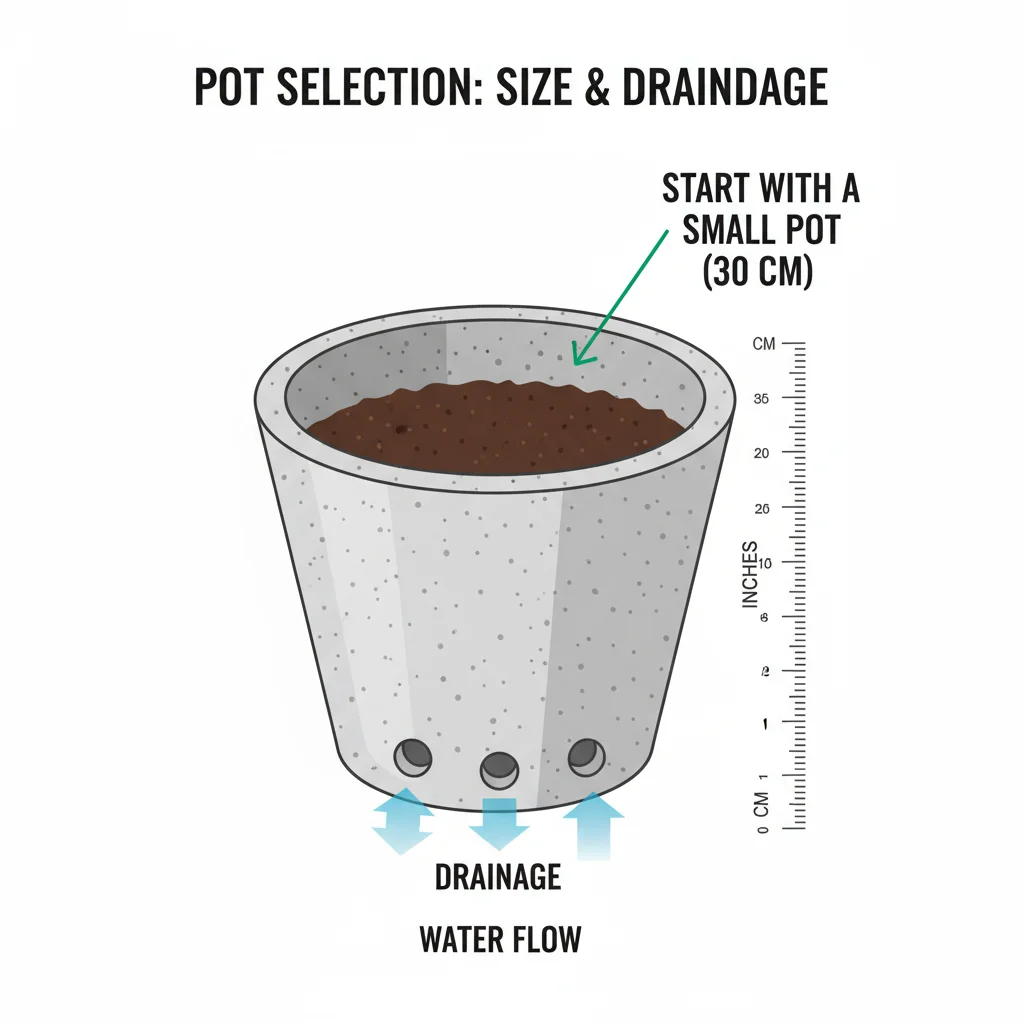
Selecting the appropriate pot is vital.
- Size: Start with a relatively small pot, about 6-8 inches in diameter. This prevents the soil from staying too wet, which can lead to root rot. As your plant grows, you will repot it into larger containers.
- Drainage: Ensure the pot has drainage holes. Excellent drainage is non-negotiable for avocado trees. Without it, water sits in the bottom of the pot, suffocating roots and causing decay.
- Material: Clay pots (terra cotta) promote better air circulation and moisture evaporation, which can be beneficial, but plastic pots also work well. The key is proper drainage.
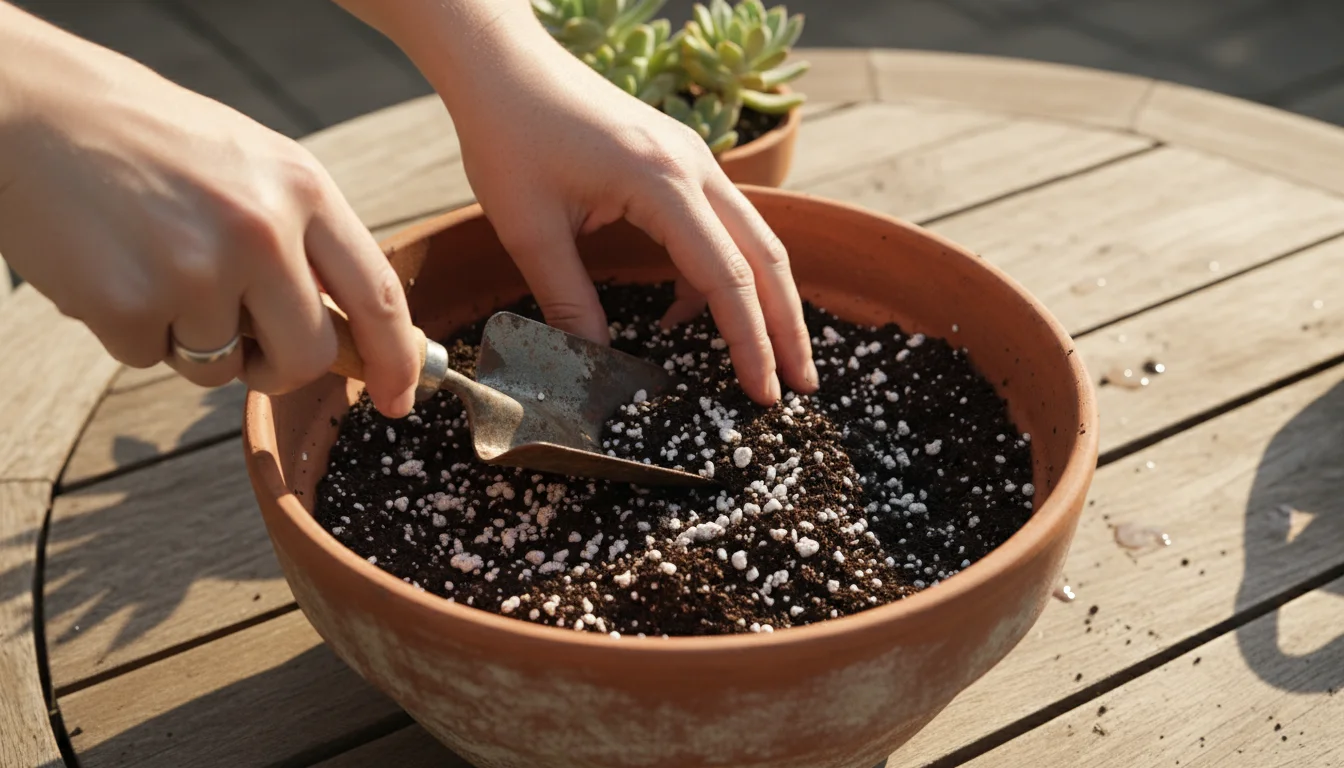
Preparing the Soil Mix
Avocado trees prefer loose, well-draining soil. A standard potting mix designed for houseplants or a mix specifically for citrus trees works well. You can enhance drainage further by mixing in perlite or coarse sand, roughly a 3:1 ratio of potting mix to perlite/sand. Good drainage means water moves through the soil easily, preventing waterlogging. This type of soil also provides the necessary aeration for healthy root development.
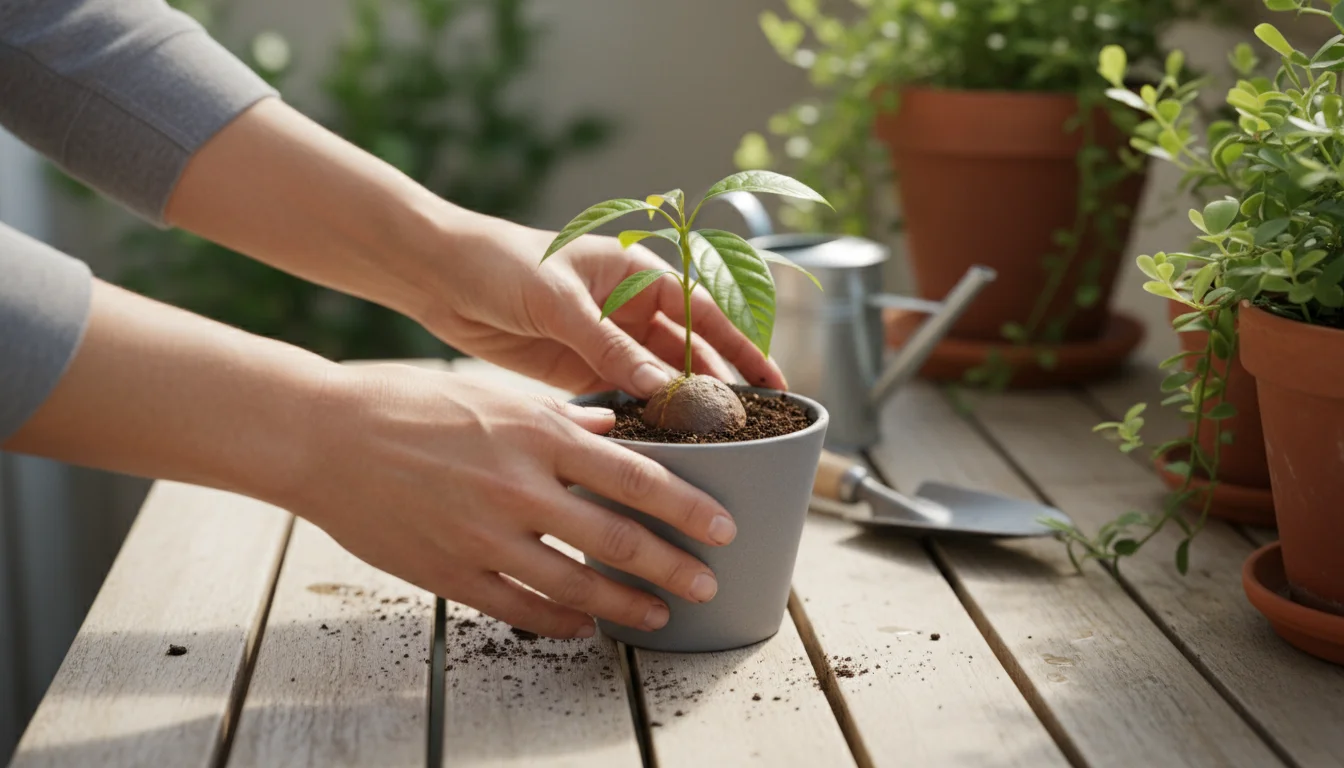
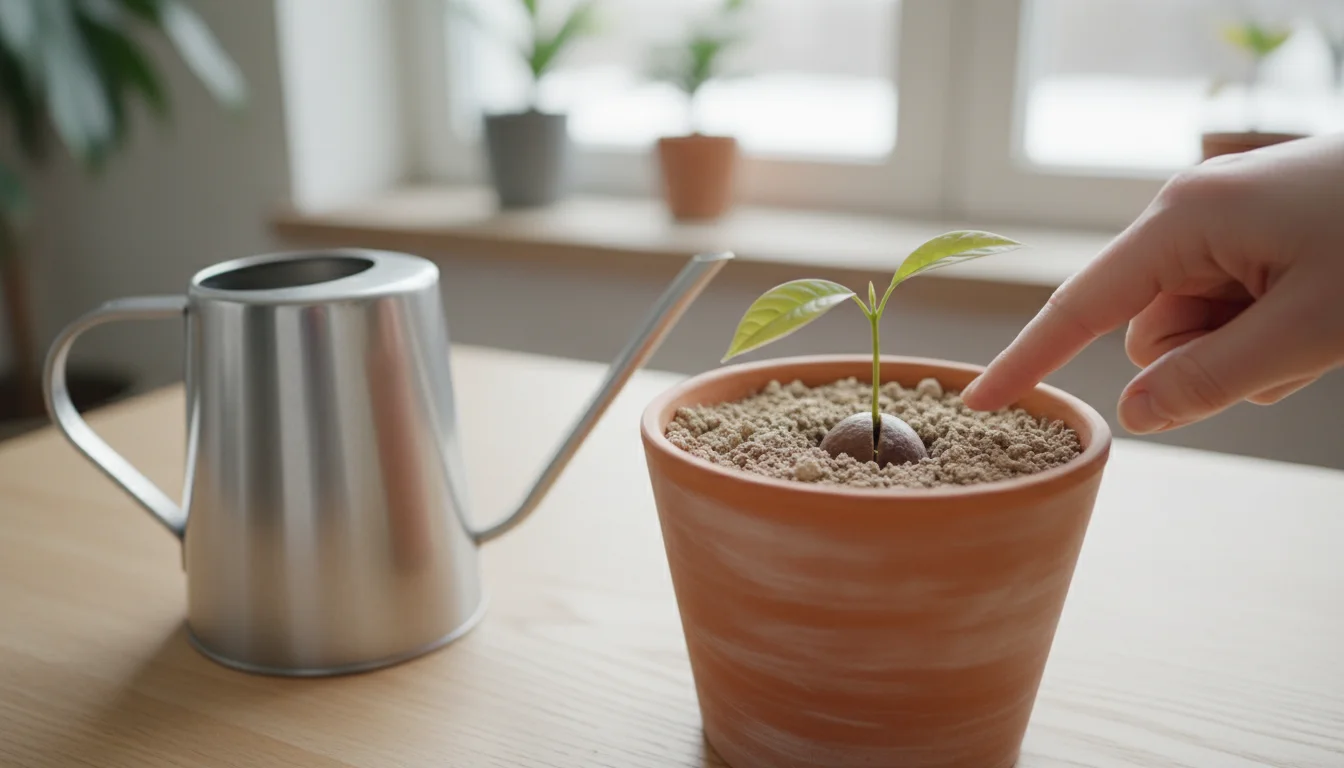
The Potting Process: Step-by-Step
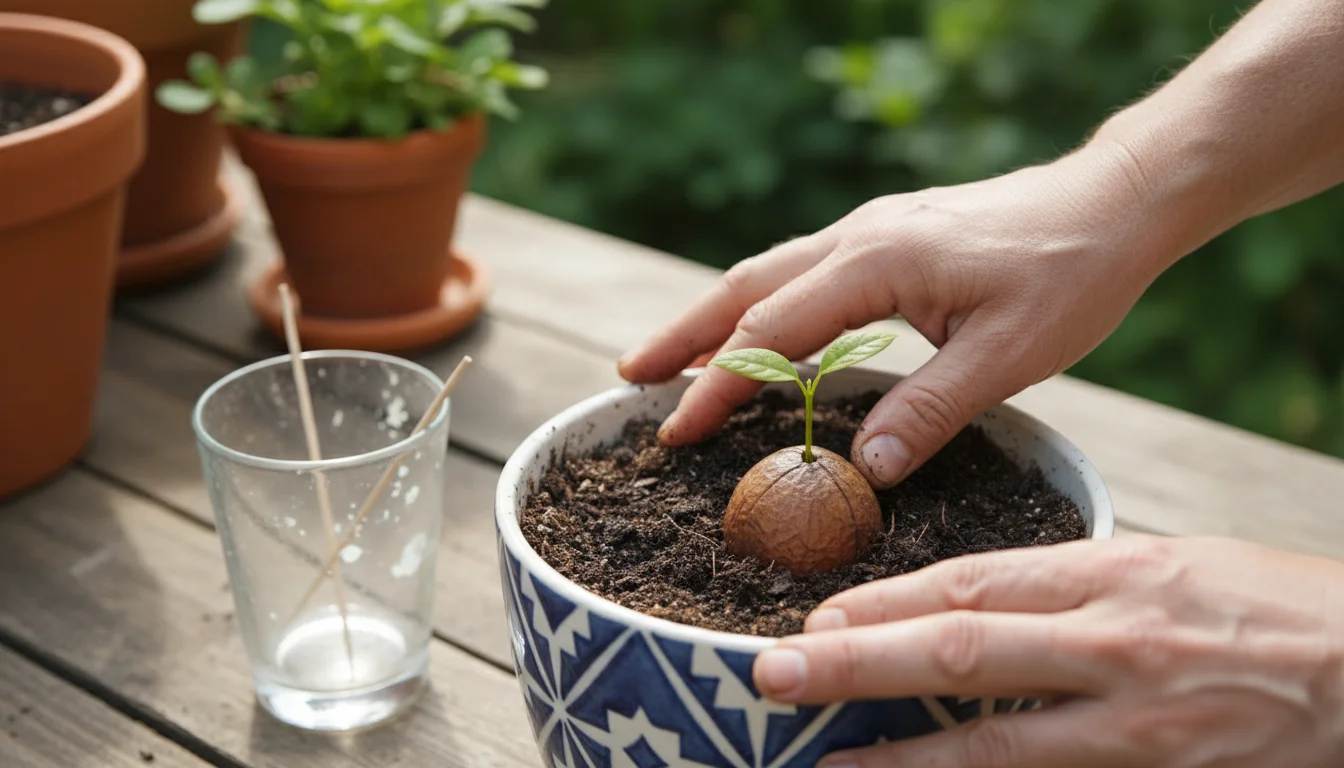
- Prepare the Pot: Place a small piece of mesh or a coffee filter over the drainage holes to prevent soil from washing out, but still allow water to escape. Fill the bottom of your chosen pot with a few inches of your prepared soil mix.
- Remove Toothpicks and Position Seedling: Gently remove the toothpicks from your avocado pit. Carefully lift the seedling from the glass, taking care not to damage the delicate roots. Create a small depression in the center of the soil in the pot.
- Plant the Seedling: Center the avocado pit and seedling in the depression. Add more soil around the pit, leaving the top half of the pit exposed above the soil line. This helps prevent the stem from rotting. Gently pat the soil down around the pit to remove large air pockets, but do not compact it too tightly, as this hinders drainage and root growth.
- Water Thoroughly: Immediately after potting, water the seedling thoroughly until water drains from the bottom of the pot. This settles the soil around the roots and provides initial moisture.
- Initial Placement: Place the newly potted seedling back in a spot with bright, indirect light, similar to where it germinated. Avoid immediate exposure to harsh direct sunlight, which can shock the plant during this transition. Provide a stable environment as it adjusts to its new home.
This careful transition from water to soil gives your young avocado the best chance to thrive and grow into a robust indoor plant.
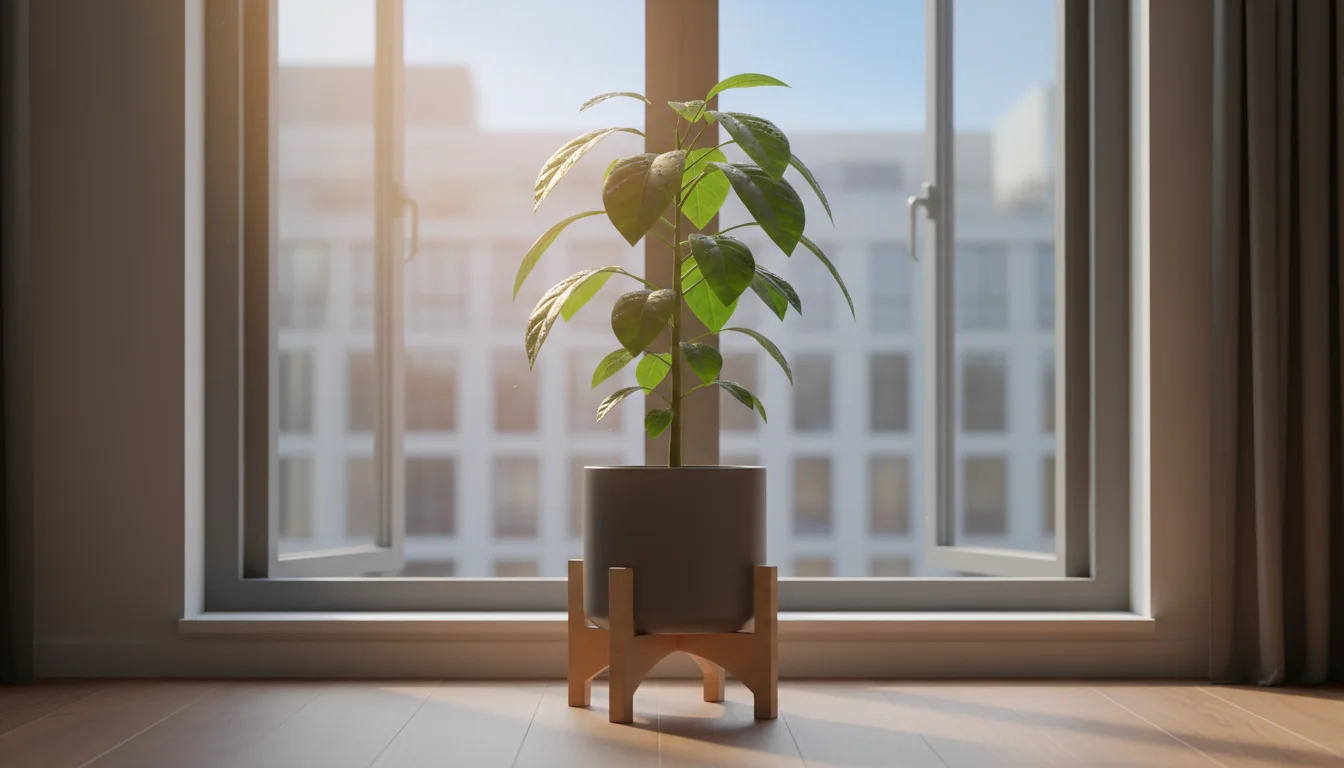
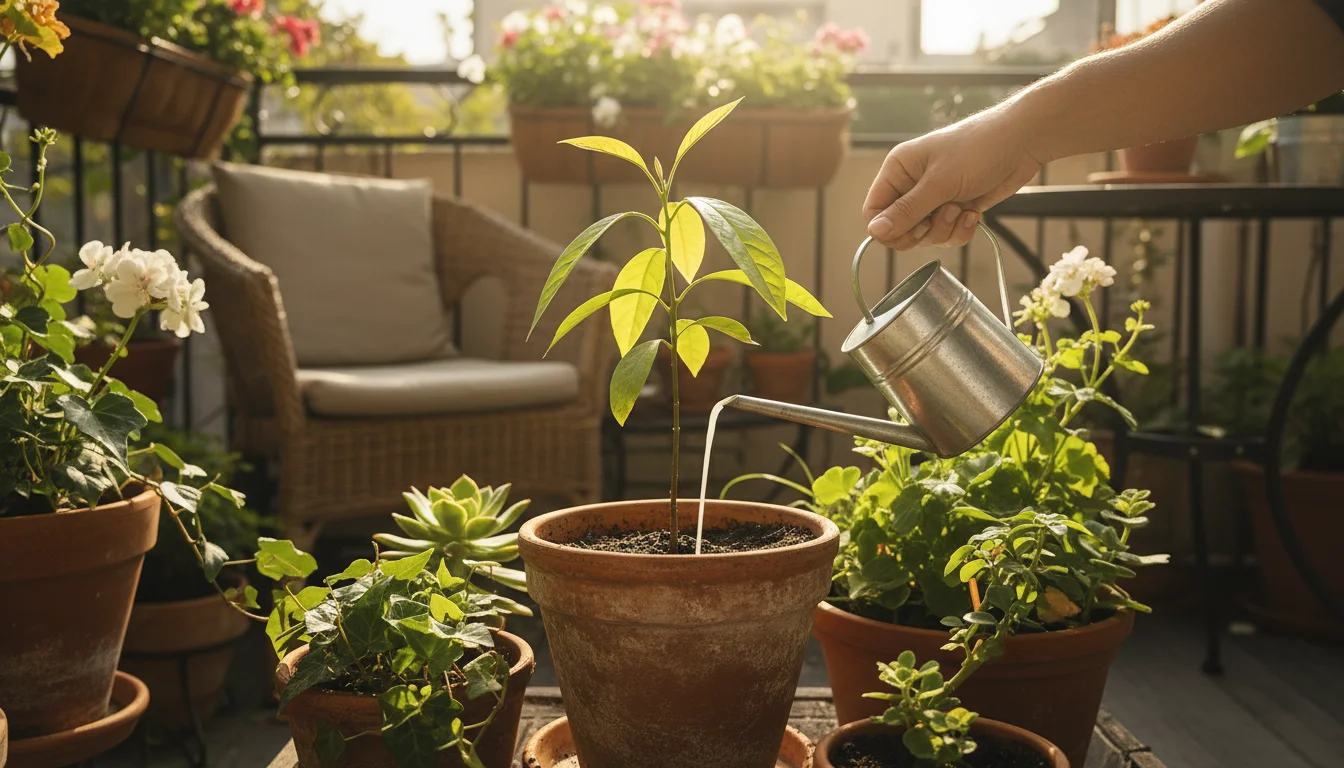
Caring for Your Young Avocado Tree Indoors
Once your avocado seedling has transitioned from its glass of water to a pot of soil, your role as a patient gardener shifts to nurturing its continued growth. Caring for an avocado seedling indoors involves providing consistent attention to light, water, nutrients, and general plant health.
Light Requirements: Abundant Brightness
Avocado trees are sun-lovers. To thrive indoors, your young plant needs abundant bright light. A south-facing window that receives several hours of direct sunlight each day is ideal. If you live in an area with less intense winter sun, or if your home lacks strong natural light, consider supplementing with a grow light. Position the grow light about 6-12 inches above the plant for 10-12 hours daily. Adequate light prevents your seedling from becoming leggy, meaning it stretches excessively towards the light source, resulting in a weak, elongated stem and sparse leaves.
Watering: The Right Balance
Proper watering is critical. Avocado trees prefer consistently moist soil, but they absolutely do not tolerate soggy conditions, which can lead to root rot.
- How to Water: Water thoroughly until you see water draining from the bottom of the pot. This ensures the entire root ball gets hydrated.
- When to Water: Allow the top inch or two of the soil to dry out completely before watering again. Stick your finger into the soil to check moisture levels. If it feels dry, it is time to water. If it still feels damp, wait a day or two. The frequency will vary based on your environment, pot size, and season. In winter, plants generally require less water.
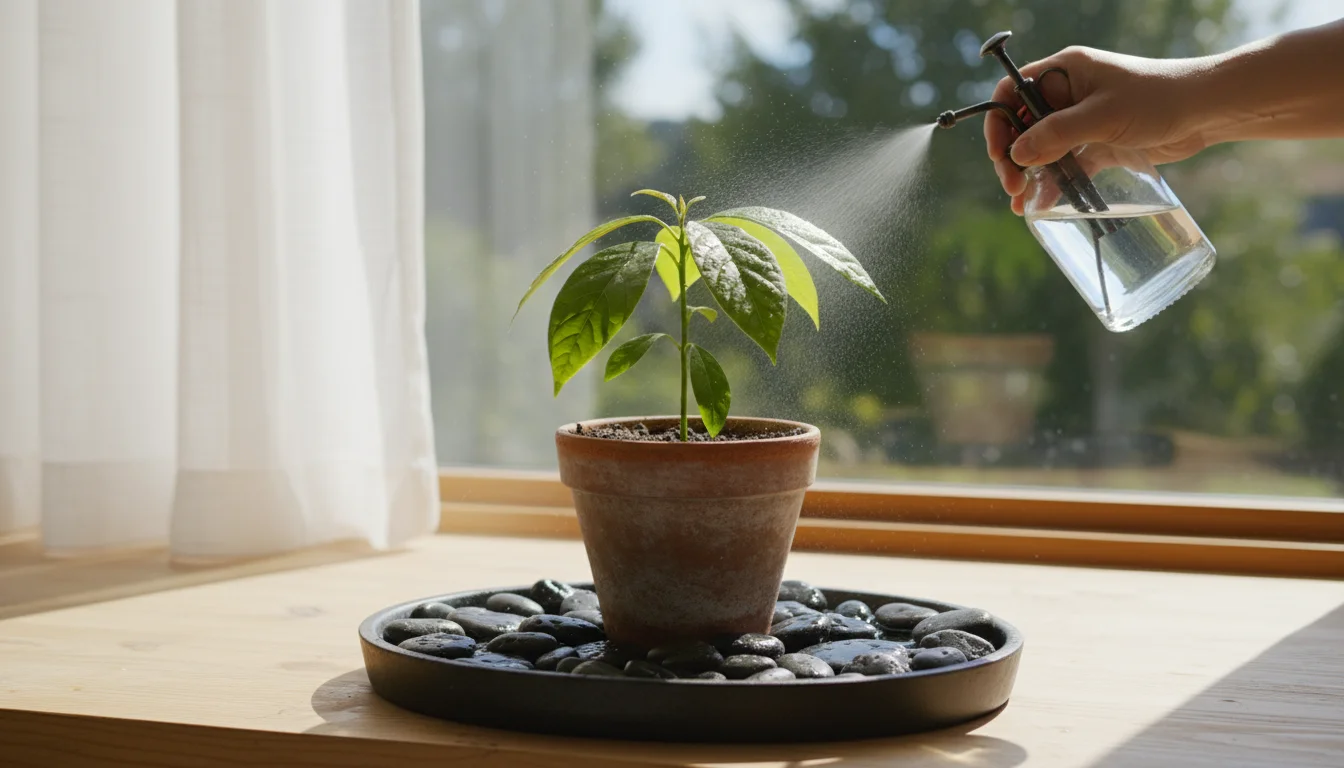
Humidity: Tropical Comfort
As tropical plants, avocados appreciate higher humidity. Indoor environments, especially during winter with heating systems running, can be quite dry. To boost humidity:
- Pebble Tray: Place the potted plant on a tray filled with pebbles and a little water. Ensure the bottom of the pot does not sit directly in the water, as this can lead to root rot.
- Misting: Lightly mist the leaves daily with a spray bottle of water.
- Humidifier: For severely dry indoor conditions, a small room humidifier can make a significant difference.
Fertilization: A Gentle Boost
Once your seedling has been in soil for about three to four months, you can begin a light fertilization regimen. Use a balanced liquid houseplant fertilizer (e.g., 10-10-10 or 5-5-5 NPK ratio) diluted to half strength. Fertilize every 2-4 weeks during the growing season (spring and summer). Reduce or cease fertilization during fall and winter when the plant’s growth naturally slows. Over-fertilization can burn delicate roots, so always err on the side of less.
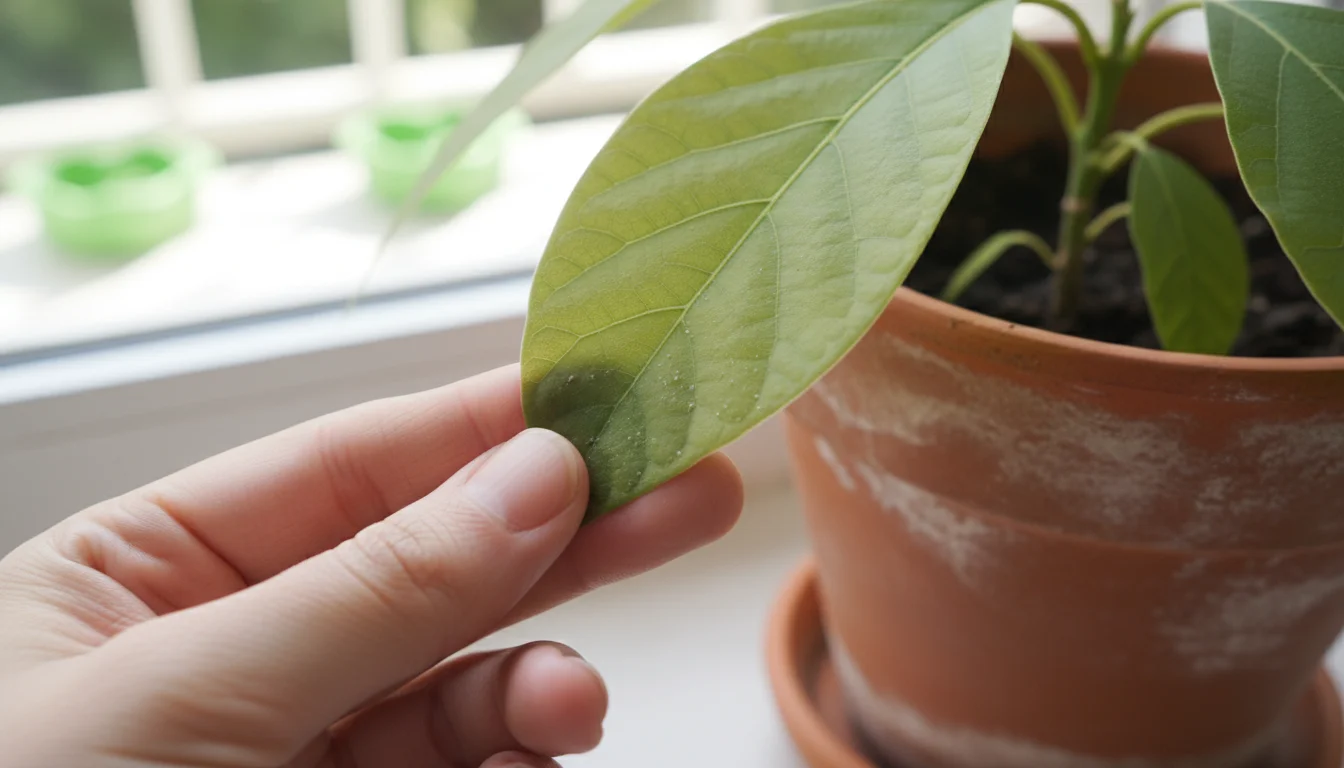
Pest Watch: Common Indoor Invaders
Indoor plants can occasionally attract pests. Keep an eye out for:
- Spider Mites: Tiny, often found on the undersides of leaves, causing small webs and stippling.
- Aphids: Small, soft-bodied insects clustering on new growth.
- Mealybugs: White, cottony masses in leaf axils.
If you spot pests, address them immediately. Isolate the plant and treat with insecticidal soap or neem oil, following product instructions carefully. Early detection makes control much easier. Regularly inspecting your plant, especially the undersides of leaves, helps catch infestations before they become severe.
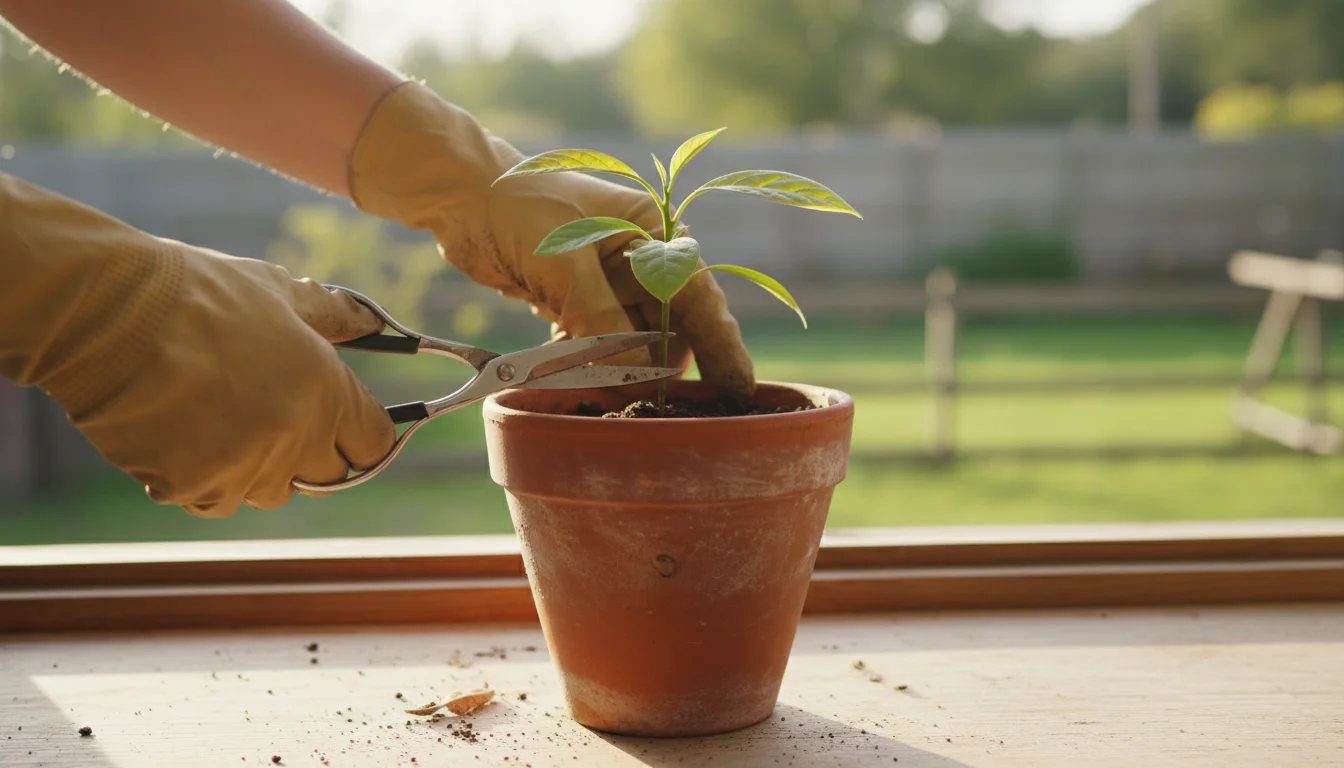
Pruning for a Bushier Plant
Left to its own devices, an avocado seedling often grows as a single, tall, slender stem. To encourage a bushier, more compact plant, you can prune it.
- When to Prune: Wait until your seedling is at least 6-12 inches tall and has several sets of leaves.
- How to Prune: Use clean, sharp scissors or pruners. Cut the main stem back to about half its height, making the cut just above a leaf node (where a leaf attaches to the stem). This encourages the plant to branch out from below the cut, leading to a fuller appearance. You can repeat this process as the plant grows to maintain your desired shape and size.
Consistent, attentive care helps your young avocado thrive, transforming it from a fragile seedling into a robust and attractive houseplant, a true testament to your green thumb.
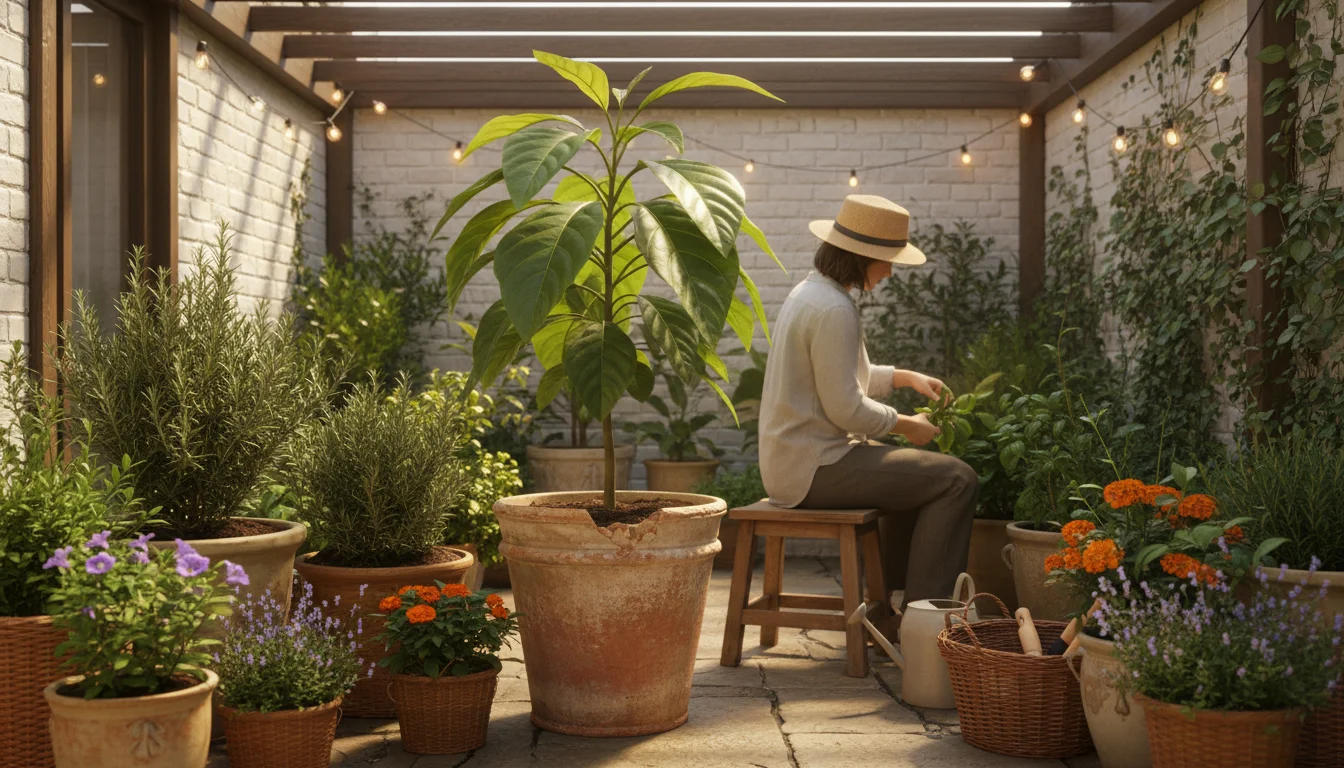
Long-Term Care and Managing Expectations
As your avocado tree matures indoors, your care routine will evolve, and managing your expectations regarding fruit production becomes important. While it is possible for an indoor avocado tree to produce fruit, it is not the primary reason most gardeners embark on this journey. The real reward lies in the beauty of the plant and the satisfaction of growing it from scratch.
Repotting Your Growing Tree
Your avocado tree will grow relatively quickly in its early years, meaning it will eventually outgrow its initial pot. You know it is time to repot when:
- Roots start emerging from the drainage holes.
- The plant seems top-heavy and unstable.
- Growth slows significantly despite adequate light and water.
When repotting, choose a container only 1-2 inches larger in diameter than the current one. Moving to too large a pot too soon can lead to excess soil moisture and root rot. Repot in spring or early summer, using fresh, well-draining potting mix. Maintain the practice of leaving the top half of the original avocado pit exposed above the soil line. Each repotting provides your tree with fresh nutrients and space for its expanding root system.
Patience for Potential Fruit
Many gardeners ask, “Will my avocado tree produce fruit?” The simple answer is: maybe, but it is rare for an indoor, pit-grown avocado.
- Maturity: Avocado trees typically take 5-13 years to mature enough to produce fruit, even under ideal outdoor conditions.
- Pollination: Most avocado varieties require cross-pollination to fruit reliably. Hand-pollination is often necessary for indoor trees.
- Variety: Pits grown from store-bought avocados are often hybrids, meaning their offspring may not grow true to the parent plant. The fruit, if it appears, might be different or of lesser quality.
- Conditions: Indoor conditions rarely provide the sustained warmth, light intensity, and humidity that avocado trees need to flower and set fruit.
Therefore, while it is exciting to dream of homegrown avocados, focus on enjoying your plant as a beautiful foliage specimen. Its lush leaves and vibrant green color contribute significantly to your indoor garden. The journey of caring for an avocado seedling indoors, watching it grow from a pit into a small tree, offers its own profound satisfaction, irrespective of fruit production.
Winter Care
During the colder winter months, your indoor avocado will likely enter a period of slower growth. Adjust your care routine accordingly:
- Reduce Watering: With less light and lower temperatures, the plant uses less water. Reduce watering frequency, allowing the soil to dry out a bit more between waterings.
- Maintain Humidity: Continue to provide humidity, as indoor heating can make the air very dry.
- No Fertilization: Pause fertilization during winter dormancy.
- Watch for Drafts: Protect your tree from cold drafts from windows or doors.
By understanding and providing for the long-term needs of your avocado tree, you ensure it remains a healthy, attractive, and long-lasting addition to your indoor plant collection. The ongoing process of caring for your avocado seedling indoors is a testament to your dedication as a gardener, bringing a slice of the tropics right into your home.
Frequently Asked Questions
What is the fastest way to sprout an avocado seed?
The toothpick and glass of water method, as detailed in this guide, is a reliable and popular method for sprouting an avocado seed. While no method offers instant results, ensuring optimal conditions such as consistent warmth (65-75°F or 18-24°C), bright indirect light, and regular water changes will encourage avocado pit germination as quickly as possible. Some gardeners also try placing the pit in a damp paper towel inside a sealed plastic bag, but this often requires more vigilance to prevent mold and still takes weeks.
How long does it take for an avocado pit to sprout?
Patience is key. An avocado pit typically takes anywhere from 6 to 12 weeks to sprout roots and a stem. Some pits might germinate in as little as 3-4 weeks, while others can take up to 3-4 months. Factors such as the freshness of the pit, ambient temperature, and consistency of care all influence the timeline. Do not give up too soon; continue to provide fresh water and warmth.
Can I grow an avocado tree directly in soil instead of water?
Yes, you can attempt to grow an avocado tree directly from seed in soil. However, the water method is often preferred by beginners because it allows you to visually monitor the root and stem development, offering a satisfying observation of the germination process. To sprout directly in soil, plant the pit half-submerged in a pot of well-draining potting mix, with the pointy end facing up. Keep the soil consistently moist but not waterlogged, and place it in a warm, bright spot. This method typically takes longer, and you cannot easily check on the root development without disturbing the pit.
Why are the leaves on my avocado seedling turning yellow?
Yellowing leaves on an avocado seedling often indicate a watering issue. Overwatering, which leads to root rot due to lack of oxygen, is a common culprit. If the soil stays consistently soggy, the roots cannot function properly. Conversely, severe underwatering can also cause leaves to yellow and wilt. Check your soil moisture carefully; allow the top inch or two of soil to dry out before watering again. Other potential causes include nutrient deficiencies, though less common in young seedlings, or insufficient light. Ensure your plant receives ample bright, indirect light and consider a very diluted balanced fertilizer if watering is not the issue and the plant has been in soil for a few months.
Will my indoor avocado tree ever produce edible fruit?
While technically possible, it is highly unlikely for an avocado tree grown from a pit indoors to produce edible fruit. Most indoor avocado plants are grown for their attractive foliage. Factors hindering fruit production include: genetic variation (pit-grown trees are not true to type), requiring 5-13 years to mature, needing specific pollination (often cross-pollination by another avocado tree), and indoor conditions rarely mimicking the consistent warmth, light, and humidity of their native tropical environment required for flowering and fruiting. Enjoy your avocado as a beautiful houseplant.
For another low-maintenance experiment, consider trying to grow your own ginger indoors to further expand your edible indoor garden.
Disclaimer: This article is for informational purposes only and is not a substitute for professional gardening advice. Always consult local extension services or horticulture experts for region-specific guidance.

Leave a Reply