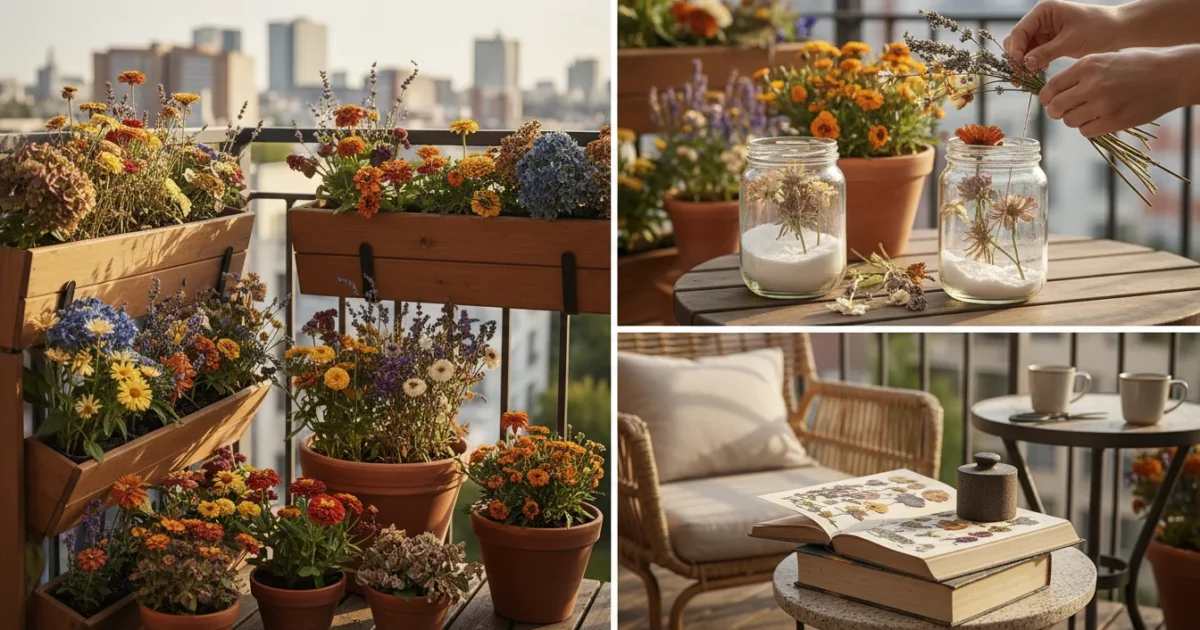
As the vibrant hues of summer begin to mellow and the days grow shorter, a bittersweet feeling often settles over our balcony gardens. Your pots and planters, once bursting with life, prepare for their final curtain call. While the changing seasons signal an end to daily watering and pruning, they also present a wonderful opportunity. Instead of simply composting those last beautiful blooms, you can extend their joy, transforming them into lasting treasures.
This guide moves beyond traditional flower pressing, offering simple, hands-on projects perfect for beginner and intermediate gardeners. You will learn practical ways to preserve flowers from your small space, turning your end-of-season gardening tasks into rewarding creative endeavors. Let’s capture that summer magic and keep it close all year long.
The Bittersweet Farewell to Balcony Blooms
Your balcony garden provides a haven of color and life throughout the warmer months. You nurture your plants, watch them grow, and enjoy their vibrant displays. As summer wanes, you face the annual task of saying goodbye to these floral companions. Instead of letting them wilt and vanish, consider an alternative: preserving their beauty. This approach allows you to hold onto those cherished memories and bring a touch of your garden indoors, even as the temperatures drop. It transforms what might feel like an ending into a creative new beginning for your precious blooms.
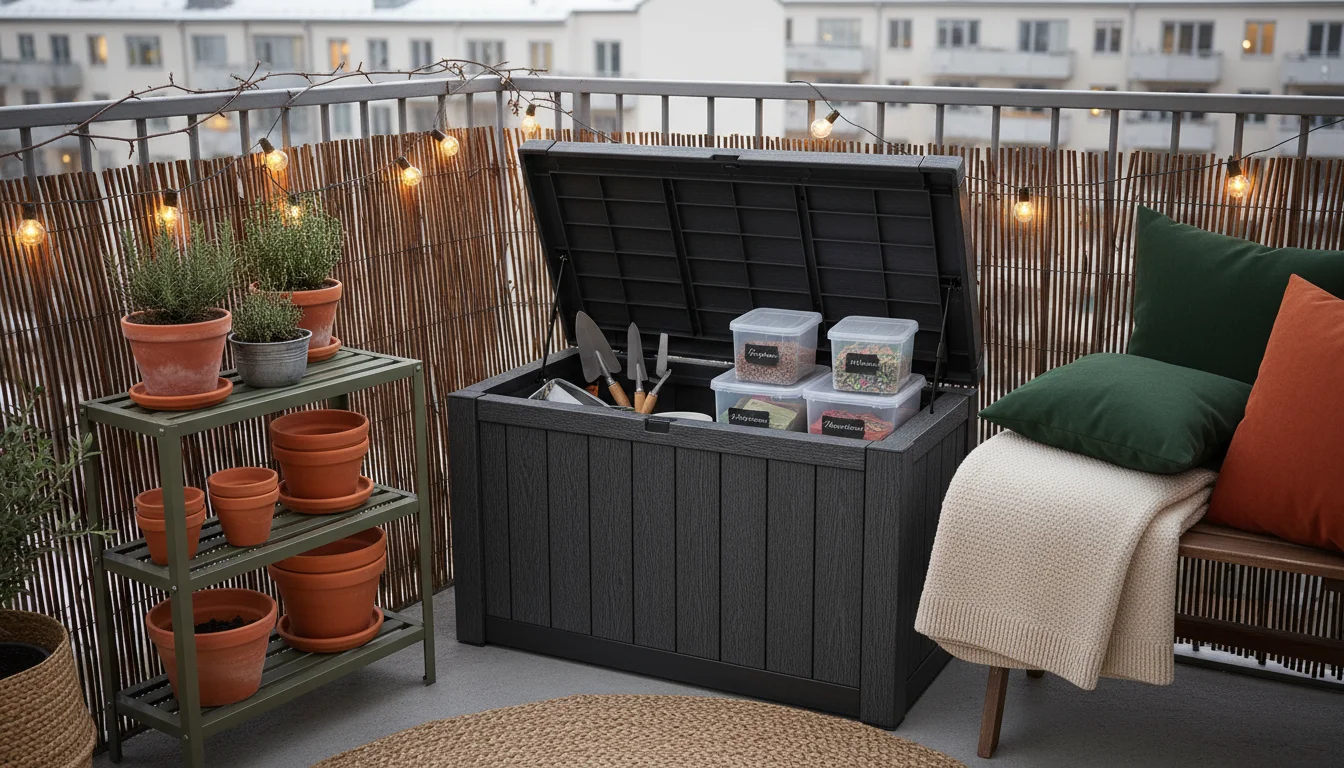
Even when your pots are finished for the season, there are still plenty of ways to use your empty garden space creatively during the colder months.
Think about the joy your marigolds or petunias brought. Preserving them lets you revisit that feeling. It is a mindful way to appreciate the full lifecycle of your plants and to extend their aesthetic and even practical uses. By learning simple ways to save summer flowers, you gain a new perspective on end of season gardening, seeing it as an opportunity rather than a chore.

Beyond the Press: Why Explore New Preservation Methods
Many gardeners are familiar with pressing flowers between book pages, a lovely method for creating flat, two-dimensional art. However, this article focuses on techniques that retain more of the flower’s natural form and volume, opening up a wider array of balcony garden crafts. You can create decorative items, sensory experiences, and even culinary enhancements.
As you handle your final blooms, it is also the perfect time to reflect on the growing season to help you plan for a better garden next year.
Exploring diverse preservation methods means you are not limited to a single artistic outcome. Imagine air-dried roses retaining their elegant shape for a rustic bouquet, or fragrant lavender transformed into soothing sachets. These methods are often surprisingly simple, require minimal specialized equipment, and offer immense satisfaction. They allow you to utilize your entire harvest, especially those last marigolds from pots, in imaginative and personal ways.
Furthermore, these techniques align perfectly with an environmentally conscious gardening ethos. You reduce waste by finding new purposes for your spent blooms, giving them a second life and minimizing what goes into the compost bin. This mindful approach extends the value of your gardening efforts beyond the growing season itself.

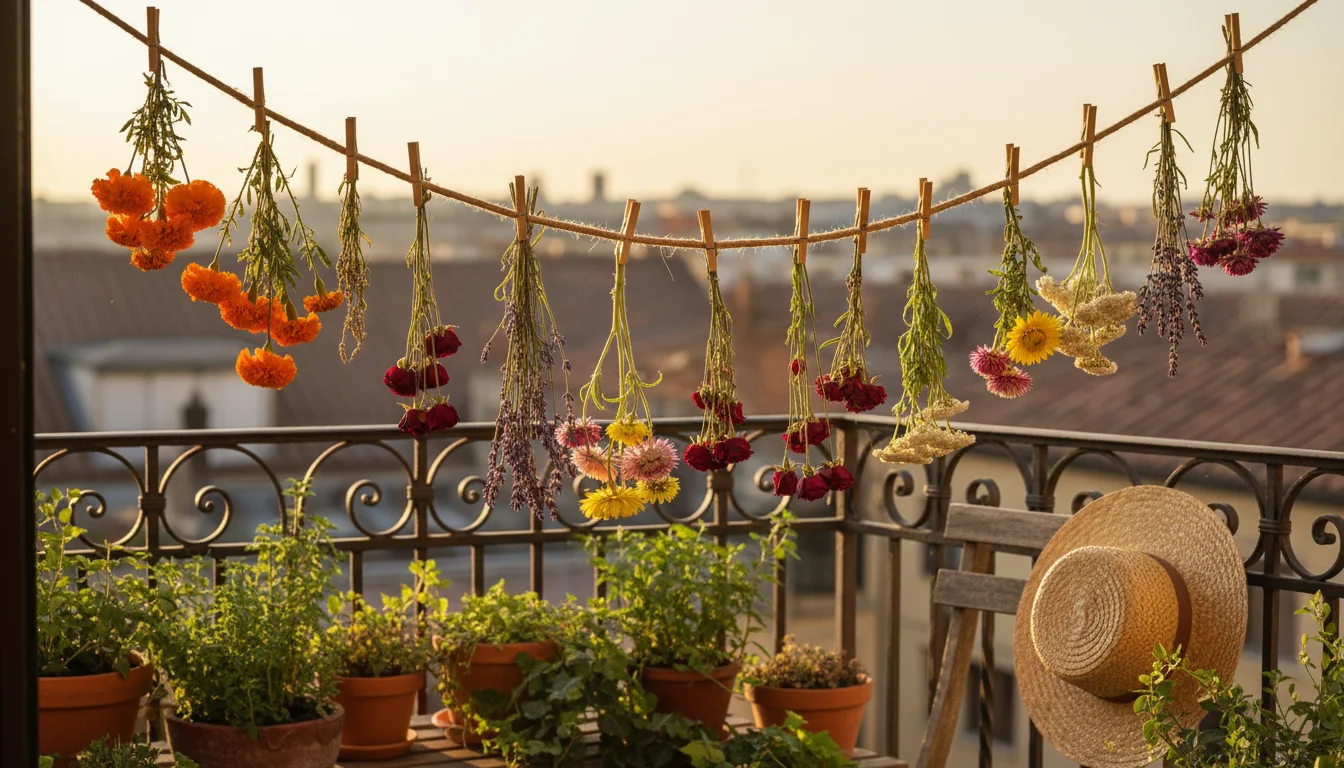
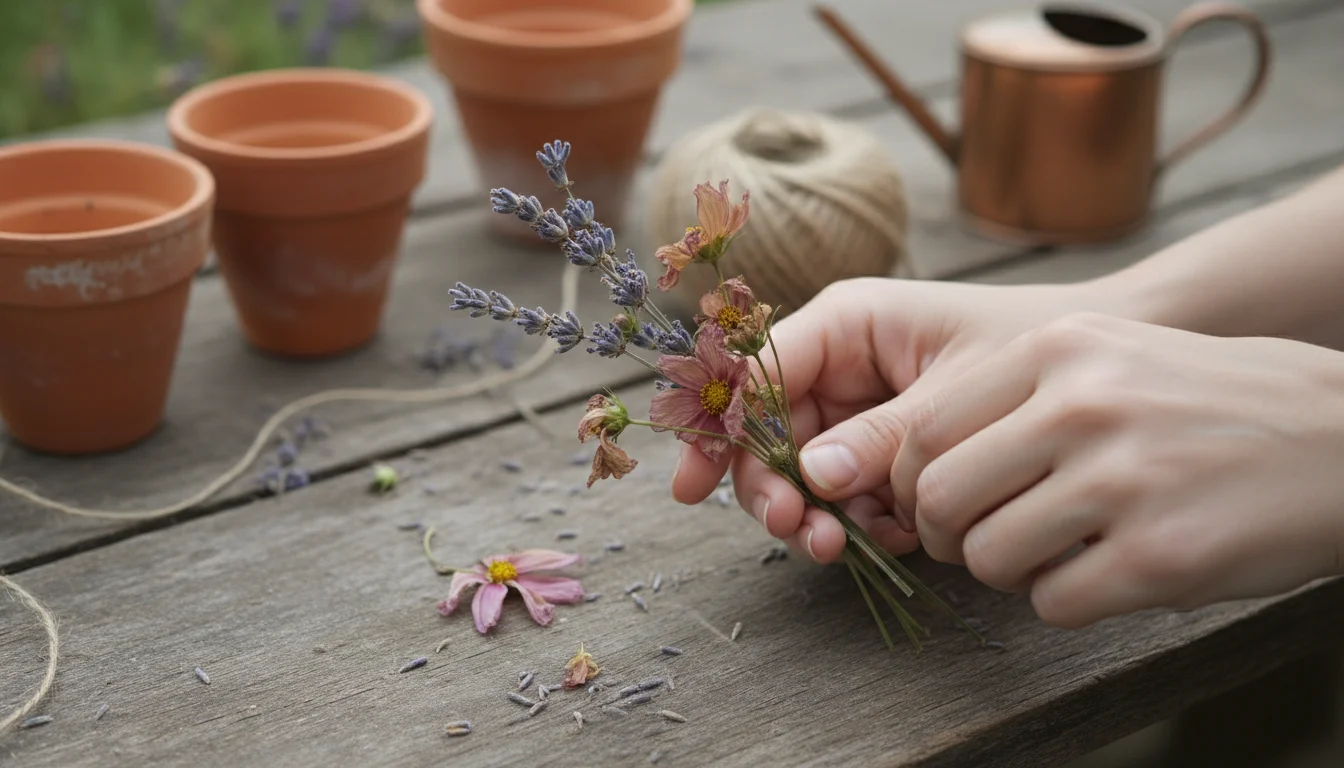
Method 1: Air Drying Flowers for Lasting Beauty
Air drying is one of the most accessible and effective methods to preserve flowers, allowing them to retain much of their natural shape and color. This process simply involves removing moisture from the plant material, preventing decay and leaving behind a beautiful, lasting memento of your garden. Many flowers from a small space, like hydrangeas, lavender, and even some varieties of marigolds, dry wonderfully.
This simple air-drying technique is very similar to how you would harvest and dry herbs from your containers for culinary or medicinal use.
Choosing the Right Blooms for Air Drying
Success starts with selection. Choose flowers that are not fully open but are past their tight bud stage. Overly mature flowers often shed petals during drying. Pick healthy blooms, free from pests, diseases, or damage. Avoid flowers that have just been watered or exposed to heavy rain; excess moisture can lead to mold during drying. Harvest your flowers in the late morning after the dew has evaporated but before the intense midday sun causes wilting. This timing helps ensure optimal moisture levels in the plant.
- Sturdy Stems: Flowers with strong, woody stems tend to dry best.
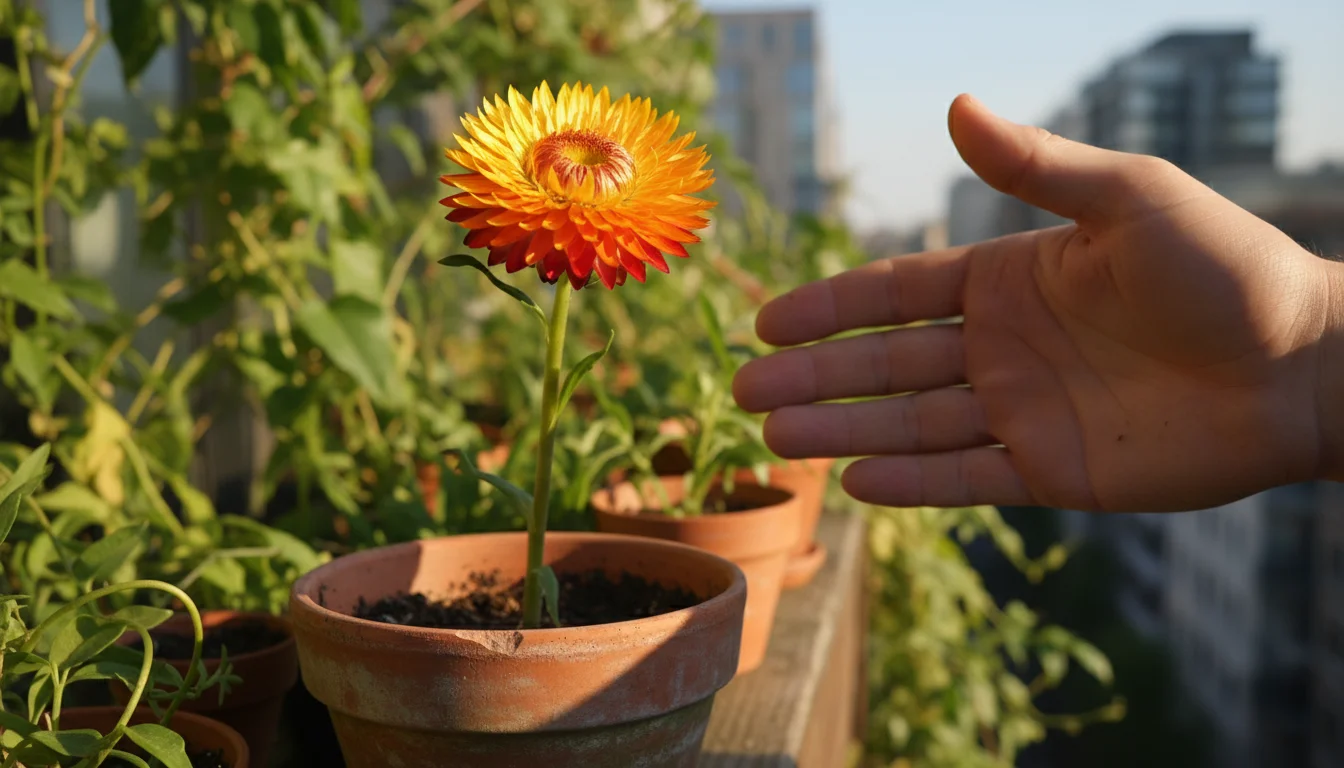
- Low Water Content: Blooms with naturally lower water content, such as strawflowers, yarrow, and lavender, excel at air drying.
- Foliage: While some foliage can be dried, consider removing most leaves, especially on thicker stems. Leaves hold a lot of water and can slow the drying process, increasing mold risk.

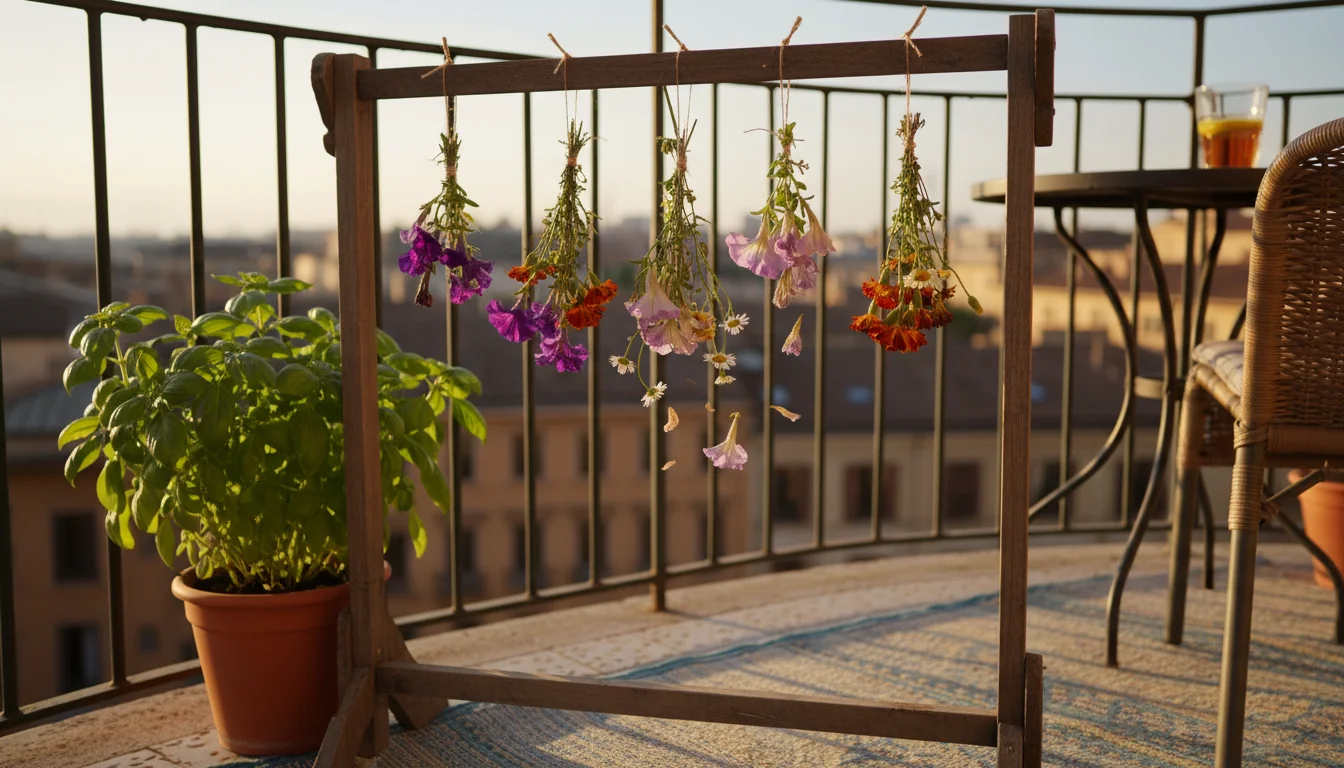
Step-by-Step Air Drying Process
- Prepare Your Flowers:
- Carefully snip your chosen flowers, leaving stems at least 6-8 inches long.
- Remove any foliage below where you plan to bind the stems. This improves air circulation and prevents mold.
- Trim any damaged petals.
- Bundle Them Up:
- Gather small bunches of 3-7 stems. Bundling too many together restricts airflow and can lead to mold.
- Securely tie the stems together using rubber bands or twine. Rubber bands are excellent because they contract as the stems shrink during drying, maintaining a tight hold.
- Consider hanging different types of flowers in separate bundles for optimal results, as their drying times may vary.
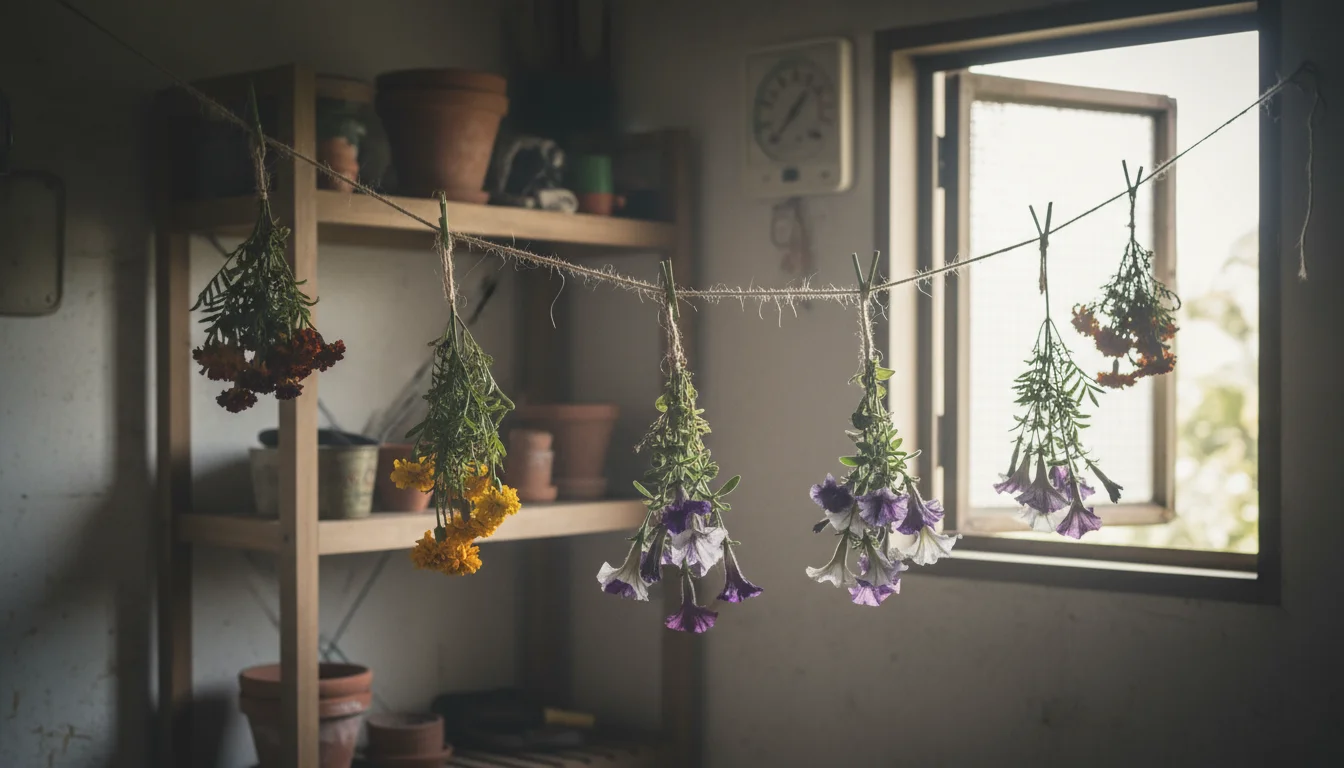
- Find the Perfect Drying Spot:
- Hang your bundles upside down. This prevents the flower heads from drooping and helps the stems dry straight.
- Choose a dark, dry, well-ventilated area. Good ventilation is crucial to wick away moisture. A spare closet, attic, or even a corner of your laundry room often works well.
- Avoid direct sunlight, which can bleach colors.
- Humidity is the enemy. A consistent temperature between 60-70°F (15-21°C) with low humidity (ideally below 50 percent) is ideal. Use a fan for air circulation if needed, but do not blow directly onto the flowers.
- Patience is Key:
- Drying typically takes 2-4 weeks, depending on the flower type, stem thickness, and environmental conditions.
- Check your flowers periodically. They are fully dry when the petals feel crispy and rustle, and the stems snap easily rather than bending.
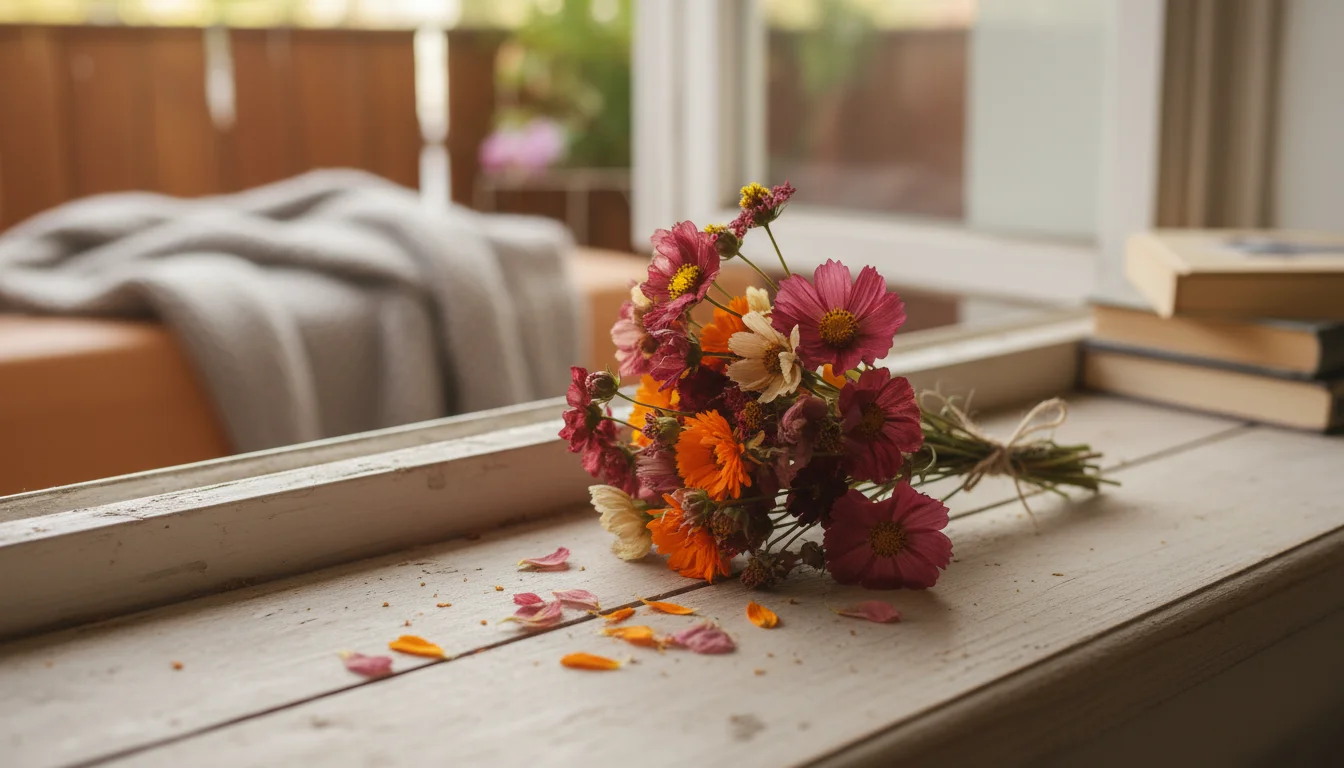
Caring for Your Dried Blooms
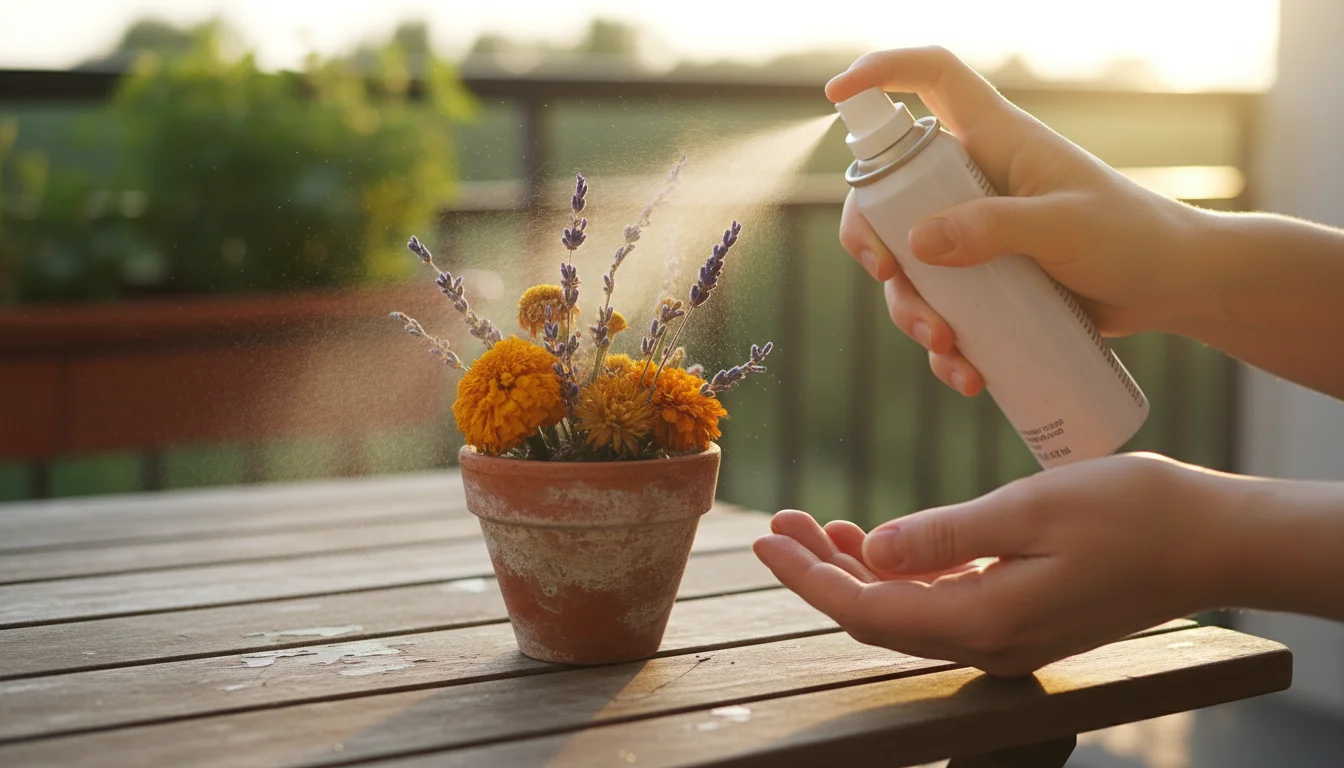
Once your flowers are fully dry, handle them gently as they become fragile. To preserve their color and integrity, keep them out of direct sunlight and away from high humidity. A light misting of unscented hairspray can help protect delicate petals and minimize shedding. Store them in airtight containers if not immediately used in arrangements, or display them in vases or creative wall hangings. This method extends the joy of your balcony garden crafts, offering lasting visual appeal.
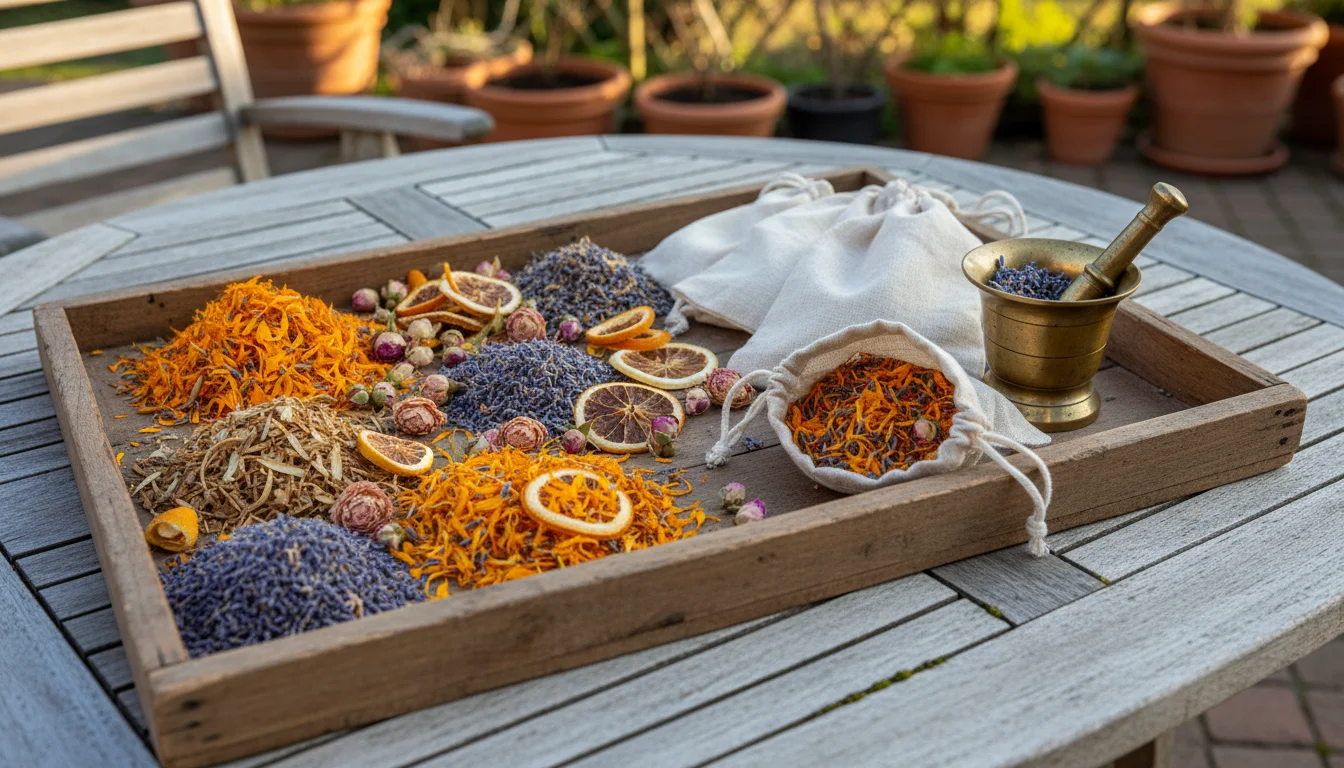
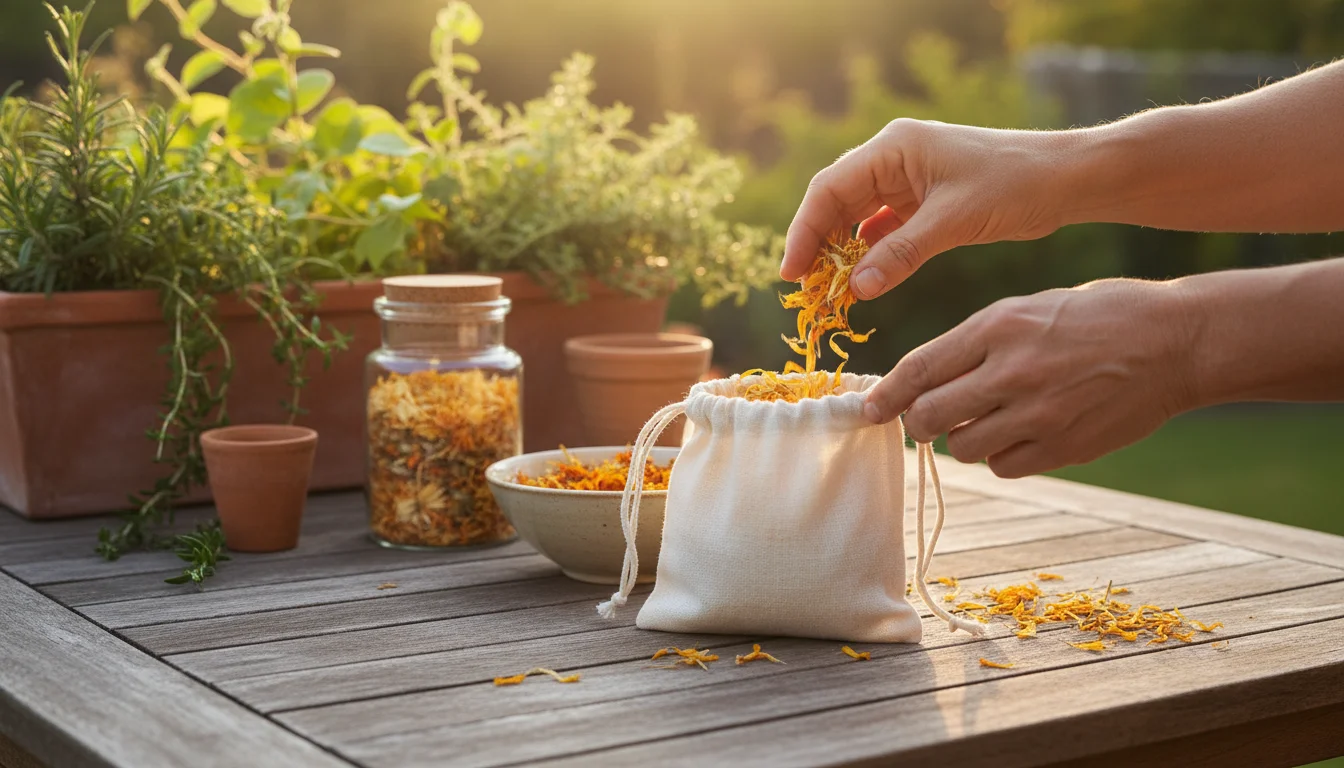
Method 2: Crafting Botanical Sachets and Potpourri
Transforming your dried flowers and herbs into fragrant sachets and potpourri offers a delightful way to capture summer’s scents and infuse your home with natural aromas. This is a truly rewarding end of season gardening activity, providing beautiful, aromatic keepsakes that make thoughtful gifts or personal comforts. It is also an excellent answer to what to do with last marigolds from pots, as their petals can contribute vibrant color and subtle fragrance.
Selecting Fragrant & Colorful Elements
For sachets and potpourri, focus on blooms and plant parts that retain their scent and color well after drying. Consider a blend of ingredients for both visual appeal and a complex fragrance profile.
- Primary Scent Providers: Lavender buds, rose petals, mint leaves, rosemary, lemon verbena.
- Color & Filler: Dried marigold petals, small dried flower heads (like strawflowers, tiny roses), calendula petals, cornflower petals.
- Scent Fixatives (Optional): A few drops of essential oils, for example lavender, rose, or sweet orange, can boost and prolong the fragrance. Orris root powder also acts as a natural fixative.
- Spices (Optional): Cinnamon sticks, whole cloves, star anise for a warm, autumnal scent profile.
Making Fragrant Sachets: Step-by-Step
Sachets are small fabric bags filled with fragrant botanicals, perfect for tucking into drawers, closets, or under pillows. They are a simple yet elegant balcony garden craft.
- Gather Your Dried Materials: Ensure all your flowers and herbs are completely dry. If necessary, gently crumble larger pieces.
- Prepare Your Fabric: Small fabric squares (4×4 to 6×6 inches) made from breathable materials like cotton, linen, or organza work best. You can hand-stitch or use a sewing machine. Alternatively, ready-made sachet bags are widely available.
- Create Your Blend: In a bowl, combine your dried flowers, herbs, and any optional essential oils or spices. Gently mix them together. For every cup of dried botanicals, use 5-10 drops of essential oil, if adding. Stir well and let the mixture sit for a few hours, or even a day, to allow the scents to meld.
- Fill the Sachets: Spoon the botanical mixture into your fabric squares or sachet bags. Do not overfill; leave enough room to tie or sew the sachet shut.
- Seal and Enjoy: If using fabric squares, gather the corners and tie them with a ribbon or twine. For pre-made bags, simply pull the drawstring tight. Place your sachets wherever you desire a burst of natural fragrance.
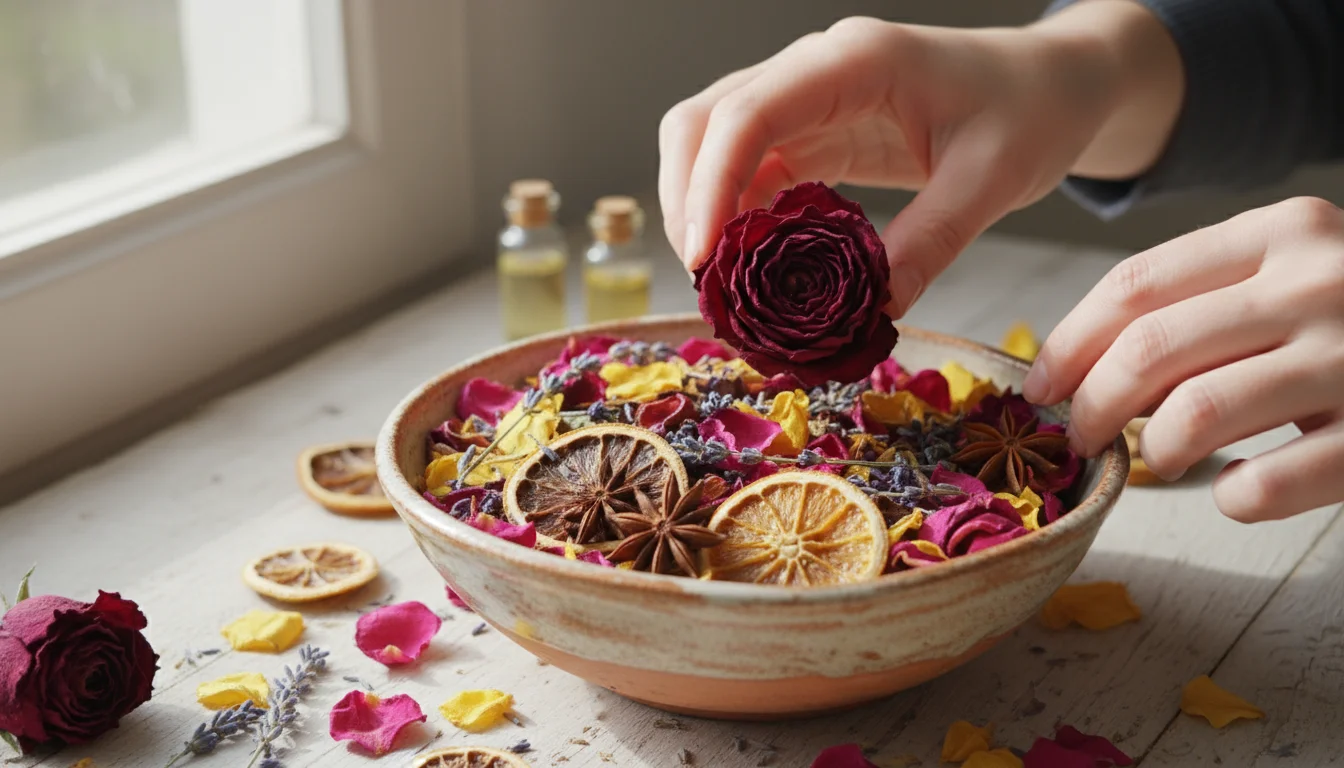
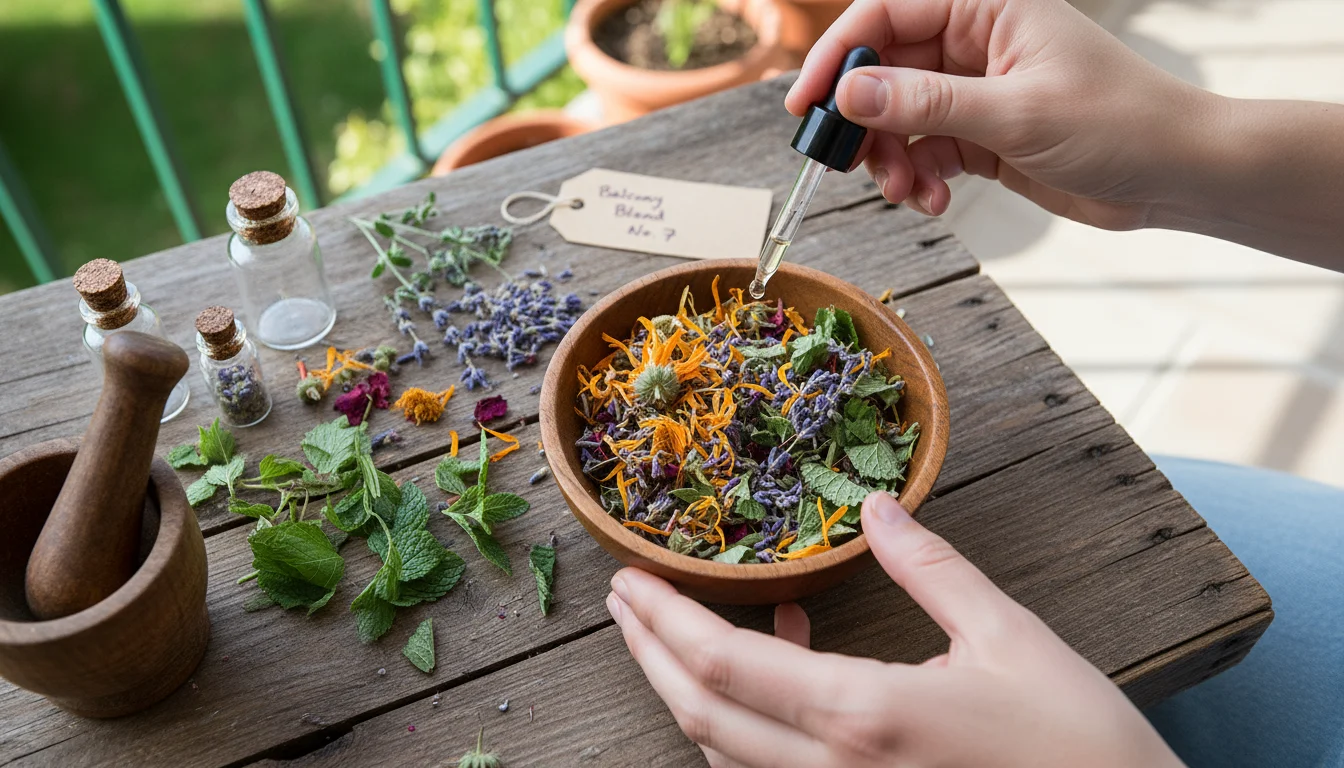
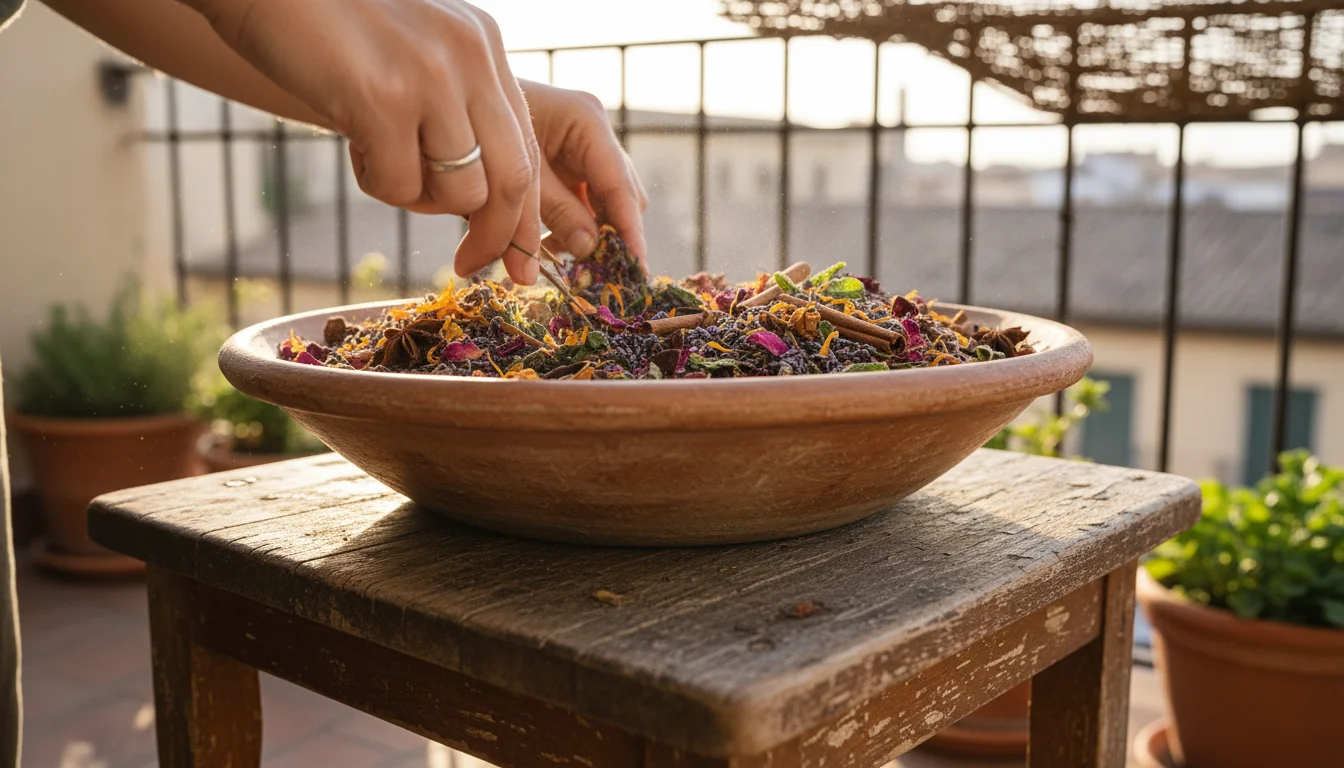
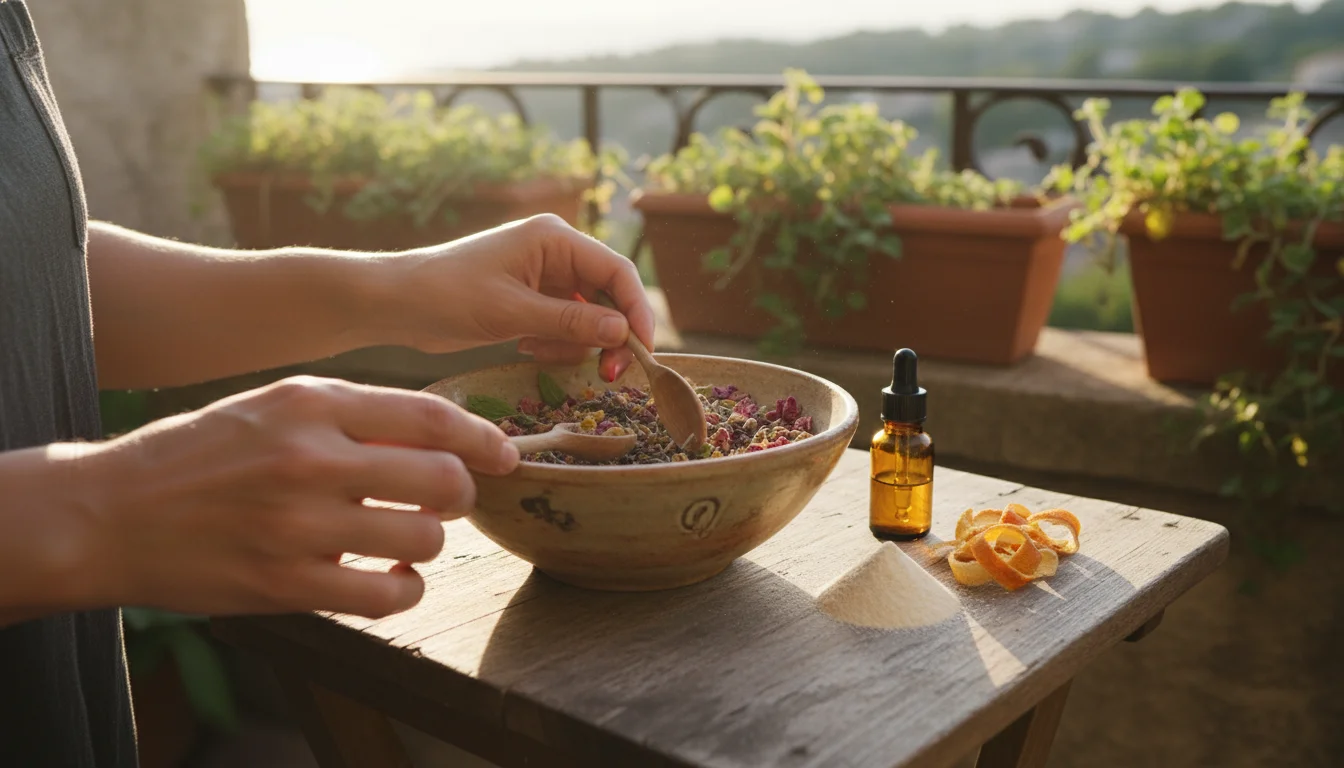
Crafting Potpourri: A Deeper Dive
Potpourri offers a more visually elaborate display than sachets, typically presented in open bowls or decorative containers. It is a fantastic way to utilize a larger volume of simple ways to save summer flowers.
- Collect a Variety of Dried Botanicals: Think about textures, colors, and shapes. Large dried flower heads, colorful petals, interesting seed pods, and even small pieces of dried citrus peel add visual interest. Remember your primary scent components.
- Mix Your Ingredients: In a large, non-reactive bowl, gently combine all your dried elements. Aim for a balanced look and scent. You can experiment with different ratios.
- Add Essential Oils (Optional, but Recommended for Potpourri): Essential oils significantly boost the long-term fragrance of potpourri. Choose oils that complement your botanical blend. Add 20-30 drops per 4-5 cups of dried material, distributing them evenly. Gently toss the mixture.
- Cure the Potpourri: This crucial step allows the scents to fully develop and meld. Transfer your potpourri mixture to an airtight glass jar or container. Store it in a cool, dark place for 2-4 weeks, shaking the jar gently every few days. This curing process ensures a richer, longer-lasting fragrance.
- Display Your Creation: Once cured, transfer your beautiful potpourri to decorative bowls, baskets, or clear glass containers. To refresh the scent over time, simply add a few more drops of essential oil and gently toss.

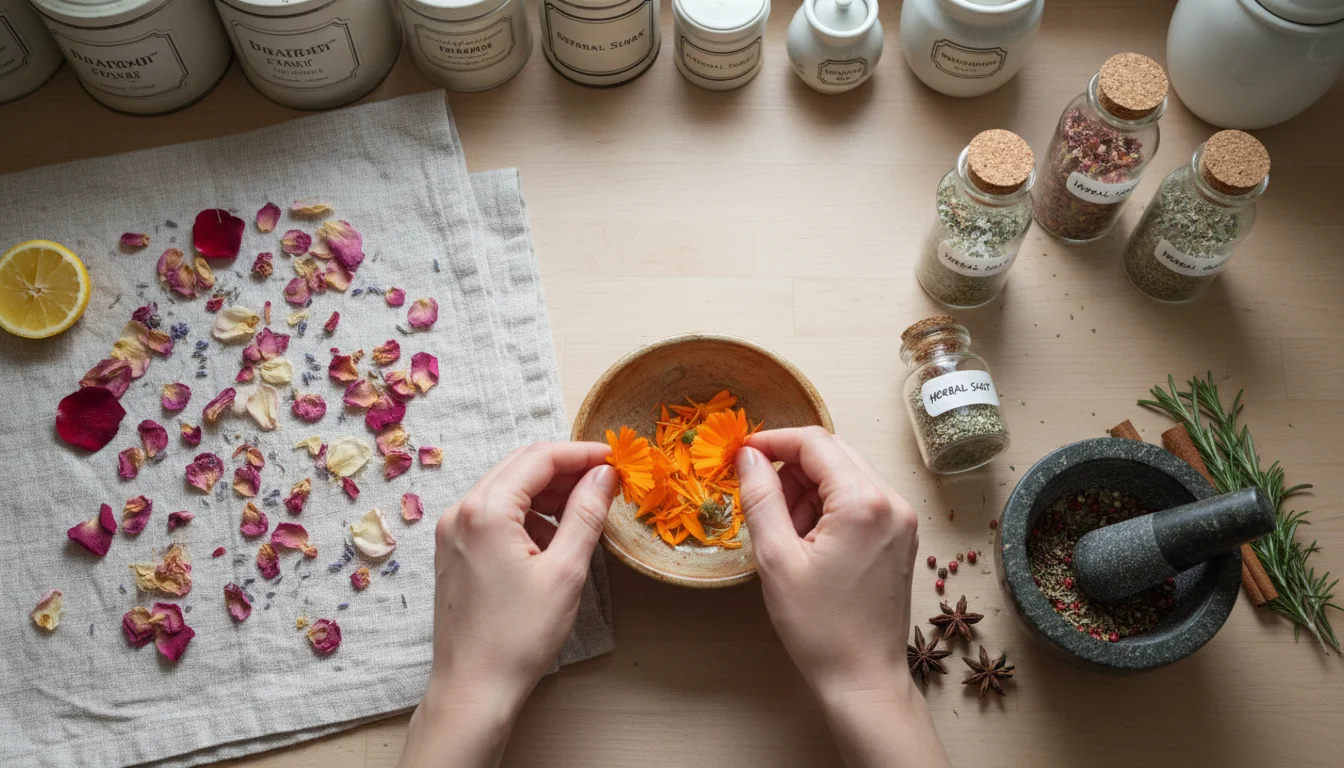
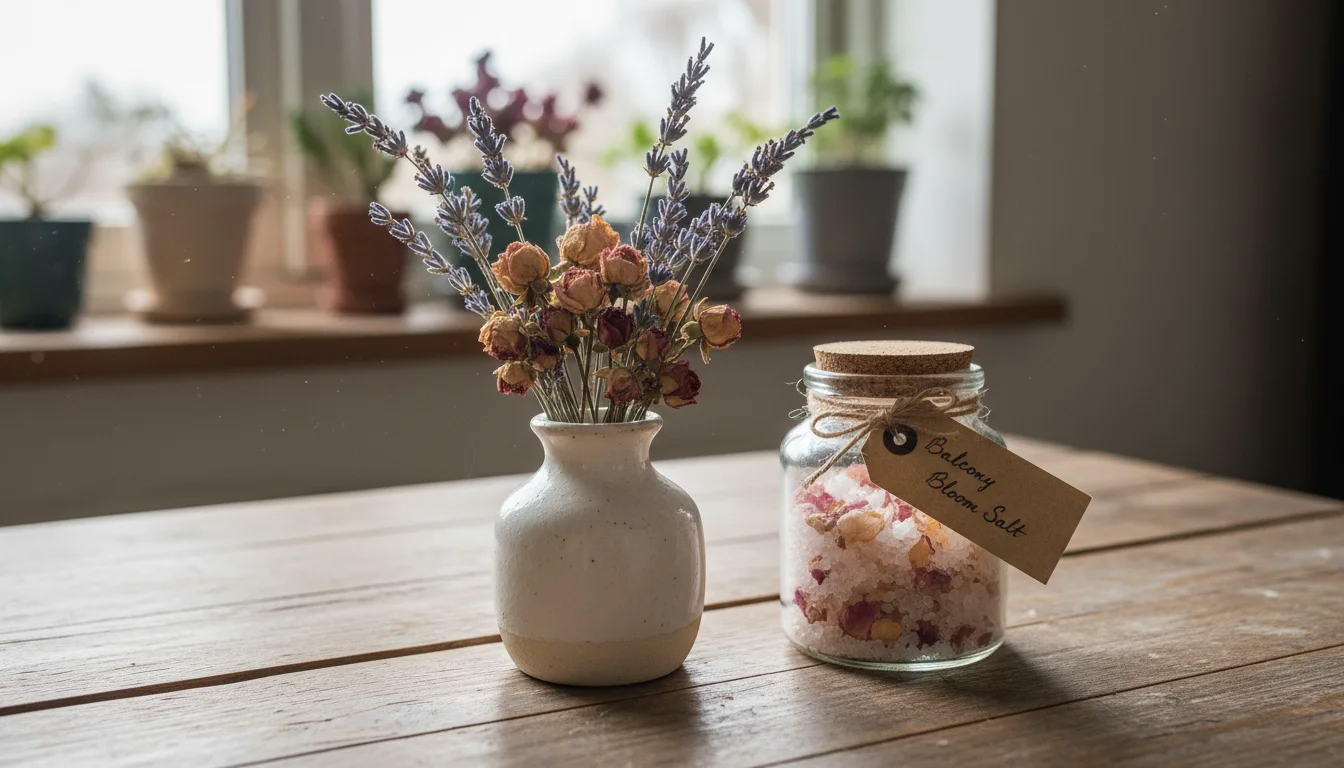
Method 3: Infusing Floral Salts and Sugars for Culinary Delights
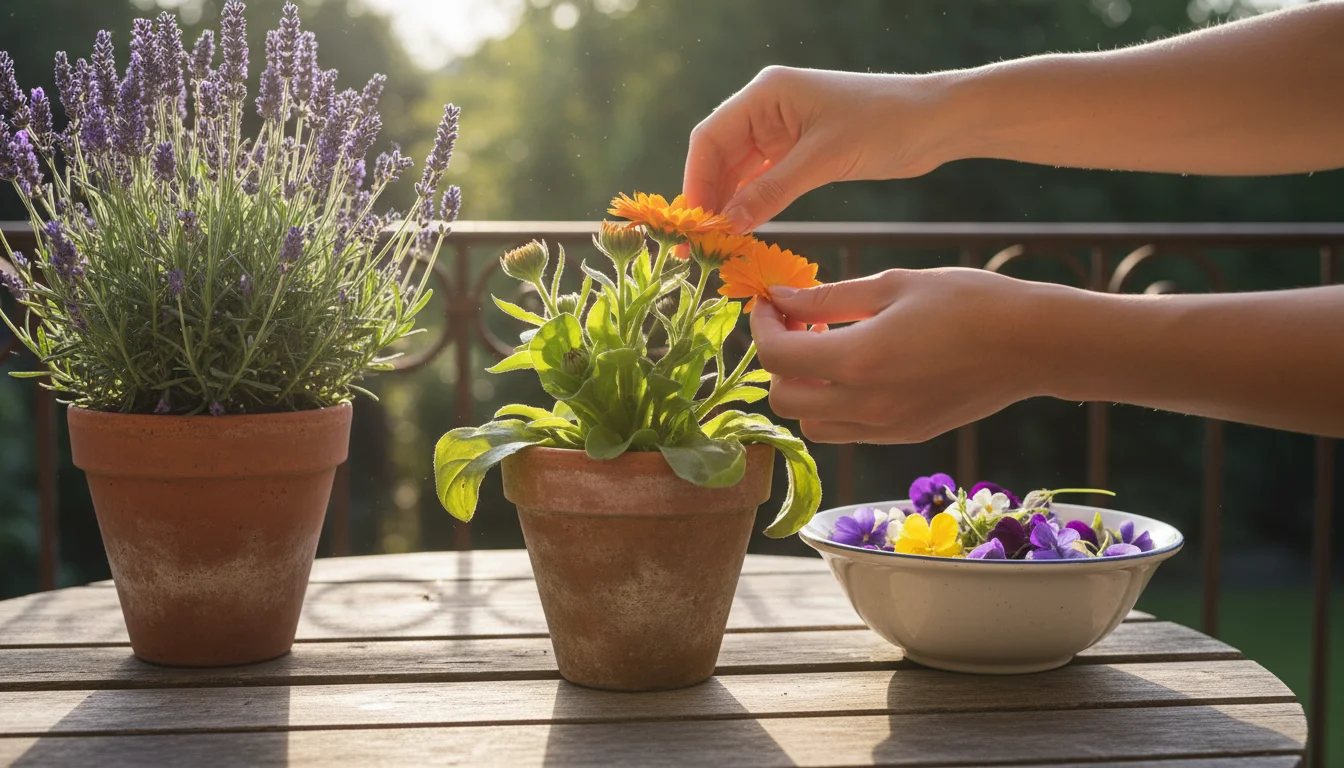
Who knew your balcony garden could contribute to gourmet cooking? Infusing salts and sugars with edible flowers is an exciting, low-effort way to add unique flavors and beautiful colors to your kitchen. This method provides an elegant answer to how to make floral infused salt, transforming everyday ingredients into culinary treasures. It is also a perfect use for those last marigolds from pots, along with other edible blooms.
This technique is very similar to creating a gourmet herb salt using the final sprigs of your culinary garden.
Choosing Edible Flowers for Infusion
Safety is paramount. Ensure that any flower you use is genuinely edible and has not been treated with pesticides or chemicals. Grow edible flowers specifically for culinary use in your balcony garden to guarantee their safety. Always research unfamiliar flowers to confirm edibility.
- Marigolds (Calendula varieties): Bright orange and yellow petals offer a mild, peppery, slightly citrusy flavor. Fantastic for color.
- Rose Petals: Provide a delicate, sweet, and perfumed note. Use organic, unsprayed roses.
- Lavender: Offers a distinct floral, slightly savory flavor. Use sparingly, as it can be strong.
- Violas/Pansies: Mild, slightly sweet flavor, excellent for visual appeal.
- Chamomile: Earthy, apple-like, and soothing flavor.
Avoid ornamental flowers not specifically listed as edible, as many can be toxic. When in doubt, leave it out. Only use petals, not the green parts, which can be bitter.
How to Make Floral Infused Salt: Step-by-Step
Floral salts add a gourmet touch to savory dishes, brightening flavors and adding a touch of visual elegance.
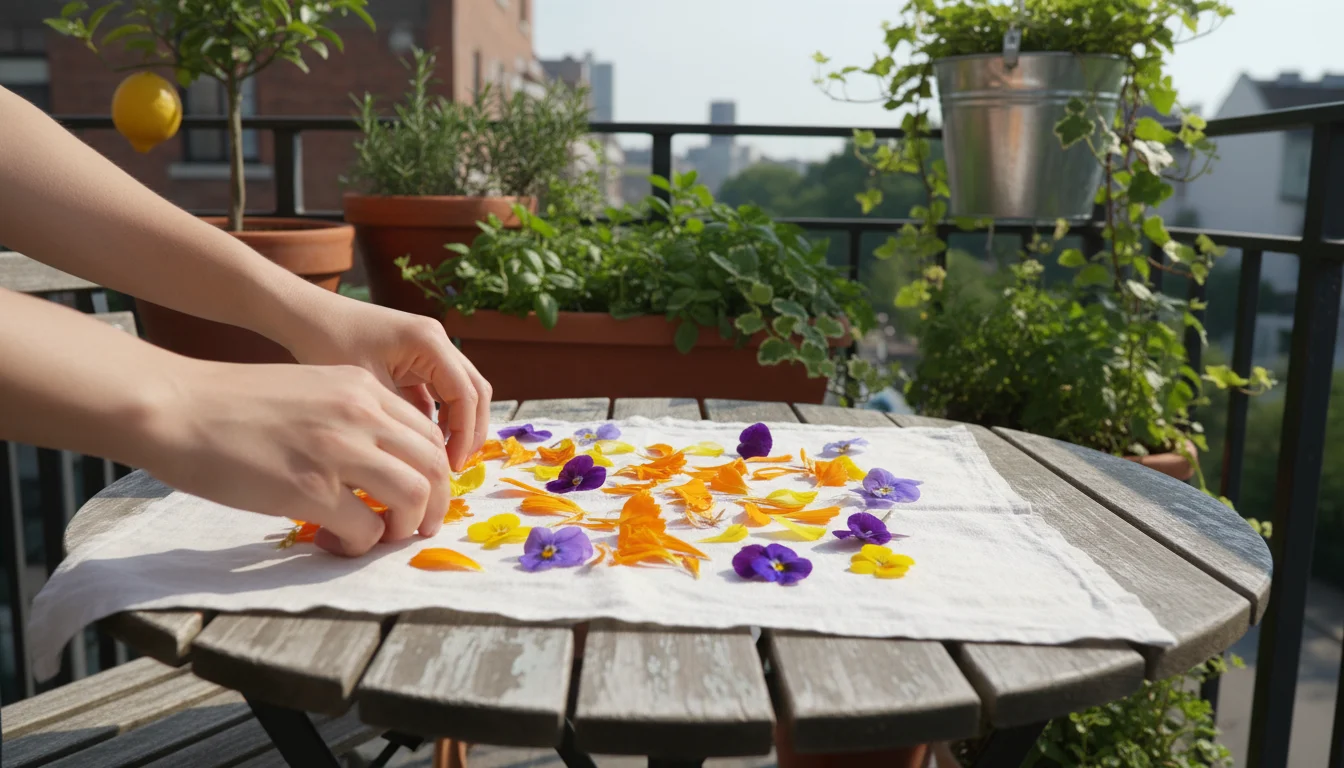
- Harvest and Prepare Your Petals:
- Carefully pick fresh, clean petals from your chosen edible flowers. Pick them on a dry day, late morning.
- Gently rinse the petals under cool water if necessary, then spread them on a clean cloth or paper towel to air dry completely. Moisture is the enemy here; ensure no water remains on the petals.
- Remove any green parts, such as sepals or stems, as these can be bitter.
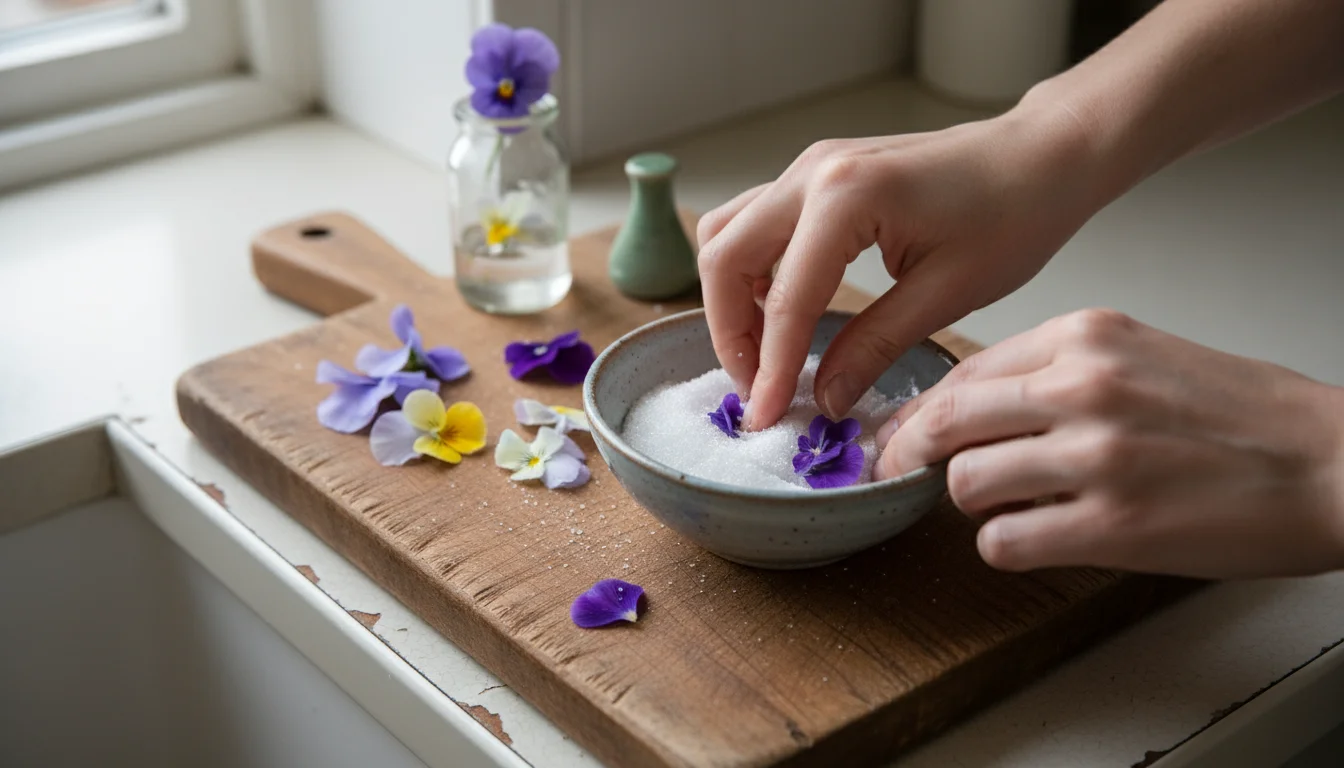
- Choose Your Salt:
- Coarse sea salt or kosher salt works best. Its larger crystals absorb flavor well and provide a pleasant texture.
- Combine and Infuse:
- In a food processor, combine 1 cup of coarse salt with about 1/4 cup of fresh, dry flower petals. Adjust ratios based on desired intensity and flower type. For stronger flavors, use more petals.
- Pulse briefly until the petals are finely chopped and evenly distributed throughout the salt, creating a vibrant, fragrant mixture. Avoid over-processing, which can make the salt pasty.
- Alternatively, if you do not have a food processor, you can finely chop the petals by hand and then thoroughly mix them with the salt in a bowl.
- Dry for Storage:
- Spread the infused salt in a thin, even layer on a baking sheet lined with parchment paper.
- Allow it to air dry at room temperature for 1-3 days, or place it in a very low oven (around 150°F / 65°C) for 1-2 hours until completely dry. Stir occasionally. This step is critical to prevent moisture from causing clumping or spoilage.
- The salt should be completely dry and free-flowing before storage.
- Store and Use:
- Once fully dry, transfer the floral salt to an airtight jar and store it in a cool, dark place. It will keep for several months.
- Use it to season roasted vegetables, grilled fish or chicken, salads, or even as a rimming salt for cocktails. Imagine a marigold salt on roasted potatoes.
Crafting Floral Infused Sugars
Floral sugars add a delightful, aromatic sweetness to desserts, baked goods, and beverages.
- Prepare Petals and Sugar:
- Use fresh, dry, edible flower petals, prepared as for the infused salt.
- Combine 1 cup of granulated sugar with about 1/4 cup of fresh petals. Fine sugar works well for even infusion.
- Infuse the Sugar:
- Gently rub the petals into the sugar with your fingers or pulse briefly in a food processor until the petals are finely incorporated and the sugar takes on their color and fragrance.
- Dry and Store:
- Spread the infused sugar on a parchment-lined baking sheet and air dry for 1-2 days, or use a very low oven setting for about an hour. Ensure it is completely dry before storing.
- Store in an airtight jar in a cool, dark place.
- Culinary Applications:
- Use floral sugar in baking cookies, cakes, or scones.
- Sprinkle it over fresh fruit, yogurt, or oatmeal.
- Stir it into tea, lemonade, or other beverages for an aromatic treat.
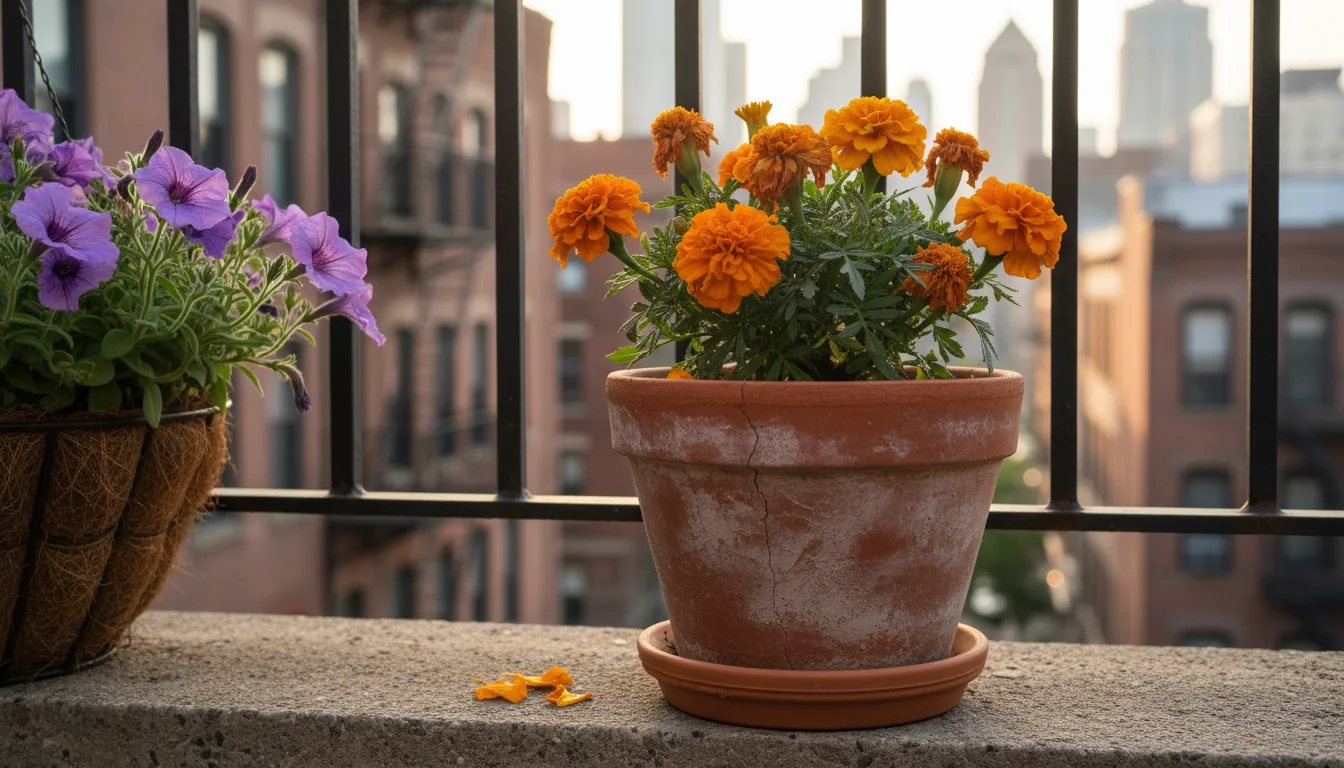
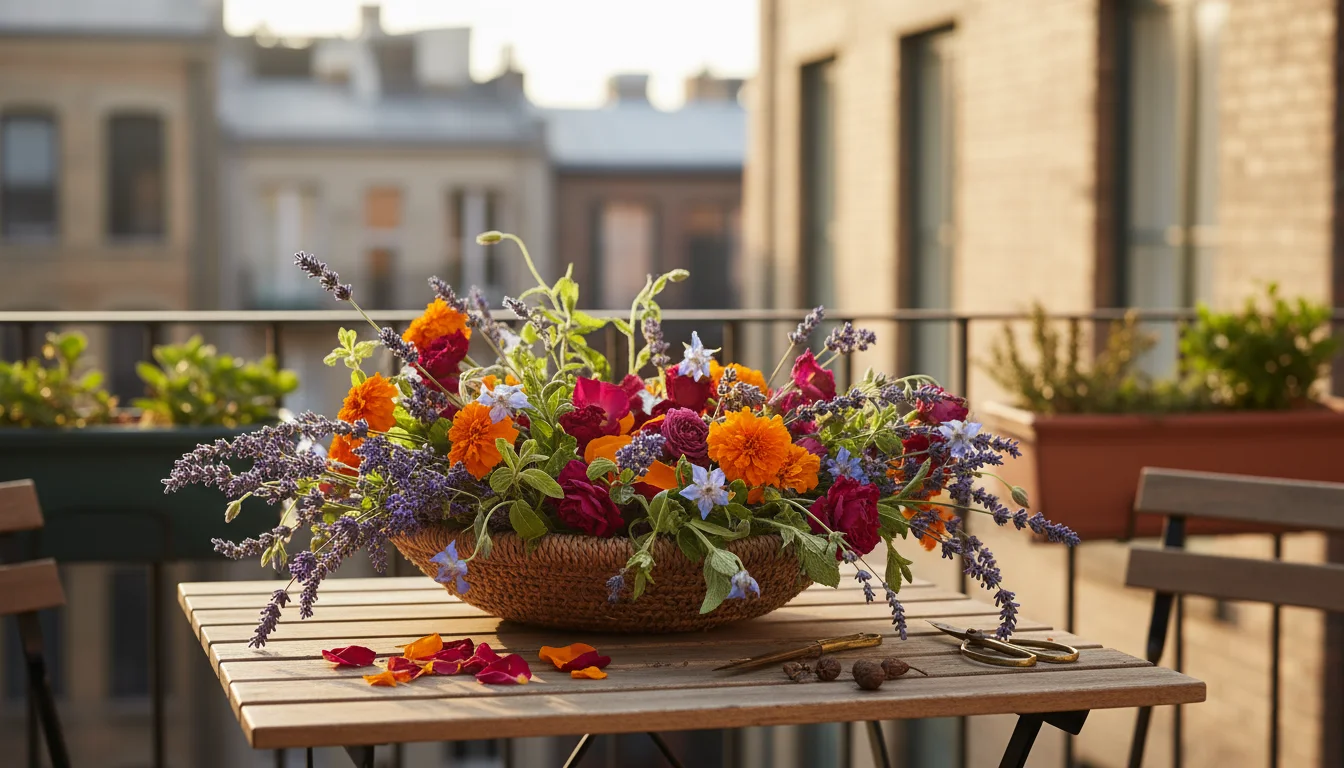
Selecting Your Stars: Best Balcony Blooms for Preservation
Not all flowers are created equal when it comes to preservation. Choosing the right varieties from your balcony garden can significantly impact the success and beauty of your projects. Focus on flowers known for holding their shape, color, and sometimes scent during the drying process. This ensures your simple ways to save summer flowers yield stunning results.
Top Picks for Air Drying:
- Marigolds (Calendula officinalis and Tagetes varieties): These hardy annuals from pots are fantastic. Their petals dry well, retaining much of their vibrant orange and yellow hues, perfect for potpourri or floral salts.
- Lavender (Lavandula species): A classic for drying, lavender retains its scent and beautiful purple color, making it ideal for sachets and arrangements.
- Roses (Rosa species): Smaller, firmer rosebuds and petals dry best. They can be air-dried or used in infused salts. Darker roses often retain more color.
- Strawflowers (Xerochrysum bracteatum): These ‘everlasting’ flowers are a dream for drying. They hold their shape and vivid colors almost perfectly.
- Yarrow (Achillea millefolium): Its flat-topped clusters dry wonderfully, maintaining structure and color, great for rustic bouquets.
- Celosia (Celosia argentea cristata or plumosa): Both the crested ‘cockscomb’ varieties and the feathery ‘plumosa’ types dry beautifully, offering unique textures.
- Hydrangeas (Hydrangea macrophylla): Harvest when the blooms are mature and their color has intensified, and they will air dry with stunning results.
Best for Scent & Potpourri:
- Lavender: Unrivaled for its calming, long-lasting fragrance.
- Rose Petals: Offer a classic, sweet perfume. Collect them when they are just fully open.
- Mint (Mentha species): Adds a refreshing, uplifting note.
- Rosemary (Salvia rosmarinus): Aromatic and woody, complementing many floral scents.
- Lemon Verbena (Aloysia citrodora): Provides a crisp, citrusy fragrance.
Ideal for Culinary Infusions (Salts & Sugars):
- Calendula (Pot Marigolds): The bright petals add a mild, peppery flavor and beautiful color. Excellent for what to do with last marigolds from pots.
- Edible Roses: Fragrant petals impart a delicate sweetness.
- Lavender: Use sparingly for its potent floral notes.
- Violas & Pansies: Offer subtle sweetness and charming visual appeal.
- Chamomile: Earthy and apple-like, perfect for soothing infusions.
Always ensure your chosen flowers are free from pesticides and are truly edible if using for culinary purposes. When in doubt, stick to decorative uses only.
Troubleshooting Common Preservation Pitfalls
Even with careful preparation, you might encounter challenges when you preserve flowers. Knowing how to identify and address these issues will help you achieve the best results for your balcony garden crafts.
Problem 1: Flowers Turning Brown or Losing Vibrant Color
- Cause:
- Too much light: Direct sunlight during drying or display can bleach colors.
- Picking immature or over-mature blooms: Flowers picked at the wrong stage may not retain their color as well.
- Humidity: High humidity can lead to slow drying and faded colors.
- Solution:
- Dry in a dark, dry place: Always hang flowers in an area away from direct light.
- Harvest at the right stage: Pick flowers just before they fully open.
- Control humidity: Ensure good air circulation. If your drying space is naturally humid, consider using a dehumidifier or a fan to circulate air, but do not blow directly onto the flowers.
Problem 2: Mold Growth on Dried Flowers
- Cause:
- Insufficient air circulation: Trapped moisture encourages mold.
- Bundling too many flowers together: Prevents proper airflow.
- High humidity during drying: Moisture in the air contributes to mold.
- Picking wet flowers: Harvesting after rain or with dew still present.
- Solution:
- Smaller bundles: Stick to 3-7 stems per bundle.
- Ample space: Ensure bundles do not touch each other or the wall.
- Dry, well-ventilated area: As mentioned, a dark, dry space with good airflow is crucial.
- Harvest dry flowers: Always pick flowers when they are completely dry, typically late morning.
- Discard moldy flowers: Do not try to salvage them, mold spores can spread.
Problem 3: Flowers Becoming Brittle and Shattering
- Cause:
- Over-drying: While flowers need to be fully dry, excessive drying can make them overly fragile.
- Low humidity in display area: Once dried, very dry environments can cause extreme brittleness.
- Solution:
- Handle gently: Dried flowers are delicate. Minimize handling.
- Light hairspray: A very light misting of unscented hairspray can add a protective layer and reduce brittleness.
- Avoid direct heat: Keep dried arrangements away from heat vents or fireplaces.
Problem 4: Loss of Fragrance in Sachets/Potpourri
- Cause:
- Volatile oils evaporate over time: Natural scents fade.
- Lack of scent fixatives: No ingredients to “hold” the fragrance.
- Solution:
- Refresh with essential oils: Periodically add a few drops of complementary essential oil to your sachets or potpourri.
- Incorporate fixatives: Use orris root powder or small pieces of dried citrus peel in your initial blend to help prolong the scent.
- Store airtight: When not in use, keep potpourri in airtight containers to preserve its fragrance.
Sustainable Practices for End-of-Season Gardening
Embracing preservation methods goes hand in hand with sustainable gardening. By finding new uses for your final balcony flowers, you reduce waste and extend the value of your efforts. This environmentally conscious approach ensures that your small space garden contributes positively to a greener lifestyle.
Beyond preservation, another sustainable habit is learning how to save seeds from your spent flower heads to ensure a beautiful garden next spring.
Beyond Preservation: Additional Eco-Friendly Tips
- Composting Leftovers: Any plant material not suitable for preservation should go into your compost bin. This enriches your soil for next season and diverts waste from landfills.
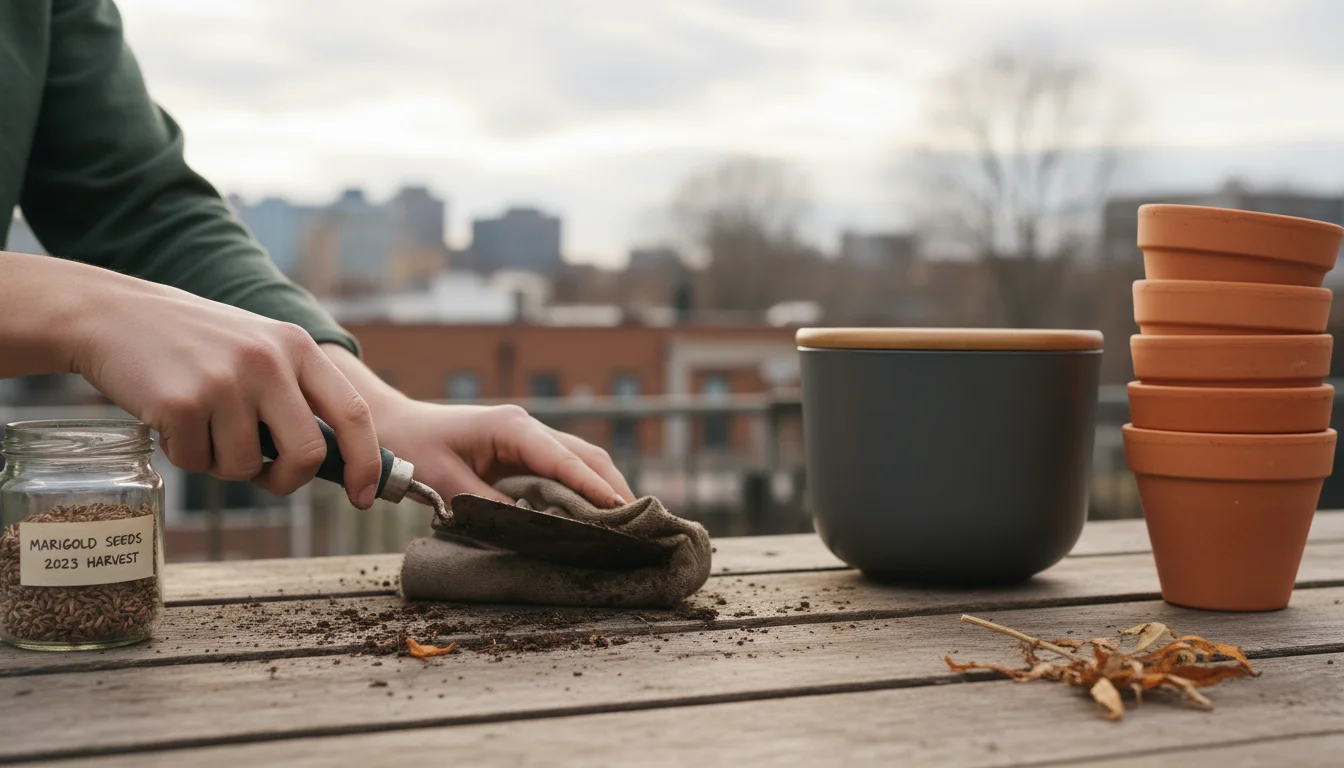
- Seed Saving: Collect seeds from your favorite open-pollinated varieties. This allows you to grow the same beautiful flowers next year without purchasing new seeds, fostering self-sufficiency in your balcony garden.
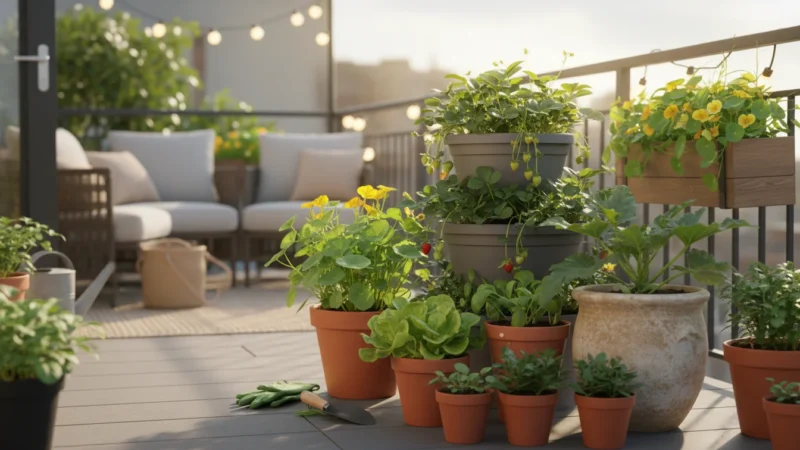
- Winterizing Containers: Clean and store empty pots. If using ceramic or terracotta, bring them indoors to prevent cracking in freezing temperatures. Consider insulating perennial plants left in containers for the winter.
- Tool Maintenance: Clean and sharpen your gardening tools before storing them. Proper care extends their lifespan, reducing the need for replacements.
- Water Conservation: As the season ends, gradually reduce watering. Plants naturally slow down their growth, and overwatering can lead to root rot.
- Mulching: For any small in-ground beds or larger containers that remain outside, a layer of mulch helps insulate roots and retain moisture, preparing them for colder weather.
Every small action in your end of season gardening contributes to a healthier planet. Your dedication to preserving blooms, composting, and planning for next year demonstrates a deep commitment to sustainable living.

Frequently Asked Questions
Can I air dry all types of flowers?
While you can attempt to air dry most flowers, some perform much better than others. Flowers with naturally sturdy stems and lower moisture content, like lavender, strawflowers, roses, and celosia, are excellent choices. Succulent-like flowers or those with very thin, delicate petals often do not dry well, as they either retain too much moisture leading to mold, or shrivel into an unrecognizable form.
How long do preserved flowers last?
Air-dried flowers can last for years if cared for properly. Keep them out of direct sunlight to prevent fading and away from high humidity to prevent mold. Sachets and potpourri, especially if refreshed with essential oils, can retain their scent for several months to a year. Floral infused salts and sugars, stored in airtight containers in a cool, dark place, typically maintain their flavor and color for 3-6 months, sometimes longer, depending on the ingredients and storage conditions.
What is the best way to store infused salts and sugars?
Store your floral infused salts and sugars in clean, airtight glass jars. Mason jars or spice jars with tight-fitting lids work perfectly. Ensure they are stored in a cool, dark pantry or cupboard, away from heat and direct light. Exposure to light and air can degrade both color and flavor over time. Proper storage ensures your culinary creations remain fresh and vibrant for an extended period.
Are there any flowers I should avoid preserving?
Yes, some flowers are problematic. Avoid very fleshy flowers, like lilies or tulips, which contain too much moisture and tend to rot rather than dry. Flowers with very fragile petals, like some varieties of petunias, may crumble easily once dried. For culinary infusions, always avoid any flower not explicitly listed as edible, or those treated with pesticides. When in doubt, it is always safer to use flowers strictly for decorative purposes, or to consult reliable sources on edible blooms.
Can I combine different methods, for example, using air-dried petals in infused salts?
Absolutely, creativity is encouraged. While the steps for infused salts and sugars typically involve fresh petals, you can incorporate thoroughly dried, edible petals into spice blends or herbal tea mixtures. For example, dried calendula petals or rose petals can be added to loose leaf tea or a dry rub for meats. Just ensure the dried petals are completely crisp and clean, particularly if meant for consumption, to prevent any moisture introduction that could lead to spoilage.
Extending the Joy Through the Colder Months
The act of preserving your final balcony flowers is more than just a garden task; it is a celebration of the season past and a bridge to the seasons ahead. You transform perishable beauty into lasting works of art, fragrant comforts, and even delectable flavors. This mindful approach to end of season gardening allows you to keep a piece of your small space garden alive, long after the last frost.
Embrace these simple ways to save summer flowers. Whether you are drying flowers for a rustic arrangement, crafting botanical sachets for a touch of natural scent, or making floral infused salt to elevate your cooking, you are extending the joy and utility of your balcony garden. These balcony garden crafts offer not just beautiful results, but also a sense of accomplishment and connection to your gardening journey. Let your preserved blooms be a reminder of summer’s warmth, brightening your home throughout the colder months.
For trustworthy gardening information, visit: University of Arizona Cooperative Extension — Gardening, University of Alaska Fairbanks Extension — Gardening, University of Georgia Extension — Gardening, Louisiana State University AgCenter — Lawn & Garden and Mississippi State University Extension — Lawn & Garden. These organizations provide expert, research-based advice for gardeners at all levels.
Disclaimer: This article is for informational purposes only and is not a substitute for professional gardening advice. Always consult local extension services or horticulture experts for region-specific guidance.


Leave a Reply