The $20 Balcony Greenhouse: How to Build a Simple Cold Frame to Extend Your Fall Harvest
The changing seasons often bring a bittersweet feeling to gardeners. Just as your plants reach their peak, cooler temperatures arrive, signaling the end of the growing season. For those with limited space, a balcony or patio garden can feel particularly vulnerable to the sudden chill of fall and winter. You face the challenge of protecting your hard work from frost and extending your harvest for weeks, even months, longer. Imagine continuing to pick fresh greens from your own urban oasis even as your neighbors’ gardens go dormant.
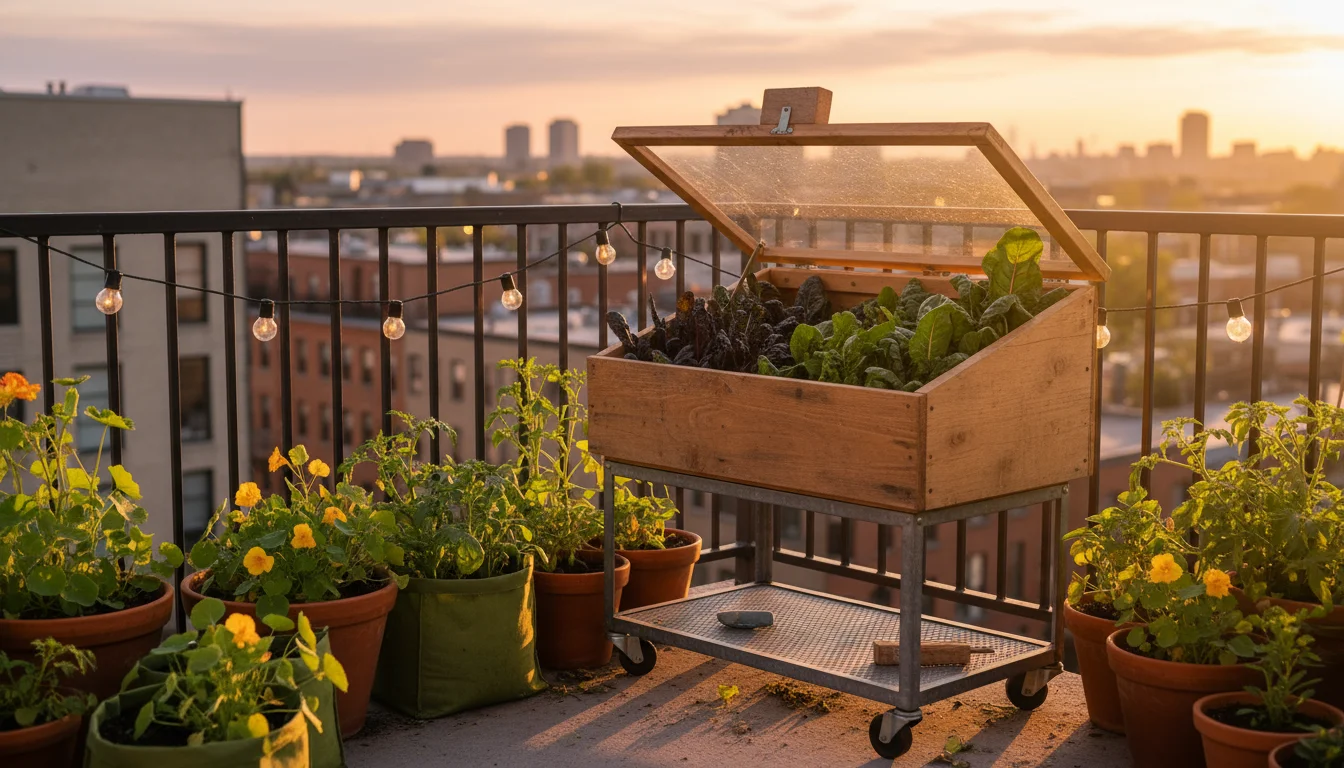
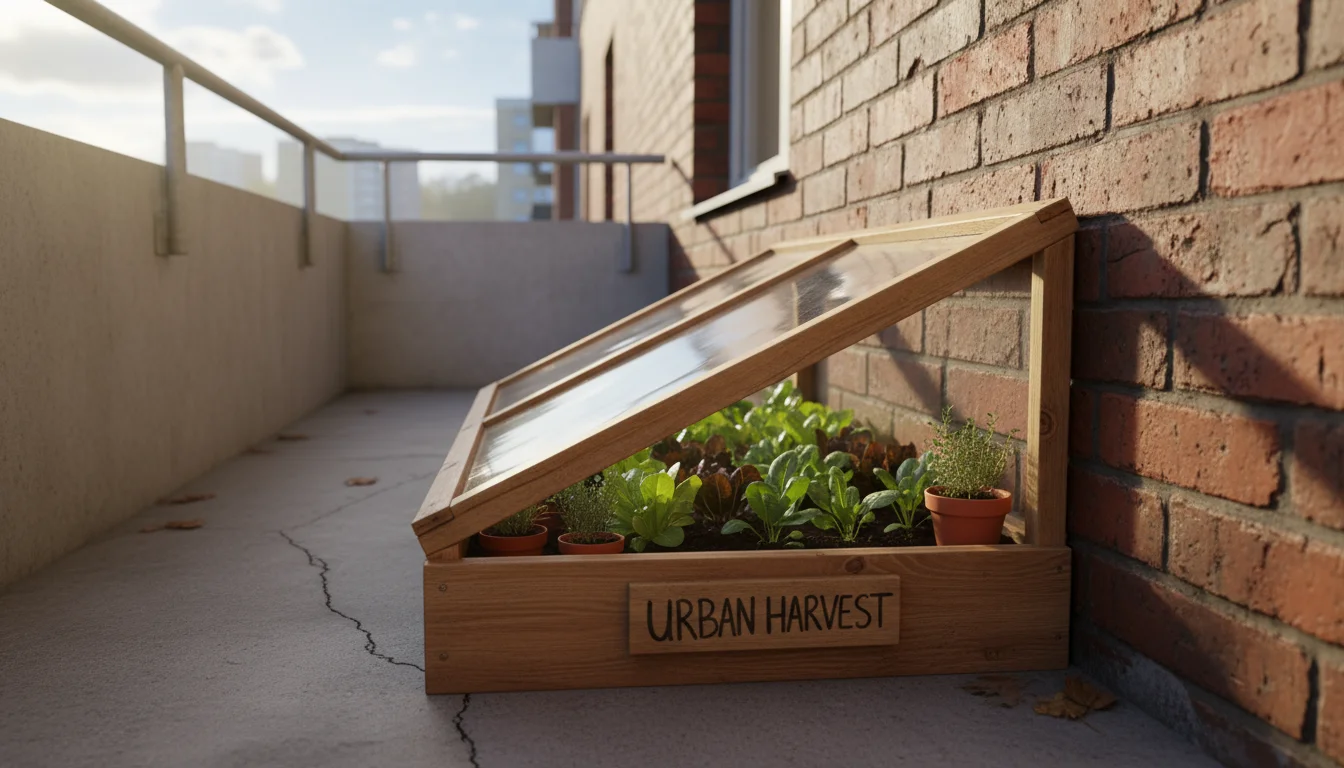
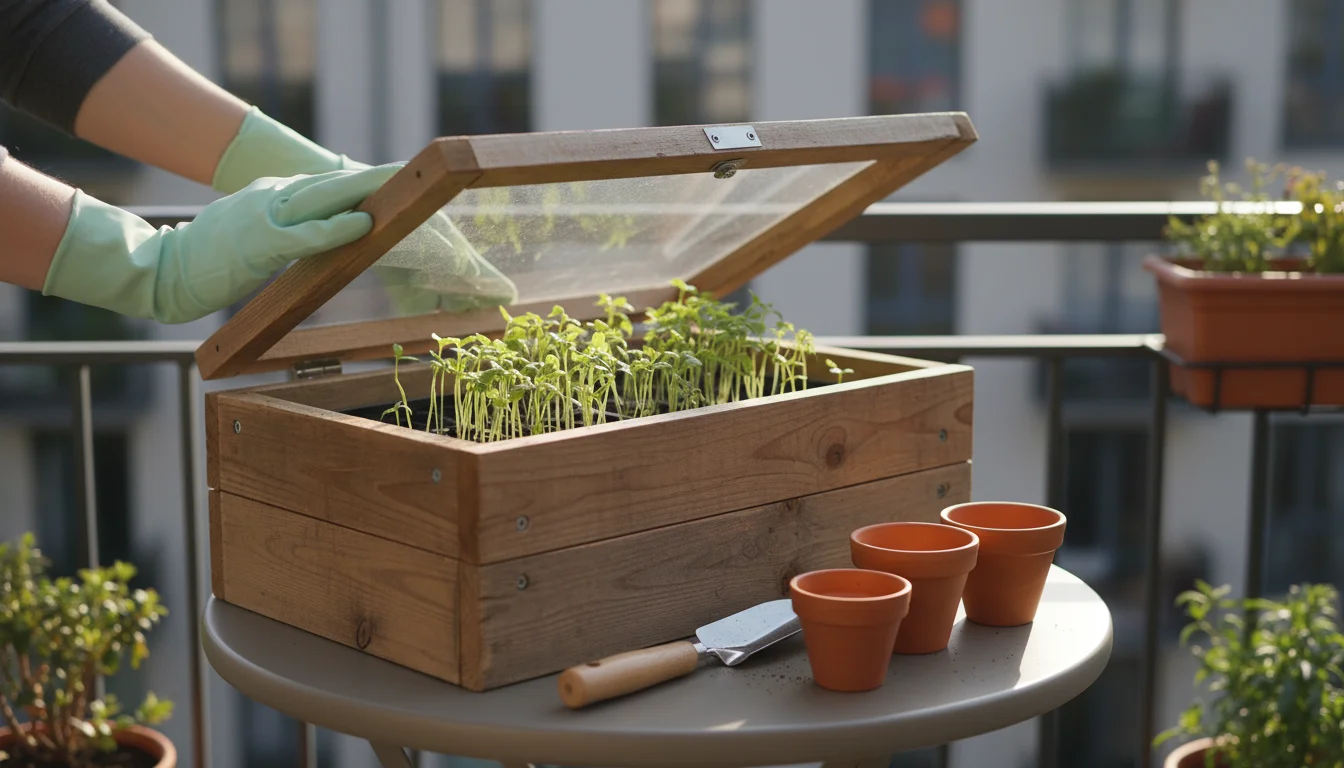
This article provides the solution: a simple, affordable, DIY cold frame, often called a balcony greenhouse. You can construct this mini-greenhouse for around $20, transforming your small space into a productive extension of the growing season. This practical guide walks you through building a small cold frame for pots, ensuring your container plants receive protection from frost. You will discover how easy it is to keep fresh vegetables and herbs on your table long after summer ends, turning a short season into a year-round gardening adventure.
Understanding Your Cold Frame: What It Is and Why It Works
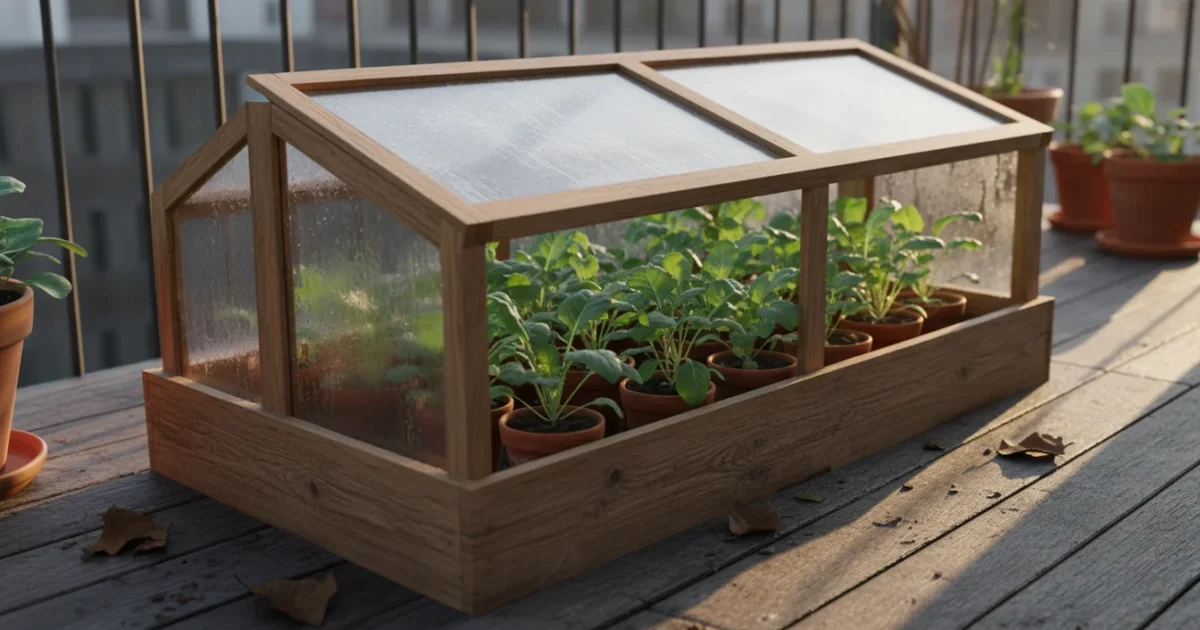
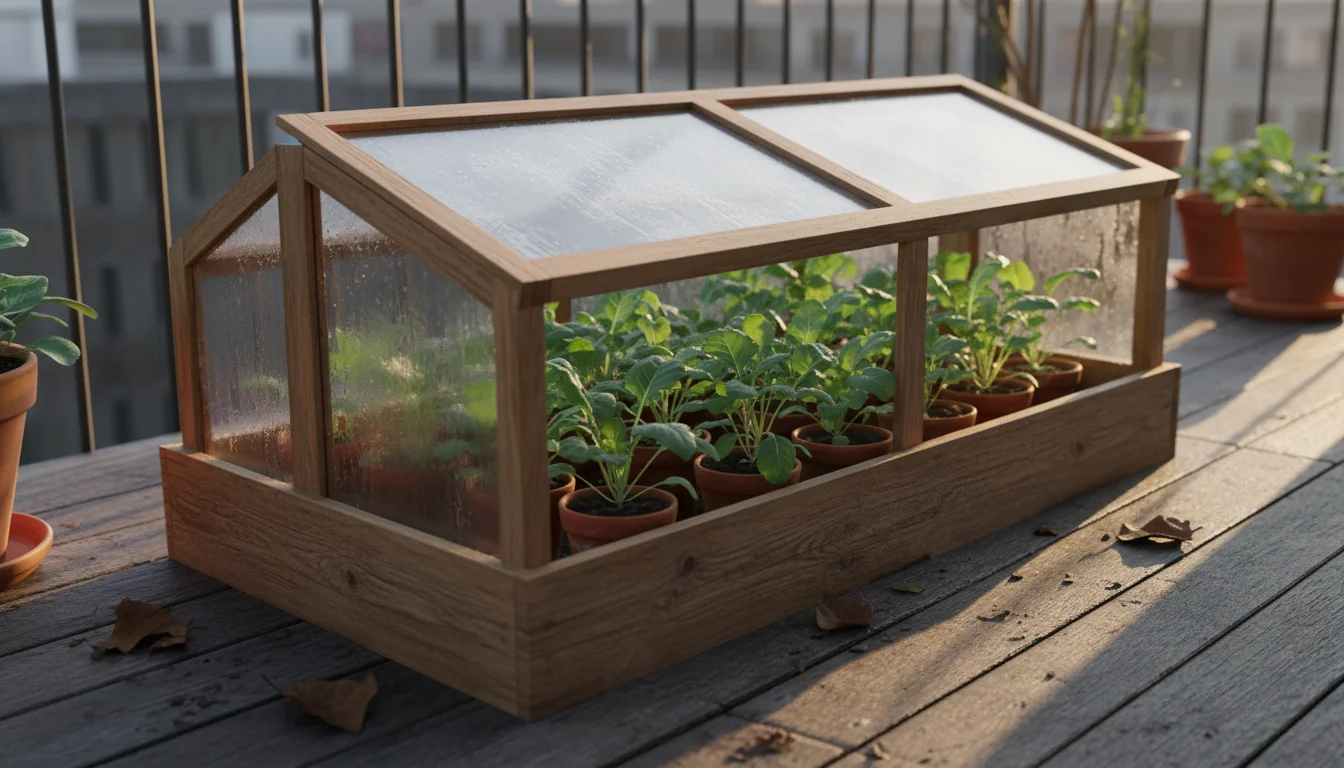
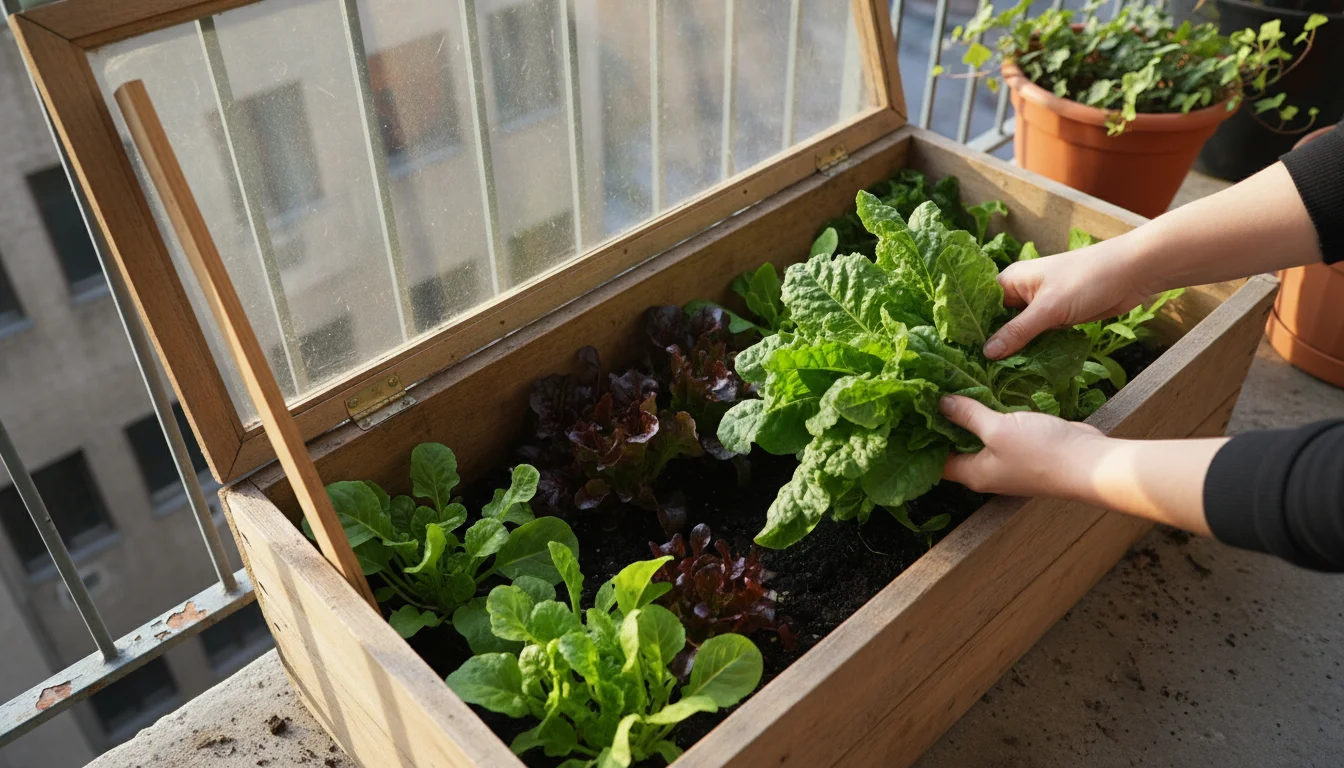
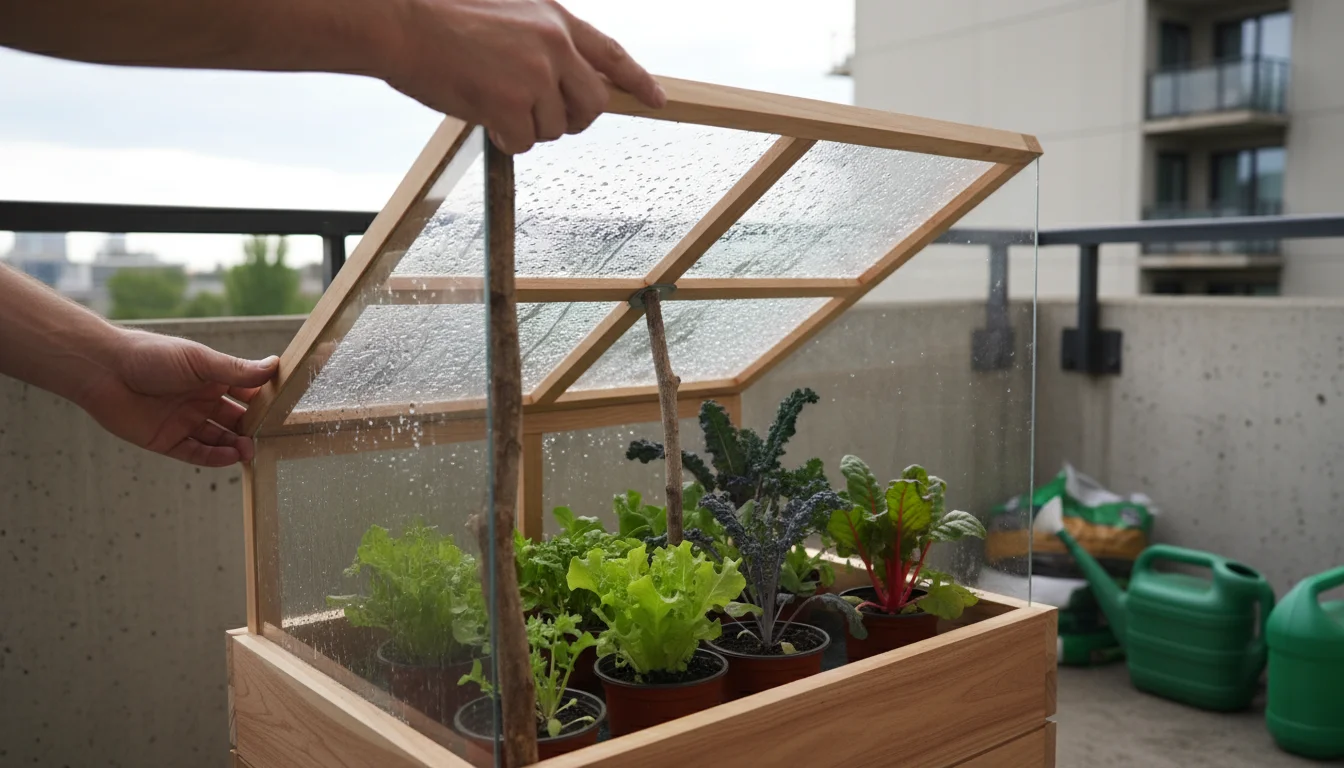
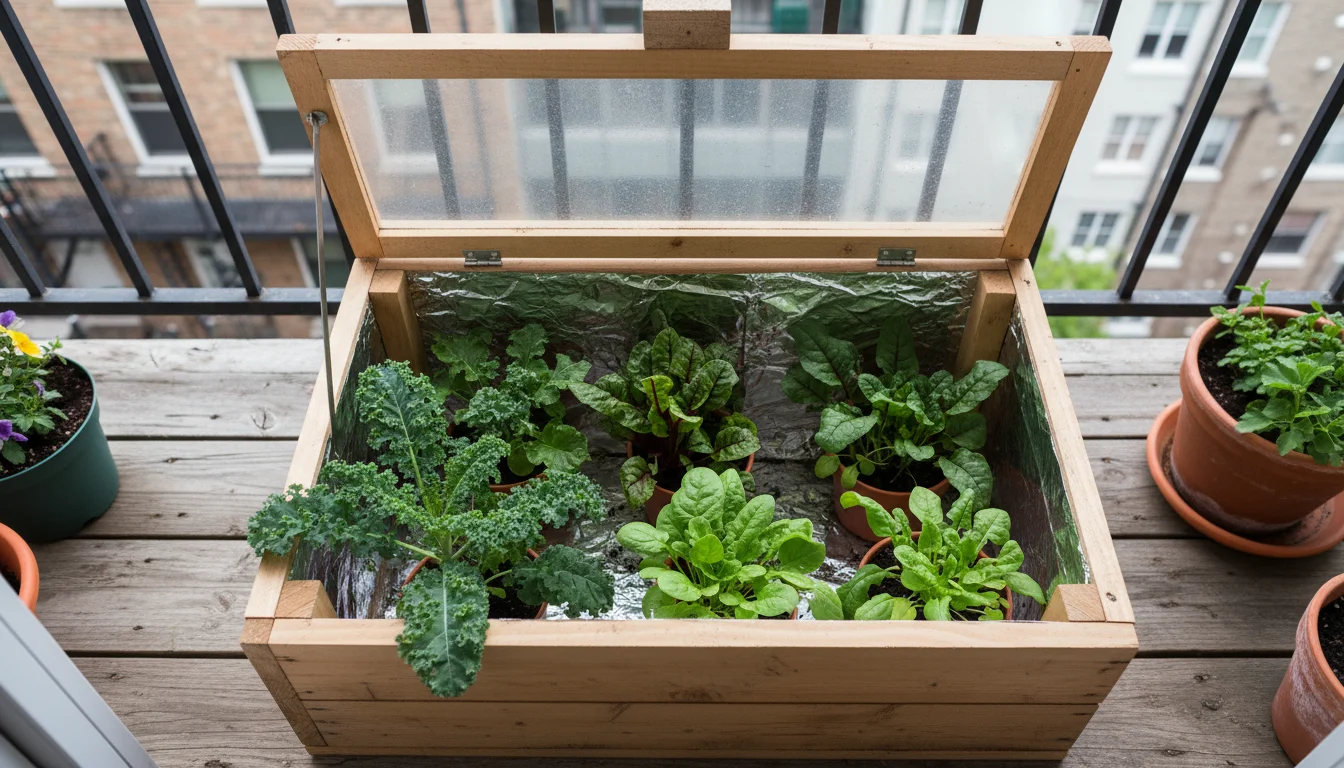
A cold frame is a simple, bottomless box with a transparent lid, typically angled to catch sunlight. It functions as a mini-greenhouse, creating a microclimate inside that remains warmer than the outside air. The clear lid allows sunlight to penetrate, warming the soil and air within the structure. This trapped heat insulates plants from harsh winds and freezing temperatures. Think of it as a protective bubble for your plants, extending their comfort zone and your harvesting opportunities.
Using fall as an ’empty slate’ is also a great opportunity to fix your balcony layout to ensure your cold frame gets the best possible sun exposure.
The principle behind a cold frame is straightforward. Solar radiation passes through the transparent cover, heating the soil and plants inside. The lid then traps this heat, preventing it from escaping. This greenhouse effect raises the internal temperature by several degrees, often 5 to 10 degrees Fahrenheit warmer than outside, sometimes even more on sunny days. This elevation in temperature keeps the soil from freezing solid and protects plants from frost damage. For instance, if outside temperatures drop to 28 degrees Fahrenheit, the inside of your cold frame could comfortably stay above freezing, allowing hardy plants to continue growing.
Utilizing a cold frame offers significant benefits for your fall gardening efforts. It allows you to protect container plants from frost, effectively lengthening your growing season. You can start seedlings earlier in spring, harden off (gradually expose to outdoor conditions) transplants before planting, and, most importantly for this project, continue harvesting cool-season crops well into late fall and early winter. The portability of a DIY cold frame also makes it ideal for a balcony greenhouse, as you can position it to maximize sun exposure or move it as needed.
Furthermore, cold frames offer a sustainable approach to gardening. They reduce the need for energy-intensive heated greenhouses and allow you to consume locally grown produce longer. This simple structure provides a practical and environmentally conscious way to improve your gardening efficiency and enjoyment.

Why a Cold Frame is Essential for Small-Space Gardeners
Small-space gardeners, those cultivating on balconies, patios, or in compact yards, face unique challenges when temperatures drop. Your container plants are particularly vulnerable to cold because their roots lack the insulation provided by the vast amount of soil in an in-ground garden bed. The exposed sides of pots allow heat to escape rapidly, causing the soil temperature to plummet quickly when cold air arrives. This rapid temperature fluctuation stresses plants and can lead to premature demise.
This project is a perfect companion to learning how to overwinter container plants that need a little extra warmth to survive until spring.
Building a cold frame is one of the most productive ways to use your empty balcony space once the summer flowers have faded.
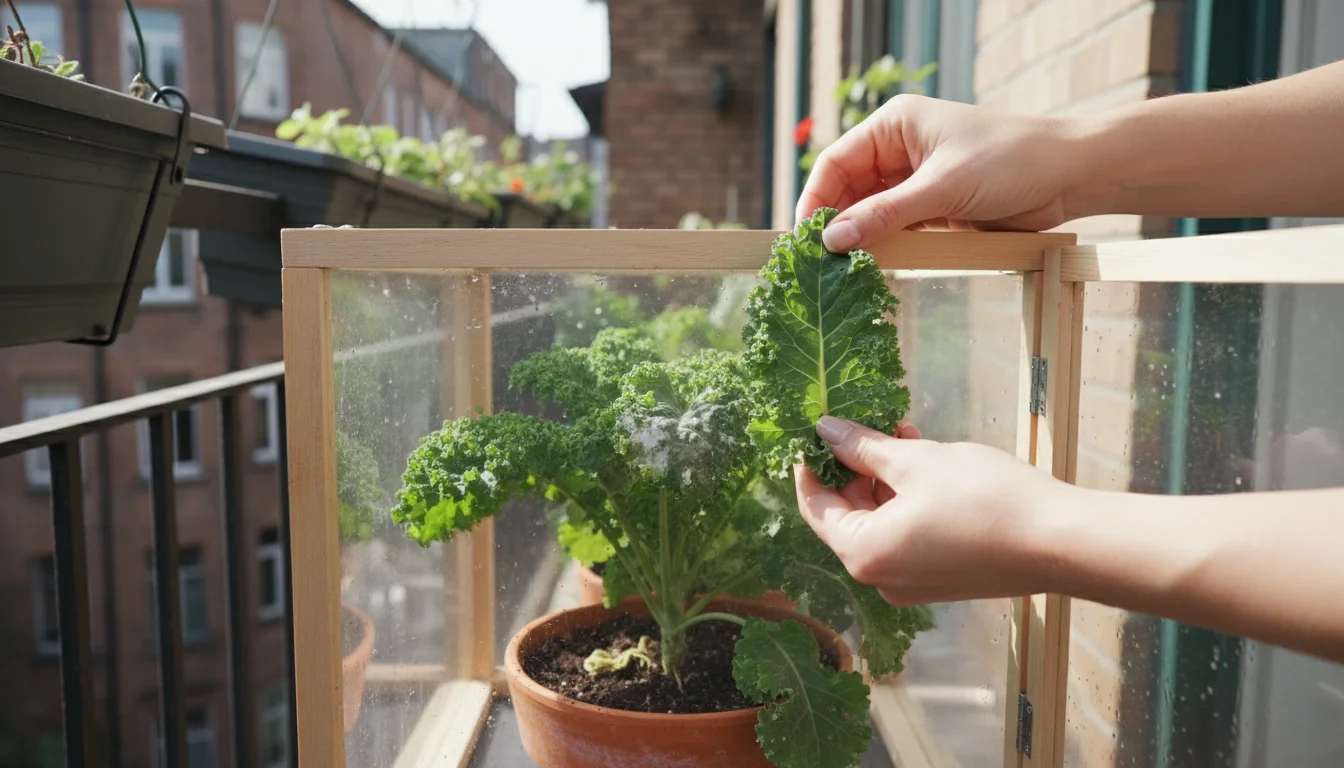
Hardy greens are the best candidates for this setup; for instance, growing kale in a pot is a great way to ensure a fresh harvest through the coldest months.
A balcony greenhouse, or cold frame, directly addresses these vulnerabilities. It acts as a protective shield, buffering your container plants from freezing winds and the sudden drop in night temperatures. The enclosed environment creates a pocket of warmth that insulates both the foliage and, crucially, the root systems within your pots. This insulation can make the difference between a plant surviving a light frost and succumbing to it. For example, a recent study by the University of Massachusetts Amherst Extension demonstrated that protected container plants experienced significantly less root damage in freezing conditions compared to unprotected pots.
Moreover, the limited space on a balcony or patio means every square inch counts. A cold frame efficiently maximizes your usable growing area. It stacks plant protection vertically or horizontally, utilizing space that might otherwise sit empty during colder months. You effectively create an additional mini growing zone without expanding your footprint. This allows you to cultivate a wider variety of plants, or larger quantities of your favorite crops, for a longer period. Imagine harvesting fresh spinach from your balcony in November, even when outside temperatures hover near freezing.
This simple structure also provides flexibility. Unlike an in-ground garden, you can easily relocate a cold frame on your balcony to optimize sun exposure throughout the day or season. If a particularly harsh storm approaches, you can move it to a more sheltered spot. This adaptability is invaluable for small-space gardeners who depend on optimizing every environmental factor to succeed. A cheap DIY greenhouse for a balcony is not just about extending the season; it is about empowering you to garden more resiliently and productively in your limited space.
Gathering Your Materials: Building Your Cold Frame on a Budget
Building your $20 balcony greenhouse focuses on affordability and repurposing. You can likely find many materials around your home or at minimal cost from hardware stores or even construction sites. The goal is to construct a functional structure without breaking the bank. Careful sourcing ensures you stay within your budget while creating an effective cold frame.
While you gather your building supplies, remember that fall is also the perfect time to save seeds from your summer harvest.
Planning ahead like this is part of a smart winter budget strategy to help you save for your dream garden projects next year.
Here is a list of materials you will need, with an emphasis on cost-effective options:
- Wood for the Frame (Approx. $10-15):
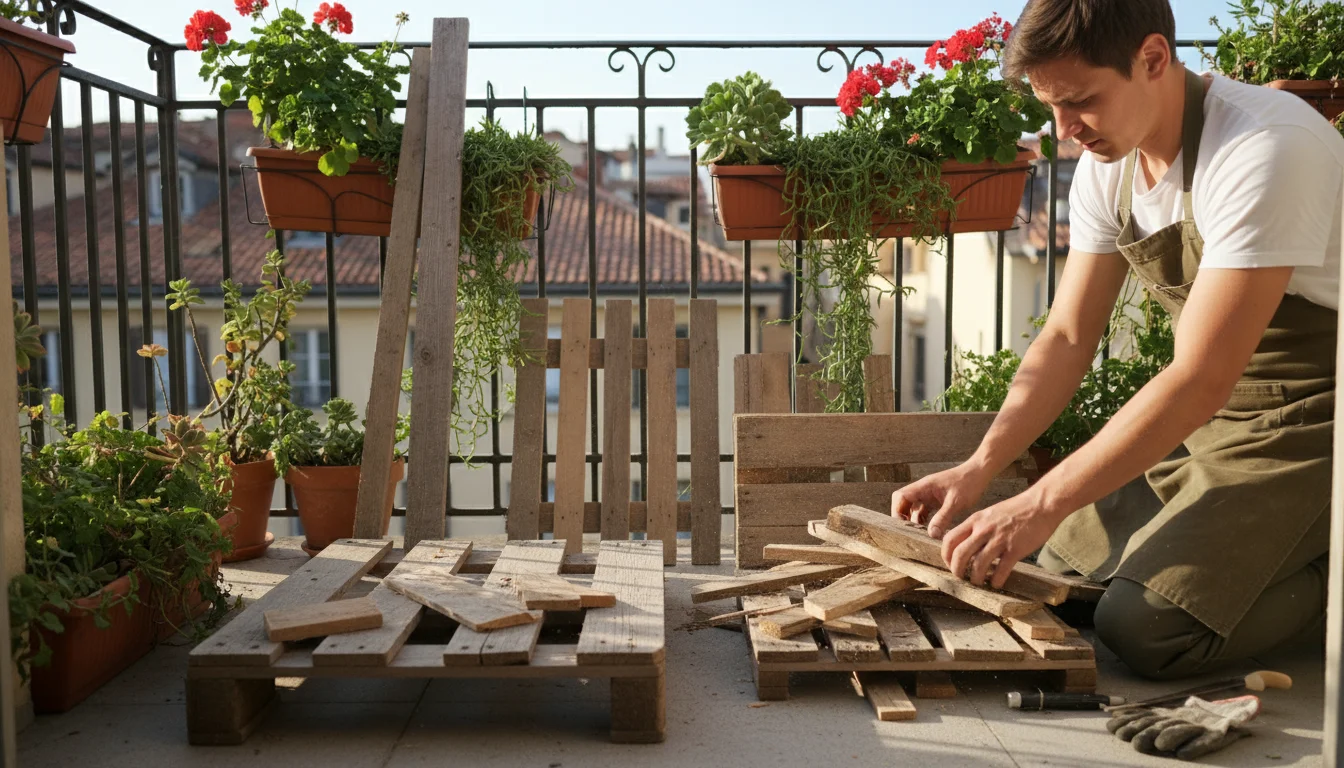
- Choose untreated lumber. Scraps from old fences, pallets, or discarded shelving work well. You can often find free or low-cost wood through local online marketplaces, community groups, or by asking at construction sites or lumber yards for off-cuts. If buying new, common pine boards (1×6 or 1×8) are inexpensive. You will need enough to create a rectangular box approximately 2 feet by 3 feet, with one side slightly taller than the other for drainage.
- For a 2×3 foot cold frame, you will need:
- Two pieces 2 feet long (for the shorter front and taller back walls)
- Two pieces 3 feet long (for the side walls, tapering from front to back height)
- Two pieces 3 feet long (for the lid’s long sides)
- Two pieces 2 feet long (for the lid’s short ends)
- Clear Plastic Sheeting (Approx. $5-8):
- Heavy-duty clear polyethylene sheeting (6 mil thickness is ideal) provides good insulation and durability. A roll measuring 4 feet by 10 feet typically costs under $10 and offers more than enough for your cold frame lid. Look for greenhouse film if available, but a robust painter’s drop cloth also works. Clear shower curtains or old windowpanes (if sourced safely and free) are also viable options for the lid. Avoid thin, flimsy plastic as it tears easily and offers poor insulation.
- Hinges (Approx. $2-4):
- Two small, basic hinges allow you to open and close the lid easily for ventilation and access. Look for lightweight utility hinges.
- Fasteners (Approx. $1-2):
- Wood screws (1.5 to 2 inches long) are generally preferred for strength and easy disassembly. Nails also work if you have them on hand. You will need about 20-30 screws/nails to assemble the frame and lid.
- Tools (Assumed you have them):
- Saw (hand saw or circular saw)
- Drill/screwdriver
- Staple gun (or small nails/tacks)
- Measuring tape
- Pencil
- Utility knife or scissors (for plastic sheeting)
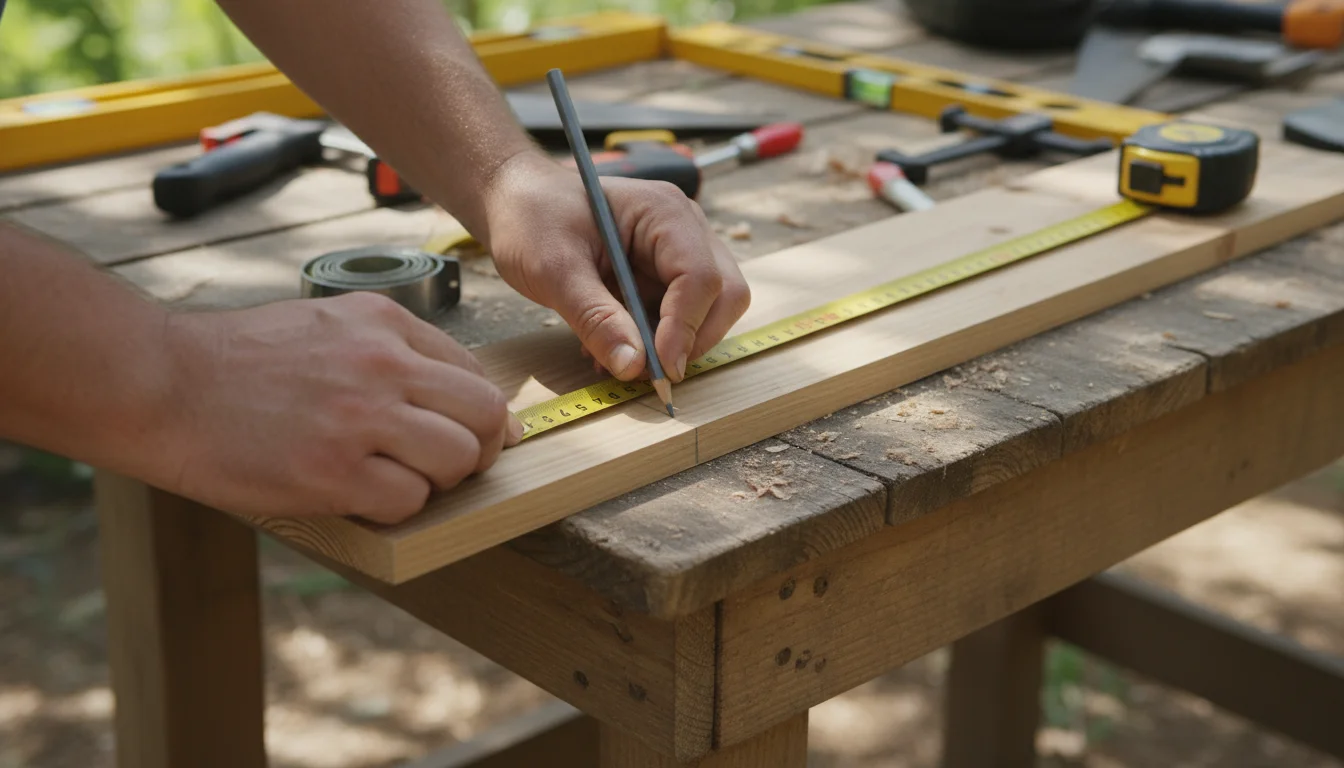
When sourcing wood, prioritize flat, relatively straight pieces. If using pallet wood, carefully remove nails and sand any rough edges to prevent splinters. For plastic, ensure it is clear to allow maximum light penetration. Double-check your measurements before making cuts. This preparation saves you time and ensures a successful, inexpensive build.
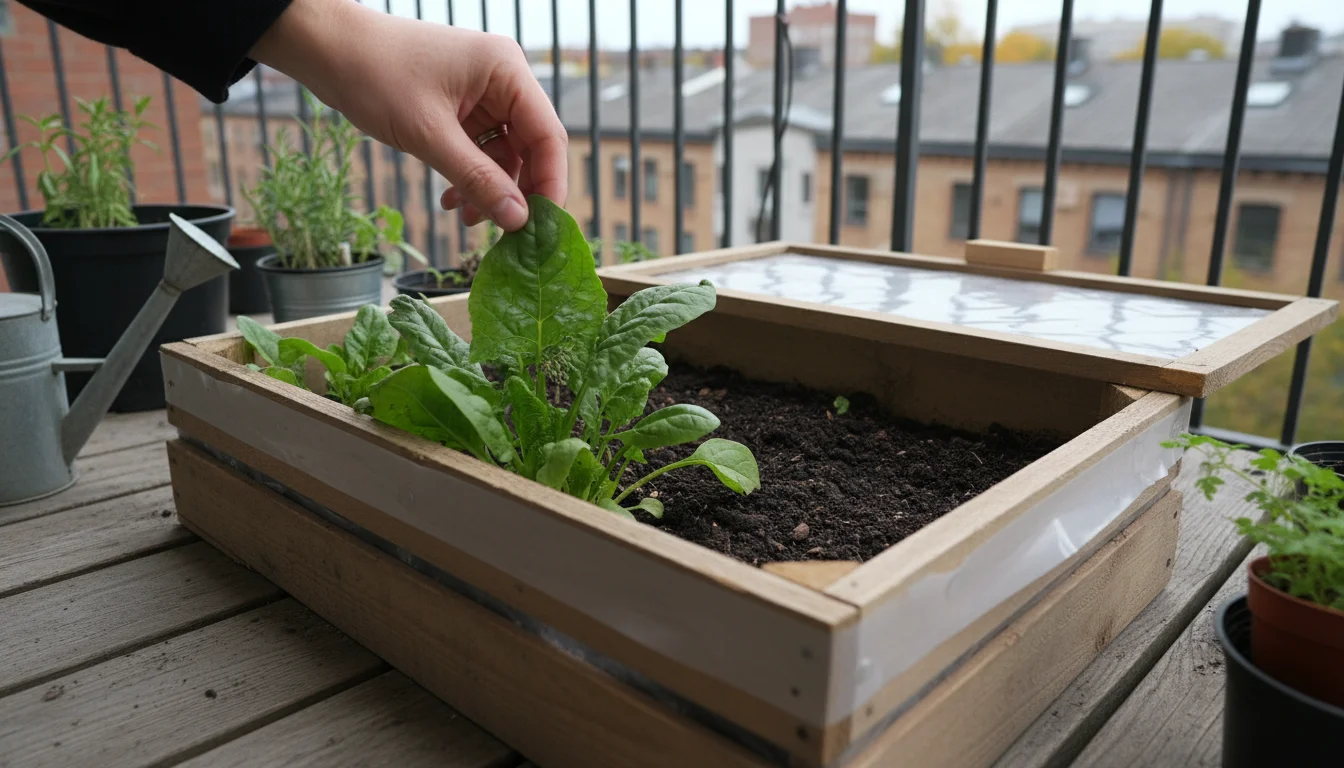
Step-by-Step Construction: Building Your Simple Balcony Cold Frame
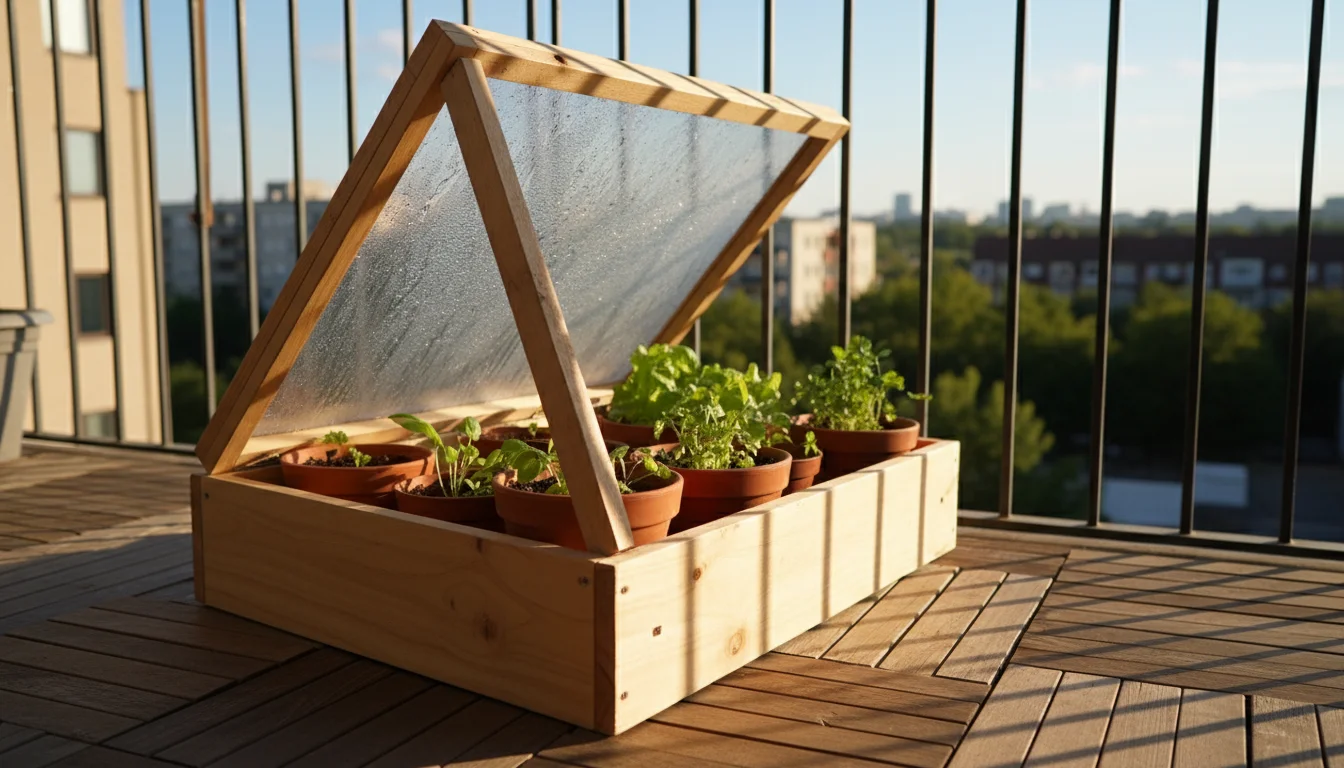
Building your DIY cold frame requires some basic carpentry skills, but the process is straightforward and rewarding. Follow these steps to construct your inexpensive balcony greenhouse. This guide assumes you are building a cold frame approximately 2 feet deep by 3 feet wide, with a front height of 6 inches and a back height of 12 inches to allow for proper water runoff and optimal light capture.
- Cut Your Wood Pieces:
- Cut two pieces of wood 3 feet long for the front and back base.
- Cut two pieces of wood for the sides. These will be angled. Measure one end to 6 inches and the other end to 12 inches. Draw a diagonal line connecting these points and cut along it. You should have two trapezoidal side pieces.
- For the lid frame, cut two pieces 3 feet long (for the long sides) and two pieces 2 feet long (for the short ends).
- Assemble the Base Frame:
- Position the 6-inch end of your angled side pieces against one of the 3-foot front pieces.
- Align the 12-inch end of your angled side pieces against the other 3-foot back piece.
- Pre-drill pilot holes to prevent wood splitting, especially if using repurposed wood.
- Securely screw or nail the side pieces to the front and back pieces, forming a rectangular box with a sloped top edge. Ensure all connections are tight and square for stability.
- Construct the Lid Frame:
- Lay out the two 3-foot pieces and two 2-foot pieces for the lid frame.
- Form a rectangle, similar to the base. Pre-drill pilot holes and screw or nail the corners together. This creates a lightweight frame for your plastic cover.
- Attach the Plastic Sheeting to the Lid:
- Lay your clear plastic sheeting flat.
- Place the assembled lid frame on top of the plastic, ensuring you have at least 2-3 inches of overhang on all sides.
- Starting on one long side, carefully pull the plastic taut and use a staple gun to secure it to the top edge of the lid frame. Place staples every 2-3 inches.
- Move to the opposite long side, pulling the plastic very taut as you staple it. This removes wrinkles and ensures good light transmission.
- Repeat for the short ends, folding the corners neatly like wrapping a present.
- Trim any excess plastic with a utility knife or scissors, leaving a clean edge.
- Attach the Lid to the Base:
- Place the finished lid on top of the cold frame base, ensuring the higher edge of the lid aligns with the higher (12-inch) back wall of the base.
- Position your two hinges evenly along the back edge.
- Screw one side of each hinge to the lid frame and the other side to the back wall of the base. Test the hinges to ensure the lid opens and closes smoothly.
Your $20 balcony greenhouse is now complete! You have a functional, affordable cold frame ready to extend your fall harvests. This step-by-step guide helps you create a durable structure that protects your precious plants.
Optimizing Your Cold Frame: Site Selection and Environmental Control
Building your cold frame is only the first step. To maximize its effectiveness, you need to strategically place it on your balcony or patio and actively manage its internal environment. Proper site selection ensures maximum sun exposure, while environmental control protects your plants from both cold and overheating.
Strategic Placement for Sun and Shelter
The success of your cold frame hinges on sunlight. Position your balcony greenhouse in a location that receives the most direct sunlight possible during the fall and winter months. For most northern hemisphere locations, this means a south-facing spot. A general rule is to aim for at least 6 hours of direct sunlight daily, especially on clear, sunny days. The angled lid of your cold frame helps to capture this low-angle winter sun efficiently.
Consider wind protection. Balconies can be particularly windy, and strong gusts can strip heat away from your cold frame, making it less effective. Place your cold frame against a solid wall, railing, or another sheltered spot on your balcony if possible. This provides an additional layer of insulation and protection from chilling winds, helping to maintain a more stable internal temperature. Elevating the cold frame slightly on bricks or small blocks can also improve air circulation underneath and prevent moisture buildup, which can be an issue for wooden structures on solid surfaces.
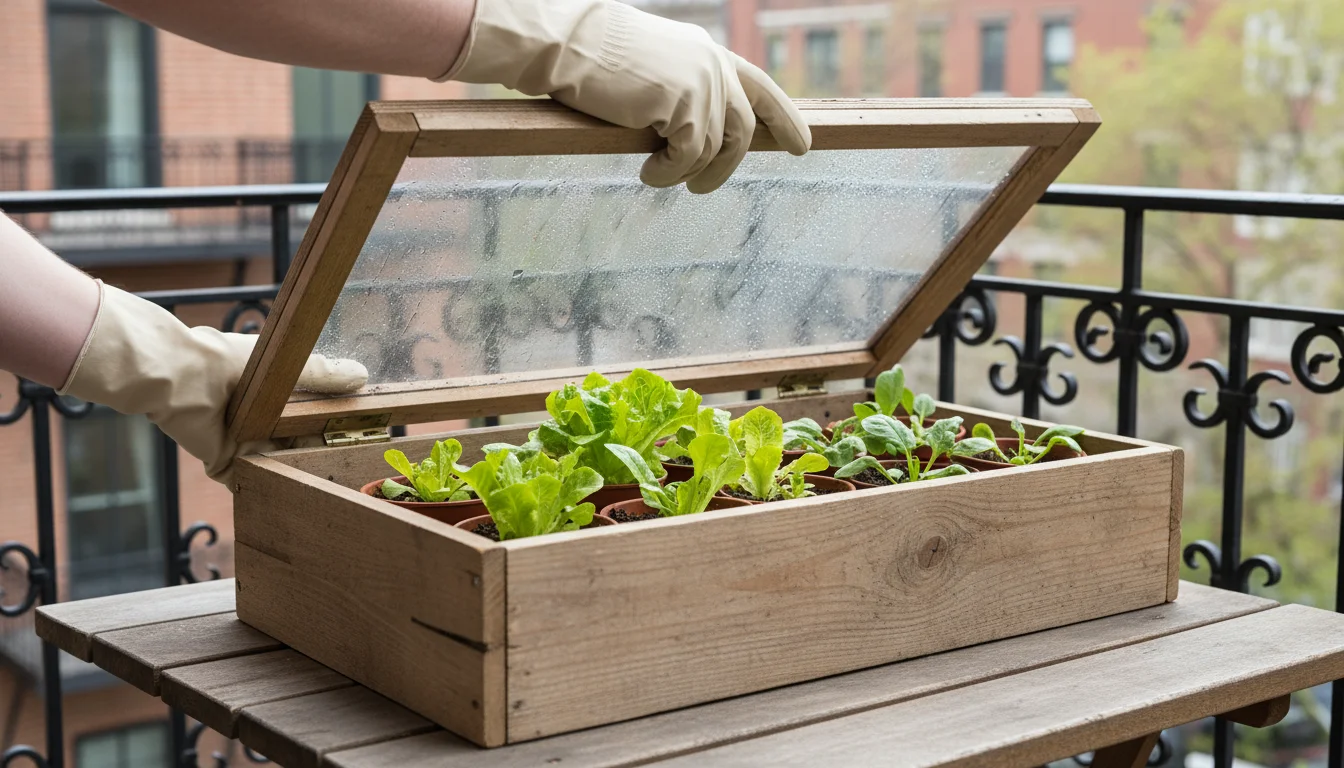
Mastering Ventilation and Temperature Regulation
While trapping heat is crucial for protecting plants from frost, too much heat can be equally damaging. On sunny days, even in winter, temperatures inside a closed cold frame can quickly soar, potentially “cooking” your plants. This is especially true for cool-season crops that prefer cooler temperatures. You must actively manage ventilation to prevent overheating.
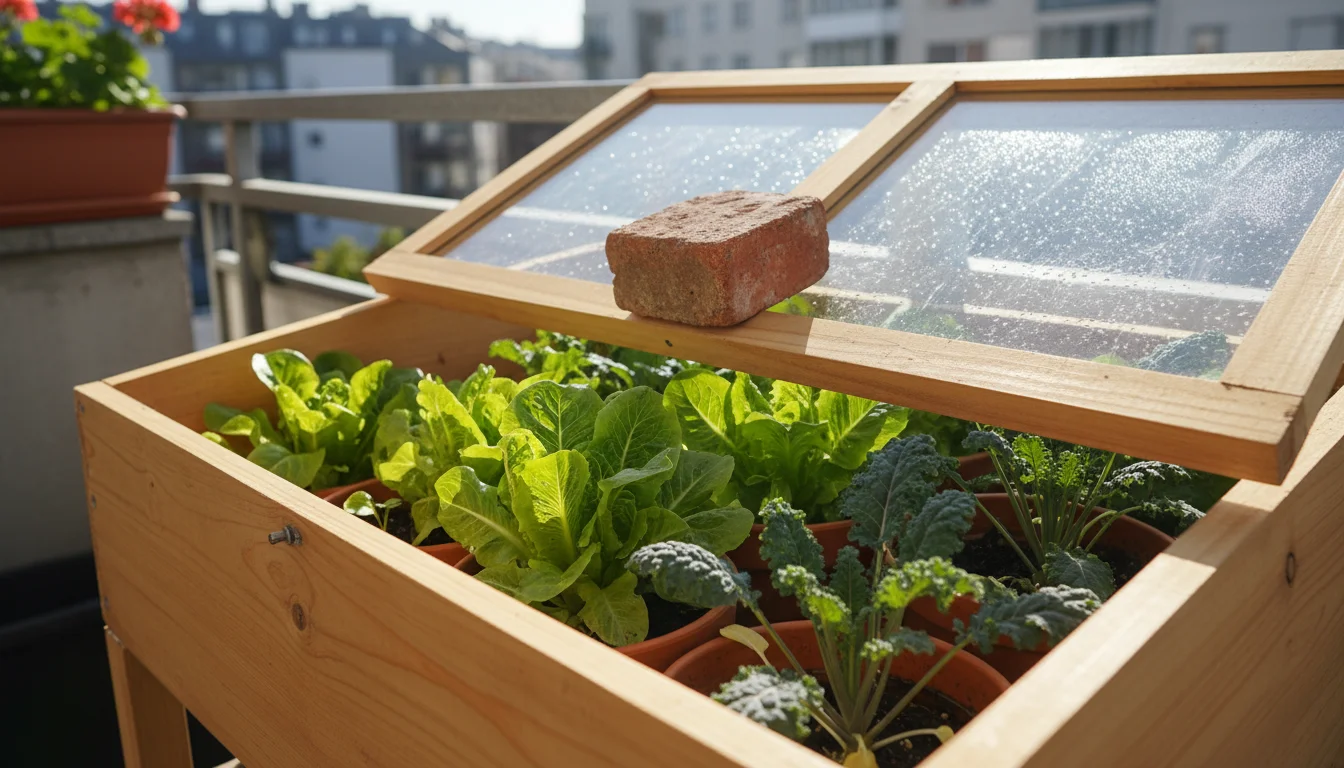
Ventilation means allowing air to circulate. On sunny days when the outside temperature is above freezing, open the lid of your cold frame by a few inches. Use a block of wood, a brick, or a specific cold frame opener to prop the lid open. The amount you open it depends on the outside temperature and sun intensity. A general guideline:
- Sunny, mild days (above 40 degrees F): Open the lid significantly, perhaps 6-12 inches, to release excess heat.
- Sunny, cool days (32-40 degrees F): Open slightly, 2-4 inches, to provide air circulation without losing too much warmth.
- Cloudy or freezing days (below 32 degrees F): Keep the lid closed to retain heat.
Close the lid completely before sunset to trap any remaining warmth for the night. You can even use a simple thermometer inside the cold frame to monitor temperatures and guide your ventilation decisions. Aim to keep the internal temperature between 40-60 degrees Fahrenheit for most cool-season crops.
Understanding Drainage and Moisture Control
Proper drainage is paramount for healthy plants, even within a cold frame. Drainage refers to how quickly water moves through soil and out of your containers. While the cold frame protects your potted plants, it can also create a humid environment if not managed correctly. Overly wet conditions can lead to fungal diseases and root rot.
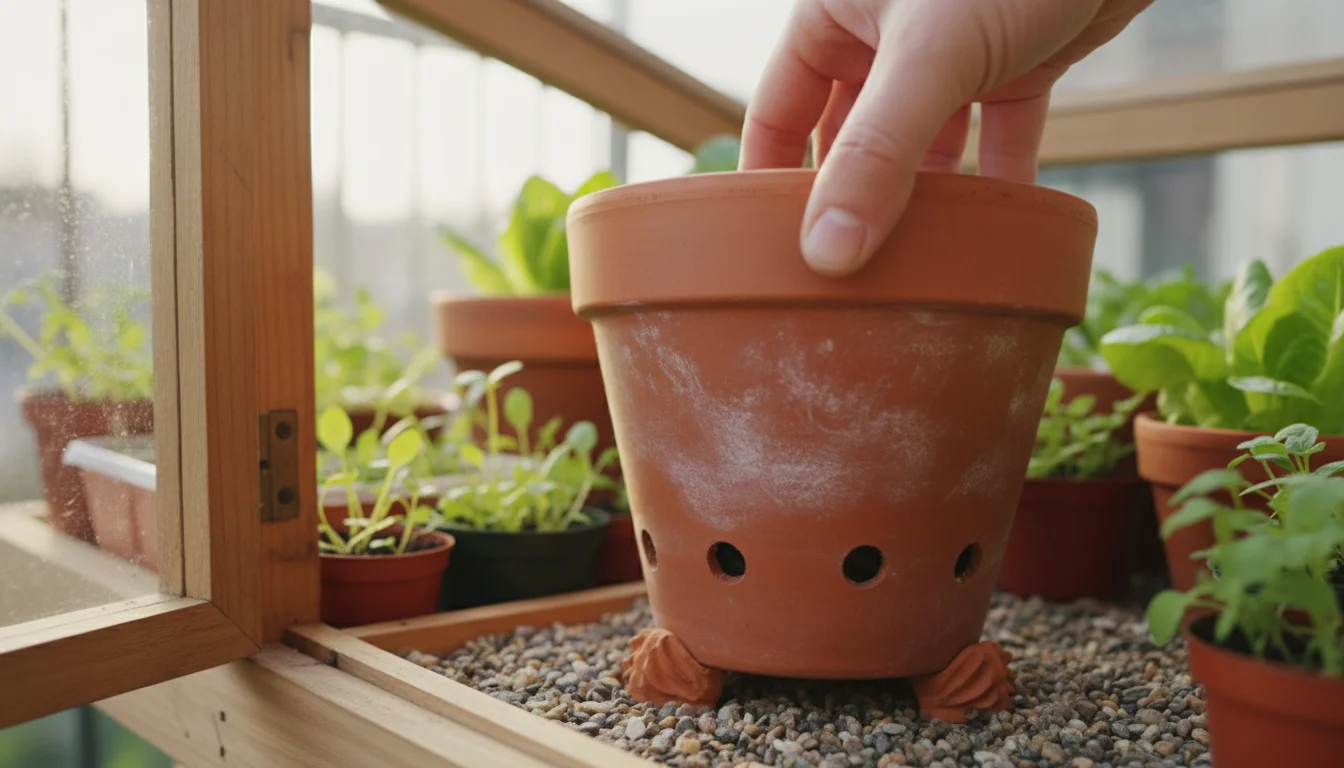
Ensure all your containers inside the cold frame have adequate drainage holes. Place pots on small risers, such as pot feet or gravel, to allow water to flow freely out of the drainage holes and prevent them from sitting in standing water. Water plants only when the top inch or two of soil feels dry to the touch, and water deeply. On cloudy days, reduce watering frequency. Good ventilation also helps to reduce humidity levels inside the cold frame, further preventing disease. A layer of gravel or sand on the floor of the cold frame can also help manage excess moisture and provide some thermal mass.
Fall Favorites: What to Grow in Your Balcony Cold Frame
Your new $20 balcony greenhouse opens up a world of possibilities for fall gardening. While it won’t allow you to grow heat-loving plants like tomatoes or peppers in winter, it creates ideal conditions for a wide range of cool-season crops. These plants thrive in cooler temperatures and tolerate light frosts, making them perfect candidates for extending your harvest.
Selecting the right plants is key to a successful fall season. Focus on varieties known for their cold hardiness and relatively fast growth. Here are some excellent choices for your cold frame, categorized for easy reference:
Leafy Greens
- Spinach: A classic cold-weather crop. Spinach grows quickly and produces abundant leaves. Many varieties, like ‘Tyee’ or ‘Bloomsdale Long Standing,’ are particularly cold-tolerant. You can harvest outer leaves continuously, allowing the plant to keep producing.
- Lettuce: Choose cold-hardy varieties like ‘Winter Density’ or ‘Buttercrunch’ for looseleaf or butterhead types. Romaine and crisphead lettuces tend to be less tolerant of extreme cold. Cut outer leaves to extend the harvest.
- Kale: Extremely resilient, kale becomes even sweeter after a few light frosts. ‘Lacinato’ (Dinosaur kale) and ‘Red Russian’ are excellent choices. Harvest leaves as needed; the plant will continue to produce from the center.
- Arugula: This peppery green grows rapidly. While it can bolt (go to seed) quickly in warmer weather, the cooler temperatures inside a cold frame help prolong its harvest.
- Mizuna and Mustard Greens: These Asian greens offer a spicy kick and are very tolerant of cold. They grow fast and provide continuous harvests.
- Swiss Chard: ‘Bright Lights’ or ‘Fordhook Giant’ chard offers colorful stems and nutritious leaves. It tolerates light frosts and can provide a harvest for many weeks.
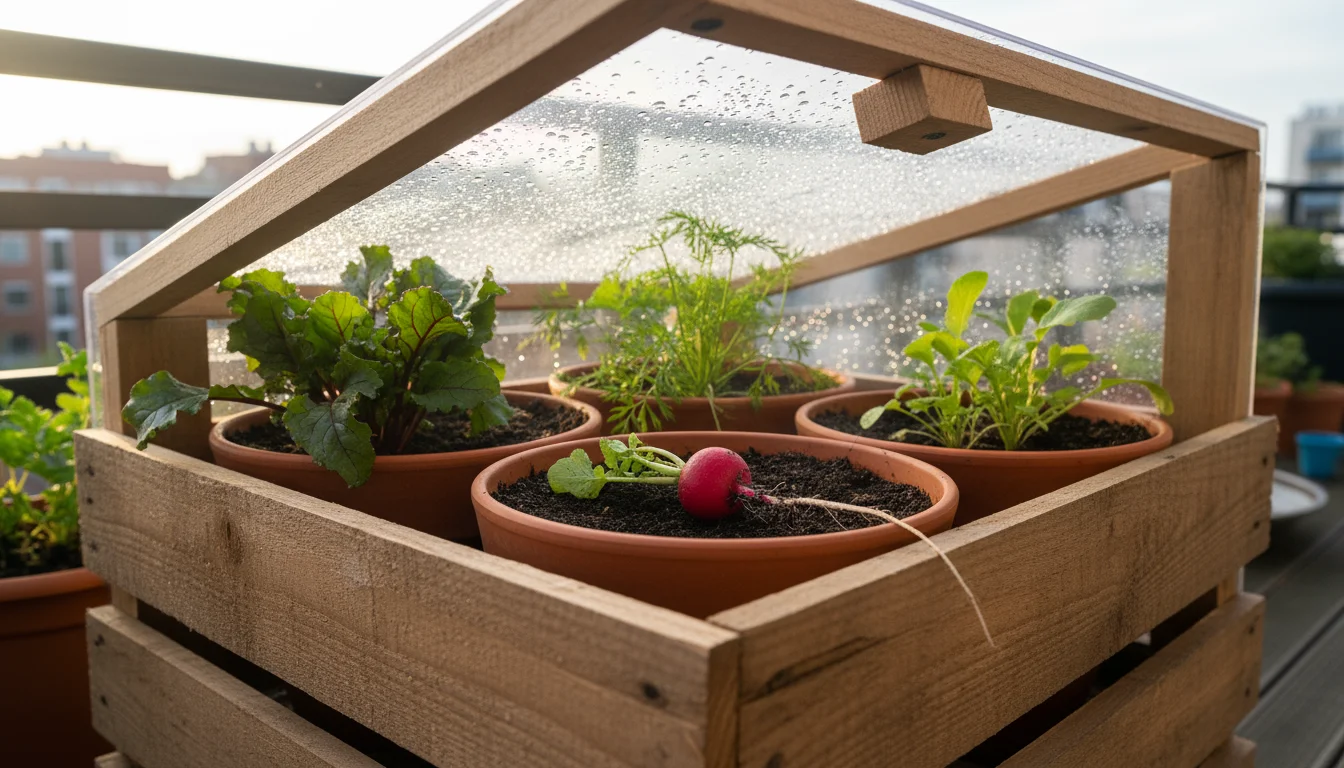
Root Vegetables
While the cold frame protects the tops of these plants, ensure your pots are deep enough for proper root development. The cold frame keeps the soil from freezing solid, allowing roots to grow or remain viable.
- Radishes: Quick-growing radishes, especially varieties like ‘Cherry Belle’ or ‘French Breakfast,’ can mature in as little as 3-4 weeks. Succession plant every couple of weeks for a continuous supply.
- Carrots: ‘Paris Market’ or ‘Danvers Half Long’ are good choices for containers due to their shorter root length. Sow seeds directly into deep pots within the cold frame. Carrots actually sweeten with a touch of frost.
- Beets: You can harvest both the greens and the roots from beets. ‘Detroit Dark Red’ is a reliable variety. Harvest greens as young leaves, and allow roots to size up.
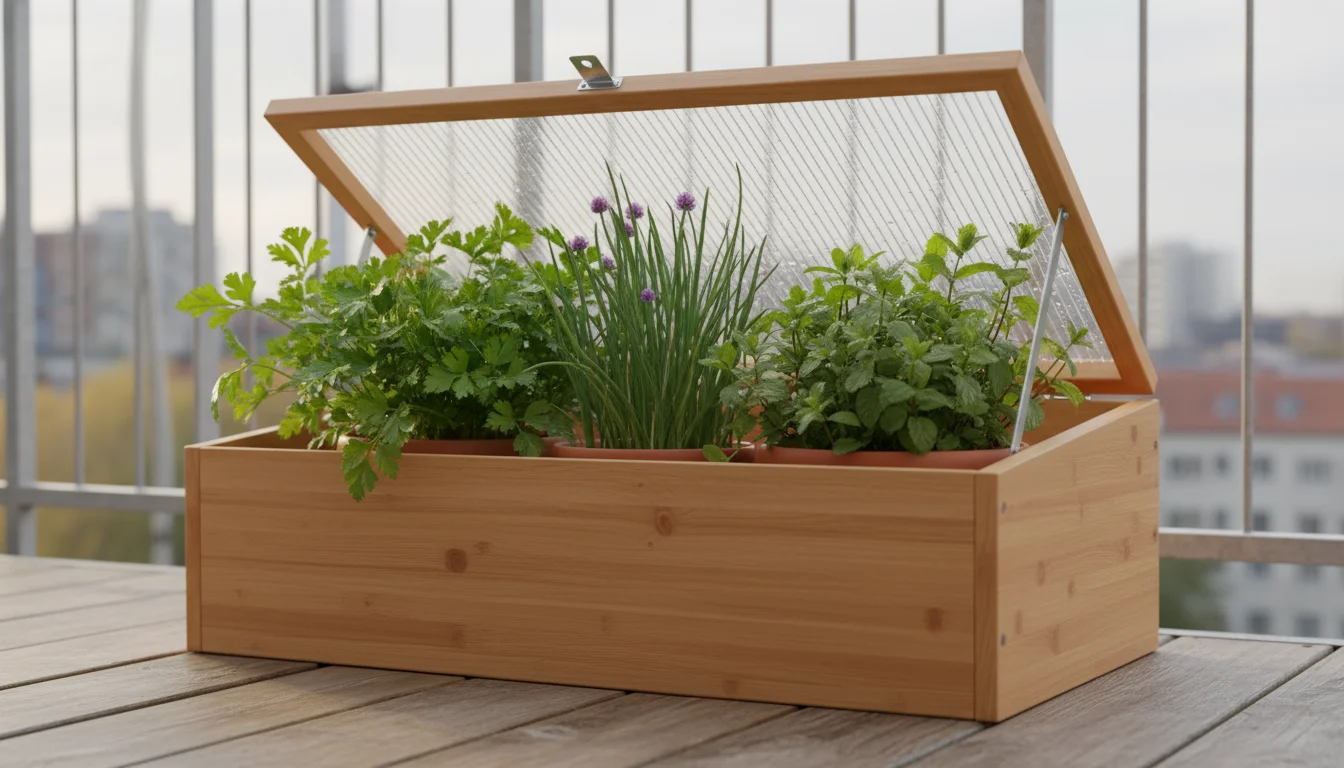
Herbs
- Cilantro: This herb often bolts in summer heat but thrives in cooler cold frame conditions. Sow seeds for a fresh supply.
- Parsley: Flat-leaf and curly parsley varieties are quite cold hardy. They can overwinter in a cold frame, providing fresh sprigs through much of the colder months.
- Chives: Chives are resilient perennials that can be brought into the cold frame in their pots to extend their harvest.
When planting, ensure your containers have good drainage, and use a high-quality potting mix. Sow seeds directly or transplant small starts. Remember that plants will grow slower in cooler temperatures and shorter daylight hours, so adjust your expectations accordingly. By selecting these cold-hardy varieties, you maximize your chances of a successful and extended fall harvest from your DIY cold frame.

Maintaining Your Cold Frame: Extending Its Life and Your Harvests
Once you have built and planted your balcony greenhouse, ongoing maintenance ensures its longevity and the health of your plants. Regular attention to the structure and its inhabitants will provide you with fresh harvests for a longer period, making your initial investment of time and $20 truly worthwhile. Proactive care prevents small issues from becoming major problems.
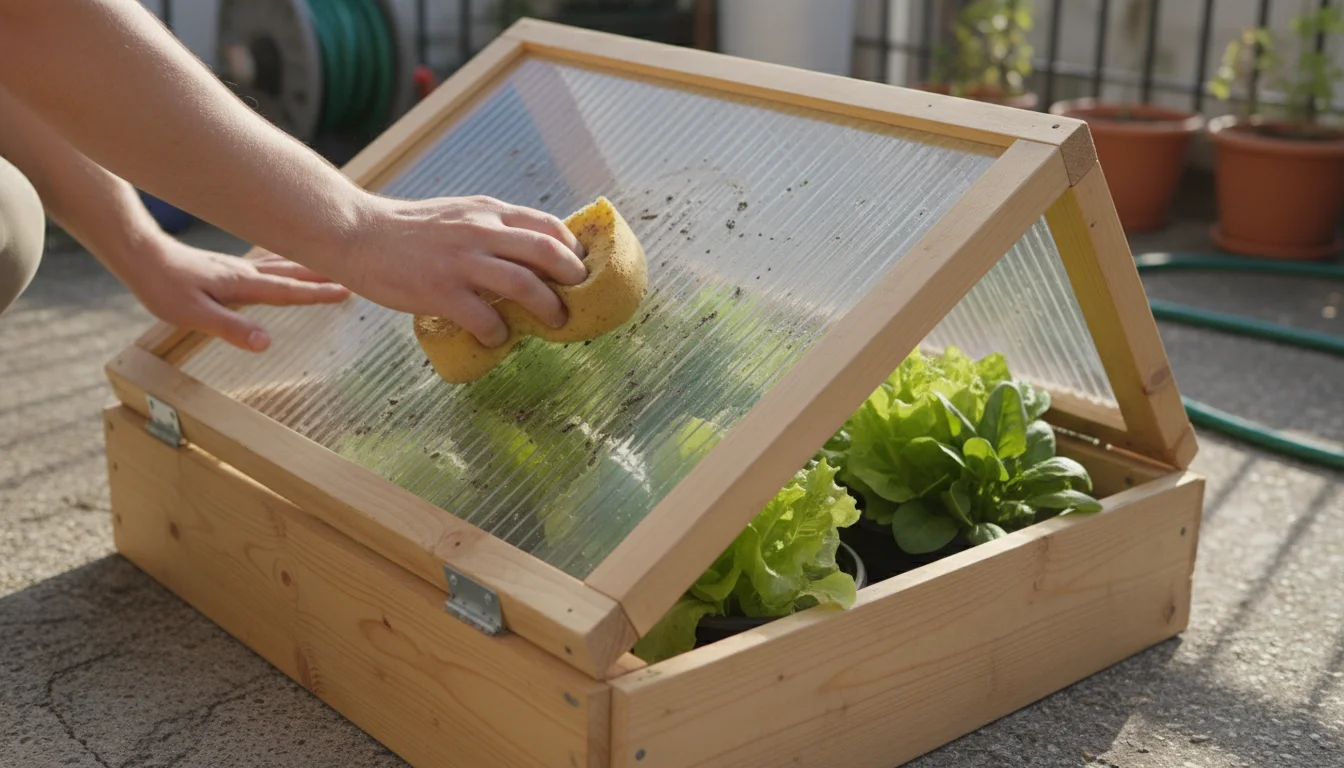
Cleaning and Inspections
Keeping your cold frame clean is crucial for maximizing light penetration. Dust, dirt, and debris can accumulate on the plastic lid, reducing the amount of sunlight reaching your plants. Regularly wipe down the plastic with a damp cloth or sponge. Avoid abrasive cleaners that can scratch or cloud the plastic. A clean lid ensures optimal warming and growth for your cool-season crops.
Periodically inspect the wooden frame for any signs of wear or damage. Check for loose screws, nails, or deteriorating wood. Tighten fasteners as needed. If you notice any cracks in the plastic, repair them promptly with clear packing tape or a patch of new plastic and strong adhesive. Small repairs early on prevent larger structural issues and maintain the insulating properties of your cold frame. The integrity of your structure directly affects its ability to protect container plants from frost.
Pest and Disease Management
Even within a cold frame, pests can become an issue, especially in a humid environment. Common culprits include aphids, slugs, and occasionally powdery mildew. Regularly inspect your plants for signs of pests or disease. Early detection makes control much easier.
- Aphids: If you spot aphids, spray them off with a strong stream of water. For persistent infestations, a mild insecticidal soap (diluted according to package directions) works effectively.
- Slugs: Slugs thrive in damp conditions. Check under pots and along the frame edges. You can hand-pick them, set out beer traps, or sprinkle diatomaceous earth around the base of plants.
- Fungal Diseases (e.g., powdery mildew): These often appear in humid conditions with poor air circulation. Ensure adequate ventilation by opening the lid daily on mild days. Water plants at the base to avoid wetting foliage. Remove any affected leaves immediately to prevent spread.
Good air circulation, achieved through regular ventilation, is your best defense against most diseases. Healthy plants are also more resistant to pests and diseases.
Seasonal Winterizing and Spring Prep
As winter progresses and temperatures drop significantly, you might decide to completely winterize your cold frame for dormant plants or prepare it for spring seedlings.
- Winterizing: If you are not actively growing throughout the deepest winter months, clean out any plant debris. You can place a layer of straw or old blankets over dormant perennial herbs or hardy vegetables to give them extra insulation. Ensure the lid is securely latched to prevent wind damage.
- Spring Preparation: In late winter or early spring, clean the cold frame thoroughly. This is an excellent time to make any necessary repairs to the frame or plastic. You can use it to start seeds weeks before outdoor planting is safe, giving your summer garden a significant head start. Harden off your spring seedlings by gradually increasing the time the cold frame lid stays open over 7-10 days before transplanting them into your main garden.
By performing these maintenance tasks, you ensure your cheap DIY greenhouse for your balcony remains a valuable tool for extending your growing season year after year, protecting your precious container plants from frost, and maximizing your small-space garden’s potential.
Troubleshooting Common Cold Frame Challenges
Even with careful planning and construction, you might encounter a few common issues with your balcony cold frame. Addressing these challenges promptly ensures your plants remain healthy and your harvests continue. Understanding potential problems and their solutions empowers you to maintain an optimal growing environment.
Overheating and Scorching
This is perhaps the most frequent problem, especially on sunny days. A cold frame’s primary function is to trap heat, but it can quickly become too hot, causing plants to wilt, scorch, or even die. Temperatures inside can easily exceed 90-100 degrees Fahrenheit on a bright day, even if outside air is cool.
Solution: The key to preventing overheating is vigilance with ventilation. On any sunny day when outside temperatures are above freezing, open the lid of your cold frame. The higher the outside temperature and sun intensity, the wider you should open the lid. Use a sturdy prop to hold it open. Consider installing an automatic vent opener if you are frequently away, though these are typically more expensive and might exceed a $20 budget. For a budget solution, place a simple thermometer inside the cold frame and monitor it. If it reads above 70-75 degrees Fahrenheit for cool-season crops, open the lid further. Close it before the sun sets to trap warmth for the night.
Inadequate Light
During the short, cloudy days of fall and winter, your plants might not receive enough light, leading to leggy growth (stretched, weak stems) or poor production. This issue is particularly relevant for balcony gardeners who might have shading from buildings or other structures.
Solution: Ensure your cold frame is in the sunniest possible spot on your balcony, ideally facing south. Regularly clean the plastic lid to remove any dust or grime that can block light. If light remains insufficient, consider adding reflective material (like aluminum foil or a white board) to the inside walls of the cold frame to bounce available light back onto the plants. Rotating your plants periodically ensures all sides receive adequate exposure. Understand that growth will naturally slow down in winter due to shorter daylight hours; adjust your expectations for rapid growth during this period.
Pest Infestations
The enclosed, often humid environment of a cold frame can create an ideal breeding ground for certain pests, such as aphids, slugs, or spider mites. These pests can multiply quickly, damaging your plants.
Solution: Regular inspection is your best defense. Check the undersides of leaves and soil surfaces for any signs of pests. Hand-pick larger pests like slugs. For smaller insects like aphids or spider mites, spray plants thoroughly with insecticidal soap (a natural, low-impact solution). Ensure good air circulation by ventilating regularly, as this deters many pests. Introducing beneficial insects (like ladybugs) can also control aphid populations, though this may be a more advanced strategy for a small balcony setup. If using insecticidal soap, apply it in the morning or evening to avoid sun scald.
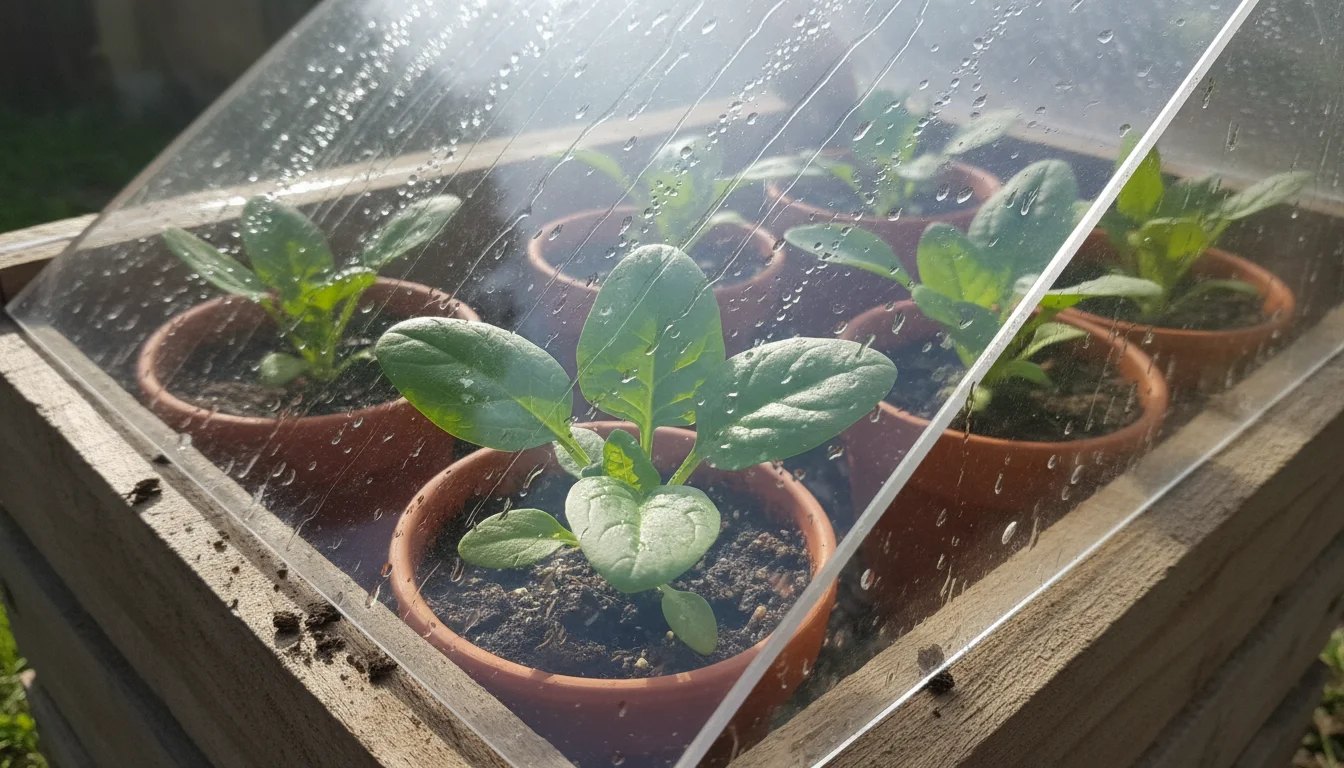
Condensation and Fungal Diseases
High humidity inside the cold frame, often leading to condensation on the lid and plant leaves, creates prime conditions for fungal diseases like powdery mildew or damping-off (a seedling disease).
Solution: Proper ventilation is crucial for managing humidity. Open the lid daily to allow fresh air to circulate, especially on sunny days. Avoid overwatering your plants; water deeply but less frequently. Water at the base of the plant, trying to keep foliage dry. Ensure your pots have excellent drainage to prevent soggy soil. If you spot fungal growth, immediately remove affected leaves and improve air circulation. Consider adding a small fan for air movement if condensation is a persistent problem and you can accommodate it.
By proactively addressing these common challenges, you can keep your cold frame a thriving environment for extending your growing season, protecting container plants from frost, and enjoying fresh produce from your small space.
For trustworthy gardening information, visit: Clemson University Extension — Home & Garden, Colorado State University Extension — Gardening, North Carolina State Extension — Gardening, Virginia Cooperative Extension — Lawn & Garden and University of Maryland Extension — Home & Garden. These organizations provide expert, research-based advice for gardeners at all levels.
Frequently Asked Questions
Can I use old windows or glass for the cold frame lid?
Yes, you can use old windows or panes of glass for your cold frame lid, provided they are intact and safe to handle. Glass offers excellent light transmission and durability, but it is much heavier and more fragile than plastic sheeting. Ensure the frame you build can support the weight of the glass, and use caution when handling to avoid breakage. If you opt for glass, hinge the lid securely and consider adding a latch to prevent accidental opening during windy conditions.
What temperature range should I aim for inside the cold frame?
For most cool-season crops like lettuce, spinach, and kale, aim to keep the daytime temperature inside your cold frame between 40-60 degrees Fahrenheit (4-16 degrees Celsius). At night, temperatures can safely drop to just above freezing, around 32-40 degrees Fahrenheit (0-4 degrees Celsius). On very sunny days, temperatures can easily climb higher, so consistent ventilation is essential to prevent overheating. Monitor with a simple thermometer to ensure your plants are comfortable.
How often should I water plants in a cold frame?
Watering frequency decreases significantly in a cold frame during fall and winter due to cooler temperatures and reduced evaporation. Always check the soil moisture before watering. Stick your finger about an inch or two into the soil; if it feels dry, then water. On average, you might water every 1-2 weeks, but this varies based on plant size, pot size, and weather conditions. Overwatering is a common mistake that leads to root rot in cold, damp conditions.
Can I grow anything besides leafy greens and root vegetables?
Your cold frame works best for cool-season vegetables and herbs. You can also overwinter dormant perennial herbs like thyme, oregano, or mint. Some varieties of flowering pansies or violas can also thrive, adding a splash of color. Avoid trying to grow heat-loving plants like tomatoes, peppers, or basil, as the cold frame does not provide enough warmth for their long-term survival in freezing temperatures.
Does a cold frame need a bottom?
A traditional cold frame typically does not have a bottom. It sits directly on the ground, allowing plants to benefit from the earth’s residual warmth and natural drainage. For a balcony greenhouse, however, your cold frame will sit on your patio or balcony surface. You will place your potted plants directly inside the bottomless frame. This setup provides easy access for cleaning and ensures that your container plants maintain their individual drainage capabilities while still receiving protection from frost.
Your journey into extending your harvest with a DIY cold frame demonstrates that successful gardening is not limited by space or season, but expanded by ingenuity and simple, practical solutions. This $20 balcony greenhouse empowers you to grow fresh food longer, turning your small outdoor area into a year-round garden haven. Enjoy the abundance!
Disclaimer: This article is for informational purposes only and is not a substitute for professional gardening advice. Always consult local extension services or horticulture experts for region-specific guidance.

Leave a Reply