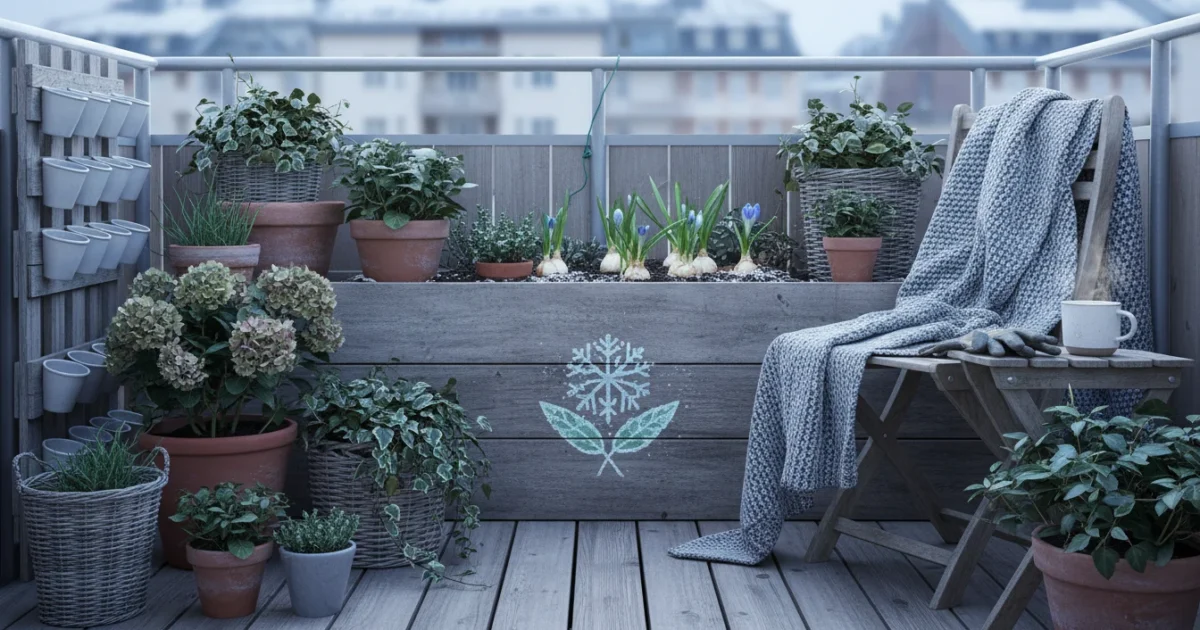
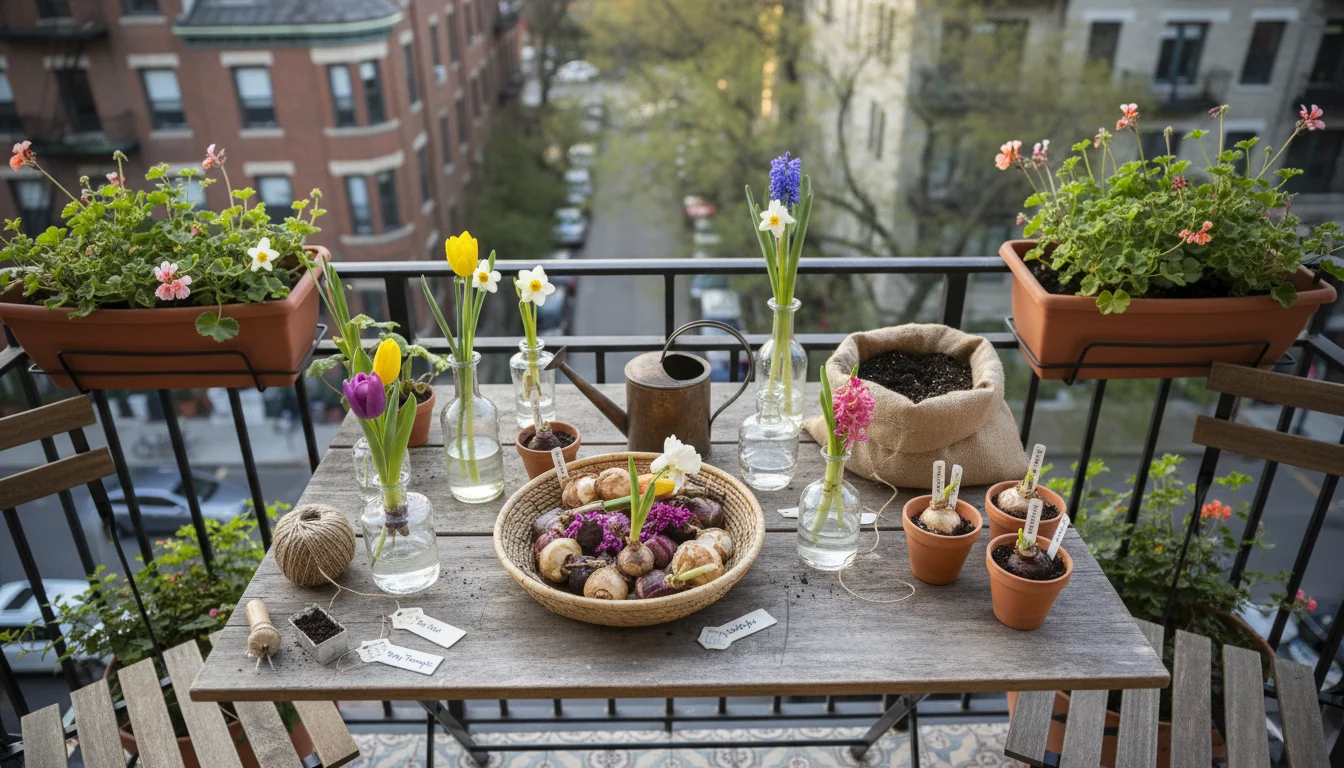
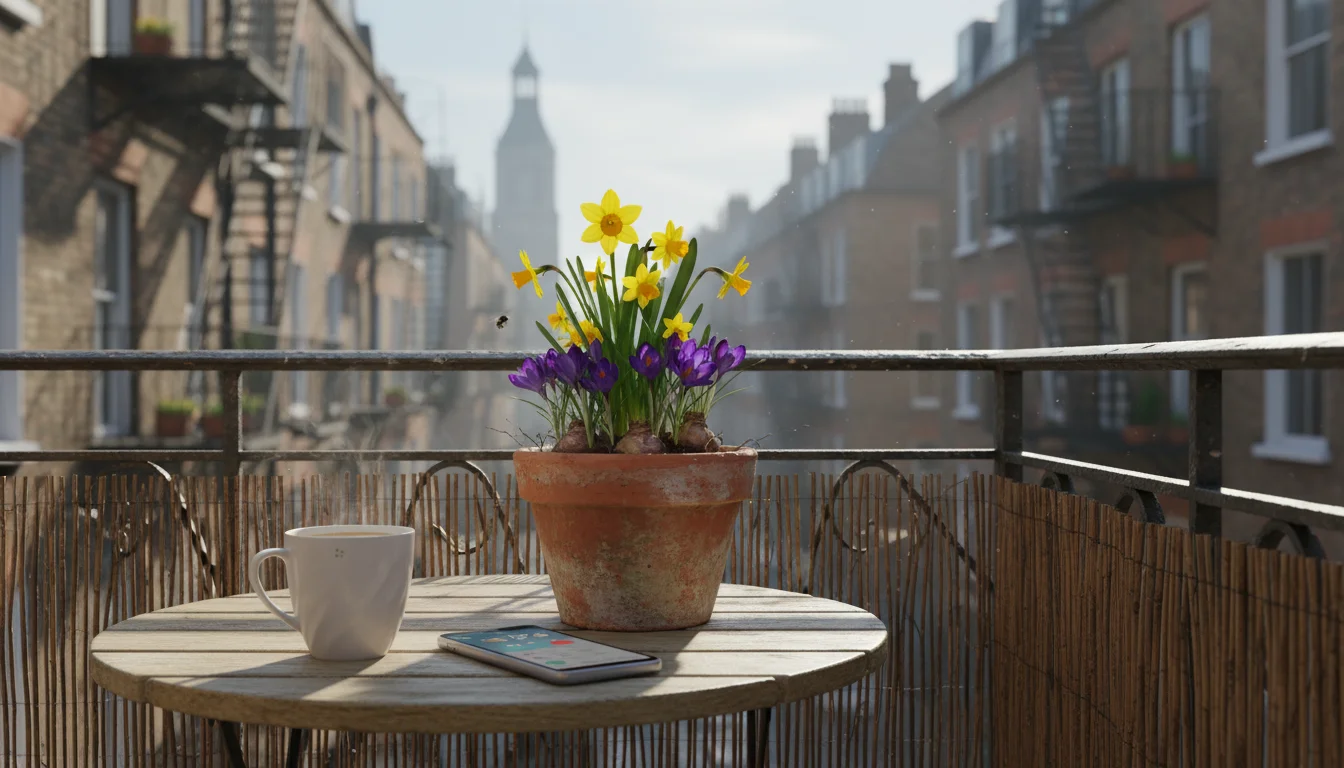
Imagine your small outdoor space, perhaps a balcony or a patio, transforming into a vibrant display of spring flowers, even when winter winds still blow. You can achieve this floral magic with a technique called “forcing” spring bulbs. This method coaxes bulbs into blooming ahead of their natural schedule, providing an early burst of color and fragrance. Your cold balcony or patio becomes the perfect natural refrigerator, or “ice box,” for chilling these bulbs, mimicking the winter conditions they require to produce stunning spring blossoms.
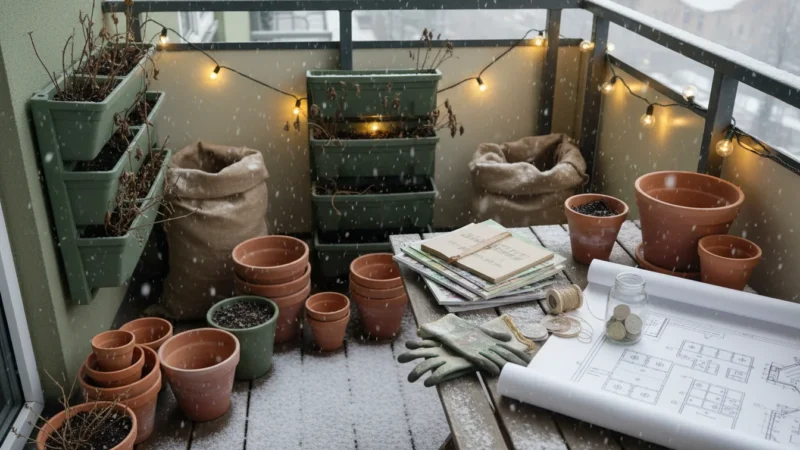
If your balcony is currently bare, using it as a seasonal forcing station is a great way to stay connected to gardening throughout the off-season.
Forcing bulbs offers a rewarding gardening experience, especially for those with limited ground space. It allows you to enjoy classic spring flowers such as tulips, daffodils, and hyacinths in containers, bringing the joy of spring to your doorstep weeks before the weather truly breaks. This guide provides practical, step-by-step instructions to turn your cold outdoor area into a productive winter garden, setting the stage for an unforgettable spring spectacle.
What is Bulb Forcing?
Bulb forcing means tricking spring-flowering bulbs into blooming earlier than they would naturally outdoors. Normally, tulips, daffodils, hyacinths, and crocuses require a period of cold temperatures, known as cold stratification, to develop their root systems and initiate flower formation. In nature, winter provides this necessary chilling. By “forcing,” you artificially create these cold conditions, then bring the bulbs into a warmer environment to encourage them to sprout and flower weeks or months ahead of spring.
This process is highly effective for enjoying spring blooms during the colder months when outdoor gardens are dormant. Forcing bulbs gives you control over your blooming schedule, allowing you to time your indoor floral displays for holidays, special events, or simply to brighten your home during the bleakest part of winter. The key to successful forcing lies in understanding the bulb’s natural life cycle and replicating it precisely.
The history of bulb forcing goes back centuries, with enthusiasts in Europe perfecting techniques to enjoy these fleeting beauties indoors. Today, with modern hybridizing and improved understanding of plant physiology, forcing bulbs is more accessible than ever. It provides a tangible connection to nature even when your garden sleeps, delivering a powerful psychological lift during the darker days of winter. This technique offers a practical solution for gardeners craving vibrant colors and fragrant scents before the true arrival of spring.
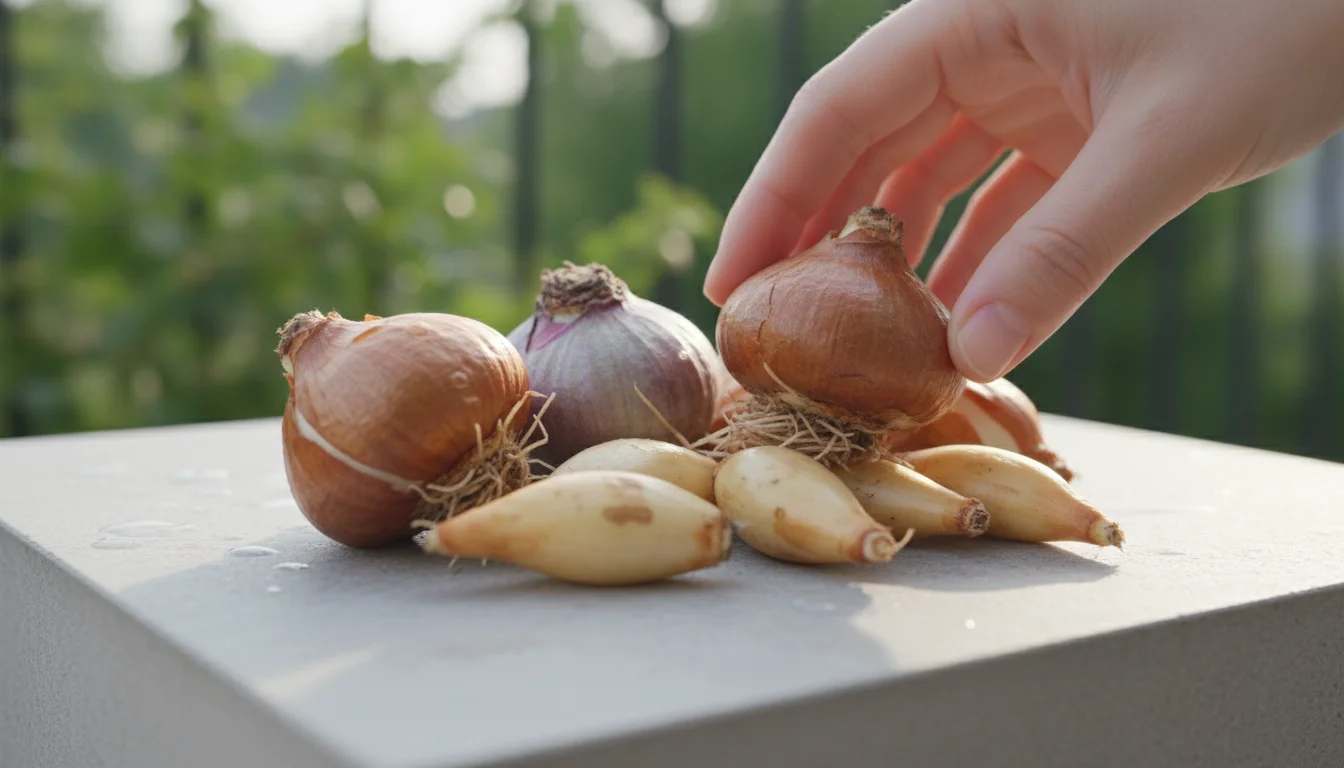
Many types of bulbs respond well to forcing. Tulips, especially single early and triumph varieties, produce magnificent blooms. Daffodils, particularly smaller varieties like ‘Tête-à-Tête’ or ‘Paperwhite’ (though ‘Paperwhite’ does not require cold stratification, making it an exception), offer cheerful yellow and white flowers. Hyacinths are famous for their intense fragrance and dense flower spikes. Crocuses and grape hyacinths (Muscari) provide delightful, smaller blooms. Selecting the right bulbs, those specifically prepared for forcing or naturally well-suited, is your first step towards success. These bulbs are typically larger and contain more stored energy, ready to produce a spectacular display when given the correct cues.
Why Force Bulbs on Your Balcony or Patio?
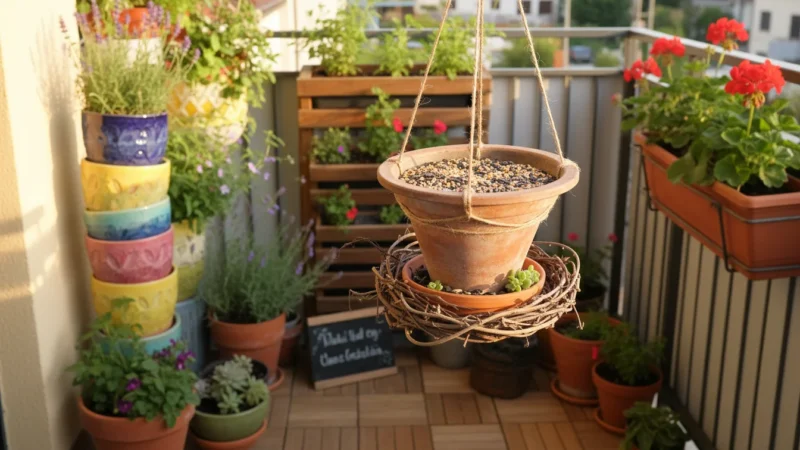
For gardeners with limited space, a balcony or patio is an invaluable asset. It transforms into a functional and beautiful extension of your home. Using your cold outdoor space for forcing bulbs offers several distinct advantages, particularly for small-space and low-maintenance gardening enthusiasts. You do not need a dedicated root cellar or extra refrigerator space when your balcony can serve as a natural “ice box.”
Your setup doesn’t have to look industrial; you can style your bare space with light and texture to keep the balcony inviting all winter.
First, your balcony provides the ideal natural chilling environment. Spring-flowering bulbs need consistent cold temperatures, generally between 35-45°F (2-7°C), for 10-16 weeks. An unheated balcony or patio naturally experiences these temperatures during fall and winter in most temperate climates. This eliminates the need for you to store bulbs in your kitchen refrigerator, freeing up valuable appliance space. Using your outdoor environment is a simple, cost-effective, and energy-efficient solution for cold stratification.
Second, forcing bulbs in containers on your balcony allows for unparalleled flexibility in design and display. You can plant various bulbs in decorative pots, arranging them creatively. Once chilled, you simply move these pre-potted containers indoors to enjoy the blooms. This means you do not commit precious garden bed space to temporary displays. Your balcony becomes a rotating stage for seasonal beauty, offering a dynamic garden experience that adapts to your needs and preferences. You control where and when these beautiful flowers appear, making them perfect focal points for your indoor decor.
Third, this method supports low-maintenance gardening. After initial planting, the bulbs require minimal attention during their chilling period outdoors. Nature handles most of the work. You occasionally check soil moisture, but the cold temperatures suppress active growth, reducing watering frequency. This makes bulb forcing an accessible project even for busy gardeners, delivering maximum impact with relatively little effort. You get stunning results with a practical approach.
Finally, forcing bulbs brings immense psychological benefits. Witnessing vibrant flowers bloom indoors while winter still rages outside lifts spirits and combats seasonal doldrums. It provides a tangible sign of spring’s eventual return, fostering a sense of hope and anticipation. For apartment dwellers or those with small yards, this technique offers a direct connection to nature’s cycles, enhancing well-being and bringing a touch of the natural world into urban living spaces. It delivers a meaningful and beautiful gardening experience, regardless of your garden’s size.

Understanding Cold Stratification: Nature’s Wake-Up Call
To successfully force spring bulbs, you must understand a critical process called cold stratification. This is the natural mechanism by which many temperate plants, including spring-flowering bulbs, break dormancy and prepare for germination or flowering. Think of it as nature’s wake-up call, a necessary period of cold that signals to the bulb that winter has passed and spring is on its way.
If you want to keep your pots organized and protected, you can build a simple cold frame to house your bulbs during this phase.
At its core, cold stratification involves exposing the bulbs to consistent cold temperatures for an extended duration. For most spring bulbs, this means temperatures generally between 35-45°F (2-7°C) for a minimum of 10 to 16 weeks. During this chilling period, several vital biochemical changes occur within the bulb. Hormones that inhibit growth diminish, and hormones that promote growth, such as gibberellins, increase. This shift in hormonal balance is crucial for the bulb to transition from a dormant state to an active growth phase.
Without adequate cold stratification, spring bulbs will often fail to flower or produce very stunted, weak blooms. The chilling period ensures that the plant has enough time to develop a strong root system underground before it expends energy on shoots and flowers above ground. It also prevents premature sprouting during a warm spell in early winter, ensuring the plant only emerges when sustained favorable conditions are more likely. This evolutionary adaptation protects the plant from freezing damage by delaying its growth until the true arrival of spring.
Your balcony or patio naturally provides these cold conditions. As winter progresses, the ambient outdoor temperature reliably falls within the required range. This makes the “balcony ice box” method an ideal solution for gardeners who want to force bulbs without specialized equipment. The key is to ensure the bulbs remain consistently cold and do not experience prolonged periods of warmth during their stratification phase. Fluctuations can confuse the bulb, potentially disrupting the delicate biochemical processes occurring within. A consistent, cool environment is paramount for success.
Proper cold stratification is fundamental to the health and vibrancy of your forced flowers. When you provide the correct chilling, your bulbs store energy efficiently, develop robust root systems, and are ready to burst forth with spectacular blooms once brought into a warmer environment. This crucial step directly impacts the number, size, and longevity of your flowers, making it the most important phase in the entire forcing process.
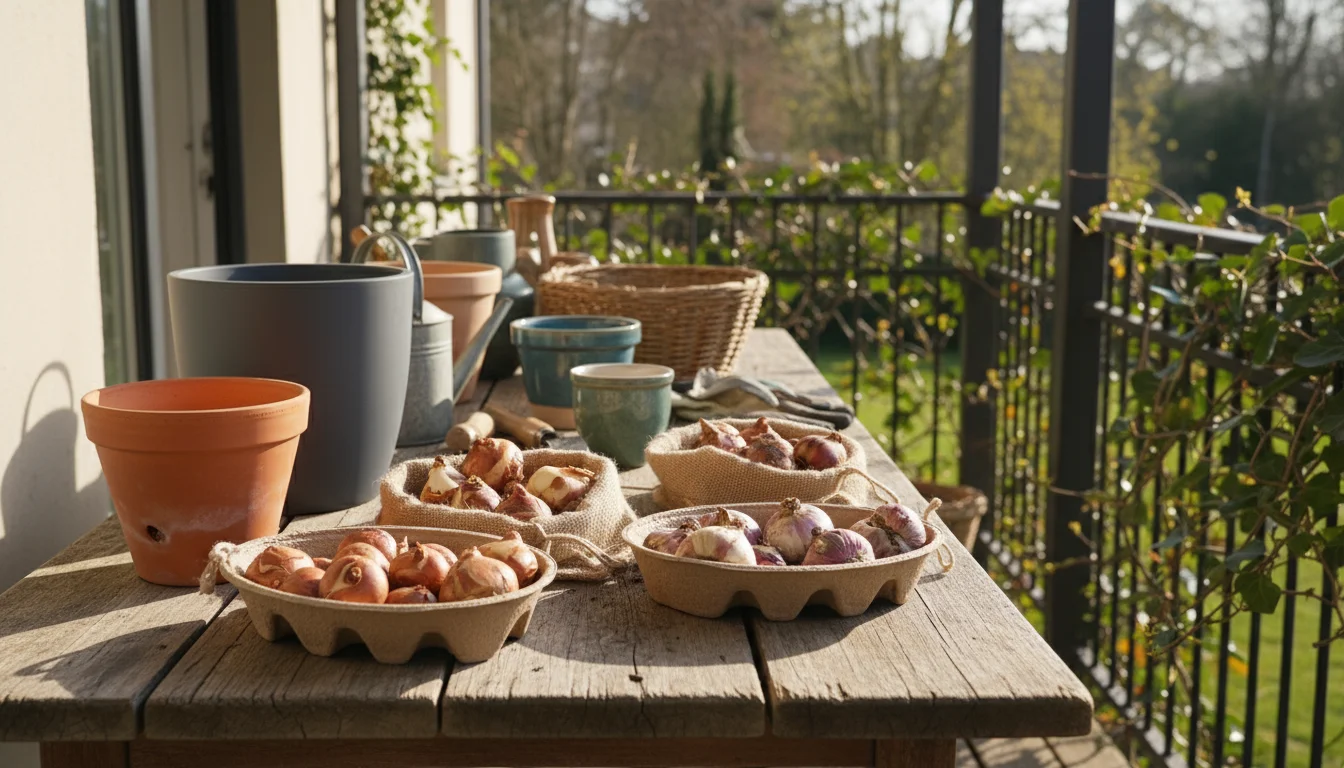
Choosing Your Bulbs and Containers for Success
Selecting the right bulbs and containers sets you up for success in your balcony ‘ice box’ project. Not all bulbs are created equal for forcing, and appropriate pot choices make a significant difference in both aesthetics and functionality. Prioritize quality and suitability for the best results.
For those worried about urban wildlife, choosing bulbs that squirrels hate can save your spring display from being dug up.
Selecting the Best Bulbs for Forcing:
- Tulips: ‘Early Single’ and ‘Triumph’ varieties are excellent choices due to their strong stems and reliable bloom time. Popular forcing varieties include ‘Christmas Marvel’ or ‘Pink Impression’. Purchase firm, large bulbs, as these contain more stored energy for blooming.
- Hyacinths: Known for their intoxicating fragrance and dense flower spikes. Choose large, firm bulbs. Many nurseries offer “prepared” hyacinth bulbs, which have already undergone a pre-chilling treatment, slightly reducing the required stratification period.
- Daffodils: Smaller, multi-flowered varieties like ‘Tête-à-Tête’ or ‘Minnow’ are ideal for pots. Larger daffodils can become top-heavy. Ensure bulbs are firm and free of soft spots.
- Crocuses: These charming, early bloomers add a delicate touch. Plant them thickly for a full display.
- Grape Hyacinths (Muscari): Produce beautiful blue, purple, or white flower spikes. They are easy to force and provide a lovely complementary texture.
When purchasing bulbs, inspect them carefully. They should feel firm and heavy for their size, with no signs of mold, rot, or soft spots. Larger bulbs generally produce larger flowers. Always buy from a reputable nursery or garden center that stores their bulbs correctly, ensuring their viability.
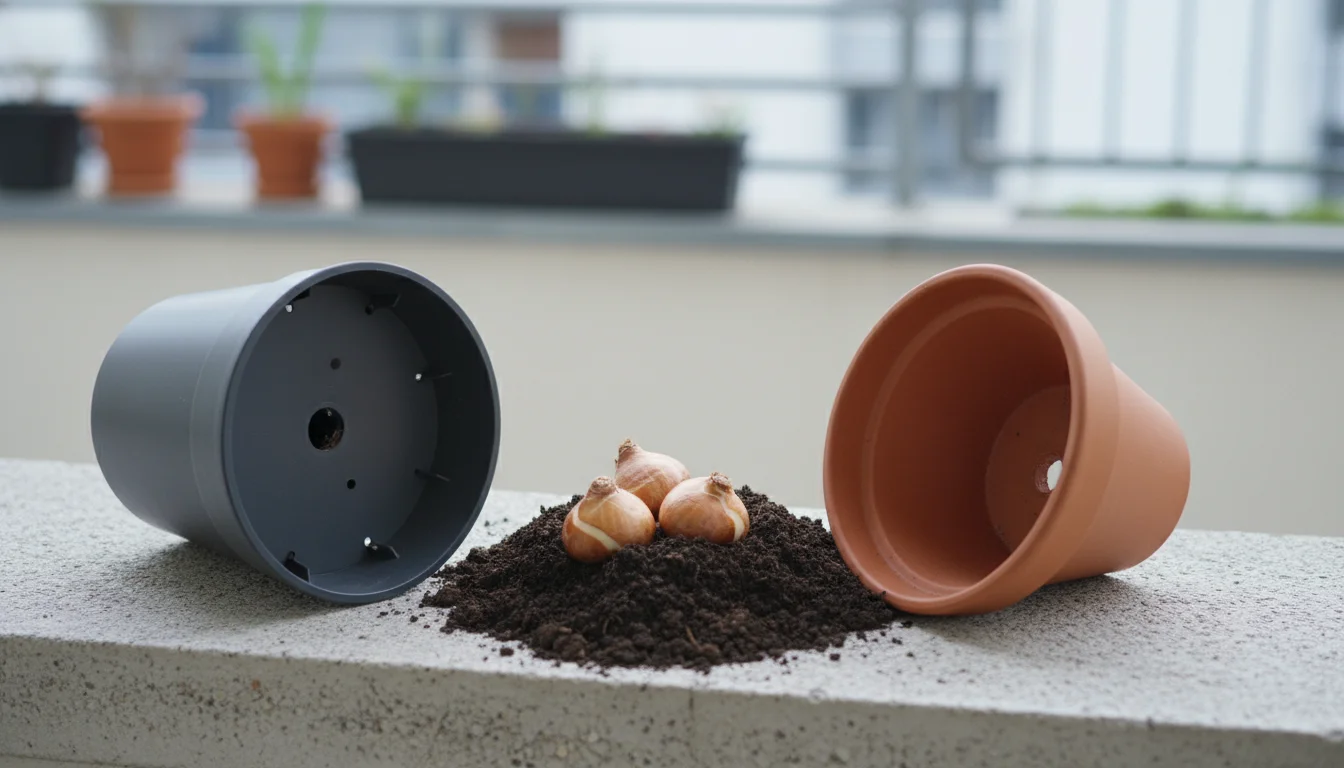
Choosing the Right Containers:
- Material: Plastic pots are lightweight and retain moisture well, making them practical for outdoor chilling. Terracotta pots look attractive, but they dry out faster and offer less insulation, which means you need to monitor moisture more closely. Any container with drainage holes works.
- Size: The pot’s depth should accommodate the bulbs, allowing for at least 2-3 inches of soil below the bulbs for root development and 1 inch of soil above. A pot with a diameter of 6-8 inches can hold 3-5 tulip or hyacinth bulbs, or 7-9 daffodil or crocus bulbs.
- Drainage: This is non-negotiable. Your containers absolutely require drainage holes to prevent waterlogged soil, which leads to bulb rot. Waterlogging means the soil stays too wet for too long, depriving roots of oxygen.
- Aesthetics: Consider the final display. You can use simple plastic pots for chilling, then slip them into more decorative cachepots when you bring them indoors. This provides flexibility and style.
Selecting robust bulbs and appropriate pots are foundational steps. These choices directly impact the success of your forcing efforts, influencing bloom quality and overall plant health. Invest in good quality, and your efforts will reward you with a magnificent early spring display.
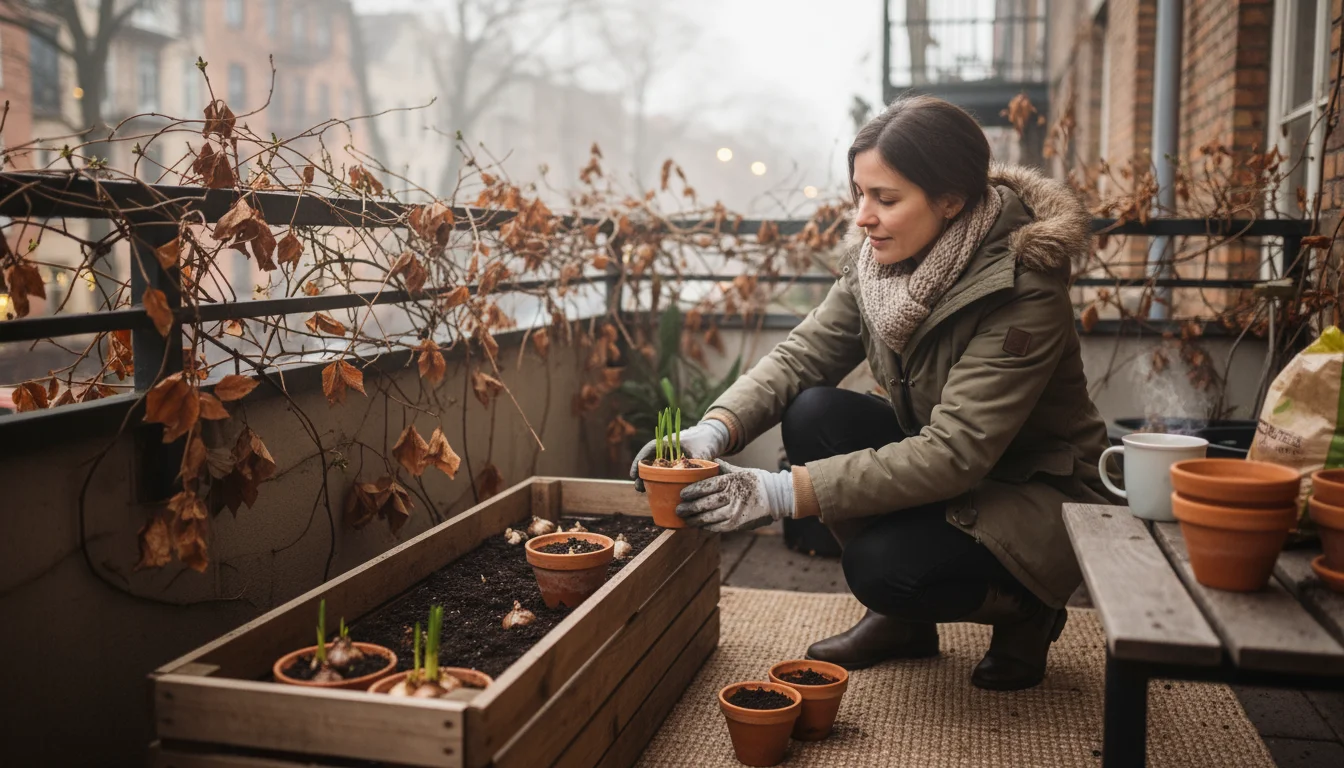
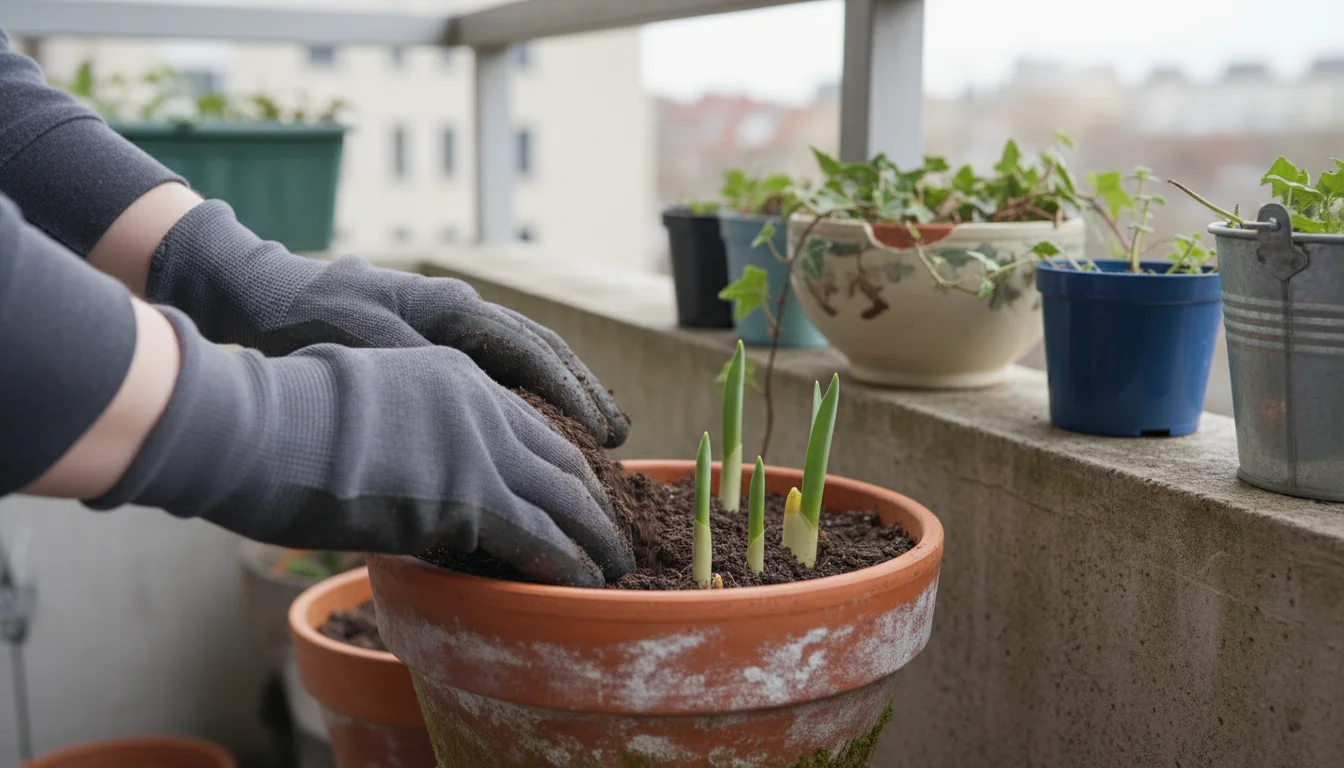
Step-by-Step Planting for Forced Bulbs
Proper planting is essential for successful bulb forcing. This step-by-step guide helps you prepare your bulbs and containers for their winter chilling period. Attention to detail now pays off with abundant blooms later.
To maximize your space, consider the lasagna bulb planting method to stack layers of different bulbs in a single pot.
Materials You Will Need:
- Chosen spring-flowering bulbs
- Containers with drainage holes
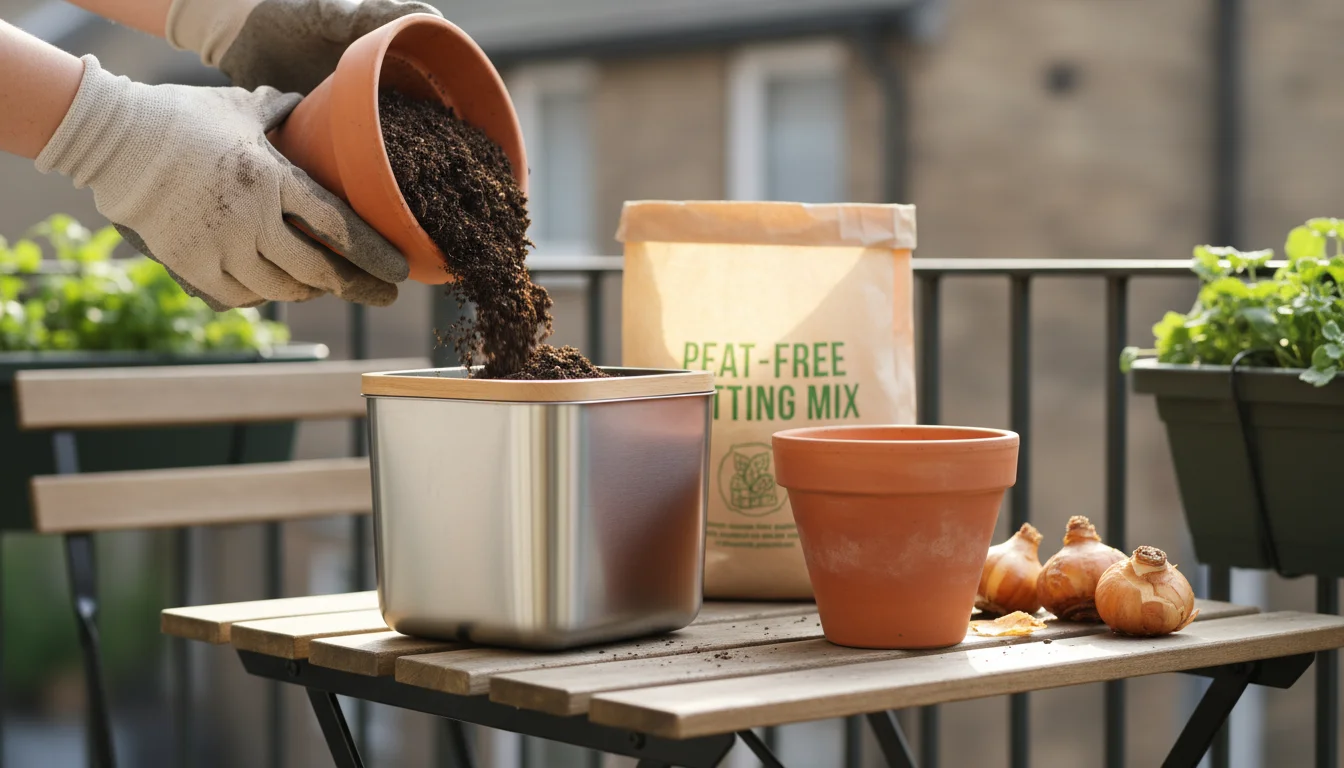
- High-quality potting mix (not garden soil)
- Gloves (optional, but recommended for hyacinths, which can cause skin irritation)
- Small trowel or scoop
- Watering can
The Planting Process:
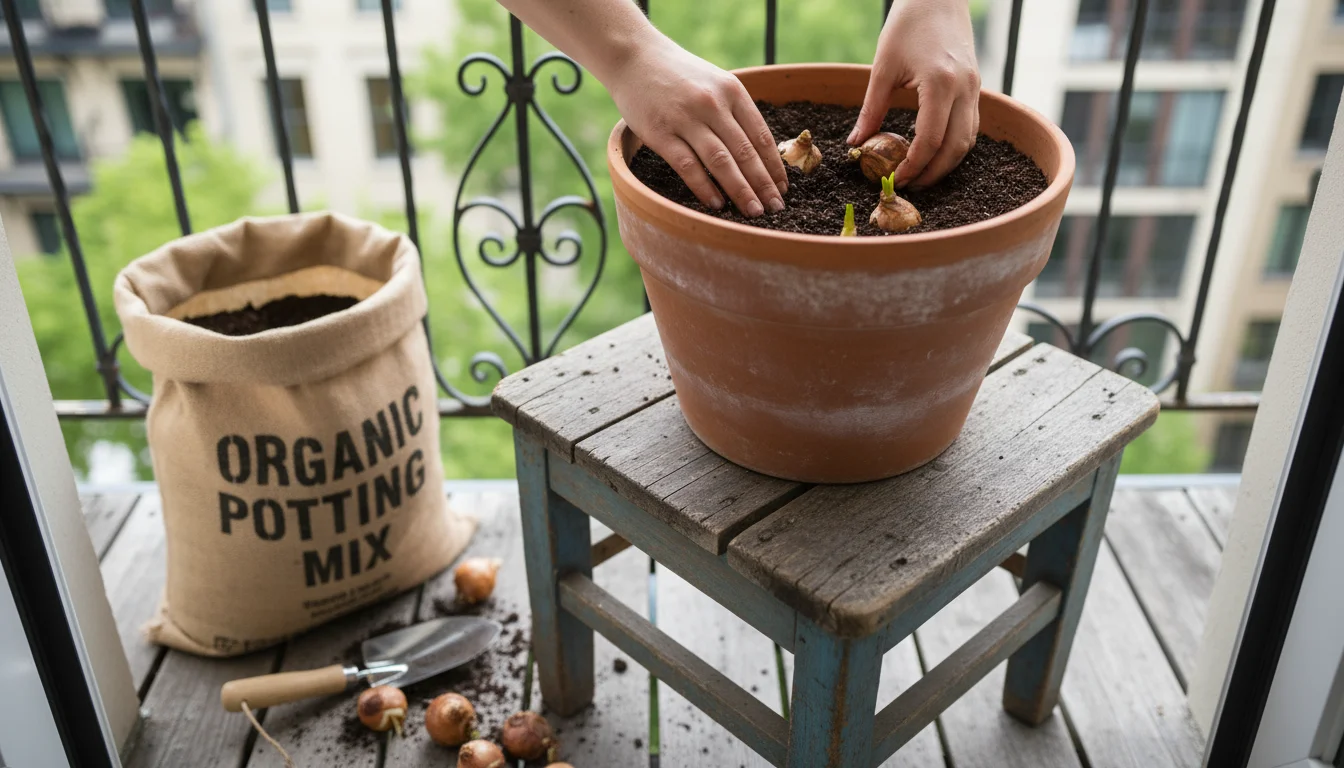
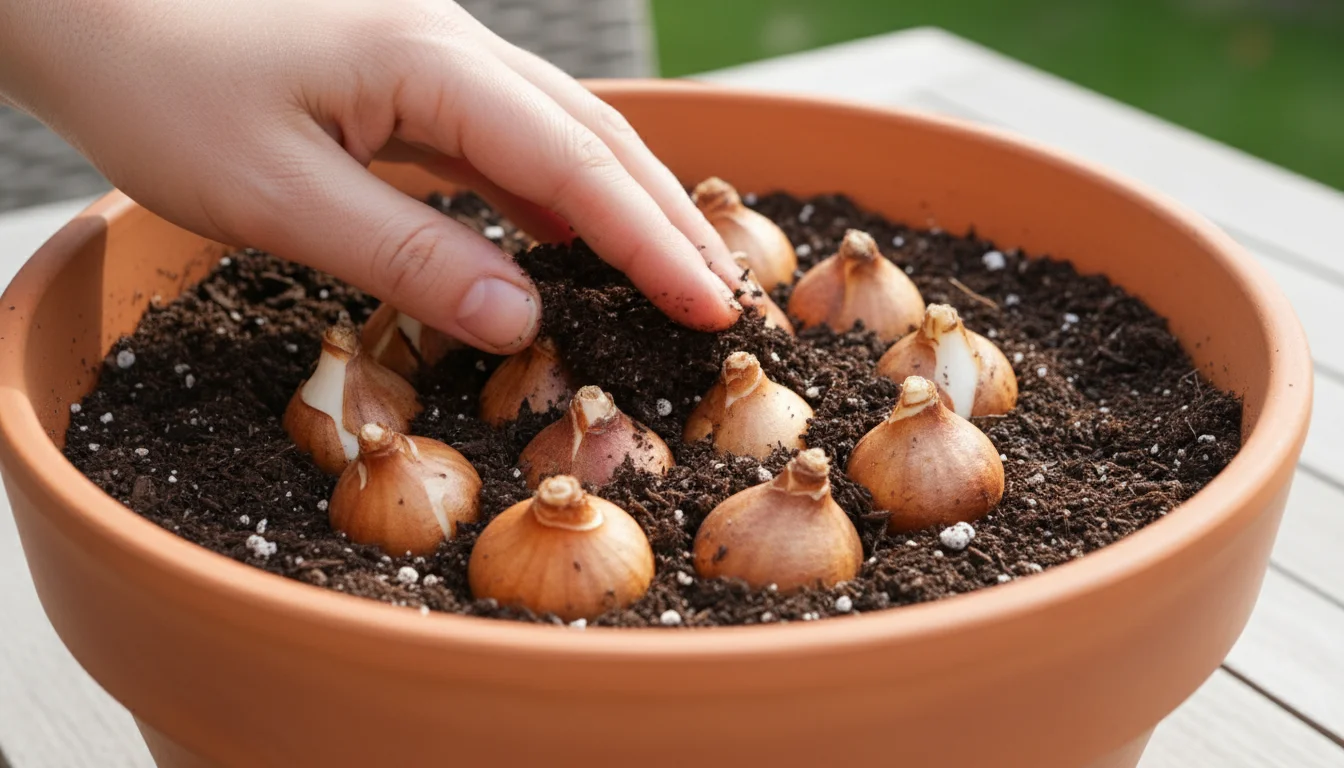
- Prepare Your Containers: Ensure your pots are clean and have adequate drainage holes. You can place a small piece of mesh or a coffee filter over the drainage holes to prevent soil from escaping, while still allowing water to drain freely.
- Add Potting Mix: Fill the bottom 2-3 inches of your container with a good quality, well-draining potting mix. Avoid using heavy garden soil, which compacts easily and can lead to poor drainage and bulb rot. A general-purpose potting mix with perlite or vermiculite works well.
- Position Your Bulbs: Arrange the bulbs on top of the soil. Plant them close together, almost touching, for a full and lush display. For most bulbs, plant them with the pointed side facing up, as this is where the shoot will emerge. If you are unsure, plant them on their side; the shoot will find its way up. Ensure a minimum of 3-5 bulbs per 6-8 inch pot for a noticeable display.
- Layering (Optional, but Recommended): For an extended bloom period or a richer display, consider layering. Plant larger, later-blooming bulbs (like tulips) deeper, then cover them with a layer of soil. On top of that, plant smaller, earlier-blooming bulbs (like crocuses or grape hyacinths). This technique, often called a “bulb lasagna,” maximizes space and provides successive waves of color.
- Cover with Soil: Gently fill the pot with potting mix, covering the bulbs completely. Aim for at least 1 inch of soil above the top of the bulbs. Lightly pat the soil down to remove large air pockets, but do not compact it too heavily. The soil should be loose enough to allow roots to grow easily.
- Water Thoroughly: Water the newly planted bulbs deeply and slowly until water drains from the bottom of the pot. This settles the soil around the bulbs and provides essential moisture for root development. Do not let the pot sit in standing water.
- Label Your Pots: It is easy to forget which bulbs you planted where, especially if you have several different varieties. Use plant markers to label each pot with the bulb type and planting date. This helps you track their chilling time and plan their move indoors.
Once planted and watered, your bulbs are ready for their chilling period on your balcony ‘ice box’. This careful preparation ensures they receive the best start for a spectacular future bloom.
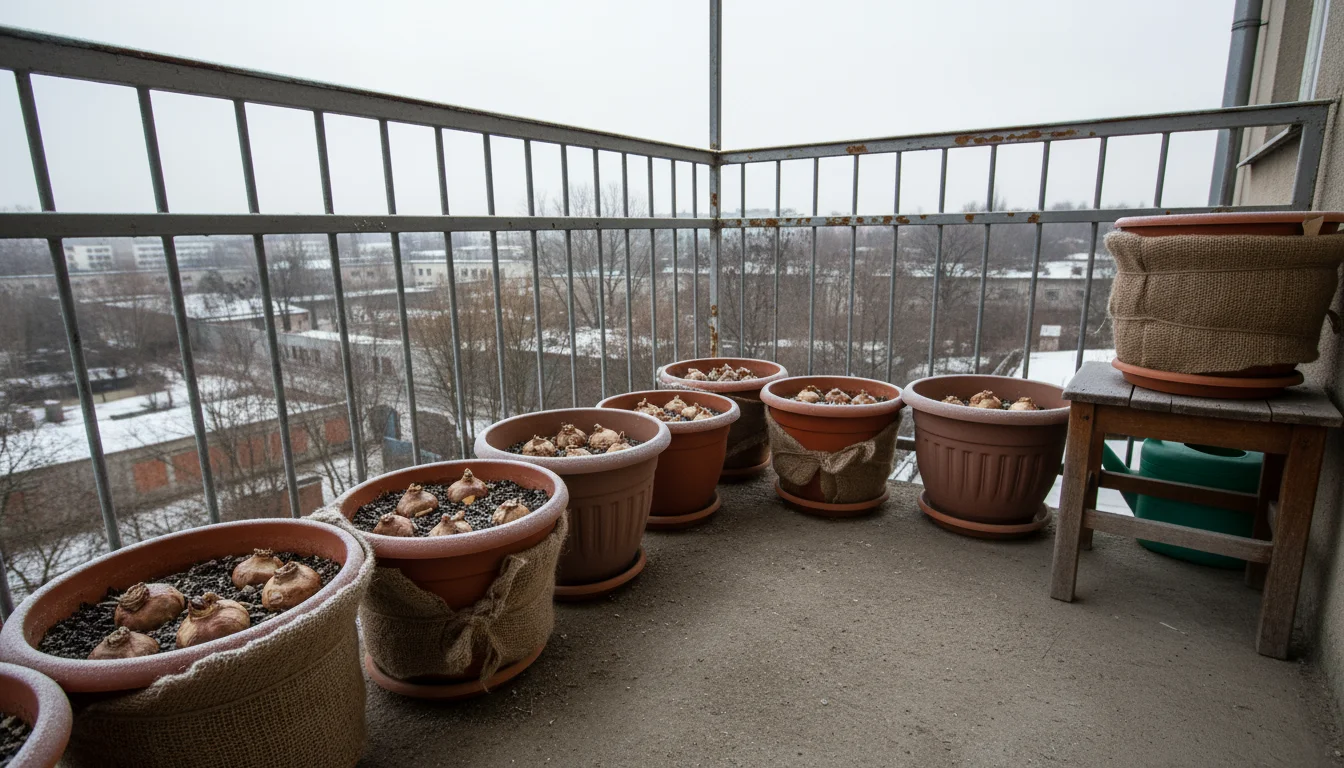
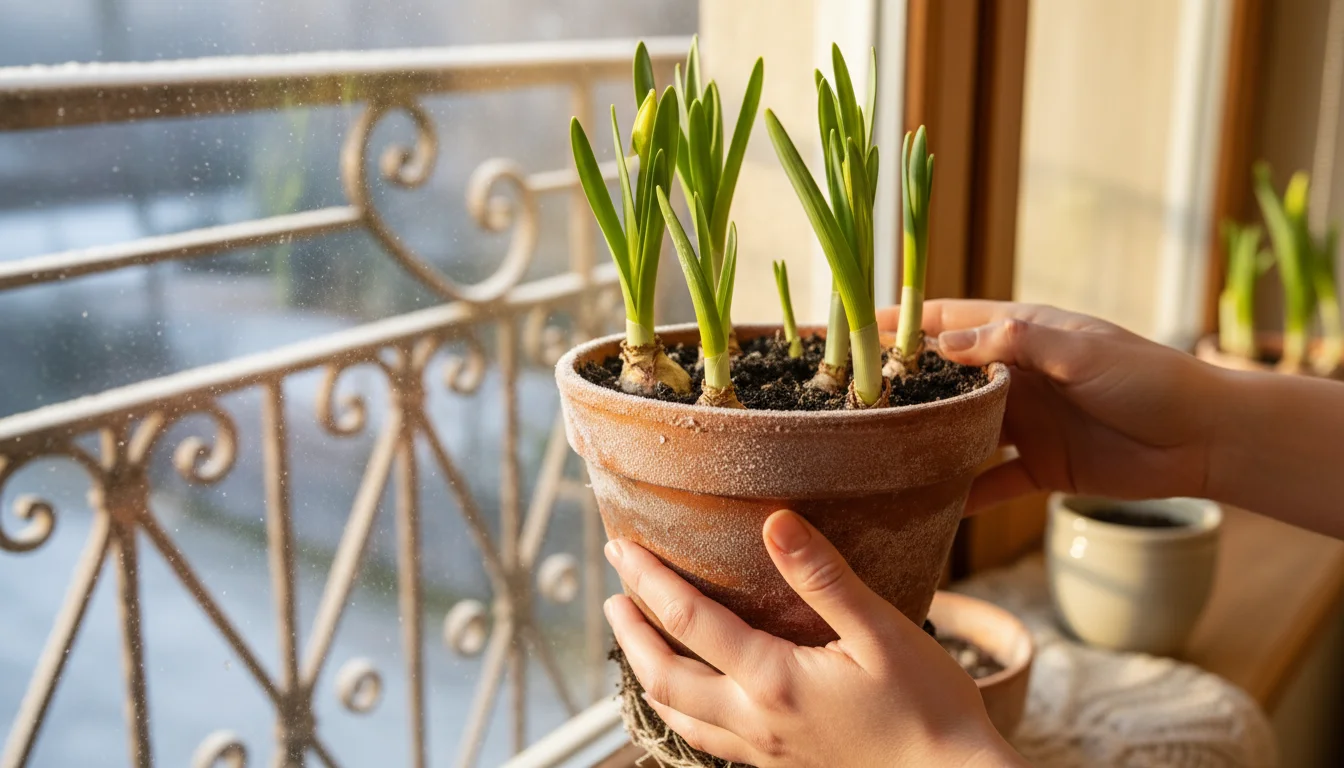
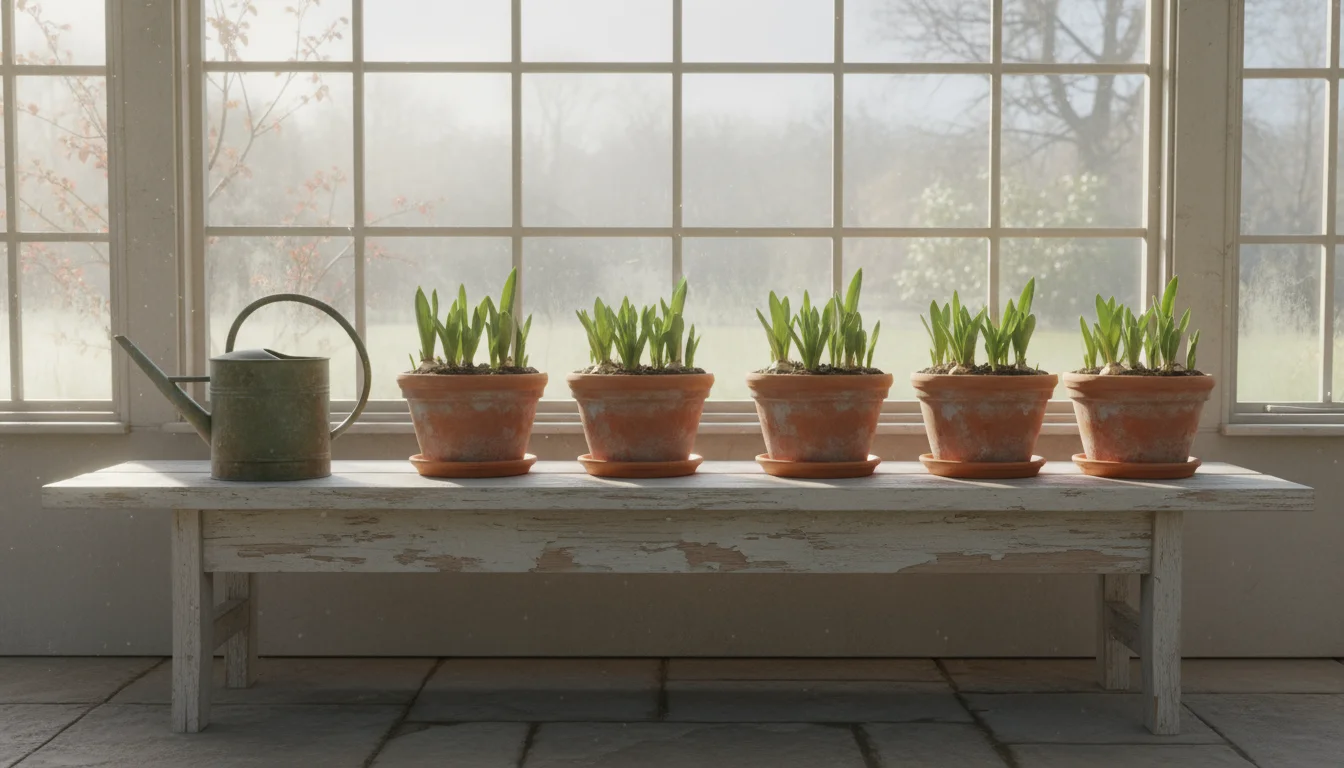
The Balcony ‘Ice Box’ Method: Chilling Your Bulbs Outdoors
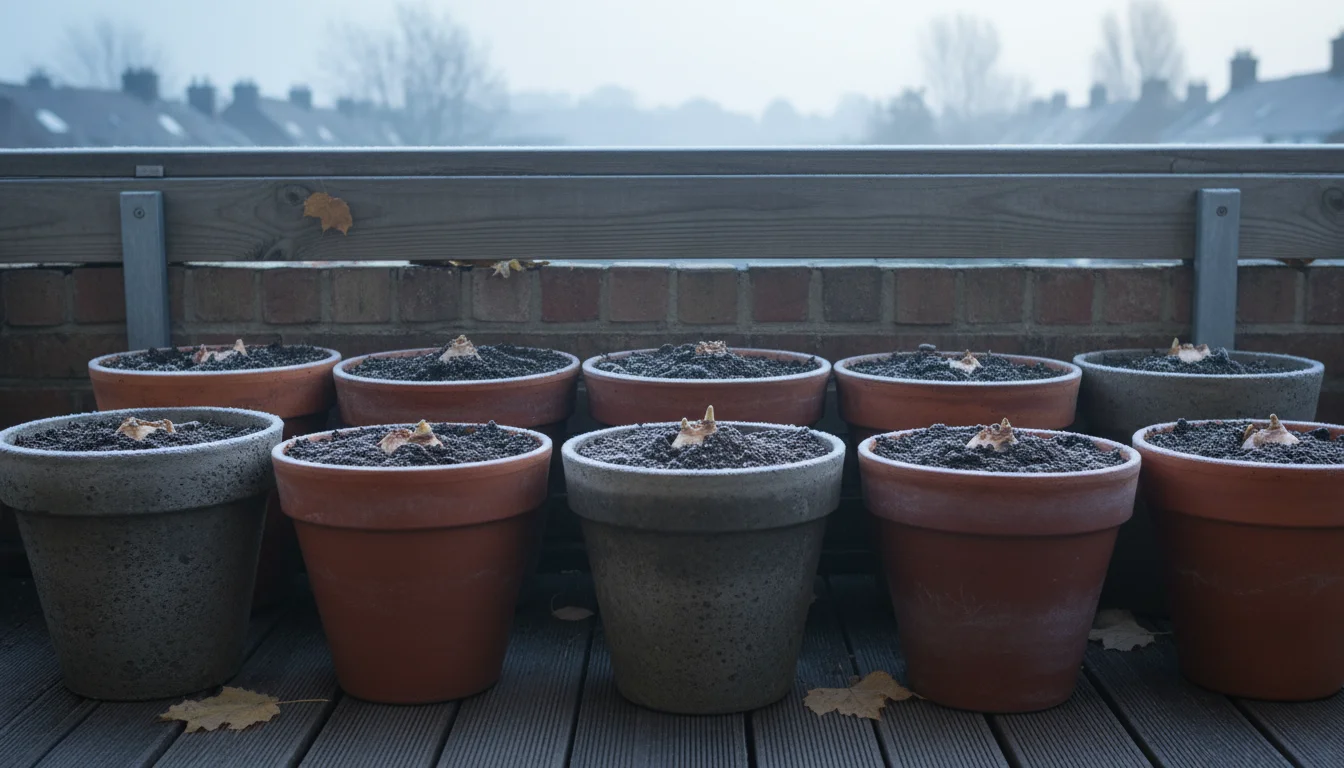
Your cold balcony or patio provides the perfect environment for cold stratification, acting as a natural refrigerator for your potted bulbs. This “balcony ice box” method is simple, effective, and requires minimal effort once the bulbs are planted. Consistent temperature and moisture are key during this crucial chilling period.
Ideal Chilling Conditions:
- Temperature: Maintain consistent temperatures between 35-45°F (2-7°C). Avoid prolonged periods above 50°F (10°C), as this can interrupt the chilling process. Most temperate winter climates naturally fall within this range.
- Duration: Most spring bulbs require 10-16 weeks of chilling. Tulips and hyacinths generally need 14-16 weeks, while daffodils and crocuses can often complete chilling in 10-12 weeks. Refer to specific bulb packaging for precise recommendations.
- Darkness: While not strictly necessary for root development, keeping the pots in a dimly lit or shaded area prevents premature sprouting. Direct sun can warm the soil too much, interrupting the chilling process.
Placing Your Pots on the Balcony:
- Choose a Protected Spot: Place your potted bulbs in a sheltered area on your balcony or patio. This could be against a wall, under an overhang, or in a corner where they are shielded from direct winter sun, strong winds, and heavy rain or snow. Protection helps maintain a more stable temperature.
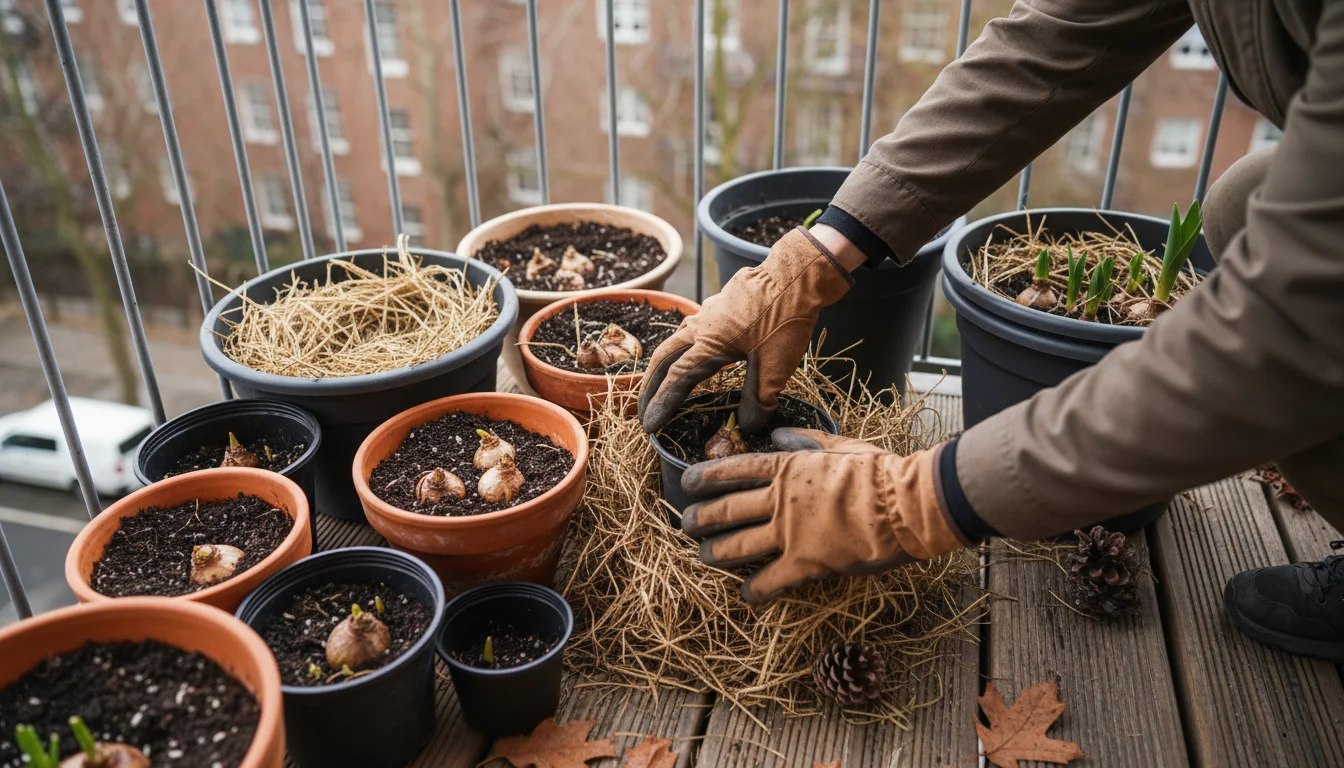
- Insulate (Optional, but Recommended): For regions with harsh freezes or extreme temperature fluctuations, consider insulating your pots. You can group pots tightly together, surround them with straw or burlap, or place them inside a larger, insulated container. This buffer protects the roots from freezing solid, which can damage the bulbs.
- Monitor Moisture: During the chilling period, the soil should remain consistently moist, but not waterlogged. Check the soil every 1-2 weeks by sticking your finger about an inch deep. If it feels dry, water lightly until moisture drains from the bottom. If you live in an area with regular rainfall or snow, you may not need to water at all. Avoid overwatering, as this is a common cause of bulb rot.
- Protect from Pests: Squirrels and other critters can sometimes dig up bulbs. If this is a concern, cover the pots with a layer of chicken wire or mesh secured with stakes, or place them in a wire cage.
The beauty of the balcony ‘ice box’ is its simplicity. Nature does most of the work. You provide the initial planting, select the right spot, and occasionally check moisture. After the required chilling time, you will notice small green shoots beginning to emerge from the soil. This signals the bulbs are ready for their next stage: coming indoors for their grand reveal. Mark your calendars when you set the pots out so you know when the chilling period is complete. For example, if you place them out in early November, they will be ready to come in by late January or early February.
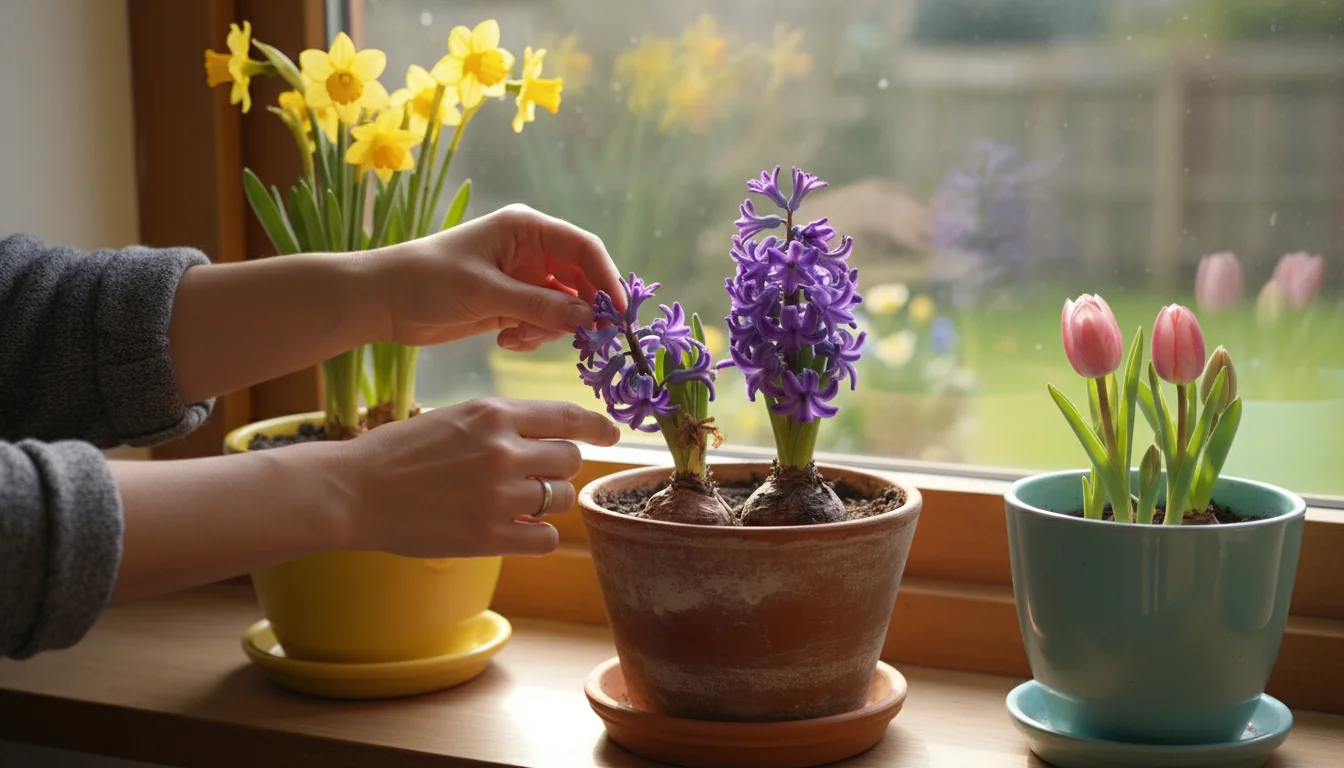
Bringing Your Bulbs Indoors: The Grand Reveal
After their long winter slumber on your balcony ‘ice box’, your bulbs are now ready to awaken and showcase their vibrant blooms indoors. The transition from cold outdoor conditions to a warmer indoor environment needs careful management to ensure a spectacular display. This step brings the magic of spring into your home.
If you want to add even more vertical interest to your indoor display, you can also force flowering branches indoors at the same time.
When to Bring Bulbs Indoors:
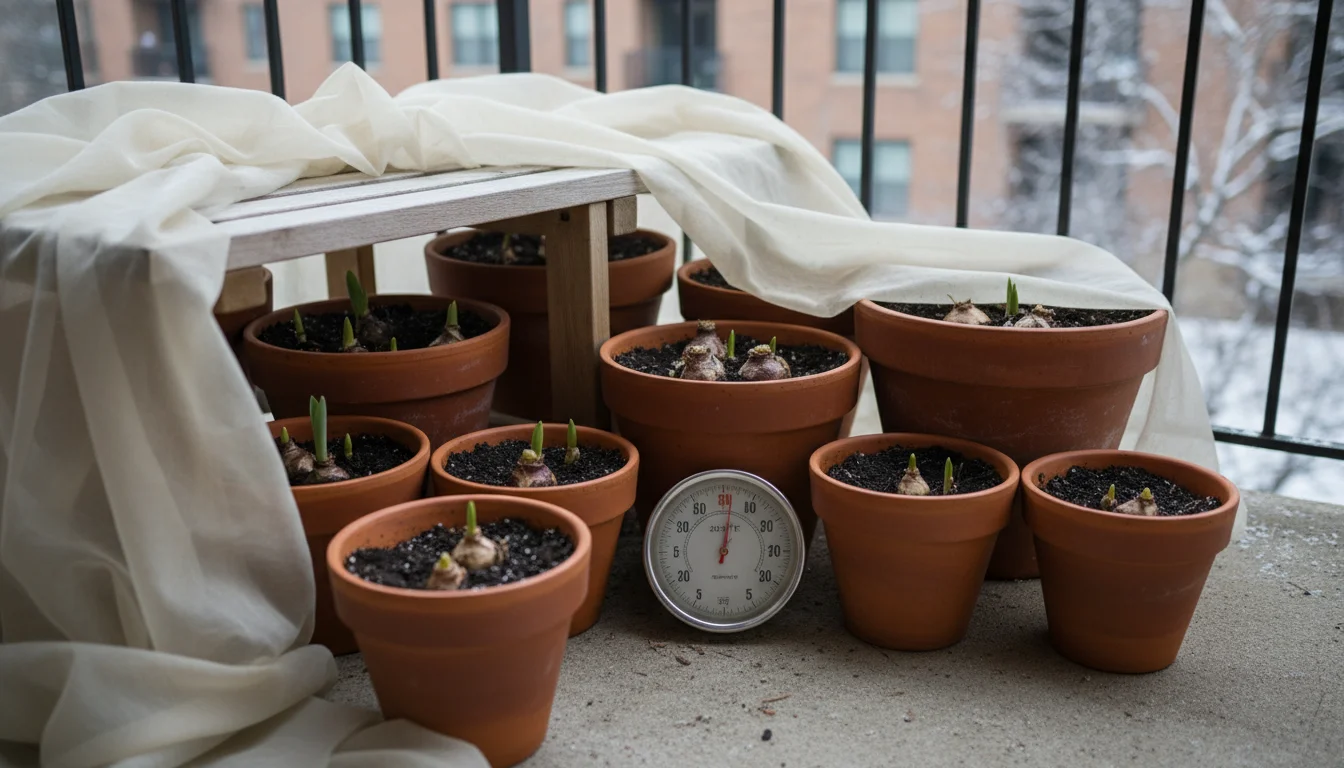
You know your bulbs are ready when you see healthy green shoots emerging from the soil, typically 1-3 inches tall. This usually happens after the minimum chilling period of 10-16 weeks. Some bulb types will show more growth than others, but green tips are a good indicator. If you see roots growing out of the drainage holes, that is also a positive sign.
The Acclimation Process:
- Gradual Warming (Optional, but Beneficial): Instead of moving bulbs directly from freezing temperatures into a warm living room, consider a brief transitional period. Place the pots in a slightly cooler, brighter spot for a few days, like a cool sunroom, an unheated guest room, or a garage that stays above freezing. This gentle acclimation helps prevent shock and encourages stronger growth.
- Choose a Bright Location: Once indoors, move your pots to a bright location. A south-facing window, a bright sunroom, or under grow lights provides ideal conditions. Bright light encourages strong, upright growth and prevents leggy, stretched-out stems.
- Moderate Temperatures: Maintain an indoor temperature between 60-68°F (15-20°C). Cooler temperatures prolong the bloom time, while warmer temperatures can make flowers fade faster. Avoid placing pots near heat sources, like radiators or vents, which can dry out the soil too quickly and stress the plants.
- Consistent Watering: As the bulbs begin active growth and flowering, their water needs increase significantly. Check the soil daily. Water thoroughly when the top inch of soil feels dry, ensuring water drains from the bottom. Do not let the pots sit in standing water, as this can still lead to rot.
- Rotate Your Pots: To promote even growth and prevent stems from leaning towards the light, rotate your pots every few days. This encourages straight stems and a balanced plant.
Within a few weeks of moving indoors, your bulbs will begin to unfurl their leaves and buds, culminating in a magnificent display of flowers. The anticipation of watching these early blooms develop adds a special joy to the winter months. Your balcony ‘ice box’ has done its job, and now you reap the rewards of your planning and patience.
Caring for Your Forced Bulbs and Maximizing Blooms
Once your forced bulbs are blooming indoors, proper care helps extend their flowering period and keeps them looking their best. These simple maintenance tips ensure you get the most out of your balcony ‘ice box’ project.
For those without any outdoor space at all, forcing bulbs indoors using your kitchen refrigerator is an equally effective alternative.

During Bloom:
- Light: Continue to provide bright, indirect light. While direct sunlight during the chilling phase is problematic, once blooming indoors, ample light encourages vibrant colors and strong stems.
- Water: Keep the soil consistently moist. Flowering plants are actively using water, so check the soil frequently, often daily. Water thoroughly when the top inch of soil is dry to the touch, allowing excess water to drain away completely.
- Temperature: To maximize bloom longevity, maintain cooler room temperatures, ideally between 60-65°F (15-18°C). Moving pots to a cooler spot at night can also help prolong the flowers. Avoid placing them near heat vents, fireplaces, or in direct hot sunlight, which will shorten the bloom time dramatically.
- Humidity: Average household humidity is usually sufficient. If your home is very dry, a pebble tray with water beneath the pots can increase local humidity, though this is rarely a critical factor for bulbs.
- Support: Some larger bulb varieties, like certain tulips or daffodils, may develop tall stems that become top-heavy as flowers open. If stems start to flop, gently provide support with thin stakes or decorative ties. This ensures your display remains upright and elegant.
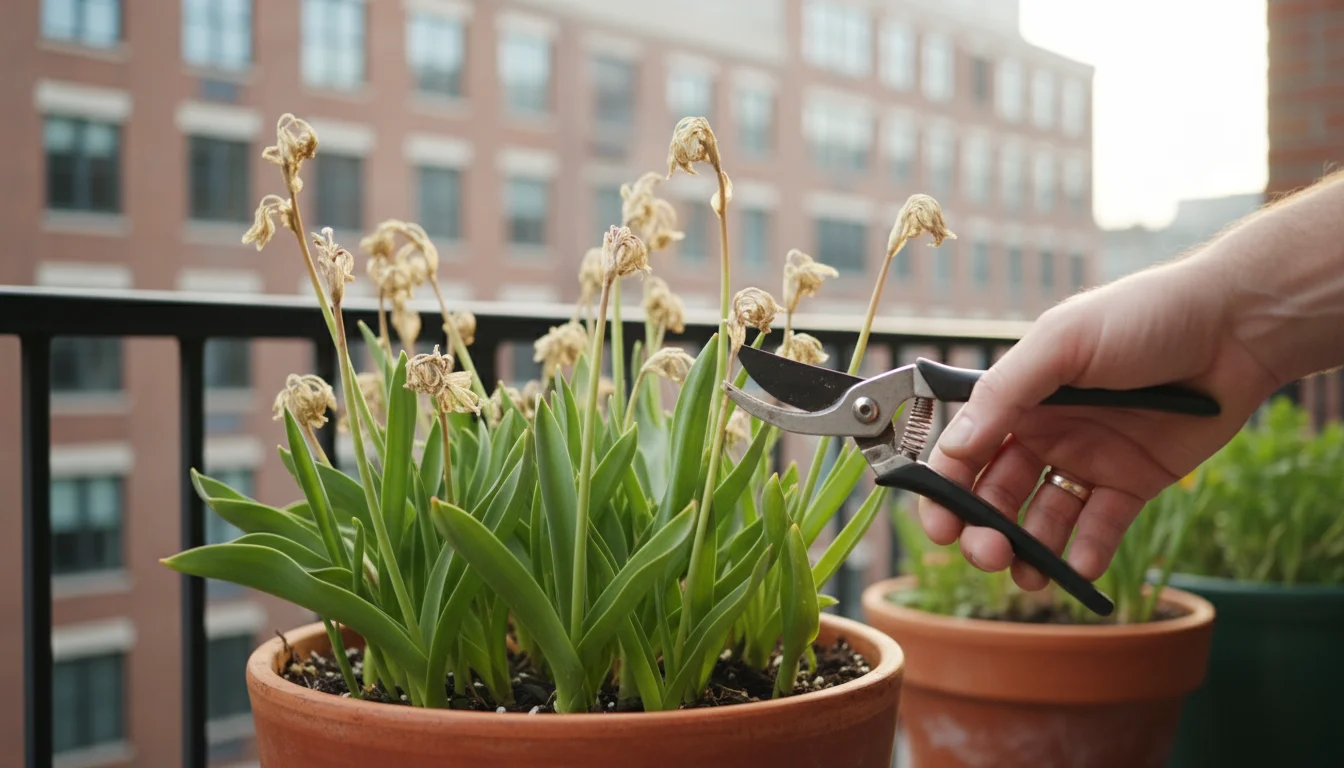
After Bloom:
Once the flowers fade, you have a choice: discard the bulbs or attempt to save them for future outdoor planting. Most forced bulbs expend a tremendous amount of energy producing indoor blooms, making them less likely to re-flower vigorously indoors in subsequent years. However, you can often transition them to your outdoor garden.
- Deadheading: Cut off faded flower stalks to prevent the plant from forming seeds. This redirects the plant’s energy into bulb regeneration rather than seed production.
- Foliage Care: Continue to water and provide light to the plant until the foliage naturally yellows and dies back. The leaves are crucial for photosynthesis, which replenishes the bulb’s energy reserves. Do not cut back green foliage prematurely.
- Drying Out: Once the foliage has completely withered and turned brown, stop watering. Allow the soil and bulbs to dry out thoroughly in their pots, or remove the bulbs from the soil and store them in a cool, dark, dry, and well-ventilated location (e.g., a mesh bag in a garage or shed) until fall.
- Outdoor Planting: In the fall, plant these “rested” bulbs outdoors in your garden. While they may not bloom the following spring, they often recover over a year or two and may re-flower in subsequent seasons. This is particularly true for daffodils and hyacinths; tulips are less reliable re-bloomers even outdoors.
Maximizing your blooms involves consistent care and attention to the plant’s needs during its active growth. Understanding the cycle allows you to enjoy the beauty of forced bulbs and potentially extend their life beyond a single indoor display. This practical approach leverages the plant’s natural resilience and provides you with beautiful flowers.
Troubleshooting Common Issues and Sustainable Practices
Even with careful planning, you might encounter a few challenges when forcing bulbs. Addressing these common issues promptly ensures a more successful and satisfying experience. Furthermore, integrating sustainable practices enhances your gardening impact.
Common Troubleshooting Scenarios:
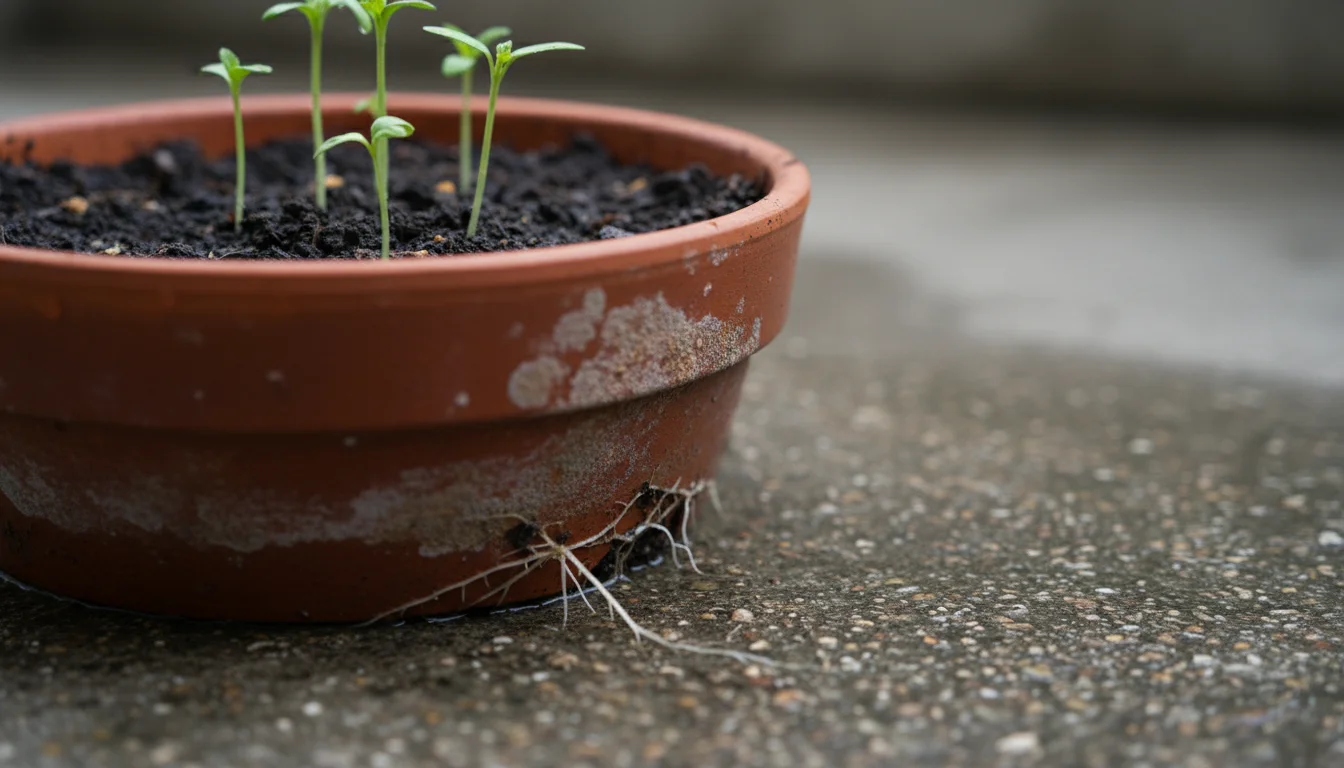
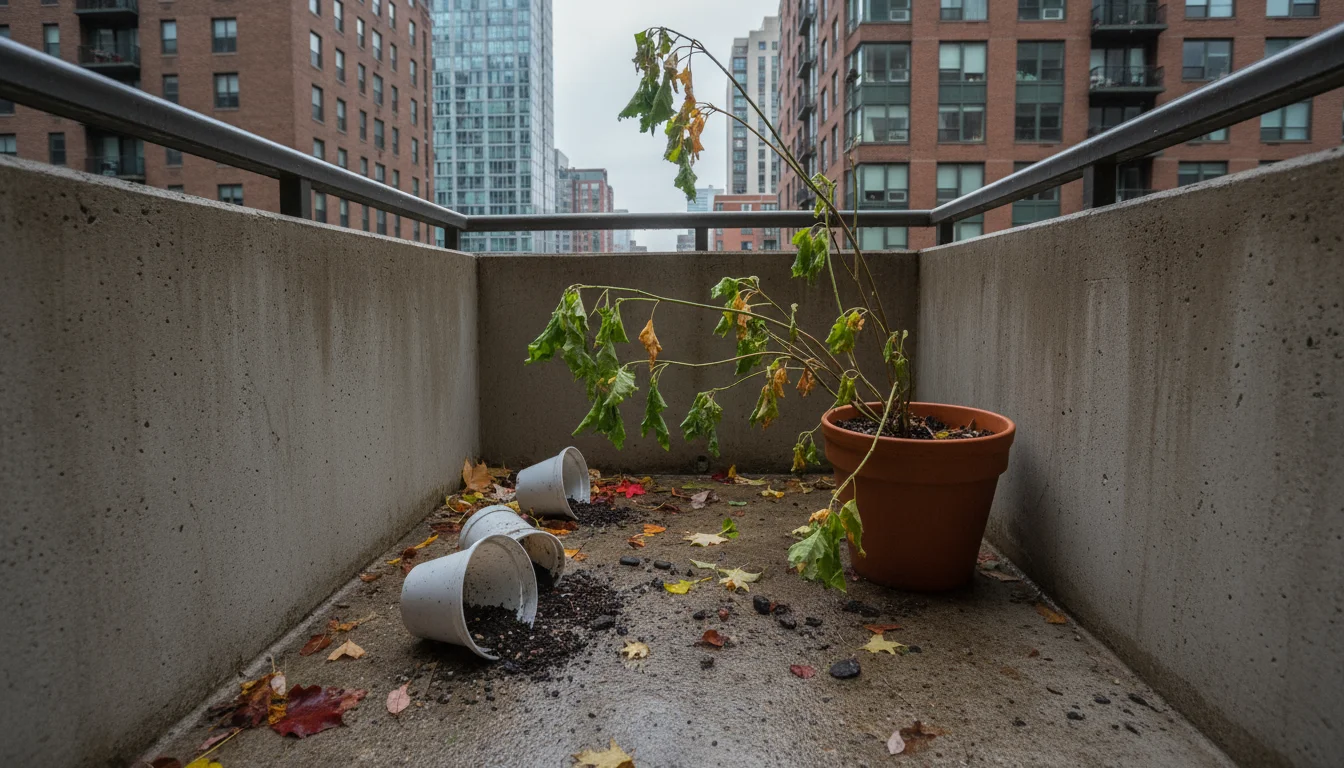
- Bulbs Rotting: This is almost always due to overwatering or insufficient drainage. Ensure your pots have drainage holes, and only water when the top inch of soil feels dry. During chilling, colder temperatures mean less water evaporation, so check moisture levels less frequently. If rot occurs, discard the affected bulb to prevent it from spreading to others.
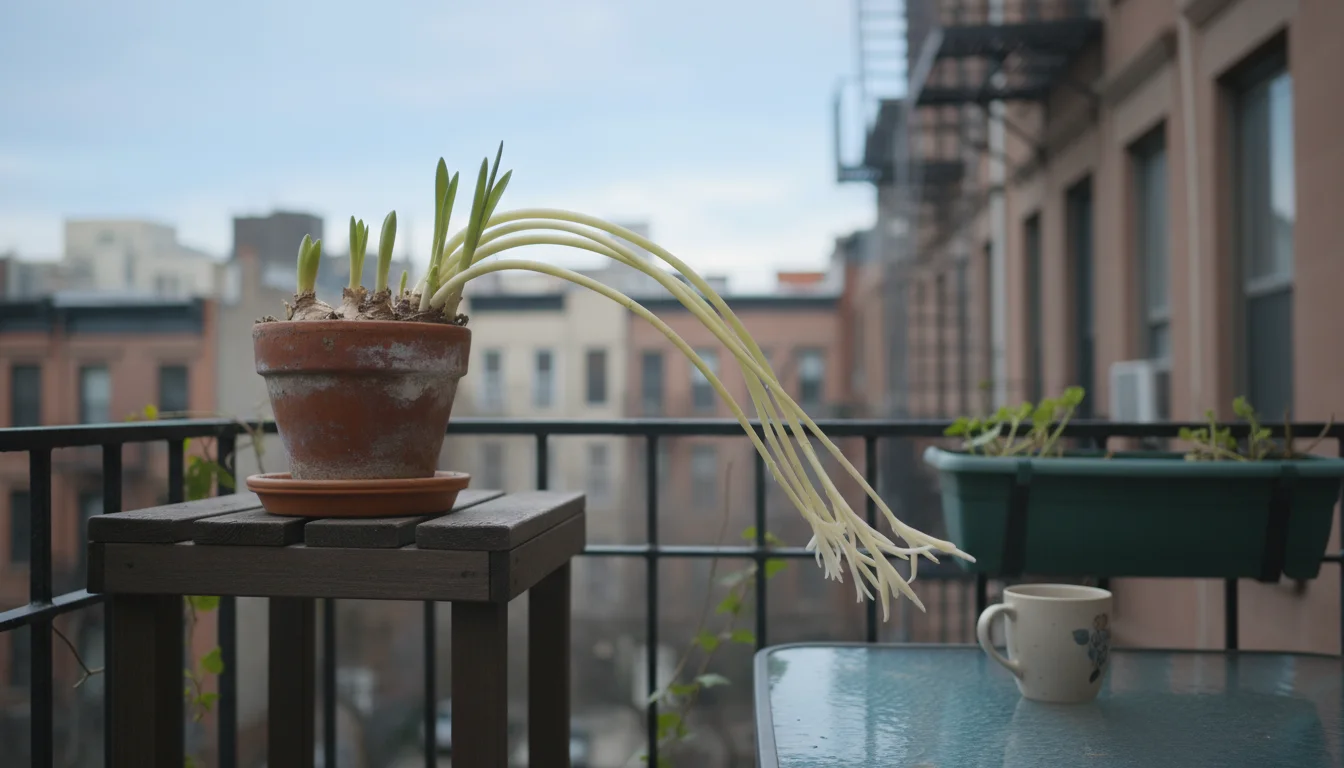
- Leggy or Stretched Stems: If your bulbs produce tall, weak, and pale stems that flop over, they are not receiving enough light indoors. Move them to the brightest possible location, ideally a south-facing window or under a grow light. Insufficient light encourages the plant to “stretch” for light, resulting in weak growth.
- No Blooms or Stunted Blooms: The most common cause for this is insufficient chilling time. The bulbs did not receive the necessary cold stratification period to develop flower buds. Ensure you track the chilling duration accurately. Another reason could be inconsistent chilling temperatures, such as warm spells during the outdoor chilling phase, which disrupt the hormonal changes. Also, ensure you use healthy, firm bulbs, as small or damaged bulbs may lack the energy to flower.
- Fungal Growth on Soil Surface: A thin layer of white mold on the soil surface usually indicates too much moisture or poor air circulation. It is generally harmless to the bulbs, but you can gently scrape it off. Ensure proper watering practices and good air movement around your pots.
- Fading Flowers: Blooms fading quickly are often a result of too much heat indoors. Move the pots to a cooler location, out of direct hot sunlight, to extend the flower life.
Sustainable Practices for Forcing Bulbs:
- Reuse Pots: Clean and reuse your plastic or terracotta pots season after season. Sterilize them with a dilute bleach solution (1 part bleach to 9 parts water) between uses to prevent disease transmission.
- Compost Old Soil: Once bulbs have finished their life cycle or are discarded, empty the used potting mix into your compost bin. This enriches your compost with organic matter and avoids unnecessary waste.
- Replant Bulbs Outdoors: As discussed, many forced bulbs can be planted in your outdoor garden after their indoor display. While they may not re-bloom immediately, this gives them a second chance and reduces waste. Daffodils and hyacinths are better candidates for this than tulips.
- Choose Peat-Free Potting Mix: Opt for potting mixes that are peat-free or contain sustainably sourced peat. Peat harvesting has environmental concerns, and many excellent alternatives exist, such as coir, compost, and pine bark.
- Conserve Water: Practice mindful watering. Only water when the soil feels dry, and avoid letting water run off unnecessarily. Grouping pots together can also help create a slightly more humid microclimate, reducing evaporation.
By understanding these common challenges and embracing sustainable habits, you become a more effective and environmentally conscious gardener. Your balcony ‘ice box’ project becomes not only a source of beauty but also a testament to mindful gardening.
Frequently Asked Questions
When is the best time to start chilling bulbs on my balcony?
You should aim to plant and begin chilling your bulbs in early to mid-fall, typically from September to November, depending on your climate. This allows them to receive the full 10-16 weeks of cold stratification before you want to bring them indoors for early spring blooms. Starting too late may mean they do not get enough chill time, resulting in poor flowering.
Do I need to fertilize my forced bulbs?
No, you do not need to fertilize forced bulbs. Spring-flowering bulbs contain all the necessary nutrients and stored energy within the bulb itself to produce a spectacular bloom for one season. Adding fertilizer during forcing can actually harm the roots or promote excessive foliage growth at the expense of flowers. Focus on proper chilling, light, and water instead.
Can I mix different types of bulbs in one pot?
Yes, you absolutely can mix different types of bulbs in one pot. This is a popular technique called “bulb lasagna.” You layer different bulbs according to their bloom time and size, with later-blooming, larger bulbs at the bottom and earlier-blooming, smaller bulbs closer to the top. This creates a longer-lasting and more diverse display. Just ensure all bulbs in the pot require a similar chilling period.
What if my balcony temperatures dip below freezing?
Most spring bulbs tolerate light freezing temperatures while dormant, as long as the soil does not freeze solid for extended periods. If you anticipate sustained periods below 20°F (-6°C), consider insulating your pots by wrapping them in burlap, placing them in a larger container filled with straw, or moving them temporarily to an unheated garage or shed. Consistent deep freezing can damage the bulbs.
My forced bulbs grew very tall and then flopped over. What happened?
This usually indicates insufficient light. When bulbs are forced indoors, they require bright, indirect light to grow strong, sturdy stems. If they do not receive enough light, they “stretch” to find it, resulting in weak, elongated, and often pale stems that cannot support the weight of the flowers. Ensure your pots are in the brightest available location indoors, or consider supplementing with a grow light.
For trustworthy gardening information, visit:
Massachusetts Horticultural Society, Denver Botanic Gardens, San Diego Botanic Garden, U.S. National Arboretum and American Horticultural Society. These organizations provide expert, research-based advice for gardeners at all levels.
Disclaimer: This article is for informational purposes only and is not a substitute for professional gardening advice. Always consult local extension services or horticulture experts for region-specific guidance.

Leave a Reply