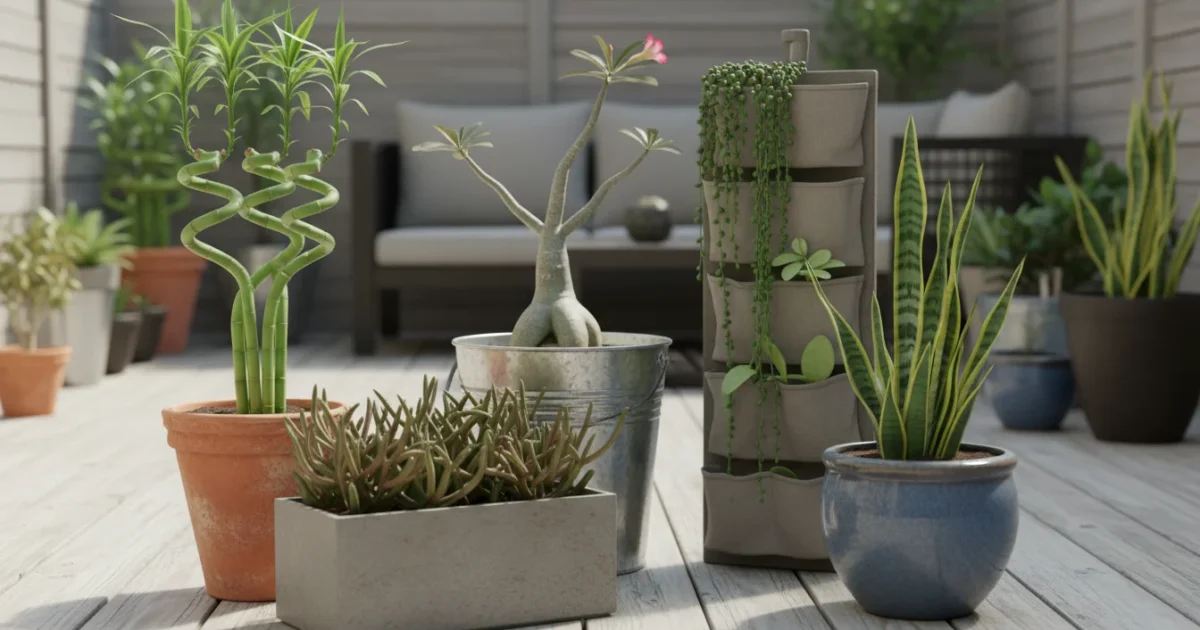
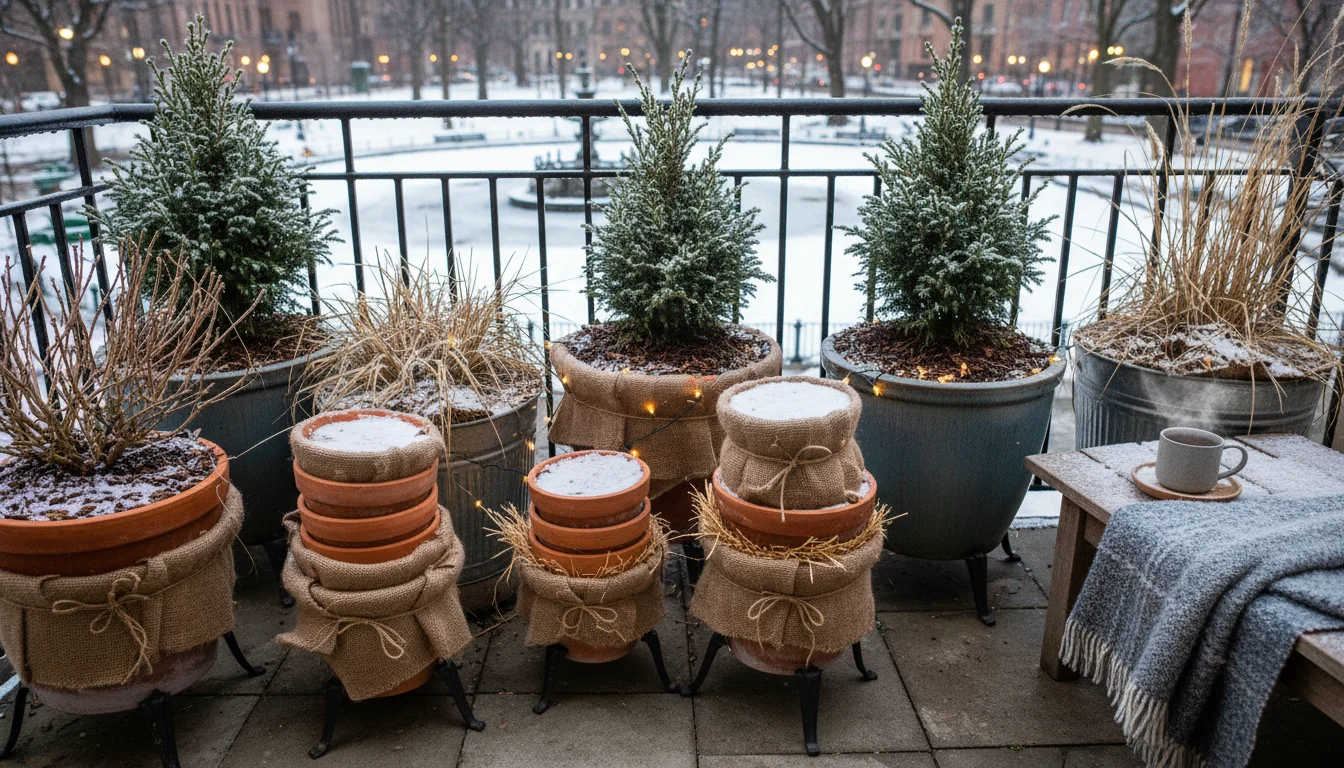
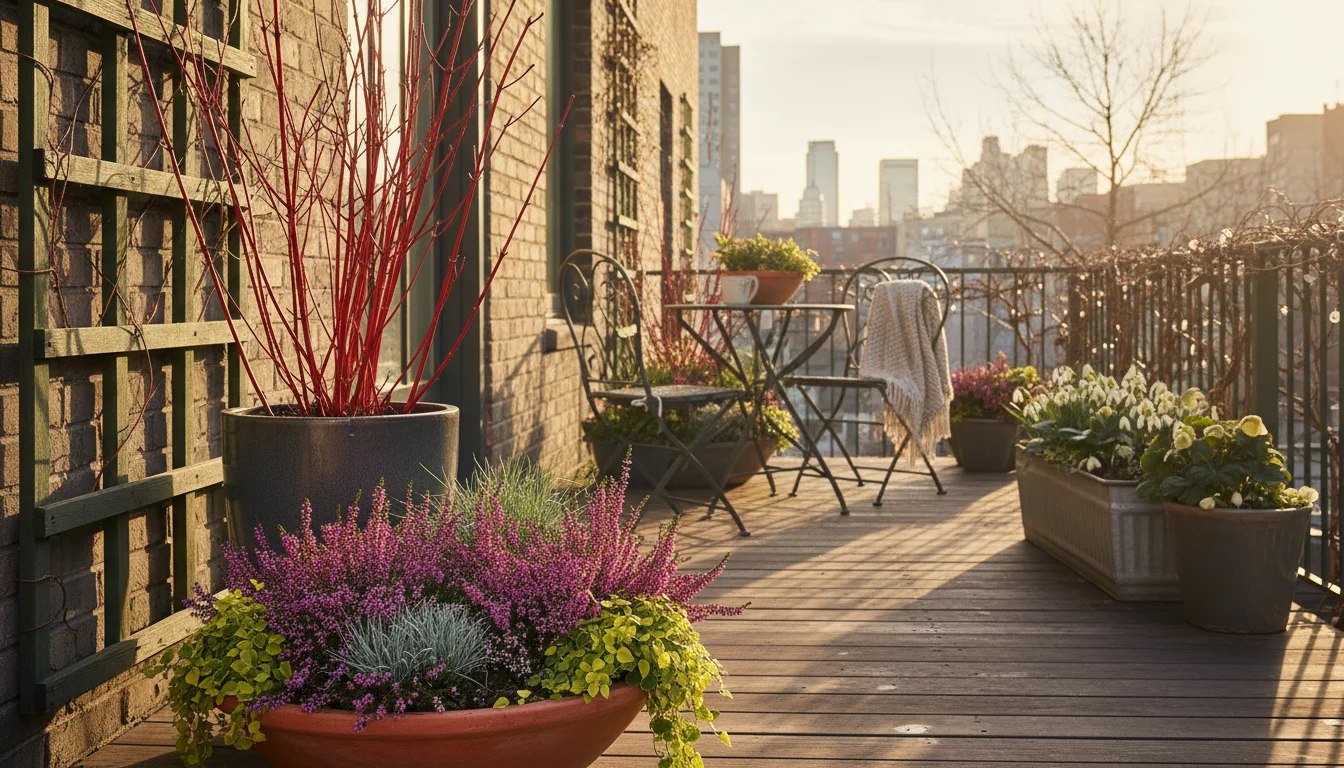
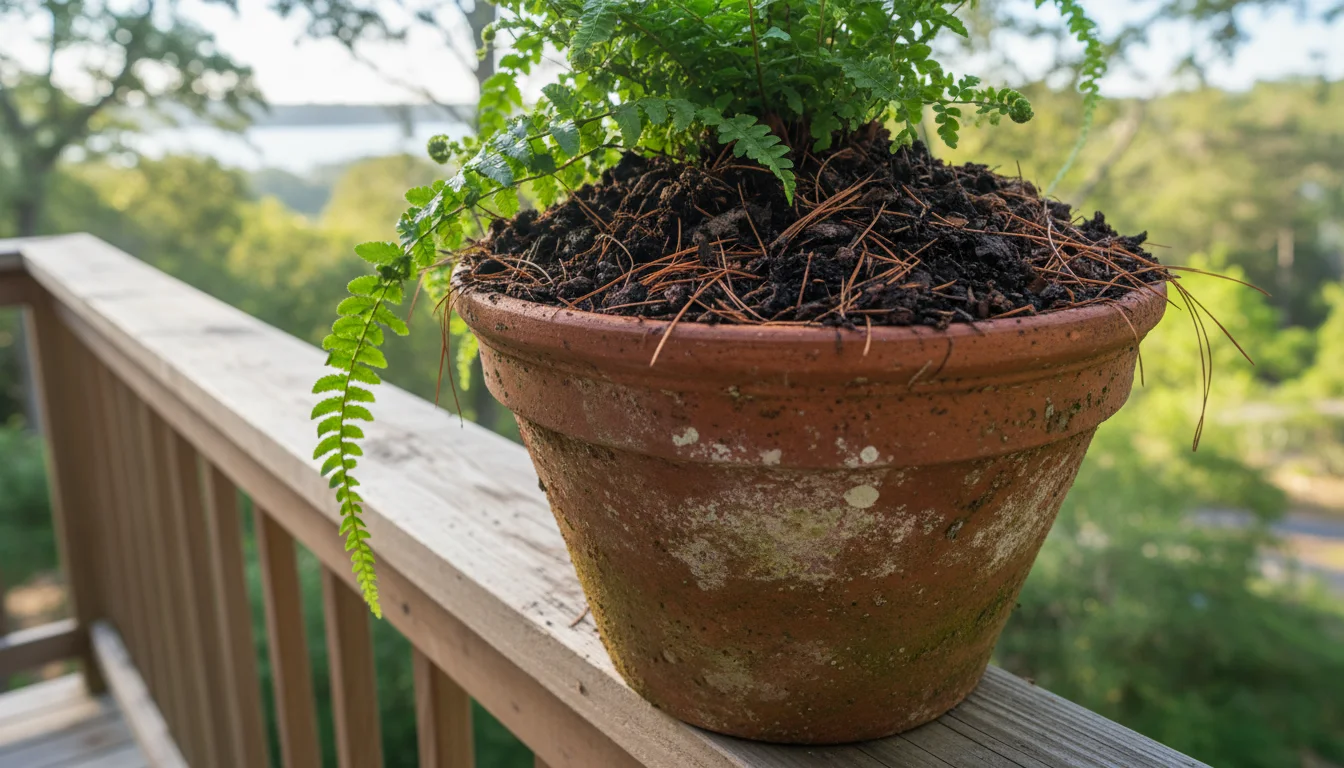
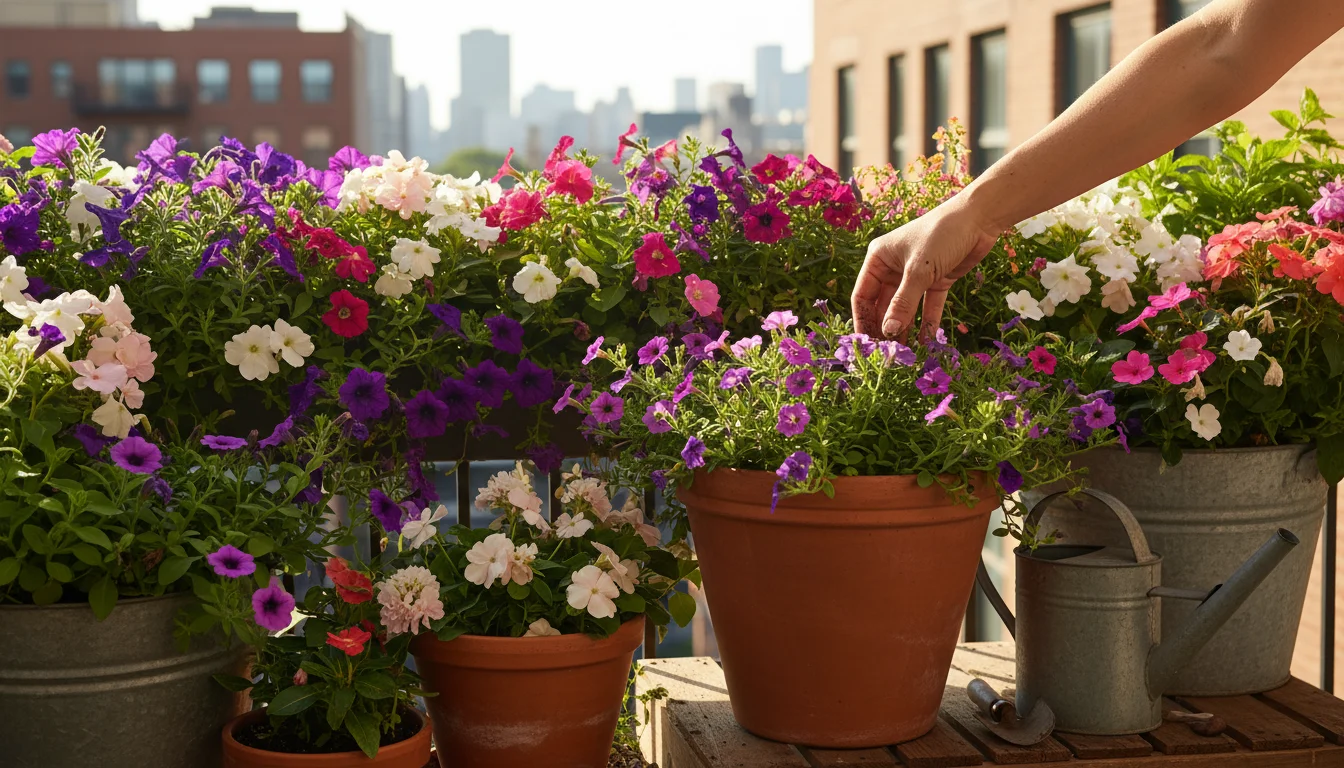
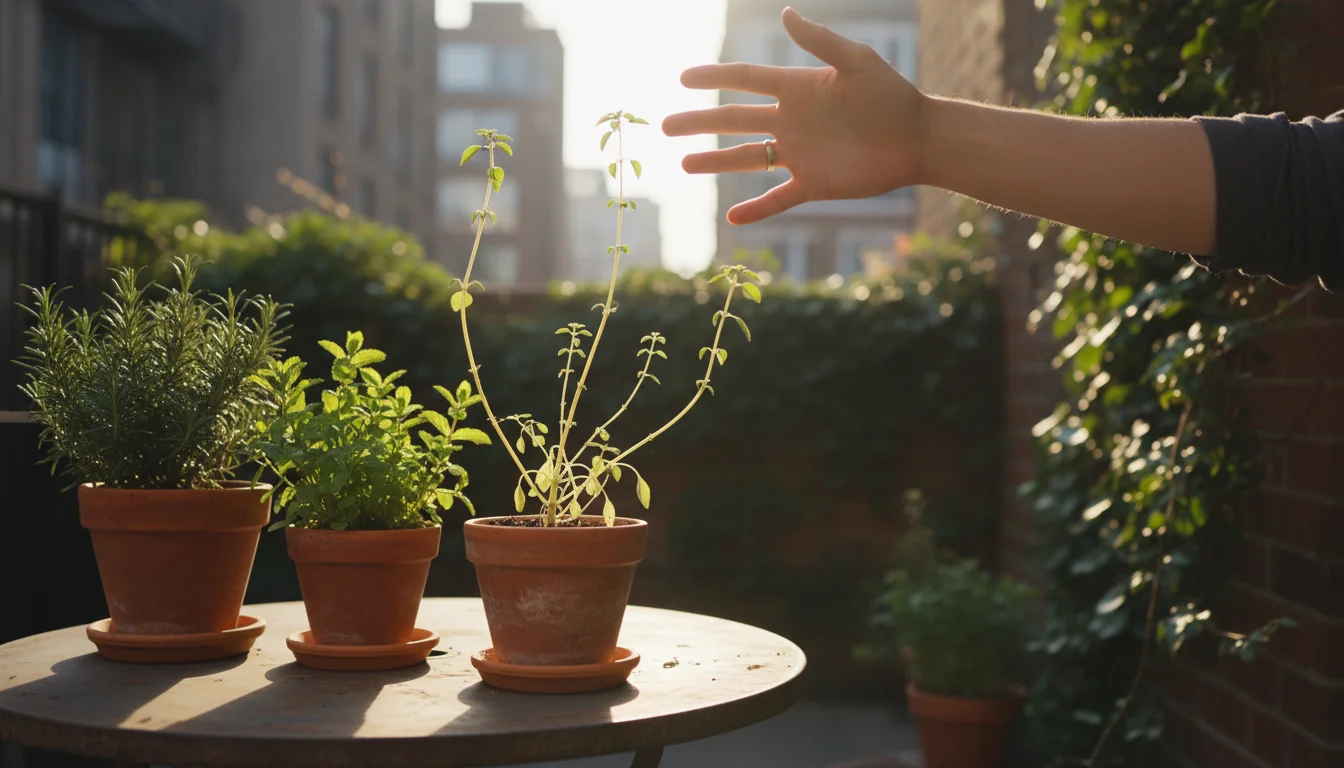
As the days grow shorter and temperatures drop, many gardeners assume their outdoor spaces lose their vibrancy. However, your balcony or small patio can still offer breathtaking beauty, even in the heart of winter. When deciduous plants shed their leaves, they reveal an often-overlooked charm: the intricate patterns, striking colors, and bold textures of their bare stems and structural forms. These “bare bones” elements provide essential winter interest, transforming your outdoor area into a captivating landscape.
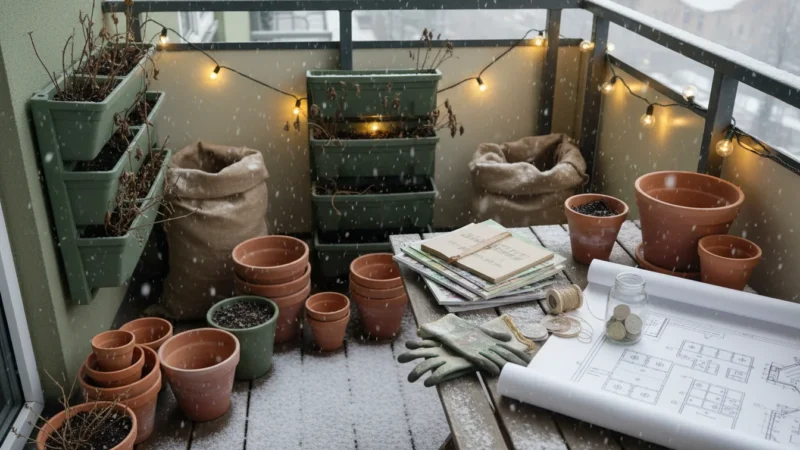
While you appreciate these structural beauties, the colder months are also an ideal time to map your balcony garden from the comfort of your home.
You can further enhance your space by incorporating unexpected plants for winter interest to create a truly unique display.
Focusing on plants with exceptional winter stems and structure allows you to cultivate a dynamic display that delights through the colder months. Imagine vivid reds, bright yellows, intriguing twists, and elegant branching patterns standing tall against a snowy backdrop or a clear winter sky. This guide empowers you to select and care for five remarkable potted plants that deliver stunning visual impact, ensuring your small-space garden remains a source of joy and inspiration all year long. You will learn practical tips for container selection, proper winter care, and design strategies to maximize their dramatic effect.
Unveiling Winter’s Silent Stars: Why Stems and Structure Matter
When the vibrant flowers and lush foliage of summer fade, your garden’s aesthetic can feel incomplete. This is where winter interest plants with their compelling stems and strong structural forms become indispensable. They prevent your small space from becoming a barren wasteland, offering continuous visual appeal even during the coldest months. Think of them as the architectural framework of your garden, providing shape, texture, and often surprising color when everything else sleeps.
Focusing on stems and structure brings a sophisticated dimension to your balcony garden winter display. You gain an appreciation for the intricate natural artistry of plants, from the bright, fiery reds of dogwoods to the sculptural twists of contorted hazelnuts. These elements create focal points, add depth, and even provide a habitat for beneficial insects and birds during a scarce season. Moreover, these plants often require minimal maintenance once established, fitting perfectly into a low-maintenance gardening philosophy. You will discover how selecting the right plants and providing proper container care ensures your outdoor space remains captivating and dynamic throughout the year.
Mastering the Winter Container: Essentials for Success
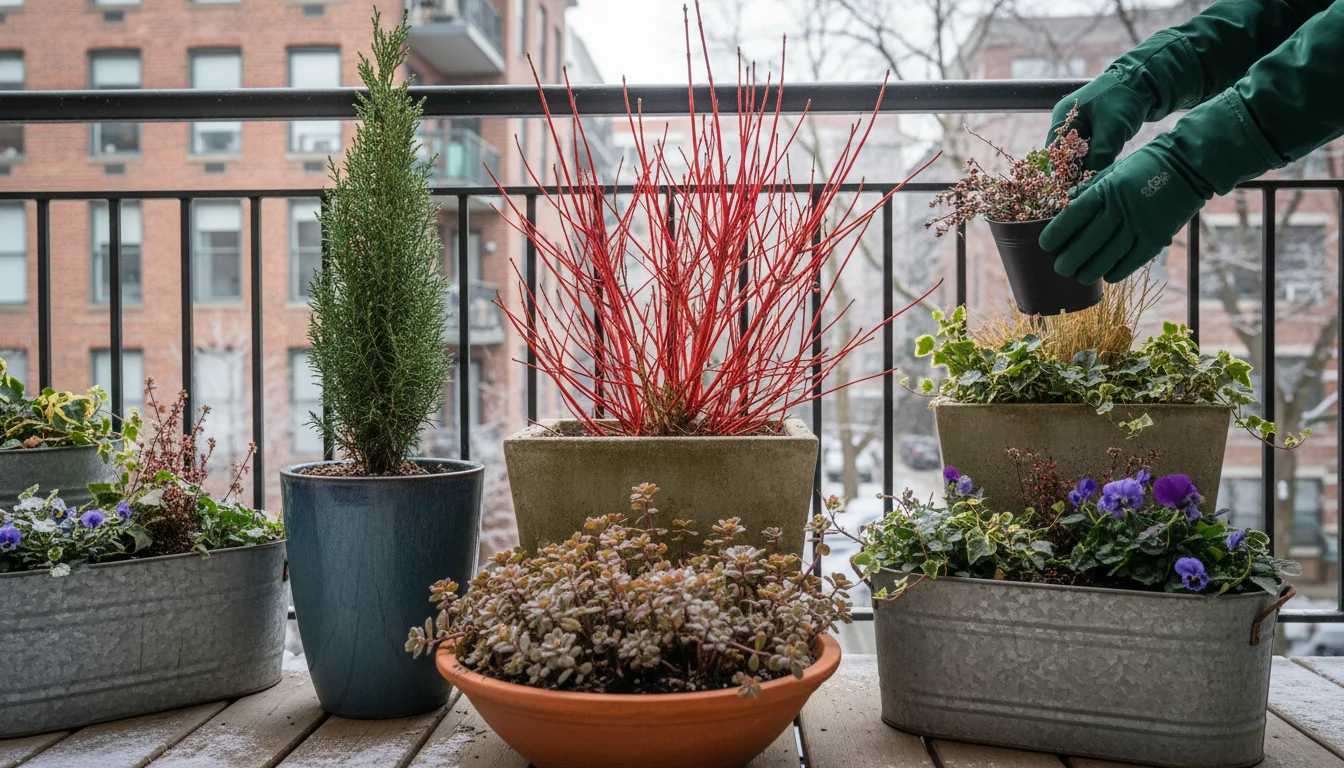
Growing plants successfully in containers during winter requires specific considerations that differ from in-ground planting. Your goal is to provide adequate insulation for roots and ensure proper drainage, preventing root rot or freezing. Choosing the right container and potting mix establishes a strong foundation for your winter structure plants for small spaces.
If you have unused containers alongside your winter stars, use the Tuck-In method to keep the soil and pots safe from freeze-thaw cycles.
Proper structural support is also vital; be sure to protect your fall containers from autumn storms and high-altitude gusts that can tip over top-heavy winter pots.
Even when you aren’t actively growing summer crops, there are creative ways to use your empty garden space in fall and winter.
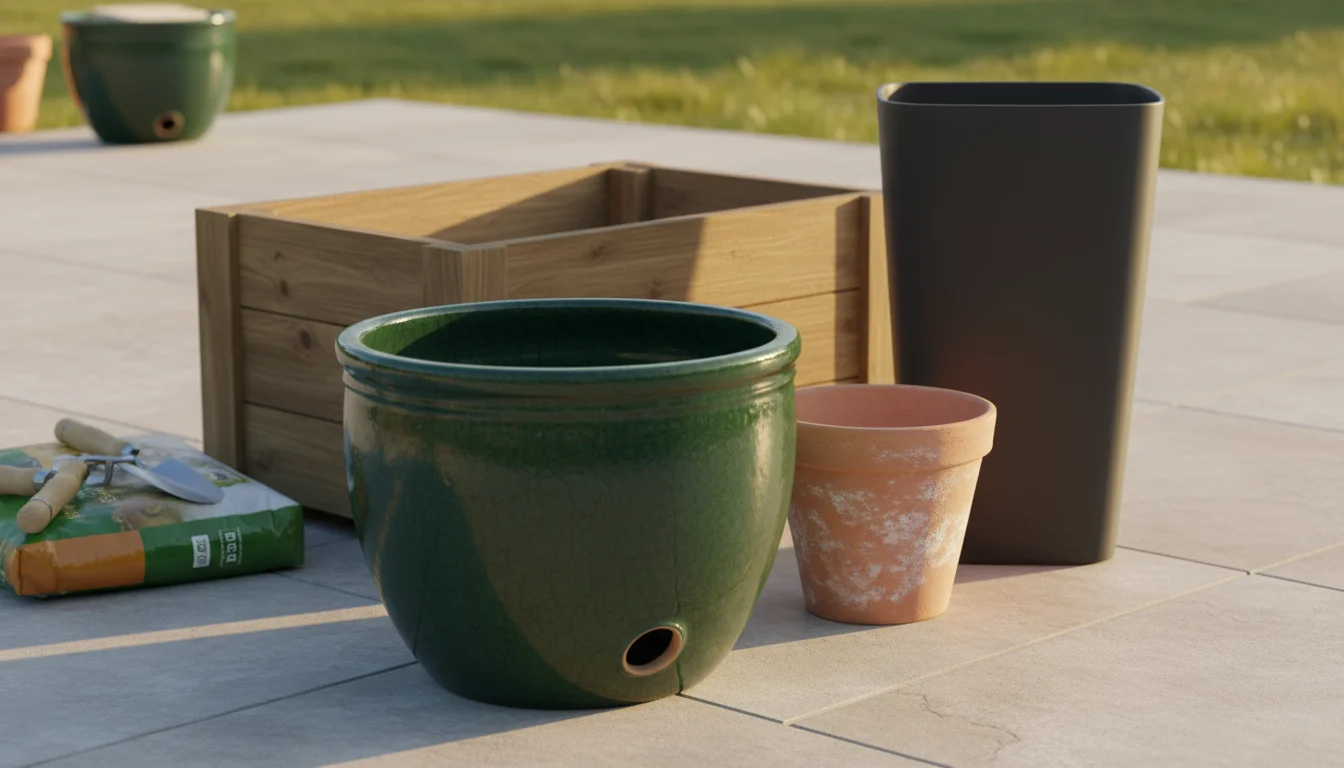
Selecting the Right Container
- Size Matters: Choose a container significantly larger than your plant’s root ball, allowing room for growth and providing insulation. A general rule for trees and shrubs is to select a pot at least 18-24 inches in diameter for adequate root space. Larger pots also dry out slower and offer better root protection from temperature fluctuations.
- Material Choices: Opt for materials that offer insulation and are frost-resistant. Terracotta pots look beautiful, but they can crack when water freezes and expands within the clay. Instead, consider thick-walled plastic, fiberglass, or glazed ceramic pots. Wooden planters, especially those made from rot-resistant cedar, also provide good insulation.
- Drainage Holes: This is non-negotiable. Every container must have drainage holes at the bottom to allow excess water to escape. Without proper drainage, soil becomes waterlogged, suffocating roots and leading to root rot. Good drainage prevents ice buildup around roots, which can be fatal. If your chosen pot lacks holes, you must drill them yourself.
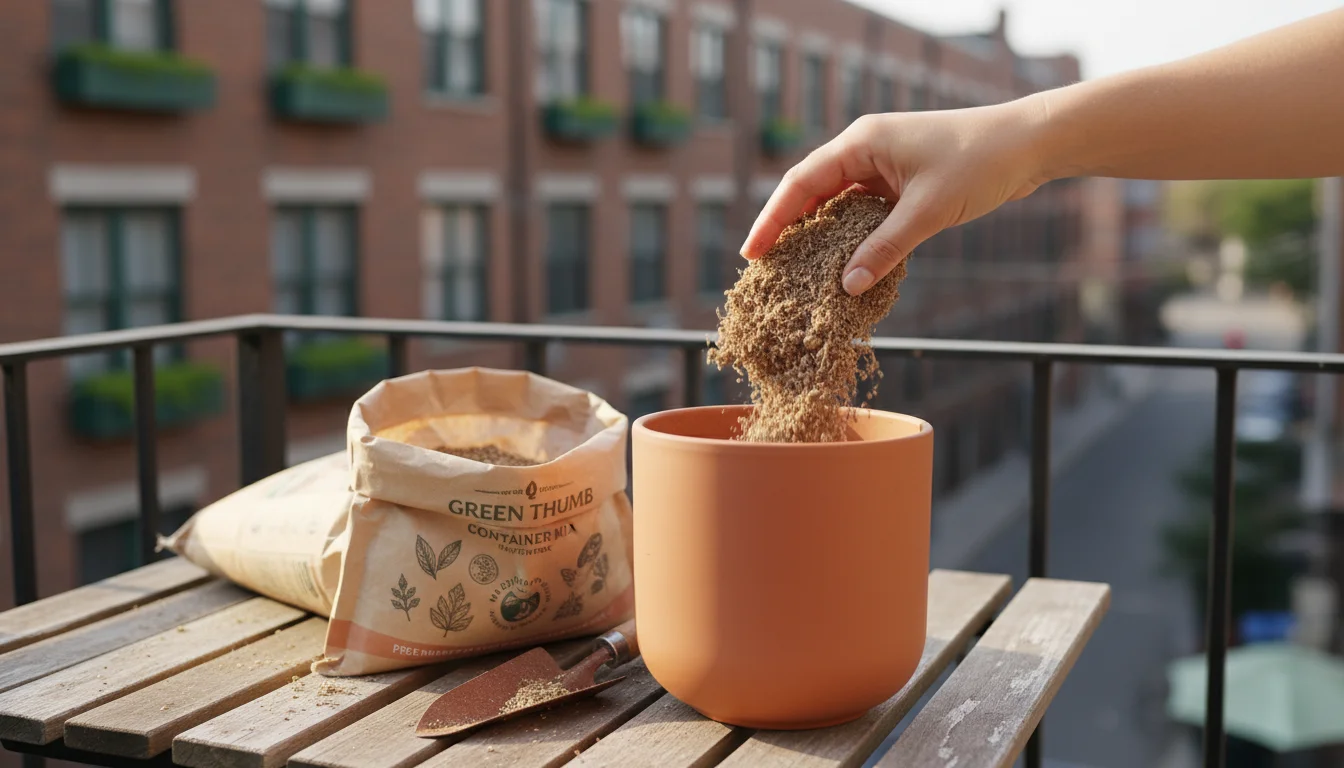
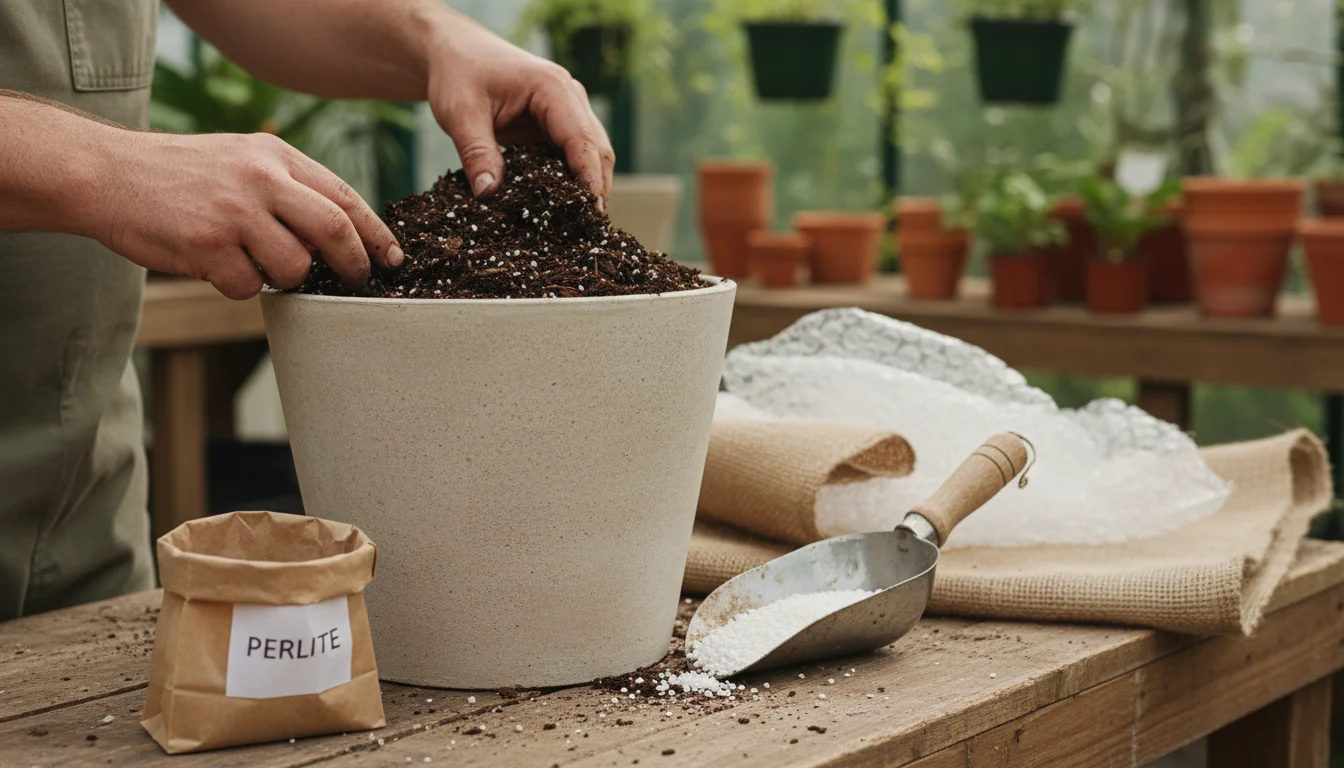
The Importance of Potting Mix
Do not use garden soil in containers; it compacts too much and lacks proper aeration and drainage. A high-quality potting mix is crucial for container plants for winter. Look for mixes specifically formulated for containers, often labeled “potting soil” or “container mix.”
- Good Drainage: A good potting mix drains freely, meaning water moves through it easily without pooling. It often contains perlite or vermiculite to improve aeration and drainage.
- Retains Moisture: While draining well, the mix should also retain enough moisture to keep roots hydrated between waterings.
- Nutrient Content: Many potting mixes contain a slow-release fertilizer, providing initial nutrients for your plant. You will still need to fertilize appropriately once the growing season begins.
- Organic Matter: Components like compost or aged bark fines improve soil structure and fertility.
Protecting Roots from Winter Chill
The roots of container plants are more exposed to cold than those in the ground. In colder climates, or if you want to overwinter less hardy plants, you might need extra insulation:
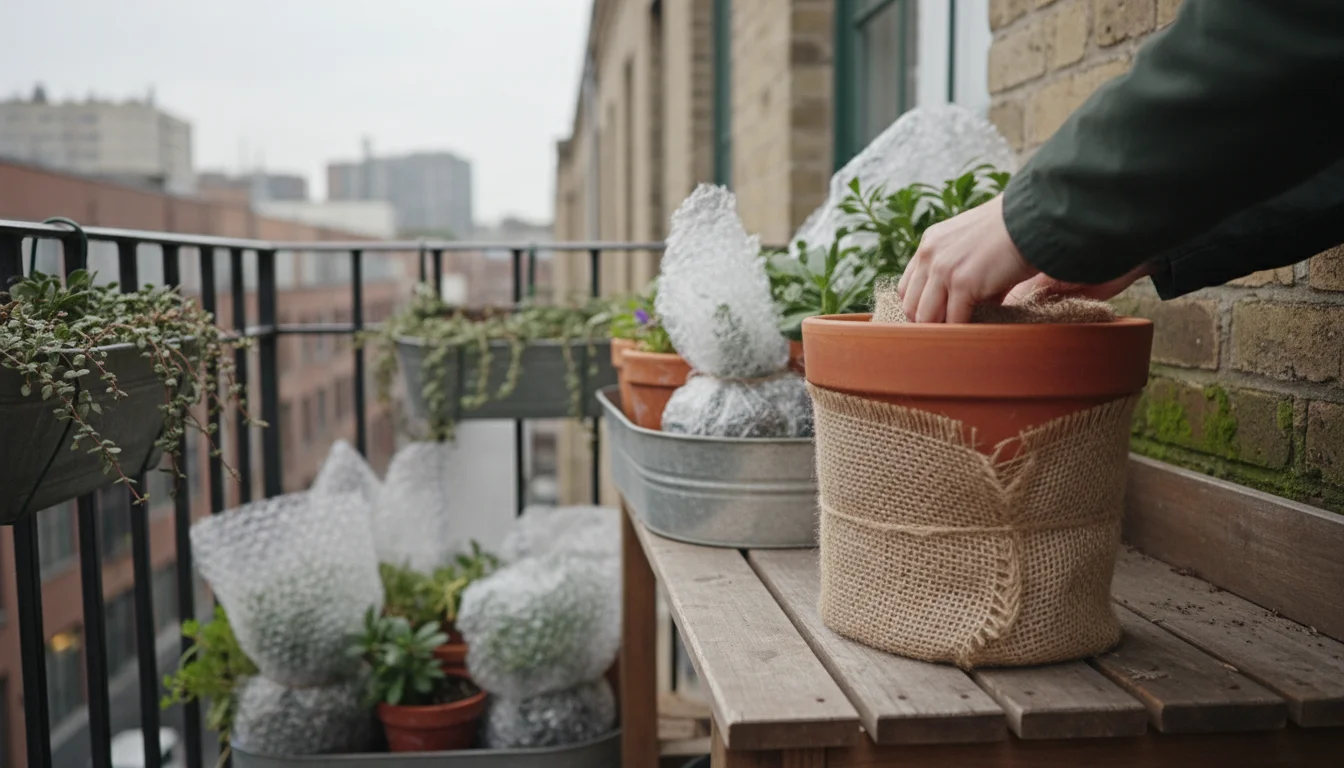
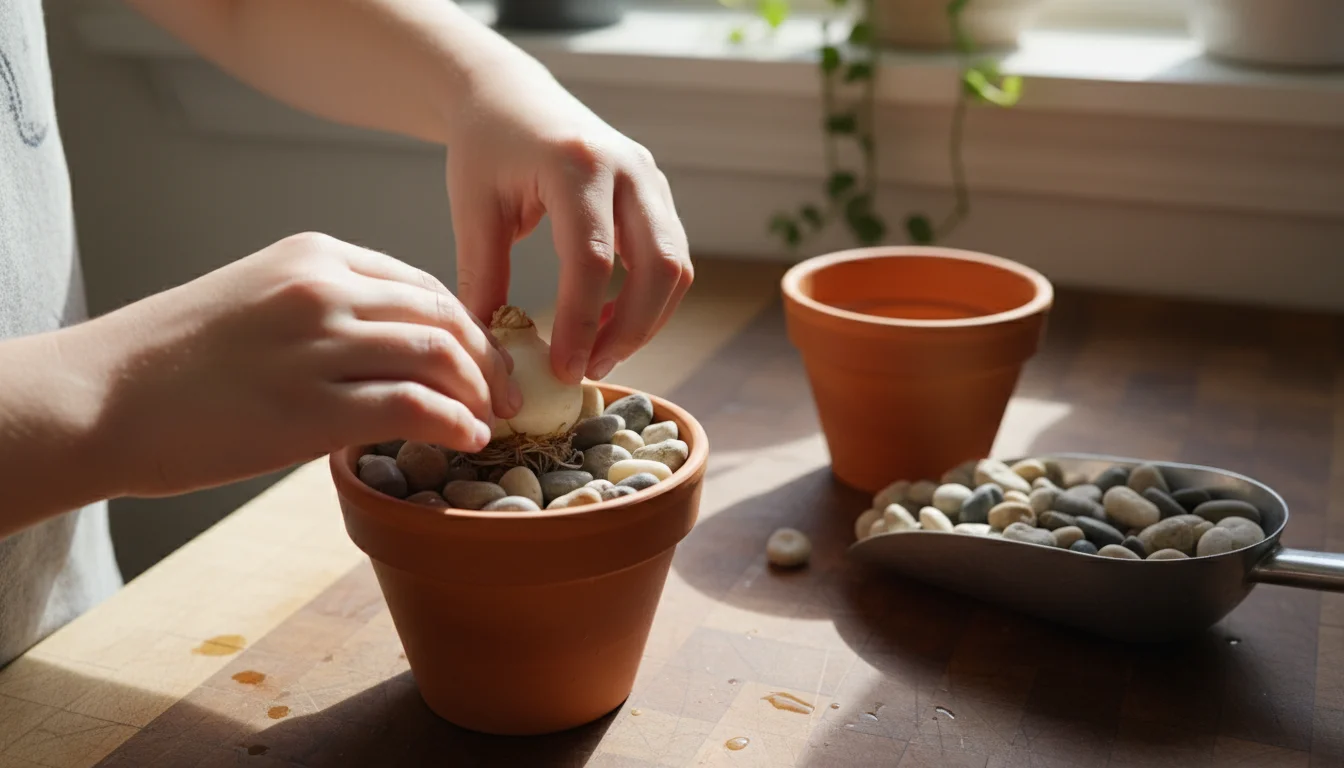
- Insulate Pots: Wrap the outside of your containers with burlap, bubble wrap, or a thick layer of straw. You can also place smaller pots inside larger, decorative pots, filling the space between with insulating material.
- Elevate Pots: Place pots on “pot feet” or bricks to lift them slightly off the ground. This improves drainage and prevents roots from freezing to cold concrete surfaces.
- Group Plants: Clustered pots offer mutual protection, creating a microclimate that is slightly warmer than individual pots.
By giving careful attention to your containers and potting mix, you set your winter interest plants up for success, ensuring they remain healthy and vibrant through the season.
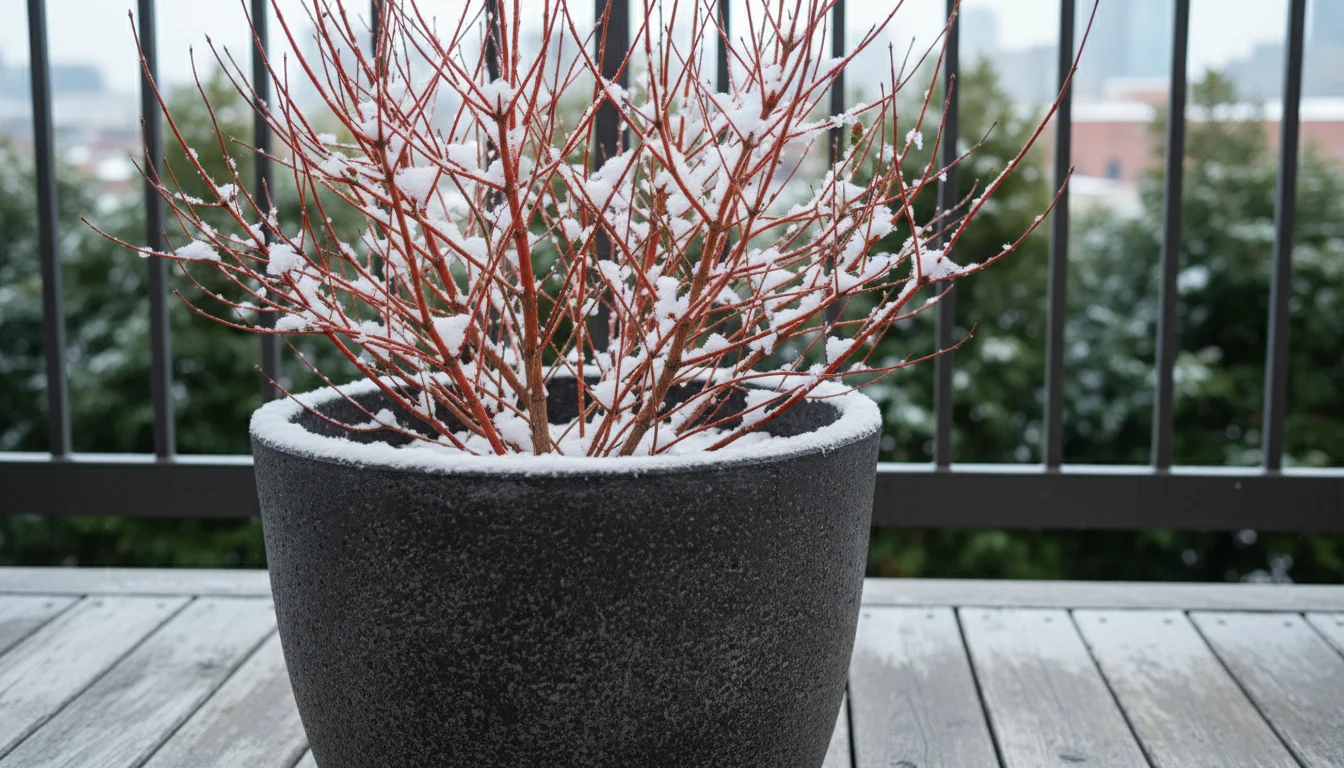
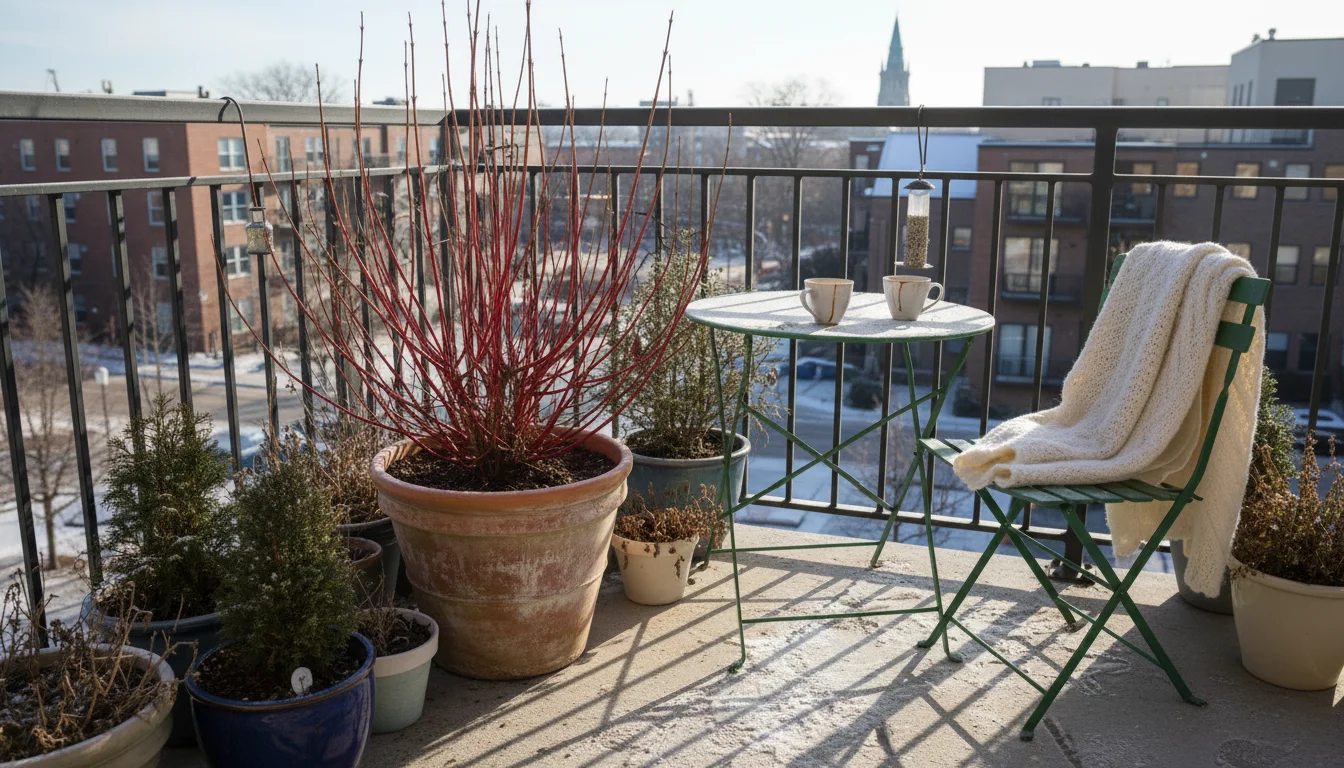
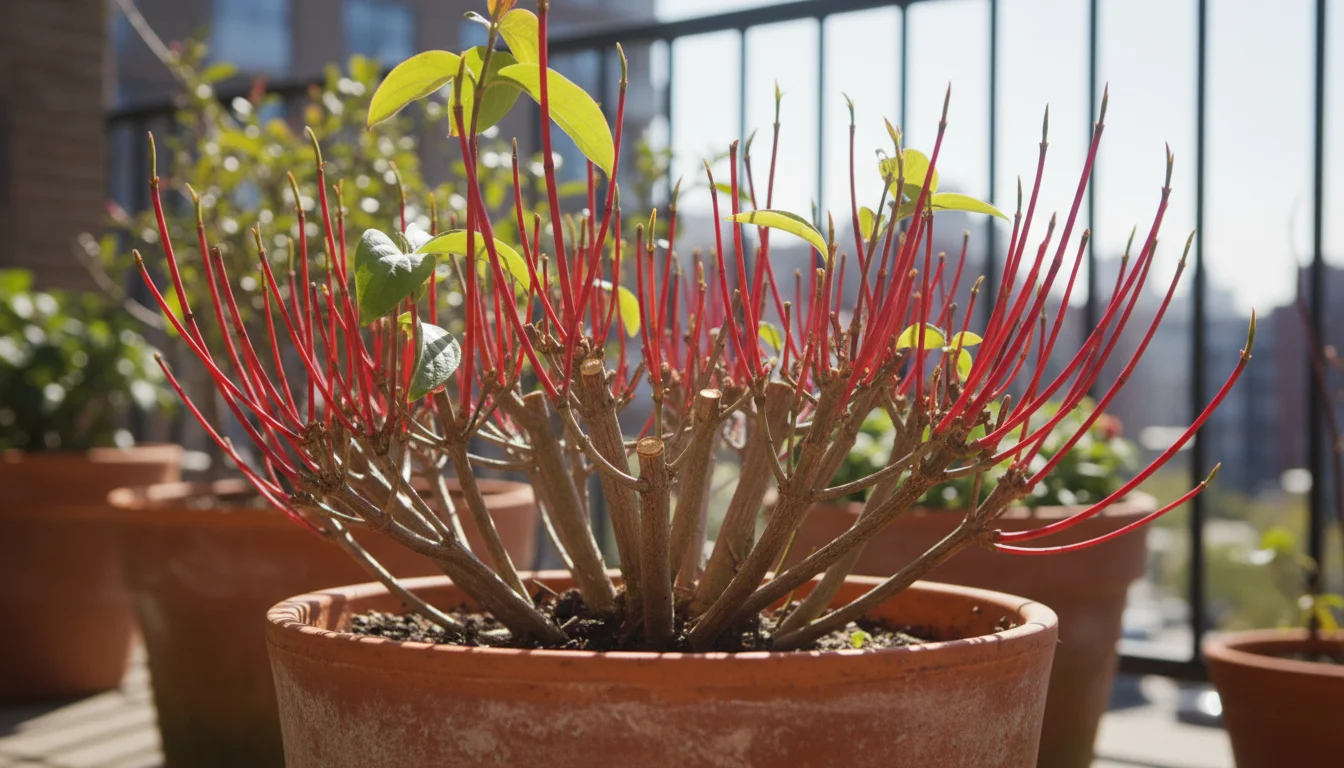
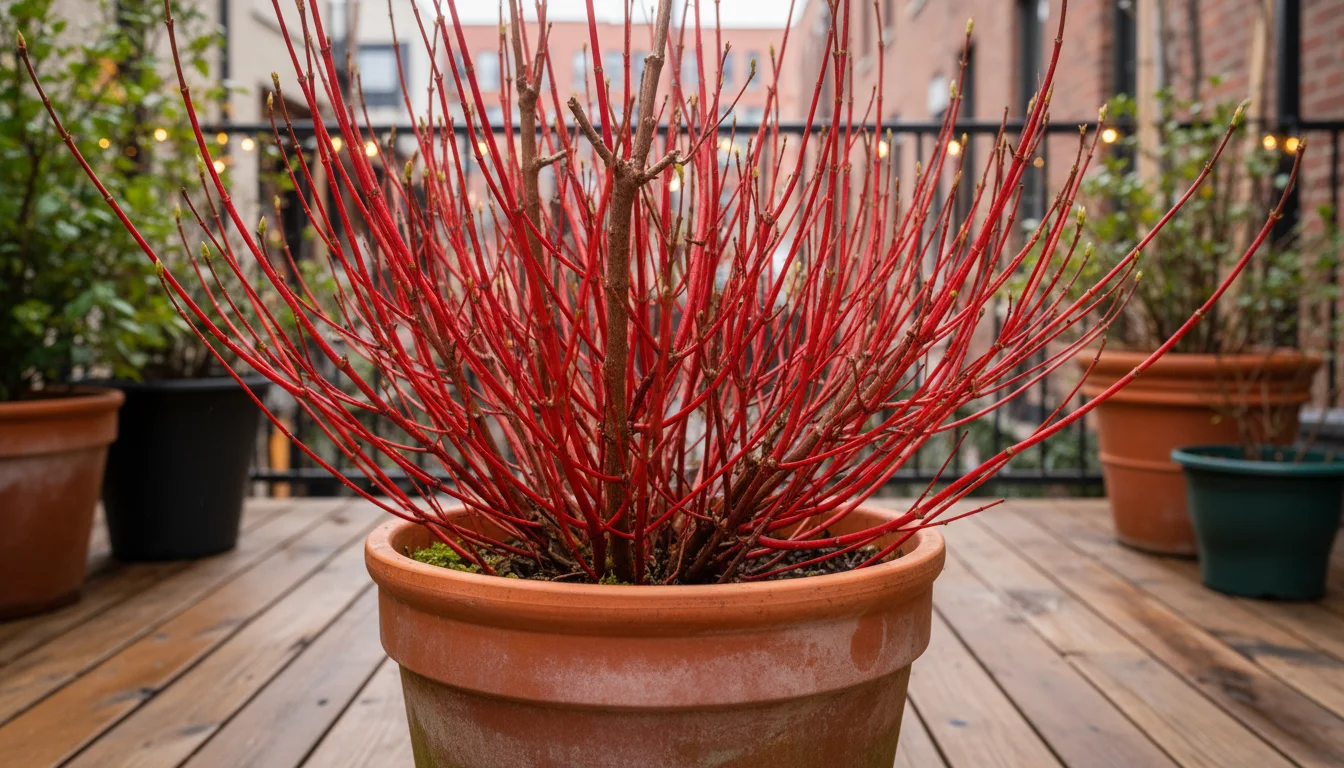
Plant Spotlight 1: Red Twig Dogwood (Cornus sericea)
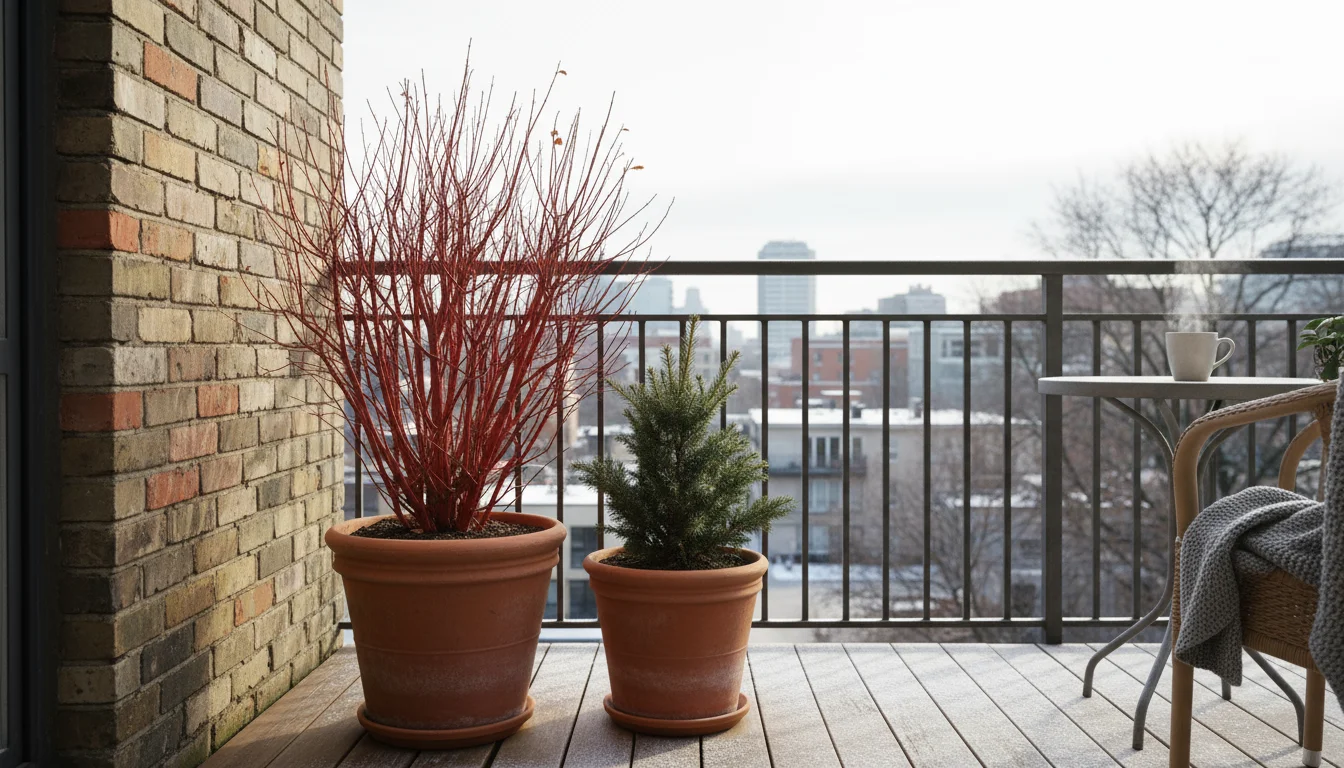
The Red Twig Dogwood, a quintessential choice for captivating winter interest plants, offers unparalleled vibrancy with its brilliant crimson stems. Once its leaves fall, you reveal a stunning network of scarlet branches that stand out vividly against snow, evergreen foliage, or a dull winter sky. This plant provides exceptional visual drama and an undeniable cheerfulness to any winter balcony garden winter display.
To complement these shrubs, consider adding winter-hardy perennials for small pots that provide texture throughout the cold months.

Key Features and Appeal
- Striking Stem Color: The most notable feature is its intense red stems, which are brightest on new growth. Older stems tend to fade to a duller reddish-brown.
- Adaptable Nature: Red Twig Dogwoods tolerate a range of conditions, adapting to various soil types and moisture levels. They thrive in full sun to partial shade, with full sun encouraging the most vibrant stem color.
- Size and Form: While larger varieties can reach 8-10 feet tall and wide, selective pruning keeps them compact for containers. Their upright, multi-stemmed growth creates a robust, structural presence.


Container Growing Success
Growing a red twig dogwood in container settings requires understanding its preferences and providing consistent care.
- Container Size: Choose a large, sturdy container, at least 20-24 inches in diameter and depth. This accommodates its vigorous root system and offers essential insulation for winter survival.
- Potting Mix: Use a high-quality, well-draining potting mix. Red Twig Dogwoods appreciate consistently moist soil but not waterlogged conditions. Incorporate some compost into your potting mix to enhance moisture retention and nutrient supply.
- Watering: During the growing season, water regularly to keep the soil consistently moist. In winter, reduce watering, but do not let the soil dry out completely. Check the soil moisture every few weeks, watering only when the top few inches feel dry.
- Light Requirements: Plant your Red Twig Dogwood in a spot that receives at least 6 hours of direct sunlight daily. This intense light exposure is critical for developing the deepest, most vibrant red stem color.
- Fertilizing: Apply a balanced slow-release fertilizer in early spring as new growth begins. Follow package instructions carefully. For subsequent years, you may top-dress with compost.
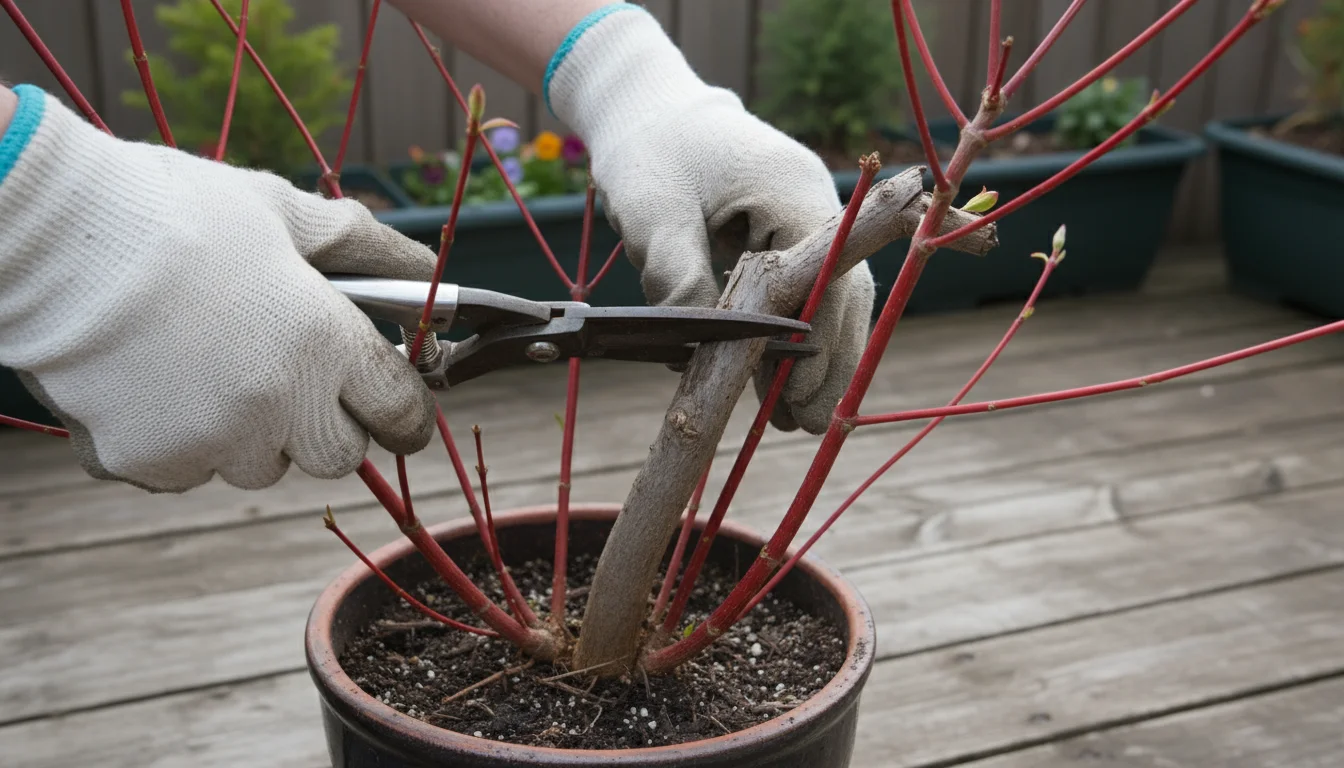
Pruning for Maximum Color
The key to maximizing the brilliant red stems of your Red Twig Dogwood is regular pruning. New growth produces the most intense color. You will want to prune in late winter or early spring before new leaves emerge.
Step-by-Step Pruning Guide:
- Remove Oldest Stems: Each year, identify and remove about one-third of the oldest, thickest, and least colorful stems at ground level. These stems often appear grayish or dull red.
- Thin Out Crowding: Cut back any weak, damaged, or crossing branches to improve air circulation and plant shape.
- Encourage New Growth: This aggressive pruning encourages the plant to produce a flush of new, brightly colored stems for the upcoming winter.
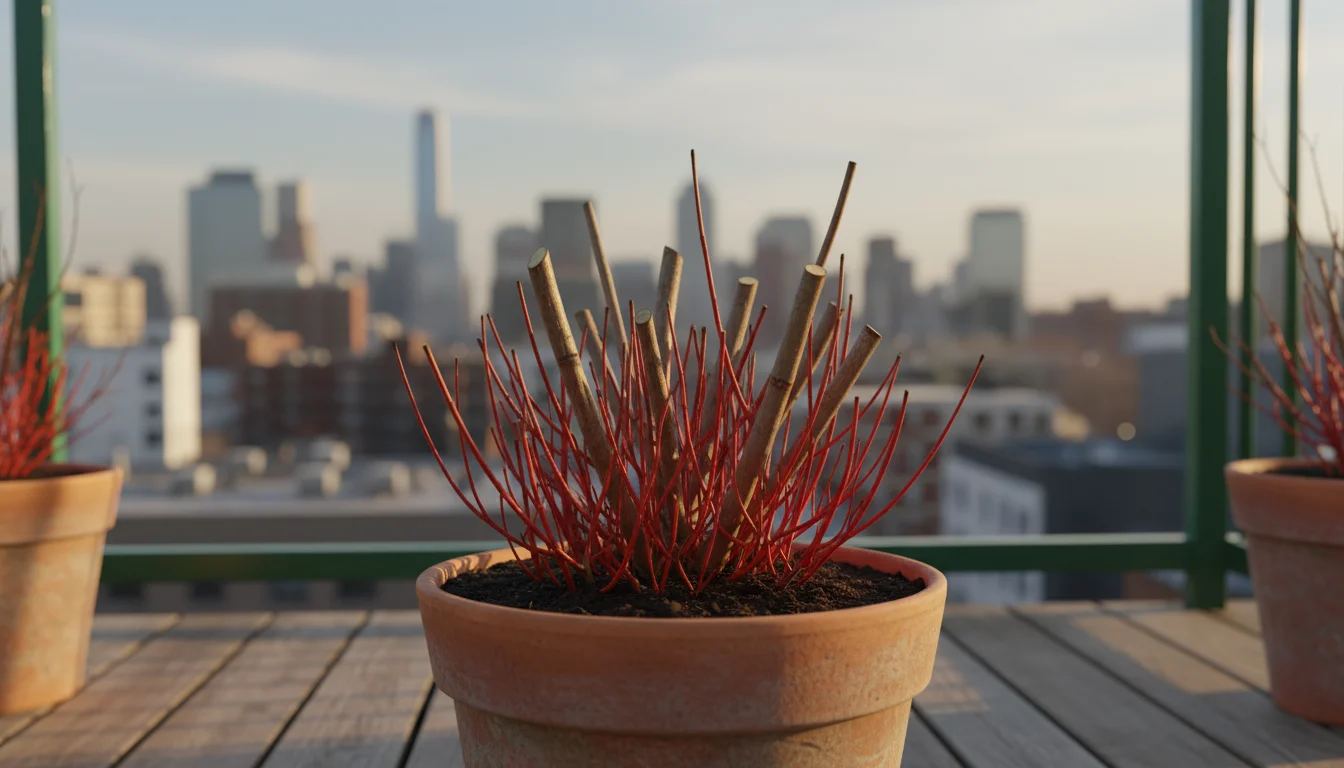
For containerized plants, you might also perform a hard prune every 2-3 years, cutting the entire plant back to 6-12 inches from the ground to rejuvenate it and maintain a manageable size. This keeps your red twig dogwood in container settings compact and beautiful.

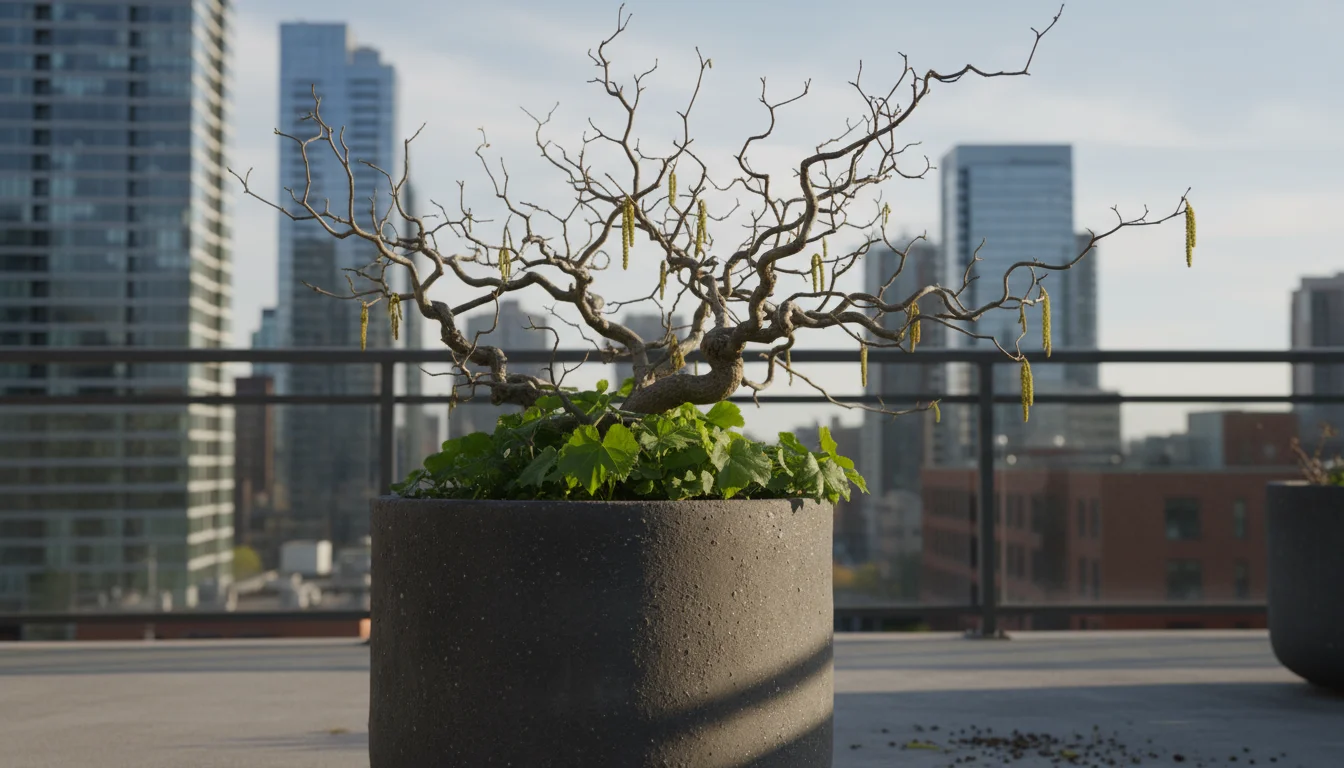
Plant Spotlight 2: Harry Lauder’s Walking Stick (Corylus avellana ‘Contorta’)
For gardeners seeking architectural drama and truly unique form, Harry Lauder’s Walking Stick offers an irresistible choice among plants that look good in winter in pots. This ornamental hazelnut is celebrated for its fantastically twisted, contorted branches, which become its primary feature once the leaves drop. It creates an almost sculptural presence, drawing the eye and providing a whimsical yet sophisticated focal point for your balcony garden winter display.
Key Features and Appeal
- Intriguing Branching: The standout characteristic is its corkscrew-like, gnarled branches that twist and spiral in every direction. This provides incredible texture and visual interest.
- Winter Catkins: In late winter, before leaves emerge, the bare branches are adorned with pendulous, yellowish-brown catkins, adding another layer of delicate beauty.
- Compact Nature: While it can eventually grow into a small tree or large shrub, its slow growth rate and naturally compact form make it well-suited for container life. You can also prune it to maintain size.
Container Growing Success
Cultivating Harry Lauder’s Walking Stick in a container ensures you can appreciate its unique structure up close on your patio or balcony.
- Container Size: Select a large, heavy container, preferably 20-24 inches in diameter and depth, to provide stability and adequate root space. The weight helps prevent it from tipping over in strong winds.
- Potting Mix: Use a well-draining, fertile potting mix. Harry Lauder’s Walking Stick prefers consistently moist soil but dislikes wet feet, so good drainage is paramount.
- Watering: Water regularly during the growing season to maintain even soil moisture. Reduce watering significantly in winter, checking the soil moisture every 2-3 weeks and watering only if the top few inches feel dry. Avoid overwatering, which leads to root rot.
- Light Requirements: This plant thrives in full sun to partial shade. Full sun encourages denser branching and potentially more catkins. Ensure it receives at least 4-6 hours of direct sunlight daily.
- Fertilizing: Apply a balanced, slow-release granular fertilizer in early spring as new growth begins. Alternatively, top-dress the container with a layer of compost, which slowly releases nutrients.

Maintaining the Twisted Form
Pruning Harry Lauder’s Walking Stick mainly focuses on removing suckers and maintaining its unique form.
- Remove Suckers: This plant is often grafted onto a straight rootstock. You will frequently see straight, vigorous shoots emerging from below the graft union or from the base of the plant. These are suckers and must be removed immediately by cutting them flush with the main stem or ground. Failure to do so will allow the rootstock to take over and diminish the contorted form.
- Shape and Thin: In late winter or early spring, before leaf-out, you can lightly prune to enhance its shape, remove any dead or damaged branches, and thin out overly dense areas to better showcase the twisted stems. Avoid heavy pruning unless you need to reduce its overall size.
This unique plant offers year-round interest, but its winter skeleton is truly where it shines, making it an exceptional addition to your container plants for winter collection.
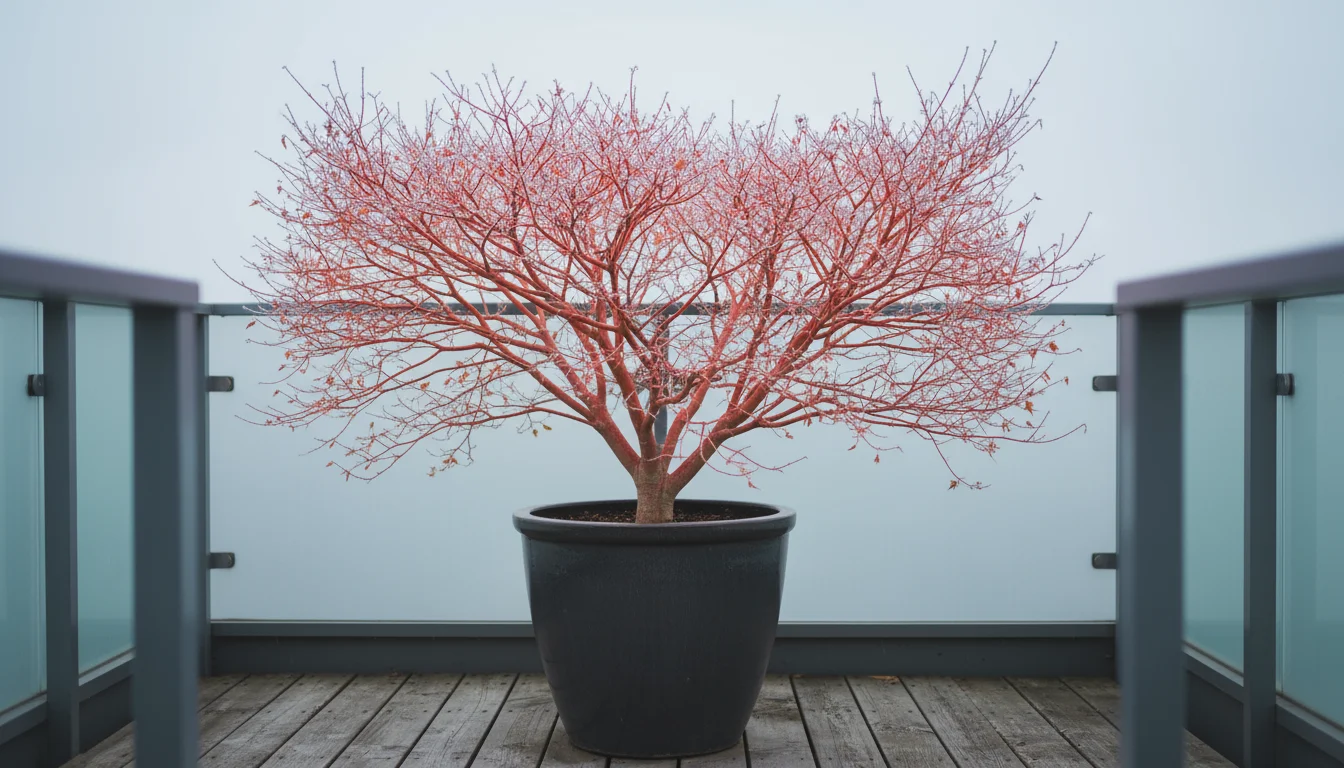
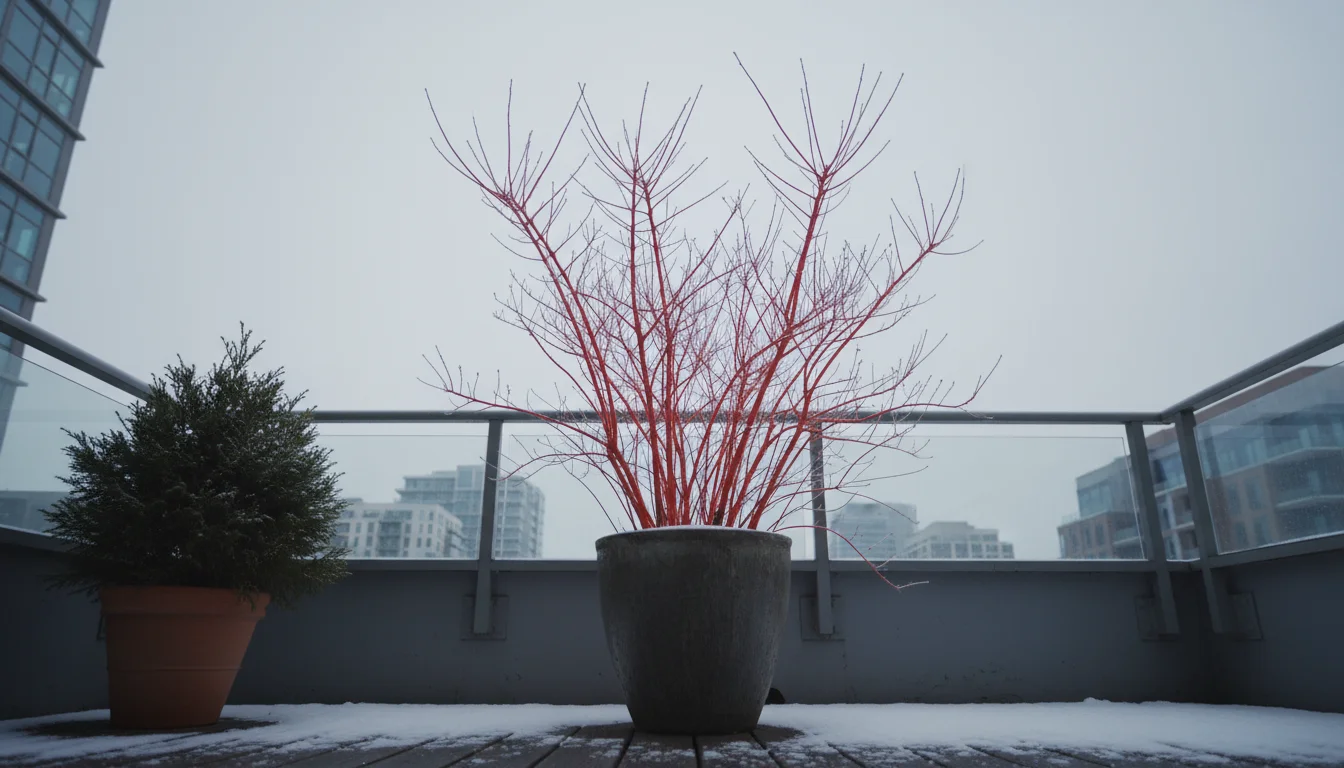
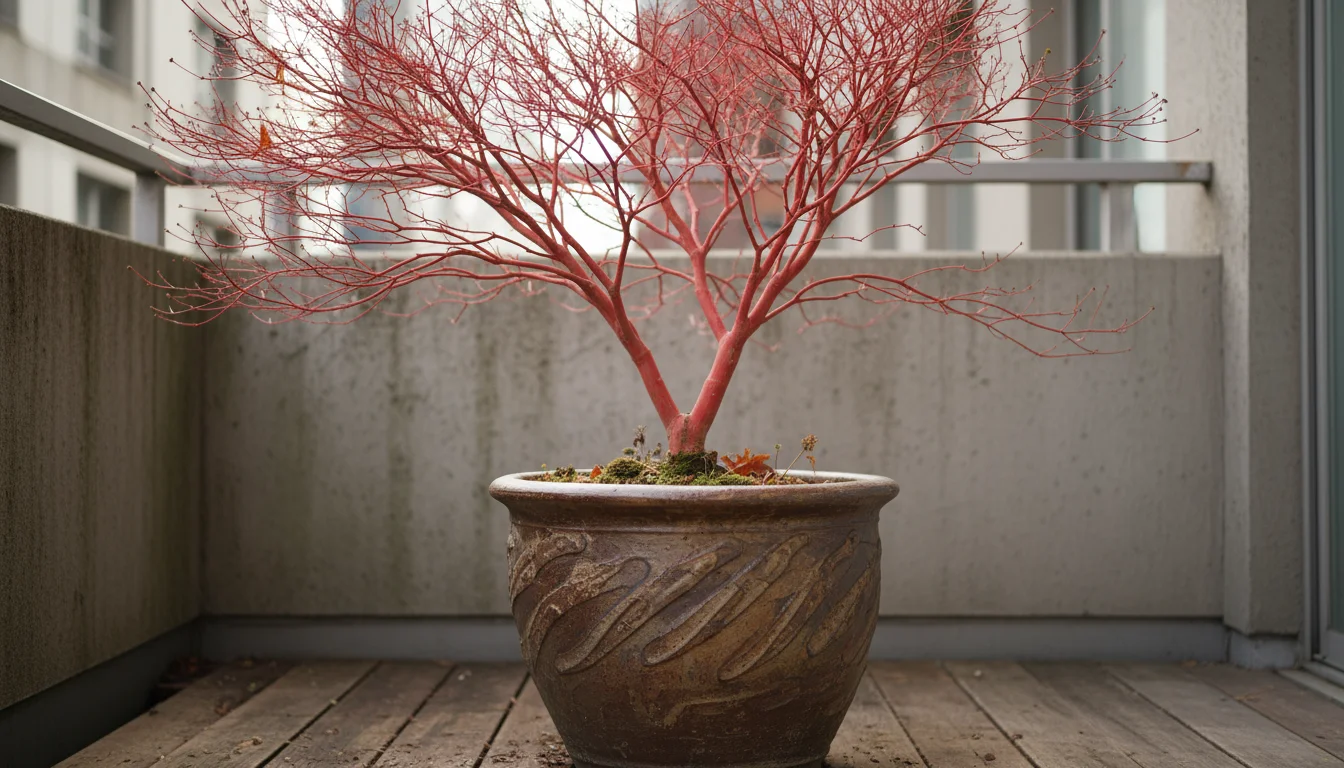
Plant Spotlight 3: Coral Bark Japanese Maple (Acer palmatum ‘Sango-kaku’)
The Coral Bark Japanese Maple, known by its cultivar name ‘Sango-kaku’ meaning “coral tower” in Japanese, is an exquisite specimen that brightens any winter balcony garden with its dazzling stem color. While celebrated for its delicate leaves in spring and striking fall foliage, its true winter glory lies in its vibrant, coral-red bark. This makes it an outstanding choice among plants that look good in winter in pots, providing a sophisticated splash of color.
Key Features and Appeal
- Vivid Winter Bark: The most captivating feature is the brilliant coral-red bark on its younger stems, which intensifies in color as winter progresses. This color contrasts beautifully with snow or evergreen companions.
- Elegant Form: It grows with an upright, vase-like habit, developing a graceful structure that provides excellent architectural interest even when bare.
- Seasonal Interest: Beyond winter, it offers chartreuse-green leaves in spring, a light green in summer, and bright yellow-gold fall foliage, making it a multi-season performer.
Container Growing Success
Growing a Coral Bark Japanese Maple in a container allows you to enjoy its beauty up close and move it to a protected spot if extreme cold threatens.
- Container Size: Choose a sturdy, well-draining container that is at least 20-24 inches in diameter and depth. Japanese maples appreciate consistent moisture but are sensitive to both drought and waterlogging.
- Potting Mix: Use a high-quality, slightly acidic, well-draining potting mix. A mix specifically formulated for trees or shrubs, or one with added perlite or bark fines, works well.
- Watering: Maintain consistently moist soil during the growing season. Water when the top inch of soil feels dry. In winter, reduce watering considerably but ensure the soil does not dry out completely. Overwatering in winter can lead to root rot.
- Light Requirements: Coral Bark Japanese Maples prefer a location with morning sun and some afternoon shade, especially in warmer climates, to prevent leaf scorch. In winter, the light levels are less critical for the bark color, but it appreciates bright exposure.
- Fertilizing: Japanese Maples are not heavy feeders. Apply a slow-release, balanced fertilizer formulated for trees and shrubs in early spring. Alternatively, top-dress with a thin layer of compost. Avoid over-fertilizing, which can burn roots.

Protecting Your Maple in Winter
While generally hardy, containerized Japanese maples are more vulnerable to extreme cold than those planted in the ground. Protect your plant during severe winter weather:
- Insulation: Wrap the container with burlap, bubble wrap, or thick blankets.
- Relocation: If possible, move the container to a more sheltered spot, such as against a warm wall, in an unheated garage, or on a covered porch during prolonged freezes.
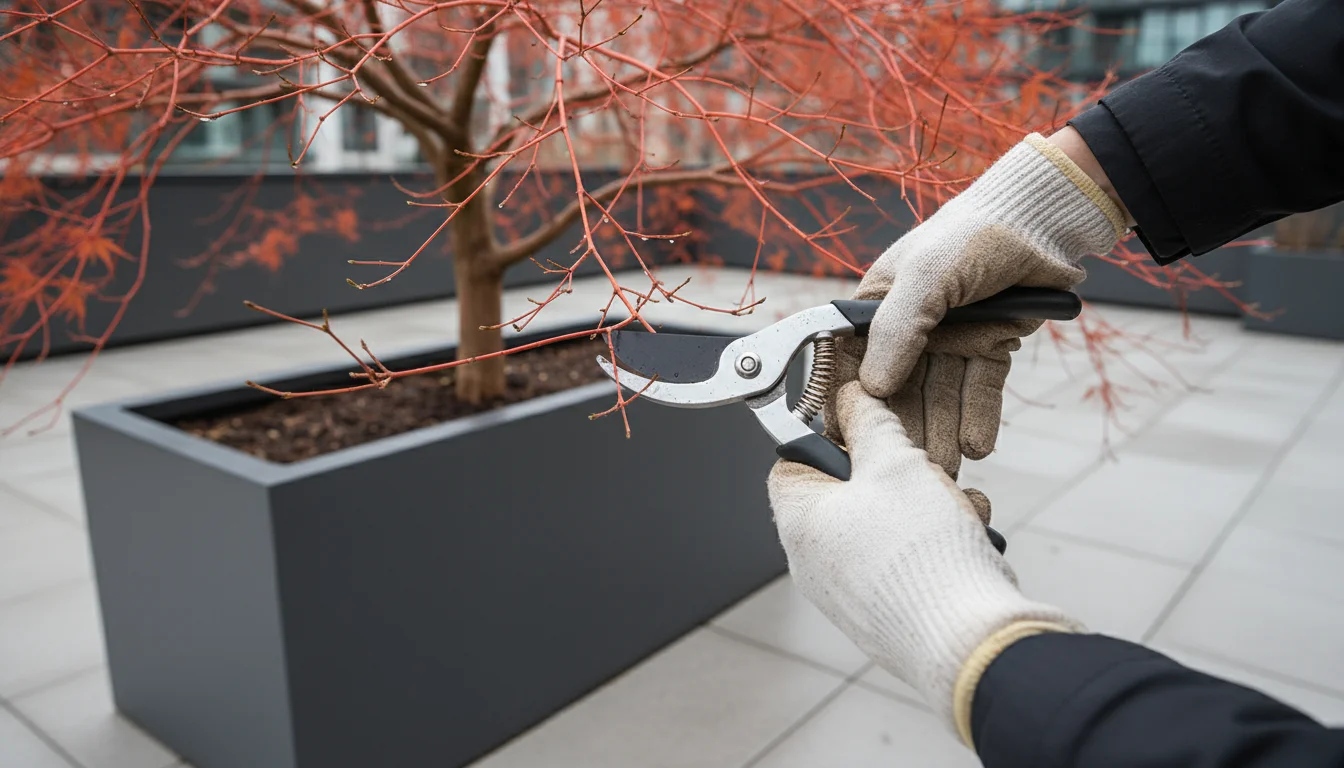
Pruning for Health and Structure
Prune in late winter or early spring while the tree is dormant. Focus on maintaining its natural shape and health.
- Remove Dead/Damaged Branches: Cut out any dead, diseased, or crossing branches to improve air circulation and prevent potential problems.
- Shape Lightly: Avoid heavy pruning, as this can detract from its natural graceful form. Only remove branches to improve overall shape or reduce size if absolutely necessary.
- Enhance Bark Color: The most vibrant coral color appears on younger stems. While you do not prune specifically for bark color like a dogwood, maintaining overall plant health ensures good new growth and thus good color.
The Coral Bark Japanese Maple offers elegance and a splash of unexpected color, making it a prized addition to your winter container garden.
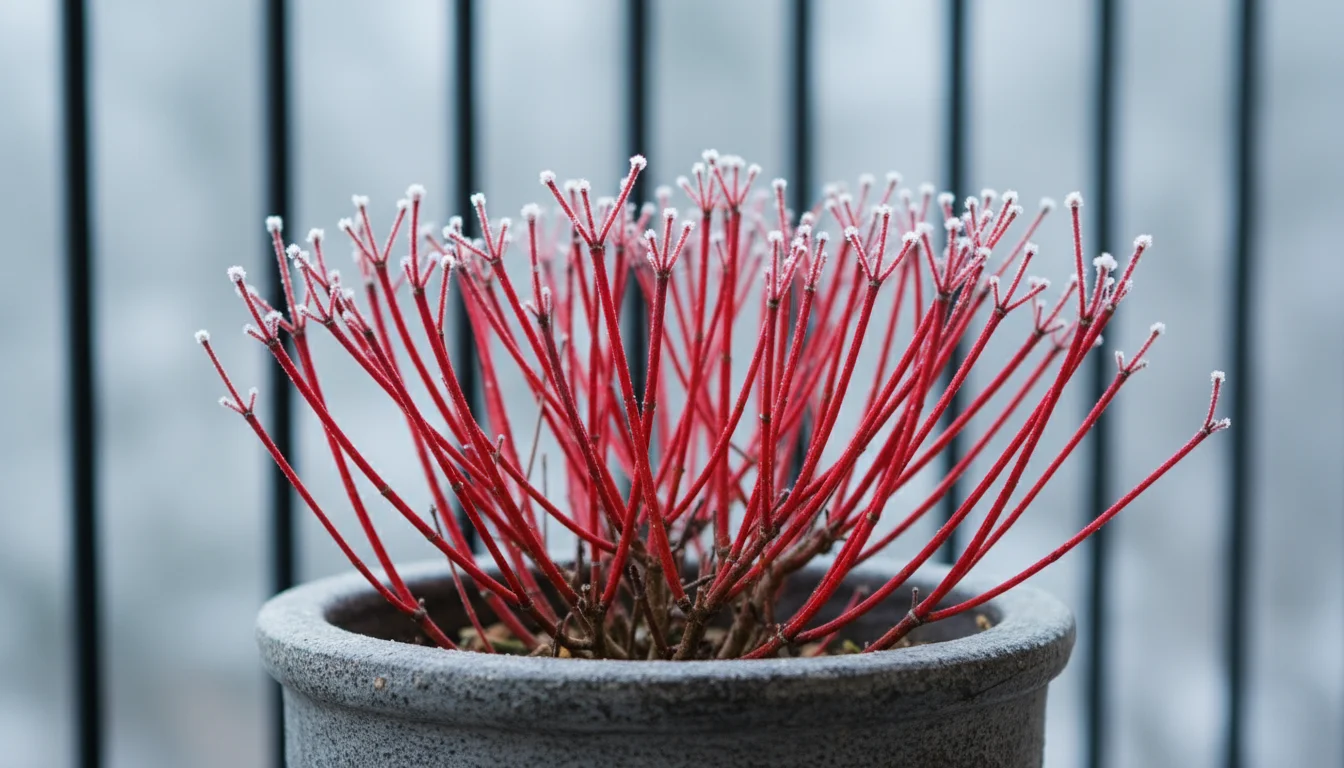
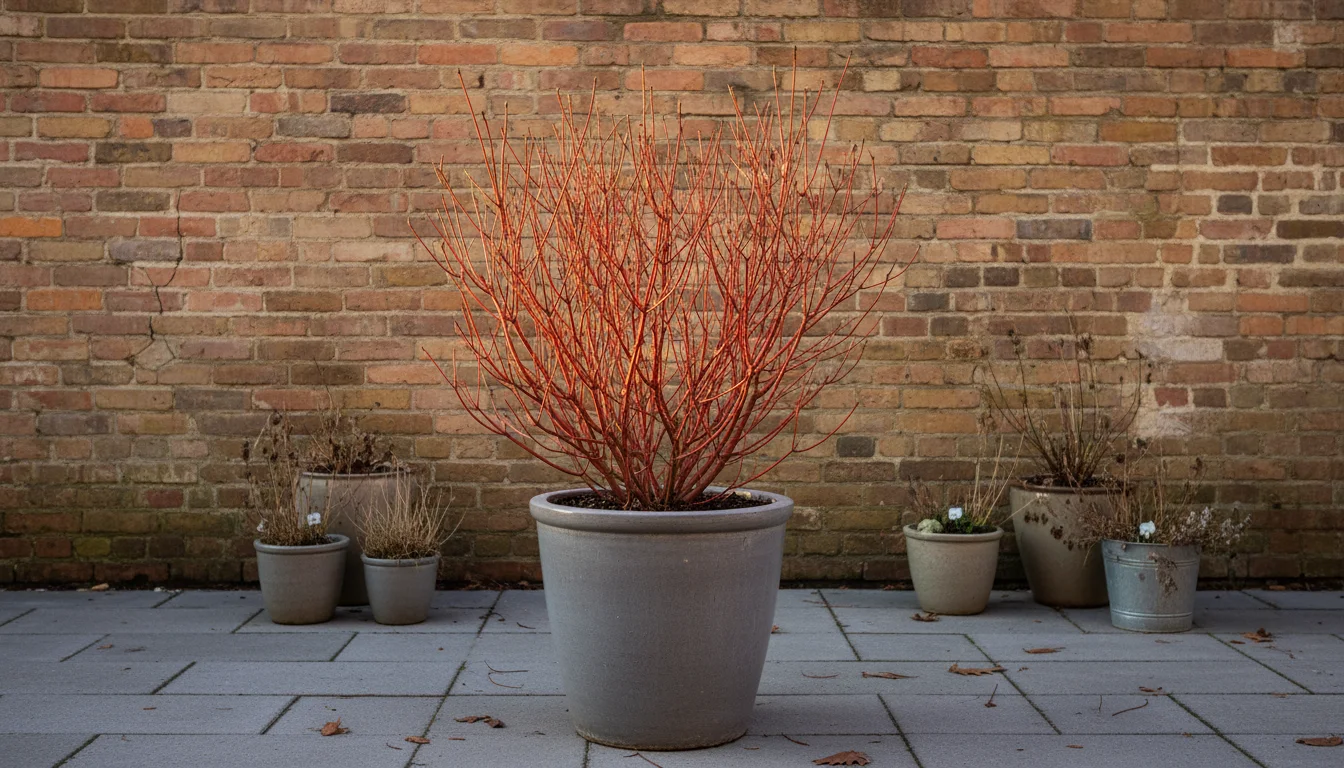
Plant Spotlight 4: Arctic Fire® Red Dogwood (Cornus stolonifera ‘Farrow’)
For small-space gardeners who adore the vivid appeal of red twig dogwoods but need a more compact option, Arctic Fire® Red Dogwood (Cornus stolonifera ‘Farrow’) presents an ideal solution. This cultivar is specifically bred for its smaller stature and intense stem color, making it a premier choice for container plants for winter. It delivers a punch of brilliant red, perfect for defining your balcony garden winter space.
Key Features and Appeal
- Compact Size: Unlike its larger relatives, Arctic Fire® typically grows to a manageable 3-5 feet tall and wide, making it perfect for smaller containers and limited spaces. This answers the need for winter structure plants for small spaces.
- Vibrant Red Stems: It maintains the classic, eye-catching red stems that glow in the winter landscape, offering a strong contrast against evergreens or snow.
- Tough and Adaptable: This dogwood is incredibly hardy and tolerant of a wide range of conditions, making it a reliable performer even for beginner gardeners.
Container Growing Success
Growing Arctic Fire® in a container follows similar principles to other dogwoods, with an emphasis on its smaller size.
- Container Size: Choose a container that is at least 18-20 inches in diameter and depth. This allows for root growth and provides sufficient insulation. Even though it is compact, generous container size is still beneficial.
- Potting Mix: Use a high-quality, well-draining potting mix. Arctic Fire® prefers consistently moist soil, so select a mix with good water retention but excellent drainage.
- Watering: During the growing season, water regularly to keep the soil moist. Reduce watering significantly in winter, checking every 2-3 weeks and watering only when the top few inches are dry.
- Light Requirements: For the most intense stem color, plant your Arctic Fire® in a location that receives full sun, meaning at least 6 hours of direct sunlight daily. Partial shade is tolerated, but the stem color may be less vibrant.
- Fertilizing: Apply a balanced, slow-release granular fertilizer in early spring. Alternatively, top-dress with a layer of compost. Follow package directions for application rates.
Pruning for Peak Color and Compactness
Like other red twig dogwoods, Arctic Fire® benefits from regular pruning to encourage the production of colorful new stems and maintain its compact habit.
Step-by-Step Pruning Guide:
- Annual Renewal Pruning: In late winter or early spring, before leaves emerge, remove about one-third of the oldest, dullest-colored stems at ground level. This encourages vigorous new growth, which produces the brightest red stems.
- Shape Maintenance: You can also lightly trim any errant branches to maintain a tidy, compact shape suitable for your container.
- Rejuvenation Pruning (Every few years): If the plant becomes too large or the stem color diminishes, you can cut all stems back to about 6 inches from the ground every 2-3 years. This hard prune completely rejuvenates the plant, promoting a flush of fresh, colorful growth.
Arctic Fire® Red Dogwood is an excellent choice for adding a durable and dazzling splash of red to your winter balcony, ensuring your small space remains vibrant and engaging.
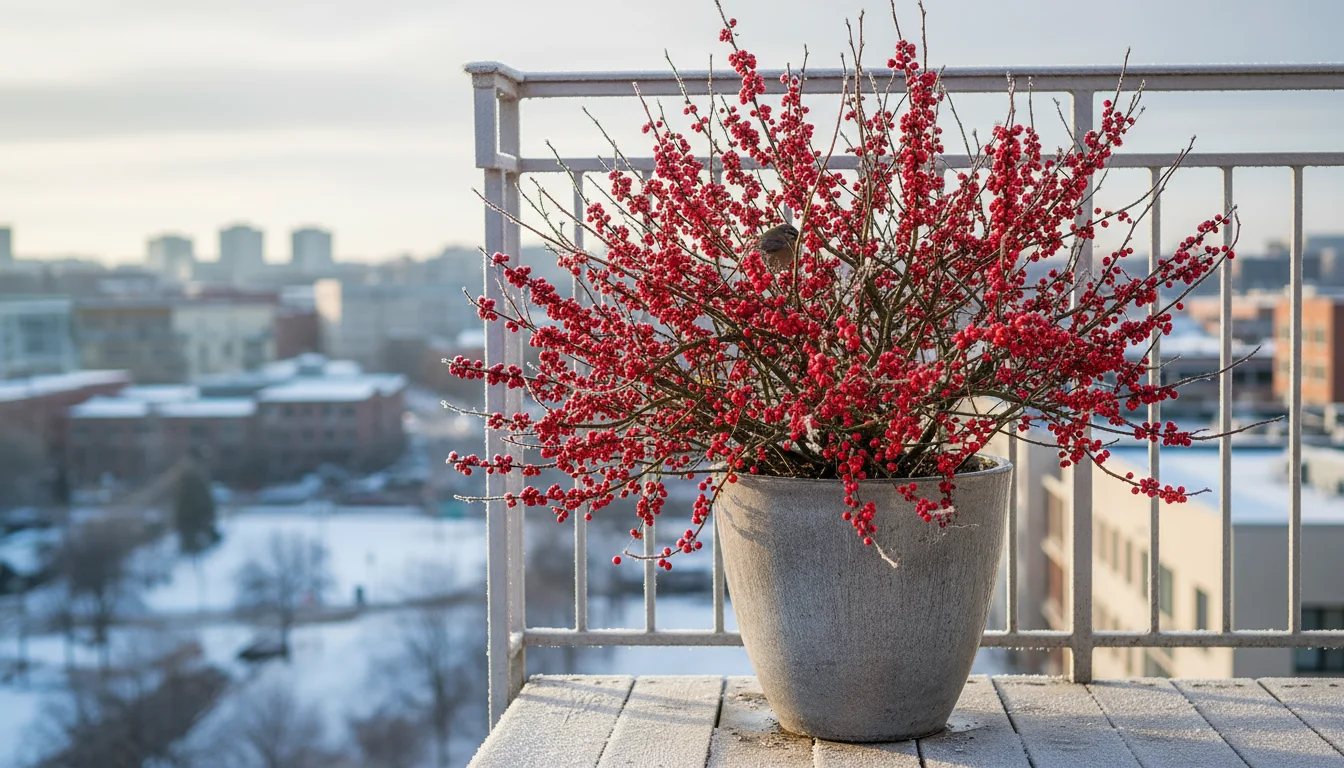
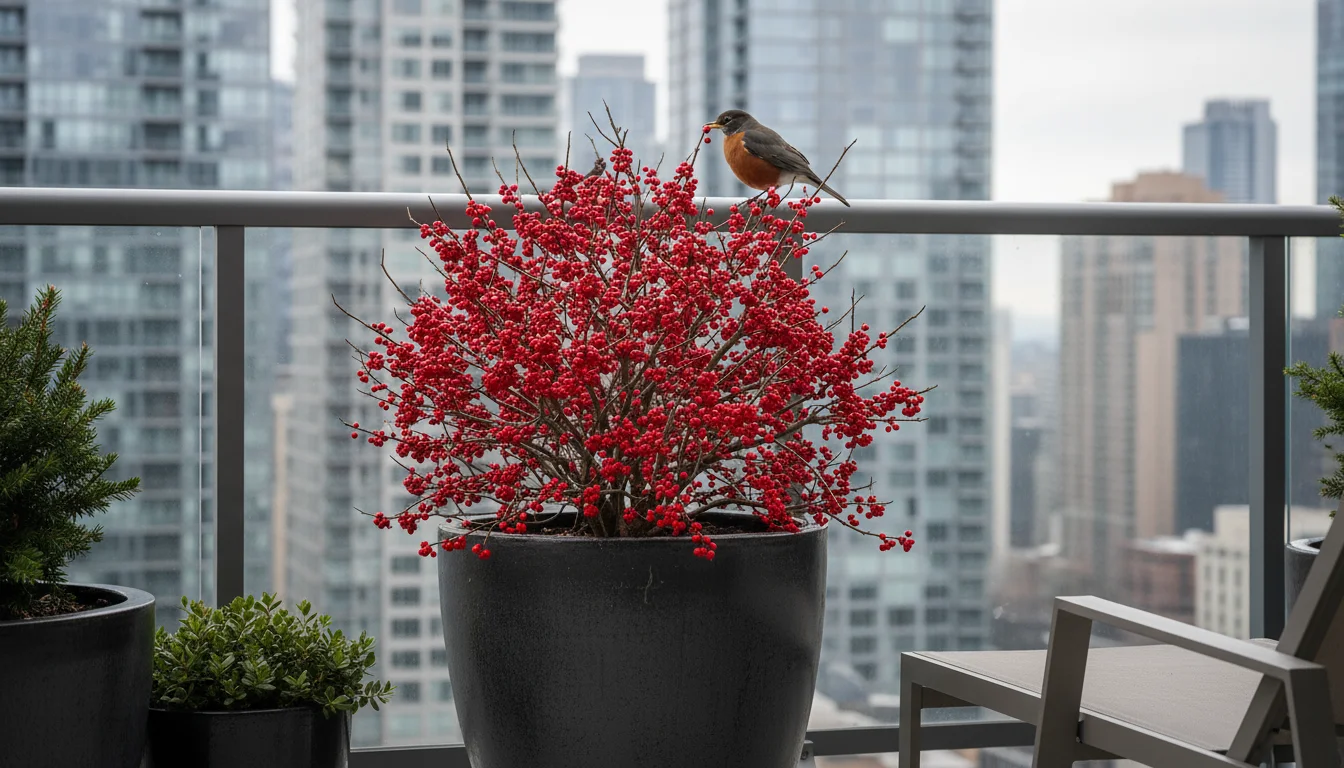
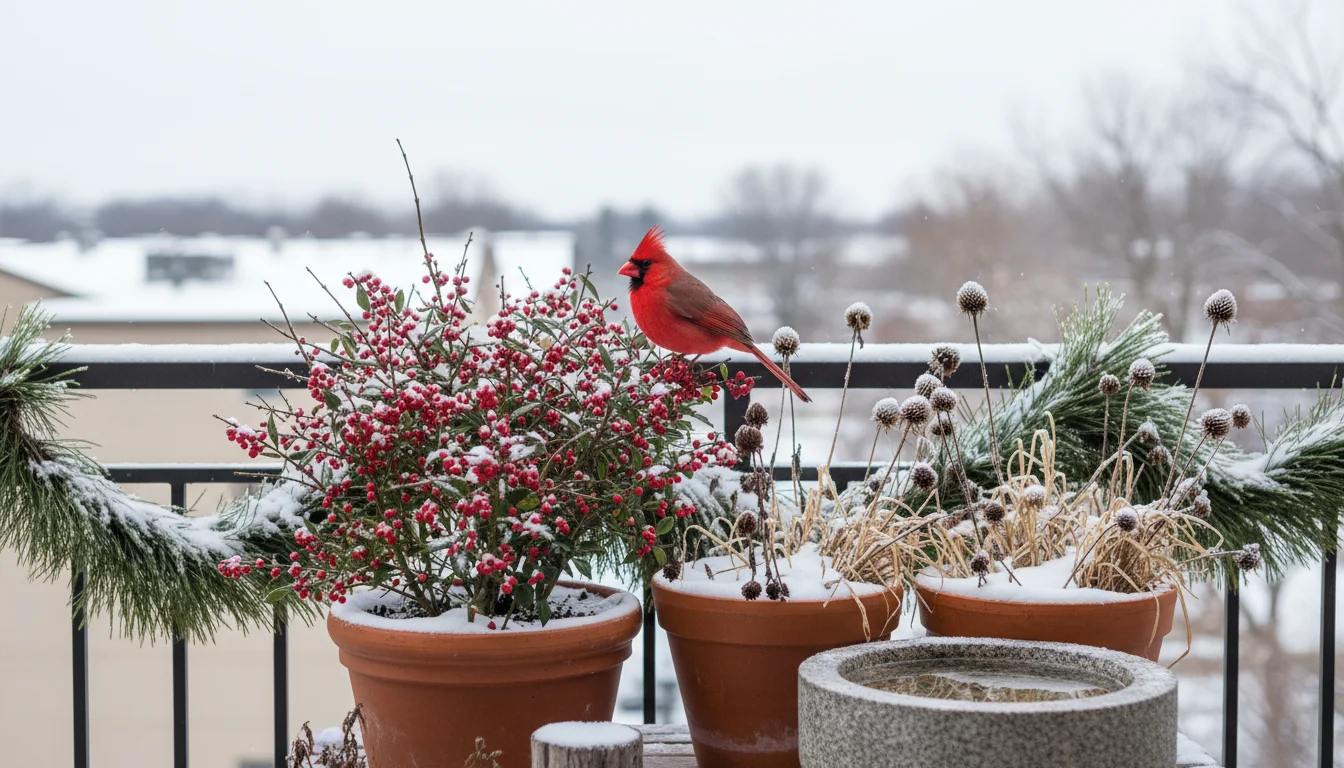
Plant Spotlight 5: Winterberry Holly (Ilex verticillata)
While often celebrated for its brilliant red berries, the Winterberry Holly (Ilex verticillata) also provides remarkable stem structure, especially when those berries adorn its bare branches. As a native deciduous holly, it sheds its leaves in fall, revealing an astonishing display of colorful fruits clinging to its intricate branching pattern. This combination of vibrant berries and elegant bare stems makes it an indispensable choice for winter interest plants and adds undeniable charm to any container garden.
Key Features and Appeal
- Abundant Winter Berries: The primary draw is the incredible profusion of bright red, orange, or yellow berries that persist on the bare stems from fall well into winter, often until eaten by birds.
- Bare Stem Structure: The branching pattern itself is attractive, providing a delicate yet distinct silhouette against the winter sky, especially when laden with berries.
- Wildlife Attraction: The berries provide a vital food source for birds during the lean winter months, bringing lively activity to your balcony.
- Compact Varieties Available: Many cultivars exist, with some being naturally more compact and well-suited for container growing.

Container Growing Success and Pollination
Growing Winterberry Holly in a container requires attention to its unique pollination needs to ensure a bountiful berry display.
- Pollination Requirement: Winterberry Holly is dioecious, meaning individual plants are either male or female. Only female plants produce berries, but they require a male pollinator planted nearby (within 50 feet or so) to produce fruit. Choose a compact male variety that blooms at the same time as your chosen female variety. If space is truly limited, consider planting a female in a larger container and a male in a smaller container, or coordinating with a neighbor who has a suitable male plant.
- Container Size: For both male and female plants, choose large containers, at least 20-24 inches in diameter and depth, to support their growth and berry production.
- Potting Mix: Winterberry Holly prefers acidic, well-draining soil that retains moisture. Use a potting mix formulated for acid-loving plants, or amend a general potting mix with peat moss or composted pine bark.
- Watering: This plant naturally grows in damp conditions, so it appreciates consistently moist soil during the growing season. Water regularly, ensuring the soil never completely dries out. In winter, reduce watering but keep the soil from becoming bone dry.
- Light Requirements: For the best berry production, plant in full sun, receiving at least 6 hours of direct sunlight daily. Partial shade is tolerated, but berry set might be reduced.
- Fertilizing: Apply a slow-release, acid-loving plant fertilizer in early spring. Top-dressing with compost also provides gentle nutrition.
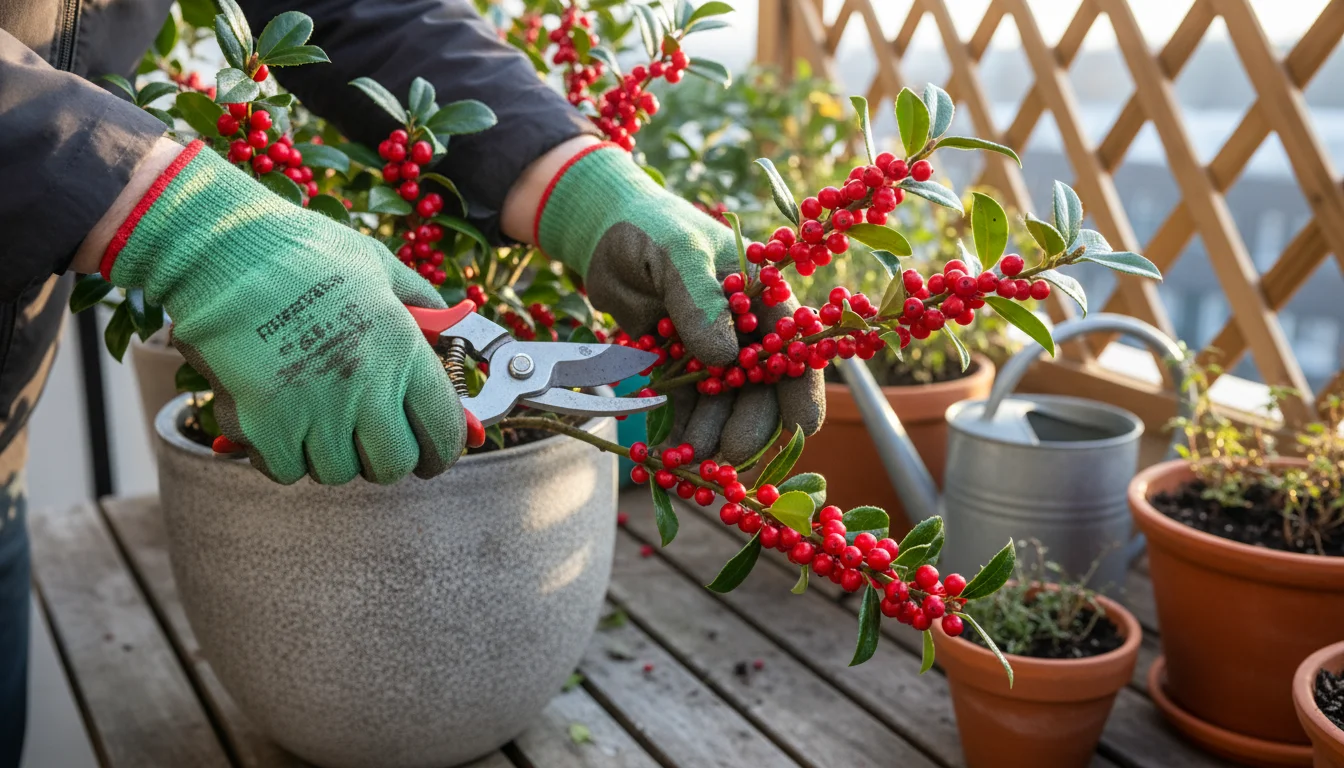
Pruning and Maintenance
Prune Winterberry Holly in late winter or early spring before new growth begins, but after the berries have provided their winter display. You can harvest berried branches for indoor decorations.
- Shape and Size: Prune to maintain a desired size and shape for your container. Remove any dead, diseased, or crossing branches.
- Renewal Pruning: Every few years, remove some of the oldest, least productive stems at the base to encourage vigorous new growth and better berry production.
- Male Pruning: You can prune male plants more aggressively to keep them compact, as their primary role is pollination. Ensure you leave enough stems to produce pollen.
Winterberry Holly not only offers stunning red berries against its bare stems but also contributes to local wildlife, making it a sustainable and beautiful choice for container plants for winter.
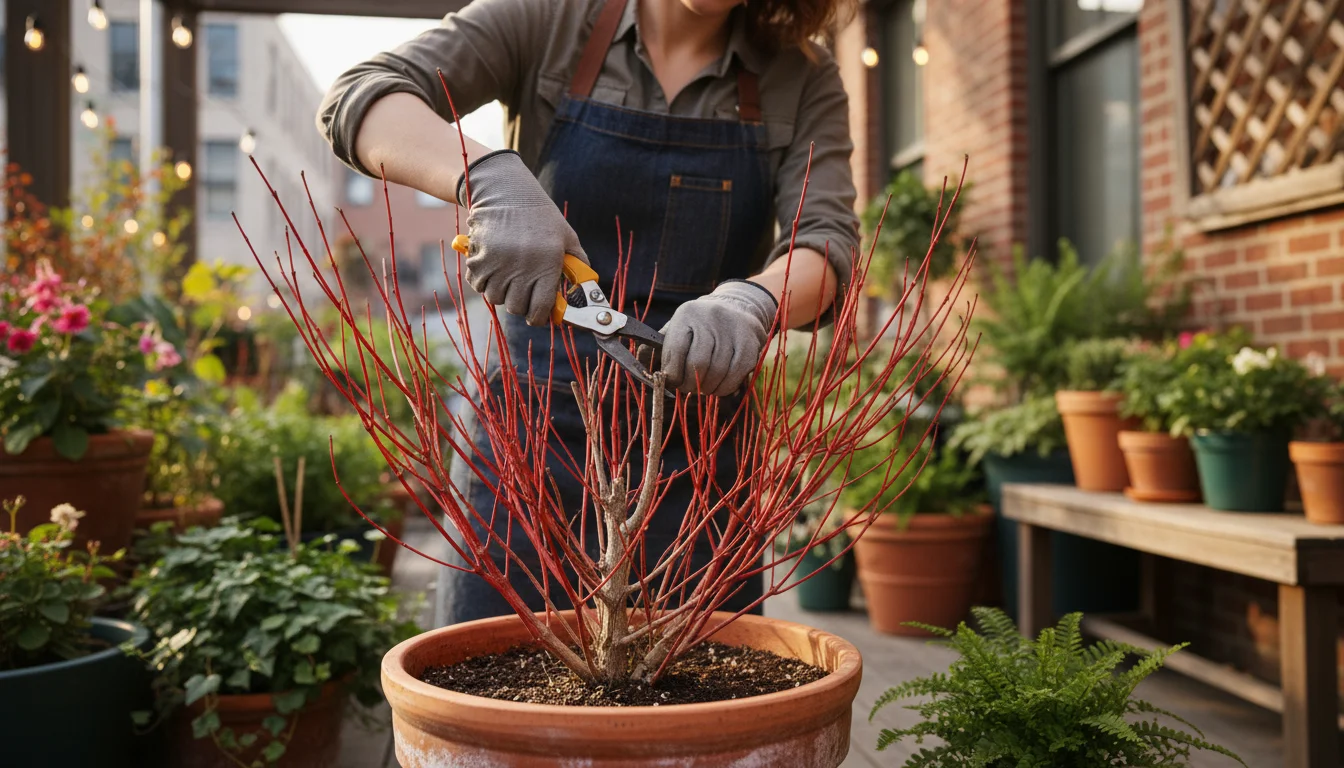
Cultivating Striking Stems: Pruning for Peak Color and Structure
The vibrancy of many winter interest plants, particularly dogwoods, depends on regular pruning. The most intense stem color usually appears on young, new growth. Neglecting pruning results in older, duller stems that diminish the plant’s winter appeal. Understanding how and when to prune ensures your container plants maintain their captivating beauty and structural integrity year after year.
Once the coldest weeks pass, refer to a late-winter checklist to ensure your structural plants wake up healthily in the spring.
Why Pruning Matters for Winter Stems
- Enhances Color: Pruning stimulates the growth of new stems, which exhibit the brightest, most saturated colors.
- Maintains Health: Removing dead, damaged, or diseased branches keeps your plant healthy and prevents pest or disease issues.
- Controls Size and Shape: For container gardening, pruning is crucial for keeping plants compact and in proportion to their pots and your small space.
- Improves Structure: Strategic cuts can enhance the architectural form of plants like Harry Lauder’s Walking Stick, showcasing their unique twists and turns.
When to Prune for Optimal Winter Interest
The best time to prune most stem-focused plants, especially dogwoods, is in late winter or early spring, just before new growth begins. This allows you to enjoy the colorful stems throughout the coldest months and then remove the older, duller growth to make way for a fresh flush of vibrant stems for the next winter season.
General Pruning Techniques
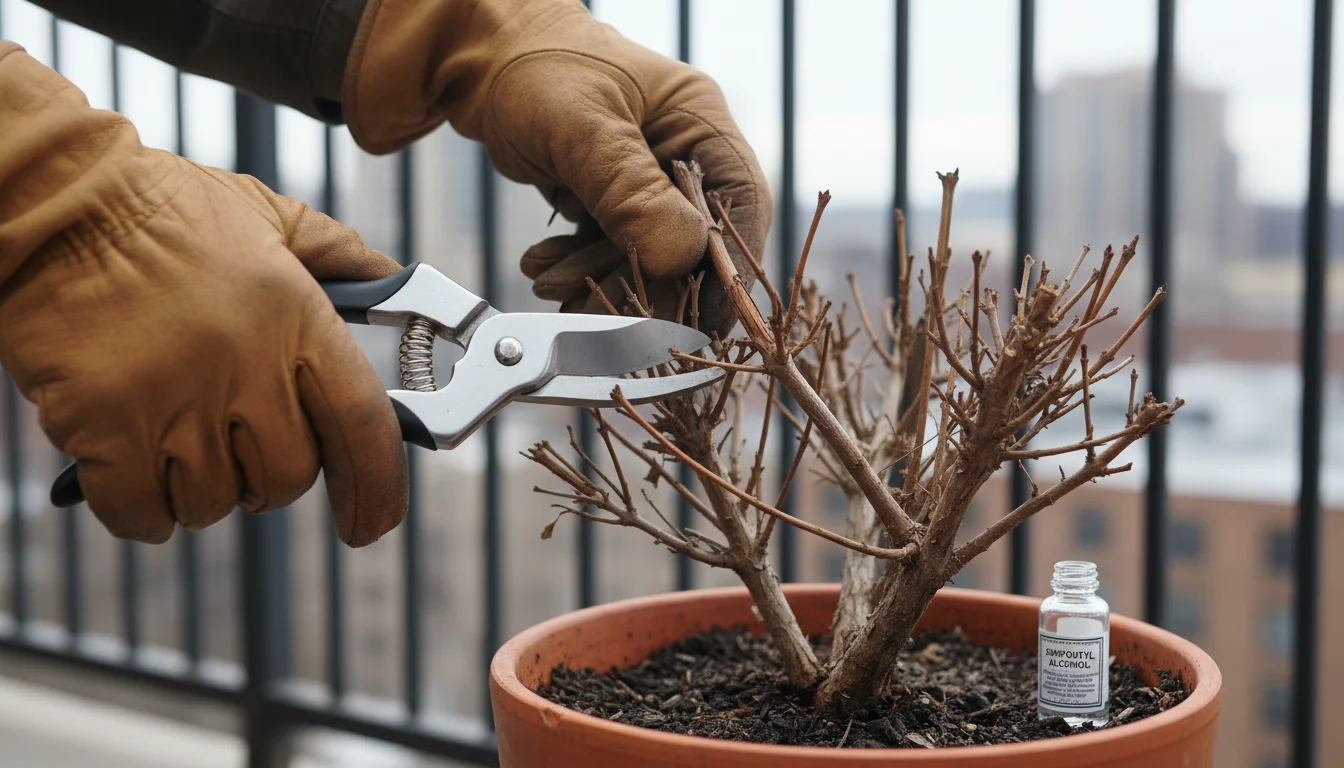
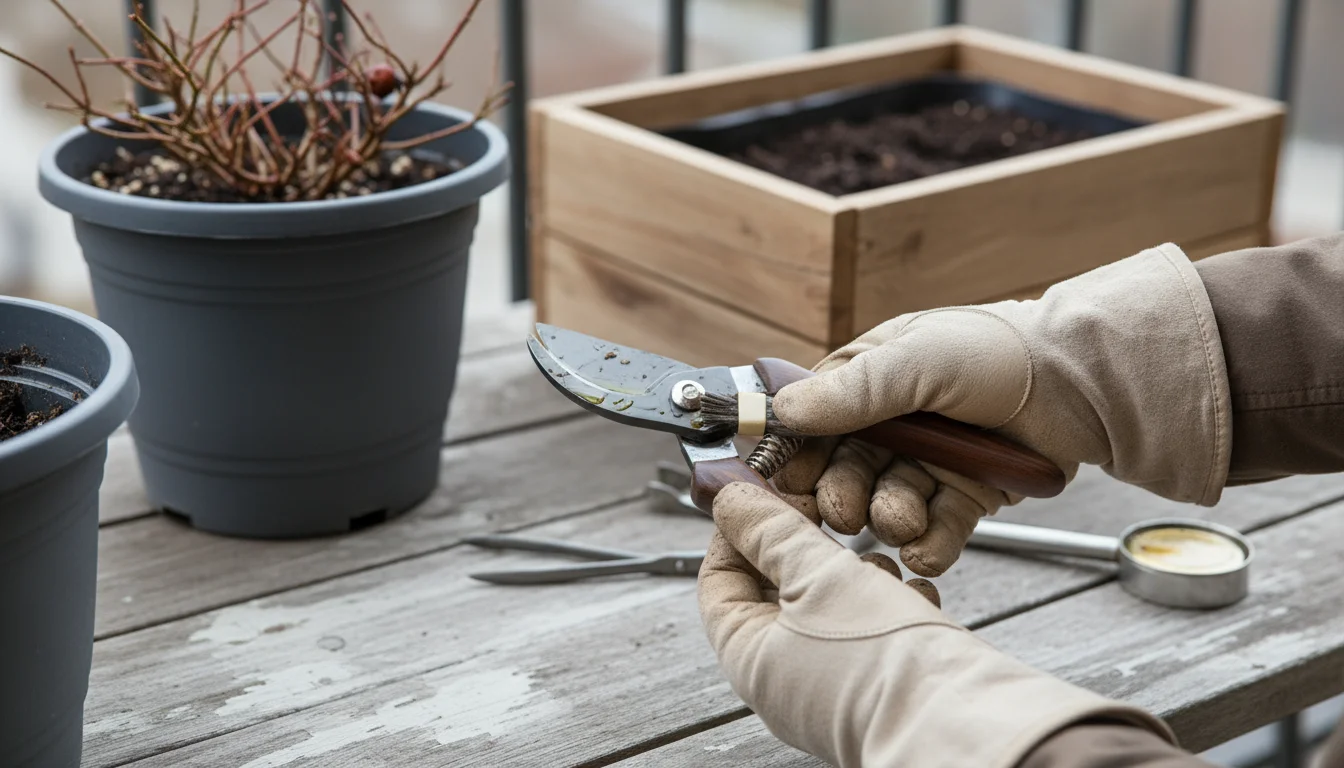
- Sanitize Tools: Always start with clean, sharp pruning shears, loppers, or a pruning saw. Sanitize blades with rubbing alcohol before and after use to prevent disease spread.
- Remove Dead, Damaged, or Diseased Wood: Make these cuts first, regardless of the season. Cut back to healthy wood.
- Thin Out Crossing Branches: Eliminate branches that rub against each other, as this can create wounds and entry points for disease.
- Renewal Pruning: This technique is vital for dogwoods. Each year, remove approximately one-third of the oldest, thickest, and least colorful stems. Cut them back to ground level or to a strong side branch. This encourages the plant to produce vigorous new shoots with vibrant color.
- Rejuvenation Pruning (Hard Pruning): For plants that have become overgrown or lost their vigor, you can perform a more drastic prune every 2-3 years. Cut all stems back to about 6-12 inches from the ground. While this sacrifices a season of stem color, it revitalizes the plant, leading to a spectacular display in subsequent winters. This is particularly effective for dogwoods in containers to maintain a manageable size and brilliant color.
- Sucker Removal: For grafted plants like Harry Lauder’s Walking Stick, promptly remove any straight shoots (suckers) that emerge from below the graft union or from the plant’s base. These are from the rootstock and will diminish the desired contorted form.
Consistent, thoughtful pruning ensures your winter interest plants remain healthy, compact, and spectacularly colorful, truly earning their place in your balcony garden.
Elevating Your Balcony: Design Principles for Winter Structure
Designing a captivating winter balcony garden goes beyond simply selecting individual plants. It involves strategic placement, thoughtful combinations, and an understanding of how these bare bones beauties interact with their surroundings. With careful planning, you can transform your small space into a visually rich and inviting winter sanctuary.
For an even more artistic touch, learn how to artfully arrange bare branches and seed heads in your empty pots.

Creating Focal Points with Bold Stems
Use your vibrant-stemmed plants as natural focal points. A striking red twig dogwood in container can anchor a corner or define an entrance. Position a Harry Lauder’s Walking Stick where its unique twists can be admired up close, perhaps near a seating area. These plants inherently draw the eye, so leverage their strong presence.
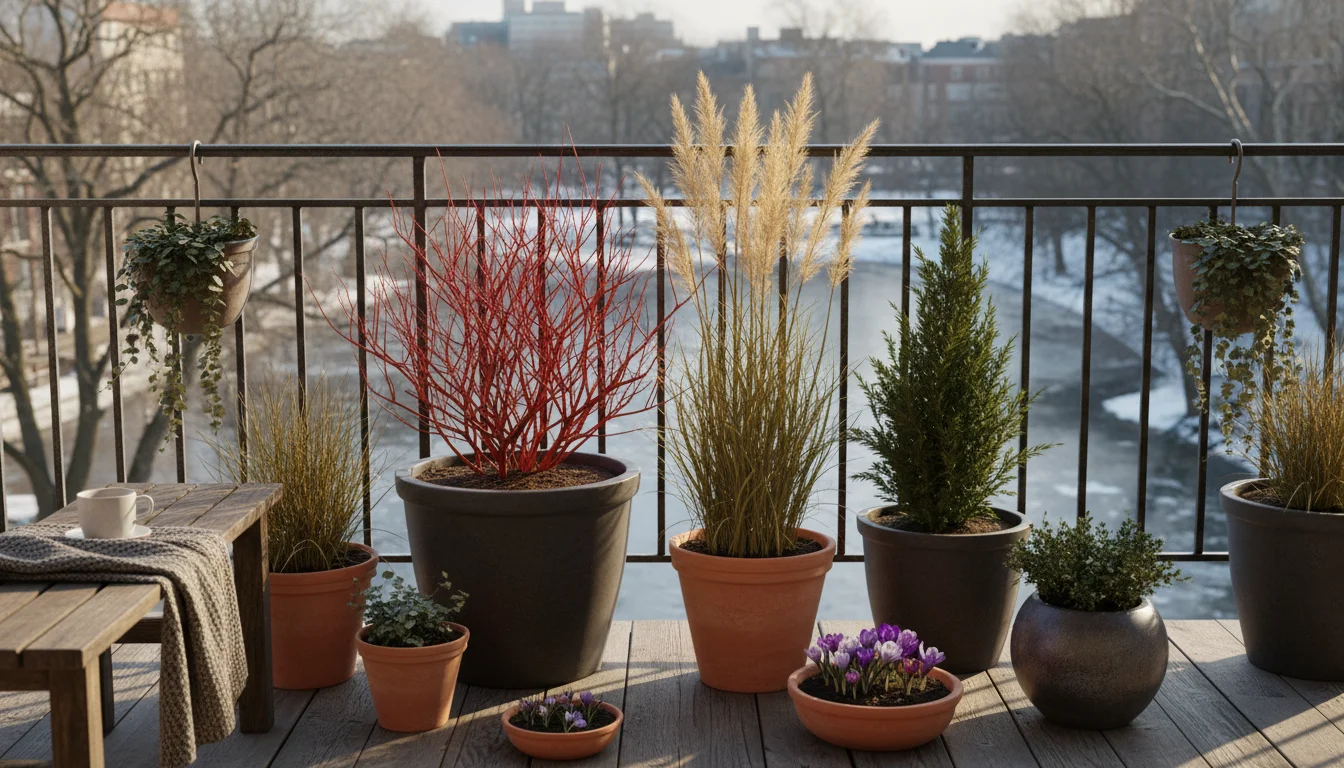
Layering Textures and Colors
While your primary focus is on stems, combining them with other winter-hardy elements enhances the overall design. Layering different textures and subtle colors adds depth and complexity:
- Evergreen Companions: Pair your deciduous stunners with compact evergreens. Dwarf conifers (like dwarf spruce or cypress), small boxwoods, or even winter-hardy heaths and heathers provide a green or variegated backdrop, making the vibrant stems pop even more. The contrast between the rigid, bare branches and the soft, textured evergreens is visually appealing.
- Container Variation: Use a variety of container shapes, sizes, and materials. A tall, slender pot can highlight a vertical form, while a wider, shallower bowl might showcase a cluster of stems. Ensure containers are complementary, creating a cohesive look.
- Lighting: Consider adding subtle LED string lights or solar-powered spotlights to illuminate your structural plants after dark. This extends their beauty into the evening hours and creates a magical ambiance.
Considering Scale and Proportion for Small Spaces
For balcony garden winter design, scale is paramount. You want plants that fit your space without overwhelming it:
- Mature Size: Always choose cultivars specifically bred for compact growth or those that tolerate heavy pruning to maintain a smaller size. Arctic Fire® Dogwood is an excellent example of this.
- Vertical Interest: Utilize vertical space. Tall, narrow plants or those trained against a trellis can draw the eye upward, making a small balcony feel larger.
- Grouping: Instead of many small pots, create impactful groupings of 3-5 containers. Vary the heights of the plants within the group to create visual interest. Place taller plants at the back or center, with shorter plants or evergreens in front.

Winter Accessories and Seating
Do not forget to incorporate elements that encourage you to enjoy your winter garden:
- Cozy Seating: Add a small bistro set or a comfortable chair with weather-resistant cushions and a warm throw blanket.
- Winter Décor: Introduce elements like smooth river stones, decorative garden stakes, or even small, frost-resistant garden sculptures to complement the natural beauty of your plants.
- Bird Feeders: A small bird feeder or bird bath (ensure water does not freeze solid) will attract winter birds, adding movement and life to your balcony.
By applying these design principles, you transform your collection of winter structure plants for small spaces into a cohesive, enchanting outdoor retreat.
Navigating Winter’s Worries: Solving Common Container Problems
Even with the hardiest winter interest plants, container gardening during the colder months presents unique challenges. Being prepared to address common issues ensures your plants remain healthy and vibrant. You can proactively mitigate risks to your container plants for winter with a little knowledge and timely intervention.
The Threat of Root Freeze
The biggest danger to container plants in winter is root freeze. Unlike plants in the ground, container roots lack the insulation of surrounding soil, making them highly susceptible to freezing temperatures. This can damage or kill the roots, leading to plant death.
- Symptoms: Wilting leaves (if evergreen), lack of new growth in spring, or a plant that fails to leaf out.
- Solutions:
- Insulate Pots: Wrap your containers with burlap, bubble wrap, or thick blankets. You can also place pots inside larger, insulating containers, filling the gap with straw or shredded leaves.
- Relocate: Move pots to a more sheltered location, such as against a warm wall of your building, into an unheated garage, or onto a covered porch during periods of extreme cold.
- Group Pots: Cluster your containers together. The combined mass of soil and plants offers mutual protection.
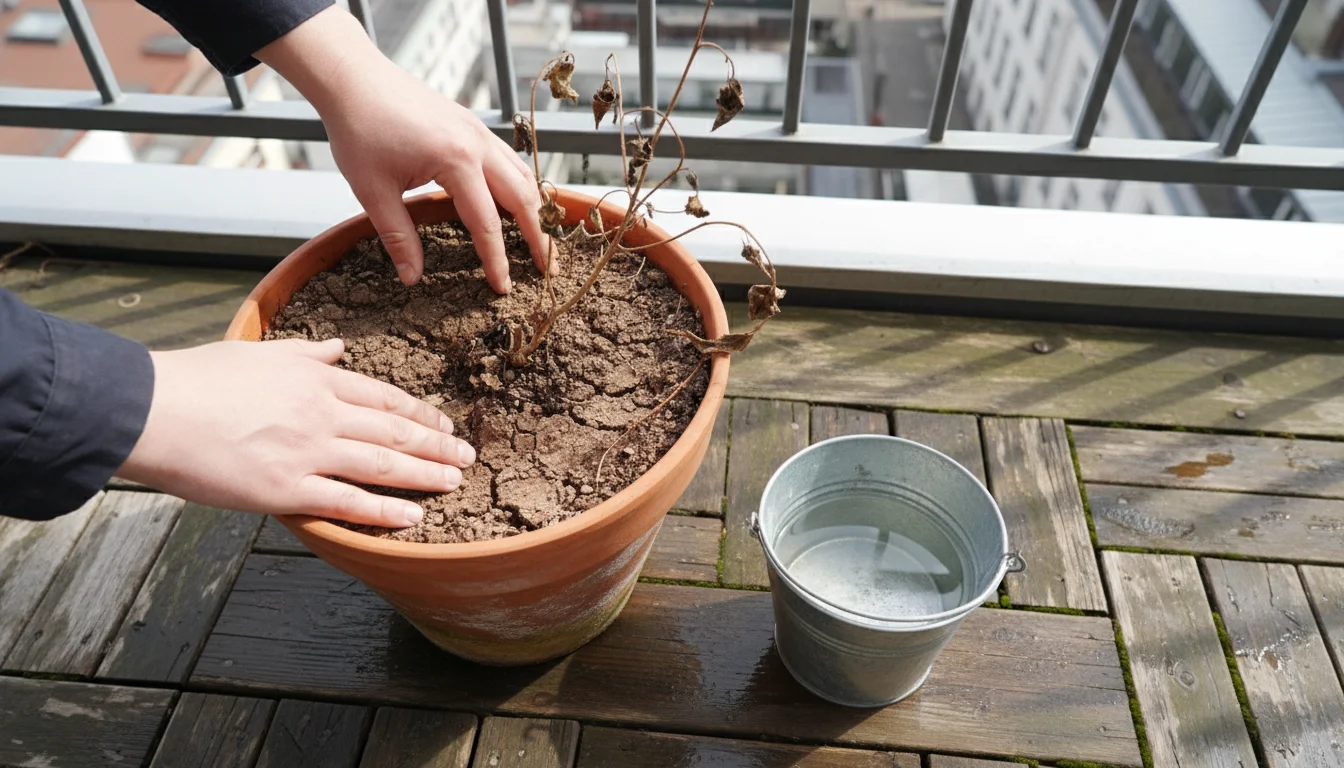
Overwatering and Underwatering
Watering in winter is tricky. Plants are dormant or semi-dormant, requiring significantly less water than in summer. However, they still need some moisture.
- Overwatering (More Common):
- Symptoms: Yellowing leaves, mushy stems, or a foul odor from the soil. Waterlogging can lead to root rot.
- Solutions: Ensure containers have excellent drainage holes. Water only when the top few inches of soil are dry to the touch. In very cold weather, water sparingly on days when temperatures are above freezing.
- Underwatering (Less Common, but still a threat):
- Symptoms: Brittle stems, shriveled bark, or a plant that appears completely dry.
- Solutions: Check soil moisture regularly. Even dormant plants need occasional hydration. Use a moisture meter or stick your finger into the soil. Water thoroughly when dry, allowing excess to drain.
Windburn and Desiccation
Cold, dry winter winds can strip moisture from plant tissues, leading to “windburn” or desiccation, especially for evergreens, but even bare stems can suffer.
- Symptoms: Browning or crisping of foliage (on evergreens), stunted growth, or weakened stems.
- Solutions:
- Shelter: Place your containers in a spot protected from prevailing winter winds, perhaps behind a wall or another larger, hardier plant.
- Anti-desiccants: For borderline hardy evergreens, you can apply an anti-desiccant spray to foliage in late fall, which forms a protective coating. This is less critical for the deciduous plants highlighted here, but good to know for other winter container components.
- Watering: Ensure adequate soil moisture before freezes, as well-hydrated plants are more resilient to desiccation.
Pests and Diseases in Winter
While most pests are dormant in winter, some can still pose a threat, particularly if you move plants indoors or to a sheltered porch. Diseases are less prevalent on dormant plants.
- Common Winter Pests: Spider mites or scale can sometimes appear on sheltered plants.
- Solutions:
- Inspection: Regularly inspect your plants, especially if they are in a more sheltered spot.
- Treatment: For minor infestations, use horticultural oil or insecticidal soap according to package directions.
- Dormant Oil: In late winter, before bud break, a dormant oil spray can help control overwintering insect eggs or scale on woody stems.
By understanding and proactively addressing these potential issues, you ensure your winter balcony garden remains a thriving and beautiful space, allowing your plants that look good in winter in pots to flourish.

Embracing Eco-Friendly Winter Gardening
Your small-space garden can be a beacon of sustainability even in winter. Adopting eco-friendly practices benefits not only your plants but also the local ecosystem. As a supportive gardening coach, I encourage you to integrate these mindful habits into your routine for a healthier garden and planet.
Managing your collection is easier when you master seasonal plant swaps to rotate containers for year-round visual appeal.
Smart Water Management
Water conservation remains crucial, even when plants are dormant. Winter watering for containers should be purposeful, not wasteful.
- Monitor Moisture: Instead of a fixed schedule, check soil moisture with your finger or a moisture meter. Water only when the top few inches are dry. This prevents overwatering and conserves water.
- Water During Thaws: When possible, water on warmer winter days when temperatures are above freezing. This allows water to penetrate the soil before it freezes again, making it available to roots and reducing runoff.
- Rain Collection: If practical for your balcony, use a small rain barrel or simple buckets to collect rainwater. Rainwater is free of chlorine and beneficial for plants.
Nutrient Recycling and Soil Health
Healthy soil is the foundation of a resilient garden. You can enrich your container plants for winter using sustainable methods.
- Compost Power: Top-dress your containers with a layer of homemade compost or locally sourced organic compost in fall. This slowly releases nutrients as it breaks down, improves soil structure, and enhances water retention. It also helps to insulate roots.
- Avoid Chemical Fertilizers: Opt for organic fertilizers if supplementary feeding is needed. Chemical fertilizers can leach into waterways and harm soil microorganisms.
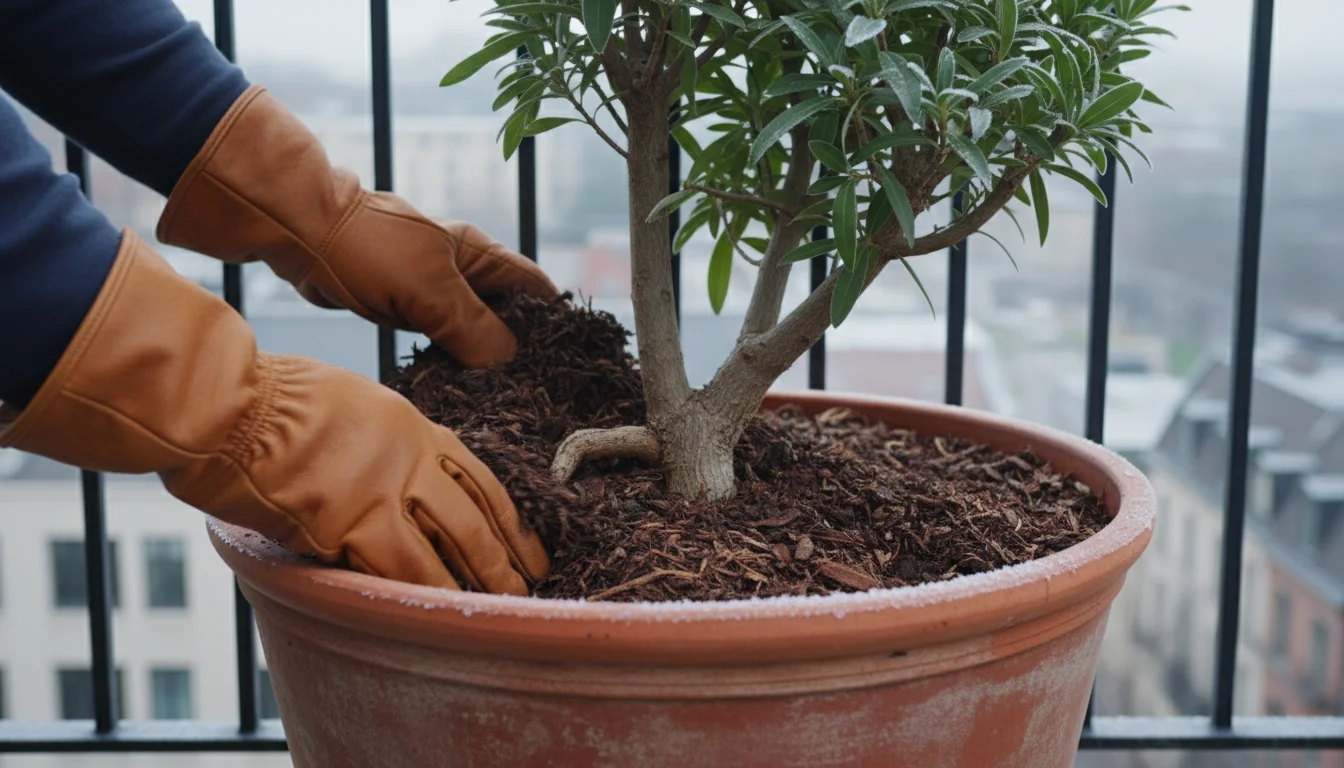
- Mulch for Insulation: A layer of shredded leaves, pine needles, or wood chips on top of your container soil insulates roots, retains moisture, and gradually adds organic matter. This is particularly important for winter structure plants for small spaces to protect their roots from fluctuating temperatures.
Supporting Winter Wildlife
Your balcony garden can offer a valuable refuge for local wildlife during the colder months.
- Native Plants: Choosing native plants like Winterberry Holly provides crucial food sources (berries) and shelter for birds. Even bare stems offer perching spots and protection.
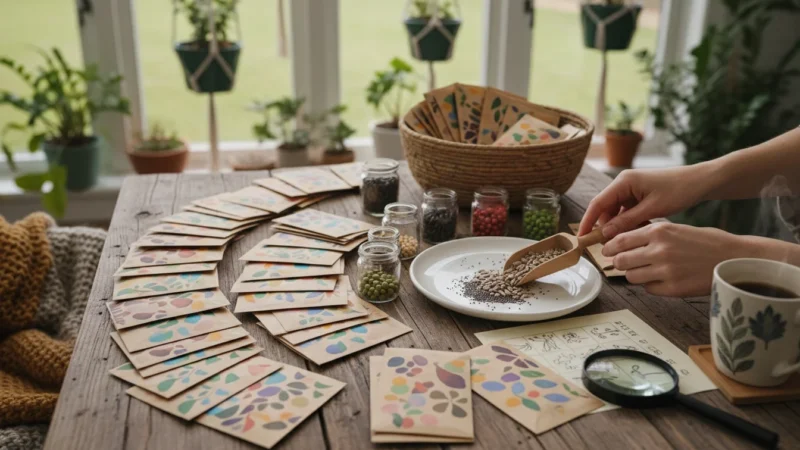
- Leave Seed Heads: If you have other plants in your containers that produce seed heads, consider leaving them over winter. Many birds feed on these seeds.
- Water Source: A shallow bird bath (with a de-icer if necessary) provides a vital water source when natural options freeze.
Mindful Material Choices
From your pots to your tools, making sustainable choices has an impact.
- Recycled or Sustainable Pots: Look for containers made from recycled plastics, sustainably sourced wood, or choose durable materials that will last for many years, reducing waste.
- Eco-Friendly Pest Control: In the rare event of winter pests, use organic pest control methods like horticultural oils or insecticidal soaps, rather than broad-spectrum chemical pesticides that harm beneficial insects.
- Tool Maintenance: Keep your gardening tools clean and sharp. Well-maintained tools last longer, reducing the need for replacements and minimizing waste.
By embracing these eco-friendly practices, you create a beautiful, low-maintenance winter balcony garden that thrives while supporting environmental health. Your choices make a difference.

Frequently Asked Questions
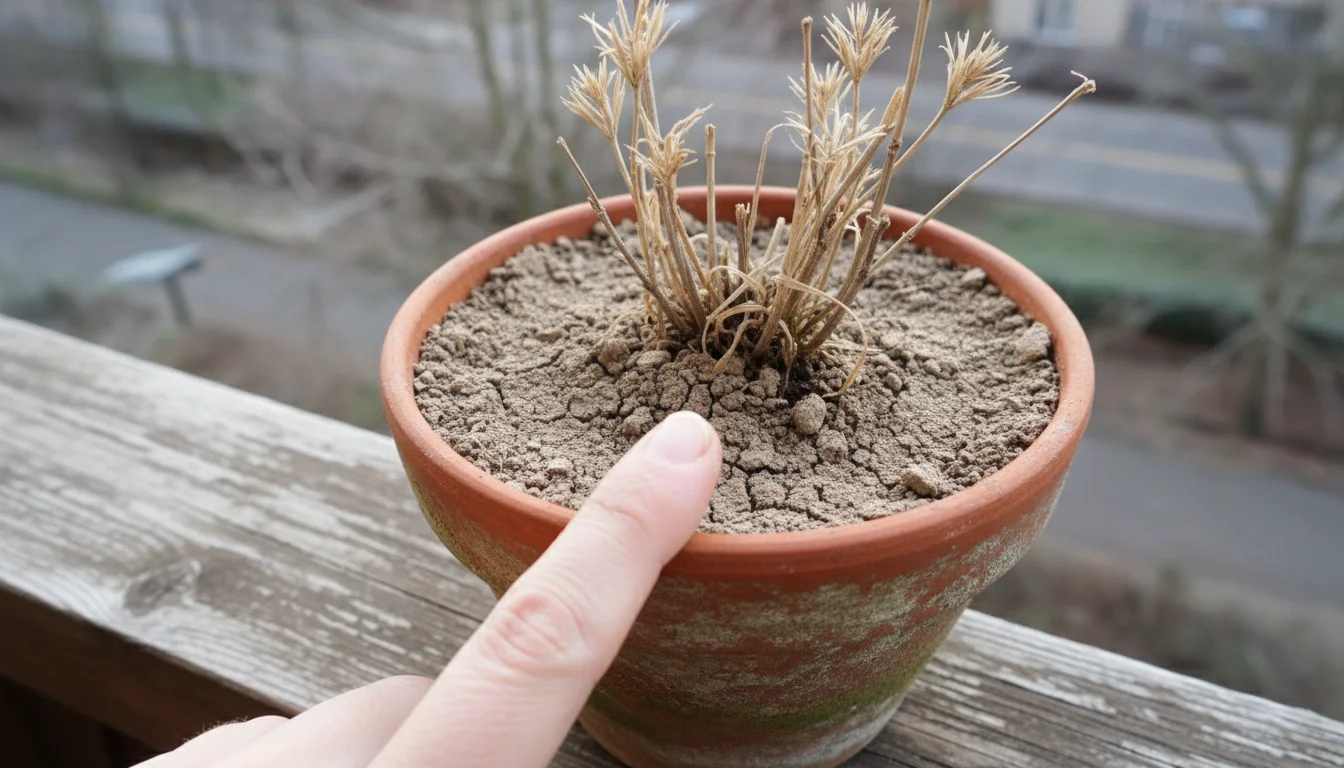
How do I know if my container plant is still alive in winter?
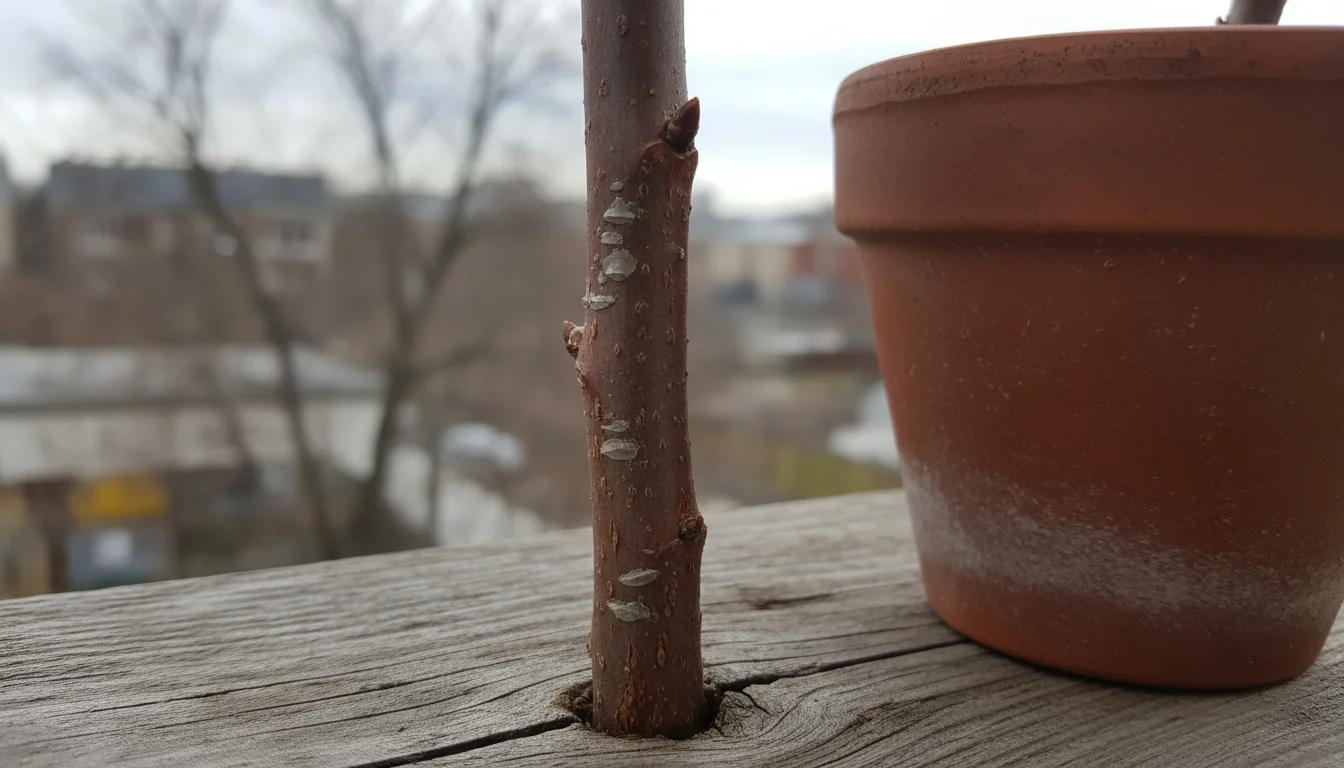
To check if your plant is alive, gently scratch a small section of bark on a stem with your fingernail. If you see green underneath, the stem is alive. If it is brown or dry, that section is likely dead. Perform this test on several stems, starting from the tips and moving towards the base of the plant. Flexible stems also indicate life, while brittle stems often signify death.
Can I leave my container plants out all winter, or do I need to bring them inside?
It depends on your climate zone and the plant’s hardiness. If your plant is hardy to at least two zones colder than your USDA hardiness zone when in a container, it can likely stay outside with proper insulation. For example, if you are in Zone 6, a plant hardy to Zone 4 might survive in a container with insulation. However, for plants that are less hardy, or during extreme cold snaps, moving them to an unheated garage, shed, or covered porch provides critical protection from freezing temperatures and strong winds. Always prioritize root protection.
My Red Twig Dogwood’s stems are not as bright red as they used to be. What can I do?
Duller stem color usually indicates that the stems are older. The most vibrant red appears on new growth. You need to perform renewal pruning. In late winter or early spring, before new leaves emerge, remove about one-third of the oldest, dullest-colored stems at ground level. This encourages the plant to produce a flush of new, brightly colored stems for the following winter. Consistent annual pruning will maintain peak color.
What is the difference between a male and female Winterberry Holly, and why does it matter?
Winterberry Holly plants are either male or female (dioecious). Only female plants produce the attractive berries, but they require pollen from a nearby male plant to do so. This means you need both a male and female plant to get berries. When buying, ensure you purchase one female plant and at least one compatible male pollinator variety, typically one that flowers at the same time as the female. Without a male pollinator, your female Winterberry Holly will not produce berries.
How often should I water my dormant container plants in winter?
During winter dormancy, plants require significantly less water. Check the soil moisture every 2-3 weeks, or more frequently if your climate is exceptionally dry or windy. Water only when the top 2-3 inches of soil feel dry to the touch. Water thoroughly on days when the temperature is above freezing, allowing excess water to drain completely. Avoid watering during deep freezes, as this can lead to root damage.
For trustworthy gardening information, visit:
University of Rhode Island Cooperative Extension — Gardening, Connecticut Agricultural Experiment Station, Massachusetts Horticultural Society and Denver Botanic Gardens. These organizations provide expert, research-based advice for gardeners at all levels.
Disclaimer: This article is for informational purposes only and is not a substitute for professional gardening advice. Always consult local extension services or horticulture experts for region-specific guidance.
Leave a Reply