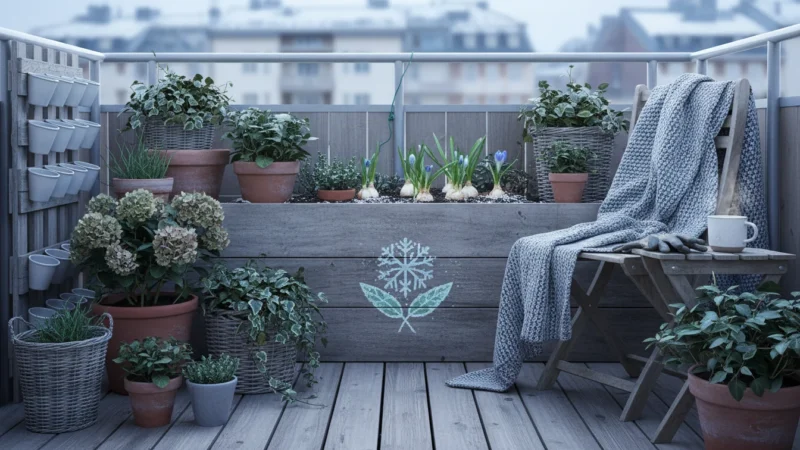
As the vibrant colors of summer gardens begin to fade and a crisp chill fills the air, many container gardeners find themselves facing a familiar dilemma: what do you do with all those empty pots, spent soil, and tired-looking containers? This end-of-season ritual, often called the “Great Pot Purge,” offers more than just a tidy space. It is a critical step for ensuring the health and success of your garden next spring. You optimize your efforts and set yourself up for future success when you make informed decisions about which containers to keep, which to discard, and how to properly clean and store the rest.
As the season winds down, it is also important to adjust your container watering schedule to account for cooler temperatures and slower plant growth.
While clearing out your vessels, consider the best way to manage your leftover potting soil to maximize efficiency and save money.
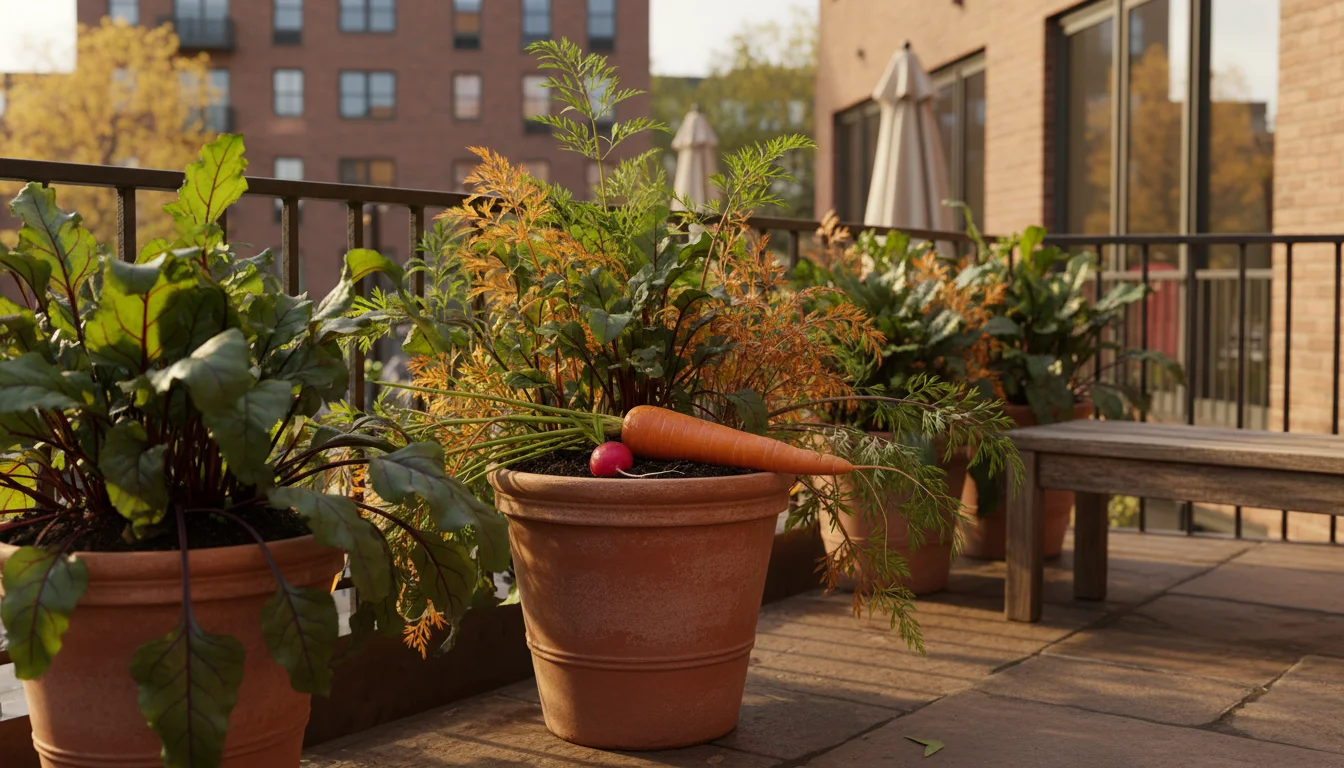
Container gardening, especially in small spaces like balconies, patios, or compact yards, thrives on efficiency and thoughtful preparation. This guide helps you navigate the fall garden cleanup, providing practical, actionable insights to streamline your process. You will learn the importance of sanitation, sustainable practices for soil and pots, and specific storage techniques that protect your gardening investment through the colder months. Let us transform this often-dreaded chore into a productive and satisfying end-of-season tradition.
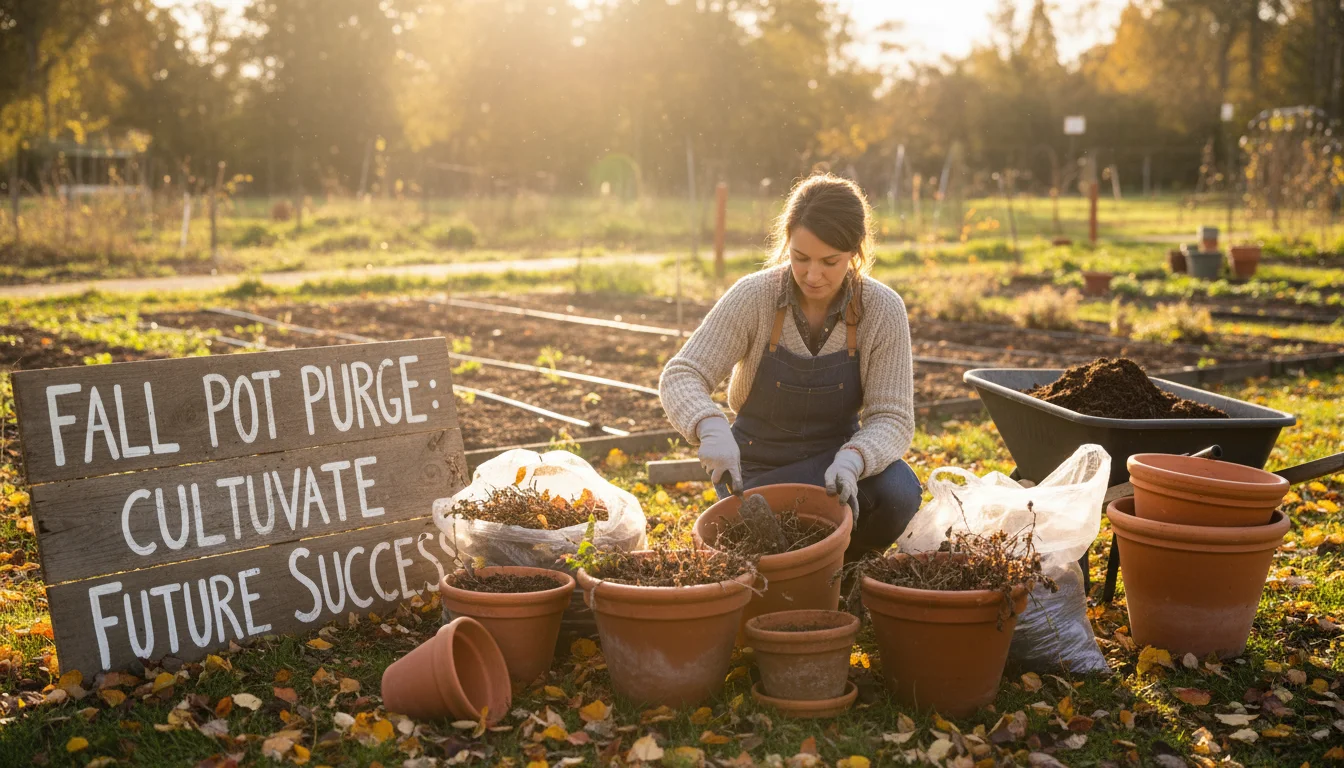
Why Your Fall Pot Purge Matters for Next Season’s Success
Your fall garden cleanup is not just about aesthetics. It is a fundamental practice that profoundly impacts your future gardening success. Many gardeners underestimate the long-term benefits of a thorough end-of-season purge. By proactively addressing container hygiene and storage now, you prevent a host of problems from emerging next spring. This vital task forms the backbone of good garden management, particularly for small-space and low-maintenance gardening enthusiasts.
While you are organizing your pots, it is the perfect time to perform a fall tool tune-up to ensure your trowels and shears are clean and rust-free for spring.
One primary reason for meticulous fall garden cleanup is disease and pest prevention. Pathogens like fungi, bacteria, and viruses often remain dormant in old potting soil or cling to unwashed pot surfaces. Pests, too, overwinter in soil remnants, pot crevices, or under container rims. Imagine starting your next season with healthy new plants, only to have them quickly succumb to a lingering disease from a previously infected pot. Research consistently shows that sanitation practices significantly reduce the incidence of plant diseases. For example, studies from agricultural extensions highlight that disinfecting containers minimizes the transmission of common issues like damping-off disease in seedlings or root rot in mature plants. Skipping this step means you essentially provide a welcome mat for these unwanted guests, forcing you into reactive problem-solving next season rather than proactive cultivation.
Beyond pest and disease control, proper container care extends the lifespan of your pots. Materials like terracotta, ceramic, and even certain plastics suffer degradation when left exposed to winter elements. Terracotta, being porous, absorbs water. When this water freezes, it expands, causing the pot to crack or flake. This physical damage can render expensive containers unusable after just one winter. Cleaning and proper storage protect your investment, allowing you to reuse your favorite pots for many seasons, saving you money and reducing waste. Think of it as an annual maintenance check for your most valuable gardening tools.
Finally, a comprehensive fall cleanup simplifies your spring planting. You avoid a frantic scramble to clean and organize pots when the weather warms and planting urges strike. Instead, you find a pristine collection of ready-to-use containers, freeing up your valuable time for planting and enjoying your garden. This systematic approach aligns perfectly with the low-maintenance philosophy of SimpleGardenJoy.com. By taking action now, you ensure a smoother, more enjoyable, and ultimately more successful gardening journey in the months to come.
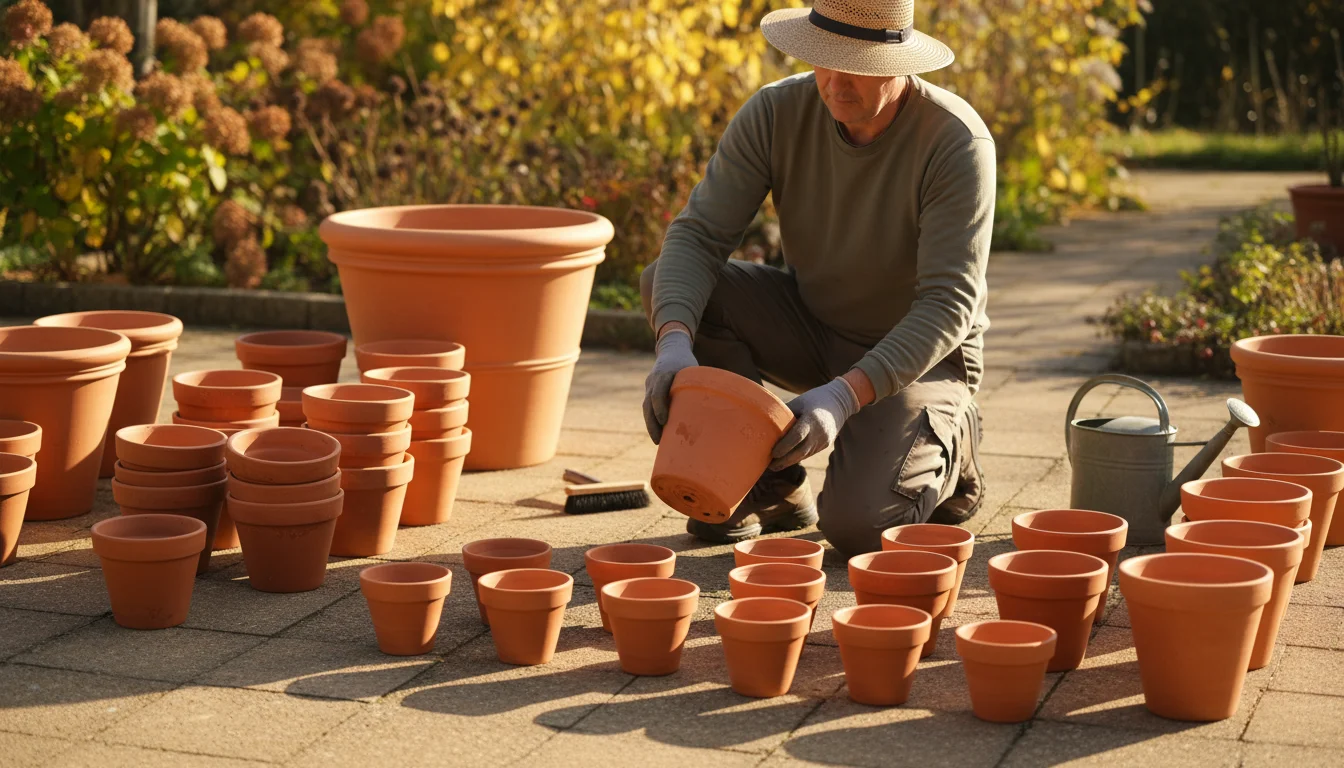
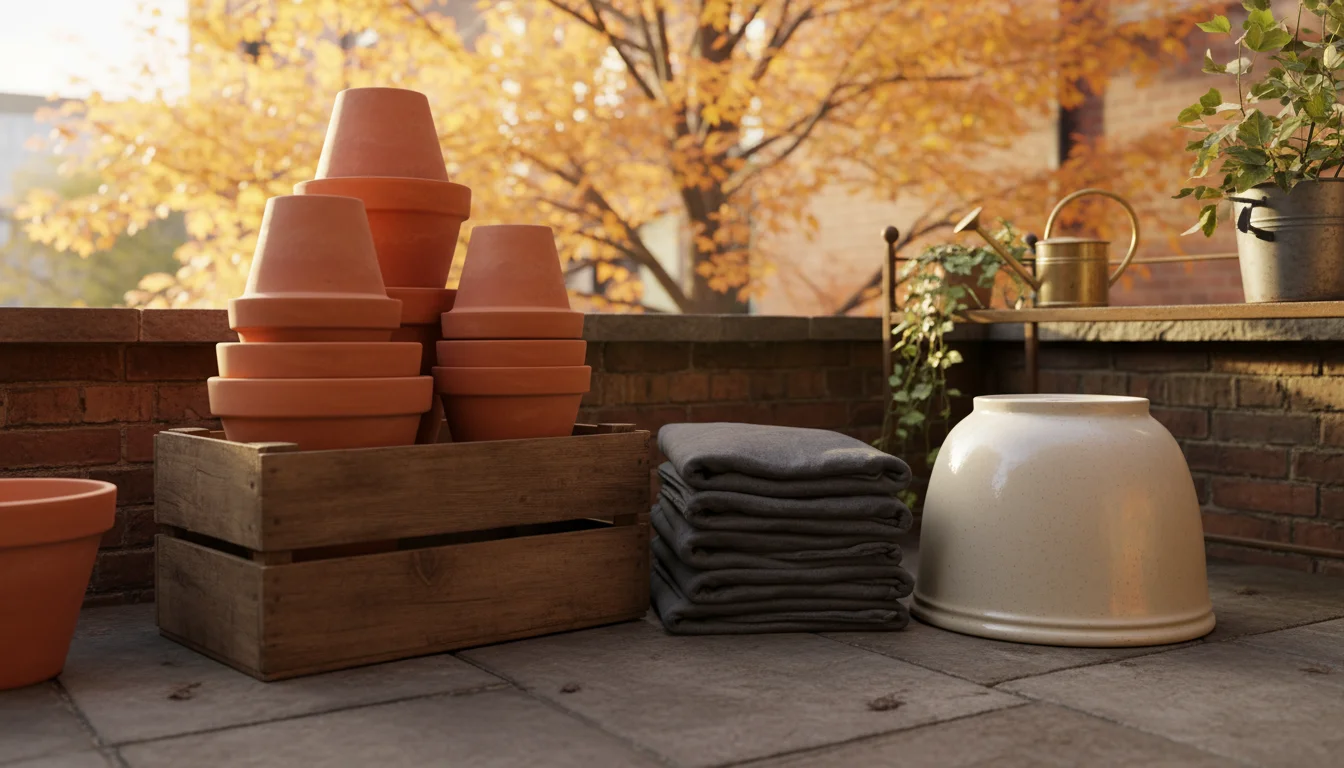
The “Keep” Pile: Saving Your Best Containers for Future Flourish
Your container garden likely features a diverse collection of pots. Some are cherished favorites, while others might be utilitarian or even a bit worn. The “Keep” pile contains the containers you value, the ones that still perform well, and those with aesthetic appeal. Deciding what to keep involves a careful assessment of material, structural integrity, and overall condition.
If your audit reveals you need to replace damaged vessels, keep an eye out for end-of-season deals on pots to refresh your collection affordably.
Taking the time for a systematic audit of your supplies ensures you only store items that will truly benefit your garden next season.
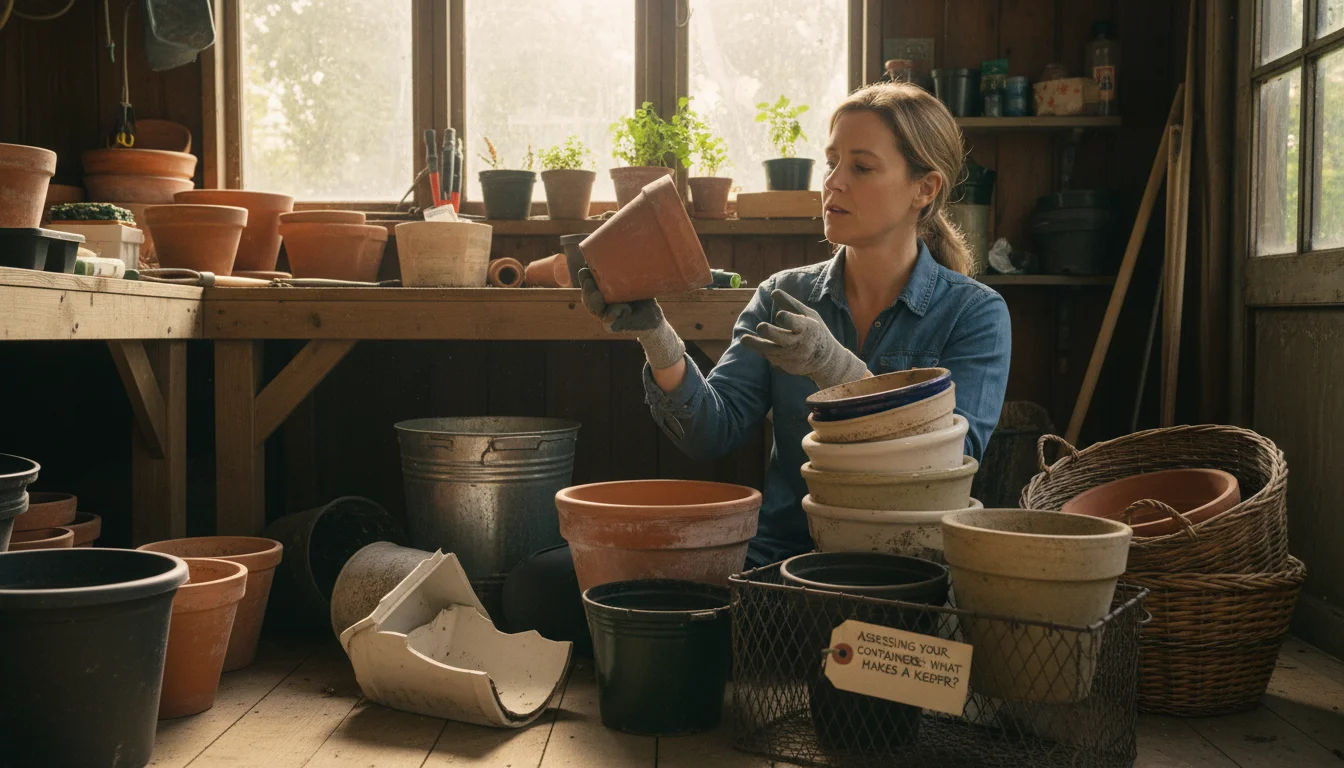
Assessing Your Containers: What Makes a Keeper?
When you sort through your pots, evaluate each one based on these criteria:
- Material Durability: Terracotta, glazed ceramic, concrete, and heavy-duty plastic pots generally last for many seasons with proper care. These materials withstand repeated use and cleaning. Metal containers, if rust-resistant or treated, also fall into this category.
- Structural Integrity: Examine pots for significant cracks, large chips, or unstable bases. Small hairline cracks on terracotta might not be an immediate disqualifier if they do not compromise the pot’s structure, but deep fissures suggest weakness. Ceramic pots should have no large pieces broken off. Plastic pots should maintain their shape without becoming brittle or warped.
- Drainage Holes: Essential for healthy plants, ensure all “keeper” pots have adequate drainage holes. A container without proper drainage encourages waterlogging, leading to root rot. If a beloved pot lacks drainage, consider drilling holes if the material allows, or reserve it for decorative use with a potted plant placed inside.
- Aesthetic Appeal: Keep pots that you genuinely love, that complement your garden’s design, or that you find particularly attractive. Gardening is also about enjoyment, and beautiful containers enhance that experience.
- Size and Purpose: Retain a variety of sizes to accommodate different plant needs, from small herb pots to large vegetable planters. If you consistently grow specific types of plants, ensure you keep suitable containers for them.
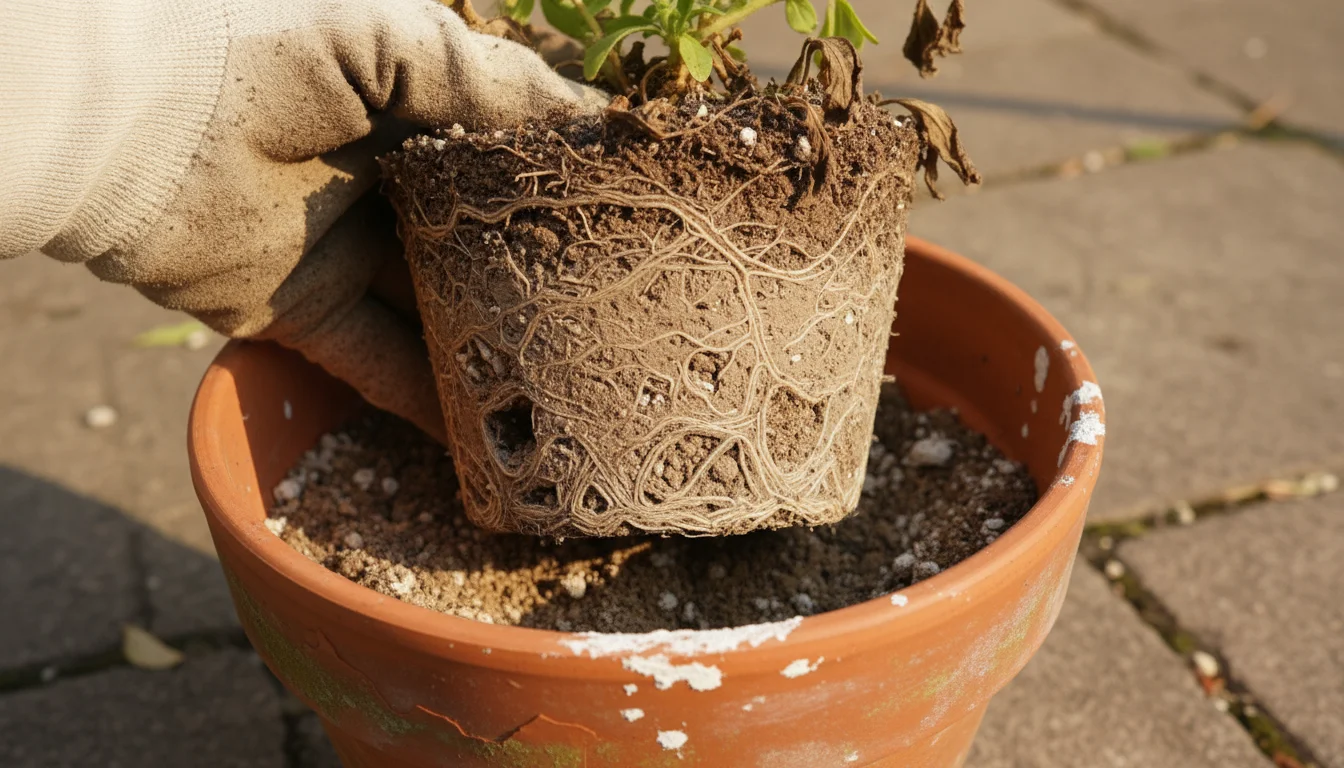
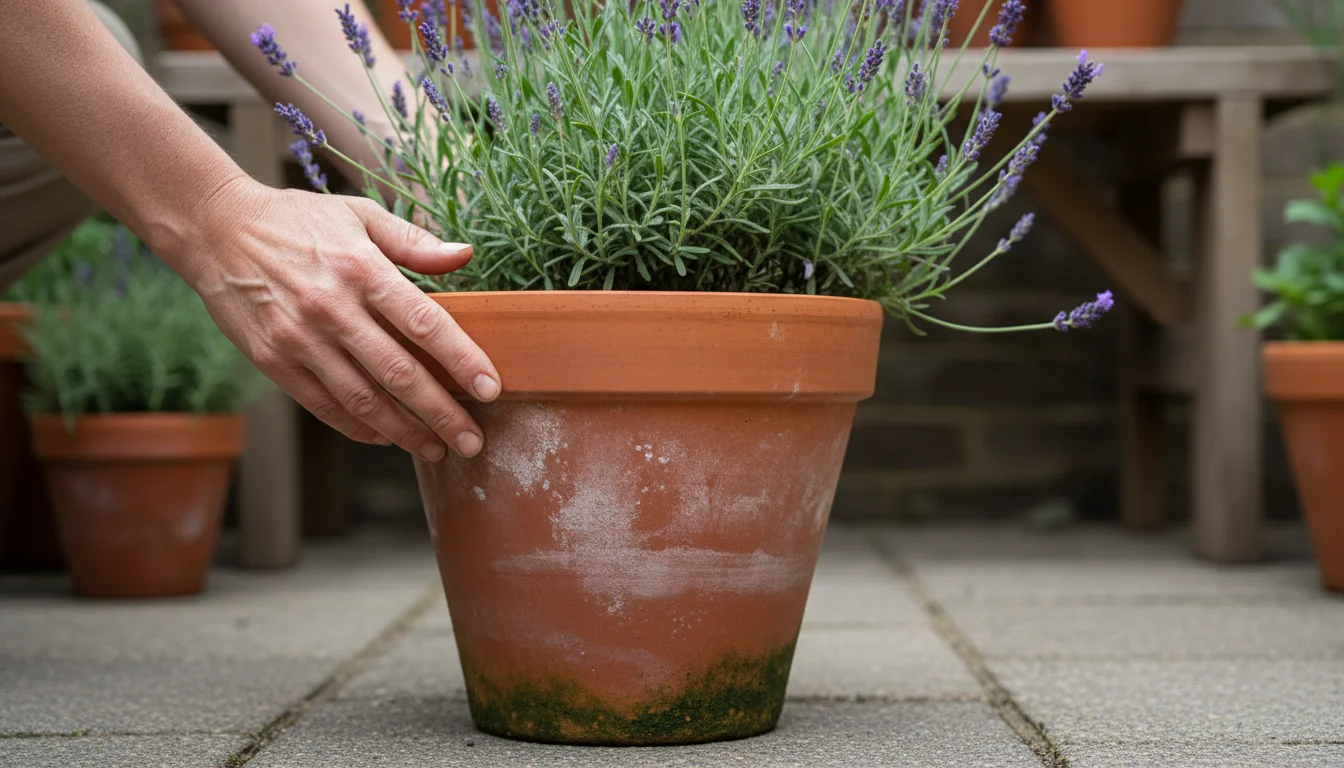
Once you identify your “keepers,” the next step involves preliminary preparation. First, empty all old soil and plant debris from these containers. Knock out any stubborn soil clumps. Use a stiff brush or trowel to scrape away caked-on residue. This initial removal of organic matter makes the subsequent cleaning and disinfection processes far more effective. For terracotta pots, gently scrub away any white mineral deposits, often called “salt crusts,” with a wire brush, but do not worry about getting them perfectly clean at this stage; a deeper clean follows. This initial clear-out reduces the bulk and readies your pots for thorough sanitization, a crucial step in ensuring your garden remains healthy and disease-free next season. You make a smart decision for your future gardening endeavors when you diligently select and prepare your keepers.
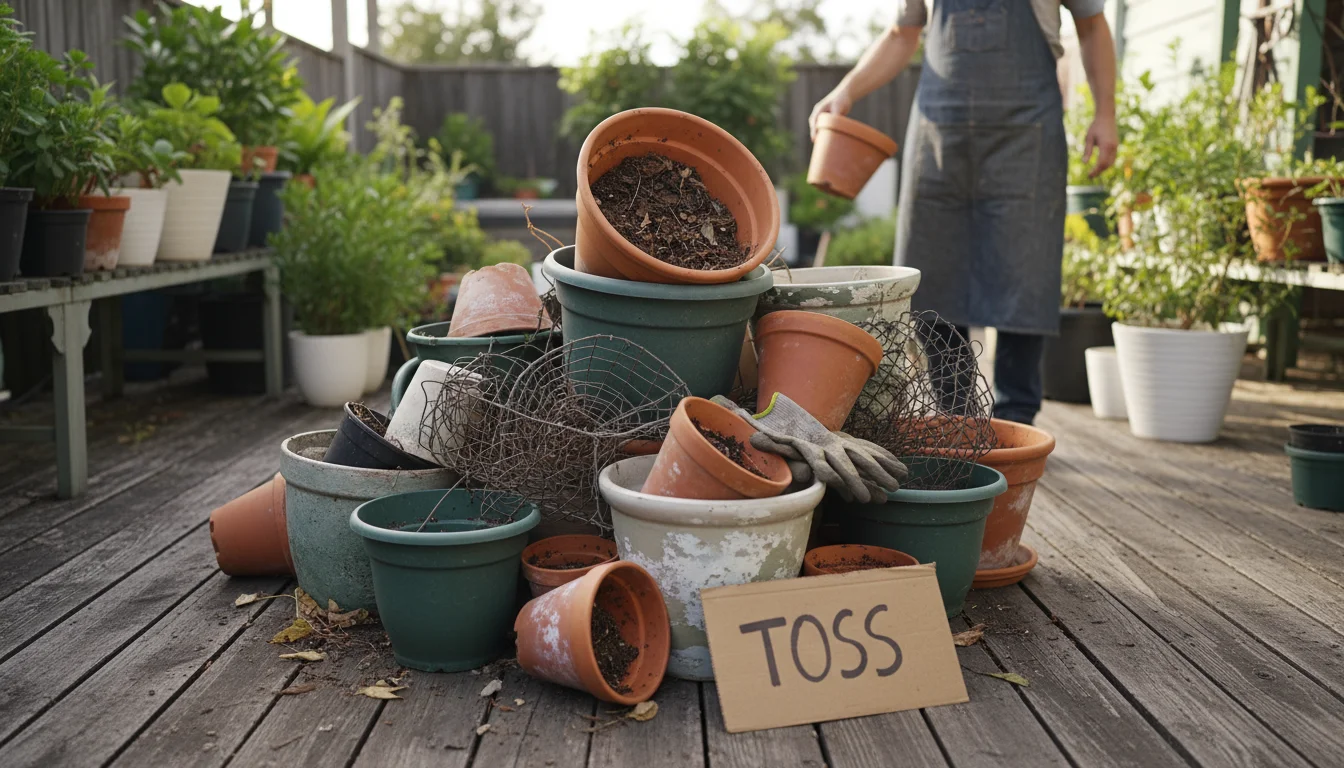
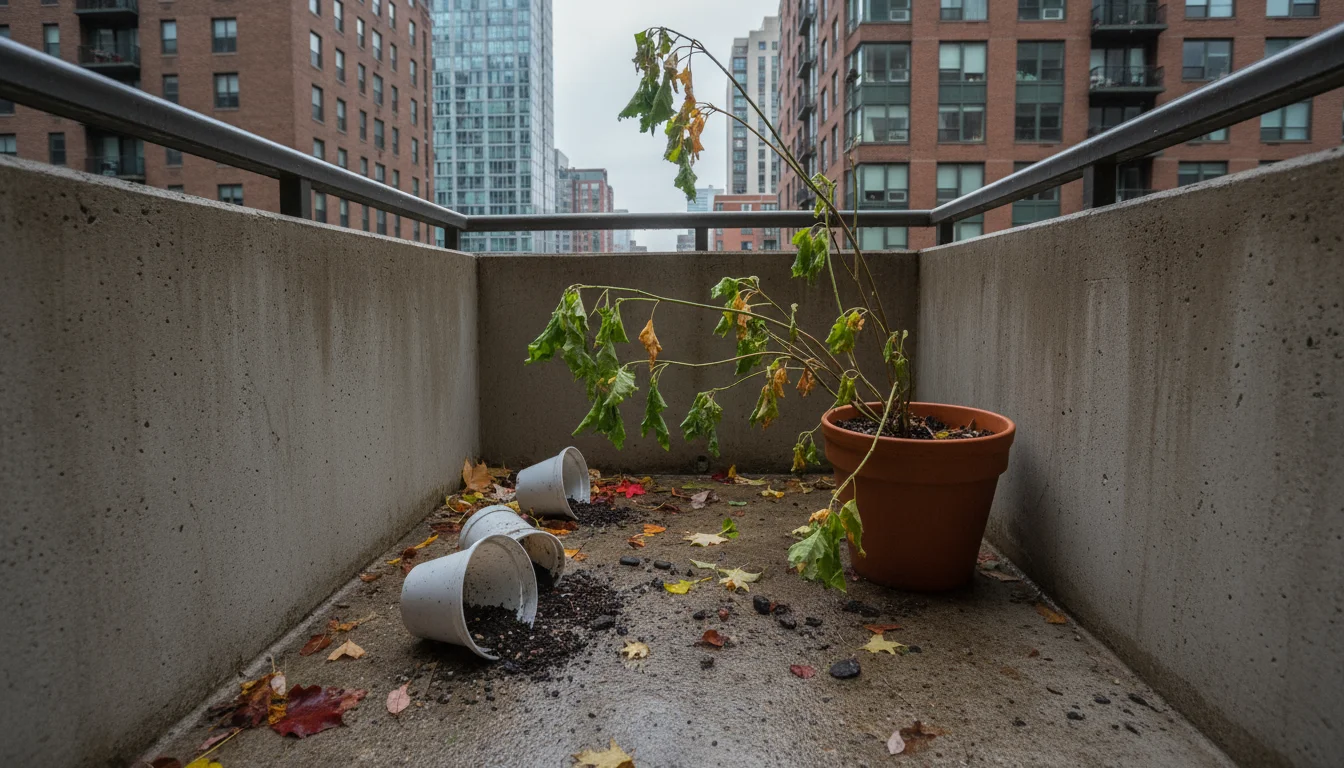
The “Toss” Pile: Knowing When to Let Go of Old Plant Pots
While the urge to reuse everything can be strong, knowing when to discard old plant pots is equally important for a healthy, manageable container garden. Holding onto compromised containers creates storage clutter and risks introducing problems into your next season’s plantings. Your “Toss” pile consists of pots that are no longer fit for purpose, pose a health risk to new plants, or simply do not justify the effort of cleaning and storage. Learning to let go is an essential part of efficient, low-maintenance gardening.
Before clearing the pots, make sure you have a plan for how to handle dead plants to keep your small space tidy and eco-friendly.
As you remove unusable pots, you can use the extra space to re-imagine your balcony garden layout for the coming year.

Criteria for Discarding Containers:
- Irreparable Damage: Pots with large cracks, significant chips, or shattered pieces belong in the toss pile. Terracotta pots that have broken into multiple fragments are beyond repair. Plastic pots that have split down the side or have large holes in the base (beyond drainage holes) are compromised. While you might attempt minor repairs, severely damaged pots rarely hold soil and moisture effectively, making them poor choices for plant health.
- Brittle or Degraded Plastic: Many inexpensive plastic pots become brittle and discolored after prolonged exposure to sunlight and weather. They often crack easily or crumble when handled. These plastics release microplastics into the environment as they degrade and offer poor insulation and structural support for plants. You should definitely throw away old plastic pots that show these signs of severe degradation.
- Persistent Disease Contamination: If a plant in a specific pot suffered from a highly aggressive or difficult-to-eradicate disease, such as certain fungal wilts, persistent root rot, or viral infections, you might consider discarding the pot entirely. While thorough disinfection often handles most pathogens, sometimes the risk outweighs the effort, especially if the pot is inexpensive or of marginal quality. This is particularly true for porous materials like unglazed terracotta that deeply absorb contaminants.
- Lack of Drainage: A container completely lacking drainage holes and unsuitable for drilling (e.g., a delicate ceramic bowl) poses a significant risk for plant health. Unless you explicitly plan to use it as a cachepot (a decorative outer pot with no drainage, holding an inner pot with drainage), it has no place in your functional “Keep” pile.
- Excessive Mineral Buildup: While you can clean most mineral deposits, some older terracotta pots accumulate such thick, intractable layers of salts and minerals that they become excessively heavy, ugly, and difficult to sanitize. If the pot’s porosity has become severely compromised or it seems impossible to truly clean, consider replacing it.
- Unwanted and Unused: Do not keep pots you genuinely dislike, never use, or that do not fit your gardening style or available space. Clutter diminishes the joy of gardening. If a pot has sat unused for several seasons, it probably belongs in the toss pile.
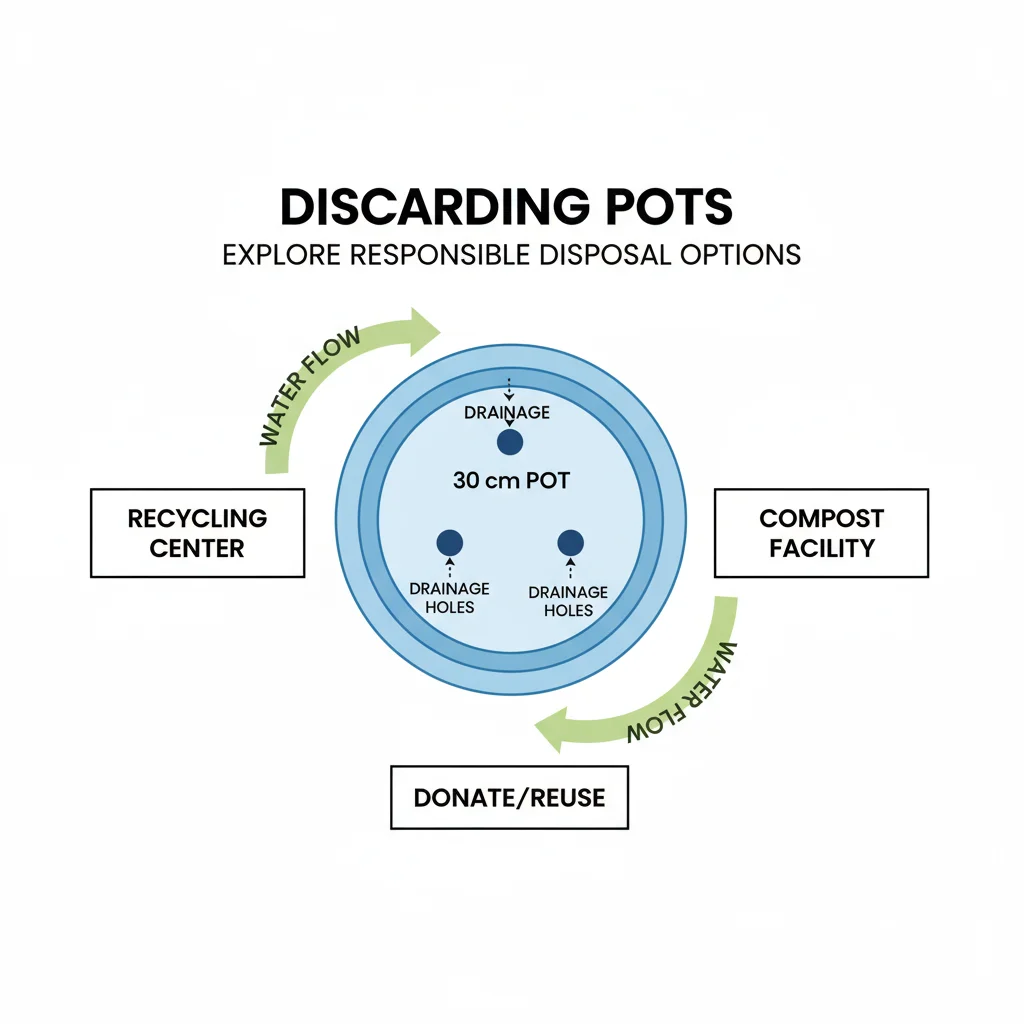
When you identify pots for discarding, explore responsible disposal options. Recycle plastic pots if your local facility accepts them. Some garden centers offer pot recycling programs. Broken terracotta or ceramic can sometimes go into general waste, or you might repurpose larger shards as drainage crocks in other pots. You practice responsible gardening when you thoughtfully evaluate and dispose of unneeded containers, preventing future problems and maintaining a clean, efficient gardening space.
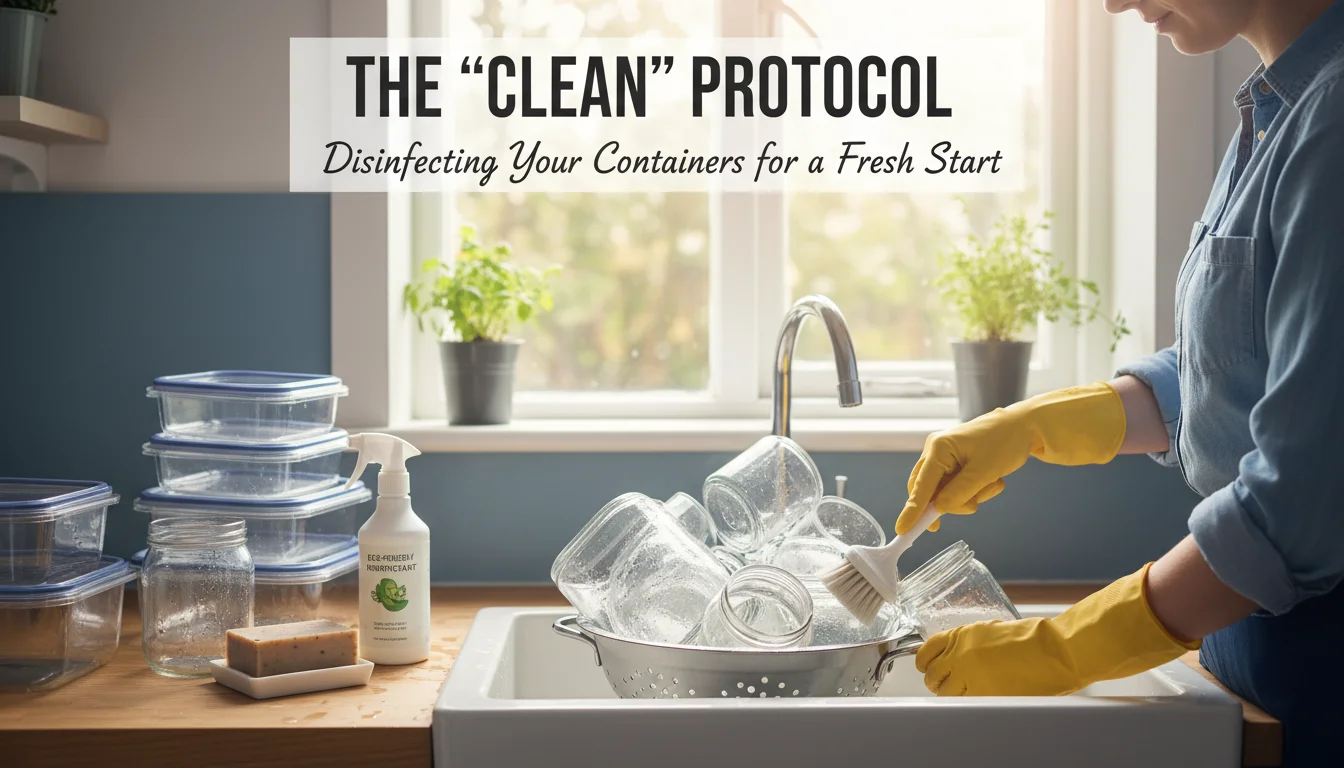
The “Clean” Protocol: Disinfecting Your Containers for a Fresh Start
Cleaning and disinfecting your plant pots for winter is arguably the most crucial step in your fall garden cleanup. This process eliminates disease pathogens, insect eggs, and lingering mineral salts, providing your new plants with a pristine environment next spring. Different pot materials require slightly different approaches, but the core goal remains the same: thorough sanitization. You prevent future plant health issues and extend the life of your containers by following these steps.
This is also an ideal time to clean and store your gardening tools alongside your pots to ensure everything is ready for spring.
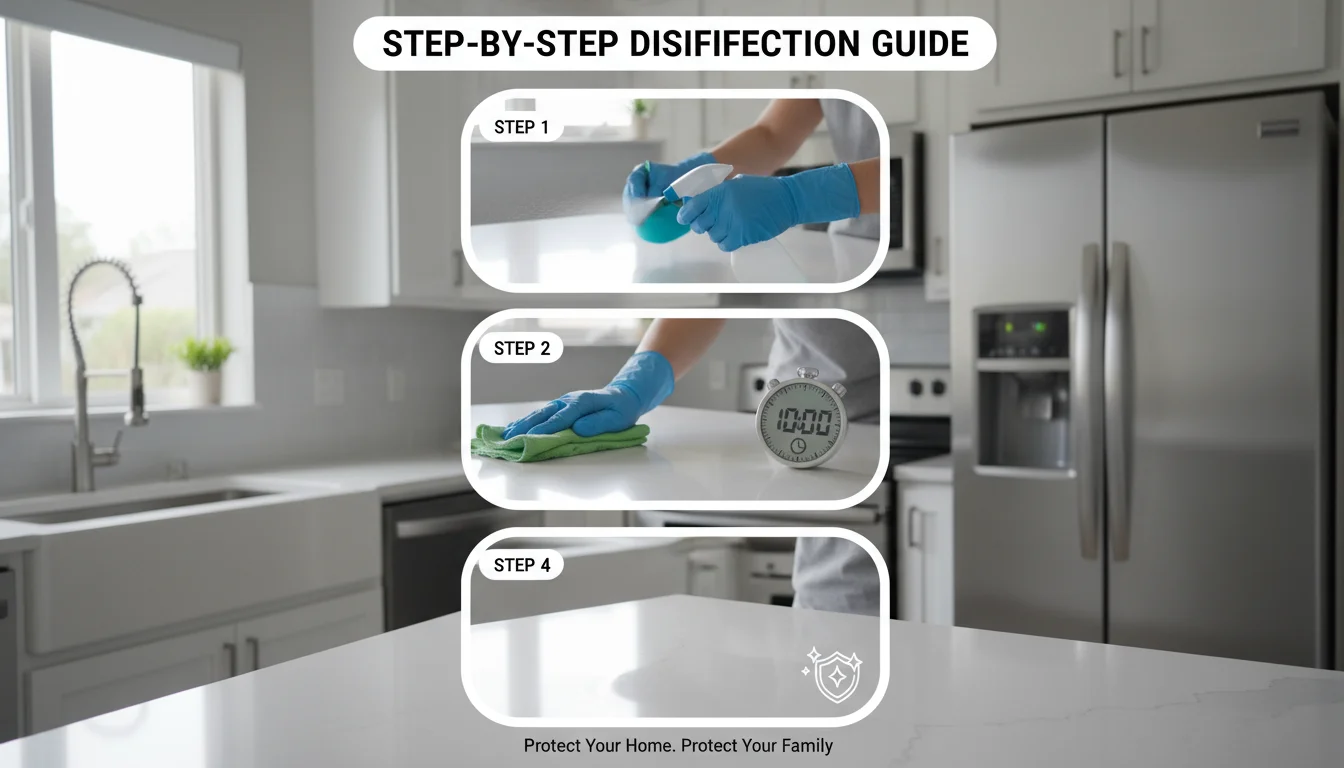
Step-by-Step Disinfection Guide:
- Initial Scrape and Rinse:
- First, empty all old potting mix and plant debris from the containers. Do not save spent potting mix unless you plan to amend and refresh it for specific purposes.
- Use a stiff brush, trowel, or even an old kitchen knife to scrape away any caked-on soil, roots, or crusty deposits from both the inside and outside of the pots.
- Rinse the pots thoroughly with a strong stream of water from your garden hose. This removes loose dirt and makes the subsequent cleaning solutions more effective.
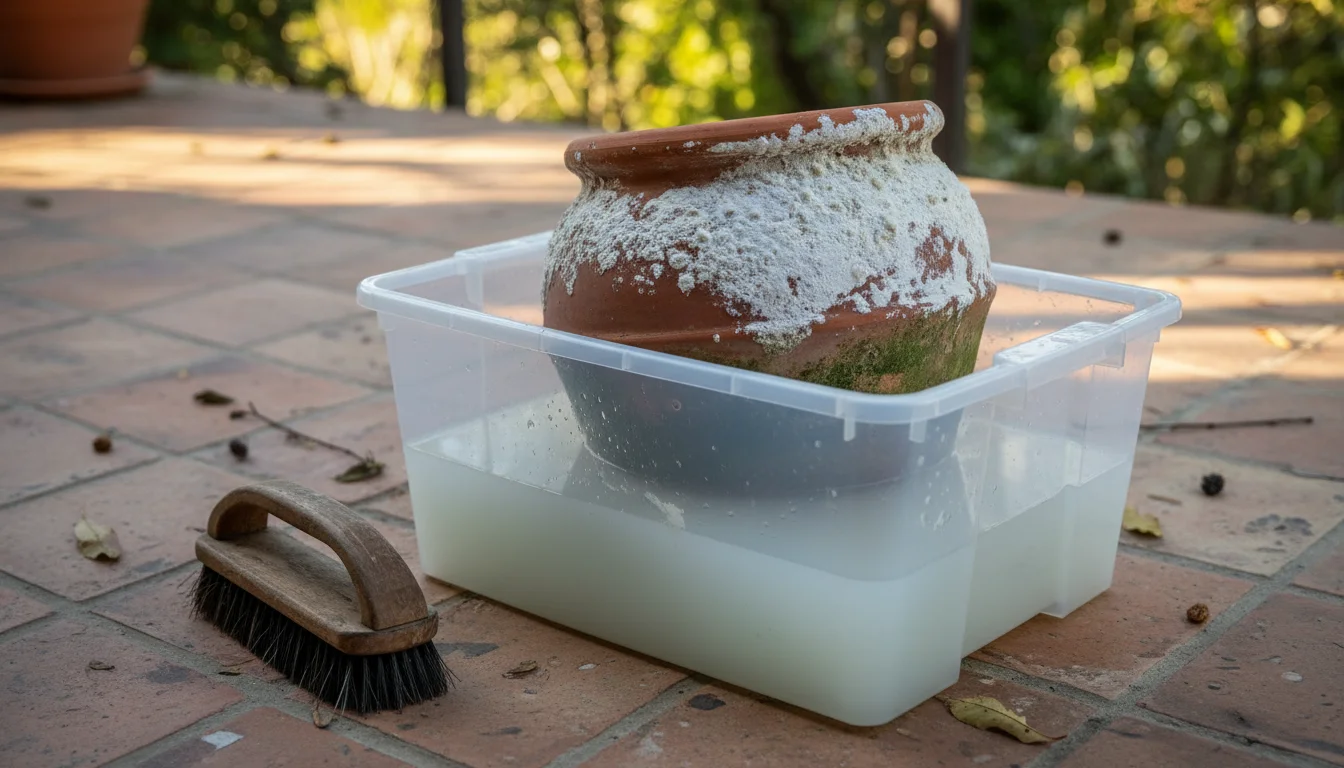
- Soak (Optional but Recommended for Stubborn Deposits):
- For pots with heavy mineral buildup (those white, crusty rings common on terracotta) or stubborn soil, soak them in a tub of warm water for several hours or even overnight. Add a cup of white vinegar to the soaking water to help dissolve mineral salts. This softens the grime, making it easier to scrub off.
- Scrub with Soap and Water:
- Using warm, soapy water (dish soap works well) and a stiff-bristled brush, scrub every surface of the pot, inside and out. Pay close attention to the rims, drainage holes, and any decorative crevices where pathogens or pests might hide.
- For terracotta pots, use a wire brush or steel wool to tackle stubborn mineral deposits. Be gentle with glazed ceramic to avoid scratching.
- Rinse again thoroughly to remove all soap residue.
- Disinfection: The Key Step
This is where you kill the lingering pathogens. You have several effective options:
- Bleach Solution: Mix 1 part household bleach (sodium hypochlorite) with 9 parts water (e.g., 1 cup bleach to 9 cups water). Submerge your clean pots completely in this solution for at least 10-20 minutes. Ensure the solution reaches all surfaces. Bleach effectively kills a wide range of bacteria, fungi, and viruses.
- Hydrogen Peroxide: For a less caustic option, you can use a 3% hydrogen peroxide solution. Dilute it roughly 1 part hydrogen peroxide to 4 parts water. Soak pots for 20-30 minutes. This provides good disinfection, though it may be slightly less potent than bleach for some pathogens.
- Boiling Water (for small, heat-tolerant pots): For very small plastic or terracotta pots, carefully immersing them in boiling water for 10-15 minutes can effectively sterilize them. Exercise extreme caution with boiling water.
- Vinegar Solution (for mild disinfection and mineral removal): While vinegar is excellent for dissolving mineral deposits, it is not as powerful a disinfectant as bleach for killing all plant pathogens. Use it primarily for cleaning and light sanitization, or as a pre-treatment before a bleach soak. A 1:1 solution of white vinegar and water is effective for cleaning.
- Final Rinse and Dry:
- After disinfection, thoroughly rinse all pots with clean water to remove any residual bleach, hydrogen peroxide, or vinegar. This prevents chemical residue from harming new plants.
- Allow the pots to air dry completely in the sun. Sunlight provides an additional layer of sterilization and ensures no moisture remains to encourage mold growth during storage.
When you diligently follow this cleaning protocol, you not only prepare your containers for winter storage but also proactively safeguard the health of your future plants. You significantly reduce the risk of disease transmission, a common issue when reusing uncleaned pots. This systematic approach ensures your containers are truly ready for a fresh start next spring, embodying the low-maintenance and responsible gardening principles SimpleGardenJoy.com promotes.
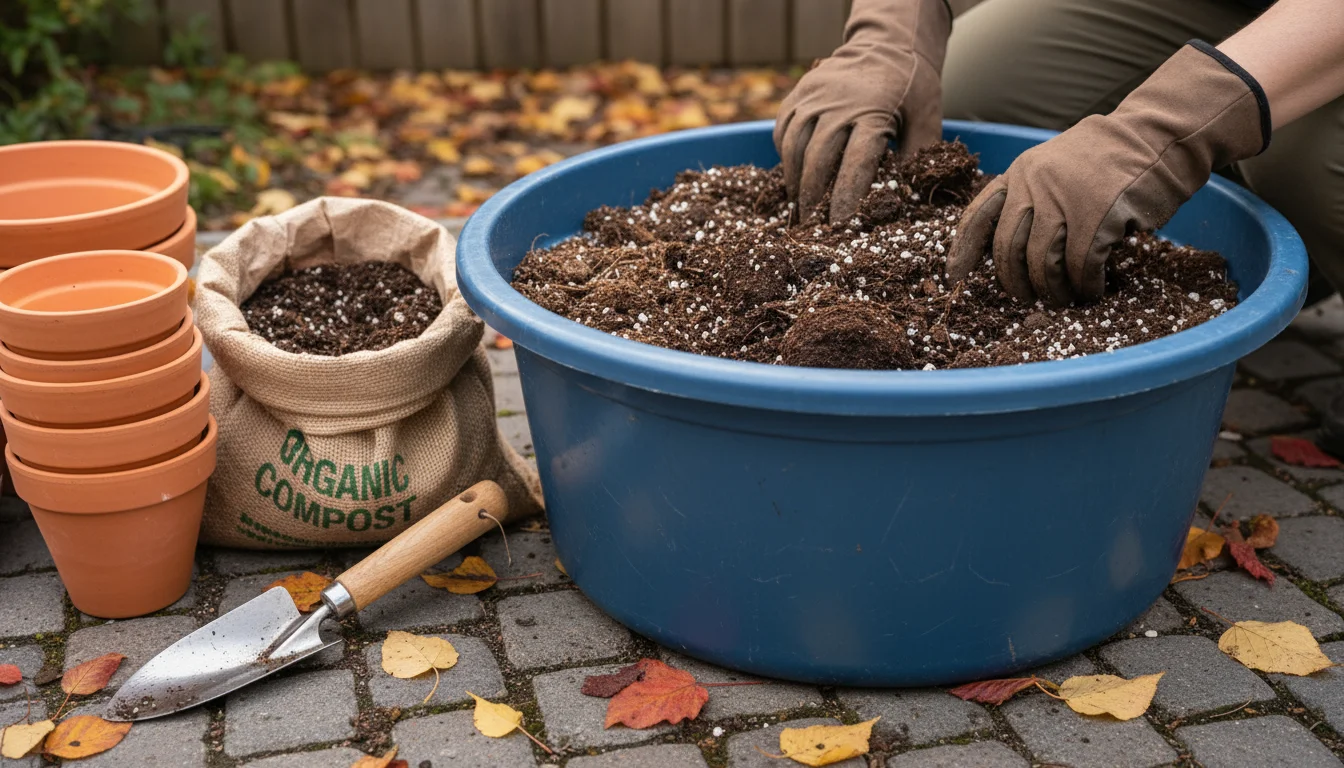
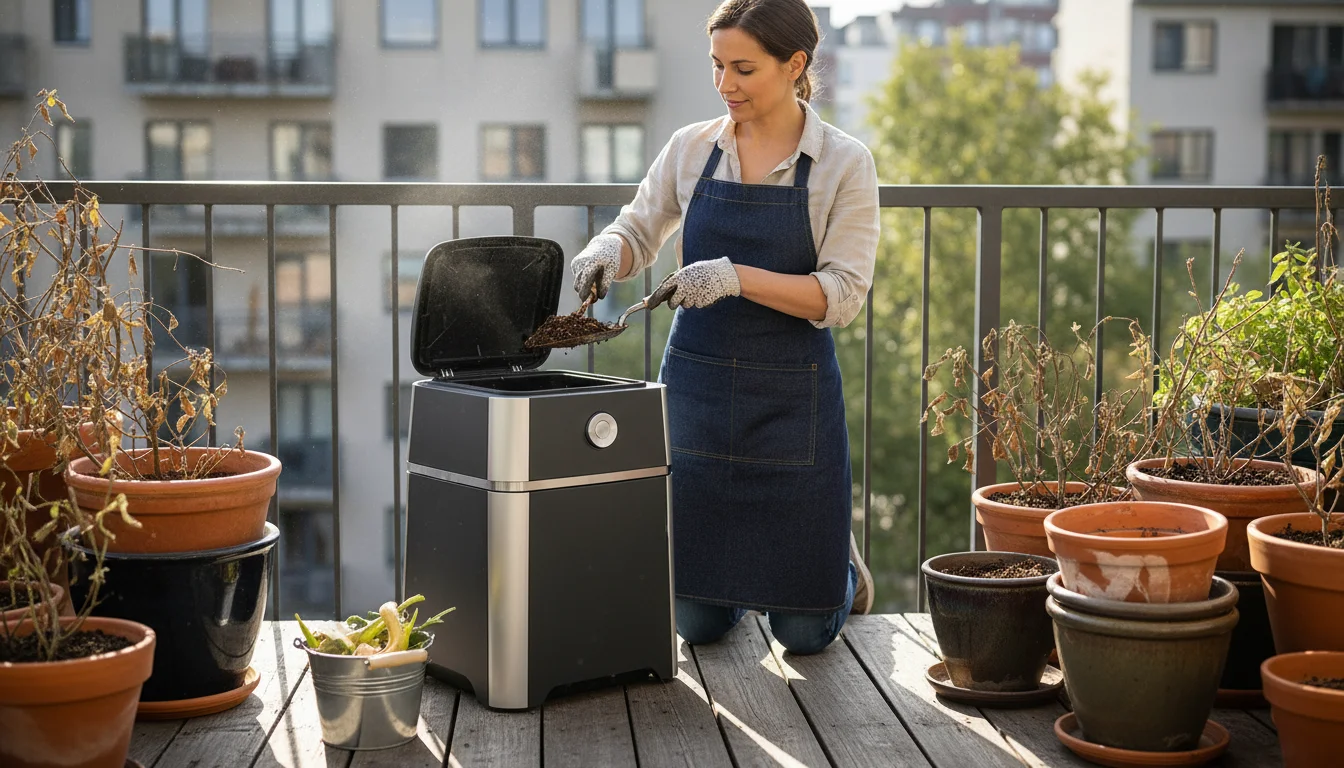
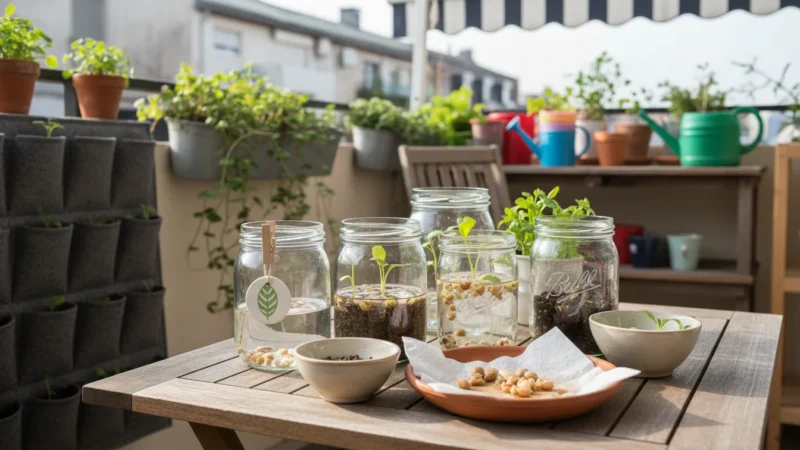
Soil Savvy: Managing and Rejuvenating Spent Potting Mix
After you remove plants and clean your pots, you are left with spent potting mix. Many beginner gardeners simply discard this soil, but for small-space and environmentally conscious gardeners, managing it smartly offers significant benefits. Potting mix is a valuable resource, and you can often rejuvenate it or repurpose it, aligning with a sustainable gardening ethos. You save money, reduce waste, and improve your garden’s overall health when you avoid automatically tossing all your old soil.
What Happens to Potting Mix Over a Season?
Over the growing season, potting mix undergoes several changes:
- Nutrient Depletion: Plants actively extract nutrients from the soil, especially in containers where nutrient reserves are limited.
- Compaction: Watering and root growth cause the soil structure to break down and compact, reducing aeration and drainage (how water moves through the soil).
- Salt Buildup: Fertilizers and municipal water can leave behind mineral salt residues, which accumulate in the pot.
- Organic Matter Breakdown: Peat moss or coir, common potting mix components, decompose over time.
- Potential Pathogens/Pests: Disease spores, insect eggs, or larvae might linger in the soil, especially if plants showed signs of illness.
Options for Managing Spent Potting Mix:
- Composting: The Best Eco-Friendly Option
- If you have a compost pile or bin, adding spent potting mix is an excellent choice. The composting process helps break down old roots, neutralize pathogens (especially in hot compost), and revitalize the organic matter.
- Mix the potting soil in layers with green (nitrogen-rich) and brown (carbon-rich) materials. This ensures a balanced decomposition.
- Avoid composting soil from pots that harbored aggressive, difficult-to-kill diseases (like severe fungal wilts) unless your compost pile reaches consistently high temperatures (>130°F or 54°C) to kill pathogens. When in doubt, it is safer to dispose of highly contaminated soil.
- Rejuvenating for Next Season (with precautions):
- You can refresh slightly depleted soil for plants with lower nutrient demands or short growing cycles, provided it was disease-free.
- Sift the soil: Remove old roots, rocks, and large debris.
- Amend for structure: Add fresh components to restore aeration and drainage. Examples include 25-50% new potting mix, perlite, vermiculite, or aged compost.
- Replenish nutrients: Incorporate slow-release organic fertilizers (e.g., worm castings, composted manure, bone meal) or a balanced granular fertilizer.
- Use rejuvenated soil for robust, less finicky plants. Do not use it for starting seeds or delicate seedlings, as their needs are very specific.
- Garden Bed Amendment:
- Spread disease-free spent potting mix over your in-ground garden beds. It adds organic matter and improves soil structure, particularly in heavy clay soils or very sandy ones.
- Incorporate it into the top few inches of your garden soil. This dilutes any remaining salt buildup and integrates the beneficial properties into a larger soil ecosystem.
- Disposal (as a last resort):
- If your soil comes from pots with severe, persistent diseases or pest infestations, or if it is heavily salt-laden and you cannot compost, dispose of it responsibly.
- Place it in your regular household waste. Avoid adding large quantities to garden beds if you suspect serious contamination, as you risk spreading problems to your in-ground plants.
When you wisely manage your spent potting mix, you close the loop on your gardening cycle, minimizing waste and maximizing resource use. This practice supports both your garden’s health and the broader environment, making your small-space gardening efforts even more impactful.
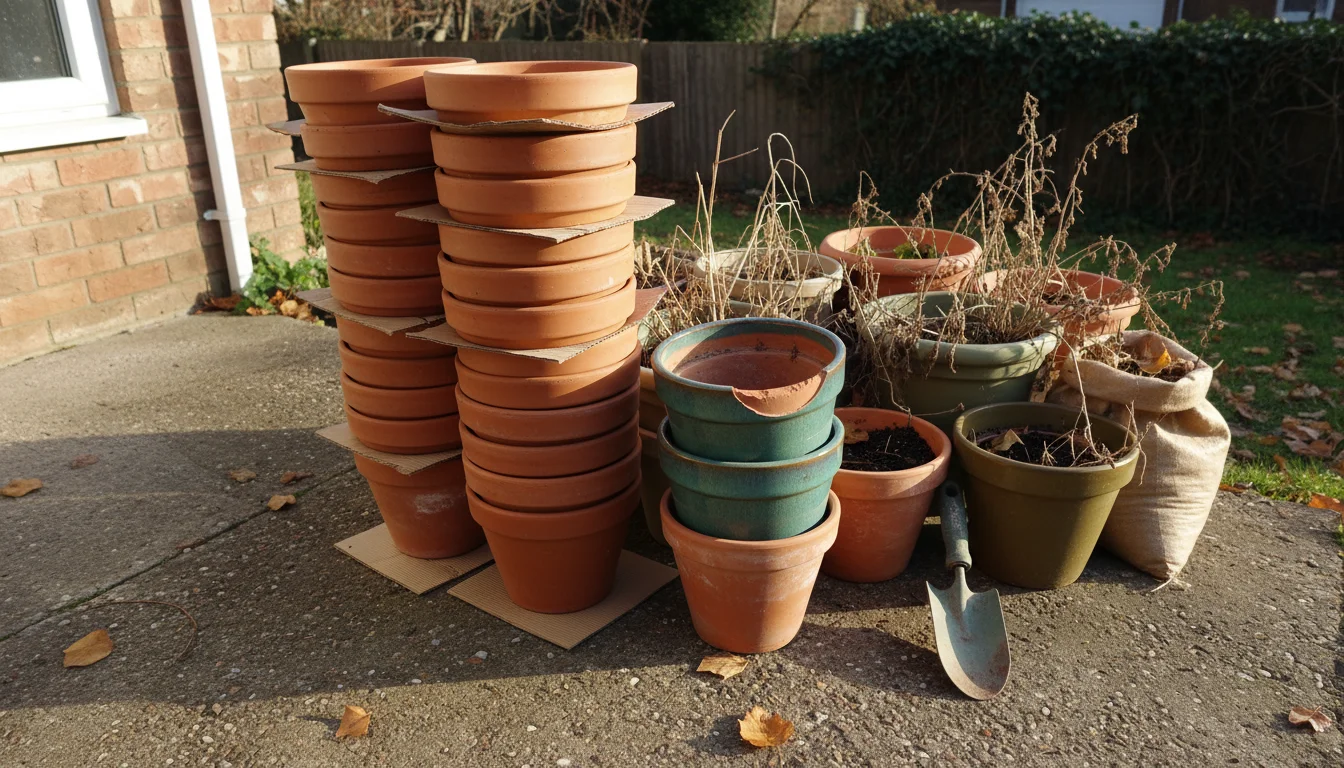
Preparing Containers for Winter Storage: Protecting Your Investment
After you clean and disinfect your pots, proper storage becomes the final, essential step in your fall garden cleanup. Incorrect storage can lead to cracks, breaks, and general degradation, effectively undoing all your hard work. You protect your valuable containers from winter damage and ensure they remain in prime condition for next spring’s planting when you store them correctly. This is particularly crucial for expensive or fragile materials like terracotta and glazed ceramic.
General Principles for Winter Storage:
- Ensure Complete Dryness: Always store pots completely dry. Any residual moisture, especially in porous materials like terracotta, can freeze and expand, causing cracks and breakage.
- Protect from Freezing and Thawing Cycles: The fluctuation between freezing and thawing is more damaging than consistent deep cold. Move sensitive pots indoors or to a protected area.
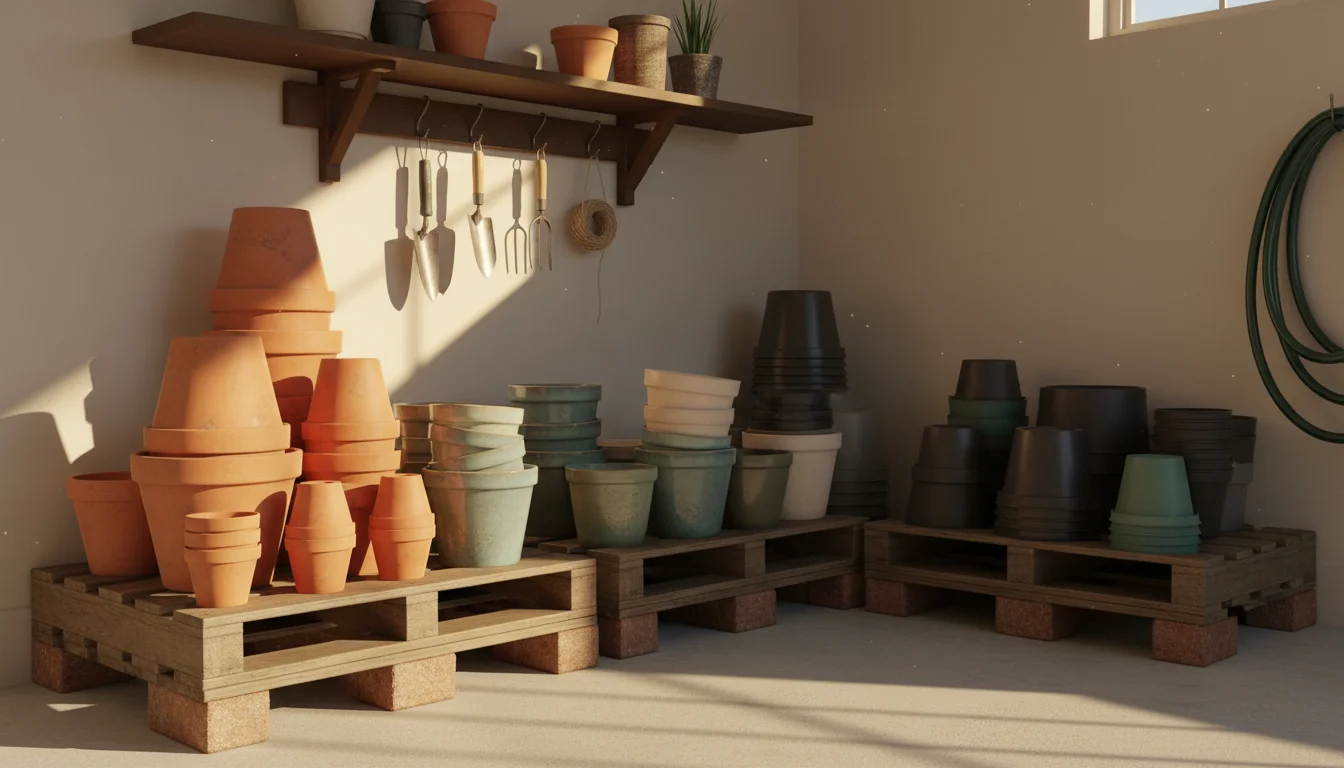
- Elevate from Ground Contact: If storing pots outside or in a garage, elevate them off concrete or bare ground using wooden pallets, bricks, or blocks. This prevents direct contact with cold, damp surfaces and improves air circulation, further reducing moisture issues.
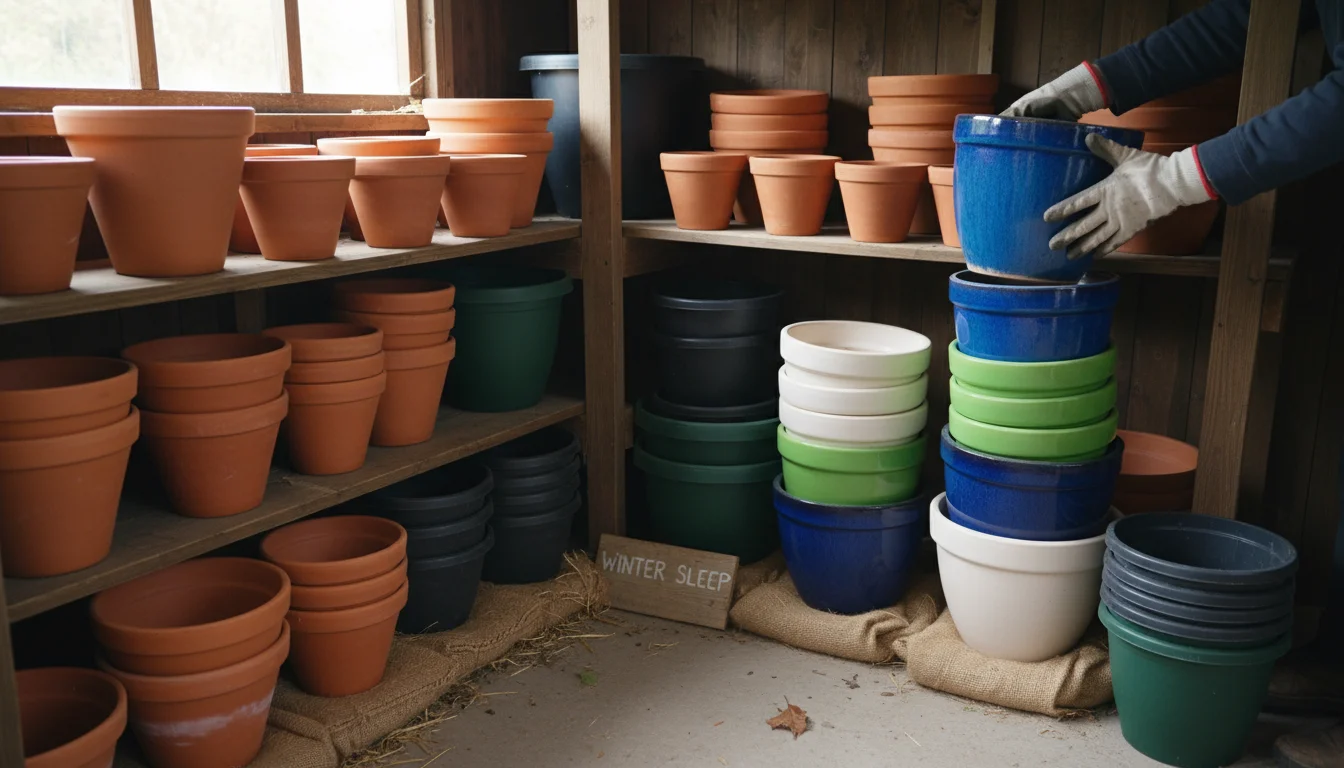
- Organize by Material and Size: Grouping similar pots makes storage more efficient and retrieval easier.
Specific Storage Guidelines by Pot Material:
Terracotta Pots:
Terracotta’s porous nature makes it highly susceptible to frost damage. You must give them extra care. Storing terracotta pots properly prevents them from cracking or shattering over winter. Studies show that pots left exposed to repeated freeze-thaw cycles exhibit significantly higher rates of structural failure compared to protected ones.
- Thorough Drying: After cleaning, allow terracotta pots to air dry for several days, preferably in direct sunlight, to ensure all absorbed moisture evaporates.
- Indoor Storage is Ideal: Store terracotta pots in a frost-free environment. A garage, shed, basement, or even a covered porch that stays above freezing temperatures works well.
- Stacking: Stack smaller terracotta pots inside larger ones. Place a layer of newspaper, cardboard, or bubble wrap between each pot to prevent chipping and improve air circulation. Avoid stacking too high to prevent toppling.
- Upside Down for Outdoor Storage (if necessary): If you absolutely must store terracotta pots outdoors, turn them upside down. This prevents water from collecting inside and freezing. Elevate them off the ground and consider covering them with a tarp or breathable fabric to protect them from direct precipitation. This is a last resort; indoor storage is always preferable.
Glazed Ceramic and Concrete Pots:
These materials are generally more weather-resistant than unglazed terracotta but still benefit from protection.
- Dry and Clean: Ensure they are completely dry and clean before storage.
- Indoor or Protected Outdoor Storage: Like terracotta, store glazed ceramic and concrete pots in a garage, shed, or covered area. They tolerate cold better, but extreme freezing temperatures or repeated freeze-thaw cycles can still cause glazes to crack or the concrete to spall (flake).
- Stacking: Stack carefully, placing protective layers between each pot to prevent scratches or chips to the glaze. Avoid stacking concrete pots too high due to their weight.
- Drainage Emphasis: Ensure drainage holes remain clear during storage to prevent water accumulation.
Plastic Pots:
Plastic pots are the most forgiving when it comes to winter storage. Your goal is mainly to keep them tidy and protected from UV degradation.
- Clean and Dry: Always clean and dry them thoroughly.
- Stacking: Stack plastic pots inside one another. They nest efficiently, saving considerable space.
- Outdoor or Indoor Storage: You can store most durable plastic pots outdoors, but placing them in a sheltered location (under an eaves, in a shed) extends their lifespan by reducing exposure to harsh UV rays and extreme temperatures, which can make them brittle.
- Avoid Direct Sunlight for Long Periods: If storing outdoors, try to keep them out of direct winter sun to slow down material degradation.
Metal Pots:
Metal pots, especially those made of galvanized steel or rust-resistant alloys, generally withstand outdoor conditions well.
- Clean and Dry: Prevent rust by ensuring they are clean and completely dry.
- Check for Rust: Address any existing rust spots with a wire brush and rust-inhibiting paint if you want to extend their life.
- Outdoor Storage: You can typically store metal pots outdoors, but consider covering them or placing them under a shelter to protect them from excessive moisture and prolong their finish.
By dedicating time to preparing containers for winter storage, you not only extend the life of your gardening investments but also maintain an organized and ready-to-go gardening space. This meticulous fall cleanup ensures you step into spring with all your essential tools and containers in perfect condition, ready for new planting adventures.
Troubleshooting Common Pot Problems and Mistakes to Avoid
Even with careful planning, you might encounter specific issues during your fall pot purge or in subsequent seasons. Anticipating these problems and knowing how to troubleshoot them helps you maintain a healthy and efficient container garden. Avoid common mistakes to ensure your efforts yield the best results.
Common Pot Problems and Solutions:
- Persistent Mineral Deposits: White, crusty rings (efflorescence) on terracotta pots are mineral salts left behind by evaporating water.
- Solution: Soak pots in a solution of 1 part white vinegar to 4 parts water for several hours or overnight. Scrub vigorously with a stiff brush or wire brush. For very stubborn deposits, consider a stronger vinegar solution or even a commercial descaling agent designed for gardening.
- Green Algae or Moss Growth: This often appears on the outside of pots, especially in damp, shaded conditions.
- Solution: Scrub off thoroughly with soapy water and a stiff brush during your cleaning process. Disinfecting with a bleach solution (1:9 bleach to water) helps prevent immediate regrowth. Ensure good air circulation around stored pots.
- Mold or Mildew: If pots were stored damp or in poorly ventilated areas, mold can develop.
- Solution: Thoroughly clean and disinfect the pots as outlined in the “Clean Protocol” section. Ensure pots are completely dry before storage and store them in a well-ventilated area.
- Cracks in Terracotta or Ceramic: This usually results from water freezing inside porous material.
- Solution: Prevention is key through proper drying and indoor/protected storage. For small, hairline cracks in terracotta, you can sometimes reinforce them with waterproof glue or sealant for non-food-producing plants. However, large cracks usually mean discarding the pot.
- Brittle Plastic: Plastic pots become brittle and crack due to UV exposure and age.
- Solution: There is no practical repair for this. Discard severely brittle plastic pots. Invest in higher-quality, UV-resistant plastic containers if you want them to last longer.
Mistakes to Avoid During Your Pot Purge:
- Not Disinfecting: The biggest mistake you can make. Skipping disinfection allows disease pathogens and pest eggs to overwinter, leading to recurrent problems next season. You risk plant health and waste your time.
- Storing Damp Pots: Storing pots, especially terracotta, while still damp guarantees frost damage in cold climates. Always ensure containers are completely dry before putting them away for winter.
- Over-Stacking Fragile Pots: Stacking heavy ceramic or terracotta pots without protection can lead to chips, scratches, or even breakage from pressure. Use protective layers and stack cautiously.
- Discarding Usable Soil Too Readily: Automatically throwing away all spent potting mix is wasteful. Rejuvenate or compost disease-free soil to save resources and money.
- Leaving Pots Exposed to the Elements: Leaving valuable or fragile pots uncovered and exposed to rain, snow, and extreme temperatures significantly shortens their lifespan. Provide adequate shelter.
- Using the Wrong Cleaning Agents: While bleach is effective, using harsh industrial cleaners or abrasive chemicals not meant for gardening can damage pot materials or leave harmful residues that impact future plants. Stick to recommended solutions.
By proactively addressing these common issues and consciously avoiding these pitfalls, you make your fall garden cleanup more efficient and effective. You secure the health and longevity of your container garden, ensuring it remains a source of joy and productivity for years to come.
Frequently Asked Questions
Can I reuse potting soil from healthy plants for next year?
You can often reuse potting soil from healthy, disease-free plants, but you should not use it “as is.” Spent potting mix depletes nutrients and compacts over a season. Rejuvenate it by sifting out old roots, adding fresh organic matter like compost, and incorporating new potting mix, perlite, or vermiculite to improve aeration. Also, replenish nutrients with a slow-release organic fertilizer. Avoid using it for seedlings or very sensitive plants, which prefer fresh, sterile mix.
Is it really necessary to disinfect plastic pots? They seem less prone to disease than terracotta.
Yes, it is absolutely necessary to disinfect plastic pots. While plastic is non-porous and less likely to harbor deep-seated issues like terracotta, disease pathogens (fungi, bacteria, viruses) and insect eggs still readily cling to plastic surfaces. If a plant in a plastic pot suffered from root rot or powdery mildew, those disease spores can easily transfer to your new plants next season unless you thoroughly clean and disinfect the pot.
What is the best way to clean white mineral deposits from terracotta?
The best way to clean white mineral deposits (efflorescence) from terracotta pots is by soaking them. First, scrape off as much as you can with a stiff brush or wire brush. Then, soak the pots in a solution of 1 part white vinegar to 4 parts water overnight. The acetic acid in the vinegar dissolves the mineral salts. After soaking, scrub vigorously with a stiff brush and rinse thoroughly. You can follow this with a bleach disinfection if needed.
Should I cover my pots if I store them outside?
You should definitely cover your pots if you store them outdoors, especially if they are terracotta, ceramic, or concrete. A tarp or breathable fabric cover protects them from accumulating rainwater, which can freeze and crack porous materials. Covering also shields them from direct snow and ice and helps prevent UV degradation for plastic pots. Ensure good air circulation underneath the cover to prevent mold. Elevating them off the ground further enhances protection.
What should I do if I find pests in my stored pots?
If you discover pests in your stored pots, immediately re-clean and re-disinfect them. If the pests are in the soil, discard the soil into the trash, not your compost, to avoid spreading them. For pots, repeat the scrubbing with soapy water and a bleach or hydrogen peroxide soak. Ensure all crevices are thoroughly cleaned. If you find pests like slugs, earwigs, or spider mites, understand that they likely overwintered due to incomplete cleaning or nearby harborage. Future diligent cleanup prevents this.
For trustworthy gardening information, visit:
University of Alaska Fairbanks Extension — Gardening, University of Georgia Extension — Gardening and Louisiana State University AgCenter — Lawn & Garden. These organizations provide expert, research-based advice for gardeners at all levels.
Disclaimer: This article is for informational purposes only and is not a substitute for professional gardening advice. Always consult local extension services or horticulture experts for region-specific guidance.
Leave a Reply