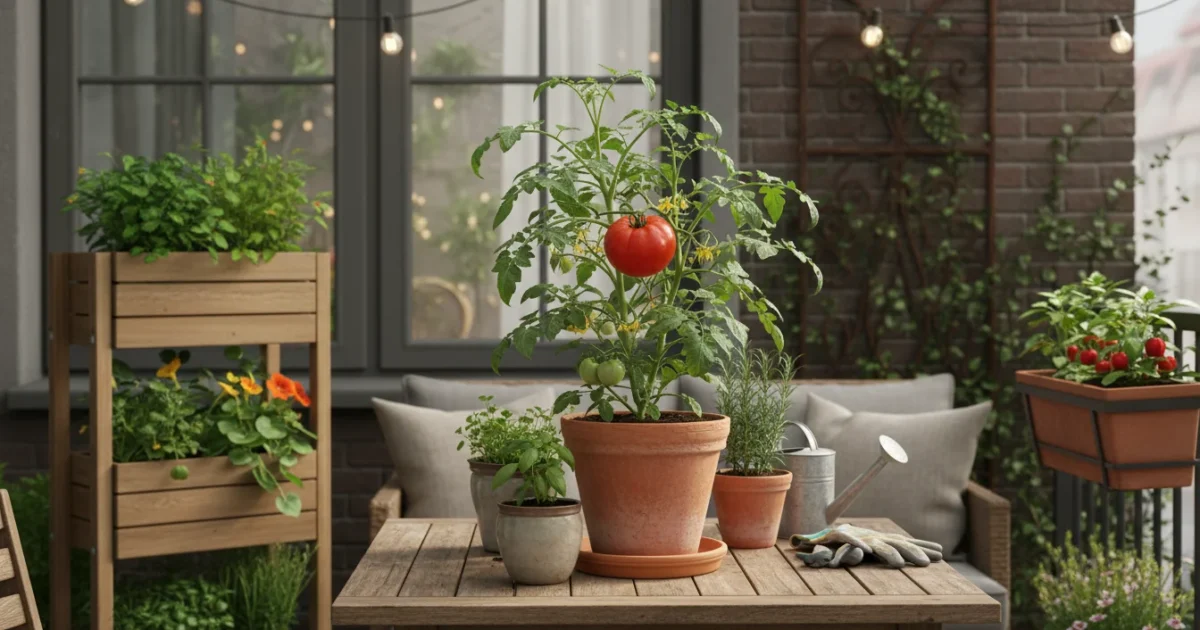
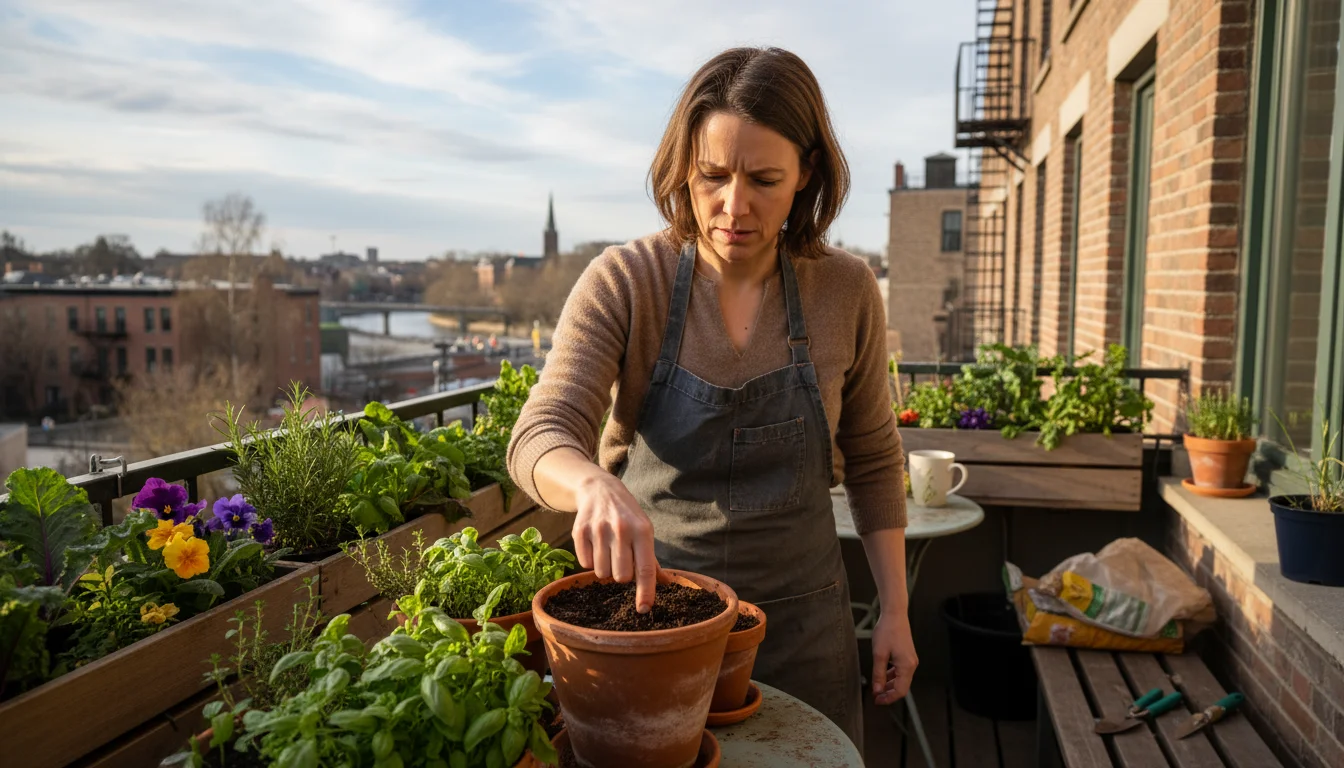
Growing fresh, sun-ripened tomatoes usually feels like a summer privilege. When winter arrives, many gardeners put their tools away, dreaming of spring. But what if you could continue enjoying that homegrown taste, even when snow covers the ground outside? Imagine plucking a ripe, juicy tomato from your very own plant, right in your living room or on your patio. This isn’t a fantasy; it’s entirely achievable with the right approach.
This guide will walk you through an exciting indoor gardening project: cultivating one perfect tomato plant under a grow light this winter. This “Indoor Tomato Experiment” offers a practical way to extend your gardening season, bring a touch of green into your home, and harvest your own delicious produce. It’s an ideal project for beginners and intermediate gardeners alike, especially those working with limited space like balconies, patios, or small yards. You’ll learn specific, actionable steps, from selecting the right dwarf tomato variety to mastering hand pollination. Prepare to transform your indoor space into a mini-greenhouse and savor the taste of summer, even in the coldest months.

Why Grow Tomatoes Indoors This Winter?
Winter vegetable gardening might sound counterintuitive, but bringing a tomato plant indoors offers a wealth of benefits beyond just fresh produce. For many gardeners, the colder months mean a lull in outdoor activity, leading to a longing for the vibrant greens and fresh tastes of summer. Growing tomatoes indoors directly combats these winter blues, providing a tangible connection to nature and a rewarding project during shorter, darker days.
Consider the satisfaction of harvesting a ripe tomato when grocery store options are often expensive and lack flavor. You gain complete control over its environment, from the soil nutrients to the absence of harmful pesticides. This ensures a truly organic, flavorful fruit. Beyond the harvest, the act of nurturing a plant offers significant mental health advantages. Studies show that interacting with plants can reduce stress, improve mood, and even boost cognitive function. Your indoor tomato experiment becomes a source of calm, curiosity, and accomplishment.
Furthermore, this project is an excellent learning opportunity. You will gain hands-on experience with specific gardening techniques like grow light management, hand pollination, and indoor pest control. These skills translate directly to more successful outdoor gardening in spring. For those with limited space, this experiment demonstrates how effectively you can grow productive plants even on a balcony or patio, provided you manage the environment properly indoors. It’s an efficient use of space and resources, promoting sustainable practices by reducing your reliance on commercially transported produce.
Think about the unique challenges of indoor growing. Outdoors, nature handles pollination with bees and wind. Indoors, you become the pollinator. Sunlight is abundant outdoors; indoors, you provide the perfect light spectrum with a grow light. This focused approach to one plant allows you to master these specific techniques without feeling overwhelmed. It’s about quality over quantity, aiming for one perfect tomato plant rather than an entire field. This experiment is a testament to resourceful and practical gardening, offering a delicious reward and a rich learning experience throughout the winter.
Choosing Your Champion: The Best Dwarf Tomato Varieties for Indoor Success
The success of your indoor tomato experiment begins with selecting the right plant. Not all tomato varieties are suitable for indoor cultivation, especially when space and light are limited. You need a tomato that stays compact, produces fruit efficiently, and doesn’t require a sprawling root system. The key here is to look for “dwarf” or “determinate” varieties.
Determinate tomato plants grow to a specific height, typically around 2 to 4 feet, and then stop. They produce their fruit all at once or within a relatively short period. This growth habit makes them ideal for containers and indoor environments where vertical space is a concern. Indeterminate varieties, in contrast, continue to grow and produce fruit until frost kills them, often reaching heights of 6 feet or more, which is impractical for an indoor setup.
Dwarf tomato varieties are specifically bred for compact growth, often reaching only 1 to 3 feet tall. Many dwarf types are also determinate, further enhancing their suitability for pots. These plants offer a manageable size without sacrificing fruit production. When you search for seeds or starter plants, actively look for terms like “dwarf,” “patio,” “bush,” or “container.”
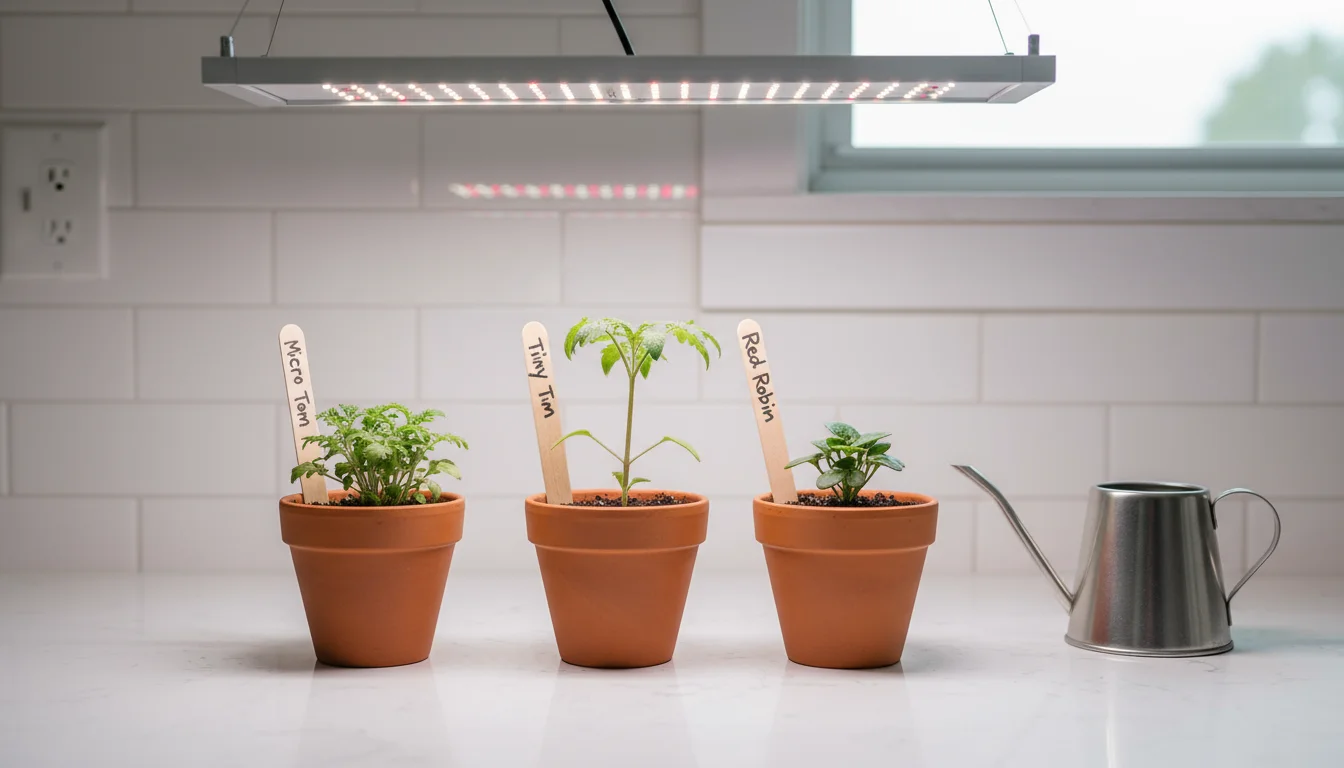
Here are some excellent dwarf tomato varieties highly recommended for indoor growing, known for their compact size and good fruit production:
- ‘Micro Tom’: Often considered the smallest tomato plant, ‘Micro Tom’ grows only 6 to 8 inches tall. It produces tiny, cherry-sized red fruits in abundance. While the fruits are small, their prolific nature and the plant’s minuscule size make it a fun and easy choice for a desktop or windowsill under a grow light.
- ‘Tiny Tim’: A slightly larger dwarf variety, ‘Tiny Tim’ reaches about 12 to 18 inches. It yields small, sweet cherry tomatoes, perfect for snacking or salads. This is a very popular choice for containers and performs reliably indoors.
- ‘Red Robin’: Similar in size to ‘Tiny Tim’, ‘Red Robin’ also produces sweet, red cherry tomatoes. It’s known for its productivity and compact bush habit, making it another excellent candidate for your indoor experiment.
- ‘Micro Cherry’: As its name suggests, this is another very small cherry tomato variety. It stays compact and offers a good yield of small, flavorful fruits, ideal for small spaces.
- ‘Patio Princess’ or ‘Celebrity’ (Dwarf Bush Types): While slightly larger than the “micro” varieties, some bush or patio types of standard-sized tomatoes, like ‘Patio Princess’, can also work. They usually grow 2 to 3 feet tall and produce medium-sized fruit, offering a more traditional tomato experience. Ensure you select a truly compact bush variety if aiming for a larger fruit.
When choosing, consider the size of the fruit you desire. If you want a small, prolific plant with cherry tomatoes, ‘Micro Tom’ or ‘Tiny Tim’ are excellent. If you prefer a slightly larger fruit and have a bit more space, a dwarf bush type might be suitable. Regardless of your choice, ensure the variety description explicitly states its compact or dwarf nature. This careful selection sets the stage for a successful indoor tomato season.
Your Indoor Tomato’s Home: Container, Soil, and Drainage Essentials
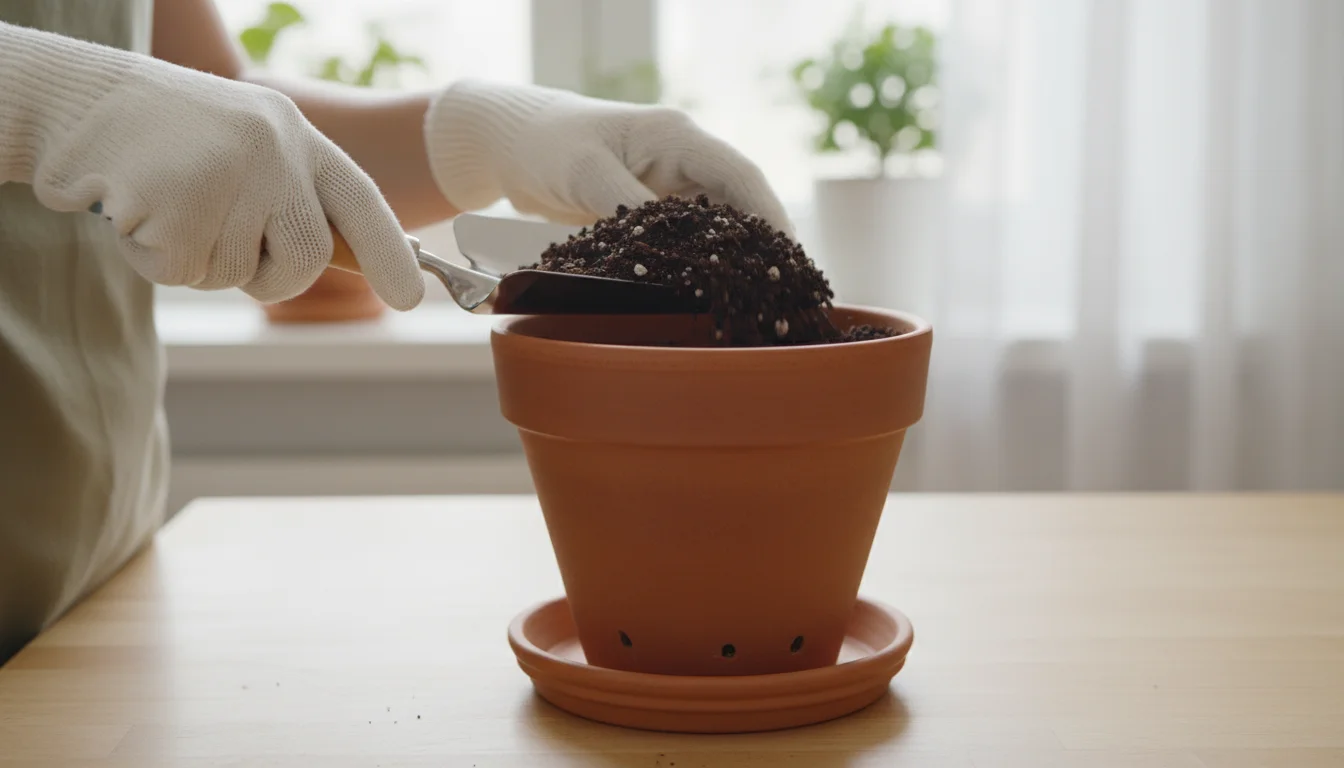
Once you have selected your ideal dwarf tomato variety, the next crucial step is preparing its living environment. The right container, a high-quality potting mix, and proper drainage are fundamental to the health and productivity of your indoor plant. These elements provide the support, nutrients, and moisture regulation your tomato needs to thrive.
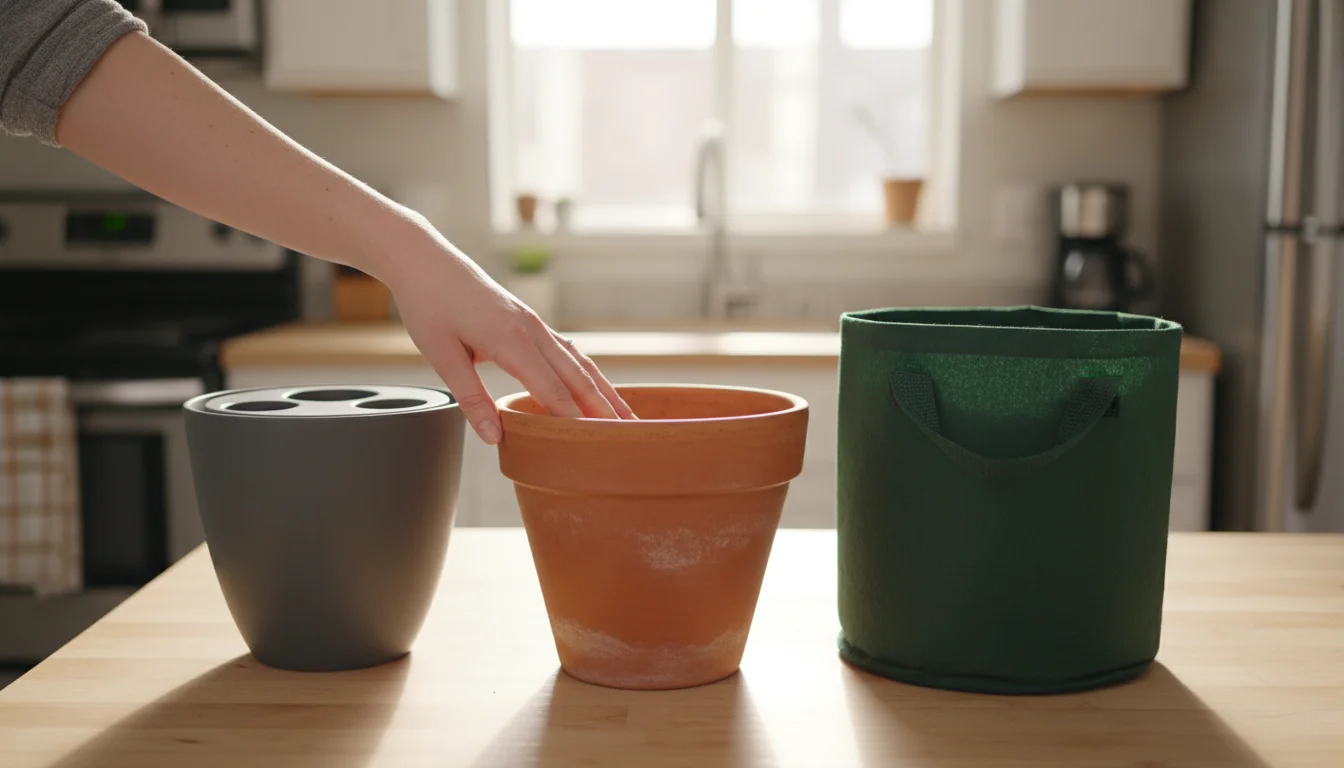
Choosing the Right Container
For one dwarf tomato plant, a container with a minimum capacity of 2-3 gallons (about 8-12 liters) is generally sufficient. While ‘Micro Tom’ might get by in a 1-gallon pot, giving your plant more root space encourages stronger growth and better fruit production. A 5-gallon fabric grow bag is an excellent choice. Fabric pots promote air circulation around the roots, preventing them from circling and becoming root-bound, which means the roots grow so densely they can’t absorb water or nutrients effectively.
The most critical feature of any container is adequate drainage. Water must be able to escape freely from the bottom of the pot. Without proper drainage, water collects, leading to soggy soil and root rot, a fungal disease that can quickly kill your plant. If you choose a plastic or ceramic pot, ensure it has several large drainage holes. If it lacks them, you will need to drill them yourself. Never use a pot without drainage holes.
Selecting Your Soil
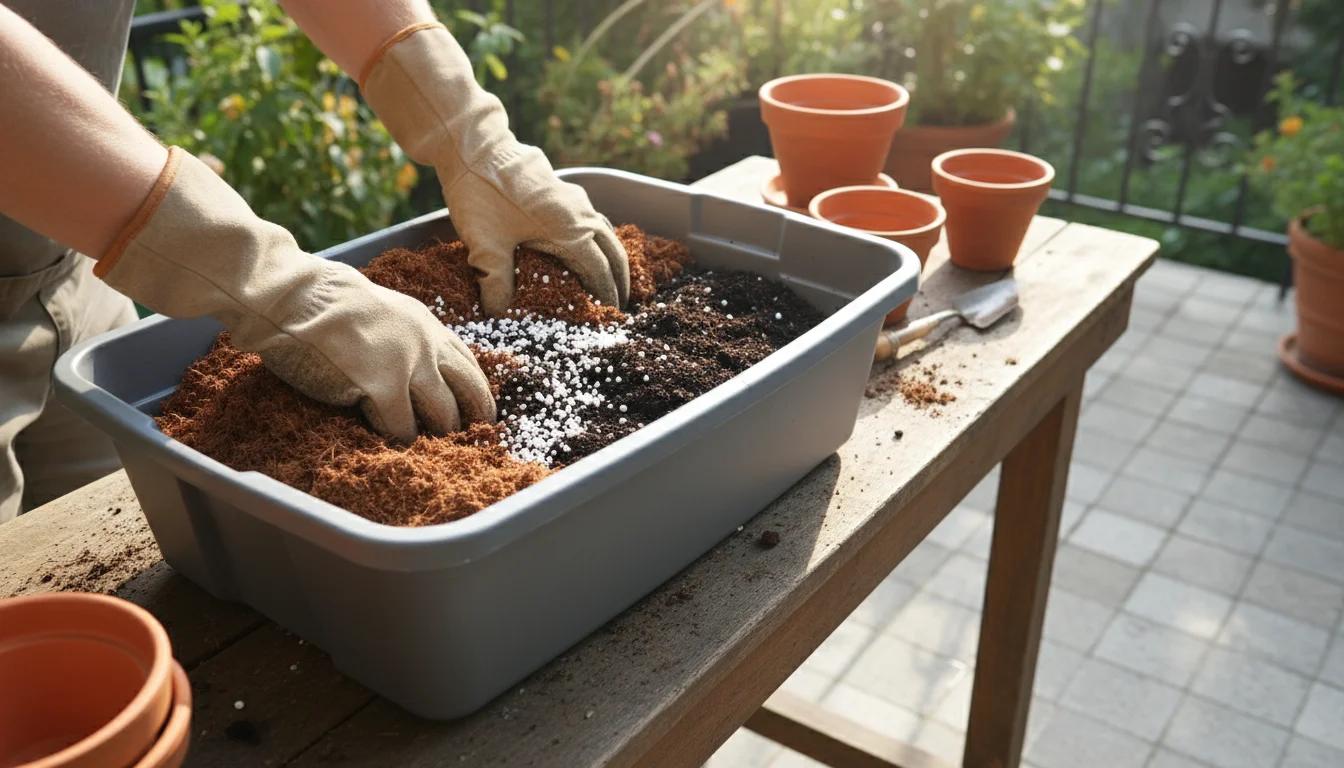
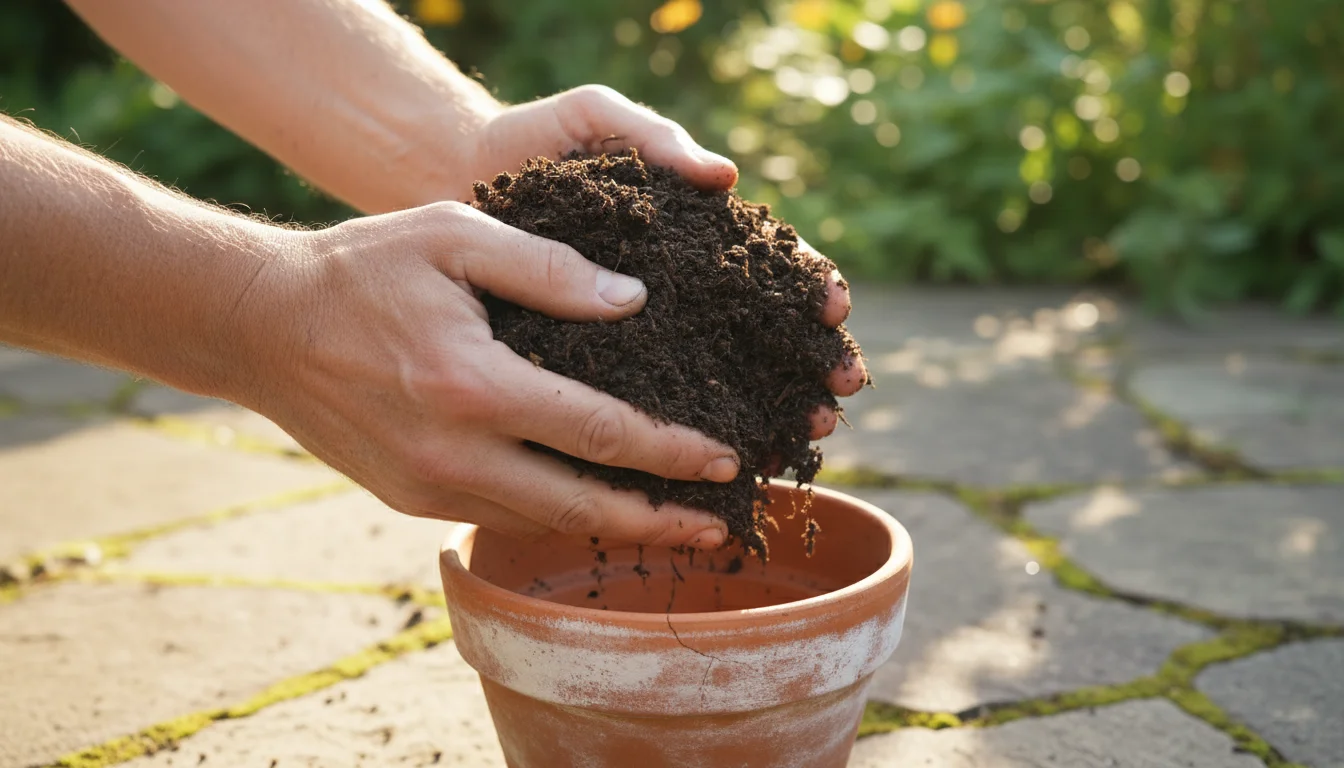
Your tomato plant will spend its entire life in this soil, so choosing the right medium is vital. Avoid using garden soil or topsoil from your yard for container gardening. Garden soil is too heavy, compacts easily in pots, and may contain pests, diseases, or weed seeds. Instead, opt for a high-quality, sterile potting mix specifically formulated for containers.
A good potting mix provides aeration, retains moisture, and offers nutrients. Look for mixes that contain ingredients like peat moss or coco coir for moisture retention, perlite or vermiculite for aeration and drainage, and some slow-release fertilizer. These components ensure that water moves through the soil effectively, which is what “drainage” refers to, preventing waterlogged roots while still holding enough moisture for the plant to absorb.
You can also create your own custom blend:
- 1 part peat moss or coco coir: Provides excellent water retention.
- 1 part compost or worm castings: Adds essential nutrients and beneficial microbes.
- 1 part perlite or vermiculite: Ensures superior drainage and aeration, preventing compaction.
This homemade blend offers a balanced environment for your tomato’s roots. Whichever soil you choose, fill your container leaving about an inch or two of space from the rim. This prevents water and soil from overflowing when you water your plant.

Ensuring Optimal Drainage
Beyond the drainage holes in your pot, you can enhance drainage by placing a layer of gravel or broken pottery shards at the bottom of the container. While some gardeners believe this is unnecessary and reduces soil volume, it can help prevent soil from washing out through larger drainage holes and ensures a clear path for excess water. However, the most important factor for good drainage remains a well-aerated potting mix. Always place your pot on a saucer or tray to catch any excess water, but remember to empty this tray within 30 minutes of watering. Allowing the pot to sit in standing water for extended periods can negate the benefits of good drainage. Your tomato plant prefers consistently moist, but never soggy, soil.
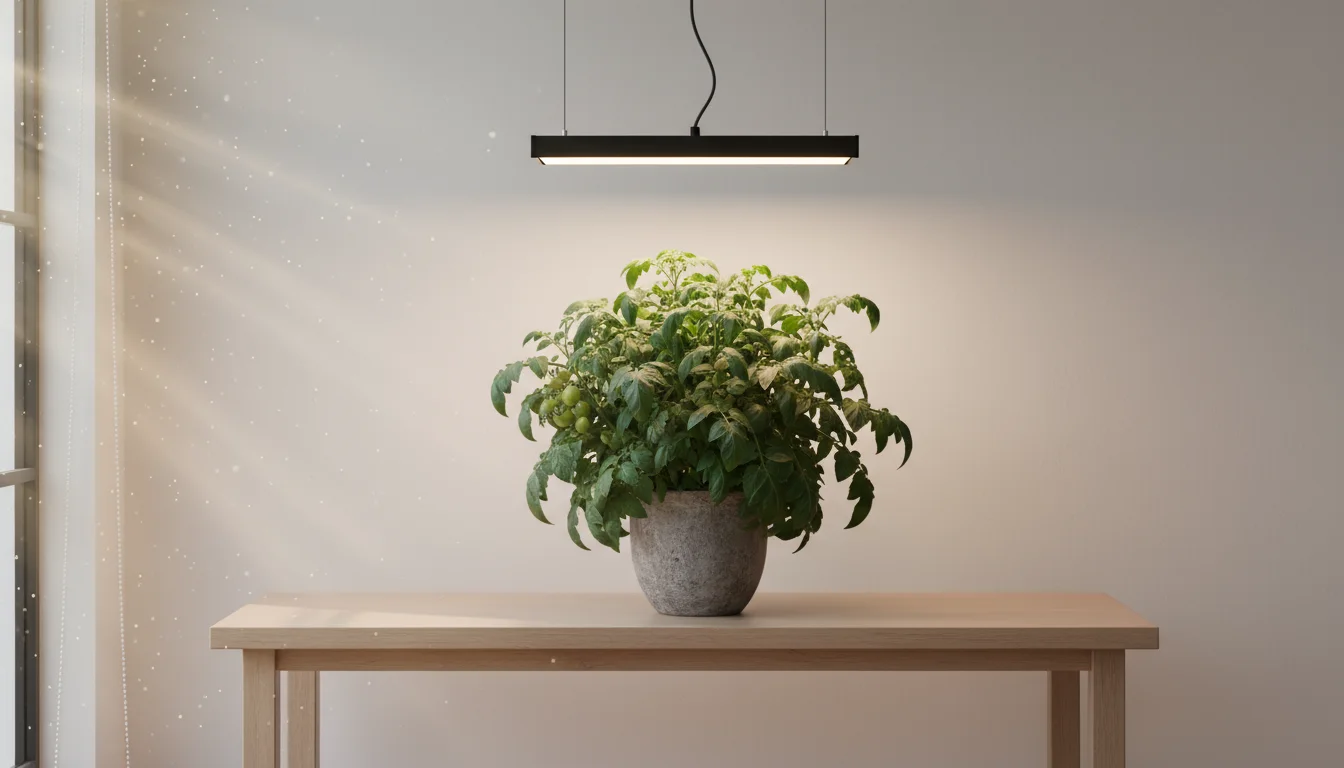
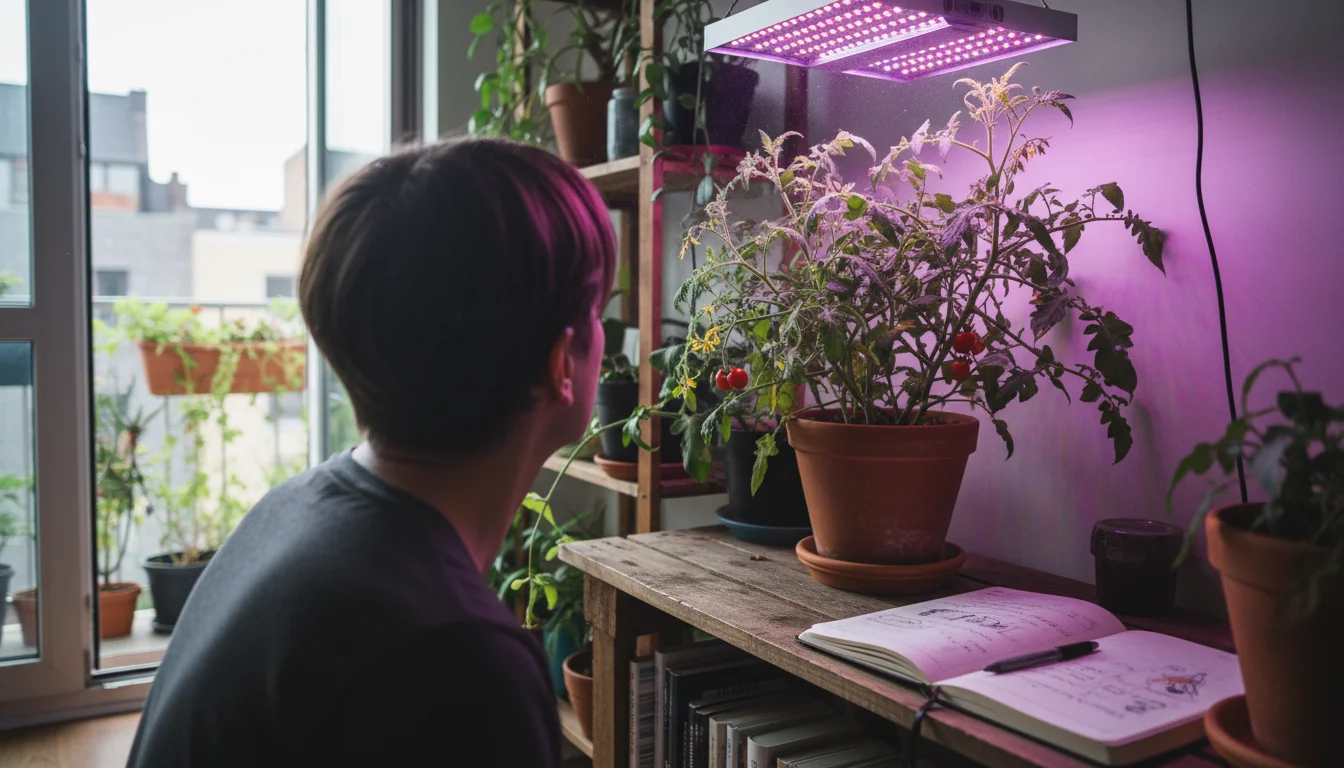
Illuminating Your Experiment: The Perfect Grow Light Setup for One Plant
Sunlight is the engine of plant growth, but during winter, natural light is often too weak and too short in duration to sustain a productive tomato plant indoors. This is where a grow light becomes indispensable for your indoor tomato experiment. Providing the right type and intensity of light is arguably the most critical factor for successful indoor tomato cultivation.
For those looking to expand their setup, building a budget-friendly DIY grow light shelf can help organize your indoor garden efficiently.
Before setting up your station, you might wonder do you really need grow lights or if a sunny window is enough for winter success.
Understanding Grow Light Needs
Tomato plants are “full-sun” plants, meaning they require a lot of light, typically 6-8 hours of direct sun daily outdoors. Indoors, under a grow light, they need even more hours because artificial light, even the best quality, rarely matches the intensity of natural sunlight. For a productive indoor tomato, aim for 14-16 hours of light per day, followed by 8-10 hours of complete darkness for essential plant processes. A simple timer is essential for maintaining this consistent schedule.
Types of Grow Lights for One Plant
For a single tomato plant, you have several excellent options:
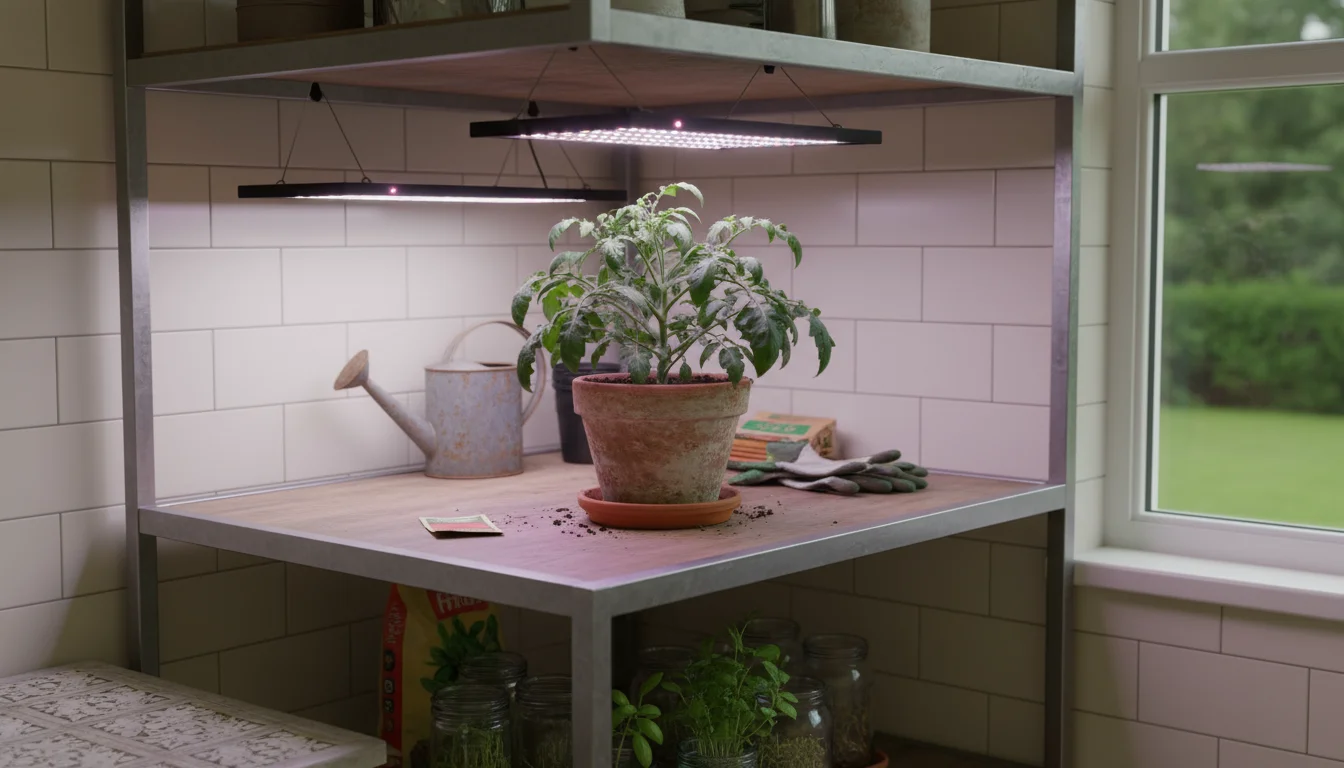
- LED Grow Lights: These are highly recommended for home growers due to their energy efficiency, long lifespan, and ability to emit specific light spectrums. Full-spectrum LEDs are ideal, mimicking natural sunlight and providing both blue light (for vegetative growth) and red light (for flowering and fruiting). While the initial cost can be higher, their operational savings and effectiveness make them a superior choice. Look for a full-spectrum LED fixture with a wattage suitable for your plant’s size, generally ranging from 30W to 100W for one plant. Many smaller, clip-on LED grow lights are perfect for this scale.
- Fluorescent Lights (T5 or T8): High-output fluorescent lights, particularly T5 fixtures, can also be effective. They are less expensive than LEDs initially but consume more electricity and have a shorter lifespan. Choose “cool white” bulbs for vegetative growth and “warm white” or “full spectrum” for flowering and fruiting. A two-bulb T5 fixture can adequately cover one tomato plant.
- Compact Fluorescent Lights (CFLs): These are very budget-friendly and can be used for seedlings or very small plants. However, their intensity is often insufficient for mature, fruiting tomato plants unless you use multiple bulbs very close to the plant. For this experiment, a dedicated LED or T5 fixture is a better investment for fruit production.
Avoid incandescent bulbs. They produce too much heat and not enough of the usable light spectrum for plant growth.
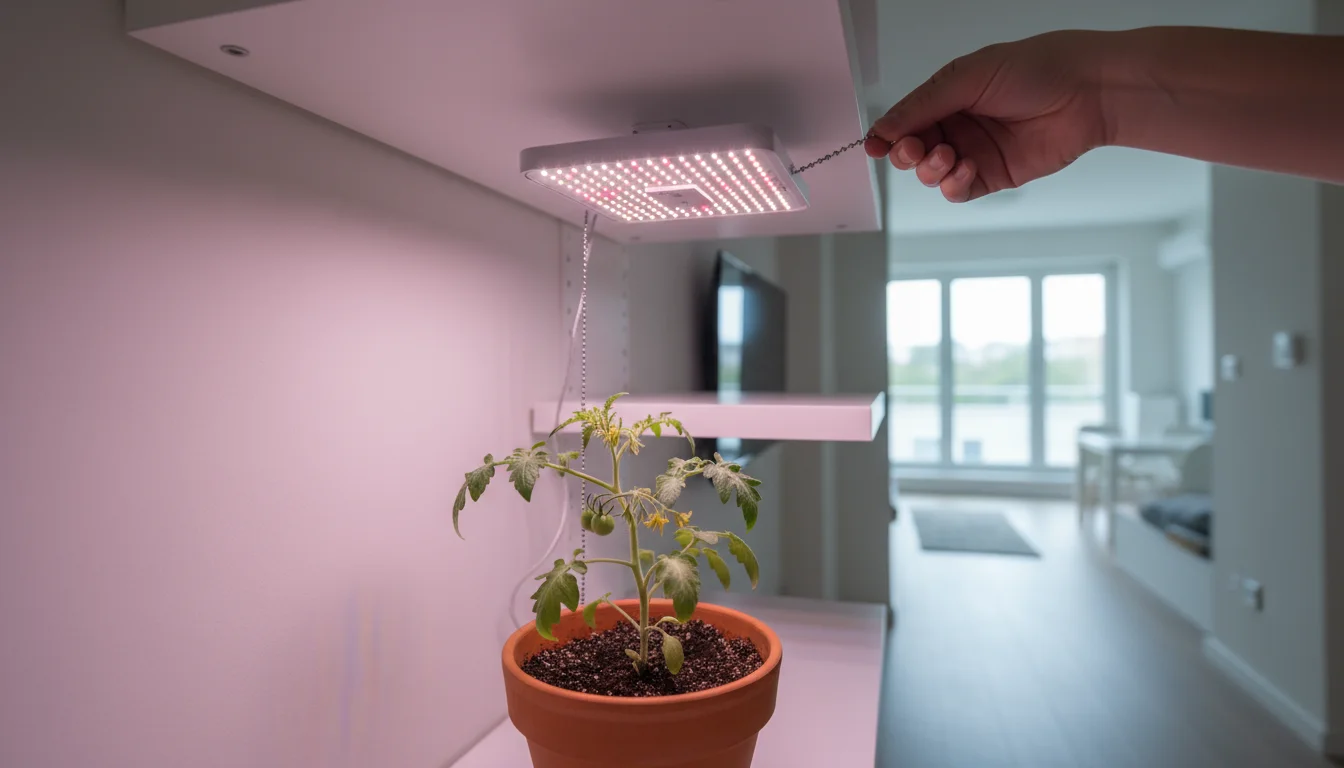
Setting Up Your Grow Light

The placement and distance of your grow light are critical.
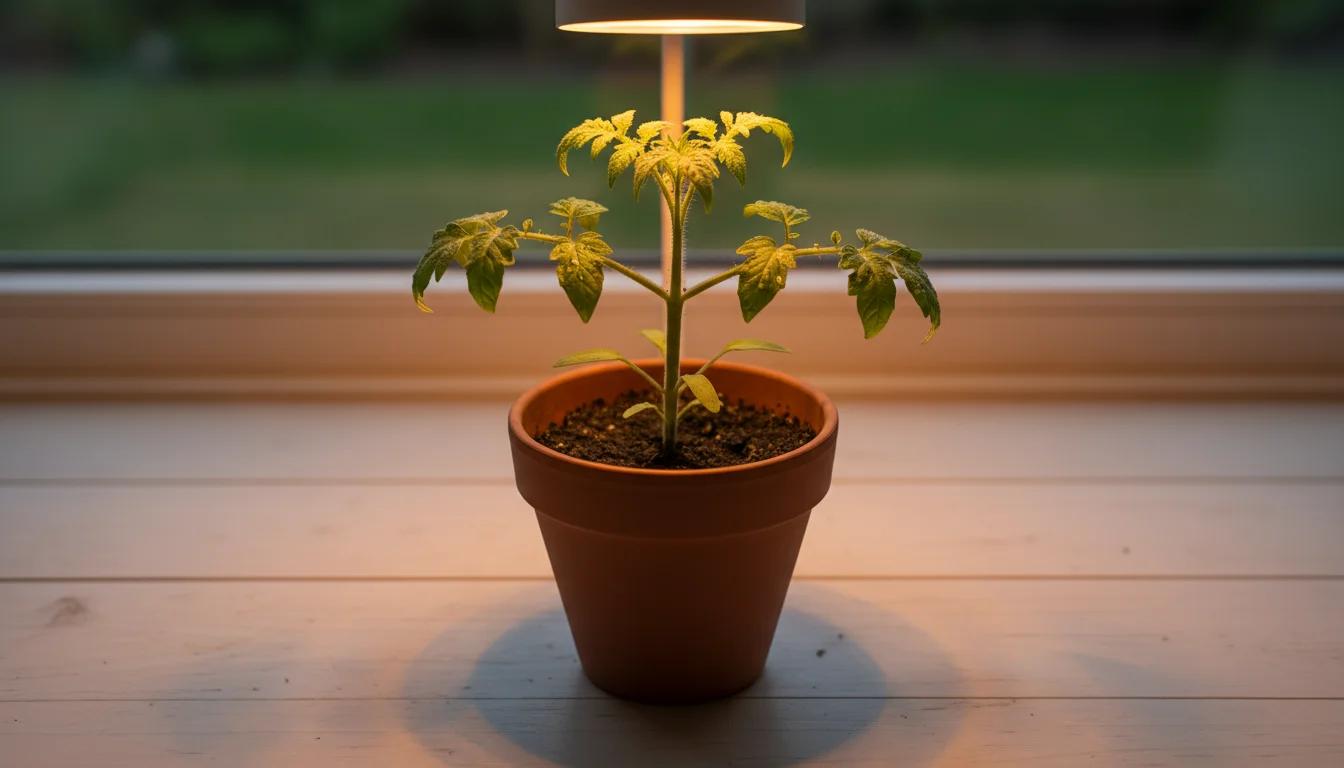
- Mounting: You will need a way to suspend your grow light above the plant. This could be a simple shelving unit, a tension rod, or a dedicated grow light stand. The key is adjustability, as you’ll need to move the light closer or further away as your plant grows.
- Distance: The ideal distance between the light source and the top of your plant varies by light type and intensity.
- LEDs: Start with the light about 12-24 inches above the plant. Monitor your plant for any signs of stress, like bleached leaves (too close) or leggy growth (too far). You might need to adjust based on the specific light’s intensity.
- T5 Fluorescents: These lights can be closer, typically 6-12 inches from the plant canopy.
Generally, if the plant looks stretched or “leggy” with long, weak stems, the light is too far away. If leaves look burnt or bleached, the light is too close. Adjust as needed.
- Reflectivity: Maximize light efficiency by using reflective surfaces around your plant. Mylar film, white paint, or even aluminum foil on nearby walls can bounce light back onto the plant, ensuring more of it is utilized for photosynthesis.
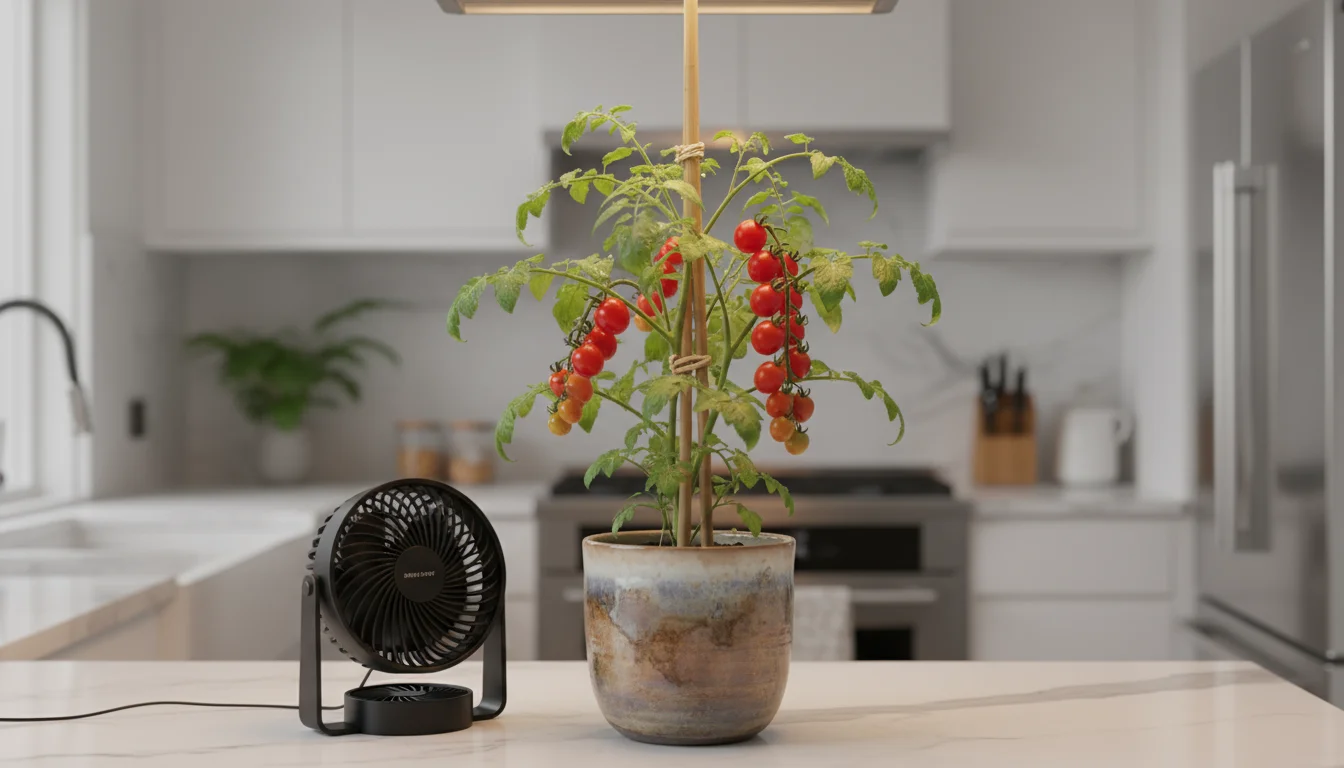
- Air Circulation: While not directly related to the light itself, good air circulation is important under grow lights. A small oscillating fan can help strengthen stems, prevent fungal issues, and ensure heat from the light dissipates effectively.
With a properly chosen and positioned grow light, you provide your indoor tomato plant with the energy it needs to grow strong, flower, and produce delicious fruit throughout the winter months. This setup is your sun surrogate, vital for a successful experiment.
Planting Your Seed of Success: From Seed to Seedling
Embarking on your indoor tomato experiment often begins with a tiny seed. Starting from seed is a rewarding process, allowing you to witness the entire life cycle of your plant and ensure you have the specific dwarf variety you desire. If you’re a beginner, purchasing a small starter plant of a recommended dwarf variety can save you a few weeks of effort, but starting from seed offers a deeper connection to the gardening process.
To keep your indoor garden productive all season, consult an apartment seed-starting calendar to plan your next crops.
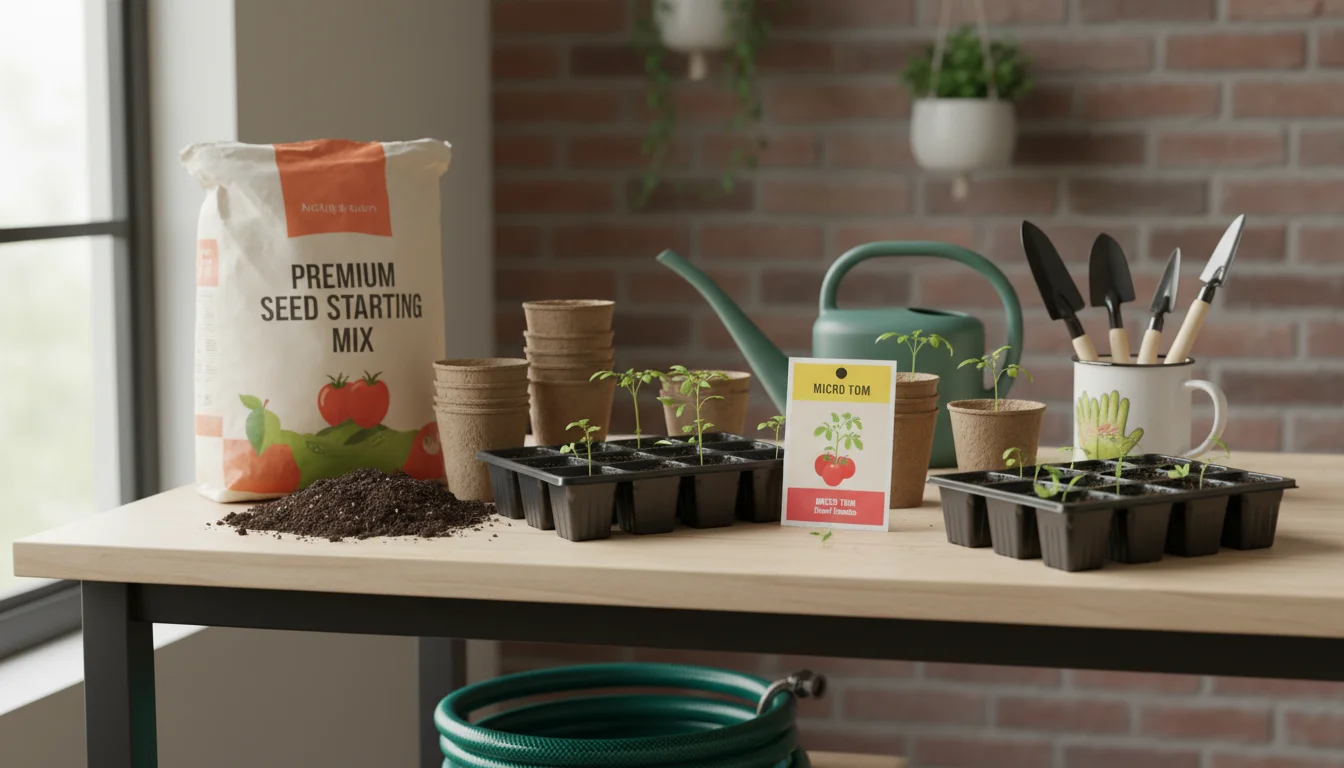
Gathering Your Materials
Before you begin, gather these essentials:
- Dwarf tomato seeds: Choose your selected variety.
- Seed starting mix: This is a fine-textured, sterile, soilless mix designed for delicate seedlings. It provides good drainage and aeration.
- Small containers or seed trays: Peat pots, plastic cells, or even repurposed yogurt cups with drainage holes work well. You’ll only need one strong seedling for this experiment, so planting a few extra ensures you have options.
- Watering can or spray bottle: For gentle watering.
- Heating mat (optional, but recommended): Tomatoes love warmth for germination.
- Grow light setup: Ready for when seedlings emerge.
The Planting Process
Follow these steps to give your seeds the best start:
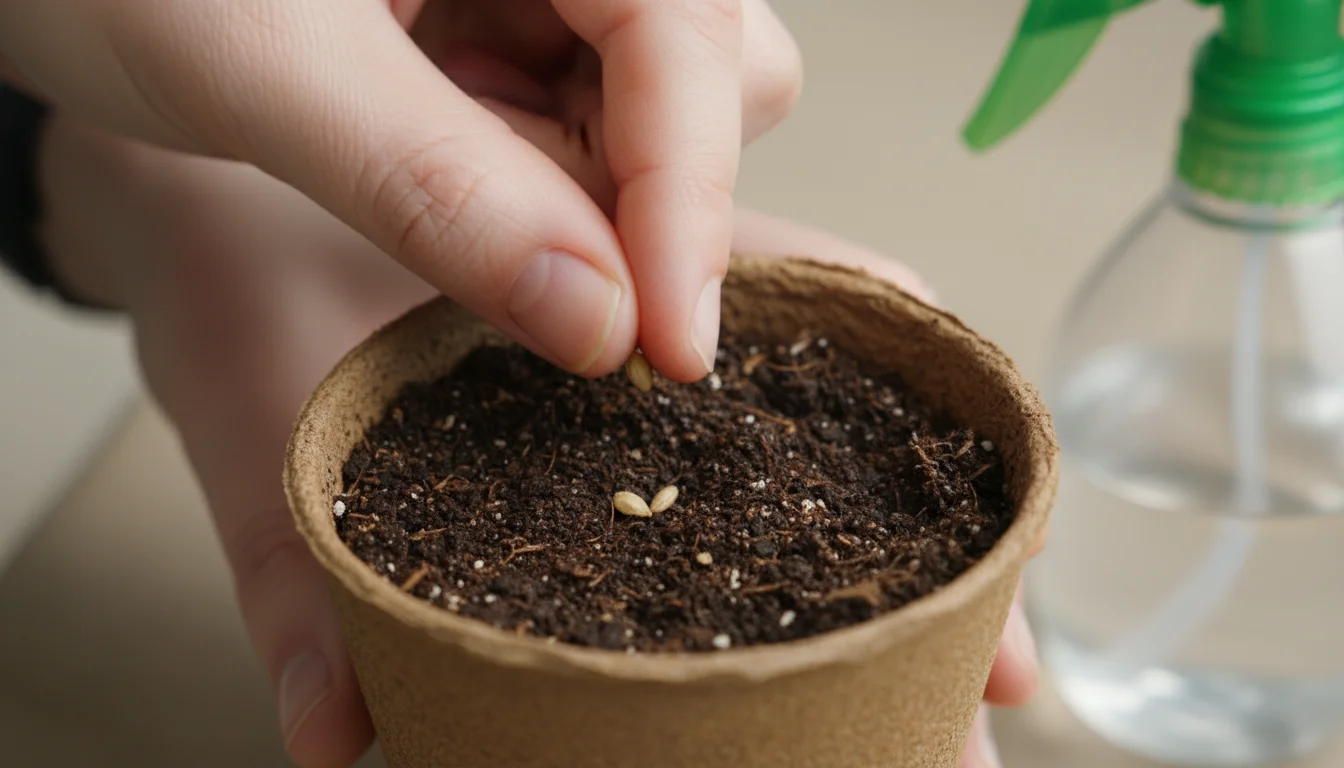
- Prepare the Containers: Fill your small containers with the seed starting mix, gently tamping it down to remove large air pockets. Leave about half an inch of space from the rim.
- Sow the Seeds: Make a small indentation in the center of each pot, about ¼ inch deep. Place 2-3 tomato seeds in each indentation. Planting a few extra increases your chances of successful germination and allows you to select the strongest seedling. Cover the seeds lightly with the seed starting mix.
- Water Gently: Mist the soil surface with a spray bottle or water gently from the bottom (by placing pots in a tray of water) until the mix is thoroughly moist. Avoid heavy watering that could dislodge the seeds.
- Provide Warmth: Tomato seeds germinate best in warm conditions, ideally between 75-85°F (24-29°C). Place your pots on a heating mat if you have one, or in a naturally warm spot in your home.
- Cover for Humidity (Optional): You can cover the pots with a clear plastic dome or plastic wrap to create a mini-greenhouse effect, maintaining humidity. Remove the cover as soon as seedlings emerge to prevent fungal issues.
Caring for Your Seedlings
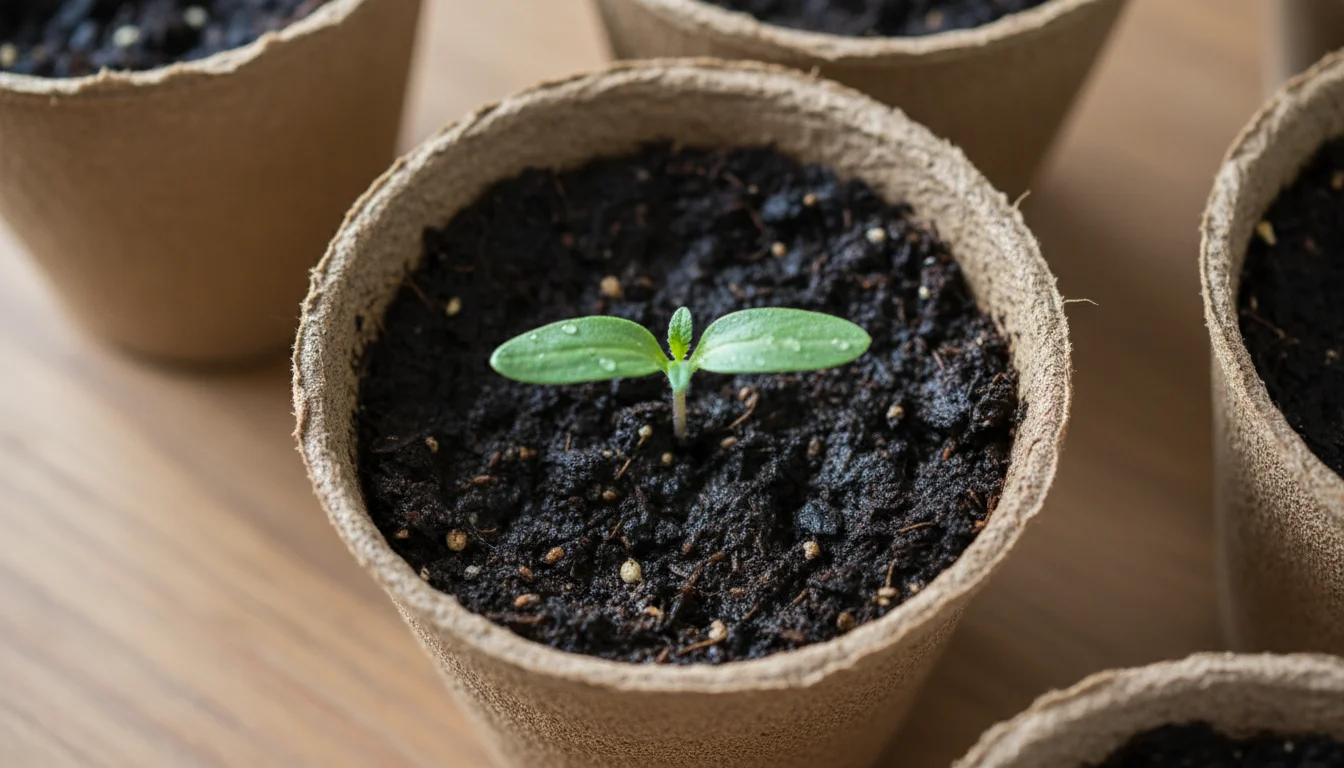
Seeds typically germinate within 5-10 days. Once you see the tiny green shoots emerge, it’s time to adjust their environment:
- Immediate Light: As soon as seedlings appear, place them immediately under your grow light. Suspend the light closer to the seedlings than a mature plant, perhaps 6-12 inches away for LEDs, to prevent them from becoming leggy. Leggy seedlings are stretched and weak, reaching desperately for light.
- Watering: Keep the seed starting mix consistently moist, but not waterlogged. Water from the bottom when possible, or use a gentle spray. Allow the top layer of soil to dry slightly between waterings.
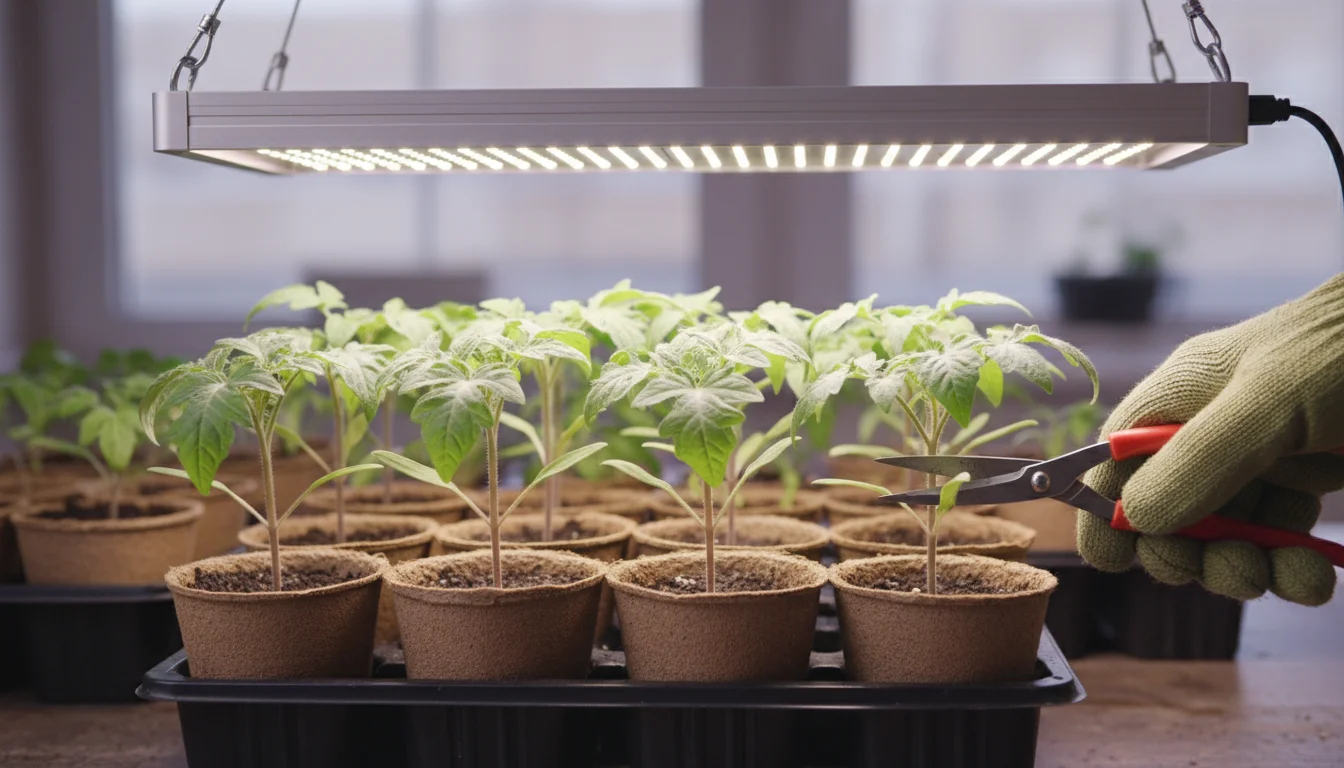
- Thinning: Once your seedlings have developed their first set of “true leaves” (the leaves that appear after the initial round, called cotyledons), select the strongest seedling in each pot and snip off the others at the soil line with small scissors. This ensures the chosen seedling gets all the resources.
- Air Circulation: A small fan set on a low setting for a few hours a day can help strengthen seedling stems and prevent damping-off disease, a common fungal issue that causes seedlings to collapse.

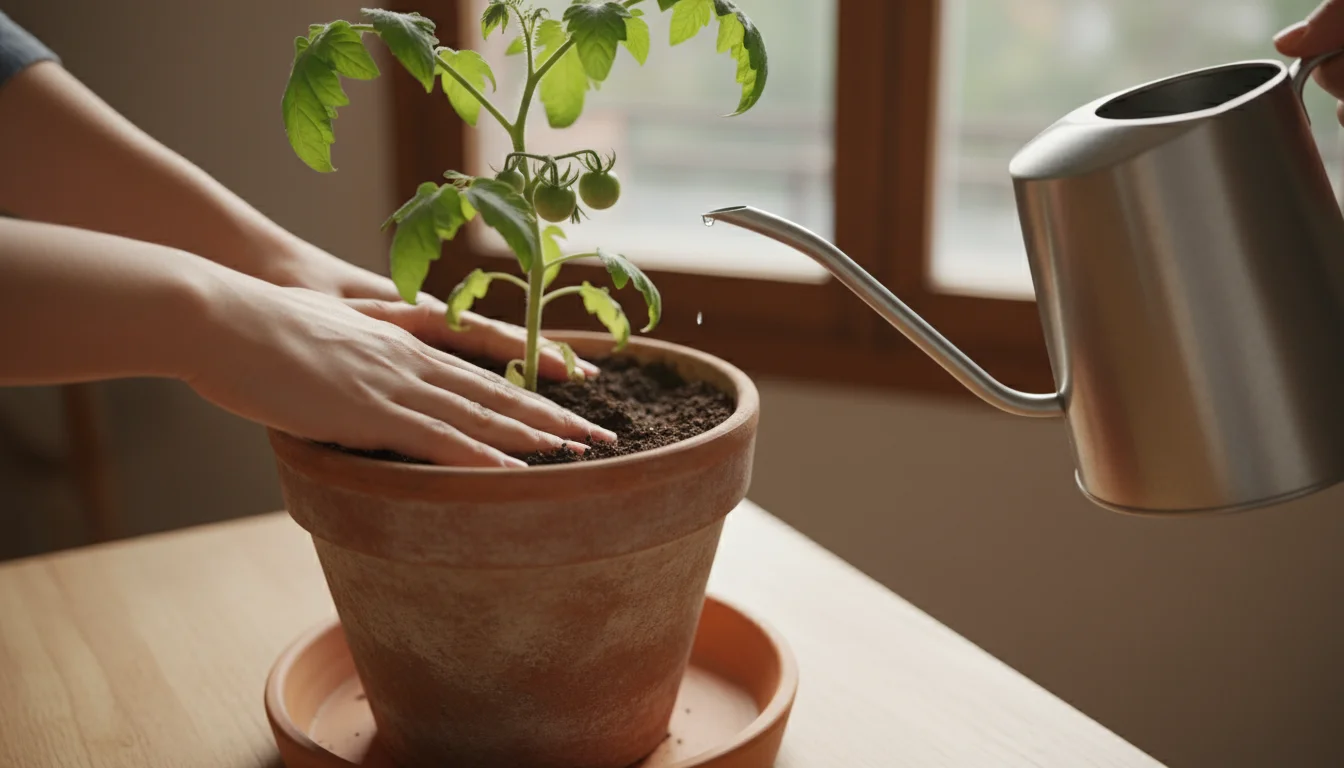
Transplanting to a Larger Home
When your seedling is about 4-6 inches tall and has developed several sets of true leaves, it’s ready to be transplanted into its final 2-5 gallon container with the regular potting mix.
- Prepare the Pot: Fill your larger pot with the chosen potting mix, making a hole in the center large enough for the seedling’s root ball.
- Careful Removal: Gently remove the seedling from its smaller container. Handle it by its leaves or root ball, avoiding the stem, which is easily damaged.
- Bury Deep: Tomato plants are unique in that they can grow roots from their stems. When transplanting, bury the seedling deeper than it was growing, up to the first set of true leaves. This encourages a stronger root system, anchoring your plant and improving nutrient uptake.
- Water In: After transplanting, water the plant thoroughly. Place it back under the grow light.
With careful attention during these initial stages, your indoor tomato plant will establish a robust foundation for a winter of successful growth and delicious harvests.
Nourishing Your Tomato: Watering, Fertilizing, and Essential Care
Once your tomato plant is established in its final container under the grow light, ongoing care becomes the focus. Proper watering and fertilization are paramount, along with a few other routine maintenance tasks, to ensure your plant remains healthy and productive. Remember, an indoor plant relies entirely on you for its needs, so consistency is key.
Mastering the Art of Watering
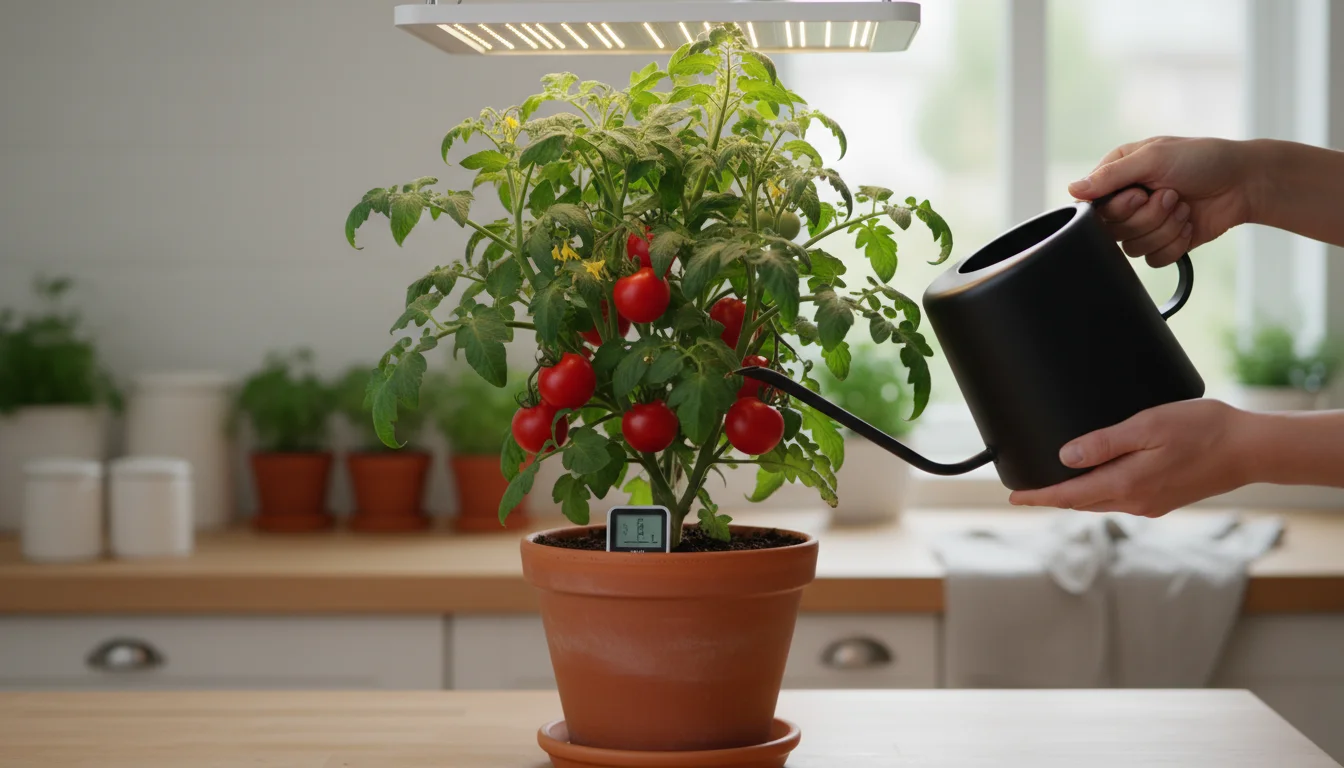
Watering is one of the most common challenges for indoor gardeners. The goal is to keep the soil consistently moist, but never soggy. Overwatering can lead to root rot, while underwatering causes stress and impacts fruit development.
- Feel the Soil: The best way to know when to water is to feel the soil. Stick your finger about an inch or two into the potting mix. If it feels dry, it’s time to water. If it’s still moist, wait.
- Thorough Watering: When you do water, do it thoroughly until water drains from the bottom of the pot. This ensures the entire root ball gets hydrated. Empty any excess water from the saucer within 30 minutes to prevent the roots from sitting in standing water.
- Frequency: The frequency of watering will depend on several factors: the size of your plant, the size of its pot, the temperature, and the humidity in your home. Smaller pots and larger plants will dry out faster. You might find yourself watering every 1-3 days.
- Water Temperature: Use room temperature water. Cold water can shock the roots.

Fertilizing for Fruit Production
Your potting mix provides some initial nutrients, but as your tomato plant grows and especially once it starts to flower and set fruit, it will deplete these resources. Regular fertilization is essential for healthy growth and abundant yields.
Look for a balanced liquid fertilizer designed for tomatoes or fruiting plants. The N-P-K ratio on fertilizers refers to the percentage of Nitrogen (N), Phosphorus (P), and Potassium (K).
- Nitrogen (N): Promotes leafy green growth. While important in early stages, too much nitrogen during flowering can lead to lush foliage but few fruits.
- Phosphorus (P): Crucial for flower and fruit development, as well as root growth.
- Potassium (K): Essential for overall plant health, disease resistance, and fruit quality.
For fruiting tomatoes, you generally want a fertilizer with a lower first number (N) and higher second and third numbers (P and K), such as a 5-10-10 or 2-4-2 ratio.
- Start Fertilizing: Begin fertilizing once your plant starts to produce flowers, or about 4-6 weeks after transplanting if you started from seed.
- Dilution: Always follow the instructions on your fertilizer package. For container plants, it’s often best to dilute the fertilizer to half or even quarter strength and apply it more frequently, perhaps every 1-2 weeks, rather than a full-strength dose less often. This prevents nutrient burn.
- Apply to Moist Soil: Always apply fertilizer to already moist soil, never dry soil. Fertilizing dry roots can cause severe burn.
Other Essential Care Tasks
- Staking or Support: Even dwarf tomato varieties benefit from support, especially when laden with fruit. Use a small stake, a tomato cage designed for patio plants, or a strong bamboo cane inserted into the pot. Tie the main stem loosely to the support as it grows, using soft ties or strips of cloth.
- Pruning (Minimal for Dwarf Types): Dwarf and determinate tomatoes generally require minimal pruning. You can remove any yellowing or dead leaves. Some gardeners pinch off “suckers” (new growth that appears in the crotch between the main stem and a branch) if they appear, but with dwarf varieties, these suckers often produce more fruit, so consider leaving them unless your plant becomes excessively dense. Focus on air circulation.
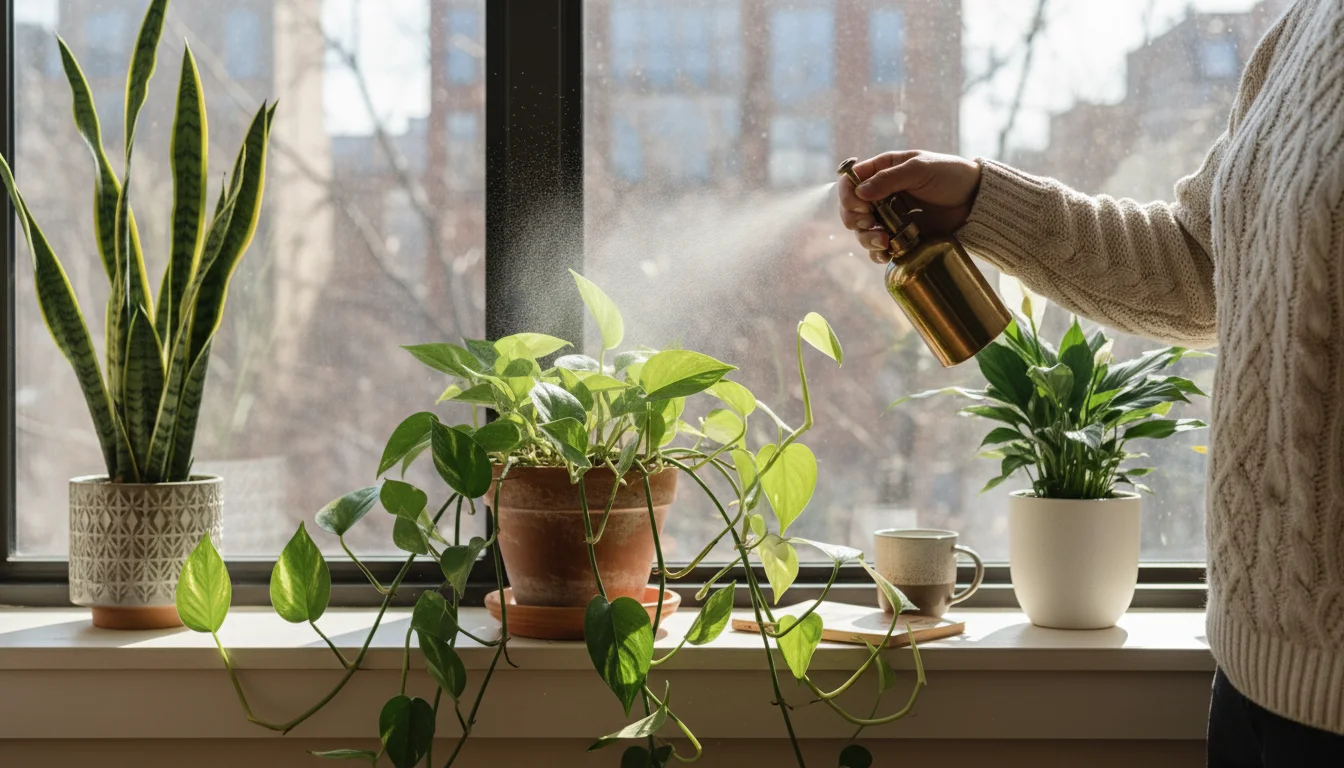
- Air Circulation: Good airflow is vital indoors to prevent fungal diseases. A small fan running for a few hours daily near your plant can simulate outdoor breezes, strengthen stems, and reduce humidity around the foliage.
- Temperature and Humidity: Tomatoes prefer temperatures between 65-80°F (18-27°C) during the day and slightly cooler at night. While they can tolerate average home humidity, very dry air can stress them. A nearby humidifier can help if your home is excessively dry.
By consistently attending to these watering, fertilizing, and general care practices, you provide your indoor tomato plant with everything it needs to thrive and produce a satisfying winter harvest.
The Art of Hand Pollination: Ensuring Fruit Set Indoors
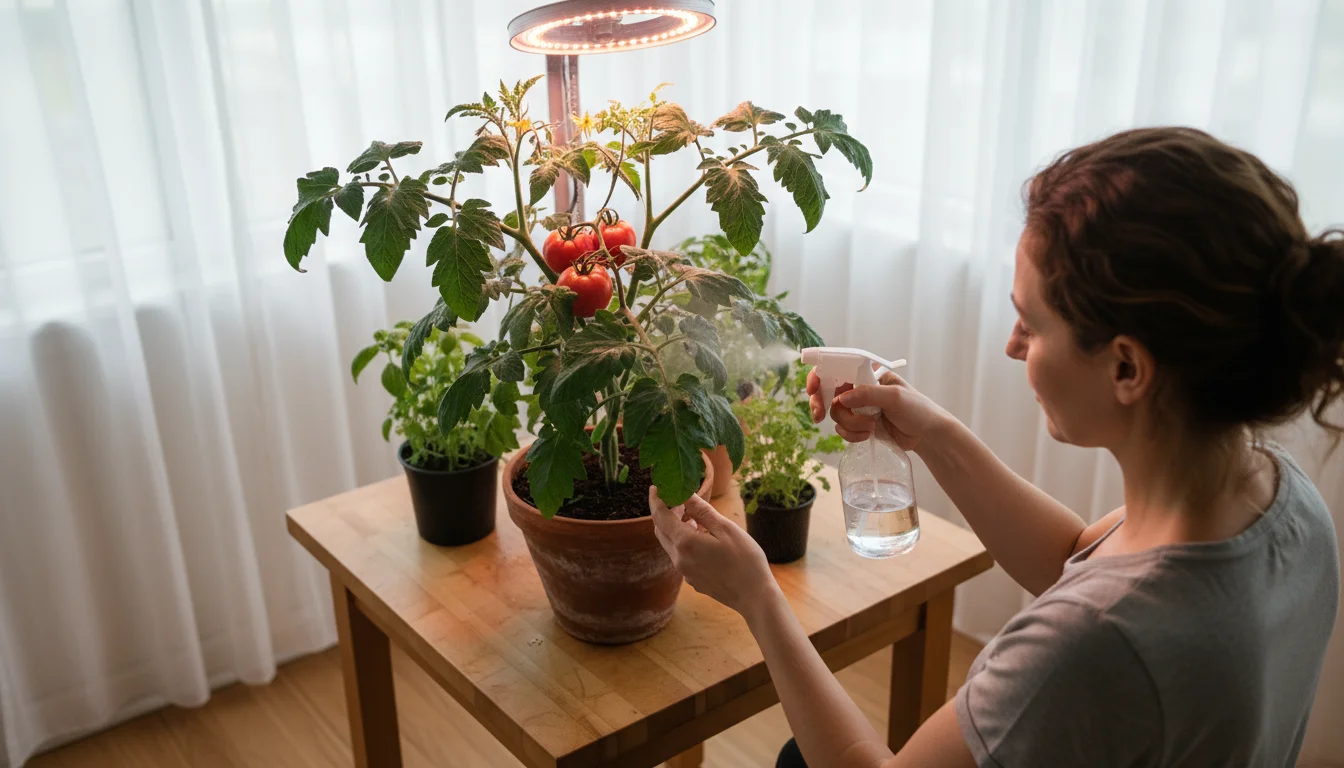
One of the most critical differences between growing tomatoes outdoors and indoors is pollination. Outdoors, wind, bees, and other insects naturally transfer pollen, leading to fruit development. Indoors, without these natural helpers, you become the pollinator. This step is often overlooked by beginners, leading to healthy plants that flower but never produce fruit. Hand pollination is simple, quick, and essential for your indoor tomato experiment’s success.
Why Hand Pollination is Necessary
Tomato flowers are “perfect,” meaning each flower contains both male and female reproductive parts (stamens and pistil). In nature, pollen from the stamens needs to be transferred to the pistil for fertilization to occur. This movement usually happens with wind vibrations or buzzing insects. Indoors, the air is often still, and there are no insects to do the job. If pollen doesn’t reach the pistil, the flower will simply drop off without forming a fruit. Your role is to mimic the wind or a buzzing bee.

When to Hand Pollinate
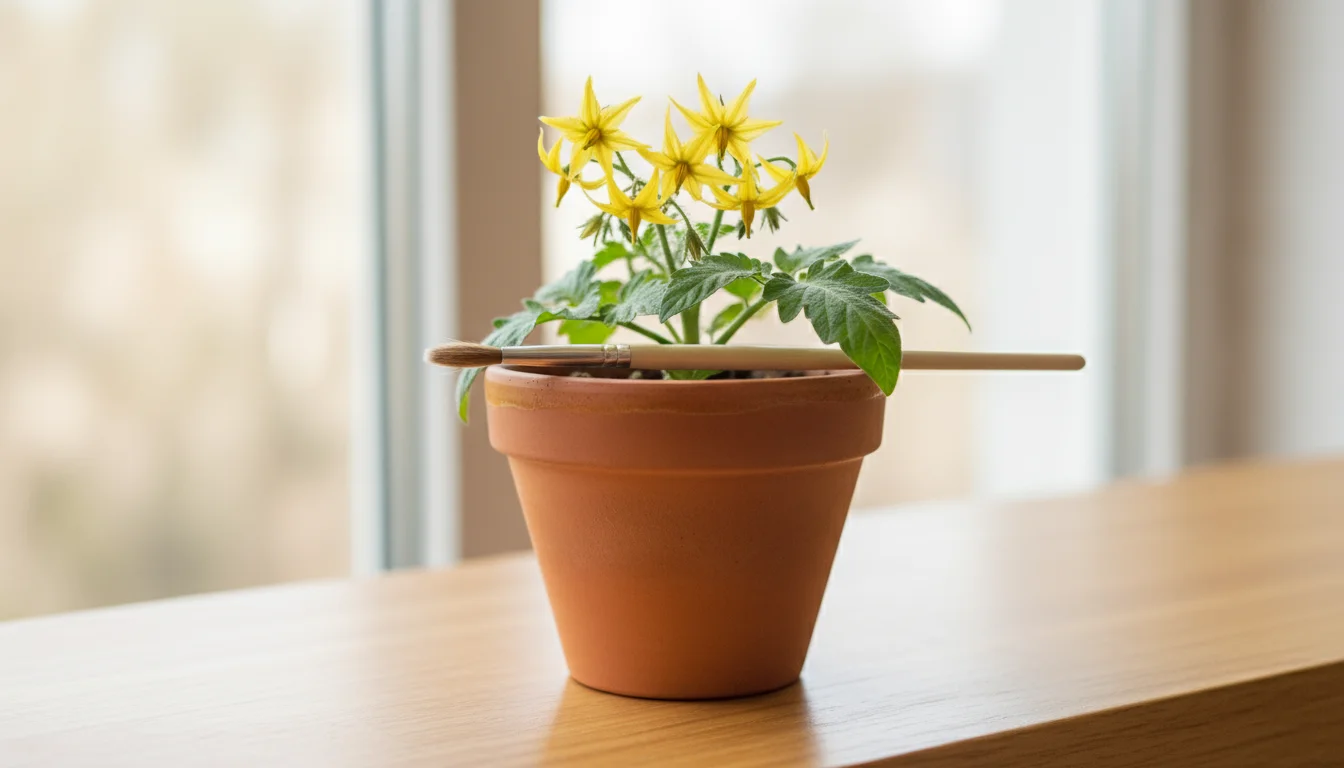
You need to hand pollinate when your tomato plant is actively flowering. Tomato flowers are typically yellow and relatively small. They are most receptive to pollination during the middle of the day, when humidity is usually lowest and pollen is driest and most viable. Aim to pollinate daily or every other day once your plant starts producing flowers, especially during peak flowering periods.
How to Hand Pollinate Your Tomato Plant
There are a few effective methods for hand pollinating, all aiming to gently shake or transfer pollen:
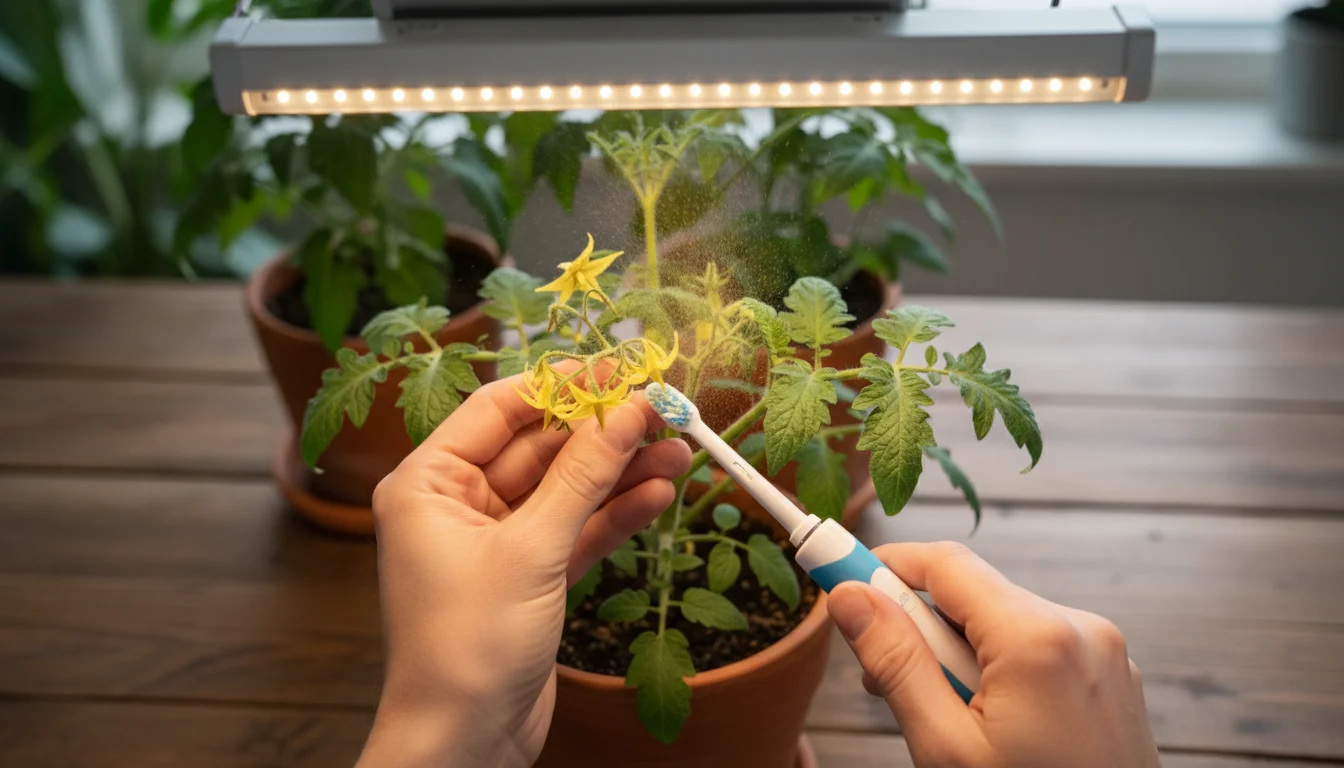
Method 1: The Vibration Technique
This is often the easiest and most effective method for tomatoes.
- Identify Open Flowers: Look for freshly opened, vibrant yellow flowers.
- Gentle Vibration: Take a small electric toothbrush (one you don’t use for your teeth!) or an electric pen. Gently touch the vibrating tip to the stem just behind each flower, or directly to the base of the flower itself. You will often see a tiny puff of yellow pollen release.
- Repeat: Work your way around the entire plant, vibrating each open flower. Repeat this process daily for best results.
The vibration mimics the buzzing of a bee, dislodging pollen from the stamens and allowing it to fall onto the pistil within the same flower.
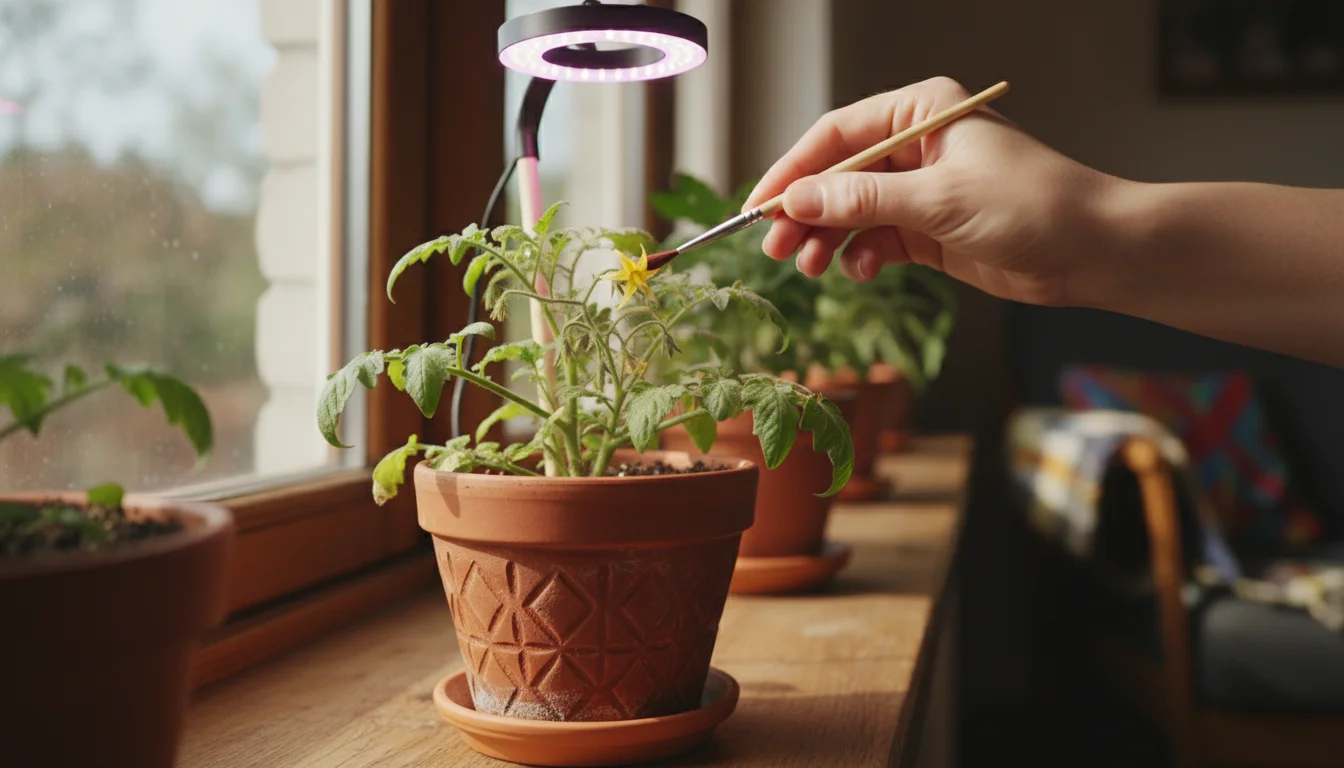
Method 2: The Swab or Brush Technique
This method is more hands-on but also very effective.
- Gather Pollen: Use a small, soft-bristled artist’s paintbrush or a cotton swab. Gently swirl it inside one tomato flower to pick up yellow pollen.
- Transfer Pollen: Immediately transfer that pollen to the pistil of the same flower or another open flower on the plant. The pistil is usually a tiny protrusion in the center of the flower.
- Repeat: Continue this process for all open flowers. Clean your brush or swab regularly if you are using it across multiple plants, though for one plant, this is less critical.
This technique ensures direct pollen transfer, especially useful if your plant isn’t responding well to vibration.
Method 3: The Tap or Shake Technique
This is the simplest method, relying purely on physical movement.
- Gentle Shake: Gently tap or shake the main stem of the plant. You can also lightly flick the back of individual flowers.
- Watch for Pollen: Look for visible pollen release. This mimics the wind.
While less precise than the other methods, this can still be effective, particularly if done consistently.
Signs of Success
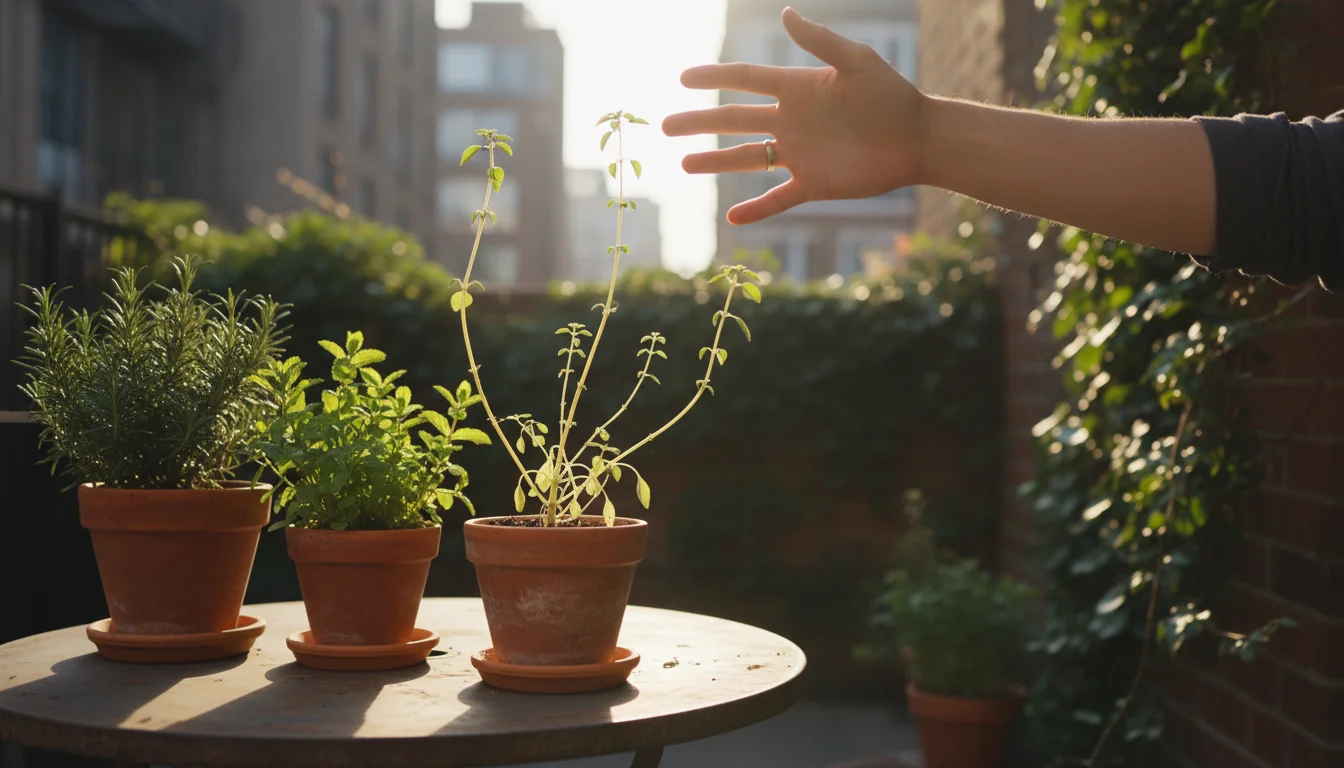
After successful pollination, the base of the flower (the ovary) will begin to swell, indicating that a tiny fruit is forming. If pollination was unsuccessful, the flower will likely turn yellow, wilt, and drop off the plant. Don’t be discouraged if some flowers drop; not every flower will become a fruit, but consistent hand pollination significantly increases your chances of a bountiful harvest. With this simple yet crucial technique, you will ensure your indoor tomato experiment yields the delicious winter bounty you anticipate.
Pest Patrol and Troubleshooting: Keeping Your Plant Healthy
Even in the controlled environment of your home, your indoor tomato plant is not entirely immune to problems. Pests and environmental stresses can emerge, but with vigilance and prompt action, you can keep your plant healthy and thriving. Regular observation is your best defense.
Common Indoor Tomato Pests
Indoor plants can attract various sap-sucking insects that are easily transferred from new plants or even hitchhike indoors on your clothes.
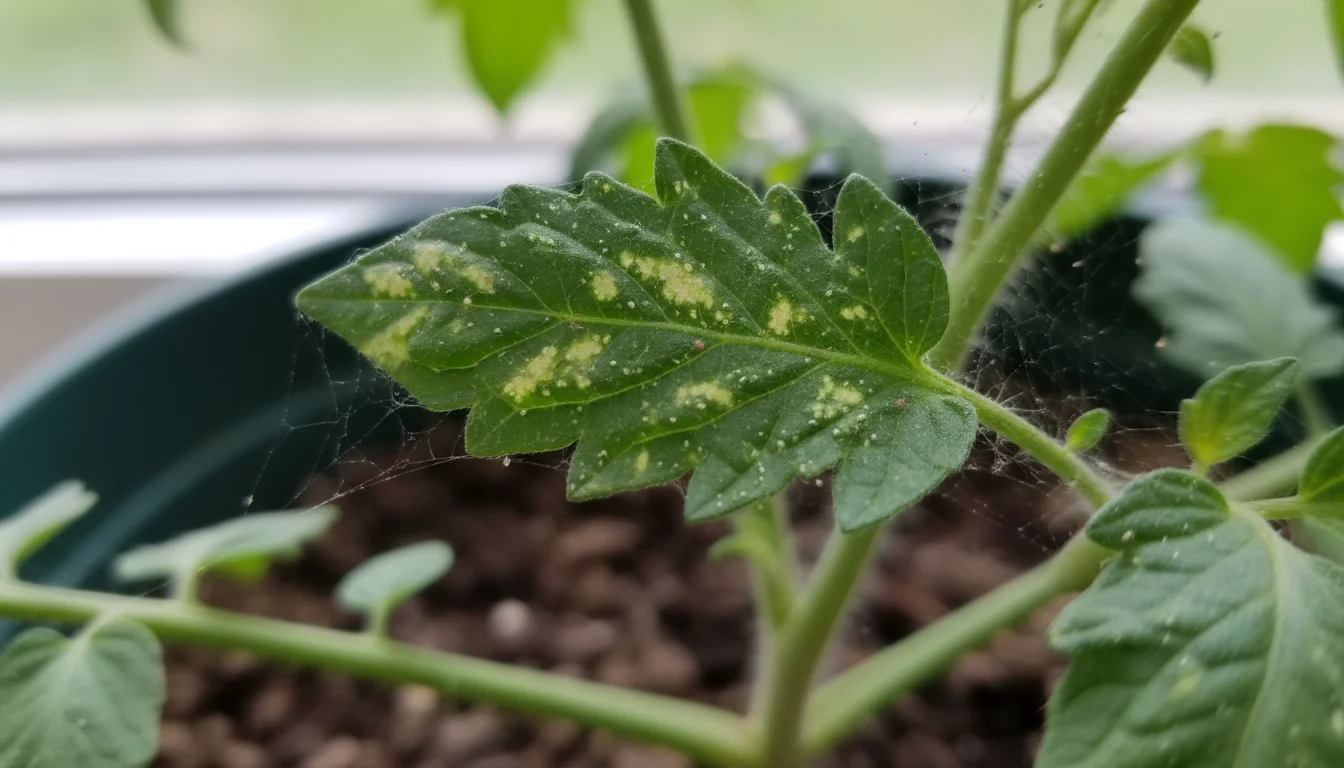
- Aphids: Small, soft-bodied insects, often green, black, or white, that cluster on new growth and the undersides of leaves. They suck plant sap, causing distorted leaves and stunted growth.
- Whiteflies: Tiny, white, moth-like insects that fly up in a cloud when disturbed. They also feed on plant sap, leading to yellowing leaves and a sticky residue called honeydew.
- Spider Mites: These are tiny, almost invisible mites that create fine webbing on the undersides of leaves and around stems. They cause stippling (tiny dots) and yellowing on leaves, eventually leading to leaf drop. They thrive in dry conditions.
- Fungus Gnats: Small, dark, mosquito-like flies that usually hover around the soil surface. Their larvae feed on organic matter in the soil and can sometimes damage fine roots, especially in seedlings. They indicate consistently moist soil.
Pest Management Strategies:
- Daily Inspection: Make it a habit to inspect your plant daily. Look at the undersides of leaves, new growth, and the soil surface. Early detection is key.
- Manual Removal: For small infestations, simply wipe off aphids or whiteflies with a damp cloth or blast them with a gentle stream of water. Remove any leaves with significant damage or pest colonies.
- Insecticidal Soap: A safe and effective option for most soft-bodied pests. Mix according to package directions and spray all affected plant surfaces, including undersides of leaves. Repeat every 5-7 days until pests are gone. You can find ready-to-use solutions or concentrate to dilute.
- Neem Oil: An organic insecticide and fungicide that disrupts pest life cycles. Use as a preventative or for active infestations. Follow product instructions carefully.
- Sticky Traps: Yellow sticky traps can help monitor and reduce populations of whiteflies and fungus gnats. Place them near the plant.
- Good Air Circulation: A small fan discourages many pests and fungal issues.
- Address Fungus Gnats: Allow the top inch of soil to dry out between waterings. This makes the environment less hospitable for gnat larvae. You can also use sticky traps or specific biological controls if the problem persists.
Troubleshooting Common Plant Problems
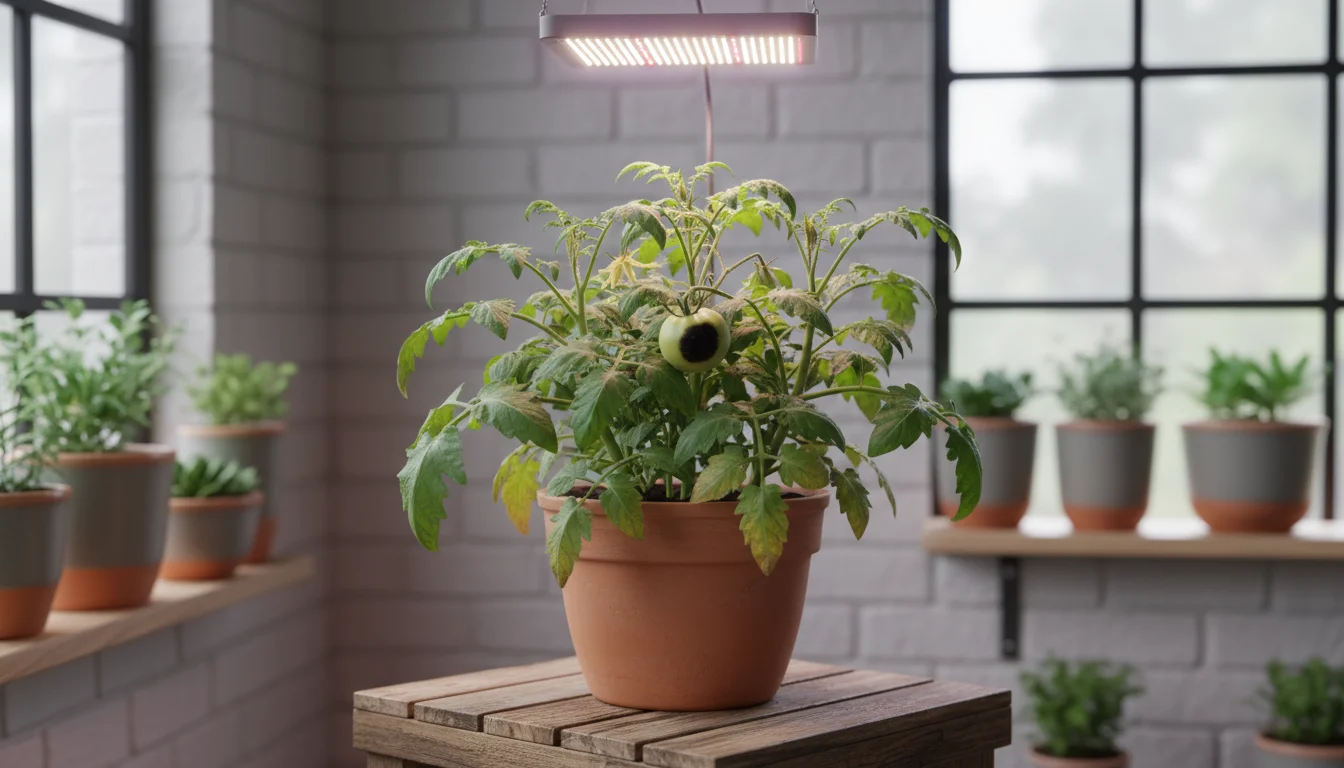
Beyond pests, your plant might exhibit symptoms that indicate environmental or nutrient issues.
- Yellowing Lower Leaves: This often indicates a nitrogen deficiency, which is common as the plant uses up nutrients in the soil. It can also be a sign of overwatering or simply older leaves naturally dying off. Assess your watering schedule and recent fertilization.
- Drooping Leaves: Most commonly a sign of underwatering. Give the plant a thorough drink and it should perk up. If the soil is already wet, it might be overwatering or root rot. Check drainage.
- Curling Leaves: Can be caused by heat stress, inconsistent watering, or sometimes a virus. If your plant is too close to a grow light or near a heat vent, move it. Ensure consistent watering.
- Blossom End Rot: This appears as a dark, sunken spot on the bottom of developing fruits. It’s not a disease but a calcium deficiency, often caused by inconsistent watering or extreme fluctuations in soil moisture, which prevents the plant from absorbing available calcium. Maintain consistent soil moisture.
- Flowers Dropping: If flowers drop without forming fruit, it’s usually a pollination issue (which you now know how to fix!) or sometimes due to extreme temperatures (too hot or too cold) or insufficient light.
By staying observant, acting quickly, and understanding the causes of common problems, you can confidently navigate any challenges your indoor tomato experiment throws your way. Remember, gardening involves continuous learning, and even experienced gardeners encounter issues. Your ability to troubleshoot and adapt is a mark of a practical and supportive gardener.
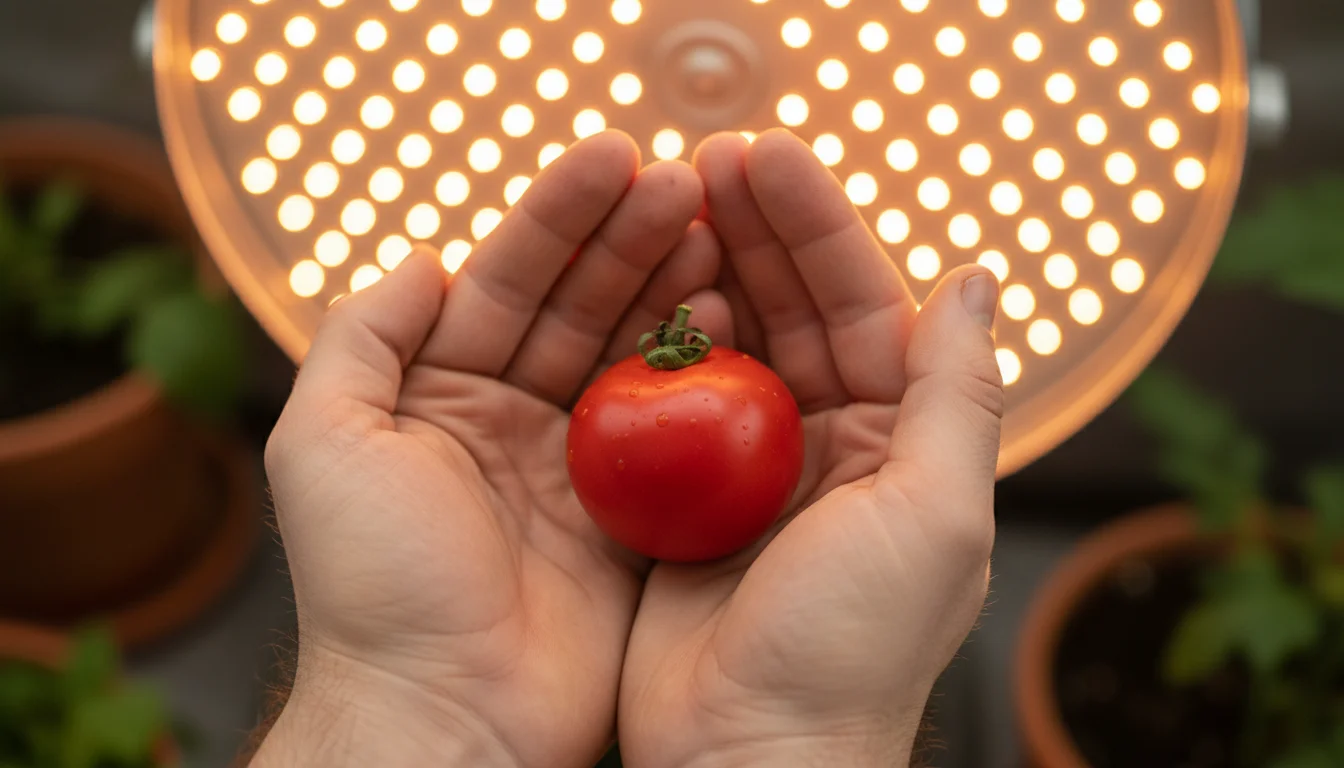
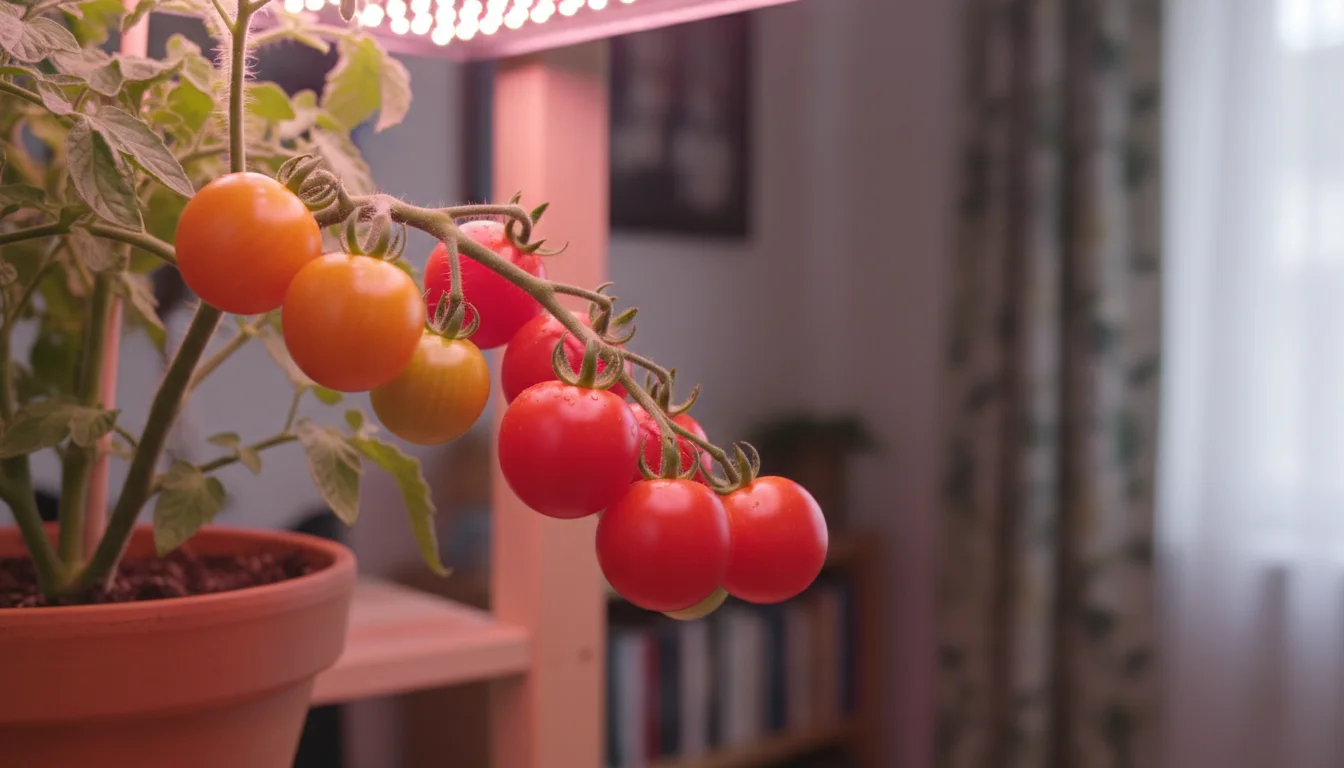
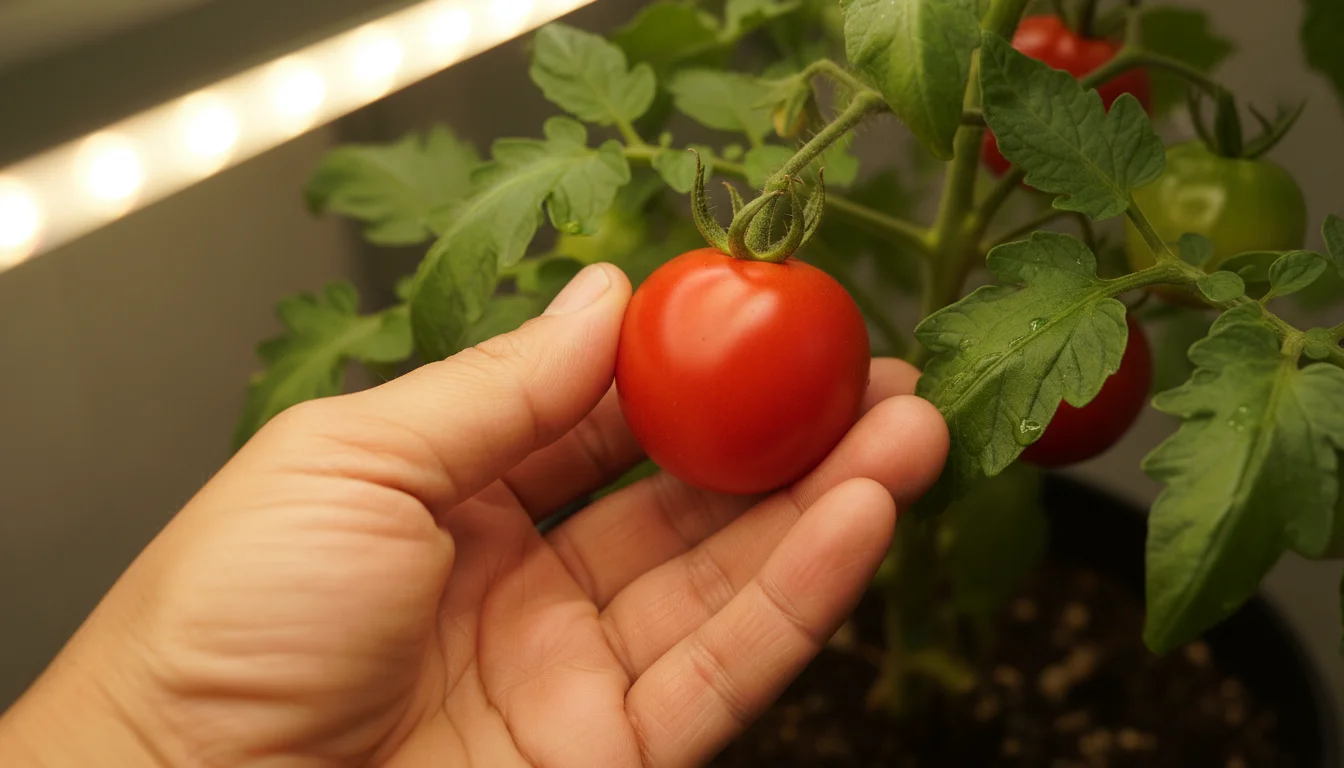
Harvesting Your Winter Bounty: The Sweet Reward
The culmination of your indoor tomato experiment is the harvest, a moment of pure satisfaction as you pluck your very own ripe tomato during the cold winter months. Knowing when and how to harvest ensures you get the best flavor and encourages your plant to produce even more.
If your plant still has fruit when you’re ready to clear the space, you can follow these tips for ripening green tomatoes indoors so none of your hard work goes to waste.
When to Harvest
Patience is a virtue in gardening, but knowing the signs of ripeness prevents you from harvesting too early or too late.
- Color: The most obvious indicator. Tomatoes change color as they ripen, typically from green to red, orange, or yellow, depending on the variety. Look for the full, characteristic color of your specific dwarf tomato.
- Firmness: A ripe tomato will feel firm but yield slightly to a gentle squeeze. If it’s rock hard, it’s not ready. If it’s mushy, it’s overripe.
- Aroma: A ripe tomato will have a distinct, sweet, earthy tomato aroma, especially near the stem end. Unripe tomatoes will have little to no scent.
- Detachment: A ripe tomato should easily detach from the plant. It might even drop off with a gentle tug. If you have to pull hard, it’s likely not fully ripe.
Cherry tomatoes, like many dwarf varieties, often ripen quickly. Keep a close eye on them once they start to change color.
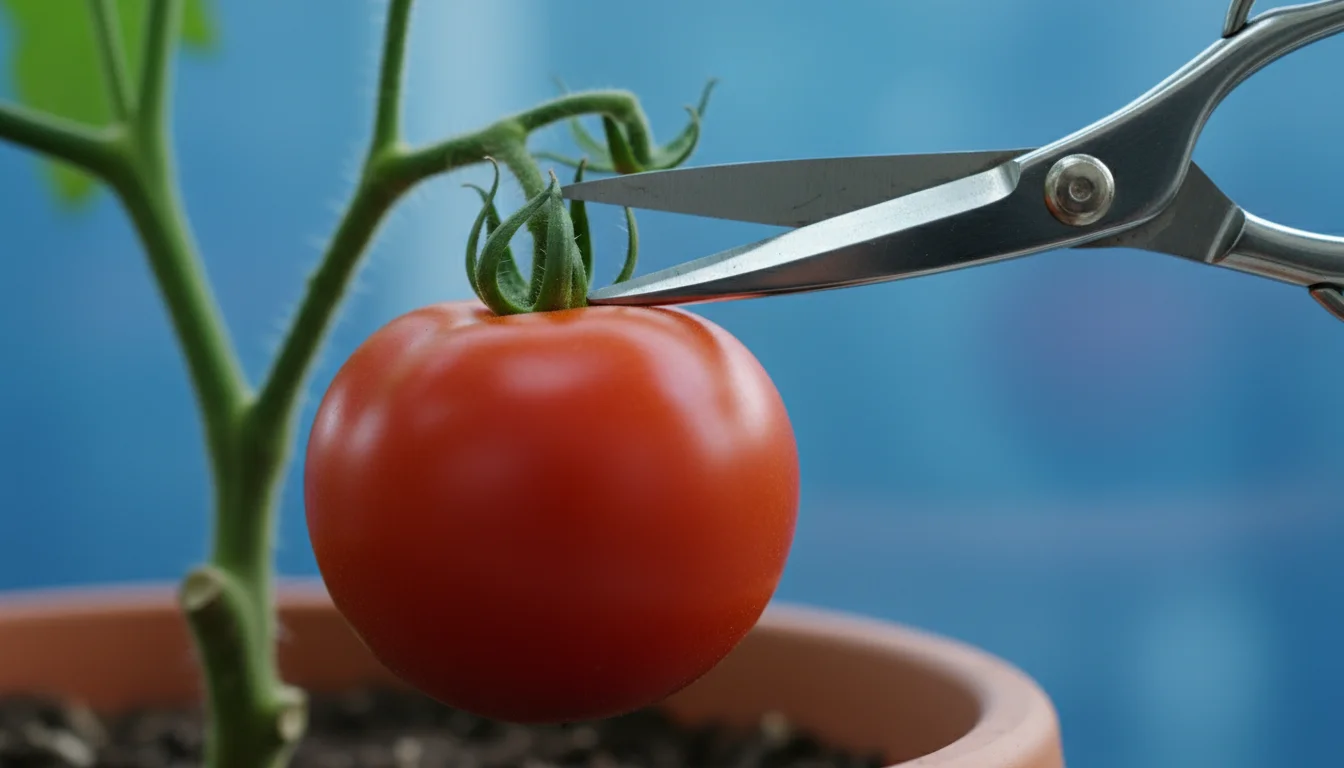
How to Harvest
Harvesting is simple, but a clean technique helps prevent damage to the plant and encourages continued production.
- Use a Gentle Twist or Snip: Gently grasp the ripe tomato and twist it off the vine, keeping the stem attached to the fruit if possible. Alternatively, use clean pruning shears or sharp scissors to snip the stem just above the fruit, again leaving the little green calyx (the leafy part at the top) attached.
- Avoid Pulling: Do not yank or pull the fruit forcefully. This can damage the plant’s branches or even pull off entire sections, reducing future yields.
- Harvest Regularly: As soon as tomatoes ripen, harvest them. Leaving ripe fruit on the plant signals to the plant that its fruiting cycle is complete, potentially slowing down the production of new flowers and fruits. Regular harvesting encourages the plant to put more energy into developing new fruits.

Enjoying Your Harvest
Your freshly picked indoor tomatoes will be a taste sensation far superior to store-bought alternatives during winter.
- Immediate Enjoyment: The best way to enjoy your perfect tomato is immediately after harvest. Slice it into a salad, add it to a sandwich, or simply eat it on its own with a sprinkle of salt.
- Storage: Store ripe tomatoes at room temperature on your counter, not in the refrigerator. Refrigeration dulls their flavor and can make them mealy. If you have an abundance, consider making a small fresh sauce or salsa that you can enjoy immediately.
This single, perfect tomato plant under your grow light proves that fresh, homegrown produce is not just a summer luxury. It’s a testament to your commitment and provides a bright, flavorful spot in your winter. This experiment provides a delicious reward for your efforts and enhances your connection to the food you eat.
Frequently Asked Questions
What is the ideal temperature for growing tomatoes indoors?
Tomato plants thrive in a consistent temperature range of 65-80°F (18-27°C) during the day. Nighttime temperatures can be slightly cooler, around 60-65°F (15-18°C), but avoid prolonged exposure below 55°F (13°C) as this can stress the plant and hinder fruit development. Maintain stable conditions for optimal growth.
How often should I water my indoor tomato plant?
Water your indoor tomato plant when the top inch or two of the soil feels dry to the touch. The frequency depends on factors like pot size, plant size, and room humidity, typically every 1-3 days. Always water thoroughly until you see drainage from the bottom of the pot, then promptly empty any excess water from the saucer. Consistent moisture, without sogginess, is key.
Can I use a regular lamp instead of a grow light?
No, a regular incandescent or fluorescent household lamp does not provide the specific light spectrum or intensity that a tomato plant needs for healthy growth and fruit production. Tomatoes require a full-spectrum light, mimicking sunlight, or specific red and blue wavelengths, which dedicated LED or high-output fluorescent grow lights provide. Using a regular lamp will likely result in leggy, weak plants that fail to flower or produce fruit.
Do I need to prune dwarf tomato varieties grown indoors?
Dwarf and determinate tomato varieties generally require minimal pruning. You should remove any yellowing, diseased, or dead leaves to maintain plant health and air circulation. While outdoor indeterminate tomatoes benefit from sucker removal, many indoor dwarf varieties will produce fruit on their suckers, so consider leaving them unless the plant becomes too dense. Focus on overall plant health rather than aggressive pruning.
Why are my indoor tomato flowers dropping off without producing fruit?
Flower drop in indoor tomatoes is almost always due to a lack of pollination. Since there are no bees or wind indoors, you must hand pollinate your tomato flowers. Gently vibrate the stems or individual flowers daily using an electric toothbrush, or transfer pollen with a small brush. Other causes could include extreme temperatures, very low humidity, or insufficient light, but inadequate pollination is the most common culprit for flowers that fail to set fruit.
For trustworthy gardening information, visit:
Denver Botanic Gardens, San Diego Botanic Garden, U.S. National Arboretum and American Horticultural Society. These organizations provide expert, research-based advice for gardeners at all levels.
Disclaimer: This article is for informational purposes only and is not a substitute for professional gardening advice. Always consult local extension services or horticulture experts for region-specific guidance.


Leave a Reply