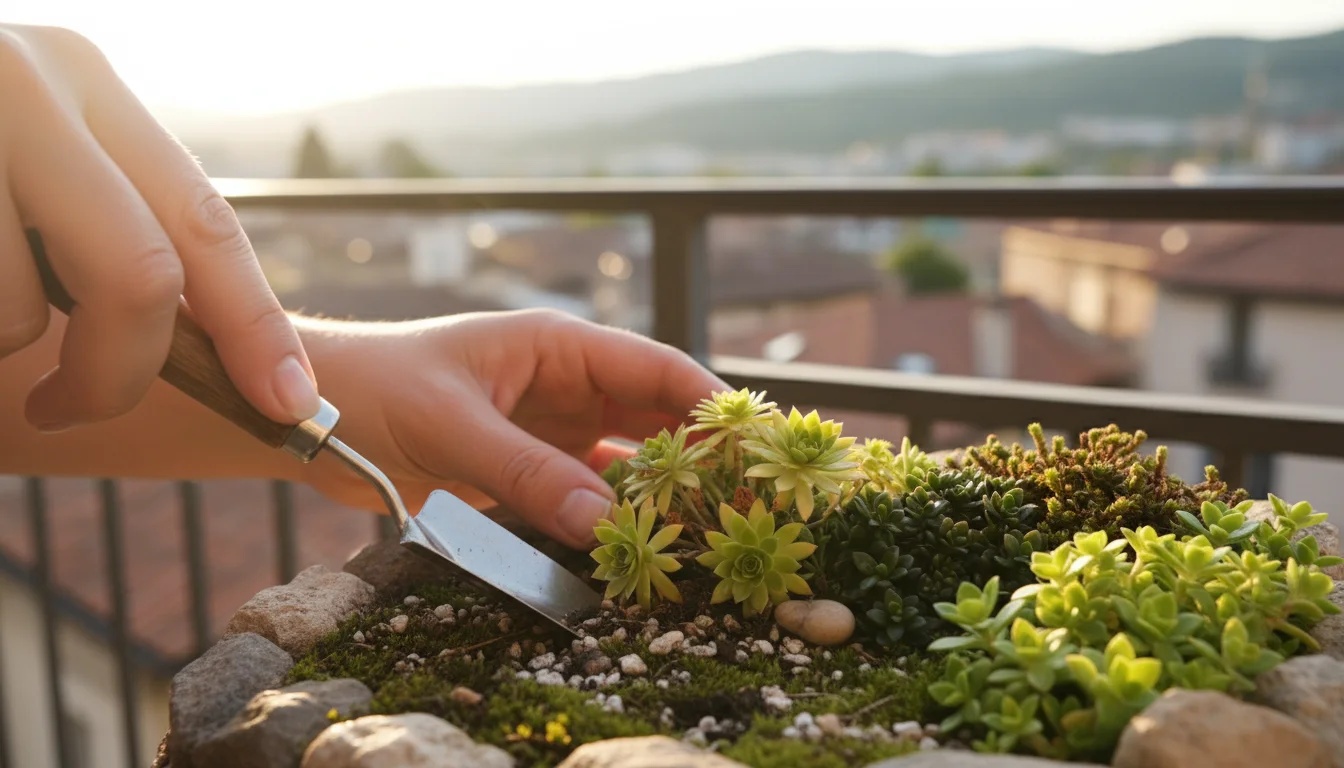
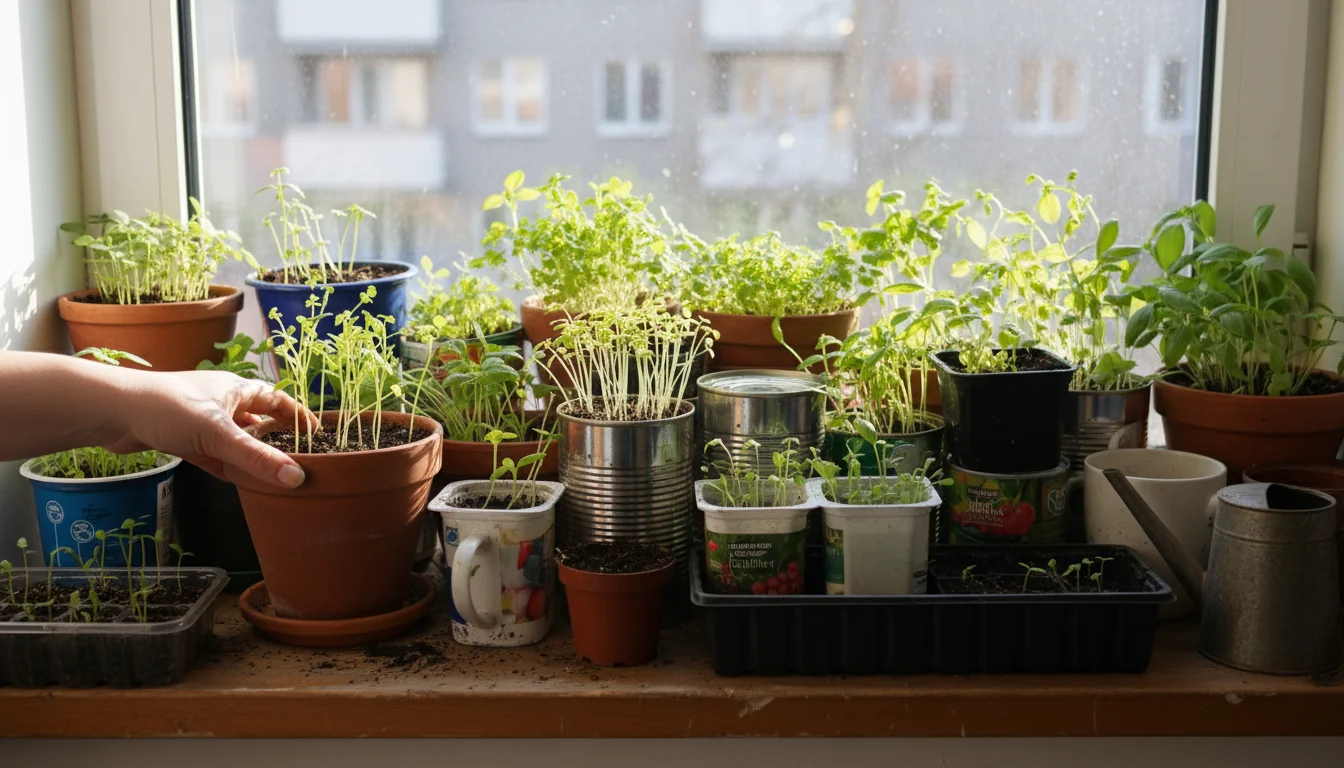
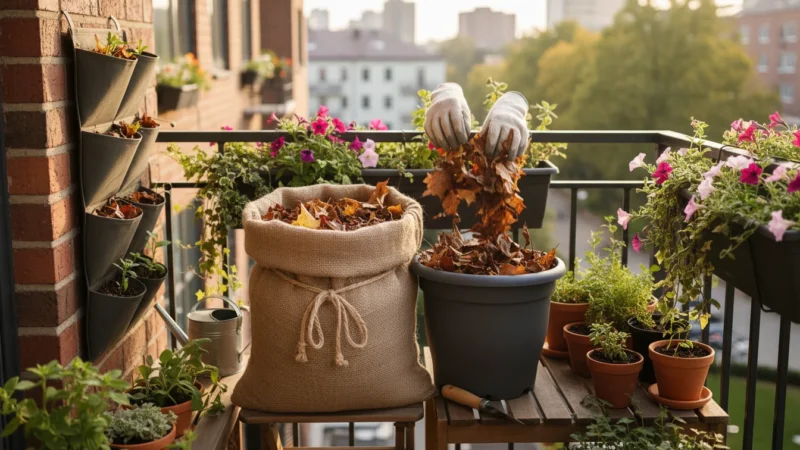
You love the idea of gardening, seeing green life thrive, and adding natural beauty to your outdoor spaces. But perhaps you live in a small apartment, a condo with a balcony, or a home with a cozy patio, making traditional gardening a challenge. You also want a project that does not demand constant attention, fitting into your busy schedule. This is where the miniature alpine trough garden comes in, offering a perfect solution for small spaces and busy lives. This fall, transform your balcony or patio into a captivating miniature landscape, brimming with hardy, beautiful alpine plants. You create a vibrant display that requires minimal effort yet provides year-round interest. This article guides you through building your very own low-maintenance alpine trough, turning your small space into a botanical wonderland.
It is also the perfect time to fix last season’s layout mistakes and plan for a more organized growing space.
What Exactly is an Alpine Trough Garden?
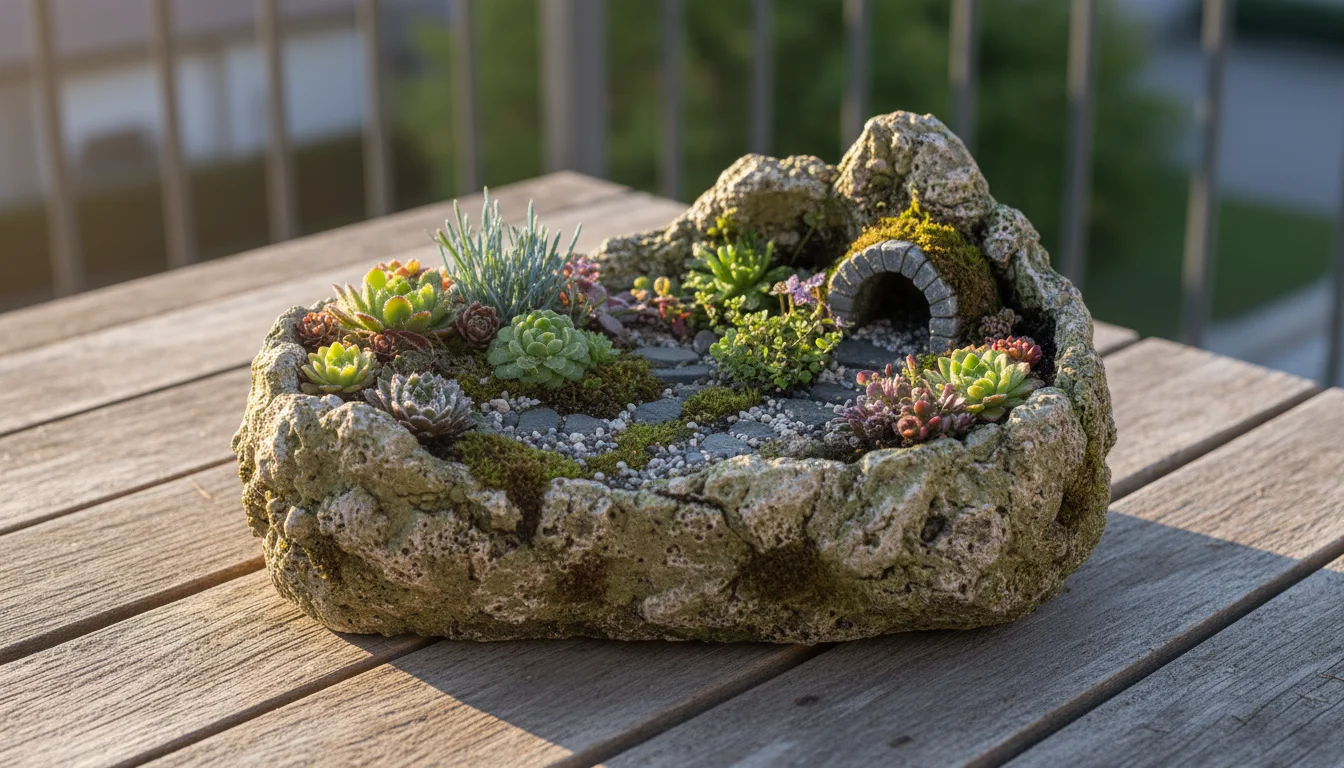
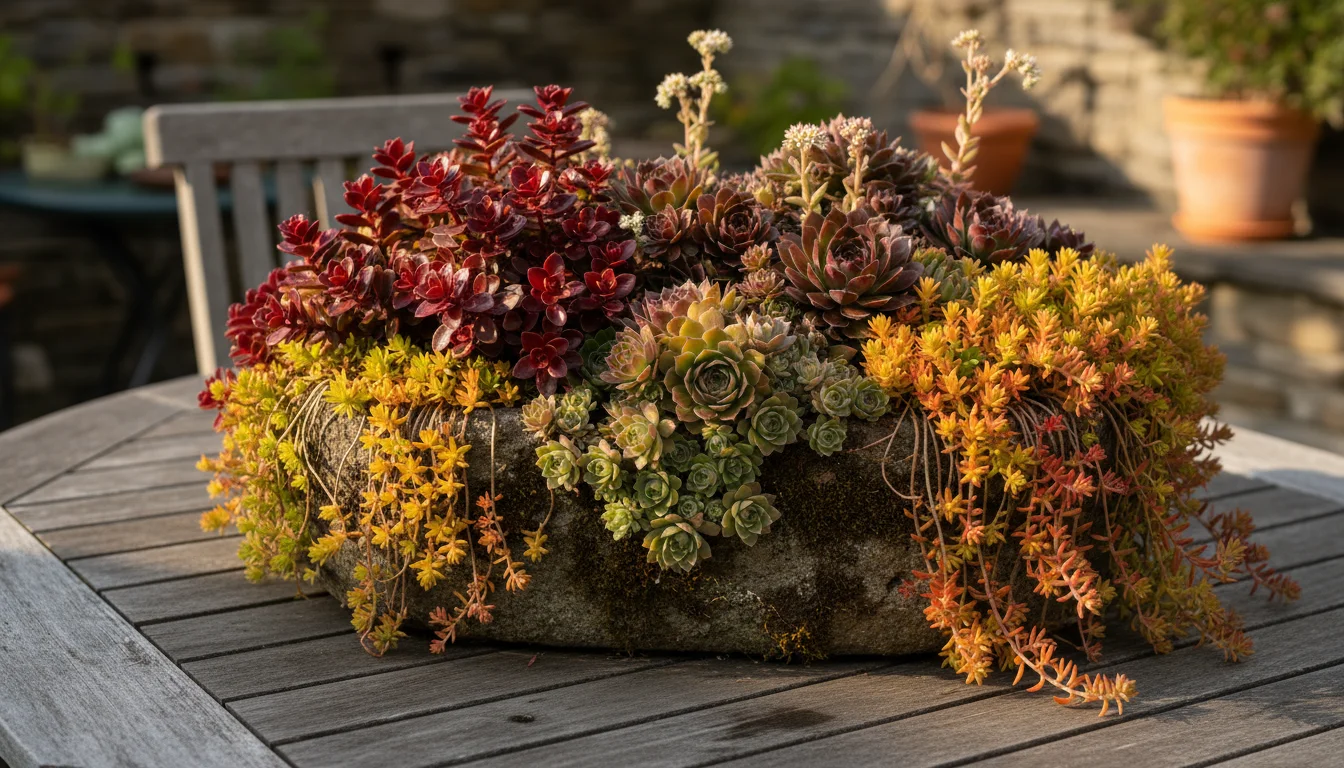
An alpine trough garden is a miniature, self-contained landscape designed to mimic the conditions of a high-altitude mountain environment. Gardeners cultivate a range of alpine plants in a shallow, well-draining container, often referred to as a trough. These plants naturally endure harsh, rocky, and often nutrient-poor conditions, making them incredibly resilient and perfect for a low-maintenance setup. Historically, troughs were repurposed stone feeding troughs, giving the garden style its name. Today, you find troughs made from various materials, including concrete, hypertufa, glazed ceramic, or even durable plastics.
This style of gardening is a more rugged cousin to the indestructible fall succulent bowl, utilizing similar low-water principles.
This project shares many similarities with creating a living fall centerpiece using potted herbs and succulents, which can also bring natural life to your outdoor furniture.
If you enjoy creating these tiny landscapes, you might also like to DIY a tabletop terrarium for some indoor greenery during the colder months.
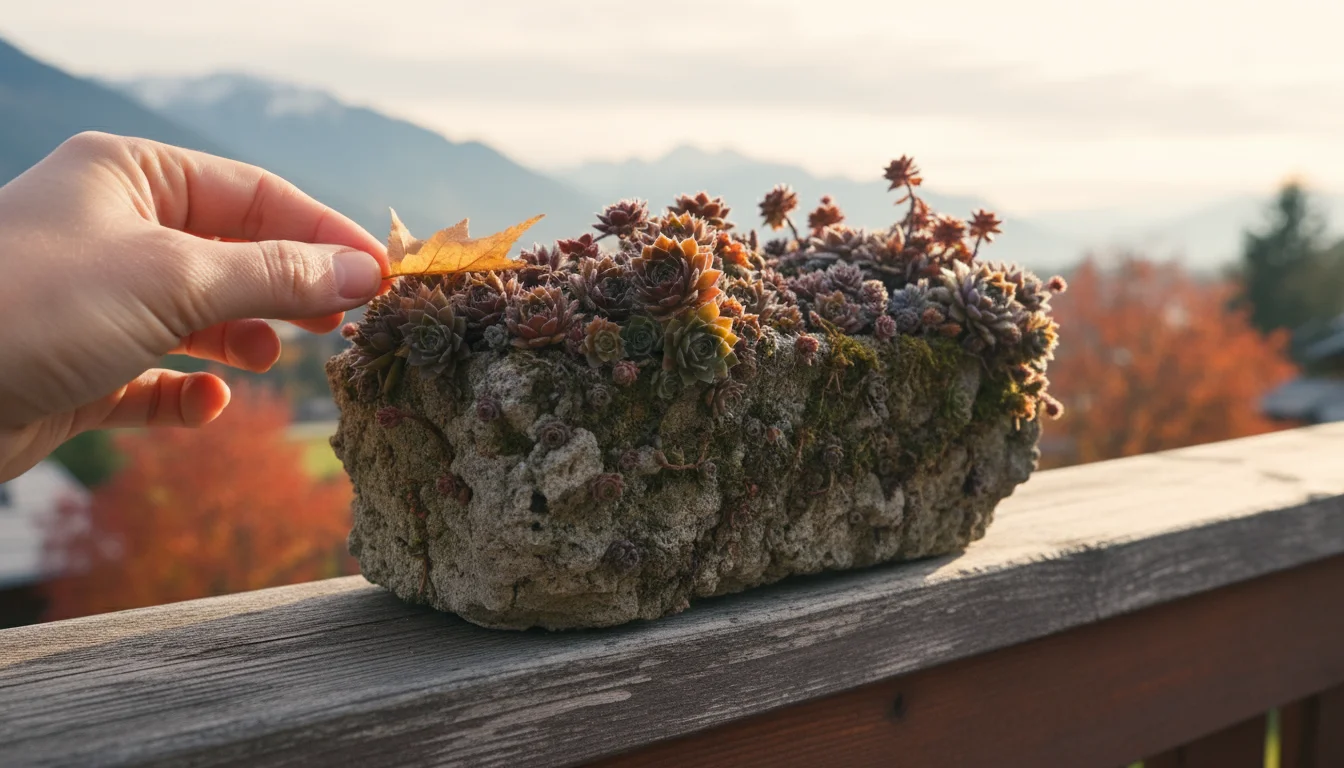
The appeal of an alpine trough for small-space gardening on your balcony or patio is significant. It offers a compact, manageable growing environment. You gain a beautiful, naturalistic display without needing a large garden bed. Alpine plants, by their nature, grow slowly and stay small, preventing your container from becoming overcrowded too quickly. This slow growth also means less pruning and less fuss, a key benefit for low-maintenance gardening. Your trough garden provides year-round interest. Many alpine plants feature evergreen foliage, interesting textures, and early spring or summer blooms that contrast beautifully with rocks and gravel. This ensures your balcony remains visually engaging even in the colder months when other plants fade. You create a distinct, miniature ecosystem, a slice of a mountain landscape, right at your fingertips. This project combines aesthetic appeal with practical, small-space gardening solutions.
Why Fall is Prime Time for Planting Your Trough
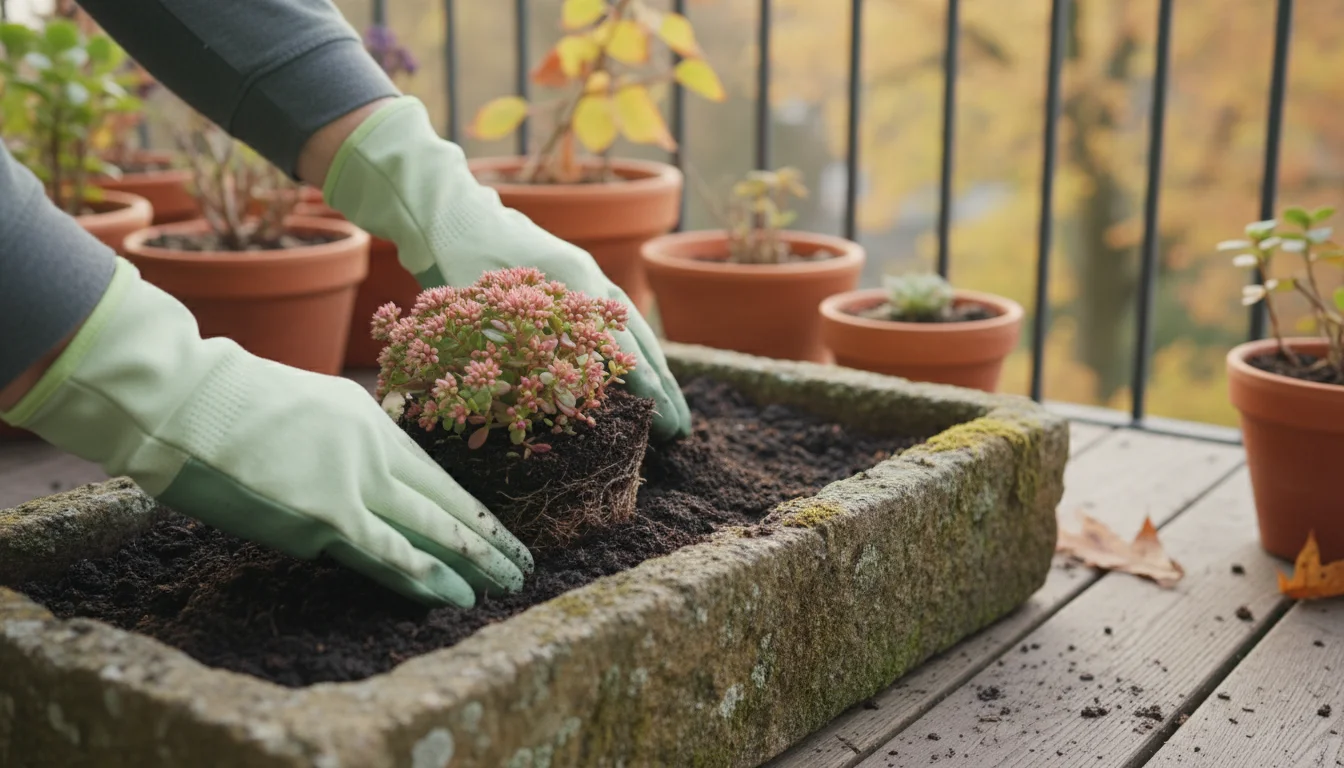
You might typically associate gardening projects with spring, but fall offers unique advantages for establishing a miniature alpine trough garden. Fall planting provides your alpine plants with a crucial period for root establishment. As air temperatures cool but the soil remains relatively warm, plants focus their energy on developing a strong root system rather than expending energy on new foliage or flowers. This deep rooting makes them much more resilient when spring arrives and the growing season truly begins.
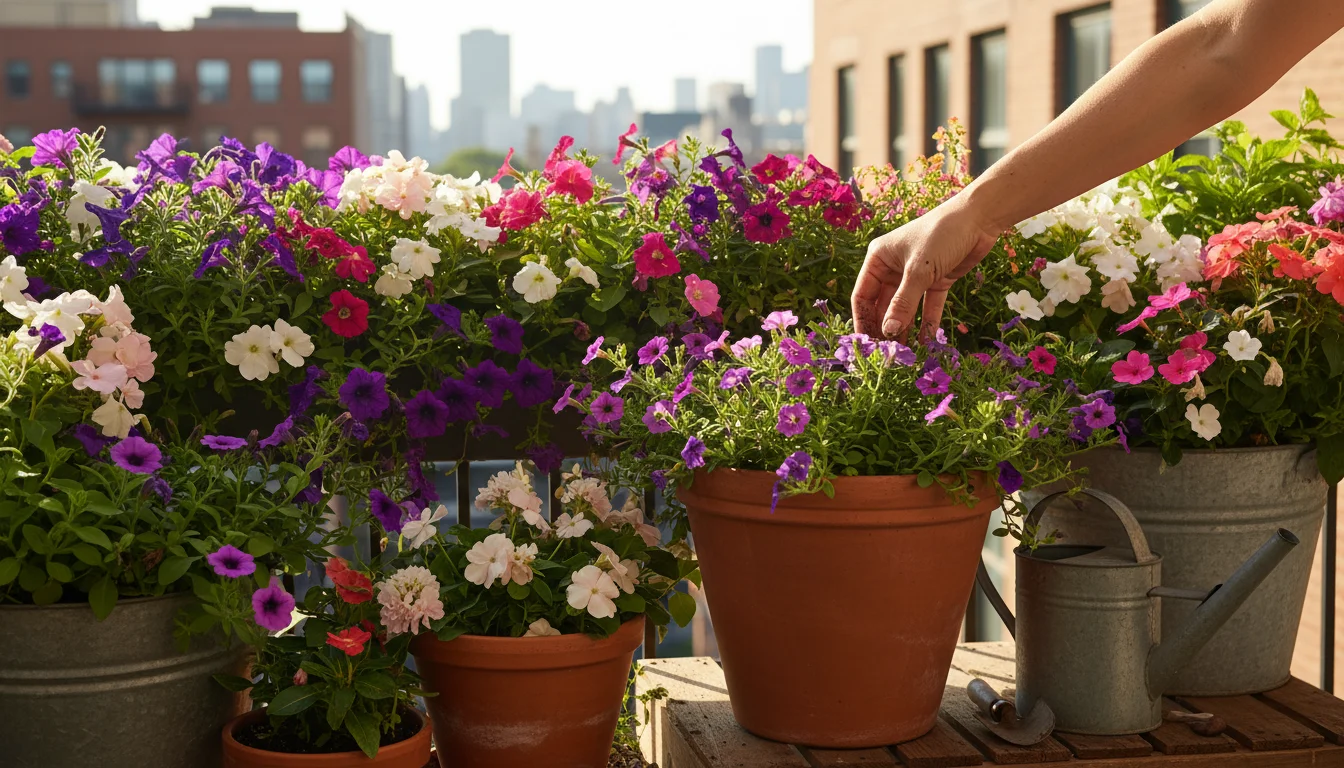
While you are busy with autumn tasks, consider how you can redesign your balcony for next spring by clearing out old summer annuals to make room for your new trough.
The cooler temperatures also reduce transplant shock. Plants experience less stress when moved into a new container in the milder fall weather compared to the intense heat of summer. You also find fewer pests and diseases active in the fall, giving your newly planted trough a healthier start. Furthermore, fall rain patterns often provide natural irrigation, lessening your watering duties during the initial establishment phase.
By planting in fall, you position your trough garden for an impressive spring display. The plants spend the autumn and winter acclimatizing, building strength, and storing energy. When the first signs of spring appear, your alpine plants will already be settled in, ready to produce their charming blooms and fresh foliage, delighting you with an early show of color and texture on your balcony. This strategic timing transforms your trough project from a simple task into an investment in future beauty and resilience.
Choosing Your Container: The Foundation of Your Tiny Ecosystem
The container you select forms the literal foundation of your miniature alpine garden, influencing both its aesthetic appeal and the health of your plants. For a balcony or patio, you must prioritize weight, size, and material durability.
Once your containers are placed, think about styling your small space for autumn evenings to fully enjoy your new miniature mountain landscape.
Because these pots will stay out all winter, you should also learn how to protect your fall containers from autumn storms if your balcony is on a high floor.
Selecting the right pot is a great way to use your empty garden space effectively as the seasons change and the air turns crisp.
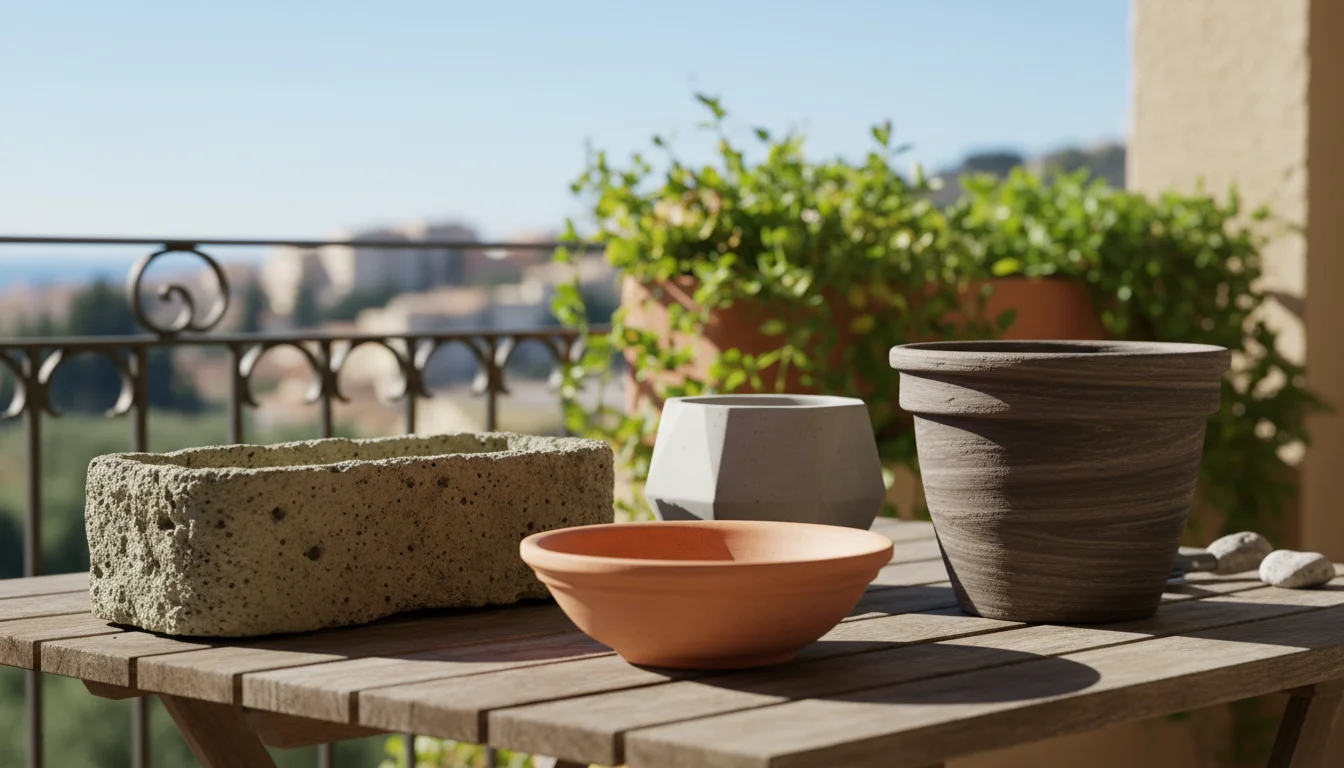
Weight: Balconies have weight limits. Choose a container that is sturdy but not excessively heavy, especially once filled with soil, rocks, and plants. Lighter materials like fiberglass, resin, or lightweight concrete are excellent choices. Traditional stone troughs are beautiful but can be extremely heavy. If you desire the look of stone, consider hypertufa, a lightweight, porous material you can even make yourself.
Size: Alpines generally have shallow root systems. A container that is 6 to 12 inches deep and 12 to 24 inches wide offers ample space for a selection of plants without becoming too bulky for a small space. The wider the container, the more plants you can accommodate, and the more stable the miniature landscape you can create. Always ensure your chosen container fits comfortably within your balcony or patio dimensions, allowing for easy movement around it.
Material: The material of your trough impacts its drainage and aesthetic.
- Hypertufa: This mixture of peat moss, perlite, and cement creates a lightweight, porous, and natural-looking container. It mimics ancient stone and offers excellent insulation and drainage properties for alpine plants.
- Concrete: Solid and durable, concrete troughs offer a classic, rugged look. They are heavy, so verify your balcony can support the weight.
- Ceramic or Terra Cotta: Glazed ceramic pots offer color and style, while unglazed terra cotta provides good breathability. Both require excellent drainage holes. Terra cotta can be prone to cracking in hard freezes if constantly saturated, so ensure good drainage and potentially protect it in extreme winter conditions.
- Resin or Fiberglass: These materials are lightweight, durable, and available in various styles and colors, often mimicking natural stone. They are excellent choices for weight-conscious balconies.
Drainage Holes are Non-Negotiable: Regardless of the material, your trough absolutely must have drainage holes. Alpine plants hate wet feet, meaning they rot easily in soggy soil. Multiple drainage holes, typically at least 0.5 to 1 inch in diameter, prevent waterlogging. If your chosen container lacks sufficient holes, you might need to drill more. Place a piece of mesh or a broken pottery shard over each hole to prevent soil from washing out while allowing water to escape freely. This critical step ensures your tiny tough-guys remain healthy and happy.
Crafting the Perfect Home: Soil Mix and Drainage Essentials
The right soil mix is paramount for a successful alpine trough garden. Alpine plants are adapted to lean, gritty, and incredibly well-draining conditions. Standard potting soil retains too much moisture and often contains too many nutrients, which encourages lush, soft growth that is susceptible to rot and diseases. Your goal is to replicate their natural mountain habitat as closely as possible within your container.
These drainage principles are also the secret to successfully overwintering hardy potted perennials on a balcony when the ground freezes.
Because they thrive in gritty, fast-draining soil, these setups are perfect examples of low-water gardening for busy plant owners.
Understanding Drainage: When gardeners talk about “drainage,” they refer to how quickly water moves through the soil and exits the container. Excellent drainage means water passes through rapidly, leaving the roots moist but not waterlogged. Poor drainage means water sits in the pot, suffocating roots and leading to root rot.
The Ideal Alpine Soil Mix:
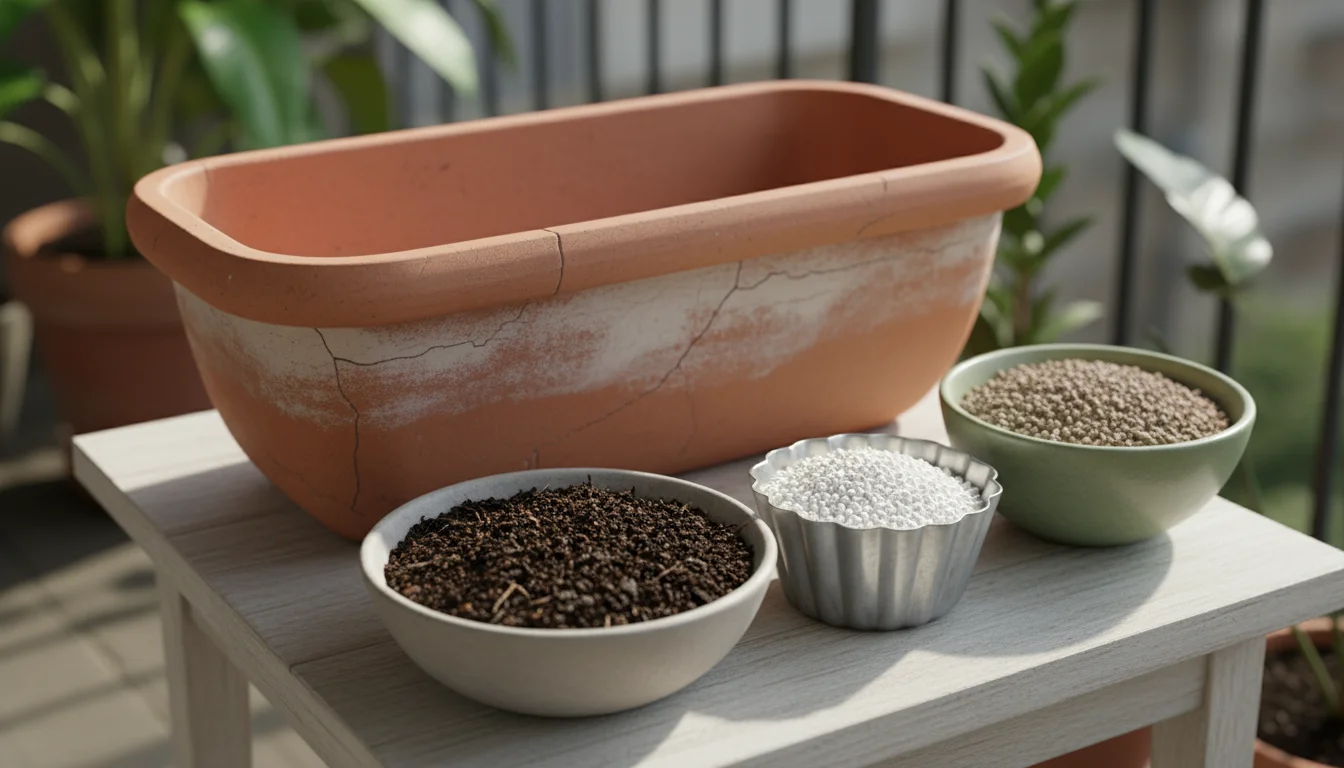
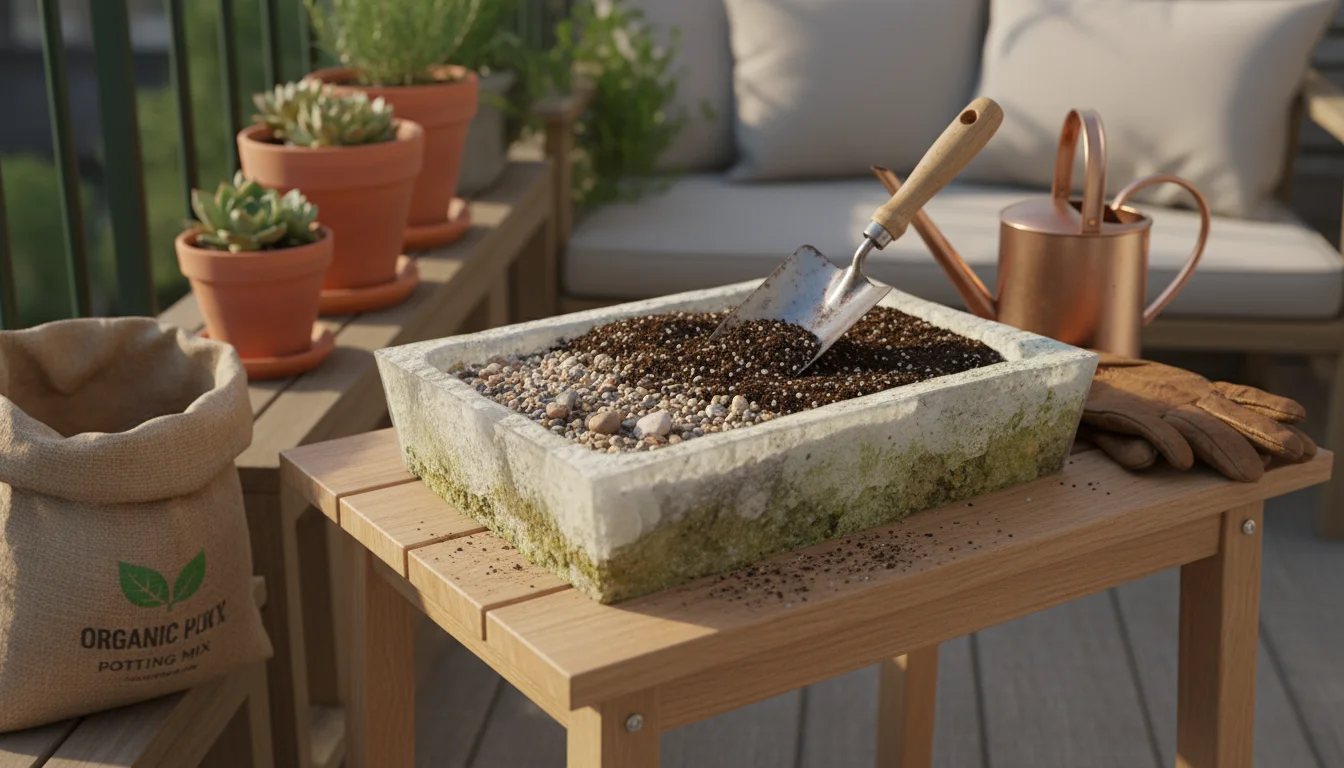
You want a mix that is gritty, porous, and low in organic matter. A good starting point is a blend of:
- 1 part standard potting soil: Choose a high-quality, free-draining potting mix. This provides a minimal amount of organic matter and some base nutrients.
- 1 part grit: This is the key component. “Grit” refers to small, inorganic particles that create air pockets and facilitate water movement. Options include:
- Horticultural grit: Specifically graded crushed rock, often granite or flint.
- Coarse sand: Not play sand, which is too fine. Look for sharp, coarse builders’ sand.
- Fine gravel or pea gravel: Small, rounded stones, typically 1/8 to 1/4 inch in size.
- Perlite or pumice: Volcanic materials that lighten the mix and improve aeration.
- Optional: 1/2 part composted bark fines or coir: A small amount of these adds some structure and retains a little moisture without becoming soggy. Avoid too much peat moss, as it can be acidic and compact over time.
Mix these components thoroughly. The resulting mixture should feel loose, crumbly, and drain very quickly when wet. A simple test: grab a handful, squeeze it, then release. It should fall apart easily.
The Drainage Layer Myth: You often hear advice to put a layer of gravel or broken pottery at the bottom of a pot for “drainage.” However, for most containers, this practice is largely ineffective and can sometimes hinder drainage. Water does not easily move from fine soil particles into coarse gravel particles until the finer soil above is fully saturated. This phenomenon, known as the “perched water table,” means water sits in the soil just above the gravel layer, potentially causing root rot anyway.
Instead of a drainage layer, focus on three critical aspects:
1. Sufficient drainage holes: As discussed, these are crucial.
2. The right soil mix: A gritty, fast-draining mix prevents waterlogging throughout the entire container.
3. Elevation: Elevate your trough slightly off your balcony surface using “pot feet” or small blocks. This ensures air circulation beneath the pot and prevents the drainage holes from becoming blocked by the surface below, allowing water to escape freely.
By focusing on a well-aerated, gritty soil mix and proper drainage holes, you create the optimal growing environment for your alpine plants.
Selecting Your Tiny Tough-Guys: Best Cold Hardy Alpine Plants
Choosing the right alpine plants is essential for a successful, low-maintenance trough garden that thrives on your balcony year-round. You need species known for their cold hardiness, drought tolerance, compact growth habit, and ability to thrive in shallow, gritty soil. Focus on plants that provide diverse textures, colors, and bloom times to ensure continuous interest.
You can also incorporate other winter-hardy perennials into your container collection to provide varied height and color alongside your alpines.
Here are some excellent choices for your miniature alpine garden, perfect for small-space, fall container projects, offering year-round interest:
- Sedums (Stonecrop): These succulent-like plants are true heroes of the alpine garden. They come in an incredible range of foliage colors, shapes, and sizes, from creeping mats to upright mounds. Many offer attractive fall flowers.
- Examples: Sedum album, Sedum spurium, Sedum ‘Dragon’s Blood’, Sedum ‘Angelina’.
- Why they are great: Extremely drought tolerant, cold hardy, low growing, provide excellent groundcover and texture, often evergreen.
- Sempervivums (Hen and Chicks): Another succulent-like genus, sempervivums form neat rosettes that multiply over time, creating a pleasing clump. They are incredibly tough and require minimal care.
- Examples: Sempervivum tectorum, Sempervivum arachnoideum (cobweb houseleek).
- Why they are great: Extremely cold hardy, architectural rosette forms, fascinating textures, require almost no water once established, year-round appeal.
- Dianthus (Pinks): These charming plants offer masses of fragrant, often fringed flowers in shades of pink, white, and red. Many alpine varieties form neat, grassy mounds of blue-green foliage.
- Examples: Dianthus gratianopolitanus (cheddar pink), Dianthus deltoides (maiden pink).
- Why they are great: Pretty blooms, attractive foliage, generally compact and cold hardy.
- Saxifraga (Saxifrage): This diverse genus includes many alpine species forming tight cushions or rosettes. They often produce dainty flowers on slender stems.
- Examples: Saxifraga x arendsii, Saxifraga paniculata.
- Why they are great: Forms tight mounds, good for filling crevices between rocks, many are evergreen.
- Thymus (Thyme): Many creeping thymes make excellent groundcovers in an alpine trough. They release a lovely fragrance when brushed and produce tiny flowers.
- Examples: Thymus serpyllum (creeping thyme), Thymus praecox.
- Why they are great: Aromatic, excellent for trailing over trough edges, very tough and low growing, evergreen.
- Draba: These form tiny, dense cushions of foliage, often with bright yellow flowers in early spring. They are incredibly small and perfect for true miniature effects.
- Examples: Draba aizoides.
- Why they are great: Ultra-compact, good for tight spaces, very cold hardy, early bloomers.
- Armeria maritima (Thrift or Sea Pink): Forms neat, evergreen clumps of grass-like foliage, producing globe-like pink or white flowers on stalks in spring and summer.
- Examples: Armeria maritima ‘Rubrifolia’.
- Why they are great: Evergreen foliage, distinctive flowers, very tough and salt tolerant, good for exposed balcony conditions.
- Silene acaulis (Moss Campion): A true cushion-forming alpine, creating dense, moss-like mats covered in small pink flowers.
- Why it is great: Iconic alpine look, extremely low growing, very cold hardy.
- Creeping Phlox (Phlox subulata): While sometimes larger than true alpines, compact varieties can work well, spilling over the edges of a trough with a cascade of spring flowers.
- Why it is great: Spectacular spring bloom, excellent trailing habit, forms dense mats.
When you select plants, consider their mature size and growth habit. Aim for a mix of textures and forms: some cushion-forming, some trailing, and perhaps one slightly taller, spiky focal point if space allows. Always check the plant’s hardiness zone to ensure it tolerates your local winter temperatures. Look for plants labeled as “alpine,” “rock garden plants,” or “cold hardy succulents.” These are your best bets for creating a thriving, beautiful miniature garden that provides year-round interest on your balcony.
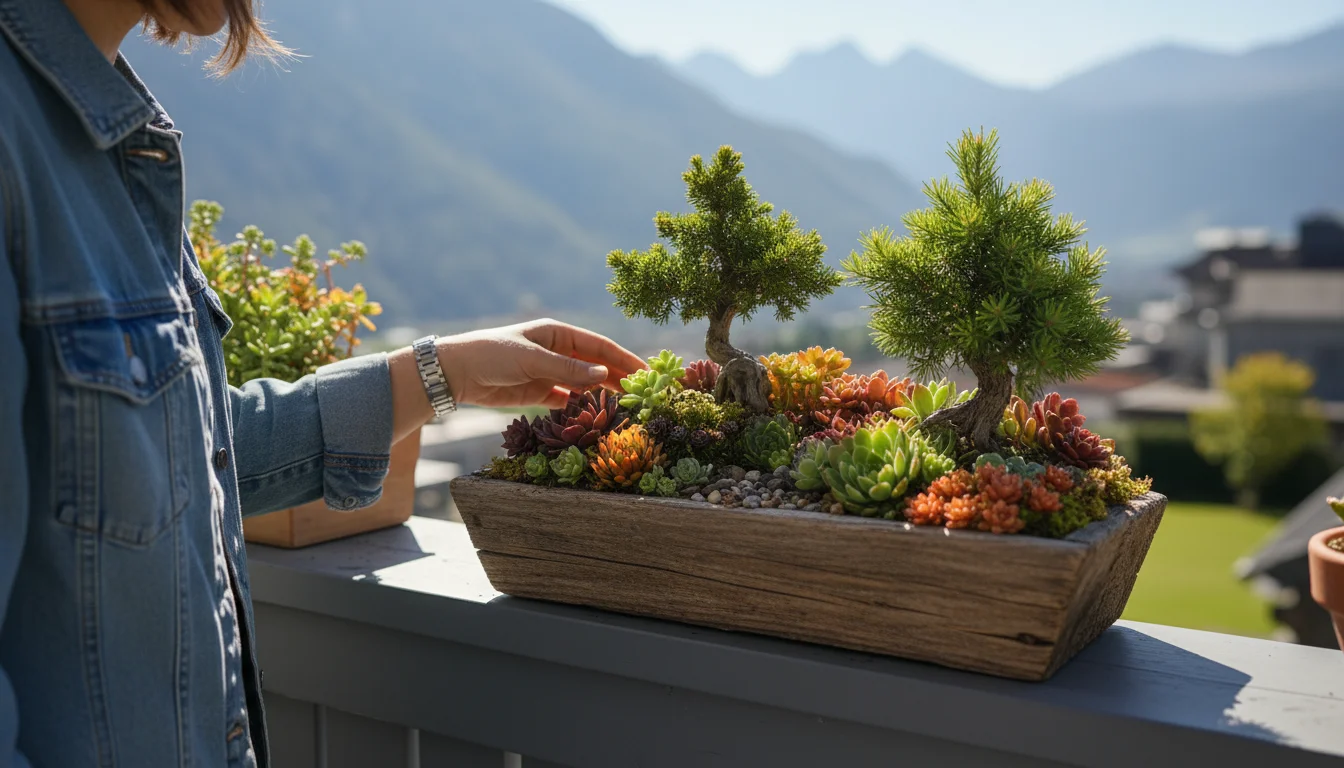
Designing Your Miniature Mountain Landscape
Designing your alpine trough garden is where your creativity truly shines. You are creating a miniature landscape, a tiny slice of a mountain range. The goal is to make it look natural, harmonious, and visually appealing from all angles, especially since it will often be viewed close up on your balcony or patio.
Consider Your Focal Point: Start by selecting a prominent rock or group of rocks. These serve as the “mountains” in your landscape. Position your largest or most interesting rock first, slightly off-center for a more natural look. Embed it partially into the soil so it looks like it has always been there, not just placed on top. Use several smaller rocks to complement this main feature, creating miniature outcroppings, slopes, and crevices. The rocks not only add visual structure but also provide microclimates that alpine plants appreciate, offering shade to roots and protecting plants from strong winds. Aim for rocks with interesting textures and colors that complement your container.
Create Topography: Do not make the soil perfectly flat. Shape the soil around your rocks to create subtle hills, valleys, and slopes. This varied topography enhances the natural feel and provides different drainage zones for your plants. Some plants might prefer a slightly elevated, drier spot, while others tolerate a bit more moisture at the base of a “hill.”
Plant Placement Strategy:
1. Tallest plants: If you include a slightly taller, upright plant, place it towards the back or center, ensuring it does not overshadow smaller plants.
2. Cushion-forming plants: These form neat mounds and are excellent for filling open spaces between rocks. Group a few similar plants for impact, or scatter different varieties for a patchwork effect.
3. Trailing plants: Position these near the edges of your trough. As they grow, they will gently cascade over the sides, softening the container’s hard lines and mimicking plants spilling over rock faces.
4. Consider textures and colors: Mix plants with different leaf shapes, sizes, and colors. A silvery sedum next to a dark green sempervivum, contrasted with the fine foliage of a dianthus, creates visual depth. Think about how the plants will look throughout the year, especially their evergreen foliage.
Leave Open Space: Resist the urge to cram too many plants in. Alpines grow slowly, and an overcrowded trough looks less natural. Leave some open patches of grit or small stones. This provides visual resting places, allows for good air circulation, and keeps the design from looking too busy. These open spaces also highlight the individual beauty of each plant and rock.
- Aesthetics: It gives the garden a finished, naturalistic look, mimicking the scree slopes of mountains.
- Moisture retention/reduction: It helps keep moisture in the soil from evaporating too quickly during dry spells, yet also prevents moisture from sitting around the plant crowns, which can lead to rot, a common issue for alpines.
- Weed suppression: It discourages weed seeds from germinating.
- Protection: It protects the plant crowns from splashing soil and winter heaving.
Choose a top dressing that contrasts or complements your container and plants. For example, light-colored gravel can brighten a dark trough, while darker grit can make bright green foliage pop. You create a cohesive and visually pleasing miniature world.
Step-by-Step: Assembling Your Alpine Trough Garden
Creating your miniature alpine trough garden is a rewarding project, especially as a fall container project. Follow these steps for a successful setup.
- Your chosen trough container with drainage holes.
- Mesh or broken pottery shards for drainage holes.
- Alpine-specific soil mix (potting soil, grit, optional bark fines).
- Selected alpine plants.
- Rocks for design.
- Coarse grit or small gravel for top dressing.
- Small trowel or scoop, gloves, watering can.
- Place your chosen container in its final desired location on your balcony or patio. Remember, it becomes heavy once filled.
- Ensure drainage holes are clear. Place a piece of mesh or a pottery shard over each hole to prevent soil loss.
- Consider placing “pot feet” or small blocks underneath the trough to elevate it slightly. This improves air circulation and ensures water drains freely.
- Fill your trough about two-thirds full with your custom alpine soil mix.
- Gently firm the soil to remove large air pockets. Leave enough space for your plant roots and rock placement.
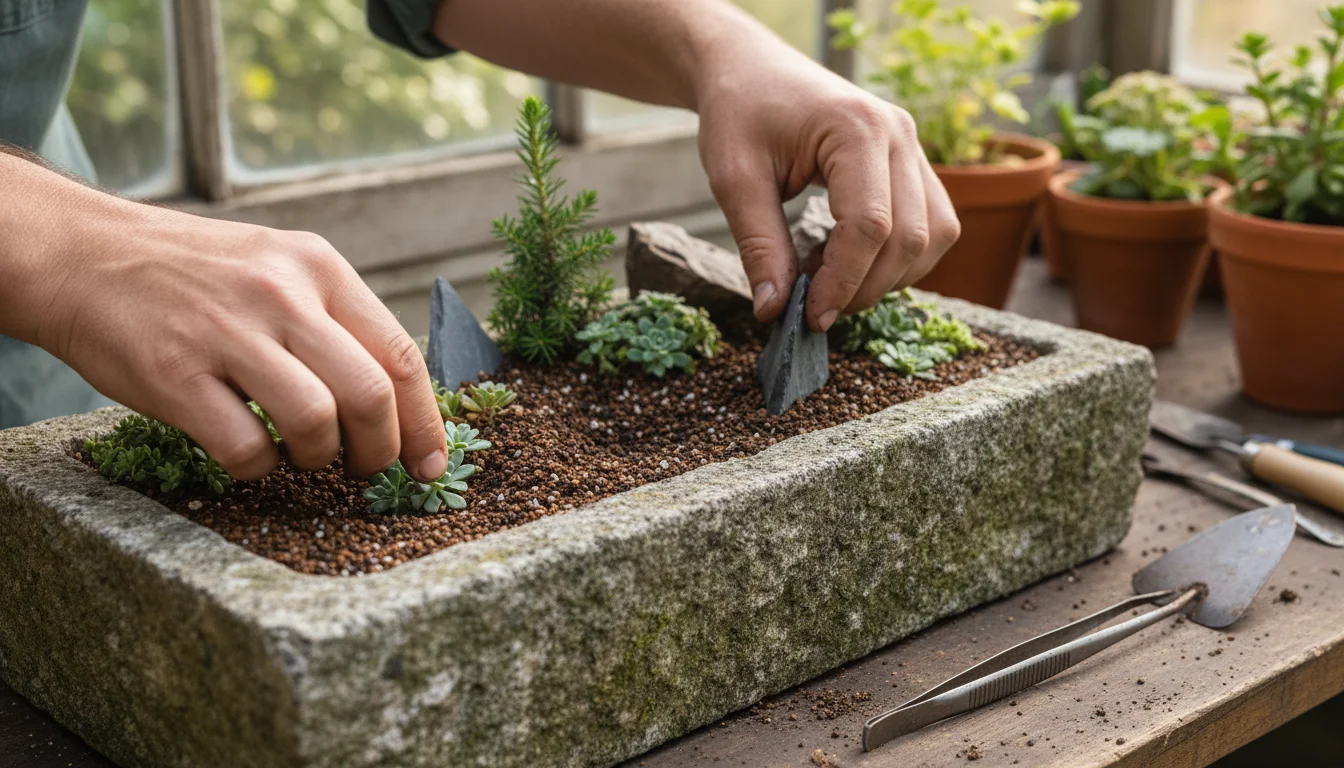
- Begin arranging your rocks, starting with your largest or most prominent “mountain” rock. Partially embed it into the soil.
- Add smaller rocks to create slopes, ledges, and crevices, making the landscape look as natural as possible. Step back and assess the arrangement from different angles. Ensure stability.
- With the rocks in place, arrange your chosen alpine plants while they are still in their nursery pots. This allows you to experiment with different layouts without disturbing the plant roots.
- Consider the mature size and growth habit of each plant. Place taller plants behind rocks, trailing plants near edges, and cushion-forming plants in open areas or crevices.
- Once you are happy with the arrangement, gently remove each plant from its nursery pot. Tease apart any tightly bound roots at the bottom of the root ball to encourage outward growth.
- Dig small holes for each plant, ensuring the crown of the plant sits at or just above the soil level, similar to how it was in its nursery pot. You do not want soil piled up around the plant’s crown, as this can lead to rot.
- Carefully place each plant in its hole and backfill with your alpine soil mix, gently firming the soil around the base of the plant.
- Pay attention to any plants that prefer specific microclimates, such as slight shade from a rock.
- Once all plants are in place, apply a generous layer (about 0.5 to 1 inch thick) of coarse grit or small gravel over the entire surface of the soil. This covers all exposed soil and extends up to the base of the plant crowns.
- Gently brush away any grit that lands on the plant foliage.
- Water your newly planted trough deeply and gently. Use a watering can with a fine rose to avoid disturbing the grit and small plants.
- Water until you see it draining freely from the bottom of the container. This settles the soil around the roots and eliminates any remaining air pockets.
Your miniature alpine trough garden is now complete. Place it in a sunny spot on your balcony, and prepare to enjoy its unique beauty for years to come.
Ongoing Care: Keeping Your Tough-Guys Thriving Year-Round
One of the greatest appeals of an alpine trough garden is its low-maintenance nature. Once established, these “tiny tough-guys” generally require less attention than many other container plants. However, consistent, mindful care ensures their long-term health and year-round beauty on your balcony.
If winter temperatures drop significantly, you can use the trench and tuck method to protect your more sensitive potted plants from the freeze.
- Less is more: Alpine plants prefer to be on the drier side. Overwatering causes root rot, their most common demise.
- Feel the soil: Before watering, stick your finger about an inch into the soil (past the grit layer). If it feels dry, it is time to water. If it still feels moist, wait.
- Water deeply: When you do water, water thoroughly until you see water draining from the bottom. This encourages deep root growth.
- Seasonal adjustments: You will water more frequently during hot, dry spells in summer and much less during cooler fall, winter, and spring months. In winter, if your trough is exposed to rain and snow, you may not need to water at all. If protected from precipitation, check for dryness occasionally.
- Minimal feeding: They typically do not require much fertilizer, if any. Too much fertilizer encourages lush, soft growth that is more susceptible to disease and less cold hardy.
- Optional light feed: If your plants appear to be struggling or have been in the same trough for several years, you can apply a very dilute, balanced liquid fertilizer (half strength or less) once in early spring. Avoid fertilizing in late summer or fall, as this encourages new growth that will be vulnerable to winter cold.
- Minimal pruning: Most alpines require very little pruning. Remove any dead, yellowing, or diseased foliage to keep the plants tidy and prevent fungal issues.
- Deadhead for appearance: You can deadhead spent flowers to keep your trough looking neat, though many alpine flowers are small and naturally fade away. For plants that tend to self-seed aggressively, deadheading can prevent unwanted spread.
- Insulation: For very cold regions (Zone 5 and below, or if you anticipate prolonged periods below 0°F), consider insulating your trough. You can wrap the container with burlap, bubble wrap, or place it inside a larger, unplanted container, filling the gap with leaves or straw.
- Relocation: If you have an unheated garage, shed, or covered porch, move your trough to that protected spot during the coldest weeks. Ensure it still receives some light and occasional watering if the soil becomes bone dry.
- Avoid standing water: Ensure the trough drains well and does not sit in standing water during winter, which leads to root rot and can cause the container to crack if water freezes and expands.
- Snow cover: A blanket of snow actually provides excellent insulation for alpine plants. Do not clear snow off your trough unless it is excessively heavy and threatens to crush delicate plants.
- Every 3-5 years: Consider repotting or refreshing your trough every 3 to 5 years. Gently remove the plants, prune any overly large root balls, replenish with fresh alpine soil mix, and replant. This rejuvenates the garden.
- Division: Some plants, like Sempervivums, naturally produce “chicks” that you can carefully separate and replant or share.
By following these simple care guidelines, you ensure your miniature alpine trough garden remains a stunning and resilient feature on your balcony, offering enjoyment through every season.
Common Challenges and How to Solve Them
Even the toughest “tiny tough-guys” can face occasional hurdles. Knowing how to identify and address common problems helps you keep your alpine trough garden thriving.
- Symptom: Wilting leaves despite moist soil, yellowing foliage, mushy stems at the base of the plant. This is the most common killer of alpine plants.
- Cause: Overwatering, poor drainage in the container, or a soil mix that retains too much moisture.
- Solution: Immediately stop watering. If the problem is severe, carefully unpot the affected plant. Gently remove as much soggy soil as possible, trim off any visibly rotted, black, or mushy roots. Repot into fresh, very gritty alpine soil mix. Review your watering habits. Ensure your container has ample drainage holes and is elevated. Consider adding more grit to your soil mix if it appears too heavy.
- Symptom: Plants appear stretched out, with long stems and sparse foliage, rather than their typical compact form.
- Cause: Insufficient sunlight. Alpines need abundant direct sunlight to maintain their dense, low-growing habit.
- Solution: Relocate your trough to a sunnier spot on your balcony or patio. Most alpines require at least 6 hours of direct sun daily. If direct sun is limited, choose varieties known to tolerate a little more shade, though true alpines generally perform best in full sun. You can prune back leggy growth to encourage bushier development, but the underlying issue of light exposure needs correction.
- Symptom: Holes in leaves, sticky residue, visible insects (aphids, mealybugs, spider mites). Alpines are generally robust, but container plants can occasionally attract pests.
- Cause: Infested new plants, stress, or specific environmental conditions.
- Solution: Regularly inspect your plants. For small infestations, a strong spray of water can dislodge pests. For persistent issues, use an insecticidal soap or neem oil spray, applying it in the evening to avoid burning foliage in direct sun. Always follow product instructions. Remove severely infested parts of the plant.
- Symptom: Powdery mildew (white powdery spots on leaves), rust (orange or brown spots), damping off (seedlings collapse).
- Cause: High humidity, poor air circulation, overcrowding, or overwatering.
- Solution: Ensure good air circulation around and within your trough. Avoid placing plants too close together. Water at the base of the plants, avoiding wetting the foliage, especially in the evening. Remove and dispose of affected plant parts. In severe cases, a fungicide may be necessary, but prevention is key.
- Symptom: Plants look dull, shriveled, or simply do not revive in spring.
- Cause: Winter desiccation (drying out in cold winds), extreme cold, or root rot from excessive winter moisture.
- Solution: Check winter care practices. Ensure the trough was not left completely dry for extended periods in freezing, windy conditions (even though they need less water, they are not zero-water). Review winter protection measures. If the plant shriveled, it likely dried out. If it is mushy, it likely rotted. Learn from the experience and adjust for the next winter. Sometimes, despite best efforts, a plant does not survive; this is a part of gardening.
Addressing these challenges promptly and understanding the specific needs of alpine plants allows you to maintain a healthy, vibrant, and long-lasting trough garden on your balcony.
Frequently Asked Questions
Can I use any kind of rocks in my alpine trough garden?
You can use most types of rock, but natural, unpolished stones like sandstone, limestone, granite, or tufa rock are best. Avoid shiny, decorative rocks that look artificial. Choose rocks with interesting textures and shapes that complement the natural aesthetic of an alpine landscape. Ensure your rocks are stable and do not shift or fall over once placed.
How much sun do alpine plants need on a balcony?
Most alpine plants thrive in full sun, meaning at least 6 hours of direct sunlight per day. Their natural habitat is exposed, mountainous terrain. If your balcony receives less sun, you might need to select specific alpine varieties that tolerate partial shade, though their growth might be less compact and flowering reduced. Sempervivums and Sedums are generally more tolerant of some afternoon shade than other alpines.
Do I need to cover my alpine trough in winter?
While alpine plants are cold hardy, container plants are more susceptible to winter damage because their roots lack the insulation of surrounding earth. In very cold regions or during prolonged freezing periods (Zone 5 and below), you should consider providing winter protection. You can wrap the trough in burlap or bubble wrap, move it to a protected, unheated space like a garage or covered porch, or even bury the container in a garden bed if you have access to a small yard. Ensure the soil does not stay waterlogged, as this often leads to root rot when temperatures drop.
What if my alpine plants grow too big?
Alpine plants are generally slow-growing and compact. However, some might eventually outgrow their space after several years. If a plant becomes too large, you can gently dig it up, divide it (if it is a clumping plant like Sempervivum or Dianthus), or prune its roots and top growth to reduce its size. Alternatively, you can replace it with a smaller plant or repot the entire trough with fresh soil and new plant arrangements every few years.
Can I use a plastic container for an alpine trough?
Yes, you can absolutely use a plastic container, especially for a balcony garden, as plastic is lightweight and durable. However, ensure it has excellent drainage holes, as plastic does not breathe like terracotta or hypertufa. Look for UV-resistant plastic to prevent degradation, and choose a style that mimics natural materials to maintain the alpine aesthetic. The key is always drainage and the correct gritty soil mix, regardless of the container material.
For trustworthy gardening information, visit:
Oklahoma State University Extension — Lawn & Garden, Tennessee Extension — Gardening, University of Delaware Extension — Gardening, University of Vermont Extension — Gardening and University of New Hampshire Extension — Yard & Garden. These organizations provide expert, research-based advice for gardeners at all levels.
Disclaimer: This article is for informational purposes only and is not a substitute for professional gardening advice. Always consult local extension services or horticulture experts for region-specific guidance.


Leave a Reply