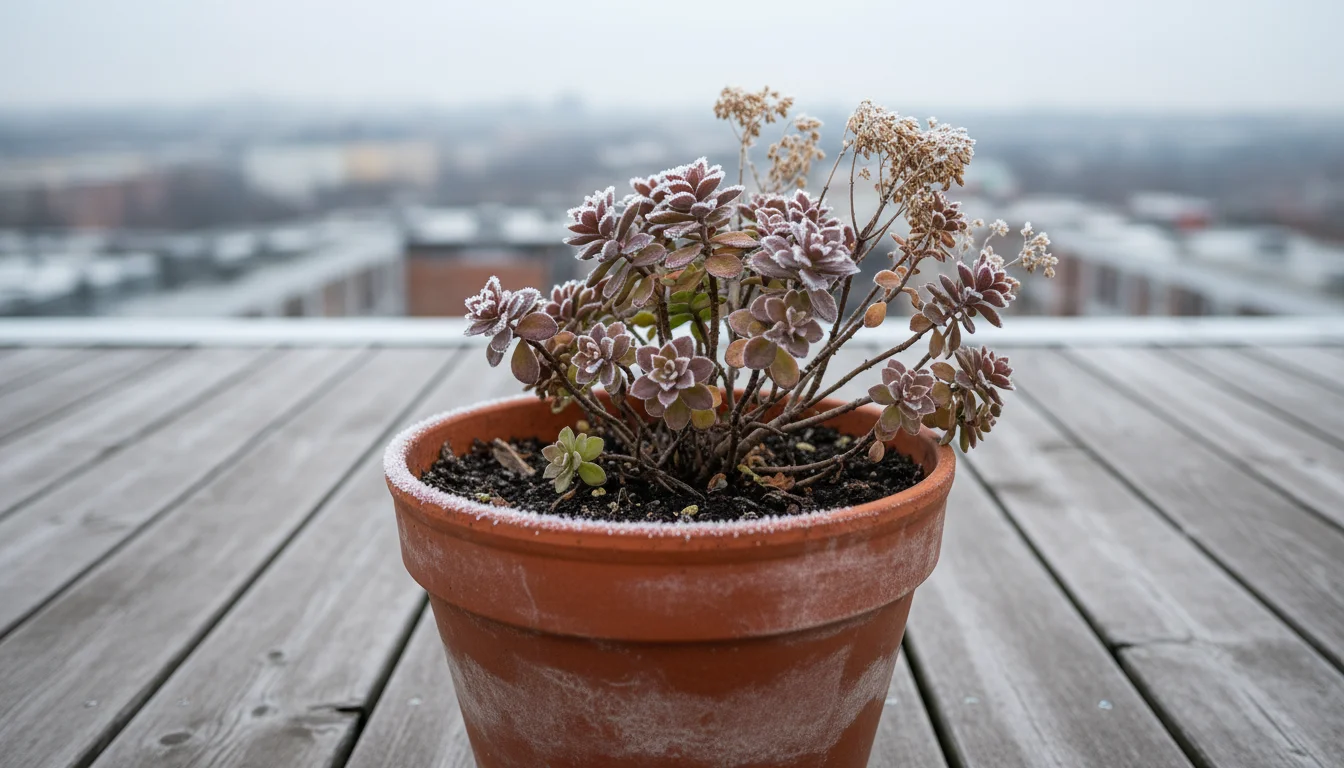
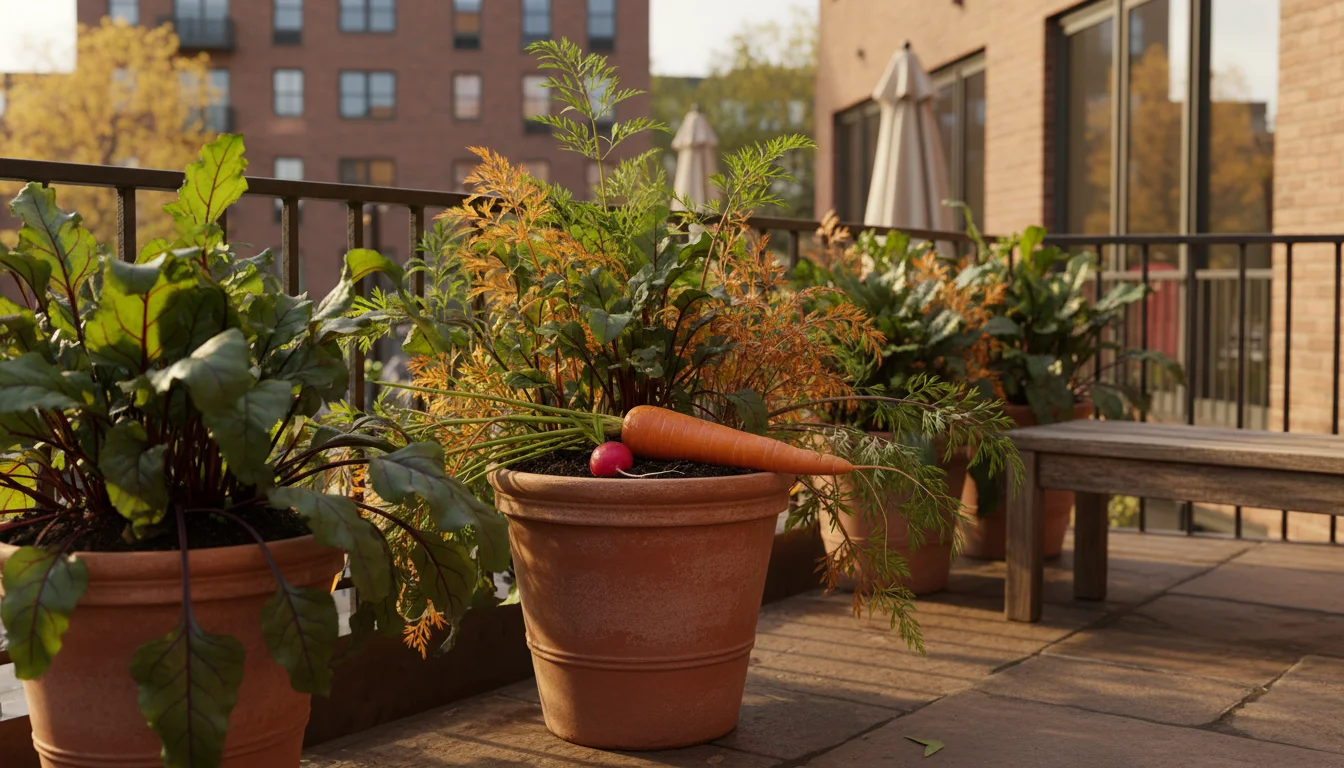
As the vibrant colors of summer begin to fade, many balcony gardeners face a common dilemma: how do you protect your beloved potted perennials from the harsh bite of winter? Cold temperatures, drying winds, and repeated freeze-thaw cycles pose significant threats, especially to plants in containers. Your pots offer less insulation than the ground, making plant roots highly vulnerable.
You can successfully overwinter many hardy perennials on your balcony, keeping them healthy and ready for a glorious return next spring. This guide introduces you to the ‘Trench and Tuck’ method, a simple, effective, and environmentally conscious strategy specifically designed for small-space gardeners. This technique provides the insulation your potted plants need to survive the winter chill, ensuring your balcony garden remains a source of joy for years to come.
Understanding the Winter Challenge for Potted Perennials
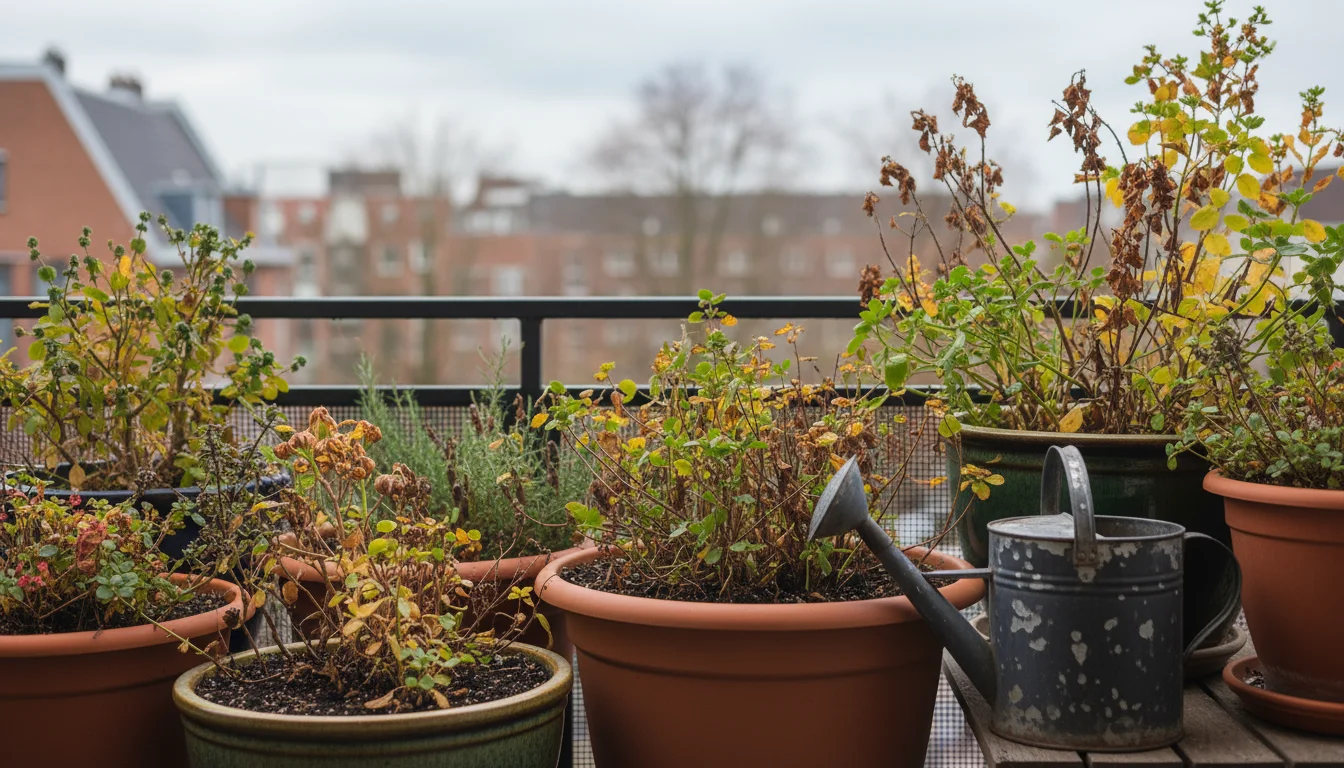
Container gardening offers incredible flexibility and beauty, especially for those with limited space. However, it presents unique challenges when cold weather arrives. Unlike plants in the ground, which benefit from the insulating mass of the surrounding soil, potted plants have their root systems exposed to fluctuating air temperatures. This exposure makes them far more susceptible to frost damage and desiccation, which means drying out. These threats specifically target the delicate root structures essential for plant survival.
Managing these winter preparations is just one of many essential fall gardening tasks that balcony owners should tackle before the first freeze.
You likely know your plant’s hardiness zone, which indicates the average annual minimum winter temperature a plant can withstand. For instance, if you live in USDA Zone 6, a plant rated for Zone 6 or lower (like Zone 5 or 4) should theoretically survive winter outdoors in the ground. However, a Zone 6 plant in a pot on a Zone 6 balcony often acts like a Zone 7 or even Zone 8 plant. This is because the pot’s soil cools much faster and freezes deeper than garden soil. Studies consistently show that container soil temperatures can be 10-20 degrees Fahrenheit colder than ambient air temperatures, directly impacting root survival. This significant difference emphasizes the need for extra protection when overwintering perennials in pots.
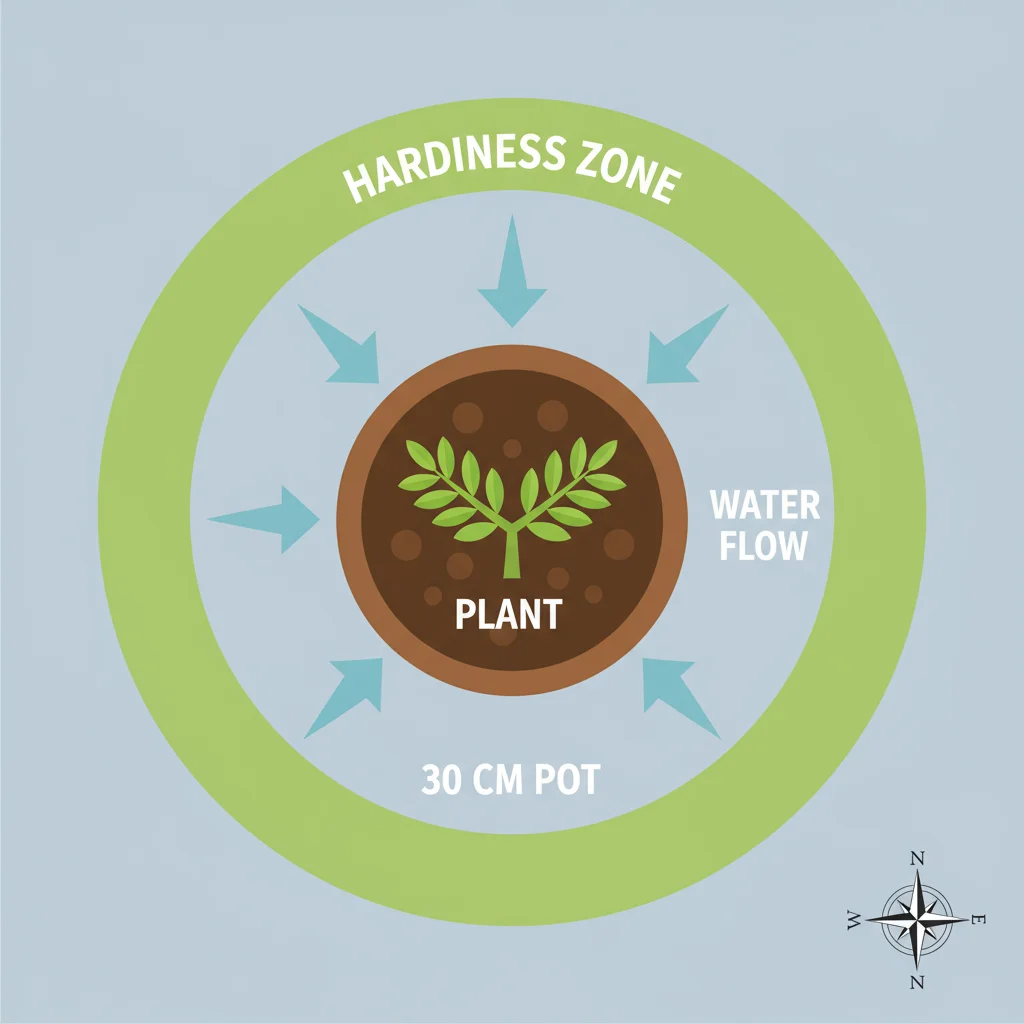
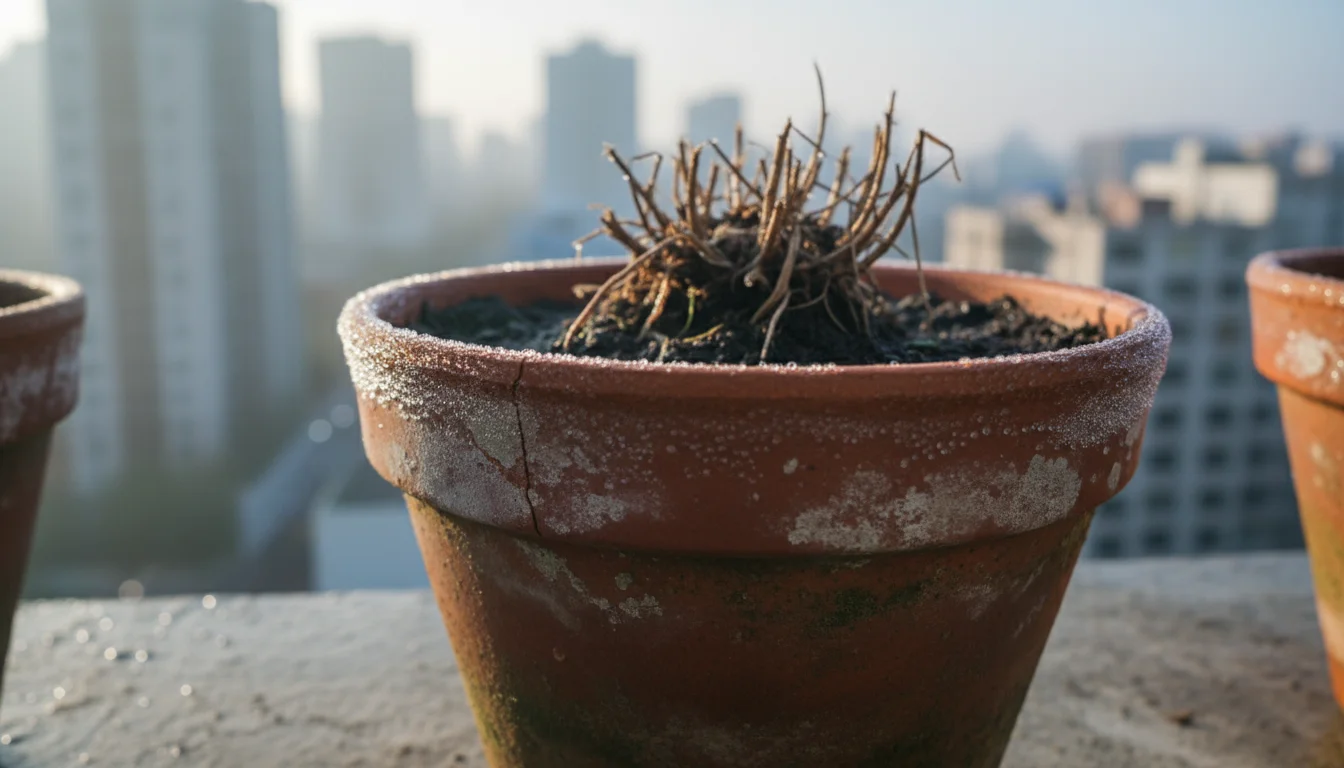
Consider the science behind it: roots require a stable temperature to survive. When soil in a pot freezes solid, the water within the plant cells expands, rupturing cell walls. This damage starves the plant of water and nutrients, leading to root rot or death. Plant roots, unlike above-ground foliage, lack the protective mechanisms to withstand such extreme cold. The repeated freezing and thawing cycles, typical of early winter and late spring, also stress plants significantly. These fluctuations cause the soil to contract and expand, potentially damaging delicate roots and lifting them out of the soil, a phenomenon called “frost heave.” Protecting these roots is paramount to your plant’s survival through the winter months. Without adequate protection, data shows significantly higher mortality rates for potted perennials compared to their in-ground counterparts, even within their stated hardiness zones.
What is the ‘Trench and Tuck’ Method?
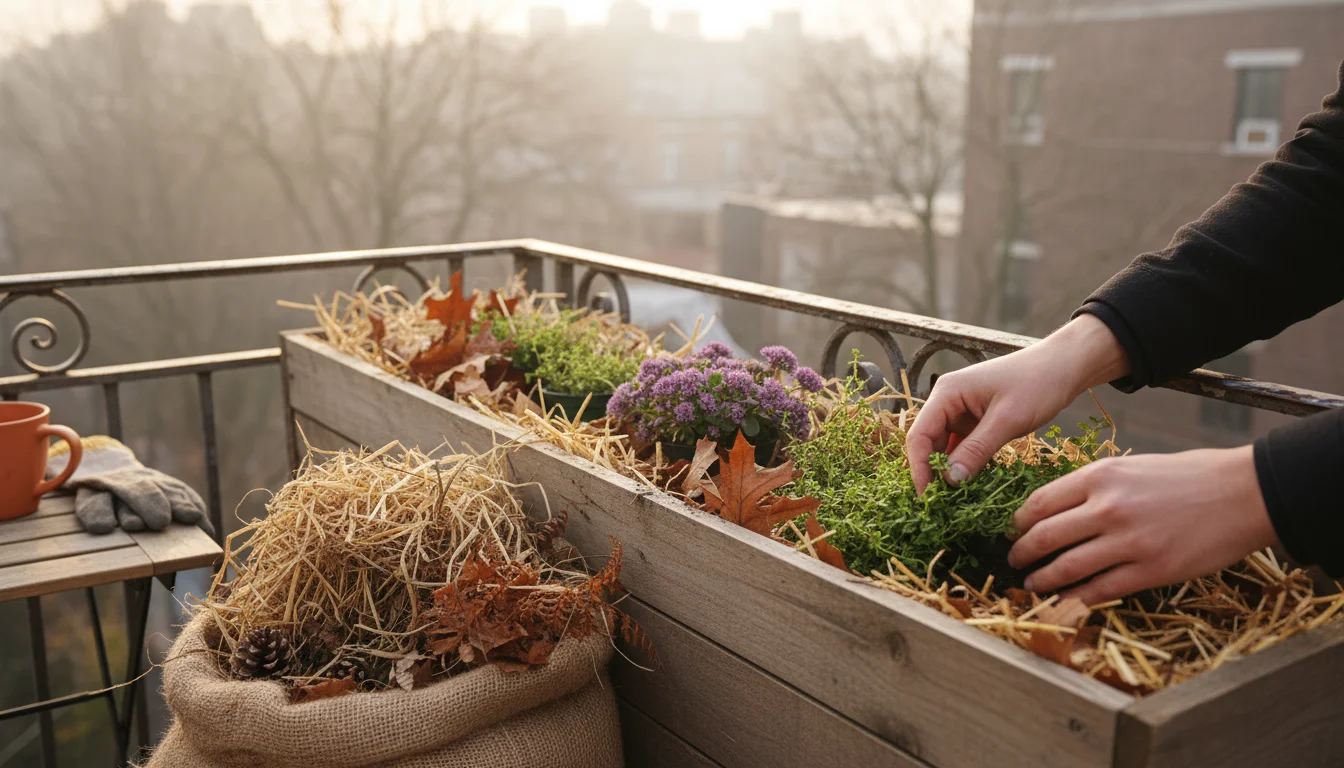
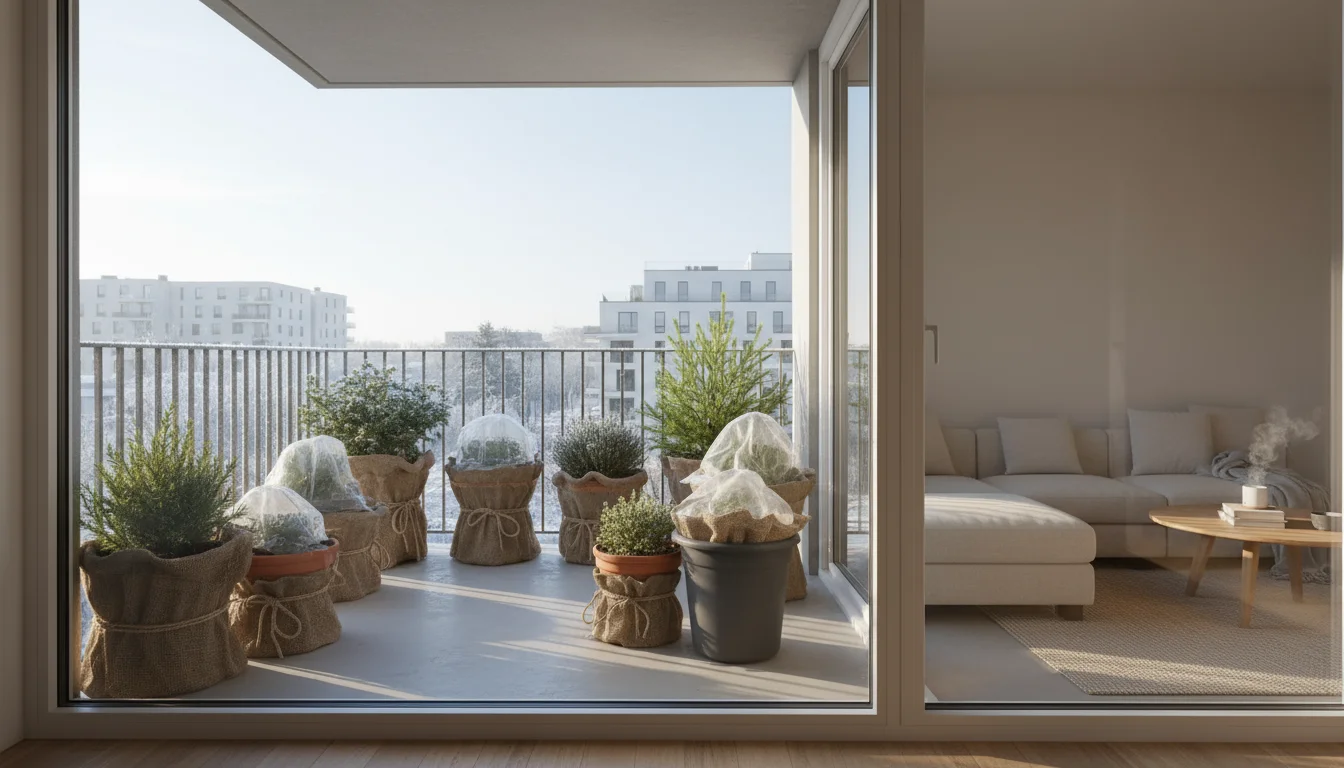
The ‘Trench and Tuck’ method is a practical and ingenious technique for overwintering hardy potted perennials, particularly suited for small spaces like balconies and patios. This method mimics the insulating effect of ground planting by creating a protective environment for your potted plants. Essentially, you “bury” your individual plant pots within a larger, insulated container or designated space on your balcony, then “tuck” them in with abundant insulating materials. Think of it as creating a custom-fit winter coat for your plants, specifically designed to keep their root zones stable and warm.
If you have empty containers left over after organizing your perennials, you can also use the ‘Tuck-In’ method to protect the pots themselves from cracking.
Imagine creating a mini-garden bed on your balcony. You achieve this by using a large, sturdy planter box or trough as your “trench.” This outer container forms the primary barrier against the elements. Inside this trench, you place your smaller potted perennials. Critically, you do not remove the plants from their individual pots; you bury the pots themselves. Then, you fill all the gaps between and around these pots with generous layers of insulating materials like straw, shredded dry leaves, or even strategically placed bubble wrap. This layered approach creates multiple barriers against the cold, preventing the rapid temperature fluctuations that harm roots. The method provides superior insulation by trapping air, shields plants from harsh winds, and significantly minimizes the risk of root damage from extreme cold, enabling hardy balcony gardening in winter.
Why the ‘Trench and Tuck’ Method Works for Balcony Gardeners
This technique specifically addresses the unique challenges of balcony gardening, offering a robust and elegant solution. Traditional overwintering methods often involve moving plants indoors, which can be impractical due to limited space, insufficient light, or concerns about introducing pests into your home. Burying pots directly into the ground is simply not an option for most balcony dwellers. The ‘Trench and Tuck’ offers a robust alternative, transforming your balcony into a safe haven for your plants, even when winter winds howl.
Consolidating your pots for the winter is also an ideal time to redesign your balcony layout for a fresh start next spring.
Here’s why this method excels in protecting plants in winter:
- Enhanced Insulation: Horticultural research consistently demonstrates the effectiveness of insulation in moderating soil temperatures. Data from controlled experiments indicates that adding insulation layers around pots can raise soil temperatures by several degrees Fahrenheit compared to unprotected containers. The ‘Trench and Tuck’ method significantly reduces heat loss from the pot walls, where most root damage occurs. This creates a more stable, warmer microclimate around the root ball, effectively making a Zone 6 plant in a pot behave more like a Zone 5 plant in terms of cold tolerance.
- Protection from Wind Desiccation: Balconies are often exposed to relentless winter winds that can rapidly dry out plant foliage and soil, even when temperatures are above freezing. This phenomenon, known as wind desiccation, can be as damaging as extreme cold. The outer “trench” container and the dense insulating “tuck” materials create a powerful windbreak, dramatically reducing moisture loss from your plants and their soil. This is a key factor in how to keep potted lavender alive over winter on a balcony, as lavender can be particularly susceptible to drying winds.
- Moderates Freeze-Thaw Cycles: One of the biggest killers of container plants is not always extreme cold, but the repeated freezing and thawing of the soil. These temperature fluctuations damage roots by causing expansion and contraction within the soil, stressing cell structures. By insulating your pots, the ‘Trench and Tuck’ method slows down these temperature changes, keeping the soil more consistently frozen or unfrozen. This significantly protects delicate root structures from the destructive stress of thermal cycling.
- Space-Efficient: You consolidate multiple smaller pots into one larger container, making efficient use of your precious balcony space. This also makes it easier to manage your overwintering plants as a single unit, reducing clutter and simplifying winter care. This is crucial for successful balcony gardening in winter.
- Cost-Effective and Sustainable: You can reuse many of the insulating materials, like straw and shredded leaves, year after year. This reduces waste, minimizes your environmental footprint, and offers an eco-friendly solution to winter plant care. You can even source leaves from local parks or your own yard, making this a truly sustainable practice. Choosing durable, reusable outer containers also contributes to this sustainable approach.
You gain peace of mind knowing your plants are safe, and your balcony remains ready for vibrant spring growth. This method empowers you to maintain a diverse perennial garden, even with limited ground access, ensuring your efforts throughout the growing season are not lost to winter’s chill. It’s a proven way of insulating pots for winter, guaranteeing a beautiful comeback.

Choosing the Right Plants and Pots for Overwintering Success
Not all perennials are suitable for overwintering on a balcony, even with the enhanced protection of the ‘Trench and Tuck’ method. Success begins with selecting the right plants and containers. Focus on hardy perennials that are at least one or two zones hardier than your actual growing zone. For example, if you live in Zone 6, select plants hardy to Zone 5 or even Zone 4. This provides an essential buffer against the increased exposure of container planting, where temperatures can drop significantly lower than ambient air. Research your specific plant varieties to confirm their hardiness ratings, looking for species known for their resilience.
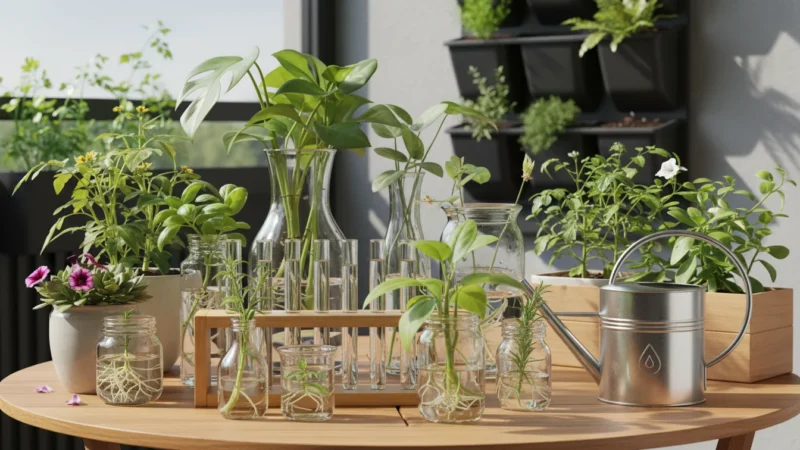
If you are particularly worried about a specific plant’s survival, consider taking fall cuttings to propagate backups indoors before the deep freeze sets in.
While focus is on survival, you might also want to select species that provide stunning winter interest to keep your balcony looking beautiful during the coldest months.
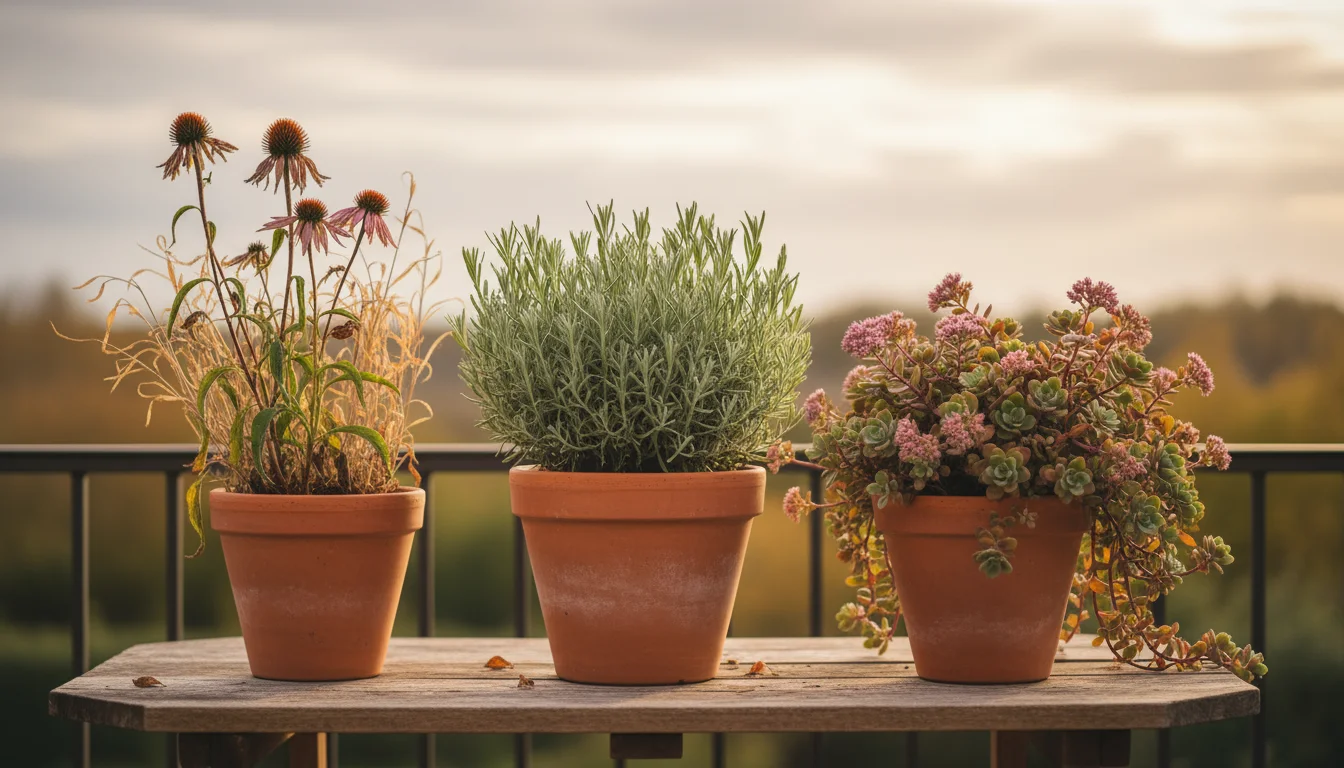
Ideal Perennial Candidates for the ‘Trench and Tuck’:
These plants have a proven track record of surviving cold when given adequate protection:
- Lavender (e.g., English Lavender varieties, Lavandula angustifolia): An excellent choice, often hardy to Zone 5 or 6. Its woody stems benefit immensely from root protection against drying winds and deep freezes. Consider robust cultivars like ‘Munstead’ or ‘Hidcote’ for their superior cold tolerance. This method is particularly effective for how to keep potted lavender alive over winter on a balcony.
- Coneflowers (Echinacea purpurea): Many varieties are exceptionally hardy, often rated for Zone 3 or 4, making them robust candidates for overwintering. They reliably return each spring.
- Sedum (Stonecrop, Hylotelephium spp. and Sedum spp.): These are extremely tough and resilient plants. Many sedums thrive in cold climates and are hardy to Zone 3. Their succulent leaves store water, helping them withstand some desiccation.
- Hostas (Hosta spp.): Generally hardy to Zone 3 or 4, hostas go dormant beautifully, with their foliage dying back completely, and emerge strong and vibrant in spring.
- Ornamental Grasses (e.g., Little Bluestem, Schizachyrium scoparium; Fountain Grass, Pennisetum alopecuroides): Many varieties are hardy to Zone 4 or 5 and provide wonderful structural interest through winter. Some types, like Little Bluestem, are native and provide ecological benefits.
- Penstemon (Penstemon spp.): Certain varieties, particularly native ones, are hardy to Zone 3 or 4. Their semi-evergreen foliage can benefit from the extra insulation.
- Creeping Phlox (Phlox subulata): A groundcover perennial that tolerates cold well, often hardy to Zone 3. Its dense mat of foliage helps protect the roots.
- Heuchera (Coral Bells): Many varieties are hardy to Zone 4, offering attractive foliage that often persists through winter, benefiting greatly from root insulation.
- Thyme (Thymus vulgaris): Most culinary thymes are hardy to Zone 4 or 5 and can be successfully overwintered in pots.
Avoid tropical plants or tender perennials that require temperatures above freezing. These plants need to come indoors for the winter, often to a heated space with specific light requirements, and will not survive with just insulation on a balcony.

Selecting the Right Pots for Overwintering Perennials in Pots:
- Material Matters: Choose pots made from materials that offer some inherent insulation and can withstand repeated freezing and thawing without cracking. Plastic, fiberglass, and glazed ceramic are generally good choices due to their non-porous nature and durability. Terra cotta pots are porous and can absorb water, which then freezes and expands, leading to cracking. If you must use terra cotta, ensure it is specifically labeled “frost-proof” or “weather-resistant.” Darker colored pots can also absorb more solar radiation on sunny winter days, offering a slight warming effect.
- Size: Larger pots provide more soil volume, which offers significantly better insulation than smaller pots. More soil means more thermal mass, which helps moderate temperature fluctuations. Aim for pots that are at least 8-10 inches in diameter for most perennials you plan to overwinter. However, the ‘Trench and Tuck’ method significantly helps even smaller pots survive if grouped effectively.
- Drainage: Every pot must have excellent drainage holes. Waterlogged soil freezes faster and more deeply, suffocating roots and promoting root rot. Ensure drainage holes are clear of debris and consider elevating pots slightly within the trench using small stones or pot feet to prevent blockage if the trench itself gets very wet.
Before winter arrives, ensure your perennials are healthy and well-watered. A robust plant stands a better chance of surviving the winter. Gradually reduce watering as temperatures drop in early fall to encourage natural dormancy, a crucial step in preparing plants for protecting plants in winter.
Gathering Your Supplies: Essential Materials for the ‘Trench and Tuck’
Successful implementation of the ‘Trench and Tuck’ method depends on having the right materials at hand. Planning ahead and gathering these items before the first hard frost makes the process smooth and efficient, reducing stress for both you and your plants. You will find many of these items are reusable, supporting an environmentally conscious and sustainable approach to gardening.
Key Supplies You Need for Burying Pots in the Ground for Winter (or a Balcony Equivalent):
- The Outer “Trench” Container:
- Large Planter Box or Trough: This forms the main insulating layer and defines your “trench” on the balcony. Choose a sturdy, weather-resistant material like heavy-duty plastic, fiberglass, or treated wood. The size should be sufficient to accommodate all the potted perennials you intend to overwinter, leaving several inches of space (at least 2-4 inches) between each individual pot and the trench walls for insulation. Ensure it has adequate drainage holes, or be prepared to drill them yourself, to prevent water accumulation at the bottom. A common size that works well for multiple medium-sized pots might be 24-48 inches long, 12-18 inches wide, and 12-18 inches deep. Consider a container with wheels if you might need to move it.
- Insulating Materials for Insulating Pots for Winter:
- Dry Shredded Leaves: One of the best and most readily available insulators. Collect leaves from your yard or local parks. Oak leaves are particularly effective because they decompose slowly and offer excellent long-term insulation, holding their structure and air pockets well. Ensure all leaves are thoroughly dry to prevent mold, mildew, and disease. Avoid using diseased leaves.
- Straw: Crucially, use straw, not hay. Hay contains seeds that can sprout in spring, creating weed issues. Straw is a fantastic insulator, providing numerous air pockets that trap warmth. It is lightweight, easy to work with, and readily available from garden centers or farm supply stores. Straw also decomposes over time, enriching your soil.
- Burlap: Use burlap fabric to wrap individual pots before placing them in the trench for an extra layer of protection, or as a breathable top cover. It’s permeable, allowing air exchange while providing an additional insulating barrier. You can also use old burlap sacks.
- Bubble Wrap: While not the most eco-friendly, a layer of bubble wrap around pots can add significant insulation, particularly for very sensitive plants or in colder zones. Use it judiciously, ensure it is clean, and reuse it each season to minimize environmental impact.
- Pine Needles: Similar to shredded leaves, pine needles offer good insulation, are slow to decompose, and add a slightly acidic touch, which some plants appreciate.
- Wood Chips or Bark Mulch: These provide decent insulation, especially as a top layer. Ensure they are dry to avoid creating a damp environment beneath.
- Tools and Other Items:
- Gardening Trowel or Small Shovel: For settling pots into place and carefully adjusting insulating materials.
- Sturdy Gardening Gloves: Protect your hands from cold, rough materials, and potential pests.
- Sharp Pruners: To trim back dormant perennial foliage before tucking them in.
- Watering Can: For the final thorough watering before winter sets in.
- Optional: Hardware Cloth or Netting: If you have issues with pests like squirrels, mice, or birds disturbing your insulation, a piece of hardware cloth or fine netting secured over the top of the trench can be highly effective.
- Optional: Old Blankets, Tarps, or Cardboard: For an extra top layer of insulation during periods of extreme cold or severe winter storms. These can be removed once the severe weather passes.
Gathering these items proactively allows you to prepare your plants for winter stress-free and on time. Remember to prioritize sustainable and readily available options like shredded leaves and straw, which often come from renewable sources and can even enrich your compost or garden soil later, completing an eco-friendly cycle for your balcony gardening in winter.
Step-by-Step Guide: Implementing the ‘Trench and Tuck’ Method
Executing the ‘Trench and Tuck’ method is straightforward, but timing and attention to detail are crucial for ensuring your plants successfully survive the winter. Aim to complete these steps before the ground freezes solid and consistent nighttime temperatures drop below 20-25 degrees Fahrenheit (-6 to -4 degrees Celsius). This early action prevents initial cold shock.
- Prepare Your Perennials (Late Fall, Typically October-November):
- Encourage Dormancy: As autumn progresses and daylight hours shorten, naturally reduce watering your plants. This signals to them that winter is approaching and it’s time to enter dormancy, a critical survival phase. Do not fertilize after mid-summer, as new growth would be vulnerable to early frosts.
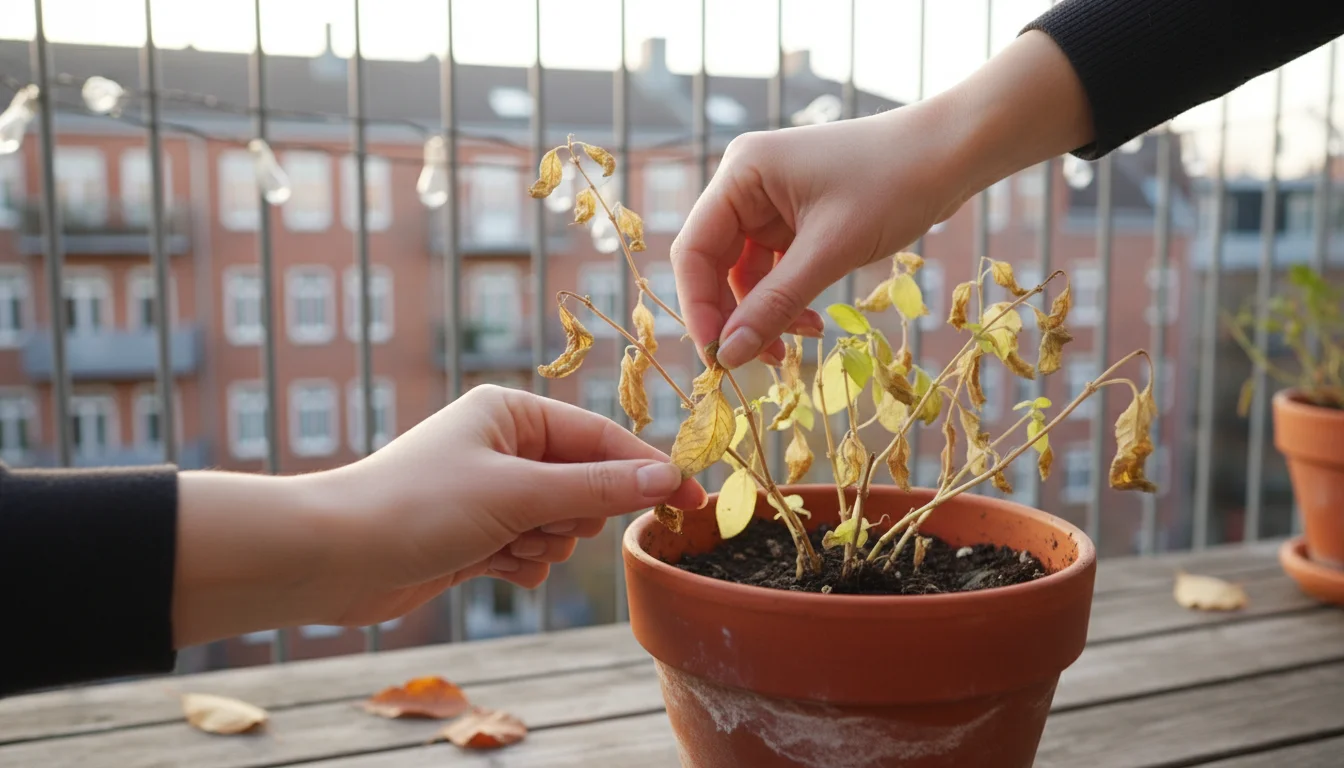
- Prune Back Foliage: Once a hard frost has caused the foliage to die back, typically turning brown, yellow, or mushy, prune the dead or dying stems back to about 4-6 inches above the soil line. For some plants, like ornamental grasses or sedum, you can leave the faded foliage until spring for added insulation and winter interest. Always consult specific plant care guides for precise pruning recommendations for your varieties. Remove any remaining leaves or debris from the pots.
- Inspect for Pests and Diseases: Before insulating, thoroughly inspect your plants for any signs of disease or pests. Remove any diseased leaves, fungal spots, or visible insects. You want to tuck in healthy plants to prevent issues from festering in their insulated winter home.
- Water Thoroughly (Just Before First Hard Freeze):
- Give your plants one last deep watering just before temperatures are predicted to consistently drop below freezing. The soil should be thoroughly moist, but not waterlogged. This ensures the soil has sufficient moisture to conduct and retain cold, stable temperatures without freezing solid too quickly or becoming desiccated. Dry soil offers little insulation and can lead to roots drying out, which is as deadly as freezing. A deeply watered pot holds its temperature better.
- Set Up Your Trench Container:
- Place your large outer planter box or trough in its final winter location on your balcony. Choose a spot that offers some natural protection from prevailing winds, perhaps against a sheltered wall or in a corner. Ensure the container has adequate drainage holes at the bottom to prevent water accumulation, even after snowmelt or winter rain.
- Add a generous layer of insulating material (like dry shredded leaves or straw) at the bottom of the trench, about 4-6 inches deep. This provides a soft, insulating base for your potted plants, preventing direct contact with the cold balcony surface. This step is critical for insulating pots for winter.
- Place Your Potted Perennials:
- Carefully arrange your smaller potted perennials inside the trench container. Position them as close together as possible, but ensure you leave at least 2-4 inches of space between each pot and between the pots and the outer trench walls. This space is crucial for packing in the insulating material.
- If your pots are different sizes, try to group similar-sized pots together or use smaller pots to fill gaps. The goal is to maximize the density of the pots within the trench to create a more solid, insulated mass, which retains heat more effectively.
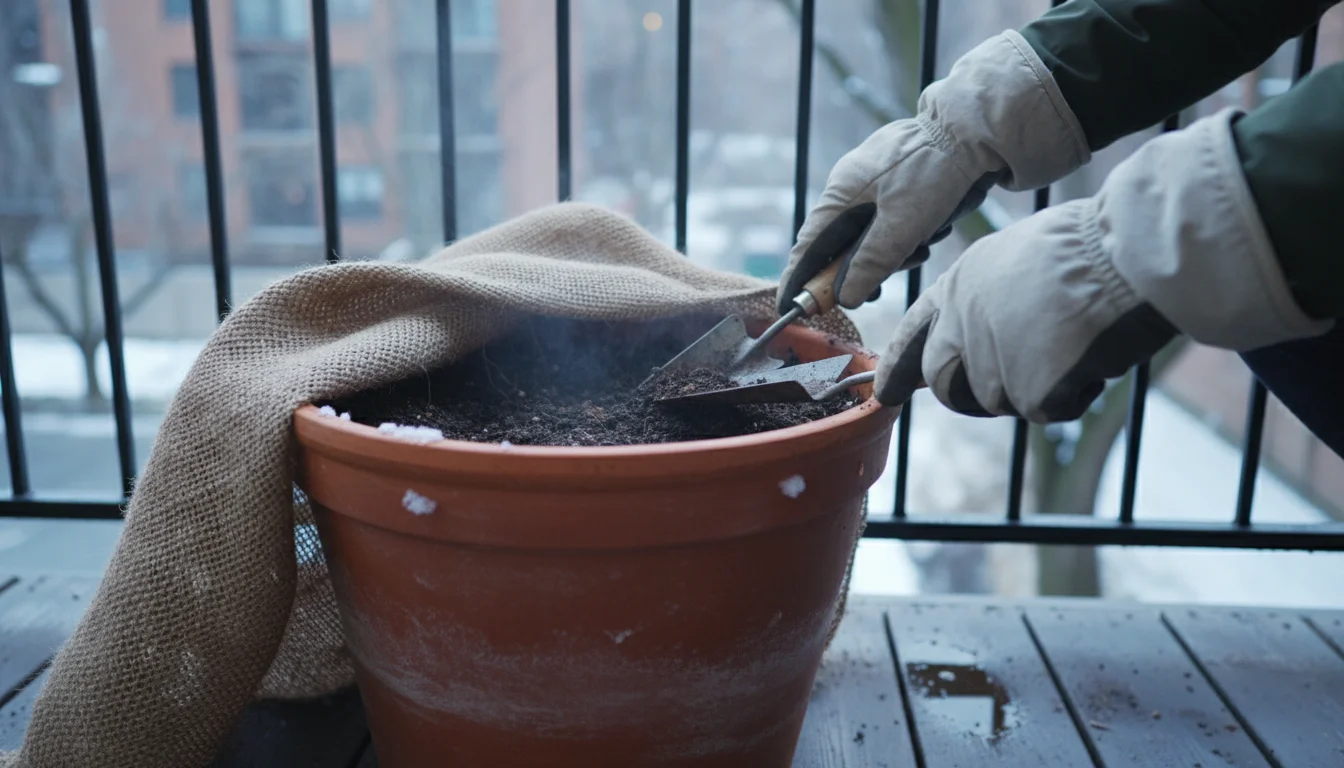
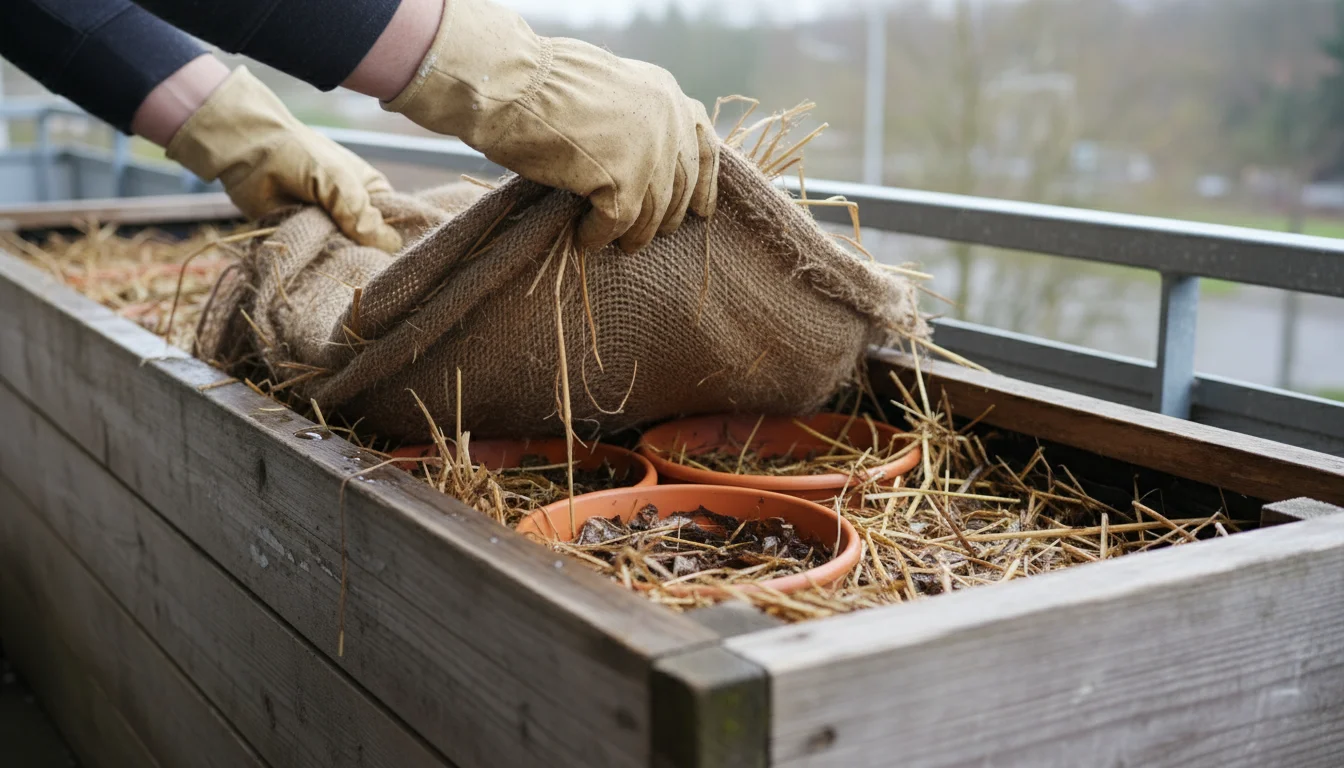
- “Tuck In” with Insulation:
- Begin filling all the gaps between the individual pots and the outer trench container with your chosen insulating materials. Use dry shredded leaves, straw, or a combination. Gently but firmly pack the material, ensuring it fills every void and wraps completely around the sides of each pot. The denser the dry insulation, the more air pockets it traps, and the better it insulates.
- Continue adding insulation until it completely covers the tops of the individual pots, reaching the rim of the outer trench container. For added protection, especially in colder zones, you can wrap individual pots in burlap or bubble wrap before placing them and then fill the gaps with loose insulation.
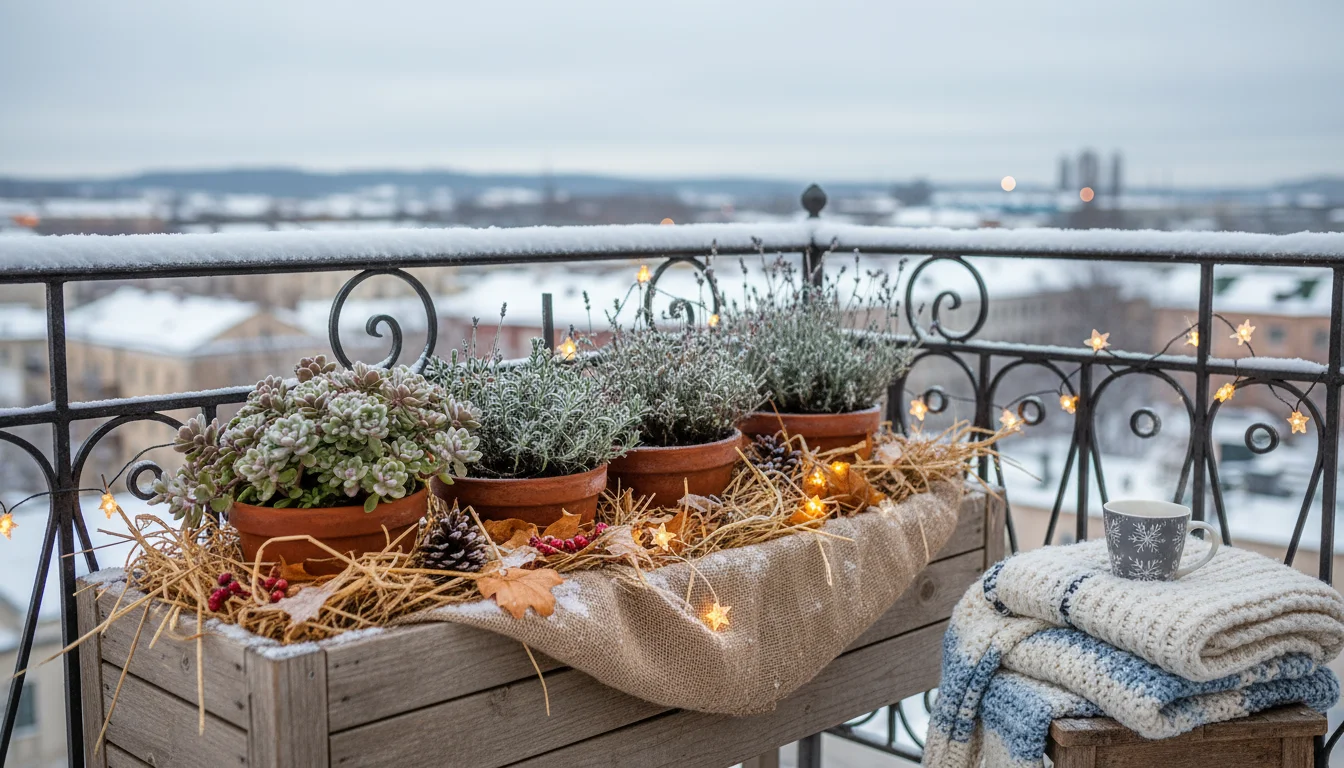
- Top Layer and Protection:
- Once the pots are completely buried in insulation, add a final layer of insulation over the top of the trench. This could be more leaves, straw, a piece of old burlap, or even a weather-resistant tarp. This top layer protects against rain, snow, and keeps the insulating materials from blowing away in high winds.
- If you anticipate heavy snowfall, understand that snow itself acts as a natural insulator, often superior to artificial materials. Do not remove it from the trench.
- If squirrels or other curious critters are a concern, place a piece of hardware cloth or fine mesh netting over the top of the trench, securing it with bricks or heavy stones to prevent disturbance.
Congratulations, you have now successfully implemented the ‘Trench and Tuck’ method for overwintering perennials in pots! Your plants are well-protected for the winter months ahead, greatly increasing their chances of survival and vibrant spring regrowth. This simple process provides immense benefit, significantly improving the survival rates of your potted perennials on your balcony.
Post-Tuck Care: Maintaining Your Overwintered Perennials
Once your plants are safely tucked away for winter, your maintenance tasks become minimal, yet important. The primary goal is to keep them dormant and protected until spring. Actively caring for them during winter is generally counterproductive, as it can disrupt dormancy or introduce too much moisture, leading to problems. Your vigilance shifts from active gardening to passive monitoring.
Winter Monitoring:
- Check for Moisture (Sporadically): While plants in dormancy require minimal water, extremely dry conditions, especially during prolonged thaws, can be detrimental to their root health. On warmer winter days (when temperatures rise consistently above freezing for several days), briefly check the moisture level of the soil in the pots. Gently move aside some insulation to access the soil. If the soil feels bone dry to the touch several inches down, give a small amount of water. You only need to provide enough to prevent the roots from completely desiccating, not to soak the soil. Overwatering can lead to root rot or cause the soil to freeze solid more readily when temperatures drop again.
- Monitor Insulation Integrity: High winds, heavy snow, or curious animals can sometimes dislodge or blow away insulating materials. Periodically check that your “tuck” materials are still intact and providing full coverage. Replenish any insulation that has shifted or been lost, particularly along the exposed edges of the trench. Maintaining a consistent insulating layer is key to protecting plants in winter.
- Pest Watch (Minimal): While less common for dormant outdoor plants, occasionally rodents or other small pests might find the warm, insulated trench appealing for shelter. If you notice signs of disturbance or gnawing, a light covering of hardware cloth or netting over the top of the trench can effectively deter unwanted visitors without impacting insulation.
- Avoid Disturbing Dormancy: Resist the urge to frequently uncover or move your plants. Consistency in temperature and darkness is vital for proper dormancy. Every disturbance risks waking the plant prematurely or exposing it to damaging cold. Trust the ‘Trench and Tuck’ to do its job.
Understanding Dormancy and Its Importance:
Dormancy is a crucial survival mechanism for perennials, similar to an animal hibernating. During this period, plants drastically slow their metabolic processes, reduce water uptake, and halt new growth. This conserves energy, allowing them to withstand harsh cold temperatures and emerge strong in spring. If you provide too much water, warmth, or light, you risk encouraging premature growth. New, tender shoots emerging during a mid-winter thaw are highly susceptible to freezing damage during subsequent cold snaps, potentially killing the plant or severely weakening it. Your role during winter is to facilitate this natural resting period, providing stability rather than stimulation, which is a core principle of overwintering perennials in pots.
A successful ‘Trench and Tuck’ operation keeps your plants in this critical dormant state, offering them the stable, protected environment they need to rest and regenerate. This passive care is one of the most appealing aspects of the method, requiring very little hands-on effort once set up. It’s an effective way of burying pots in the ground for winter, even if you are on a balcony.
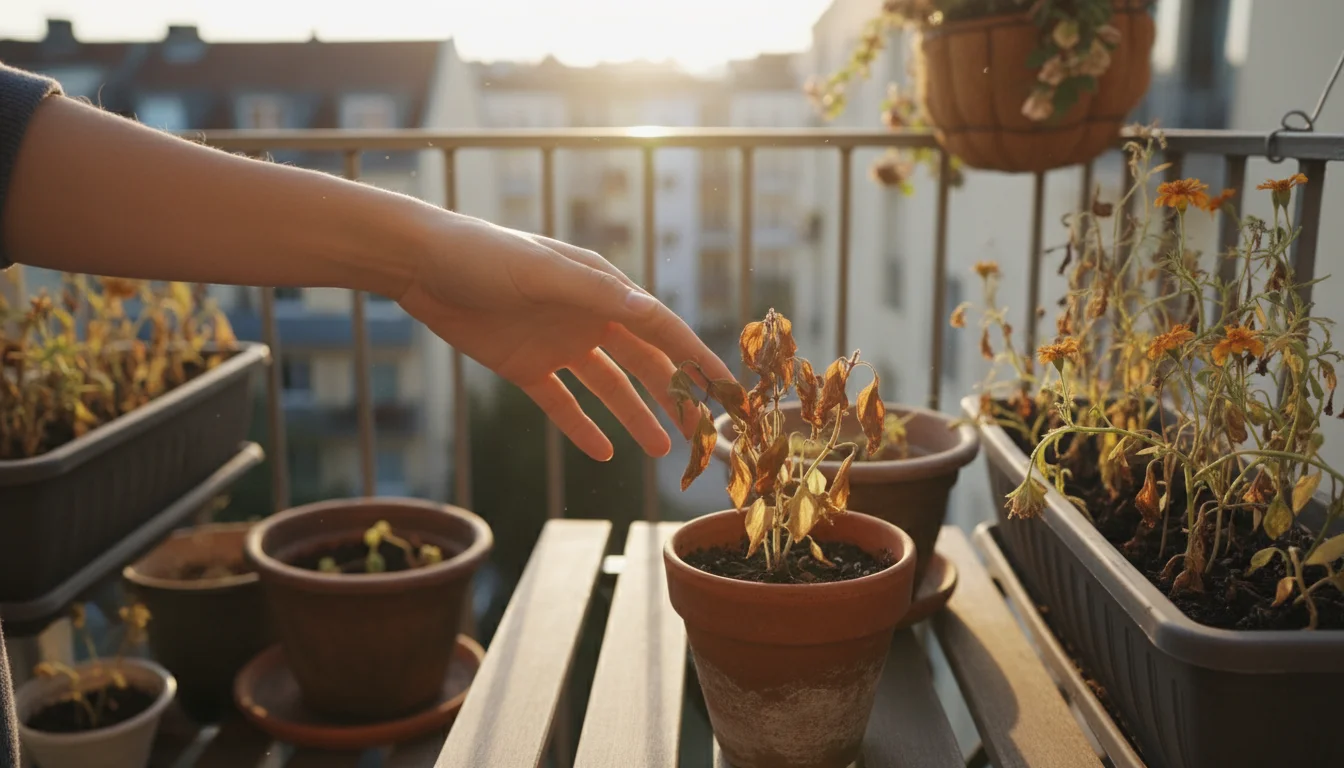
Spring Awakening: Uncovering Your Plants
As winter slowly loosens its grip and the first undeniable signs of spring begin to appear, it’s time to gently bring your overwintered perennials back to life. This process requires patience and gradual steps to avoid shocking your plants with sudden changes in temperature, light, or moisture. Rushing this transition can negate all your diligent overwintering efforts, so approach it thoughtfully.
Timing is Everything for Overwintering Perennials in Pots:
- When to Start: Begin the uncovering process when consistent daytime temperatures are reliably above freezing (e.g., 40-50 degrees Fahrenheit, 4-10 degrees Celsius) and, crucially, the threat of severe hard frosts has largely passed for your region. This typically coincides with early to mid-spring, depending on your climate zone. You can check local weather forecasts and historical frost dates. Avoid rushing this step; a late hard frost can still damage newly emerging, tender growth.
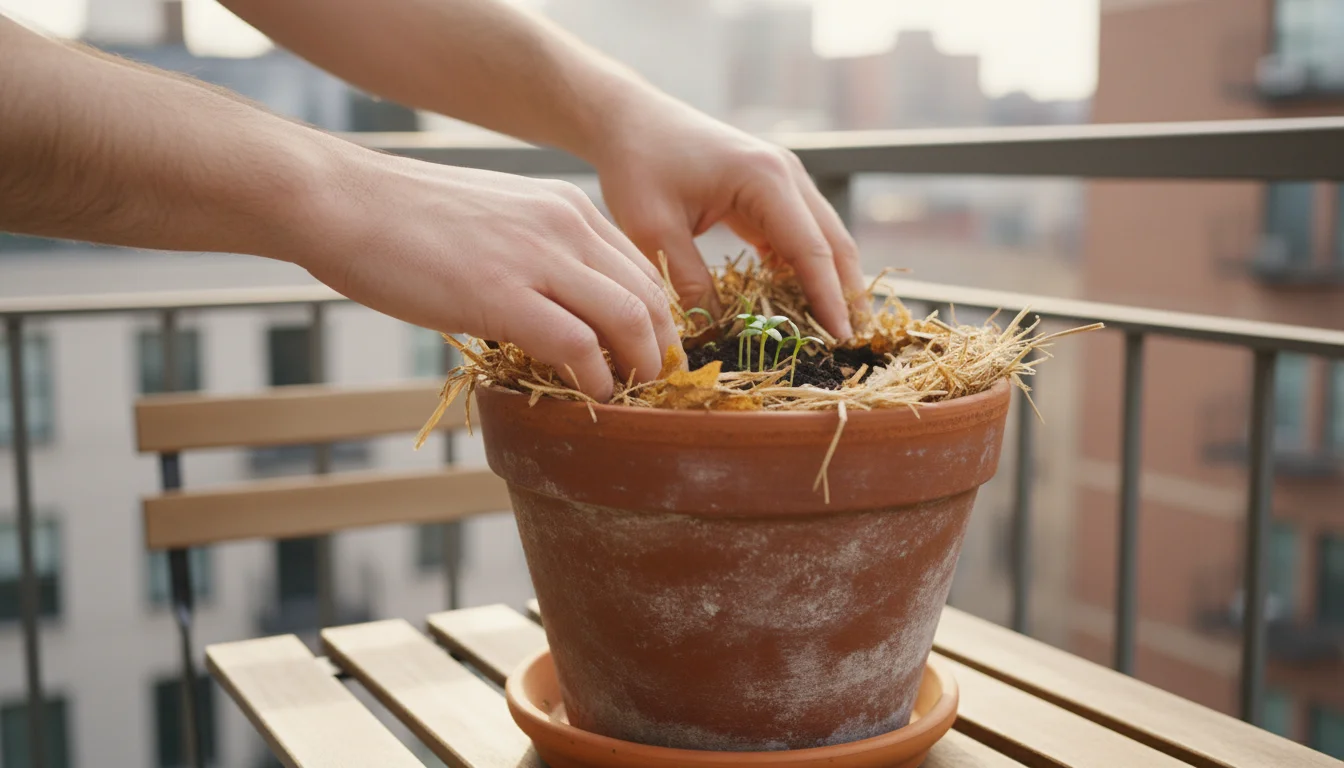
- Watch for New Growth: You might notice small green shoots emerging from the soil or along the dormant stems within the insulation. This is a clear, reliable sign your plants are naturally ready to awaken and signifies that it is generally safe to begin the uncovering process.
Step-by-Step Uncovering Process:
- Gradual Unpacking (Phase 1):
- On a mild, overcast day, carefully remove only the top layers of insulation from your trench container. You can leave some insulation around the sides of the pots for a few more days, especially if nighttime temperatures are still cool or there is a chance of light frost.
- This initial uncovering allows for better air circulation, helps dissipate any lingering dampness, and exposes the soil to slightly warmer spring temperatures, signaling to the plant that spring has definitively arrived.
- Remove All Insulation (Phase 2):
- After a few days, or when temperatures are consistently above freezing both day and night, remove all the remaining insulating materials from around and between the pots. You can compost these organic materials (leaves, straw) or store them dry in bags for reuse next winter (e.g., burlap, bubble wrap).
- Carefully lift the pots out of the trench container. Avoid tugging on any new shoots.
- Inspect and Assess:
- Once the pots are out, inspect your plants closely. You will likely see dormant stems, possibly some new green growth, or just bare soil. This is normal and expected.
- Check the soil moisture in each pot. It should be slightly damp. If it is bone dry, give your plants a gentle watering to rehydrate the root ball. If it is waterlogged, allow it to dry out a bit.
- Look for any signs of disease or pests that might have survived the winter. Prune away any remaining dead or damaged foliage carefully, using clean pruners.
- Acclimation to Light and Temperature (Hardening Off):
- Do not immediately expose your plants to full, intense spring sun. After a winter of darkness and low light, direct sunlight can severely scorch tender new growth.
- Place your pots in a semi-shady or indirect light spot for a few days to a week. Gradually move them into brighter locations over several days, increasing their exposure to direct sunlight by a few hours each day. This “hardening-off” process is crucial for preventing transplant shock and sunburn, allowing the plants to adjust to outdoor conditions.
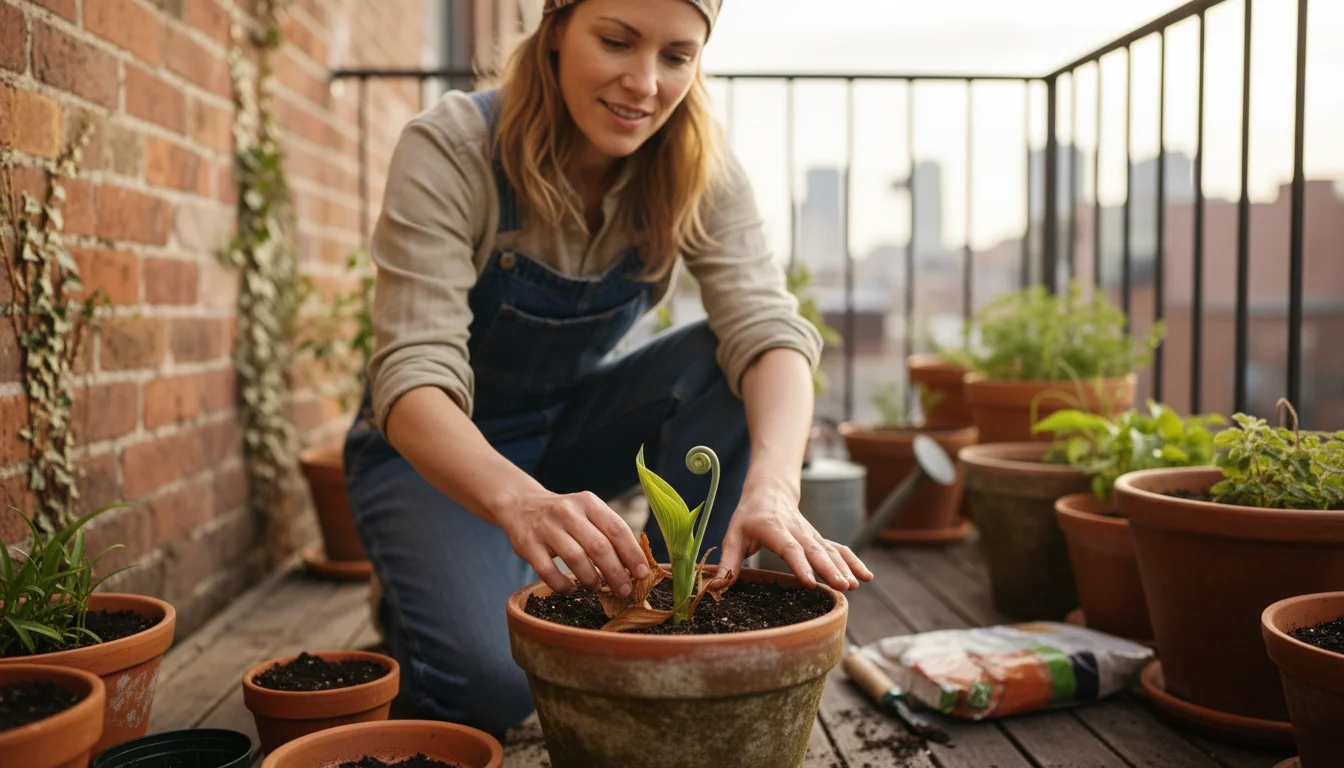
- Repotting and Fertilizing (Recommended):
- Once your plants are fully acclimated to outdoor conditions and show strong, healthy signs of new growth, consider repotting them into fresh potting mix. Perennials benefit greatly from new nutrients and improved drainage that fresh soil provides. You can increase the pot size if the plant appears root-bound (roots circling the bottom of the pot).
- Begin a regular watering and fertilization schedule appropriate for your specific plant, once new growth is well-established. Use a balanced, slow-release granular fertilizer or a liquid feed at half strength to gently reintroduce nutrients.
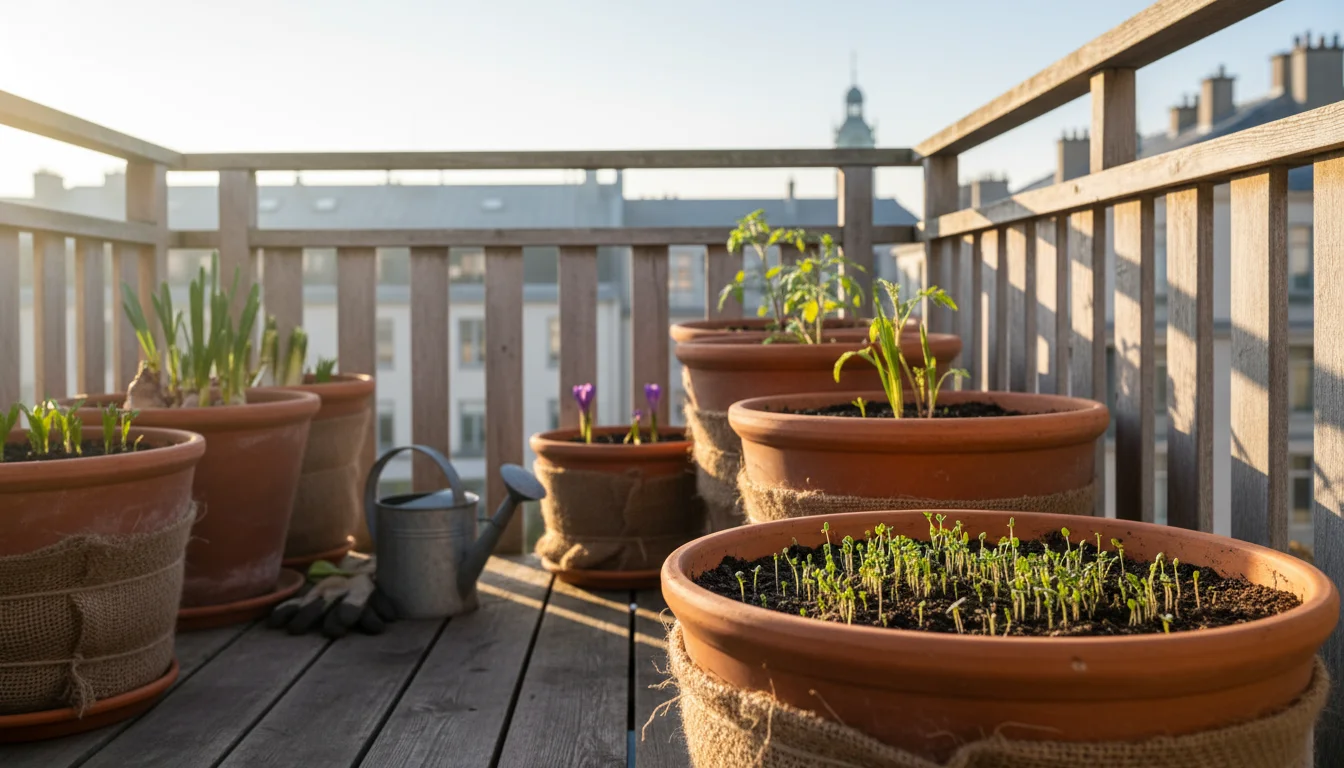
By following these steps, you give your overwintered perennials the best possible start to a new growing season, ensuring they thrive and add beauty to your balcony for another year, a testament to your success in balcony gardening in winter.
Common Mistakes to Avoid When Overwintering Potted Perennials
Even with a reliable and well-planned method like the ‘Trench and Tuck’, certain missteps can jeopardize your plants’ survival. Understanding these common errors helps you preemptively avoid them, ensuring a higher success rate for your overwintering efforts and keeping your plants healthy through winter.
- Not Checking Plant Hardiness Adequately: This is arguably the biggest mistake. Attempting to overwinter a plant that is not hardy enough for your specific zone, even with insulation, often leads to failure. Always select perennials that are at least one or two zones hardier than your local climate for container planting. For example, trying to overwinter a Zone 7 plant in a Zone 6 pot will significantly challenge it, whereas a Zone 4 plant in a Zone 6 pot stands a much better chance. Always confirm the plant’s lowest tolerance.
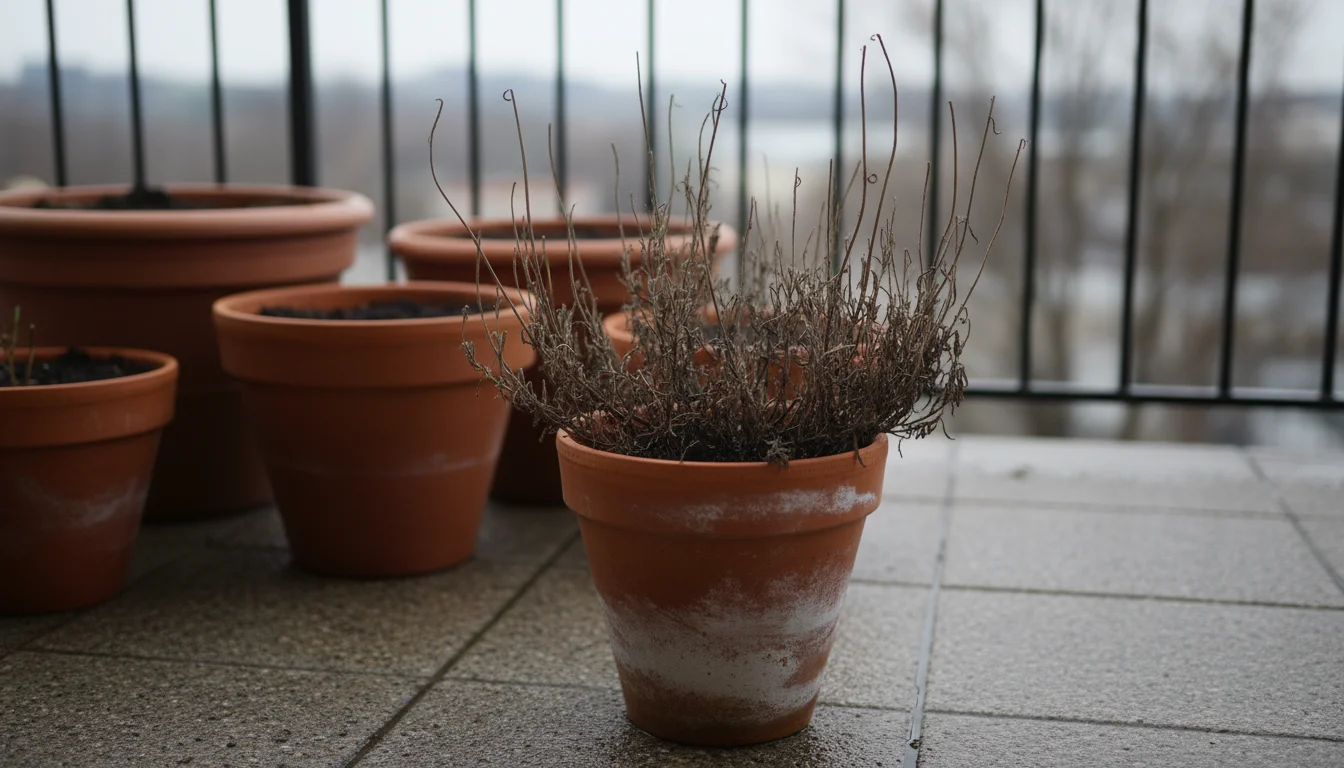
- Overwatering During Dormancy: While a final deep watering before insulation is important, excessive watering during winter is detrimental. Dormant plants require very little moisture. Saturated soil encourages root rot, suffocating roots, and also makes the plant much more susceptible to freezing damage, as wet soil freezes more deeply and stays frozen longer. Only water if the soil is completely dry during a prolonged warm spell.
- Using Wet Insulating Materials: Damp leaves, straw, or other materials create a moist, stagnant environment within your trench, which is highly prone to fungal diseases, mold, and pest infestations. Always ensure all insulating materials are thoroughly dry before tucking them around your pots. Dry insulation also provides better insulating capacity, as the trapped dry air is the primary barrier against cold, unlike damp, compressed material.
- Insufficient Drainage in the Trench Container: If your outer trench container does not have adequate drainage holes, water from rain or snowmelt will accumulate at the bottom. This water can freeze solid, essentially turning your entire trench into an ice bath for your potted plants, leading to severe root damage and likely death. Ensure clear drainage holes are present and not blocked.
- Uncovering Too Early or Too Abruptly in Spring: Spring’s arrival can be fickle, with warm days often followed by sudden, damaging freezes. Removing insulation too soon exposes tender new growth to potentially fatal frost. Similarly, moving plants directly from dark, insulated conditions into intense, full sunlight can cause severe leaf scorch and shock. Always follow the gradual acclimation (hardening-off) process described earlier.
- Forgetting About Pests or Diseases: While most pests are dormant, some overwintering insects or rodents might seek shelter in your insulated trench. A quick, thorough inspection of plants for pests and diseases before tucking them in, and considering a mesh or hardware cloth cover for the trench, can significantly mitigate this risk. An undetected pest infestation can devastate plants during their dormant, vulnerable state.
- Neglecting Container Size for Individual Plants: Small pots have less soil volume, meaning less natural insulation for the roots. While the ‘Trench and Tuck’ method helps immensely, combining very small pots or choosing slightly larger containers (at least 8-10 inches diameter) for individual plants from the outset provides a better starting point and more resilient root system. Larger pots contribute more thermal mass to the overall system.
By actively identifying and avoiding these common pitfalls, you significantly increase the chances of your hardy potted perennials thriving through winter and re-emerging beautifully in spring. Your thoughtful preparation and careful execution directly contribute to your success in burying pots in the ground for winter, or its effective balcony equivalent.
Frequently Asked Questions
Do I need to water my plants at all during winter in the ‘Trench and Tuck’ setup?
Yes, but very sparingly and only under specific conditions. While plants are dormant, they still need minimal moisture to prevent their root systems from completely drying out, especially during periods of prolonged thaw. Check the soil moisture in your pots during warmer spells (when temperatures are consistently above freezing for several days) by gently moving aside some insulation. If the soil feels bone dry several inches down, give a small amount of water, just enough to moisten, not saturate, the root ball. Avoid watering if temperatures are consistently below freezing, as this can lead to frozen, damaging soil.
Can I use this method for tender perennials or tropical plants?
No, the ‘Trench and Tuck’ method is specifically designed and effective for hardy perennials. Tender perennials (those not hardy to your specific USDA zone) and tropical plants require warmer conditions, typically above freezing, and often need to be brought indoors to a heated space or greenhouse. This method provides insulation against cold, but it does not generate heat, nor does it protect against prolonged deep freezes that exceed a plant’s inherent hardiness range. Trying to overwinter a tropical plant this way will almost certainly result in its demise.
What kind of container works best for the outer “trench” for insulating pots for winter?
A large, sturdy, and weather-resistant planter box or trough made of heavy-duty plastic, fiberglass, or treated wood works best. Ensure it has ample drainage holes drilled in the bottom to prevent water accumulation. The size should be large enough to comfortably hold all your individual plant pots, leaving several inches of space between them for insulation material. Common garden center planter boxes, large durable storage bins (with drilled drainage), or even custom-built wooden troughs are excellent choices. Consider its aesthetic appeal if it will be visible on your balcony.
When is the best time to set up the ‘Trench and Tuck’ to protect plants in winter?
Aim to set up the ‘Trench and Tuck’ method in late fall, specifically before the first sustained hard freeze. This is typically when nighttime temperatures consistently drop into the low 30s or 20s Fahrenheit (0 to -7 degrees Celsius). Waiting until the ground is completely frozen or after several hard frosts makes the process more difficult and can expose your plants to initial cold damage. It’s better to be a bit early than too late to ensure your plants are adequately prepared for winter’s arrival.
Can I use leaves from any tree as insulation when burying pots in the ground for winter (or a balcony equivalent)?
Mostly yes, but some are better than others. Dry, shredded leaves from deciduous trees like oak, maple, or sycamore are excellent. Oak leaves are particularly good because they decompose slowly and maintain their structure, providing long-lasting insulation. Always ensure all leaves are thoroughly dry to prevent mold and mildew. Avoid using leaves from trees known to carry diseases specific to your garden plants, and never use matted, wet leaves, as these can suffocate plants, promote rot, and attract pests. Leaves should be loose and airy to trap maximum warmth.
For trustworthy gardening information, visit: Wild Ones — Native Plants, Natural Landscapes, Pollinator Partnership and International Society for Horticultural Science (ISHS). These organizations provide expert, research-based advice for gardeners at all levels.
Disclaimer: This article is for informational purposes only and is not a substitute for professional gardening advice. Always consult local extension services or horticulture experts for region-specific guidance.


Leave a Reply