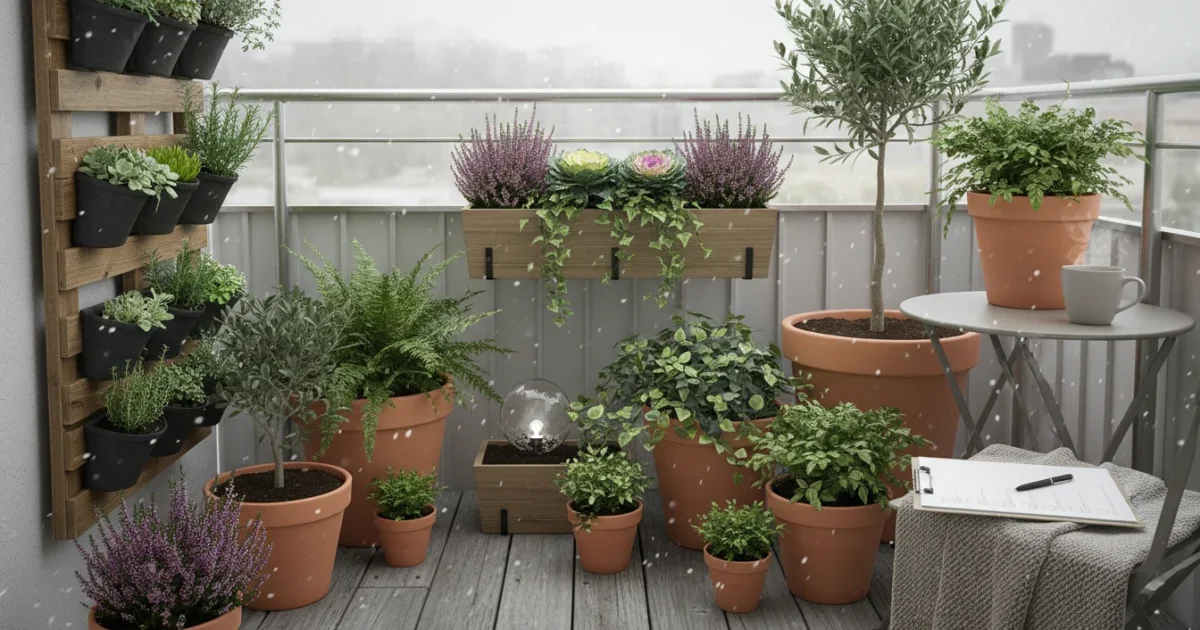
Planning a winter getaway should bring excitement, not anxiety about your beloved houseplants. For apartment gardeners, leaving plants unattended, especially during the colder months, presents unique challenges. Your indoor environment, often drier and with fluctuating temperatures due to heating, demands a strategic approach to plant care while you are away. This comprehensive guide provides you with a practical, actionable pre-trip checklist designed to keep your indoor green companions thriving, ensuring you return to a vibrant, healthy home.
Selecting air-purifying houseplants that naturally thrive in dry heat can make your indoor garden much more resilient during your travels.
If you are new to keeping greenery, a basic indoor plant survival guide can provide additional peace of mind before you travel.
You can enjoy your vacation knowing your plants are well-cared for. We focus on small-space solutions and low-maintenance strategies, making sure your apartment garden remains resilient even when you are not there to tend to it daily. Let’s transform your pre-vacation plant prep from a stressful chore into a simple, confidence-boosting routine.
Understanding Winter Houseplant Challenges While You’re Away
Winter presents a distinct set of challenges for houseplants, particularly when you are away from home. Your plants experience shorter daylight hours, leading to reduced photosynthesis and slower growth. This means their water and nutrient needs decrease significantly. The air inside your apartment also tends to become much drier due to heating systems running continuously. This dry air can stress plants, leading to brown leaf tips, wilting, and increased susceptibility to pests.
Many environmental stressors can be managed by avoiding common winter care mistakes that often lead to plant decline.
Learning how to handle dormancy is essential for keeping your indoor pots healthy until spring.
When you are absent, you cannot adjust to these daily fluctuations. Therefore, preparing your plants means anticipating these environmental shifts and mitigating their impact. We focus on strategies that account for lower light, reduced metabolic activity, and increased dry air, ensuring your plants remain stable and healthy throughout your absence. Understanding these core issues helps you implement the most effective vacation plant care plan.
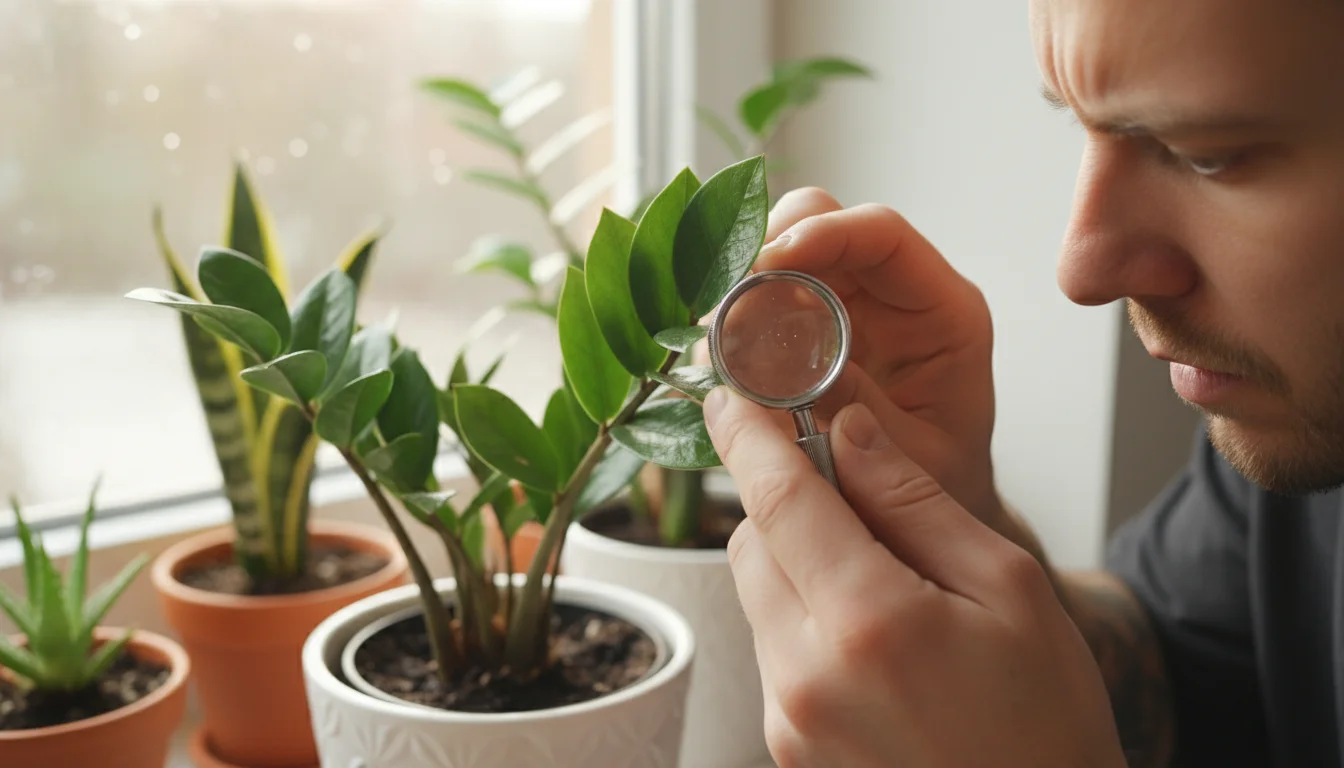
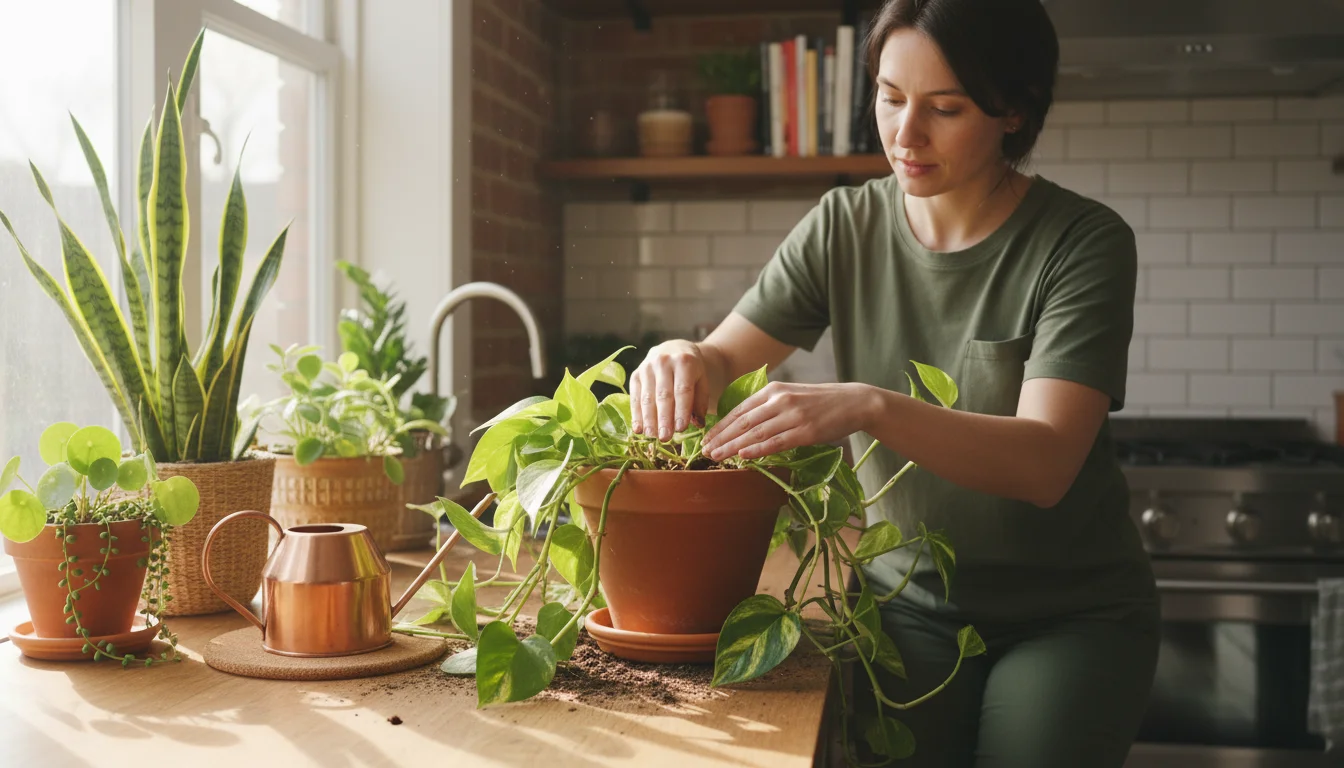
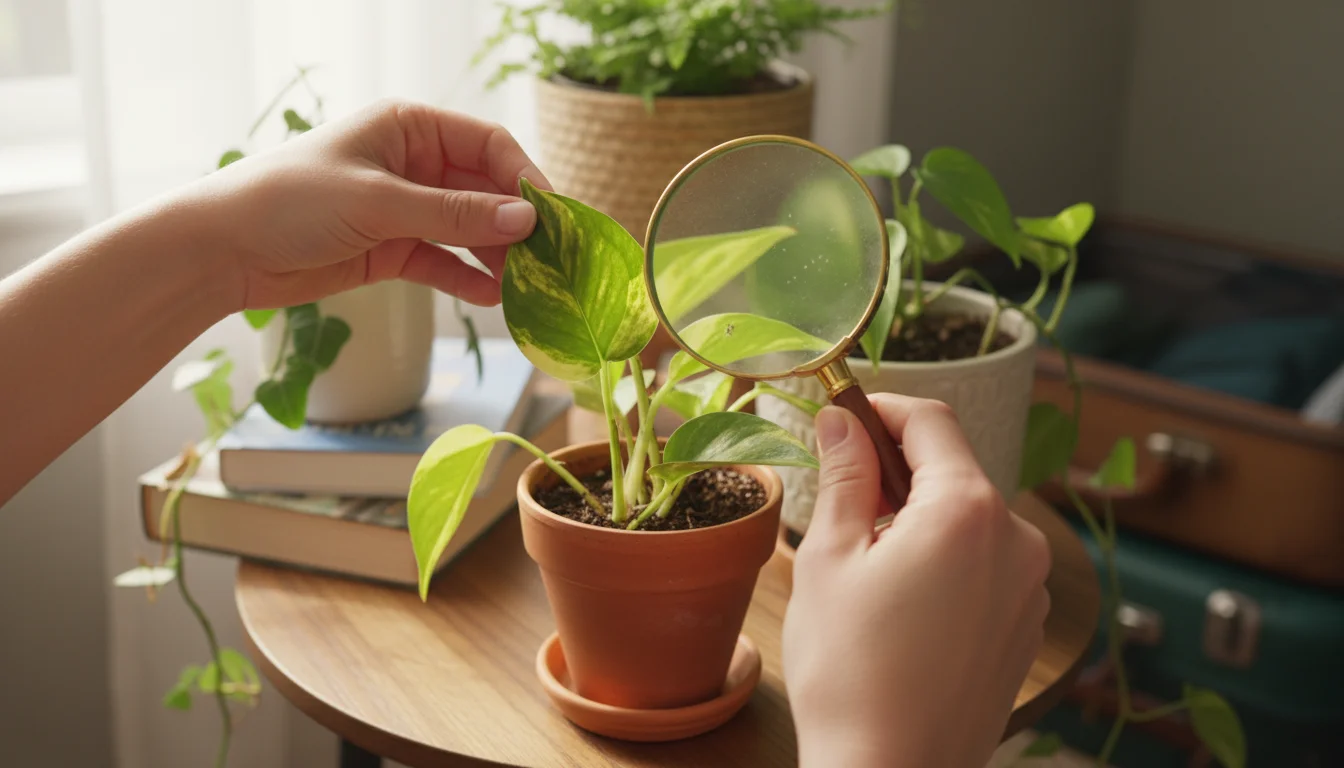
The Essential Pre-Trip Houseplant Health Check: A Crucial First Step
Before you even consider watering, conduct a thorough health check on all your houseplants. This proactive step helps you identify and address any existing issues that could worsen while you are gone. A healthy plant stands a much better chance of surviving your absence than one already struggling.
Assembling a specialized indoor gardening tool kit ensures you have everything on hand for these vital pre-trip inspections.

What to Look For:
- Yellowing Leaves: This often indicates overwatering, underwatering, or a nutrient deficiency. Address the cause immediately.
- Brown Tips or Edges: Usually a sign of low humidity or inconsistent watering.
- Wilting or Drooping: Can signal extreme thirst, root rot from overwatering, or even pest infestation.
- Fungus Gnats: Small, black flying insects often indicate overly moist soil. Allow the soil to dry out more between waterings.
- Pests (Aphids, Spider Mites, Mealybugs): Inspect the undersides of leaves, stems, and soil for any signs of these unwelcome guests. A small problem can become a major infestation in two weeks.
Actionable Steps for Your Pre-Trip Health Check:
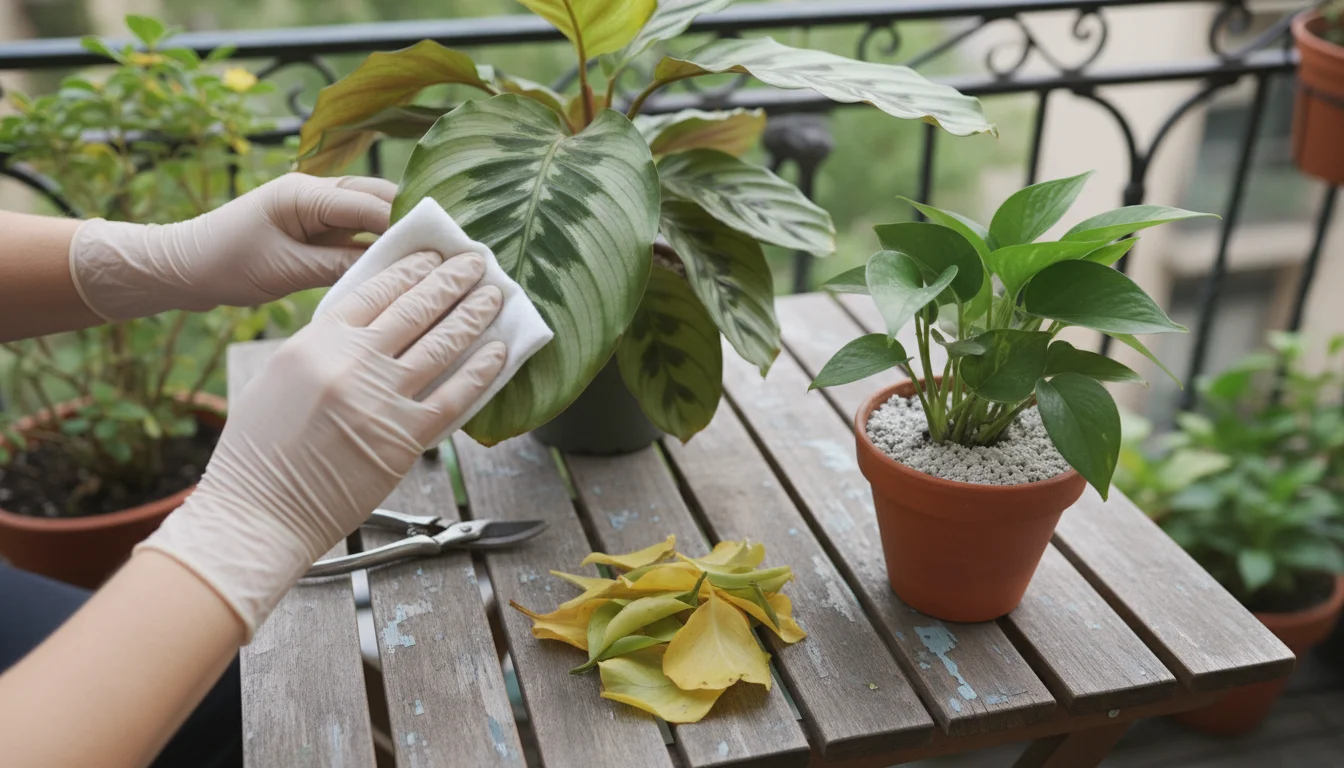
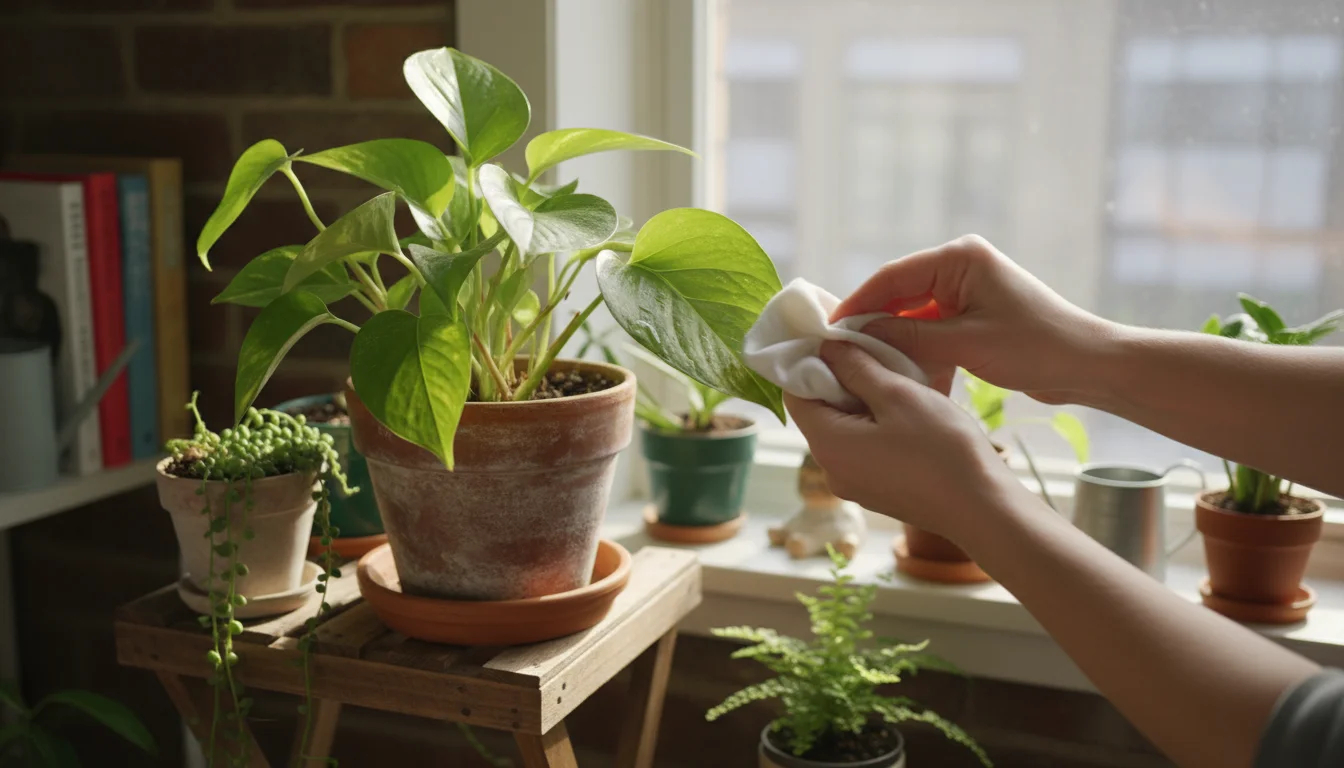
- Prune Away Dead or Dying Foliage: Remove any yellow, brown, or damaged leaves. These parts drain the plant’s energy and can become breeding grounds for pests or diseases. Use clean, sharp pruners or scissors.
- Wipe Down Leaves: Dust accumulates on leaves, blocking light and hindering photosynthesis. Gently wipe both the top and bottom surfaces of leaves with a damp cloth. This also provides an opportunity to spot hidden pests.
- Inspect the Soil Surface: Look for mold, fungus gnats, or any unusual growth. If you see fungus gnats, let the soil dry out significantly and consider a top layer of horticultural sand or diatomaceous earth (food grade) to deter them.
- Check Drainage: Ensure all pots have functioning drainage holes. Stagnant water causes root rot, a silent killer. If a pot lacks drainage, consider repotting or placing the plant inside a slightly larger decorative pot with a layer of pebbles at the bottom to elevate the inner pot.
- Isolate Troubled Plants: If you discover a plant with a pest infestation, immediately isolate it from your other plants. Treat it thoroughly before your departure using appropriate organic pest control methods like insecticidal soap or neem oil. Treating pests is vital; leaving an infested plant will almost guarantee the problem spreads and intensifies.
Completing this health check ensures your plants are in their best possible condition, ready to endure your time away. This is your first line of defense for successful vacation plant care.
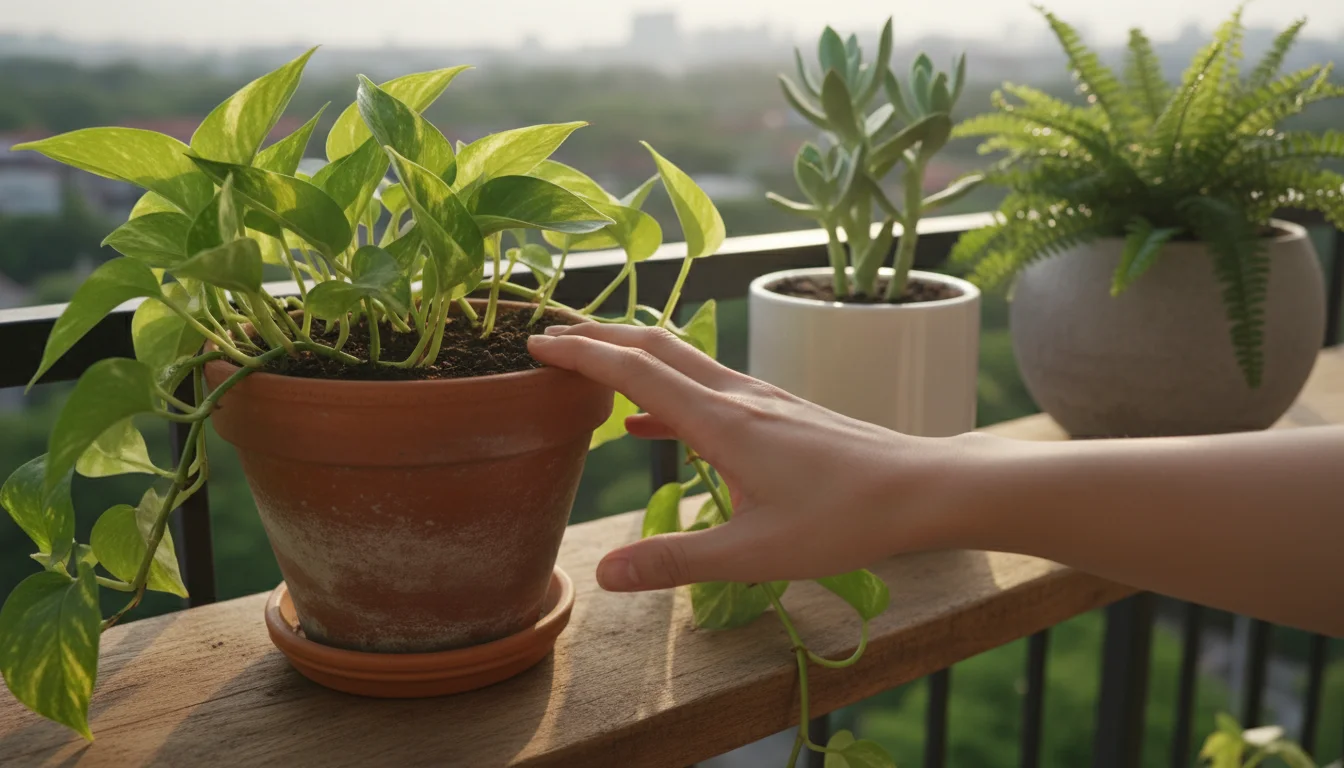
Strategic Watering Before Departure: Avoiding Over and Under-Watering
One of the biggest concerns for gardeners is watering plants while away, especially in winter. The key is to provide enough moisture to last your absence without drowning your plants. Remember, in winter, most houseplants are in a state of semi-dormancy, meaning they require less water than in their active growing seasons. Overwatering is often more detrimental than slight underwatering for many plants, leading to root rot. Here is how to approach it:
It is also helpful to look past houseplant watering myths to ensure you are meeting each species’ specific hydration needs.
The Timing and Amount:
- Water Thoroughly, But Not Right Before You Leave: Water your plants deeply 2-3 days before your departure. This allows excess water to drain away and the topsoil to dry slightly, reducing the risk of root rot. For plants that prefer consistently moist soil, like ferns or peace lilies, water them the day before.
- Feel the Soil: Insert your finger about an inch or two into the soil. If it feels moist, your plant likely has enough water. If it feels dry, water thoroughly until water drains from the bottom.
- Consider Plant Type:
- Succulents and Cacti: These require very little water, especially in winter. Water them very lightly, if at all, a week before you leave. They can easily go 2-3 weeks without water.
- Tropical Plants (e.g., Philodendrons, Pothos): These prefer consistently moist, but not soggy, soil. Water them thoroughly but ensure excellent drainage.
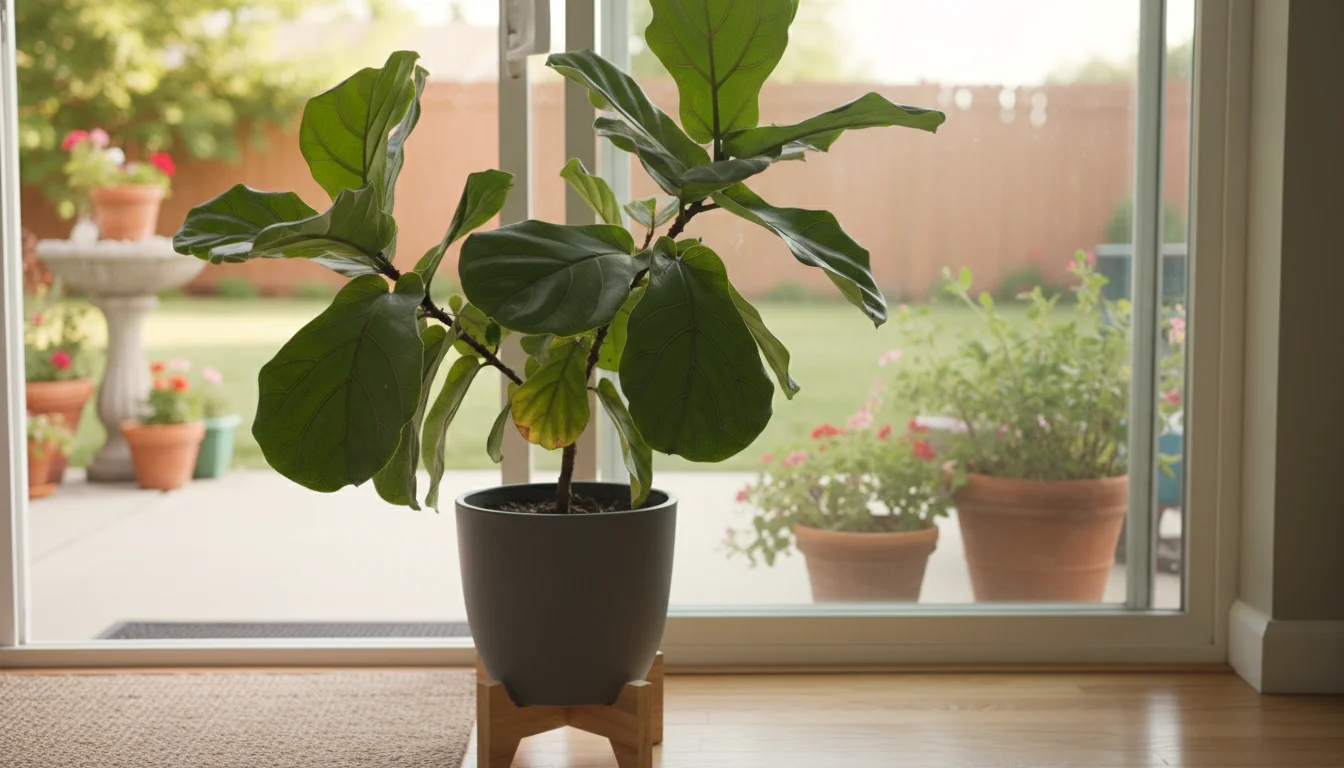
- Foliage Plants (e.g., Fiddle Leaf Fig, Monstera): Check the soil moisture carefully. They typically prefer the top inch or two of soil to dry out between waterings.
- Empty Saucers: Always empty any standing water from saucers or cachepots after watering. This prevents roots from sitting in water, which leads to root rot.
Adjusting for Winter:
Your heating system creates a drier environment, but plants also use less water when light levels are low and growth is slow. Do not compensate for dry air by overwatering the soil. Instead, focus on humidity solutions (discussed next) and appropriate soil moisture. This careful balance is crucial for keeping houseplants alive for 2 weeks in winter.
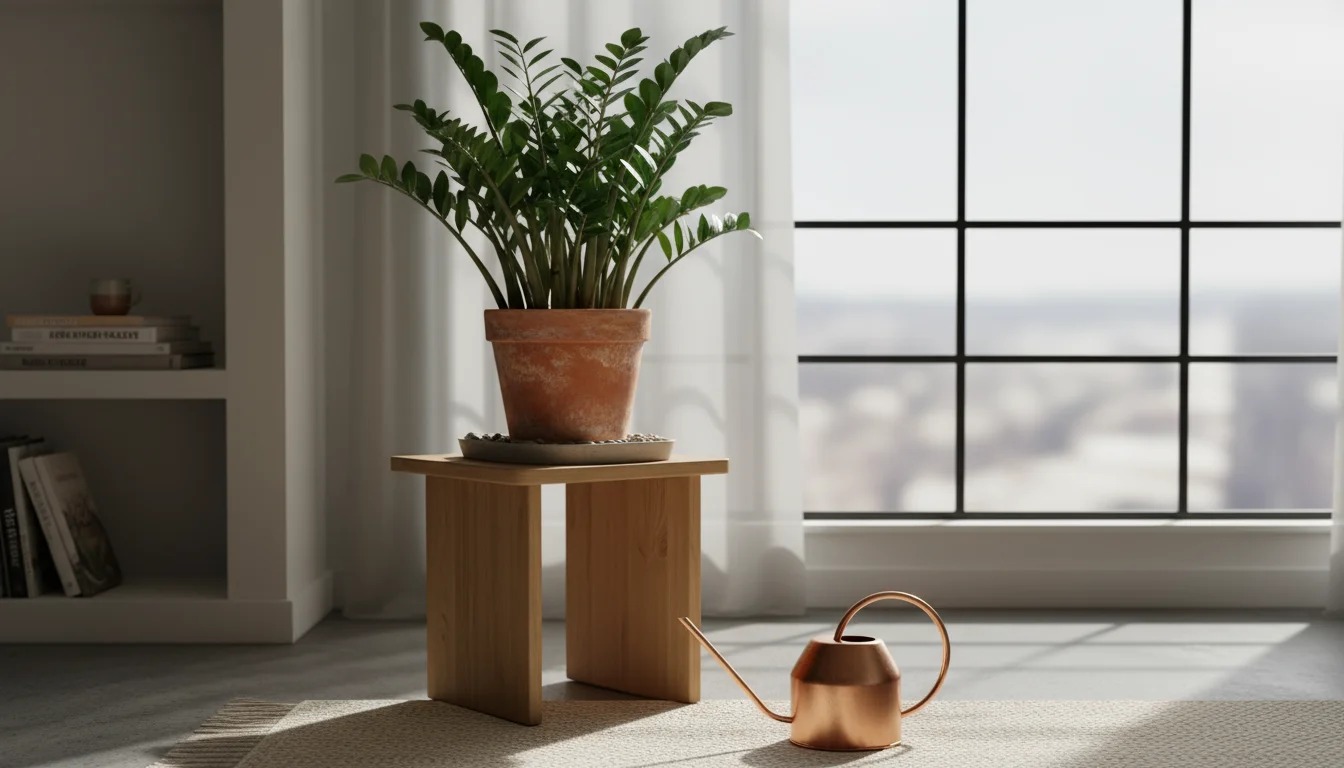
Optimizing Light and Temperature: Creating a Stable Environment
Winter conditions mean less natural light and potentially wider temperature swings in an unoccupied apartment. Your goal is to create as stable an environment as possible for your plants to minimize stress.
In darker apartments, using a few essential gadgets for sun-starved plants can provide the light consistency your garden needs while you are away.
Managing Light Exposure:
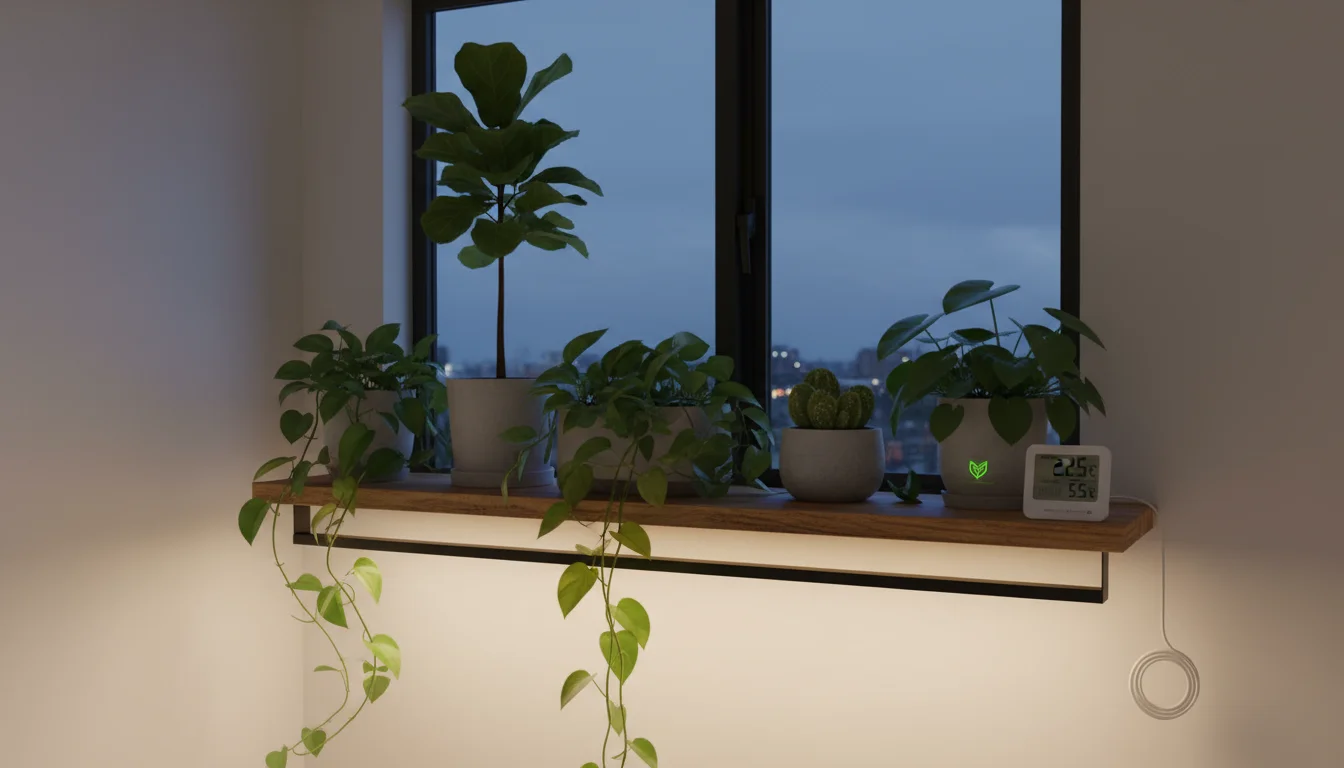
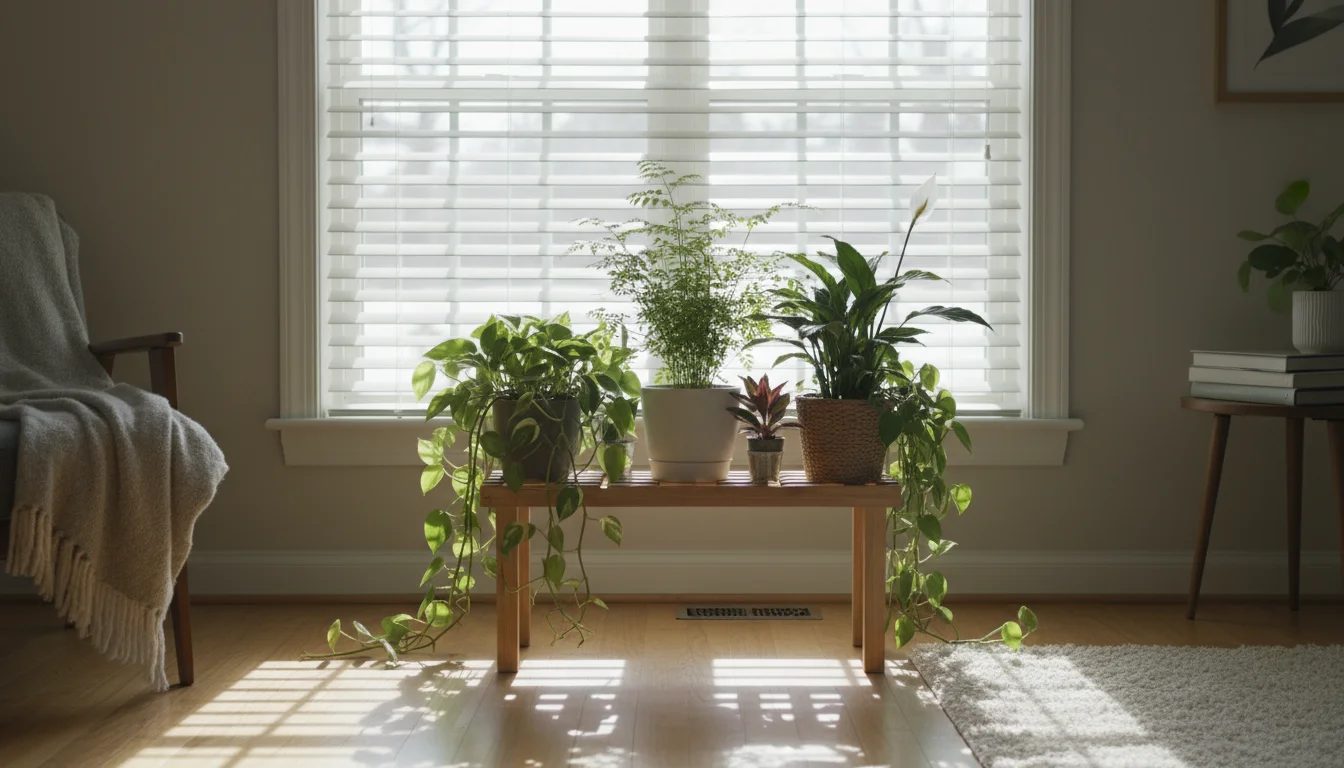
- Consolidate Plants: Group plants together. This creates a microclimate, slightly increasing humidity around them, which benefits their health in dry winter air.
- Move to Bright, Indirect Light: Move plants away from drafty windows or direct, intense winter sun, which can scorch leaves or cause rapid drying. Place them in a room with consistent, bright indirect light. East or north-facing windows are often ideal.
- Avoid Dark Corners: Do not relegate plants to dark corners. They still require some light to survive, even in dormancy.
- Adjust Blinds or Curtains: Partially close blinds or curtains to diffuse direct sunlight and provide some insulation against cold window panes, but ensure enough ambient light still reaches your plants.
Controlling Temperature:
- Maintain a Stable Temperature: If possible, set your thermostat to a consistent, moderate temperature, ideally between 60-70°F (15-21°C). Avoid extreme drops or spikes in temperature. Leaving the heat on at a lower setting is better than turning it off completely, which can shock plants when outdoor temperatures plummet.
- Away From Vents and Drafts: Move plants away from heating vents, radiators, and exterior doors or windows that might have drafts. These can cause rapid dehydration or sudden temperature drops, stressing your plants.
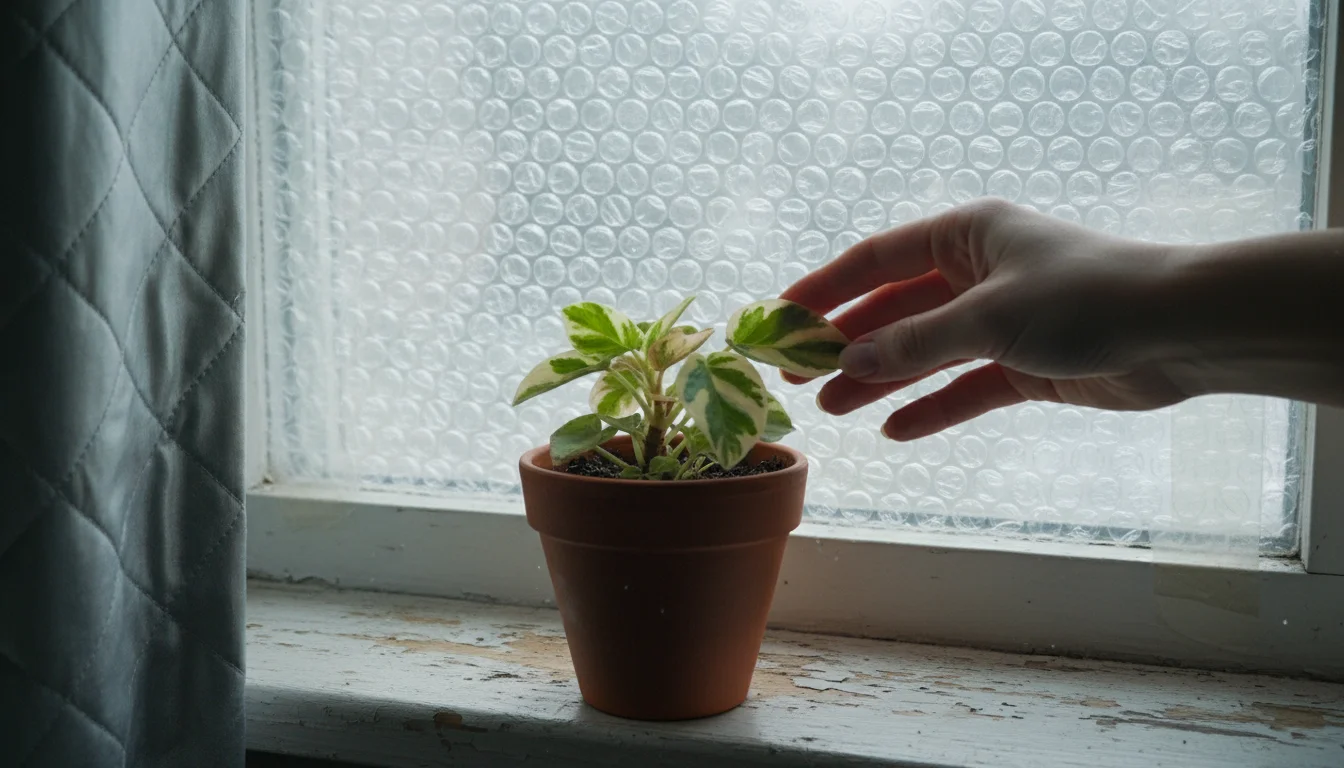
- Insulate: For plants near windows, consider adding a layer of bubble wrap or a thick curtain between the window and your plants for extra insulation, especially if you anticipate very cold outdoor temperatures.
Careful attention to these details forms a core part of your pre-vacation plant checklist for apartment living, ensuring your plants do not suffer from environmental shock.
Boosting Humidity for Winter Travel: Simple Apartment Solutions
Dry winter air, exacerbated by indoor heating, is a major enemy for most houseplants. Increasing humidity is critical for their well-being while you are away. Luckily, several simple and effective methods do not require constant monitoring.

Effective Humidity Hacks:
- Group Plants Together: Grouping plants creates a small ecosystem where the transpiration (water vapor release) from one plant benefits its neighbors, raising local humidity.
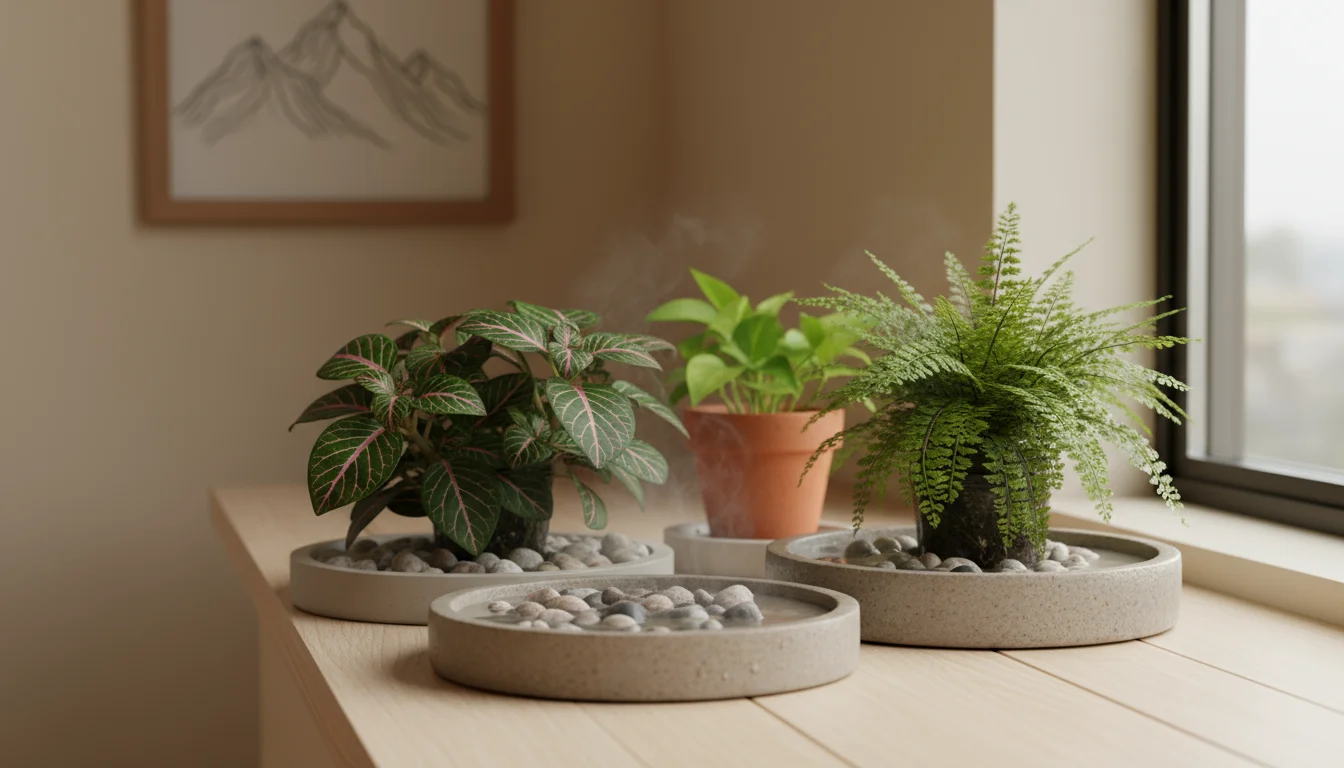
- Pebble Trays: Place trays filled with pebbles and water beneath your plant pots. Ensure the bottom of the pots does not sit directly in the water, as this can lead to root rot. The evaporating water naturally humidifies the air around the plants. You can use several large trays for grouped plants.
- Create a “Mini Greenhouse” (For Shorter Absences): For smaller, humidity-loving plants, you can create a temporary humidity dome.
- Water the plant thoroughly but ensure no standing water.
- Place the potted plant inside a clear plastic bag or an upturned clear plastic container (like a large storage bin or a repurposed cake cover).
- Do not let the plastic touch the leaves. You can use stakes to support the plastic if necessary.
- Seal the bag or container loosely to trap humidity. This method works well for a week or two but requires monitoring for mold if used for longer periods or in warmer conditions.
- Move Plants to a Humid Room: If you have a bathroom or kitchen with a window that receives adequate light, these rooms naturally have higher humidity levels and can be excellent temporary homes for your plants.
- Capillary Mats (for larger collections): A capillary mat, kept moist, allows plants to wick up water as needed. Place the mat on a waterproof surface, thoroughly wet it, and then place your potted plants directly on the mat. Ensure the pots have drainage holes for roots to access the water. This is a fantastic option for a collection of plants that need consistent moisture.
Implementing one or more of these strategies will significantly improve your plants’ chances of surviving the dry winter conditions while you are enjoying your vacation. These winter houseplant tips are especially beneficial for moisture-loving varieties.
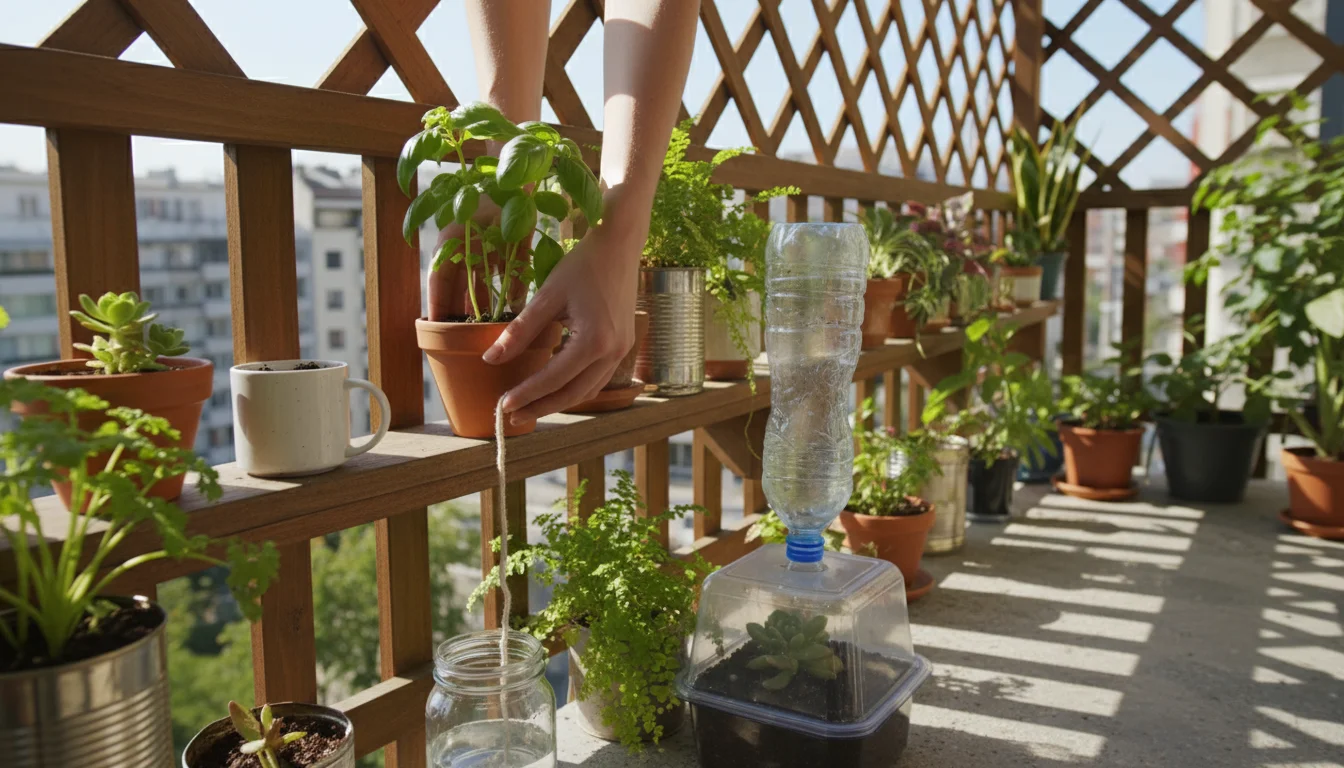
DIY Self-Watering Systems: Practical Solutions for Apartment Gardeners
For absences longer than a few days, or for plants that demand consistent moisture, a DIY self-watering for vacation system can be a lifesaver. These solutions are typically inexpensive, easy to set up, and perfect for small spaces.
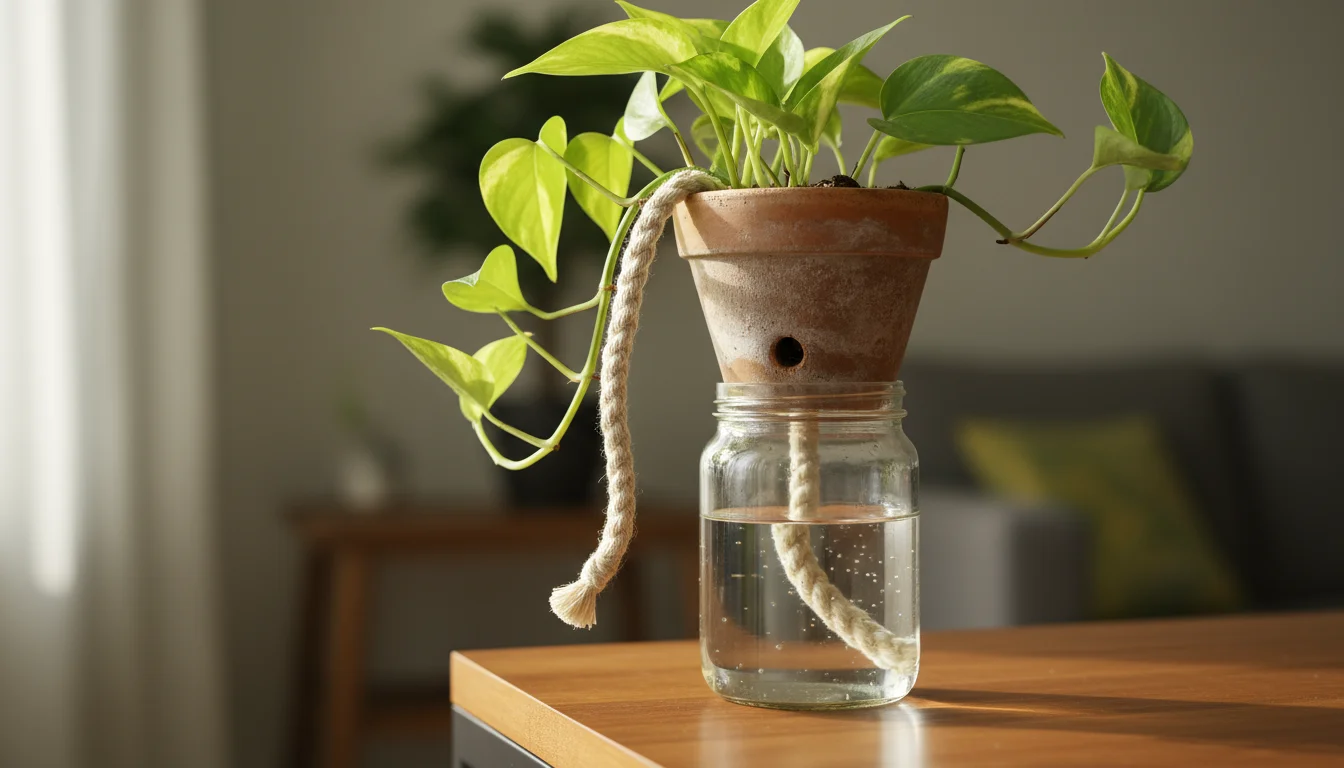
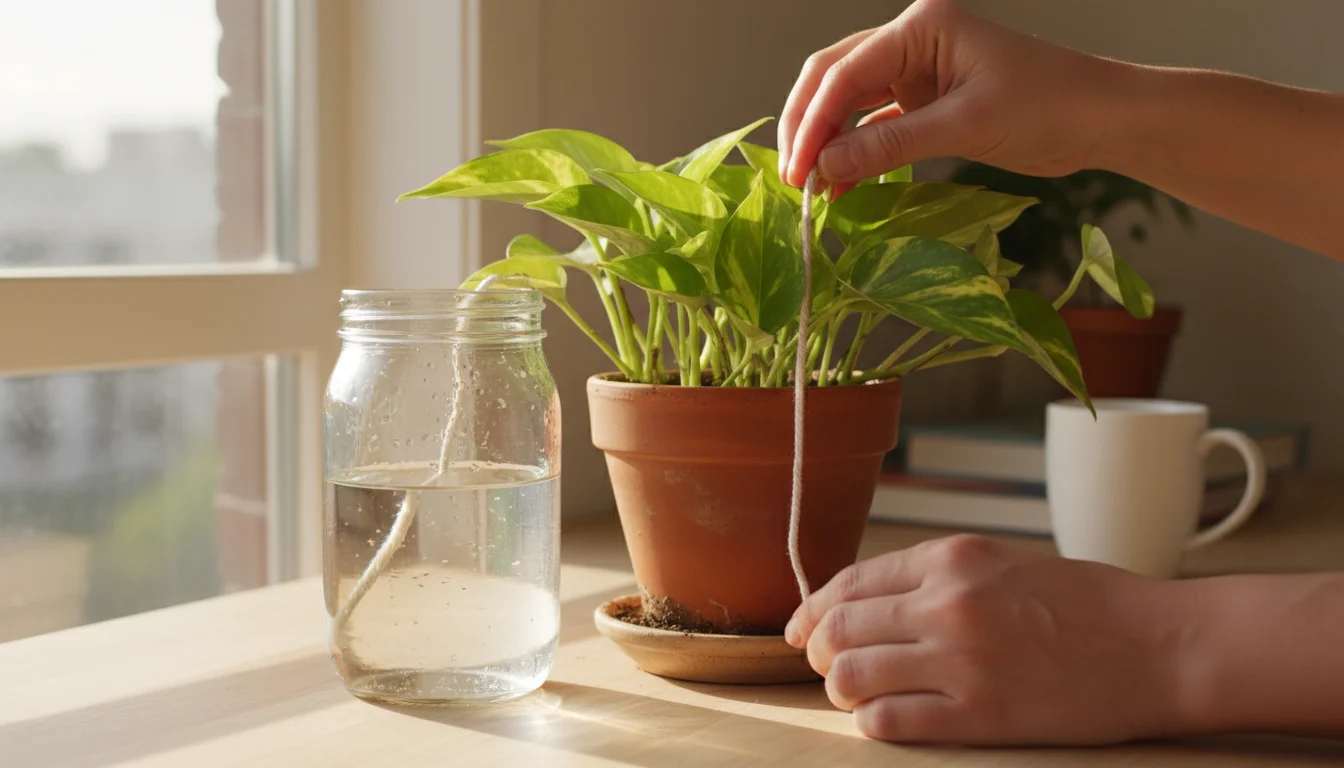
1. Wicking System: The Capillary Action Method
This is one of the most reliable and simplest self-watering methods for houseplants.
What You Need:
- Thick cotton rope, nylon cord, or strips of old cotton t-shirt (synthetic wicks better than cotton for long-term consistency).
- A container of water (a bottle, jar, or bucket) larger than your plant’s pot.
- Your potted plant.
How to Set It Up:
- Prepare the Wick: Cut a length of rope or cord long enough to reach from the bottom of your water reservoir to several inches into your plant’s soil.
- Insert the Wick: Gently push one end of the wick into the drainage hole at the bottom of your plant pot, up into the soil about 2-3 inches. You can use a chopstick or pencil to help guide it.
- Position the Water Reservoir: Place the plant pot directly above or beside the water container, ensuring the other end of the wick reaches the bottom of the water. The water reservoir must be lower than the plant’s soil level to prevent overwatering due to gravity, allowing capillary action to do its work.
- Fill and Test: Fill the water reservoir. Water your plant normally the day before to moisten the soil and help establish the wick. The wick will then draw water from the reservoir as the soil dries.
This method ensures your plants get water as they need it, preventing both over and under-watering.
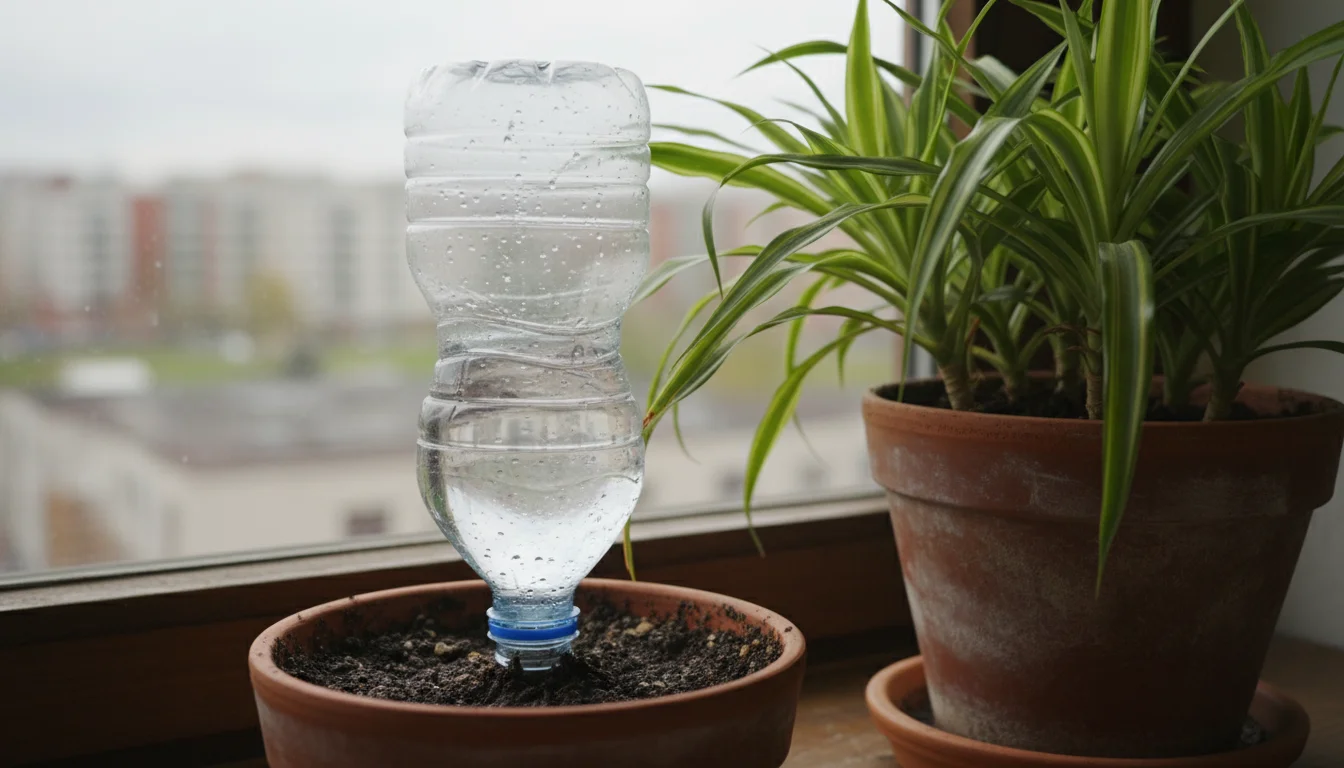
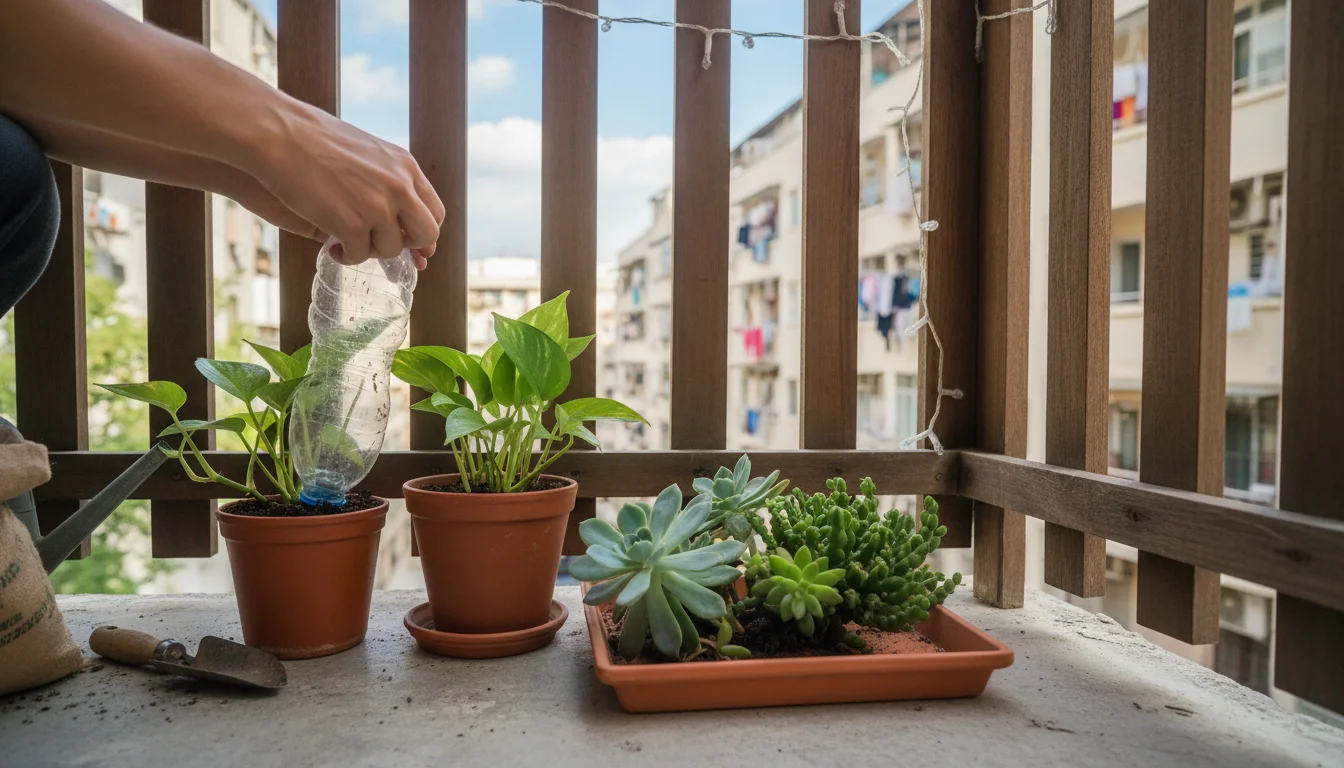
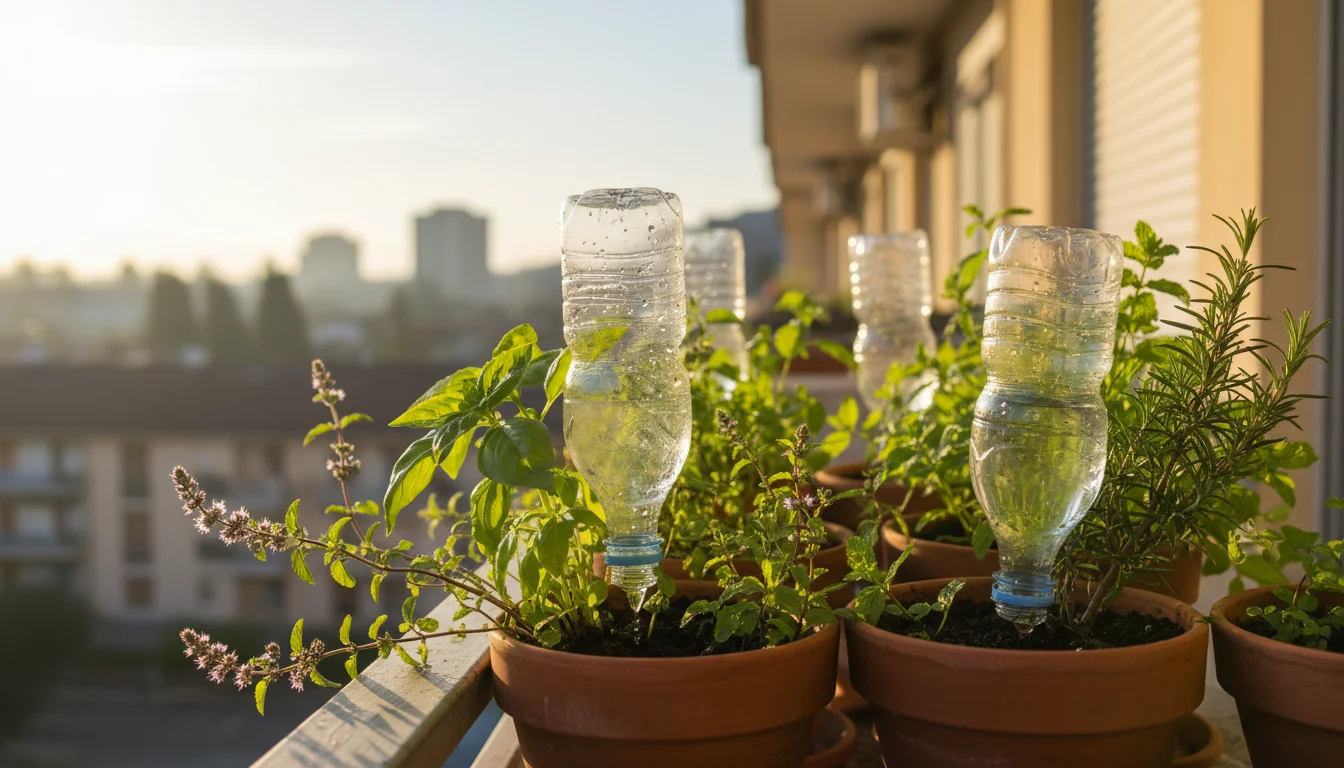
2. Water Bottle Drip System: Simple and Effective
A quick, temporary solution for individual plants.
What You Need:
- An empty plastic water bottle (e.g., 500ml or 1-liter).
- A small nail or drill bit.
How to Set It Up:
- Punch Holes: Make 1-2 tiny holes in the cap of the water bottle. You want a slow drip, not a stream.
- Fill the Bottle: Fill the bottle with water and quickly screw on the cap.
- Invert into Soil: Dig a small, shallow hole in the plant’s soil, away from the stem. Invert the bottle and gently push the cap end into the soil. The water will slowly drip out, hydrating the soil.
Test this system for a day or two before you leave to gauge the drip rate and ensure it is not too fast or too slow for your plant’s needs. This is particularly useful for apartment dwellers with limited space for larger self-watering setups.
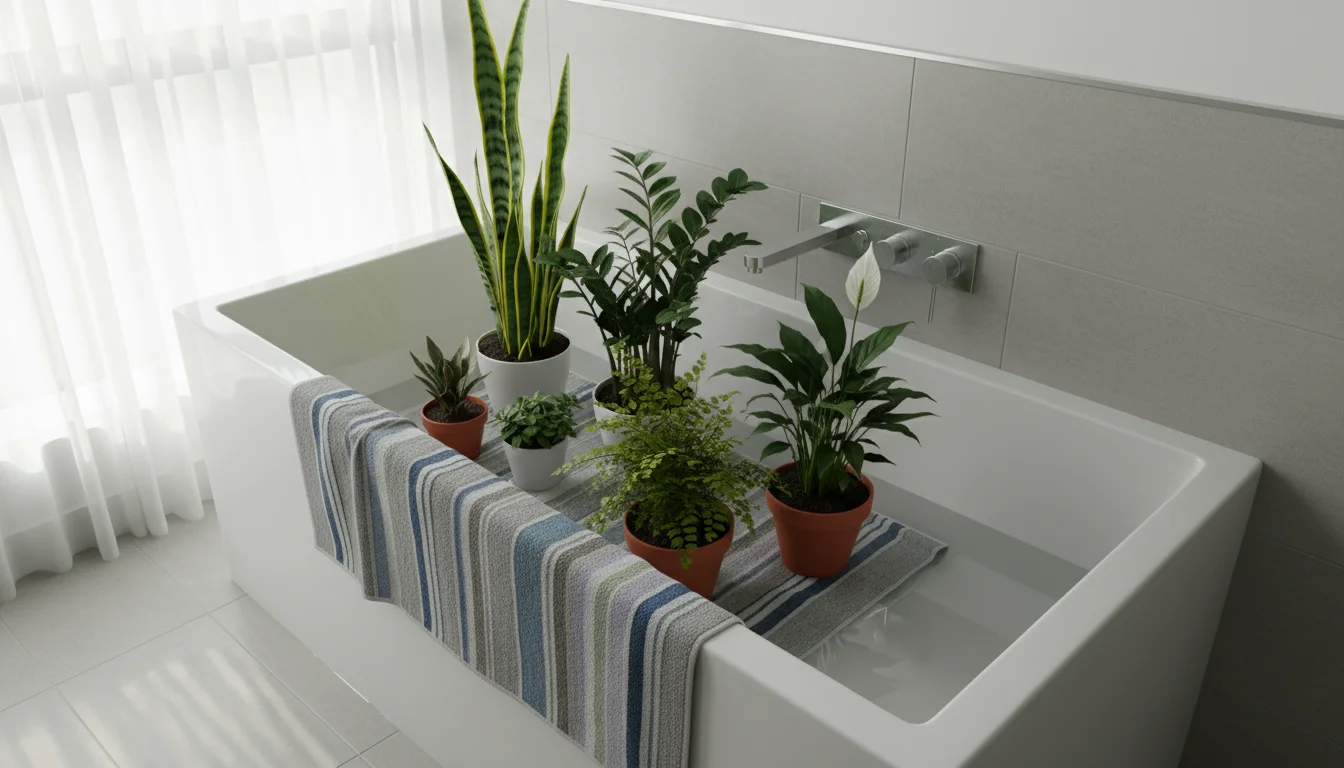
3. Bathtub or Sink Reservoir (for Multiple Plants):
This method utilizes your bathtub or sink as a large, shared water reservoir for several plants.
What You Need:
- A clean bathtub or large sink.
- Towels or capillary mats.
How to Set It Up:
- Prepare the Basin: Clean your bathtub or sink thoroughly. Place a thick layer of old towels or a capillary mat on the bottom to protect the pots and absorb moisture.
- Add Water: Fill the tub or sink with about 1-2 inches of water.
- Arrange Plants: Place your potted plants (ensure they have drainage holes) on the towels or mat. The plants will slowly wick up water from the saturated towels or mat as needed.
- Consider Light: Ensure the bathroom or kitchen receives enough indirect light for the duration of your trip.
This setup works well for plants that tolerate consistent moisture and provides some humidity. Monitor for light levels if your bathroom window is small.
Important Considerations for All DIY Systems:
- Test First: Always test any self-watering system for a few days before your actual departure. This helps you adjust drip rates, wick lengths, and water levels.
- Cleanliness: Ensure all components are clean to prevent algae or mold growth in the water reservoir or on the wicks.
- Reservoir Size: Use a water reservoir large enough to last your entire trip. For a two-week absence, a larger bottle or jar is preferable.
- Plant Needs: Not all plants are suited for continuous watering. Succulents and cacti will rot quickly with these systems. Use these methods for plants that prefer consistently moist soil.
These DIY self-watering for vacation methods offer practical ways to manage plant hydration, providing peace of mind as you prepare for your winter travels.
Pest Patrol Before You Go: Preventing Unwelcome Surprises
A small pest problem can explode into a major infestation in a matter of days, especially when environmental conditions shift, like increased dryness from heating. A thorough pest check and preventative measures are non-negotiable for successful vacation plant care.
Your Pre-Trip Pest Checklist:
- Thorough Visual Inspection: Carefully examine every part of your plants:
- Leaf Undersides: Many pests, like spider mites and mealybugs, hide here. Look for tiny webs, white cottony masses, or small moving dots.
- Stems and Leaf Axils: Check where leaves meet the stem for scale insects or mealybugs.
- Soil Surface: Look for fungus gnats or tiny larvae.
- Wipe Down Leaves: Use a damp cloth to wipe down both sides of the leaves. This removes dust and physically dislodges many pests. For more stubborn pests, add a tiny drop of dish soap to the water for an insecticidal soap effect.
- Treat Existing Infestations: If you find any pests, act immediately:
- Insecticidal Soap: A mild, non-toxic solution effective against soft-bodied pests. Spray thoroughly, ensuring coverage on all affected areas.
- Neem Oil: An organic pesticide that disrupts insect feeding and reproduction. Follow product instructions carefully.
- Horticultural Oil: Smothers insects and their eggs.
- Manual Removal: For larger pests like mealybugs, use a cotton swab dipped in rubbing alcohol to wipe them off.
- Isolate Infected Plants: Move any plant with an active infestation away from your other plants to prevent spread. Continue treatment until clear.
- Consider a Preventative Measure (Optional): For plants prone to pests, a light spray of diluted neem oil a few days before leaving can offer some preventative protection.
Preventing pests is far easier than battling a full-blown infestation after your return. This proactive approach saves you time and stress, ensuring your plants stay healthy through your winter vacation.
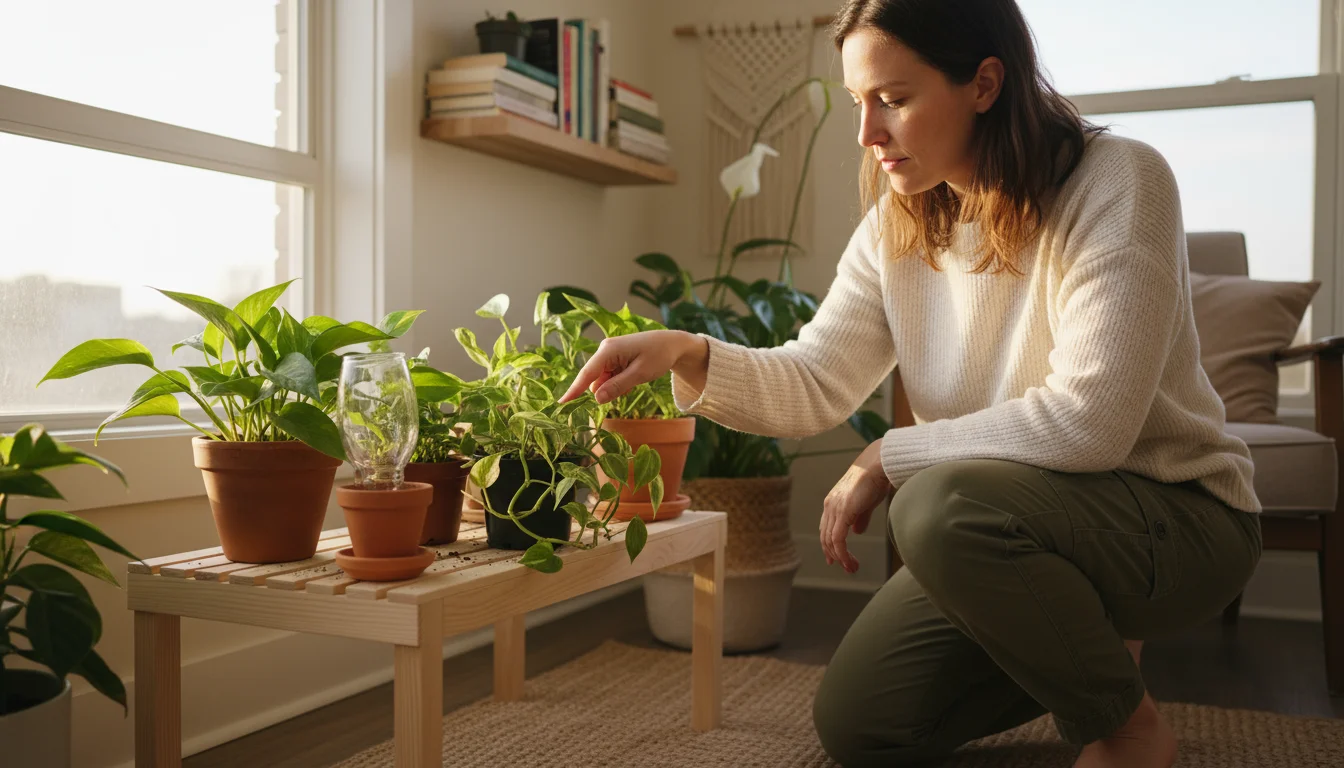
Post-Vacation Plant Recovery: Welcoming Your Plants Home
You have returned home, relaxed and refreshed. Now it is time to check on your green friends. Even with the best preparation, some plants might show signs of stress. A gentle recovery plan helps them bounce back quickly.
If you return to find a plant has significantly deteriorated, our winter emergency recovery guide can help you determine the best path to restoration.
Your Post-Vacation Plant Recovery Checklist:
- Initial Assessment: Walk through your apartment and visually inspect each plant. Look for obvious signs of distress: wilting, yellowing, dry soil, or unexpected pests.
- Check Soil Moisture: Do not immediately water every plant. Feel the soil. If it is dry an inch or two down, water thoroughly until it drains from the bottom. If it is still moist, wait. Overwatering after a period of stress can be more harmful.
- Gradual Return to Routine: Do not immediately blast plants with fertilizer or drastic light changes. Slowly reintroduce them to their normal watering schedule and light conditions.
- Prune Dead or Damaged Leaves: Remove any yellow, brown, or crispy leaves. This helps the plant redirect energy to new, healthy growth.
- Address Pests: If you find new pest activity, isolate the affected plant and treat it immediately using your preferred organic pest control method.
- Consider a Gentle Feeding (Optional): If your plants look generally well but a bit lackluster, after a week of consistent watering, you can give them a very diluted, balanced liquid fertilizer. Do not fertilize stressed plants.
- Restore Humidity: If you moved plants to a bathroom or had a mini-greenhouse setup, slowly reintroduce them to their usual spots and maintain humidity with pebble trays or grouping.
Patience is key during this recovery phase. Your plants are resilient and with a little care, they will soon return to their vibrant selves, ready to brighten your home once more. These post-trip winter houseplant tips complete your successful vacation plant care strategy.
Eco-Friendly Vacation Plant Care: Sustainable Choices for Your Apartment Garden
As gardeners dedicated to simple joys and sustainable practices, our approach to vacation plant care extends to environmental consciousness. Many of the strategies we have discussed naturally align with eco-friendly principles, emphasizing resourcefulness and minimal waste.
Sustainable Practices for Your Pre-Trip Routine:
- Repurpose Materials for DIY Systems: Instead of buying new self-watering tools, use what you already have. Old cotton t-shirts make excellent wicks. Repurpose plastic water bottles or milk jugs for drip systems. Old plastic food containers can serve as mini-greenhouses for small plants.
- Conserve Water: By strategically watering and employing self-watering systems, you optimize water usage. Ensuring thorough drainage prevents waste, and collecting runoff water for other plants (if not contaminated) further conserves this precious resource.
- Choose Organic Pest Control: Opt for organic, non-toxic pest control methods like insecticidal soap, neem oil, or manual removal. These methods protect your plants, your home environment, and the wider ecosystem from harmful chemicals.
- Natural Humidity Boosters: Pebble trays and grouping plants are natural, energy-free ways to increase humidity, avoiding reliance on electric humidifiers.
- Reduce Plant Stress: A healthy, well-prepared plant is less susceptible to pests and diseases, reducing the need for interventions. By following the health checklist, you strengthen your plants’ natural defenses.
- Compost Pruned Material: If you have a small compost bin or a local composting program, add any healthy pruned leaves or stems there instead of discarding them.
Your small efforts in your apartment garden contribute to a larger sustainable lifestyle. These mindful choices ensure your plants are cared for responsibly, aligning with the ethos of SimpleGardenJoy.com.
Frequently Asked Questions
How long can houseplants typically go without water in winter?
Most houseplants can comfortably go 1-2 weeks without water in winter, provided they are healthy and the indoor environment is not excessively dry. Succulents and cacti can often last 3-4 weeks or even longer. Plants that prefer consistently moist soil, like ferns or peace lilies, will require a self-watering system for absences exceeding a week to 10 days.
Should I fertilize my plants before leaving for vacation?
No, avoid fertilizing your plants right before you leave. Fertilizing encourages new growth, which requires more water and nutrients. Since plants are often in a semi-dormant state in winter and their water supply will be limited while you are away, stimulating growth can stress them. Resume fertilization only after you return and your plants have settled back into their routine, ensuring they appear healthy.
Is it better to leave plants in a dark room or near a window?
It is generally better to leave plants near a window that provides bright, indirect light, even in winter. While growth slows down, plants still require some light for basic metabolic functions. A completely dark room will stress plants more than one with diffused natural light. Just ensure they are not in direct, scorching sun or in a drafty spot. Grouping them near a stable, indirectly lit window is usually the best option.
What if my apartment gets very cold when I’m gone?
If your apartment gets excessively cold (below 50°F or 10°C), your plants are at risk of cold damage. Ideally, set your thermostat to maintain a minimum temperature of 60-65°F (15-18°C). If this is not possible, consider moving cold-sensitive plants (e.g., tropicals) to a smaller, interior room like a bathroom or closet, ensuring they get some light. You can also place them in a box lined with newspaper or bubble wrap for insulation. This protects them from extreme temperature drops, crucial for how to keep houseplants alive for 2 weeks in winter in challenging conditions.
Can I use plant sitter services for my apartment plants?
Absolutely! For longer trips or valuable collections, a trusted plant sitter or friend is an excellent solution. Provide clear, written instructions for each plant’s specific needs, including watering frequency, light requirements, and any pest concerns. This personalized care can offer the most peace of mind, especially when you need extended vacation plant care.
For trustworthy gardening information, visit: Mississippi State University Extension — Lawn & Garden, Arkansas Extension — Yard & Garden, Kansas State University Extension — Horticulture and Oklahoma State University Extension — Lawn & Garden. These organizations provide expert, research-based advice for gardeners at all levels.
Disclaimer: This article is for informational purposes only and is not a substitute for professional gardening advice. Always consult local extension services or horticulture experts for region-specific guidance.
Leave a Reply