
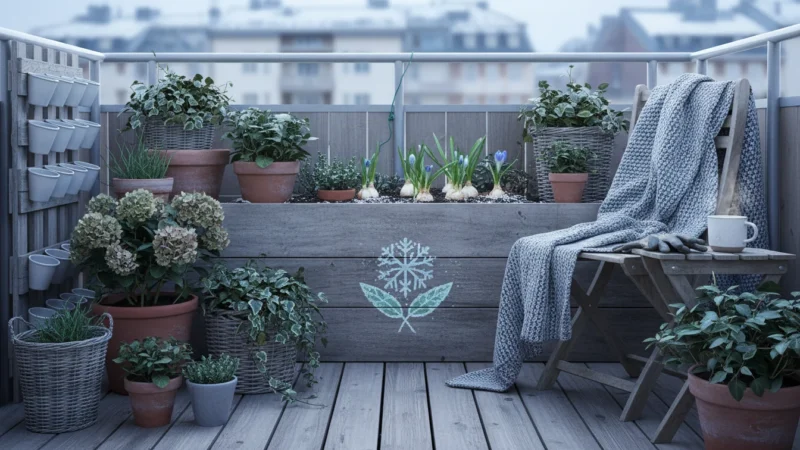
As the days grow shorter and the garden fades to winter dormancy, many gardeners find themselves yearning for green. The colder months offer a perfect opportunity to bring nature indoors and engage in satisfying indoor gardening projects. If you have limited space, a balcony, or a small patio, you understand the need for creative, space-saving plant solutions. This guide introduces you to the art of Kokedama, a beautiful and practical way to enjoy plants in any setting. Kokedama, often called a “Japanese moss ball,” transforms ordinary houseplants into living sculptures, perfect for brightening up your home and indulging your gardening passion during winter.
These moss balls also fit perfectly into broader holiday garden projects that celebrate the season with natural elements.
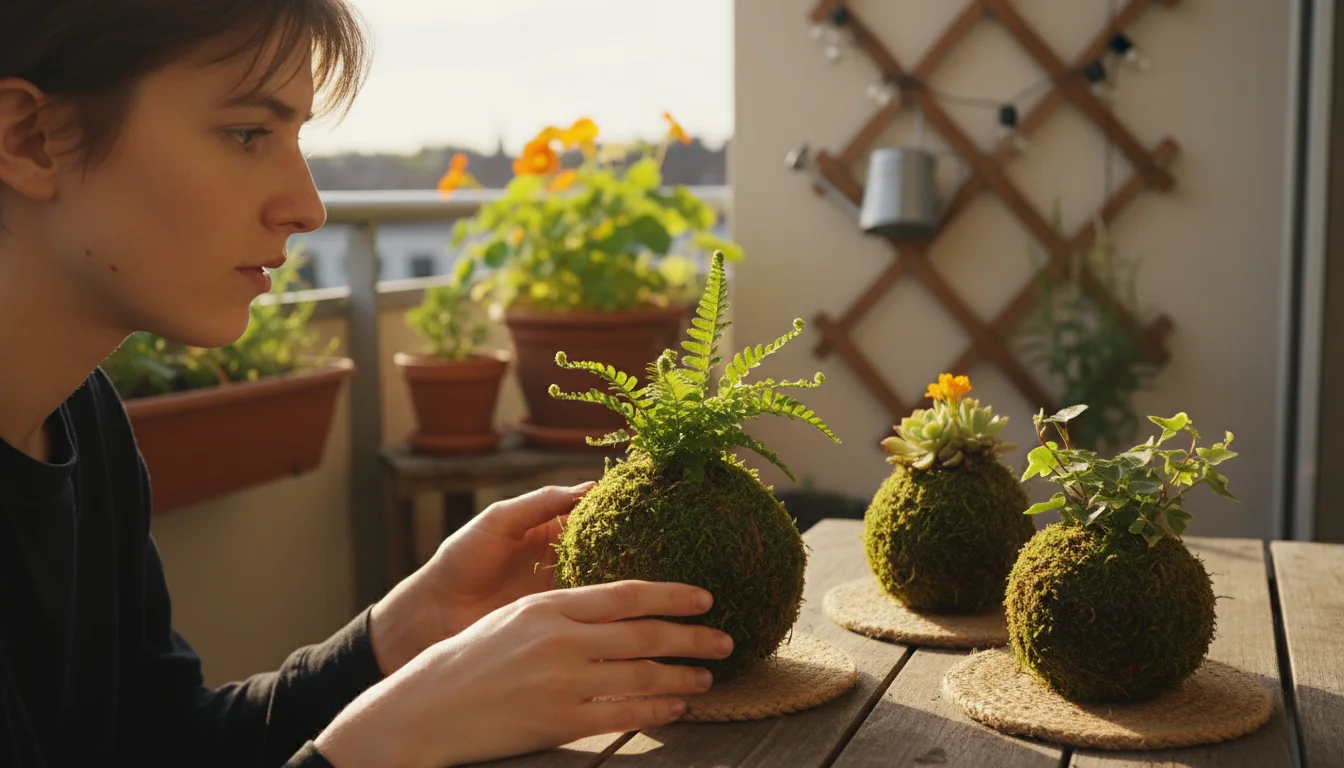
Creating your own Kokedama is a rewarding and relatively simple DIY kokedama project. It requires minimal tools and materials, making it accessible for beginners and experienced gardeners alike. This article provides a comprehensive, step-by-step tutorial to help you craft your own stunning moss ball, complete with tips on plant selection, soil mixes, and long-term care. Get ready to turn your indoor space into a vibrant botanical display.
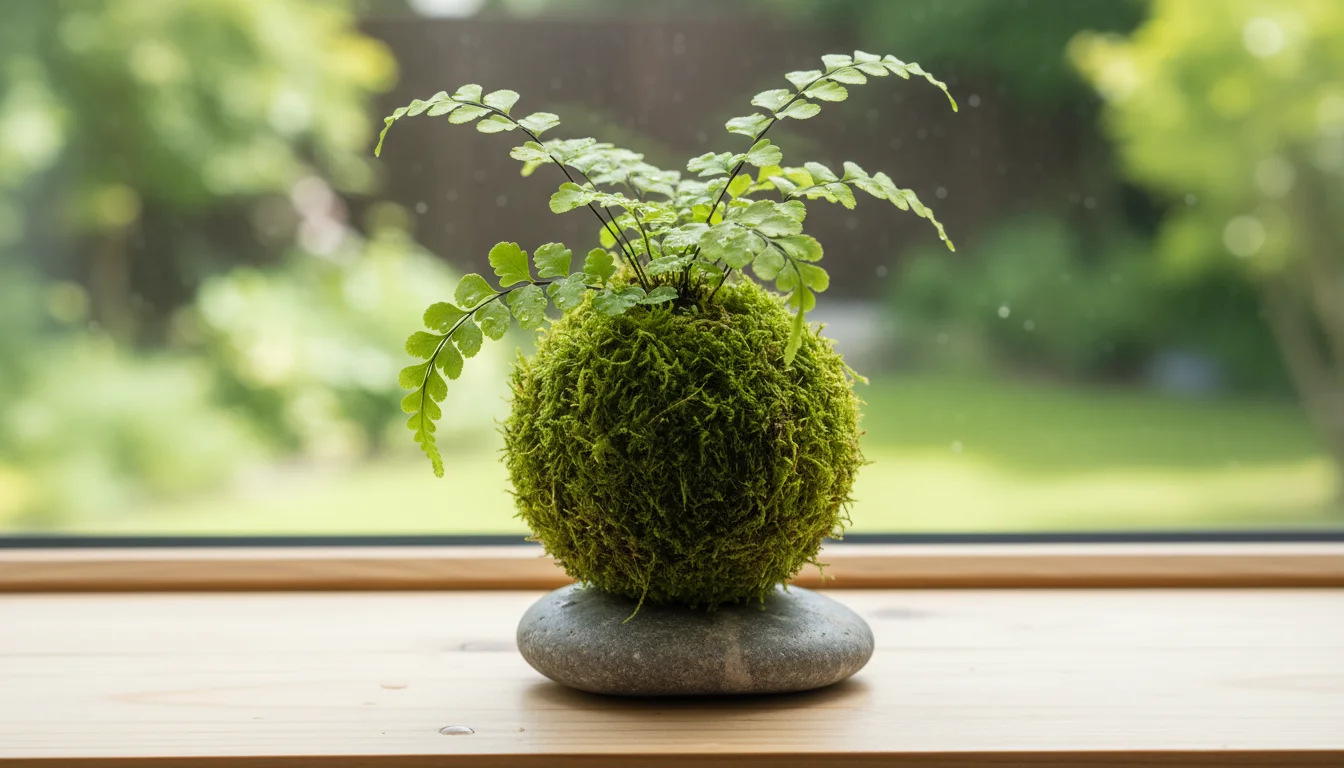
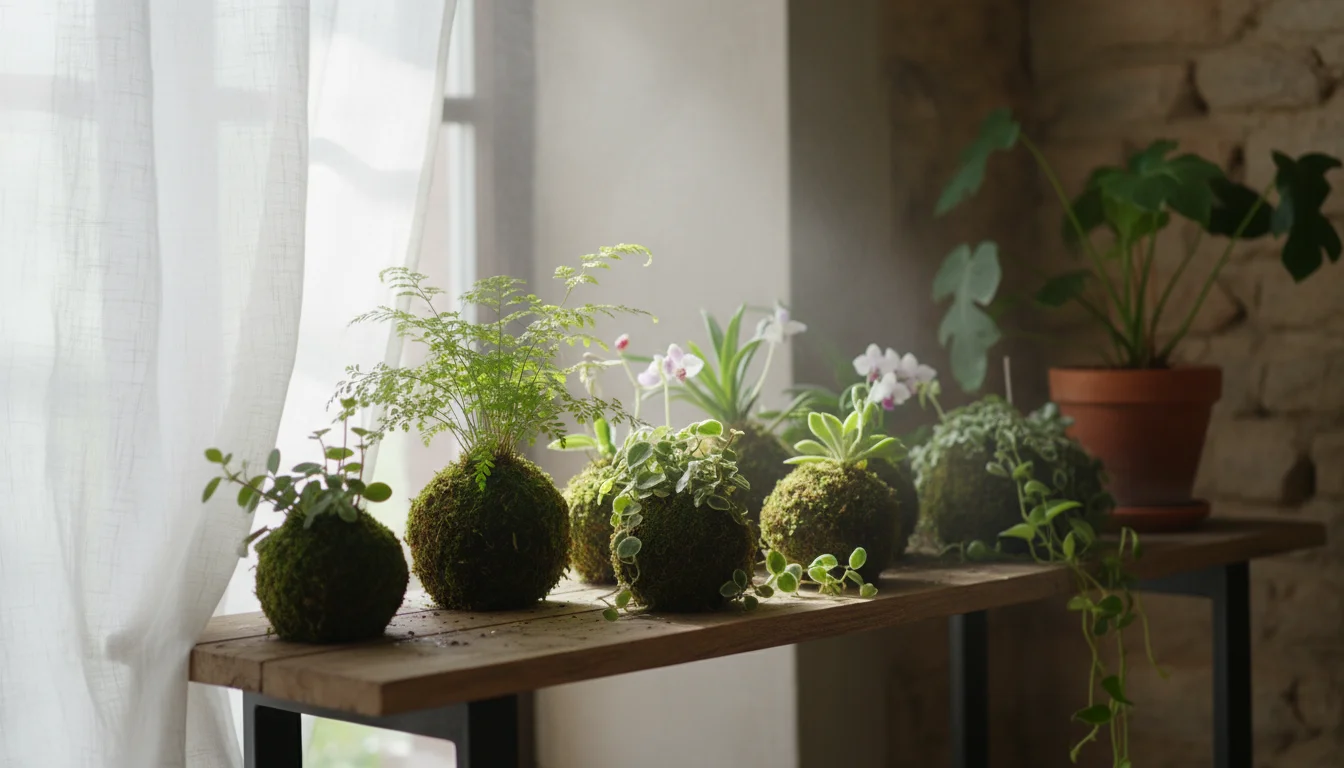
What is Kokedama?
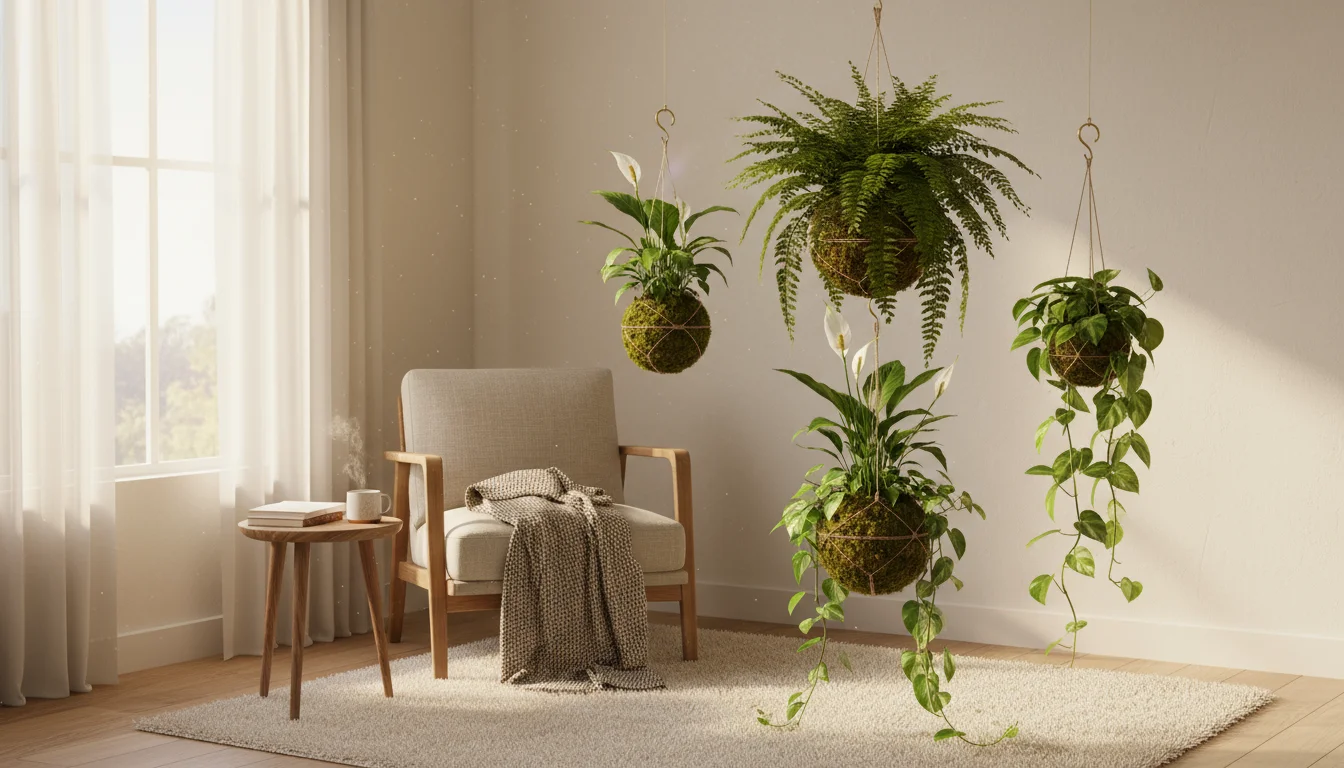
Kokedama, translated directly as “moss ball,” is a traditional Japanese horticultural art form. It involves removing a plant from its pot, enclosing its root ball in a special soil mixture, and then wrapping the entire sphere in moss, which is then secured with string or twine. The result is a self-contained, living planter that requires no pot. These botanical creations embody the Japanese aesthetic principles of wabi-sabi, finding beauty in imperfection, and kusamono, celebrating natural landscapes in miniature. Kokedama offers a unique and organic way to present plants, allowing them to be displayed on trays, hung from ceilings, or nestled among other decor. This method provides an alternative to conventional potting, creating a minimalist yet striking display. For small-space gardeners, Kokedama represents an elegant solution, adding natural beauty without occupying extensive shelf space or requiring bulky containers. It allows you to transform ordinary houseplants into captivating focal points, fostering a deeper connection with nature right in your living area.
If you enjoy this aesthetic, you might also like creating a winter sculpture project to add height and texture to your outdoor pots.
Much like building a tabletop terrarium, kokedama creates a self-contained environment that brings the outdoors inside.
Why Kokedama for Your Small Space?
Kokedama offers numerous advantages, especially for individuals navigating the challenges of gardening in compact environments. If your gardening adventures are confined to a balcony, a small patio, or an apartment, Kokedama provides practical and aesthetic benefits that traditional potted plants often cannot match.
If you are using these moss balls to decorate a porch, consider styling your bare balcony with light and texture to keep the area inviting all season.
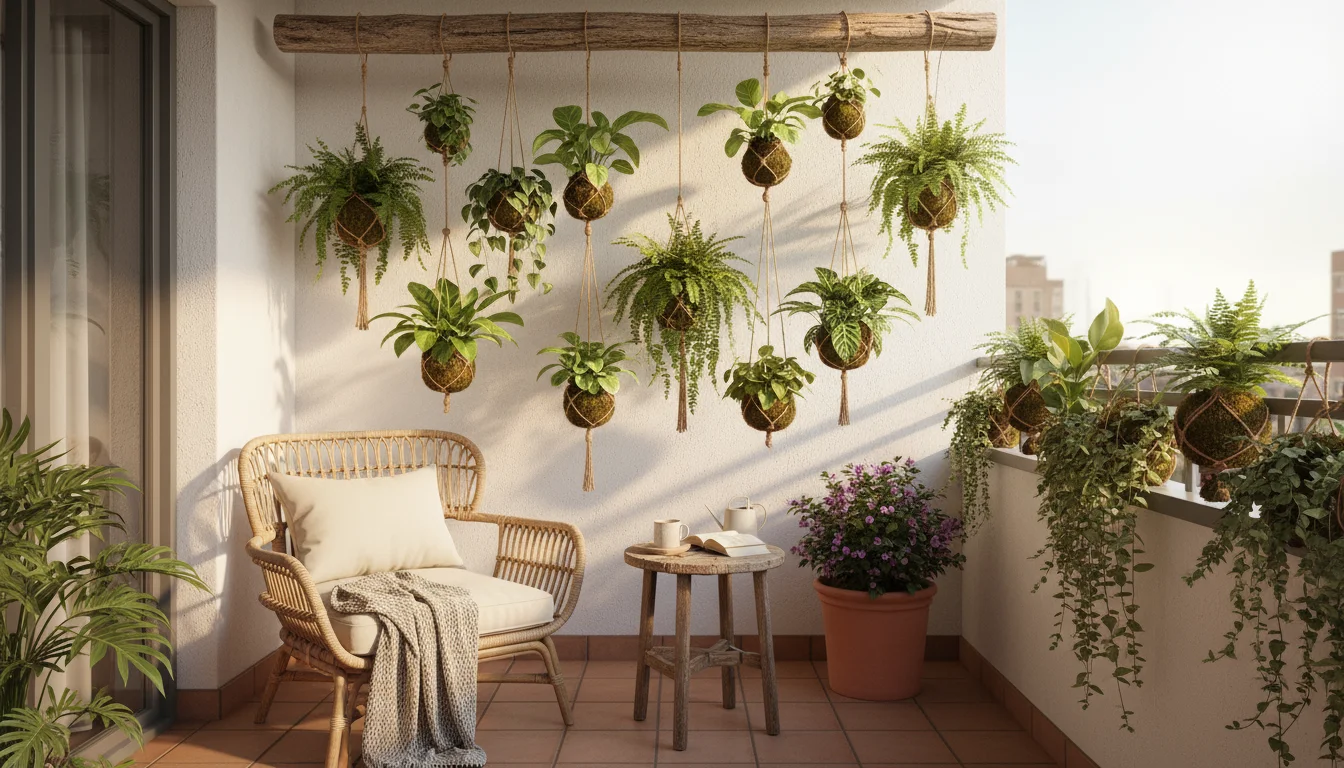
- Space-Saving Design: Kokedama eliminates the need for bulky pots, freeing up valuable surface area. You can hang them from ceilings, allowing you to utilize vertical space effectively. This maximizes your plant display potential in even the smallest rooms. Think of a collection of hanging moss balls, transforming an empty corner into a lush, green focal point without sacrificing floor space.
- Aesthetic Appeal: The organic, sculptural nature of Kokedama adds a unique, artistic touch to any decor. The vibrant green moss provides a natural, calming aesthetic that complements a variety of interior styles, from modern minimalist to rustic bohemian. Each moss ball acts as a living piece of art, drawing the eye and adding texture to your surroundings.
- Portability: These lightweight moss balls are easy to move, allowing you to rearrange your plant displays effortlessly. You can shift them to different light conditions, bring them closer for admiration, or move them for cleaning. This flexibility is invaluable in small spaces where every inch serves multiple purposes.
- Enhanced Air Quality: Like all houseplants, Kokedama contributes to improved indoor air quality by filtering toxins and releasing oxygen. Having several Kokedama strategically placed can significantly enhance your indoor environment. Data from NASA’s Clean Air Study indicates that common houseplants can remove airborne toxins, making your indoor sanctuary healthier.
- Stress Reduction: Interacting with plants and engaging in indoor gardening projects, like making Kokedama, provides documented psychological benefits. The act of creation and the presence of living greenery can reduce stress, improve mood, and foster a sense of well-being, especially during the long winter months. This winter craft idea offers a hands-on, therapeutic activity.
Embracing Kokedama allows you to cultivate a thriving indoor garden, regardless of your spatial constraints. It transforms your home into a verdant oasis, offering both beauty and tranquility.
Gathering Your Kokedama Supplies
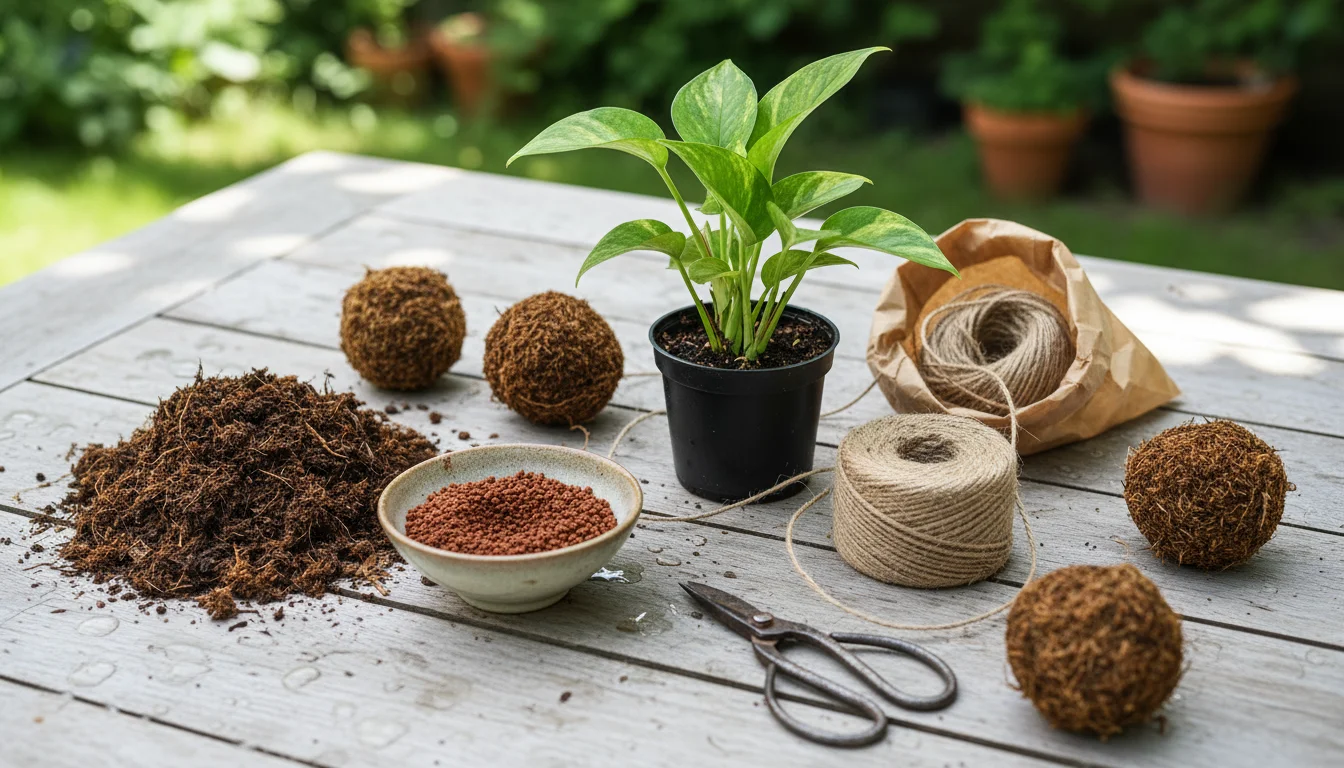
Before you embark on your DIY kokedama journey, gather all your materials. Having everything ready simplifies the process and allows for a smooth, enjoyable crafting experience. Here is a comprehensive list of what you will need:
To stay organized while crafting, it helps to have a mini tool kit for houseplant care ready at your workbench.
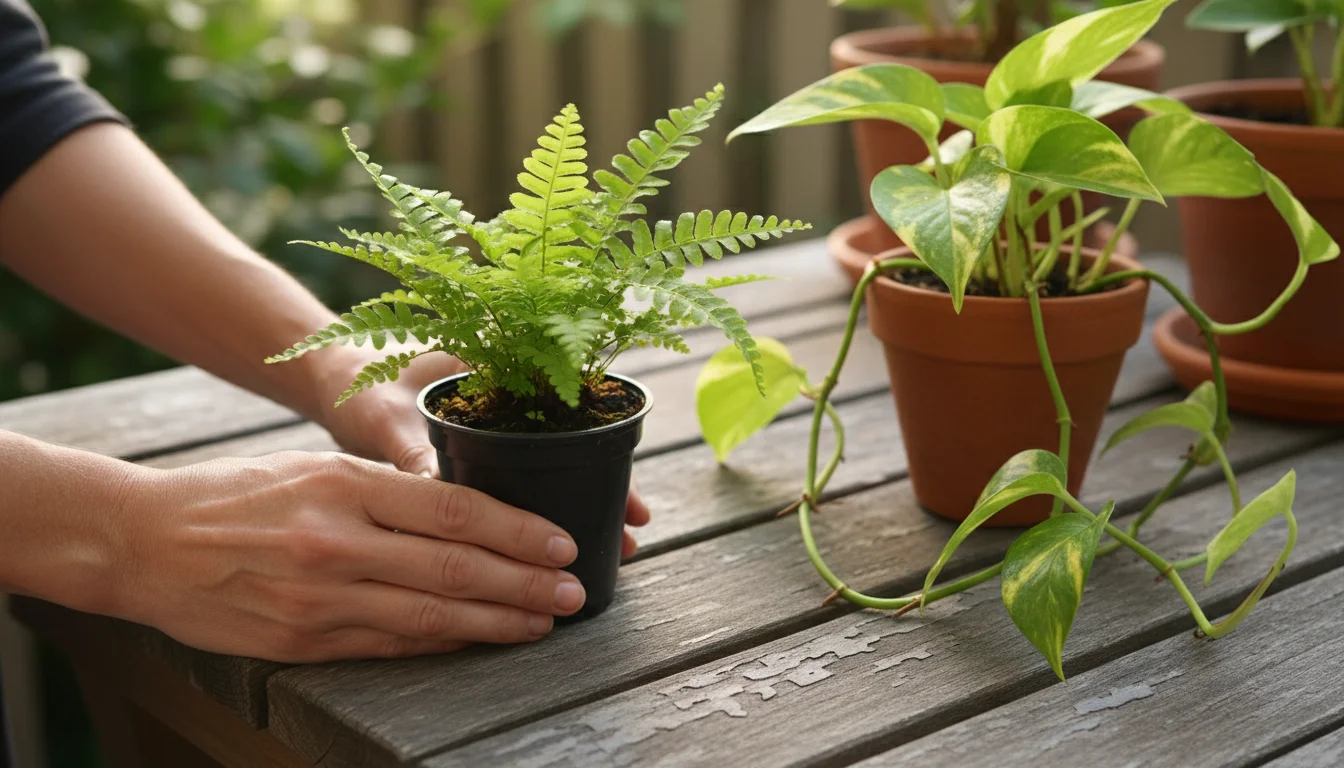
- Your Chosen Plant: Select a small, healthy plant that thrives in Kokedama. See the “Choosing the Best Plants for Your Kokedama” section for specific recommendations.
- Peat Moss or Coco Coir: These materials form the bulk of your soil mix for kokedama. They retain moisture and provide a lightweight structure. Aim for about 2 parts peat moss or coco coir.
- Akadama Soil (Optional, but recommended): A granular clay mineral soil, widely used in bonsai. Akadama improves drainage while retaining moisture and nutrients. If unavailable, horticultural grit or perlite can be a substitute, providing similar benefits for soil structure and drainage. Use 1 part Akadama or substitute.
- Potting Mix or Bonsai Soil: A general-purpose potting mix provides essential nutrients. For an even better Kokedama soil mix, especially for plants needing good drainage, consider a bonsai soil blend, which is typically well-draining. Use 1 part potting mix or bonsai soil.
- Sheet Moss (Dried or Live): This is the outer layer of your Kokedama. Dried sheet moss is widely available at craft stores or garden centers. Live moss, if sustainably harvested and available, provides a more authentic and vibrant green finish. Ensure it is free of pests. You will need enough to completely encase your root ball.
- Twine or String: Natural jute twine, cotton string, or even fishing line works well. Jute twine offers a rustic aesthetic and biodegradable quality. Fishing line, while less natural looking, becomes virtually invisible. Choose a strong, thin material that you can easily wrap multiple times. You will need several yards.
- Water: Essential for mixing your soil and shaping the ball.
- Gloves: Protect your hands from soil and moss.
- Small Trowel or Scoop: For mixing soil ingredients.
- Bowl or Container: For mixing your Kokedama soil.
- Scissors: For cutting twine and trimming moss.
- Newspaper or Drop Cloth: To protect your work surface.
Having these materials organized before you begin will streamline your crafting process, making this winter craft idea an enjoyable and mess-free experience. Remember, good preparation is key to a successful Kokedama project.
Choosing the Best Plants for Your Kokedama
Selecting the right plant is crucial for the success and longevity of your Kokedama. When choosing the best plants for Kokedama, prioritize those that are small, slow-growing, and adaptable to consistent moisture, as the moss ball retains water efficiently. Consider the light conditions of your intended display area as well. Here are some excellent choices:
If you are feeling extra ambitious, you can even grow your own houseplants from seed to use in future vertical projects.
- Ferns: Many small fern varieties, such as Boston fern (Nephrolepis exaltata), Bird’s Nest Fern (Asplenium nidus), and Maidenhair Fern (Adiantum raddianum), thrive in the humid environment Kokedama provides. They prefer indirect light and consistent moisture, making them ideal candidates.
- Pothos (Epipremnum aureum): This incredibly forgiving plant is a fantastic choice for beginners. Pothos tolerates a range of light conditions, from low to bright indirect, and is very adaptable to varying watering schedules. Its trailing vines look beautiful draped from a hanging Kokedama.
- Philodendrons: Similar to Pothos, many Philodendron species, especially heartleaf philodendron (Philodendron hederaceum), are robust and easy to care for. They appreciate consistent moisture and indirect light.
- Peace Lily (Spathiphyllum spp.): Known for its elegant white blooms and air-purifying qualities, Peace Lilies do well in Kokedama. They signal their need for water by drooping slightly, making them easy to read. They prefer low to medium indirect light.
- Hoya (Wax Plant): These succulent-like plants are excellent for Kokedama due to their drought tolerance and attractive foliage. Hoyas require less frequent watering than ferns and thrive in bright, indirect light. Their growth habit makes them perfect for hanging displays.
- Orchids: Certain smaller orchid varieties, particularly Phalaenopsis (Moth Orchids), can flourish in Kokedama. They require excellent drainage and airflow, which can be achieved with a specific soil mix, often incorporating bark. This choice is more advanced but offers stunning results.
- Ivy (Hedera helix): Various ivy cultivars, with their compact growth and trailing habits, are well-suited for Kokedama. They are relatively low maintenance and enjoy consistent moisture.
- Prayer Plant (Maranta leuconeura): These plants feature strikingly patterned leaves and a fascinating habit of folding their leaves up at night. Prayer plants appreciate high humidity and indirect light, making them a good fit for Kokedama.
Avoid plants that grow very large quickly, require dry conditions, or have deep, extensive root systems. Remember that Kokedama provides a limited amount of soil, so choose plants that do not mind slightly restricted roots. Selecting a healthy plant with compact roots will ensure a successful and long-lasting Kokedama creation. For specific plant care guidelines, you can often find detailed information through your local university extension services. For example, Oklahoma State University Extension provides fact sheets on various plant care topics that can inform your choices. Checking resources like this helps you choose the most suitable options for your indoor gardening projects.
Crafting Your Kokedama Moss Ball: A Step-by-Step Tutorial
Creating your Kokedama is a hands-on, meditative process, perfect for a calming winter craft idea. Follow these detailed steps to build your beautiful Japanese moss ball. This comprehensive guide on how to make a kokedama moss ball for beginners ensures you achieve stunning results.
-
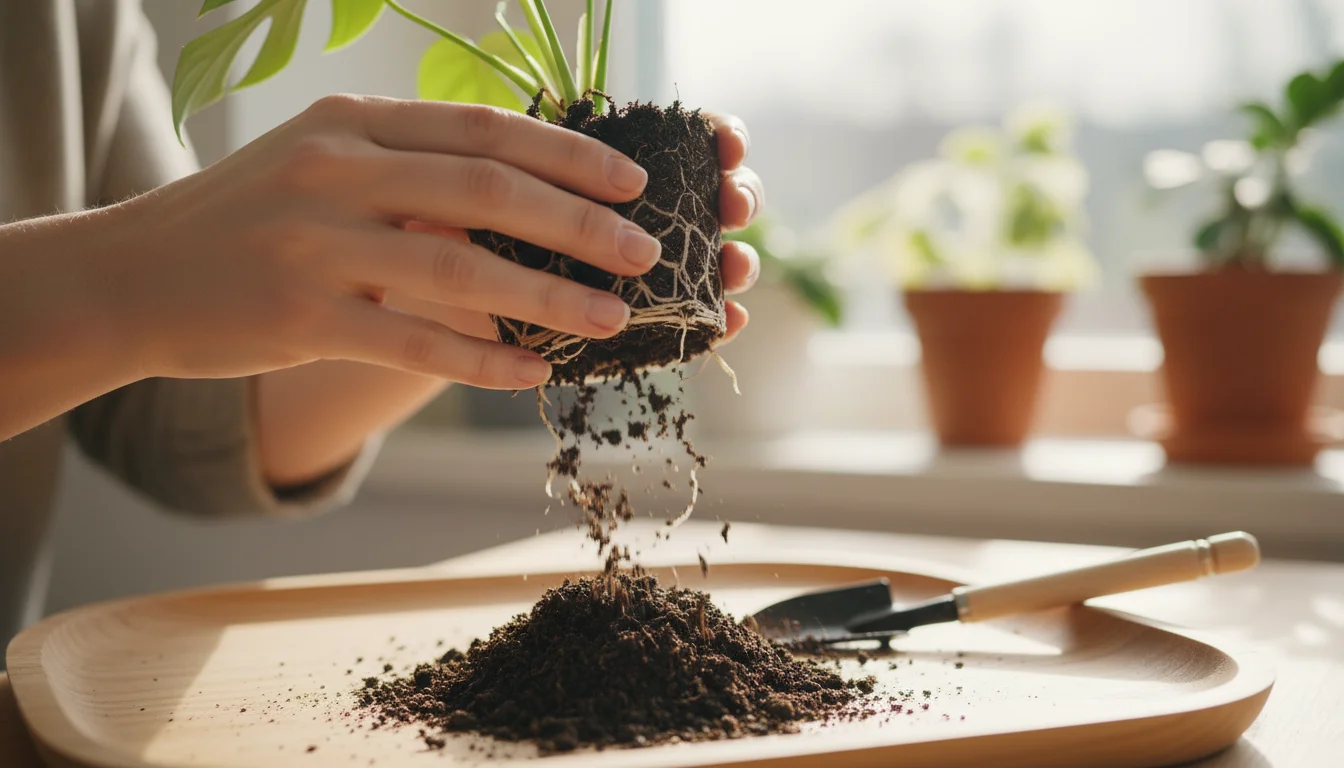
Prepare Your Plant: Gently remove your chosen plant from its nursery pot. Carefully shake off excess soil from the roots, aiming to remove about one-third to one-half of the original soil. Be gentle to avoid damaging the root system. If the roots are very dense, you may need to loosen them a bit with your fingers. Leave enough of the root ball intact to provide a good foundation for your moss ball.
-
Mix Your Kokedama Soil: In a large bowl, combine your soil components. A good general soil mix for kokedama is 2 parts peat moss or coco coir, 1 part Akadama (or horticultural grit/perlite), and 1 part general potting mix or bonsai soil. Mix these dry ingredients thoroughly with your hands or a small trowel. Gradually add water, a little at a time, and continue mixing. You want a consistency similar to firm cookie dough or wet clay: moist enough to hold its shape when squeezed, but not soggy or dripping wet. It should be pliable and formable. This unique blend provides both drainage and moisture retention, crucial for the plant’s health in its new, pot-less environment.
-
Form the Soil Ball: Take a generous amount of your prepared soil mixture. Form it around the plant’s exposed root ball, carefully molding it into a firm, compact sphere. Ensure the soil evenly covers all the roots. Use gentle pressure to compress the soil, removing air pockets and creating a solid ball that will maintain its shape. The finished soil ball should be roughly twice the size of the original root ball, depending on your plant’s size. Smooth out any cracks or loose areas with a little extra soil mix and water.
-
Prepare the Moss: Lay out your sheet moss on your work surface. If using dried moss, rehydrate it by spritzing it with water or soaking it briefly. Gently squeeze out excess water. Flatten the moss sheets and trim them into manageable pieces that can wrap around your soil ball. You might need several pieces, ensuring they overlap slightly for full coverage. The goal is to create a seamless green surface.
-
Wrap with Moss: Carefully place your soil ball onto the center of one or more moss sheets. Bring the edges of the moss up and around the soil ball, completely encasing it. Gently press the moss onto the soil, molding it to the spherical shape. Ensure there are no gaps or exposed soil. This step might require patience and careful handling to keep the moss in place before securing it.
-
Secure with Twine: Once the moss completely covers the soil ball, take a long piece of twine (start with 10-15 feet, you can always cut more). Tie one end securely around the base of the plant or at the top of the moss ball, leaving a tail long enough to create a hanging loop later if desired. Begin wrapping the twine tightly and randomly around the moss ball. crisscrossing the string in various directions. This technique helps to secure the moss firmly in place and adds to the organic aesthetic of the Kokedama. Continue wrapping until the moss feels stable and tight. The twine should provide enough tension to hold everything together without crushing the plant’s base. If you plan to hang your Kokedama, create a longer loop with the twine at the end of your wrapping, securing it with a knot.
-
Finishing Touches: Trim any excess moss or loose twine ends with scissors. Give your Kokedama a gentle misting of water. Your beautiful DIY kokedama is now complete and ready for display! Stand back and admire your handiwork, a living piece of art for your home.
Caring for Your Kokedama
Proper care ensures your Kokedama remains vibrant and healthy for years. The unique structure of a moss ball means its watering and light requirements differ slightly from potted plants. Understanding these nuances will help your plant thrive.
Checking on your kokedama’s moisture can become part of your mindful winter houseplant rituals to help beat the indoor blues.
Watering Your Kokedama
This is the most critical aspect of Kokedama care. Since there’s no pot, you water by soaking the entire moss ball. The frequency depends on your plant type, indoor humidity, and the season.
- The “Lift Test”: The best way to determine if your Kokedama needs water is to feel its weight. A dry moss ball will feel significantly lighter than a watered one. This method becomes intuitive over time.
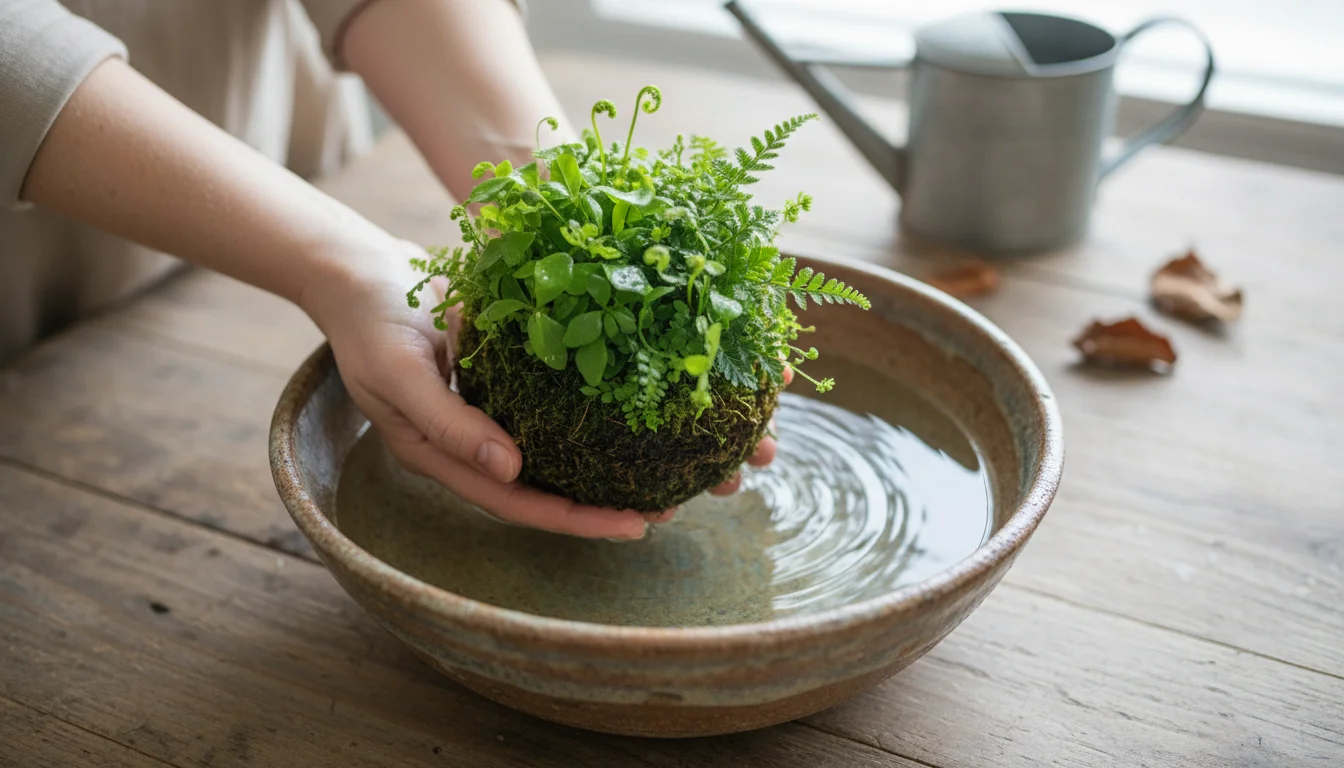
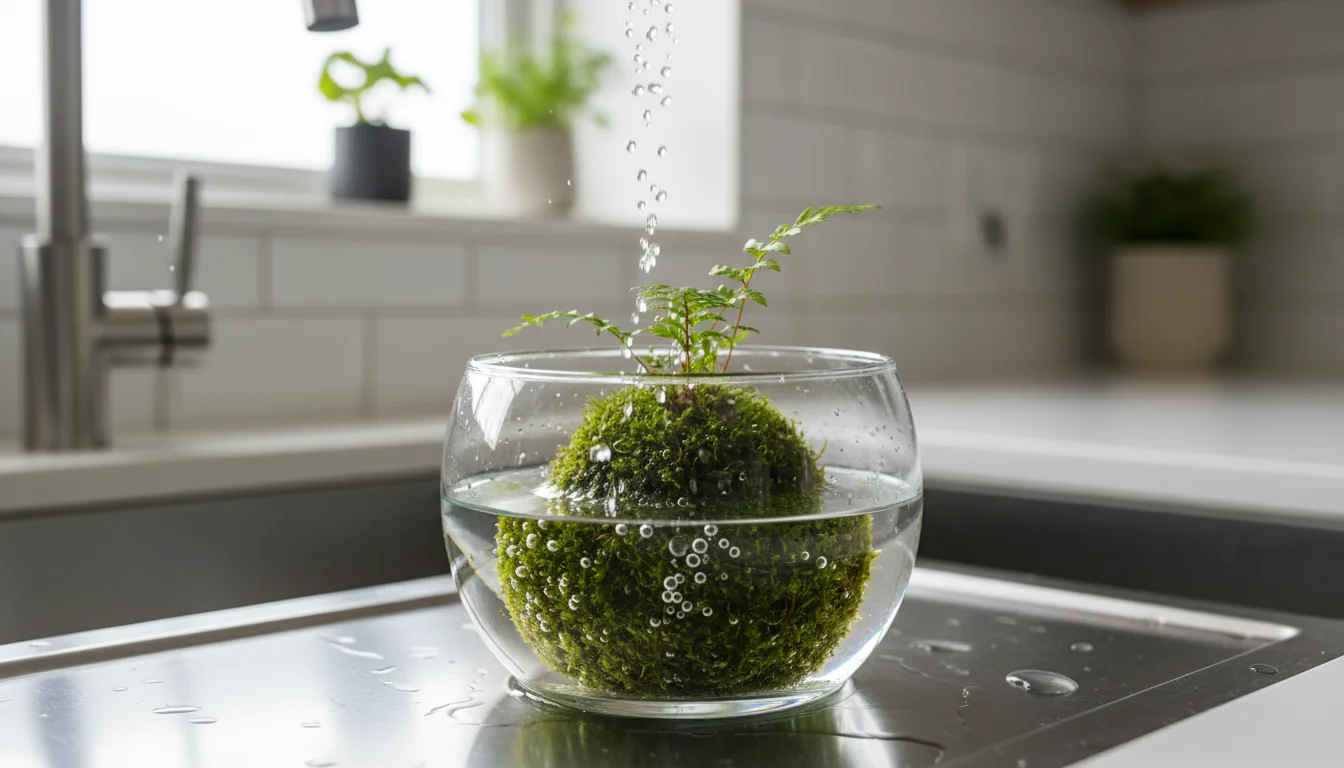
- The Soak Method: When it is time to water, submerge the entire moss ball in a bowl or sink filled with room-temperature water. Ensure the water covers the whole ball. Allow it to soak for 5-10 minutes, or until bubbles stop rising from the moss. The cessation of bubbles indicates the soil has absorbed enough water.
- Drainage: After soaking, gently squeeze the moss ball to remove excess water. This prevents root rot. Place the Kokedama on a tray or hang it, allowing any remaining drips to escape before returning it to its display location. Adequate drainage is how water moves through soil, preventing it from becoming waterlogged.
- Frequency: Most Kokedama plants require watering every 1-3 weeks. Drought-tolerant plants like Hoyas might need water less often, perhaps every 3-4 weeks. Ferns, on the other hand, might require water weekly. Adjust based on your plant’s specific needs and environmental conditions.
Light Requirements
Place your Kokedama in a location that meets your chosen plant’s specific light needs. Most indoor plants suitable for Kokedama prefer bright, indirect light. Avoid direct, harsh sunlight, which can scorch leaves and dry out the moss ball too quickly. Similarly, insufficient light will lead to weak growth and pale foliage. Rotate your Kokedama periodically to ensure even light exposure and balanced growth.
Humidity and Airflow
Many plants suitable for Kokedama, especially ferns and tropical varieties, appreciate high humidity. If your indoor environment is dry, consider misting your Kokedama occasionally, particularly during winter when heating systems can lower humidity levels. Grouping plants can also create a microclimate with higher humidity. Good airflow is also important to prevent mold growth on the moss. Avoid placing Kokedama in stagnant, overly enclosed spaces.
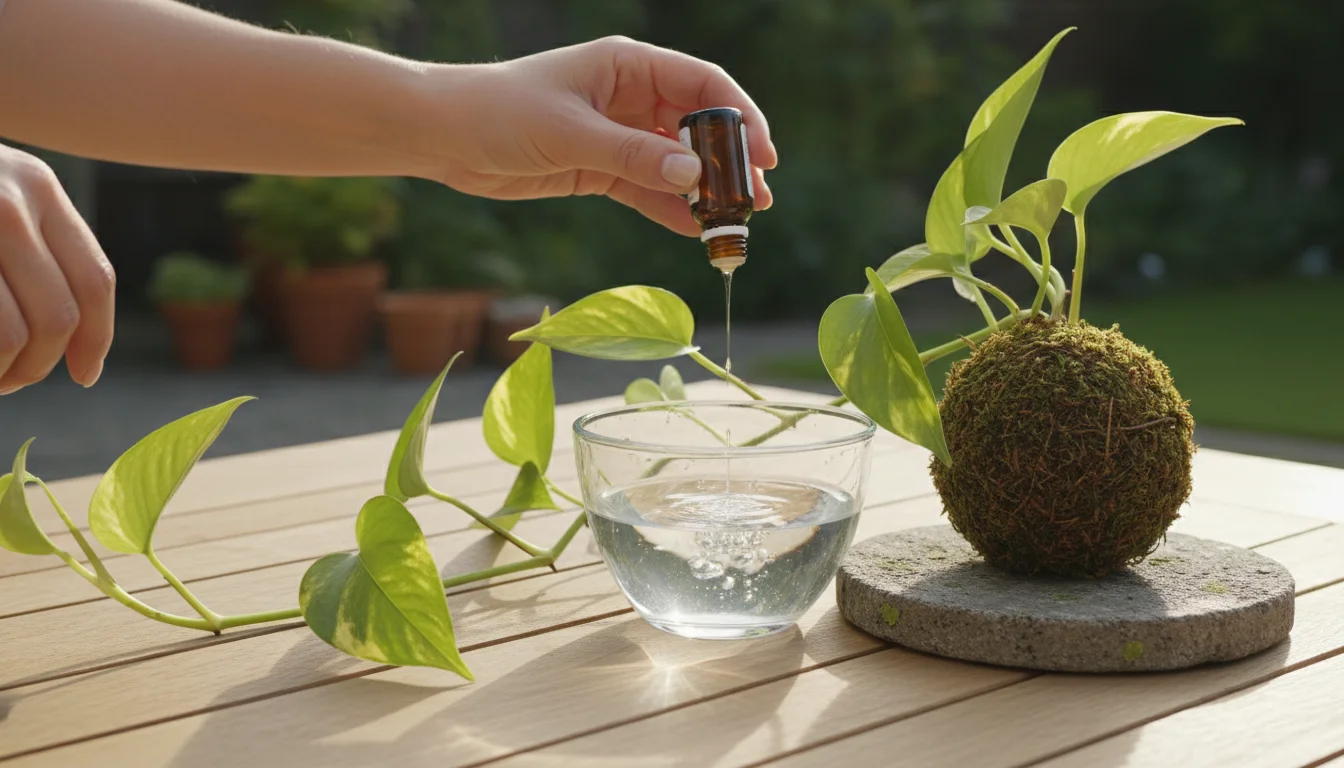
Fertilizing
Kokedama plants have a limited amount of soil, so they benefit from occasional fertilization. Use a diluted liquid fertilizer at half or quarter strength, adding it to the soaking water during watering once every 2-4 months during the growing season (spring and summer). Avoid fertilizing during the plant’s dormant period in winter. Over-fertilization can harm the plant, so err on the side of caution.
Troubleshooting Common Kokedama Challenges
Even with careful attention, you might encounter a few issues with your Kokedama. Addressing these promptly ensures the continued health and beauty of your moss ball. Here are common challenges and practical solutions:

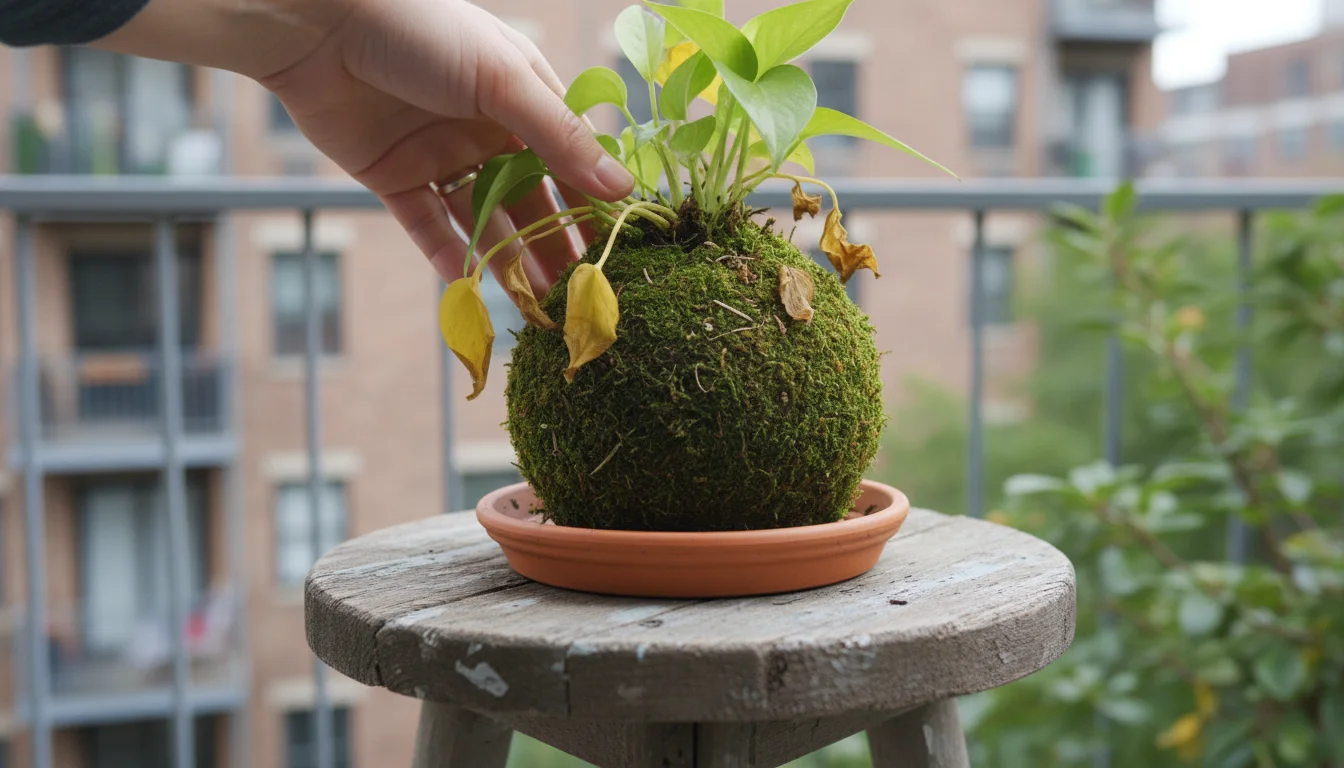
1. Yellowing Leaves
Cause: Yellow leaves often indicate either overwatering or underwatering. Overwatering leads to root rot, preventing roots from absorbing nutrients, while underwatering causes dehydration. It can also signal a nutrient deficiency or natural aging of leaves.
Solution: Check your watering routine. If the moss ball feels heavy and damp but the leaves are yellow, you are likely overwatering. Reduce frequency and ensure proper drainage after soaking. If the ball is very light and dry, you are underwatering; increase frequency. Also, consider a diluted liquid fertilizer if you have not fertilized in a while. Remove severely yellowed leaves to direct energy to new growth.
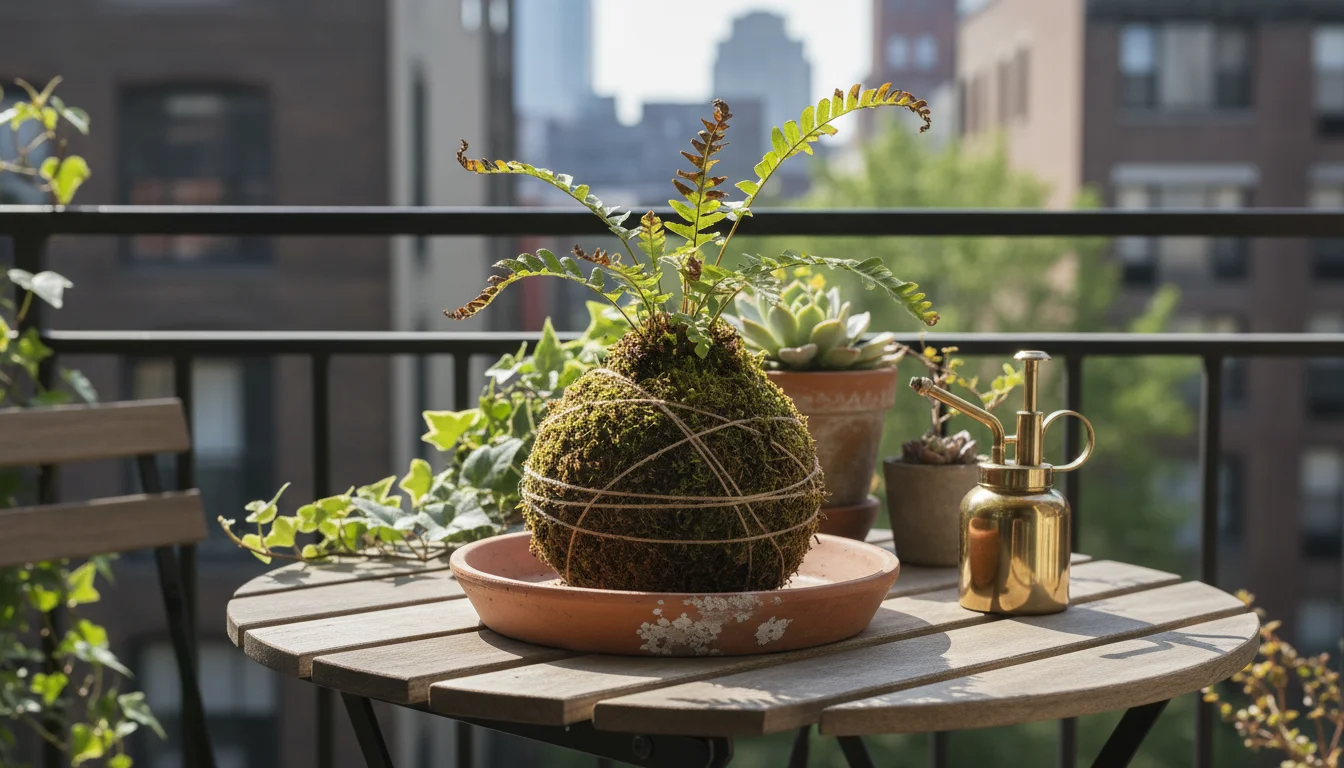
2. Brown, Crispy Leaf Tips
Cause: This usually points to low humidity or underwatering. Some plants, like ferns and prayer plants, are particularly sensitive to dry air.
Solution: Increase humidity around your Kokedama. You can mist the plant daily, place it near a humidifier, or group it with other plants. If the moss ball feels light, increase watering frequency. Ensure the plant is not in direct drafts from heating vents, which rapidly dry out the air.
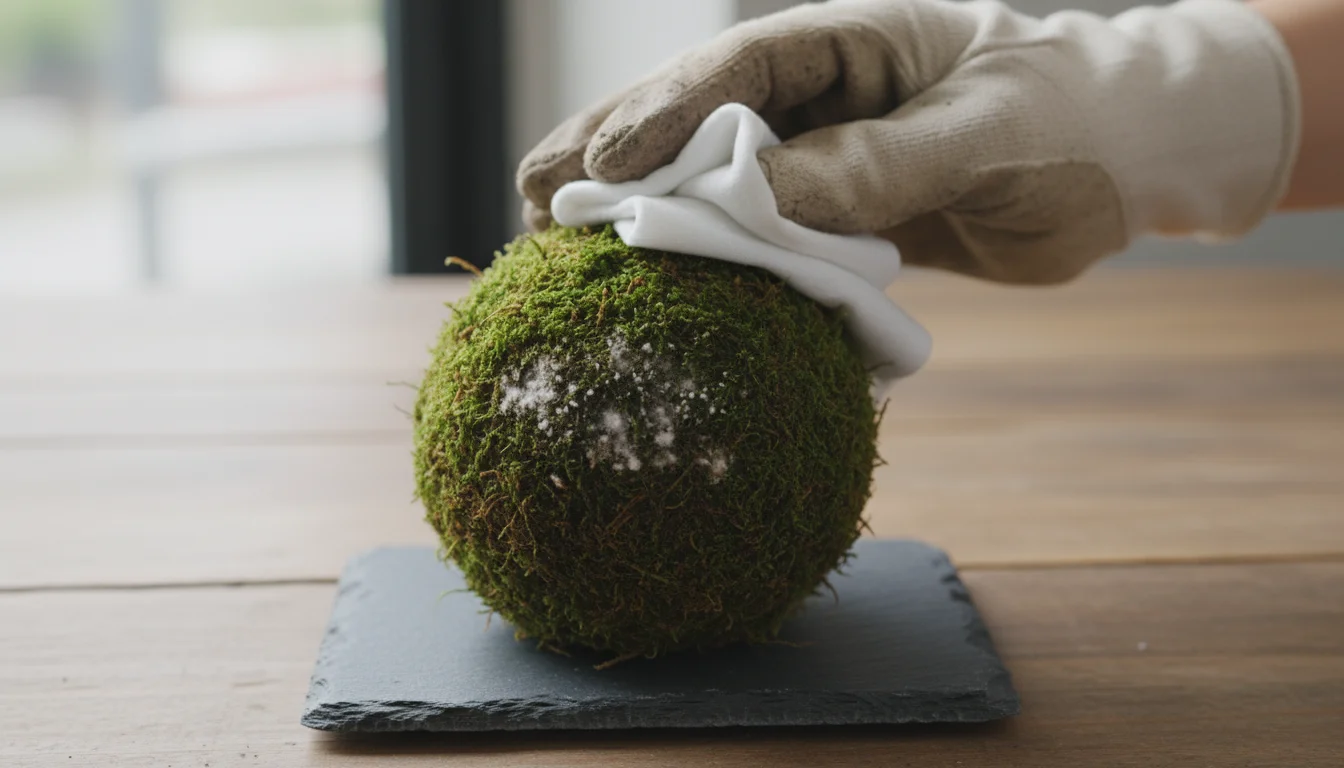
3. Mold Growth on Moss Ball
Cause: Persistent dampness, poor air circulation, or overly wet moss can lead to mold or mildew growth on the outer moss layer. This is more common in cooler, humid conditions.
Solution: Improve air circulation around your Kokedama. Ensure the moss ball dries out sufficiently between waterings. If you display it on a tray, lift it occasionally to allow air to circulate underneath. Gently wipe away any visible mold with a cloth dampened with a very weak solution of water and hydrogen peroxide (1 teaspoon per cup of water) or a natural fungicide. Reduce watering frequency if the moss is constantly saturated.
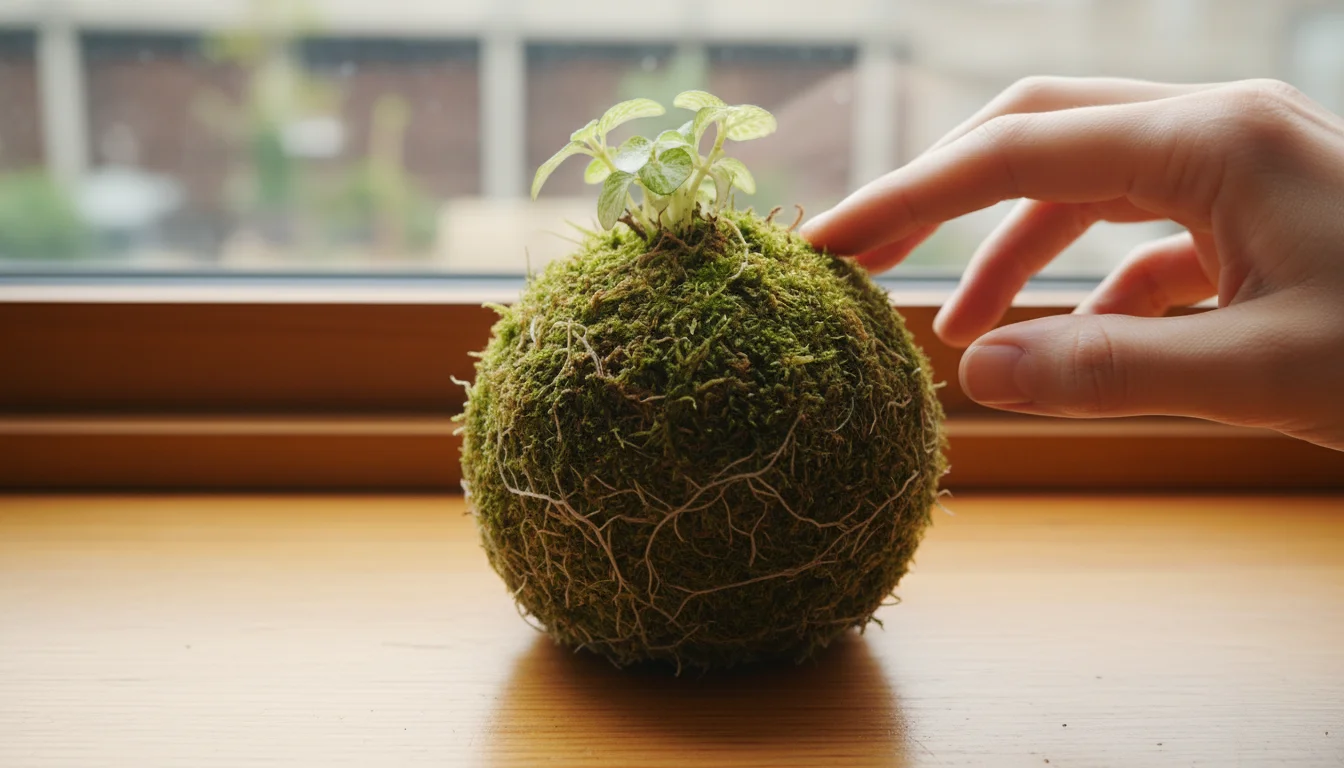
4. Stunted Growth or Lack of Vitality
Cause: This can stem from insufficient light, lack of nutrients, or a plant outgrowing its moss ball.
Solution: Assess your plant’s light exposure. Is it receiving enough bright, indirect light? Consider moving it to a brighter spot if it is struggling. If you have not fertilized, provide a diluted liquid feed during the growing season. If the plant has grown significantly and its roots are pushing through the moss, it might be time to either transplant it into a larger Kokedama or a traditional pot.
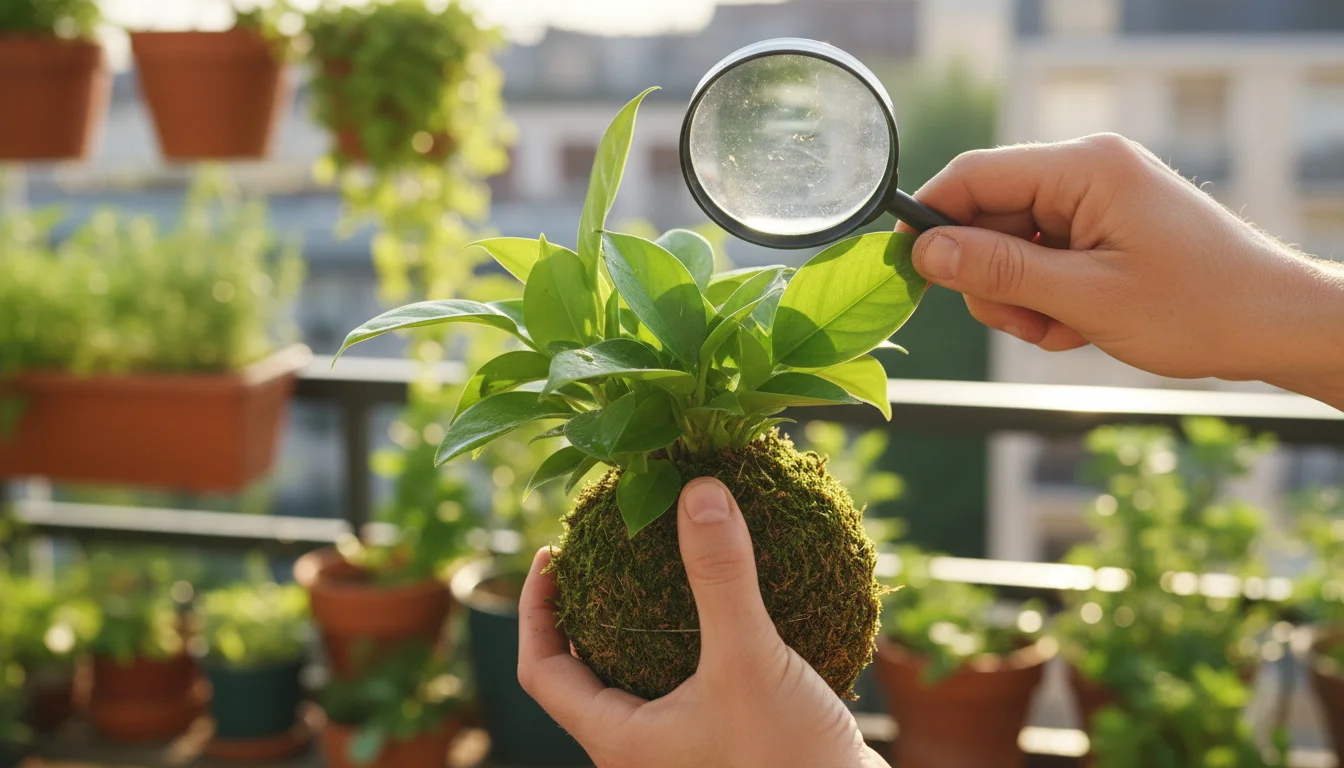
5. Pests
Cause: Like any houseplant, Kokedama can attract common indoor pests such as spider mites, mealybugs, or scale. These typically appear due to new plants introduced or existing infestations spreading.
Solution: Regularly inspect your Kokedama for signs of pests. If detected, isolate the affected plant. Treat with horticultural oil, neem oil, or an insecticidal soap, following product instructions carefully. For localized infestations, you can often wipe pests away with a cotton swab dipped in rubbing alcohol.
Consistent observation and quick action are your best tools for managing these challenges. By understanding the underlying causes, you can provide targeted care and keep your Kokedama thriving.
Eco-Friendly Kokedama Practices
As conscious gardeners, we strive to make our practices as sustainable as possible. Kokedama inherently aligns with eco-friendly principles by utilizing natural materials and reducing plastic waste from traditional pots. You can further enhance your Kokedama project’s environmental footprint with these tips:
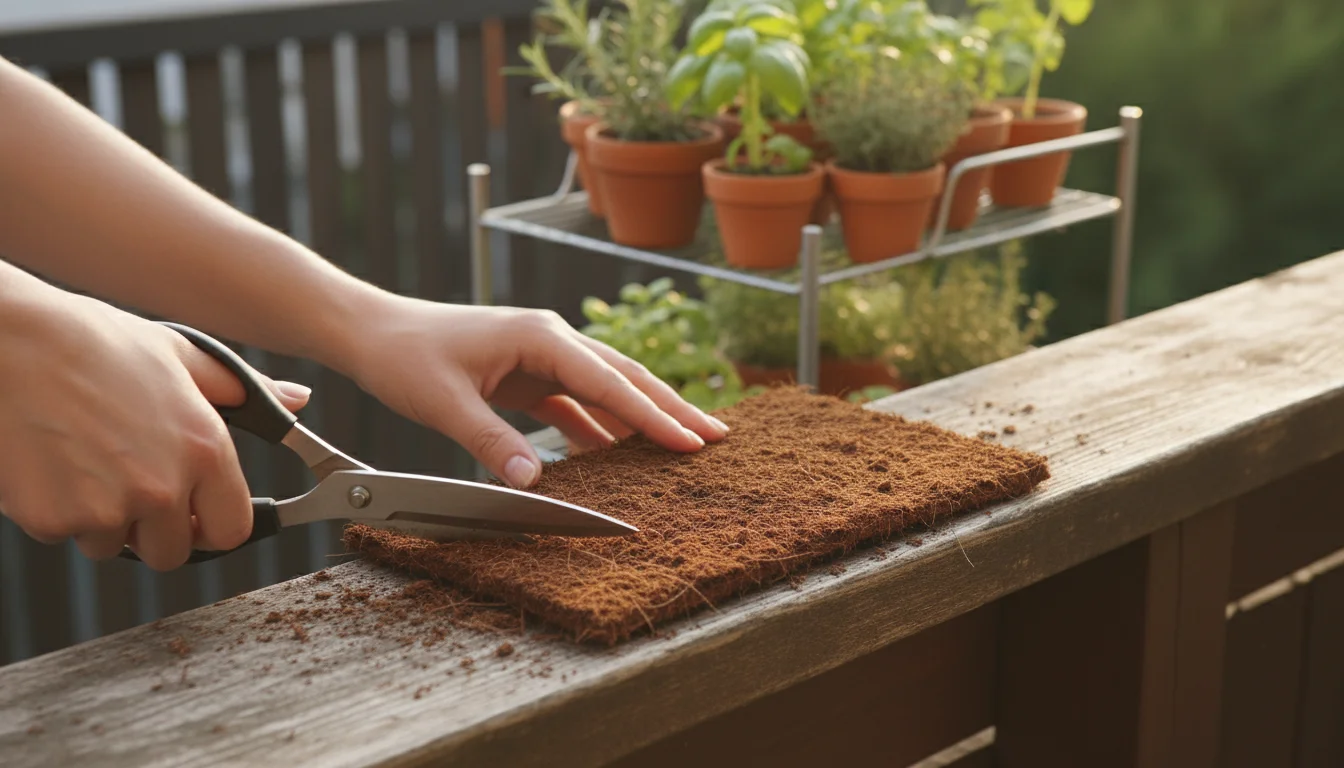
- Sustainable Moss Sourcing: When acquiring sheet moss, prioritize sources that practice sustainable harvesting. Look for moss that is either cultivated or collected from areas where it grows abundantly and is quickly replenished. Avoid collecting moss from fragile ecosystems or private land without permission. Alternatively, you can use coco coir mats cut into sheets as an outer layer, offering a similar aesthetic and excellent moisture retention, while being a highly renewable resource.
- Compostable Materials: Choose natural, biodegradable twine like jute or cotton. These materials break down naturally over time, unlike synthetic options. When your Kokedama eventually needs to be refreshed or retired, these components can return to the earth without leaving plastic waste.
- Recycled or Repurposed Containers: Use old mixing bowls, buckets, or even cleaned food containers for mixing your soil and soaking your Kokedama. This reduces waste and gives new life to items that might otherwise be discarded.
- Homemade Soil Mixes: By creating your own soil mix for kokedama, you control the ingredients. Consider incorporating homemade compost or worm castings into your potting mix component to enrich the soil naturally and reduce reliance on commercially produced, potentially peat-heavy mixes. Peat moss harvesting can impact wetlands, so using coco coir is a more sustainable alternative.
- Water Conservation: When soaking your Kokedama, collect the excess water and use it to water other houseplants or outdoor garden beds. This simple act conserves water and ensures no drop goes to waste.
- Long-Term Plant Health: By providing optimal care and understanding your plant’s needs, you extend the life of your Kokedama. A healthy plant means less waste from replacement and a longer-lasting natural decor piece. If a plant outgrows its moss ball, consider carefully removing it and repotting it into a larger, sustainable container or creating a new, larger Kokedama.
- Native Plant Choices (where appropriate): While many Kokedama plants are tropical, consider if any small, non-invasive native plants in your region might adapt to Kokedama, especially for outdoor display in suitable climates. Always ensure they are suited to the Kokedama environment.
These practices not only benefit the environment but also deepen your connection to the gardening process, making your Kokedama project an even more fulfilling indoor gardening project.
Displaying Your Kokedama Creations
Once you have crafted your beautiful Kokedama, the next step is to display it in a way that highlights its unique charm and complements your home decor. Kokedama offers versatile display options that are perfect for small spaces, allowing you to maximize greenery without clutter.
- Hanging Displays: This is one of the most popular ways to showcase Kokedama. If you left a long loop of twine during the wrapping process, you can easily hang your moss ball from a ceiling hook, a curtain rod, or a wall bracket. Create a cascading effect by hanging multiple Kokedama at varying heights. This utilizes vertical space effectively and draws the eye upward, making a room feel larger and more dynamic. Ensure your hooks are securely anchored.
- On Trays or Plates: For a grounded display, place your Kokedama on a decorative tray, a ceramic plate, or a shallow dish. This protects surfaces from moisture and creates a neat, contained look. Use different sized and textured trays to add visual interest. Grouping several Kokedama of different plant varieties on a single large tray creates a miniature landscape.
- Suspended from Branches or Dowels: For a truly artistic touch, suspend several Kokedama from a decorative branch or a simple wooden dowel. Hang the branch horizontally from the ceiling or wall. This creates a striking natural mobile or a living art installation that becomes a central feature of your room.
- In a Terrarium or Cloche: For smaller Kokedama or plants that love high humidity, placing them inside a large glass terrarium or under a glass cloche can create a stunning, self-contained display. This arrangement boosts humidity and offers a dramatic visual impact, turning your Kokedama into a precious botanical jewel.
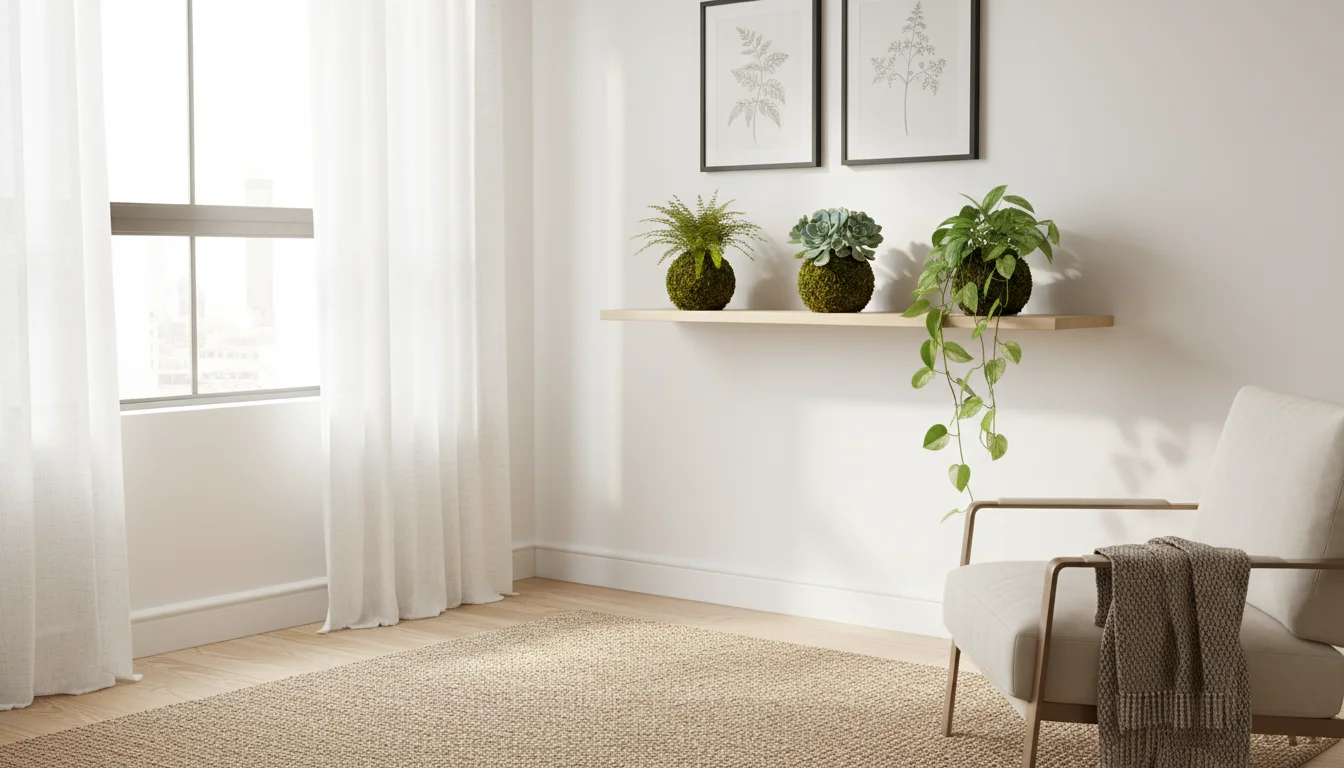
- Shelf Styling: Arrange your Kokedama on bookshelves, open shelving units, or windowsills. Pair them with books, ceramics, or other decorative objects. The spherical shape of the moss ball provides a pleasing contrast to the linear forms of shelves, adding an organic element to your styling.
- Bathroom or Kitchen Decor: Kokedama can thrive in bathrooms and kitchens, often benefiting from the higher humidity in these areas. Place them on a counter, a small shelf, or hang them near a window. They bring a fresh, natural feel to these functional spaces.
Consider the plant’s light requirements when choosing its display location. Rotate your Kokedama occasionally, especially if it is near a window, to ensure even growth. The beauty of Kokedama lies in its adaptability and ability to transform any nook or cranny into a verdant display, making it an ideal choice for any indoor gardening project.
Frequently Asked Questions
Can I use any plant for Kokedama?
While many plants adapt well to Kokedama, it is best to choose small, slow-growing plants that prefer consistent moisture and tolerate somewhat restricted root space. Excellent choices include ferns, Pothos, Philodendrons, and Peace Lilies. Avoid plants that grow large rapidly or require extremely dry conditions.
How do I know when to water my Kokedama?
The simplest method is the “lift test.” Lift your Kokedama; if it feels significantly lighter than when it was fully watered, it is time to soak it. You can also feel the moss: if it feels dry and brittle, it likely needs water. Some plants, like Peace Lilies, will slightly droop when thirsty.
What kind of moss should I use for Kokedama?
You typically use sheet moss, either dried or live. Dried sheet moss is widely available and easy to work with. Live moss provides a more vibrant green and authentic look, but you must ensure it is sustainably harvested and free of pests. Both types effectively hold the soil ball together and retain moisture.
Can I hang my Kokedama outdoors?
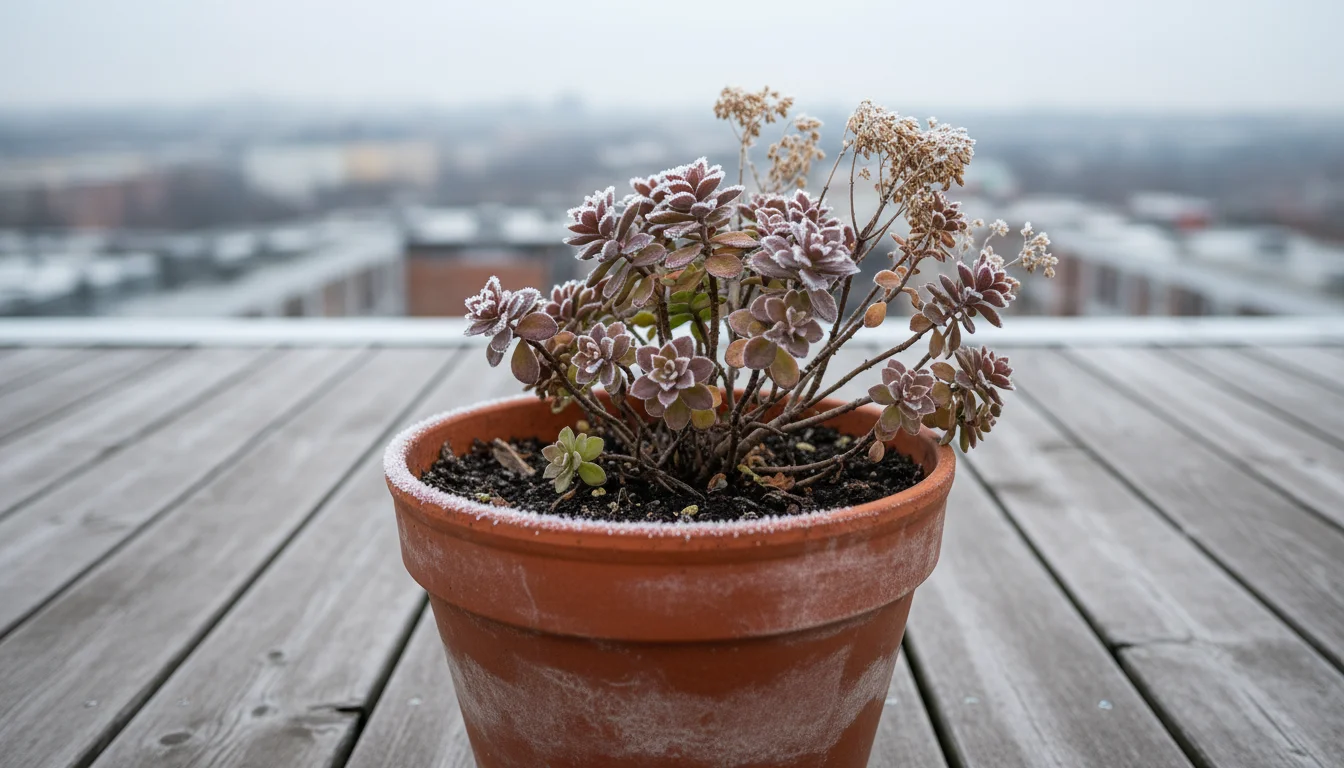
Yes, you can hang Kokedama outdoors, provided your chosen plant is suitable for your local climate and outdoor conditions. Ensure the plant is tolerant of the sun exposure, temperature fluctuations, and humidity levels outside. If you live in a region with cold winters, bring tropical Kokedama plants indoors before the first frost.
My Kokedama moss is turning brown. What should I do?
Brown moss often indicates the Kokedama is drying out too quickly or is exposed to too much direct sun. Increase your watering frequency, ensuring the moss ball gets a good soak each time. Move it to a spot with more indirect light. You can also gently mist the moss between waterings to maintain its green color, especially if your indoor air is dry. Persistent brown moss might mean you need to replace some of the outer moss layer.
For trustworthy gardening information, visit: Oklahoma State University Extension — Lawn & Garden, Tennessee Extension — Gardening, University of Delaware Extension — Gardening and University of Vermont Extension — Gardening. These organizations provide expert, research-based advice for gardeners at all levels.
Disclaimer: This article is for informational purposes only and is not a substitute for professional gardening advice. Always consult local extension services or horticulture experts for region-specific guidance.

Leave a Reply