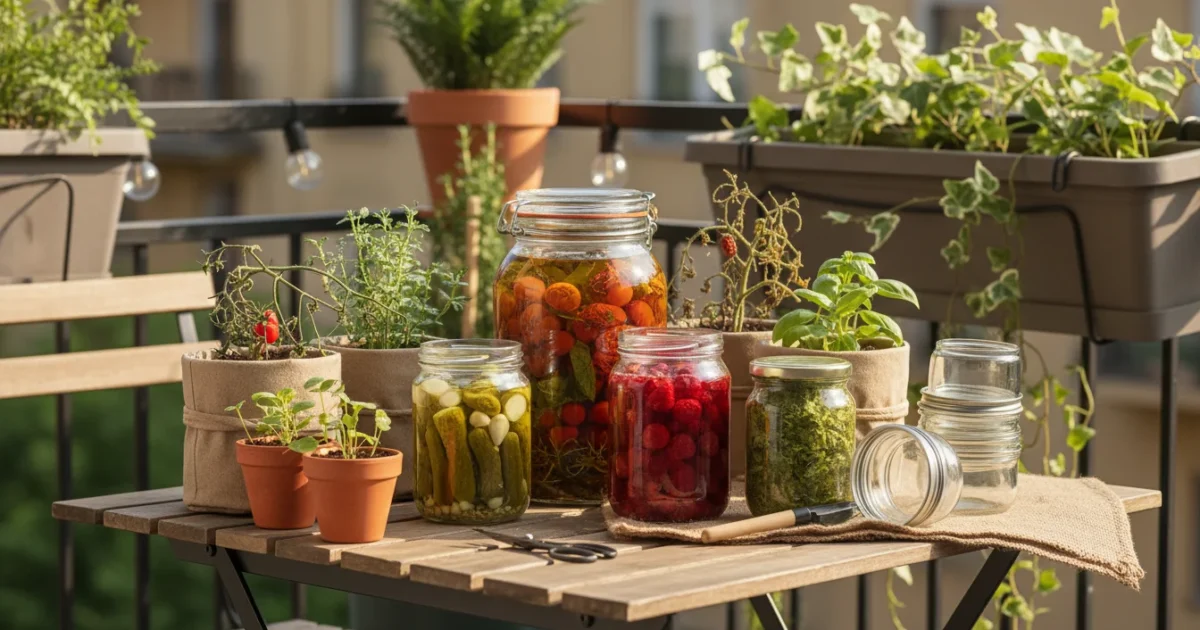
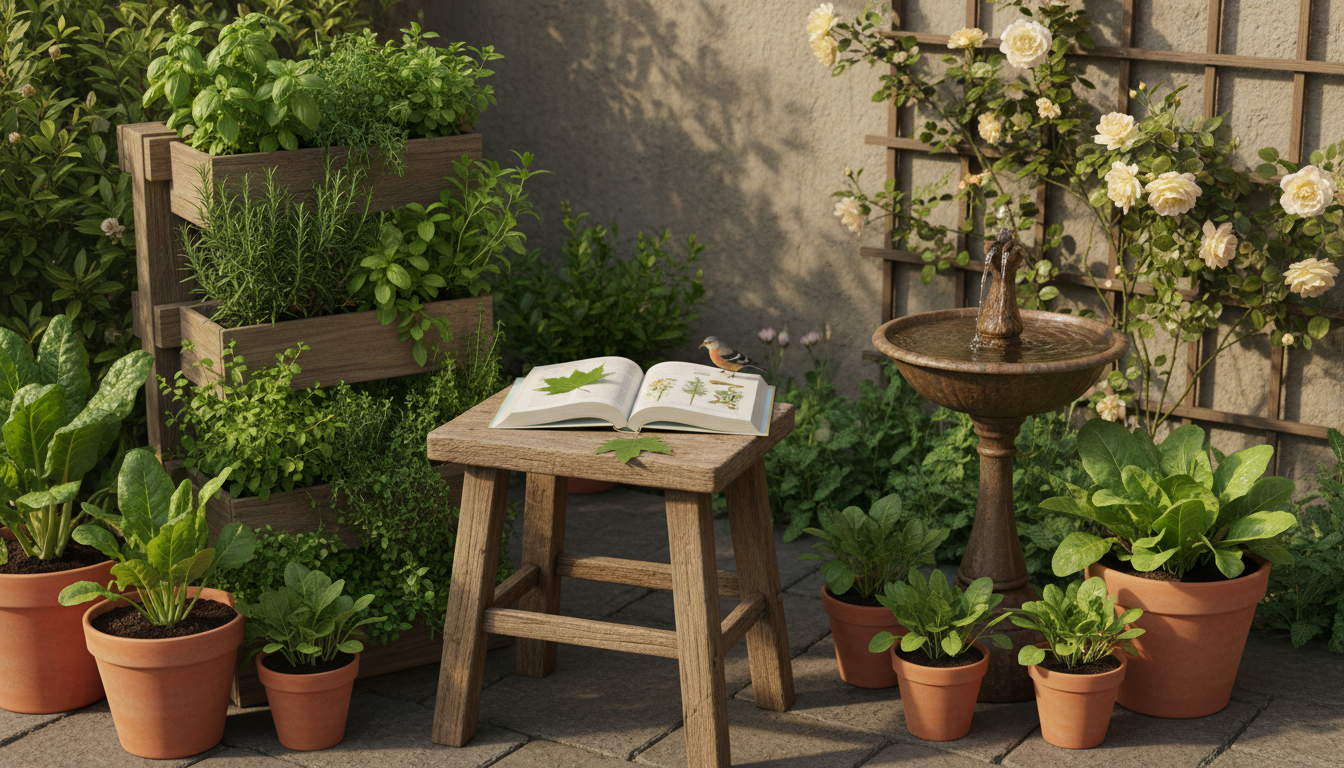
Beyond Freezing: 5 Easy Ways to Preserve Your Final, Scrappy Balcony Harvest (Think Herb Salts & Infused Oils)
As the gardening season winds down, your balcony or patio containers might still hold a treasure trove of herbs and small vegetables. Do not let that final, scrappy end of season harvest go to waste. You worked hard nurturing those plants, and their flavors deserve to be enjoyed long after the growing season concludes. While freezing is a common method, it is not always the most exciting for small batches or delicate herbs. This guide explores five easy, creative, and accessible ways to preserve your small-space garden bounty, transforming your leftover garden herbs and small amounts of vegetables into gourmet pantry staples.
If your balcony also holds ornamental plants, you can learn how to preserve your final balcony flowers to keep the beauty of summer alive indoors.
Why Preserve Your Balcony Bounty? Maximize Your Small Garden’s Yield
Your small garden delivers immense satisfaction, flavor, and a connection to nature. Preserving your end of season harvest amplifies these benefits. Imagine adding a dash of summer rosemary salt to your winter roast or drizzling basil-infused oil on a fresh salad in the middle of January. Preserving herbs and small amounts of vegetables extends their usability and integrates their fresh flavors into your cooking year-round. It also champions sustainability by minimizing food waste. You utilize every leaf and every pepper, making the most of your balcony’s productive potential. This proactive approach saves money on grocery bills, reduces your environmental footprint, and provides a deeply satisfying sense of self-sufficiency. Each preserved jar or bottle holds not just ingredients, but also the memory of your garden’s bounty.
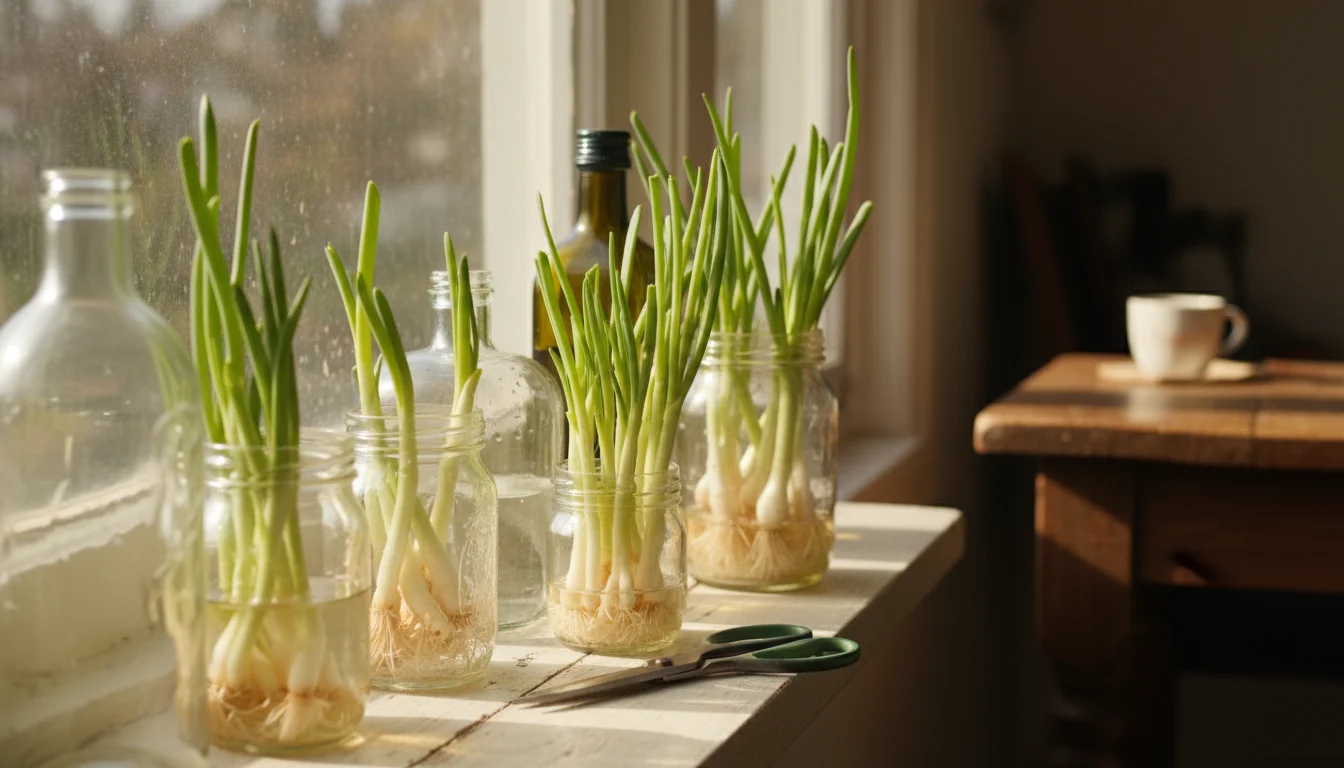
While harvesting, this is also the perfect moment to take fall cuttings from your potted herbs so you can keep growing your garden indoors.
For example, a single pot of basil might yield enough fresh leaves for a pesto or two during peak season. But as temperatures drop, those remaining leaves, while still flavorful, might not be enough for a full dish. This is where small batch preserving shines. You can combine those last few basil leaves with some thyme from another pot and a stray chili pepper to create something entirely new, like a spicy herb oil or a vibrant herb salt. This method celebrates the “scrappy” nature of an end-of-season harvest, turning what might seem like too little into something truly special.
Essential Tools for Successful Small-Batch Preserving
You do not need an industrial kitchen to excel at small batch preserving. Many of the tools you likely already own will suffice. The key is cleanliness and organization. Here is a rundown of the basic equipment you will find useful for preserving small amounts of vegetables and herbs:
In addition to preserving your harvest, you might consider how to save seeds from your balcony garden to prepare for next year’s planting.
Before you begin, make sure you understand the best practices for harvesting and drying herbs to ensure they retain their maximum potency.
- Sharp Knife and Cutting Board: Essential for precise chopping and mincing. Cleanliness here prevents cross-contamination.
- Mixing Bowls: Various sizes accommodate different quantities of herbs and salts or oils.
- Baking Sheets or Trays: Perfect for air drying herbs or creating thin layers of herb salt.
- Grater or Microplane: Useful for zesting citrus, which often pairs well with preserved herbs.
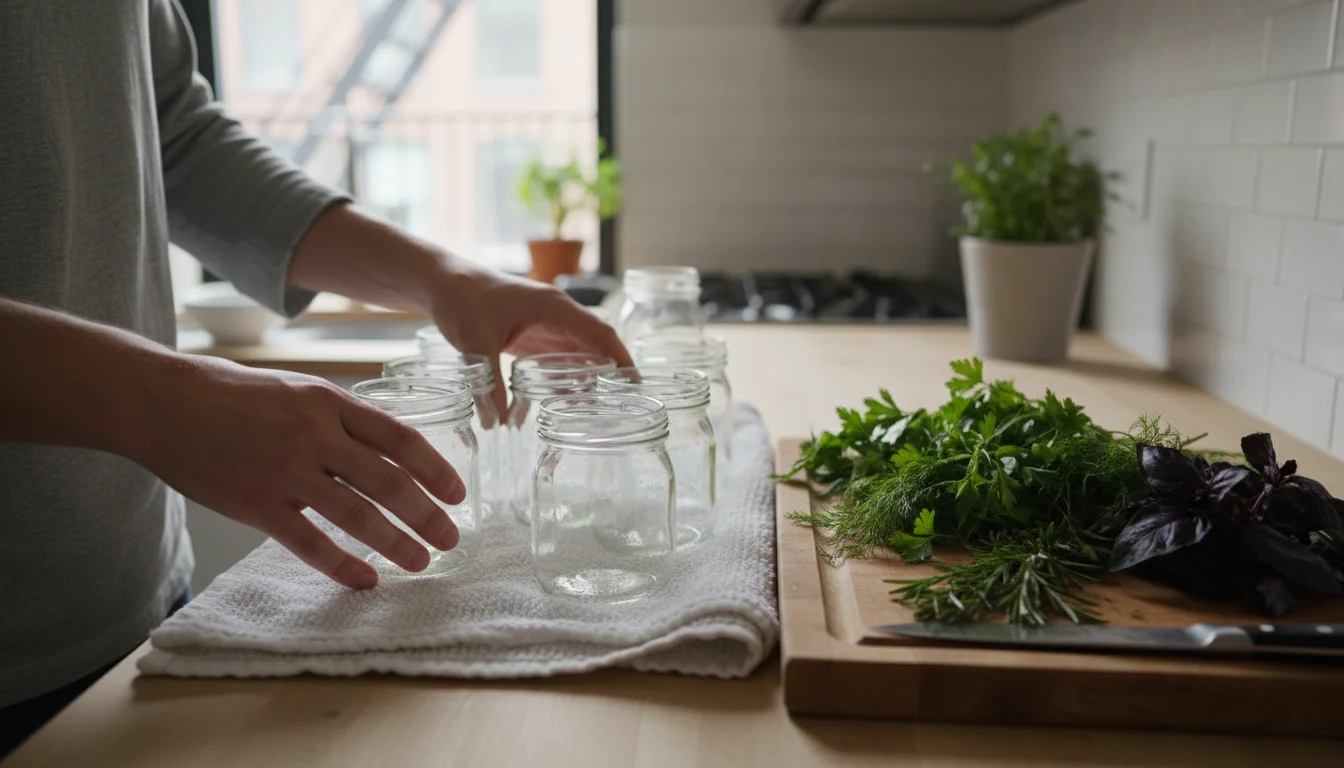
- Clean Glass Jars and Bottles: Invest in small, airtight containers. Mason jars are excellent, but recycled jam or condiment jars work well after thorough washing and sterilization. Make sure the lids seal properly.
- Funnels: For cleanly transferring liquids into bottles or dry ingredients into jars.
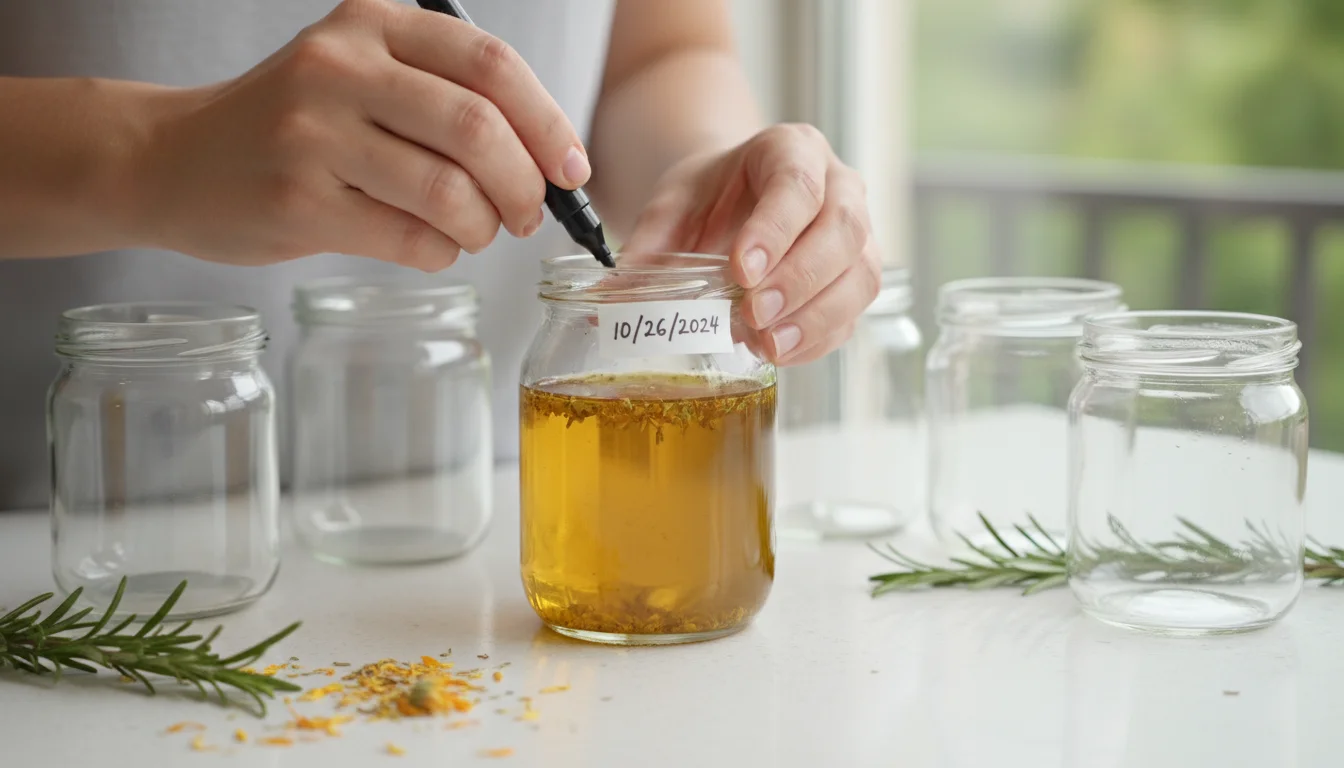
- Labels and Markers: Critical for noting contents and preservation dates. You will thank yourself later for this small organizational step.
- Fine-Mesh Sieve or Cheesecloth: Necessary for straining infused oils or drying herbs evenly.
- Gloves: Protect your hands when working with strong peppers or herbs that might stain.
- Measuring Spoons and Cups: Accuracy helps achieve consistent results, particularly with recipes involving salt or specific ratios.
- A Dehydrator (Optional): While not essential, a small food dehydrator can significantly speed up the drying process for herbs and small vegetables, offering more consistent results than air drying, especially in humid climates.
Always ensure your tools are impeccably clean. Sterilizing jars and bottles is crucial for food safety, especially when making infused oils or quick pickles. You can sterilize glass jars by washing them thoroughly in hot, soapy water, rinsing well, and then placing them in an oven at 225°F (107°C) for 10-15 minutes, or by running them through a hot cycle in your dishwasher.
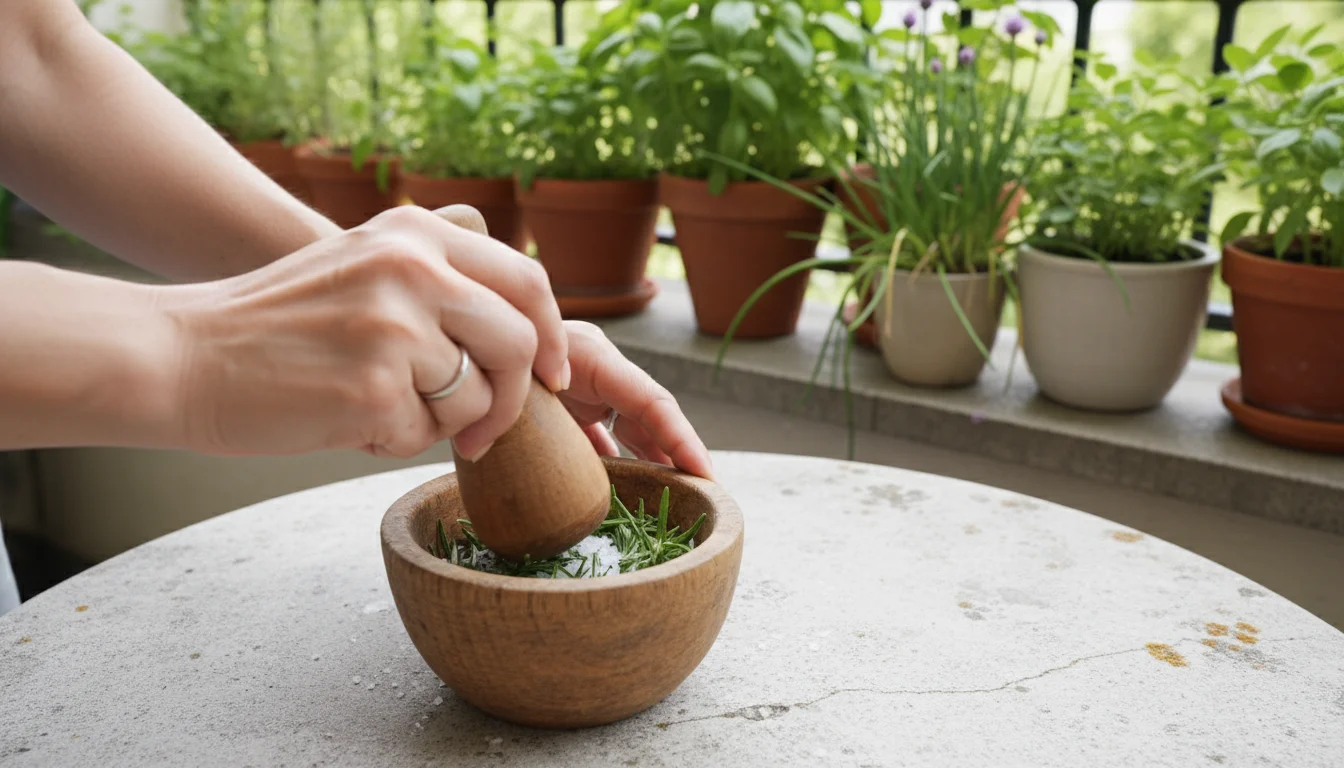
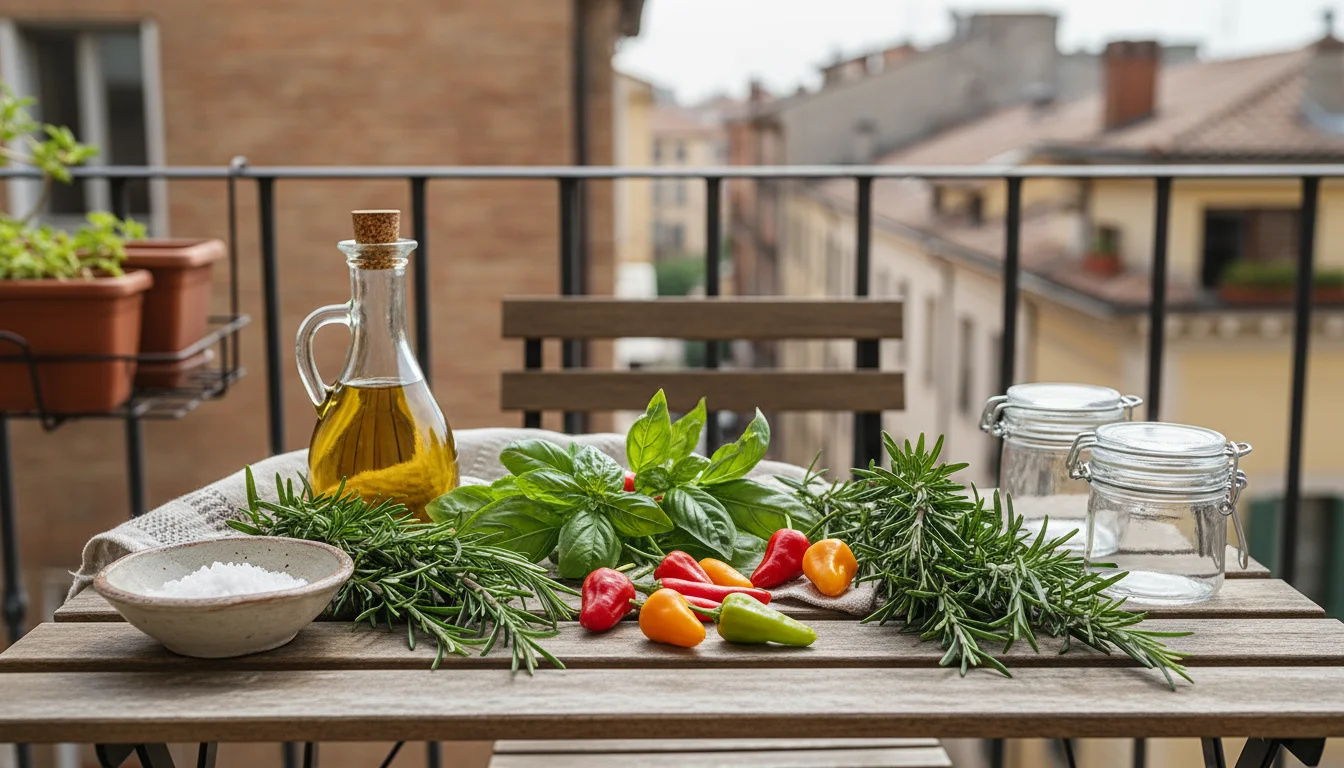
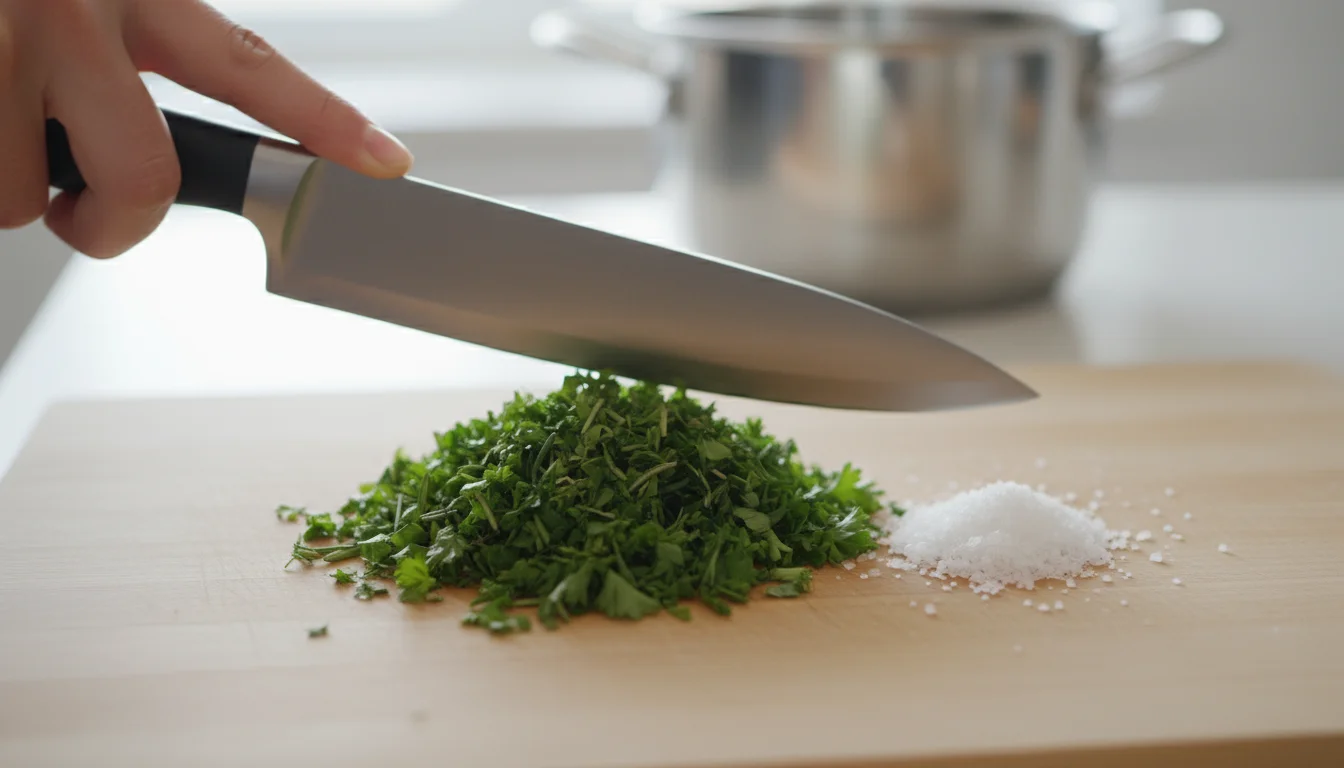
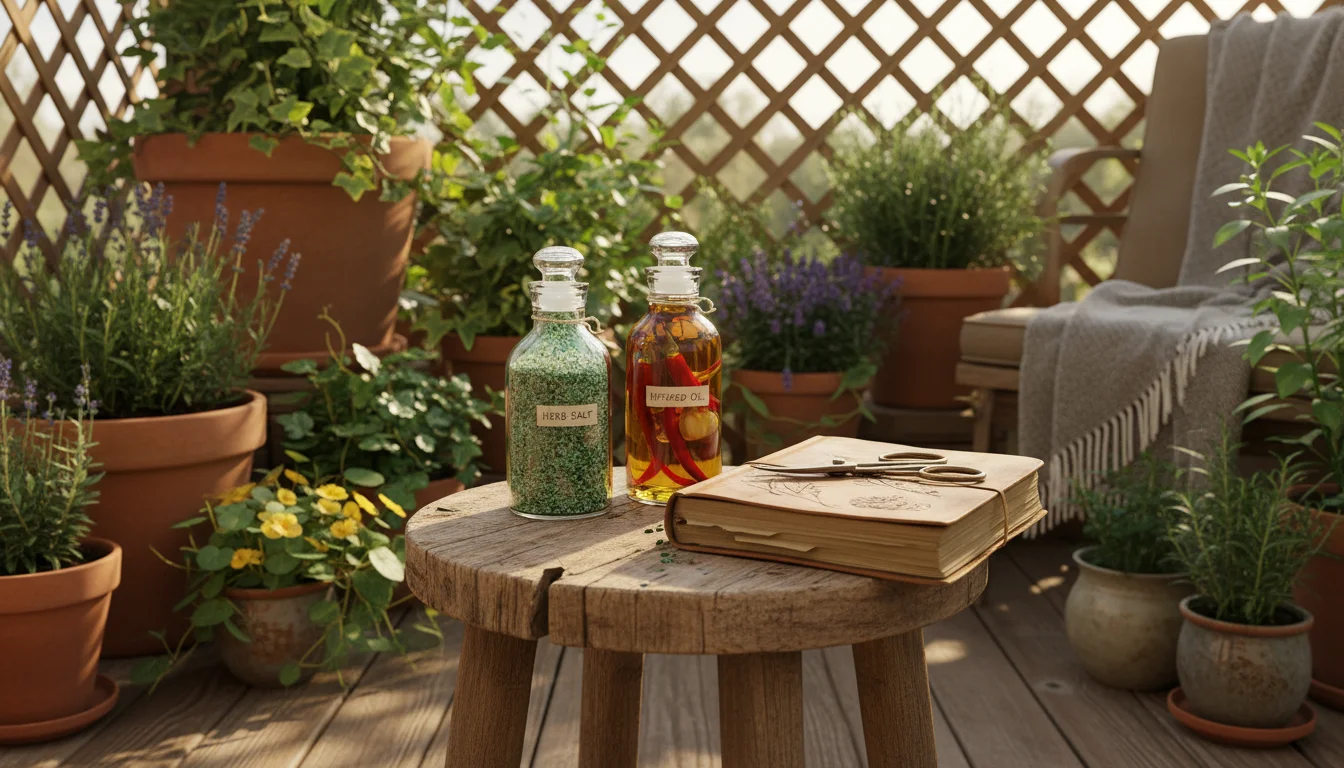
Method 1: Crafting Flavorful Herb Salts for Instant Flavor Boosts
Herb salts are one of the simplest and most rewarding ways to preserve your end of season harvest. They capture the essence of fresh herbs in a convenient, shelf-stable form. You can use virtually any herb or combination you love, making this an excellent answer to how to make herb infused salt. These salts are fantastic for seasoning meats, vegetables, eggs, or even as a finishing salt for bread.
If you find yourself with extra trimmings, you can also dry your final herb cuttings to create a fragrant, natural fall scent for your home.
Step-by-Step Guide to Making Herb Salt:
- Gather Your Herbs: Harvest your chosen herbs. Think rosemary, thyme, oregano, sage, parsley, dill, or chives. Ensure they are dry and free of dirt or pests.
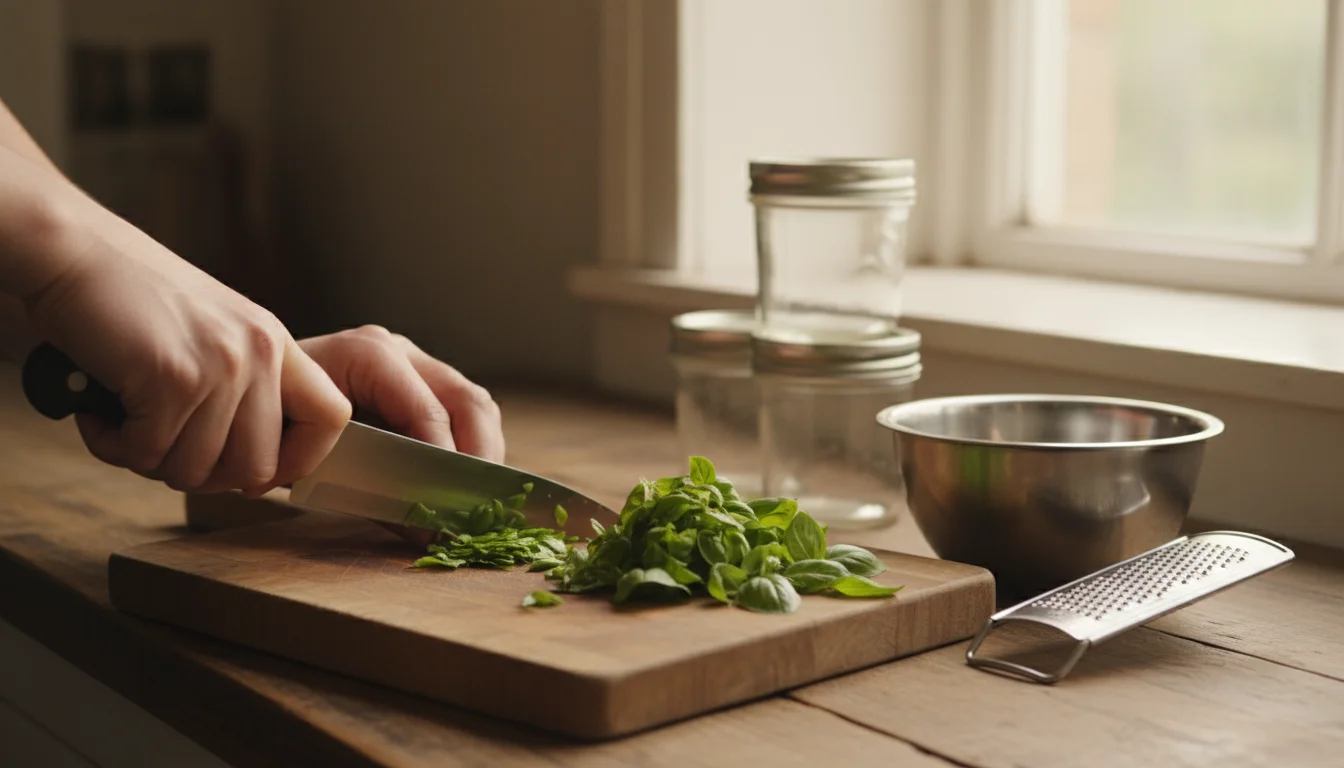
- Prepare the Herbs: Wash your herbs gently if needed, then thoroughly pat them dry with a clean cloth or paper towels. Excess moisture is the enemy here. Remove the leaves from the stems. Chop the herbs very finely. The finer you chop them, the more evenly they will distribute in the salt and the quicker they will dry.
- Choose Your Salt: Use a good quality coarse sea salt or kosher salt. Avoid iodized table salt, as it can impart a slightly metallic flavor and often has anti-caking agents that interfere with the process.
- Combine Herbs and Salt: The general ratio is 1 part fresh herbs to 3 parts salt by volume. For example, if you have 1/2 cup of finely chopped herbs, you will use 1 1/2 cups of salt. You can adjust this ratio to your preference for a stronger or milder herb flavor. Place the herbs and salt in a bowl.
- Blend Thoroughly: Use your hands or a spoon to thoroughly mix the herbs and salt. You want an even distribution. For a finer, more integrated salt, pulse the mixture a few times in a food processor. This helps break down the herbs further and infuses the salt with their volatile oils.
- Dry the Mixture: This is the most crucial step for shelf stability. Spread the herb salt in a thin, even layer on a baking sheet lined with parchment paper. Leave it in a dry, airy spot at room temperature, away from direct sunlight, for 3-7 days. Stir it daily to encourage even drying and prevent clumping. The salt should be completely dry and crumbly, with no visible moisture, before storing. Alternatively, you can dry it in a low oven (around 150°F / 65°C) with the door ajar for a few hours, stirring occasionally.
- Store: Once completely dry, transfer your herb salt to airtight jars. Store it in a cool, dark place. Properly dried herb salt will last for several months, if not longer.
Example: Rosemary & Garlic Salt
Finely chop 1/4 cup fresh rosemary leaves and mince 2 cloves of garlic. Combine with 3/4 cup coarse sea salt. Pulse in a food processor until evenly distributed. Spread on a baking sheet and dry for 3-5 days, stirring daily. The result is a fragrant salt perfect for roasted potatoes or chicken.
This is a simple, effective method for preserving herbs and a fantastic way to capture your garden’s flavors.
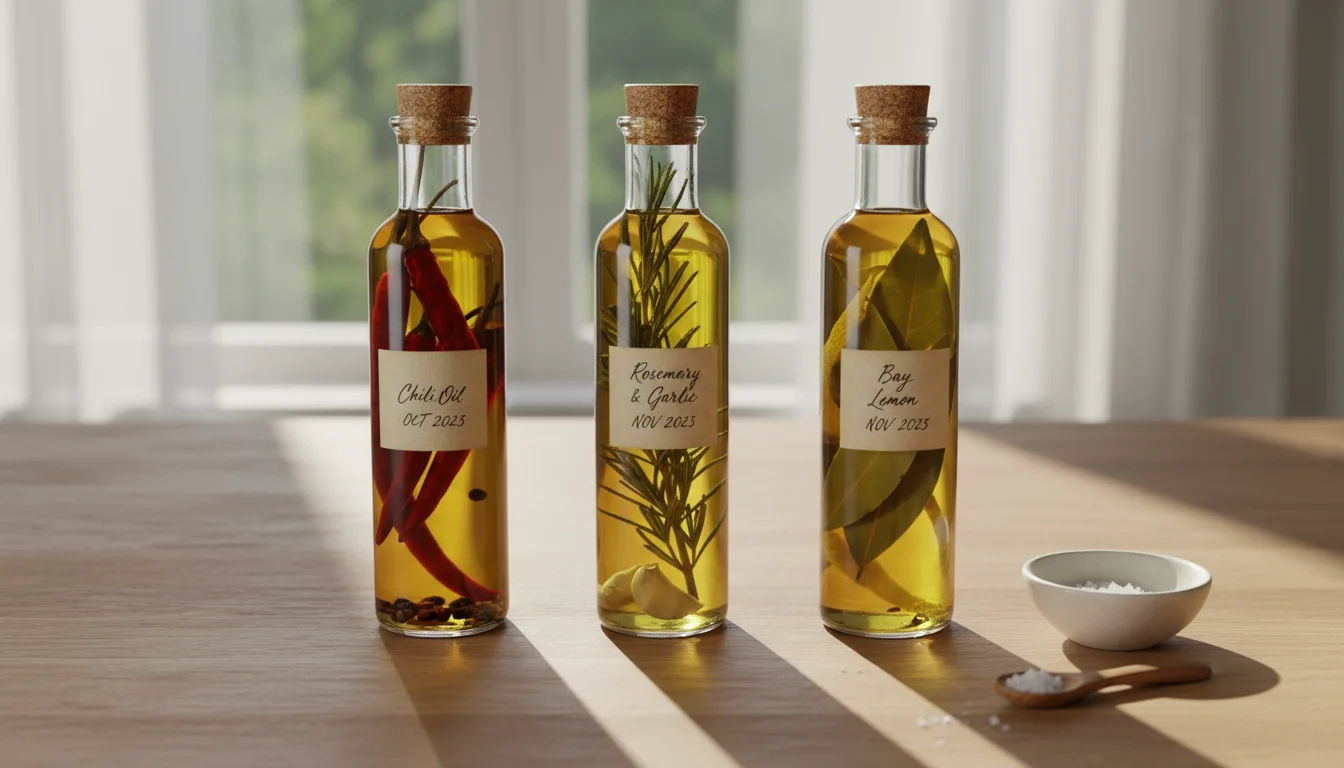
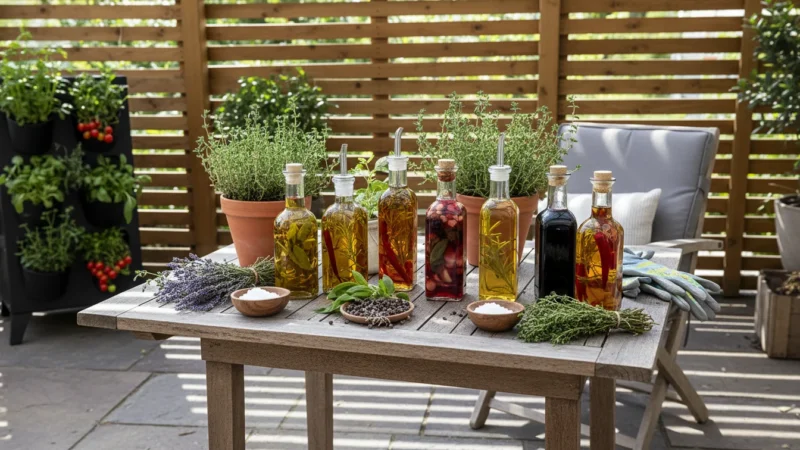
Method 2: Infused Oils for Culinary Delights and Aromatic Dishes
Infused oils transform humble herbs and spices into gourmet finishing oils or flavorful cooking mediums. You create a vibrant addition to salads, bread dips, or drizzled over grilled vegetables. However, you must prioritize safety when making infused oils, especially with fresh ingredients. The risk of botulism exists if you do not handle the oil properly. Botulism-causing bacteria thrive in anaerobic environments (without oxygen) and in low-acid conditions, making oil a potential hazard if fresh, moist ingredients are involved.
Before processing peppers for your oils, make sure to ripen your final potted peppers to achieve the best flavor and heat.
Safety First: Critical Considerations for Infused Oils
- Always Dry Ingredients: If using fresh herbs or garlic, you absolutely must dry them thoroughly first. This removes the moisture that botulism spores need to grow. You can air dry them, use a dehydrator, or roast garlic cloves until fully dried.
- Acidify (Optional, but Safer): Adding a small amount of acid, like vinegar, can reduce the risk. However, it changes the flavor profile. A safer bet for long-term storage is to dry ingredients.
- Refrigerate and Use Quickly: If you insist on using fresh herbs or garlic, you must store the infused oil in the refrigerator and use it within 7-10 days. The cold slows bacterial growth, but does not eliminate the risk entirely.
- Choose High-Quality Oil: Extra virgin olive oil is a popular choice for its flavor, but you can also use grapeseed, avocado, or sunflower oil depending on your culinary goals.
Step-by-Step Guide to Making Safe Herb-Infused Oil (Using Dried Herbs):
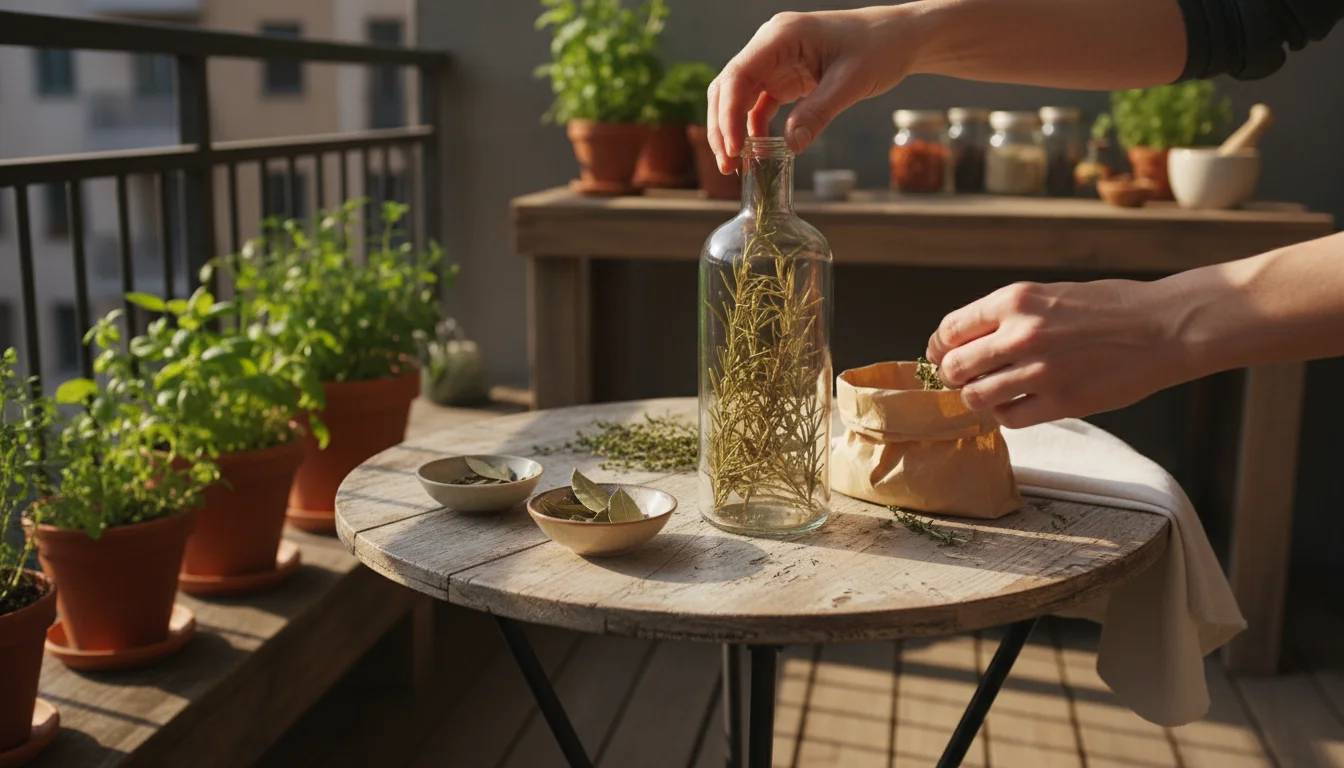
- Dry Your Herbs: Harvest your preferred herbs. Good choices for oil include rosemary, thyme, oregano, bay leaves, and chili peppers. Completely dry them using an air-drying method (hanging or on a tray for several days until brittle) or a dehydrator. Ensure absolutely no moisture remains.
- Prepare Your Bottle: Sterilize a clean glass bottle with a tight-fitting lid.
- Add Herbs to Bottle: Place your dried herbs into the sterilized bottle. A general guideline is about 1/4 cup of dried herbs per 1 cup of oil, but you can adjust for intensity.
- Pour in Oil: Fill the bottle with your chosen oil, ensuring the herbs are completely submerged.
- Infuse: Cap the bottle tightly. Store it in a cool, dark place for 1-2 weeks to allow the flavors to meld. Shake the bottle gently every day or two.
- Strain (Optional): After infusing, you can strain the oil through a fine-mesh sieve or cheesecloth to remove the herbs. This extends shelf life and prevents the herbs from degrading in the oil. If you leave the herbs in, they might become bitter over time.
- Store and Label: Store your infused oil in a cool, dark place. Label it with the contents and the date. Dried herb-infused oils can last for several months.
Example: Rosemary & Chili Infused Oil
Dry a handful of fresh rosemary sprigs and 2-3 small chili peppers (like cayenne or bird’s eye chilies) until completely brittle. Place them in a clean bottle. Fill with extra virgin olive oil. Seal tightly and let infuse for 2 weeks in a cool, dark place. Strain before use for a longer shelf life. This oil is excellent for pizza, pasta, or dipping bread.
By following these safety precautions, you can confidently enjoy your homemade, aromatic infused oils, a fantastic way of preserving herbs.
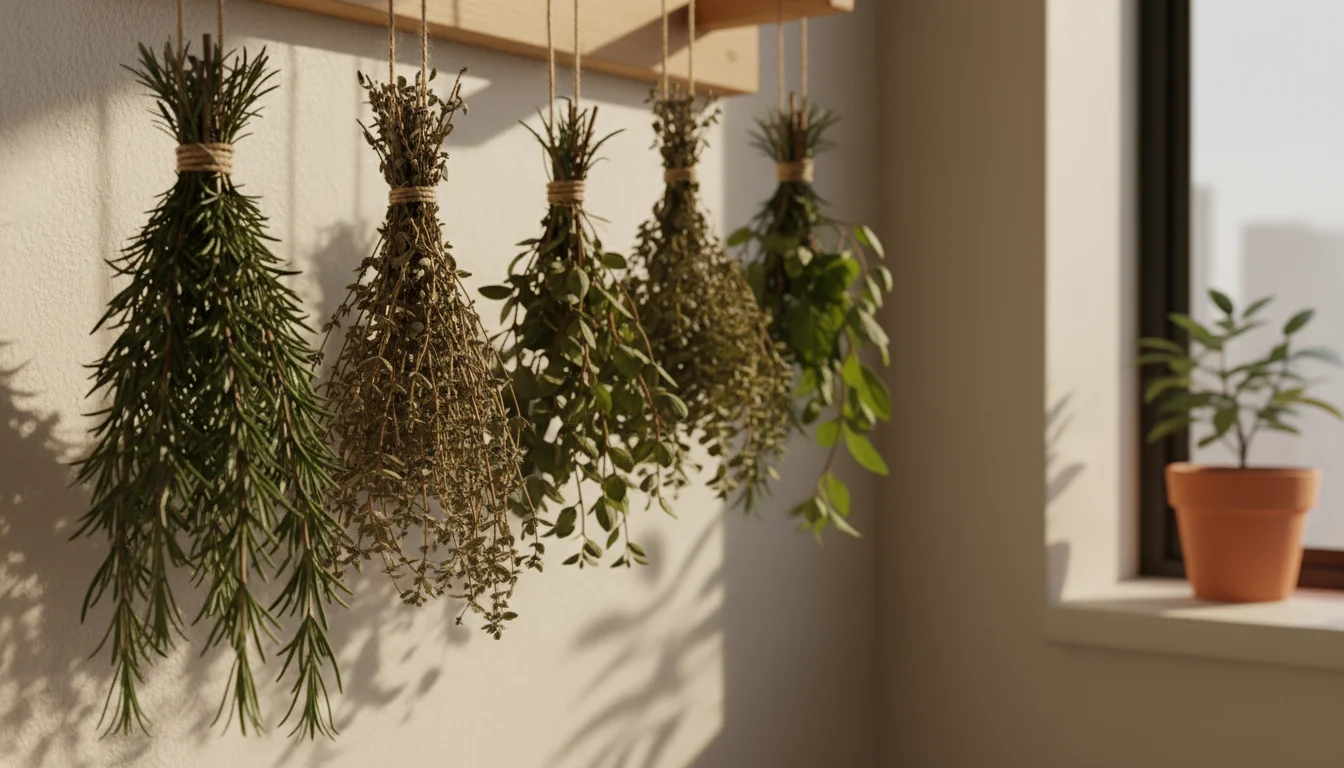
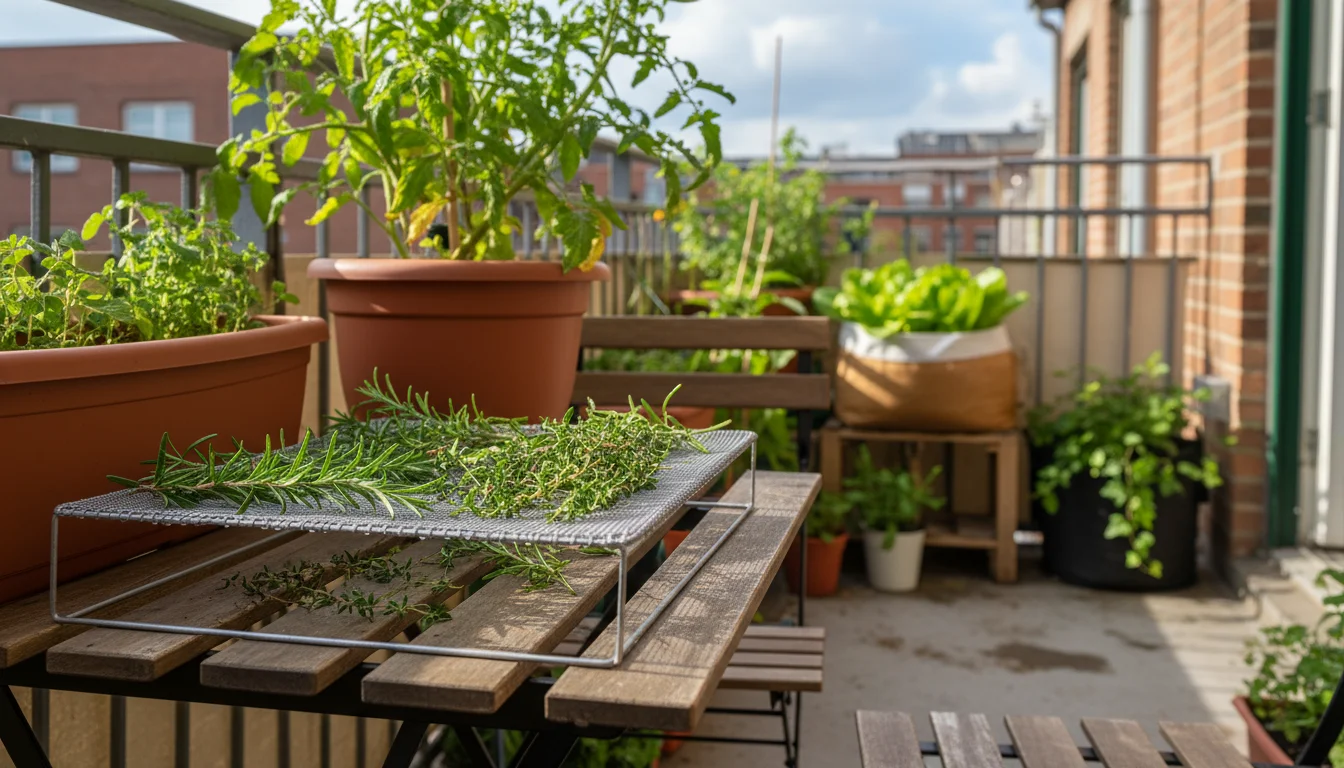
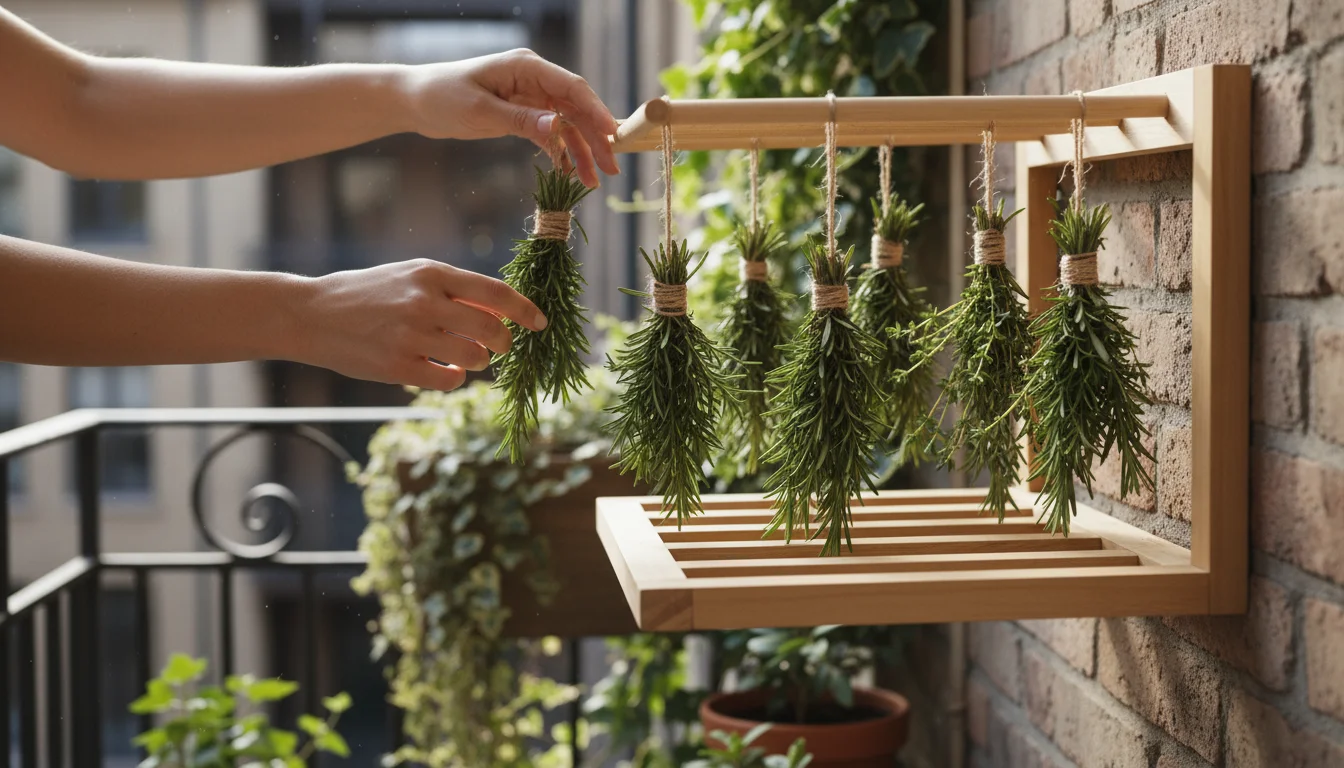
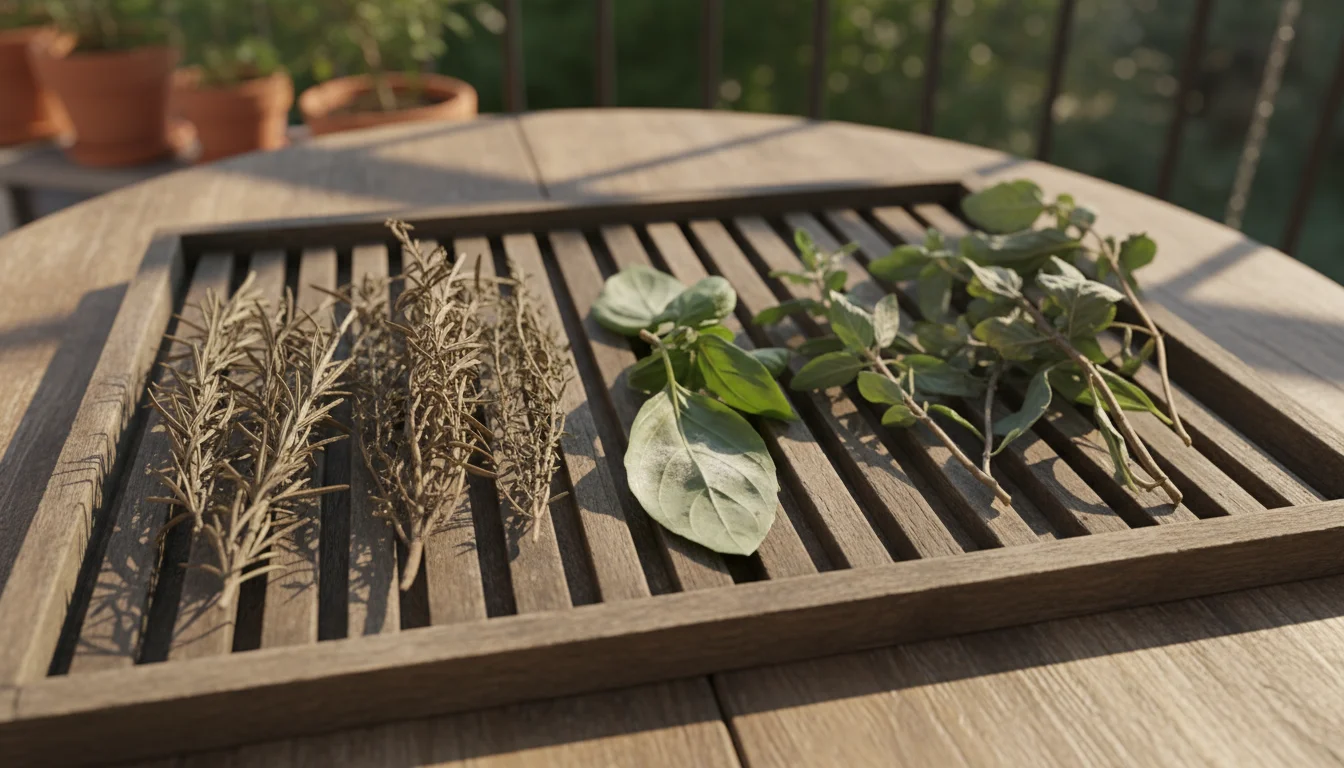
Method 3: Drying Herbs for Year-Round Enjoyment and Potent Flavor
Drying herbs is a classic, simple, and effective method for preserving herbs, especially for those with a small end of season harvest. When done correctly, drying concentrates the herb’s essential oils, leading to more potent flavor than fresh herbs. This method works beautifully for woody herbs like rosemary, thyme, oregano, sage, and mint, as well as softer herbs like parsley and basil, though softer herbs can be a bit trickier to dry successfully without a dehydrator.
Once your harvest is brittle and dry, there are many creative ways to use dried herbs to keep the spirit of your garden alive during the colder months.
Step-by-Step Guide to Drying Herbs:
- Harvest Your Herbs: Choose healthy, blemish-free herbs, preferably in the morning after the dew has dried but before the sun gets too hot, as this is when their essential oils are most concentrated.
- Clean and Prepare: Gently rinse your herbs under cool water if they have any dirt. Pat them absolutely dry with a clean towel. Remove any discolored or damaged leaves. For woody herbs, you can dry them on the stem. For softer herbs, you might want to remove leaves from thick stems for faster drying.
- Choose Your Drying Method:
- Air Drying (Best for Woody Herbs): Bundle small bunches of 5-10 stems together with kitchen twine. Hang them upside down in a warm, dry, well-ventilated area away from direct sunlight (which can bleach the herbs and degrade their flavor). A brown paper bag with holes punched in it can protect them from dust. This method can take 1-3 weeks.
- Tray Drying (Good for Leafy Herbs): Spread individual leaves or small sprigs in a single layer on a clean screen, a baking sheet, or a dehydrator tray. Ensure good air circulation around them. Turn them occasionally. This works well for basil, mint, and parsley.
- Dehydrator Drying (Fastest and Most Consistent): If you have a food dehydrator, arrange herbs in a single layer on the trays. Follow your dehydrator’s instructions, typically setting it to a low temperature (around 95-105°F / 35-40°C). This method dries herbs in a matter of hours, usually 4-12 hours depending on the herb and humidity.
- Oven Drying (Use with Caution): As a last resort, you can try drying herbs in an oven set to its lowest temperature (usually 150-170°F / 65-77°C) with the oven door propped open slightly to allow moisture to escape. This method requires constant vigilance as herbs can burn easily.
- Test for Dryness: Herbs are completely dry when they are brittle, crumble easily between your fingers, and feel crisp, not pliable. They should snap if you try to bend a stem.
- Store Dried Herbs: Once fully dry, remove the leaves from the stems (if applicable). You can store them whole or lightly crushed. Place them in airtight containers, such as glass jars, in a cool, dark place. Label with the herb type and date.
Properly dried herbs retain their flavor and potency for up to a year. Regularly check for any signs of moisture or mold, especially if you air-dried them. This practical step ensures you always have what to do with leftover garden herbs, transforming them into valuable pantry staples.
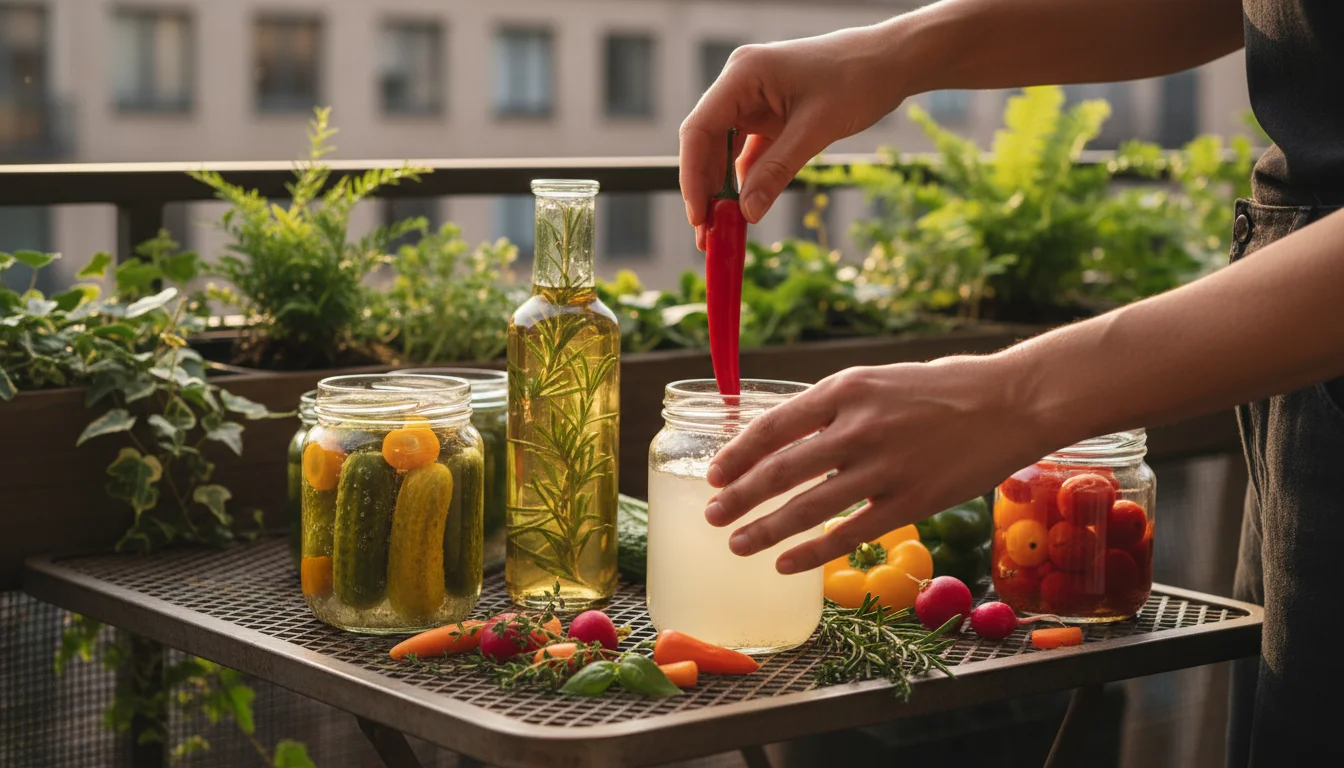
Method 4: Quick Pickles and Vinegars for Tangy Treats and Small Veggies
When your small garden offers up a final scattering of miniature cucumbers, cherry tomatoes, or an odd chili pepper, quick pickles are your answer to preserving small amounts of vegetables. This method is simpler and faster than traditional canning, as quick pickles are stored in the refrigerator and consumed within a few weeks to months. Similarly, infused vinegars capture herb flavors in a tangy, versatile liquid, perfect for salad dressings or marinades.

Step-by-Step Guide to Making Quick Pickles:
- Prepare Your Vegetables: Wash your small vegetables thoroughly. Good choices include mini cucumbers, green beans, radishes, cherry tomatoes, small bell peppers, or even garlic cloves. You can leave them whole or slice them as desired. Trim off any ends or stems.
- Sterilize Jars: Use clean, sterile glass jars with tight-fitting lids.
- Pack the Jars: Tightly pack the prepared vegetables into the sterilized jars. You can add flavorings like dill sprigs, garlic cloves, mustard seeds, peppercorns, or red pepper flakes.
- Make the Brine: A basic quick pickle brine consists of equal parts white vinegar (5% acidity) and water, plus salt and sugar to taste. A common starting point is:
- 1 cup white vinegar
- 1 cup water
- 1 tablespoon salt (kosher or pickling salt, avoid iodized)
- 1 teaspoon sugar (optional, for balance)
Combine these ingredients in a saucepan and bring to a boil, stirring until salt and sugar dissolve.
- Pour Brine Over Vegetables: Carefully pour the hot brine over the vegetables in the jars, ensuring they are completely submerged. Tap the jars gently to release any air bubbles.
- Seal and Cool: Place the lids on the jars. Let them cool completely at room temperature.
- Refrigerate: Once cool, store your quick pickles in the refrigerator. They are usually ready to eat within 24 hours but develop more flavor over a few days. Consume within 2-3 weeks for best quality, or up to 2-3 months if properly refrigerated.
Example: Spicy Radish Quick Pickles
Slice a handful of radishes thinly. Pack them into a small jar with a sprig of dill and 1/4 teaspoon of red pepper flakes. Heat 1/2 cup white vinegar, 1/2 cup water, 1 teaspoon salt, and 1/2 teaspoon sugar until dissolved. Pour over radishes, cool, and refrigerate. Enjoy their crisp, tangy heat within a day.

Step-by-Step Guide to Making Infused Vinegars:
- Choose Your Vinegar: White vinegar, apple cider vinegar, or white wine vinegar all work well.
- Prepare Your Herbs/Fruits: Wash and thoroughly dry herbs like rosemary, thyme, oregano, basil, or chives. You can also use small berries, citrus zest, or chili peppers. For stronger flavor, gently bruise herbs or lightly crush berries.
- Sterilize Bottle: Use a clean, sterilized glass bottle.
- Add Flavorings: Place your chosen herbs or other flavorings into the bottle.
- Fill with Vinegar: Pour the vinegar over the ingredients, ensuring they are fully submerged.
- Infuse: Seal the bottle and store it in a cool, dark place for 1-2 weeks. Shake gently every few days.
- Strain (Optional): After infusing, you can strain out the solids for a clearer vinegar and longer shelf life, or leave them in for visual appeal.
- Store and Label: Store infused vinegars in a cool, dark place. They can last for several months.
These methods are excellent for an end of season harvest, allowing you to easily preserve small amounts of vegetables and herbs in flavorful, tangy ways.
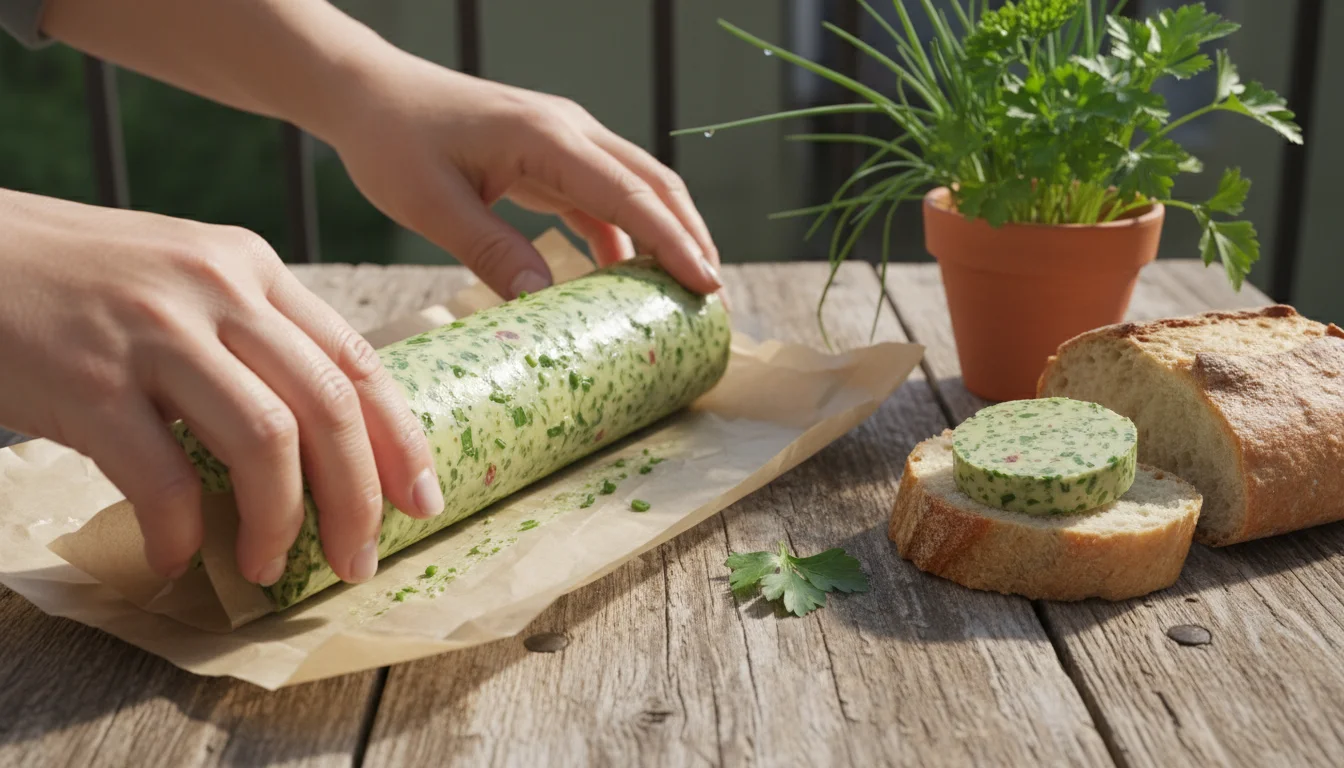
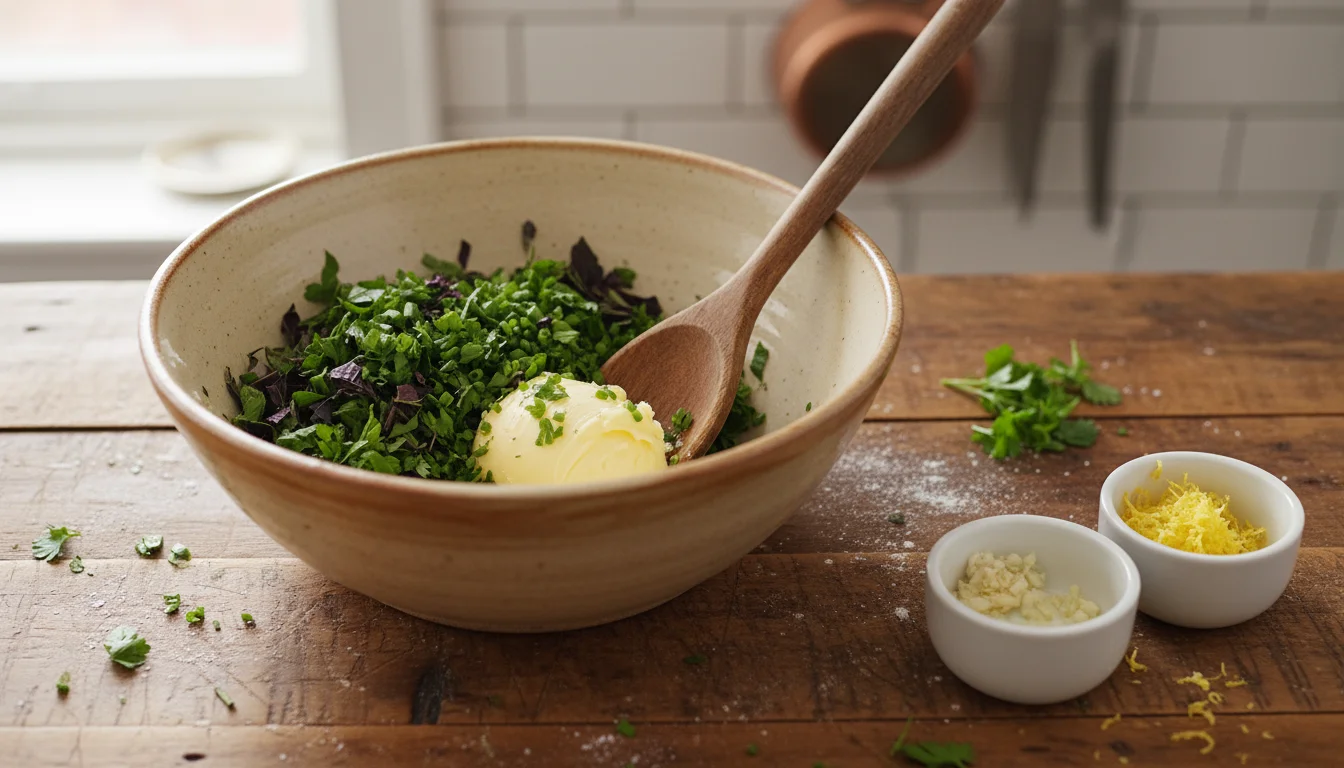
Method 5: Compound Butters: A Rich Finish for Your Culinary Creations
Compound butters offer a luxurious and incredibly easy way to utilize your leftover garden herbs. You combine fresh herbs, spices, and sometimes garlic or citrus zest with softened butter, then chill it. These flavorful butters elevate simple dishes like grilled steak, roasted vegetables, corn on the cob, or warm bread. They freeze beautifully, making them ideal for small batch preserving and extending your herb harvest well into the colder months.
Step-by-Step Guide to Making Compound Butter:
- Gather Your Ingredients: You need unsalted butter (at room temperature, softened), your chosen fresh herbs, and any additional flavorings.
- Prepare the Herbs: Wash and thoroughly dry your fresh herbs. This is critical to prevent moisture from compromising the butter. Finely chop the herbs. Popular choices include parsley, chives, dill, rosemary, thyme, sage, and basil.
- Soften the Butter: Allow the butter to come to room temperature so it is soft enough to mix easily but not melted.
- Combine Ingredients: In a mixing bowl, combine the softened butter with the finely chopped herbs. A good ratio is typically 1/4 cup of chopped herbs per 1/2 cup (one stick) of butter. Add any other flavorings such as minced garlic, lemon zest, black pepper, or a pinch of sea salt.
- Mix Thoroughly: Use a fork or a rubber spatula to thoroughly mash and mix all the ingredients until they are evenly distributed throughout the butter. You want to ensure every bite delivers the intended flavor.
- Form and Chill:
- Log Form: Spoon the mixed butter onto a piece of parchment paper or plastic wrap. Form it into a log shape, about 1-1.5 inches in diameter. Roll it tightly, twisting the ends to seal.
- Small Portions: You can also spoon the butter into an ice cube tray for individual servings.
Chill the butter in the refrigerator for at least 1-2 hours until it becomes firm.
- Store: Once firm, you can slice the butter log into rounds and store these in an airtight container in the refrigerator for up to 1 week. For longer storage, freeze the butter logs or individual portions. Frozen compound butter will last for several months. When ready to use, simply slice off a medallion or pop out a cube.
Example: Garlic & Herb Compound Butter
Finely chop 2 tablespoons of fresh parsley and 1 tablespoon of chives. Mince 1 clove of garlic. Combine with 1/2 cup (1 stick) softened unsalted butter and a pinch of salt and pepper. Mix well. Form into a log, chill, and then freeze. Perfect for spreading on crusty bread, finishing grilled steak, or melting over steamed vegetables.
Compound butters are a delightful and practical way of preserving herbs, ensuring that your small-space garden contributes to delicious meals all year long.
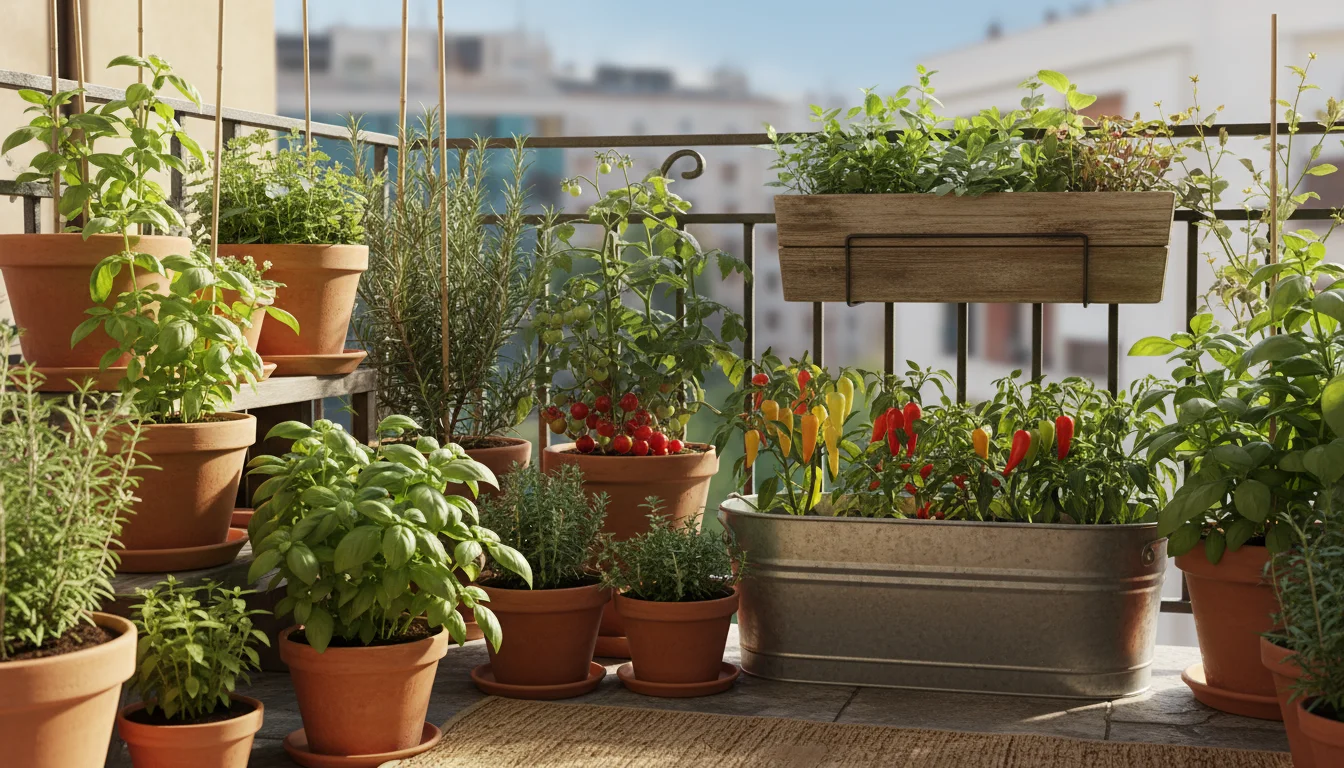
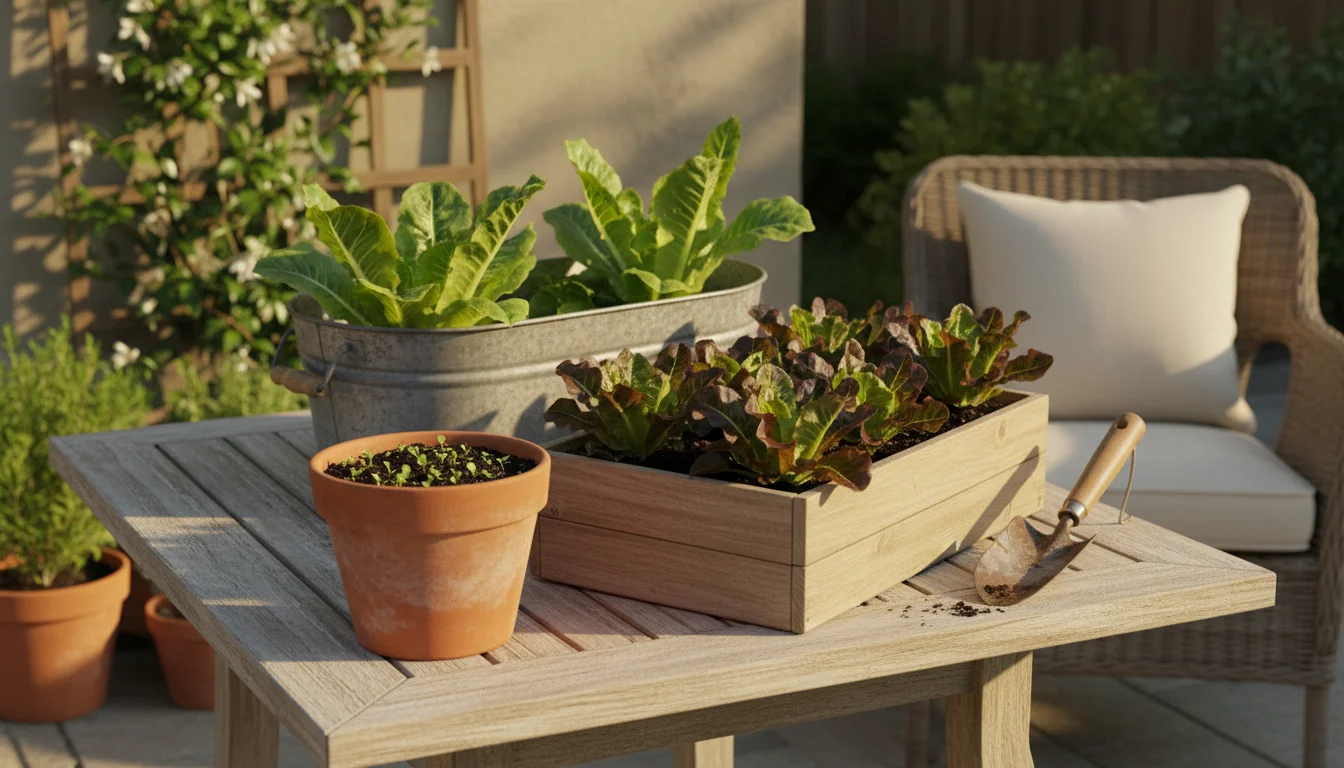
Growing Your Preservation Garden: Best Balcony Herbs and Veggies
Selecting the right plants for your balcony or small space makes a significant difference in how much you can harvest and ultimately preserve. Focus on plants that thrive in containers, are relatively low maintenance, and produce abundantly for an end of season harvest. You will find that some varieties are naturally better suited for preserving herbs and small amounts of vegetables than others.

Top Picks for Your Small Preservation Garden:
- Rosemary: A woody herb that loves sun and well-draining soil (how water moves through soil). It dries beautifully and infuses oils and salts exceptionally well. Look for upright varieties that do not sprawl too much in a pot.
- Thyme: Small, fragrant leaves that are perfect for drying and herb salts. It is drought-tolerant once established and thrives in sunny, airy conditions. Creeping varieties can cascade attractively over pot edges.
- Oregano: Similar to thyme, oregano is a sun-lover that offers prolific growth. It dries easily and adds robust flavor to Mediterranean dishes.
- Sage: Velvety leaves with a distinctive, earthy flavor. Sage dries well and is a star in compound butters and herb salts, especially for poultry or root vegetables.
- Chives: These oniony herbs grow in clumps and are easy to snip for compound butters or to finely chop into herb salts. They prefer consistent moisture and good light.
- Mint: Grows vigorously, so keep it in its own pot to prevent it from taking over. Mint is fantastic for infused vinegars and can be dried for teas or culinary uses.
- Basil: A warmer weather favorite. While it can be challenging to dry successfully without a dehydrator, basil is excellent for making infused oils (remember to dry leaves completely first) or quick pesto cubes. “Bush” or “Dwarf” varieties are best for small spaces.
- Cherry Tomatoes: Many varieties are bred for container growth, producing abundant small fruits. These are perfect for quick pickles or drying into “sun-dried” tomatoes in a low oven or dehydrator. Look for determinate varieties.
- Small Chili Peppers: Varieties like ‘Jalapeno’, ‘Serrano’, or ‘Thai Chili’ grow well in pots and provide heat for infused oils or quick vinegars. They love full sun.
- Radishes: Quick-growing and compact, radishes offer a speedy end of season harvest suitable for quick pickles.

Tips for Success in Small Spaces:
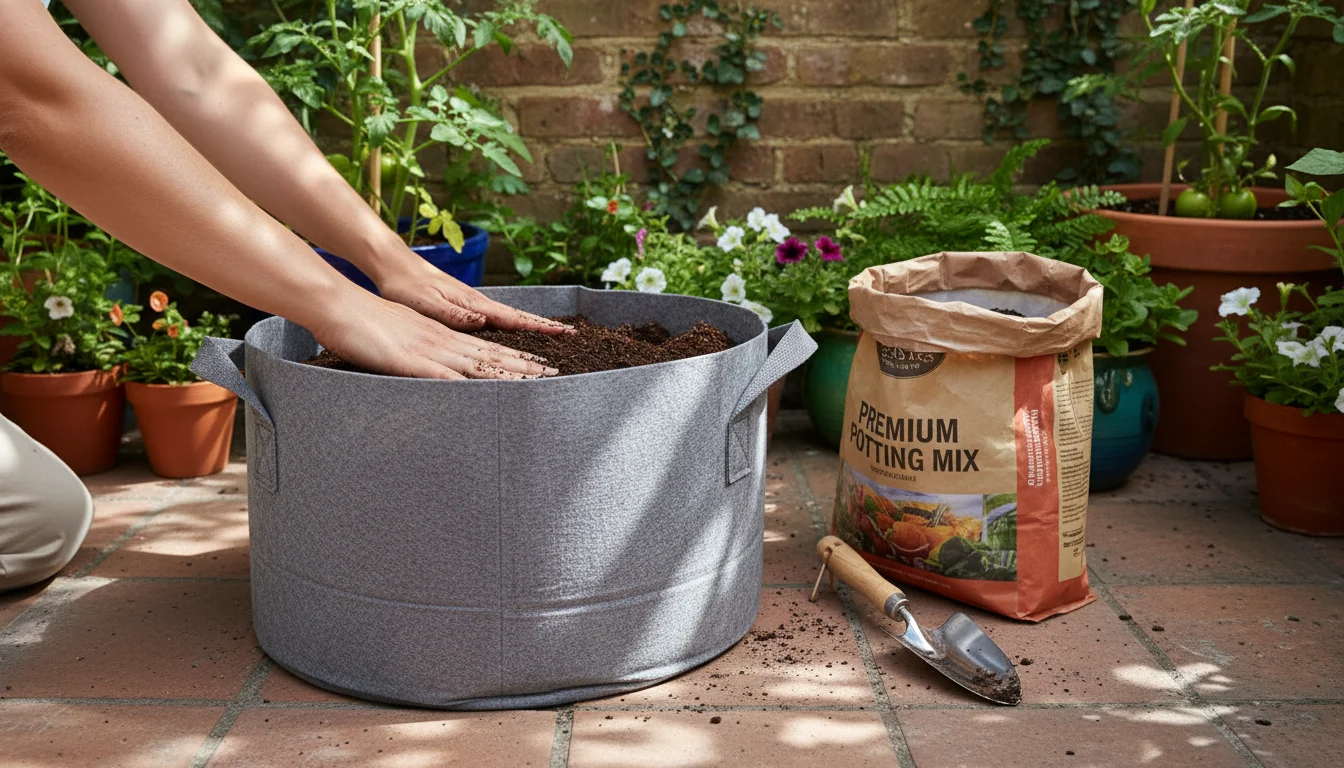
- Container Size Matters: While you are aiming for a small batch preserving, ensure your containers are large enough to support healthy plant growth. A 10-12 inch diameter pot often works well for most herbs.
- Sunlight is Key: Most herbs and small vegetables require at least 6-8 hours of direct sunlight daily. Position your balcony garden to maximize light exposure.
- Proper Drainage: All containers must have drainage holes to prevent root rot. This allows excess water to escape, crucial for healthy plants.
- Quality Potting Mix: Use a high-quality potting mix, not garden soil, as it is lighter, drains better, and provides essential nutrients for container growth.
- Consistent Watering: Container plants dry out faster than in-ground plants. Check soil moisture daily. Water when the top inch of soil feels dry.
- Fertilize Regularly: Small spaces mean plants quickly deplete soil nutrients. Use a balanced liquid fertilizer every 2-4 weeks during the growing season.
By thoughtfully planning your small-space garden with preservation in mind, you ensure a steady stream of ingredients for your small batch preserving projects.
Common Pitfalls and Safety First in Small-Batch Preserving
Even with simple preservation methods, a few common mistakes can lead to disappointment or, more critically, food safety issues. You should understand these to ensure your preserved goods are delicious and safe. Adhering to strict cleanliness and correct procedures protects you and your family.
Mistakes to Avoid:
- Insufficient Drying: This is the number one cause of mold in dried herbs and herb salts. Any residual moisture provides a breeding ground for undesirable microorganisms. Always ensure herbs and salt mixtures are completely dry and brittle. This means no pliability in herbs and no clumping in salt.
- Using Wet Herbs for Oils: As discussed, fresh, moist ingredients in oil create an anaerobic, low-acid environment, ideal for the growth of Clostridium botulinum, the bacteria that causes botulism. Always use thoroughly dried herbs or other ingredients when making shelf-stable infused oils. If using fresh, refrigerate and consume within 7-10 days.
- Skipping Sterilization: For infused oils and quick pickles, clean and sterilized jars and bottles are non-negotiable. Unsterilized containers can introduce bacteria, leading to spoilage or unsafe products.
- Improper Storage: Heat, light, and air are enemies of preserved foods. Store dried herbs, herb salts, and infused oils in airtight containers in a cool, dark pantry. Refrigerate quick pickles and fresh-ingredient infused oils.
- Ignoring Acidity in Pickles: The acidity of vinegar in quick pickles is crucial for safety. Always use vinegar with at least 5% acidity. Do not dilute the brine too much with water or use a vinegar with lower acidity, as this compromises its preservative properties.
- Overfilling Containers: Especially with quick pickles, leave a small headspace (about 1/2 inch) at the top of the jar. This allows for slight expansion and prevents spills.
- Using Impure Salt: For pickling and herb salts, use kosher salt or pickling salt. Iodized table salt contains anti-caking agents that can cloud brine and sometimes impart an off-flavor.
- Harvesting Damaged or Diseased Plants: Only preserve healthy, vibrant parts of your plants. Any signs of disease, pests, or decay can compromise the safety and quality of your preserved product.
Key Safety Principles:
- Cleanliness: Always start with clean hands, clean surfaces, and clean, sterilized equipment.
- Dryness: For methods like herb salts and most infused oils, ensure all fresh ingredients are completely dry before combining with salt or oil.
- Acidity: When pickling, maintain proper vinegar-to-water ratios and use vinegar with appropriate acidity levels.
- Storage: Follow recommended storage guidelines for each preservation method, including refrigeration and airtight containers.
- Labeling: Always label your preserved goods with the contents and the date they were made. This helps you track freshness and ensures you consume them within their safe window.
- When in Doubt, Throw it Out: If you ever question the safety or quality of a preserved item (e.g., unusual smell, mold, bubbling, off-color), discard it. Your health is more important than a small batch of preserved herbs.
By diligently observing these precautions, you will confidently turn your small-space garden’s end of season harvest into a collection of safe, delicious, and long-lasting culinary treasures. For trustworthy gardening information, visit:
University of Arizona Cooperative Extension — Gardening, University of Alaska Fairbanks Extension — Gardening, University of Georgia Extension — Gardening, Louisiana State University AgCenter — Lawn & Garden and Mississippi State University Extension — Lawn & Garden. These organizations provide expert, research-based advice for gardeners at all levels.
Frequently Asked Questions
What is the best way to clean herbs before preserving?
You should gently rinse herbs under cool, running water if they have visible dirt. Then, crucially, pat them thoroughly dry with a clean kitchen towel or paper towels. You must remove all surface moisture, especially for drying and making herb salts or infused oils.
Can I mix different herbs when making herb salts or infused oils?
Absolutely! Experimentation is part of the fun. Combining complementary flavors like rosemary and garlic, or basil and oregano, creates unique blends. Always ensure you follow the safety guidelines for each method, especially ensuring all herbs are completely dry before infusion into oil.
How long do these preserved items last?
Properly dried herb salts and infused oils (made with dry ingredients) can last for several months to a year when stored in a cool, dark place. Quick pickles, being refrigerator-stored, typically last 2-3 weeks, sometimes up to 2-3 months. Frozen compound butters maintain quality for several months.
What if my herbs are not fully dry for herb salt?
If your herb salt mixture feels at all damp or clumps together, it is not fully dry. Spread it out again on a baking sheet and continue air drying, stirring daily, until it is completely dry and free-flowing. Storing insufficiently dried herb salt will lead to mold growth.
Is it safe to use olive oil for infused oils?
Yes, you can use olive oil. However, the critical safety factor for infused oils is the dryness of the ingredients you infuse into it. Always use thoroughly dried herbs, garlic, or peppers to prevent the risk of botulism. If you use fresh ingredients, you must refrigerate the oil and consume it within 7-10 days.
Embrace the satisfaction of extending your small garden’s bounty with these easy and flavorful preservation techniques. You transform your leftover garden herbs and small amounts of vegetables into culinary gems, ready to brighten your meals year-round. Enjoy the deep satisfaction of savoring your own end of season harvest, long after the last warm day.
Disclaimer: This article is for informational purposes only and is not a substitute for professional gardening advice. Always consult local extension services or horticulture experts for region-specific guidance.

Leave a Reply