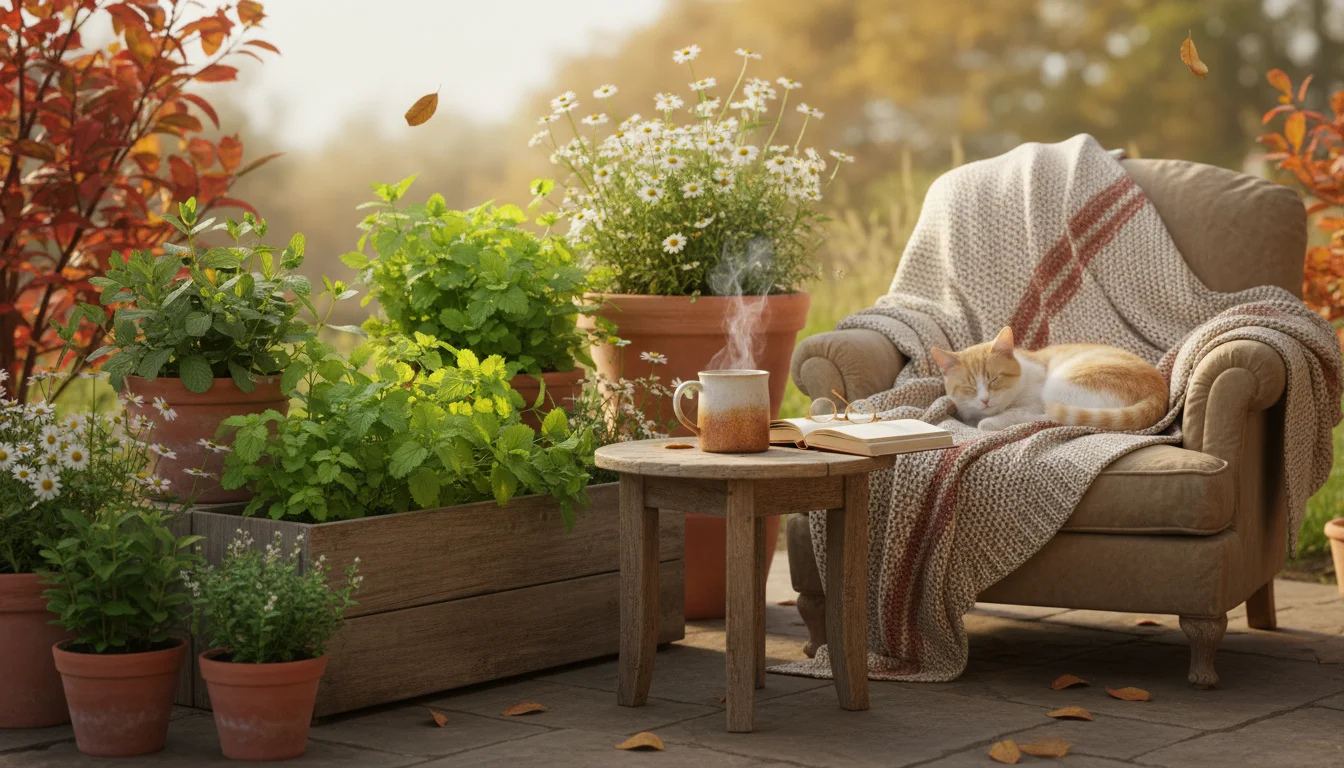
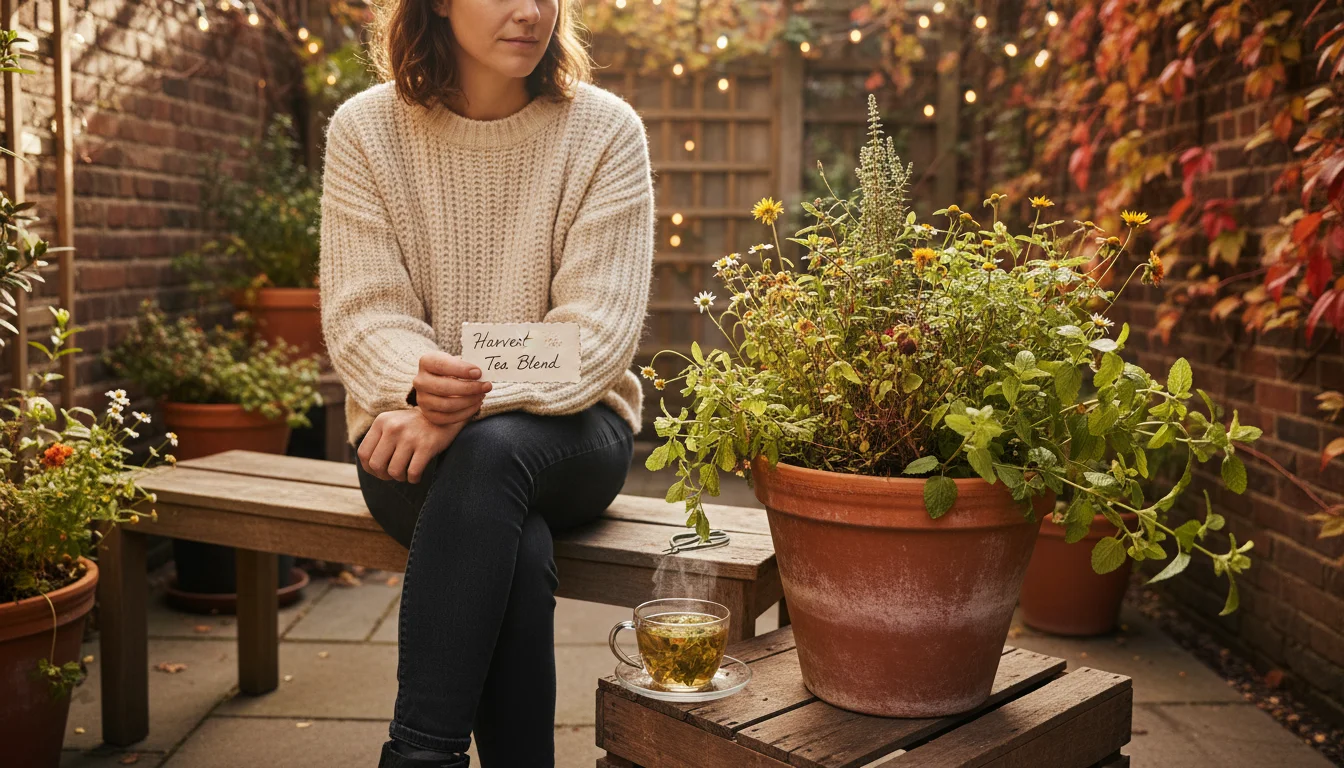
Transforming your small outdoor space into a sanctuary of warmth and flavor becomes a delightful reality with an autumnal ‘tea garden’. Even if you have just a balcony, a compact patio, or a tiny yard, you possess ample room to cultivate fragrant, comforting herbs. Imagine stepping outside on a crisp fall morning, plucking fresh leaves, and brewing a soothing cup of tea right from your own pots. This guide empowers you to establish a thriving fall herb garden, focusing on three incredibly easy-to-grow plants: Chamomile, Lemon Balm, and Mint. These resilient herbs flourish in containers, offer bountiful harvests, and provide the perfect ingredients for delicious, homemade autumnal beverages. You will discover practical strategies for growing tea at home, ensuring your small space yields maximum enjoyment with minimal effort.
If you enjoy spirited drinks as well as infusions, you can also grow a cocktail garnish garden to elevate your evening drinks with these same hardy herbs.
If you find yourself running out of outdoor room, you can also create a windowsill apothecary for year-round indoor herbal brewing.
Autumn’s Embrace: Why a Fall Tea Garden on Your Patio?
Autumn brings a unique beauty and a subtle shift in our routines. The vibrant colors, cooler air, and longer evenings invite reflection and coziness. Establishing a fall herb garden on your patio seamlessly integrates this seasonal charm into your daily life. Your small space becomes a productive hub, offering fresh ingredients for comforting teas. Consider the tangible benefits: fresh ingredients, stress reduction, and a connection to nature, even in urban settings.
First, fresh ingredients elevate your tea experience. Store-bought dried herbs often lack the potency and nuance of freshly picked ones. Growing your own ensures you access the freshest, most flavorful leaves and blossoms. You control the growing conditions, guaranteeing an organic, pesticide-free harvest. This direct access to quality ingredients significantly enhances the taste and efficacy of your homemade teas. Imagine the satisfaction of brewing a mug of chamomile tea knowing you nurtured every blossom from seed to cup.
Second, gardening itself offers significant mental health benefits. The act of tending to plants, watching them grow, and harvesting their bounty provides a calming, meditative escape. Studies consistently link gardening with reduced stress and improved mood. For those in limited spaces, a container garden brings these benefits directly to your doorstep. You engage your senses, observing the delicate petals of chamomile, inhaling the zesty aroma of lemon balm, and feeling the velvety texture of mint leaves. This sensory engagement grounds you, offering a simple yet profound way to unwind after a busy day. Your tea garden becomes a personal wellness retreat.
Third, a fall herb garden maximizes the utility of your small space throughout the year. Many popular herbs, like the ones we explore today, thrive in cooler temperatures or tolerate light frosts, extending your gardening season well beyond summer. This efficient use of space means your balcony or patio remains a vibrant, productive area, providing continuous enjoyment and harvest. You transform a typically inactive area into a source of continuous supply for your tea habit, demonstrating the power of compact gardening. This strategy helps you make the most of every square inch.
Finally, cultivating herbs for tea aligns perfectly with a low-maintenance gardening philosophy. These specific herbs generally demand less intensive care than many vegetables or flowers. They are forgiving of occasional neglect and rarely require complex pruning or intricate support structures. Their resilience makes them ideal candidates for beginners or those seeking maximum reward for minimal effort. You invest a small amount of time and energy and receive a continuous return in delicious, home-grown teas.
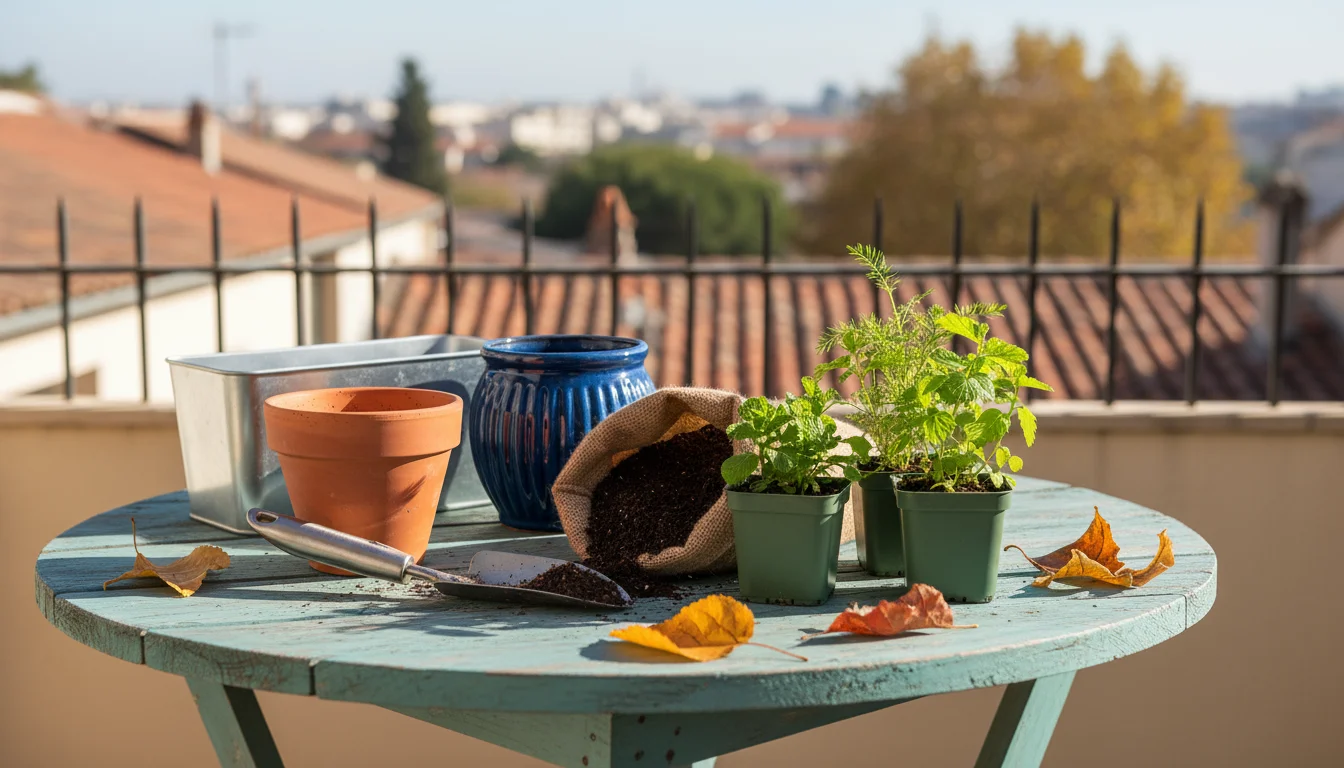
Selecting the Right Containers and Soil for Your Herbs
The foundation of any successful container garden lies in choosing appropriate containers and providing high-quality soil. For your autumnal tea garden, these choices become even more critical, impacting drainage, nutrient availability, and root health. Making smart selections now saves you considerable effort and prevents common problems later.
If your patio receives limited sunlight as the seasons change, prioritize shade-tolerant plants that can handle shorter, darker days.
Containers:
Selecting the right containers is paramount for happy, healthy herbs. Your choices influence moisture retention, root development, and overall plant vigor. Here’s what to consider:
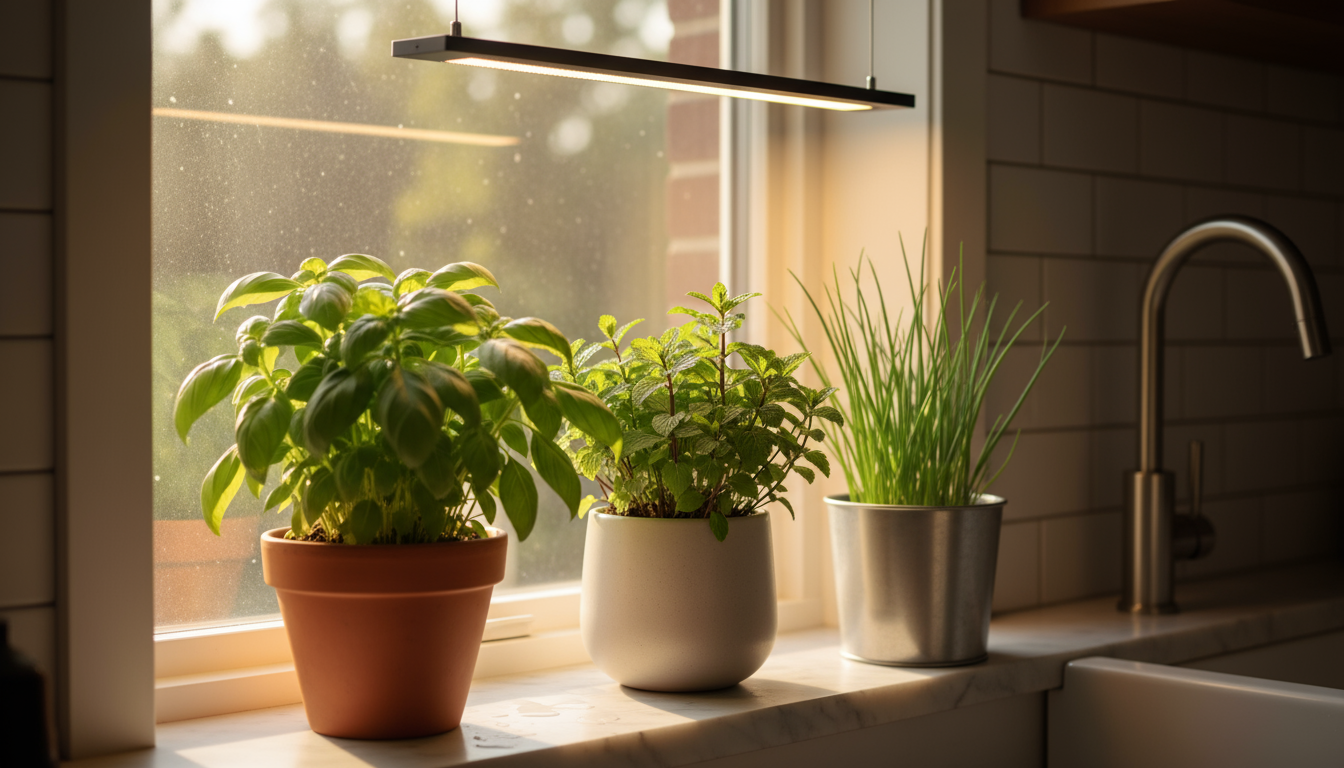
- Size Matters: Most herbs, especially those we discuss, appreciate room for their roots to spread. Chamomile and Lemon Balm benefit from pots at least 8-10 inches in diameter and depth. Mint, a vigorous grower, truly thrives in its own dedicated container, ideally 10-12 inches across, to prevent it from overwhelming other plants. Larger pots also dry out less quickly, reducing your watering frequency.
- Drainage Holes are Non-Negotiable: This is the single most important feature. Without adequate drainage, water accumulates, suffocating roots and leading to root rot, a common killer of container plants. Ensure every pot has at least one, preferably several, drainage holes at the bottom. If a decorative pot lacks holes, use it as a cachepot (an outer pot) and place your herb in a slightly smaller, well-draining inner pot.
- Material Options:
- Terracotta (Clay): These breathable pots allow air circulation to the roots and wick excess moisture from the soil, which is excellent for herbs that prefer slightly drier conditions. However, they dry out faster, requiring more frequent watering, especially in sunny spots.
- Plastic: Lightweight, inexpensive, and excellent at retaining moisture. Plastic pots are a practical choice, particularly if you travel or forget to water occasionally. Choose thicker, UV-resistant plastic to prevent brittleness over time.
- Glazed Ceramic: These offer good moisture retention like plastic but provide a more aesthetically pleasing appearance. Ensure they have proper drainage holes.
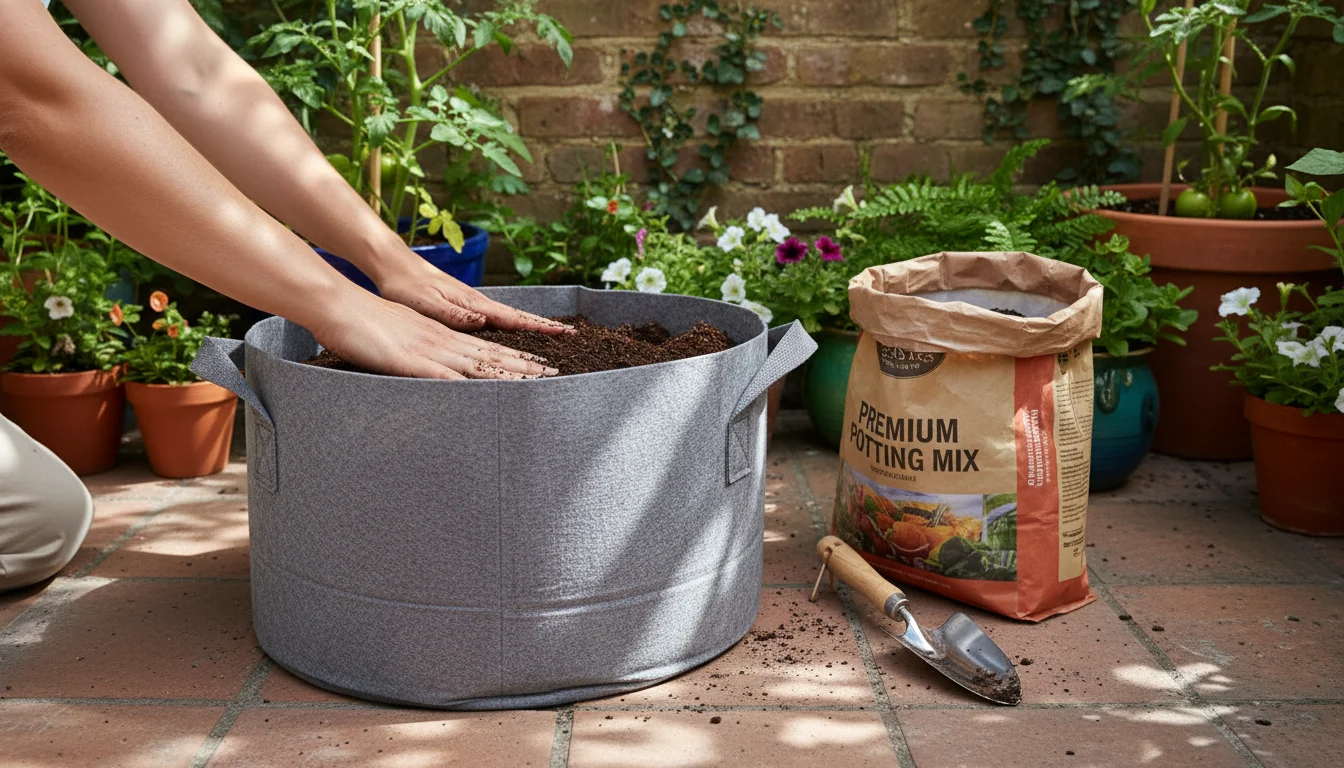
- Fabric Grow Bags: Increasingly popular, these bags offer superior aeration, promoting a healthy root system and preventing root circling. They are lightweight, flexible, and often made from recycled materials. Fabric bags are excellent for mint, as they naturally air-prune roots, helping to control its spread. Consider the overall look of your patio. Grouping different container materials or colors can create visual interest. For instance, you might use terracotta for chamomile, plastic for lemon balm, and a fabric bag for mint, balancing aesthetics with functional needs.
Soil:
The right potting mix provides essential nutrients, aeration, and water retention for your herbs. Avoid using garden soil directly in containers. Garden soil compacts easily in pots, inhibiting drainage and air flow.
- Choose a High-Quality Potting Mix: Look for a sterile, lightweight potting mix specifically formulated for containers. These mixes contain ingredients like peat moss or coco coir for water retention, perlite or vermiculite for drainage and aeration, and sometimes a slow-release fertilizer. This combination creates an ideal environment for root growth.
- Enhance Drainage: Even good potting mixes benefit from a little extra help. You can amend your potting mix with additional perlite or small gravel (about 10-20% of the total volume) to improve drainage further. This is particularly beneficial for herbs like chamomile, which dislikes soggy feet. Ensure this amendment is thoroughly mixed into the potting medium.
- Nutrient Boost (Optional): Many potting mixes include a starter fertilizer. If yours does not, or if you plan for a long growing season, consider incorporating a small amount of organic slow-release granular fertilizer at planting time. Alternatively, you can plan to feed your herbs with a diluted liquid organic fertilizer every 2-4 weeks during their active growing season. Do not overfertilize, as this can lead to lush leaf growth but diminished flavor in culinary herbs.
Understanding how water moves through your soil, known as drainage, prevents many common plant problems. When you water, excess moisture should flow freely from the bottom of the pot. If water sits on the surface or drains slowly, your soil is too dense, or your drainage holes are insufficient. Correcting this quickly protects your plant’s roots.
Meet Your Tea Trio: Chamomile, Lemon Balm, and Mint
Your autumnal tea garden will thrive with the inclusion of Chamomile, Lemon Balm, and Mint. These three herbs distinguish themselves with their ease of care, adaptability to containers, and delightful contributions to homemade teas. They are among the best herbs to plant in fall for tea, offering both flavor and comfort as the seasons change.
While herbal infusions are wonderful, you can also grow true tea indoors by planting Camellia sinensis for a caffeinated addition to your collection.
Many tea herbs are actually winter-hardy perennials that will go dormant in the winter and return to your patio pots year after year.
1. Chamomile (Matricaria chamomilla): The Calming Blossom
Known for its delicate, daisy-like flowers, Chamomile is a classic choice for relaxing herbal teas. It produces a mild, apple-like fragrance and flavor, perfect for an evening unwind. Chamomile, particularly German Chamomile (Matricaria chamomilla), grows as an annual in most climates, completing its life cycle within one season. However, you can succession plant it, meaning you sow seeds every few weeks, to ensure a continuous harvest of blossoms well into autumn. Its compact growth habit makes it perfectly suited for containers. You will find it a truly rewarding plant to cultivate.
2. Lemon Balm (Melissa officinalis): The Uplifting Leaf
Lemon Balm, a member of the mint family, offers a bright, lemony fragrance and flavor. Its cheerful scent has uplifting qualities, making it a wonderful addition to morning or afternoon teas. This perennial herb is incredibly robust and easy to grow, often self-seeding prolifically if allowed. For container care, it requires minimal intervention, rewarding you with abundant, verdant leaves. Lemon balm’s resilience and vigorous growth make it an ideal candidate for even novice gardeners, providing a reliable source of fresh leaves for your tea blends.
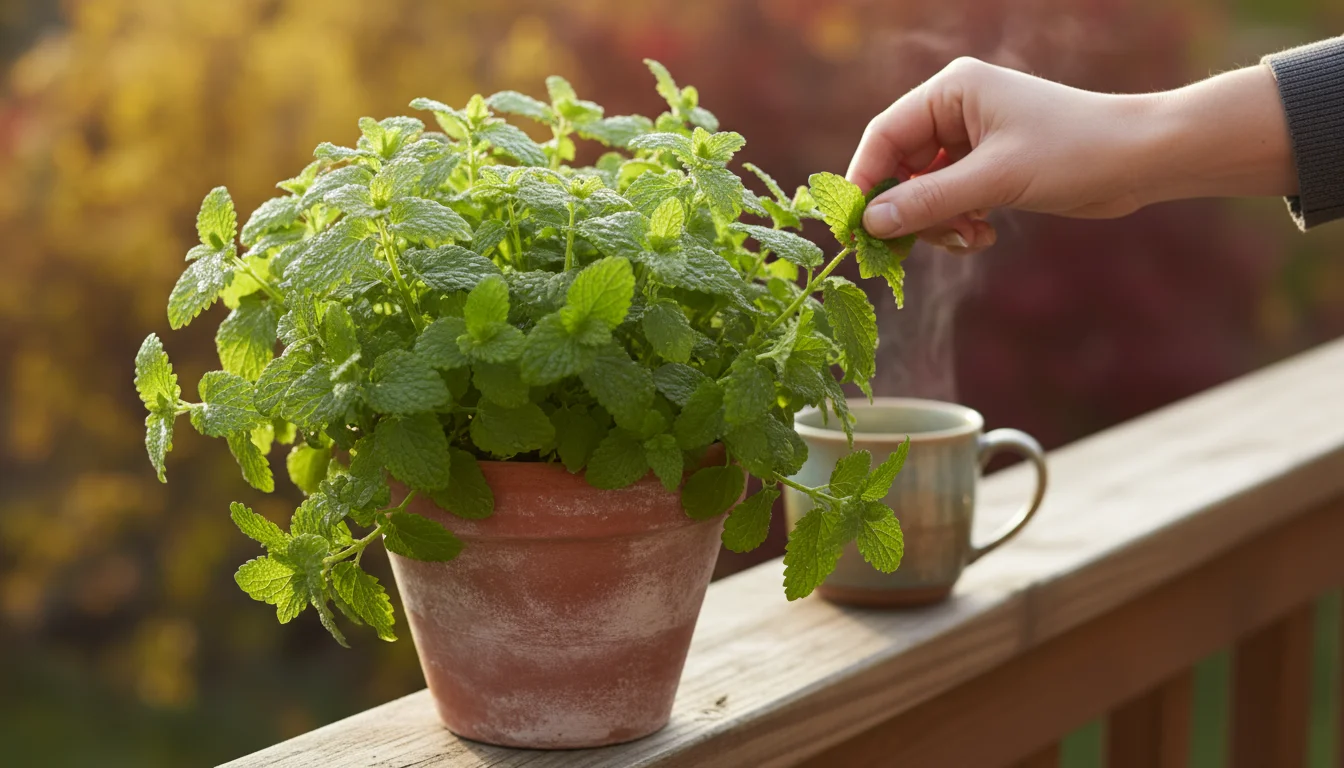
3. Mint (Mentha spp.): The Invigorating Classic
Mint encompasses a vast family of aromatic herbs, with popular varieties including Peppermint (Mentha x piperita) and Spearmint (Mentha spicata). Each offers its own unique twist on the classic refreshing mint flavor. Mint is a perennial known for its vigor, and it absolutely thrives in container gardening. Its invigorating flavor profile makes it a versatile ingredient for tea, hot or cold. While its growth habit demands attention, primarily by containing its spread, its low-maintenance nature and prolific leaf production make it a cornerstone of any herbal tea garden.
Together, these three herbs form a harmonious collection for your autumnal tea garden. Chamomile provides a soothing, floral base; Lemon Balm introduces a bright, citrusy note; and Mint delivers a crisp, invigorating freshness. You gain a versatile palette of flavors, allowing you to create personalized tea blends tailored to your mood and preferences.
Herb Focus 1: Cultivating Soothing Chamomile in Containers
Growing chamomile in a pot is surprisingly straightforward, offering you a steady supply of these delicate, calming blossoms. As an annual, German Chamomile (Matricaria chamomilla) completes its life cycle in one season, but its rapid growth means you can enjoy multiple harvests.
- Seeds or Starts: You can sow chamomile seeds directly into your containers or purchase small plant starts from a nursery. Seeds are tiny, so mix them with a pinch of sand before scattering them thinly over moist potting mix. Gently press them down; do not cover them deeply, as they require light for germination. Keep the soil consistently moist during this phase. Germination typically occurs within 7-14 days.
- Timing: For an autumnal harvest, start chamomile seeds in late summer or early fall. In regions with mild winters, you may get a continuous flush of flowers. You can also succession plant, sowing new seeds every 3-4 weeks to ensure a continuous supply of fresh blossoms.
- Sunlight: Chamomile thrives in full sun, meaning at least 6 hours of direct sunlight per day. Place your container in the brightest spot on your patio. While it tolerates partial shade, you will observe fewer flowers and less vigorous growth.
- Watering: Consistent moisture is key, especially during flowering, but soggy conditions are detrimental. Water thoroughly when the top inch of soil feels dry to the touch. Ensure proper drainage from the bottom of your pot. During cooler autumn weather, your watering frequency will naturally decrease compared to summer. Do not let the soil completely dry out.
- Fertilizing: Chamomile does not require heavy feeding. If your potting mix contains a slow-release fertilizer, you may not need to fertilize at all. Otherwise, apply a diluted, balanced liquid organic fertilizer (e.g., 5-5-5 or similar) every 4-6 weeks during its active growth and flowering period. Over-fertilizing can lead to leggy plants with fewer flowers.
- Pest and Disease Management: Chamomile is generally resilient. Occasionally, you might encounter aphids or spider mites. Inspect your plants regularly. If you spot pests, a strong spray of water or an application of insecticidal soap typically resolves the issue. Ensure good air circulation to prevent fungal issues, particularly in humid conditions.
- When to Harvest: Harvest chamomile flowers when they are fully open, but before the petals start to droop or turn brown. The ideal time is usually in the morning after the dew has dried but before the intense heat of midday.
- How to Harvest: Gently pinch or snip off the entire flower head, leaving a small stem. Harvesting regularly encourages the plant to produce more blooms, extending your harvest period significantly.
- Drying: Spread the fresh flower heads in a single layer on a clean screen, parchment paper, or a mesh drying rack in a warm, dry, well-ventilated area, out of direct sunlight. They typically dry in 1-2 weeks. Once completely dry (they will feel brittle), store them in an airtight container in a cool, dark place. This ensures they retain their fragrance and potency for future tea enjoyment.
By following these simple guidelines, you will successfully grow chamomile in a pot, securing a delightful, soothing ingredient for your autumnal tea blends.
Herb Focus 2: Growing Refreshing Lemon Balm for Your Brew
Lemon Balm (Melissa officinalis) is an absolute powerhouse for a container herb garden, especially if you seek a refreshing, low-maintenance plant. Its vibrant lemon scent and flavor make it a wonderful addition to any tea. The plant’s robust nature ensures a generous harvest throughout the fall and beyond. You will find that lemon balm container care is surprisingly simple.
- Seeds or Cuttings: You can grow lemon balm from seed, though germination can be slow (up to 2-3 weeks). For quicker results, purchase a small plant from a nursery or propagate from cuttings. To take a cutting, snip a 4-6 inch stem just below a leaf node, remove the lower leaves, and place it in a glass of water or moist potting mix. Roots typically form within a few weeks.
- Timing: Plant lemon balm in spring or early fall. For an autumn tea garden, planting in late summer allows it to establish before cooler weather fully sets in. As a perennial, it returns year after year.
- Sunlight: Lemon balm prefers full sun to partial shade. In hotter climates, a spot with morning sun and afternoon shade prevents the leaves from scorching. In cooler autumn weather, it appreciates as much sun as you can provide, ideally 4-6 hours daily.
- Watering: Keep the soil consistently moist but never waterlogged. Allow the top inch of soil to dry out between waterings. Lemon balm wilts dramatically when thirsty, signaling its need for water. However, it usually perks up quickly once rehydrated. Excellent drainage is crucial for its long-term health.
- Fertilizing: Lemon balm is not a heavy feeder. If your potting mix contains slow-release fertilizer, that may suffice for the season. Otherwise, apply a diluted, balanced liquid organic fertilizer every 6-8 weeks during active growth. Too much fertilizer can reduce the intensity of its essential oils, diminishing its signature lemon scent and flavor.
- Pruning and Maintenance: Lemon balm grows vigorously. Regular harvesting encourages bushier growth and prevents the plant from becoming leggy. If you notice it getting too big, simply prune back stems by about one-third. You can also pinch back the growing tips to encourage branching. If you do not want it to self-seed, snip off flower stalks before the seeds mature. This helps direct the plant’s energy into leaf production.
- Pest and Disease Management: Lemon balm is generally pest-free, thanks to its strong scent. Occasionally, you might spot aphids, but these are easily managed with a strong spray of water. Fungal diseases are rare, provided you ensure good air circulation and avoid overwatering.
- When to Harvest: Harvest lemon balm leaves at any time once the plant is established. The flavor is most potent before the plant flowers. For an autumnal harvest, you can continue to pick leaves until the first hard frost.
- How to Harvest: Snip off individual leaves or entire stems as needed. For larger harvests, cut back up to one-third of the plant. This stimulates new growth.
- Drying: Spread fresh lemon balm leaves in a single layer on a clean screen or paper towel in a warm, dry, well-ventilated area away from direct sunlight. They dry relatively quickly, usually within a week. Once crisp, strip the leaves from the stems and store them in an airtight container in a cool, dark place. Dried lemon balm retains its lovely fragrance for many months, perfect for a cozy fall tea.
Growing lemon balm in containers offers an effortless way to enjoy its delightful aroma and flavor, making it a valuable asset for your home-grown tea blends.

Herb Focus 3: Mastering Mint for Flavorful Fall Teas
Mint is practically synonymous with ease of growth, making it an excellent candidate for your autumnal tea garden. Its invigorating aroma and diverse flavor profiles make it incredibly versatile for brewing tea at home. However, its enthusiastic growth habit requires strategic container care to keep it thriving without becoming invasive. Mastering mint in a pot ensures you enjoy its benefits year after year.
Since mint is such a vigorous grower, it is one of the easiest plants to take fall cuttings from, allowing you to multiply your garden for free.
- Purchasing Plants: The easiest way to start mint is by purchasing a small plant from a nursery. Look for varieties like Peppermint (Mentha x piperita) or Spearmint (Mentha spicata) for classic tea flavors. Chocolate Mint and Orange Mint also offer unique aromatic experiences.
- Cuttings: Mint roots exceptionally easily from cuttings. Snip a 4-6 inch stem, remove the lower leaves, and place it in water. Roots often appear in just a few days. Once rooted, transplant to a pot.
- Timing: Plant mint in spring or early fall. It quickly establishes itself, providing ample leaves for autumn harvesting.
- Sunlight: Mint prefers full sun to partial shade, ideally 4-6 hours of direct sunlight daily. In very hot climates, partial shade during the hottest part of the day prevents leaf scorch. For fall, maximize its sun exposure.
- Watering: Mint loves consistent moisture. Keep the soil evenly moist, but ensure good drainage to prevent waterlogging. Allow the top inch of soil to dry out slightly before watering again. During cooler autumn months, your watering schedule will naturally decrease.
- The Container Strategy: This is critical for mint. Mint spreads aggressively via underground runners. In the ground, it can quickly take over. In a container, it remains contained, but still benefits from a larger pot (at least 10-12 inches in diameter) to give its roots room. Consider planting mint in a fabric grow bag, which naturally air-prunes its roots, further preventing it from becoming root-bound and promoting healthier growth. Never plant mint directly with other herbs in the same container unless you want it to dominate.
- Fertilizing: Mint is not a heavy feeder. If your potting mix has slow-release fertilizer, that may be enough. Otherwise, a diluted, balanced liquid organic fertilizer applied every 6-8 weeks during the growing season will suffice. Over-fertilizing can reduce the concentration of essential oils, impacting flavor.
- Pruning and Maintenance: Regular pruning is essential for vigorous, bushy mint plants. Harvest frequently, pinching back growing tips to encourage branching. If your mint plants flower, snip off the flower stalks. This diverts the plant’s energy into producing more flavorful leaves rather than seeds. Mint can become leggy and woody over time; a hard prune back to a few inches above the soil line in late summer or early fall revitalizes the plant. You can also divide and repot your mint every 1-2 years to rejuvenate it and prevent it from becoming root-bound.
Pest and Disease Management:
Mint is generally robust. Aphids or spider mites occasionally appear, but a strong spray of water or insecticidal soap typically resolves the issue. Rust, a fungal disease, can occur in humid conditions. Ensure good air circulation around your plants to help prevent this. If rust appears, remove affected leaves and ensure adequate spacing.
- When to Harvest: Harvest mint leaves at any time once the plant is established. For the best flavor, harvest before flowering. You can continue to harvest leaves throughout the autumn until hard frosts cause the plant to die back to the ground (it will regrow in spring).
- How to Harvest: Snip off individual leaves or entire stems as needed. For a larger harvest, cut stems back by about one-third. Regular harvesting encourages the plant to produce more foliage.
- Drying: Spread fresh mint leaves in a single layer on a clean screen or paper towel in a warm, dry, well-ventilated area away from direct sunlight. They dry quickly, often in less than a week. Once crisp, strip the leaves from the stems and store them in an airtight container in a cool, dark place. Dried mint retains its refreshing qualities, perfect for a warming autumn brew.
By providing mint with its own space and consistent care, you will enjoy an abundance of flavorful leaves for your tea garden, adding a wonderful, invigorating dimension to your homemade blends.
Planting Your Autumnal Tea Garden: A Step-by-Step Guide
Successfully planting your autumnal tea garden involves more than just putting plants in pots. It requires careful preparation and execution to ensure your herbs establish well and thrive. Follow these steps to create a productive and beautiful container fall herb garden on your patio. This guide also covers essential tips for how to grow chamomile in a pot and ensure robust lemon balm container care from the start.
Step-by-Step Planting Process:
- Selected containers with drainage holes.
- High-quality potting mix.
- Chamomile seeds/starts, Lemon Balm plants, Mint plants.
- Small trowel or scoop.
- Watering can.
- Gardening gloves (optional).
- Clean any used pots thoroughly with a scrub brush and a diluted bleach solution (1 part bleach to 9 parts water) to kill any lingering pathogens. Rinse well.
- If using new terracotta pots, soak them in water for 15-30 minutes. This prevents them from wicking moisture from your soil immediately after planting.
- Place a small piece of mesh screen or a coffee filter over the drainage holes. This allows water to escape but keeps the soil from washing out. Avoid using broken pot shards or rocks, as they can impede drainage.
- Add a layer of potting mix to the bottom of each container, filling it about one-third to halfway.
- Gently firm the soil, but do not compact it too densely. You want a balance of support and aeration for the roots.
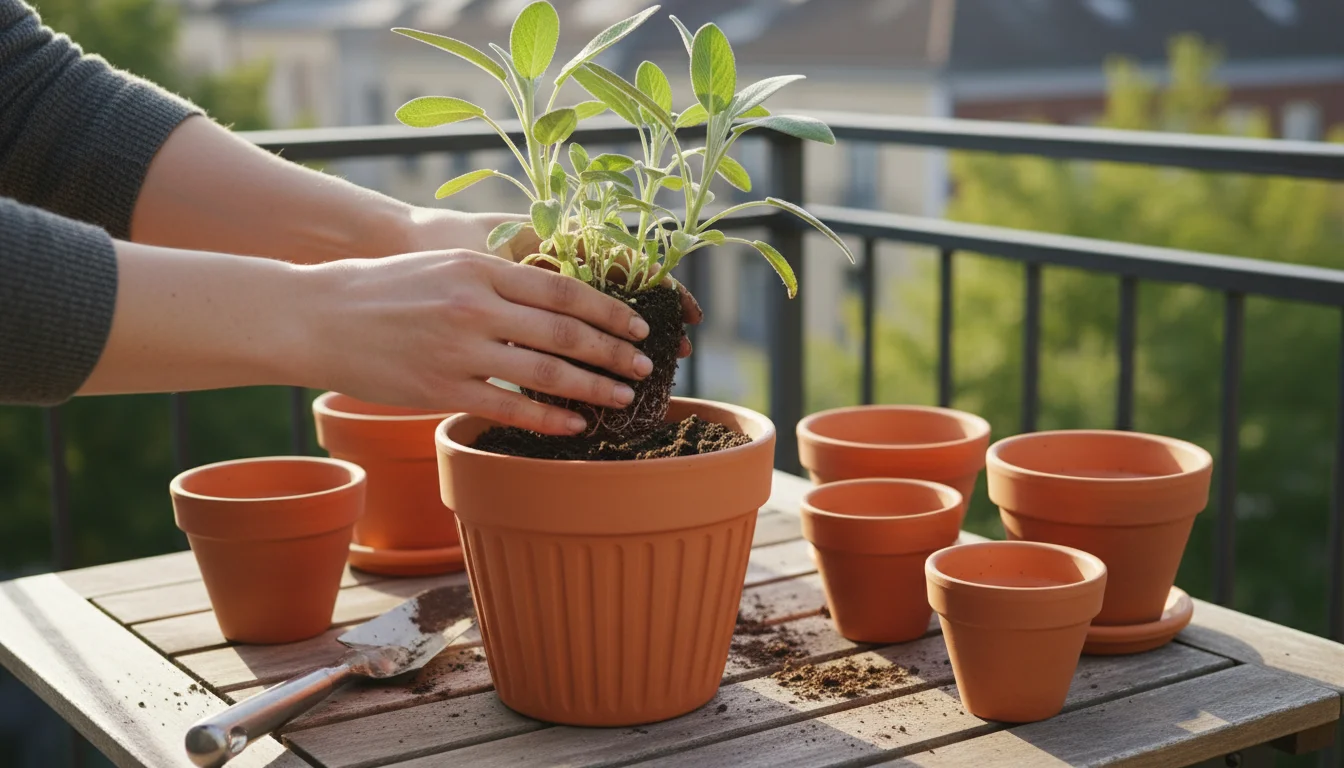
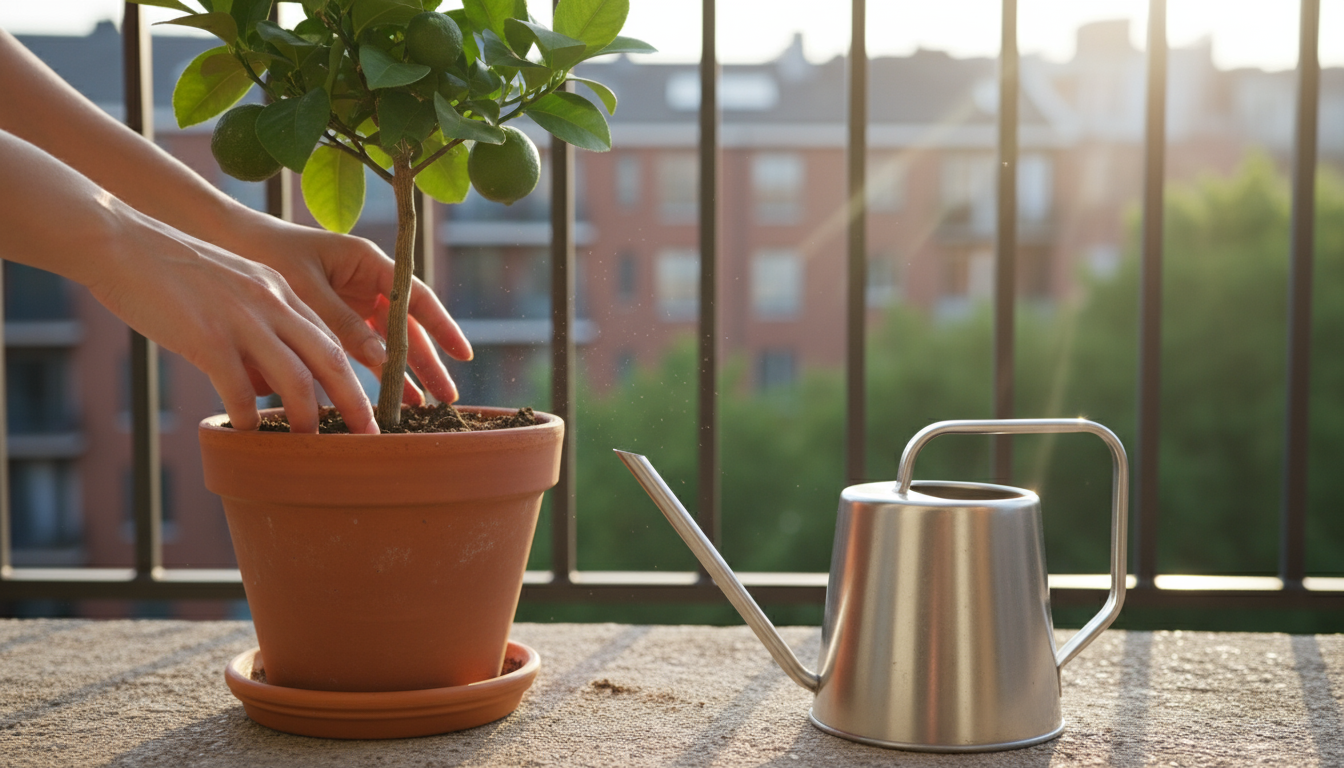
- For plant starts: Carefully remove the herb plant from its nursery pot. Gently loosen any circling roots at the bottom with your fingers. This encourages the roots to grow outwards into the new potting mix.
- Place the plant in its new container, ensuring the top of the root ball is about 1 inch below the rim of the pot. This leaves space for watering.
- For seeds (chamomile): Scatter seeds thinly over the moist potting mix. Gently press them onto the surface; do not bury them deeply as they need light to germinate. Follow specific seed packet instructions for depth.
5. Add More Potting Mix:
* Fill the remaining space around the plant’s root ball with potting mix, gently firming it around the base of the stem. Again, leave about 1 inch of space between the soil surface and the rim of the pot.
- Water your newly planted herbs deeply until water flows freely from the drainage holes. This settles the soil around the roots and eliminates air pockets.
- For seeded containers, use a gentle spray to avoid dislodging the tiny seeds.
7. Initial Placement:
* Place your newly planted containers in their designated sunny spots on your patio. For the first few days, particularly if transplanting, provide a slightly shaded location to help plants recover from transplant shock before moving them to full sun.
Key Tips for Success:
- Patience with Seeds: Chamomile takes time to germinate. Maintain consistent moisture and warmth.
- Mint’s Solo Act: Always plant mint in its own container. Its aggressive root system will outcompete other herbs for space and nutrients.
- Grouping for Aesthetics and Function: Group your containers together. This can create a microclimate, benefiting plants in terms of humidity, and also makes watering more efficient. Visually, a cluster of pots appears more substantial and inviting than scattered individual containers.
- Labeling: Especially if you plant multiple varieties of mint or similar-looking herbs, use plant labels. This prevents confusion later when identifying which herb to harvest for a specific tea.
By following these planting steps, you lay a strong foundation for a vibrant and productive autumnal tea garden. You maximize the chances of successful growth for all your herbs, ensuring you enjoy fresh, home-grown tea ingredients throughout the cooler months.
Harvesting, Drying, and Brewing Your Homegrown Tea Herbs
The ultimate reward for your gardening efforts is harvesting your fresh herbs and transforming them into delicious, comforting teas. Knowing the right techniques for harvesting, drying, and brewing ensures you capture the peak flavor and beneficial properties of your homegrown chamomile, lemon balm, and mint. This is where growing tea at home truly shines.
- Timing: The best time to harvest most herbs for tea is in the morning, after the dew has evaporated but before the sun’s intense heat starts to dissipate their aromatic oils.
- Method: Use clean, sharp scissors or pruners. This minimizes damage to the plant and ensures clean cuts.
- Regular Harvesting: Consistent harvesting encourages your herbs to produce more foliage. For chamomile, this means more flowers. For lemon balm and mint, more leaves. Avoid removing more than one-third of the plant at any one time, allowing it sufficient foliage for photosynthesis and recovery.
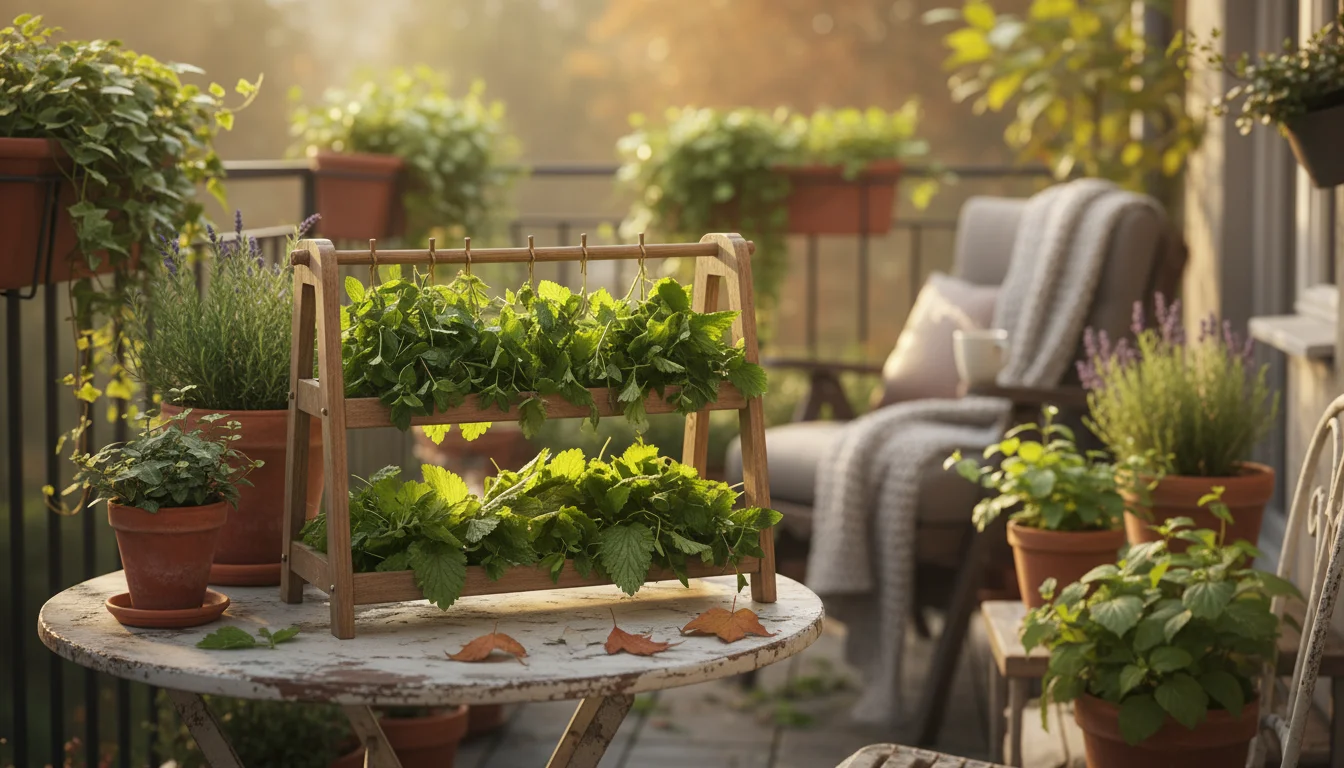
- Air Drying (Ideal for Leaves):
- Gather bundles of mint or lemon balm stems, tying them loosely with twine.
- Hang them upside down in a warm, dry, well-ventilated room, away from direct sunlight. Direct sunlight fades color and reduces potency.
- Alternatively, spread individual leaves in a single layer on screens, parchment paper, or mesh drying racks. Ensure good air circulation around each leaf.
- Leaves are completely dry when they feel brittle and crumble easily. This usually takes 1-2 weeks depending on humidity.
- Drying Chamomile Flowers:
- Spread harvested chamomile flowers in a single layer on a clean screen or paper towel.
- Place them in a warm, dry, well-ventilated area, out of direct sunlight.
- Flowers are dry when they feel papery and brittle, typically within 1-2 weeks.
- Storage: Once thoroughly dry, strip leaves from stems (if air-drying bundles) and store them whole or lightly crushed. Store dried herbs in airtight containers (glass jars are excellent) in a cool, dark place. Label your containers with the herb name and date. Properly stored dried herbs retain their quality for 6-12 months.
- Fresh Herb Tea:
- For a single cup, use about 1-2 tablespoons of fresh, chopped herbs (or 5-10 fresh chamomile flowers).
- Place them in a tea infuser, French press, or directly in your mug.
- Pour hot (not boiling) water over the herbs. Boiling water can sometimes scald delicate herbs.
- Steep for 5-10 minutes, depending on your desired strength. Mint brews quickly; chamomile and lemon balm can steep longer for stronger flavor.
- Strain out the herbs, sweeten if desired, and enjoy.
- Dried Herb Tea:
- Use about 1 teaspoon of dried herbs per cup. Dried herbs are more concentrated, so you need less.
- Follow the same brewing process as with fresh herbs.
- Steep time may be slightly shorter, around 3-7 minutes, as the flavors release more readily.
- Chamomile & Lemon Balm: A perfect calming blend. The floral notes of chamomile balance beautifully with the bright citrus of lemon balm, ideal for an evening drink.
- Mint & Lemon Balm: An invigorating and refreshing combination. Great for a morning pick-me-up or a digestive aid after a meal.
- Mint & Chamomile: A surprisingly delightful blend, combining the soothing qualities of chamomile with a gentle minty lift.
- Experimentation: Do not hesitate to combine these herbs in different ratios, or even add a slice of fresh ginger, a cinnamon stick, or a squeeze of lemon juice for added autumnal flavor.
By diligently harvesting, carefully drying, and mindfully brewing, you unlock the full potential of your autumnal tea garden, providing you with warmth and wellness throughout the cooler months.
Nurturing Your Herbs: Common Challenges and Sustainable Solutions
Even easy-to-grow herbs can present occasional challenges. Understanding common issues and adopting sustainable practices ensures your autumnal tea garden remains vibrant and productive. You proactively address problems, promoting long-term health for your herbs and minimizing environmental impact.
Common Challenges and Solutions:
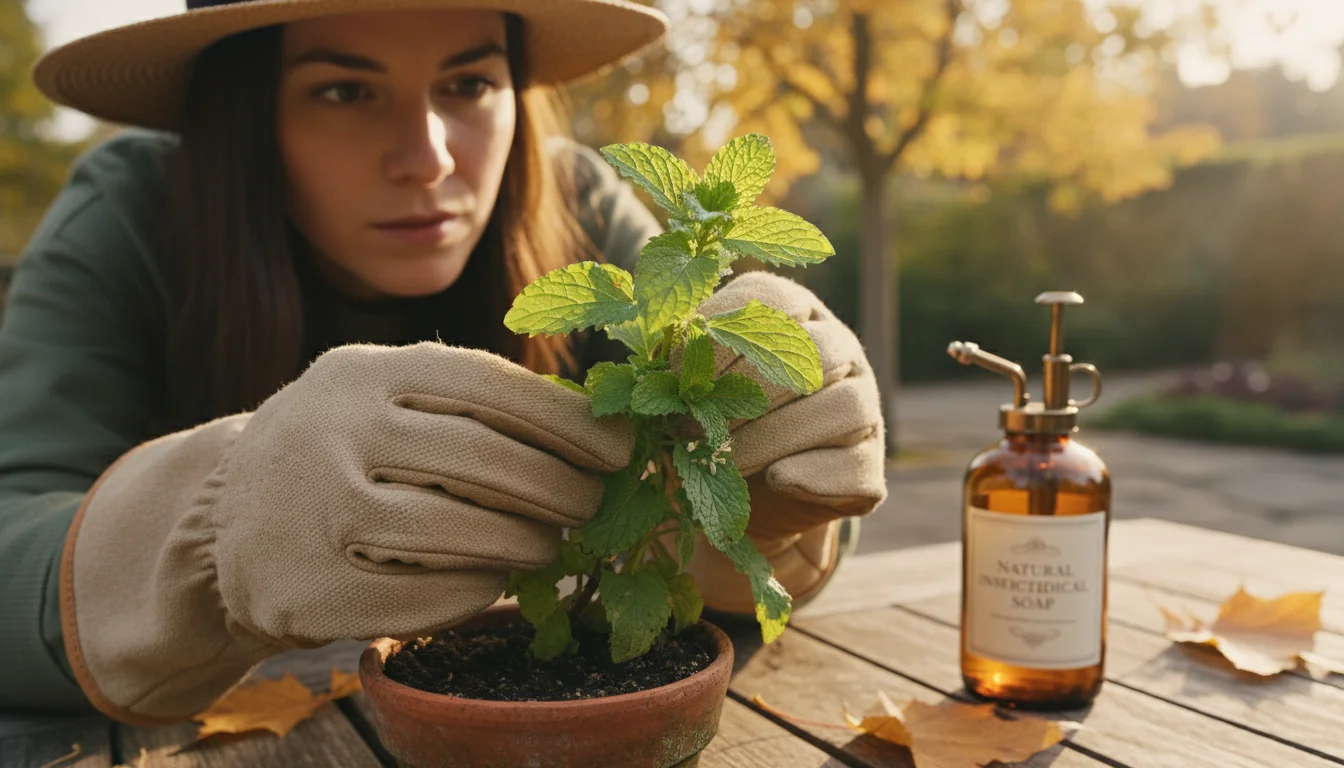
- Pests: * Aphids and Spider Mites: These tiny insects feed on plant sap, causing distorted leaves or yellowing. * Solution: Regularly inspect your plants, especially the undersides of leaves. For minor infestations, a strong spray of water from your hose often dislodges them. For more persistent issues, use an insecticidal soap, following product instructions carefully. Encourage beneficial insects like ladybugs by avoiding broad-spectrum pesticides.
- Diseases: * Fungal Issues (e.g., powdery mildew, rust): These appear as white powdery patches or rusty spots on leaves, often due to high humidity and poor air circulation. * Solution: Ensure proper plant spacing to allow air to flow between leaves. Water the soil, not the foliage, to keep leaves dry. Remove any affected leaves immediately and dispose of them (do not compost diseased material). Fungicidal sprays, like neem oil, can help control severe outbreaks.
- Watering Woes: * Underwatering: Plants wilt, leaves crisp, and soil pulls away from the pot edge. * Solution: Water thoroughly until water drains from the bottom. Establish a consistent watering schedule, but always check soil moisture (top inch dry) before watering again. * Overwatering: Leaves turn yellow, plant growth stunts, and soil smells musty. This often leads to root rot. * Solution: Ensure excellent drainage in your containers. Reduce watering frequency. If root rot is suspected, gently unpot the plant, trim off any mushy, dark roots, and repot with fresh, well-draining soil.
- Nutrient Deficiencies: * Yellowing Leaves: Often indicates a nitrogen deficiency, especially if older leaves yellow first. * Solution: While herbs are not heavy feeders, container plants deplete nutrients over time. Apply a diluted liquid organic fertilizer every 4-6 weeks during the growing season. Compost tea also provides a gentle nutrient boost.
Sustainable Practices for a Thriving Garden:
- Water Conservation: * Efficient Watering: Water early in the morning or late in the evening to minimize evaporation. Water the soil directly, not the leaves. * Mulch: Apply a thin layer of small pebbles or coco coir on top of your potting mix. This helps retain soil moisture, reduces evaporation, and regulates soil temperature. * Rainwater Harvesting: If feasible, collect rainwater in a small barrel. Rainwater lacks chlorine and minerals found in tap water, making it excellent for your plants.
- Composting (Small Scale): * Start a small worm bin or a countertop compost bin for kitchen scraps and spent herb clippings. This diverts waste from landfills and creates nutrient-rich compost for your plants. You return organic matter to the soil, improving its structure and fertility naturally.
- Natural Pest Control: * Companion Planting: While these herbs are typically in separate pots, the principle of companion planting can be applied. For instance, planting marigolds nearby can deter some pests from your patio area generally. * Hand-Picking: For larger pests like slugs (though less common in containers), physically remove them. * Homemade Sprays: Use diluted neem oil or insecticidal soap as a first line of defense against pests, avoiding harsh chemical pesticides.
- Seed Saving and Propagation: * Lemon Balm: Allow a few lemon balm flowers to go to seed, and collect them for next year’s planting. Lemon balm also propagates easily from cuttings. * Mint: Propagate mint from cuttings, a simple and free way to expand your tea garden or share with friends. * Chamomile: Collect chamomile seeds from spent flowers to sow for future seasons.
- Reusing and Repurposing: * Clean and reuse old plastic or terracotta pots. * Repurpose household items as planters, ensuring they have adequate drainage. This reduces waste and adds unique character to your garden.
By integrating these practical solutions and sustainable habits, you cultivate not just healthy herbs, but also a more environmentally conscious gardening practice. Your autumnal tea garden becomes a testament to mindful living and continuous growth.
Frequently Asked Questions
Can I grow these herbs indoors during winter?
Yes, you can bring these herbs indoors for the winter, especially in colder climates. Chamomile, lemon balm, and mint can thrive indoors if you provide sufficient light. Place them near a south-facing window, or supplement with a grow light for 12-14 hours a day. Ensure they receive good air circulation and monitor watering closely, as indoor environments can be drier. Mint can become quite leggy indoors, so regular pruning helps maintain its shape and encourages new growth.
How long do these herbs typically last in containers?
Chamomile is an annual, meaning it completes its life cycle in one growing season and then dies. You will need to replant it from seed or starts each year. Lemon Balm and Mint are perennials. In containers, they can last for several years, especially if protected from extreme winter cold (by bringing them indoors or providing mulch). You will likely need to repot them into slightly larger containers or divide them every 1-2 years to prevent them from becoming root-bound and to rejuvenate their growth. This also helps maintain vigor and productivity.
What if my patio gets very little sunlight?
While these herbs prefer full sun, they can tolerate partial shade (3-4 hours of direct sun), though their growth may be less vigorous and their yield slightly smaller. If your patio receives very limited direct sunlight, focus on plants that are more shade-tolerant. However, even with less sun, you will still enjoy some harvest from these herbs. Supplementing with a small grow light might be an option if you have an outlet nearby.
Can I combine these herbs in one larger container?
You can combine chamomile and lemon balm in a larger container, provided the container is sufficiently sized (at least 14-16 inches in diameter) and offers excellent drainage. Chamomile will grow and then die back, allowing lemon balm space. However, it is strongly recommended to keep mint in its own separate container. Mint’s aggressive root system spreads rapidly and will quickly choke out other plants if they share the same pot, even in a very large one. Its vigorous growth necessitates its own dedicated space to prevent it from becoming a problem.
For trustworthy gardening information, visit:
Mississippi State University Extension — Lawn & Garden, Arkansas Extension — Yard & Garden and Kansas State University Extension — Horticulture. These organizations provide expert, research-based advice for gardeners at all levels.
Disclaimer: This article is for informational purposes only and is not a substitute for professional gardening advice. Always consult local extension services or horticulture experts for region-specific guidance.


Leave a Reply