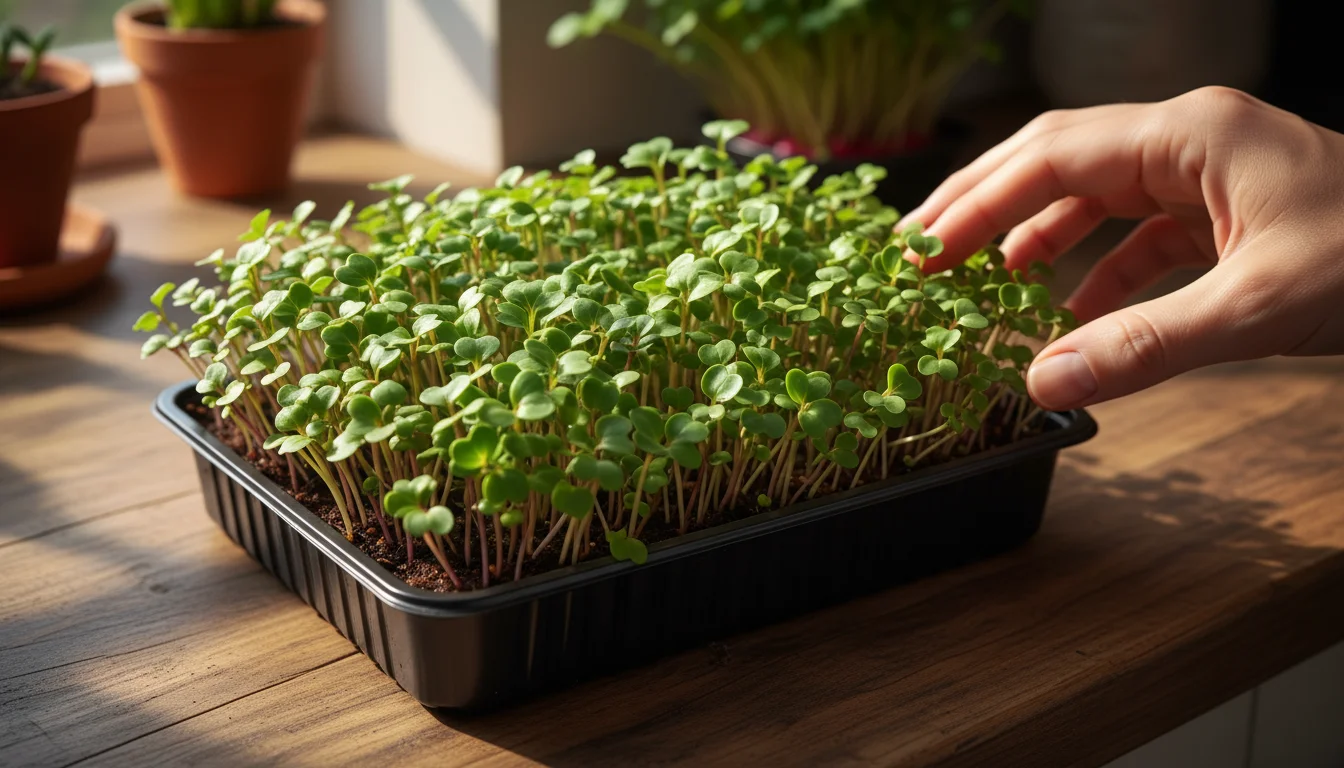
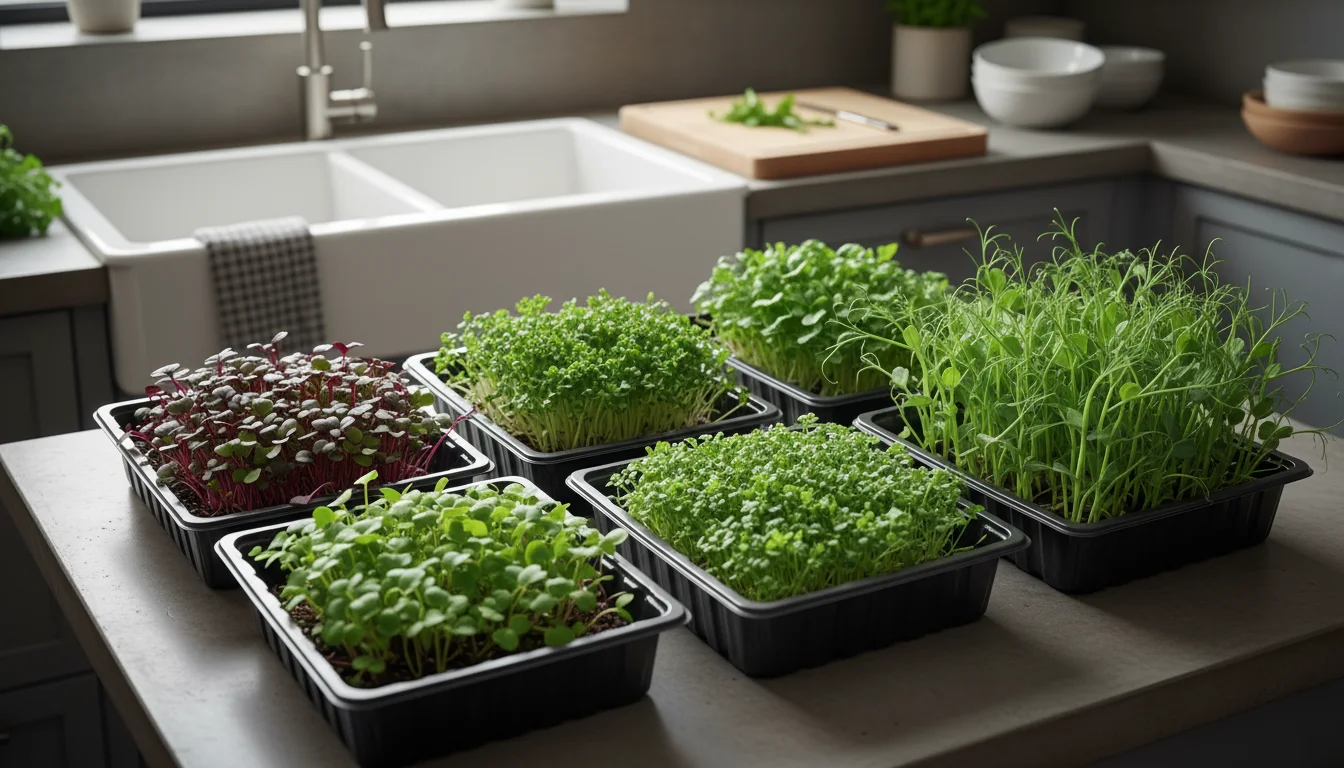
Imagine fresh, vibrant, nutrient-packed greens gracing your meals every day, harvested directly from your kitchen. This is not a distant dream for large garden owners. You can achieve this convenient, healthy reality right now by growing microgreens on your kitchen counter. This practice brings immediate freshness and powerful nutrition to your home, regardless of your garden size. Even with a small balcony or patio, your kitchen counter offers prime real estate for a thriving indoor garden.
This practice is a key component of successful winter indoor gardening, ensuring you can maintain a green thumb regardless of the weather outside.
Setting up a windowsill salad bar is one of the easiest ways to ensure a constant supply of greens during the colder months.
Microgreens are young vegetable greens, harvested when they are just a few inches tall, typically after their first true leaves appear. They are distinct from sprouts, which you eat root, seed, and all, and baby greens, which grow larger before harvest. These miniature powerhouses offer intense flavor and significantly higher concentrations of vitamins, minerals, and antioxidants compared to their mature counterparts. Research from the USDA National Nutrient Database highlights, for instance, that red cabbage microgreens can contain up to six times more Vitamin C than mature red cabbage. Growing these tiny treasures provides you with direct control over their quality and freshness, making them a superb addition to your small-space, low-maintenance gardening efforts.
For research-based guidance on edible gardening, visit UF/IFAS Gardening Solutions, Penn State Extension — Gardening, Missouri Botanical Garden and Kew Science — Plants of the World.
Disclaimer: This article is for informational purposes only and is not a substitute for professional advice. Consult local extension services for region-specific recommendations.
What Are Microgreens? Your Tiny Powerhouse Garden
Microgreens are edible young seedlings of various vegetables and herbs, harvested when they develop their cotyledon leaves and possibly the first pair of true leaves. These small plants are typically one to three inches tall when you cut them. They burst with flavor, ranging from spicy to earthy, and offer a concentrated dose of nutrients. You eat the stem and leaves of microgreens. This is a significant difference from sprouts, which you consume whole, root and all, often just a few days after germination, before any leaves fully develop. Baby greens, on the other hand, are harvested at a more mature stage, after growing for several weeks, and they usually become part of a larger salad mix.
The nutritional benefits of microgreens are impressive. Scientists have extensively researched these tiny greens, finding that they often contain higher levels of vital nutrients than their mature counterparts. For example, a study published in the Journal of Agricultural and Food Chemistry revealed that microgreens can contain up to five times more vitamins and carotenoids than their fully grown equivalents. This nutritional density means you receive a potent health boost in every bite. When you grow microgreens at home, you ensure maximum freshness, which preserves these delicate nutrients and flavors. Your kitchen gardening effort contributes directly to your family’s health and culinary enjoyment.
Why Grow Microgreens at Home? Freshness, Flavor, and Fulfillment
Choosing to grow microgreens at home offers a multitude of benefits that extend beyond simply having fresh produce. You gain control over your food source, experience gardening enjoyment, and save money. Let us explore the compelling reasons to embark on this simple, yet rewarding, kitchen gardening journey.
Tending to these trays is just one of many rewarding indoor gardening projects that can brighten your home during the darker months.
If you enjoy the efficiency of this method, you can also grow green onions on your windowsill from kitchen scraps for a truly sustainable cycle.
Unmatched Freshness and Flavor
Store-bought microgreens, while convenient, often travel long distances, impacting their freshness, nutritional value, and flavor. When you grow microgreens on your kitchen counter, you cut them just moments before you eat them. This immediate farm-to-fork experience means maximum nutrient retention and the most vibrant flavor. Imagine adding peppery radish microgreens or sweet pea shoots to your sandwich seconds after harvesting them. The difference is palpable, elevating your meals with a crispness and intensity commercial options rarely match.
Cost-Effectiveness
Microgreens can be expensive at grocery stores, often selling for several dollars per small plastic container. These costs quickly add up if you consume them regularly. Growing microgreens at home drastically reduces this expense. A packet of microgreen seeds, typically costing a few dollars, yields multiple trays of greens, providing a significantly lower cost per serving. Your initial investment in trays and growing medium quickly pays for itself, making fresh, healthy greens an affordable luxury.
Control Over Quality and Sustainability
When you grow microgreens, you decide what goes into them. You choose organic, untreated seeds and high-quality, peat-free growing mixes. This eliminates concerns about pesticides, herbicides, or unknown additives often associated with conventionally grown produce. Your `kitchen gardening` efforts promote environmental consciousness by reducing packaging waste and your carbon footprint from transportation. You contribute to a more sustainable food system right from your countertop.
Ease and Accessibility for Small Spaces
One of the most appealing aspects of microgreens is their suitability for small spaces. They require minimal room, flourishing on a sunny windowsill, a small shelf, or under a compact grow light setup. This makes `grow microgreens` an ideal activity for urban dwellers, apartment residents, or anyone with limited outdoor gardening space. The process is straightforward, requiring no complex tools or extensive gardening knowledge, making it perfect for beginners and seasoned gardeners alike.
A Therapeutic and Rewarding Hobby
Engaging with nature, even on a small scale, provides significant mental health benefits. Watching your seeds germinate and quickly grow into vibrant greens offers a sense of accomplishment and connection. The simple act of tending to your `microgreens at home` can be a meditative, calming activity, a welcome break from daily stresses. This hands-on experience provides immense satisfaction and a continuous source of fresh, healthy food.
Choosing Your Microgreens: Top Varieties for Beginners
The world of microgreens offers a diverse palette of flavors, textures, and colors. For those new to `kitchen gardening`, selecting easy-to-grow varieties ensures a positive and rewarding experience. Here are some excellent choices for your first foray into growing microgreens on your kitchen counter.
For those seeking even more variety, you can also learn how to sprout lentils and beans on your counter to complement your leafy harvest.
Excellent Choices for First-Time Growers
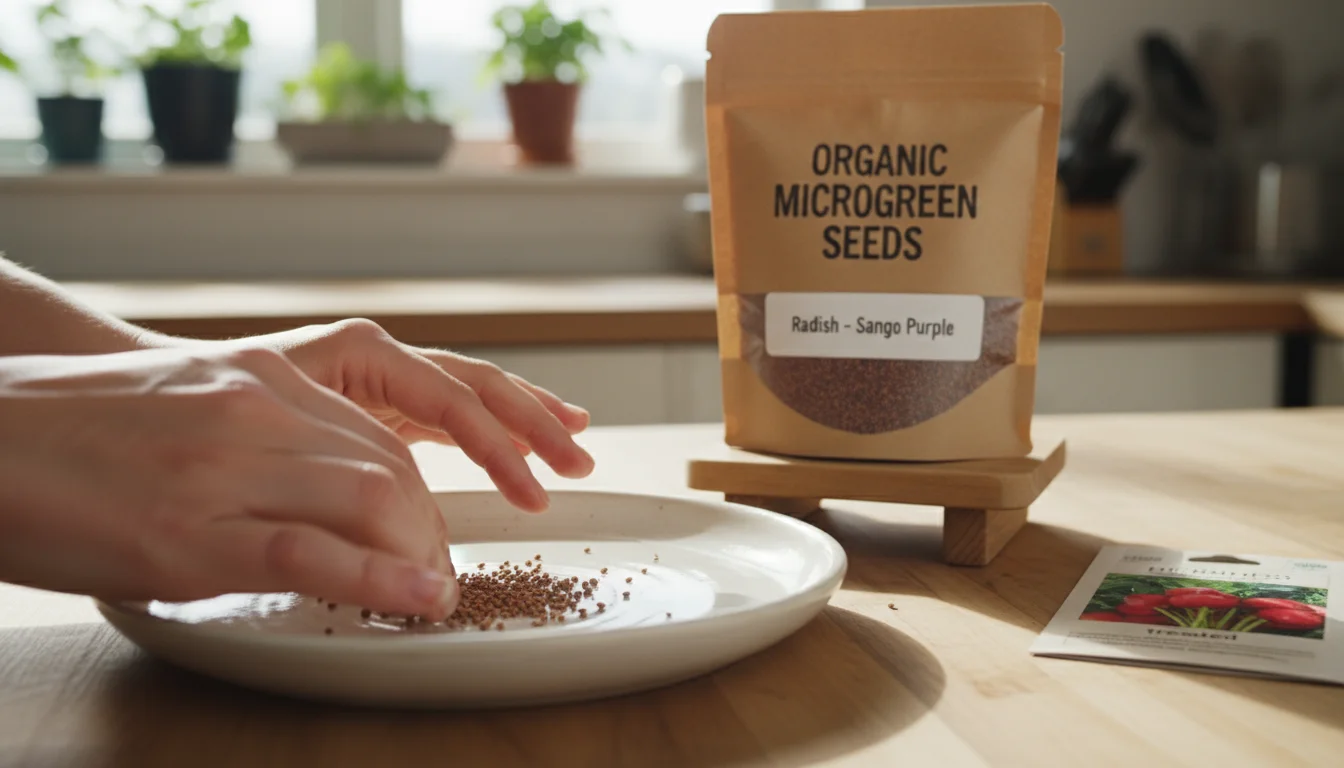
- Radish: These microgreens are among the fastest growers, often ready to harvest in 5-10 days. They offer a delightful peppery kick, similar to mature radishes, and come in various colors, adding visual appeal to your dishes. Look for varieties like ‘Sango’ (purple) or ‘China Rose’ (pink stems).
- Broccoli: A classic and highly nutritious choice, broccoli microgreens have a mild, slightly bitter, yet fresh flavor. They are robust growers and reliable, typically ready in 7-12 days. Studies have shown they contain high levels of sulforaphane, a potent health compound.
- Kale: With a mild, slightly earthy flavor, kale microgreens are tender and versatile. They grow reliably, reaching harvest size in 8-14 days. Varieties like ‘Lacinato’ (Dinosaur Kale) or ‘Red Russian’ offer attractive colors.
- Arugula: If you enjoy a peppery, spicy note, arugula microgreens are an excellent choice. They grow quickly, often ready in 7-12 days, and add a zesty punch to salads and sandwiches.
- Mustard: Similar to arugula but often with a more intense spice, mustard microgreens are vibrant and fast-growing, ready for harvest in 6-12 days. Choose ‘Red Giant’ for beautiful color.
- Pea Shoots: Technically not microgreens but often grouped with them due to similar growing methods, pea shoots are incredibly popular. They offer a sweet, fresh, pea-like flavor and a satisfying crunch. These take a bit longer, usually 10-20 days, but you can get multiple harvests from a single planting. Look for ‘Dun Pea’ or ‘Sugar Snap’ varieties.
- Sunflower: Another slightly larger option, sunflower microgreens have a distinct nutty flavor and a satisfying crunchy texture. They take 7-14 days and are very popular for their versatility in various dishes. Ensure you buy hull-less sunflower seeds specifically for microgreens, as hulled seeds can cause issues.
Considerations for Seed Selection
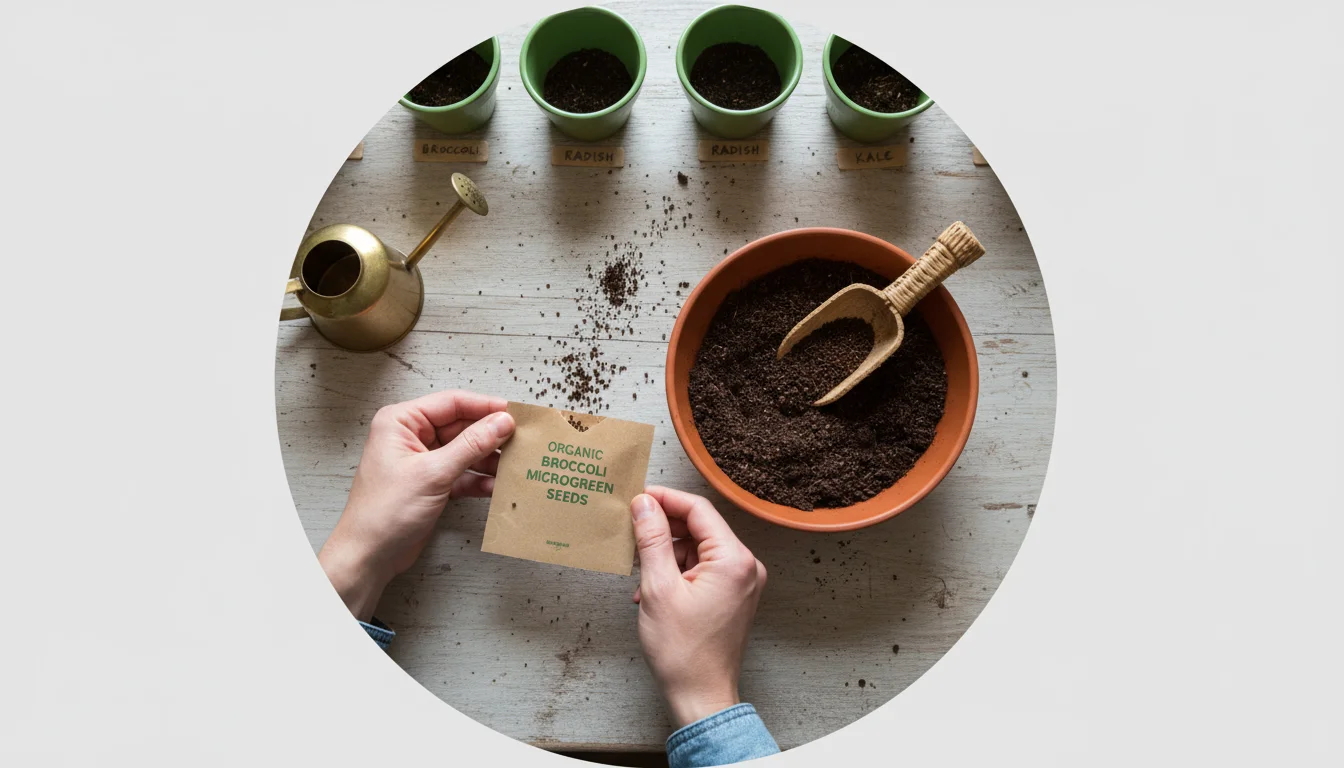
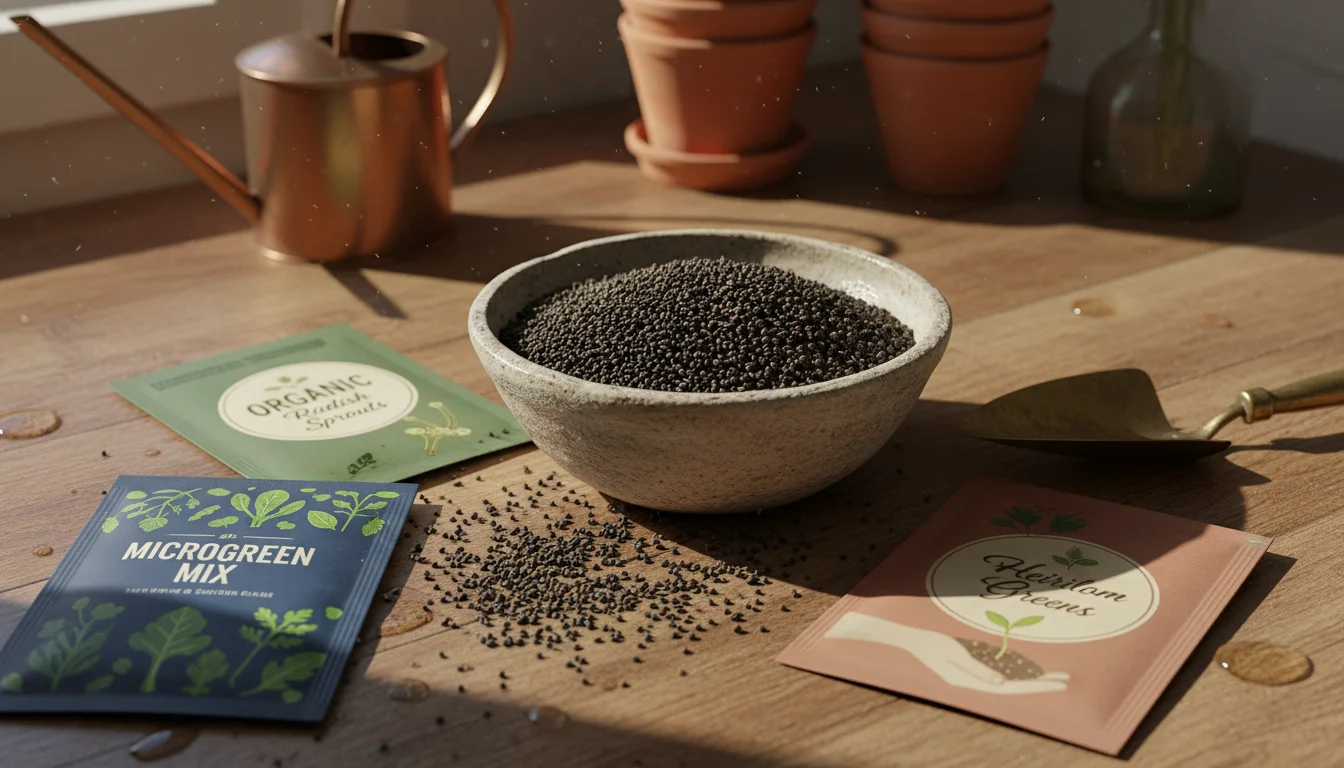
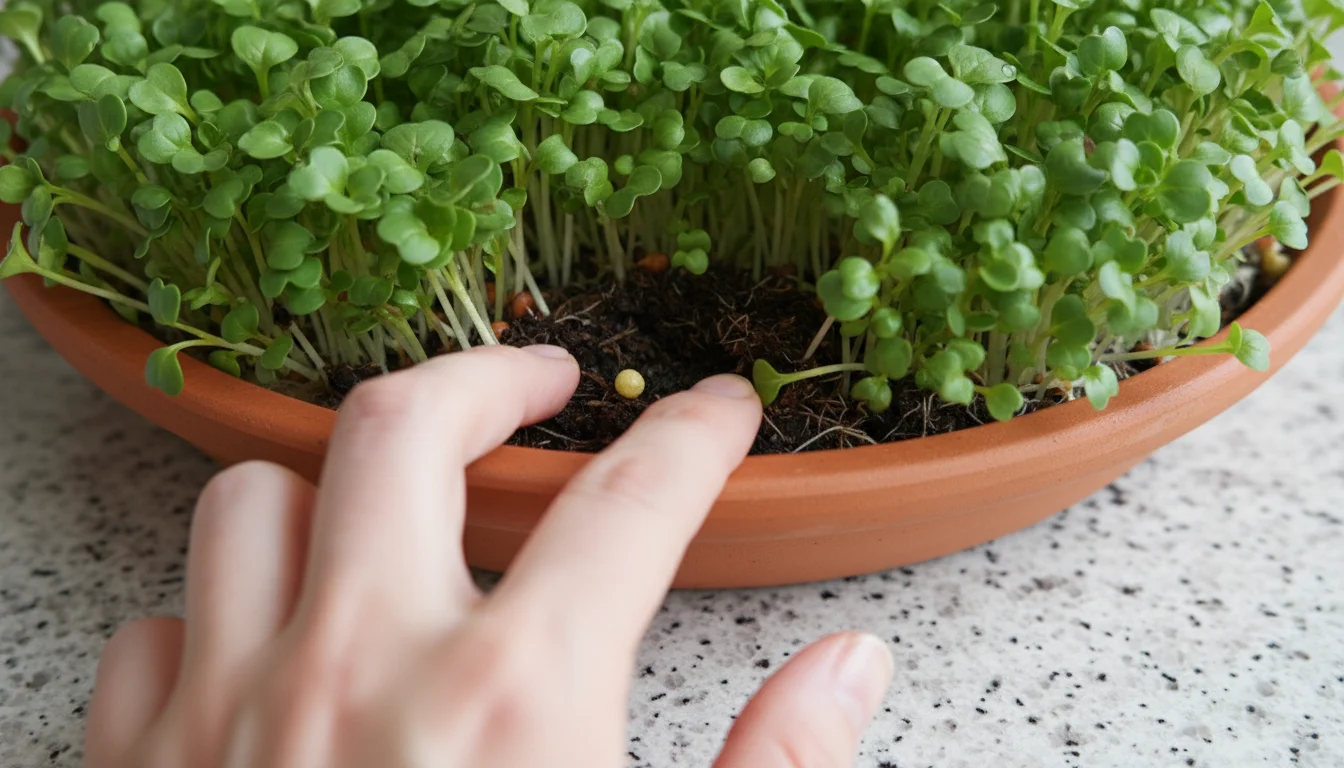
When you select seeds for growing microgreens, always choose seeds specifically labeled for microgreen production or untreated, organic seeds. Standard garden seeds might be treated with fungicides or other chemicals unsuitable for consumption in their young, raw form. Reputable seed suppliers offer bulk microgreen seeds, which are more economical for continuous growing. You find numerous online retailers specializing in microgreen seeds, or check local garden centers for organic options.

Essential Supplies for Your Countertop Microgreen Garden
Growing microgreens on your kitchen counter requires only a few basic supplies, most of which are readily available and reusable. Gathering these items before you begin ensures a smooth and successful `kitchen gardening` experience. You do not need fancy equipment, just functional tools to support your tiny greens.
Growing Trays
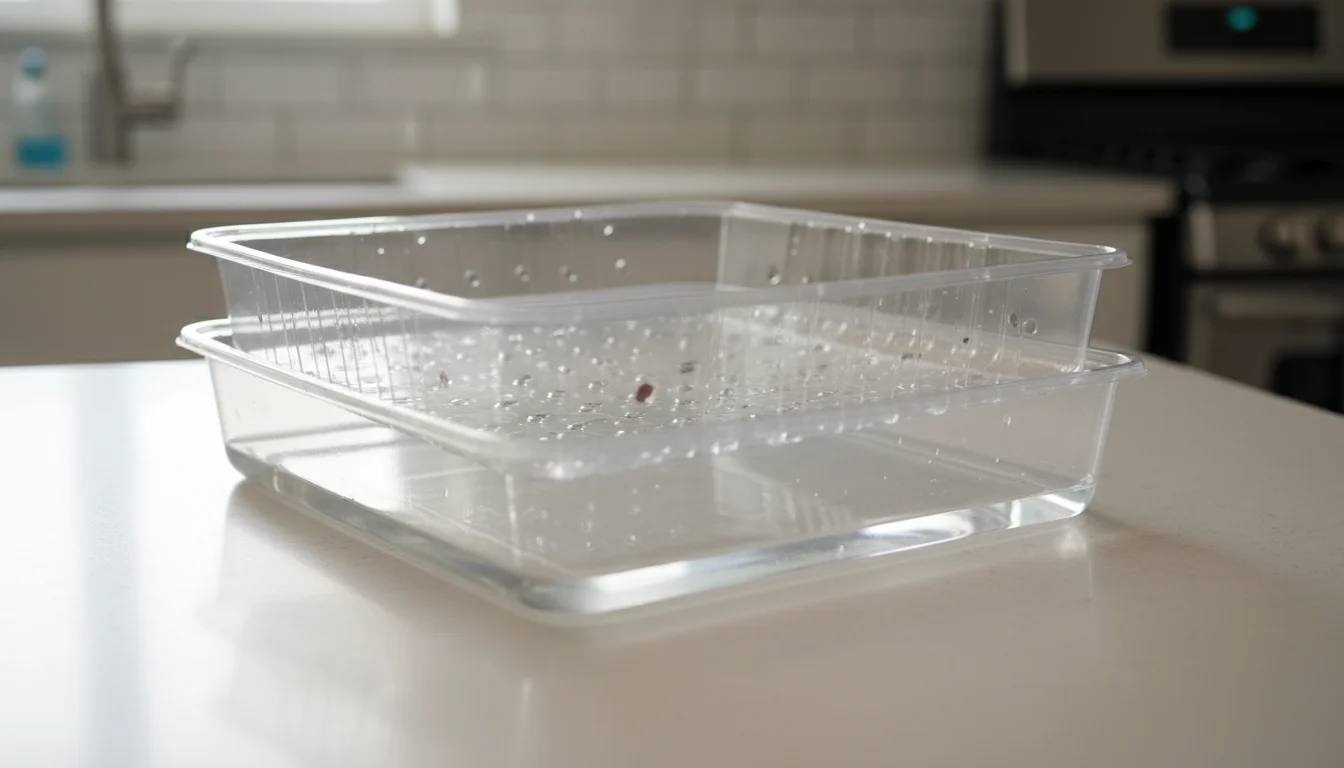
- Seed Starting Trays: You need two types of trays. The first is a shallow tray with drainage holes, typically 10×20 inches, to hold your growing medium and seeds. The drainage holes are crucial to prevent waterlogging, which leads to mold.
- Bottom/Drip Trays: The second type is a solid tray, without holes, designed to fit underneath the holed tray. This bottom tray catches excess water and allows for bottom watering, keeping the delicate greens dry.
- Material: Choose food-safe, durable plastic trays. Many gardeners reuse plastic take-out containers or shallow bakery trays, but ensure they are clean and have appropriate drainage holes if necessary.
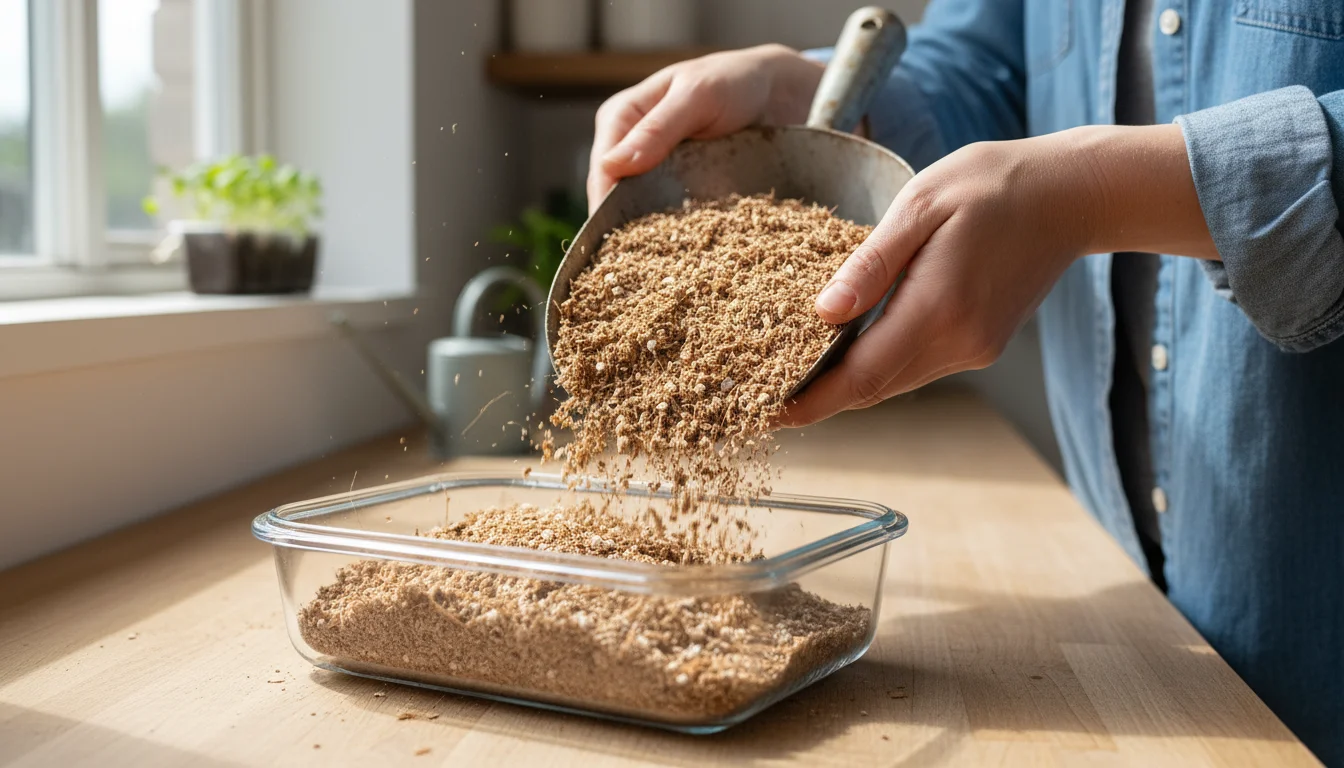
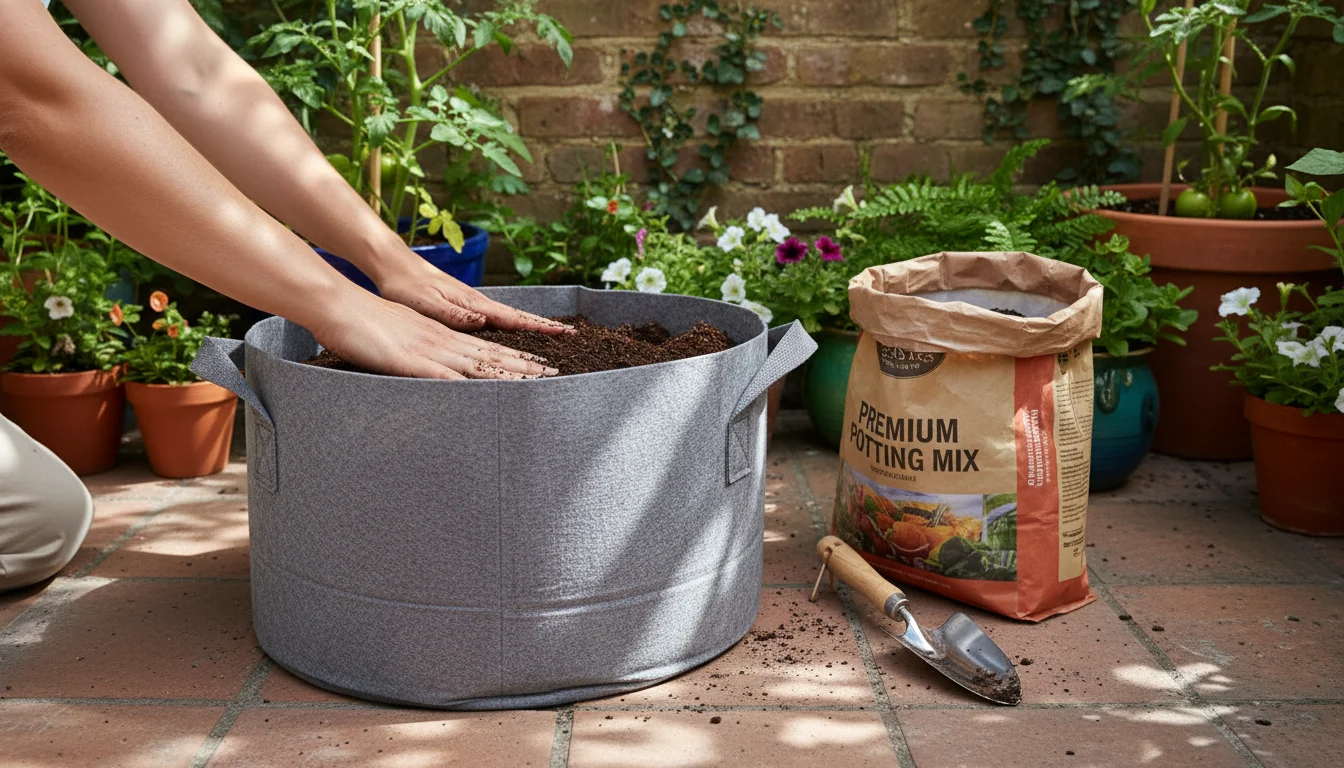
Growing Medium
Microgreens do not require a nutrient-rich potting mix because they draw most of their initial energy from the seed itself. A sterile, fine-textured medium promotes good germination and root development. Avoid heavy garden soil, which can compact and harbor pests or diseases.
- Peat-Free Seed Starting Mix: Look for organic, peat-free seed starting mixes. These mixes are typically composed of coco coir, perlite, and vermiculite. Coco coir, a sustainable alternative to peat moss, retains moisture well and provides excellent aeration.
- Hemp Mats or Burlap: Some growers use inert growing mats, such as hemp fiber or burlap, particularly for “soil-less” microgreens. These require diligent watering but offer a clean harvest. For beginners, a fine seed starting mix is often easier to manage.
High-Quality Seeds
As mentioned, select seeds specifically intended for microgreens or untreated, organic seeds. The quantity you need is higher than for traditional gardening, as you sow seeds densely. Purchase from reputable suppliers to ensure good germination rates and healthy plants.
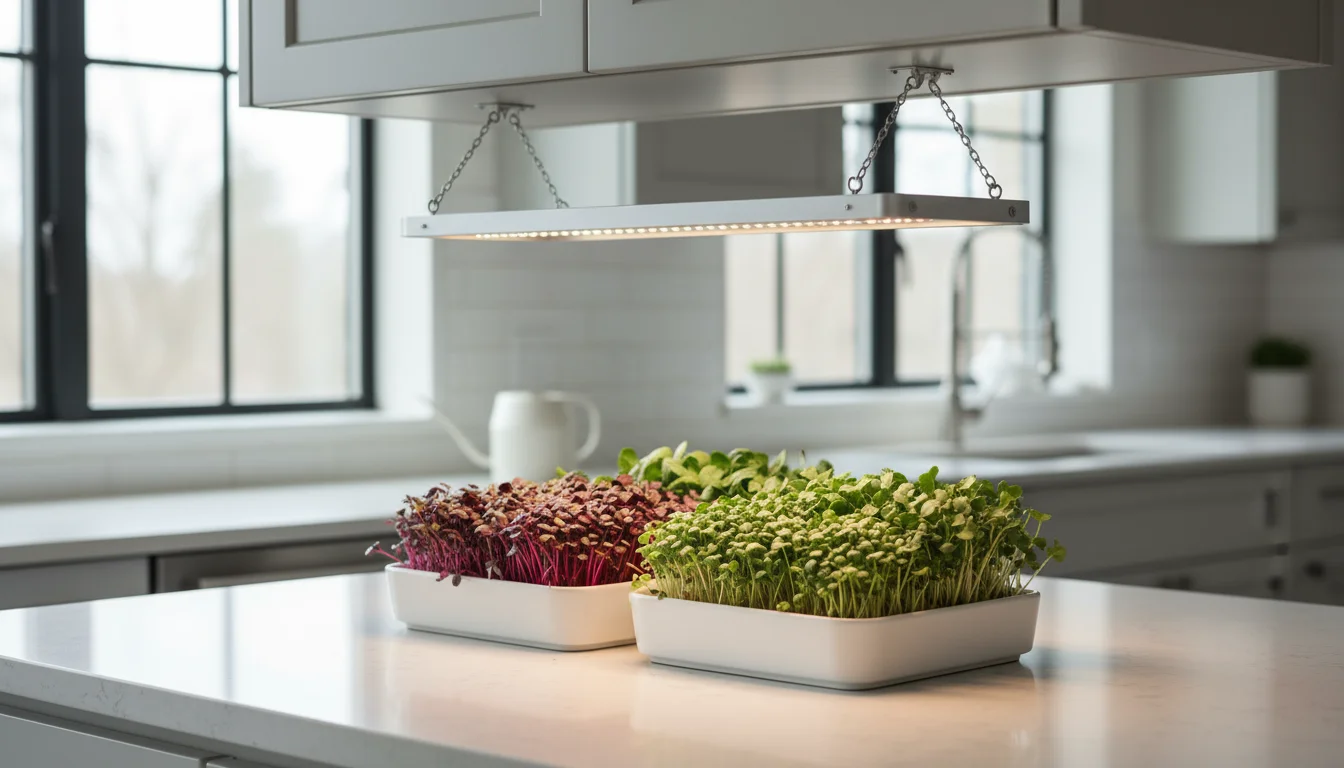
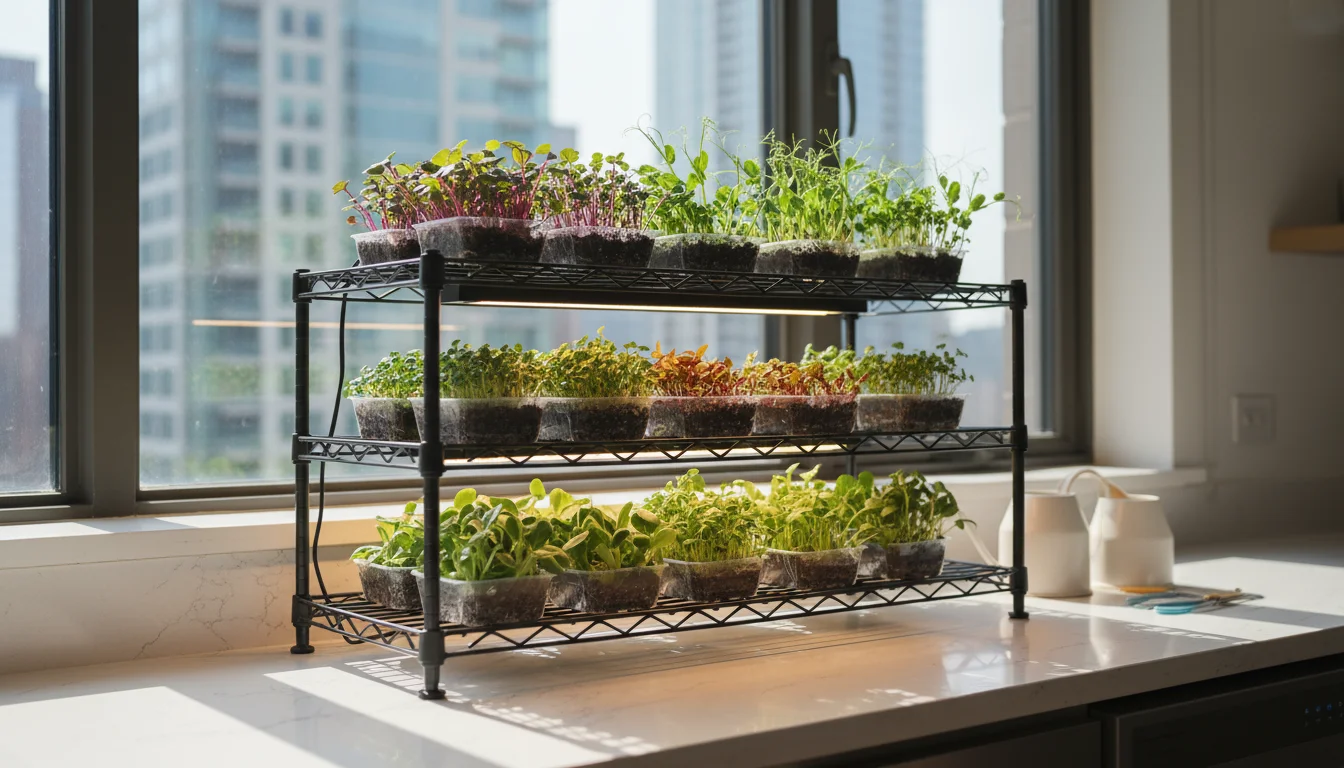
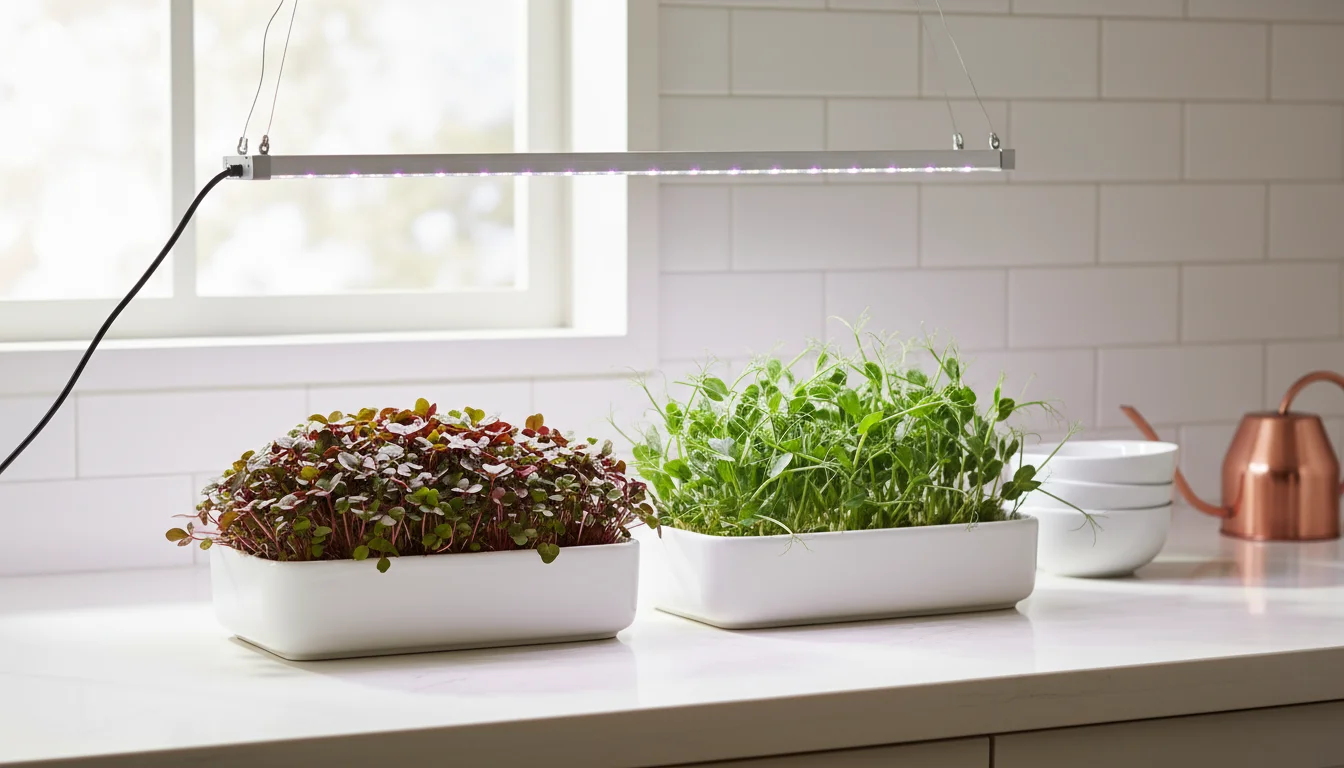
Light Source
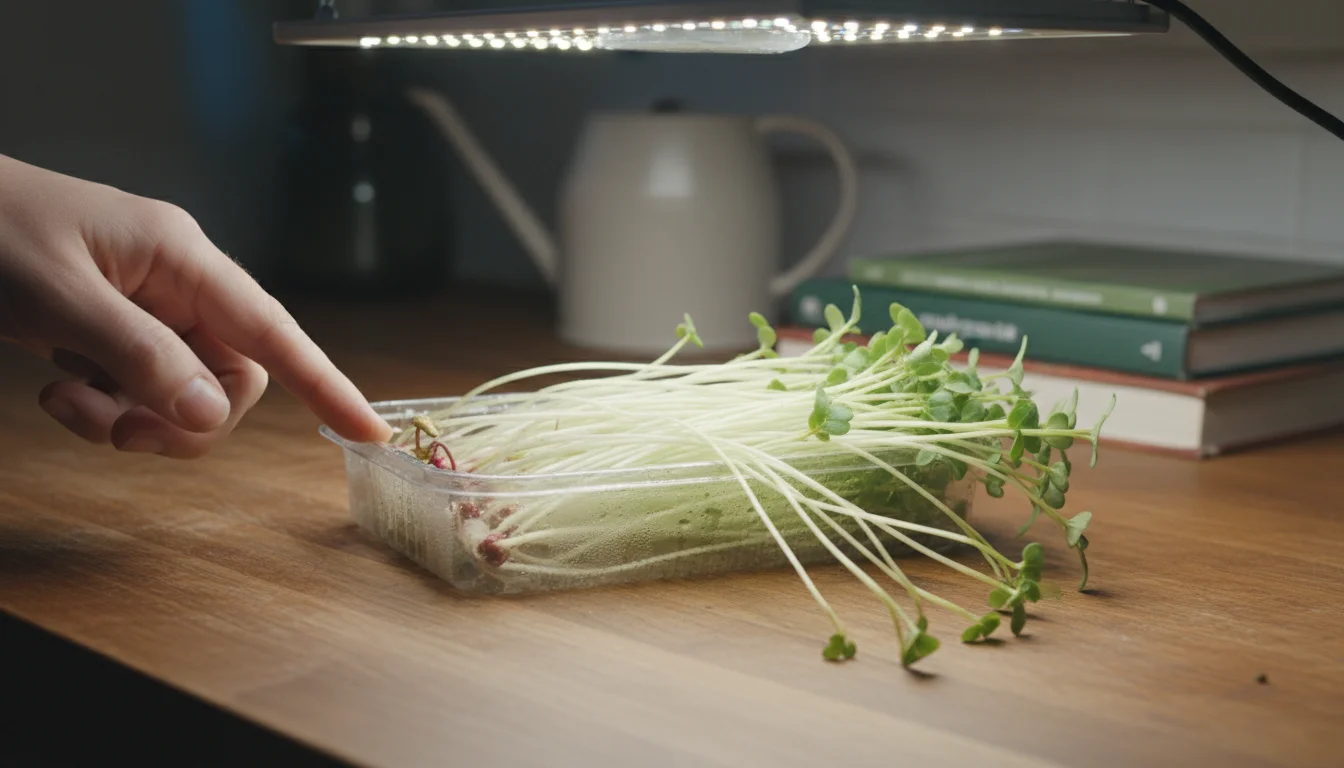
Adequate light is paramount for healthy, colorful microgreens. While a sunny south-facing window can work, many indoor gardeners find that supplemental lighting produces better results, especially during darker winter months or if your natural light is limited.
- Sunny Window: A bright window that receives at least 4-6 hours of direct sunlight per day is a good starting point. Rotate your trays daily to ensure even growth.
- LED Grow Lights: For optimal growth and year-round consistency, consider a basic LED grow light. Look for full-spectrum lights that mimic natural sunlight. A simple shop light fixture with LED bulbs works effectively. Hang the light a few inches above your trays using adjustable chains or stands.
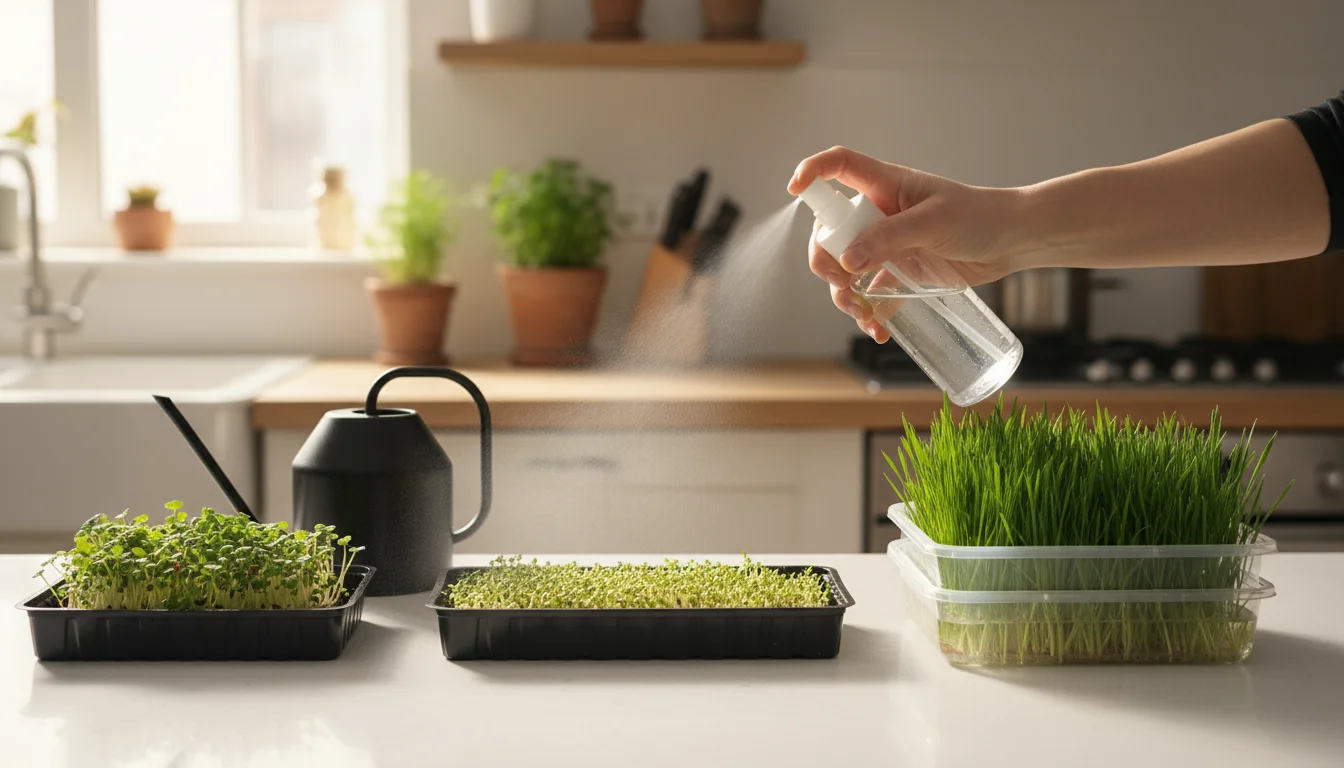
Watering Tools
- Spray Bottle: A fine-mist spray bottle is essential for gently moistening the seeds and growing medium during the initial stages without dislodging them.
- Small Watering Can with a Fine Rose: Once your microgreens germinate, a small watering can with a gentle shower head attachment helps water the soil without flattening your delicate plants. Bottom watering, where you pour water into the bottom tray, is also highly recommended.
Harvesting Tools
A sharp, clean tool ensures a quick, damage-free harvest.
- Sharp Scissors or a Knife: Kitchen scissors or a sharp paring knife work perfectly. Clean them before and after each use to prevent disease.
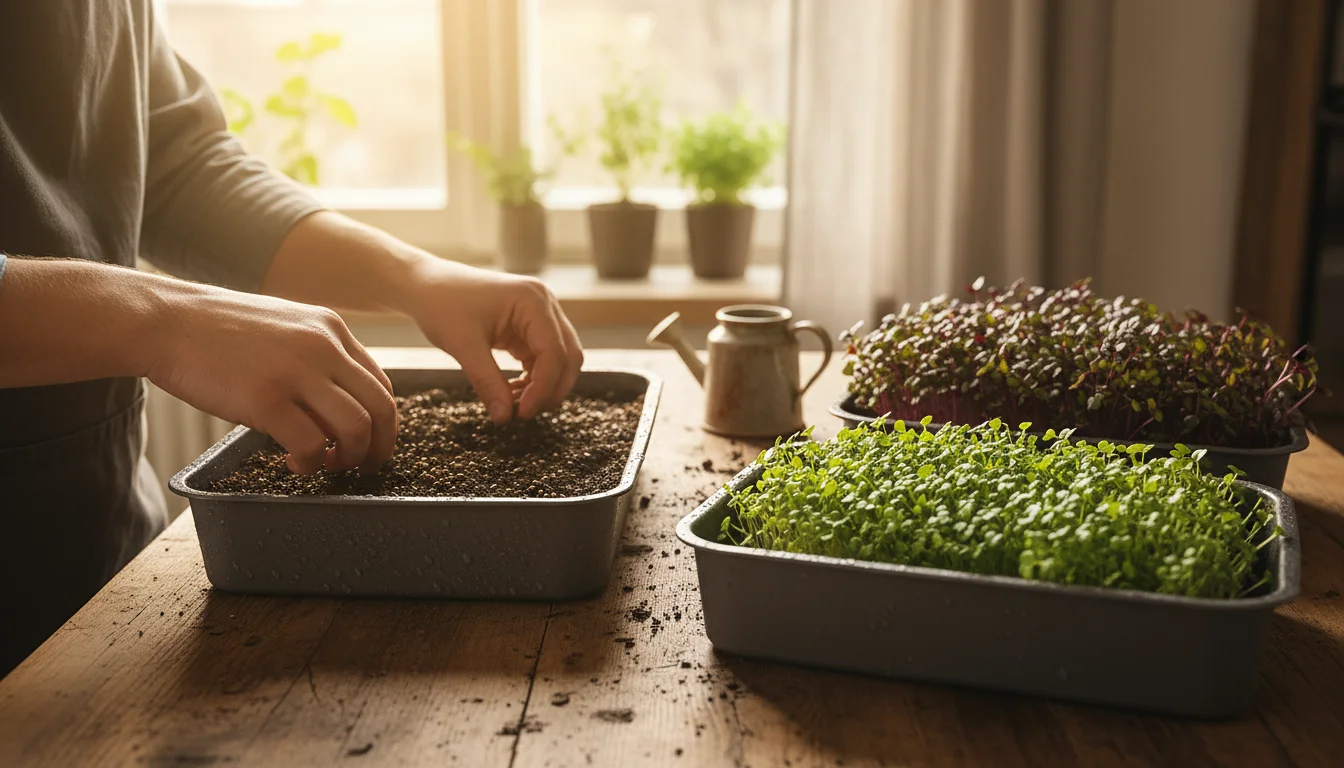
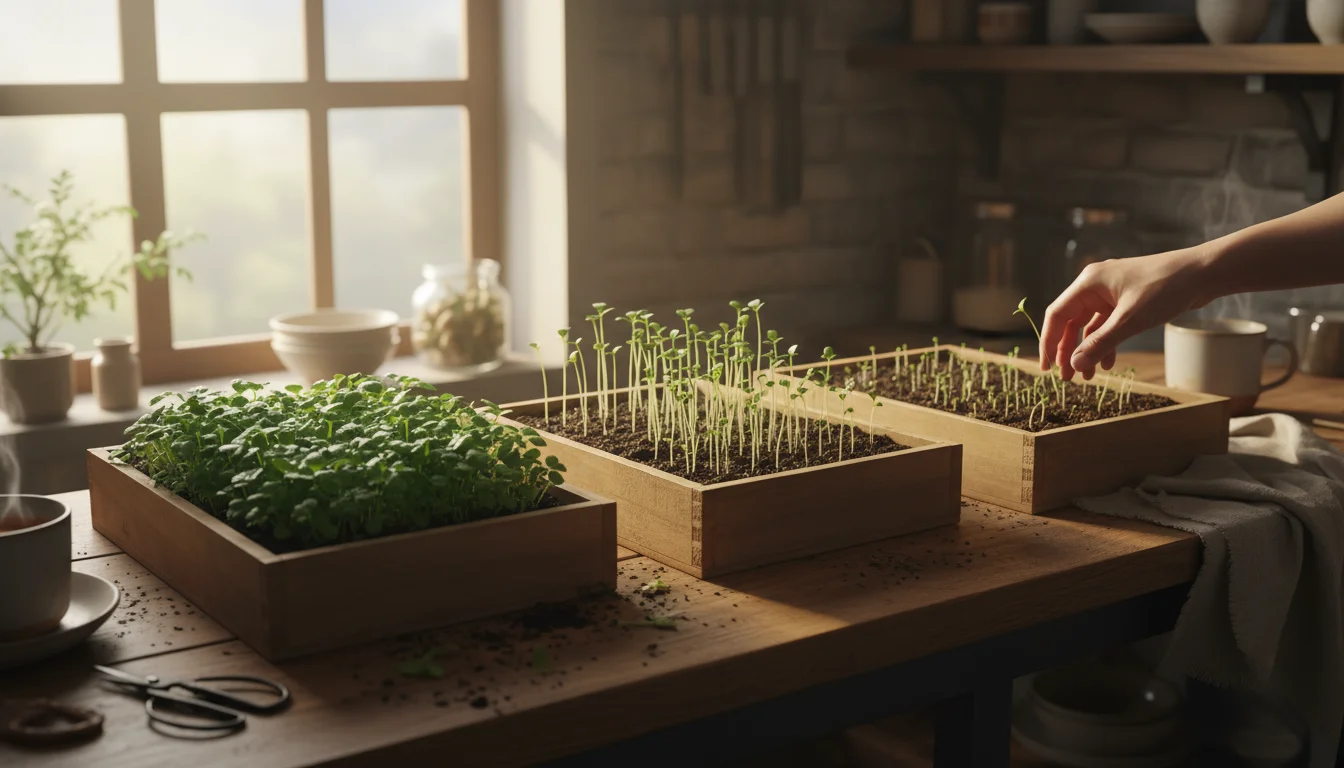
Step-by-Step Guide: Sowing and Growing Microgreens
Growing microgreens is a straightforward process, broken down into a few simple steps. Follow this guide to successfully `grow microgreens` on your kitchen counter, from seed to harvest.
-
Prepare Your Growing Medium:
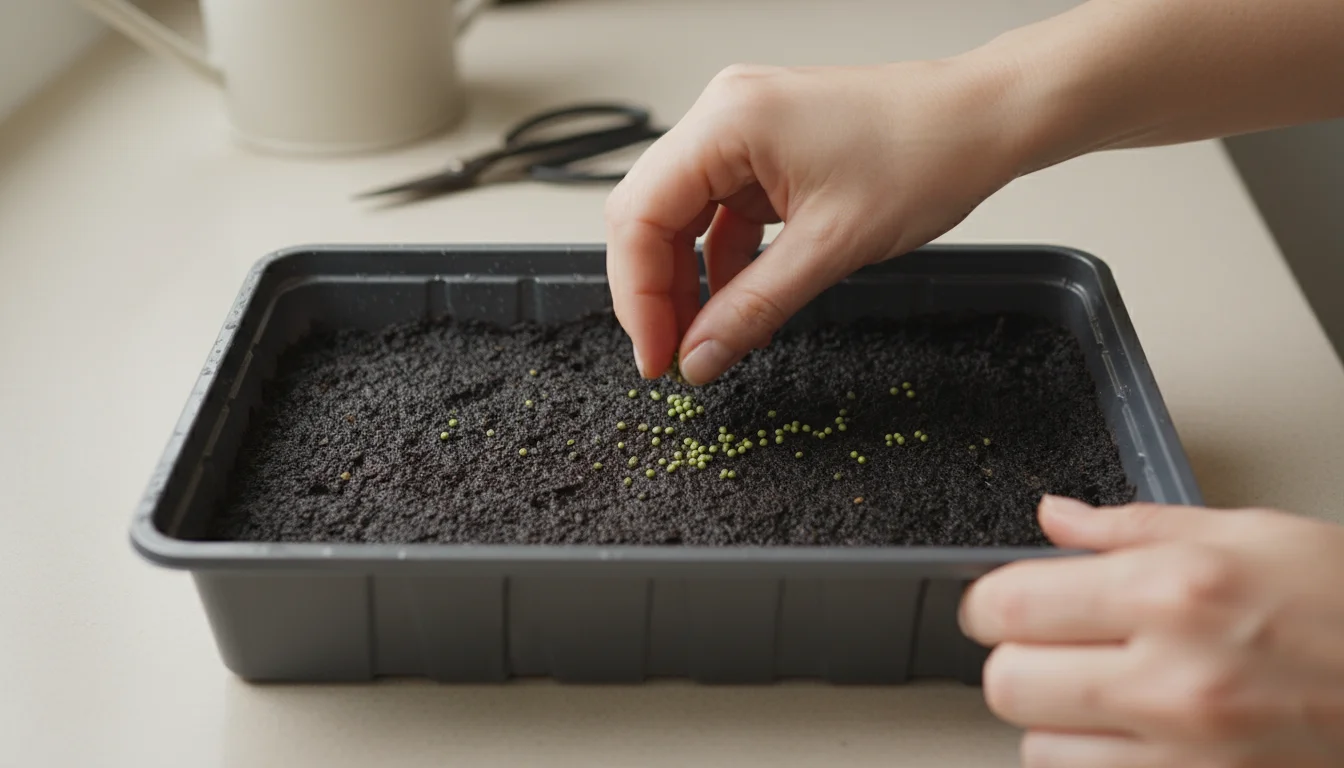
Fill your drainage tray (the one with holes) with about one to two inches of your chosen peat-free seed starting mix. Gently level the soil surface without compacting it too much. You want the surface relatively flat for even seed distribution. Lightly moisten the soil using your spray bottle until it feels consistently damp but not soggy. Excess water can lead to mold and damping off.
-
Sow Your Seeds Densely and Evenly:
This is a critical step for a thick, full microgreen harvest. Scatter your microgreen seeds generously and uniformly across the entire surface of the moistened soil. Aim for density. For example, for a standard 10×20 inch tray, you might use approximately 1 ounce (about 28 grams) of smaller seeds like broccoli or radish, and more for larger seeds like peas or sunflowers (up to 4-6 ounces or 113-170 grams). Avoid clumping, as this can lead to poor air circulation and mold. Do not bury the seeds; simply let them rest on the surface.
-
Lightly Mist and Cover (Blackout Period):
After sowing, gently mist the seeds with water from your spray bottle to ensure good seed-to-soil contact. Then, place your solid bottom tray directly on top of the seeds, acting as a “blackout dome.” This mimics the soil environment, encouraging germination by keeping the seeds dark and moist. For heavier seeds like peas or sunflowers, you can place a small weight (a brick, another tray with a few pounds of weight) on top of the cover tray. This encourages the roots to grow downwards and helps the seedlings shed their hulls. Leave the seeds in blackout for 2-5 days, checking daily for moisture and early germination.
-
Uncover and Provide Light:
Once you see most of your seeds germinating and showing their initial cotyledon leaves, usually after 2-5 days, remove the cover tray. Immediately move your tray to your light source. If using a grow light, position it 2-4 inches above the seedlings. If using a windowsill, ensure it receives maximum light. Rotate the tray daily to promote even, upright growth and prevent leaning toward the light source. Insufficient light at this stage leads to “legginess,” where stems are long and weak.
-
Watering and Airflow:
Water your microgreens consistently. The best method is bottom watering: pour water into the solid bottom tray, allowing the growing medium to absorb it from below. This keeps the foliage dry, reducing the risk of fungal issues. Water only when the top of the soil appears slightly dry. A simple test: lift the tray; if it feels light, it needs water. Good air circulation is also vital. If your growing area is enclosed or humid, consider a small fan set on a low setting to gently circulate air around your plants. This helps prevent damping off and mold.
-
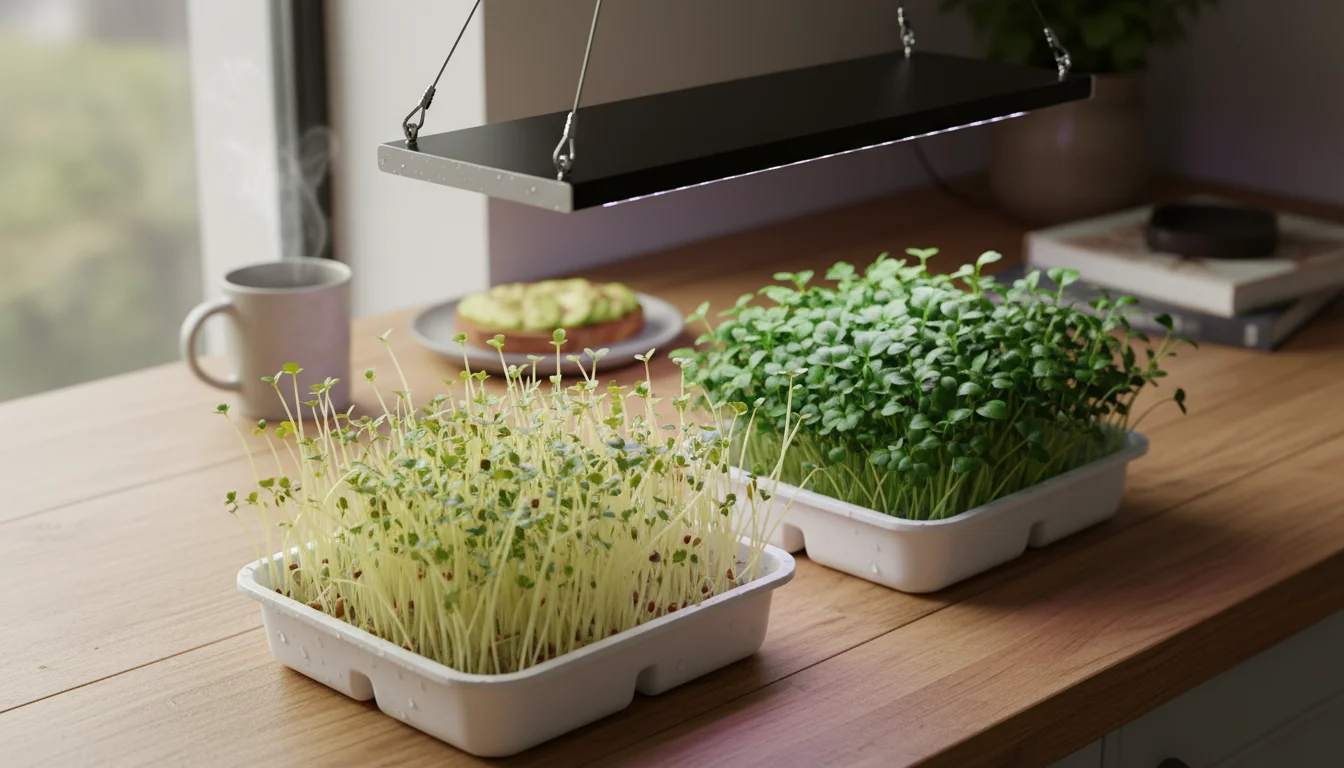
Monitor and Grow:
Over the next 5-15 days, watch your microgreens grow. They will quickly develop their first set of true leaves after the cotyledons. Keep an eye on moisture levels, light exposure, and air circulation. This active monitoring ensures healthy development. The duration to harvest depends on the variety, typically 7-21 days from sowing.
Optimizing Your Microgreen Environment: Light, Water, Airflow
Creating the ideal environment ensures your `microgreens at home` thrive, providing you with a consistent supply of healthy, vibrant greens. You must manage light, water, and airflow to prevent common issues and maximize your harvest.
Mastering Light Exposure
Light plays a pivotal role in microgreen development, affecting stem strength, leaf color, and nutrient content. You aim for strong, consistent light after the blackout period.
- Intensity Matters: Insufficient light causes microgreens to stretch, becoming tall, pale, and weak, a condition known as “legginess.” If you notice your greens reaching excessively for the light, they need more intensity.
- Grow Lights for Consistency: A dedicated LED grow light provides the most reliable and intense light source. Position a full-spectrum LED light 2-4 inches above your microgreen trays. This close proximity ensures maximum light absorption without generating excessive heat. Use a timer to provide 12-16 hours of light per day, mimicking natural daylight cycles.
- Natural Light Limitations: A sunny south-facing window offers a decent option, especially if you lack a grow light. However, window light varies greatly with seasons, weather, and window cleanliness. Rotate your trays daily to ensure all sides receive equal exposure, preventing plants from leaning significantly toward the light source.
Efficient Watering Practices
Correct watering is critical. Both overwatering and underwatering harm microgreens, but overwatering, leading to fungal issues, poses a greater risk.
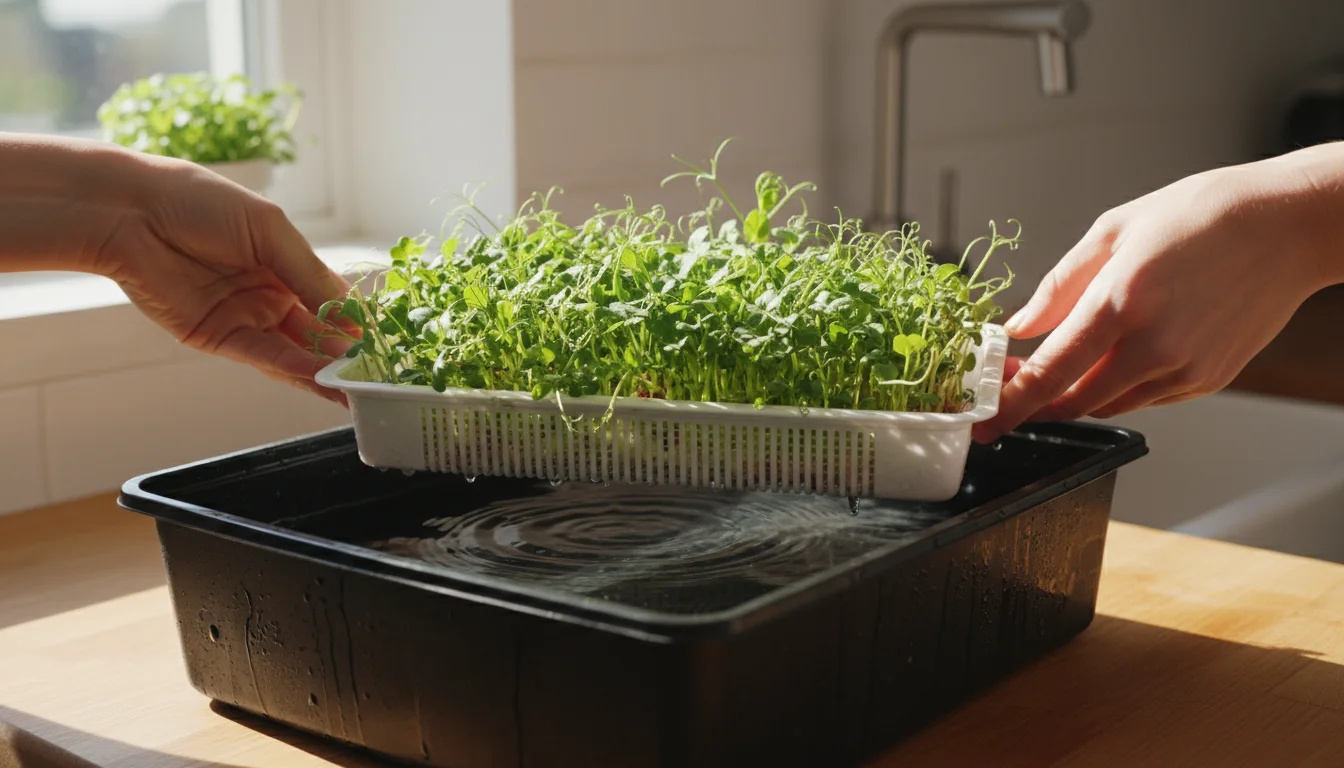
- Bottom Watering is Best: After germination, switch to bottom watering. Place your drainage tray (with microgreens) into a solid bottom tray containing about half an inch of water. Let the growing medium absorb the water from below for 10-20 minutes, or until the top surface appears moist. Then, remove the drainage tray from the water, allowing any excess to drain completely. This method keeps the delicate foliage dry, minimizing the risk of mold and damping off.
- Gentle Top Misting for Germination: During the initial blackout period and immediately after sowing, use a fine-mist spray bottle to moisten the seeds and top layer of soil. This gentle application prevents you from displacing the small seeds or delicate sprouts.
- Feel the Weight: To determine if your microgreens need water, lift the tray. If it feels significantly lighter than when fully watered, it is time to re-water. Consistency is key; avoid letting the soil completely dry out.
Ensuring Good Airflow
Stagnant, humid air is an open invitation for mold and fungal diseases like damping off, a common killer of young seedlings. You need good air circulation around your microgreens.
- Open Space: Do not crowd your trays. Leave some space between them to allow air to move freely. If you stack trays during the blackout period, ensure you remove the covers and spread them out once germination occurs.
- Small Fan: If you grow in a humid environment or a small, enclosed space, a small oscillating fan set on its lowest setting can work wonders. Position it to gently circulate air above and around your trays, not directly on the plants, which could dry them out too quickly.
- Preventing Mold: Good airflow, combined with bottom watering, significantly reduces the conditions favorable for mold growth. If you notice any fuzzy white growth, which could be mold or root hairs, assess your watering and airflow immediately. Healthy root hairs typically appear fine and white, clinging to the root, whereas mold often appears fuzzy and spreads across the soil surface or around decaying seeds.
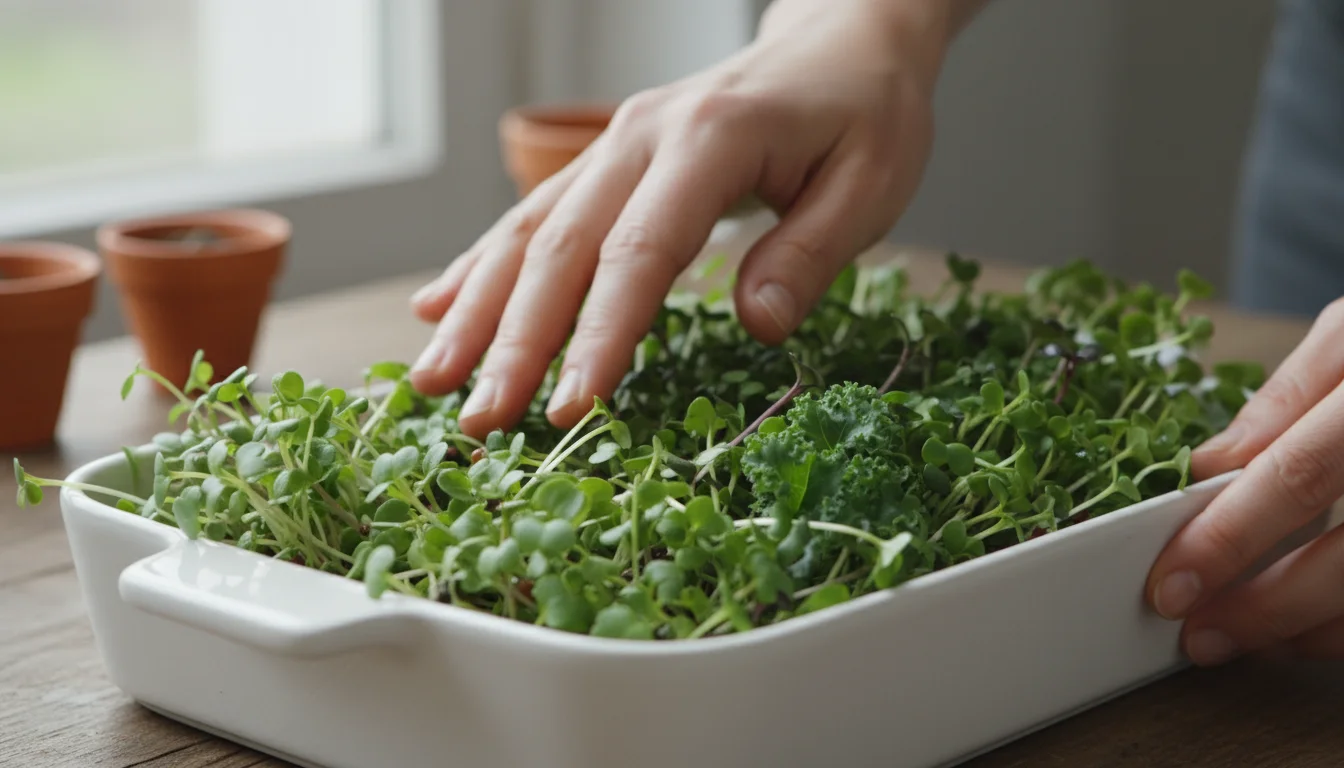
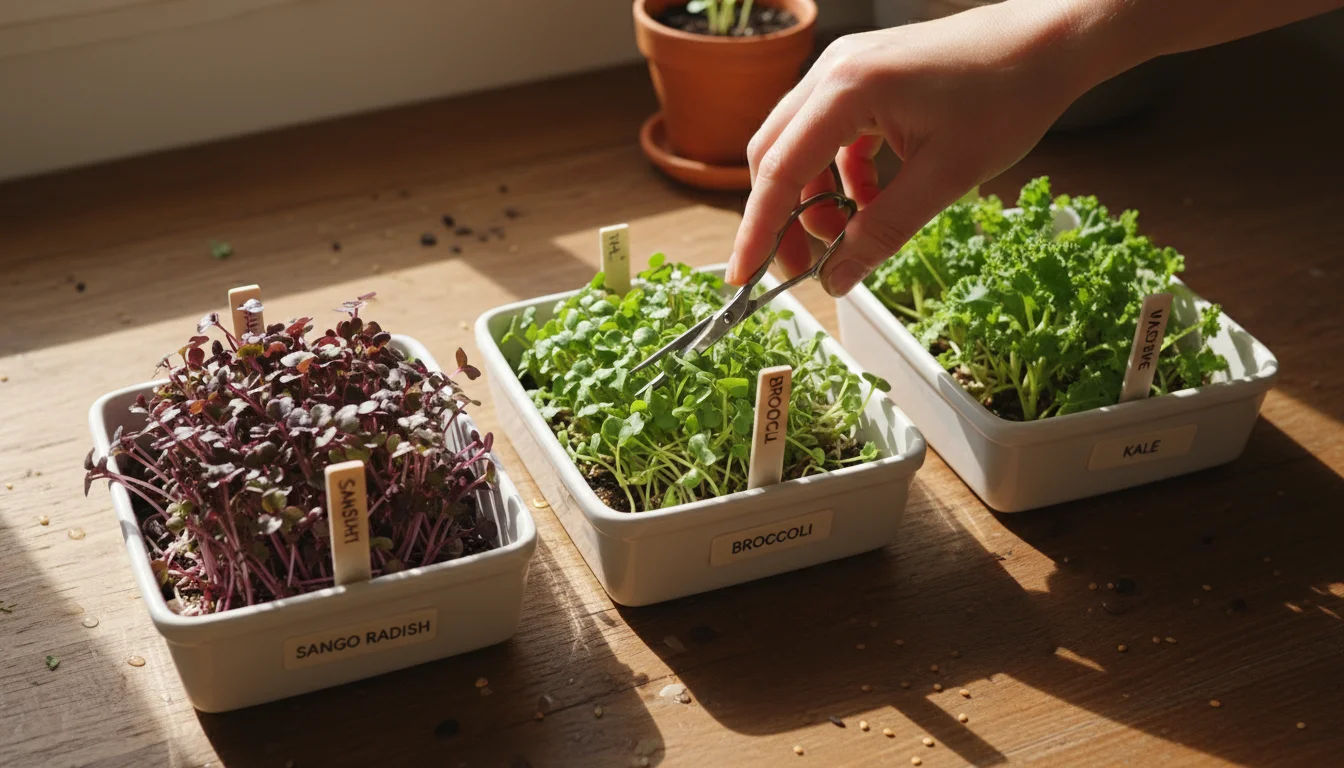
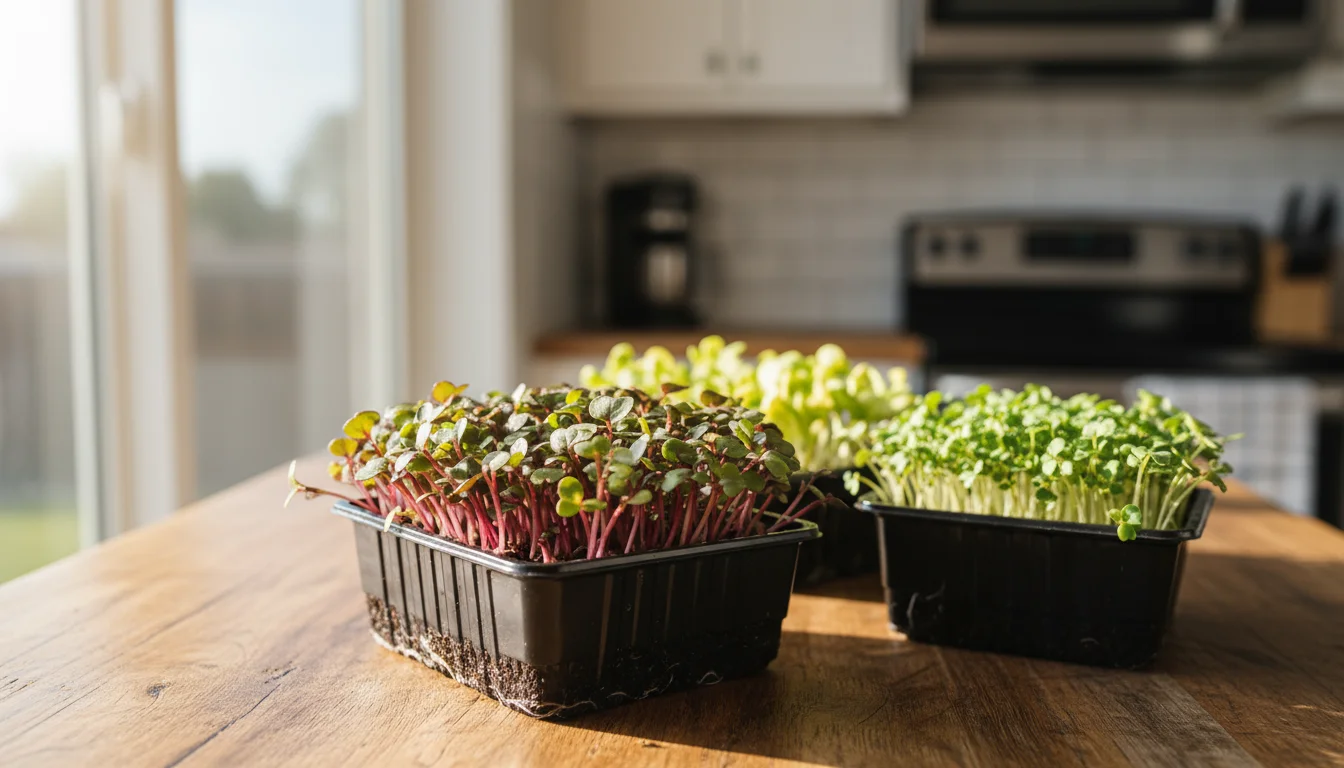
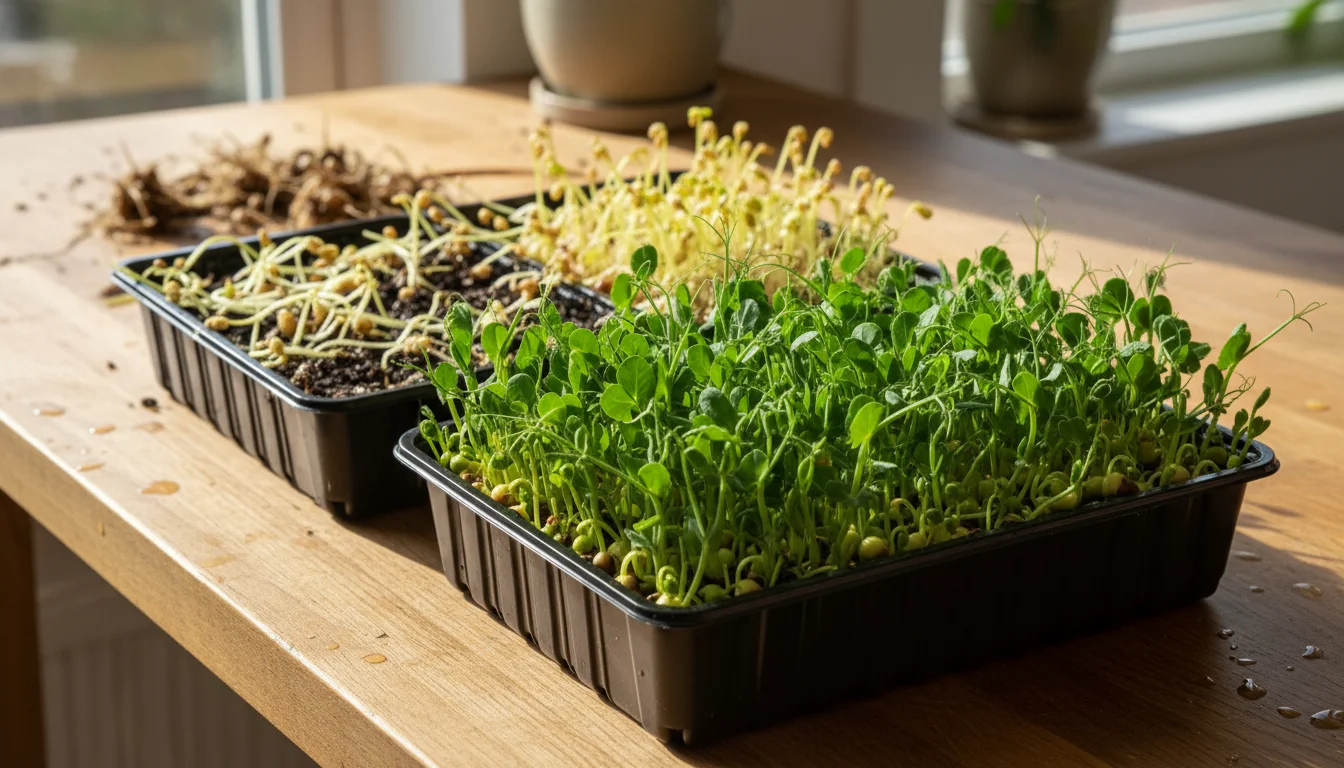
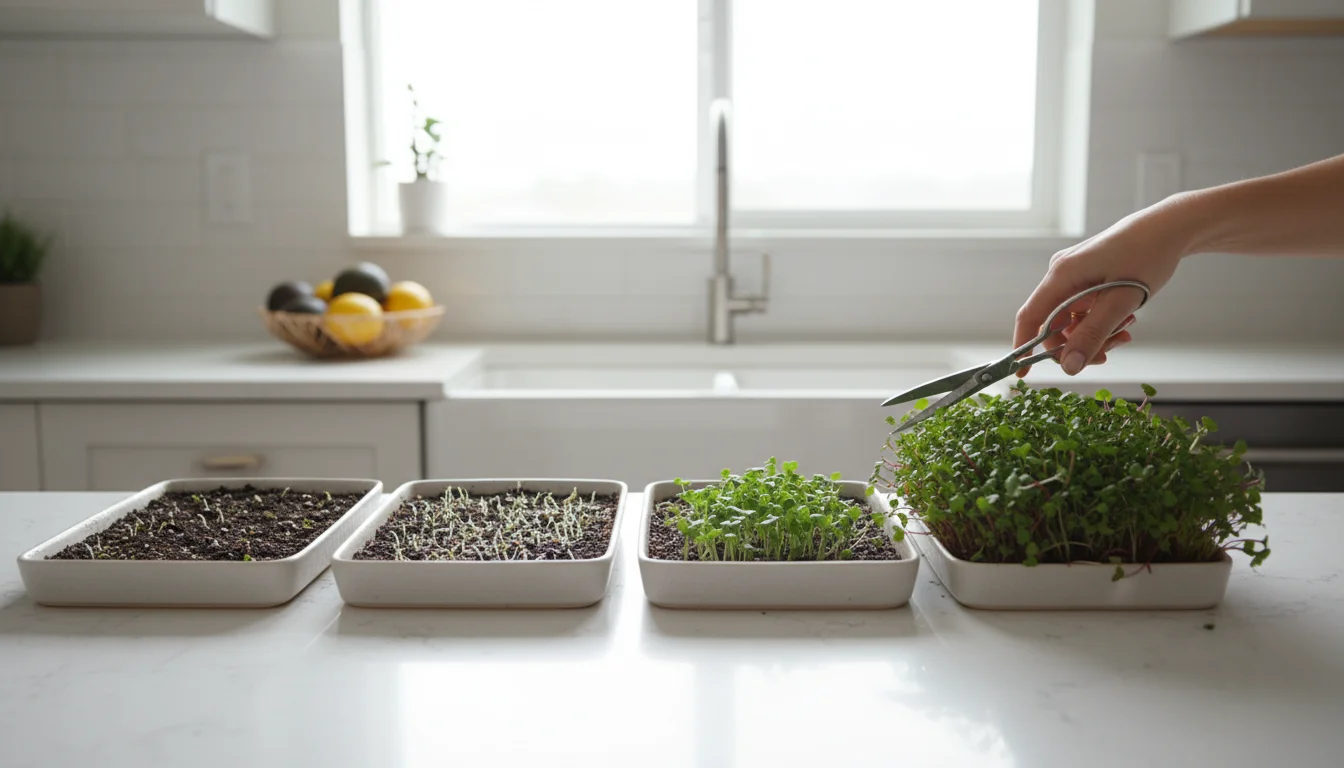
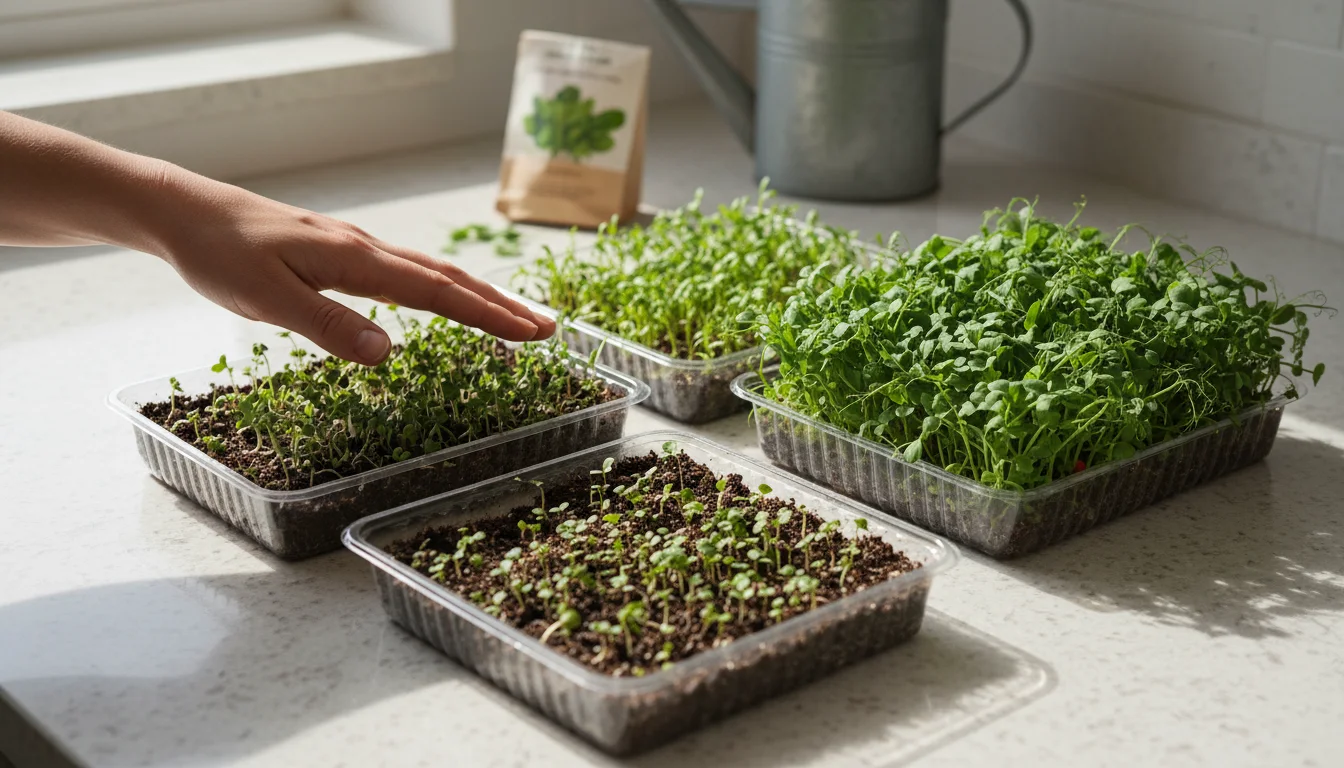
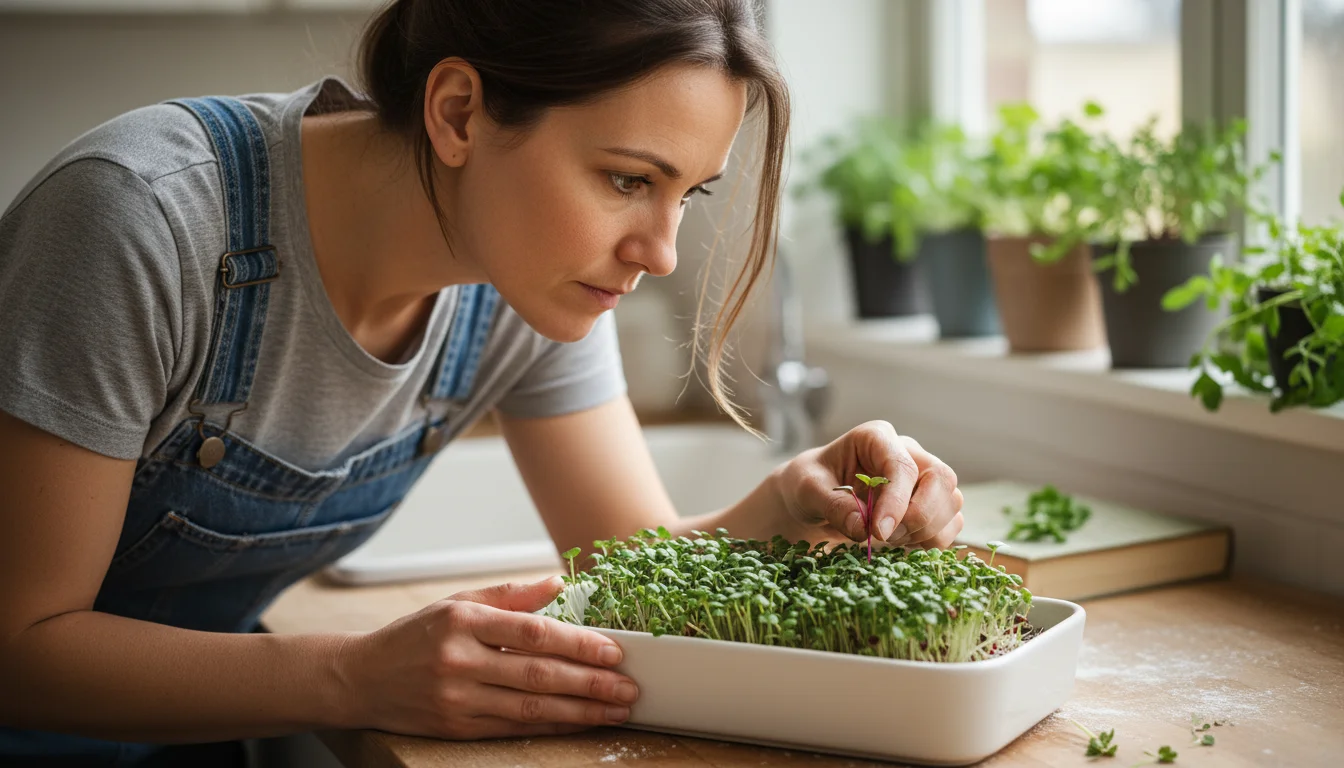
Harvesting Your Microgreens: Timing, Tools, and Storage
The exciting moment arrives when your `microgreens at home` are ready for harvest. Knowing when and how to cut them, along with proper storage, maximizes their flavor, nutrients, and shelf life. You get to enjoy the literal fruits of your `kitchen gardening` labor.
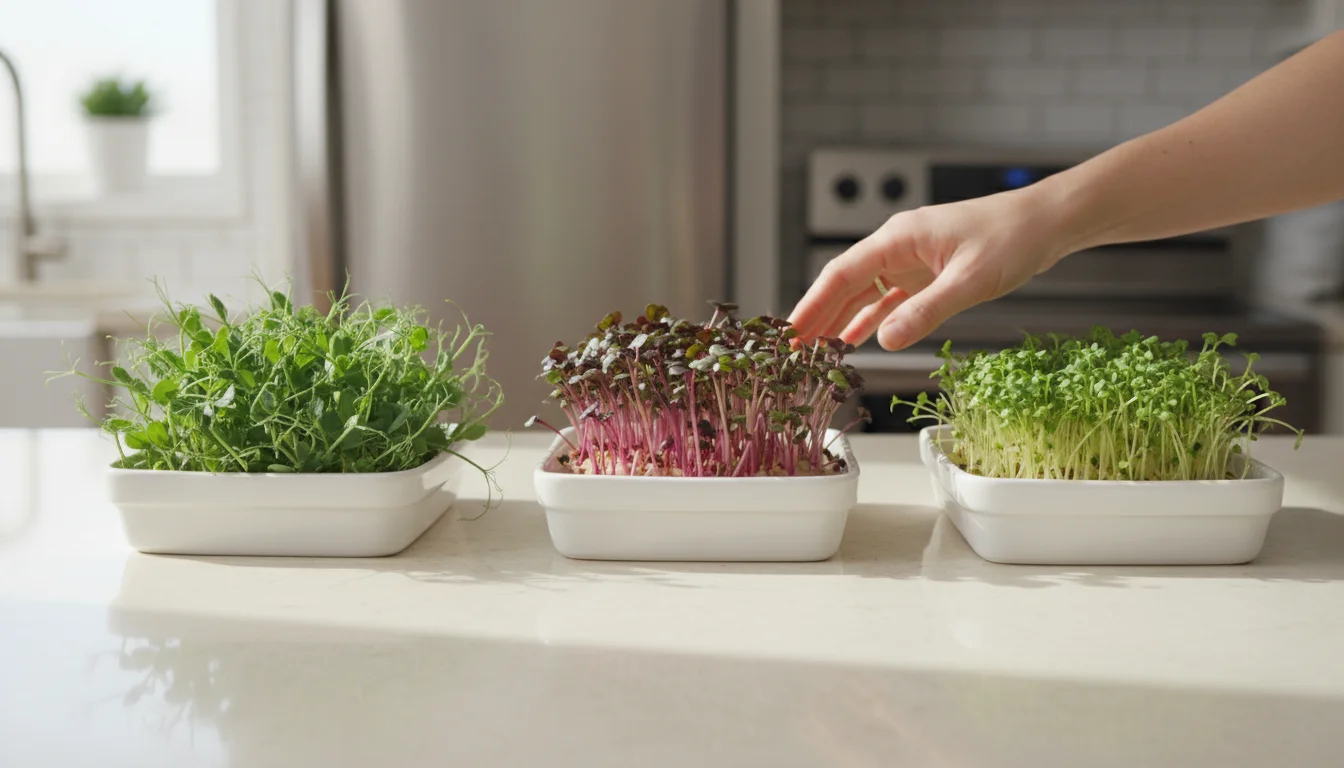
- Look at these beauties flourishing in the sun, ready for a tasty harvest!
- My kitchen counter is bursting with fresh greens, from zesty radishes to sweet pea shoots.
- So rewarding to watch these little powerhouses grow right on my countertop!
Optimal Harvest Timing
Most microgreens are ready for harvest between 7 and 21 days after sowing. The exact timing depends on the variety. You primarily look for the development of the cotyledon leaves, which are the first embryonic leaves, and often the first set of true leaves. True leaves resemble the mature plant’s leaves, just in miniature form. Harvesting at this stage ensures peak flavor and nutritional density. If you wait too long, microgreens can become tougher, less flavorful, and transition into baby greens, which have different characteristics. For example:
- Fast Growers (5-10 days): Radish, Arugula, Mustard
- Medium Growers (10-14 days): Broccoli, Kale, Kohlrabi, Cabbage
- Slower Growers (14-21 days): Beets, Swiss Chard, Cilantro, Basil, Pea Shoots, Sunflower
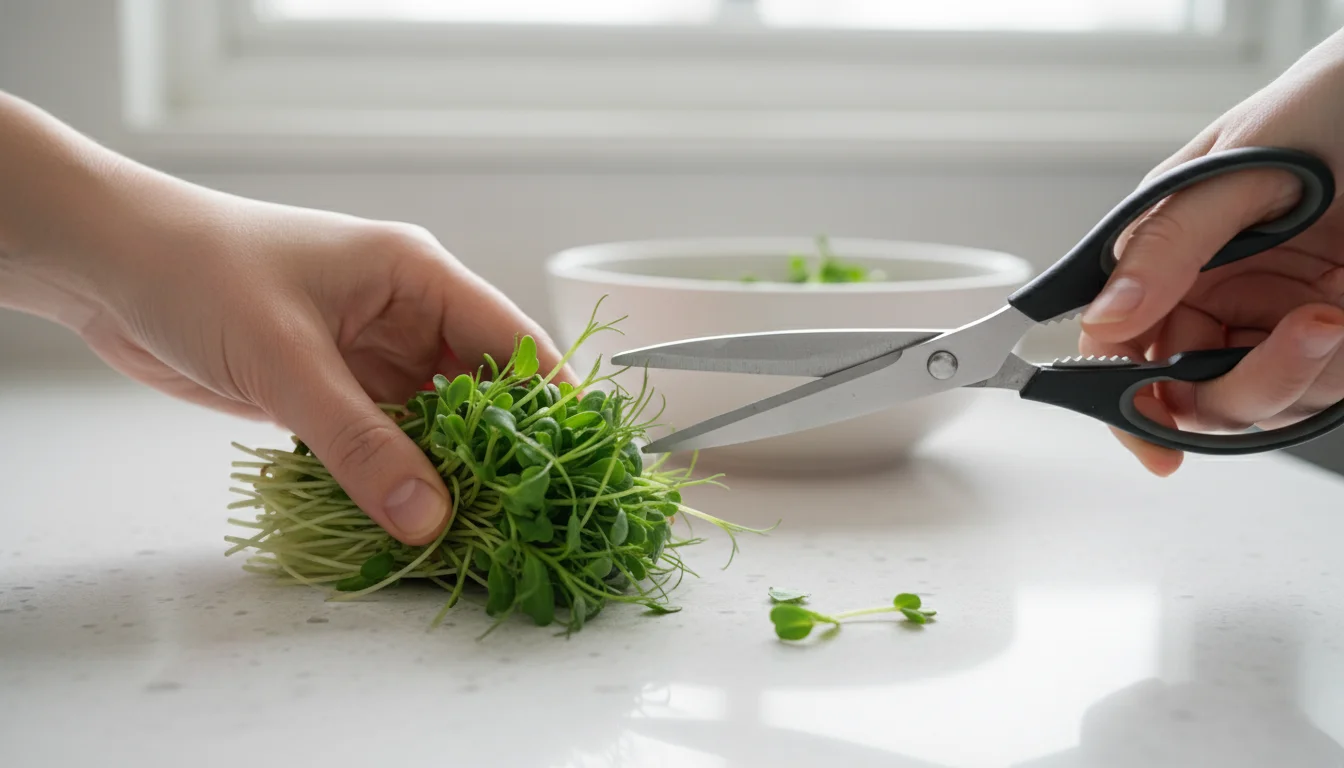
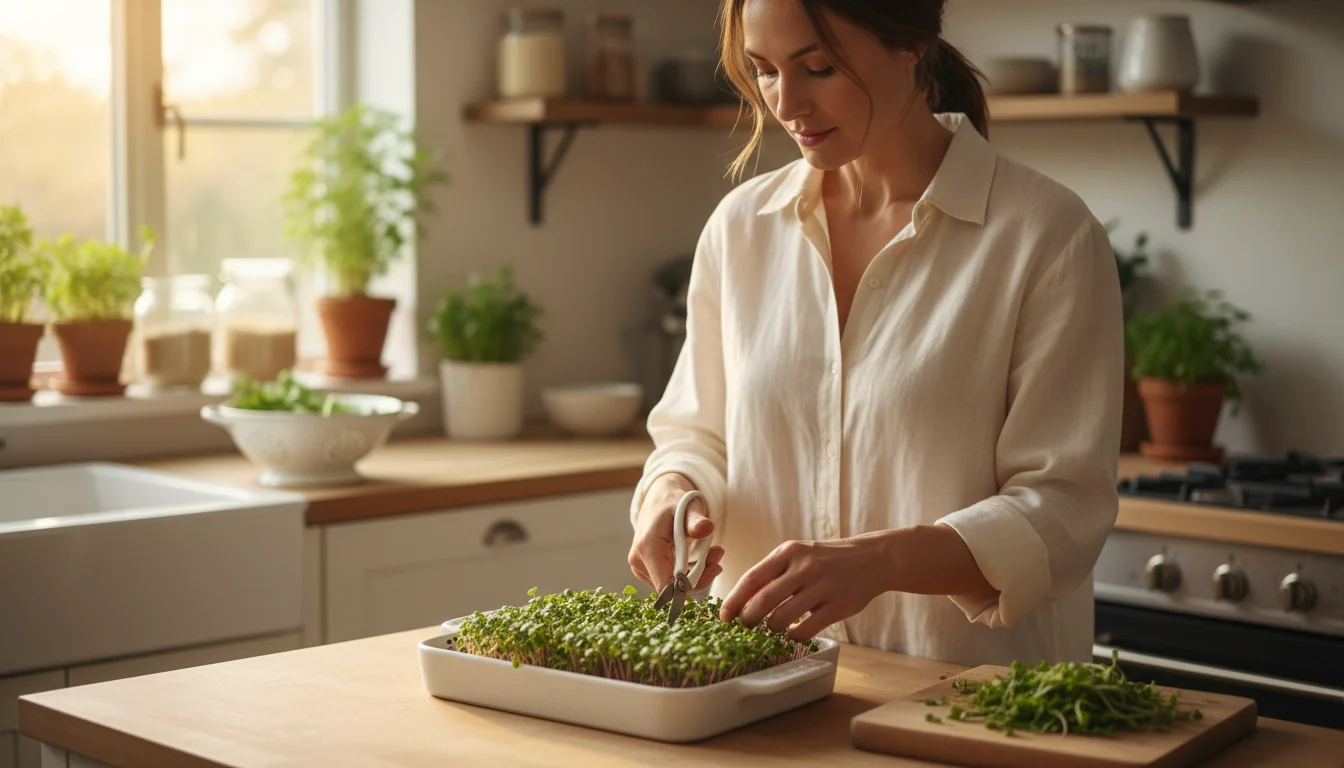
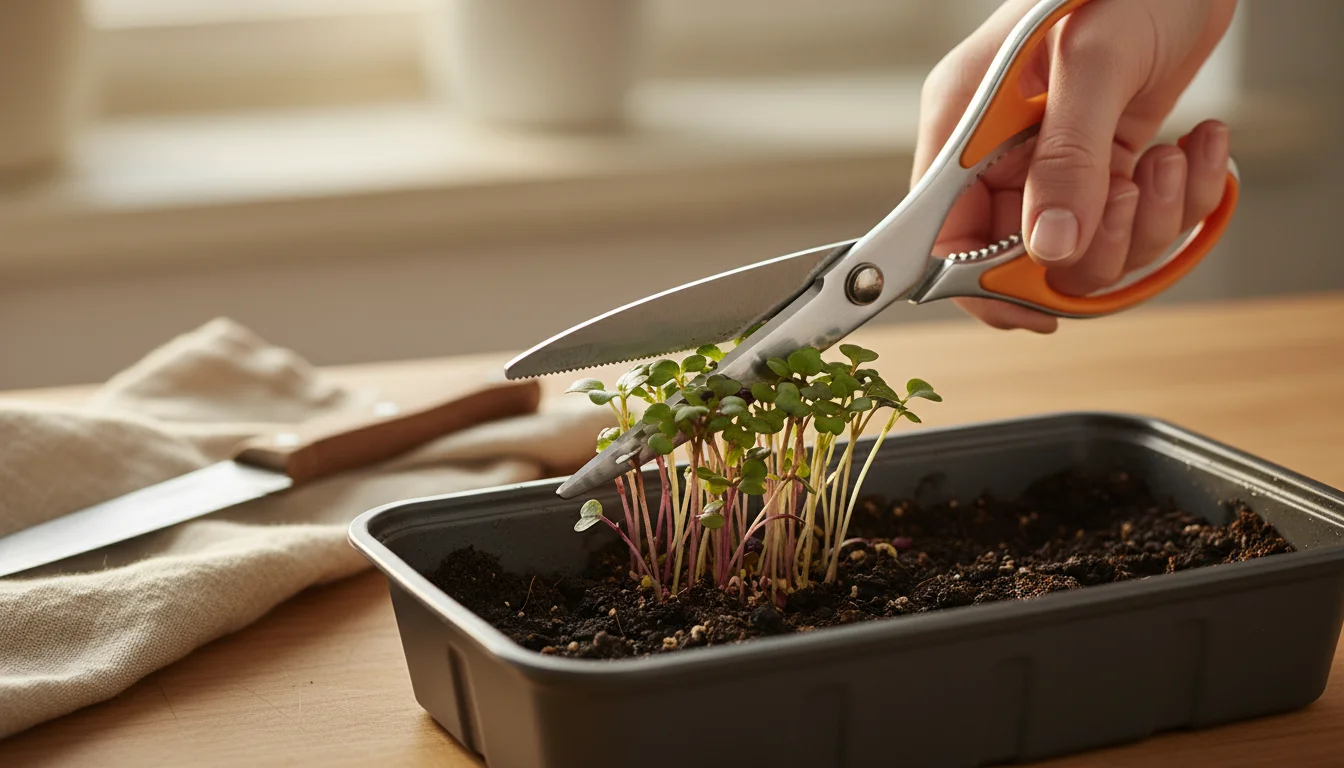
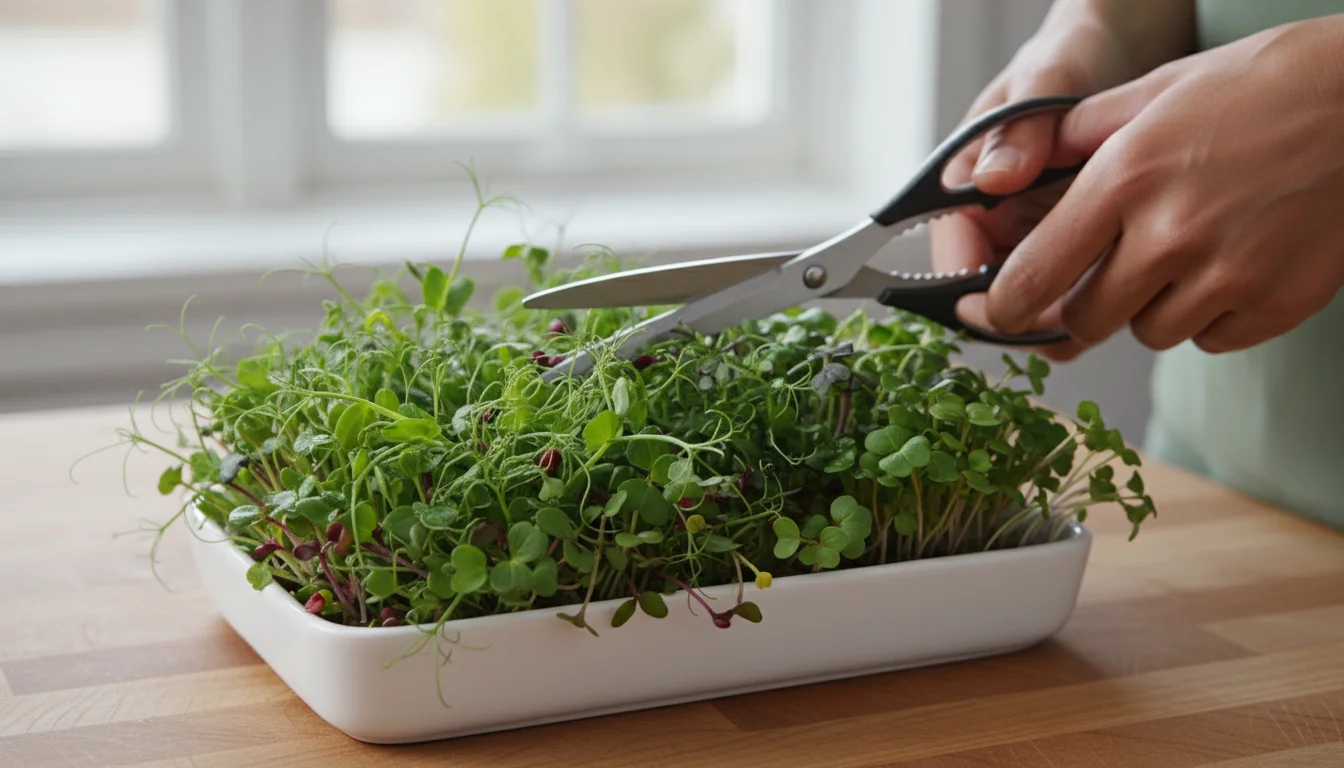
Tools and Technique for Harvest
A clean, sharp tool ensures a quick and efficient harvest without damaging the delicate plants or causing undue stress. Dull tools can crush stems, leading to quicker spoilage.
- Tools: Use sharp kitchen shears or a clean, sharp paring knife. Sterilize your tools with rubbing alcohol before and after each harvest to prevent the spread of any potential pathogens.
- Technique: Grasp a small bunch of microgreens gently. Cut the stems just above the soil line, approximately half an inch to one inch above the medium. Avoid cutting into the soil, as this introduces soil particles into your harvest and can dull your blade. Try to harvest only what you plan to use immediately for the freshest experience. If you need a larger quantity, harvest entire trays.
Single Harvest vs. Cut-and-Come-Again
Most microgreens are a one-time harvest crop. You cut them once, and they do not regrow significantly. However, a few varieties offer a “cut-and-come-again” option, allowing for a second or even third harvest. This typically applies to:
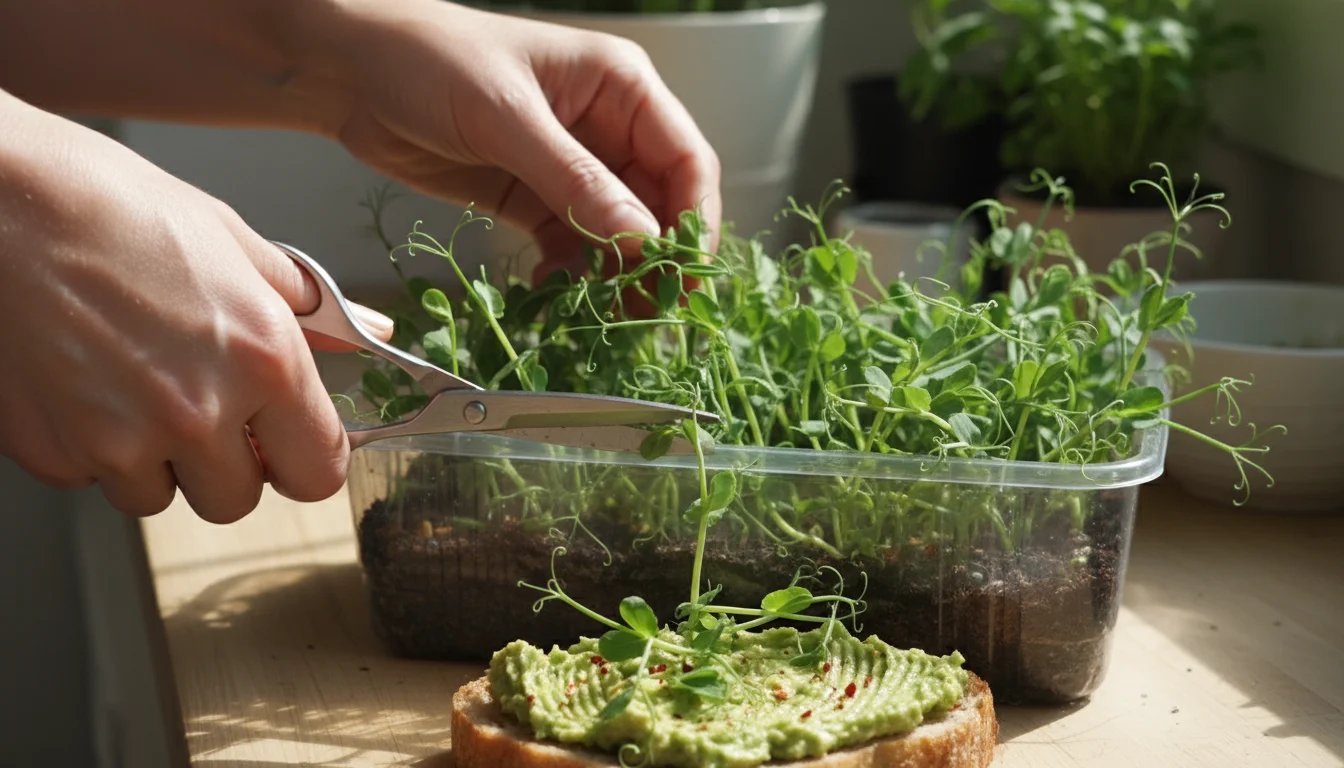
- Pea Shoots: You can often get a second harvest if you cut them above the lowest leaf node. The plant will regrow from there. The second harvest might be slightly less vigorous but still yields tasty greens.
- Wheatgrass: Known for multiple harvests, wheatgrass readily regrows after cutting.
For most other microgreens, the energy reserves in the seed deplete after the first growth, and the effort to get a meager second flush usually outweighs the benefit. It is more efficient to start a new tray.
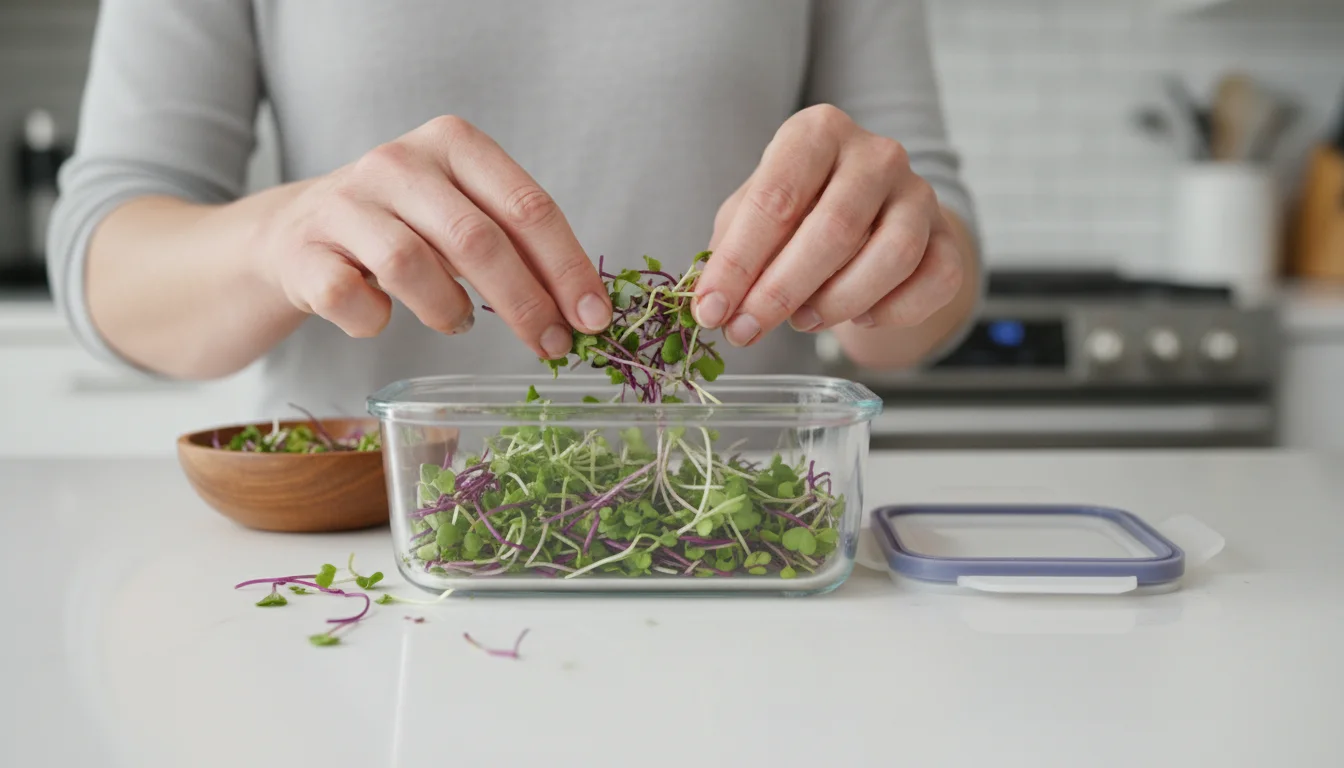
Post-Harvest Handling and Storage
Proper post-harvest care extends the life of your freshly cut microgreens.
- Gentle Washing (Optional): Many growers choose not to wash microgreens if they are cut cleanly, as washing can reduce their shelf life. If you do wash them, do so very gently in a bowl of cool water to remove any stray soil particles.
- Thorough Drying: This is the most crucial step for storage. After washing, or if they feel damp, gently dry your microgreens completely. Use a salad spinner or carefully pat them dry with paper towels. Any residual moisture accelerates spoilage.
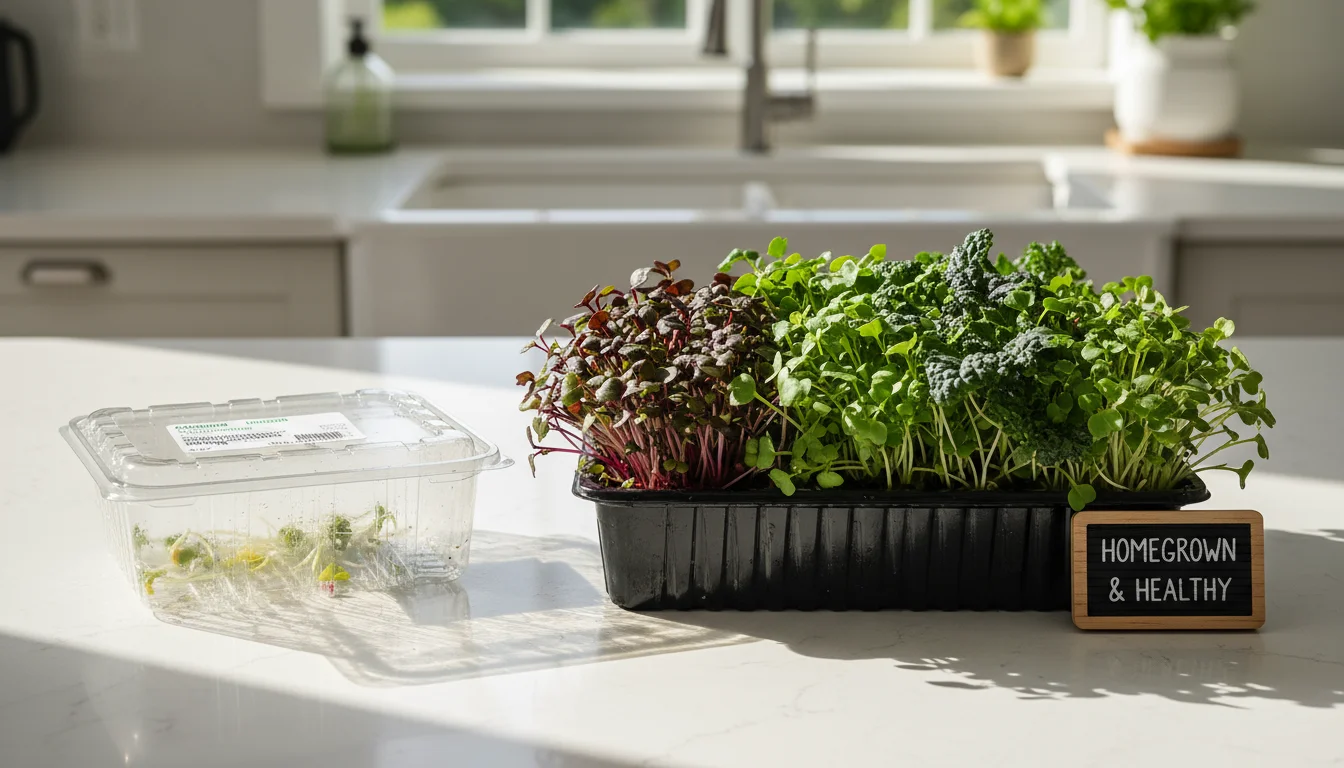
- Airtight Storage: Once dry, store your microgreens in an airtight container lined with a dry paper towel. The paper towel absorbs any remaining moisture, keeping the greens crisp.
- Refrigeration: Place the airtight container in the crisper drawer of your refrigerator. Stored correctly, most microgreens last 5-7 days, with some varieties lasting longer.
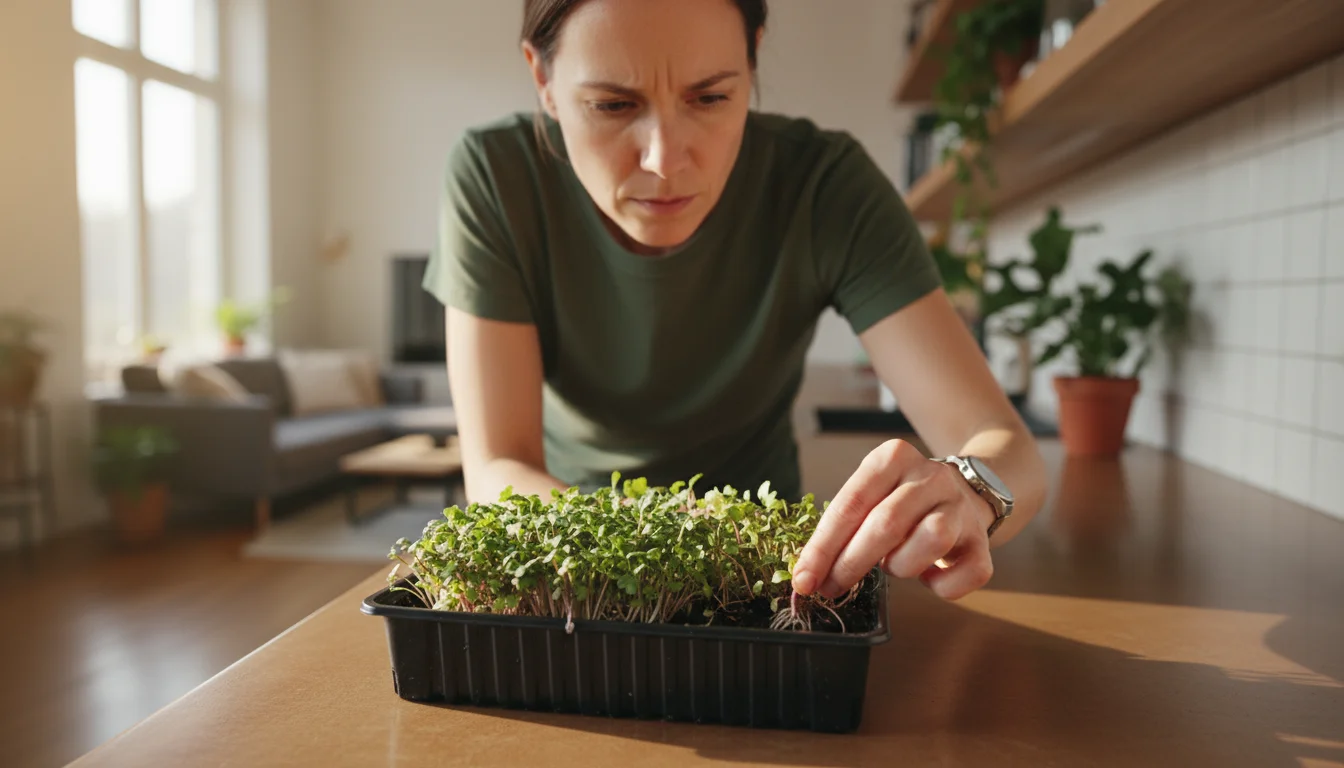
Troubleshooting Common Microgreen Problems
Even with careful planning, you might encounter a few challenges when growing `microgreens at home`. Recognizing and addressing these issues promptly ensures your `kitchen gardening` success. Here are some common problems and practical solutions.
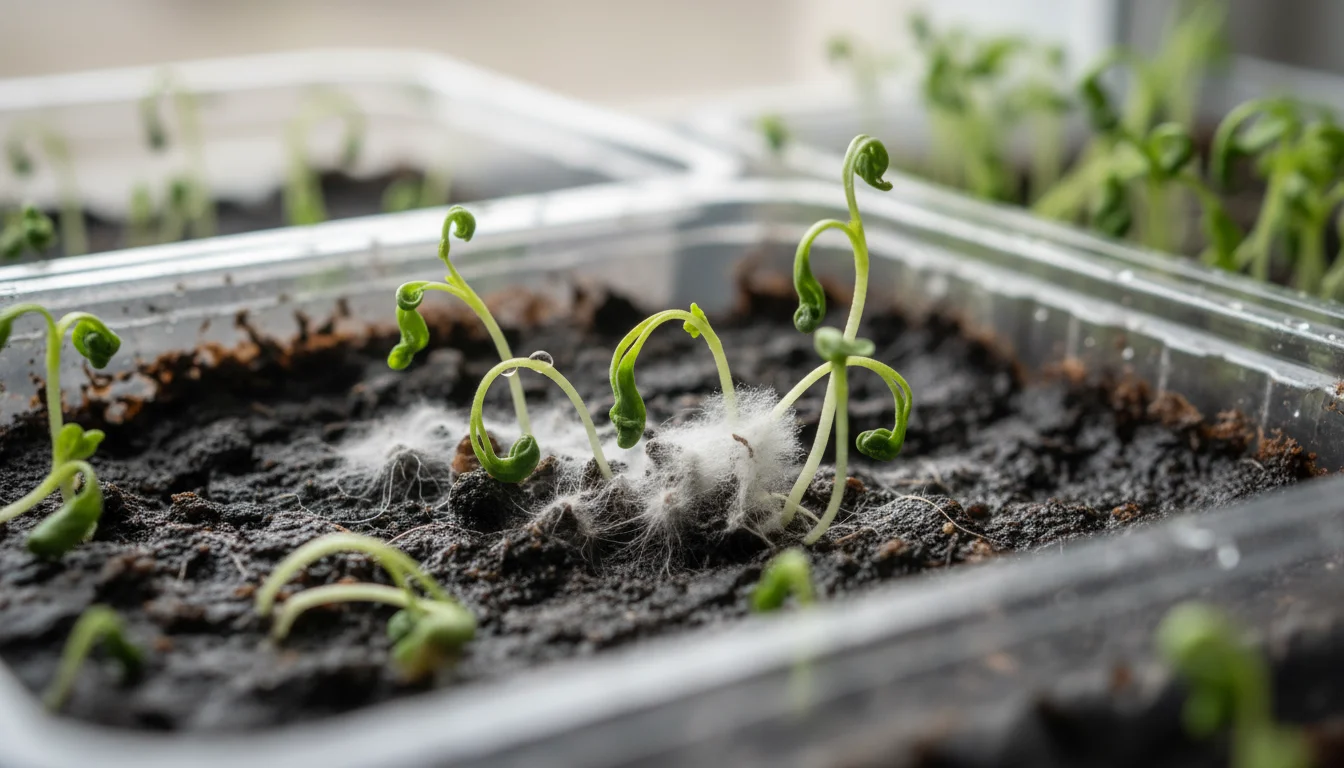
Mold or Damping Off
This is perhaps the most common and disheartening issue. Mold appears as white or grayish fuzzy growth on the soil surface, seeds, or stems. Damping off causes seedlings to suddenly wilt and collapse at the soil line, often with a constricted stem base.
- Cause: Overwatering, poor air circulation, overly dense sowing, non-sterile growing medium, or high humidity.
- Solution:
- Reduce watering frequency and ensure you bottom-water to keep foliage dry.
- Improve air circulation with a small fan or by increasing spacing between trays.
- Ensure you sow seeds with enough space for air movement. While dense, avoid clumping.
- Use a fresh, sterile, peat-free seed starting mix for each planting.
- If mold appears, isolate the affected tray. For a small patch, you might try sprinkling a tiny bit of cinnamon, a natural fungicide, or a very dilute hydrogen peroxide spray (1 part 3% H2O2 to 10 parts water). However, often starting fresh is the most effective approach.
Leggy, Pale, or Stretched Microgreens
If your microgreens appear tall, spindly, and pale with small leaves, they are “leggy.”
- Cause: Insufficient light or the light source is too far away. Plants stretch to reach light.
- Solution:
- Move your trays to a brighter location or closer to your grow light. For grow lights, position them 2-4 inches above the seedlings.
- Increase the duration of light exposure to 12-16 hours per day.
- Rotate trays daily to ensure all sides receive equal light, promoting even growth.
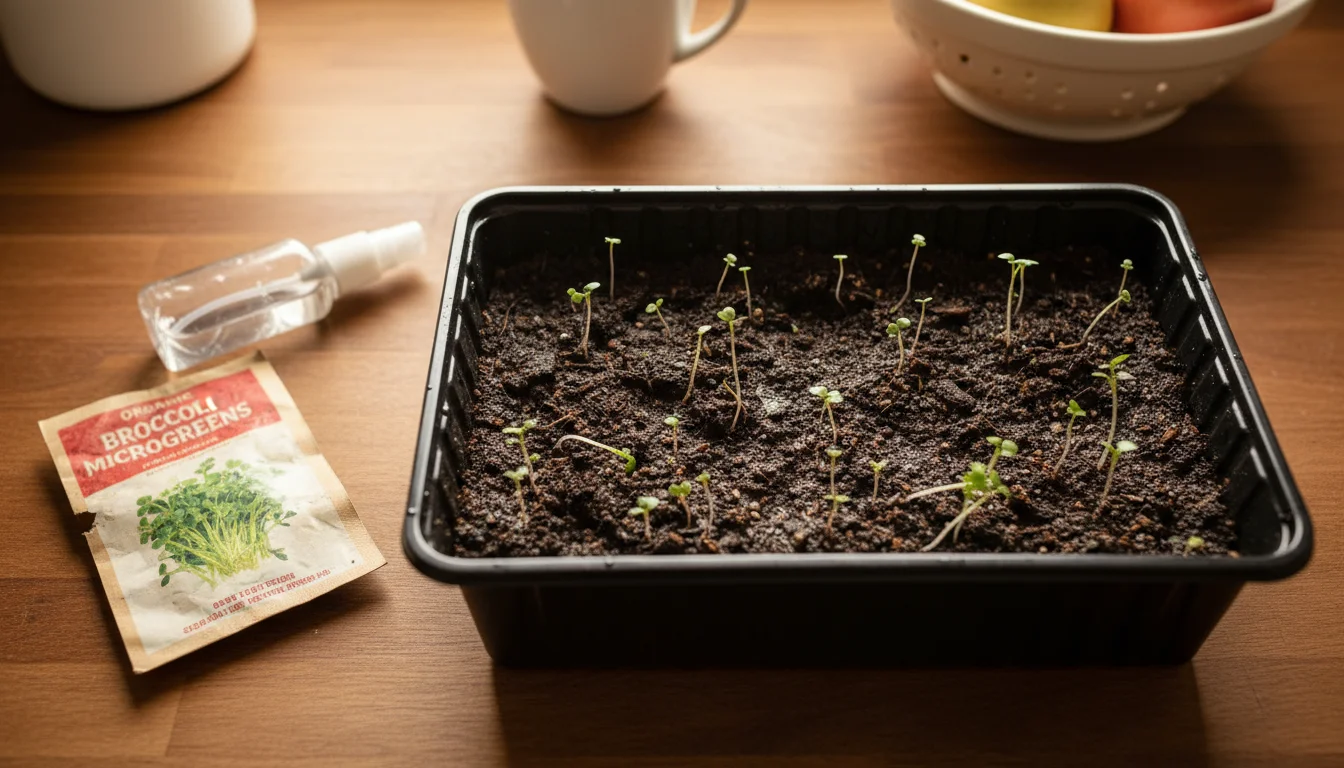
Poor or Uneven Germination
Some seeds do not sprout, or they sprout inconsistently across the tray.
- Cause: Old or low-quality seeds, inconsistent moisture during germination, temperature fluctuations, or inadequate blackout period.
- Solution:
- Use fresh, high-quality seeds from reputable suppliers. Always check seed viability if you suspect old seeds.
- Maintain consistent moisture in the growing medium during the blackout phase; it should be damp, not soggy.
- Ensure a stable room temperature, ideally between 65-75°F (18-24°C), which is optimal for most seeds.
- Confirm the blackout period is sufficient, typically 2-5 days, to encourage strong initial growth before light exposure.
Root Hairs vs. Mold
Sometimes, what appears to be mold on the soil surface might actually be healthy root hairs.
- Distinction: Root hairs appear as very fine, fuzzy white filaments extending from the roots into the soil. They are uniform and cling tightly to the root. Mold, conversely, often looks cottony or slimy, spreads across the soil or decaying seeds, and may have a grayish or darker hue. Mold also often has a distinct musty odor.
- Solution: If you suspect mold, improve airflow and check watering. If you identify root hairs, continue normal care; they indicate healthy root development.
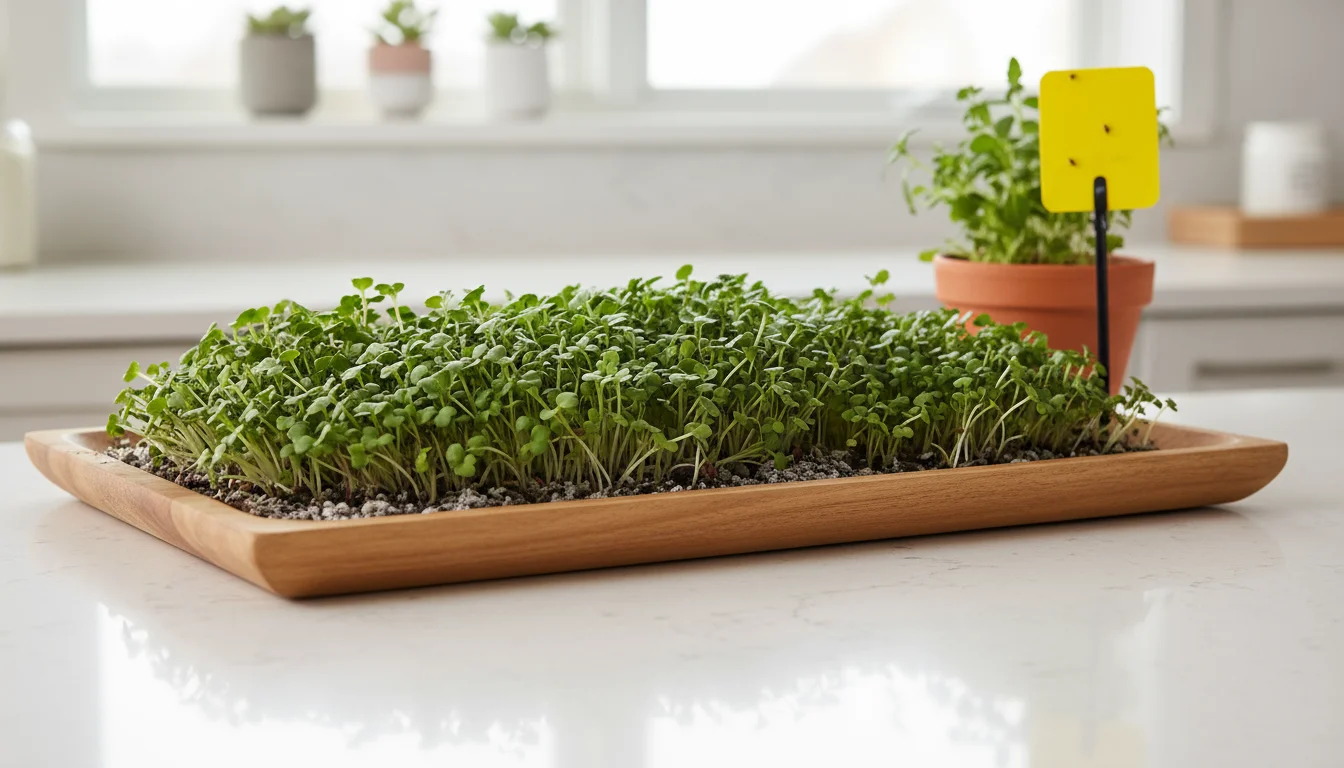
Pests
Pests are rare in indoor microgreen setups due to the short growth cycle and controlled environment. However, fungus gnats can sometimes appear.
- Cause: Overly wet soil, often introduced through contaminated potting mix.
- Solution:
- Allow the top layer of soil to dry out slightly between waterings.
- Use sticky traps near your trays to catch adult gnats.
- Ensure your growing medium is sterile and pest-free.
Succession Sowing for a Continuous Microgreen Harvest
One of the greatest joys of `kitchen gardening` with microgreens is the ability to enjoy a continuous, fresh supply. You achieve this through succession sowing, a simple but effective technique. Succession sowing means planting small batches of seeds at regular intervals, rather than planting an entire large crop all at once. This practice ensures you always have microgreens at various stages of growth, ready for harvest when you need them, preventing gluts and gaps in your supply.
Understanding Succession Sowing
Think of it as staggering your plantings. Instead of sowing three trays of radish microgreens on Monday, you sow one tray on Monday, another on Thursday, and a third on Sunday. By the time your first tray is harvested and consumed, your second tray is ready, and your third tray is well on its way. This method aligns perfectly with the rapid growth cycle of microgreens, which are typically ready to harvest within 7-21 days.
How to Implement a Succession Sowing Schedule
You need to establish a planting rhythm that suits your consumption rate and the growth speed of your chosen microgreens. Here is a practical approach:
- Determine Your Consumption: Estimate how much microgreens your household consumes per week. Do you use one tray’s worth, or do you need two or three?
- Choose Your Varieties: Consider the harvest time for each microgreen. Fast growers like radish and arugula will require more frequent sowing. Slower growers like pea shoots or cilantro can have slightly longer intervals.
- Establish a Planting Interval: For most fast-growing microgreens, sowing a small tray every 3-5 days works well. For slower varieties or if your consumption is lower, you might extend this to once a week.
- Dedicated Trays: Have multiple trays on hand. For example, if you want a continuous supply of radish microgreens, you might have three trays in rotation: one just sown, one growing, and one ready for harvest.
Example Succession Sowing Schedule for a Standard 10×20 Inch Tray
This table illustrates a hypothetical schedule for continuous `grow microgreens` production, assuming you use one tray per harvest for small daily additions to meals.
| Week | Day | Activity | Microgreen Type (Example) | Status of Previous Tray |
|---|---|---|---|---|
| 1 | Monday | Sow Tray A | Radish | N/A |
| 1 | Thursday | Sow Tray B | Broccoli | Tray A germinating |
| 2 | Monday | Sow Tray C | Arugula | Tray A ready for harvest, Tray B growing |
| 2 | Wednesday | Harvest Tray A | Radish | Tray B nearing harvest, Tray C growing |
| 2 | Thursday | Sow Tray D | Radish (repeat) | Tray B ready for harvest, Tray C growing |
| 3 | Monday | Harvest Tray B | Broccoli | Tray C nearing harvest, Tray D growing |
| 3 | Tuesday | Sow Tray E | Broccoli (repeat) | Tray C nearing harvest, Tray D growing |
This cycle continues, providing you with fresh microgreens every few days. Adjust the number of trays and sowing intervals based on your personal needs and the growth rates of your chosen varieties. You quickly find a rhythm that works for your `kitchen gardening` efforts.

Incorporating Your Harvest: Delicious Ways to Use Microgreens
You have successfully cultivated your vibrant `microgreens at home` on your kitchen counter. Now comes the exciting part: enjoying your fresh harvest! Microgreens are incredibly versatile, adding a burst of flavor, texture, and nutrition to a wide array of dishes. Their intense flavors mean a little goes a long way, elevating everyday meals into gourmet experiences.
Enhance Your Everyday Meals
Microgreens are not just a garnish, they are a powerful ingredient that can transform simple dishes. Here are some practical ways to incorporate them into your daily diet:
- Salads: The most obvious use. Instead of plain lettuce, mix in a handful of spicy radish microgreens or sweet pea shoots to create a more dynamic and nutritious salad. You can also use a generous bed of microgreens as the base for a light, vibrant side salad.
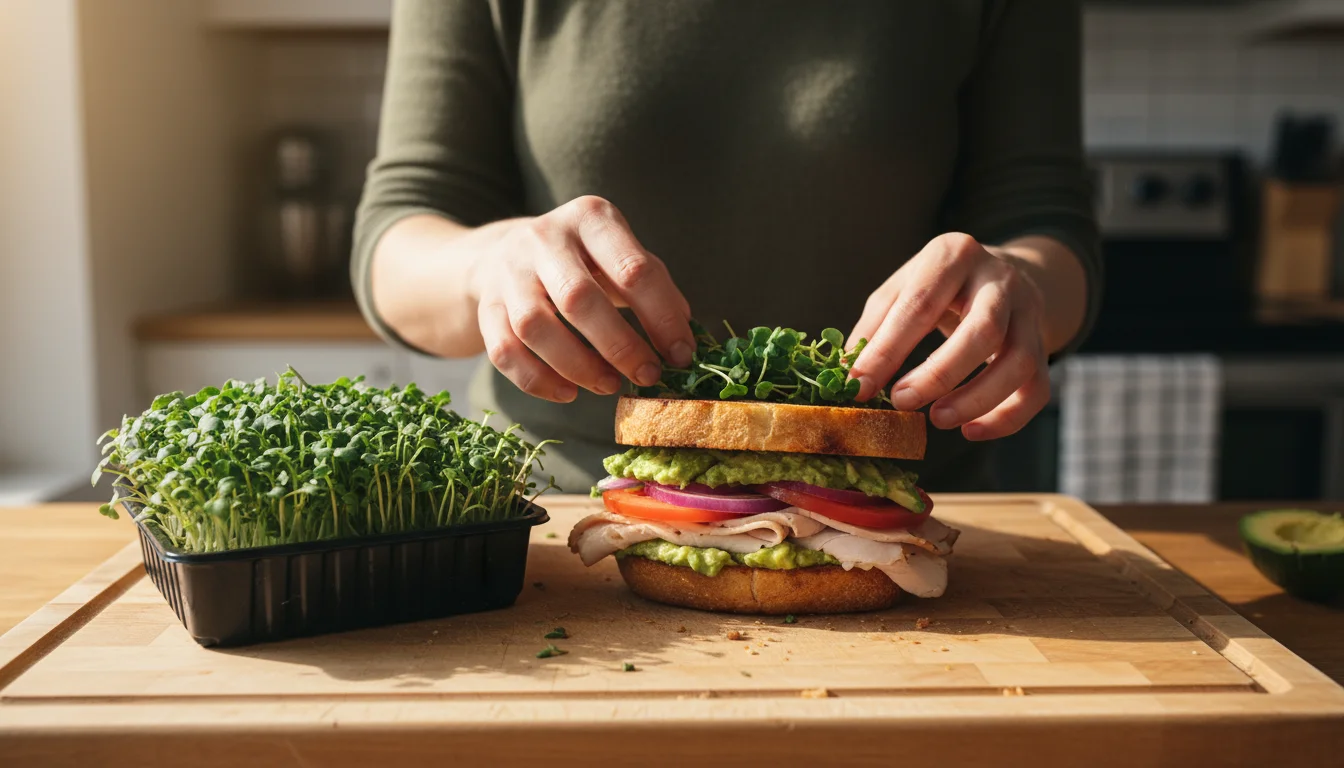
- Sandwiches and Wraps: Replace or supplement traditional lettuce with microgreens for added crunch, flavor, and a nutritional boost. Broccoli microgreens in a turkey sandwich, or spicy arugula microgreens in a veggie wrap, add a fresh twist.
- Soups and Stews: Stir a handful of microgreens into your bowl of soup or stew just before serving. The residual heat gently wilts them, releasing their flavor and adding a fresh element without overcooking. Pea shoots or kale microgreens work wonderfully here.
- Scrambled Eggs and Omelets: Fold microgreens into your eggs just as they finish cooking, or sprinkle them on top. Their fresh flavor brightens up any egg dish, offering a savory contrast.
- Smoothies and Juices: For a hidden nutritional kick, blend mild-flavored microgreens like broccoli, kale, or wheatgrass into your morning smoothie or fresh juice. They integrate seamlessly, boosting your intake of vitamins and minerals.
- Pizzas and Flatbreads: Add a layer of microgreens on top of your pizza or flatbread immediately after it comes out of the oven. The warmth wilts them slightly, bringing out their flavor. Arugula or basil microgreens are excellent choices.
Creative Culinary Applications
Do not limit yourself to the basics. Experiment with your microgreens in more adventurous ways:
- Garnish for Main Courses: Elevate roasted meats, grilled fish, or pasta dishes with a vibrant topping of microgreens. They provide both visual appeal and a fresh counterpoint to richer flavors. Consider cilantro microgreens for Mexican or Asian-inspired dishes.
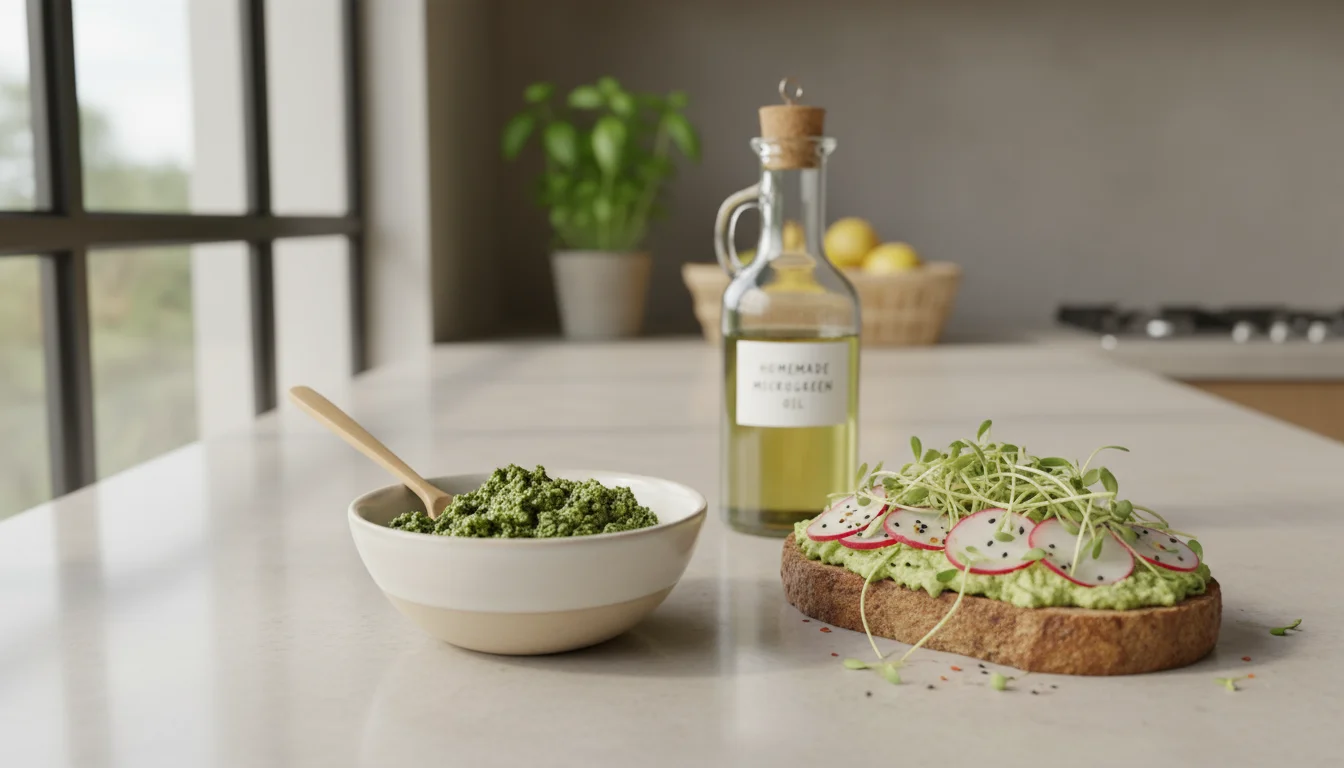
- Pesto: While traditional pesto uses basil, you can create unique pestos with microgreens. Try a blend of sunflower microgreens and basil, or an all-arugula microgreen pesto for a peppery kick.
- Dressings and Dips: Finely chop microgreens and blend them into homemade salad dressings, vinaigrettes, or creamy dips. They add depth of flavor and a beautiful green hue.
- Loaded Toast and Avocado Toast: A simple slice of avocado toast becomes a gourmet treat with a generous pile of mixed microgreens on top, perhaps with a sprinkle of sea salt and red pepper flakes.
The key is to add microgreens at the very end of cooking, or use them raw. Their delicate structure and concentrated nutrients are best preserved when exposed to minimal heat. Your `grow microgreens` effort pays off in delicious, healthy, and visually appealing meals every time.
Frequently Asked Questions
Can I reuse the soil after harvesting microgreens?
While some adventurous gardeners try, we generally do not recommend reusing the soil for successive batches of microgreens. Microgreens exhaust many of the available nutrients in the small amount of growing medium during their rapid growth cycle. Additionally, spent soil can harbor mold spores or other pathogens from the previous crop, increasing the risk of issues for your next batch. For best results and to minimize problems, use fresh, sterile, peat-free seed starting mix for each planting. You can compost the spent soil and root mats, returning the organic matter to the earth sustainably.
Do I need special seeds to grow microgreens?
Yes, you absolutely need specific seeds for `grow microgreens`. Always purchase seeds labeled for microgreen production or untreated, organic seeds. Standard garden seeds are often treated with fungicides or pesticides to protect them during longer outdoor germination periods. These chemicals are not safe for consumption, especially when you eat the young, raw plant. Reputable seed suppliers offer bulk quantities of untreated seeds suitable for dense microgreen sowing. This ensures your `microgreens at home` are safe and healthy.
What if my microgreens get moldy?
Mold is a common issue, typically caused by overwatering, insufficient airflow, or overly dense sowing. If you notice mold, first isolate the affected tray to prevent spread. Increase air circulation by using a small fan or giving your trays more space. Ensure you are bottom-watering to keep the foliage dry, and let the top layer of soil dry slightly between waterings. For a mild case, you can try spraying a very dilute hydrogen peroxide solution (1 part 3% H2O2 to 10 parts water). However, often, the most effective solution is to discard the moldy crop and thoroughly clean your trays before starting a fresh batch, implementing preventive measures from the beginning.
How long do microgreens last after harvest?
With proper handling, most microgreens last 5-7 days in the refrigerator. The key to extending their shelf life is to harvest them cleanly, wash them gently only if necessary, and most importantly, dry them thoroughly. Any residual moisture significantly shortens their storage time. Store completely dry microgreens in an airtight container lined with a dry paper towel in your refrigerator’s crisper drawer. For maximum flavor and nutrient density, we recommend consuming them within 2-3 days of harvest.
Can I grow microgreens without grow lights?
Yes, you can `grow microgreens` without grow lights if you have access to a very bright, sunny windowsill, ideally south-facing, that receives at least 4-6 hours of direct sunlight daily. However, natural light conditions can vary greatly with seasons and weather, potentially leading to leggy or less vibrant growth. For consistent results, especially during winter months or in homes with limited natural light, a simple LED grow light setup is highly recommended. Grow lights provide controlled intensity and duration, resulting in stronger, more robust microgreens.


Leave a Reply