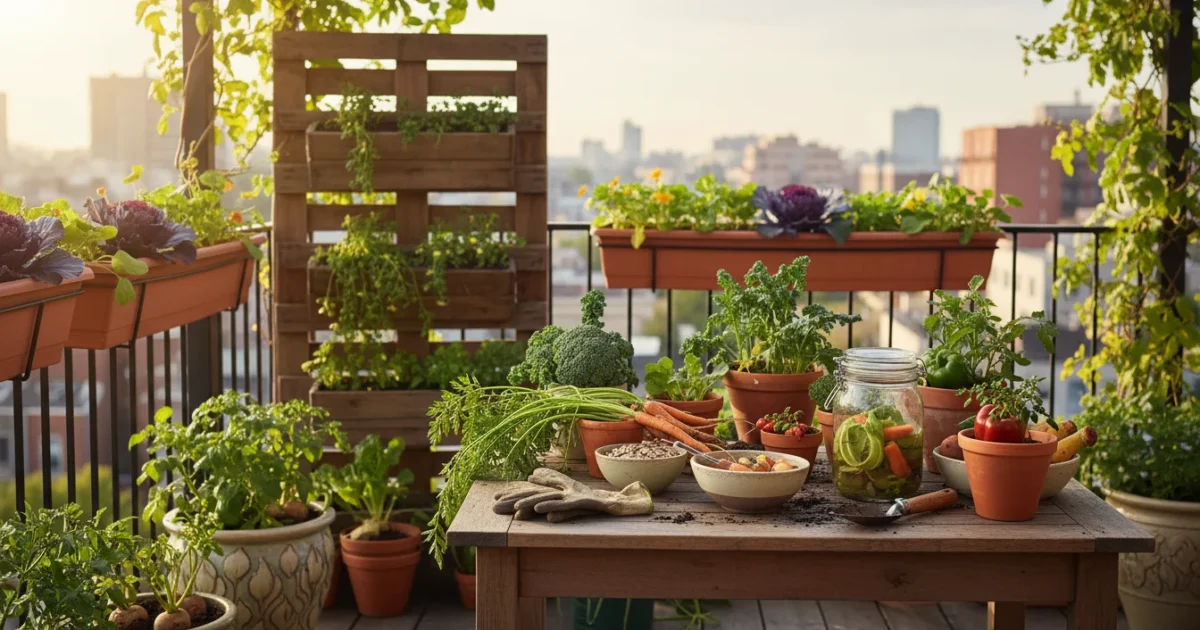
As a small-space gardener, you master maximizing every inch of your growing area. But what about maximizing every part of your harvest? You probably already enjoy the delicious roots and florets of your fall vegetables. Yet, many gardeners toss away perfectly edible, nutrient-rich parts like carrot tops, beet greens, and broccoli stems. This guide shows you how to transform these often-discarded “scraps” into culinary delights, adding flavor, nutrition, and incredible value to your container garden. You will discover practical ways to embrace no-waste gardening, making your efforts even more sustainable and rewarding. Learn to appreciate the full potential of your container harvest this fall.
If you are looking to expand your autumn garden, there are several overlooked root veggies you can still plant in deep pots during the late season.
Why Embrace the Scrappy Harvest in Your Small Garden?
When you grow vegetables in containers, every seed and every leaf represents an investment of time, effort, and resources. Adopting a “scrappy harvest” approach means you get the absolute most from that investment. This practice aligns perfectly with no-waste gardening principles, helping you reduce food waste while increasing the yield and nutritional diversity of your meals. Many discarded vegetable parts offer impressive health benefits and culinary versatility. For example, beet greens contain more iron than spinach, and broccoli stems deliver a satisfying crunch alongside vitamins C and K. By using these parts, you essentially expand your harvest without planting more. You also save money, stretching your grocery budget further by transforming what was once waste into delicious ingredients. This sustainable method fosters a deeper connection to your food and encourages mindful consumption, a core value for any small-space gardener.
Beyond fresh use, you can also explore ways to preserve your final scrappy balcony harvest to keep these nutrient-dense flavors available through winter.
Furthermore, embracing the whole vegetable enhances your gardening journey. You learn to recognize the full potential of each plant you cultivate. This knowledge empowers you to make more informed decisions about what to grow and how to use it, solidifying your expertise as a gardener. It is an environmentally conscious choice, reducing the amount of organic material sent to landfills. This helps minimize methane emissions, a potent greenhouse gas. Your small actions in your container garden create a significant positive impact on the environment. You gain a richer culinary experience, experimenting with new textures and flavors often overlooked in traditional cooking. You boost your kitchen creativity, finding exciting new ways to prepare familiar vegetables. This approach extends your food dollar, as you effectively purchase less by utilizing more of what you already grow. Your culinary skills improve, and you develop a greater appreciation for the entire life cycle of your plants. This commitment to sustainability makes your small-space gardening efforts even more meaningful and impactful.
Beyond the environmental and economic benefits, the scrappy harvest enriches your diet. Many overlooked vegetable parts are surprisingly rich in vitamins, minerals, and antioxidants. Incorporating them adds diverse nutrients and flavors to your meals. You diversify your plate, moving beyond the usual suspects and exploring a wider range of tastes and textures. This makes healthy eating more exciting and accessible. Imagine a vibrant carrot top pesto, a hearty beet green sauté, or a crunchy broccoli stem slaw. These dishes bring fresh perspectives to your menu and demonstrate the true bounty of your container garden. You become a more resourceful cook, capable of transforming simple ingredients into extraordinary meals. This mindset fosters a spirit of innovation in your kitchen, constantly seeking new ways to create delicious, healthy food from your own backyard, or in your case, your balcony or patio.
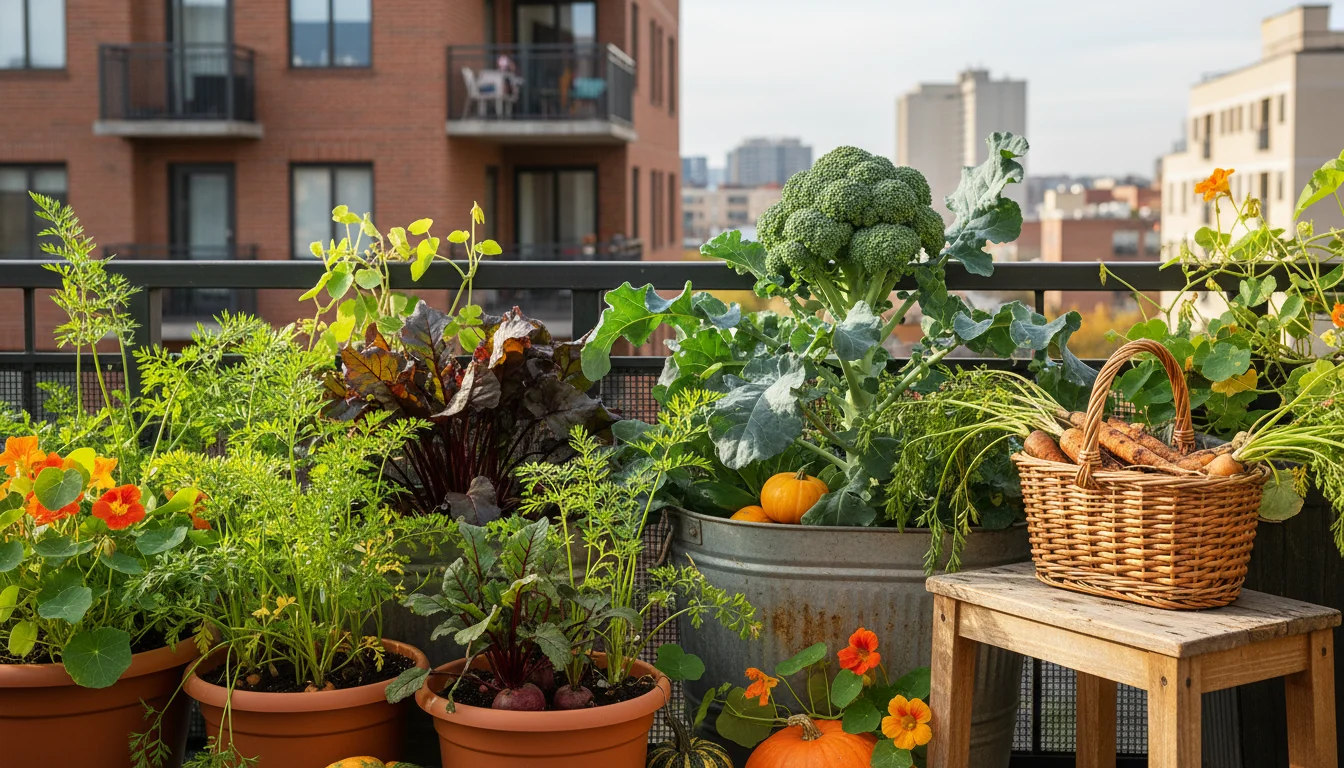
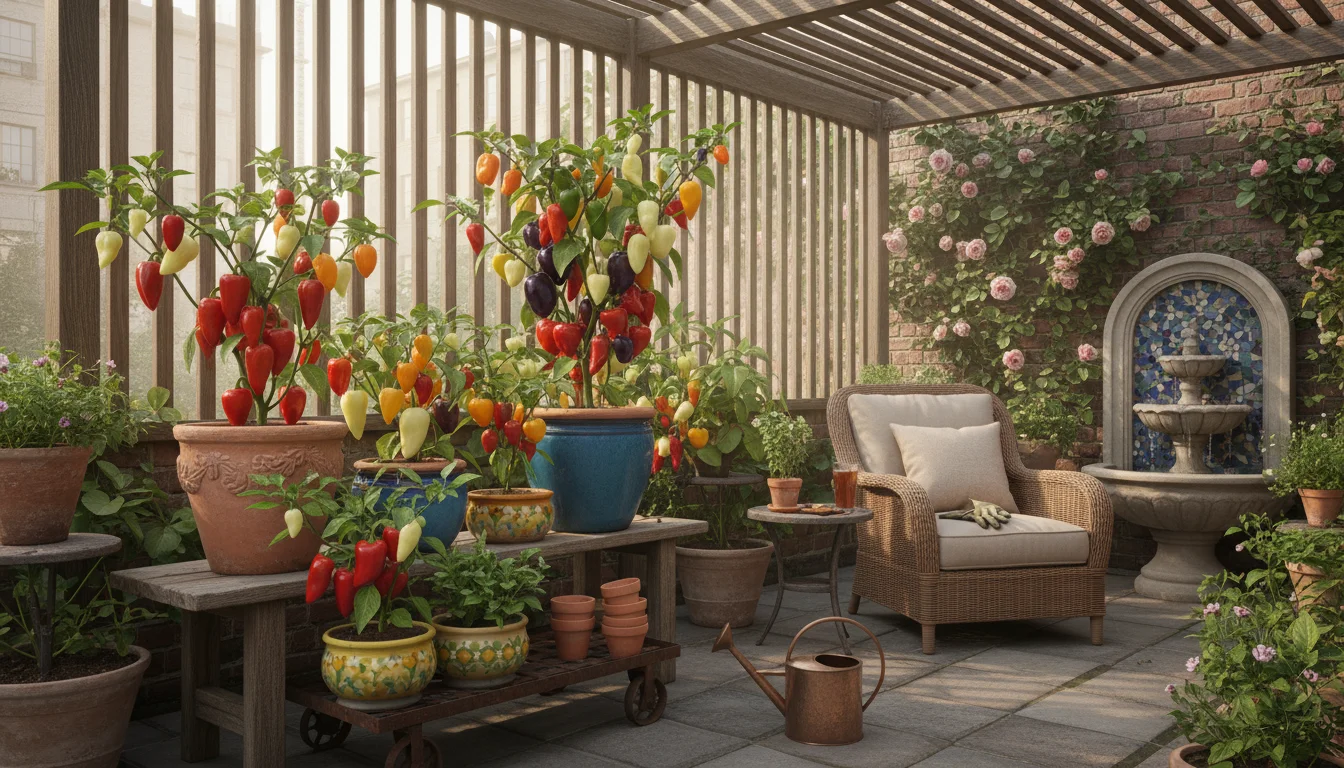
Top Fall Vegetables for Your Containers and Their Hidden Edible Gems
Fall brings a delightful array of cool-season vegetables perfect for container growing. These plants often thrive in the milder temperatures, producing robust harvests. Understanding which parts of these fall vegetables are edible, beyond the primary crop, opens up a world of possibilities for your kitchen. Here, we focus on three fantastic examples that provide excellent “scrappy harvest” opportunities from your pots.
If you enjoy high-yield greens, growing kale in a pot is another excellent option as it offers a similar dual bounty of leaves and stems.
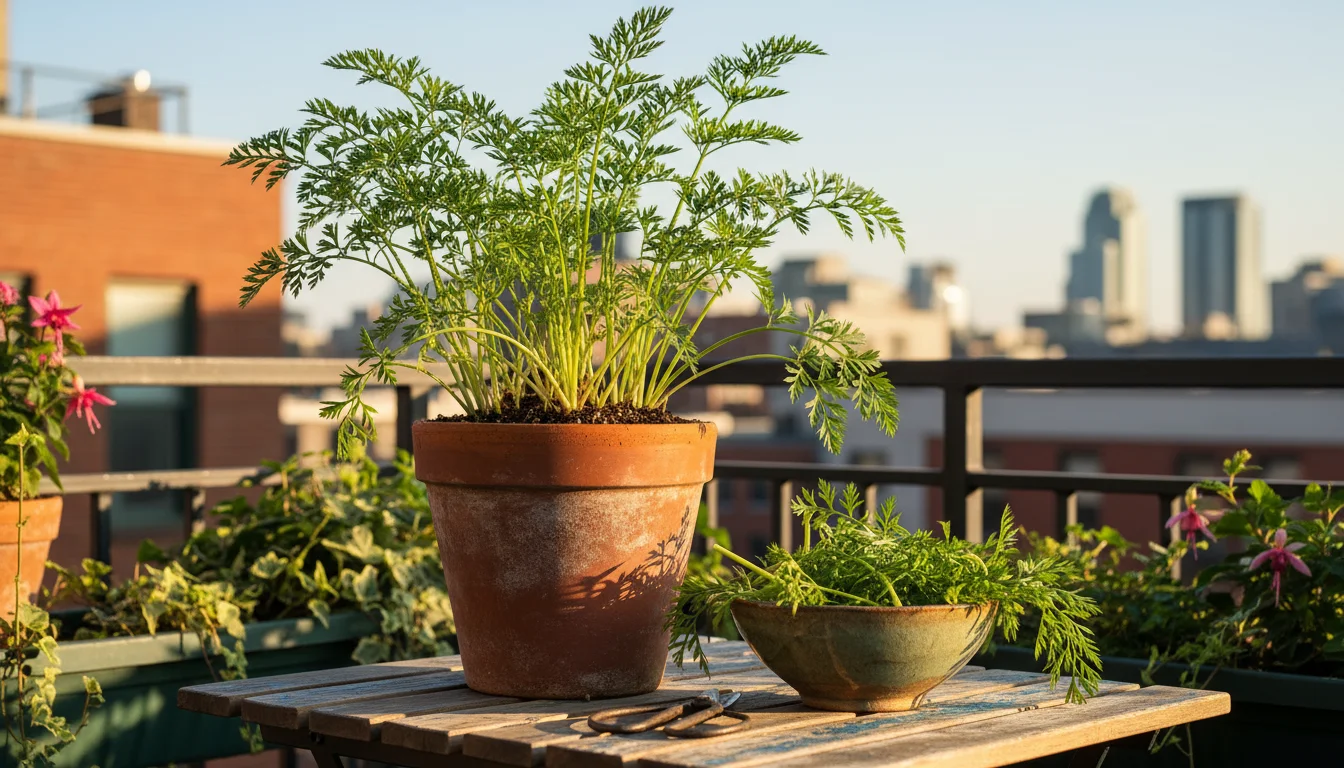
Carrots (Daucus carota): More Than Just Roots
Carrots are a staple in many container gardens. They grow well in deep pots, producing vibrant orange, purple, or white roots. Most gardeners eagerly pull up the roots and then discard the leafy green tops. However, carrot tops are entirely edible and packed with flavor. They possess a slightly bitter, earthy taste, similar to parsley, and a vibrant green color that adds appeal to dishes. These greens are rich in vitamins A, C, and K, as well as several minerals. They do contain compounds called furocoumarins, which can cause skin irritation in some sensitive individuals when handled wet and exposed to sunlight. Eating them in typical culinary portions is perfectly safe. Avoid tops from carrots treated with pesticides by growing your own in containers or buying organic varieties. Their distinct flavor profile makes them a fantastic ingredient for pestos, chimichurris, and a range of other savory dishes. You enhance your cooking with a fresh, herbaceous note often missed when you only use the root.
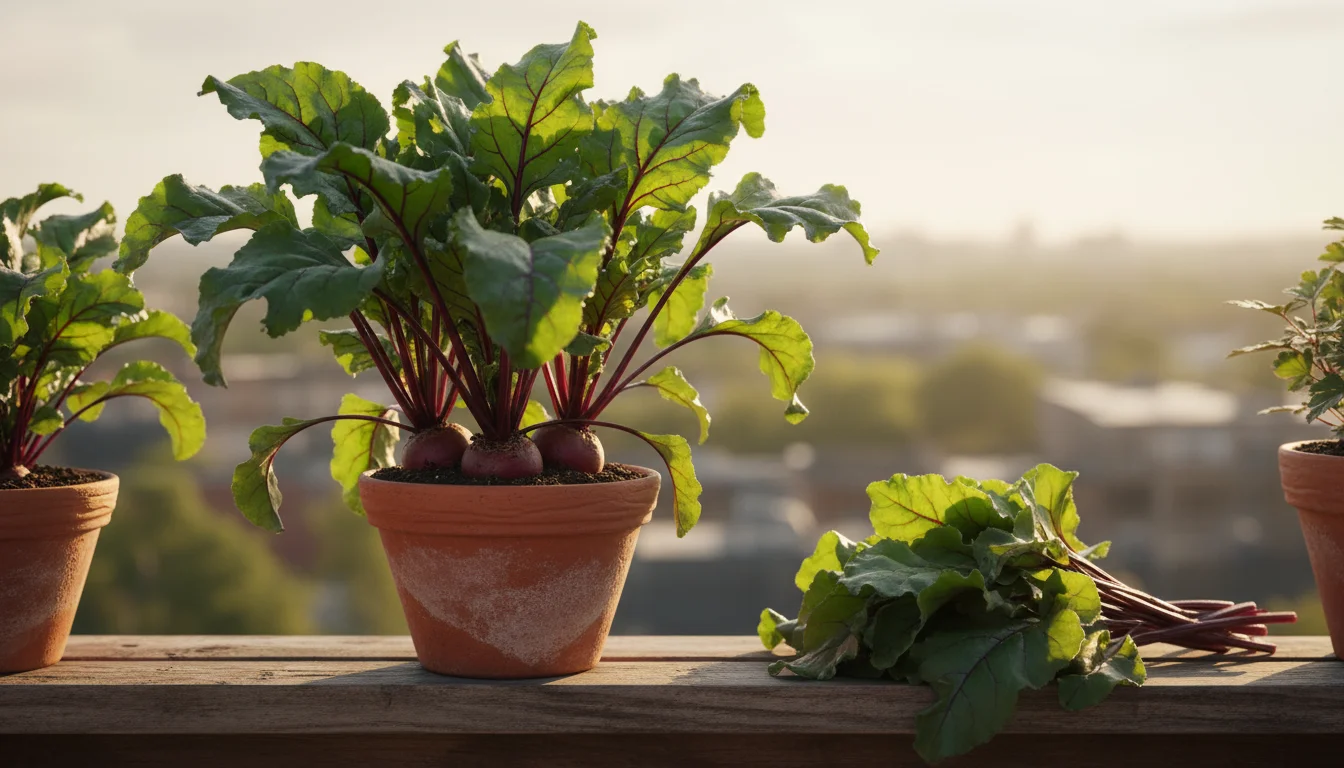
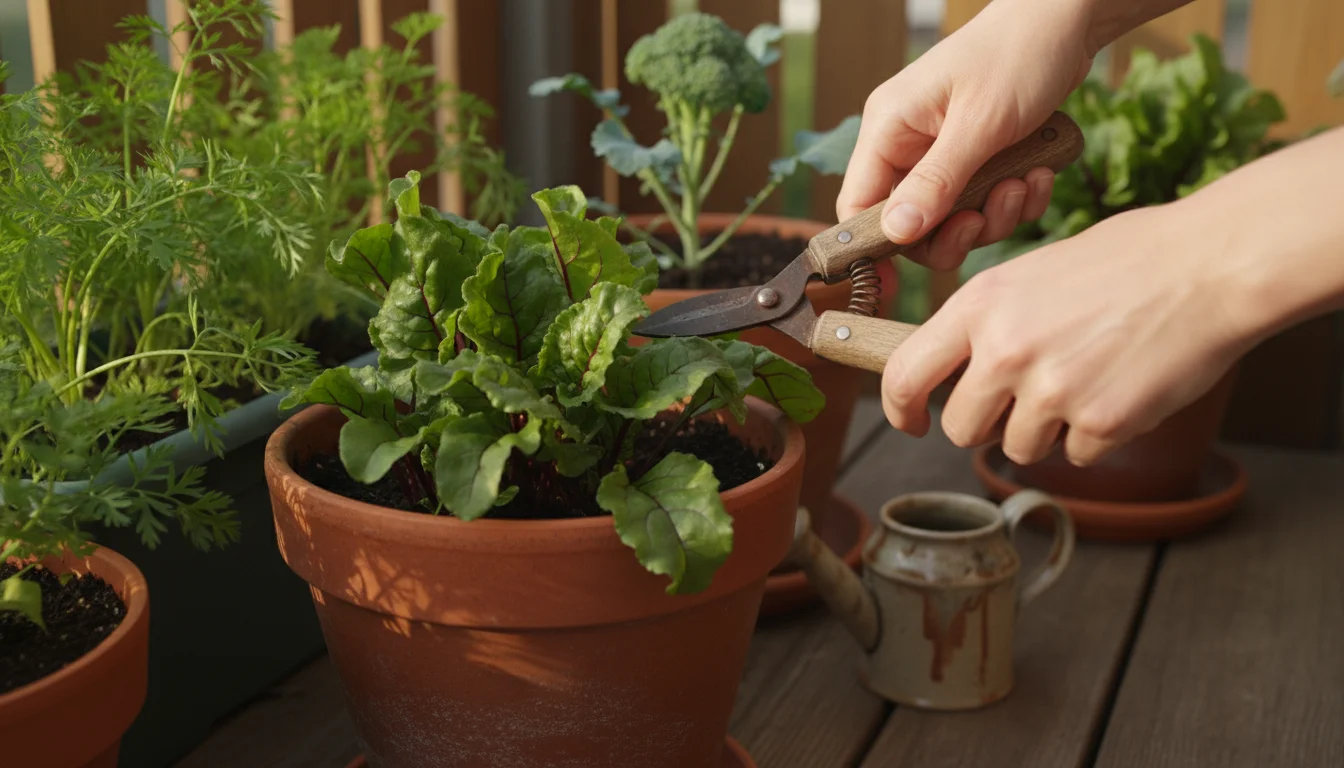
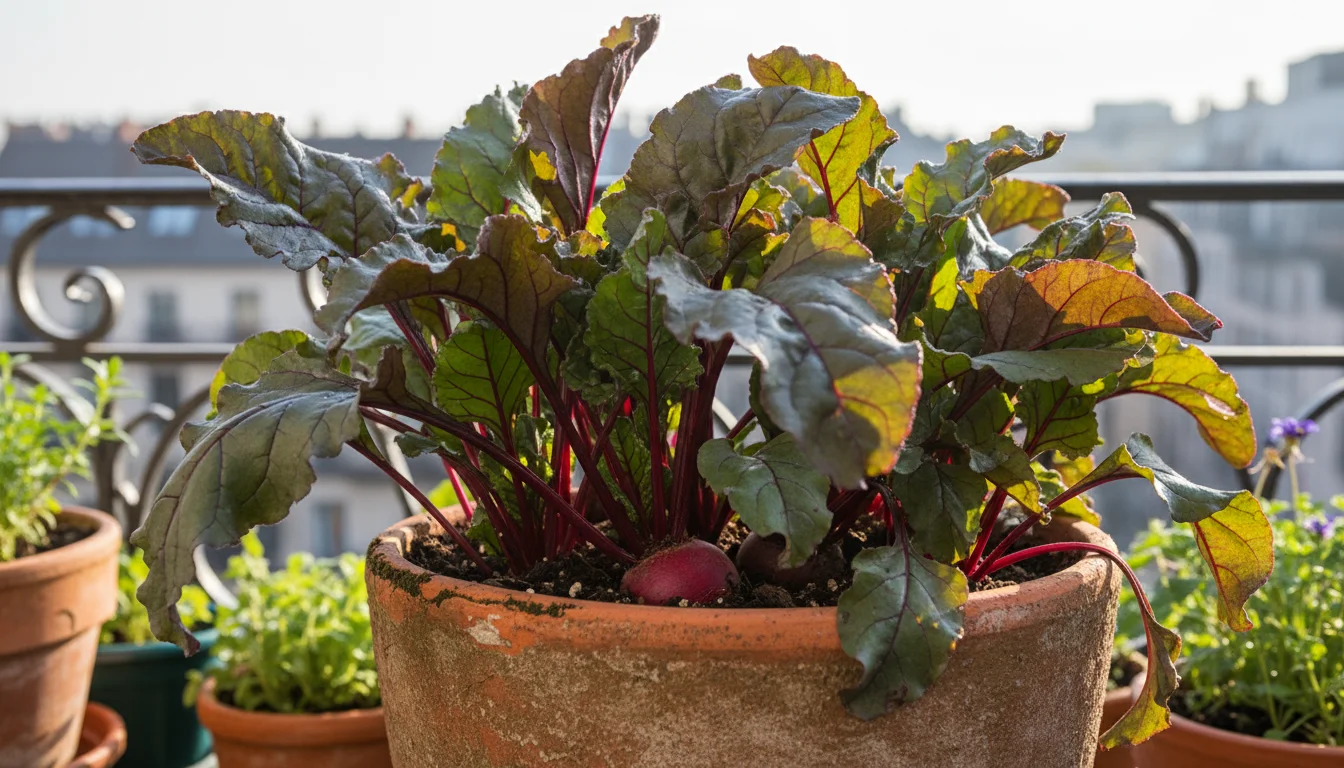
Beets (Beta vulgaris): Two for One Harvest
Beets are another excellent choice for container growing. You cultivate them for their colorful, nutrient-dense roots. However, the leafy green tops are often considered a bonus crop. Beet greens are undeniably delicious and incredibly nutritious. They offer a slightly bitter, earthy flavor reminiscent of Swiss chard or spinach, but with a unique beet-like undertone. They are outstanding sources of vitamins A, C, and K, along with calcium, iron, and magnesium. You can harvest these greens throughout the growing season without sacrificing the root’s development, making them a true dual-purpose plant for your container harvest. Just ensure you leave enough foliage for the root to continue growing. Their vibrant color and texture make them an exciting addition to any meal. You gain a continuous supply of fresh, healthy greens from a single planting. This maximizes your yield in a small space, providing nutrient-rich food for an extended period. Many people find the taste of home-grown beet greens superior to those purchased from a store, offering a fresh, vibrant flavor that elevates any dish.
Broccoli (Brassica oleracea var. italica): Stems Get Star Billing
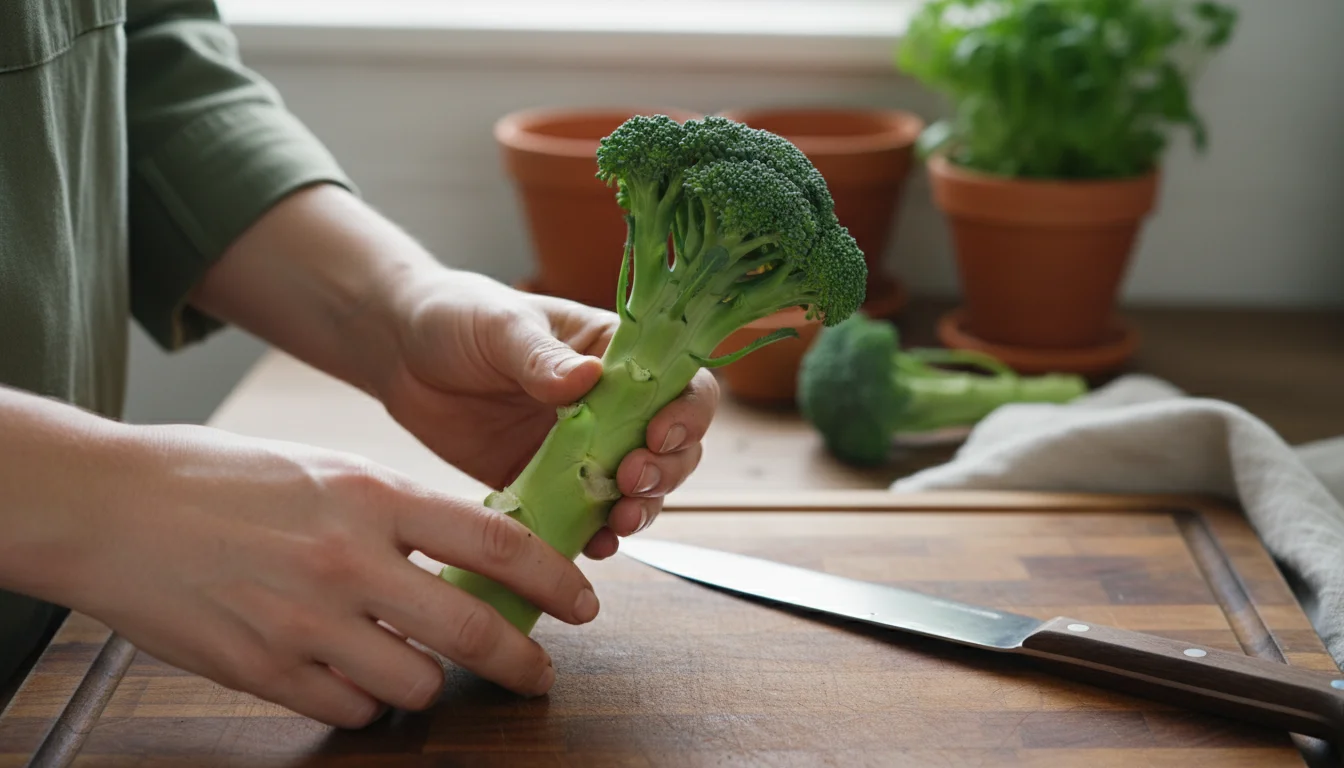
Broccoli is a rewarding fall vegetable for containers, providing large, nutritious florets. After you cut the main head, smaller side shoots often develop, extending your harvest. But what about the thick, often discarded, main stem? Broccoli stems are remarkably edible, offering a sweet, mild flavor and a satisfyingly crunchy texture. They are packed with fiber, vitamin C, and other beneficial compounds. Many people peel the tougher outer layer of the stem, revealing a tender, palatable interior. Do not let these substantial parts go to waste. They serve as a perfect example of using the whole vegetable from container garden, transforming what many consider garbage into a culinary asset. You reduce food waste and add a versatile ingredient to your kitchen. The stems are incredibly adaptable, working well in stir-fries, slaws, or roasted dishes. Their crisp texture provides an excellent contrast to softer ingredients, enhancing the overall dining experience. This practice highlights your commitment to sustainable eating and intelligent use of all your homegrown produce.
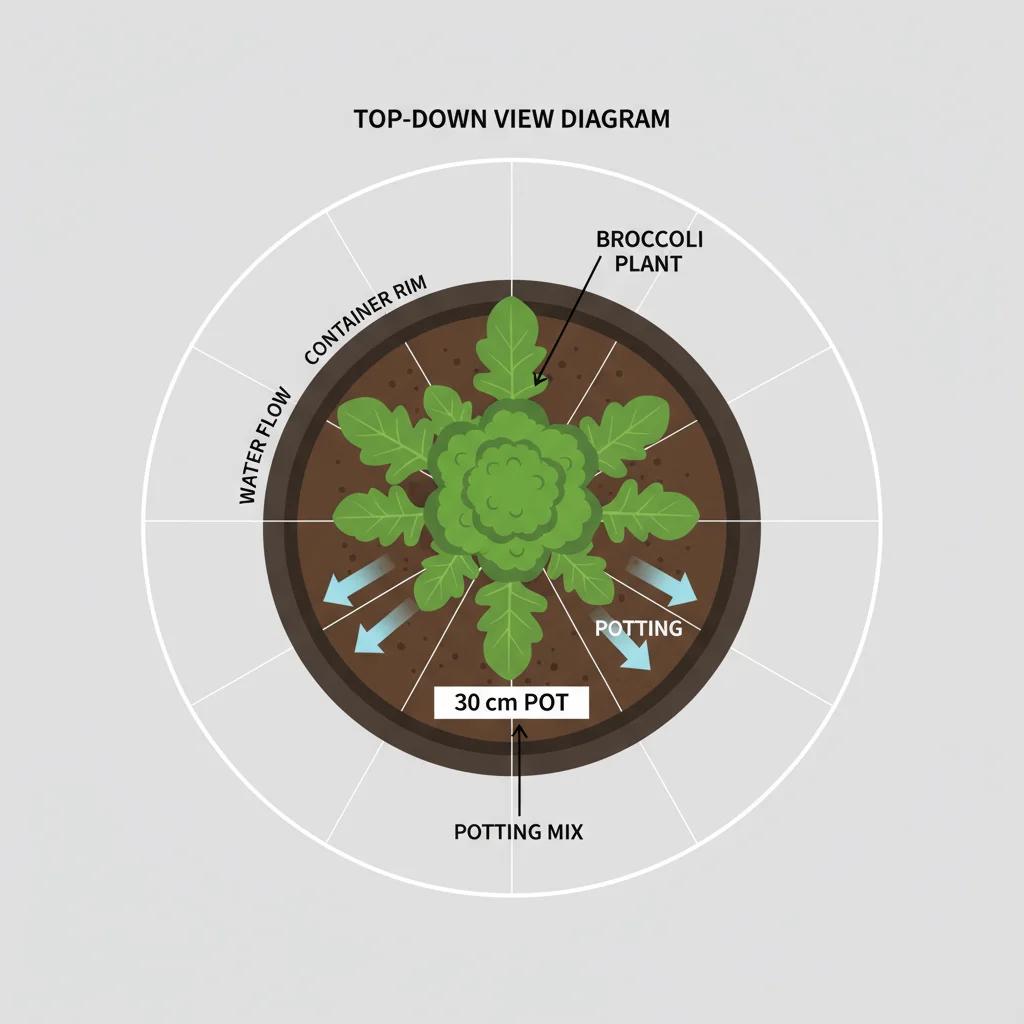
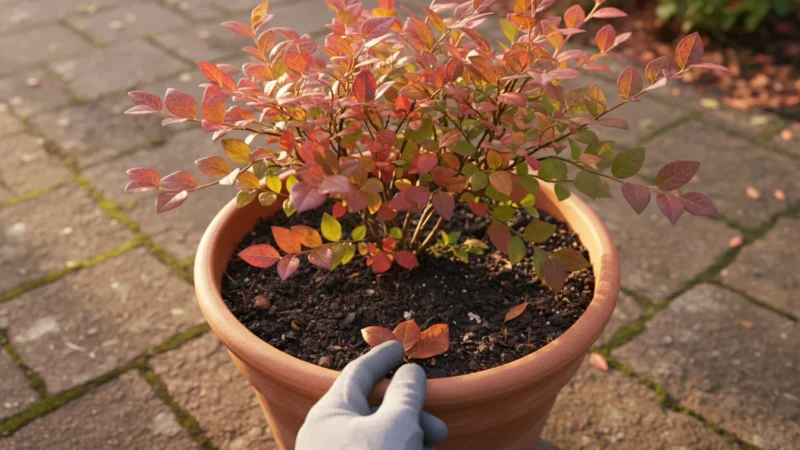
Broccoli container diagram: 30cm pot, soil, broccoli plant. Arrows show water flow/drainage. Simple labeled parts.
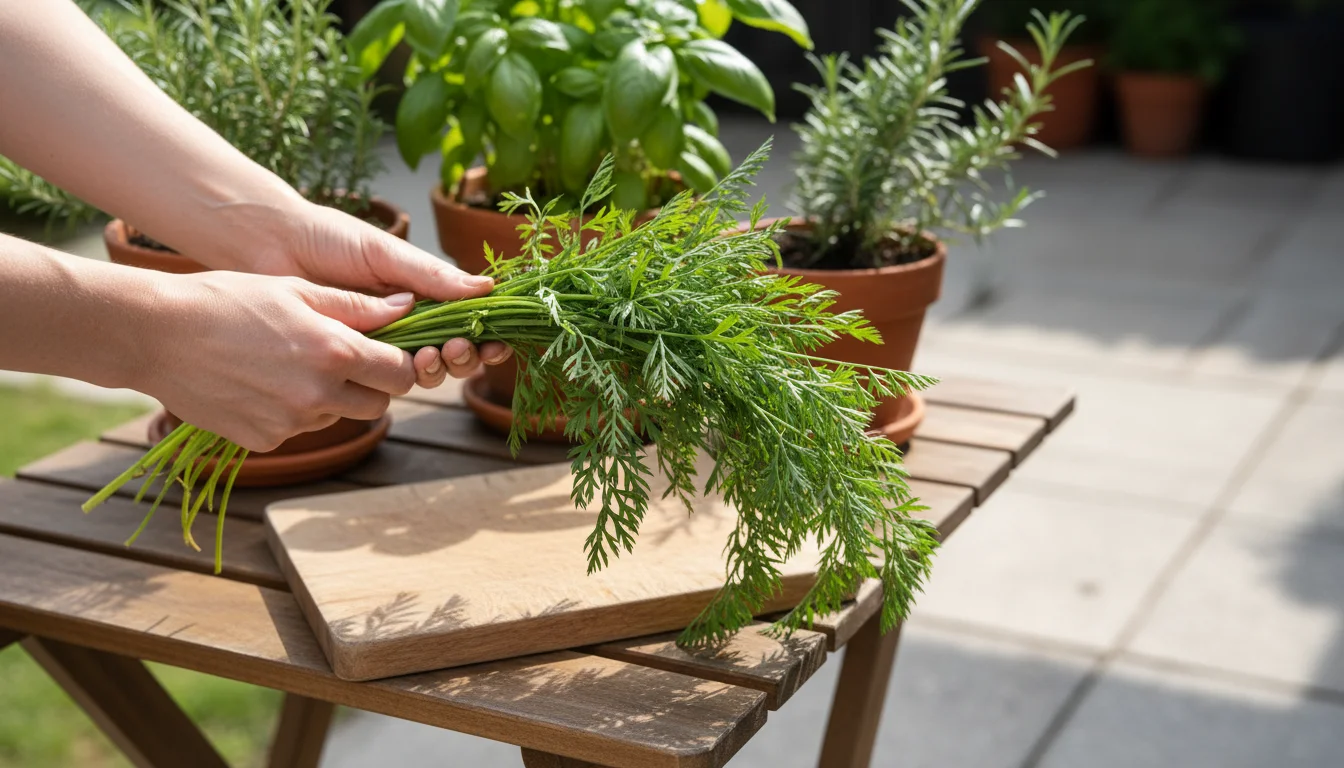
Carrot Tops: From Garnish to Gourmet
You have harvested your beautiful carrots from your pots. Now, let’s turn those leafy green tops into something truly special. What to do with carrot tops from garden is a common question, and the answer involves delicious, versatile recipes that elevate your cooking. Remember, always wash your carrot tops thoroughly before use, especially if they came into contact with soil.
Harvesting and Preparation
- Separate: As soon as you harvest the carrots, cut the greens from the roots. Store roots and tops separately for optimal freshness. Leaving the tops on the carrots causes the roots to soften quickly as the leaves draw moisture away.
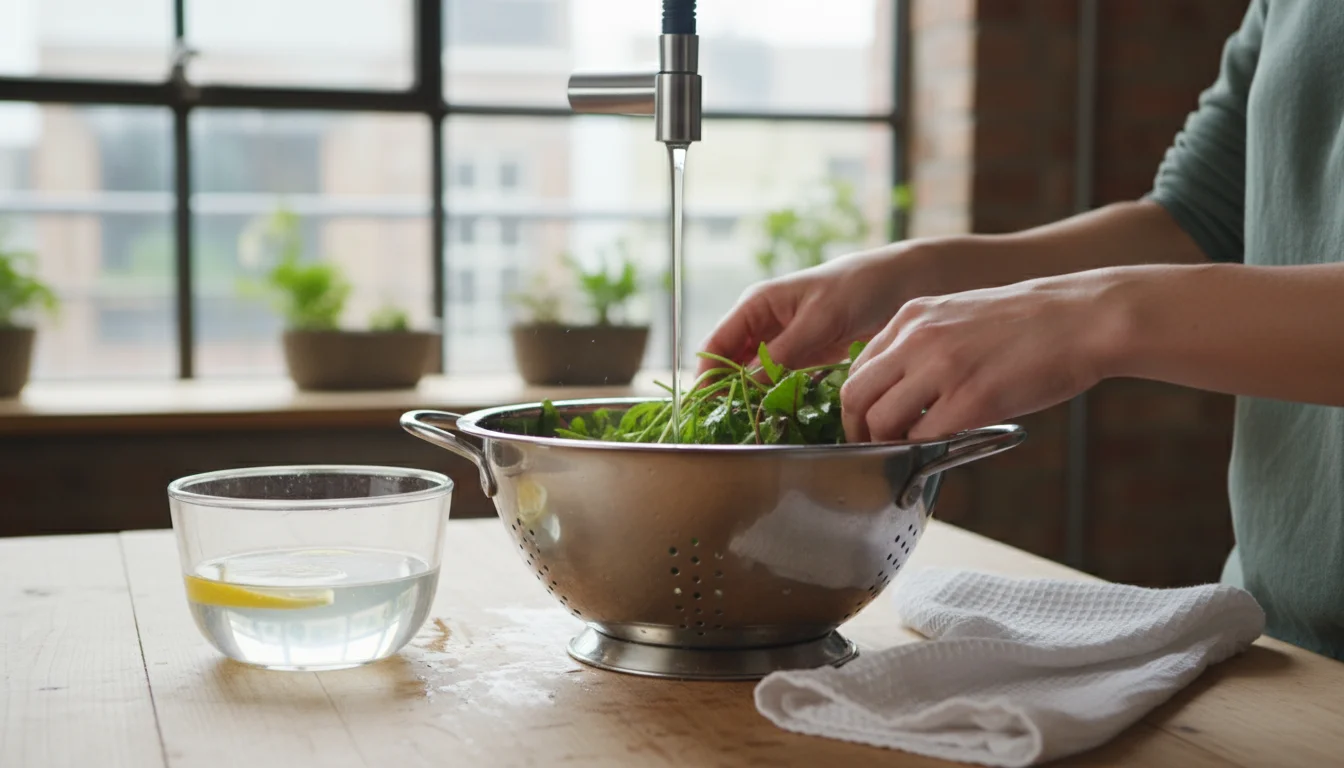
- Clean: Rinse the carrot tops under cool running water. Pay close attention to the nooks and crannies where soil or small insects might hide. You can soak them in a bowl of water with a splash of vinegar for a few minutes to dislodge any stubborn dirt.
- Dry: Pat them dry with a clean towel or use a salad spinner. Excess moisture leads to quicker spoilage.
- Inspect: Discard any yellowed, wilted, or damaged leaves. You want only the freshest, most vibrant greens for your recipes.
Culinary Uses for Carrot Tops
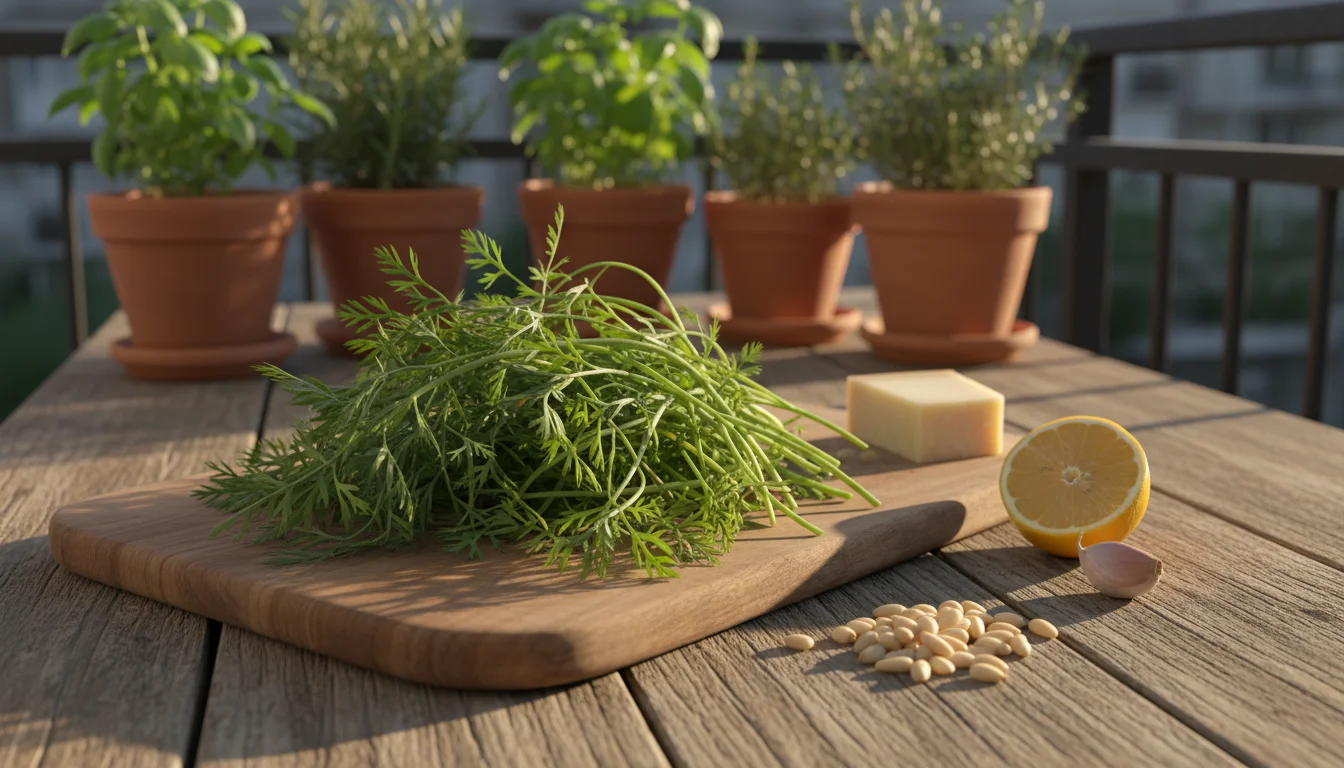
- Carrot Top Pesto: This is arguably the most popular and delicious use. Replace basil with carrot tops in your favorite pesto recipe. Blend clean carrot tops with garlic, Parmesan cheese (or nutritional yeast for a vegan option), pine nuts (or walnuts), lemon juice, and olive oil. Season with salt and pepper. It tastes fantastic on pasta, sandwiches, or as a dip. You get a unique, peppery, and earthy pesto that stands out.
- Soups and Stocks: Chop carrot tops finely and add them to vegetable broths or fall soups. Their earthy, slightly bitter flavor adds depth and complexity. Add them during the last few minutes of cooking to retain their vibrant color and nutrients. They contribute a subtle herbal note that enriches the broth.
- Salads: Tender, young carrot tops make a flavorful addition to mixed green salads. Use them sparingly as their strong flavor can overpower delicate greens. Combine them with other hearty greens, like kale or arugula, for a balanced taste. They add a fresh, slightly spicy kick.
- Green Smoothies: Boost the nutritional content of your morning smoothie. Add a handful of cleaned carrot tops along with fruits, other greens, and your liquid of choice. They blend seamlessly, providing vitamins without significantly altering the flavor.
- Garnish: Just like parsley, finely chopped carrot tops make an attractive and flavorful garnish for roasted vegetables, stews, or even baked potatoes. They offer a fresh aroma and a hint of green color.
- Chimichurri: Create a vibrant carrot top chimichurri by blending them with parsley, oregano, garlic, red wine vinegar, olive oil, and red pepper flakes. This sauce is excellent with grilled vegetables or meats.
By incorporating carrot tops into your cooking, you prevent valuable nutrients from going to waste. You expand your culinary repertoire and add fresh, homegrown flavors to your meals. This demonstrates a true commitment to no-waste gardening and innovative cooking. You will surprise yourself with the delicious results and impress your family and friends with your resourcefulness.
Beet Greens: A Nutritional Powerhouse You Are Missing
Many gardeners grow beets for their vibrant roots, but the greens are a true culinary gem. If you are wondering are beet greens edible from pots, the answer is a resounding yes! They offer incredible flavor and an impressive nutritional profile, making them a fantastic addition to your diet.
Harvesting and Preparation
- Selective Harvesting: You do not need to wait for the roots to fully mature to enjoy the greens. You can snip a few outer leaves from each plant throughout the growing season. This “cut and come again” method encourages more leaf production without significantly impacting root development. Leave the inner leaves and the growing point intact. This allows the beet root to continue growing.
- Post-Root Harvest: When you pull the entire beet, immediately separate the greens from the roots. Cut them about an inch above the root crown. This prevents the greens from drawing moisture and nutrients from the root, helping both parts stay fresh longer. You maximize the freshness of both your roots and greens.
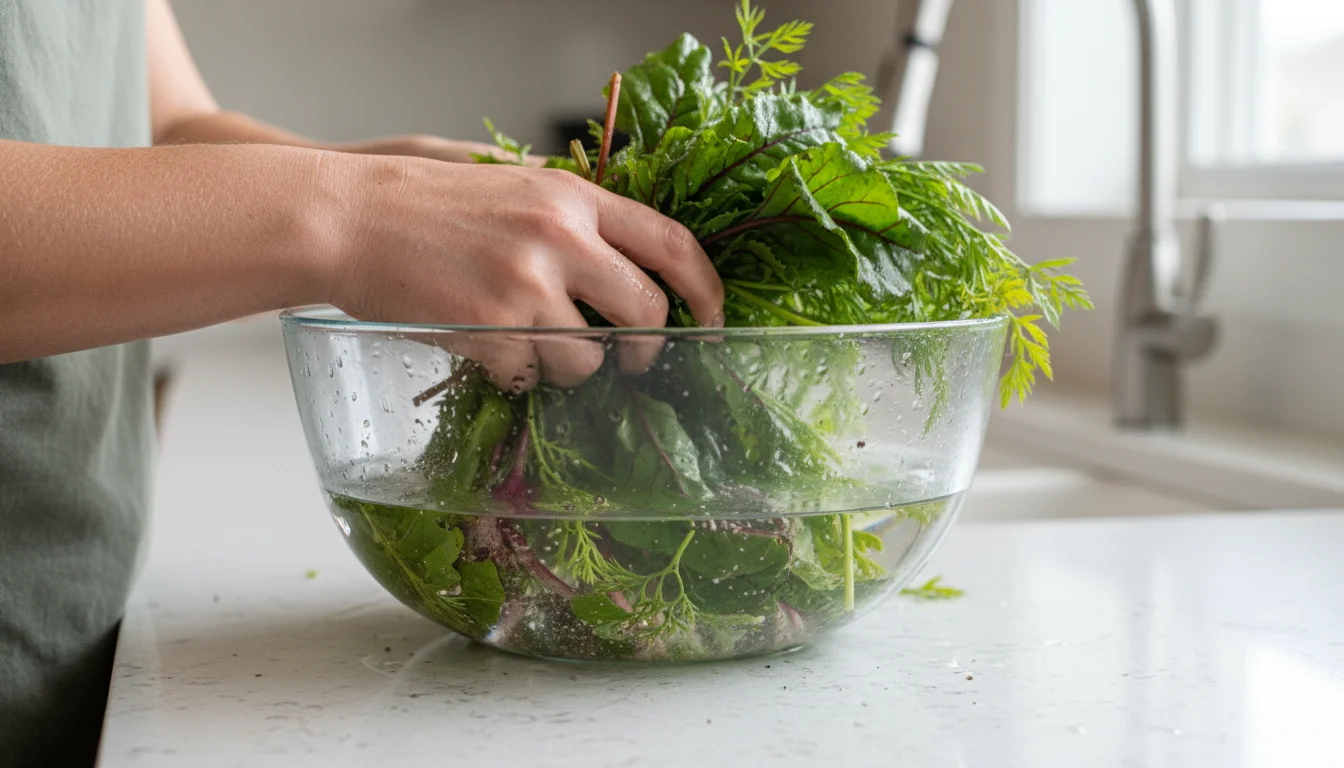
- Cleaning: Rinse beet greens thoroughly under cool water. They often collect more soil than other leafy greens due to their broad leaves. A brief soak in a large bowl of water can also help dislodge dirt. Swish them gently, then lift them from the water, leaving grit behind.
- Drying: Spin them dry in a salad spinner or pat them dry with paper towels. Removing excess moisture is key to preventing spoilage and ensuring they cook well.
- Trimming: You can trim away any tough, thick stems if desired, though smaller, tender stems are often delicious. Some prefer to remove the very largest, most fibrous stems for a smoother texture.
Culinary Uses for Beet Greens
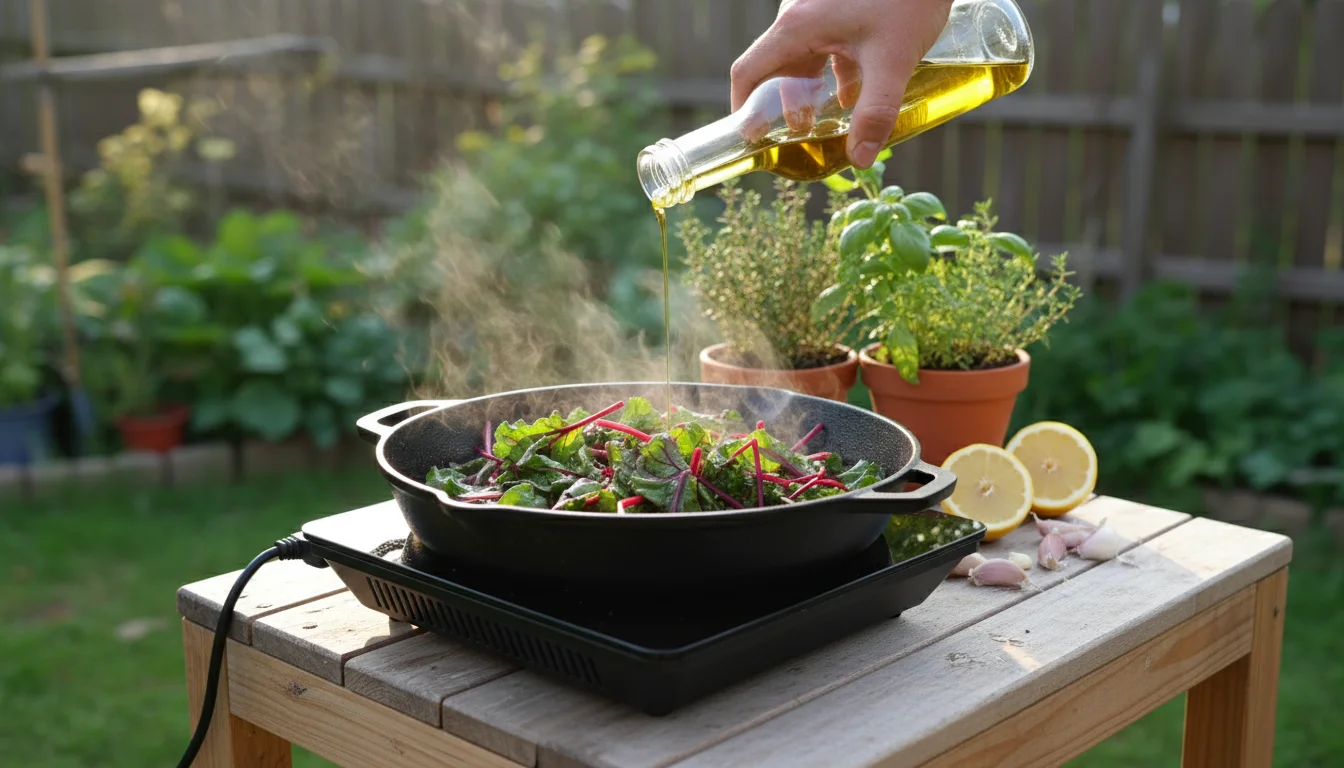
- Sautéed Greens: This is a classic and delicious way to prepare beet greens. Sauté garlic in olive oil, then add the chopped greens. Cook until wilted, usually just a few minutes. Season with salt, pepper, and a splash of lemon juice or vinegar. You can add red pepper flakes for a kick. They make a robust and healthy side dish.
- Stir-Fries: Incorporate beet greens into your favorite stir-fry recipes. Add them towards the end of the cooking process so they retain some texture and nutrients. Their earthy flavor pairs well with soy sauce, ginger, and other Asian-inspired ingredients. They add color and a nutrient boost.
- Soups and Stews: Much like spinach or chard, beet greens add bulk and nutrition to soups and stews. Add them during the last 5-10 minutes of cooking. They soften and absorb the flavors of the broth beautifully.
- Omelets and Frittatas: Chop and sauté beet greens before adding them to egg dishes. They create a flavorful and colorful addition to your breakfast or brunch. Their earthiness complements eggs wonderfully.
- Blanched and Dressed: Briefly blanch beet greens in boiling water for 1-2 minutes, then shock them in ice water to preserve their vibrant color. Dress them simply with olive oil, a squeeze of lemon, and a sprinkle of sea salt for a healthy side dish. This method retains their bright green hue.
- Pasta Dishes: Add chopped beet greens to pasta sauces or toss them directly with cooked pasta, garlic, and olive oil for a simple yet satisfying meal. Their hearty texture stands up well to pasta.
By making beet greens a regular part of your cooking, you double your yield from each beet plant. You gain access to an incredibly nutritious vegetable often discarded. This makes your container harvest even more productive and delicious, fulfilling your commitment to using the whole vegetable from container garden.
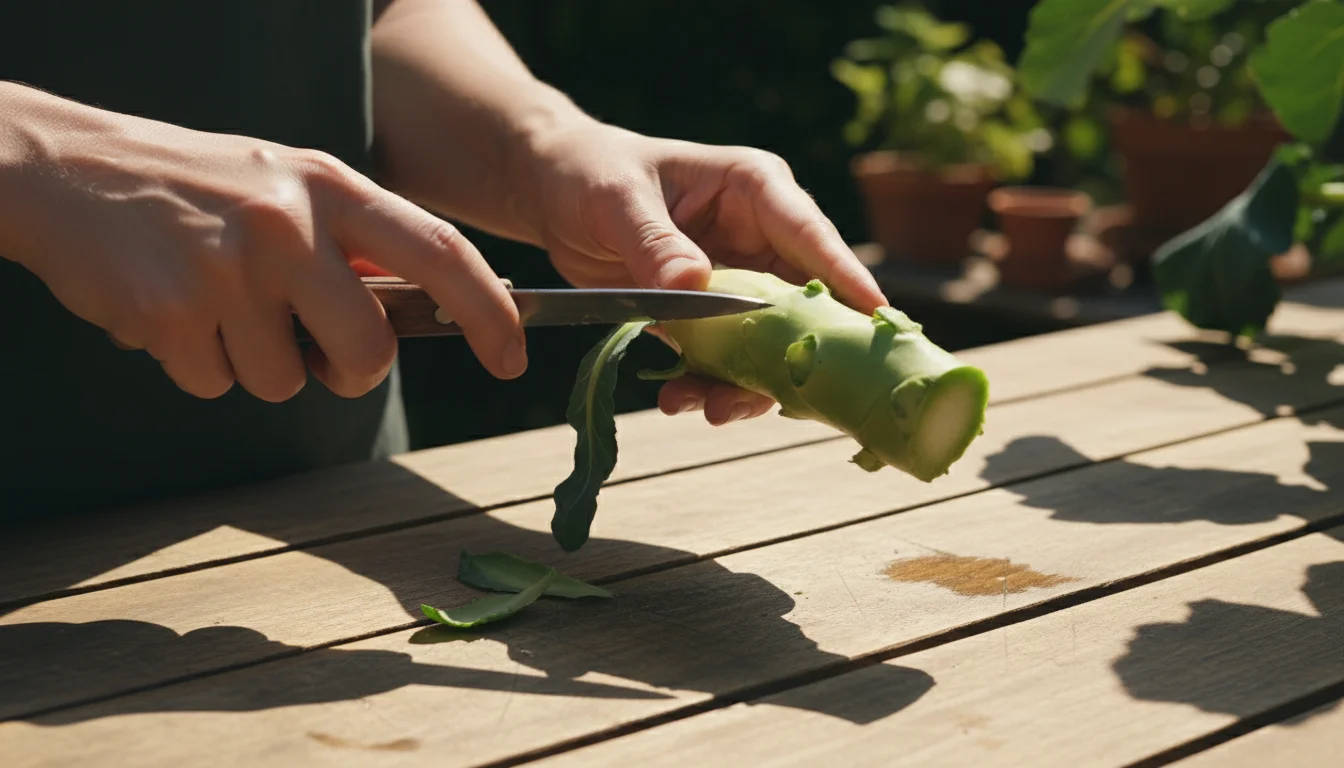
Broccoli Stems: Crunch and Flavor Beyond the Florets
When you harvest broccoli from your container harvest, you often focus solely on the florets. However, the thick, substantial stems offer a delightful crunch and a subtly sweet flavor, proving that using the whole vegetable from container garden truly extends your culinary possibilities. Do not let these nutritious parts go to waste. You are discarding fiber, vitamins, and a unique texture if you throw them out.
Harvesting and Preparation
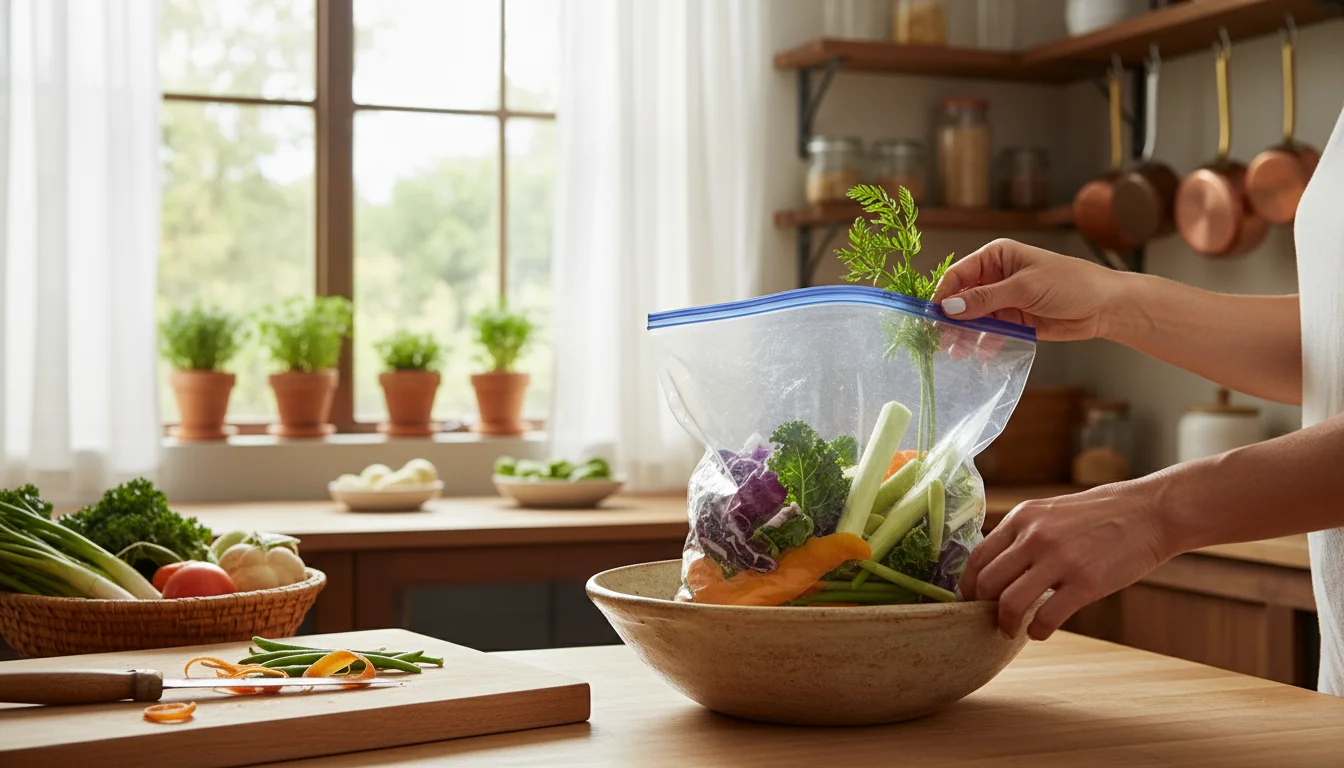
- Separate: After cutting the main broccoli head, you are left with the stem. You can trim off any remaining small leaves or florets. These small pieces can go into your vegetable scrap bag for broth.
- Peel: The outer skin of the broccoli stem can be fibrous and tough. Use a vegetable peeler to remove this outer layer, revealing the tender, pale green interior. This step is crucial for optimal texture and flavor. Peel until you reach the lighter, more succulent core.
- Chop: Once peeled, you can chop the stem into coins, matchsticks, or small cubes, depending on your intended use. Uniform pieces ensure even cooking.
Culinary Uses for Broccoli Stems
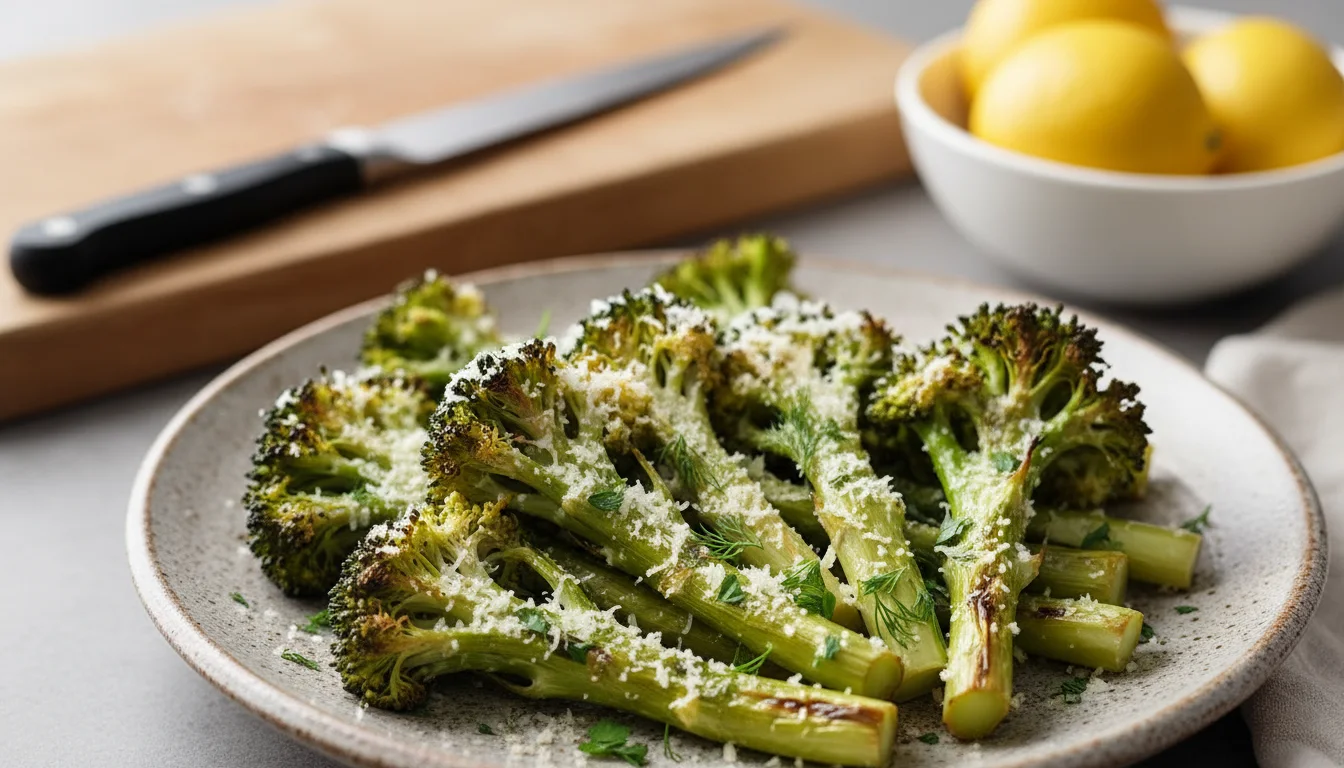
- Roasted Broccoli Stems: Peel and cut stems into uniform pieces. Toss them with olive oil, salt, pepper, garlic powder, and a sprinkle of Parmesan cheese. Roast in a hot oven (400°F or 200°C) until tender-crisp and lightly caramelized, about 15-20 minutes. They make a fantastic side dish. The roasting brings out their natural sweetness.
- Broccoli Stem Slaw: Grate peeled broccoli stems using a box grater or food processor. Combine with shredded carrots, cabbage, and a creamy or vinaigrette dressing for a crunchy, flavorful slaw. This creates a refreshing and unique salad.
- Stir-Fries: Cut peeled stems into matchsticks or thin coins. Add them to stir-fries along with other vegetables. They hold their crunch well and absorb flavors beautifully. They add satisfying texture to any stir-fry.
- Soups and Purees: Incorporate chopped broccoli stems into creamy vegetable soups. They add body and nutrients. Cook them until very tender, then puree with an immersion blender. Their mild flavor blends well with various soup bases.
- Snacks: Simply slice peeled broccoli stems into rounds and enjoy them raw with your favorite dip, like hummus or ranch dressing. They offer a satisfying crunch and freshness, making them a healthy alternative to chips.
- Pickled Broccoli Stems: For a unique treat, thinly slice peeled broccoli stems and pickle them. Combine white vinegar, water, sugar, salt, and your favorite pickling spices (like dill, mustard seeds, or garlic). Bring to a boil, pour over the stems in a jar, and let cool before refrigerating. These tangy, crunchy pickles are fantastic on sandwiches.
By transforming broccoli stems into delicious meals, you prevent food waste and add a versatile ingredient to your kitchen. You demonstrate the full potential of your container harvest. You will find their mild, sweet flavor and satisfying crunch a delightful discovery, making you question why you ever discarded them.
General Tips for a Successful Container Scrappy Harvest
Maximizing your container harvest by utilizing every edible part requires a few best practices. These tips ensure your “scraps” are safe, delicious, and contribute to your no-waste gardening efforts.
- Timely Harvest: Harvest greens and stems when they are young and tender for the best flavor and texture. Older leaves and tougher stems can become fibrous and more bitter. For beet greens, snip outer leaves regularly. For carrot tops, harvest immediately after pulling the root. For broccoli stems, process them soon after cutting the florets. Early harvesting prevents undesirable textures and flavors.
- Thorough Cleaning: Vegetable parts, especially greens growing close to the soil, often harbor dirt, small insects, or even pest eggs. Wash them meticulously under cool running water. Consider a short soak in a bowl of water with a small amount of food-grade vegetable wash or vinegar to loosen stubborn debris. Rinse thoroughly afterward. Cleanliness is paramount for food safety.
- Inspect for Pests or Disease: Before cooking, carefully inspect all parts for any signs of pests, mold, or disease. Discard any affected portions. While you embrace using the whole vegetable from container garden, you should not compromise food safety. Look for discolored spots, holes, or any unusual textures.
- Proper Storage: Store harvested greens and stems correctly to maintain freshness. After washing and thoroughly drying, wrap them in a clean paper towel and place them in an airtight container or a reusable produce bag in your refrigerator’s crisper drawer. This method helps absorb excess moisture and prevents wilting. Most greens stay fresh for 3-5 days. Proper storage extends their usability.
- Consider Organic Practices: When you grow your vegetables in containers, you control the growing conditions. Avoid using synthetic pesticides or herbicides if you plan to eat the leaves and stems. This ensures your entire harvest is safe for consumption. This aligns with your goal of sustainable and healthy gardening, providing peace of mind.
- Blanching for Freezer Storage: If you have an abundance of greens or stems, blanching and freezing extends their shelf life for months. Quickly dunk chopped parts into boiling water for 1-2 minutes, then immediately transfer them to an ice bath to stop the cooking process. Drain well, pat dry, and store in freezer-safe bags. This preserves color, texture, and nutrients for later use.
- Understand Your Variety: Different varieties of carrots, beets, and broccoli may have slight variations in the flavor or texture of their edible “scraps.” Experiment with what you grow to learn which varieties produce the most delicious tops and stems. This personalizes your scrappy harvest experience.
By following these guidelines, you will confidently turn every edible part of your fall vegetables into a culinary asset. You maximize your efforts in no-waste gardening and enjoy the full bounty of your container garden.
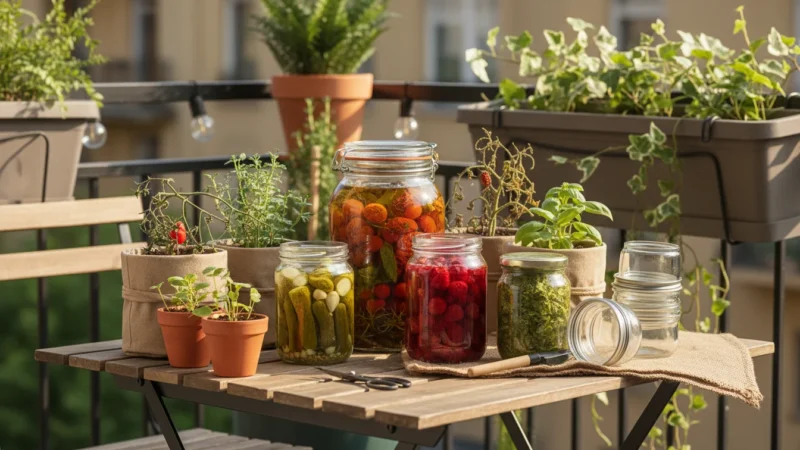
Creative Recipes and Storage Solutions for Your Scraps
Beyond the individual recipe ideas, consider how you can combine these “scrappy” ingredients or store them effectively to always have them on hand. Your commitment to no-waste gardening means transforming these parts into staples rather than occasional novelties. This section offers broader inspiration for integrating your entire container harvest into your kitchen, ensuring nothing goes to waste.
For more ways to use unusual ingredients, check out these recipes for your end-of-season balcony harvest.
Batch Cooking and Meal Prep
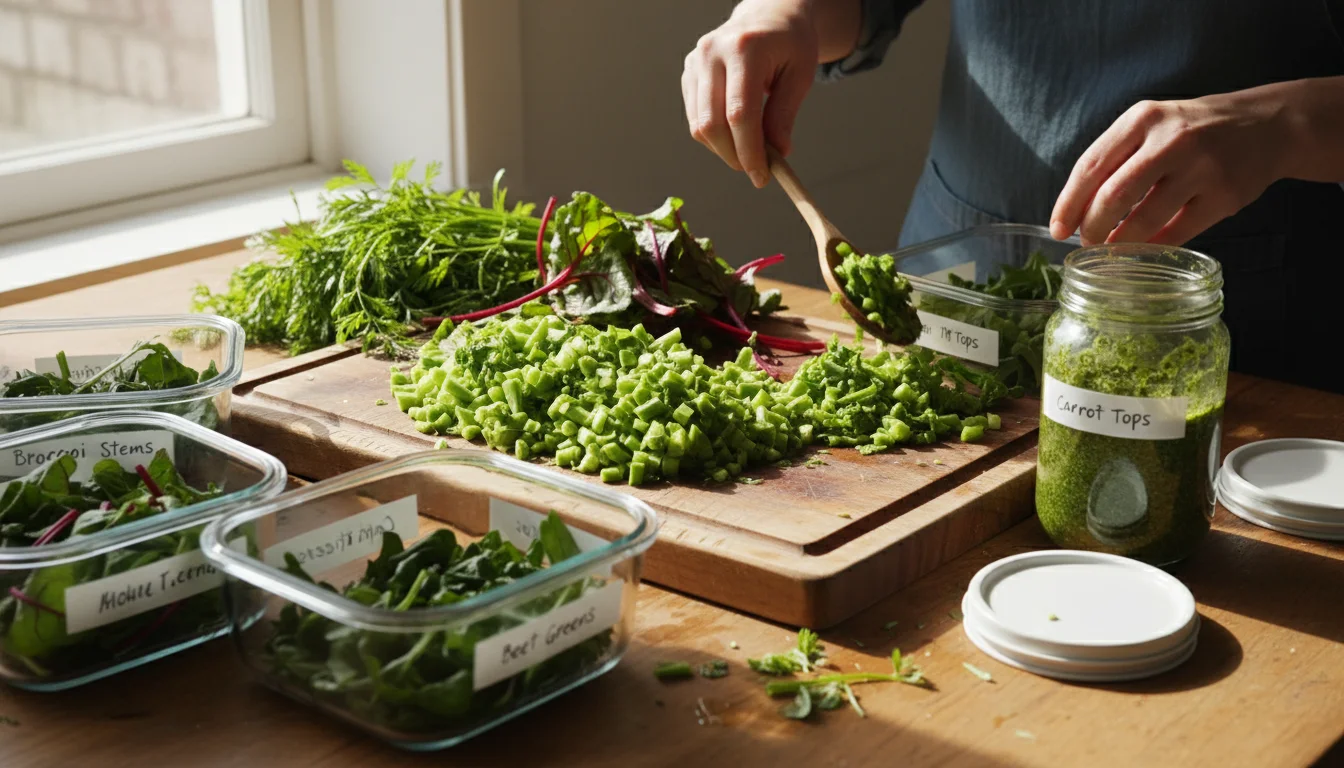
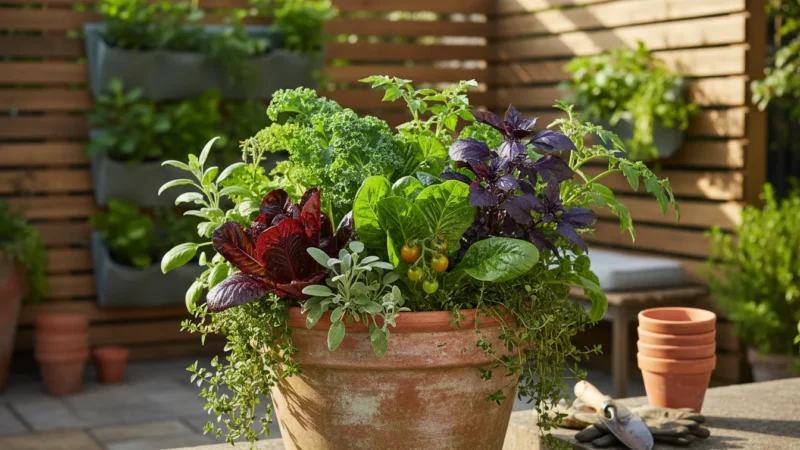
- Mixed Green Medley: Combine chopped beet greens and tender carrot tops. Sauté them together with garlic and onions for a flavorful side dish that uses both types of greens in one go. You can also add some finely diced broccoli stems for extra crunch. This provides a versatile side for any meal.
- Vegetable Broth Booster: Keep a bag in your freezer labeled “Vegetable Scraps for Broth.” Add any clean, unused carrot tops, broccoli stems (peeled and chopped), and tough beet green stems to this bag. When you accumulate enough, simmer them with onions, celery, and other aromatics for a rich, homemade vegetable stock. This is the ultimate expression of using the whole vegetable from container garden, even the parts not suited for direct eating. You create a flavorful foundation for future soups and stews.
- Green Smoothies and Juices: Pre-portion bags of mixed greens (including carrot tops and beet greens) for quick morning smoothies. Add a small piece of peeled broccoli stem for an extra nutrient boost. Freeze these pre-portioned bags, then simply add to your blender with liquid and fruit.
- Scrappy Stir-Fry Mix: Chop and blanch a variety of your ready-to-use vegetable scraps like broccoli stems and tougher beet green stems. Freeze them in a single bag. When you need a quick stir-fry, simply pull out a portion, add your other vegetables and protein, and cook. This reduces prep time on busy weeknights.
Advanced Storage Techniques
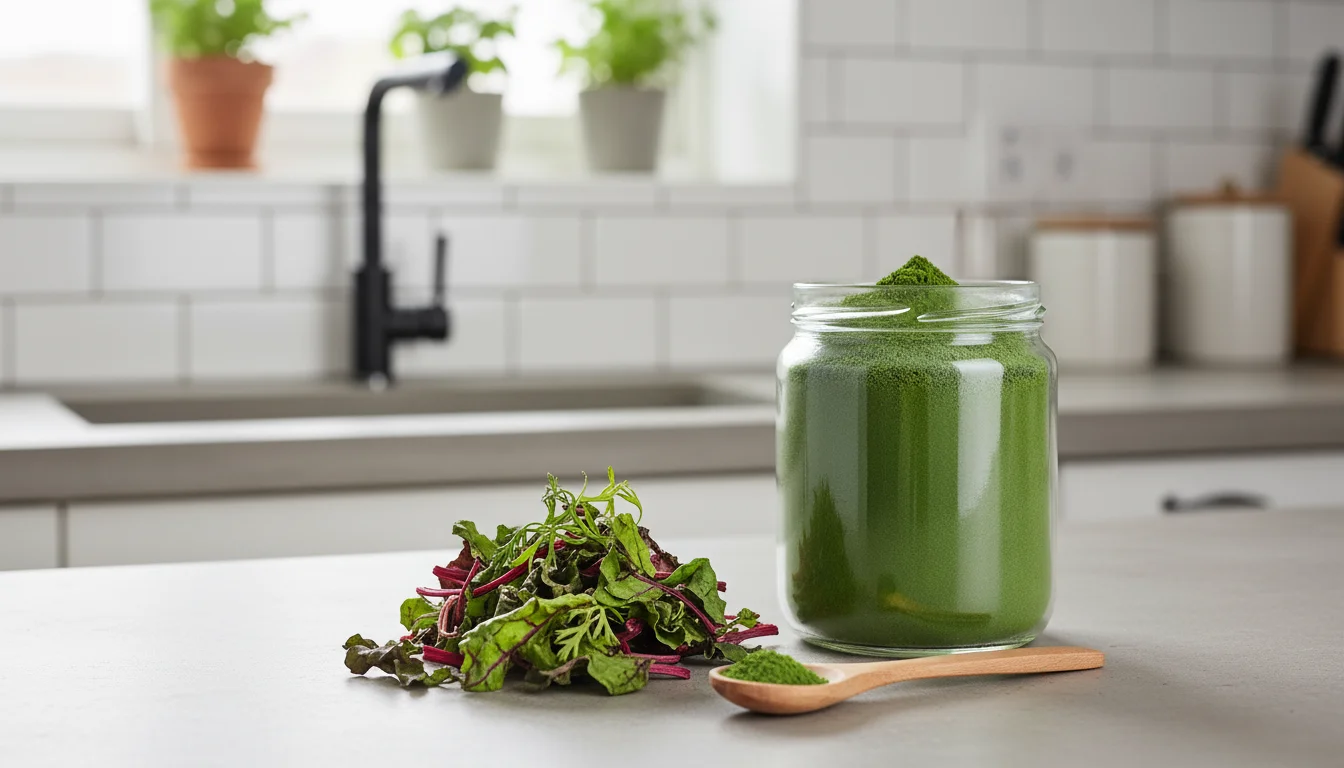
- Dehydrating Greens: If you have a dehydrator, dry excess beet greens or carrot tops. Once crispy, crush them into a powder. Store this vibrant green powder in an airtight jar. Sprinkle it into soups, stews, sauces, or even blend it into dough for a nutritional and colorful boost. This method preserves nutrients and reduces bulk for long-term storage, perfect for small kitchens. You create your own homemade green superfood powder.
- Freezing Pesto: Make a large batch of carrot top pesto. Freeze it in ice cube trays. Once frozen, pop out the cubes and store them in a freezer bag. You can then thaw individual portions as needed for pasta, pizzas, or dressings, ensuring you never run out of this unique condiment. This makes a gourmet touch always available.
- Quick Pickling: We mentioned pickling broccoli stems earlier. You can also quick-pickle a portion of cleaned beet greens or even carrot tops. The pickling liquid transforms their flavor and extends their shelf life significantly, creating a tangy, crunchy condiment for sandwiches or salads. You get a delightful sour crunch.
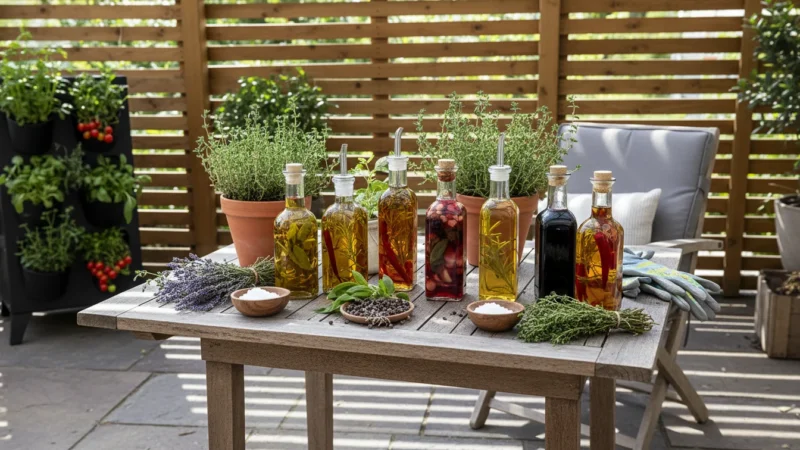
- Infused Oils and Vinegars: Gently warm clean, dry carrot tops or beet greens in olive oil or white wine vinegar. Let them infuse for a few days in a cool, dark place, then strain. You create flavorful infused oils or vinegars perfect for salad dressings or cooking, capturing the essence of your harvest.
By thinking creatively about storage and combining your “scraps,” you ensure that your fall vegetables provide value long after their initial harvest, reinforcing your dedication to a truly sustainable and delicious container harvest. You maximize every nutrient and every flavor your garden produces.
Troubleshooting Your Scrappy Harvest: Avoid Common Pitfalls
Even with the best intentions, you might encounter challenges when trying to utilize every part of your container harvest. Knowing how to troubleshoot common issues helps you avoid disappointment and truly embrace no-waste gardening. Your success depends on learning from these potential problems.
- Mistake 1: Not Washing Thoroughly.Problem: Gritty greens or a lingering earthy taste, possibly due to soil or tiny insects. This is especially common with beet greens and carrot tops which grow close to the soil surface in your pots.
Solution: Always perform a thorough washing. For heavily soiled greens, soak them in a large bowl of cool water for 5-10 minutes, then swish them around. Lift them out, discard the dirty water, and repeat until no grit remains at the bottom of the bowl. For added cleanliness, a quick rinse with a weak vinegar solution (1 cup water, 1 tablespoon white vinegar) followed by a plain water rinse helps. Dry them completely before storing or cooking. This ensures a pleasant eating experience.
- Mistake 2: Harvesting Old, Fibrous Parts.Problem: Tough, overly bitter greens or woody broccoli stems. This occurs when you wait too long to harvest or process these parts, especially if your fall vegetables mature quickly in fluctuating temperatures.
Solution: Harvest greens when they are young and tender. For beet greens, practice “cut and come again” harvesting, taking outer leaves as they develop. For carrot tops, use them immediately after pulling the root. Peel broccoli stems thoroughly to remove the tough outer layer. If parts are truly too fibrous, relegate them to the compost pile or use them for vegetable broth rather than direct consumption. You optimize for tenderness and flavor by harvesting promptly.
- Mistake 3: Improper Storage Leading to Wilting or Spoilage.Problem: Your carefully harvested greens wilt quickly, turn yellow, or develop mold, negating your no-waste gardening efforts.
Solution: Proper drying is critical. Excess moisture promotes spoilage. Use a salad spinner or pat greens thoroughly dry with a clean cloth. Store them wrapped in a dry paper towel inside an airtight container or a reusable produce bag in the crisper drawer of your refrigerator. Change the paper towel if it becomes damp. For longer storage, consider blanching and freezing as described earlier. This keeps your produce fresh and usable.
- Mistake 4: Not Addressing Bitterness.Problem: Some vegetable parts, particularly older carrot tops or certain beet green varieties, can taste quite bitter.
Solution: Incorporate ingredients that balance bitterness. A squeeze of lemon juice, a touch of vinegar, a pinch of sugar, or a creamy element (like cheese or a rich sauce) can mellow strong flavors. Blanching greens briefly before sautéing also helps reduce bitterness. Combine bitter greens with milder ones in salads or pestos. You adjust the flavor profile to your preference.
- Mistake 5: Overcooking.Problem: Mushy, unappetizing greens or soft broccoli stems that lack texture and vibrancy.
Solution: Cook greens quickly. Sautéing them for just a few minutes until wilted is often sufficient. Add them towards the end of cooking for stir-fries or soups. Broccoli stems also benefit from a tender-crisp texture, so avoid prolonged boiling or roasting that turns them soft. Aim for a crisp bite, preserving their satisfying texture and nutritional value. This maintains the best quality of your harvest.
- Mistake 6: Ignoring Pest Damage.Problem: Pests like aphids or leaf miners can target greens, making them unappetizing or unsafe. This often occurs on fall vegetables during warmer spells.
Solution: Regularly inspect your container plants for pests. Address infestations quickly with organic pest control methods, such as neem oil or insecticidal soap. Discard heavily damaged leaves to prevent pest spread. You ensure your edible parts are healthy and clean. Prevention and early intervention protect your harvest.
By proactively addressing these common issues, you ensure your scrappy harvest is consistently delicious, safe, and truly contributes to your no-waste gardening goals. You cultivate confidence and expertise in making the most of every plant from your pots.
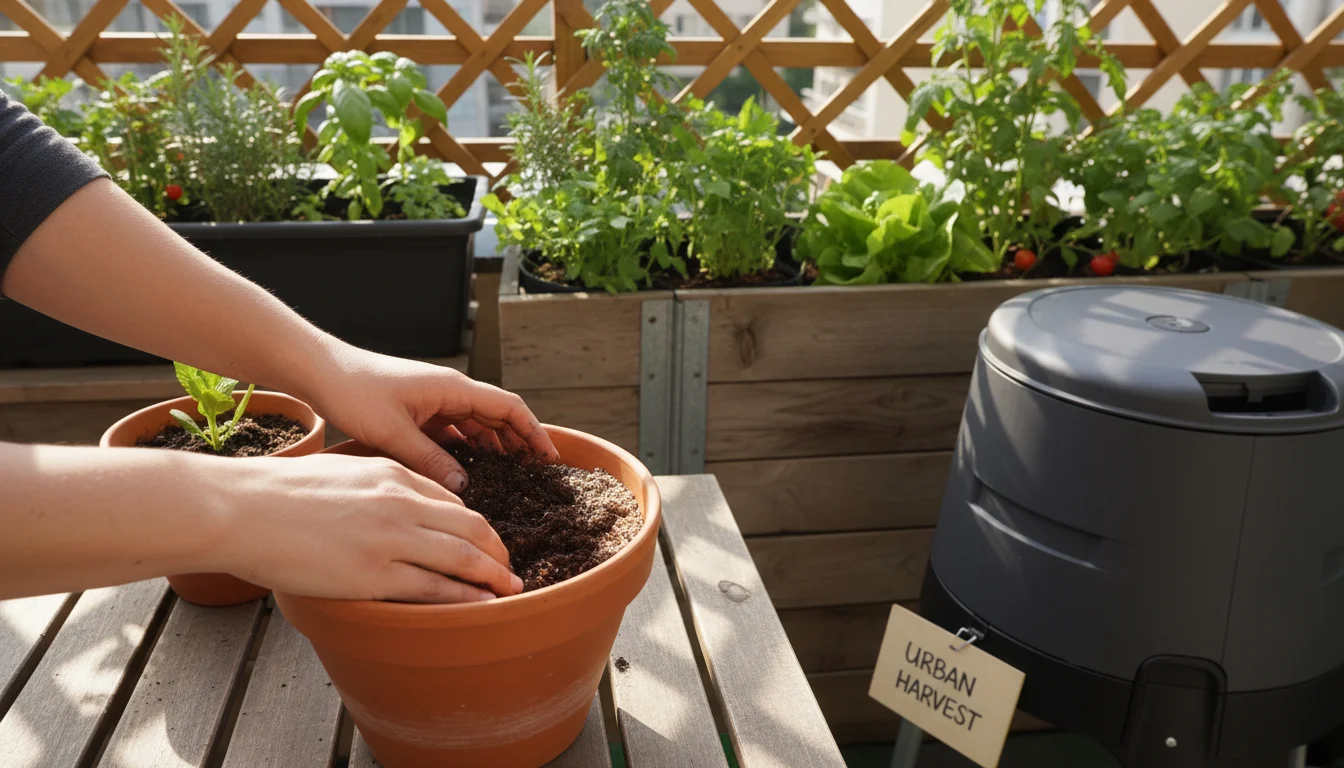
Composting Leftovers: The Ultimate No-Waste Cycle for Your Pots
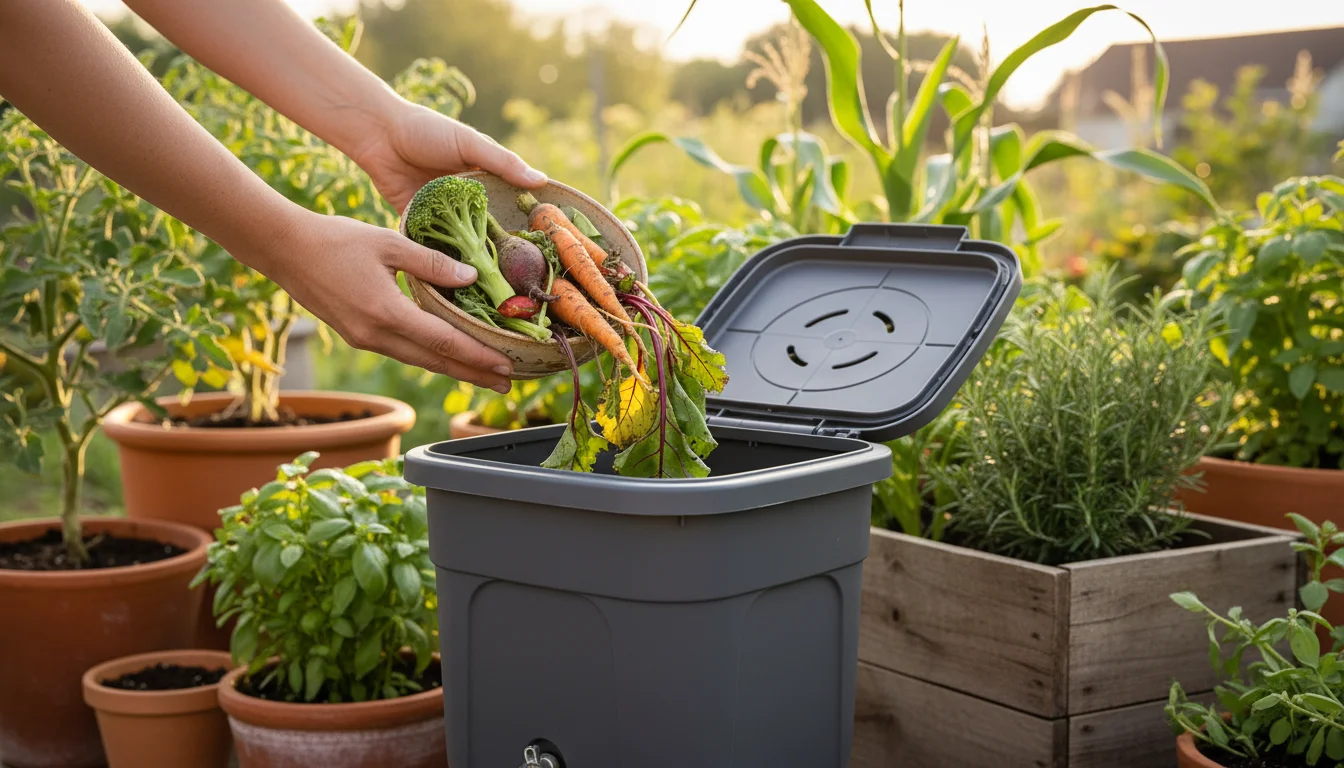
Even with your best efforts in using the whole vegetable from container garden, some parts simply are not palatable or edible. This includes roots that are too tough, stems that are too woody, or greens that have spoiled. This is where composting becomes an invaluable part of your no-waste gardening strategy. Composting closes the loop, turning unavoidable organic waste back into nutrient-rich soil for your containers. You transform waste into a valuable resource.
Why Compost for Container Gardens?
- Nutrient Recycling: Compost enriches your potting mix, providing essential nutrients that fuel plant growth. This reduces your reliance on external fertilizers. You create a natural, slow-release food for your plants.
- Improved Soil Structure: Adding compost improves drainage (how well water moves through soil) in heavy soils and helps sandy soils retain moisture, both crucial for container plants. It creates an ideal environment for root development.
- Reduced Waste: Diverting food scraps and inedible plant parts from landfills significantly reduces your household waste and lowers your environmental footprint. This is a core tenet of sustainability. Your actions make a tangible difference.
- Pest and Disease Resistance: Healthy, compost-rich soil fosters robust plants that are often more resistant to pests and diseases, a benefit for any gardener. Stronger plants naturally defend themselves better.
- Cost Savings: Producing your own compost saves you money you would otherwise spend on commercial potting mixes or soil amendments. You become more self-sufficient in your gardening efforts.
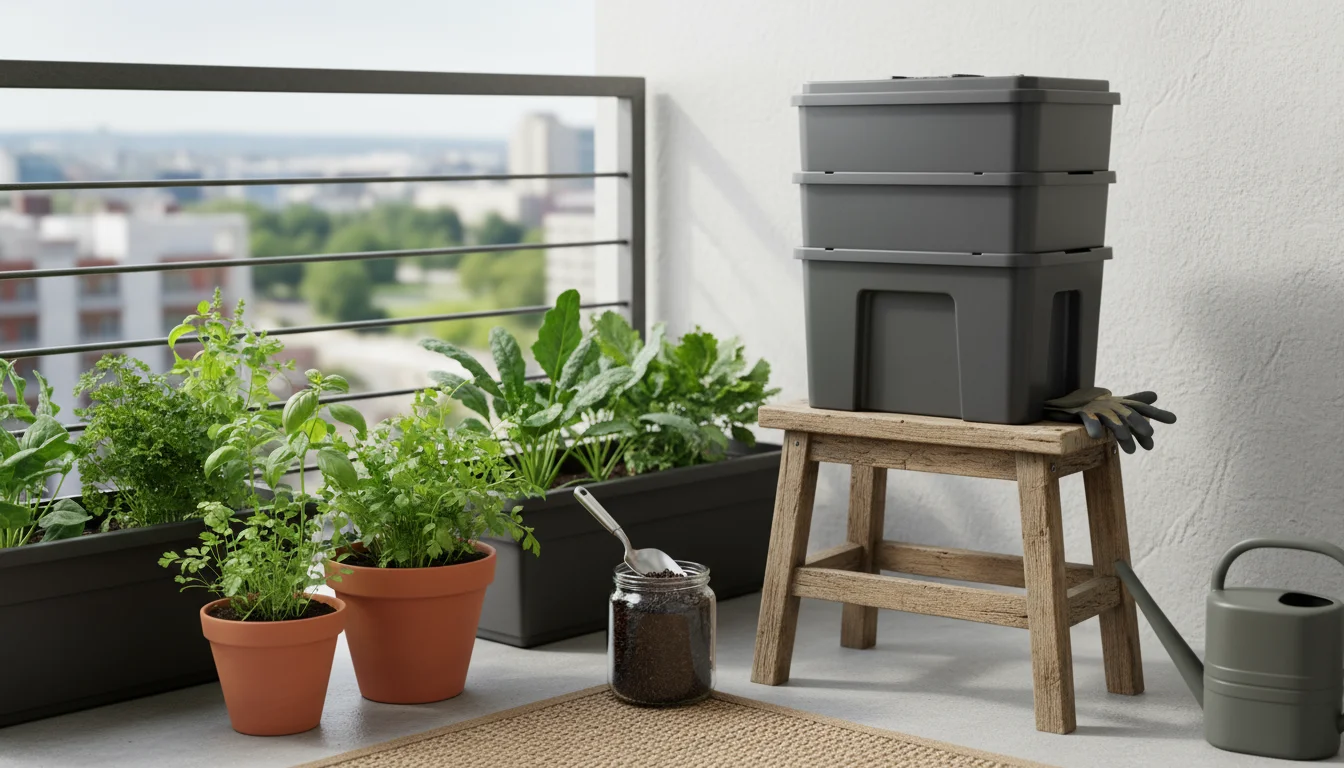
Composting in Small Spaces
You do not need a large backyard to compost. Many excellent small-space composting solutions exist:
- Worm Composting (Vermicomposting): This is ideal for apartment or balcony gardeners. A small worm bin (often available online or at garden centers) houses red wiggler worms that efficiently break down kitchen scraps, including soft vegetable parts. It produces nutrient-rich “worm castings” that are perfect for top-dressing your container plants. It is odorless when managed correctly. You create a powerful, natural fertilizer.
- Bokashi Composting: This anaerobic fermentation method uses inoculated bran to break down food waste, including cooked foods and meat (which traditional composting avoids). After fermentation, the “pre-compost” needs to be buried or added to a traditional compost pile to fully break down, but it significantly reduces the volume and speeds up the process. You can bury it directly into large containers or garden beds, completing the decomposition cycle.
- Small Outdoor Tumblers/Bins: If you have a small patio or yard, a compact compost tumbler or a small, enclosed bin works well. These contain the compost, prevent pests, and often make turning the pile easier. Tumblers rotate, aerating the compost and speeding decomposition.
- Digester Bins: These partially bury into the ground, allowing direct contact with soil microbes to aid decomposition. They are discreet and effective for breaking down a variety of kitchen scraps.
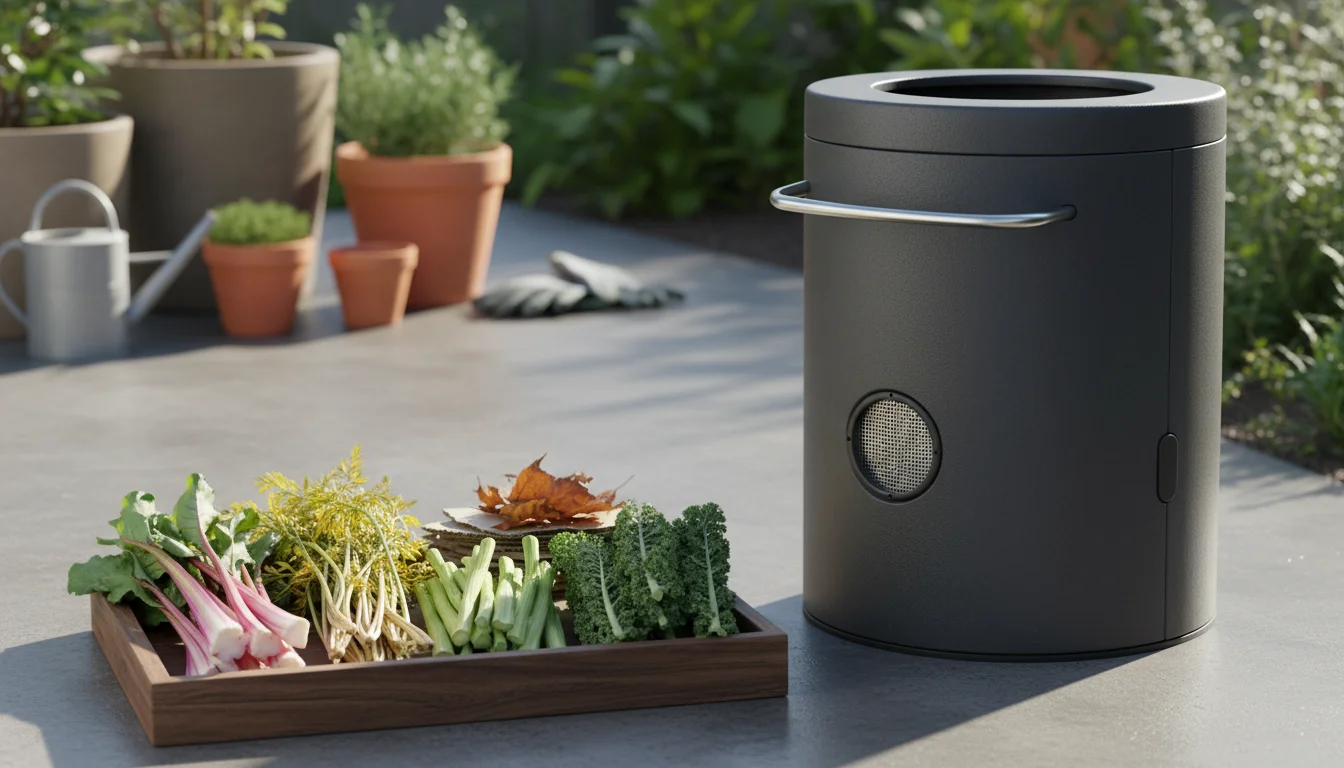
What to Compost from Your Scrappy Harvest
Compost any parts of your fall vegetables you cannot or do not wish to eat:
- Tough, woody beet stems
- Yellowed or diseased carrot tops/beet greens (ensure disease is not soil-borne)
- Any peelings from broccoli stems (after you have enjoyed the tender interior)
- Small root trimmings
- Dried or spent vegetable leaves
Remember to balance “greens” (nitrogen-rich items like food scraps) with “browns” (carbon-rich items like dry leaves, shredded paper, or small twigs) for a healthy compost pile. This balance ensures efficient decomposition and prevents odors. Composting truly completes your no-waste gardening journey, transforming every last bit of your container harvest into future plant nourishment. You turn your organic waste into vibrant life for your next planting cycle.
Frequently Asked Questions
Can I eat carrot tops from store-bought carrots?
Yes, you can generally eat carrot tops from store-bought carrots, but exercise caution. Store-bought carrots, unless specifically labeled organic, may have been treated with pesticides. Always wash the greens thoroughly. For the safest and most confident consumption, growing your own carrots in containers gives you complete control over their growing conditions, ensuring a truly clean harvest.
How long do beet greens stay fresh after harvesting?
Freshly harvested beet greens, when properly cleaned, dried, and stored, will typically last 3-5 days in your refrigerator. Wrap them in a damp paper towel and place them in an airtight container or a sealed bag in the crisper drawer to maintain their freshness and prevent wilting. Change the paper towel if it becomes too wet.
Are there any health considerations when eating these vegetable parts?
Carrot tops contain compounds called furocoumarins that can be mildly toxic in very large quantities, but eating them in typical culinary portions is safe. Some individuals might experience skin irritation when handling wet carrot tops and then exposing skin to direct sunlight. Beet greens contain oxalates, which can contribute to kidney stones in sensitive individuals; cooking reduces oxalate levels. Broccoli stems are generally safe and highly nutritious. Always consume a balanced diet and consult a health professional if you have specific dietary concerns or a pre-existing medical condition.
Can I use these “scraps” to regrow new plants?
Some vegetable parts can be used for regrowing, but not typically the leafy tops or main stems of these specific plants for a full harvest. For example, you can often regrow some green leafy tops from the very top of a carrot or beet root if you place it in water, but this usually produces a small amount of greens, not a full new root or plant suitable for a significant container harvest. These methods are fun kitchen experiments rather than serious food production strategies for these particular fall vegetables. Broccoli stems will not regrow new broccoli plants.
What is the best way to clean very dirty greens from my container garden?
For very dirty greens, start by rinsing them under cool running water to remove loose soil. Then, fill a large bowl or clean sink with cool water and immerse the greens. Swish them gently for a minute or two to loosen dirt. Lift the greens out, leaving the grit in the water, and drain the dirty water. Repeat this process two or three times until no sediment remains at the bottom of your bowl. You can add a tablespoon of white vinegar to the final soaking water for extra sanitization, followed by a plain water rinse.
For trustworthy gardening information, visit: San Diego Botanic Garden, U.S. National Arboretum and American Horticultural Society. These organizations provide expert, research-based advice for gardeners at all levels.
Disclaimer: This article is for informational purposes only and is not a substitute for professional gardening advice. Always consult local extension services or horticulture experts for region-specific guidance.
Leave a Reply