You want fresh herbs readily available, even if your garden space is a tiny balcony or a sunny kitchen window. Imagine snipping vibrant green onions whenever a recipe calls for them, without another trip to the grocery store. This dream is entirely achievable with a simple, budget-friendly project: regrowing green onions from kitchen scraps. This method is incredibly rewarding, demonstrating a powerful concept in `no-cost gardening`. It transforms what you would typically discard into a continuous harvest, putting fresh flavor at your fingertips.
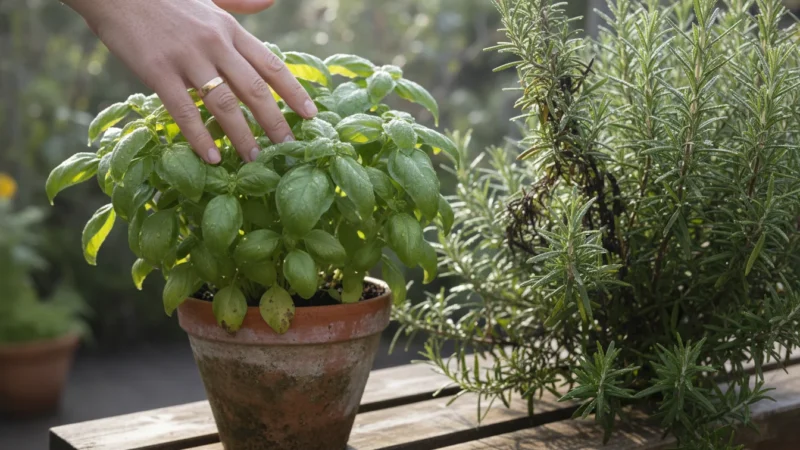
Learning to grow these alongside other fast-growing herbs is the quickest way to stock a small-space kitchen with year-round flavor.
This project is not only practical but also deeply satisfying. You take a forgotten part of a vegetable and give it a second life. It is an excellent introduction to `windowsill gardening` for beginners, offering a quick win and tangible results. Even experienced gardeners with limited space will appreciate the convenience and sustainability. You will learn exactly `how to grow green onions in water from scraps`, turning your kitchen into a miniature farm that provides endless garnish and flavor.
Why Regrow Green Onions? Your Path to Perpetual Flavor and Zero Waste
Regrowing green onions offers a multitude of benefits, making it one of the `easiest vegetables to regrow on a windowsill`. It is an accessible entry point into gardening, providing immediate gratification and practical results. You reduce food waste by utilizing parts of vegetables you would otherwise discard. This practice aligns perfectly with an environmentally conscious lifestyle, fostering a deeper connection to your food sources.
This method is a core component of successful winter indoor gardening, ensuring you have fresh greens even when it is freezing outside.
Think about the cost savings. A single bunch of green onions from the store can cost a dollar or two. If you use them regularly, these small purchases add up. By regrowing them, you effectively create an endless supply for pennies. This truly epitomizes `no-cost gardening`. Furthermore, you ensure a fresh, organic supply of green onions right in your home. You control the environment, avoiding pesticides and ensuring the produce is always at its peak freshness. This convenience means you will never run out of this versatile ingredient, ready for stir-fries, salads, garnishes, and more. It is a simple yet impactful step towards kitchen self-sufficiency, even in the smallest urban apartment.
Gathering Your Green Onion Scraps and Simple Supplies
Starting your `grow green onions` project requires minimal supplies. You likely already have everything you need in your kitchen. This simplicity makes it a perfect `gardening project for kids in winter`, offering an educational and engaging activity without complex tools.
Just like growing your own ginger indoors, this project requires almost no specialized equipment to get started.
Here is what you will need:
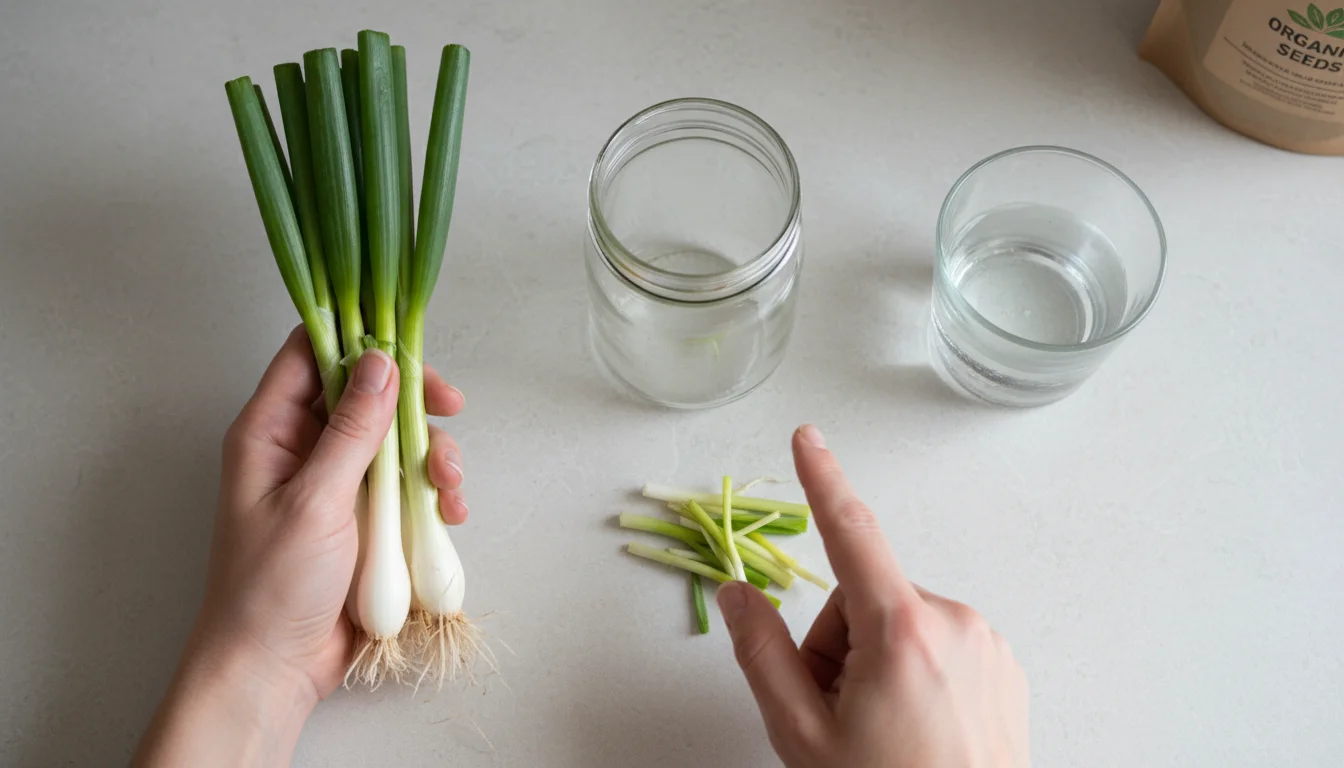
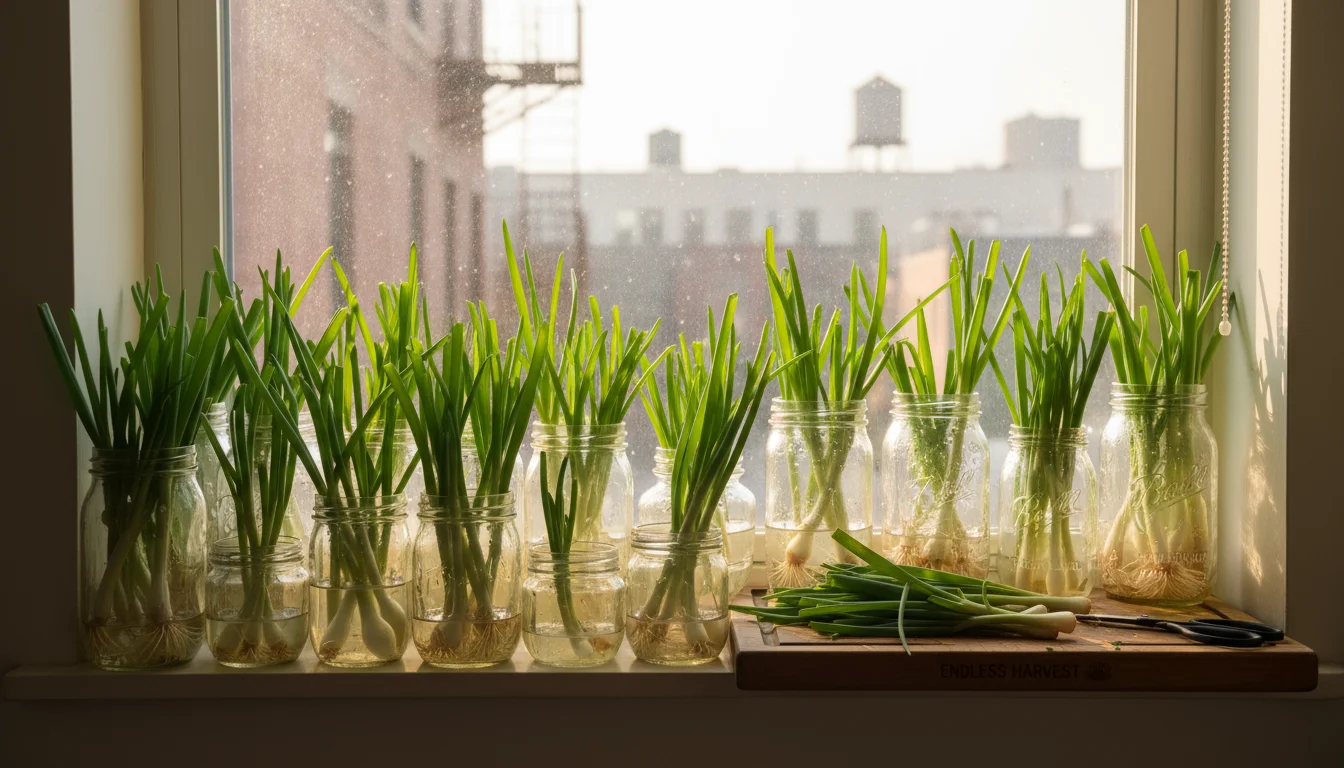
- Green Onion Scraps: Select healthy green onions from the grocery store. Look for bulbs that are firm and free of any mushy spots or significant discoloration.
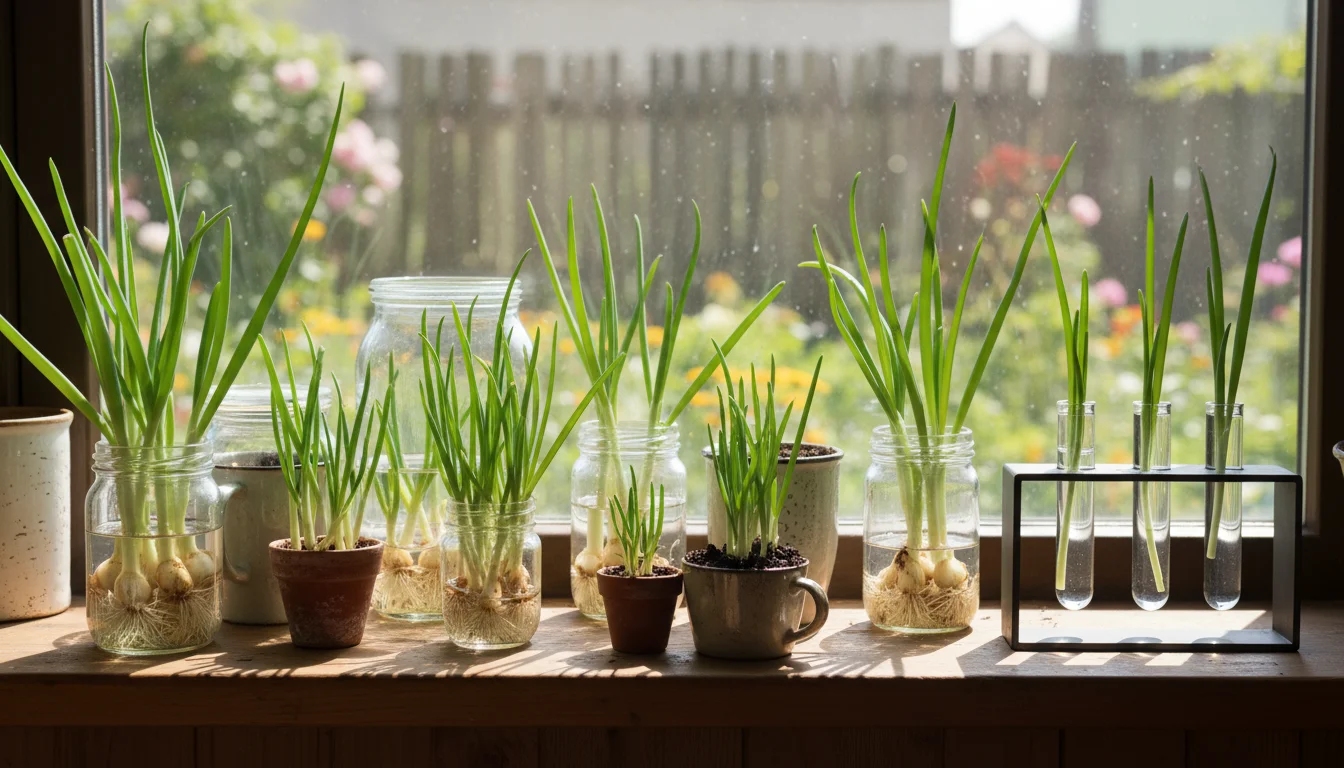
- Small Glass Jar or Container: A shot glass, a small Mason jar, or any clear glass container works perfectly. The transparency allows you to monitor root growth and water levels.
- Water: Tap water is generally fine. If your tap water is heavily chlorinated, let it sit out for an hour or two to allow the chlorine to dissipate.
- Potting Mix (Optional, for long-term growth): If you plan to transition your onions to soil, a small pot with drainage holes and a basic all-purpose potting mix will be necessary. “Drainage” refers to how water moves through the soil, preventing roots from sitting in stagnant water and rotting.
When you prepare green onions for cooking, instead of chopping the entire stalk, preserve about one inch of the white and light green base, including the root end. This small section holds the incredible potential for regrowth. Aim for at least 3-5 such sections to start your project. More pieces increase your chances of success and provide a more substantial initial harvest. Store any extra green onion bases in your refrigerator for a day or two if you cannot start the project immediately. However, fresh scraps yield the best results.
The Water Method: A Step-by-Step Guide to Initial Rooting
The water method is the quickest and easiest way to start your `regrow kitchen scraps` journey with green onions. It is incredibly straightforward and often yields visible results within a few days. This makes it a fantastic starter `windowsill gardening` endeavor.
If you want a harvest even faster than onions, you might also try growing sprouts in a jar which requires no soil or natural sunlight.
Here are the precise steps to get your green onions rooting:
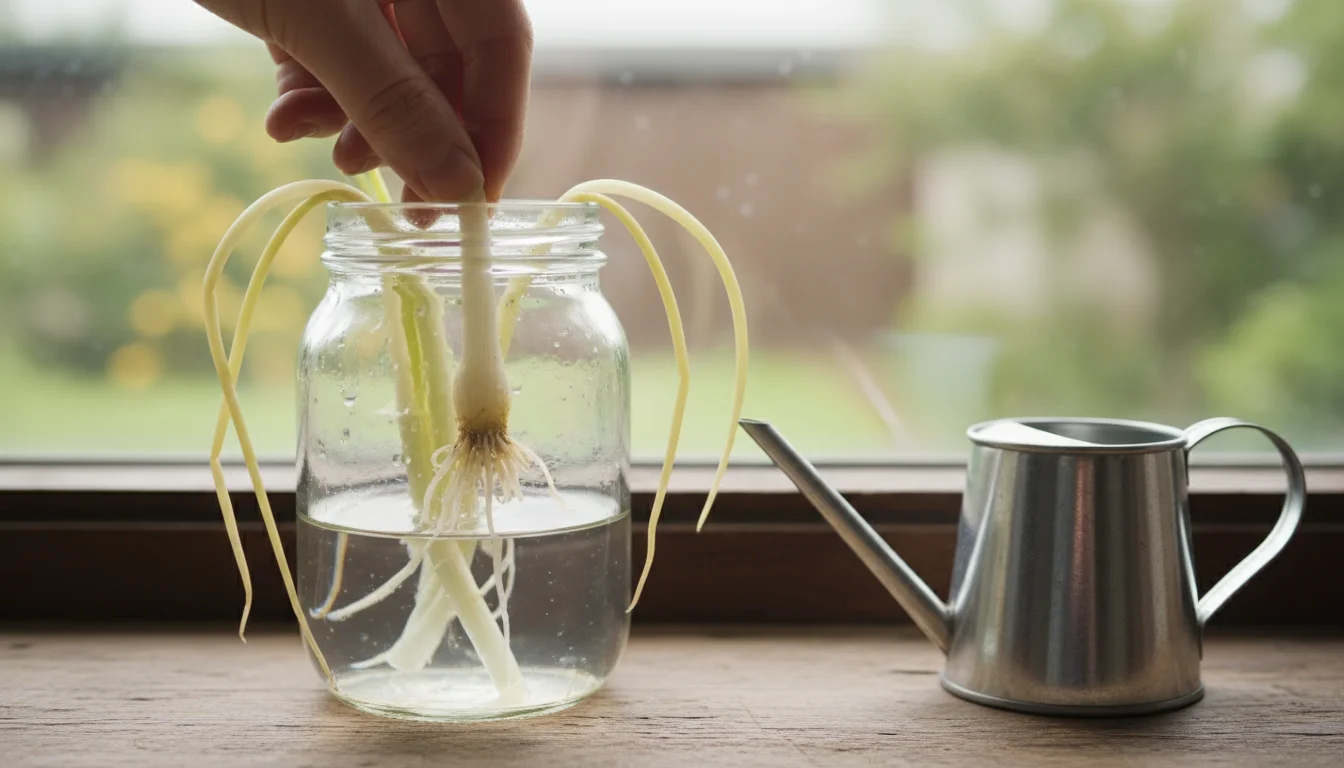
- Prepare Your Scraps: Take your saved green onion bases, each about one inch long with the roots intact. Ensure no green leaves remain attached above this one-inch mark, as they can sometimes rot in the water.
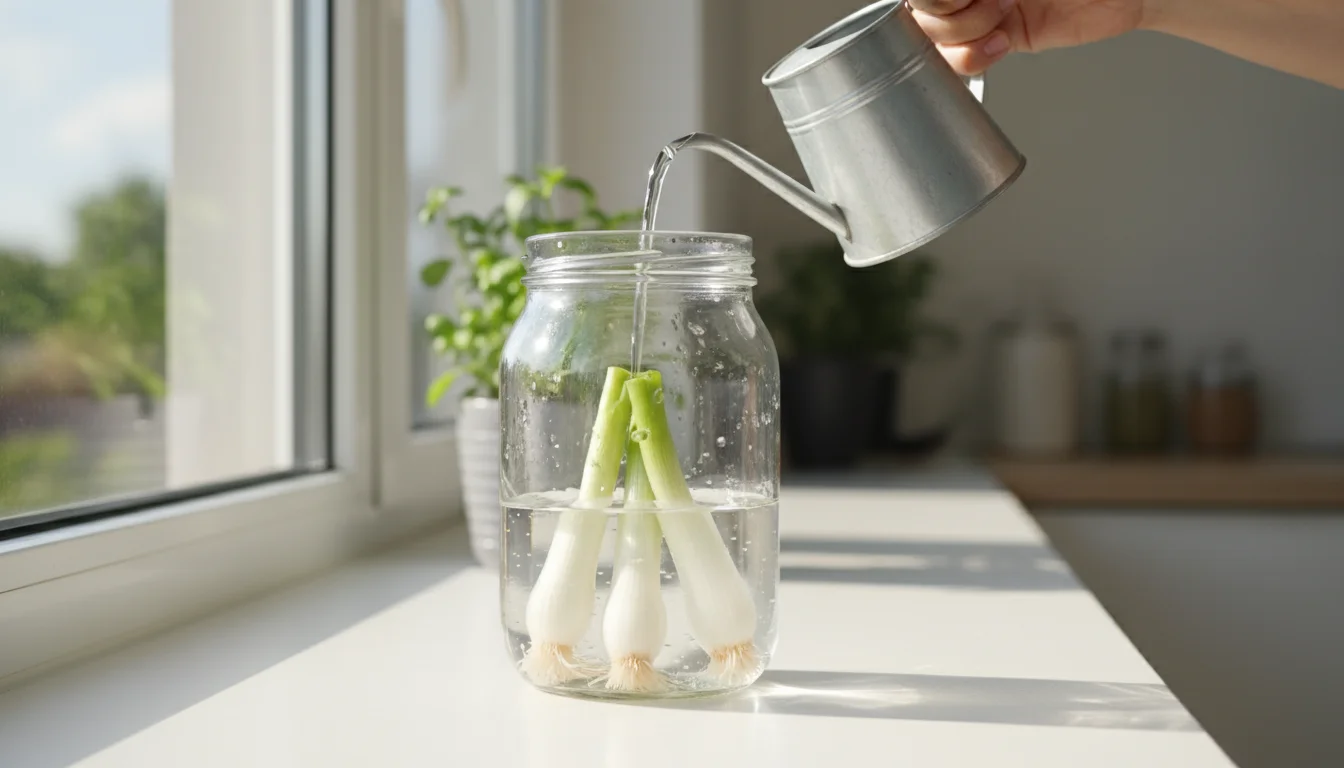
- Place in Water: Stand each green onion base upright in your small glass jar or container. The root end should face down.
- Add Water: Pour just enough water into the container to cover the root end and about half an inch of the white base. Do not submerge the entire scrap, as this can encourage rot. The goal is to keep the roots moist while allowing the top portion to breathe.
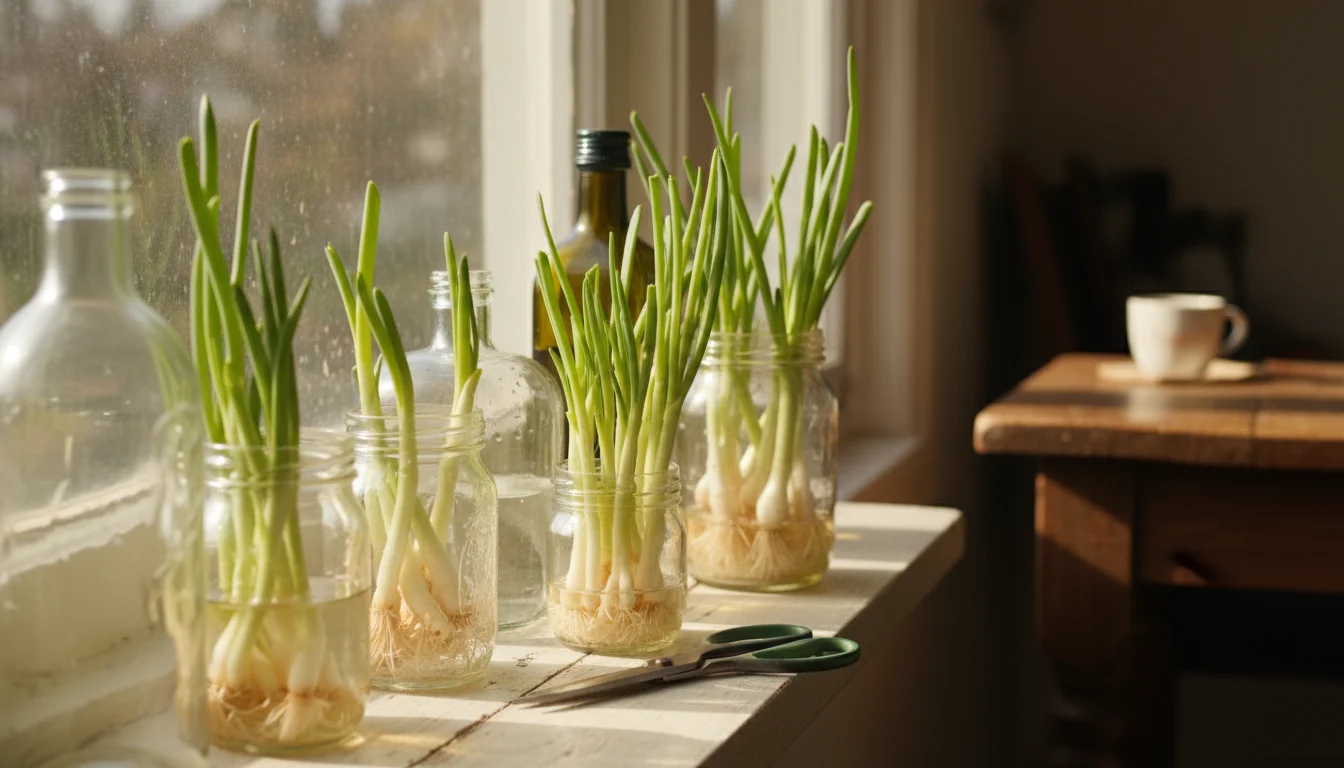
- Find a Sunny Spot: Place your container on a windowsill that receives bright, indirect sunlight for most of the day. A south-facing window is ideal, but an east or west-facing window also works well. Consistent light is crucial for stimulating new growth.
- Change Water Regularly: This is a critical step. Change the water daily, or at least every other day, to prevent bacterial growth and keep the water fresh and oxygenated. Stagnant water is the primary enemy of this project, often leading to a slimy texture and a foul smell.
- Observe and Wait: Within 3-7 days, you will notice small white roots extending from the base and green shoots emerging from the top. This rapid growth is incredibly satisfying and shows you the power of `how to grow green onions in water from scraps`.
During this initial phase, some people opt to add a tiny amount of liquid fertilizer to the water, perhaps a quarter strength. However, for the first week or two, the green onion base contains enough stored energy to fuel new growth without additional nutrients. For beginners and those focused on `no-cost gardening`, plain water is perfectly sufficient. The key is consistency in water changes and ample sunlight. You are essentially providing the basic conditions for the plant to reactivate its growth hormones.
Transitioning Your Onions: From Water to Soil for Long-Term Growth
While you can `grow green onions` in water for a few harvests, moving them to soil significantly extends their lifespan and increases their vigor. Soil provides a stable environment with essential nutrients that water alone cannot offer indefinitely. This transition is a smart move for sustainable `windowsill gardening`.
To ensure a non-stop supply, you can use succession planting by starting a new container of scraps every two weeks.
Follow these steps to successfully transplant your sprouted green onions into soil:
- Prepare Your Pots: Select small pots or containers, ideally 4-6 inches in diameter, with excellent drainage holes. Proper drainage prevents waterlogging, which suffocates roots. Fill the pots with a good quality, all-purpose potting mix. Avoid garden soil, as it can be too dense for containers and may harbor pests.
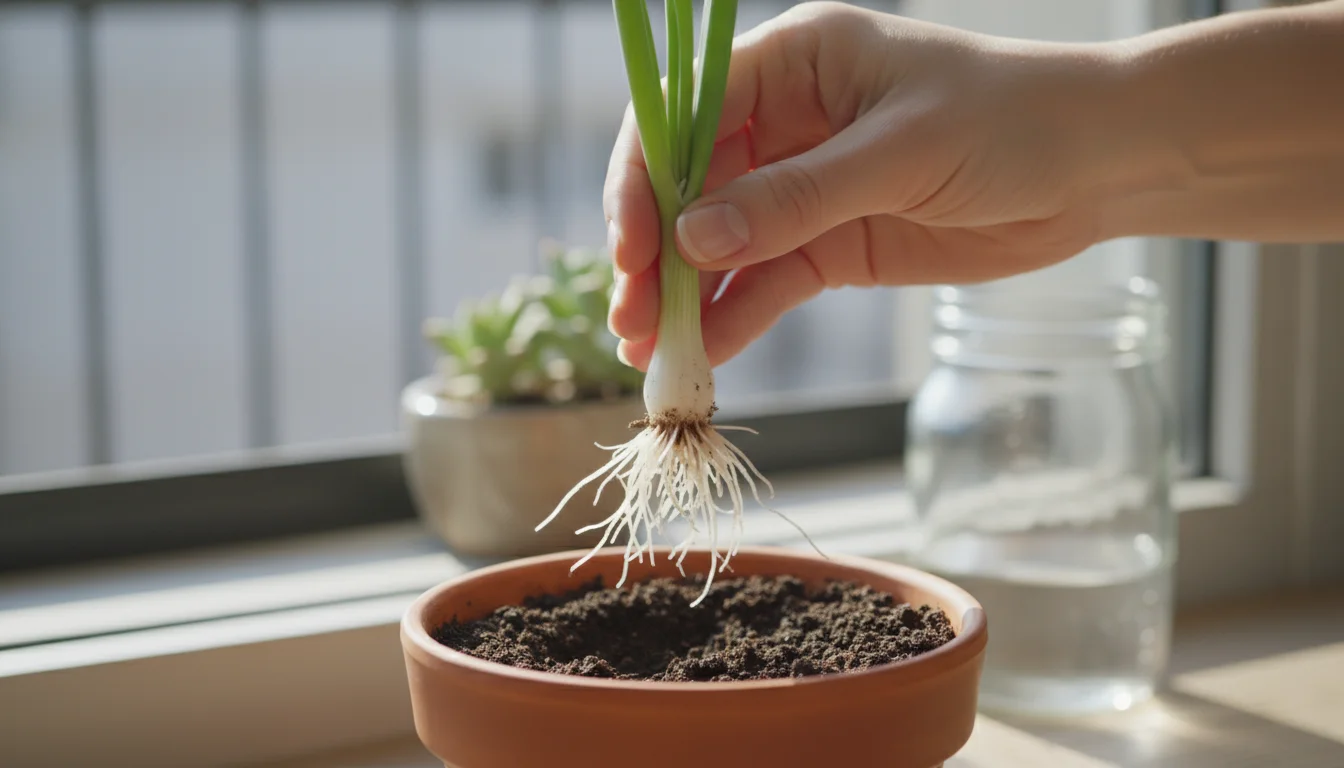
- Gently Remove from Water: Carefully take your rooted green onion scraps out of the water. Handle them gently to avoid damaging the delicate new roots.
- Create Planting Holes: Use your finger or a small trowel to create shallow depressions in the potting mix, spaced about 2-3 inches apart if you are planting multiple scraps in one larger pot.
- Plant the Scraps: Place each green onion scrap into a hole, ensuring the white base and roots are covered by soil. The green shoots should remain above the soil line. Do not bury the entire green part.
- Water Thoroughly: After planting, water the soil deeply until water begins to drain from the bottom of the pot. This settles the soil around the roots and eliminates air pockets.
- Return to Sunlight: Place the potted green onions back on your sunny windowsill. They will continue to thrive with consistent light.
The initial transition might cause a slight pause in growth as the plant adjusts from a water-based environment to a soil-based one. Do not worry if growth slows for a day or two. This is normal. Within a week, you should observe vigorous new shoots emerging. Once in soil, your green onions will have access to a broader range of nutrients, leading to stronger, healthier, and more productive plants. This step truly transforms your `regrow kitchen scraps` project into a long-term, self-sustaining green onion farm.
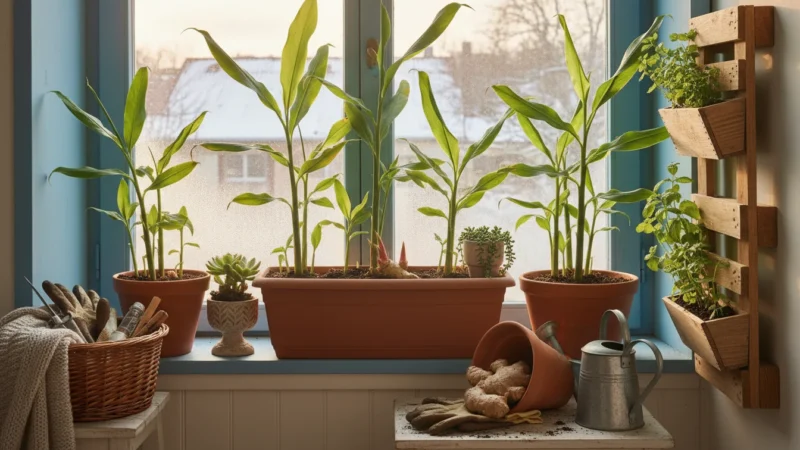
Optimizing Your Windowsill Garden: Light, Location, and Lush Growth
To ensure your green onions flourish and provide a continuous harvest, attention to their environment on your windowsill is paramount. Understanding light requirements, temperature preferences, and consistent watering practices makes all the difference in achieving `lush growth`.
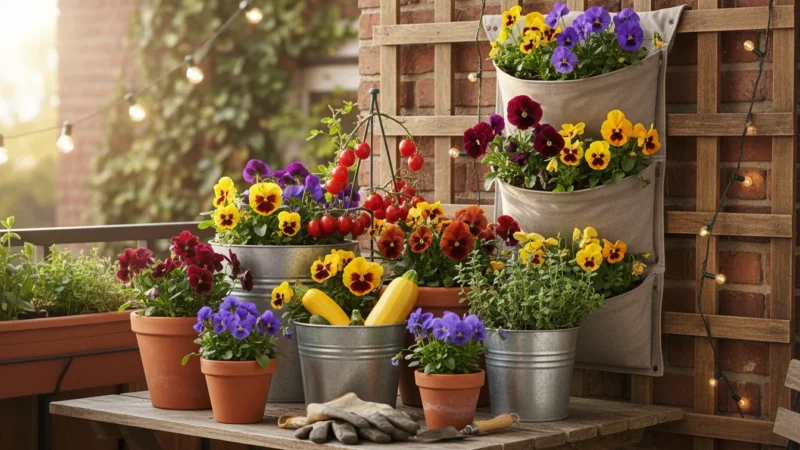
Once you have your onions established, you can maximize your small space by planting a one-pot wonder salad bar to harvest fresh leaves right alongside your stalks.
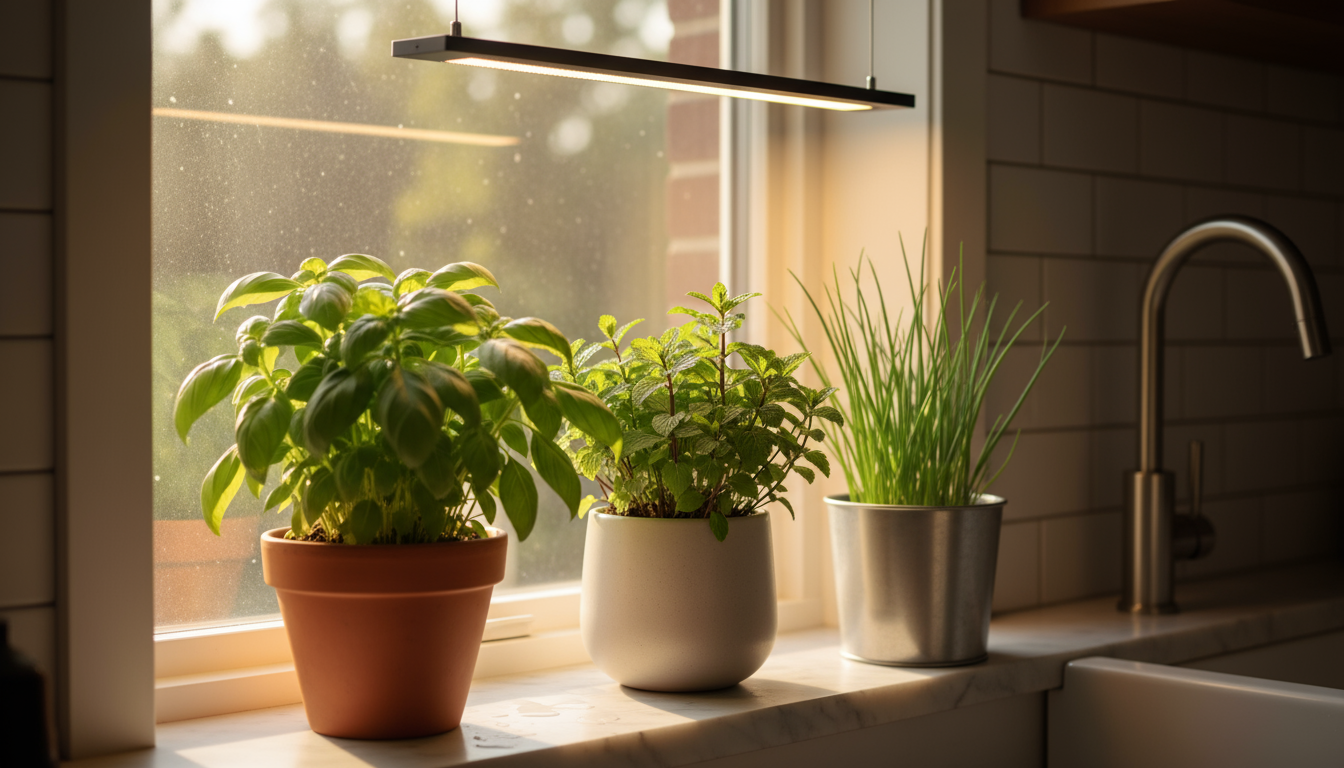
- Light is Key: Green onions, like most plants, are sun-worshippers. They need at least 6 hours of bright, direct sunlight daily. A south-facing window is ideal, offering the most intense and prolonged light exposure. East or west-facing windows can also work, but north-facing windows typically do not provide enough light, leading to leggy (stretched and weak) growth. If natural light is insufficient, consider supplementing with an inexpensive LED grow light. Even a small clip-on light can provide the boost your plants need, especially during shorter winter days. This makes `gardening projects for kids in winter` much more successful.
- Temperature Matters: Green onions prefer moderate temperatures, ideally between 60-75°F (15-24°C). Avoid placing them directly next to drafty windows in winter or near heat vents, as extreme temperature fluctuations stress the plants. Consistent room temperature is generally perfect for their growth.
- Watering Wisdom: While green onions like consistent moisture, they hate soggy soil. Water thoroughly when the top inch of soil feels dry to the touch. The goal is to keep the soil consistently moist but never waterlogged. Overwatering is a common mistake that leads to root rot, which is when roots sit in too much water and essentially drown or develop fungal issues. A good practice is to feel the weight of the pot: a light pot usually means it needs water, a heavy pot means it is still moist.
- Fertilization (Optional, but Recommended for Vigor): While `no-cost gardening` initially implies no inputs, for long-term health and productivity, your green onions will benefit from occasional feeding. Once your green onions are established in soil and actively growing, consider a diluted liquid fertilizer every 2-4 weeks. Use a balanced all-purpose houseplant fertilizer at half strength. This replenishes nutrients depleted by continuous harvesting and promotes robust regrowth.
- Air Circulation: Ensure your windowsill area has decent air circulation. Stagnant air can encourage fungal issues, especially if humidity is high. Avoid overcrowding your plants.
By paying attention to these factors, you create an optimal microclimate for your green onions. You are not just growing food; you are nurturing a thriving mini-ecosystem right in your home, demonstrating the rewarding potential of `windowsill gardening`.
Harvesting Your Endless Supply: The Smart Snip for Continuous Yields
The beauty of regrowing green onions lies in their ability to provide multiple harvests from the same plant. Knowing how to harvest them correctly ensures a truly endless supply. This technique is key to maintaining your `grow green onions` project as a sustainable source of fresh flavor.
Here is how to harvest your green onions for continuous production:
- Wait for Sufficient Growth: Allow your green onions to grow to at least 6-8 inches tall before their first harvest. This gives the plant enough foliage to photosynthesize and build up energy reserves for future growth. Harvesting too early can weaken the plant.
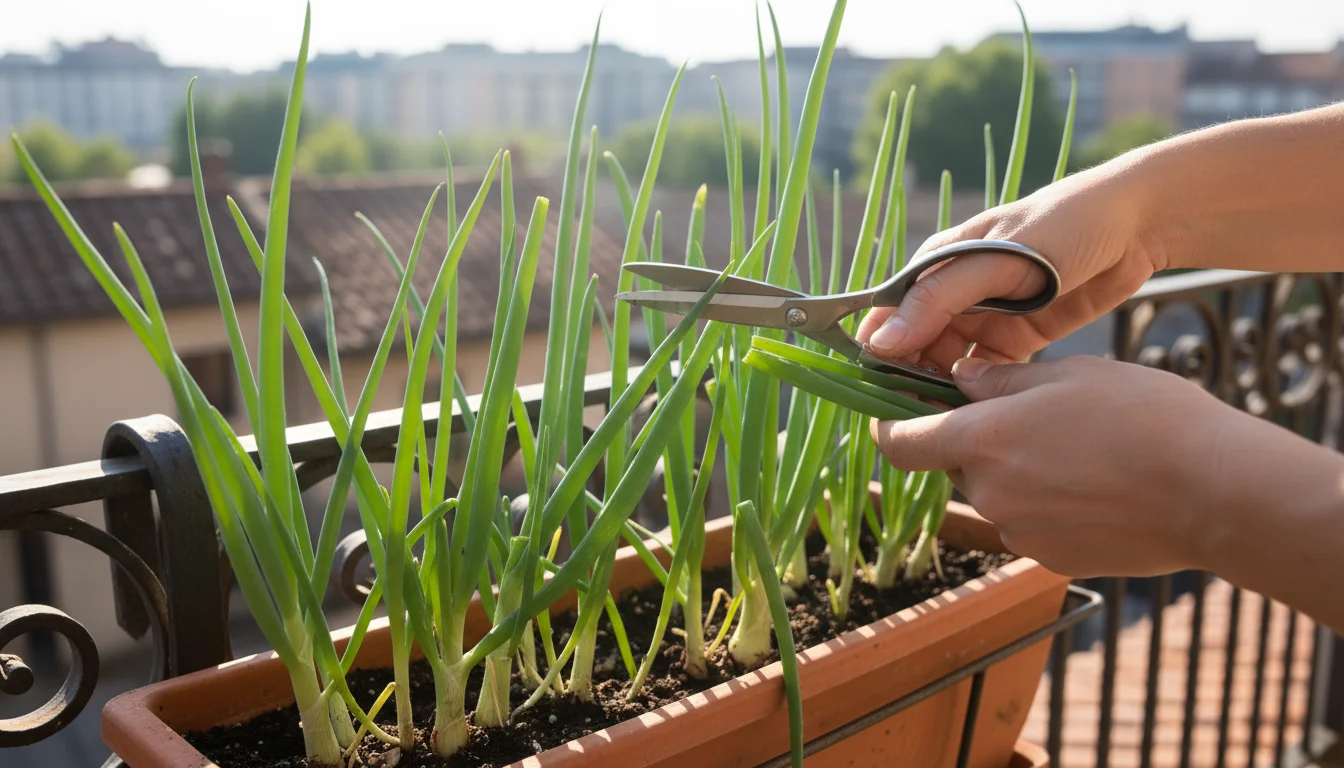
- The “Cut and Come Again” Method: To harvest, use clean, sharp scissors or kitchen shears. Cut the green tops about one inch above the soil line (or water line if you are still growing in water). Avoid cutting too low, as you need to leave enough of the base to stimulate new growth.
- Harvest What You Need: Only snip off the amount you plan to use immediately. This keeps the remaining plant actively growing and fresh. You do not need to harvest all stalks at once.
- Rotate Your Harvest: If you have multiple green onion plants or bases, consider harvesting from different ones each time. This distributes the stress of harvesting and allows each plant a chance to recover fully.
- Expect Rapid Regrowth: After harvesting, you will observe new green shoots emerging from the cut ends within a few days. The rate of regrowth depends on light, water, and nutrient availability, but it is typically quite fast. You can often get a new harvest every 1-2 weeks.
Each time you harvest, you reinforce the plant’s ability to regenerate. You are essentially pruning it, which often encourages bushier and more vigorous growth. This method is a cornerstone of sustainable `regrow kitchen scraps` projects, turning a simple waste product into a long-term culinary asset. Over several months, you might notice the plant’s vigor slowly diminishing, or the bulb may start to rot. At this point, it is time to start new scraps, rotating your supply to maintain a consistently fresh and productive green onion patch on your windowsill.
Common Hurdles and Simple Solutions: Troubleshooting Your Regrowth Project
While `grow green onions` from scraps is one of the `easiest vegetables to regrow on a windowsill`, you might encounter a few challenges. Knowing how to troubleshoot these common issues ensures your project remains successful and rewarding.
- Mushy or Slimy Bases in Water:
- Problem: The base of your green onion in water feels soft, looks discolored, or develops a slimy film. This indicates rot.
- Solution: Change the water daily without fail. Ensure only the very bottom of the white base and roots are submerged, not the entire scrap. Remove any affected scraps immediately to prevent spread if you have multiple in one container. Rinse healthy scraps under running water before placing them in fresh water.
- Yellowing or Bending Shoots:
- Problem: The new green shoots appear pale, yellow, or are bending over, indicating weak growth.
- Solution: This usually points to insufficient light. Move your container to a brighter windowsill. If natural light is limited, consider a supplemental grow light. Yellowing can also be a sign of nutrient deficiency if your plants have been in soil for a while without fertilizer. Apply a diluted liquid fertilizer.
- Slow or Stunted Growth:
- Problem: Your green onions are growing very slowly, or new shoots are not appearing as quickly as expected.
- Solution: Review your light situation first, as this is the most common cause. Ensure they get at least 6 hours of bright light. Also, check the temperature; very cold or very hot conditions can slow growth. If in soil, ensure consistent watering and consider a diluted feed.
- Fungal Growth or Mold on Soil:
- Problem: White or greenish mold appears on the surface of the soil.
- Solution: This often indicates overwatering and poor air circulation. Reduce watering frequency, ensuring the top inch of soil dries out between waterings. Gently scrape off the mold, and ensure your pot has adequate drainage holes. Improving air circulation by opening a window (if not too cold) or using a small fan can also help.
- Pests (Rare, but Possible):
- Problem: Small flying insects (fungus gnats) or tiny crawling pests appear around your plants.
- Solution: Fungus gnats are usually a sign of consistently wet soil. Let the soil dry out more between waterings. For other pests, gently wipe leaves with a damp cloth or a cotton swab dipped in rubbing alcohol. A diluted neem oil spray (following product instructions) can also be effective for persistent issues.
Addressing these issues promptly will keep your `windowsill gardening` project thriving. Most problems with green onions are easily remedied with minor adjustments to their care. Your proactive approach ensures a steady supply of fresh green onions.
Beyond Green Onions: Expanding Your Kitchen Scrap Garden
Once you master the art of regrowing green onions, you will likely feel inspired to explore other `regrow kitchen scraps` projects. This sustainable approach to gardening extends far beyond a single vegetable, opening up a world of possibilities for `no-cost gardening` and reducing food waste. This is particularly exciting for `gardening projects for kids in winter`, as many scraps readily regrow indoors.
For another simple indoor project, consider learning how to grow your own ginger indoors as a rewarding companion to your green onions.
Consider these other `easiest vegetables to regrow on a windowsill`:
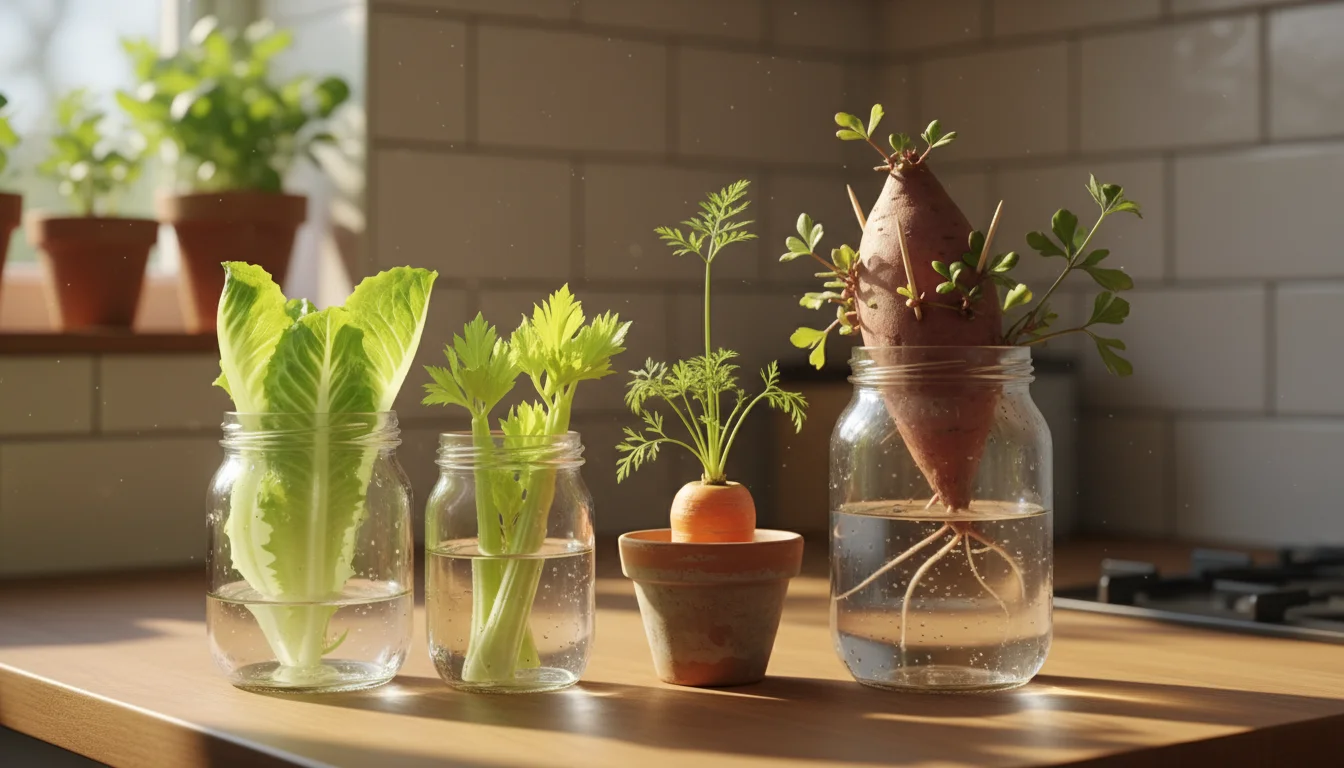
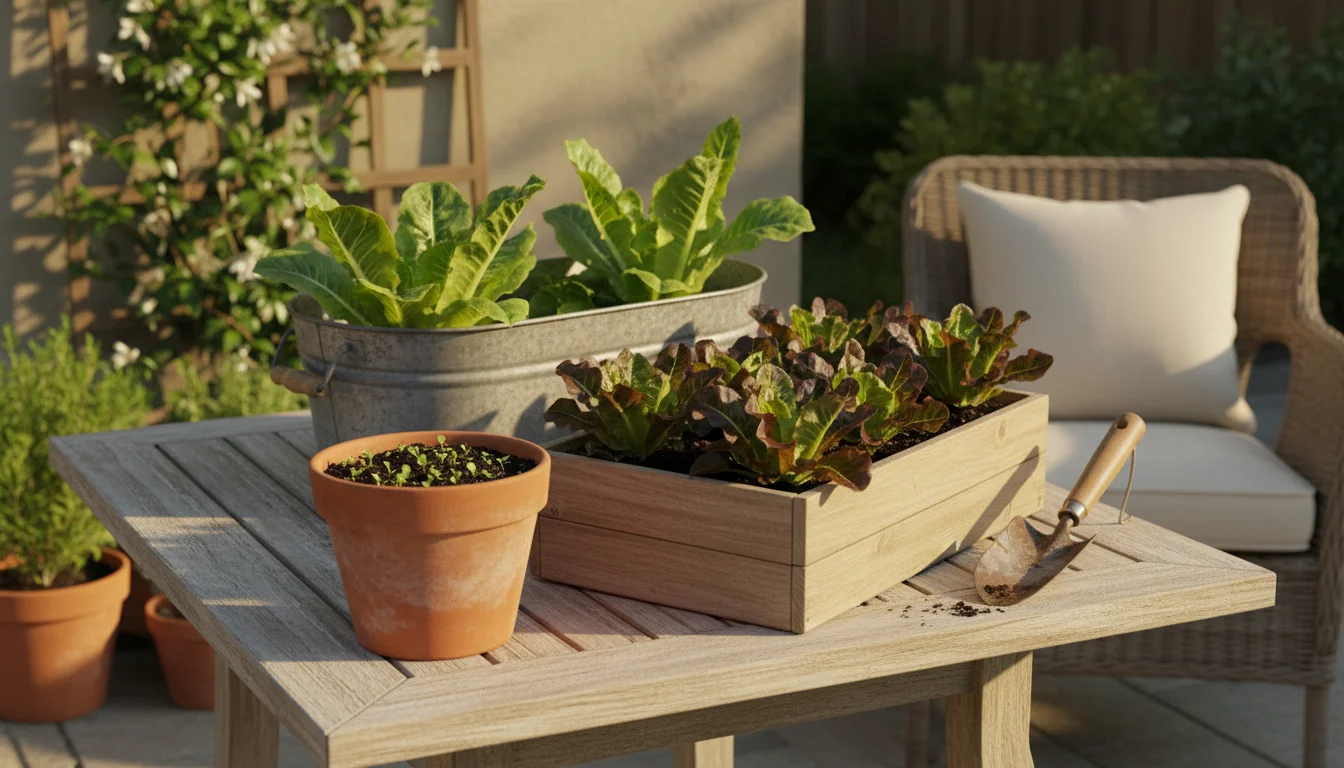
- Romaine Lettuce or Celery: Place the base of a romaine lettuce head or celery stalk in about an inch of water. You will see new leaves emerge from the center. Once rooted and showing substantial leaf growth, you can transfer them to soil for larger harvests.
- Bok Choy: Similar to lettuce, the base of a bok choy can be placed in water to sprout new leaves.
- Potatoes and Sweet Potatoes: If you have potatoes with “eyes” (sprouts), cut them into pieces, ensuring each piece has at least one eye. Let them cure (dry out) for a day or two to prevent rot, then plant them in soil. Sweet potatoes can be suspended in water (half submerged) to grow “slips” or sprouts, which you then plant.
- Ginger: Plant a piece of ginger root with an “eye” (a small bud) in potting mix, just below the surface. Keep the soil moist, and it will sprout.
- Garlic: Plant individual garlic cloves, root-end down, in potting mix. They will sprout green shoots similar to chives. You can harvest the green shoots repeatedly, or let them mature to form new garlic bulbs (though this takes longer and requires more space).
- Carrot Tops: While carrot tops will not produce new carrots, you can place the top inch of a carrot in a shallow dish of water to grow green foliage. This is purely ornamental or can be used as a fresh, albeit slightly bitter, garnish for salads. It is an excellent visual lesson in plant growth for kids.
Expanding your `windowsill gardening` repertoire with these scraps provides continuous learning and enjoyment. It is an environmentally friendly way to maximize resources and provides a deeper understanding of where your food comes from. Every time you successfully `regrow kitchen scraps`, you contribute to a more sustainable household.
Frequently Asked Questions
Can I keep regrowing green onions indefinitely in water?
While you can `grow green onions` in water for several harvests, their energy reserves eventually deplete. After 2-3 harvests, you will likely notice slower growth and weaker stalks. For truly indefinite regrowth, transplanting them into soil is the best practice. Soil provides a stable source of nutrients that water alone cannot offer long-term, leading to more vigorous and continuous production.
Do I need special equipment to start growing green onions from scraps?
Absolutely not. One of the greatest appeals of this `no-cost gardening` project is its simplicity. You only need the green onion scraps themselves, a small glass jar or cup, and water. For long-term growth, a small pot with drainage and regular potting mix are helpful, but these are common household items or inexpensive purchases.
What type of light is best for green onion regrowth on a windowsill?
Green onions thrive in bright, direct sunlight. Place your green onion scraps or potted plants on a windowsill that receives at least 6 hours of direct sun daily. A south-facing window is ideal. If you do not have sufficient natural light, particularly during winter, an affordable LED grow light can significantly boost their growth, making it a viable `gardening project for kids in winter` even in dim conditions.
My green onions are growing, but they are very thin and floppy. What is wrong?
Thin, leggy, or floppy growth almost always indicates insufficient light. Your green onions are stretching to find more light, which results in weak stalks. Move them to a brighter location, or supplement with artificial grow lights. Ensuring adequate light from the start prevents this common issue and promotes strong, upright growth.
How often should I harvest my regrowing green onions?
You can harvest your green onions every 1-2 weeks, once the green shoots reach 6-8 inches in height. Always leave at least one inch of the green stalk above the soil line (or water line) to ensure the plant has enough energy to regrow. Regular harvesting encourages the plant to produce more, providing you with a continuous supply.
For trustworthy gardening information, visit:
Missouri Botanical Garden, Kew Science — Plants of the World, Brooklyn Botanic Garden and Chicago Botanic Garden. These organizations provide expert, research-based advice for gardeners at all levels.
Disclaimer: This article is for informational purposes only and is not a substitute for professional gardening advice. Always consult local extension services or horticulture experts for region-specific guidance.

Leave a Reply