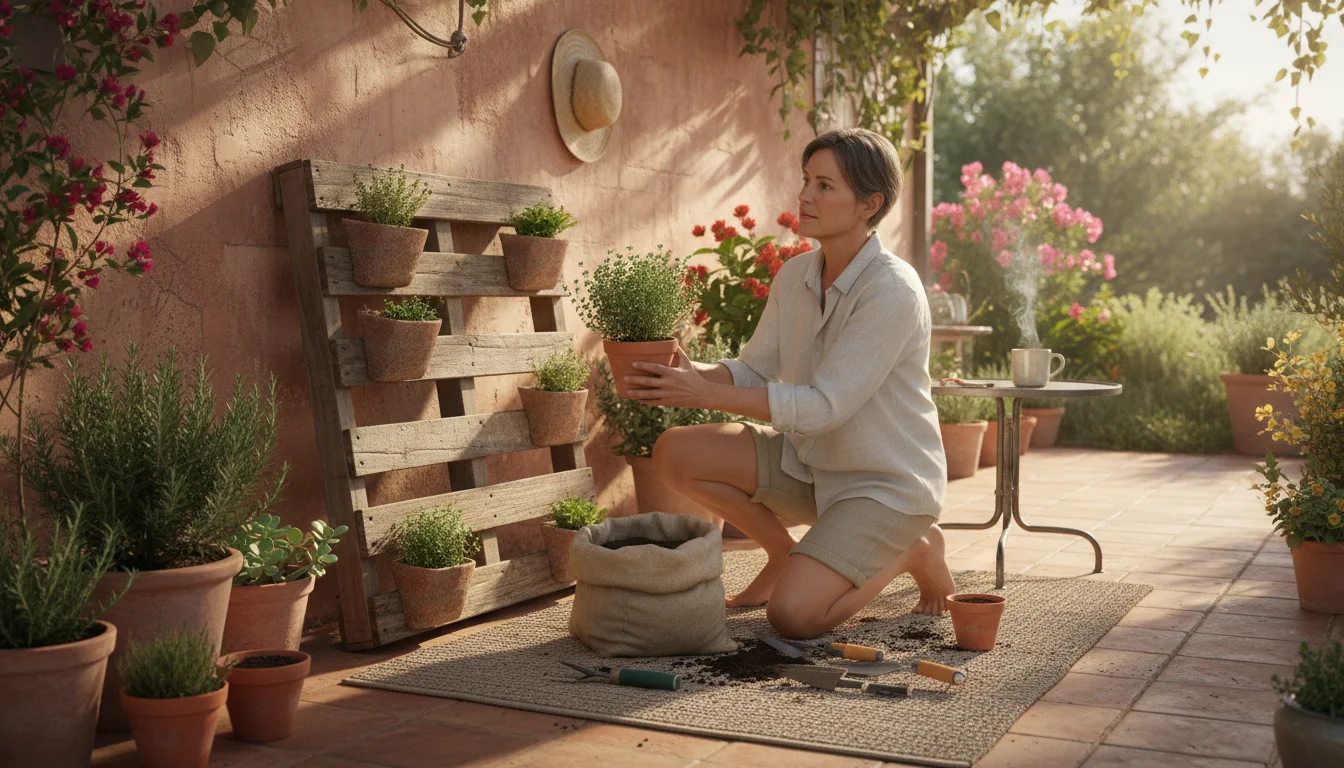
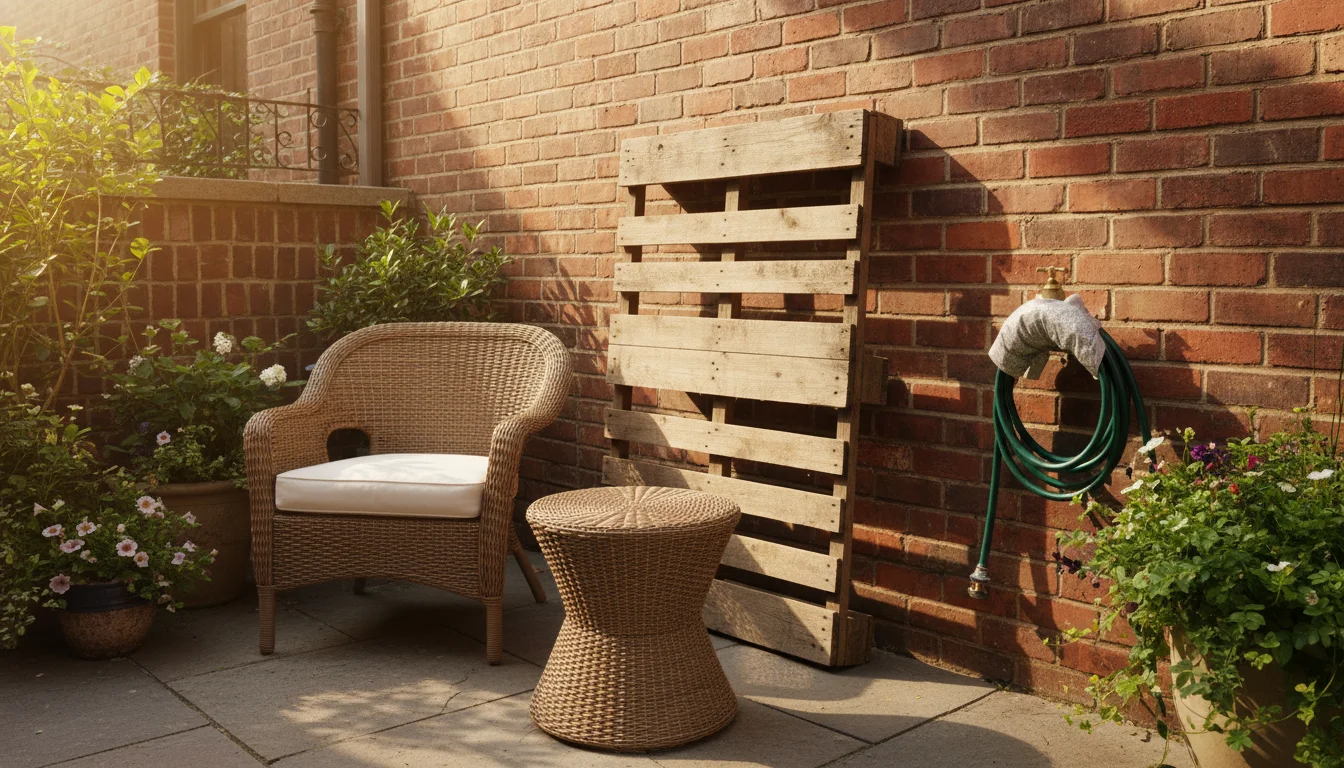
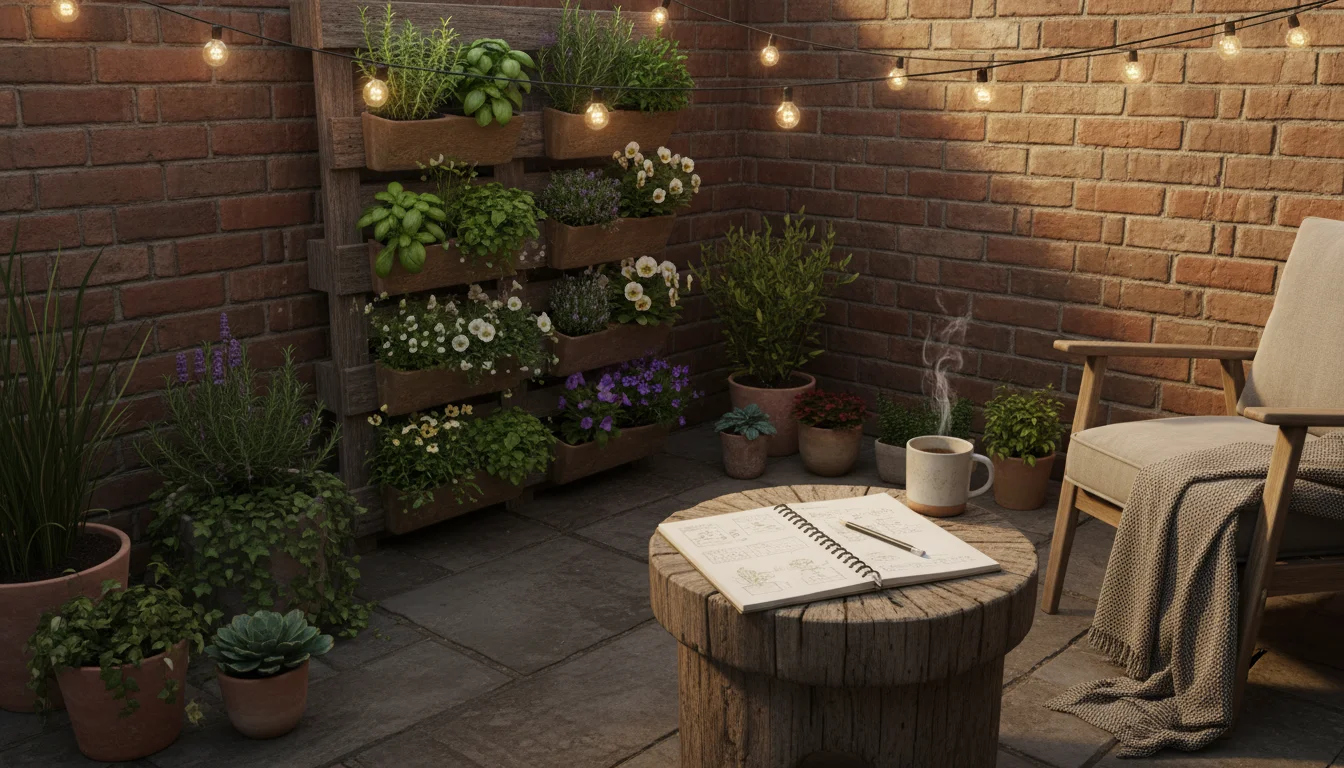
Your small outdoor space, be it a balcony, patio, or compact yard, holds untapped potential. Imagine a vibrant wall of greenery, a culinary herb station, or a burst of color in an otherwise overlooked corner. This vision becomes a reality with a DIY vertical pallet garden, a brilliant solution for maximizing limited square footage. You transform a discarded shipping pallet into a functional, beautiful planter, bringing life and fresh produce directly to your doorstep. This guide provides a detailed, step-by-step tutorial, empowering you to create a stunning vertical garden that enhances your home, benefits the environment, and simplifies your gardening efforts.
Learning how to design a balcony garden that functions as an outdoor room can help you better integrate this vertical feature into your lifestyle.
Creating a vertical garden gives you the opportunity to grow more in less space, opening up possibilities for flowers, herbs, and even vegetables. Repurposing a pallet offers an accessible, cost-effective, and sustainable approach to gardening, aligning perfectly with a low-maintenance and eco-conscious lifestyle. This project is approachable for beginners and offers satisfying results for experienced gardeners looking for new design solutions. Prepare to transform your outdoor area into a productive and visually appealing oasis.
Embrace Vertical Gardening for Small Spaces
Vertical gardening represents a transformative approach for anyone working with limited outdoor space. You leverage vertical planes, such as walls, fences, or even the side of your home, to cultivate plants that would otherwise require significant ground area. This method is incredibly efficient, allowing you to grow a wider variety of plants in a compact footprint. For apartment dwellers, urban gardeners, or those with small courtyards, vertical gardening is a game-changer.
Consider the benefits: you maximize every square inch, create stunning visual interest, and often improve air quality. A vertical garden adds texture, color, and life to bland surfaces. It can also serve practical purposes, such as growing herbs directly outside your kitchen or creating a privacy screen from a busy neighbor. Studies show that green spaces, even small ones, contribute positively to mental well-being, reducing stress and enhancing mood. You are not simply growing plants, you are cultivating a more enjoyable and functional living environment.
This design principle extends beyond aesthetics, offering practical advantages. Vertical structures can make gardening more accessible, reducing the need for bending and kneeling. They also help elevate plants away from ground-dwelling pests. When planning your small space, consider how vertical elements draw the eye upwards, making an area feel larger and more expansive. This creates a sense of depth and dimension that flat, ground-level plantings often cannot achieve.
Why Choose a Pallet Garden? Sustainable, Stylish, and Simple
Among the many vertical gardening options, the DIY pallet garden stands out for its unique blend of sustainability, aesthetic appeal, and straightforward construction. Pallets are readily available, often free or inexpensive, making this project highly budget-friendly. You take a discarded item, destined for a landfill, and give it a new purpose, reducing waste and embracing a circular economy model. This act of repurposing aligns perfectly with environmentally conscious living.
This project is a fantastic way to apply budget garden design tips that yield high-end results for very little cost.
Beyond its eco-credentials, a pallet garden offers a rustic, appealing aesthetic that complements various outdoor design styles. Its natural wood tones provide a warm backdrop for lush greenery and vibrant blooms. You can leave the wood unfinished for a natural look, or paint it to match your existing decor, offering significant customization potential. The inherent structure of a pallet naturally creates compartments, simplifying the planting process and organizing your garden.
The simplicity of constructing a pallet garden makes it an ideal DIY project for gardeners of all skill levels. You do not need specialized carpentry skills or expensive tools. The basic transformation involves minimal modifications, allowing you to focus on the exciting part: selecting and planting your chosen botanicals. With its low cost, easy assembly, and charming appearance, a repurposed pallet garden is an intelligent choice for enhancing your small outdoor space.
Sourcing Your Pallet: Safety and Selection
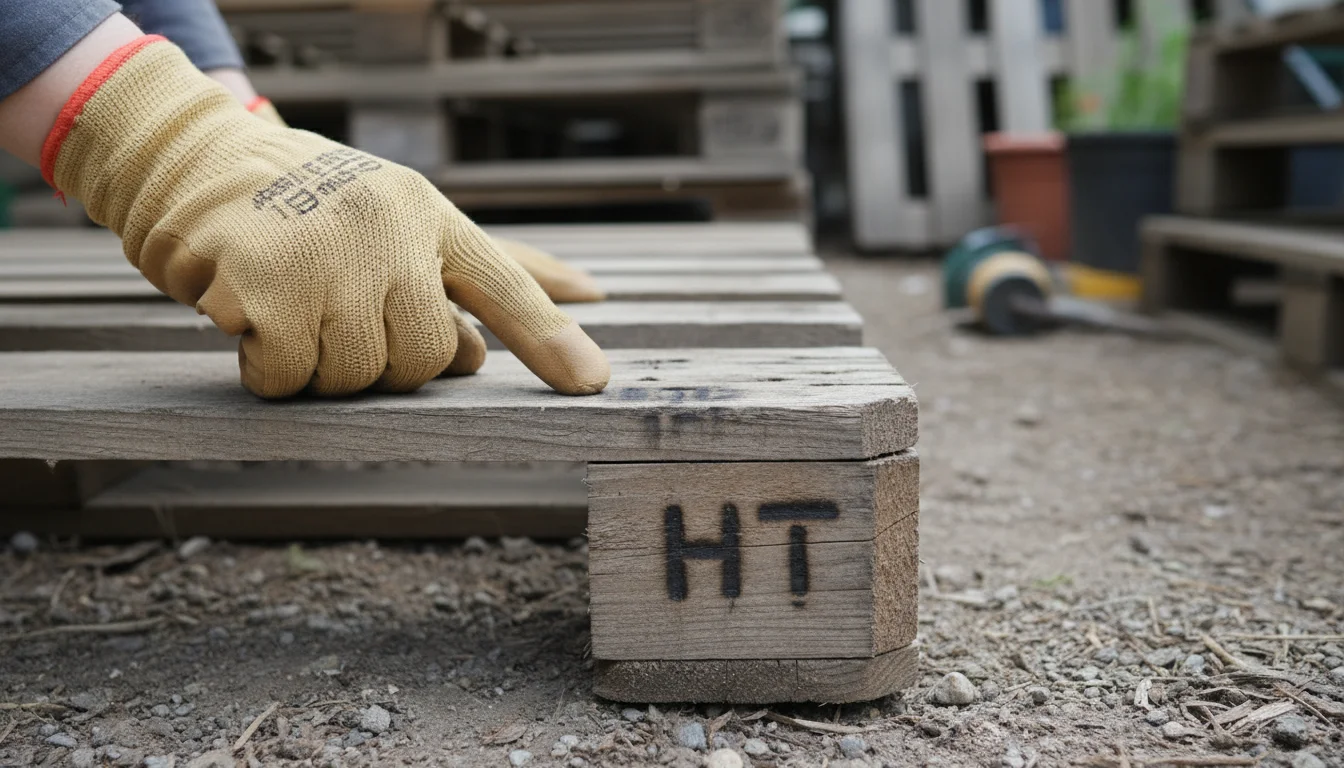
The first and most critical step in creating your DIY vertical pallet garden involves sourcing the right pallet. Not all pallets are suitable for gardening, especially if you plan to grow edible plants. Understanding pallet markings ensures your project is safe and sustainable.
Understanding Pallet Markings
Pallets carry stamps or brands that indicate their treatment method. Look for these codes:
- HT (Heat Treated): This is the safest option. Heat-treated pallets undergo a process that kills pests and pathogens without using chemicals. These are ideal for gardening, especially for edibles.
- DB (Debarked): This indicates the wood was debarked, often preceding heat treatment. You still need to look for the HT stamp.
- MB (Methyl Bromide): Avoid pallets with this stamp. Methyl bromide is a highly toxic pesticide used to treat pallets, and its residues can leach into soil, posing health risks and harming plants.
- EUR or EPAL: These stamps indicate a European pallet standard, typically heat-treated, making them safe.
- No Stamp: Exercise caution with unstamped pallets. Their origin and treatment method are unknown, making them a risky choice for growing food.
Always prioritize pallets stamped ‘HT’ for safety and peace of mind. Your local extension service, such as Oregon State University Extension, offers additional resources on safe material sourcing.
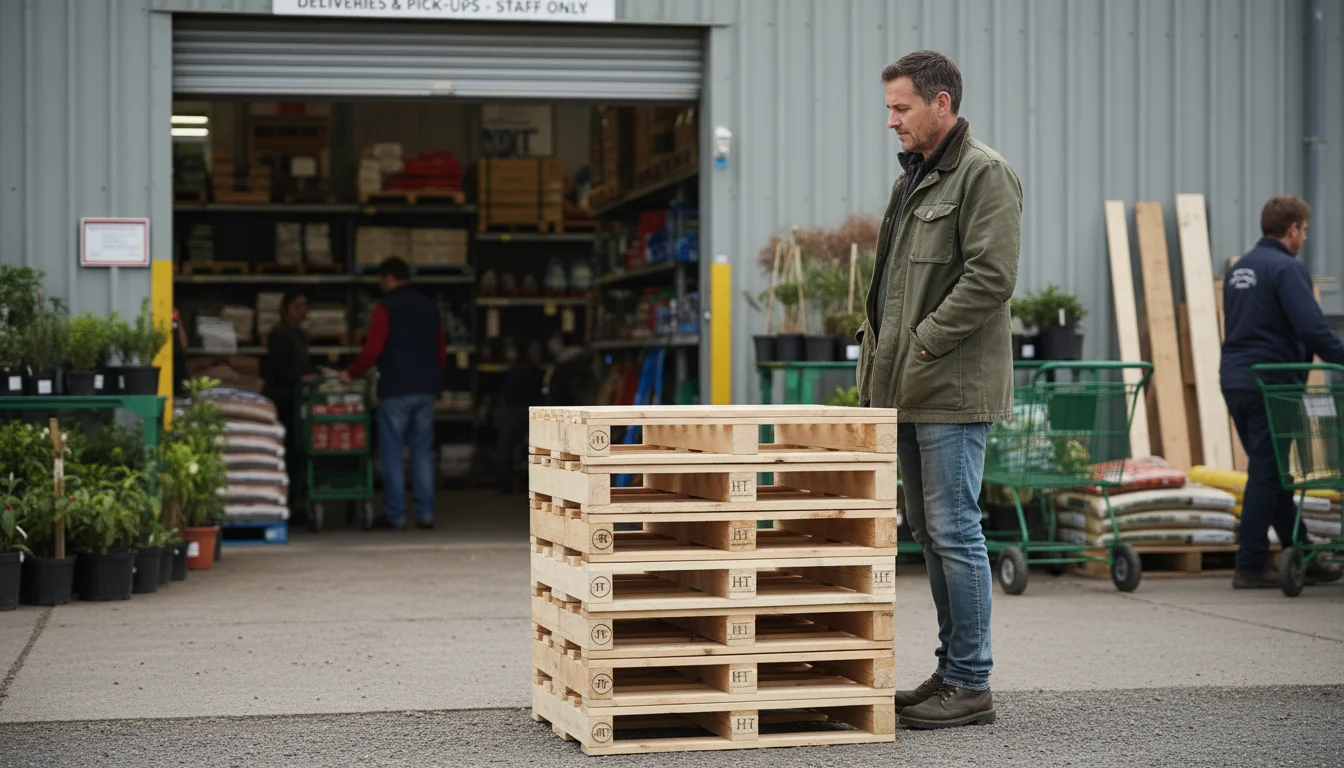
Where to Find Safe Pallets
You can often find safe, heat-treated pallets for free or at a low cost. Consider these sources:
- Local businesses: Small businesses, especially those receiving international shipments, often have heat-treated pallets. Look for furniture stores, hardware stores, pet supply shops, or nurseries. Always ask permission before taking a pallet.
- Industrial areas: Warehouses and distribution centers might have surplus pallets. Again, always ask first.
- Construction sites: Sometimes construction projects have pallets for materials. Inquire with the site manager.
- Online marketplaces: Websites like Craigslist or local community groups often list free pallets.
- Pallet recyclers: These businesses specialize in pallet collection and resale, and can often provide safe, sorted options.
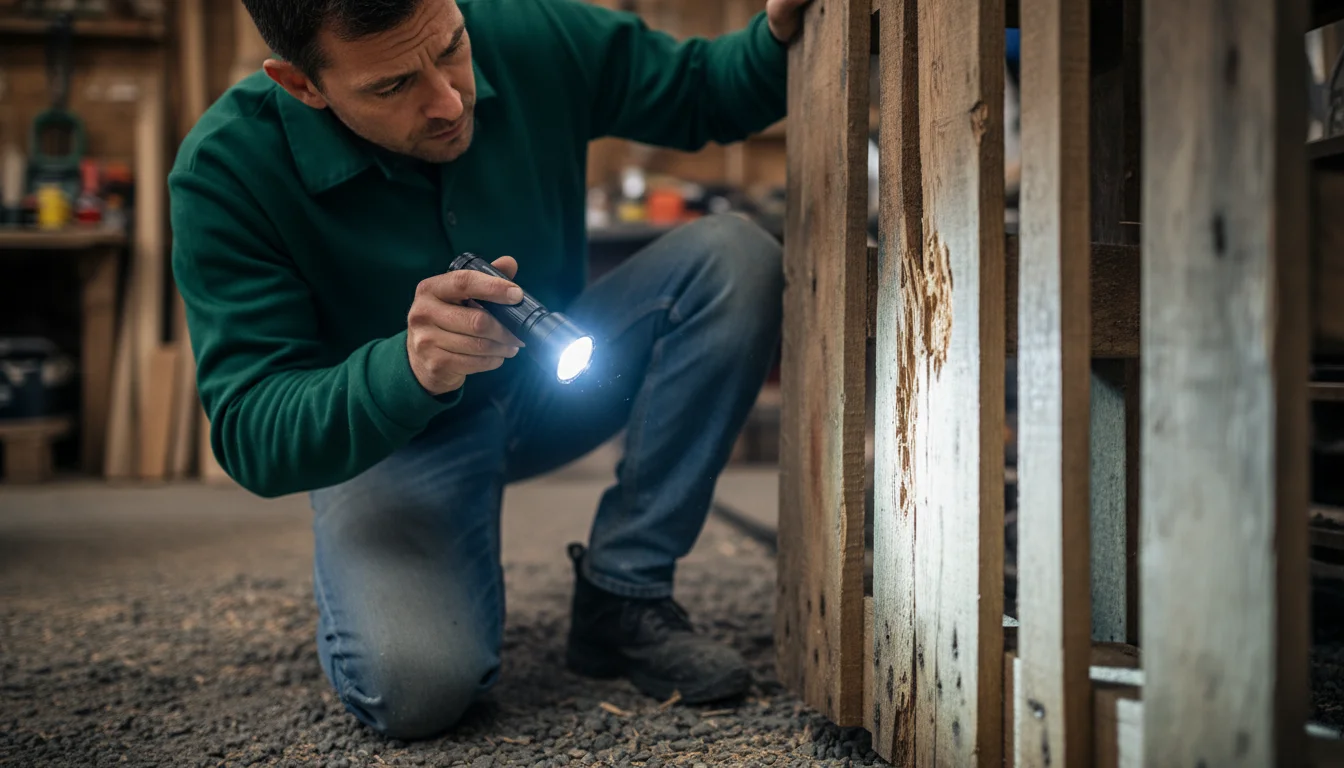
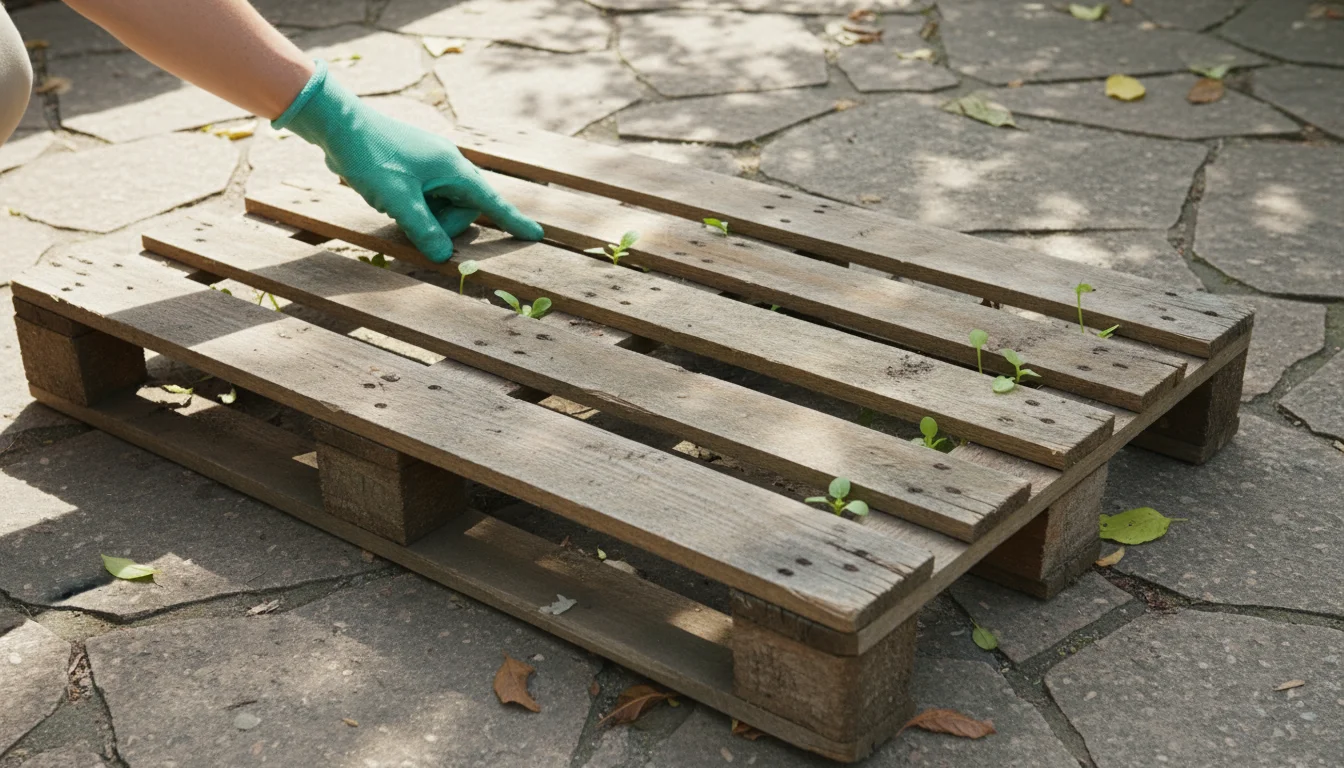
Inspecting Your Pallet
Once you locate potential pallets, inspect them thoroughly:
- Structural integrity: Ensure the pallet is sturdy, with no rotting wood, significant cracks, or missing planks. It needs to hold soil and plants.
- Contamination: Check for chemical spills, oil stains, or strong odors. Avoid pallets that have held hazardous materials.
- Pest damage: Look for signs of insect infestation, such as sawdust trails or exit holes.
Selecting a clean, sound, heat-treated pallet forms the foundation of a successful and safe vertical garden. Take your time with this crucial selection process.

Gathering Your Tools and Materials
Before you begin the transformation, gather all necessary tools and materials. Having everything on hand streamlines the process and ensures a smooth project completion. Most items are commonly available at hardware stores or home centers.
While basic tools get the job done, exploring affordable garden gadgets can make the construction and planting phases much more efficient.
To save money while building your setup, consider these DIY garden tool hacks that use common household items.
Tools You Will Need:
- Safety Glasses and Gloves: Protect your eyes and hands from splinters and dust.
- Sander or Sandpaper (medium grit): Essential for smoothing rough edges and preparing the wood.
- Drill with Phillips Head Bit: For attaching fabric and potentially adding drainage.
- Staple Gun and Heavy-Duty Staples (at least 1/2 inch): For securing landscaping fabric.
- Measuring Tape: For accurate cuts and measurements.
- Utility Knife or Scissors: For cutting fabric.
- Crowbar or Pry Bar (optional): If you need to remove or adjust any planks.
- Saw (optional): For cutting planks if modifications are needed.
- Paintbrush (optional): If you plan to seal or paint the pallet.
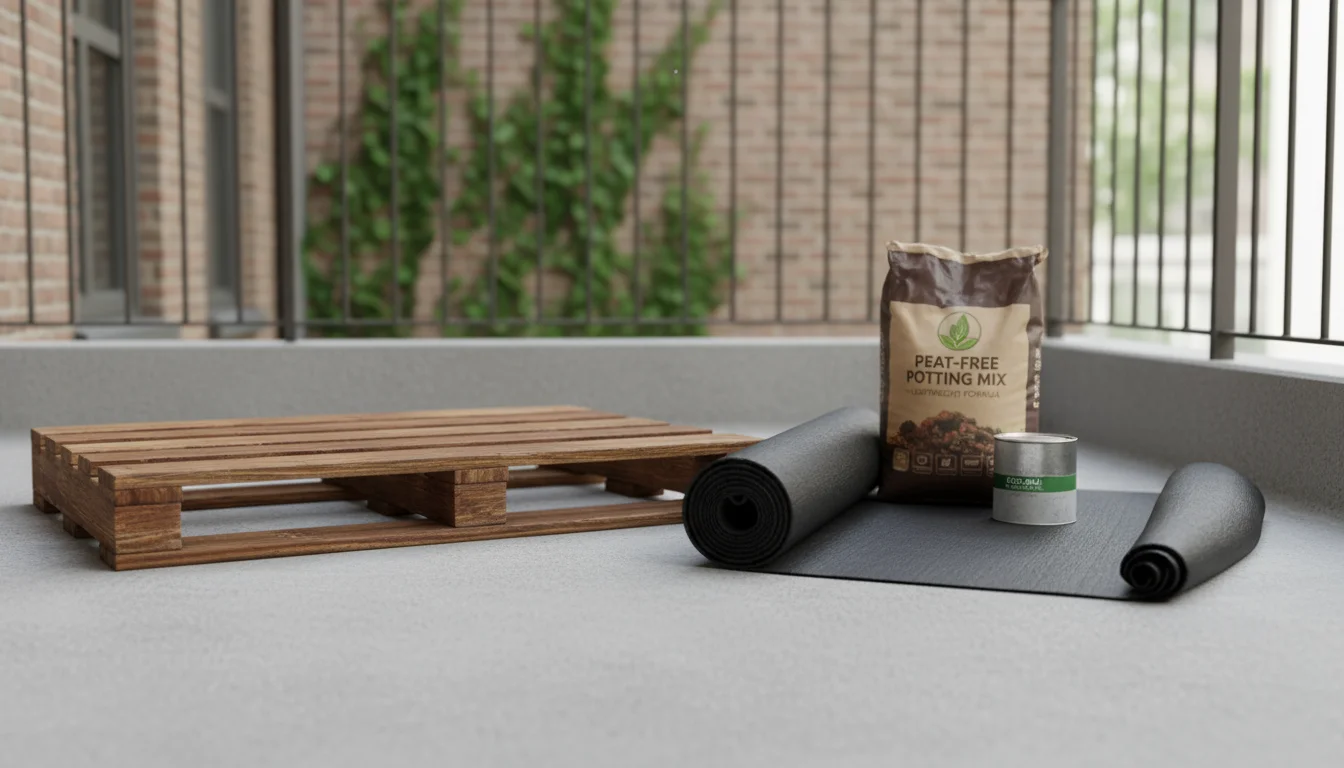
Materials You Will Need:
- Sourced Pallet: Your chosen heat-treated pallet.
- Heavy-Duty Landscaping Fabric or Weed Barrier: Choose a durable, rot-resistant, breathable fabric. This forms the pockets for your soil and plants. Approximately 3-4 yards for a standard pallet.
- Potting Mix: Select a high-quality, lightweight, peat-free potting mix specifically designed for containers. This provides essential nutrients and good drainage. Consider mixes containing compost for added sustainability.
- Plants: Choose plants suitable for vertical gardening and your specific light conditions. More on this in a later section.
- Exterior Wood Sealer or Paint (optional): For protecting the wood and customizing its appearance. Look for non-toxic, eco-friendly options if growing edibles.
- Drainage Material (optional, but recommended): Small pebbles or broken pottery shards for the bottom of each pocket to improve drainage.
- Lag Screws or Heavy-Duty Brackets (for mounting, if applicable): If you plan to secure the pallet to a wall, ensure these are robust and appropriate for the wall material.
Ensuring you have all these items before starting saves time and prevents interruptions. This preparation phase is crucial for a smooth and enjoyable DIY experience.
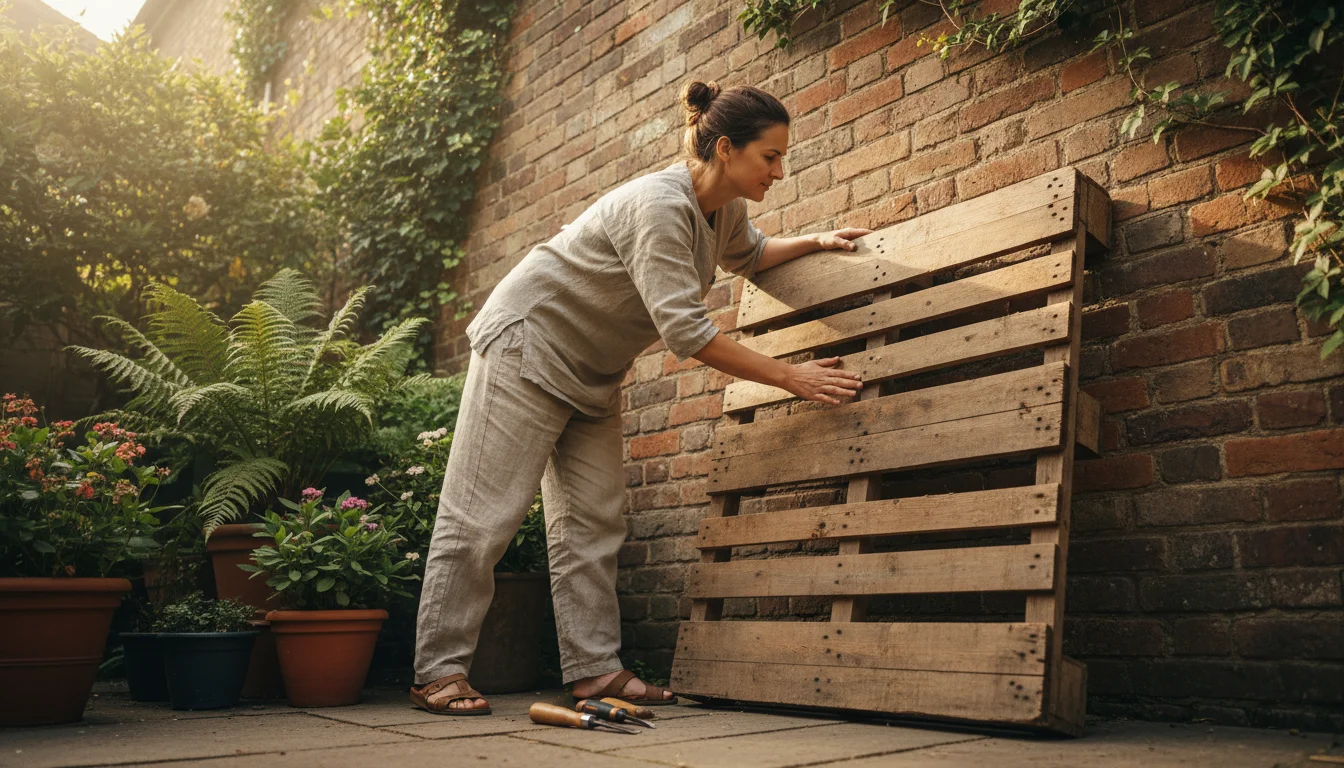
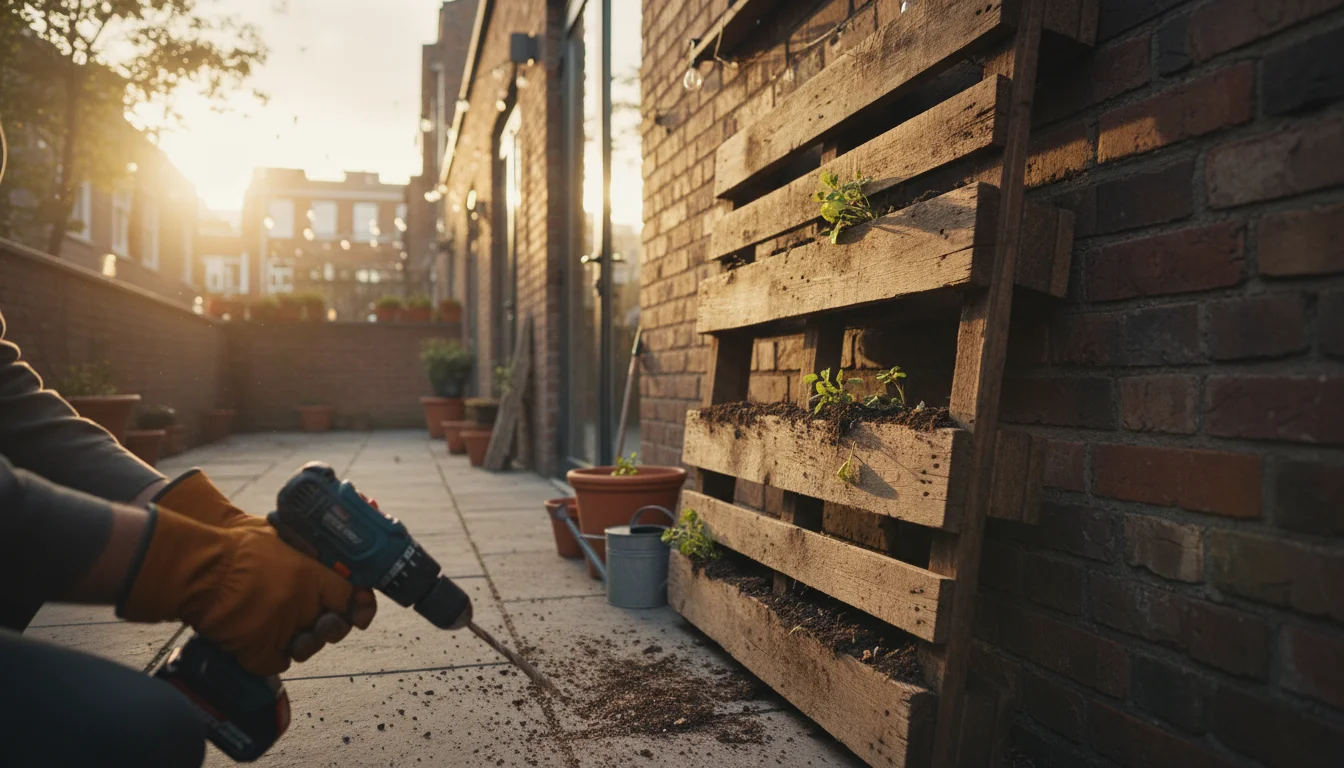
Preparing Your Pallet for Planting
With your materials gathered, you are ready to prepare your pallet. This stage focuses on cleaning, smoothing, and fortifying the structure to ensure it is plant-ready and durable.
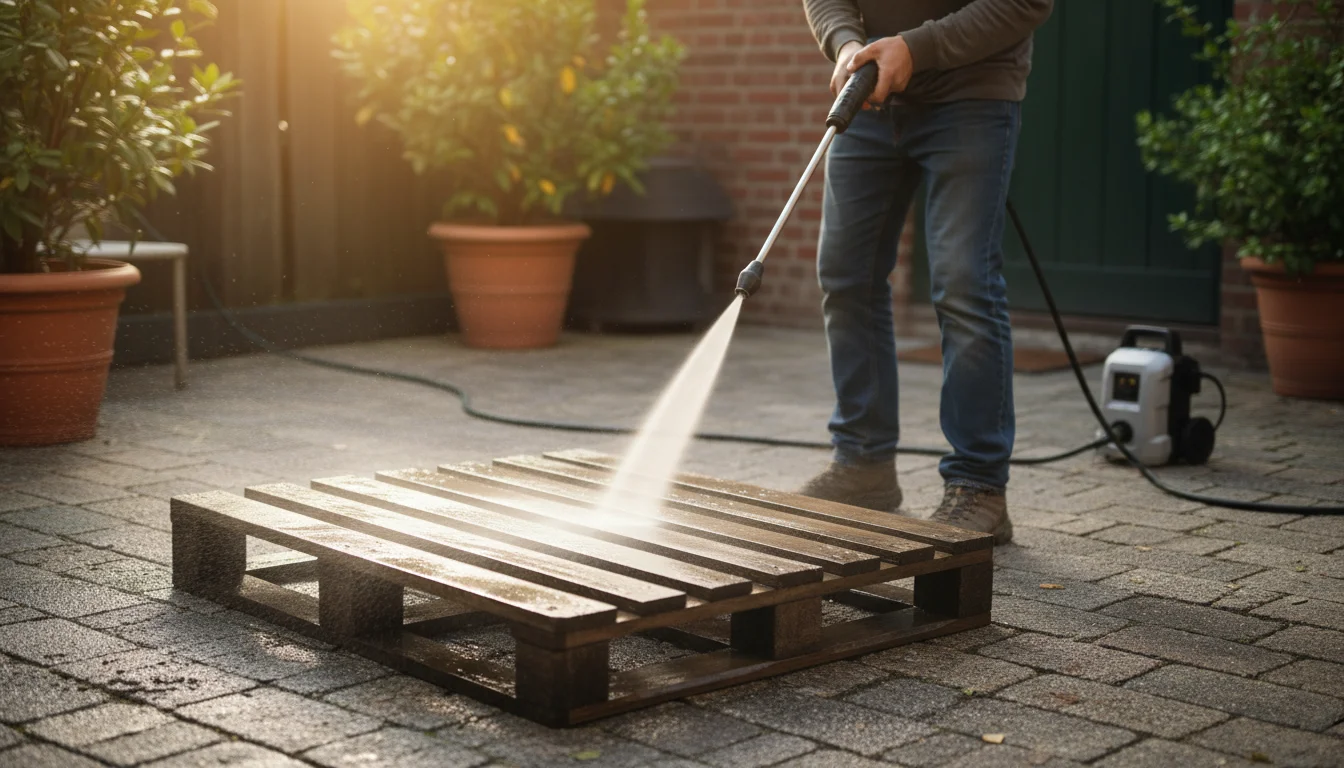
Step 1: Thorough Cleaning
Begin by giving your pallet a comprehensive cleaning. Use a stiff brush or a power washer to remove all dirt, dust, spiderwebs, and any lingering debris. A mixture of mild soap and water works effectively for tougher grime. Rinse it thoroughly and allow the pallet to dry completely in the sun. This step is vital for hygiene and ensures better adhesion if you plan to seal or paint.

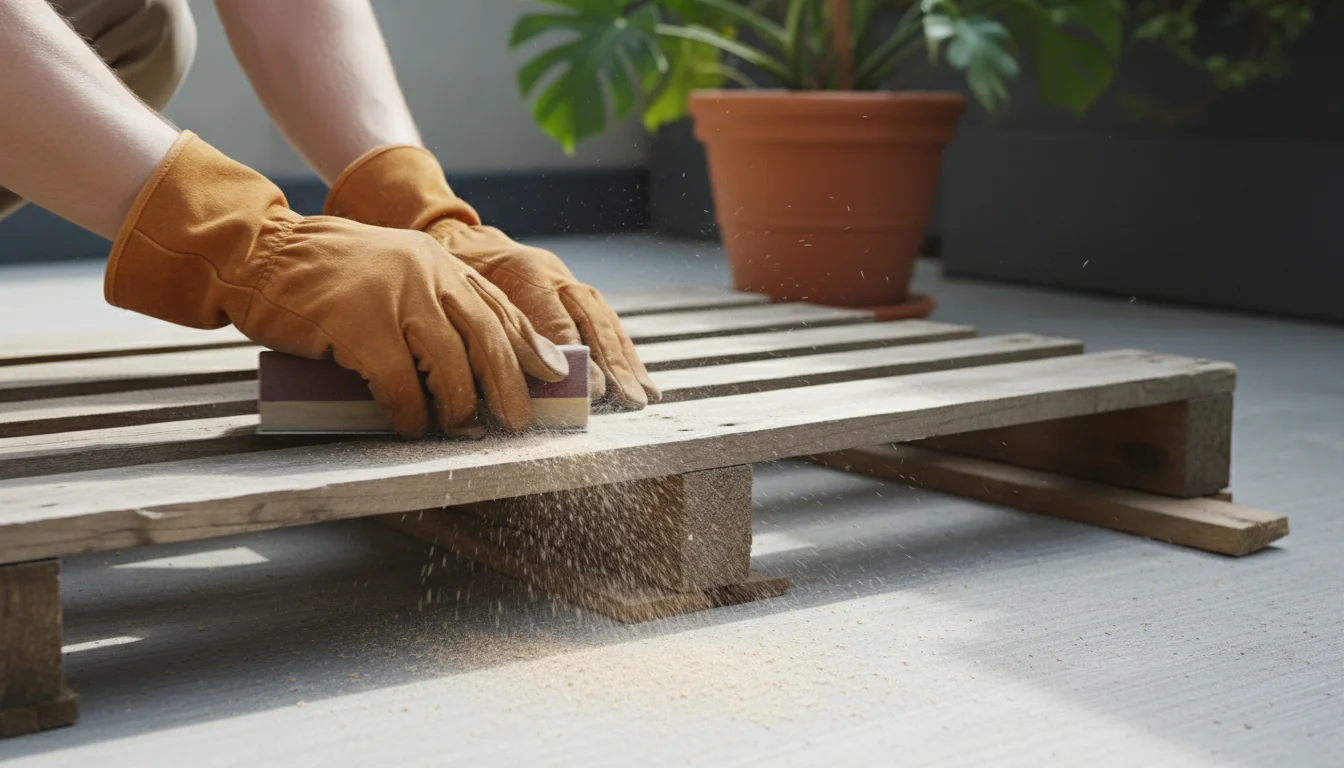
Step 2: Sanding and Smoothing
Pallets often have rough edges and splinters. Use a sander or sandpaper (medium grit, around 80-120) to smooth all surfaces, especially any areas you will frequently touch. Pay close attention to the edges of the slats and the tops of the support blocks. This not only prevents splinters during handling but also creates a more finished look for your garden. If you plan to paint or seal, sanding helps the finish adhere better.
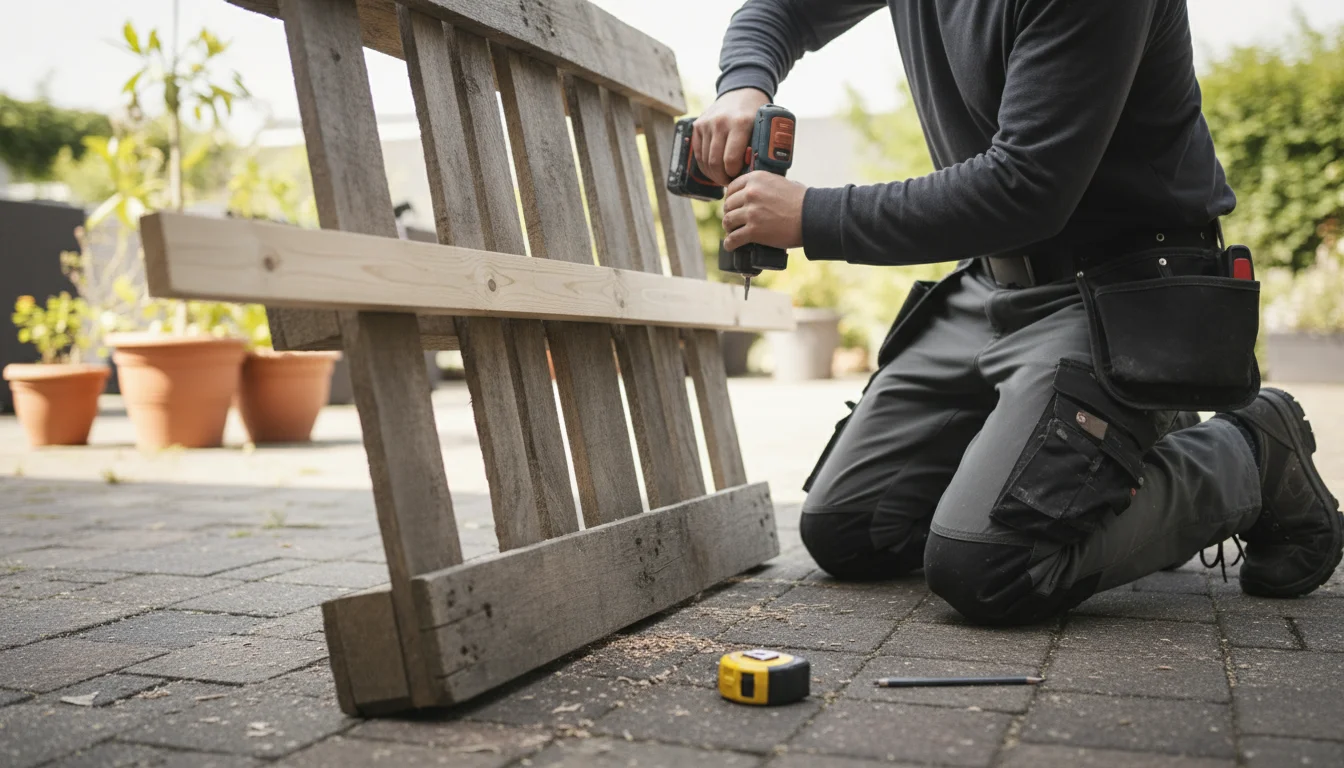
Step 3: Structural Assessment and Reinforcement (Optional)
Examine the pallet for any loose or damaged boards. If you find any, you can:
- Tighten: Use wood screws to re-secure loose planks.
- Remove: Carefully pry off severely damaged planks with a crowbar.
- Replace: If you remove a plank, you can cut a piece of scrap wood to size and screw it in place.
For heavy plants or if you foresee significant weight, you might add extra support by screwing thin, sturdy planks across the back of the pallet, perpendicular to the main slats. This reinforcement distributes weight and prevents bowing.
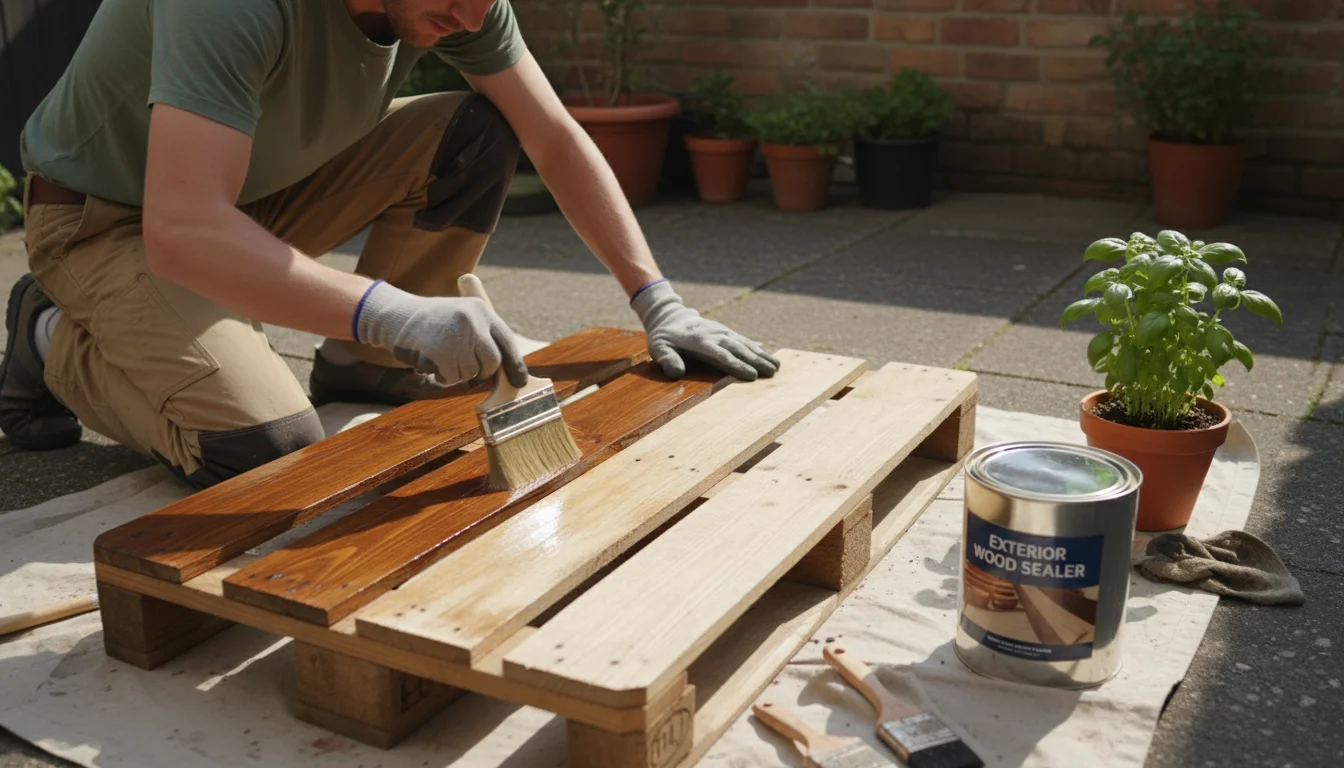
Step 4: Sealing or Painting (Optional, but Recommended for Longevity)
To extend the life of your pallet garden and customize its appearance, apply a wood sealer or exterior-grade paint. If you are growing edibles, choose a non-toxic, food-safe sealer or paint.
- Sealing: A clear exterior wood sealer protects the wood from moisture, UV rays, and rot. Apply 2-3 coats, allowing adequate drying time between each.
- Painting: Exterior paint allows you to match your garden to your home’s aesthetic. White or light colors reflect heat, beneficial in sunny locations, while darker colors absorb heat. Apply a primer first, then 2-3 coats of paint.
Ensure the pallet dries completely after this step before proceeding to assembly. This preparatory work safeguards your investment and sets the stage for a beautiful and lasting vertical garden.
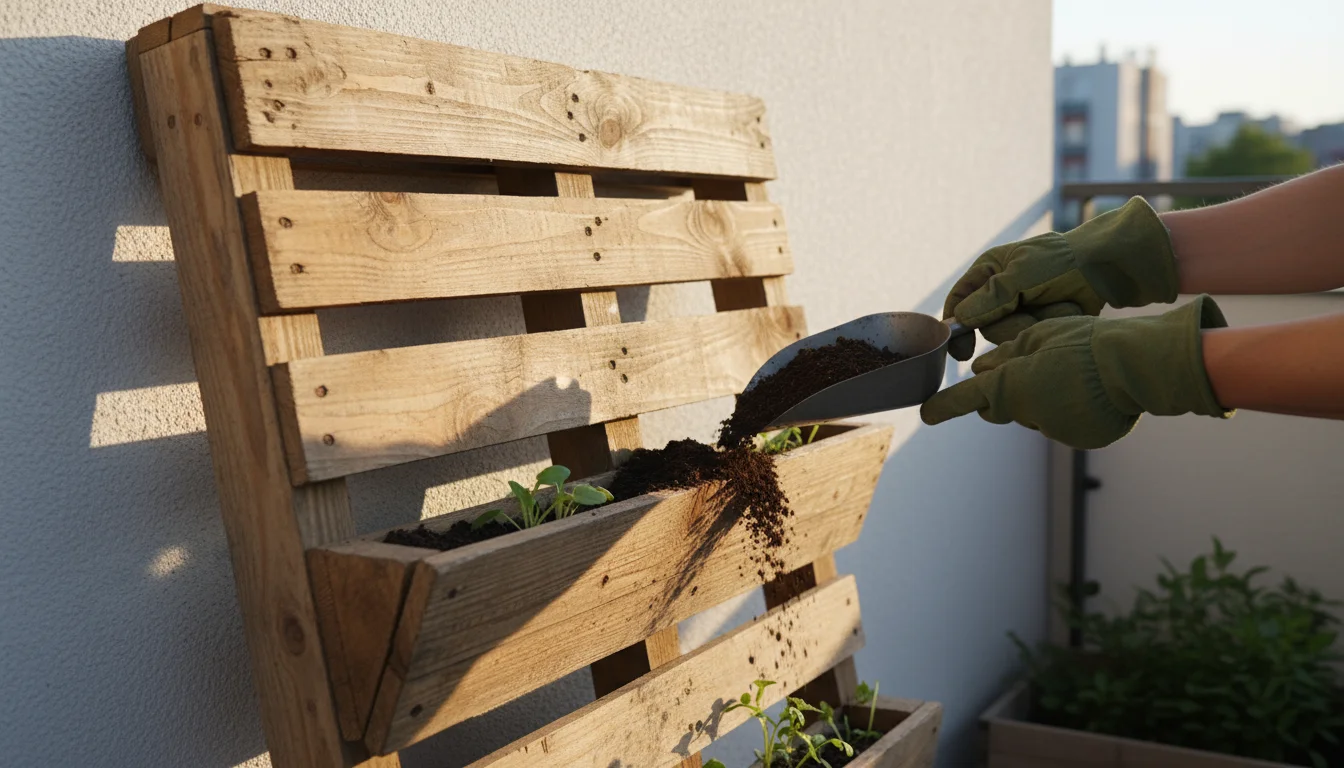
Assembly: Transforming Your Pallet into a Planter
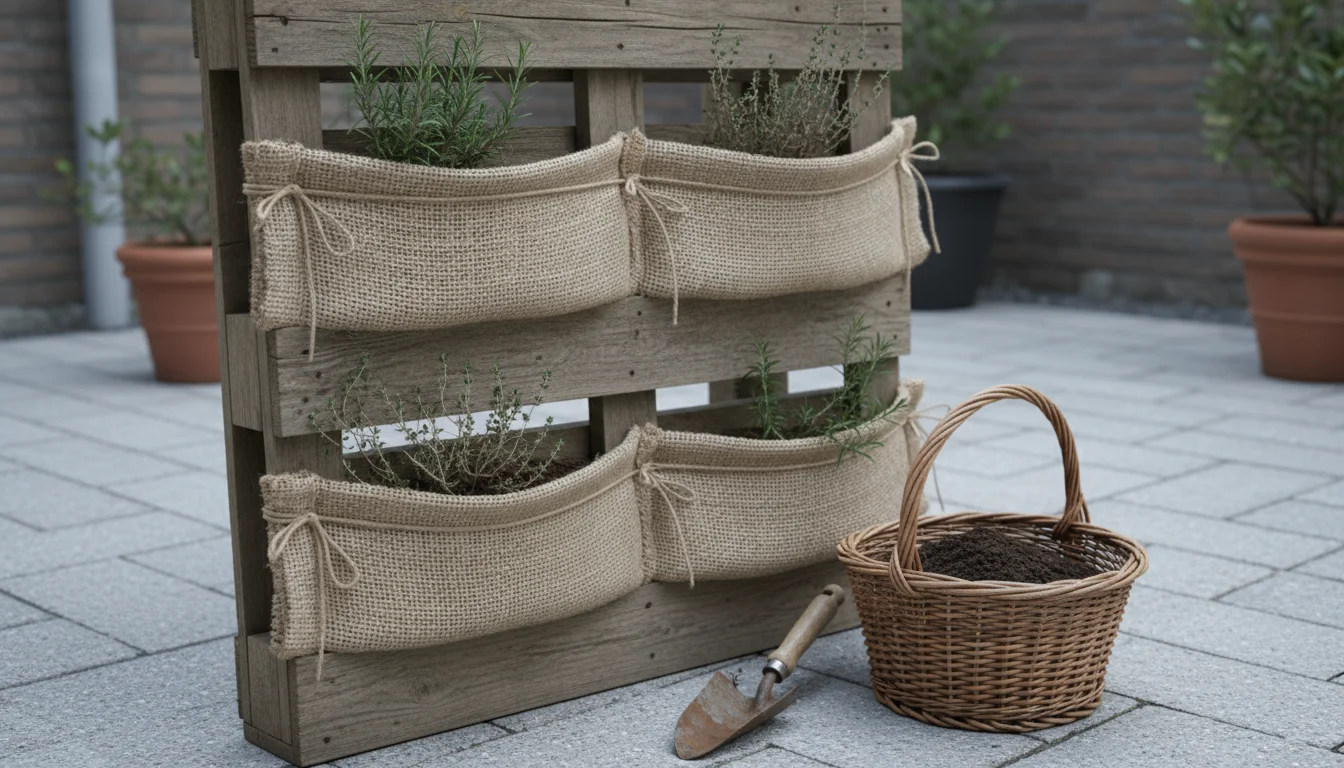
Now, you convert your prepared pallet into functional planting pockets. This involves strategically attaching landscaping fabric to create contained sections for soil and plants. The goal is to form “pouches” along the length of the pallet.
Step 1: Orient Your Pallet
Decide which side of the pallet will be the top. Most commonly, you will lay the pallet on its back, with the wider opening facing upwards. The narrow gaps between the top planks will become your planting openings. If your pallet has different sized gaps, choose the orientation that offers the most suitable planting depth and width.
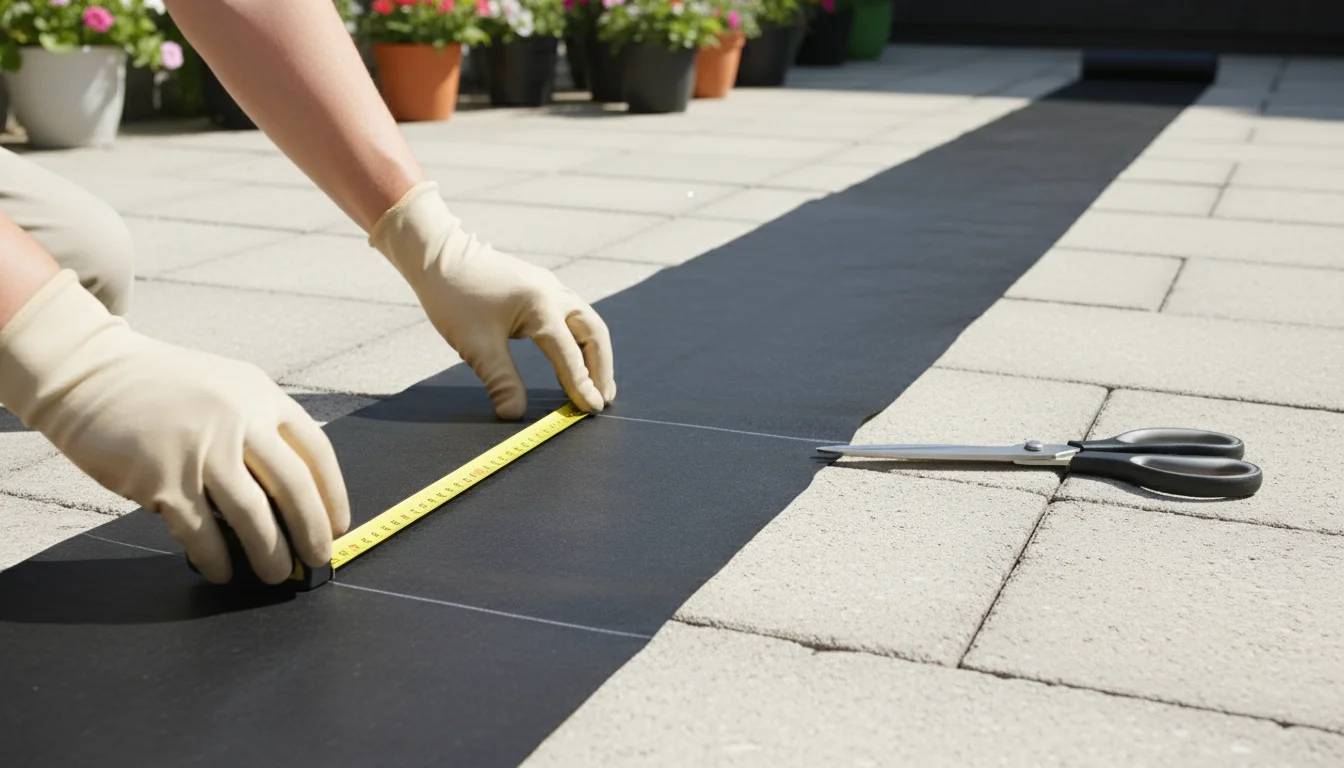
Step 2: Measure and Cut Landscaping Fabric
You need to create pockets that hold soil securely. Measure the width of your pallet. You will cut strips of landscaping fabric that are at least twice the depth of your desired pocket, plus an extra 6-8 inches for overlap and stapling. For example, if your pallet slats are 4 inches apart and you want a 6-inch deep pocket, you would cut strips approximately 16-18 inches wide (6 inches for each side of the pocket, plus stapling allowance). The length of each strip will match the interior width of your pallet, from one side stringer to the other.
You will need one fabric strip for each planting row. A typical pallet offers 3-4 rows.
Step 3: Create the Planting Pockets
This is the core of the assembly. For each planting row:
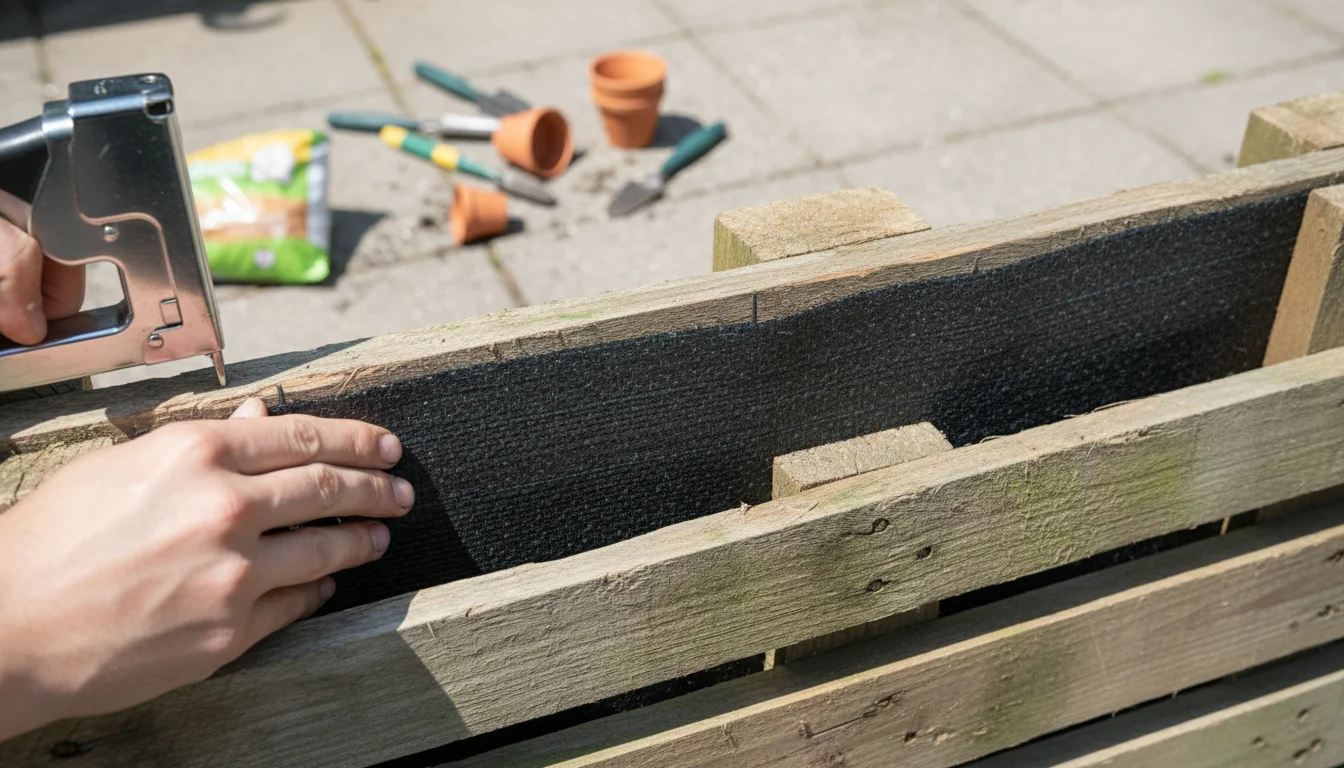
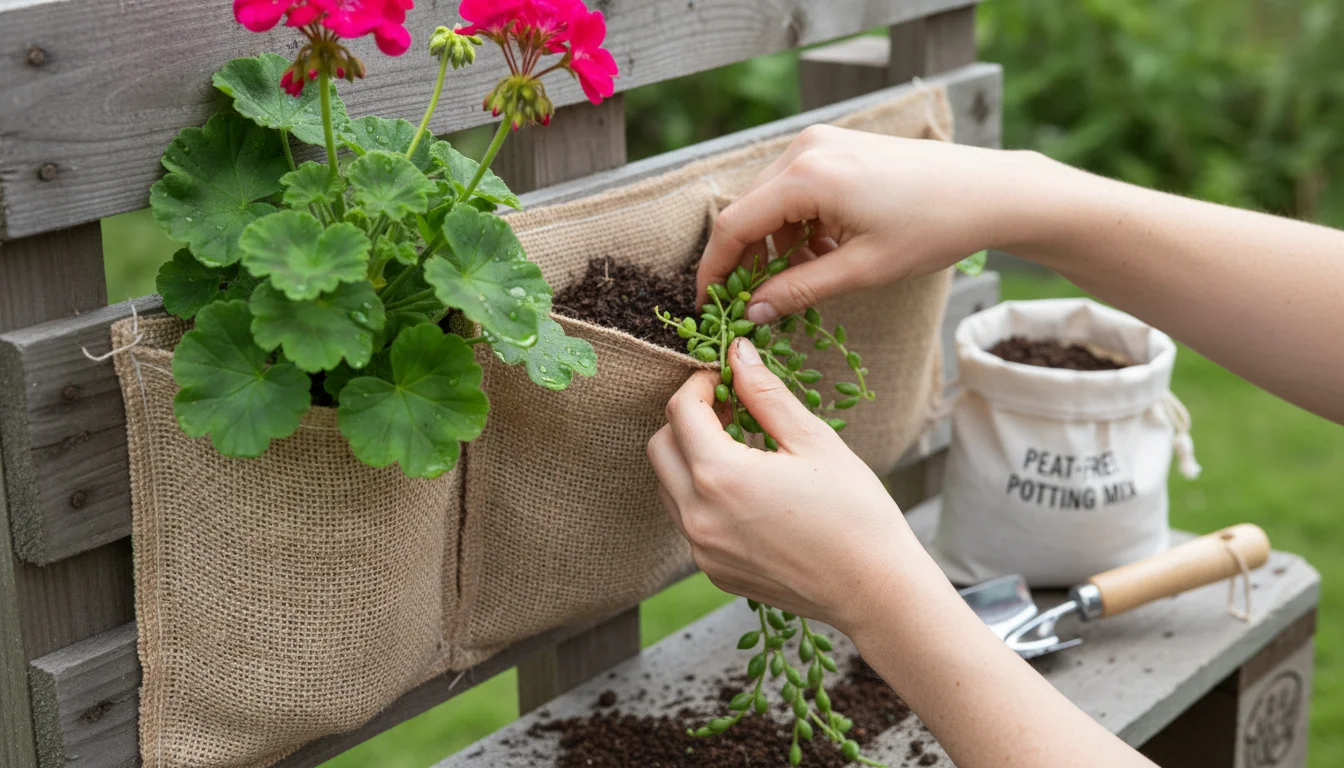
- Position the Fabric: Lay a cut strip of landscaping fabric over the opening of one planting row. Allow one long edge to drape down into the pallet’s interior, creating the “back” of your pocket. The other long edge will form the “front” of the pocket.
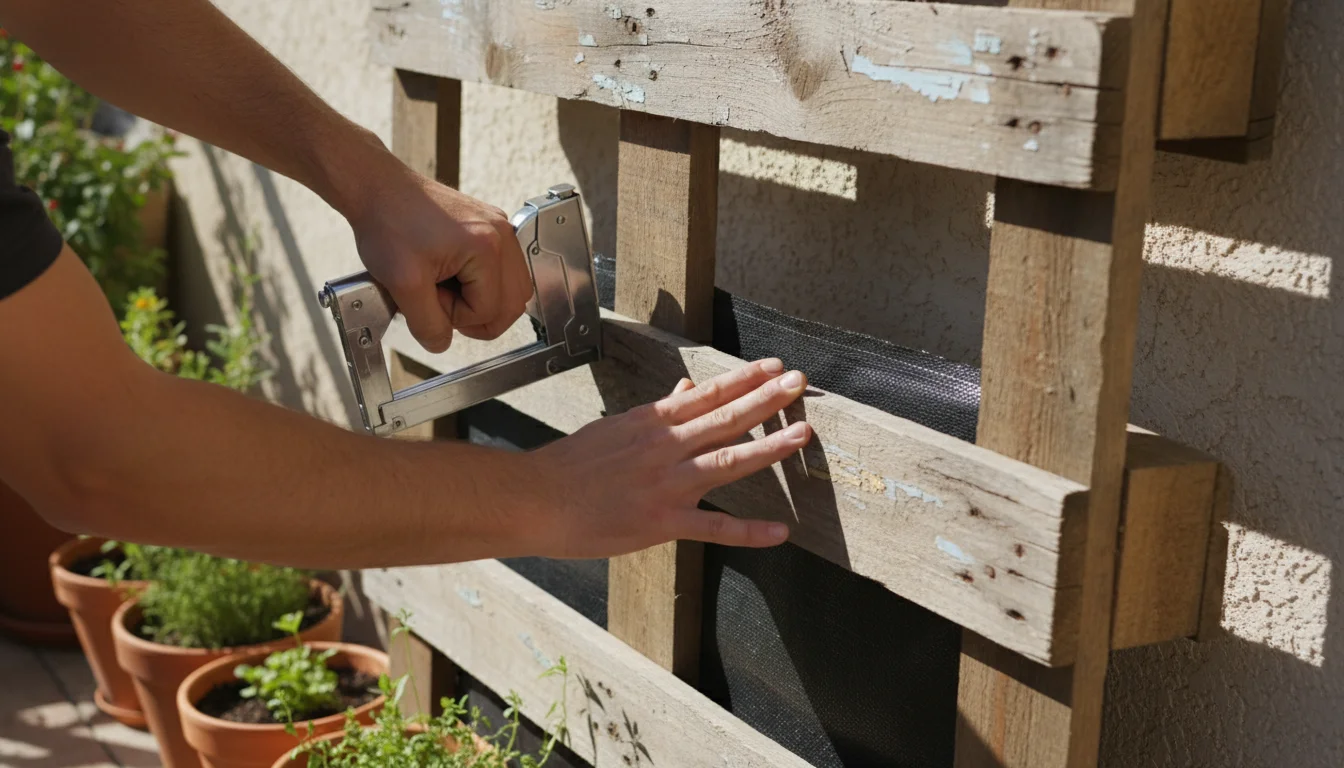
- Secure the Back Edge: Pull the back edge of the fabric taut and staple it securely to the underside of the pallet’s top plank or to the horizontal support beam behind the planting opening. Ensure staples are close together, creating a strong seam. You want no gaps where soil can escape.
- Form the Bottom and Sides: Now, push the fabric down into the pallet opening, forming a U-shape or a trough. The fabric should extend downwards to create your desired pocket depth. At the sides, fold the fabric inwards, similar to wrapping a gift, to create closed ends for the pocket. Staple these side folds securely to the pallet’s side stringers.
- Secure the Front Edge: Bring the remaining front edge of the fabric up and over the front plank of your planting row. Pull it taut and staple it securely to the top or back of this front plank. This creates a lip, preventing soil from spilling out.
- Repeat for All Rows: Repeat this process for each planting row. Each pocket should be distinct, fully enclosed by the fabric and staples, and capable of holding soil.
Some vertical pallet garden designs only open one side for planting, effectively creating large, deep pockets. Other designs utilize the gaps between slats as individual pockets. Your fabric placement dictates this. For beginners, creating distinct, individual pockets per slat opening is generally easier to manage for watering and plant placement.
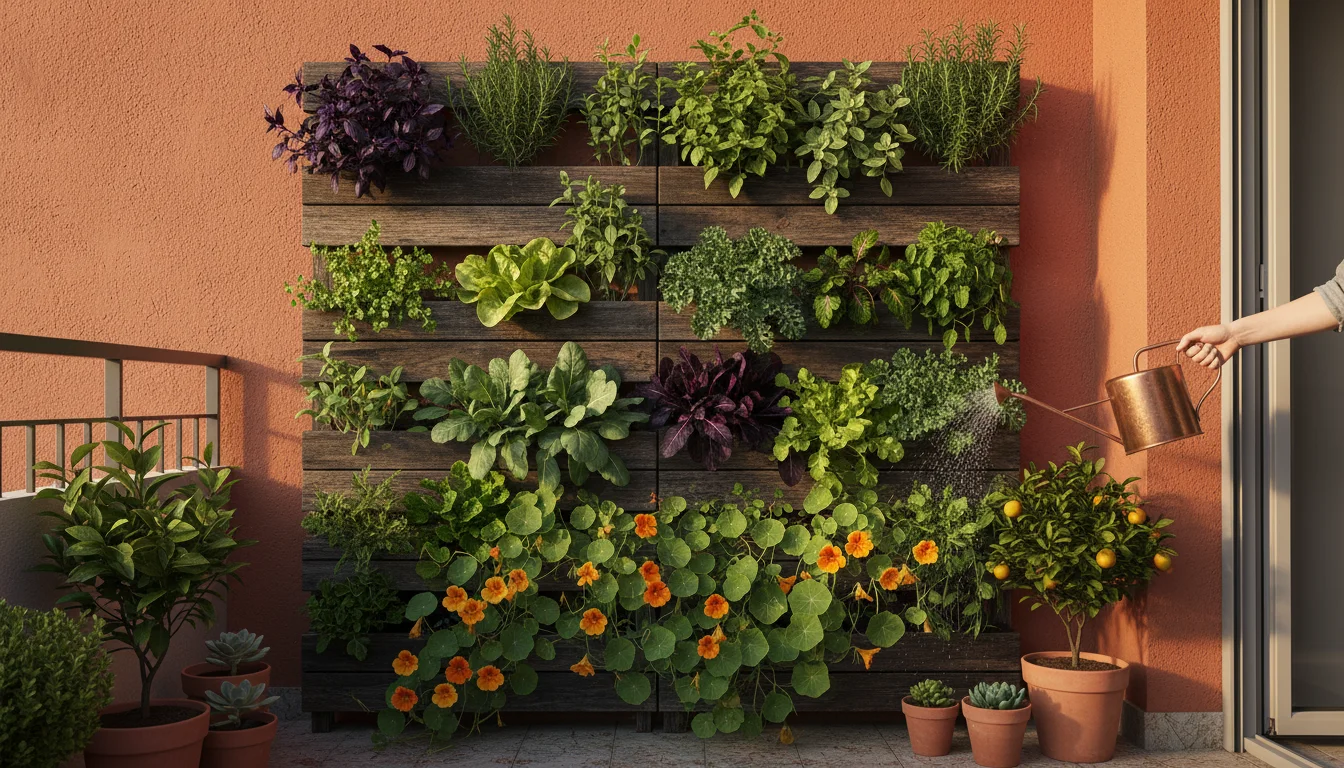
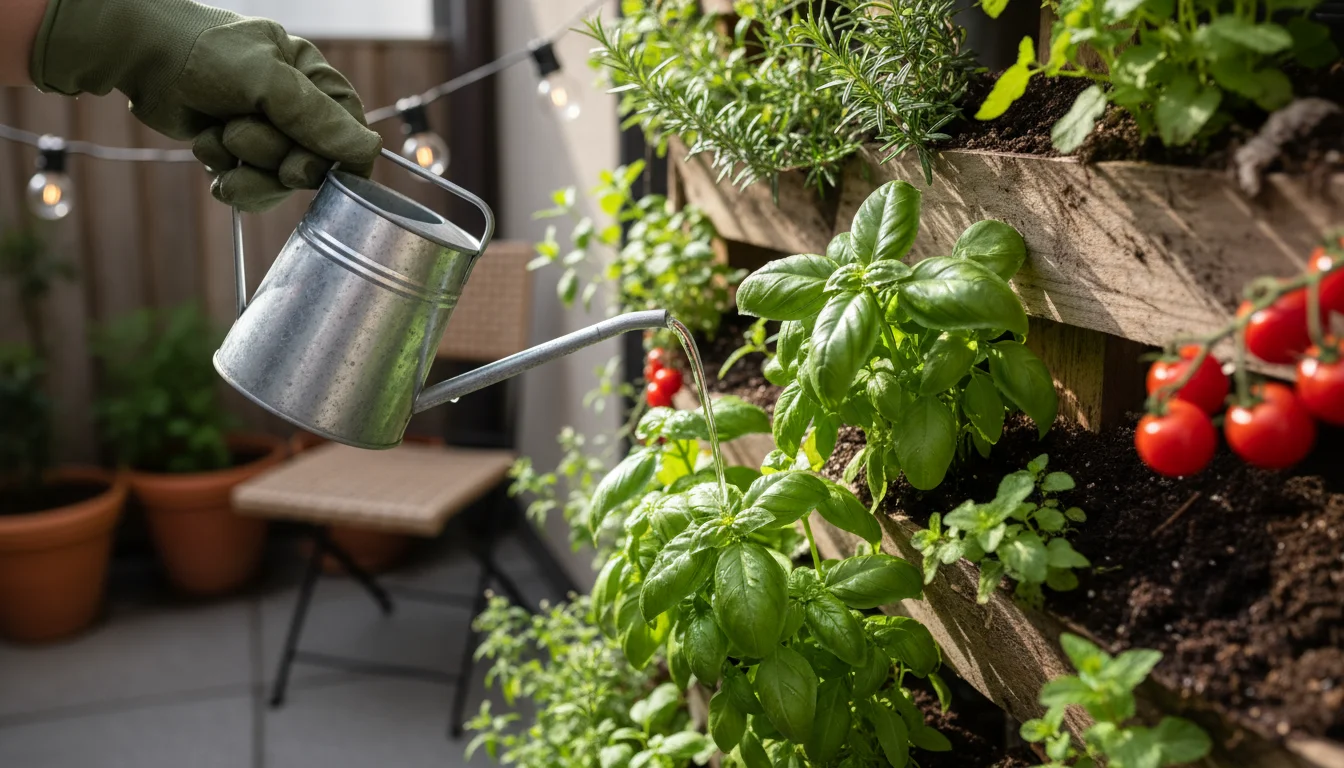
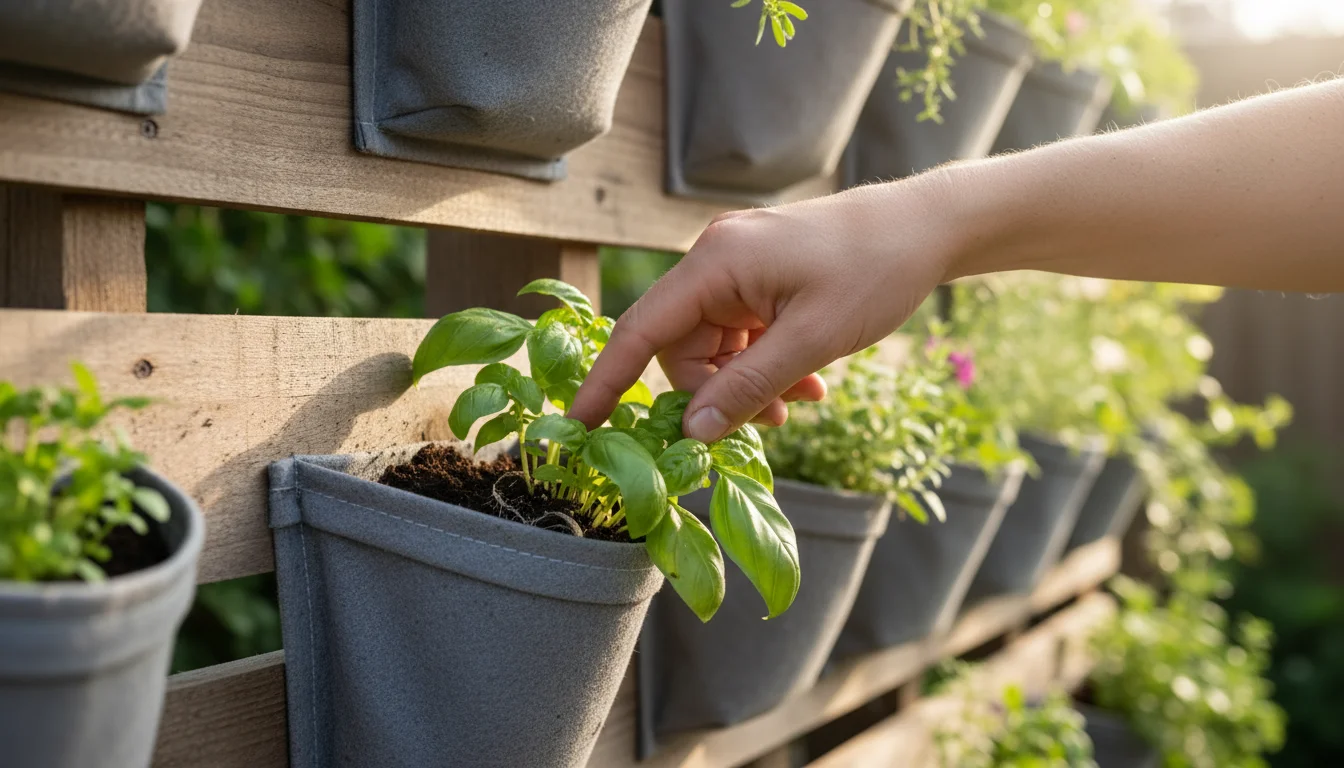
Planting Your Vertical Garden: Design and Plant Choices
With your pallet transformed, the exciting phase of planting begins. Strategic plant selection and thoughtful arrangement ensure your vertical garden thrives and looks beautiful. Remember, plants in vertical gardens dry out faster, so choose accordingly.
If you have a sunny spot, you might even consider how to grow tomatoes in containers by utilizing the larger bottom sections of your pallet.

Consider Your Microclimate
Before selecting plants, assess your pallet garden’s location.
- Sunlight: How many hours of direct sun does it receive? Full sun (6+ hours), partial sun (4-6 hours), or shade (less than 4 hours)?
- Wind: Is the area protected or exposed to strong winds? Wind increases moisture loss.
- Temperature: Does the area experience extreme heat or cold?
These factors dictate which plants will flourish.
Selecting the Right Plants
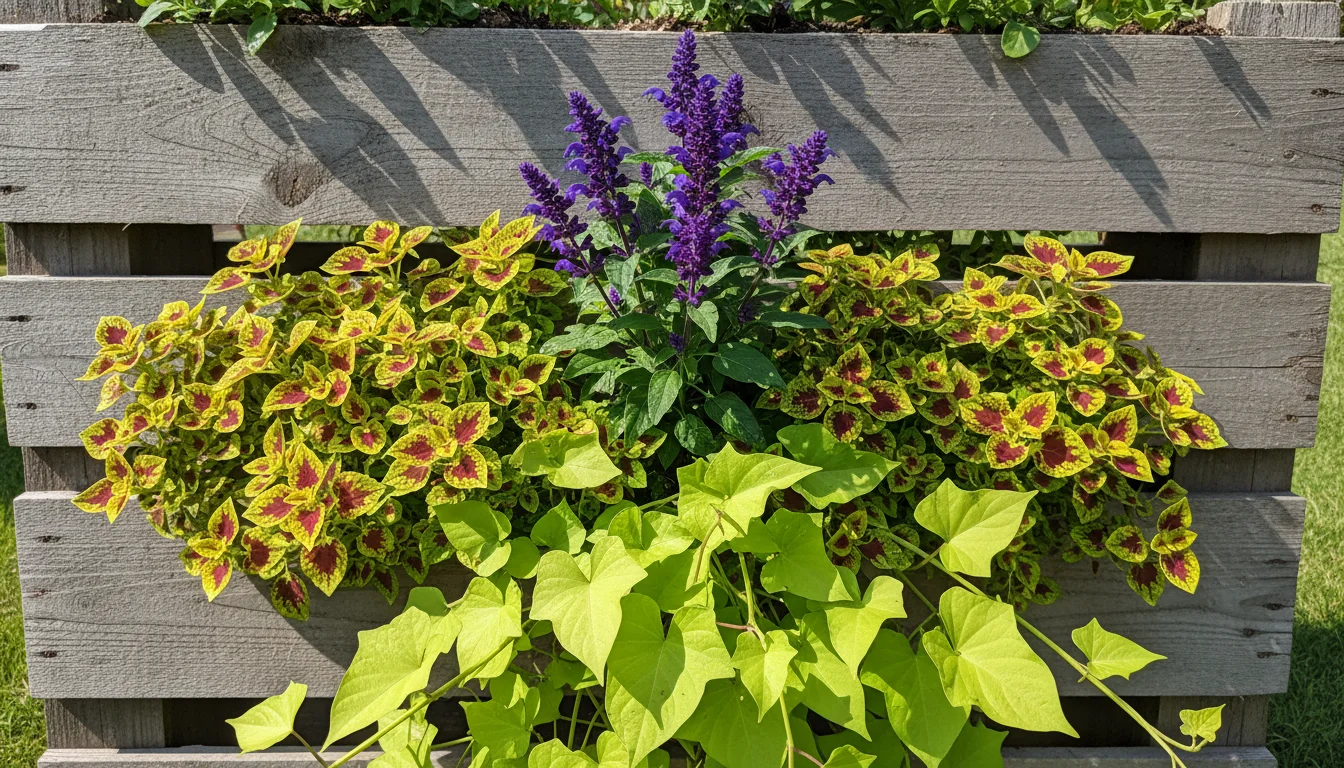
Choose plants that do not require extensive root systems, tolerate drier conditions, and have a trailing or compact growth habit. The “thriller, filler, spiller” concept works well here:
- Thrillers: Upright plants that provide height and a focal point. Use sparingly in a vertical garden, perhaps one per pallet or at the top. Examples: dwarf ornamental grasses, compact salvias, upright fuchsias.
- Fillers: Bushy, mounding plants that fill out the middle of the pocket. These form the bulk of your planting. Examples: coleus, petunias, marigolds, impatiens (for shade), herbs like basil, thyme, oregano.
- Spillers: Trailing plants that cascade over the edges, softening the lines of the pallet and adding visual interest. Examples: sweet potato vine, creeping jenny, nasturtiums, strawberries, lobelia, various sedums.
Excellent Plant Choices for Pallet Gardens:
- Herbs: Basil, mint (plant in its own pocket to control spread), thyme, oregano, rosemary, chives, cilantro, parsley. These are perfect for kitchen gardens.
- Lettuces and Greens: Loose-leaf lettuces, spinach, Swiss chard, arugula. Harvest outer leaves regularly for continuous production.
- Strawberries: Trailing varieties are ideal, producing fruit that hangs freely.
- Succulents: Sedums, hens and chicks (Sempervivum), Echeveria. These are extremely drought-tolerant and require minimal care, thriving in sunny, well-drained conditions. They are perfect for low-maintenance designs.
- Annual Flowers: Petunias, impatiens (shade), lobelia, calibrachoa, nasturtiums. Provide continuous color throughout the season.
- Perennial Flowers: Dianthus, creeping thyme, certain low-growing sedums. These return year after year.
- Small Vegetables: Radishes, bush beans (compact varieties), cherry tomatoes (dwarf, determinate varieties with good support).
For pollinator-friendly options, consider herbs like thyme and oregano, or flowers like lobelia and sweet alyssum. You support local ecosystems directly from your small space. For further guidance on plant selection suited to your climate, consult resources like the Chicago Botanic Garden plant finder.
Planting Technique
- Add Drainage Layer (Optional): Place a thin layer of small pebbles or broken pottery shards at the bottom of each fabric pocket. This improves drainage and prevents soil from compacting.
- Fill with Potting Mix: Fill each pocket with your chosen peat-free potting mix. Leave about an inch or two of space from the top edge. Gently compact the soil.
- Arrange and Plant: Carefully remove plants from their nursery pots. Arrange them in the pockets, considering their mature size and growth habit. For each pocket, place thriller plants (if using) towards the back, fillers in the middle, and spillers at the front, allowing them to trail over the pallet’s edge.
- Backfill and Water: Once plants are in place, backfill any remaining space with potting mix, gently firming it around the plant bases. Water thoroughly until water drains from the bottom of the pockets. This settles the soil and eliminates air pockets.
Remember, the visual impact of your vertical garden is significant. Place plants with contrasting foliage textures or bloom colors next to each other to create dynamic interest. For example, the silvery foliage of lamium provides a striking contrast to the deep green of basil. The bright red of petunias pops against the sprawling green of sweet potato vine.
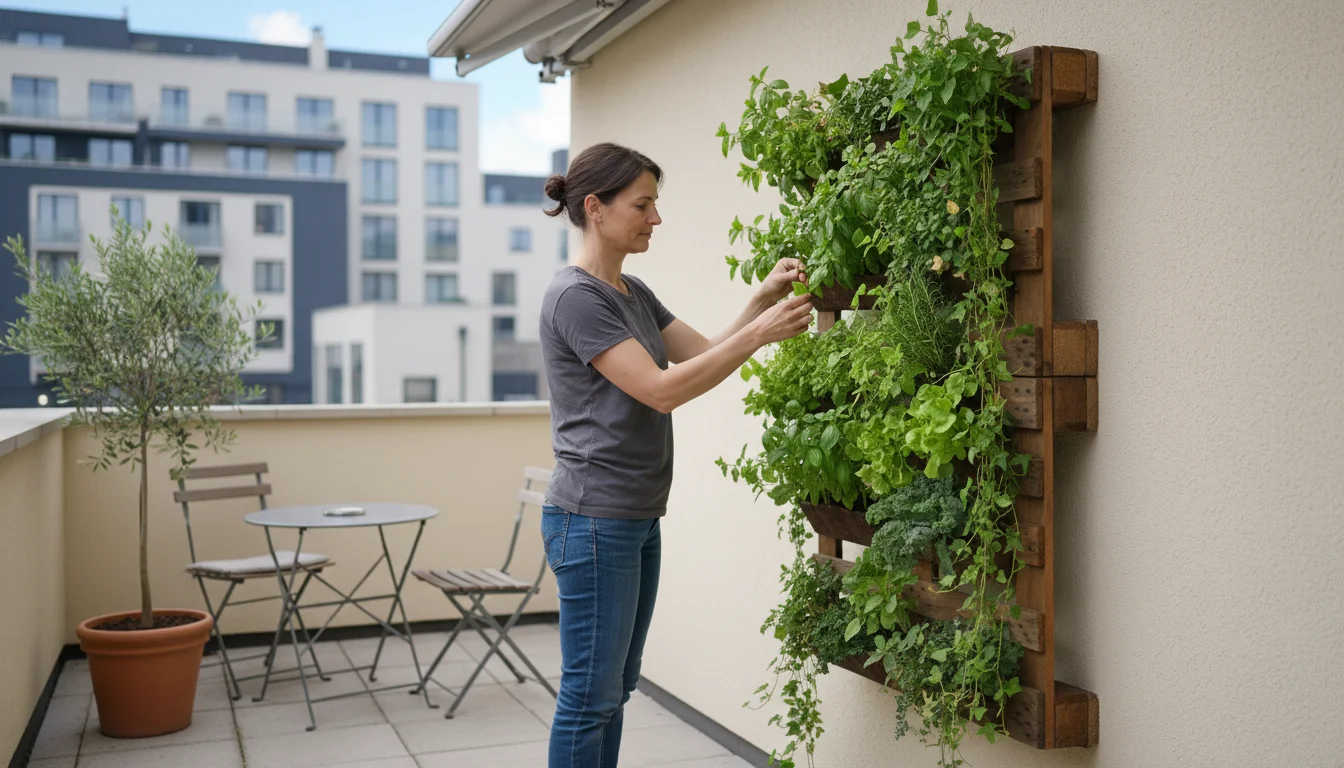
Installation and Placement: Optimizing Your Vertical Oasis
Once planted, proper installation and placement of your pallet garden ensure its stability, accessibility, and optimal plant health. Consider safety, sun exposure, and aesthetics.
Choosing the Ideal Location
Your garden’s location dictates its success:
- Sunlight: The primary factor. Most edible plants and flowering annuals require at least 6 hours of direct sunlight daily. If you have a shadier spot, choose shade-tolerant plants like impatiens, ferns, or some lettuces.
- Accessibility: Place your pallet garden where you can easily reach all plants for watering, harvesting, and maintenance. Consider placing it near a water source.
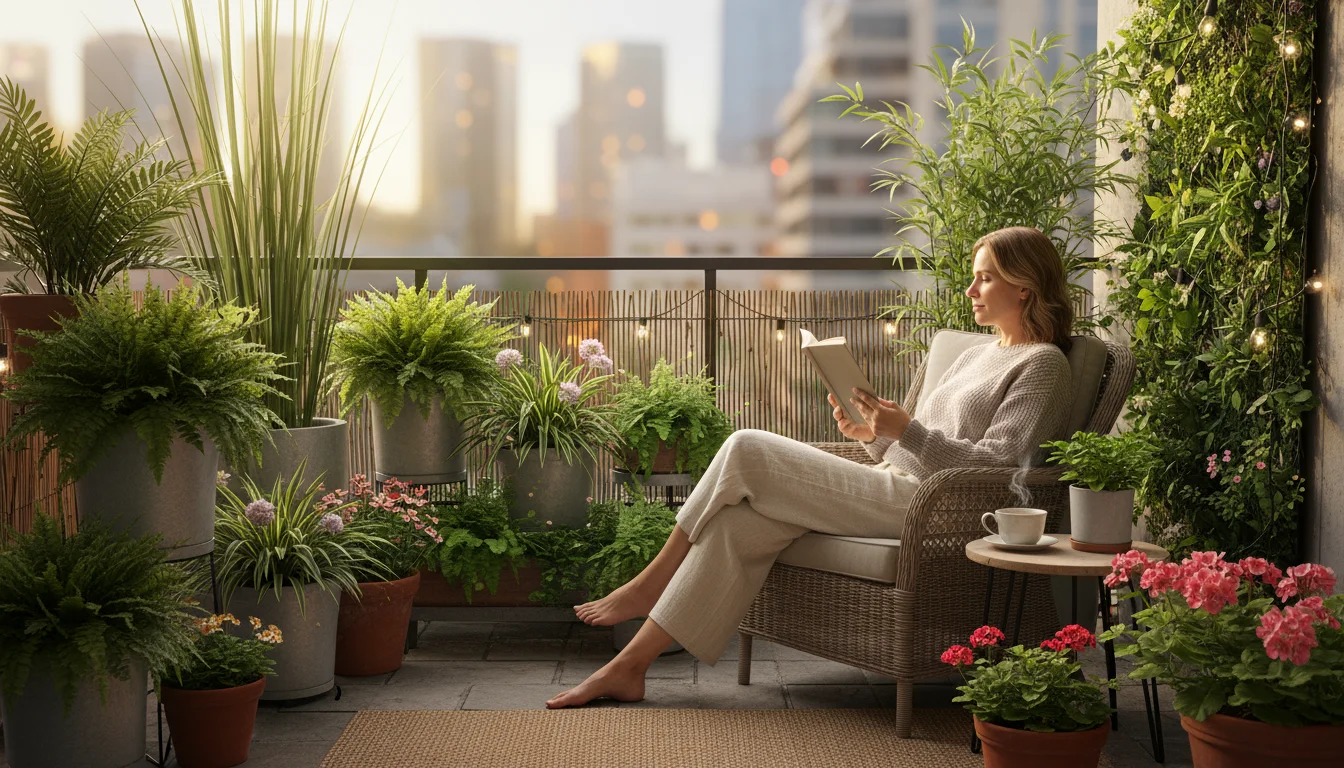
- Visibility: Position the garden where you can enjoy its beauty. A focal point from a window, patio, or seating area adds value to your outdoor living space. The first thing your eye notices defines a focal point.
- Protection: Shelter your garden from strong winds, which can dry out plants quickly and cause structural damage. A wall or fence offers good protection.
Securing Your Pallet Garden
A filled pallet garden becomes quite heavy. You must ensure its stability, especially if it stands upright.
- Leaning Against a Wall: For a temporary or less permanent setup, you can lean the pallet against a sturdy wall or fence. Ensure it sits on a level surface. However, this is less secure and not recommended in windy areas or where children or pets play.
- Freestanding with Support: If you want a freestanding pallet, you need to add a secure base or attach support legs. You can construct a wide, sturdy base from additional lumber or repurpose thick wood blocks. Another option involves creating A-frame supports that attach to the sides of the pallet, ensuring a broad and stable footprint.
- Mounting to a Wall or Fence: This is the most secure method. Use heavy-duty lag screws or L-brackets suitable for exterior use and the weight of your filled pallet (which can exceed 100-200 pounds, depending on size and soil moisture).
- Locate Studs (for walls): If mounting to a house wall, use a stud finder to locate wall studs for maximum security.
- Mark Attachment Points: Hold the pallet in its desired position and mark the drilling points through the pallet’s frame onto the wall or fence.
- Drill Pilot Holes: Drill pilot holes into the wall/fence and through the pallet.
- Secure with Hardware: Attach the pallet using lag screws (long, heavy-duty screws designed for wood) or L-brackets, ensuring they are tightened securely. Use at least four attachment points for a standard pallet.
Regardless of your chosen installation method, regularly check the stability of your pallet garden, especially after heavy rains or strong winds. Your garden’s safety and longevity depend on a solid installation. Always prioritize stability to prevent accidents and protect your plants.
For design and plant selection guidance, visit Oregon State Extension — Gardening, Chicago Botanic Garden and Brooklyn Botanic Garden.
Ongoing Care and Maintenance
A vertical pallet garden, like any garden, requires consistent care to thrive. Its unique structure means specific maintenance considerations, primarily concerning watering and nutrient management.
Implementing low-water gardening principles is particularly beneficial for vertical setups, which are more exposed to drying winds than ground-level beds.
To save time on daily maintenance, you can adapt the concepts used in DIY self-watering containers to help maintain consistent moisture in your pallet pockets.
Watering Your Vertical Garden
Plants in vertical gardens, especially those in landscaping fabric pockets, tend to dry out more quickly than those in traditional garden beds. This is due to increased exposure to air and sun. You will likely need to water more frequently, possibly daily during hot, dry periods.
- Check Soil Moisture: Stick your finger about an inch into the soil. If it feels dry, it is time to water. Do not rely solely on visual cues; the surface might look dry when deeper soil is still moist, or vice versa.
- Water Thoroughly: Water each pocket until you see drainage from the bottom. This ensures water reaches all roots. Uneven watering leads to stressed plants.
- Consider Drip Irrigation: For ease and efficiency, especially for busy gardeners or larger pallet gardens, consider installing a simple drip irrigation system. A micro-drip line with emitters in each pocket delivers water directly to the root zone, minimizing waste and ensuring consistent moisture. This is a highly recommended upgrade for low-maintenance care.
- Morning is Best: Water in the morning to allow foliage to dry before nightfall, reducing the risk of fungal diseases.
Fertilization
Container plants deplete soil nutrients faster than those in the ground. Your potting mix will provide initial nutrients, but regular feeding becomes necessary.
- Start with Rich Potting Mix: Begin with a high-quality potting mix that includes compost or slow-release fertilizer.
- Liquid Feed Regularly: After 3-4 weeks, begin feeding with a diluted liquid organic fertilizer every 2-4 weeks, following product instructions. For edibles, choose an organic, balanced fertilizer.
- Observe Your Plants: Yellowing leaves, stunted growth, or poor flowering often indicate a nutrient deficiency. Adjust your feeding schedule accordingly.
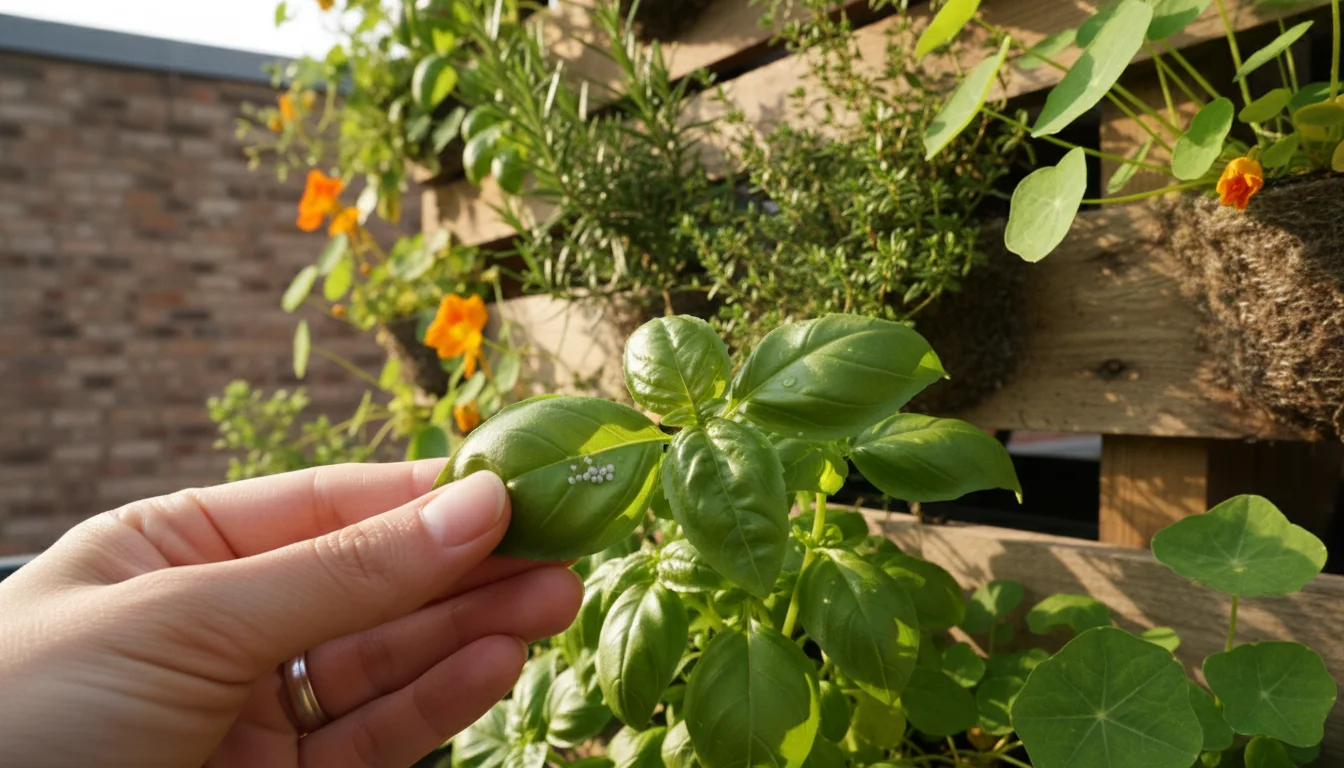
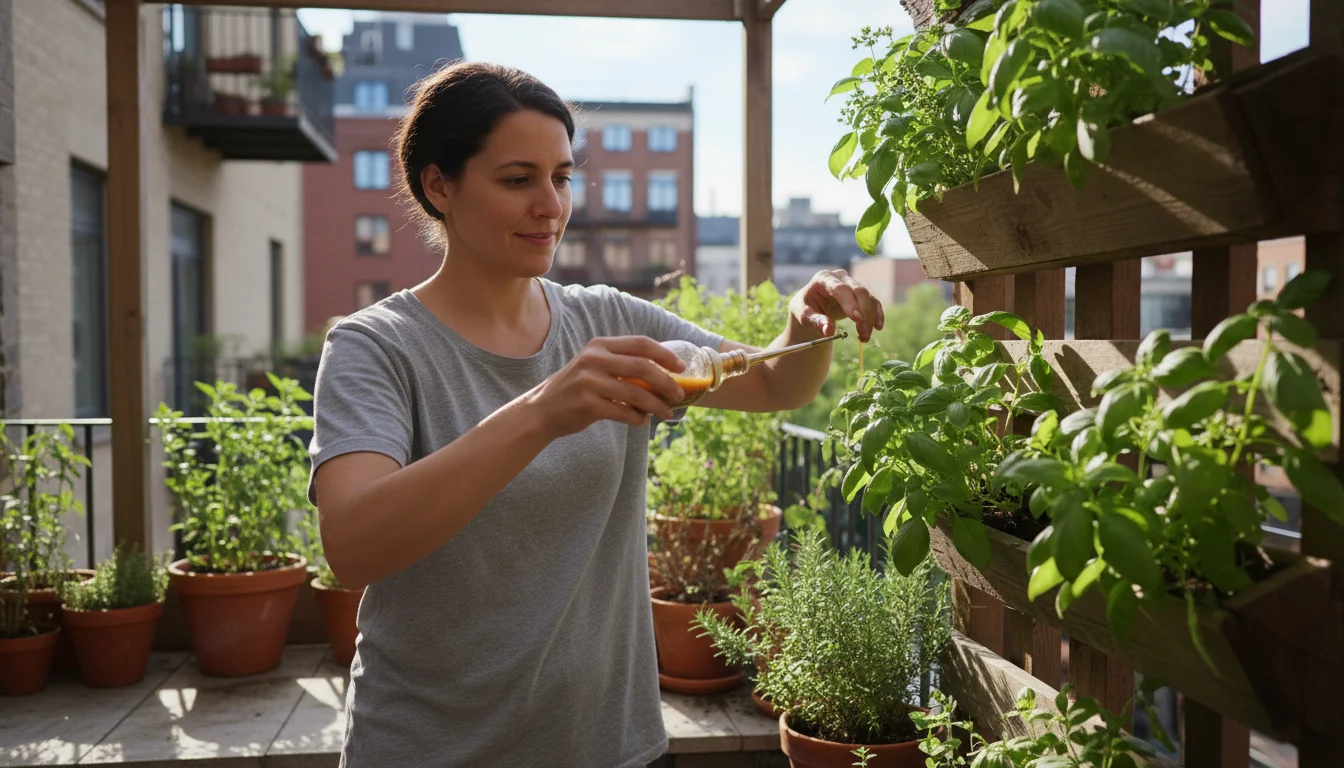
Pest and Disease Management
Even in a small vertical garden, pests and diseases can appear. Early detection is key.
- Regular Inspections: Routinely check the undersides of leaves, stems, and soil for signs of pests (aphids, spider mites, slugs) or diseases (leaf spots, mildew).
- Manual Removal: For small infestations, physically remove pests or prune affected leaves.
- Organic Solutions: Use insecticidal soap or neem oil for persistent pest problems. Always follow label directions. Encourage beneficial insects by planting pollinator-friendly flowers nearby.
- Good Air Circulation: Proper spacing between plants and good air circulation around your pallet garden helps prevent fungal diseases.
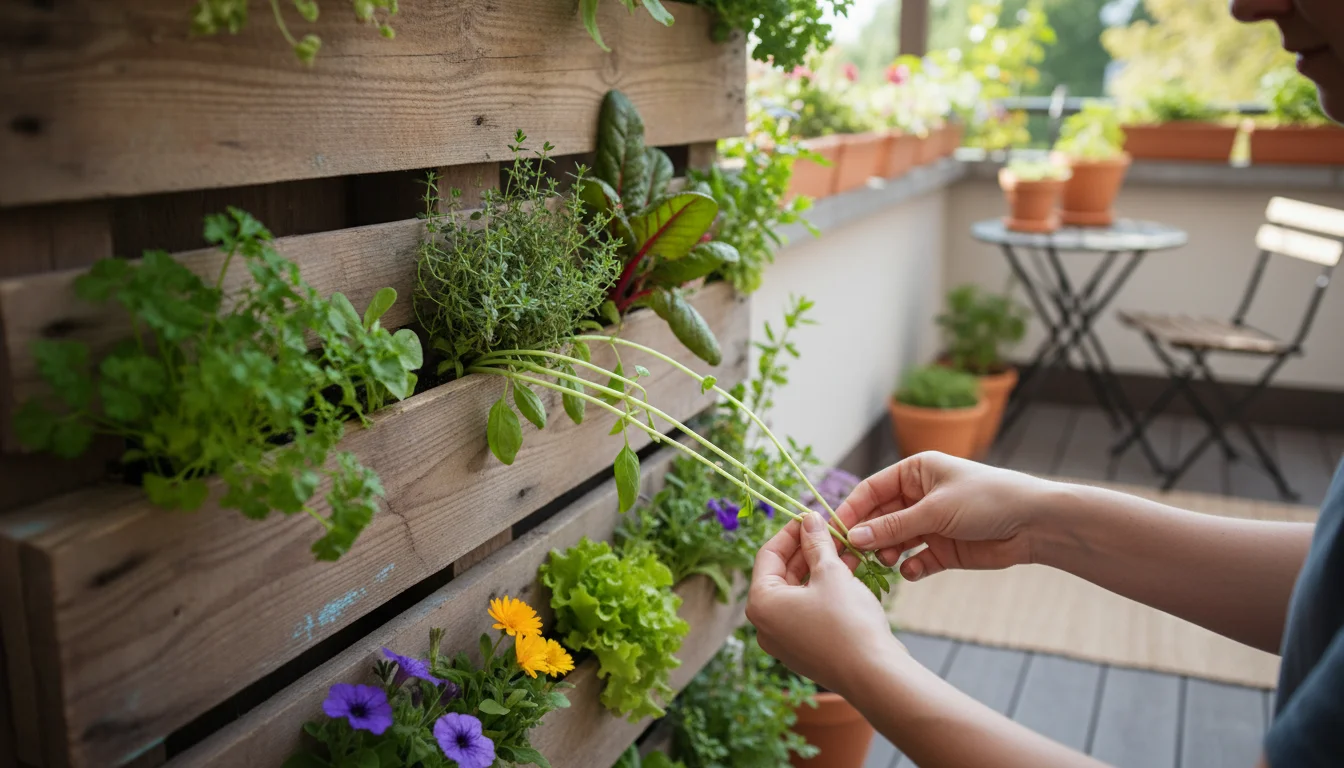
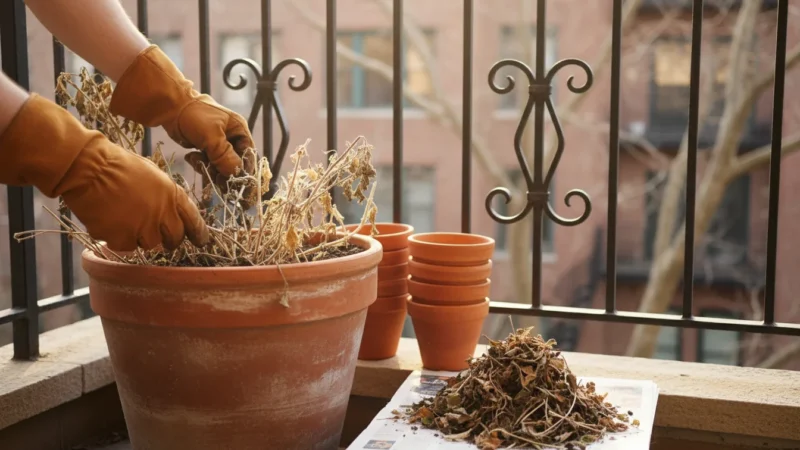
Pruning and Harvesting
- Deadheading: Remove spent flowers (deadhead) to encourage new blooms and maintain a tidy appearance.
- Pinching Back: Pinch back leggy growth on herbs and flowering annuals to promote bushier, more compact plants.
- Harvest Regularly: For herbs and leafy greens, frequent harvesting encourages more production. Do not remove more than a third of the plant at once.
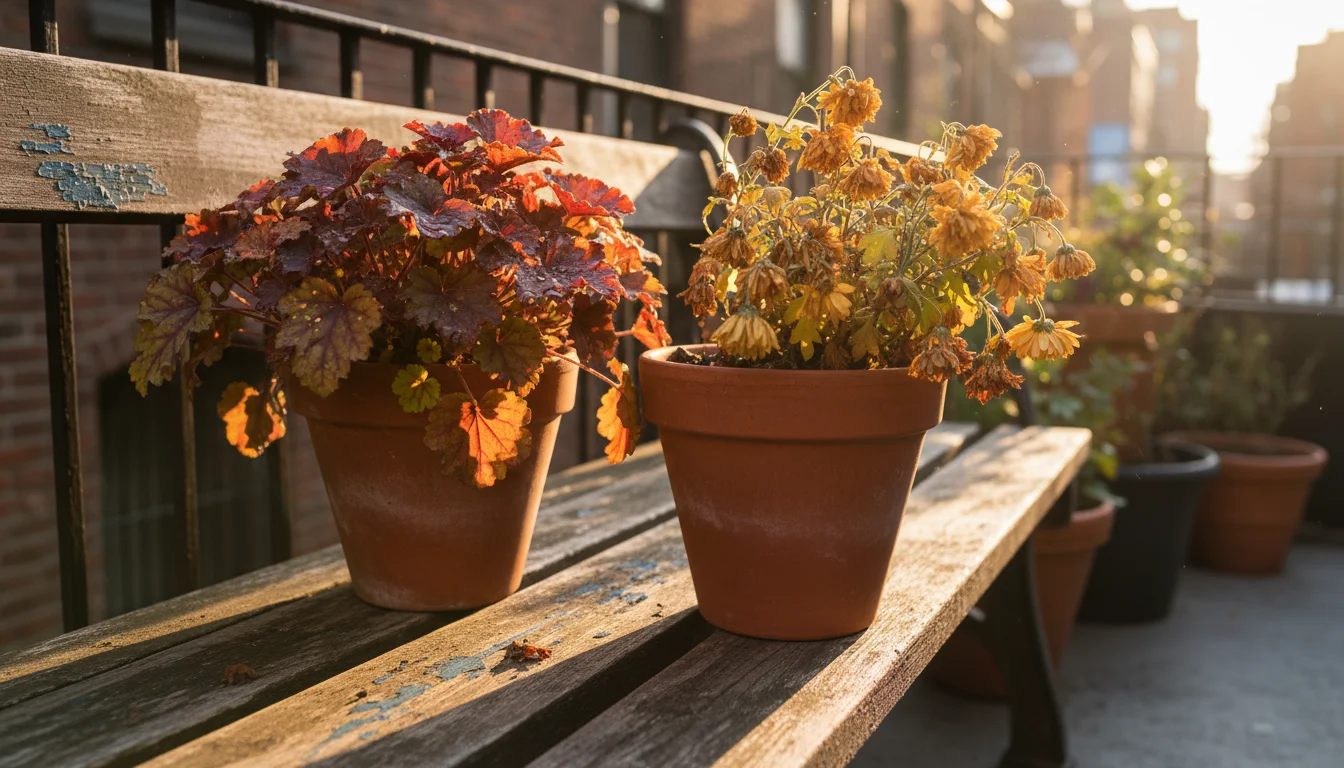
Seasonal Considerations
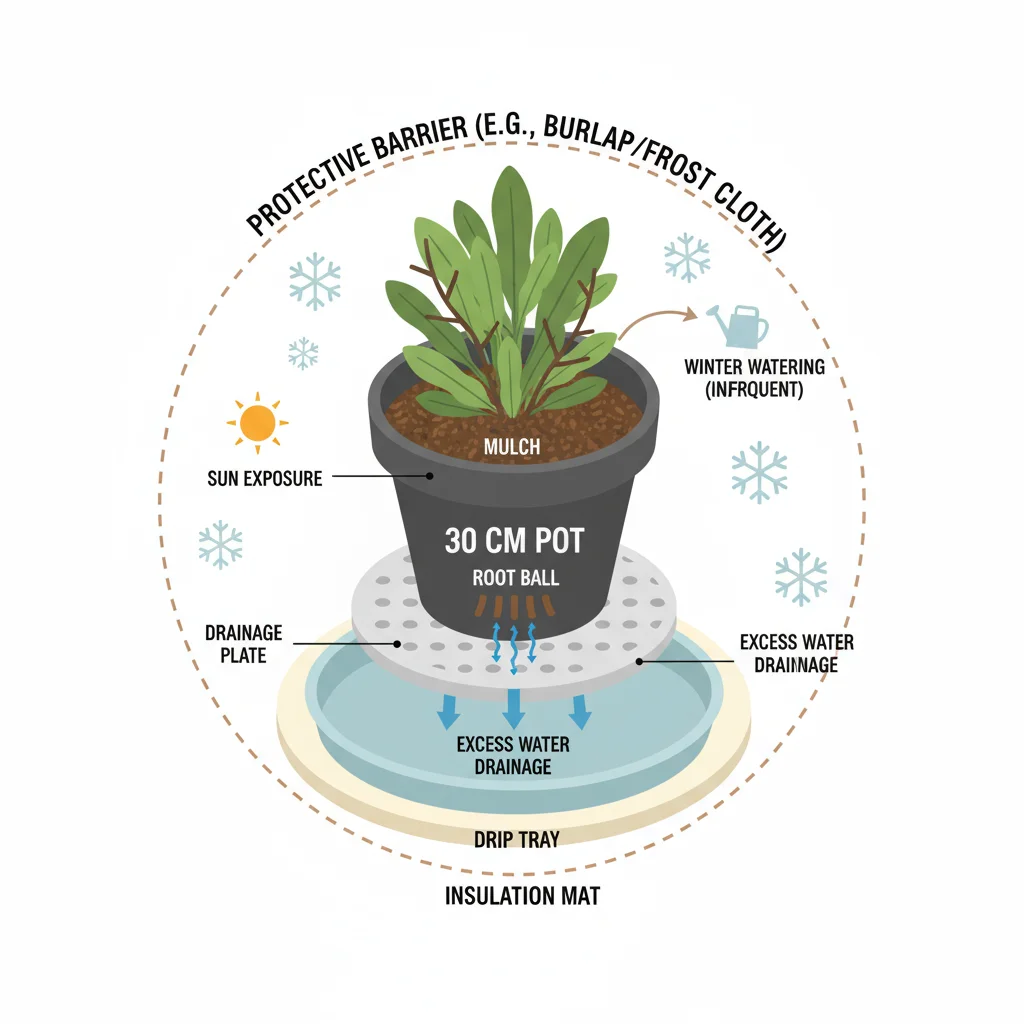
- Winter Protection: In colder climates, bring annuals indoors or protect the entire pallet with burlap or frost cloth. For perennials, you might need to empty the pockets and store the pallet, or use cold-hardy varieties.
- Spring Refresh: Each spring, replenish the potting mix in each pocket. Top-dress with fresh compost or replace about a third of the old soil with new, nutrient-rich mix.
Consistent, attentive care ensures your DIY vertical pallet garden remains a thriving and beautiful feature in your small space, providing you with continuous joy and harvests.
Frequently Asked Questions
Can I grow vegetables in a pallet garden?
Yes, absolutely. Many compact vegetables thrive in vertical pallet gardens. Choose smaller varieties such as loose-leaf lettuces, spinach, radishes, bush beans, dwarf cherry tomatoes, and strawberries. Ensure the pallet is heat-treated (HT stamped) and use a high-quality, organic potting mix for safe consumption.
How deep should the planting pockets be?
The ideal depth for planting pockets in a vertical pallet garden is generally 4 to 6 inches. This depth accommodates the root systems of most herbs, annual flowers, and shallow-rooted vegetables. If your pallet allows for deeper pockets, even better, as it provides more room for root development and soil volume.
How do I prevent soil from washing out of the pockets when I water?
Several strategies prevent soil washout. Firstly, ensure you use a heavy-duty landscaping fabric that is securely stapled to form enclosed pockets. Secondly, avoid overfilling the pockets; leave an inch or two of space at the top. Thirdly, water gently and slowly, allowing the soil to absorb moisture gradually. Installing a drip irrigation system also minimizes direct impact on the soil surface.
What should I do with my pallet garden in winter?
Your winter strategy depends on your climate and the types of plants you grow. For annuals in colder regions, you can either empty the pockets and store the pallet, or bring the entire garden indoors if space allows. For perennial plants, consider using cold-hardhardy varieties and wrapping the pallet with burlap or frost cloth. In milder climates, some plants might survive with minimal protection. Always check the specific winter hardiness zones for your chosen plants.
Can I move my vertical pallet garden once it’s planted?
Moving a fully planted vertical pallet garden is challenging due to its significant weight. A standard pallet filled with wet soil and plants can weigh well over 100-200 pounds. It is best to choose a permanent location during initial installation. If you anticipate needing to move it, consider attaching heavy-duty locking caster wheels to the base of the pallet before planting. Ensure the wheels are rated for the total estimated weight.
Disclaimer: This article is for informational purposes only and is not a substitute for professional advice. Consult local extension services for region-specific recommendations.


Leave a Reply