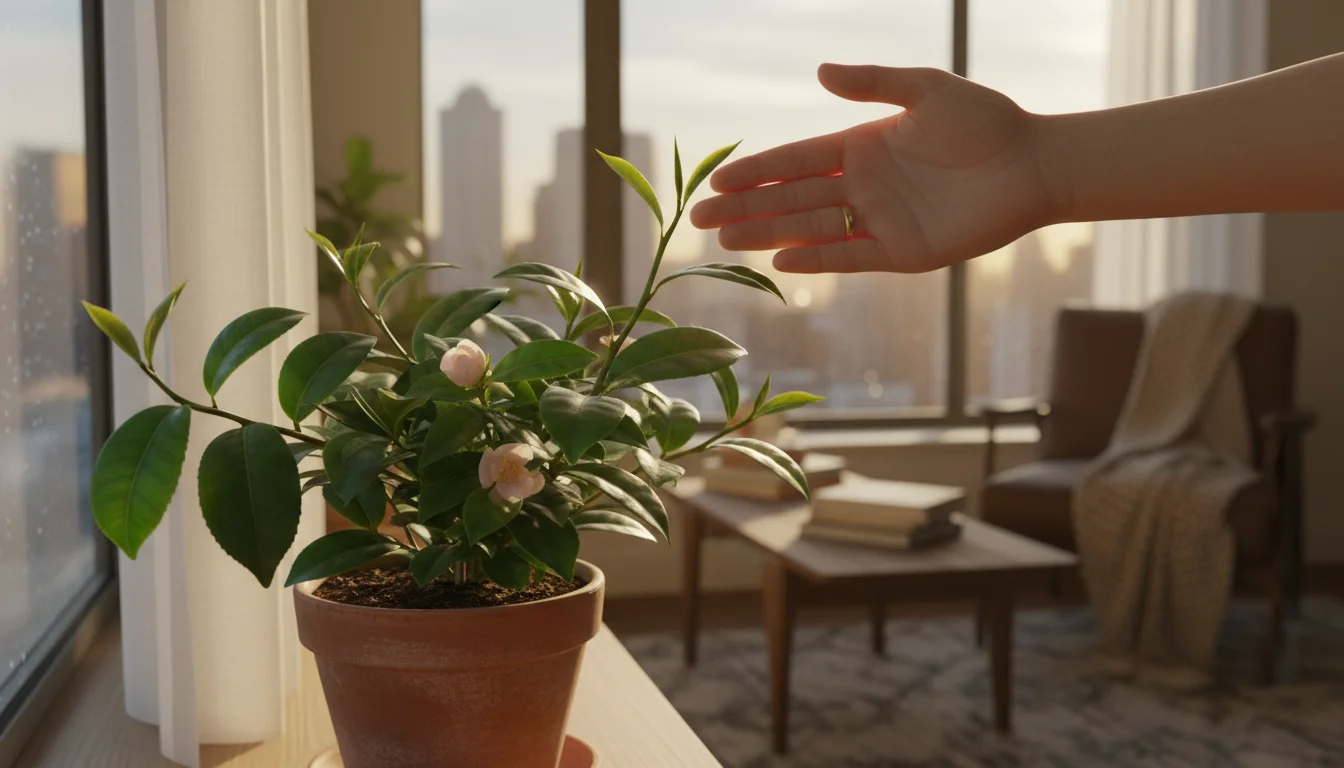
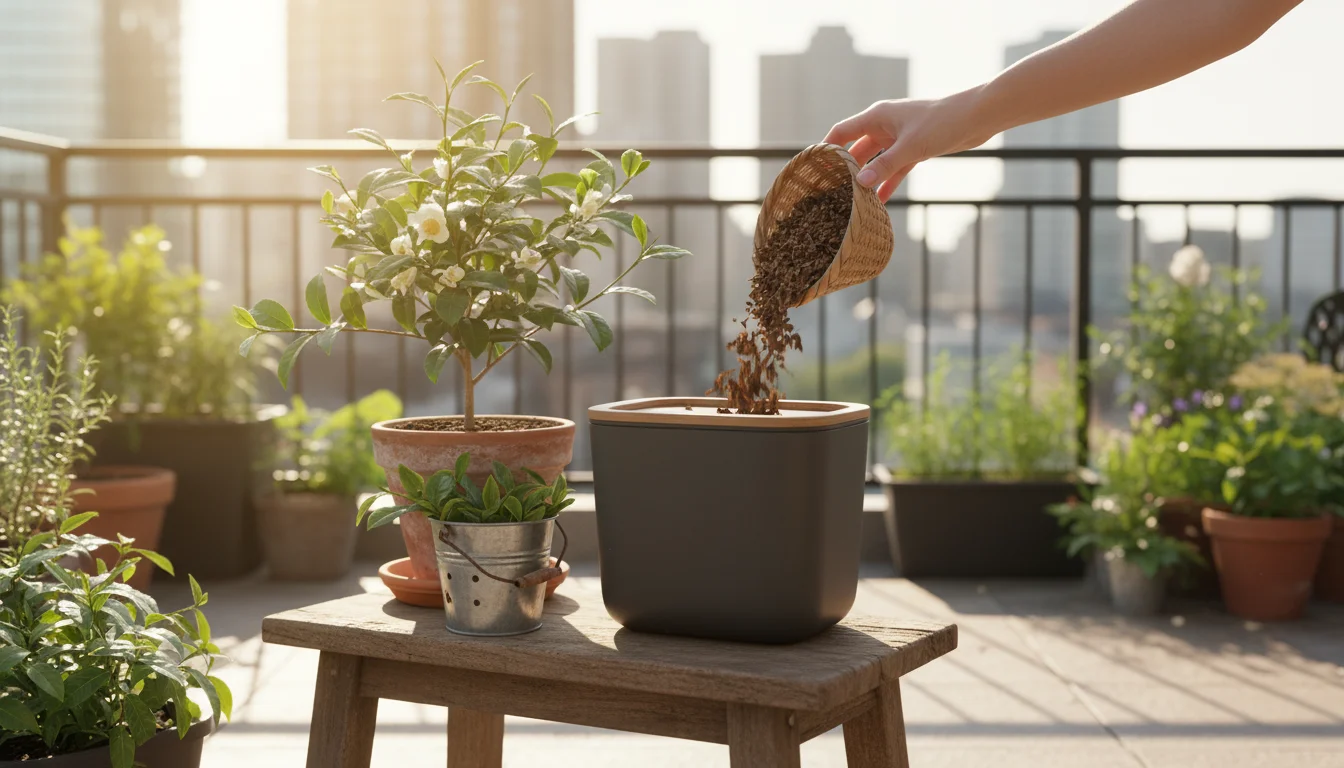
Imagine sipping a warm cup of tea, knowing you grew the very leaves yourself. This isn’t just a fantasy for those with vast estates. You can absolutely cultivate your own tea plant, Camellia sinensis, right in a pot, even if your gardening space is limited to a sunny windowsill or a cozy balcony. Growing tea indoors offers a rewarding project, a connection to nature, and the freshest brew you will ever taste. It transforms a common beverage into a personal journey from seed to cup, a truly unique indoor gardening experience.
Many home brewers also explore medicinal herbs for winter wellness teas to complement their tea plant collection.
This guide empowers you to embark on this delightful adventure. We will walk through everything you need to know, from understanding your tea plant to brewing your first batch. Prepare to discover the simple joys of nurturing a tea plant and harvesting its leaves in your own home. It is a fantastic way to engage in winter indoor gardening projects, bringing lush greenery and future refreshment into your living space.
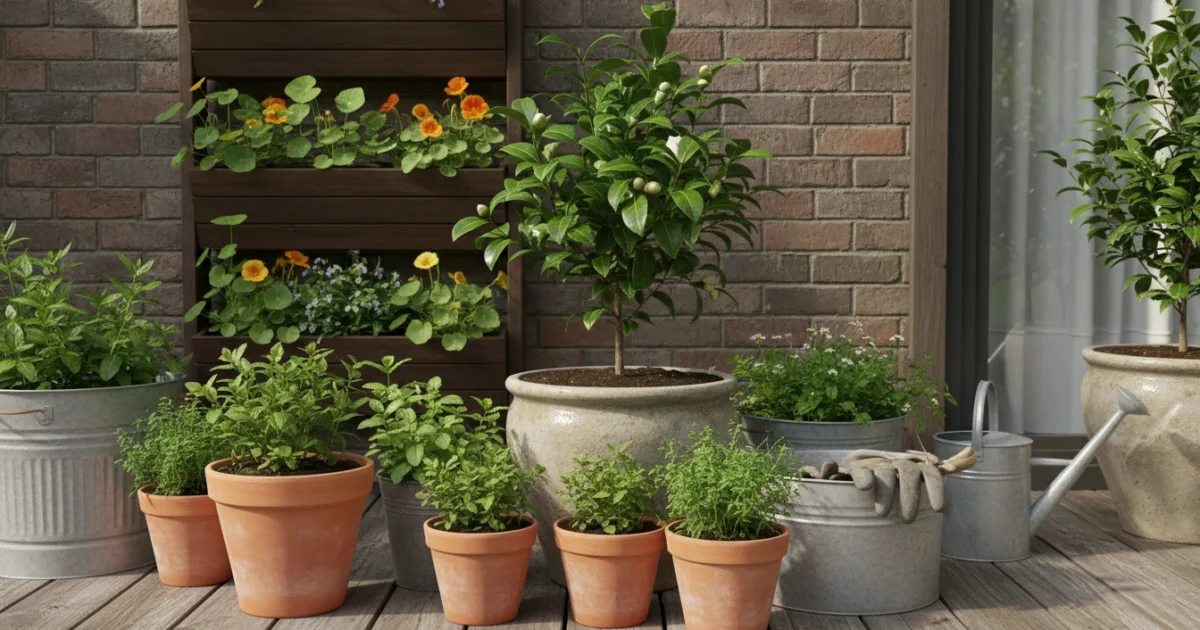
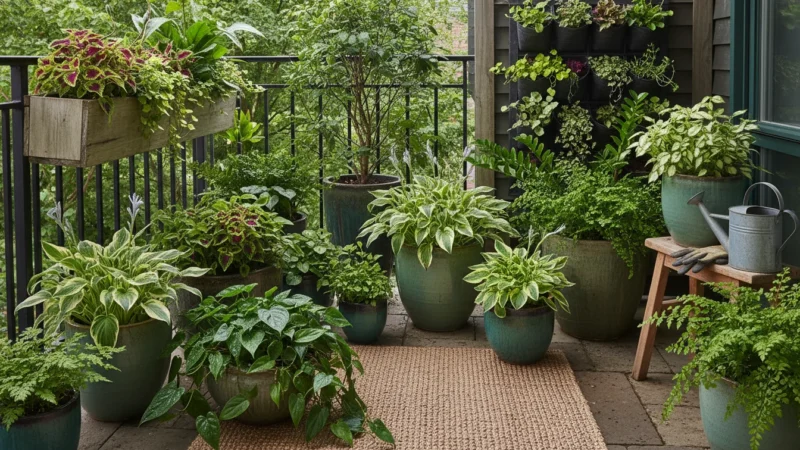
The Allure of Indoor Tea Growing
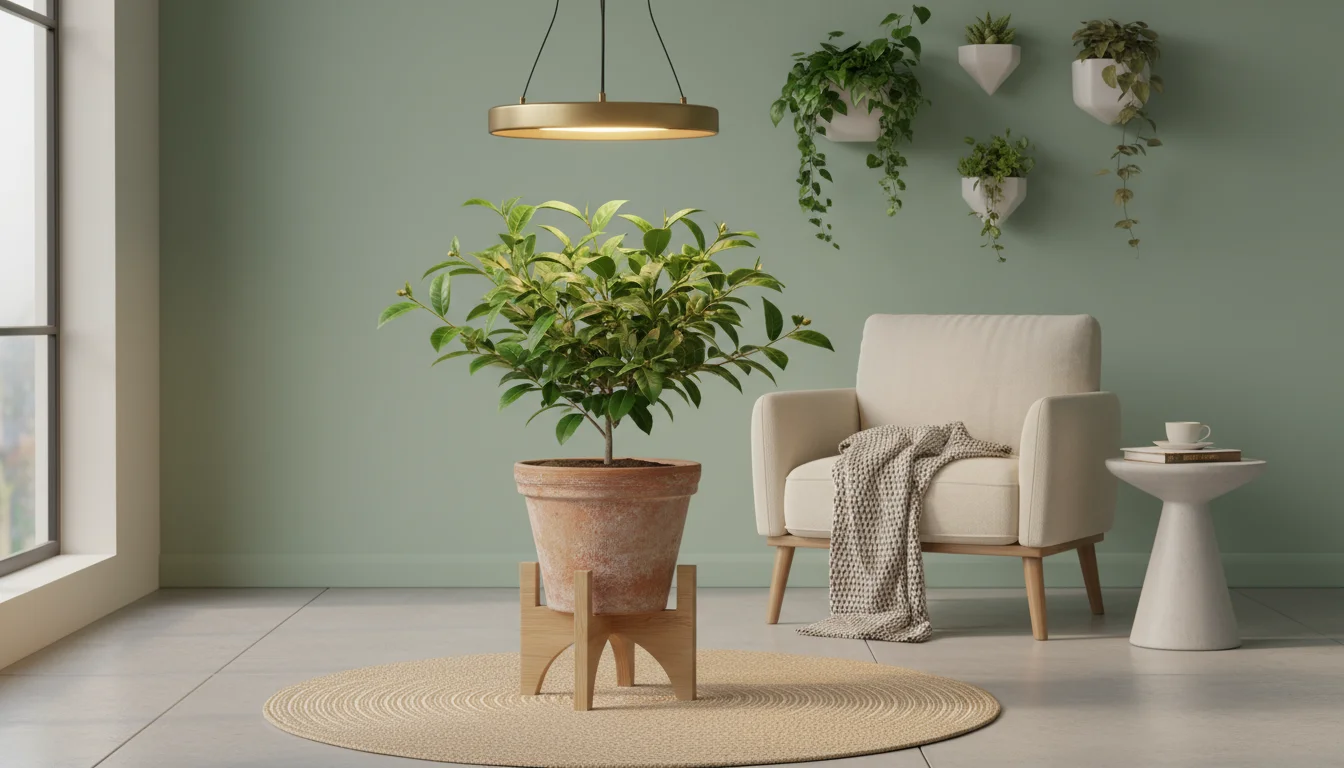
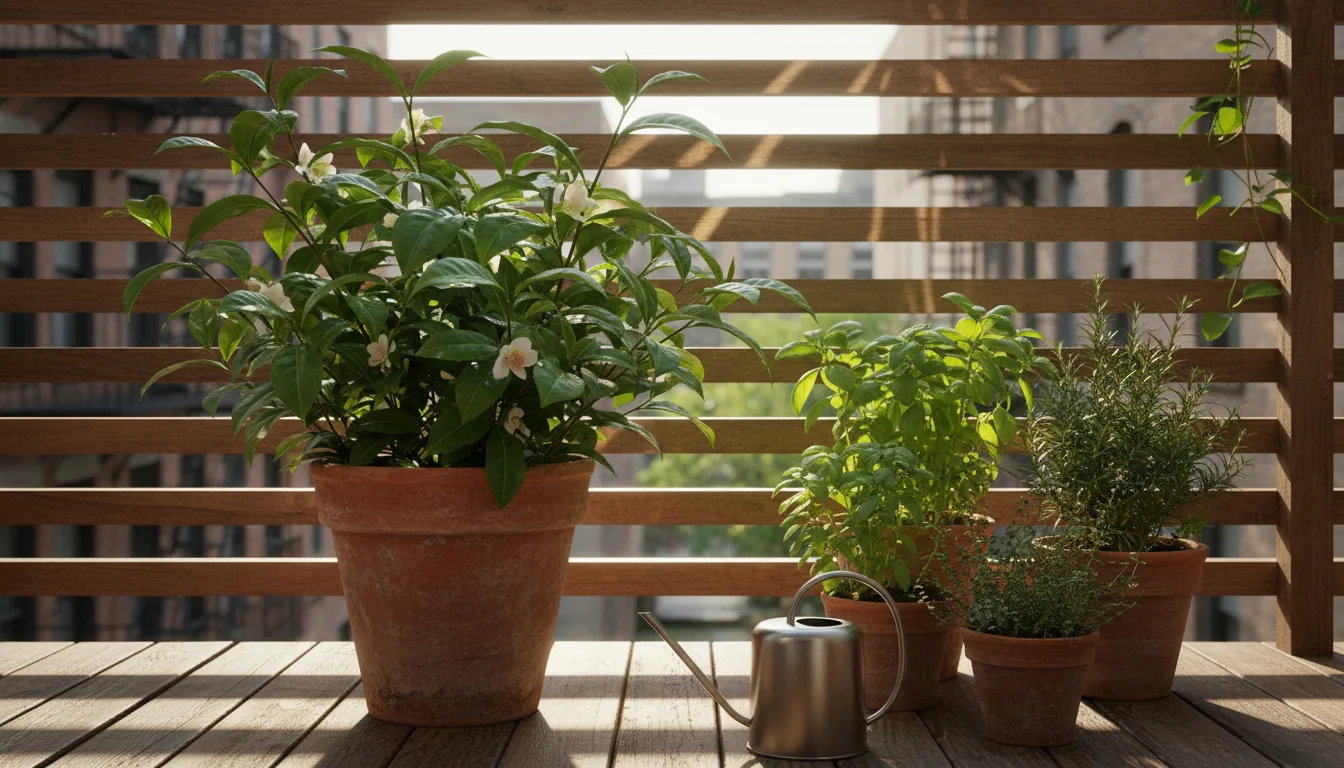
Growing `Camellia sinensis` indoors offers more than just a fresh cuppa. It provides a unique aesthetic to your living space, adding a touch of exotic greenery with glossy, evergreen leaves. For those passionate about homegrown food and drink, cultivating your own tea fulfills a similar desire for self-sufficiency and deep connection to what you consume. You control the growing conditions, ensuring your tea leaves remain free from unwanted pesticides and chemicals. This makes it an incredibly appealing project for anyone interested in healthy living and sustainable practices.
While focusing on tea, don’t forget other woody perennials; for instance, keeping potted rosemary alive indoors requires a similar attention to drainage and light.
If you have a small balcony, you can also create an autumnal tea garden with hardy herbs to enjoy alongside your indoor tea plant.
For a different twist on edible roots, you might also enjoy learning how to grow ginger on your windowsill during the colder months.
Beyond the practical benefits, nurturing a `potted tea plant` brings a calming, meditative element to your daily routine. Watching new shoots emerge and carefully harvesting leaves offers a small, grounding ritual. It is a fantastic alternative to more common indoor edibles like herbs or small vegetables, elevating your indoor garden with a plant that has a rich history and cultural significance. Many consider it among the `best indoor plants for tea lovers` for its unique dual purpose: a beautiful plant and a source of delicious tea. Moreover, it presents an engaging `winter indoor gardening projects` option, providing a green oasis when outdoor gardens rest. Data shows an increasing interest in unique indoor edibles, with tea plants gaining popularity for their ornamental value and practical output.

Understanding Your Tea Plant: Camellia sinensis
Camellia sinensis is the plant that gives us all types of true tea, whether it is green, black, oolong, or white. This beautiful evergreen shrub originates from Asia. You generally find two main varieties: Camellia sinensis sinensis, known for its cold hardiness and often used for green and white teas, and Camellia sinensis assamica, a larger-leaf variety typically grown in warmer climates for black teas. For indoor container gardening, the `sinensis` variety generally proves more manageable due to its smaller growth habit and greater tolerance for temperature fluctuations often found indoors.
For those new to nurturing greenery, an indoor plant survival guide can help you master the basics of keeping any potted species thriving.
While Camellia sinensis is a shrub, it can be maintained alongside other top-performing indoor trees that suit smaller living spaces.
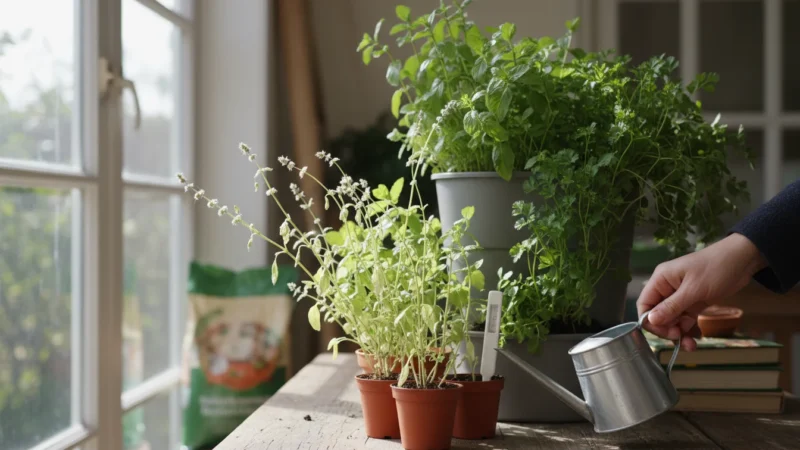
Your tea plant thrives in specific conditions. It needs well-draining, acidic soil, plenty of light, and consistent moisture. Understanding these fundamental requirements forms the bedrock of successful `camellia sinensis care`. While tea plants can grow quite large in their natural habitat, careful pruning keeps them compact and bushy in a pot, making them ideal `grow tea indoors` candidates. The plant’s vibrant green leaves, often flushed with bronze on new growth, make it an attractive specimen even before you consider its tea-making potential.
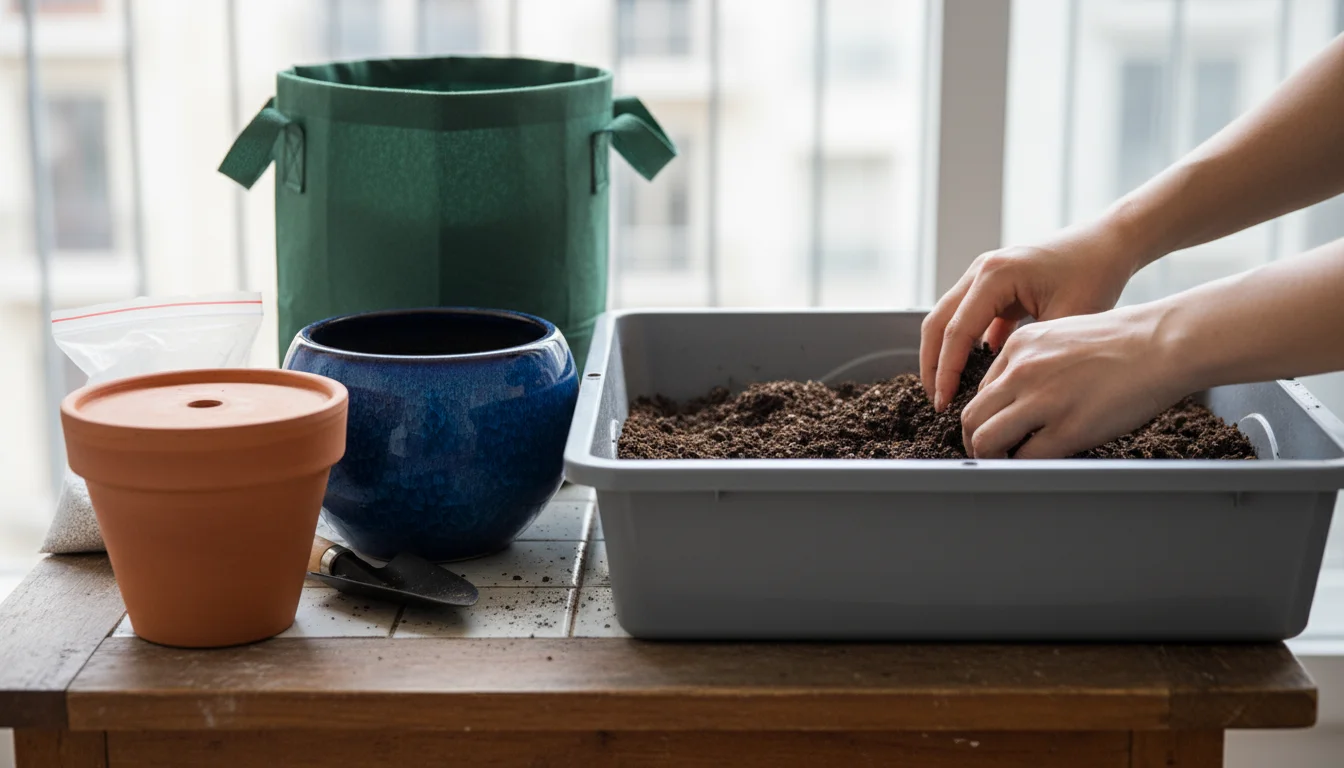
Choosing the Right Container and Potting Mix
Selecting the correct container and soil provides the foundation for a thriving `potted tea plant`. These choices directly impact the plant’s health, growth, and your success in growing tea indoors.
To make soil preparation and maintenance easier, it helps to assemble a small indoor gardening tool kit with all your essentials.
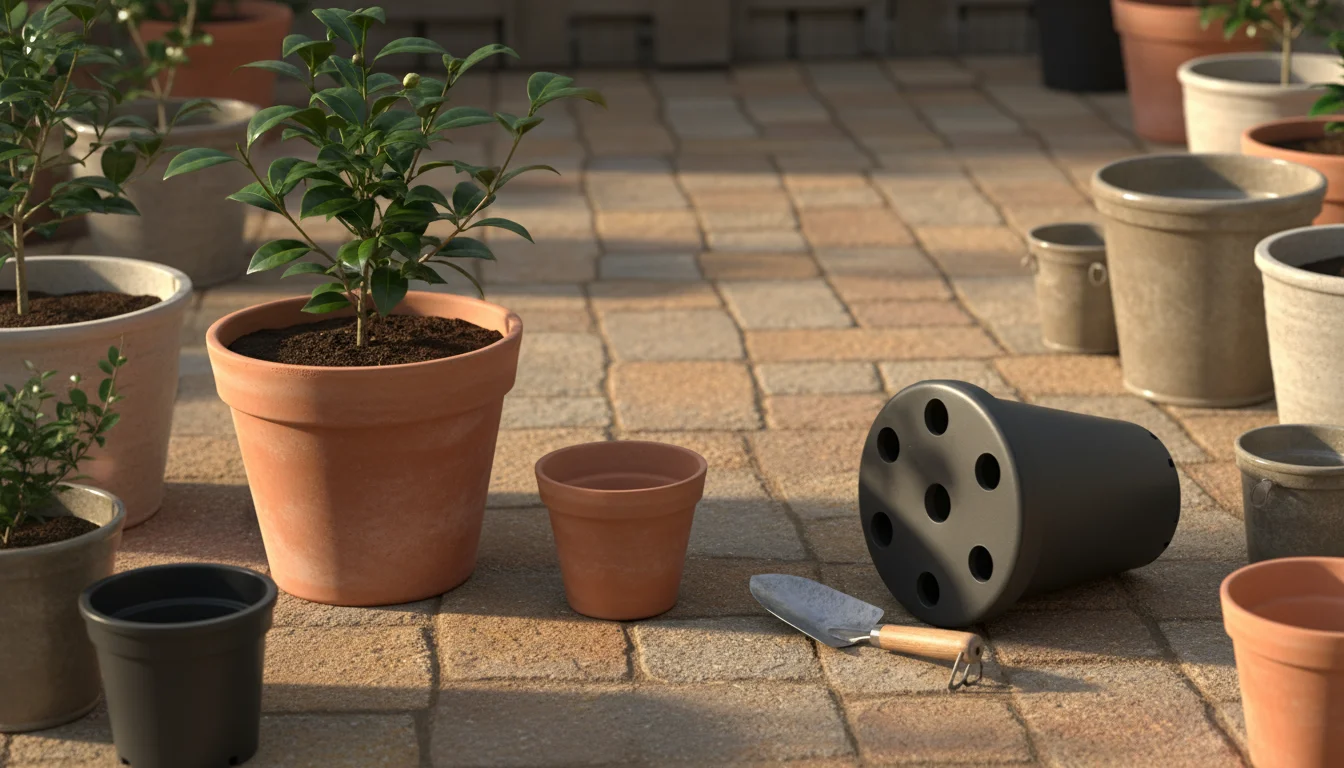
Container Selection
The right pot supports healthy root development and prevents waterlogging.
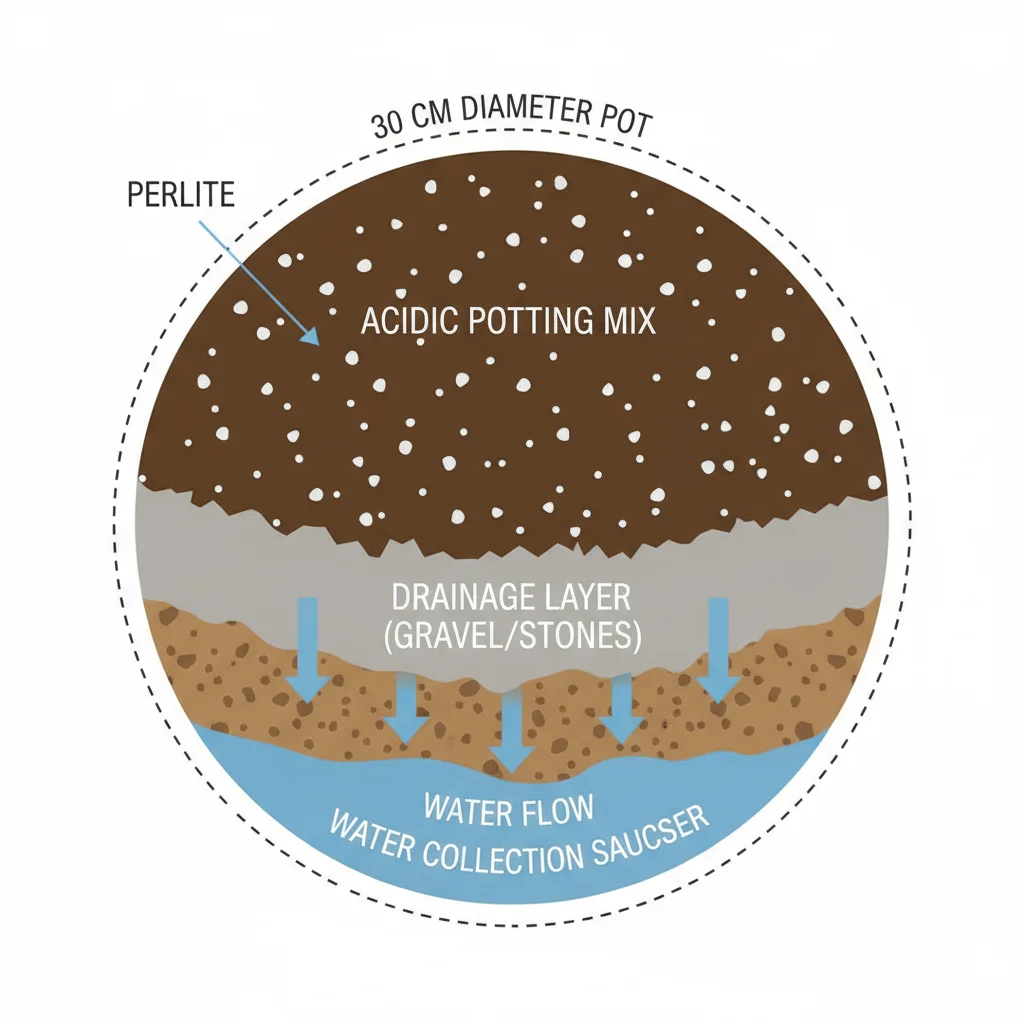
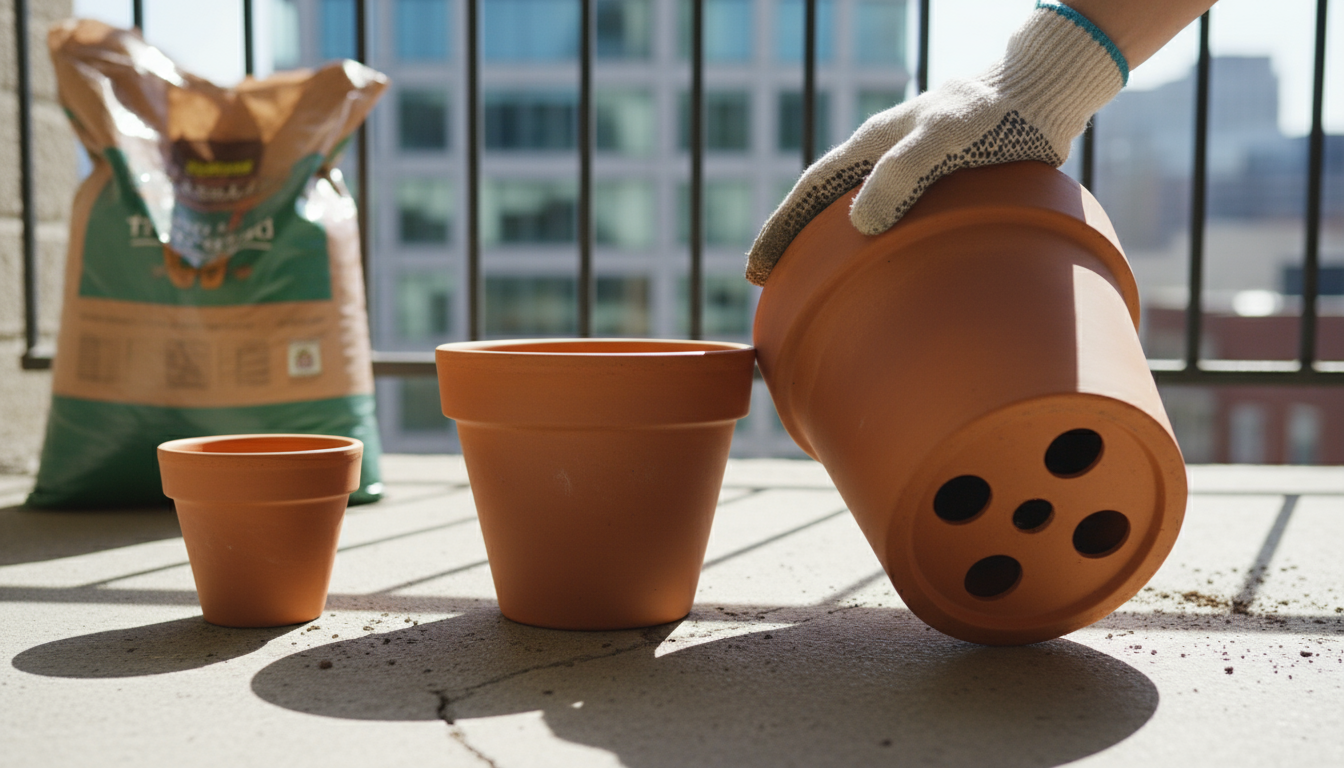
- Size: Begin with a pot at least 6-8 inches in diameter for a young plant. As your tea plant grows, you will need to repot it into increasingly larger containers, eventually aiming for a pot 12-18 inches wide and deep. Larger pots provide more room for roots, reducing the frequency of watering and repotting.
- Material: Terracotta pots are excellent choices. Their porous nature allows for good air circulation to the roots and helps excess moisture evaporate, preventing soggy soil. Plastic pots also work but require more vigilant watering as they retain moisture longer. Ensure any pot you choose has drainage holes at the bottom; this is non-negotiable for `camellia sinensis care`. Without drainage, water collects, suffocating roots and leading to rot.
- Drainage: No matter the material, ample drainage holes are crucial. You can place a screen or coffee filter over the holes to prevent soil from escaping while still allowing water to flow freely.
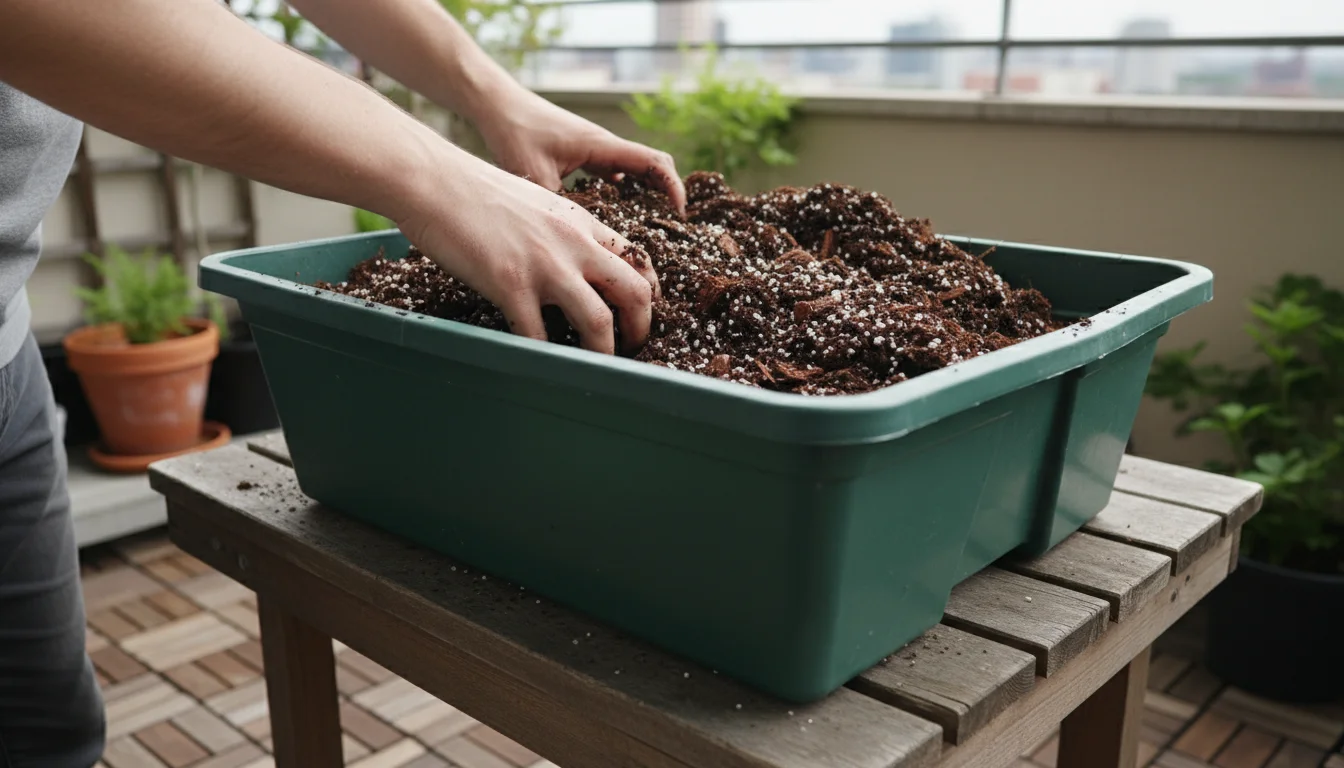
Crafting the Perfect Potting Mix
`Camellia sinensis` thrives in acidic, well-draining soil. Standard potting mixes often do not meet these specific needs. Creating your own mix ensures your plant receives the ideal environment.
- Acidity: Tea plants prefer a soil pH between 5.5 and 6.5. Regular potting soil often sits at a neutral pH. To acidify your mix, incorporate amendments like peat moss, pine bark fines, or composted oak leaves.
- Drainage: “Drainage” refers to how easily water moves through the soil. Good drainage prevents roots from sitting in water, which leads to root rot. To improve drainage, add perlite, coarse sand, or small gravel to your mix. These materials create air pockets, allowing water to pass through quickly.
- Recipe for Success: A good starting point for your potting mix is a blend of:
- 2 parts peat moss or coco coir (for acidity and moisture retention)
- 1 part perlite or coarse sand (for drainage)
- 1 part pine bark fines or acidic compost (for acidity, nutrients, and aeration)
- (Optional) A handful of worm castings for slow-release nutrients.
This combination provides the necessary acidity, excellent drainage, and some organic matter for nutrition, creating an ideal home for your `potted tea plant`.
Mix these ingredients thoroughly before adding them to your container. This meticulous approach to soil preparation significantly boosts your chances of success in `grow tea indoors`.
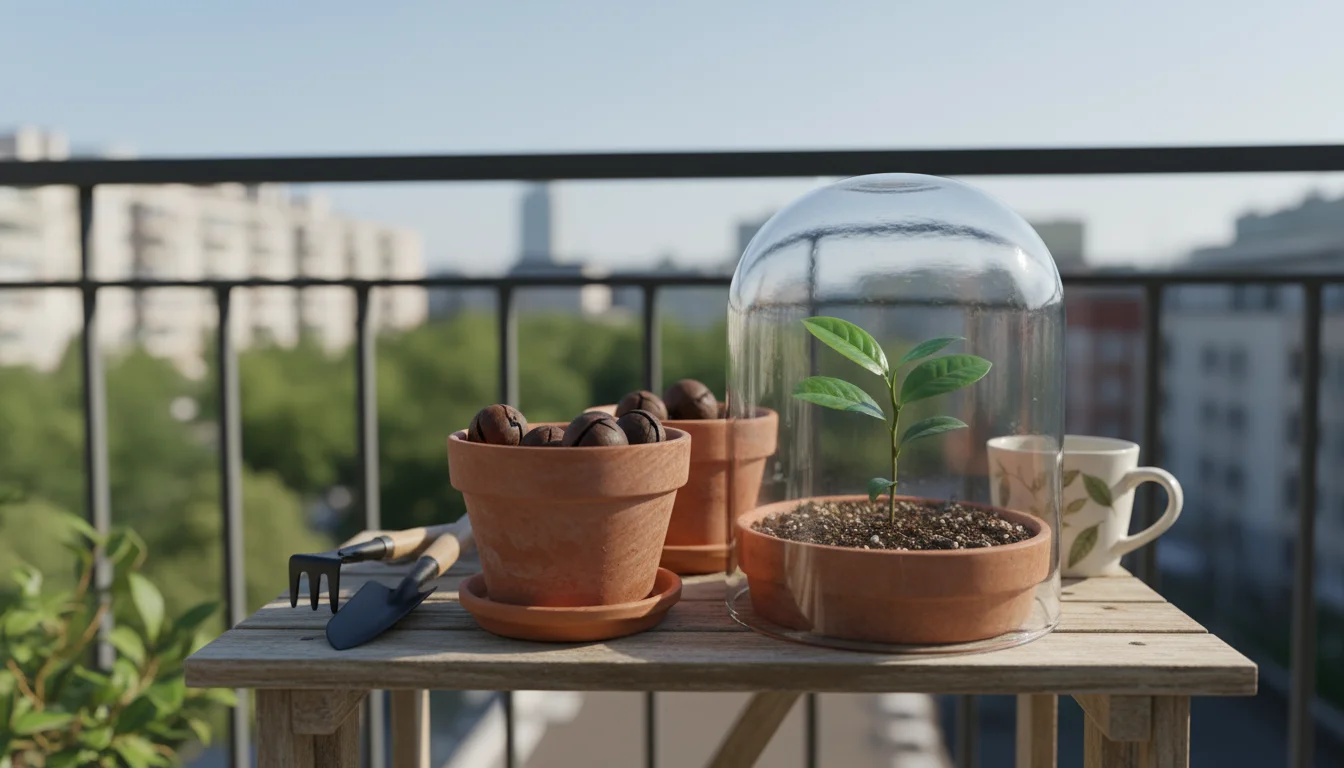
Starting Your Tea Plant: From Seed or Cutting
You have two primary paths to start your `potted tea plant`: growing from seed or propagating from cuttings. Each method has its unique considerations for the beginner gardener.
Growing a Tea Plant from Seed in a Container
Starting from seed is a rewarding but slower process. It gives you the full experience of nurturing life from its earliest stage.
- Source Quality Seeds: Obtain fresh `Camellia sinensis` seeds from a reputable supplier. Freshness is key for germination rates. Seeds often have a short viability window.
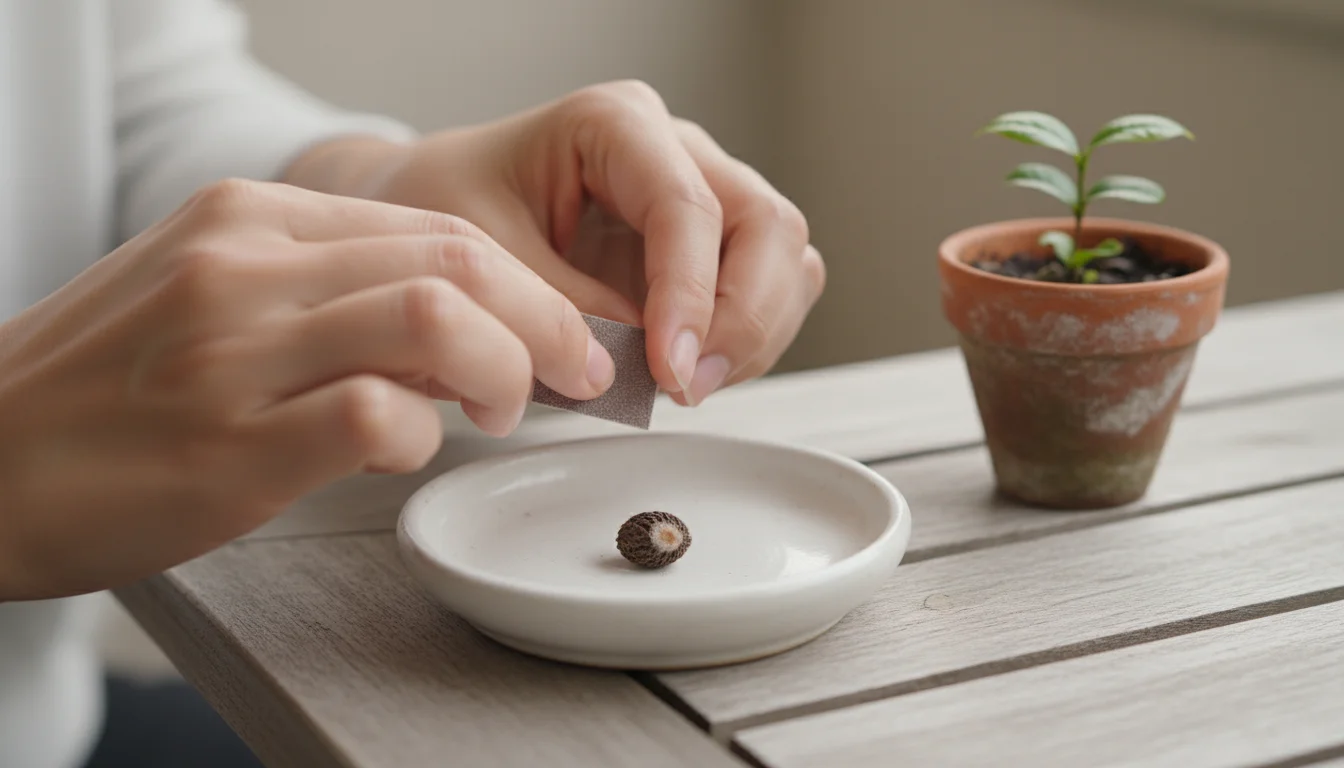
- Seed Preparation (Stratification): Tea seeds benefit from a process called stratification, which mimics winter conditions to encourage germination.
- Soak seeds in warm water for 24-48 hours. Discard any seeds that float, as they are likely not viable.
- Gently scarify the outer shell of the remaining seeds with sandpaper or a small file. This helps water penetrate the tough outer coating.
- Place the scarified seeds in a moist medium, such as peat moss or sand, inside a sealed plastic bag.
- Refrigerate the bag for 4-8 weeks. Keep the medium consistently moist. This cold period signals to the seed that winter has passed, and it is safe to germinate.
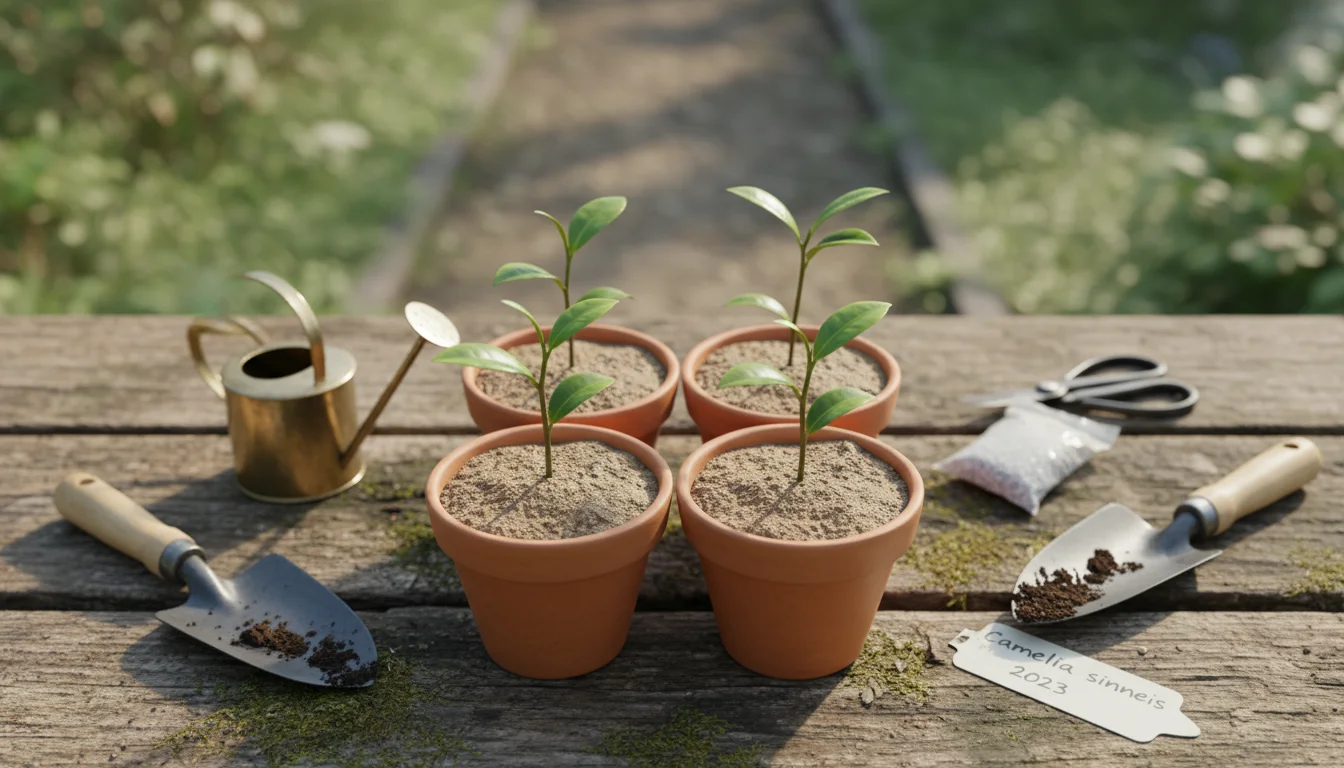
- Planting the Seeds: After stratification, plant the seeds about ½ inch deep in small pots (3-4 inches in diameter) filled with your acidic, well-draining potting mix. Plant several seeds per pot to increase your chances of success.
- Germination Conditions:
- Temperature: Maintain a consistent soil temperature of 65-75°F (18-24°C). A heat mat can assist with this.
- Moisture: Keep the soil consistently moist but never waterlogged. Mist the surface regularly.
- Light: Provide indirect bright light. A north-facing window or under grow lights works well.
- Patience: Germination can take anywhere from 2 weeks to several months. Do not lose hope if you do not see sprouts immediately.
- Thinning and Transplanting: Once seedlings develop a few sets of true leaves, thin them to the strongest seedling per pot. When they reach 4-6 inches tall, carefully transplant them into their permanent, larger containers using the specialized acidic potting mix. This detailed process shows you `how to grow a tea plant from seed in a container`.
Propagating from Cuttings
Starting from cuttings offers a faster route to a mature plant, as it bypasses the germination phase.
- Take Cuttings: In late spring or early summer, select healthy, semi-hardwood cuttings 4-6 inches long from a mature `Camellia sinensis` plant. Choose stems that are firm but still slightly flexible, with at least 2-3 leaves at the top.
- Prepare Cuttings: Remove the leaves from the bottom 2 inches of the cutting. Dip the cut end into a rooting hormone powder or gel. This significantly increases your chances of successful root development.
- Plant Cuttings: Plant each cutting into a small pot (3-4 inches) filled with a moist, well-draining rooting medium, such as a mix of peat moss and perlite or coarse sand. Ensure at least one node (where a leaf was attached) is buried beneath the soil surface.
- Create a Humid Environment: Cover the pots with a clear plastic bag or dome to create a mini-greenhouse effect. This high humidity prevents the cuttings from drying out while they establish roots. Make sure the plastic does not touch the leaves directly.
- Placement and Care: Place the covered pots in a warm spot with bright, indirect light. Keep the rooting medium consistently moist. Roots typically form within 6-12 weeks. You can gently tug on a cutting; resistance indicates root development.
- Acclimatization and Transplanting: Once rooted, gradually expose the cuttings to ambient room humidity by periodically removing the plastic cover over a week or two. After hardening off, transplant them into their larger permanent containers with the acidic potting mix.
Regardless of your chosen method, establishing your `potted tea plant` requires diligence and attention to detail.
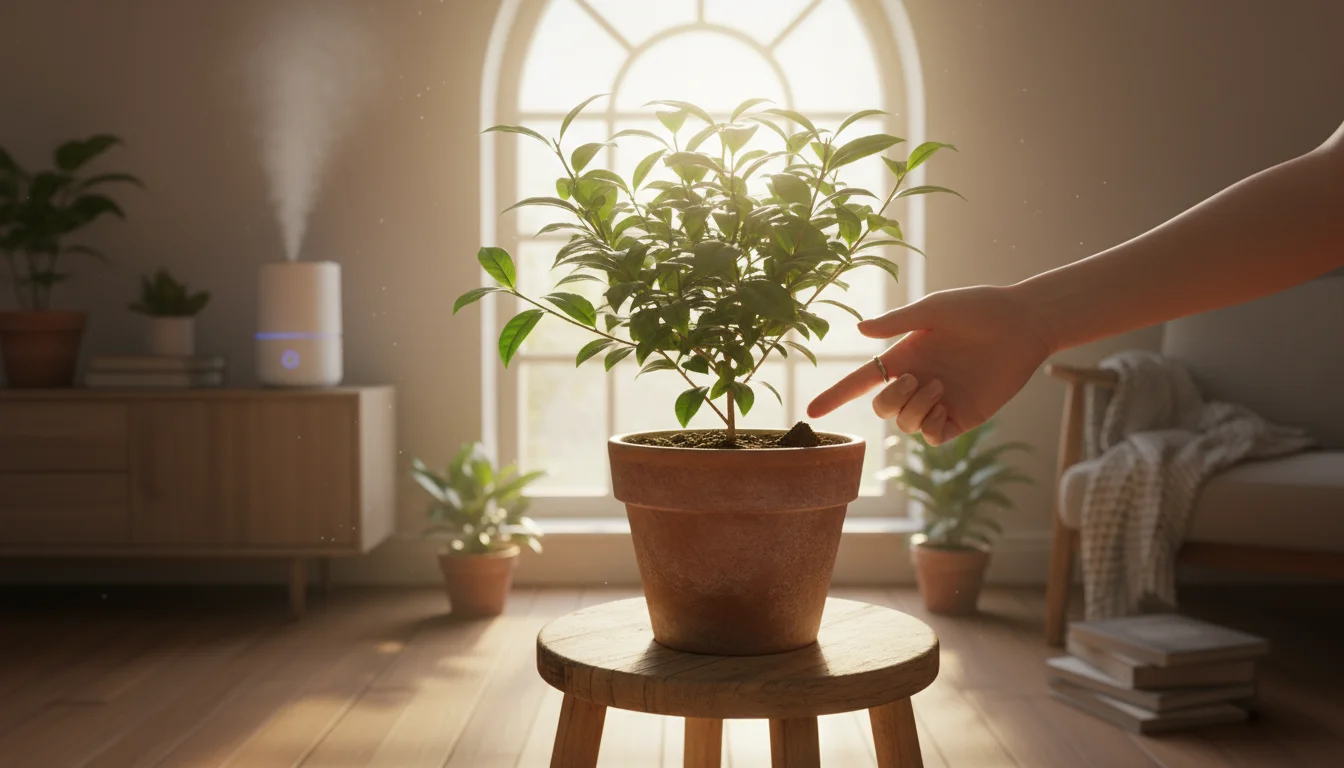
Mastering Light, Water, and Humidity: The Essential Trio for Indoor Tea
Achieving the right balance of light, water, and humidity is paramount for successful `camellia sinensis care` when growing tea indoors. These three elements directly influence your plant’s growth, health, and ability to produce tea leaves.
Light Requirements
Tea plants are sun-lovers but can suffer from intense, direct, afternoon sun indoors.
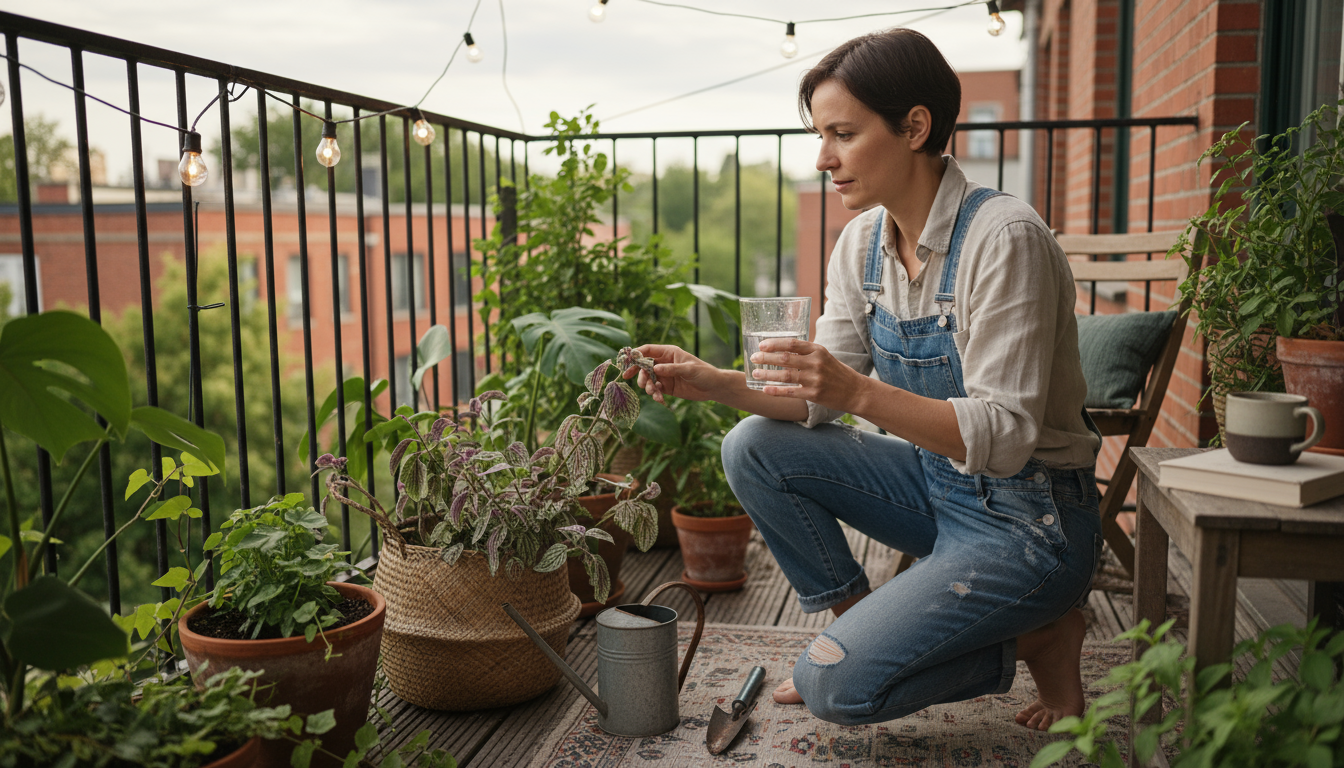
- Bright, Indirect Light: Your `potted tea plant` needs at least 4-6 hours of bright, indirect light daily. An east-facing window that receives morning sun, or a south/west-facing window shielded by a sheer curtain, provides ideal conditions.
- Grow Lights: If natural light is insufficient, especially during shorter winter days, supplemental grow lights become invaluable. LED grow lights positioned about 12-18 inches above the plant can provide the necessary intensity. Run them for 12-14 hours daily to mimic optimal growing conditions. This makes growing tea indoors viable even in less-than-ideal spots and is a great solution for `winter indoor gardening projects`.
- Rotating Your Plant: Periodically rotate your pot to ensure all sides of the plant receive adequate light, promoting even growth.
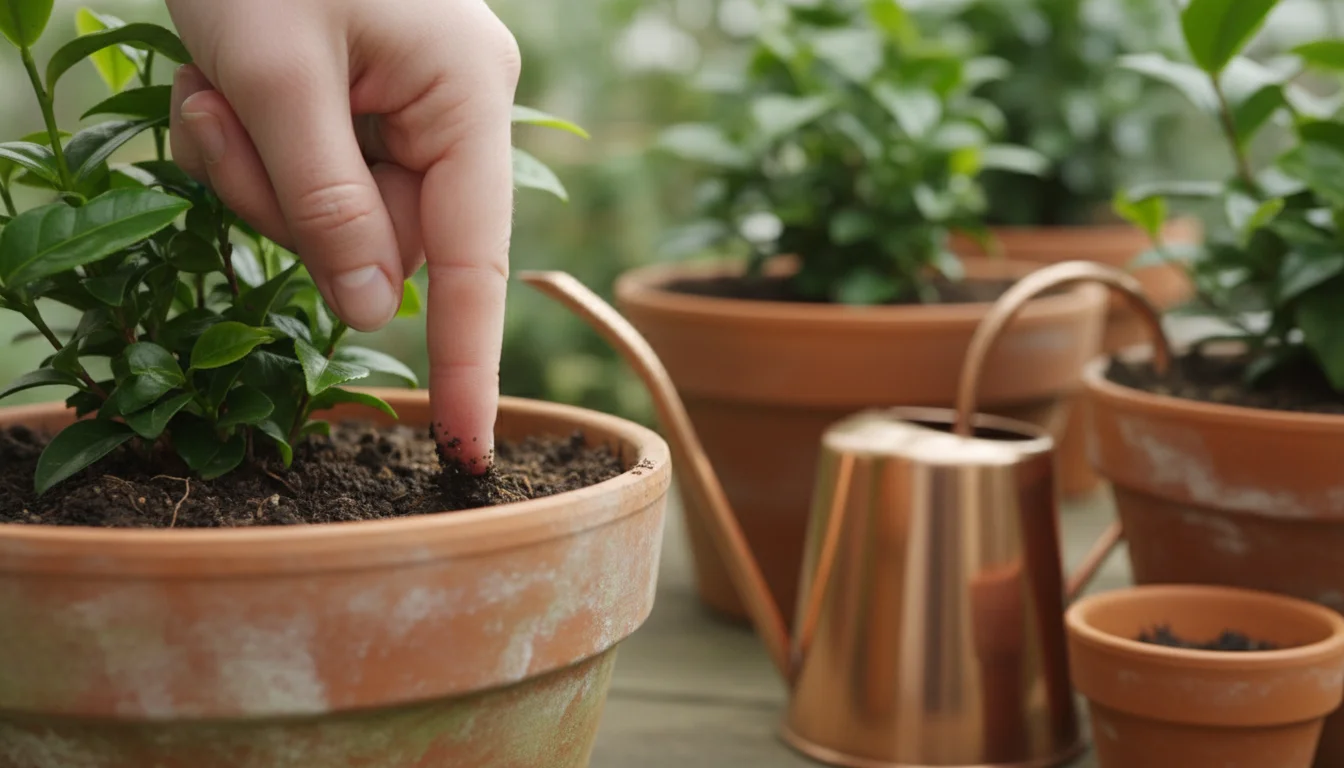
Watering Your Tea Plant
Consistent moisture is critical, but overwatering proves detrimental.
- Moist, Not Soggy: Keep the soil consistently moist. Allow the top inch of soil to dry out slightly before watering again. Overwatering leads to root rot, a common killer of indoor plants. Stick your finger into the soil to check moisture levels.
- Quality of Water: Tea plants prefer slightly acidic conditions, so tap water high in alkalinity can cause issues over time. If your tap water is hard (high in minerals), consider using filtered water, rainwater, or distilled water, or letting tap water sit out for 24 hours to allow chlorine to dissipate. You can also add a few drops of white vinegar to your water every few waterings to help maintain soil acidity.
- Drainage is Key: Always ensure your pot has adequate drainage holes. Water thoroughly until you see water flowing out of the bottom drainage holes, then empty any collected water from the saucer. Never let your plant sit in standing water.
- Frequency: Watering frequency varies based on pot size, soil mix, light intensity, and humidity. In warmer, brighter conditions, you may water every few days. In cooler, lower light conditions, watering less often is appropriate.
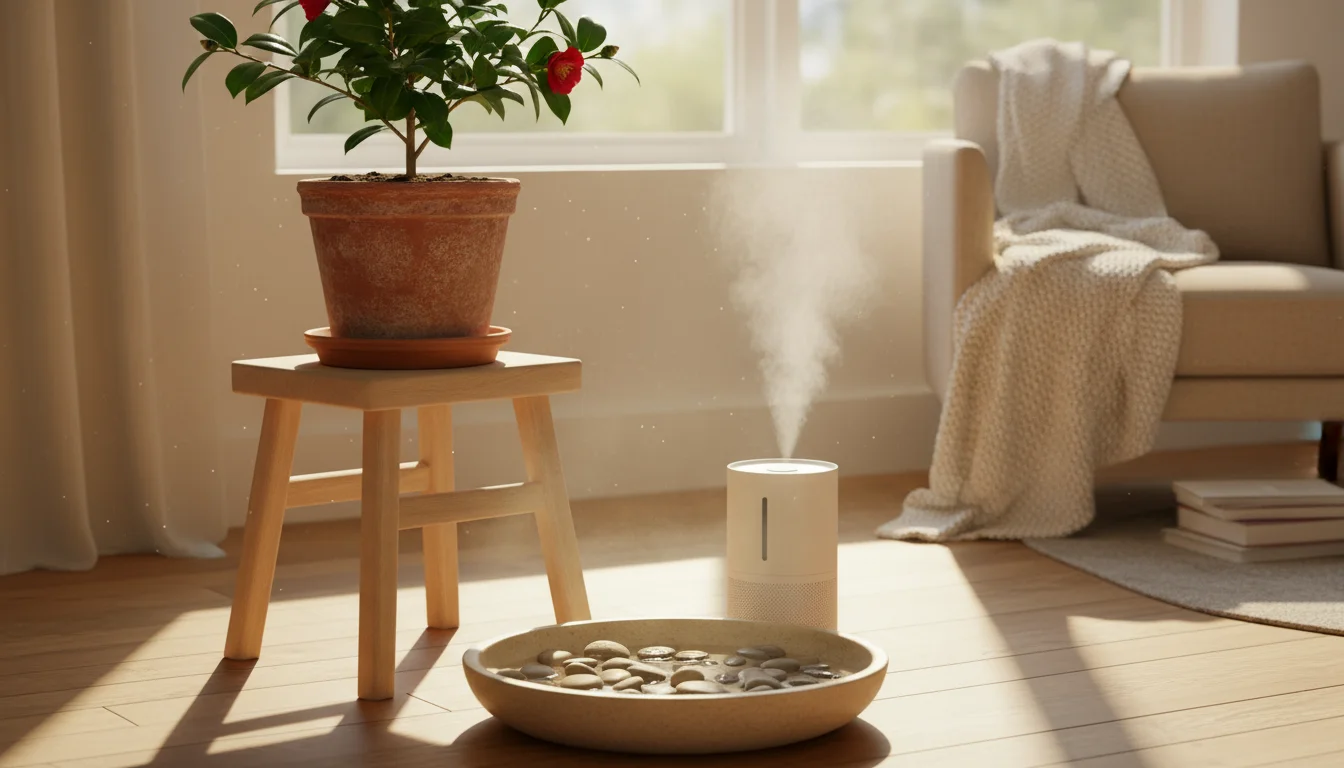
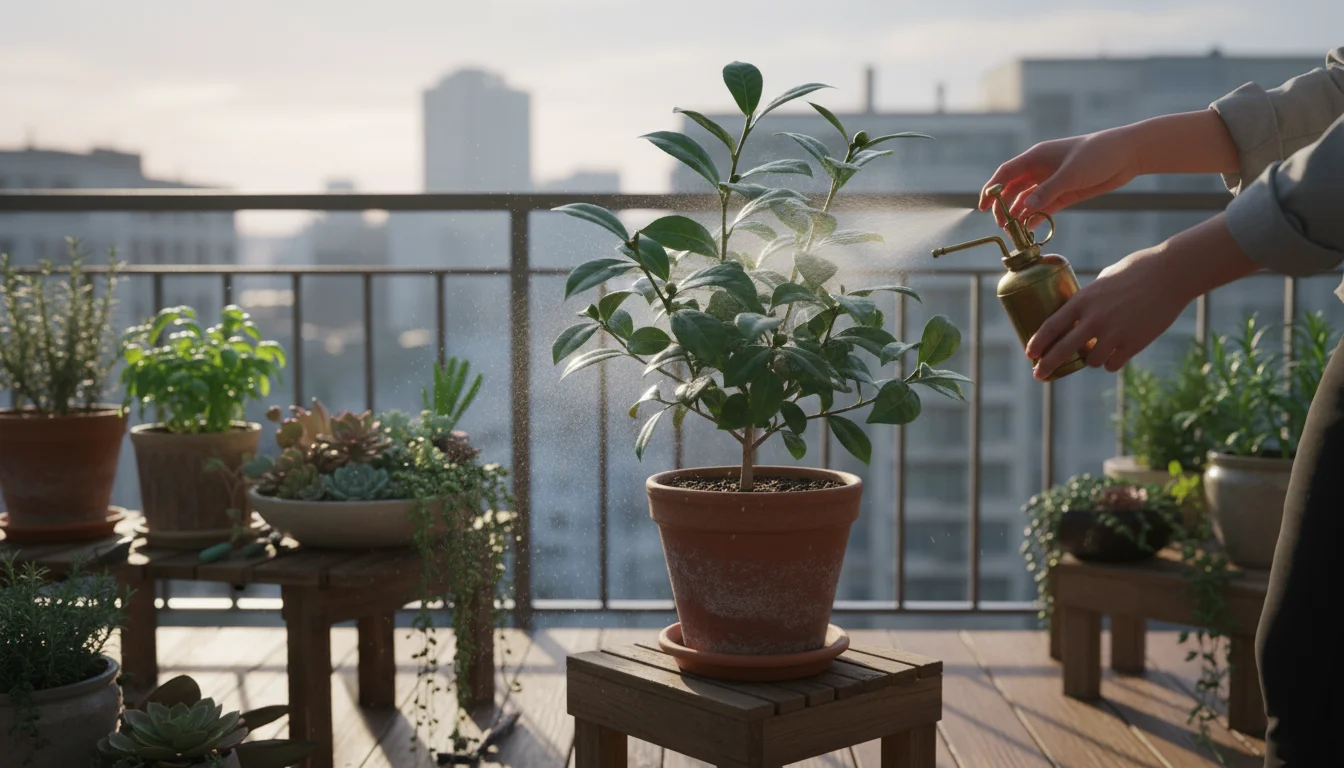
Humidity Levels
Tea plants hail from humid, subtropical regions, so they appreciate higher humidity indoors.
- Target Humidity: Aim for humidity levels between 50-70%. Indoor environments, especially heated homes in winter, often fall far short of this.
- Misting: Misting the leaves once or twice daily can temporarily increase humidity around the plant. This works best when combined with other methods.
- Pebble Trays: Place your `potted tea plant` on a pebble tray filled with water. As the water evaporates, it increases humidity around the plant. Ensure the bottom of the pot does not sit in the water, which can lead to root rot.
- Humidifier: For sustained high humidity, especially during dry indoor months, a small room humidifier proves most effective. This benefits `grow tea indoors` efforts significantly, helping the plant thrive.
- Grouping Plants: Grouping several plants together can create a localized humid microclimate, as plants release moisture through transpiration.
By diligently managing these three environmental factors, you provide your `camellia sinensis` with the conditions it needs to flourish and become a productive tea source.
Feeding and Pruning Your Camellia sinensis
Nourishing and shaping your `potted tea plant` are vital aspects of `camellia sinensis care`. Proper feeding ensures healthy growth and vibrant leaves, while strategic pruning encourages bushiness and maximizes your tea harvest.
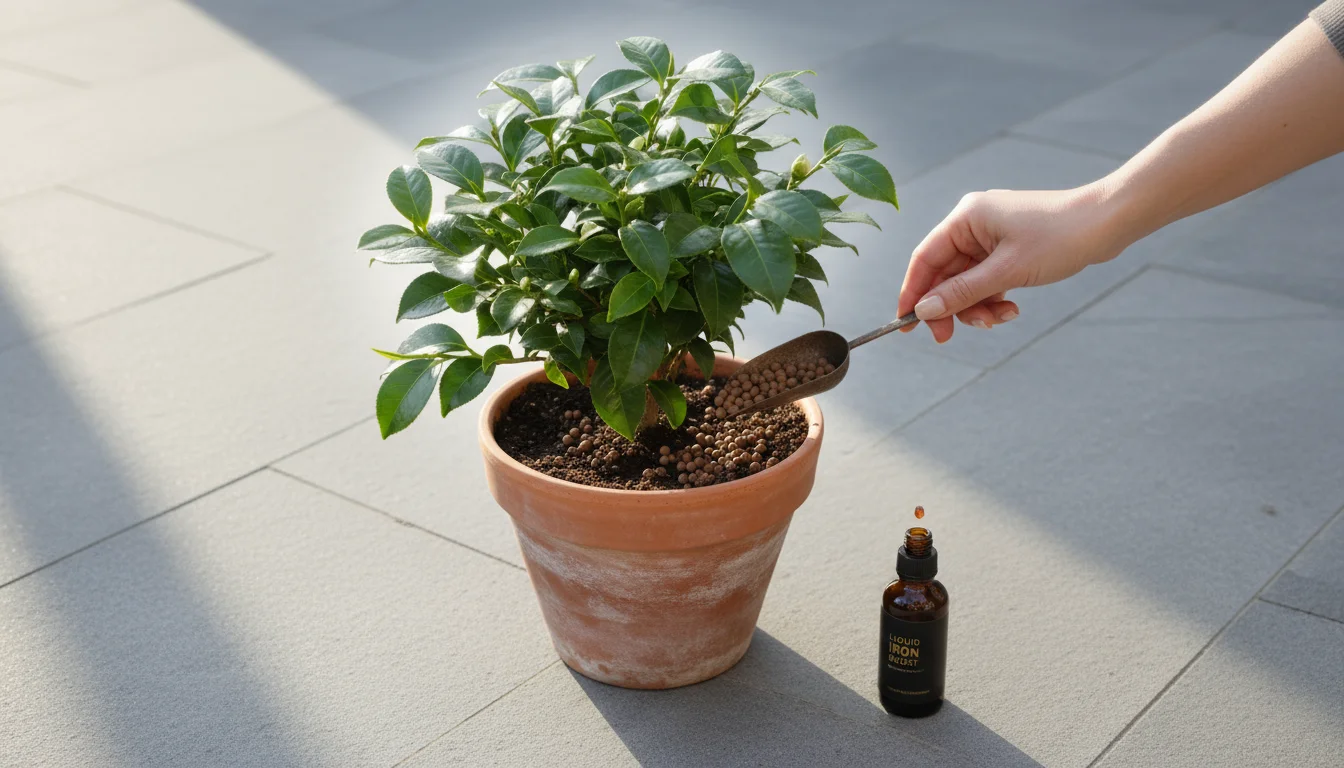
Nutrient Needs and Fertilization
Tea plants are generally light feeders, but consistent nutrition supports robust growth.
- Acid-Loving Fertilizer: Use a balanced, slow-release fertilizer specifically formulated for acid-loving plants like azaleas, rhododendrons, or camellias. Look for fertilizers with an NPK ratio like 3-1-2 or similar, and check the label for acidification properties.
- Application Frequency: During the active growing season (spring and summer), fertilize your plant every 4-6 weeks according to package directions. Reduce or cease fertilization during fall and winter when growth naturally slows, especially during `winter indoor gardening projects`.
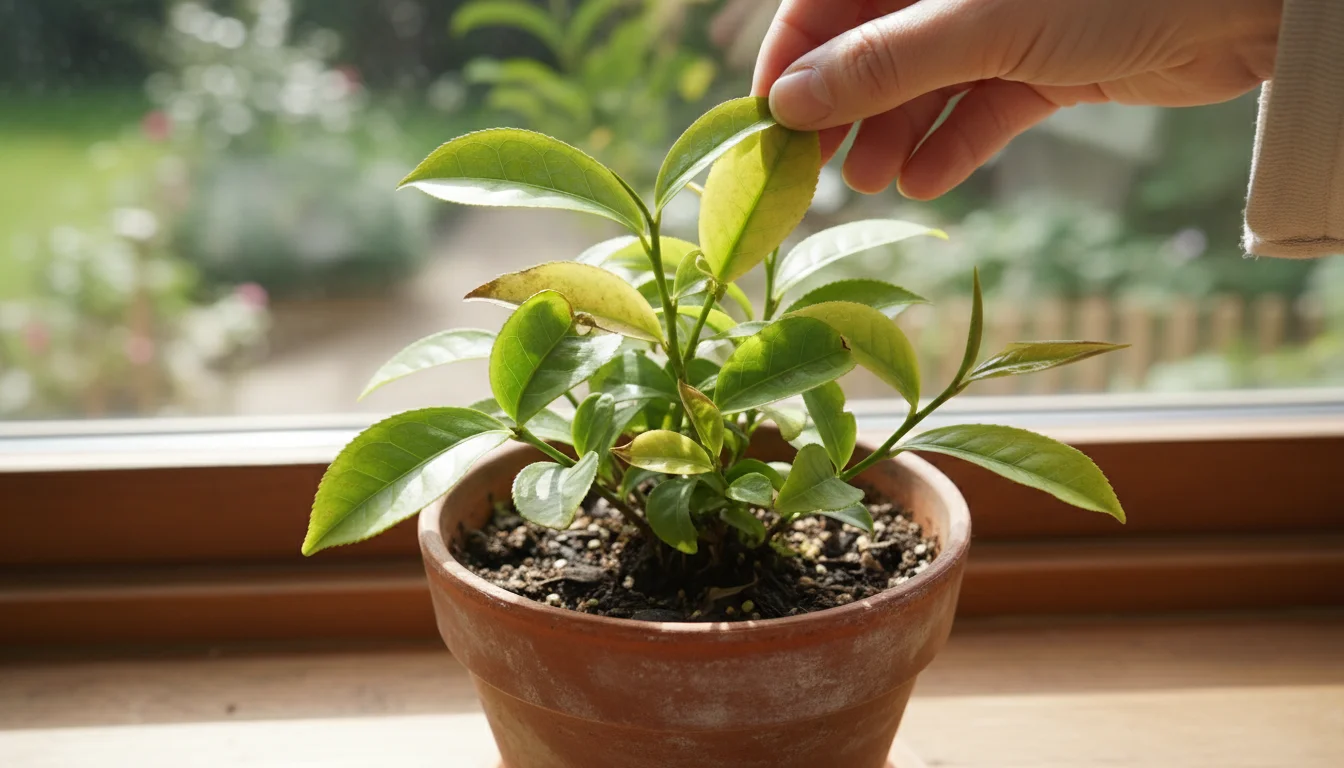
- Micronutrients: Tea plants benefit from micronutrients, especially iron, which prevents yellowing leaves (chlorosis) in alkaline conditions. If you notice yellowing leaves with green veins, this suggests an iron deficiency, often due to high soil pH. Use a chelated iron supplement or ensure your acidic fertilizer contains these elements.
- Organic Options: For an eco-friendly approach, consider incorporating organic amendments like compost tea or worm castings into your watering routine. These provide gentle, slow-release nutrients and help maintain soil health.
The Art of Pruning for Harvest and Shape
Pruning serves two main purposes for your `grow tea indoors` project: maintaining a manageable size and encouraging new, tender growth for harvesting.
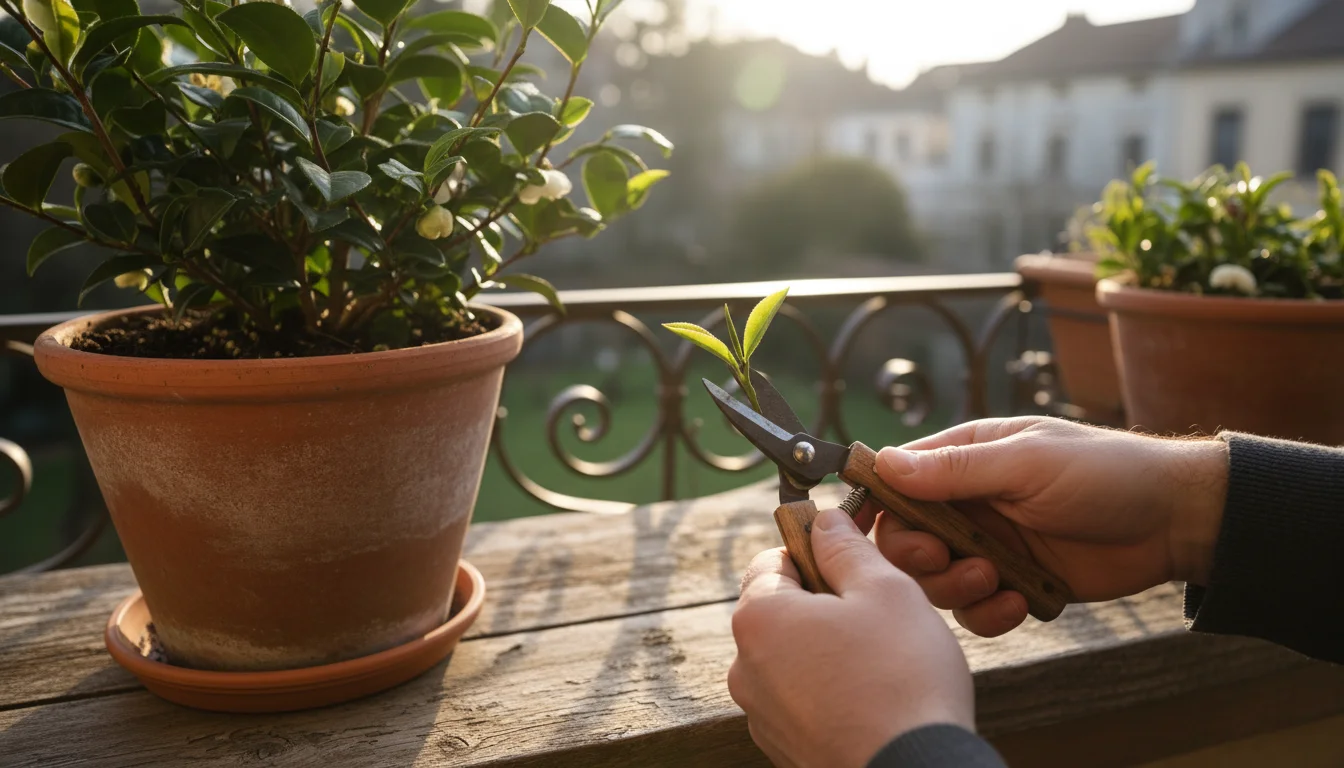
- Encouraging Bushiness: When your tea plant is young and has reached about 8-12 inches in height, “tip prune” it. This means pinching or clipping off the top two leaves and the terminal bud of each shoot. This action signals the plant to produce side shoots, making it bushier and producing more potential tea leaves.
- Maintenance Pruning: Regularly remove any dead, damaged, or diseased branches. Also, prune away any leggy growth that makes the plant look sparse. This improves air circulation and directs the plant’s energy towards healthy growth.
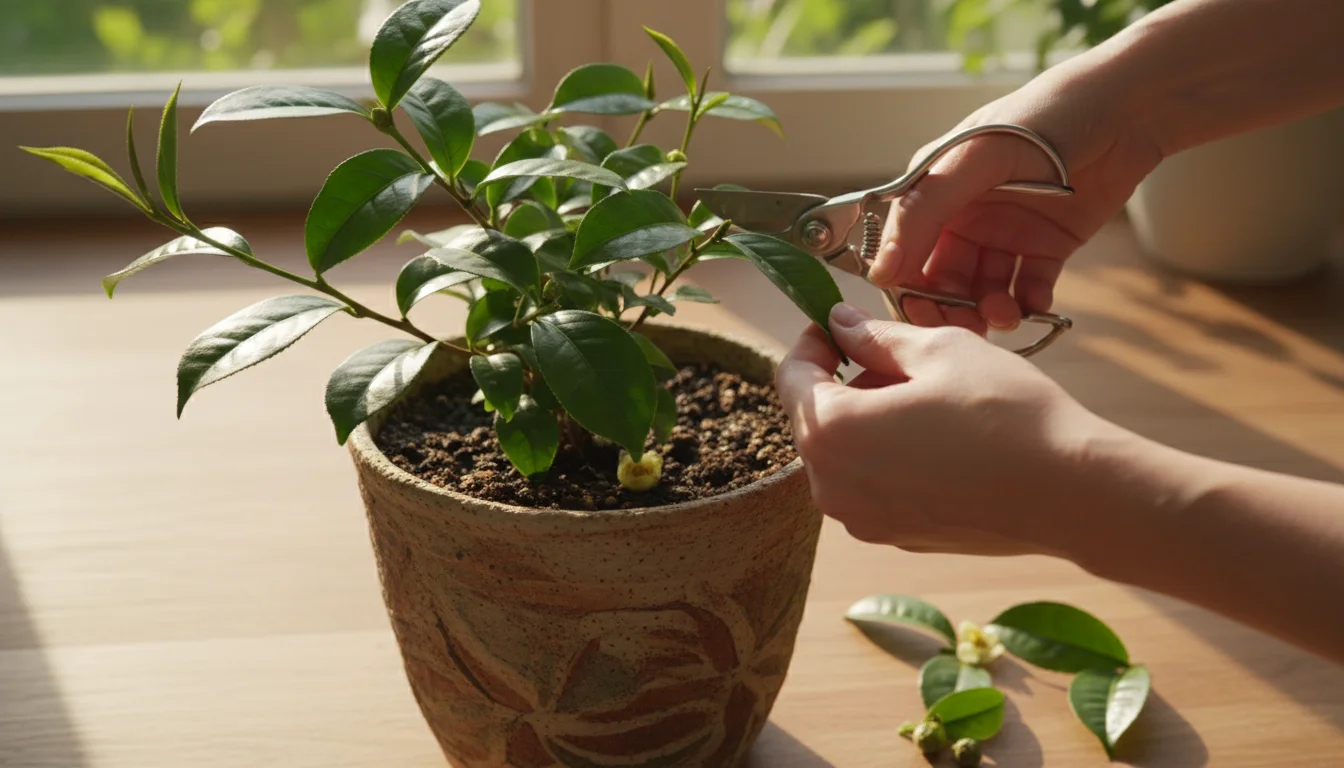
- Harvest Pruning: Your primary pruning goal aligns directly with harvesting. Tea is made from the youngest, most tender leaves, typically the top two leaves and the bud (the “flush”). When you harvest these, you are simultaneously pruning, encouraging the plant to produce more flushes. You will learn more about harvesting in the next section.
- Shaping Your Plant: Over time, you can prune to create a desired shape. Keeping the plant compact and well-branched makes it an attractive `best indoor plants for tea lovers` addition and simplifies harvesting. Aim for an open structure that allows light to penetrate all parts of the plant.
- Timing: Perform major shaping or heavier pruning in late winter or early spring, just before the plant enters its most vigorous growth phase. Light harvesting can occur throughout the growing season.
Consistent feeding and mindful pruning ensures your `potted tea plant` remains vibrant, productive, and an attractive feature in your home.
Harvesting and Processing Your Homegrown Tea
The moment you have patiently waited for has arrived: harvesting your very own tea leaves. This process is simple but precise, directly impacting the quality and flavor of your home-brewed tea.
If you enjoy the idea of brewing from your harvest, consider expanding your collection with medicinal herbs for winter wellness teas to complement your tea plant.
When and How to Harvest
The goal is to collect the freshest, most tender growth.
- Timing: Wait until your `Camellia sinensis` plant is at least two to three years old before beginning your first significant harvest. This allows the plant to establish a strong root system and sufficient foliage. Once mature, you can harvest during the active growing season, typically spring through early autumn, whenever new flushes appear.
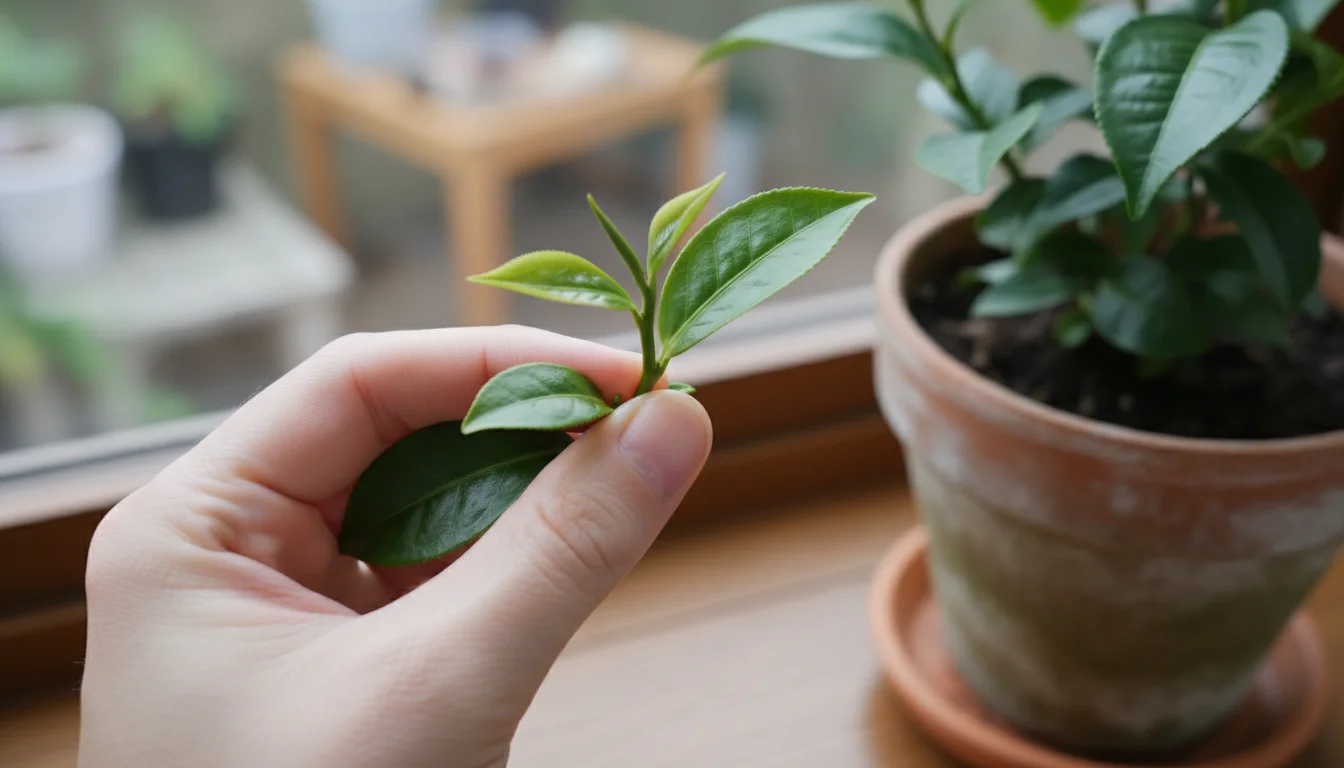
- Identifying the “Flush”: For the best quality tea, you want to harvest the “flush,” which consists of the top two leaves and the unopened leaf bud at the tip of a new shoot. These youngest leaves contain the highest concentration of desirable compounds for flavor.
- Method: Gently pinch or snip off the flush with your fingernails or small, clean scissors. Be careful not to damage the stem or surrounding leaves. Harvest only what you intend to process immediately, as fresh leaves quickly wilt and lose quality.
- Frequency: A healthy `potted tea plant` can produce new flushes every 1-2 weeks during peak growing season. Regular harvesting actually encourages more new growth, keeping your plant productive.
Processing Your Harvested Tea
The processing method determines whether you produce green, black, or oolong tea. For beginners `grow tea indoors`, green tea is the easiest to achieve.
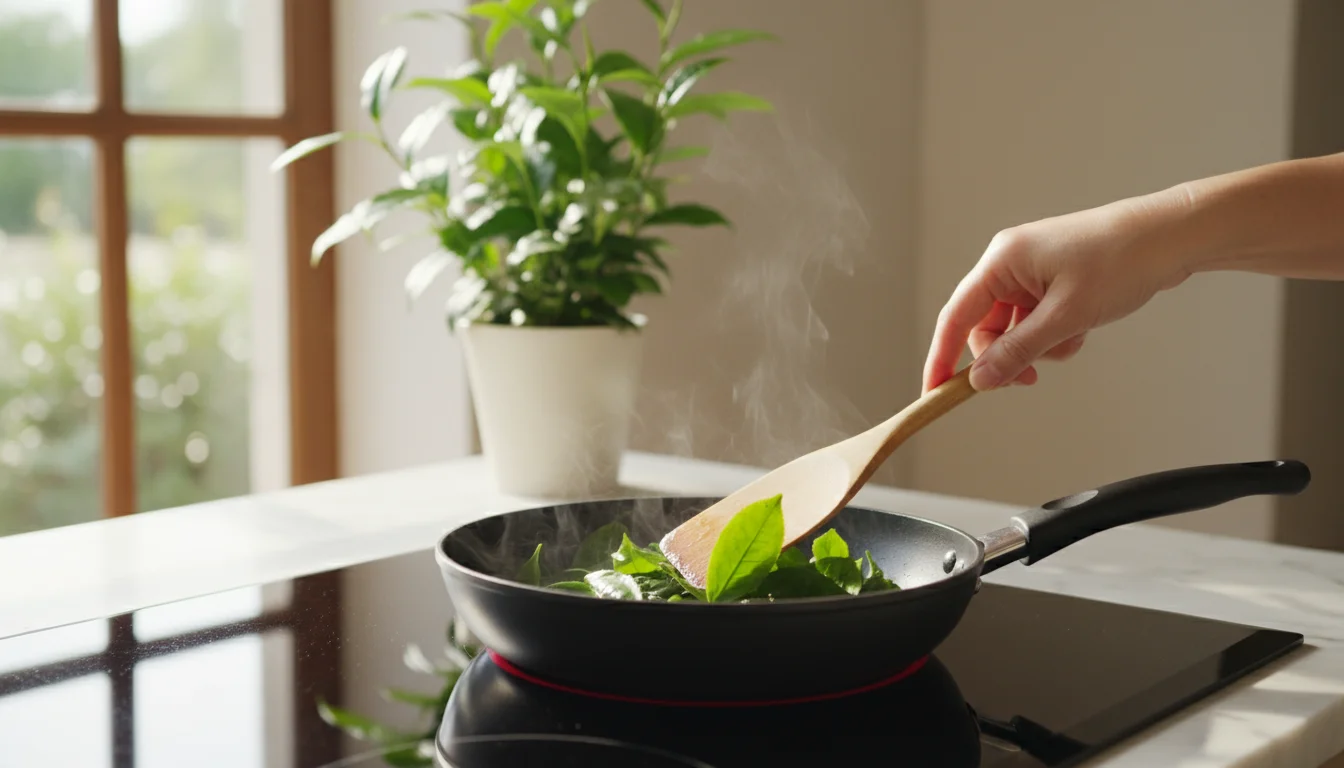
Making Green Tea
Green tea requires minimal processing, emphasizing quick steps to prevent oxidation.
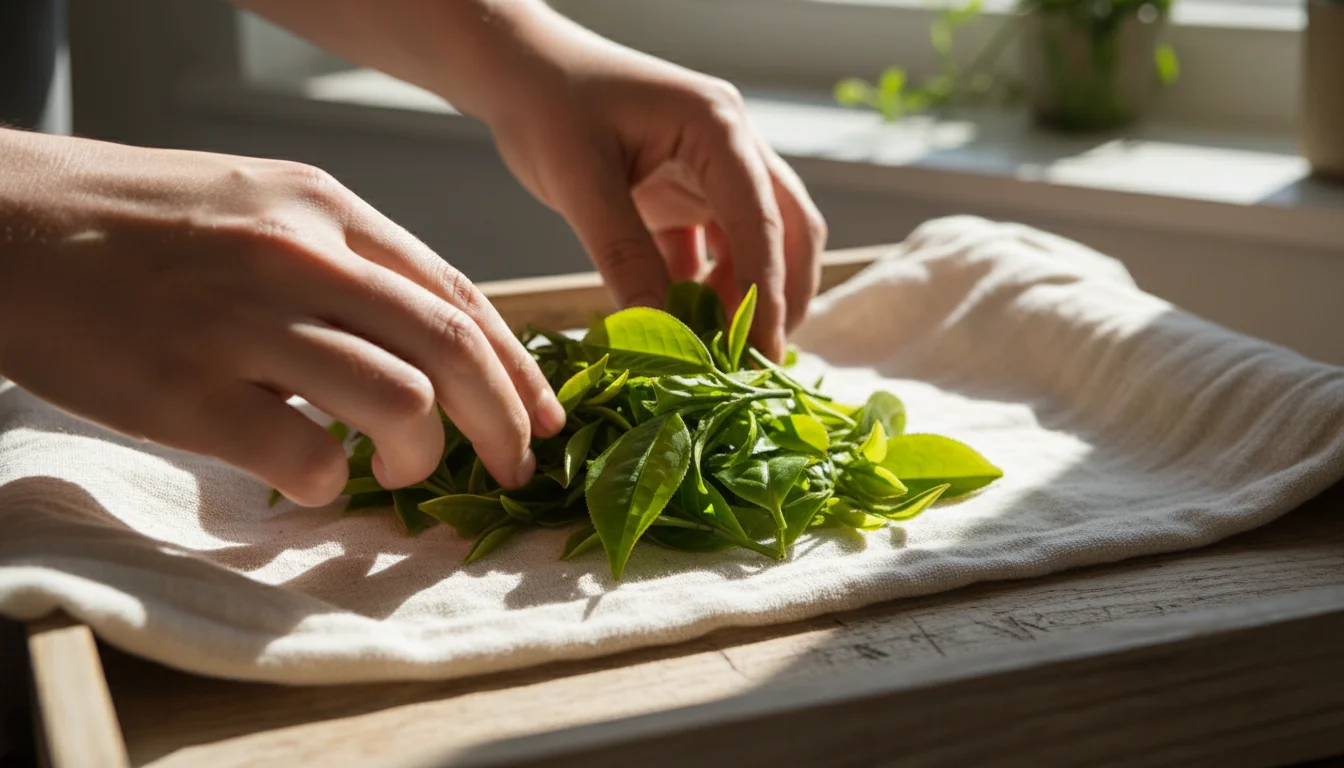
- Withering (Optional, but Recommended for Larger Batches): Spread the freshly harvested leaves thinly on a clean tray or cloth in a cool, well-ventilated area for 1-2 hours. This slightly reduces moisture content and makes the leaves more pliable. For small, indoor batches, you can often skip this and move directly to steaming.
- Steaming or Pan-Firing (Killing the Green): This step is crucial. It stops the enzymes in the leaves from oxidizing, preserving their green color and fresh flavor.
- Steaming: Place the leaves in a steamer basket over boiling water for 30-60 seconds, or until they turn a brighter green and become pliable.
- Pan-Firing: Alternatively, you can gently toss the leaves in a dry skillet over medium-low heat for 1-2 minutes, constantly stirring to prevent burning.
The goal is to stop the enzymatic oxidation without cooking the leaves.
- Rolling: After steaming/pan-firing, roll the warm leaves between your palms or on a clean surface to break down cell walls and release flavor. You can roll them into tight balls, twists, or simply keep them flat. This step is important for developing flavor and allowing the tea to steep properly.
- Drying: Spread the rolled leaves thinly on a baking sheet. Dry them in a dehydrator at a low temperature (around 100-120°F or 38-49°C) for 1-2 hours, or in an oven on its lowest setting with the door slightly ajar. You can also air dry them in a well-ventilated area, though this takes longer. The leaves are fully dry when they are brittle and snap easily.
- Storing: Store your homemade green tea in an airtight container in a cool, dark place. Proper storage helps retain its freshness and flavor for several months.
Briefly on Black Tea
Black tea involves a full oxidation process after rolling. After withering, you roll the leaves vigorously to break cell walls, then spread them in a humid environment for several hours until they turn a coppery brown. Finally, you dry them thoroughly. This takes more control over temperature and humidity, making it more challenging for `best indoor plants for tea lovers` beginners.
Enjoy the simple satisfaction of brewing your own tea. The taste of your homegrown leaves will connect you deeply to your `potted tea plant` and the effort you invested.
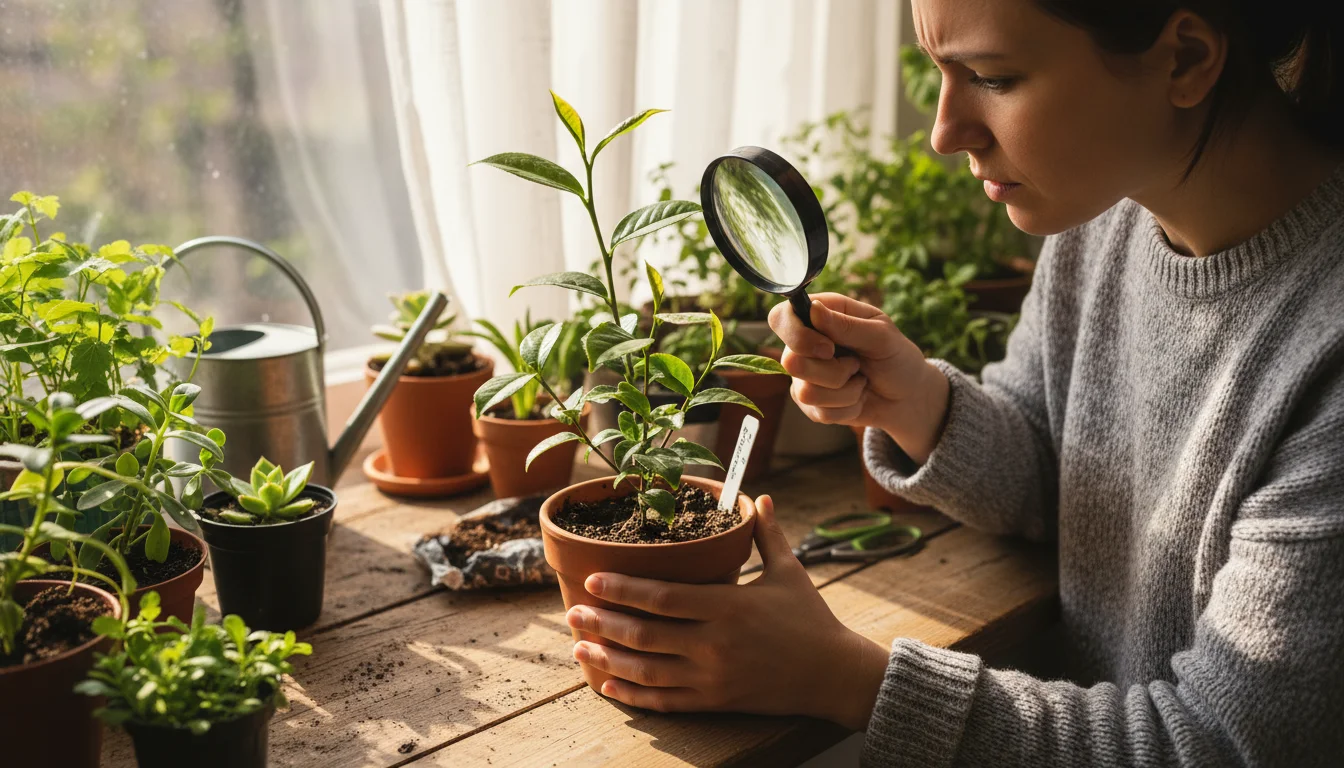
Common Challenges and Troubleshooting Your Indoor Tea Plant
Even with the best `camellia sinensis care`, your `potted tea plant` may encounter issues. Knowing how to diagnose and address common problems helps keep your `grow tea indoors` project successful.
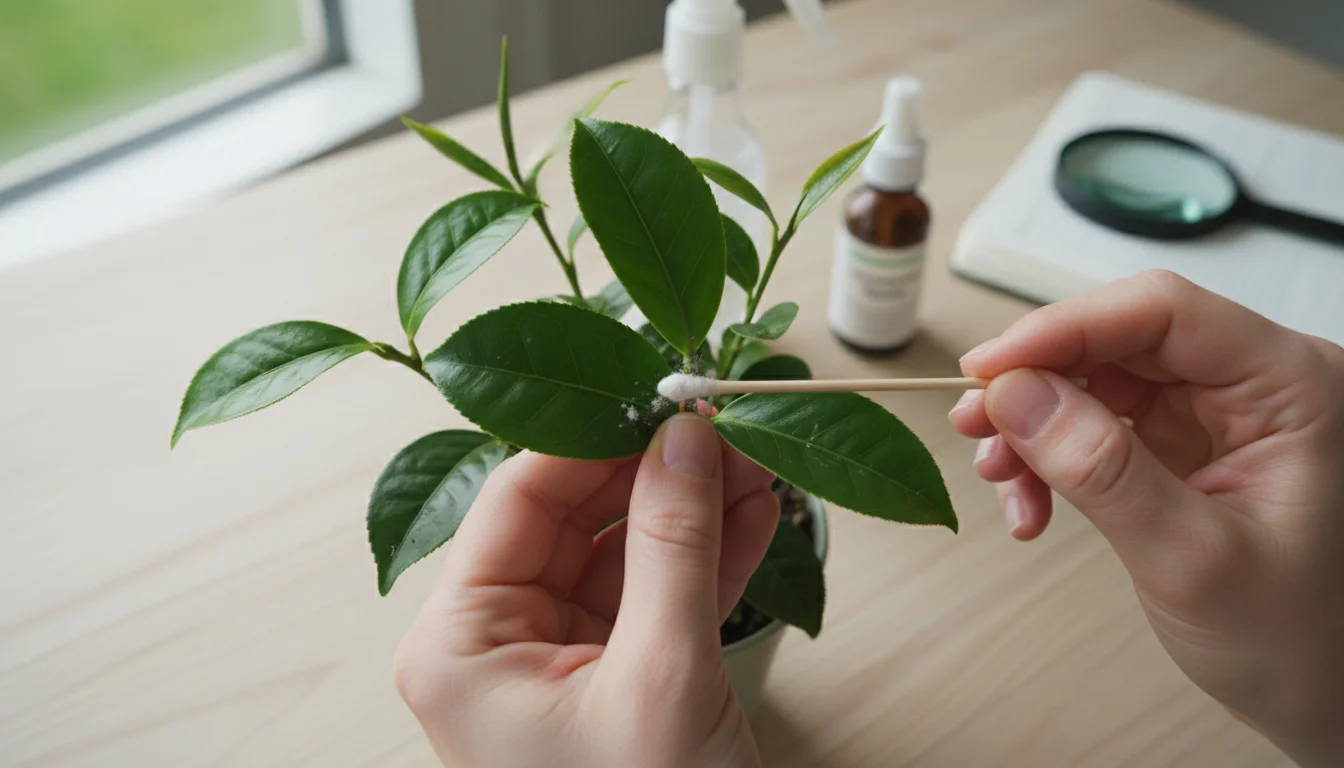
Pest Management
Indoor plants can attract pests, though tea plants are relatively resistant.
- Spider Mites: These tiny pests create fine webs on the undersides of leaves and cause stippling (tiny yellow or brown dots). High humidity helps deter them.
- Solution: Isolate the plant. Spray thoroughly with insecticidal soap or a neem oil solution, focusing on leaf undersides. Repeat every 5-7 days until they disappear.
- Aphids: Small, soft-bodied insects that cluster on new growth, causing leaves to curl and distort.
- Solution: Wipe them off with a damp cloth, blast them with a gentle stream of water, or apply insecticidal soap.
- Mealybugs: White, cottony masses found in leaf axils and on stems. They suck plant sap, leading to stunted growth.
- Solution: Dab individual mealybugs with an alcohol-soaked cotton swab. For larger infestations, use insecticidal soap or neem oil.
- Prevention: Regularly inspect your plant. Early detection makes pest control much easier. Quarantining new plants for a few weeks before introducing them to your collection prevents pest spread.
Nutrient Deficiencies and Environmental Stress
Discoloration or stunted growth often signal underlying issues.
| Symptom | Possible Cause | Solution |
|---|---|---|
| Yellowing leaves, green veins | Iron deficiency (often due to high soil pH) | Adjust soil pH with acidifying fertilizer or chelated iron. Ensure consistent use of acidic water. |
| Overall yellowing or pale leaves | Nitrogen deficiency or insufficient light | Provide a balanced, acid-loving fertilizer. Increase light exposure with a grow light or move to a brighter spot. |
| Brown leaf tips or margins | Underwatering, low humidity, or salt buildup | Water more consistently. Increase humidity (pebble tray, humidifier). Flush soil with plain water every few months to remove salt buildup. |
| Drooping leaves | Underwatering or overwatering (root rot) | Check soil moisture. If dry, water thoroughly. If soggy, improve drainage, repot with fresh soil, and allow soil to dry out more between waterings. |
| Lack of new growth | Insufficient light, nutrients, or dormant period | Ensure adequate light and regular feeding during the growing season. If in winter, this is normal dormancy. |
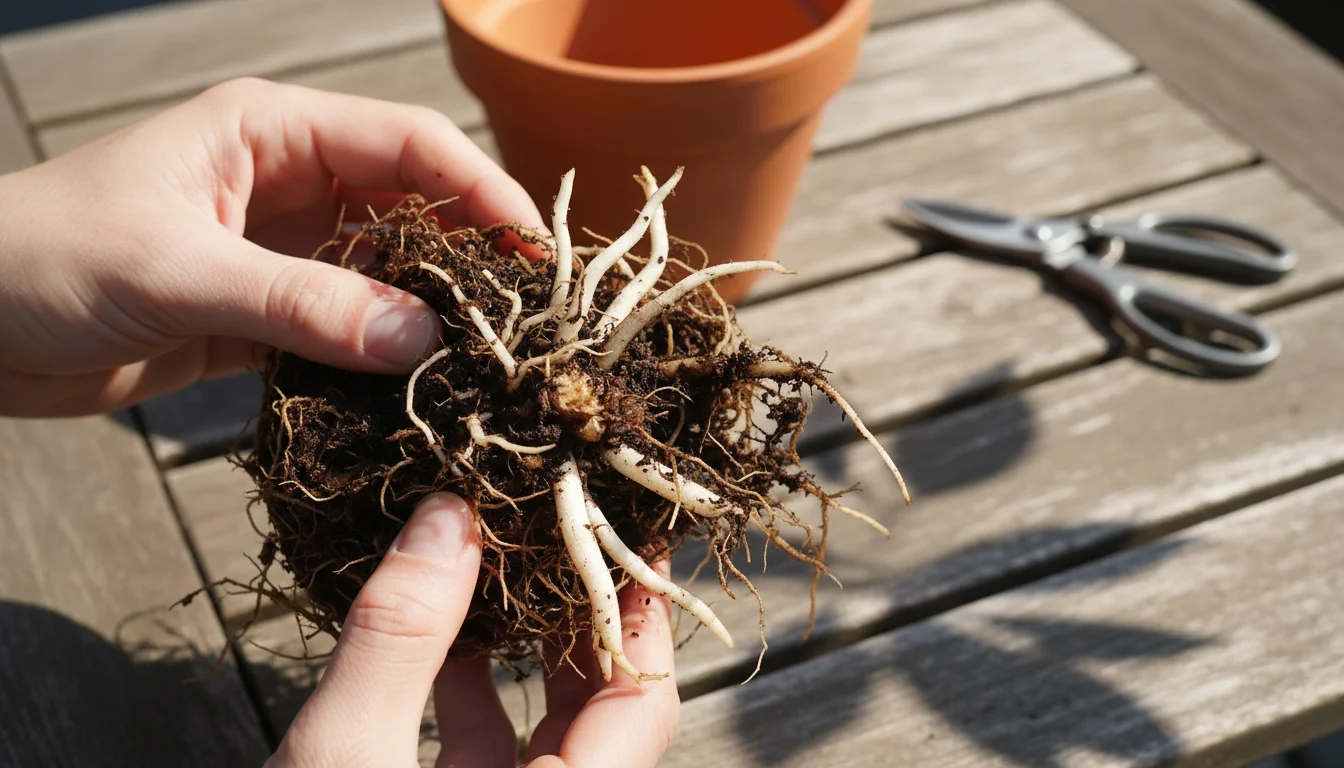
Root Rot
This is one of the most serious issues for `potted tea plant` and primarily stems from overwatering and poor drainage.
- Symptoms: Wilting leaves despite moist soil, soft and mushy stem base, foul odor from soil.
- Solution: Immediately unpot the plant. Inspect roots; healthy roots are firm and white. Trim away any mushy, brown, or black roots with clean scissors. Repot into fresh, well-draining, acidic potting mix and a clean pot with ample drainage holes. Adjust your watering schedule to allow the top inch of soil to dry before watering again.
Regular observation of your `Camellia sinensis` allows you to catch problems early and respond effectively, ensuring your plant remains a healthy part of your `winter indoor gardening projects`.
Enjoying Your Tea Plant Year-Round and Sustainability
Your `potted tea plant` offers more than just leaves for brewing; it brings continuous beauty and a connection to sustainable gardening practices throughout the year. Adapting your `camellia sinensis care` to the seasons ensures its longevity and productivity.
Seasonal Adjustments for Indoor Tea Plants
Even indoors, your plant responds to seasonal changes, particularly light and temperature.
- Spring and Summer: This is the active growing season. Increase watering frequency and resume fertilization. Ensure ample bright, indirect light. If temperatures permit (above 50°F or 10°C consistently), you can move your `potted tea plant` outdoors to a sheltered spot with dappled shade, which often invigorates the plant. Gradually introduce it to outdoor conditions to prevent shock.
- Fall and Winter: Growth naturally slows as light intensity and day length decrease. Reduce watering frequency, allowing the soil to dry out a bit more between waterings. Cease fertilization. If natural light is limited, this is an excellent time to use supplemental grow lights to prevent legginess and support the plant during these `winter indoor gardening projects`. Maintain good humidity, as indoor heating systems can drastically dry the air. Avoid placing your plant near cold drafts or hot air vents.
Embracing Eco-Friendly Tea Cultivation
Growing your own tea is inherently sustainable, reducing the carbon footprint associated with commercial tea production and packaging. You can enhance this eco-conscious approach even further:
- Organic Practices: Avoid synthetic pesticides and fertilizers. Use organic options like neem oil for pest control, and compost or worm castings for nutrients. This ensures your tea is pure and safe to consume.
- Water Conservation: Collect rainwater for your plant. This provides naturally soft, slightly acidic water that tea plants love and reduces reliance on treated tap water. You can also reuse water from rinsing vegetables (as long as it is free of soap or oil).
- Repurposing: Instead of discarding spent tea leaves, compost them. They enrich your compost pile, creating valuable nutrients for future gardening endeavors.
- Long-Term Commitment: A `Camellia sinensis` plant can live for many decades with proper care. By investing in its long-term health, you create a sustainable source of tea and a beautiful, enduring houseplant, making it one of the `best indoor plants for tea lovers` who value longevity.
The joy of `grow tea indoors` extends beyond the brew; it is about cultivating a sustainable, beautiful, and rewarding relationship with a truly special plant.
For trustworthy gardening information, visit:
Royal Horticultural Society (RHS), UF/IFAS Gardening Solutions, University of Illinois Extension — Gardening and UC IPM (University of California Integrated Pest Management). These organizations provide expert, research-based advice for gardeners at all levels.
Frequently Asked Questions
Does Camellia sinensis need a lot of sun indoors?
Your Camellia sinensis plant thrives in bright, indirect light for at least 4-6 hours daily. A spot near an east-facing window or a south/west-facing window with a sheer curtain provides ideal conditions. Avoid intense, direct afternoon sun, which can scorch the leaves. Supplementing with a grow light helps significantly if natural light is limited, especially during shorter winter days, making it a great option for `winter indoor gardening projects`.
How long until I can harvest tea leaves from my potted plant?
Patience is key. Allow your `potted tea plant` to mature for at least two to three years before you begin harvesting leaves. This ensures the plant establishes a strong root system and sufficient foliage to support regular harvesting. Once mature, you can harvest new flushes during the active growing season, typically from spring through early autumn, whenever new shoots appear, usually every 1-2 weeks.
What kind of soil is best for growing tea indoors?
The best soil for `grow tea indoors` is an acidic, well-draining potting mix. Tea plants prefer a soil pH between 5.5 and 6.5. A good mix includes components like peat moss or coco coir for acidity and moisture retention, and perlite or coarse sand for excellent drainage. You can create your own mix using 2 parts peat moss/coco coir, 1 part perlite/coarse sand, and 1 part pine bark fines or acidic compost. This specific blend supports robust `camellia sinensis care`.
Can I make different types of tea, like black tea, from my indoor plant?
Yes, you can make different types of true tea (green, black, oolong, white) from the leaves of your `Camellia sinensis` plant. The difference lies in the processing method, specifically the level of oxidation. Green tea involves quickly stopping oxidation through steaming or pan-firing, making it the easiest for beginners. Black tea requires intentional wilting, rolling, and full oxidation before drying, which demands more controlled environmental conditions and practice. Starting with green tea is recommended for your first `potted tea plant` harvest.
Is a tea plant one of the best indoor plants for tea lovers who are beginners?
Absolutely. While it has specific needs, `Camellia sinensis` is manageable for beginner and intermediate gardeners who are prepared to meet its requirements for light, acidic soil, consistent moisture, and humidity. It offers a unique reward compared to more common houseplants, appealing especially to those who enjoy a practical, hands-on approach to their hobbies. Its attractive foliage and the joy of brewing your own tea make it a top choice among `best indoor plants for tea lovers`.
Disclaimer: This article is for informational purposes only and is not a substitute for professional gardening advice. Always consult local extension services or horticulture experts for region-specific guidance.


Leave a Reply