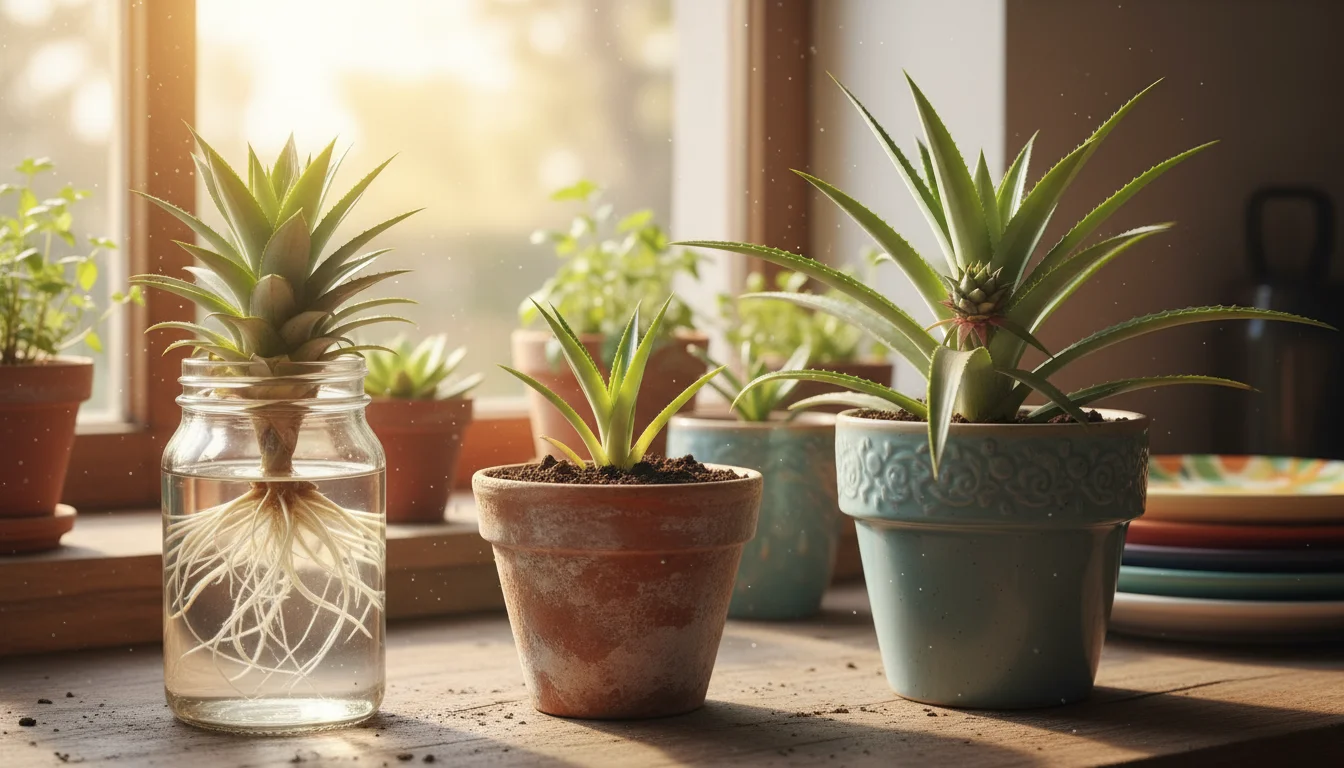
Transforming kitchen scraps into flourishing houseplants offers a unique blend of satisfaction and sustainability. Imagine turning that leafy green top from your grocery store pineapple into a vibrant, tropical addition to your windowsill. This isn’t just a gardening project; it’s a statement about making the most of what you have, even in the smallest spaces. You will learn how to plant a pineapple crown in a pot, nurturing it from a simple scrap into a beautiful, long-lived plant that brings a touch of the tropics indoors. This guide focuses on low-maintenance methods, making it perfect for beginner and intermediate gardeners who want to explore kitchen scrap gardening without extensive fuss.
If you enjoy this windowsill project, you might also like growing your own ginger indoors as another rewarding way to expand your edible collection.

Your Journey to a Homegrown Pineapple: Why Bother?
Embarking on the adventure to grow a pineapple top offers a uniquely rewarding experience, particularly for gardeners with limited space. This project epitomizes zero-waste gardening, converting what would otherwise go into your compost bin or trash into a stunning, long-lived houseplant. You give new life to a discarded food item, reducing waste and contributing to a more sustainable lifestyle. Imagine the satisfaction of telling friends that your impressive tropical plant started as a grocery store scrap.
Beyond the environmental benefits, growing a pineapple indoors provides immense personal enjoyment. The plant itself boasts an attractive, architectural form with stiff, spiky leaves that add a dramatic flair to any room. It requires minimal daily attention once established, making it an excellent choice for those seeking a low-maintenance botanical companion. For apartment dwellers or those with small patios, this project demonstrates that you do not need acres of land to cultivate interesting and unusual plants. Your windowsill or a bright corner provides ample space for this tropical endeavor.
The process of watching roots form, new leaves unfurl, and the plant slowly mature offers a profound connection to nature. It teaches patience and provides a tangible example of growth and regeneration. Many find the experience of regrowing plants from food scraps a fascinating winter project, providing a green escape when outdoor gardening activities cease. This accessible project shows you how simple steps lead to significant results, bolstering your confidence as a gardener and proving that tropical dreams fit perfectly within your small-space reality.

Selecting the Perfect Pineapple Crown for Propagation
Your success in growing a pineapple top begins at the grocery store. Choosing the right pineapple crown significantly impacts the likelihood of successful rooting and growth. Think of this step as laying the foundation for your tropical plant. You want a crown that is healthy, fresh, and free from any signs of disease or damage.
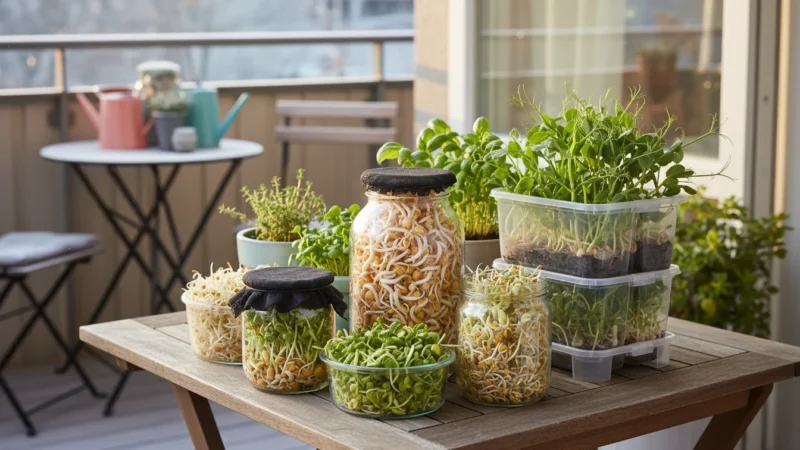
While searching for the best pineapple, you can also pick up seeds to grow sprouts in a jar for a fast, nutrient-dense harvest while you wait for your crown to root.
When you select a pineapple, examine the leaves on the crown closely. Look for vibrant, green foliage. Avoid crowns with yellowed, brown, or excessively limp leaves, as these indicate a less healthy plant or one that has been sitting for too long. Green, firm leaves signal a strong, viable crown.
Next, check the base of the crown where it attaches to the fruit. Ensure it shows no signs of rot, mold, or softness. A firm, intact base is crucial for successful rooting. Any dark, mushy spots suggest bacterial or fungal issues that will likely hinder your propagation efforts. Some gardeners even prefer organically grown pineapples, believing they may have fewer chemical treatments, which could potentially improve rooting success, though conventional pineapples often root just fine.
Consider the overall size and vigor of the crown. A larger, more robust crown with a good number of healthy leaves generally offers more energy reserves for rooting and initial growth. Avoid crowns that appear excessively small or sparse. Trust your instincts; if a crown looks lackluster or compromised, choose another. Taking the time to pick a prime candidate at the store directly increases your chances of a thriving windowsill pineapple, making your “how to plant a pineapple crown in a pot” journey much smoother.
Preparing Your Pineapple Crown: The First Steps to Success
Once you have selected your perfect pineapple, the preparation phase begins. This crucial stage sets your crown up for successful rooting, whether you opt for water or soil propagation. Most gardeners find soil propagation more reliable for long-term health, as it encourages stronger root development from the start.
While your crown is curing, you might want to start another slow-growth adventure by sprouting an avocado seed in a glass of water.
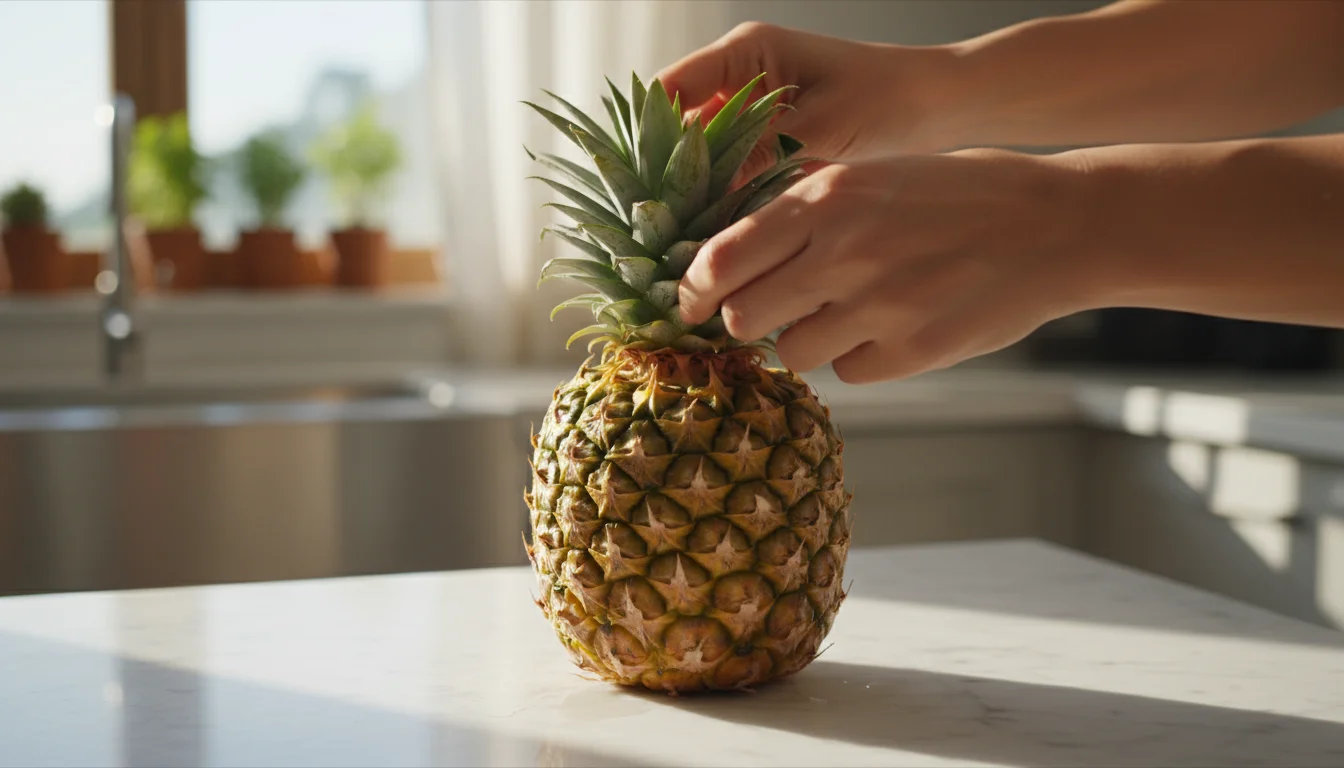
First, you need to separate the crown from the fruit. There are two primary methods for this: twisting or cutting.
- Twisting Method: Grasp the pineapple firmly in one hand and the leafy crown in the other. Twist the crown firmly, like you are opening a jar. It should separate cleanly from the fruit, bringing with it a small portion of the stem. This method often leaves a cleaner base with embryonic roots intact, which is ideal.
- Cutting Method: If twisting proves difficult, use a sharp, clean knife to slice off the crown. Make your cut about one inch below the base of the leaves. After cutting, carefully trim away any remaining fruit flesh from the base of the crown. Excess fruit flesh will rot, inviting mold and bacteria that can kill your nascent plant. Ensure you remove all soft, pulpy material, exposing the woody core.
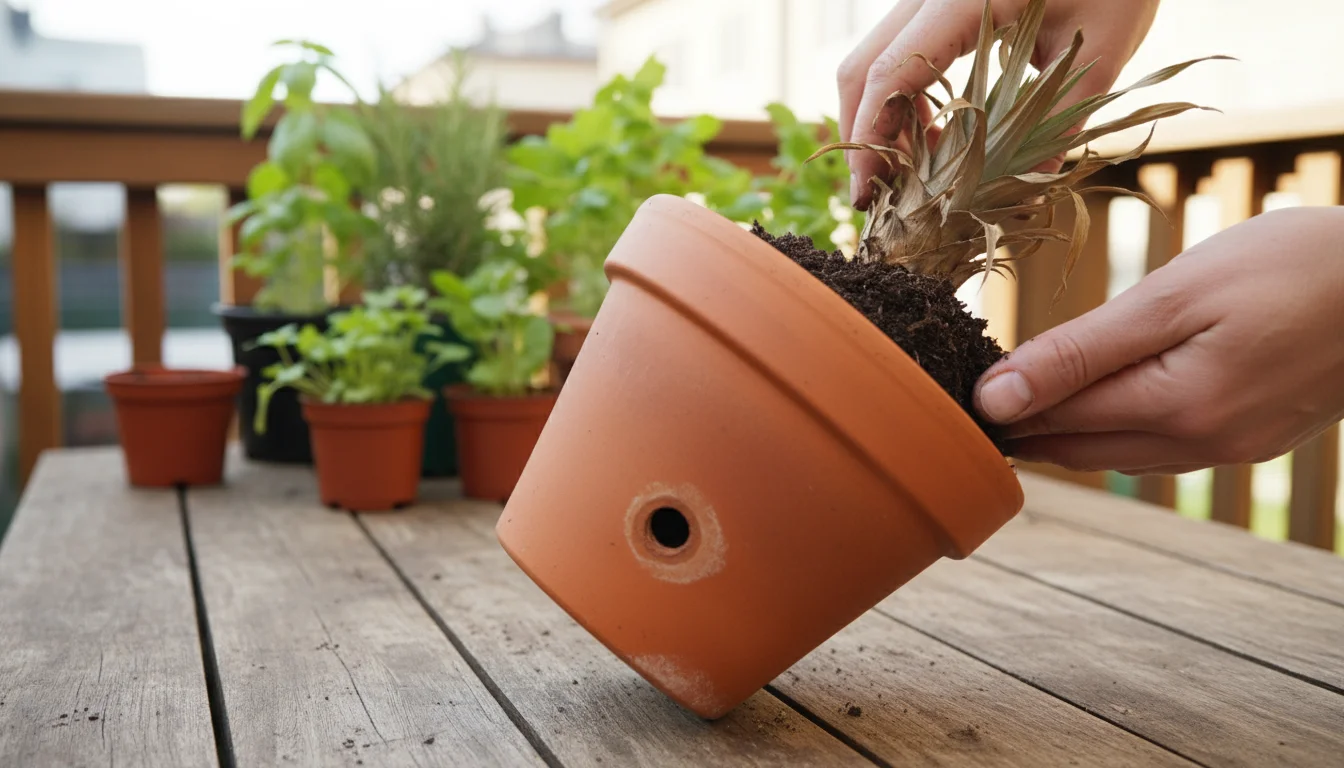
Regardless of the separation method, the next step involves removing several layers of the lower leaves. Peel back two to three inches of the small, lower leaves to expose the bare stem. You will often see tiny brown bumps on the exposed stem; these are undeveloped root primordia, the very beginnings of future roots. Removing these leaves helps prevent them from sitting in moist soil or water and rotting, while also providing a clear rooting zone.
After stripping the leaves, it is vital to allow the crown to dry. Place the prepared pineapple crown in a warm, dry spot, away from direct sunlight, for about three to seven days. This drying period, often called “curing,” allows the cut end to callus over, forming a protective barrier against rot and disease when you eventually plant it. Think of it as a natural band-aid. Skipping this step significantly increases the risk of your crown succumbing to rot once introduced to moisture. A properly cured crown is a resilient crown, ready for its next step as you learn how to plant a pineapple crown in a pot.
Planting Your Pineapple Crown: Giving it a Home
With your pineapple crown properly prepared and cured, it is time to give it a new home. This stage focuses on creating the ideal environment for root development, setting the foundation for your long-term “growing pineapple indoors from scraps winter project.” Proper container and soil selection are paramount.
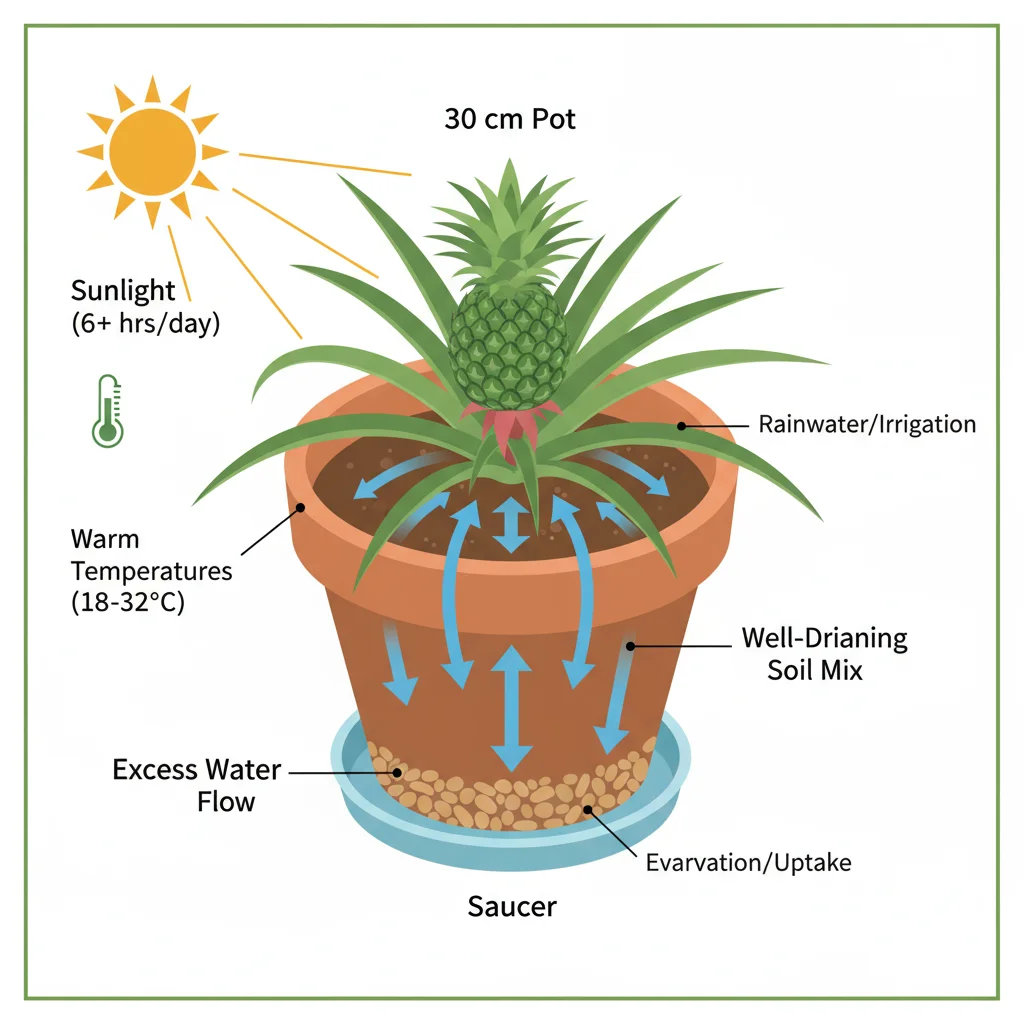
Begin by choosing an appropriate container. A pot with a diameter of about six to eight inches works well for the initial planting. Crucially, your pot must have drainage holes at the bottom. Without proper drainage, water accumulates, suffocating roots and leading to rot. Drainage is simply how effectively excess water can escape the pot, preventing the soil from becoming waterlogged. Clay pots often offer better breathability than plastic, but plastic pots work perfectly if they have ample drainage.
Next, select the right potting mix. Pineapples thrive in well-draining soil, which means water passes through it readily, preventing soggy conditions. A standard potting mix amended with perlite or coarse sand creates an excellent environment. You can achieve this by mixing two parts good quality potting soil with one part perlite or sand. This combination ensures good aeration for the developing roots and prevents compaction. A general-purpose potting mix designed for houseplants also works well, provided it drains efficiently.
Now, follow these steps to plant your pineapple crown:
- Add Soil: Fill your chosen pot about two-thirds full with the prepared potting mix. Gently pat it down to remove large air pockets, but do not compact it too densely.
- Create a Depression: Make a small depression in the center of the soil, just large enough to accommodate the base of your pineapple crown.
- Position the Crown: Place the prepared pineapple crown into the depression. Ensure that the bare stem, where you removed the lower leaves, is buried in the soil, with the lowest remaining leaves sitting just above the soil surface.
- Backfill with Soil: Gently add more potting mix around the base of the crown, filling the pot to about an inch below the rim. Press the soil lightly around the crown to secure it, making sure it stands upright and is stable.
- Initial Watering: Water the newly planted crown thoroughly until water drains from the bottom of the pot. This settles the soil around the crown and provides initial moisture.
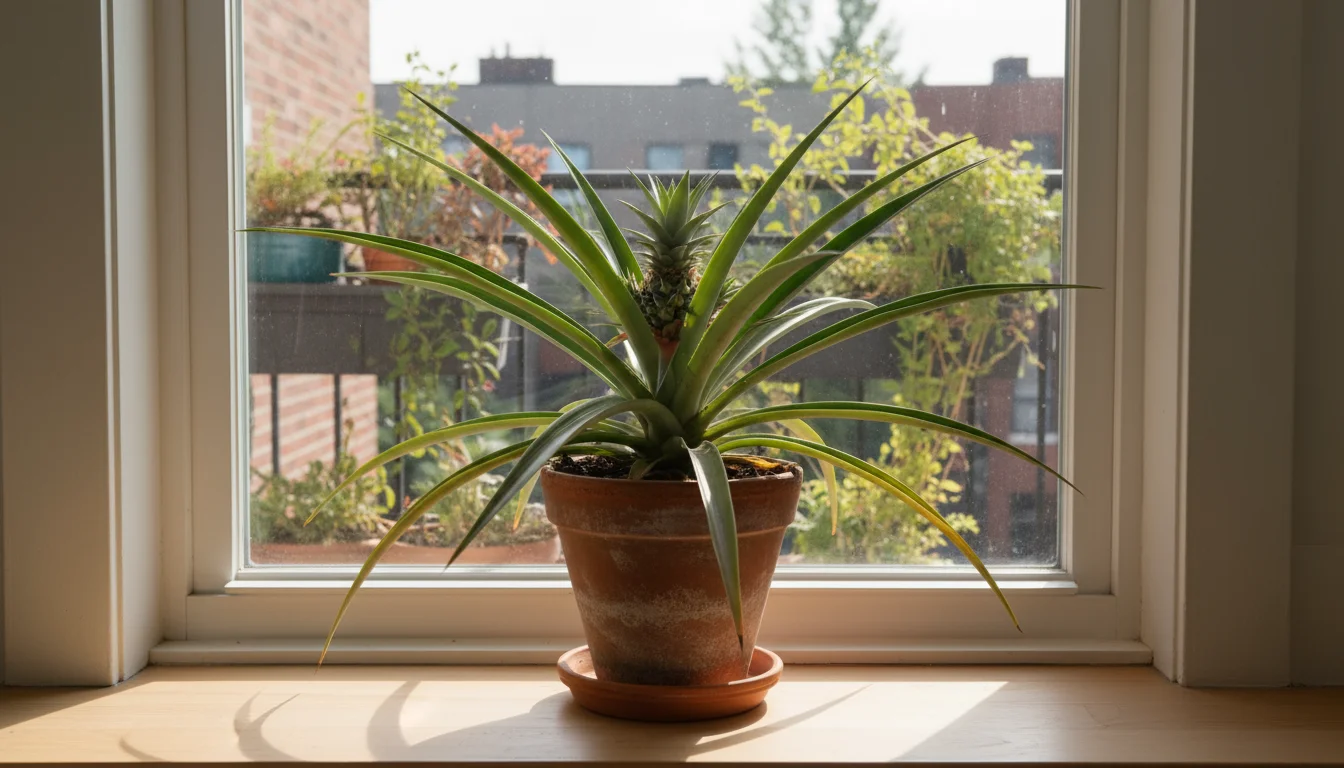
- Placement: Position your potted pineapple in a warm spot that receives bright, indirect sunlight. A south-facing window that gets plenty of light but avoids intense, scorching direct sun is often ideal. Consistent warmth helps encourage root growth.
Regular, but not excessive, watering will be key in the coming weeks. The soil should remain consistently moist, but never waterlogged. Expect rooting to take anywhere from six to eight weeks, though sometimes longer. During this period, avoid disturbing the crown; let it establish itself in its new home. You now have a solid foundation for your unique tropical plant.
Essential Care for Your Growing Pineapple Plant Indoors
Once your pineapple crown has rooted and begun to show new growth, the real fun of nurturing a tropical plant indoors begins. Providing the right conditions ensures its continued health and vigor, making it a truly rewarding “growing pineapple indoors from scraps winter project.”
To keep your indoor oasis thriving through the colder months, follow a winter indoor gardening guide to manage seasonal light and humidity changes.
Light: Pineapples are tropical plants, meaning they crave light. Place your potted pineapple in the brightest spot available in your home. A south-facing window is usually ideal, providing ample bright, indirect sunlight throughout the day. While they appreciate abundant light, protect them from intense, direct summer sun that can scorch their leaves, especially if they are not acclimated. If natural light is insufficient, consider supplementing with a grow light for 12-14 hours daily, especially during darker winter months.
Watering: This is where many beginner gardeners make mistakes. Pineapples prefer consistently moist soil, but they absolutely detest being waterlogged. Allow the top inch or two of soil to dry out before watering again. When you water, do so thoroughly until water drains from the bottom of the pot. Always empty any collected water from the saucer to prevent the roots from sitting in stagnant moisture, which leads to root rot. During cooler, darker months, your plant will require less frequent watering than in warmer, brighter periods.
Humidity: As tropical plants, pineapples appreciate higher humidity levels than typically found in indoor environments. You do not need to mist them excessively, as this can encourage fungal issues on the leaves. Instead, consider placing the pot on a pebble tray filled with water; as the water evaporates, it increases localized humidity around the plant. Grouping your pineapple with other houseplants also creates a microclimate of higher humidity.
Temperature: Pineapples thrive in warm conditions. Maintain indoor temperatures between 65°F and 85°F (18°C-30°C). Avoid placing your plant near cold drafts from windows or air conditioning vents, and protect it from sudden temperature fluctuations. Consistency is key for their tropical comfort.
Fertilizing: Your pineapple plant will benefit from occasional feeding, particularly once it establishes a strong root system and begins active growth. Use a balanced liquid fertilizer (e.g., 10-10-10 or a houseplant-specific formula) diluted to half strength. Fertilize every two to four weeks during the spring and summer growing seasons. Reduce or cease fertilization during the fall and winter months when the plant’s growth naturally slows down.
Repotting: As your plant grows, its root system will expand. You will need to repot it into a slightly larger container, typically every one to two years. Choose a pot only one to two inches wider than the current one. Overpotting can lead to too much soil holding excess moisture, increasing the risk of rot. Refresh the soil with a new, well-draining potting mix during repotting.
Consistent and thoughtful care ensures your pineapple plant remains a healthy, attractive focal point in your home, proving that kitchen scrap gardening is both sustainable and simple.

Troubleshooting Common Pineapple Plant Challenges
Even with the best intentions, you may encounter a few challenges when growing a pineapple top. Recognizing common issues and knowing how to address them helps keep your plant healthy and thriving. Remember, gardening involves observation and learning from your plant’s signals.
Yellowing Leaves: Yellowing leaves are one of the most common signs of distress in pineapple plants.
- Overwatering: If the leaves are yellow and soft, especially at the base, and the soil feels constantly soggy, you are likely overwatering. Allow the soil to dry out more between waterings. Ensure your pot has adequate drainage.
- Underwatering: If the leaves are yellow, crispy, and dry, particularly at the tips, your plant may be underwatered. Increase watering frequency, ensuring the soil gets thoroughly moistened each time.
- Nutrient Deficiency: General yellowing across the plant, especially older leaves, might indicate a lack of nutrients. Begin a regular fertilization schedule during the growing season as described in the care section.
Brown Leaf Tips: Brown, crispy leaf tips often point to low humidity or inconsistent watering.
- Low Humidity: Indoors, air can be very dry. Increase humidity around the plant using a pebble tray or by grouping it with other plants.
- Inconsistent Watering: Ensure you maintain a consistent watering schedule, allowing the soil to dry slightly between waterings, but avoiding prolonged drought.
No Growth or Slow Growth: If your plant seems stalled, several factors could be at play.
- Insufficient Light: Pineapples are light-lovers. If your plant is not growing, it likely needs more light. Move it to a brighter location or supplement with a grow light.
- Temperature: If temperatures are too cool, the plant’s metabolism slows down. Ensure it is in a warm, consistent environment.
- Patience: Remember, pineapple plants grow slowly. Be patient, especially in the initial rooting phase and during winter months.
Pests: Indoor pineapple plants are generally resistant to pests, but occasional infestations can occur.
- Mealybugs or Scale: These small, white, cottony insects (mealybugs) or brown, waxy bumps (scale) can attach to the undersides of leaves or leaf axils. For minor infestations, wipe them off with a cotton swab dipped in rubbing alcohol. For larger issues, use an insecticidal soap spray, ensuring full coverage.
- Prevention: Inspect your plant regularly. A healthy plant is less susceptible to pests. Isolate any new plants before introducing them to your existing collection.
Rotting Crown: If the base of your crown becomes mushy and dark during the rooting phase, it is likely rotting due to overwatering or improper curing. This often means you need to start over with a new pineapple crown, ensuring thorough drying and appropriate watering this time.
Addressing these issues promptly keeps your “regrow pineapple” project on track, leading to a healthy and robust plant. Your observational skills are your best tool for successful troubleshooting.

Encouraging Your Pineapple to Fruit: A Long-Term Goal
The ultimate dream for many who grow a pineapple top is to see it produce its own fruit. While it is certainly possible to achieve this indoors, it requires patience and a specific environmental trigger. Do not expect fruit within the first year or even two. Typically, an indoor pineapple plant needs two to three years of steady growth before it reaches maturity and is ready to flower and fruit.
First, ensure your plant is large and healthy. It should have a robust root system and a full crown of leaves. A mature plant will generally have leaves that span at least two to three feet. Without this foundational growth, the plant simply lacks the energy reserves to produce fruit. Consistent bright light, regular watering, and appropriate feeding are vital during these initial years.
When your plant reaches a sufficient size, you can attempt to induce flowering using a simple, eco-friendly method: ethylene gas. Ethylene is a natural plant hormone that ripens fruit and can trigger flowering in mature pineapple plants. Here is how you can use it:
- Gather Materials: You will need a ripe apple (or a banana, which also produces ethylene) and a large, clear plastic bag that can completely enclose your pineapple plant and its pot.
- Prepare the Plant: Ensure your pineapple plant is well-watered but not soggy. Place the ripe apple at the base of the plant, directly on the soil.
- Enclose the Plant: Carefully place the entire potted pineapple plant and the apple inside the plastic bag. Seal the bag securely, trapping the ethylene gas released by the apple around the plant. Do not allow the bag to touch the plant leaves excessively, as this can encourage rot.
- Wait: Leave the plant enclosed for about one week. Place it in its usual bright location, avoiding direct, scorching sunlight while bagged.
- Observe: After a week, remove the bag and the apple. Continue with your regular care routine. Within four to six weeks, you should observe a small, reddish cone-like structure emerging from the center of the plant. This is the flower stalk. If you do not see it, you can repeat the process after a month.
Once the flower stalk appears, tiny blue flowers will bloom sequentially. After the flowers fade, a small pineapple fruit will begin to form. This mini-pineapple will take several months to mature and ripen, often turning from green to yellow, and developing a characteristic aroma when ready. While homegrown pineapples may not always reach the massive size or sugar content of commercially grown fruits, tasting a pineapple you grew yourself is an unparalleled experience in your kitchen scrap gardening journey. After the fruit is harvested, the main plant will typically die back, but it often produces “slips” or “pups” at its base, which you can separate and plant to start a new generation.
Sustainable Practices in Your Pineapple Project
Growing a pineapple from a grocery store top is, by its very nature, a zero-waste project and a fantastic example of sustainable gardening. However, you can integrate even more eco-friendly practices throughout your journey, amplifying the positive environmental impact of your “kitchen scrap gardening” efforts.
Besides food scraps, you can also learn to grow your own tea in a container for a truly unique and sustainable addition to your home garden.
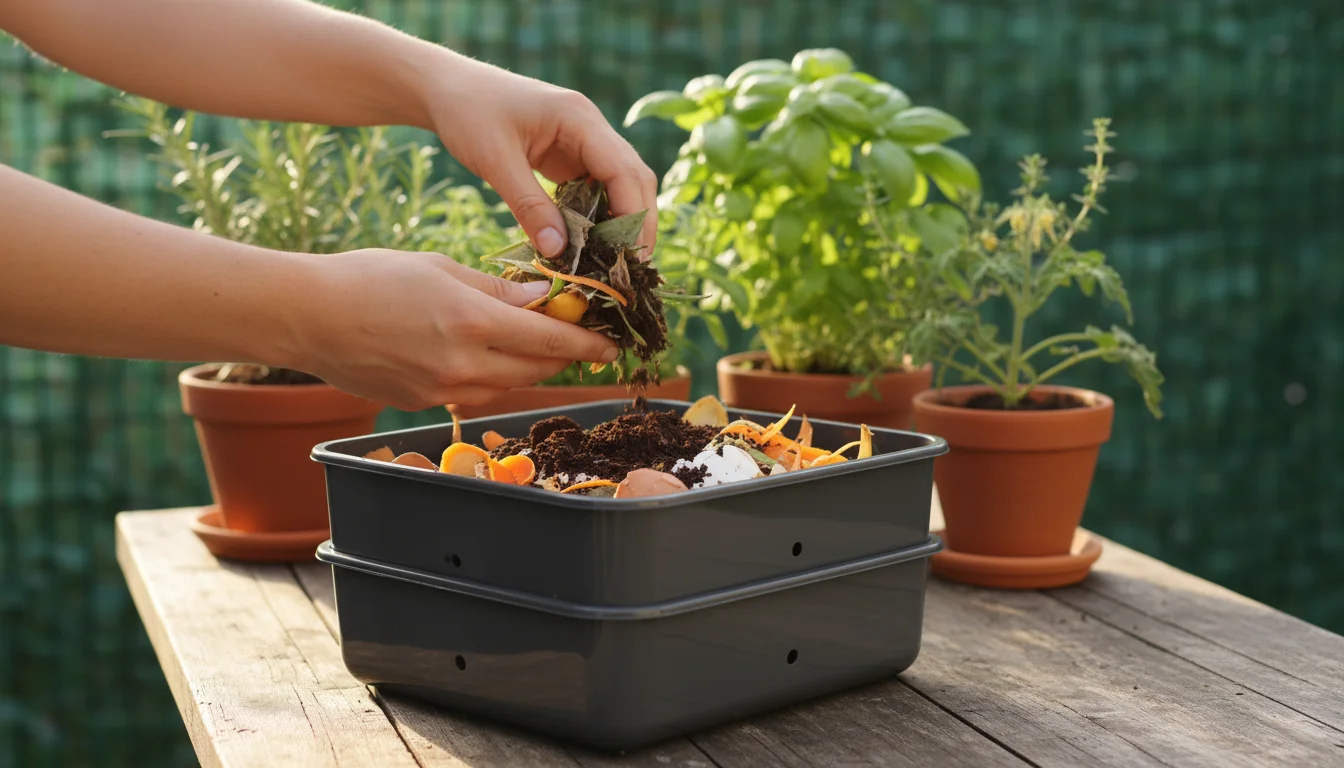
Compost Old Leaves and Fruit Scraps: When you trim the lower leaves from your pineapple crown, or when you eventually harvest and consume your homegrown fruit, do not discard the organic matter. Add it to your compost bin or pile. Composting enriches your garden soil, reduces landfill waste, and returns valuable nutrients to the earth, completing the circle of life in your gardening ecosystem. Even if you only have a small worm composting bin for indoor use, these scraps are perfect.
Repurpose Containers: Before purchasing new pots, consider what you already have. Old plastic food containers (yogurt tubs, milk jugs), coffee cans, or even sturdy laundry detergent bottles can be transformed into planters with a few well-placed drainage holes. Ensure they are thoroughly cleaned. This reduces plastic waste and gives new life to items that would otherwise be thrown away, aligning perfectly with the zero-waste ethos of growing a pineapple top.
Collect Rainwater: If you live in an area with reliable rainfall, consider setting up a simple rainwater collection system. A rain barrel or even just a bucket placed outdoors can collect water for your plants. Rainwater is free of chlorine and other chemicals found in tap water, which can be beneficial for sensitive plants. Using collected rainwater reduces your reliance on municipal water sources and lowers your water bill.
Homemade Fertilizers: Instead of relying solely on synthetic fertilizers, explore natural alternatives. Composted materials, worm castings, or a simple “compost tea” made from soaking compost in water can provide nutrients for your pineapple plant. Coffee grounds, rich in nitrogen, can also be lightly sprinkled on the soil surface and gently worked in, providing a slow-release nutrient boost and improving soil structure. Just ensure not to overdo it, as pineapples prefer slightly acidic to neutral soil.
Embrace Natural Pest Control: Should pests become an issue, opt for eco-friendly solutions. Insecticidal soaps, neem oil, or manual removal are effective and safer for your plant, your home, and the environment than harsh chemical pesticides. A strong spray of water can dislodge many common pests before they become a serious problem.
By incorporating these sustainable practices, your windowsill pineapple project becomes more than just growing a plant; it transforms into a holistic approach to responsible and environmentally conscious gardening. You not only enjoy a beautiful tropical plant but also contribute to a greener planet, one kitchen scrap at a time.
Frequently Asked Questions
Cultivating a pineapple from a grocery store top often sparks many questions, especially for those new to kitchen scrap gardening. Here are answers to some of the most common inquiries.
How long does it take for a pineapple top to root?
Typically, a pineapple top takes anywhere from six to eight weeks to develop a robust root system. Some crowns might show signs of rooting in as little as three to four weeks, while others could take up to twelve weeks, especially during cooler seasons or with less optimal light. Patience is crucial during this initial establishment phase. You can gently tug on the crown after a few weeks; if you feel resistance, roots are forming.
Can I grow a pineapple outdoors in a small space?
Yes, you can absolutely grow a pineapple outdoors in a pot, even in a small space like a balcony or patio, provided your climate is suitable. Pineapples are tropical plants and thrive in warm, humid conditions. If you live in USDA Hardiness Zones 10 or warmer, you can grow them outdoors year-round. In cooler zones, grow them in containers and bring them indoors before the first frost, treating them as tender perennials. They make excellent patio plants during summer months, then transition seamlessly into an indoor “growing pineapple indoors from scraps winter project.”
Will my homegrown pineapple be as sweet as a store-bought one?
Your homegrown pineapple can be incredibly sweet and flavorful, often surprisingly so compared to store-bought varieties. The key difference is that you can allow your pineapple to fully ripen on the plant, accumulating maximum sugars and flavor. Commercially grown pineapples are often harvested slightly before peak ripeness to withstand shipping. While the size might be smaller, the taste experience can be superior and intensely satisfying, a true reward for your “regrow pineapple” efforts.
What if my pineapple crown rots during the rooting process?
If your pineapple crown rots, it usually indicates either insufficient curing time, overwatering, or a combination of both. When starting over with a new crown, ensure you remove all fruit flesh and allow the crown to dry and callus thoroughly for at least a week before planting. When watering, ensure the soil dries out slightly between applications, and always provide a pot with excellent drainage. Rot is a common setback, but learning from it helps you succeed with your next attempt.
How big will the pineapple plant get indoors?
An indoor pineapple plant can grow quite large, typically reaching two to three feet tall and wide when mature, though its size is somewhat constrained by the pot size. Its impressive, spiky foliage creates a striking architectural display. While it will not become a massive tree, it certainly becomes a significant and eye-catching houseplant, requiring a dedicated spot where it can spread its leaves without obstruction. Regular repotting into slightly larger containers encourages its growth without making it unmanageable for small spaces.
Growing a pineapple from a grocery store top is a delightful and rewarding experience that embodies the spirit of practical, eco-conscious gardening. From selecting the perfect crown to troubleshooting minor setbacks and even encouraging fruit, you gain valuable gardening skills and enjoy the unique beauty of a tropical plant in your home. This project is a testament to the fact that even with limited space, you can cultivate extraordinary things, transforming a simple kitchen scrap into a thriving symbol of sustainability and botanical joy. Embrace the journey, and savor the satisfaction of your own homegrown pineapple.
For trustworthy gardening information, visit:
American Public Gardens Association, Plant Select (Colorado) and Missouri Native Plant Society. These organizations provide expert, research-based advice for gardeners at all levels.
Disclaimer: This article is for informational purposes only and is not a substitute for professional gardening advice. Always consult local extension services or horticulture experts for region-specific guidance.


Leave a Reply