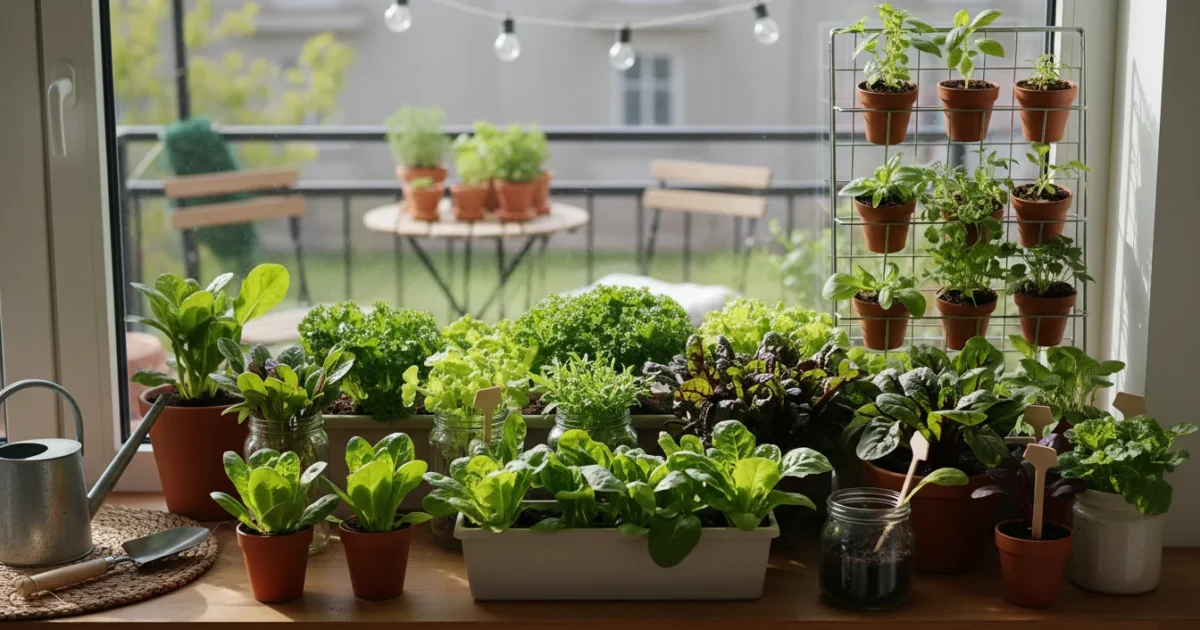
Winter often brings a yearning for fresh, vibrant greens, a taste of the garden’s bounty lost to shorter days and colder temperatures. You do not need a large yard or even a balcony to satisfy this craving. Imagine harvesting crisp, nutrient-dense greens from your kitchen windowsill, even when snow blankets the ground outside. Growing microgreens indoors offers a simple, rewarding solution for every home, transforming limited space into a productive indoor salad garden for apartments or small homes.
While microgreens are incredibly fast, you can also grow your own ginger indoors for a slow-growing but deeply rewarding winter project.
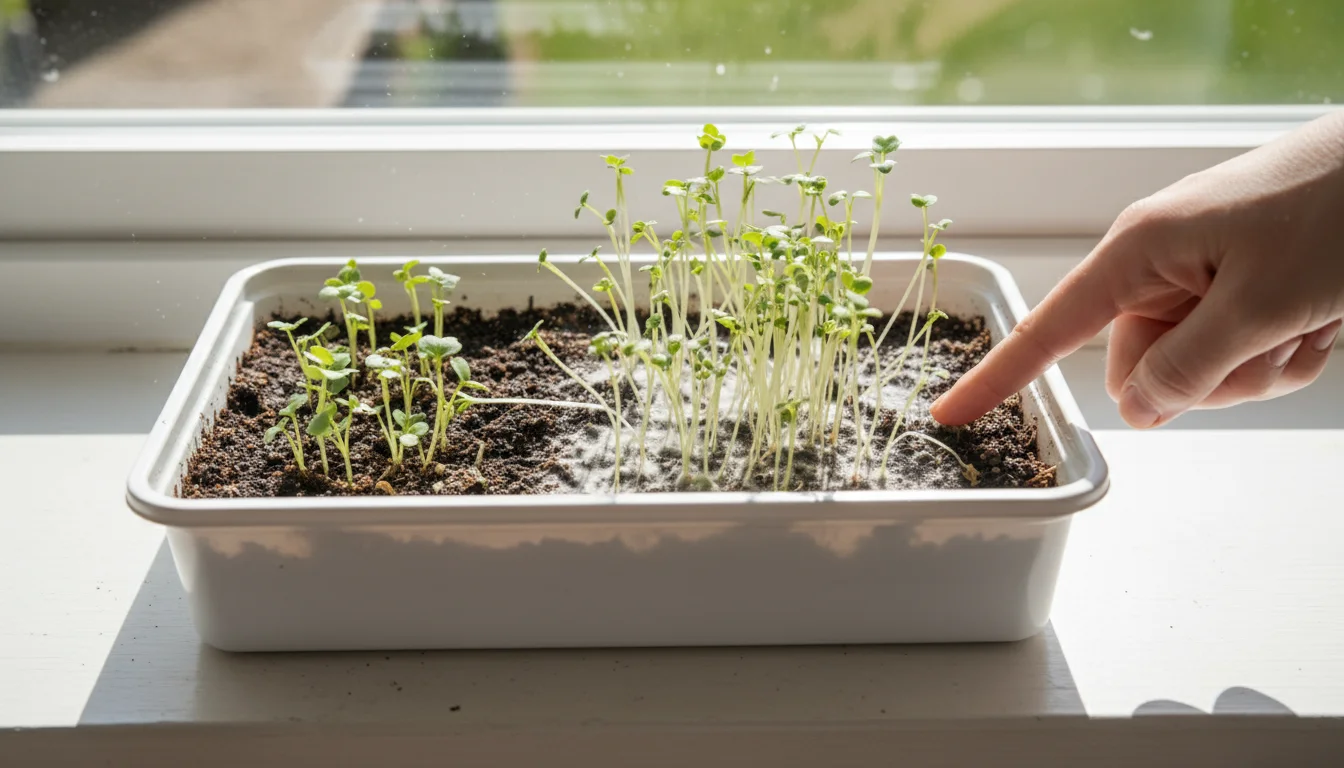
Microgreens are simply immature versions of common vegetables and herbs, harvested when they are just a few inches tall. These tiny powerhouses pack a remarkable nutritional punch, often containing significantly higher levels of vitamins and antioxidants than their mature counterparts. They grow quickly, require minimal space, and demand little light, making them perfect for winter indoor gardening. You can enjoy a continuous supply of fresh, flavorful additions to your meals with just a few basic supplies and a sunny windowsill. This guide walks you through everything you need to know, from selecting the right seeds to harvesting your very own windows garden bounty.
Why Your Windowsill Needs a Microgreen Makeover This Winter
Transforming your windowsill into a productive growing space offers numerous advantages, especially during the colder months when outdoor gardening pauses. You gain access to fresh, organic produce right in your home, providing a consistent supply of healthy greens. This simple project eliminates grocery store trips for expensive, often pesticide-treated, greens, saving you money while ensuring you consume the freshest possible produce. Growing your own food also reduces your carbon footprint, cutting down on transportation and packaging waste associated with store-bought items.
If your window space is truly limited, you might build a space-saving seed starting shelf to maximize your vertical growing area.
Starting a windowsill project is a perfect way to practice winter indoor gardening and maintain your connection to nature during the off-season.
Beyond the environmental and financial benefits, the act of gardening itself is therapeutic. Nurturing plants, even tiny ones, offers a calming and rewarding experience. Observing the rapid growth of microgreens, from seed to harvest in just a week or two, provides instant gratification and a tangible connection to nature. This hands-on activity proves especially valuable for apartment dwellers or those with limited outdoor space, allowing you to enjoy the benefits of gardening without a large commitment. Furthermore, microgreens elevate your cooking, adding gourmet flavor and vibrant color to any dish. Imagine sprinkling peppery arugula microgreens over your winter soup or adding a delicate crunch of radish microgreens to a sandwich. Your culinary creations will thank you, and your body will appreciate the nutritional boost.
Understanding Microgreens: Tiny Plants, Big Nutrition
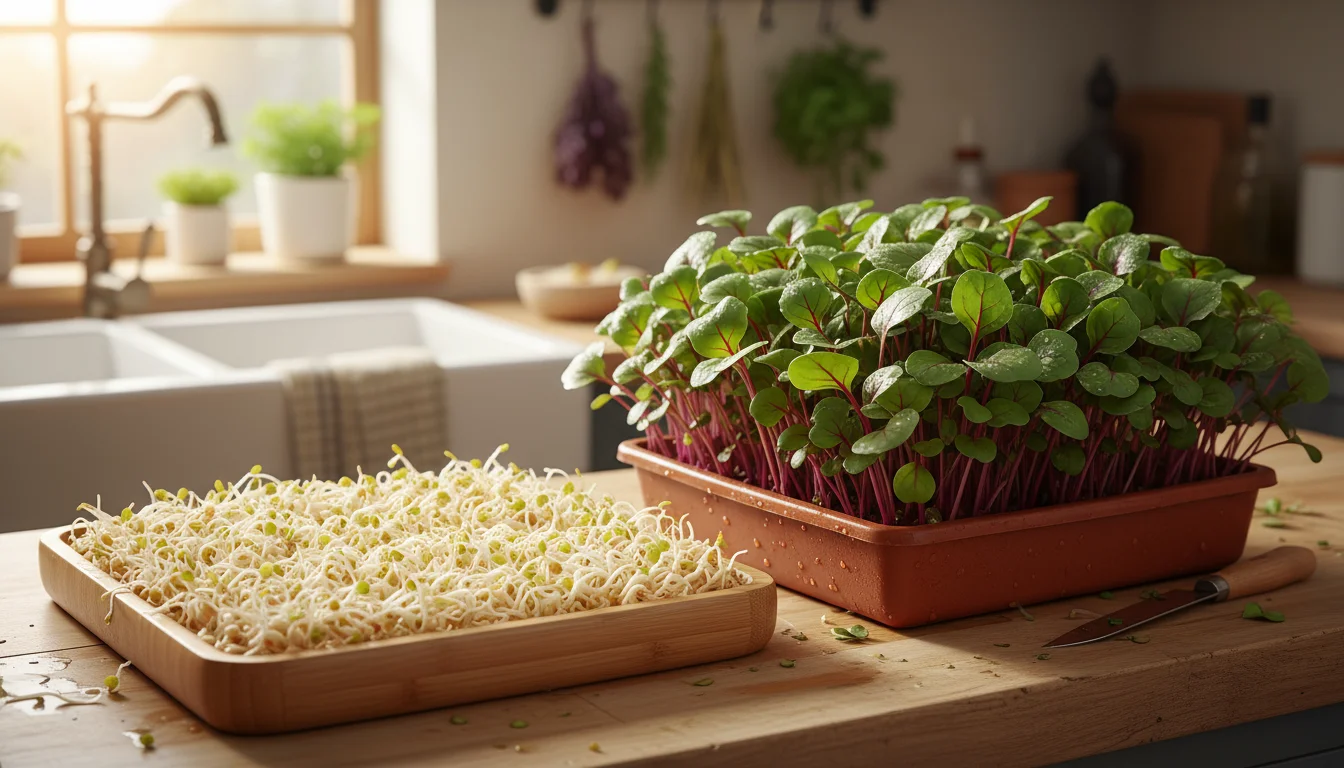
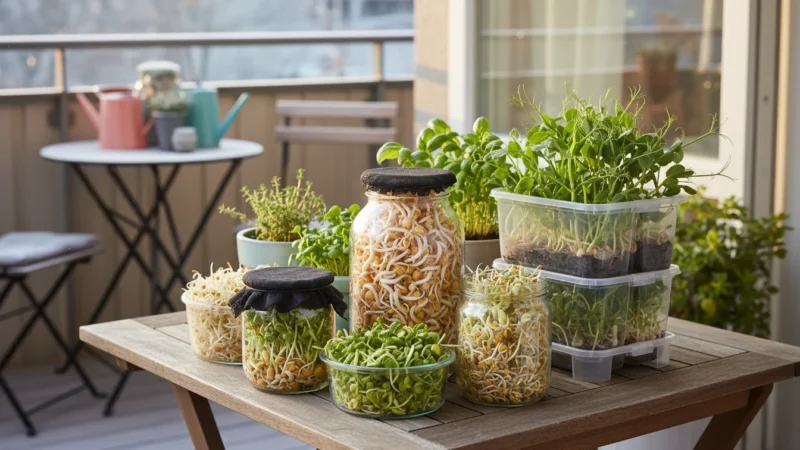
Microgreens are more than just small plants; they are nutritional powerhouses. These young vegetable greens are typically harvested when they develop their first true leaves, usually 7 to 21 days after germination. At this stage, they contain concentrated levels of nutrients, often surpassing the amounts found in their mature plant counterparts. For instance, studies indicate that red cabbage microgreens can contain 40 times more vitamin E and six times more vitamin C than mature red cabbage. This phenomenon, known as “nutrient density,” makes microgreens an excellent choice for boosting your winter diet.
If you are looking for even faster edible results, you can also sprout nutritious lentils and beans in just a few days.
You might wonder how microgreens differ from sprouts. Sprouts are germinated seeds, harvested before any leaves develop, typically grown in water. You consume the entire sprout, including the seed, root, and shoot. Microgreens, however, grow in soil or a growing medium, developing a stem and cotyledon (seed) leaves, and sometimes their first true leaves, before you harvest them by cutting the stem just above the soil line. This distinction matters because growing in soil reduces the risk of bacterial contamination sometimes associated with sprout production in humid environments. The nutrient profile also differs; microgreens generally offer a broader spectrum of vitamins, minerals, and antioxidants than sprouts. Focusing on microgreens provides a safer, more nutritionally robust option for your indoor salad garden for apartments. Their concentrated nutrients, including vitamins A, C, E, K, and various B vitamins, along with essential minerals like iron, potassium, and zinc, make them an exceptional dietary supplement during months when fresh produce is scarce.

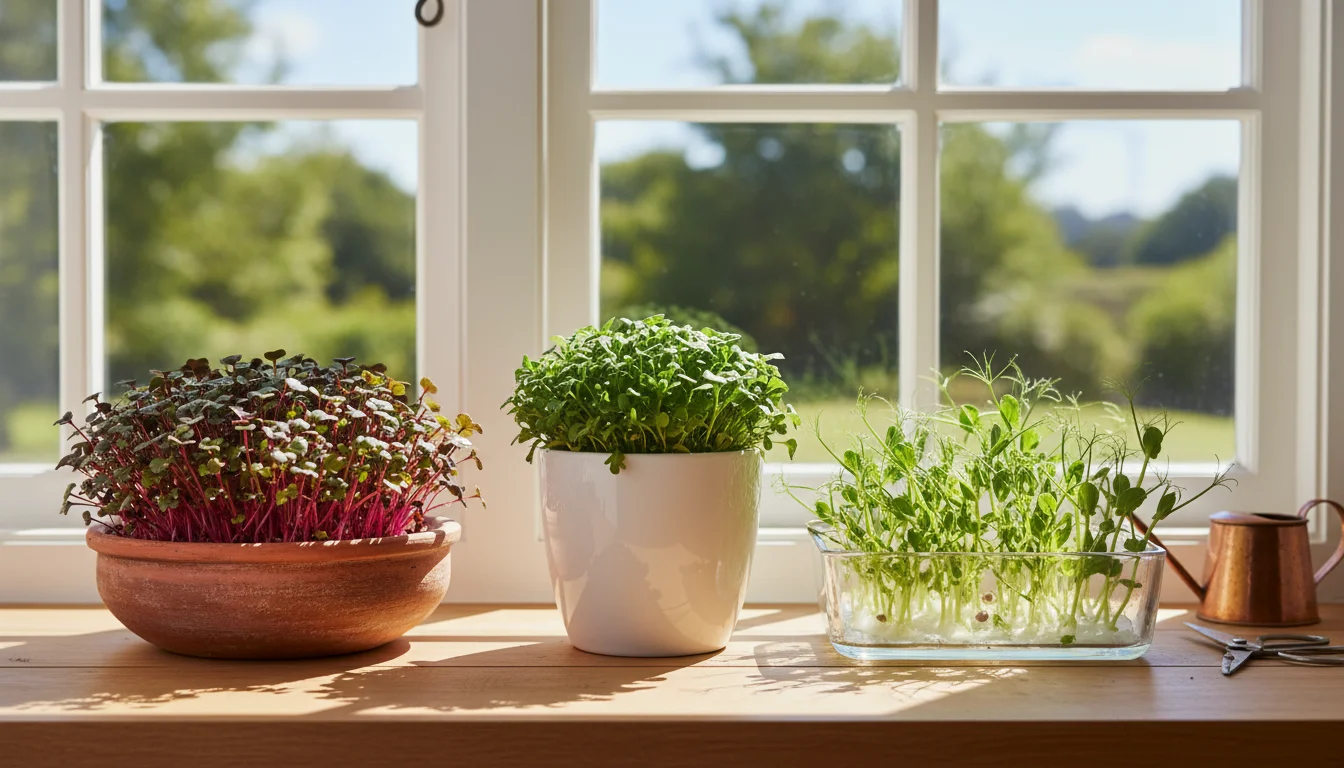
Choosing Your Microgreen Stars: Best Varieties for Low-Light Winter Growing
Selecting the right microgreen varieties is crucial for success, especially when aiming to grow microgreens indoors during winter’s naturally lower light conditions. Some microgreens thrive with minimal light exposure, germinating quickly and growing vigorously on a standard windowsill. Focus on these forgiving varieties to ensure a bountiful harvest and avoid disappointment.
For those with slightly more room than a tray, a one-pot fall salad bar allows you to grow several larger lettuce varieties in one compact container.
Here are some of the best microgreens to grow in winter low light:
- Radish: Known for their incredibly fast growth (often ready in 5-7 days) and a delightful peppery kick. Varieties like Sango or China Rose offer beautiful red stems. They germinate readily, even in cooler temperatures, and tolerate less intense light well.
- Broccoli: A classic for its mild, slightly cabbage-like flavor and impressive nutritional profile. Broccoli microgreens are robust growers, typically ready in 7-10 days, and do not demand excessive light.
- Kale: Offers a slightly nutty, earthy flavor and a wealth of vitamins. Kale microgreens grow relatively quickly, maturing in 8-12 days, and adapt well to windowsill conditions.
- Arugula: If you love a spicy, peppery flavor, arugula is your go-to. It grows exceptionally fast, often ready in 6-10 days, and remains productive even with indirect light.
- Mustard: Provides a distinct pungent, spicy flavor, perfect for adding a kick to your dishes. Mustard varieties like Red Giant or Green Wave are fast growers, typically harvested in 7-10 days, and tolerate lower light levels.
- Kohlrabi: A less common but excellent choice, offering a mild, sweet, and slightly peppery taste. Kohlrabi microgreens are resilient and grow well in 8-12 days.
You can purchase seeds specifically labeled for microgreen production, which often come in larger quantities and at a better price point than standard garden seeds. Look for organic, untreated seeds to ensure the healthiest possible harvest for your indoor salad bar.
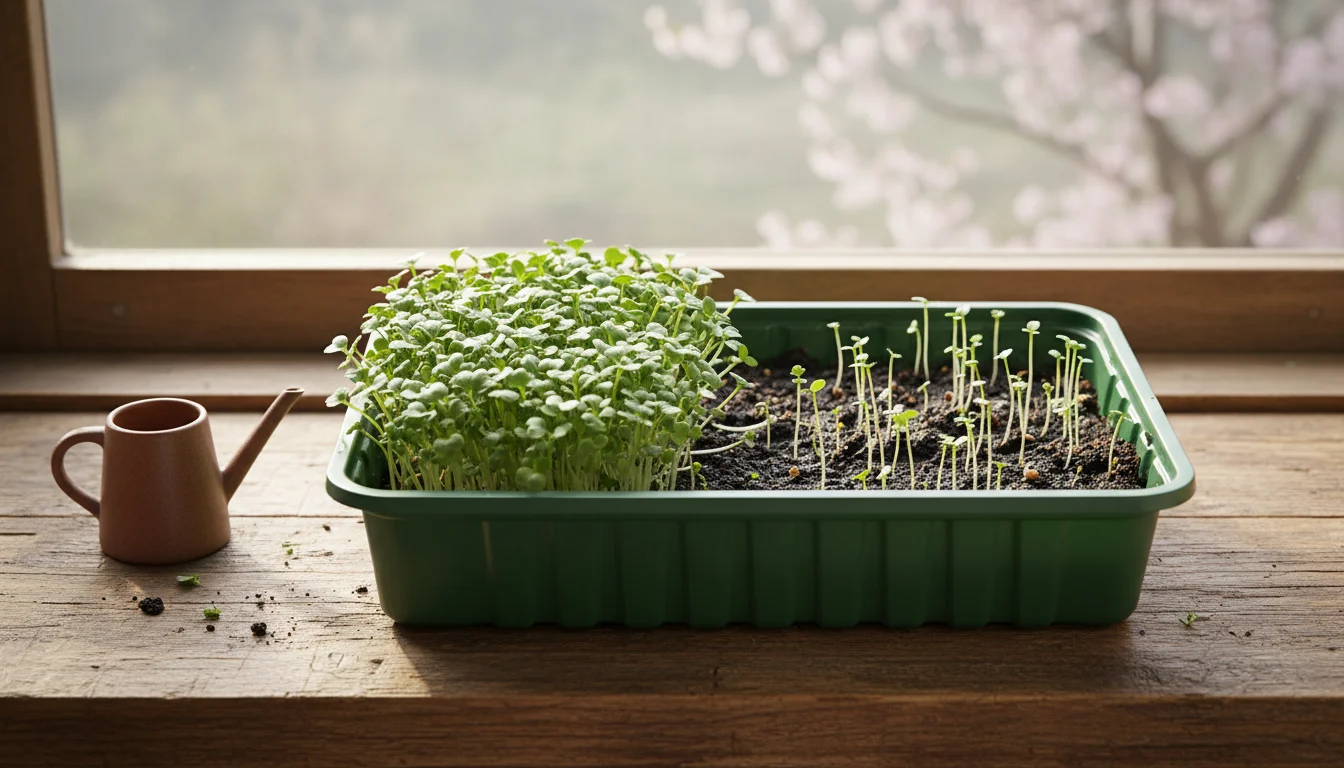
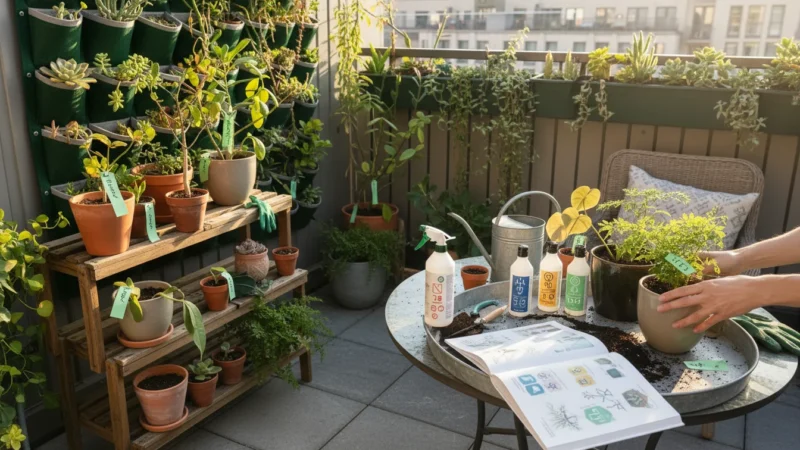
Setting Up Your Indoor Salad Garden: Essential Supplies
Creating your windowsill garden requires only a few basic items, most of which you likely already own or can easily acquire. You do not need fancy equipment or a large investment to start growing microgreens. Simplicity is key for this low-maintenance approach.
To keep your indoor crops organized throughout the season, consult an apartment seed-starting calendar for planning your winter and early spring planting.
This windowsill setup is one of the most productive indoor gardening projects for winter days, requiring very little equipment to get started.
Here is what you will need:
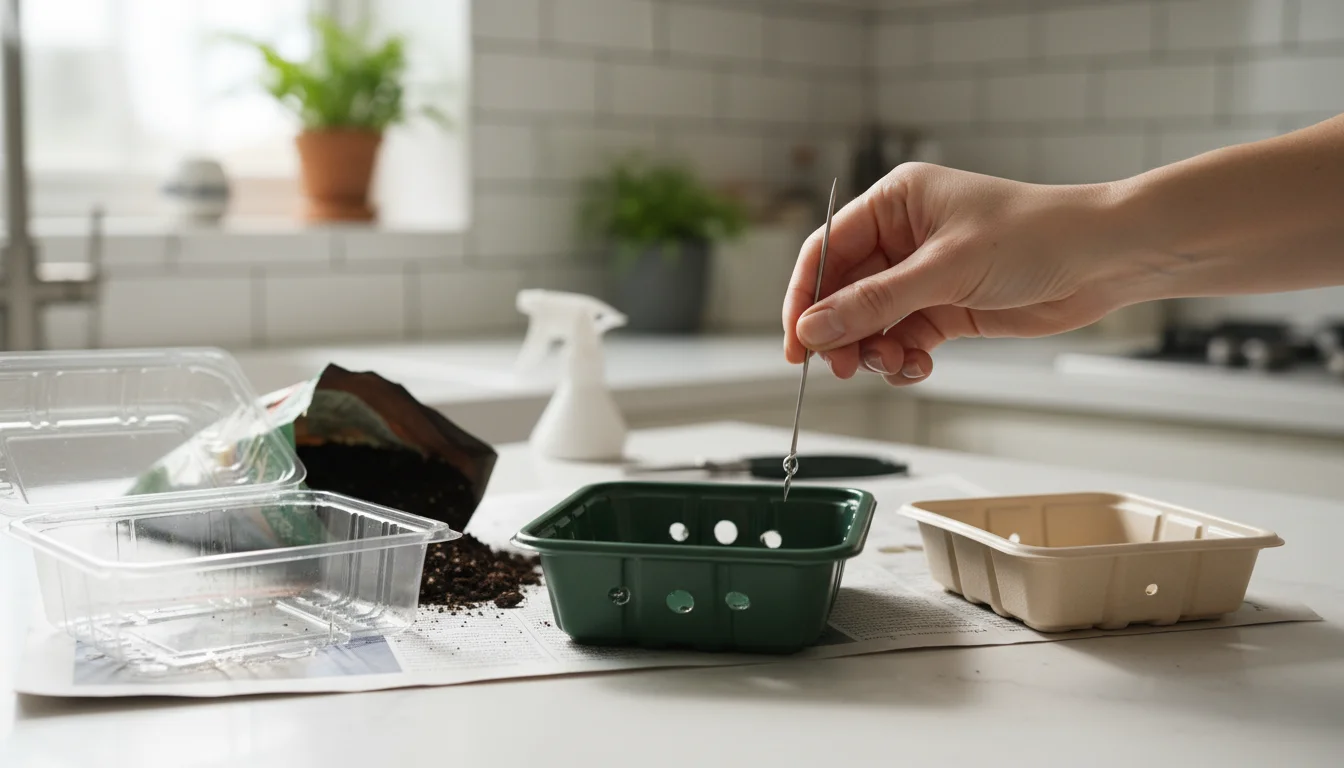
- Shallow Trays or Containers: Choose food-safe plastic trays, old takeout containers, or even upcycled plastic clam shells from berries. The key is shallow depth (1-2 inches) and drainage holes. If your container lacks drainage, you can easily punch a few holes in the bottom. Drainage allows excess water to escape, preventing waterlogging and root rot.
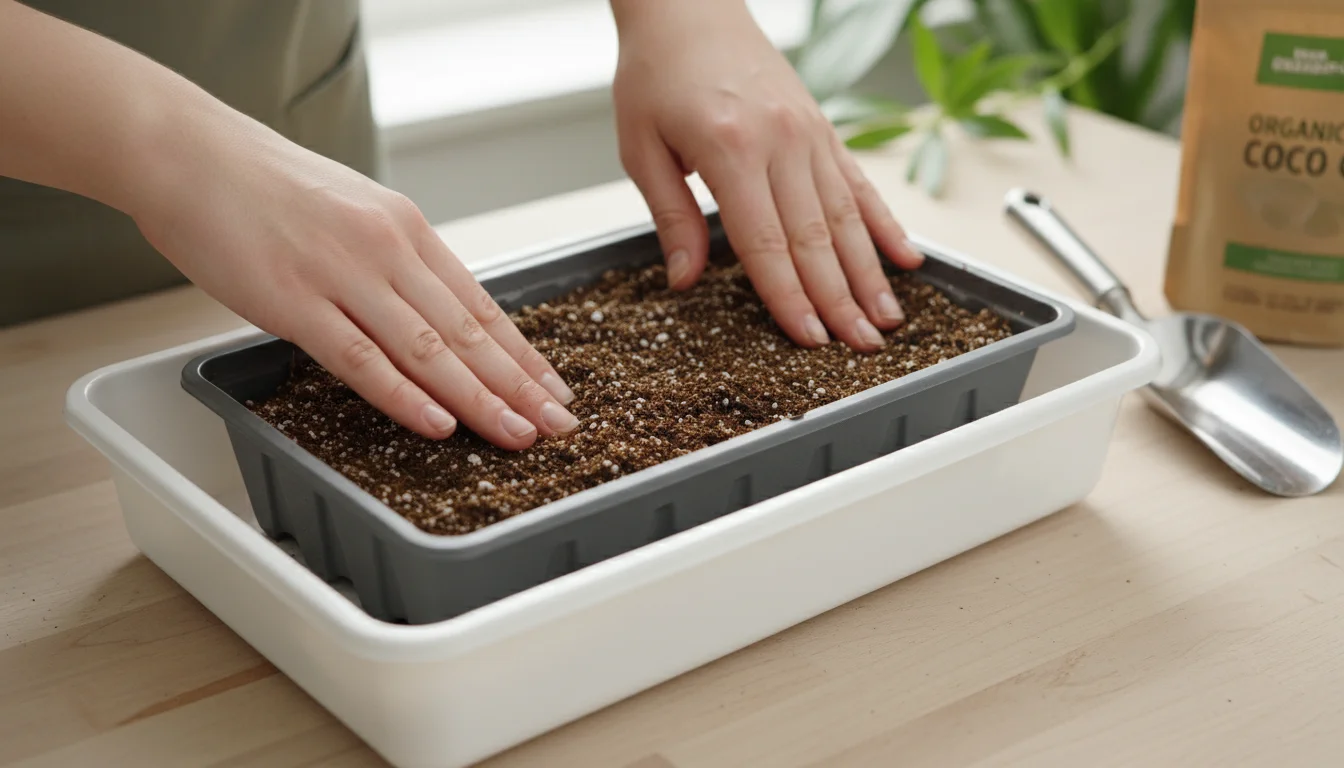
- Seed Starting Mix or Coco Coir: Avoid heavy garden soil; it compacts too much for microgreens and may contain pathogens. A fine-textured, sterile seed-starting mix or coco coir (a renewable resource made from coconut husks) provides an ideal light and airy medium for delicate microgreen roots. These options retain moisture well but also allow for good air circulation, which is crucial for healthy root development.
- Microgreen Seeds: As discussed, choose varieties suitable for low light. Purchase seeds specifically for microgreen growing, as you will use a higher density of seeds than for traditional gardening.
- Spray Bottle: A fine mist sprayer is essential for gently watering your seeds and young plants without disturbing them.
- Sharp Scissors or a Knife: For clean harvesting.
- Optional: Dome or Cover: A clear plastic dome or even a piece of cardboard can help maintain humidity during germination, especially if your home is dry.
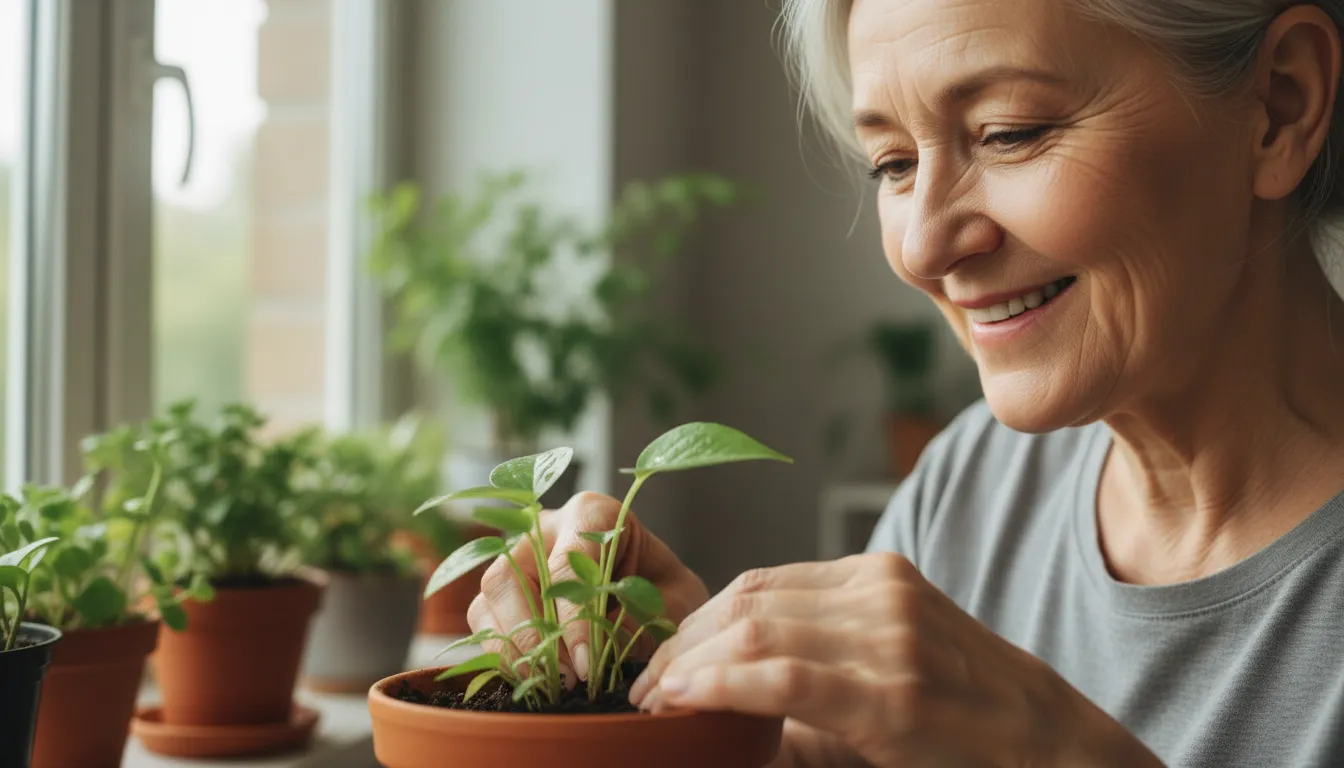
Once you gather your supplies, you are ready to prepare your growing environment. Remember, clean containers prevent disease, so wash and rinse any reused trays thoroughly. With your supplies ready, you will find the actual planting process straightforward and quick. This minimal setup supports a continuous cycle of fresh greens, ensuring your indoor salad garden for apartments remains productive throughout the colder months.
Step-by-Step Microgreen Cultivation: Your Winter Growing Guide
Growing microgreens is a simple process, even for absolute beginners. Follow these clear steps to establish your thriving windowsill garden and enjoy fresh greens throughout the winter. This method focuses on efficiency and success for a low-maintenance setup.
- Prepare Your Trays: Ensure your shallow trays have drainage holes. If using a bottom watering method, you will need a slightly larger, solid tray to place your planting tray inside. Fill your planting tray with about 1-1.5 inches of your chosen seed-starting mix or coco coir. Gently tamp the soil down to create a level, firm surface. This prevents seeds from settling too deeply or forming uneven patches.
- Sow Your Seeds Densely: This is where microgreen planting differs from traditional gardening. Sprinkle your microgreen seeds evenly and densely across the entire surface of the soil. Aim for a single layer of seeds, covering as much of the soil as possible without significant overlap. Think of it like sprinkling sesame seeds on a bun. The high density encourages straight, tall growth and maximizes your yield from a small space.
- Mist and Cover (Optional Blackout): After sowing, lightly mist the seeds with water from your spray bottle until the top layer of soil appears moist. For better germination, especially with varieties like broccoli or kale, you can cover the tray. Some growers use a plastic dome, a second tray inverted over the first, or even a piece of cardboard. This “blackout” period maintains humidity and encourages uniform germination. Place a light weight on top of the cover if using a second tray; this encourages seeds to root more deeply as they push against the resistance. Keep the trays covered for 2-4 days, checking daily for germination.
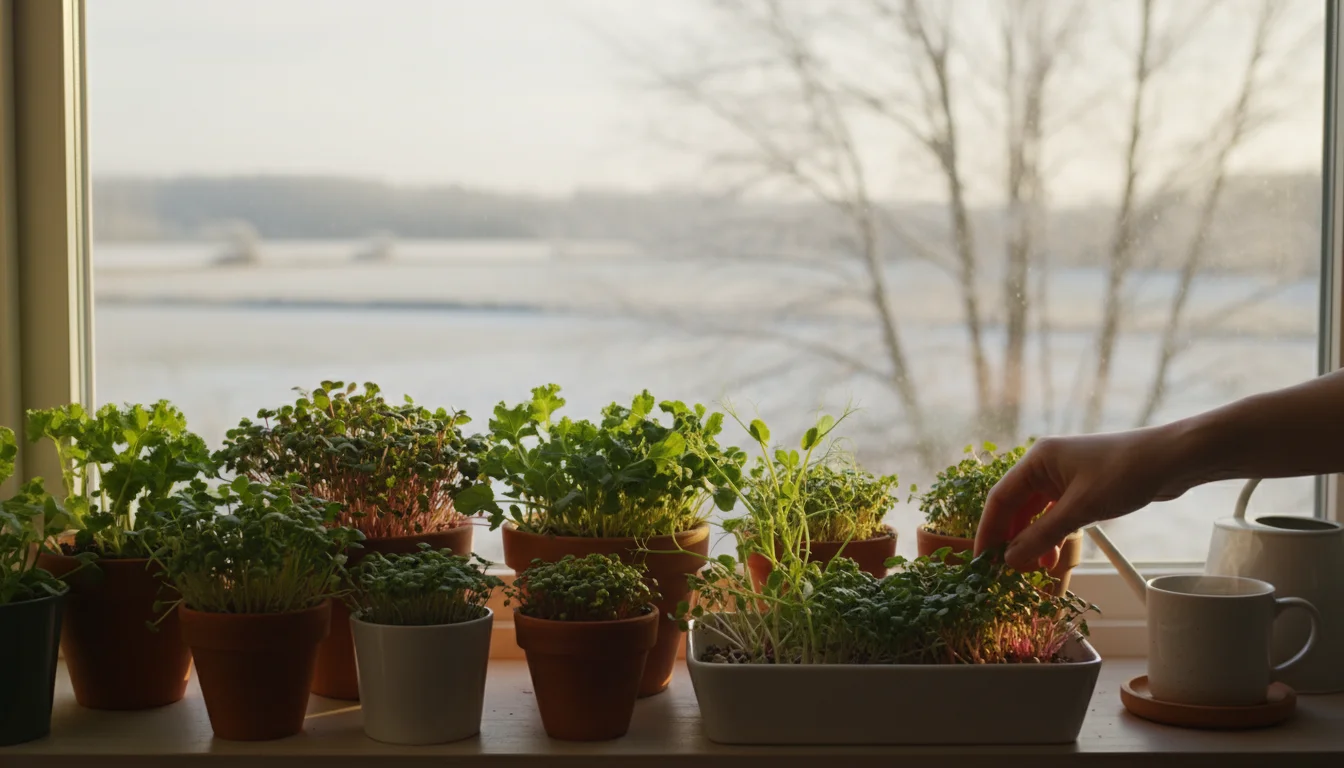
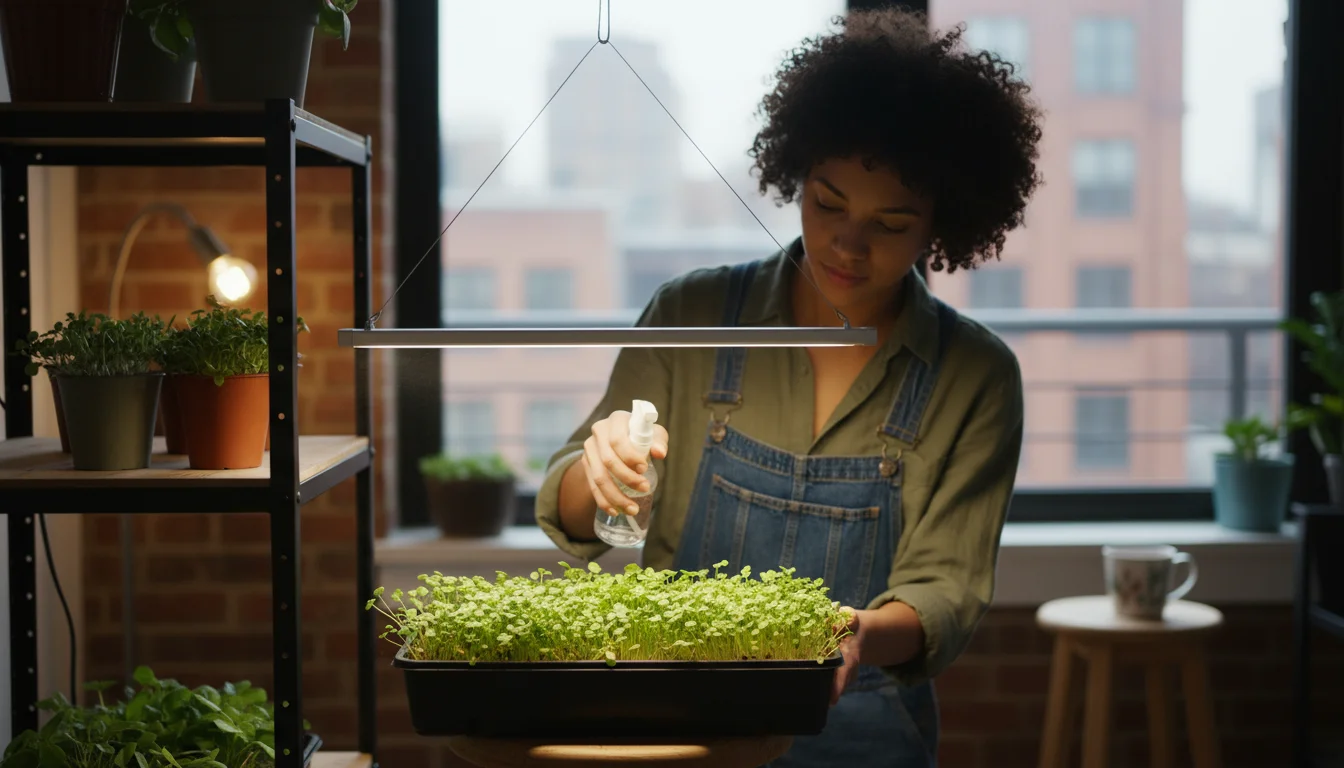
- Introduce Light: Once your seeds germinate and tiny green shoots emerge, remove the cover and move your trays to your sunniest windowsill. An east or south-facing window typically provides the best natural light exposure during winter months. Even in low light, the microgreens will stretch towards the window, but adequate light ensures strong, colorful growth.
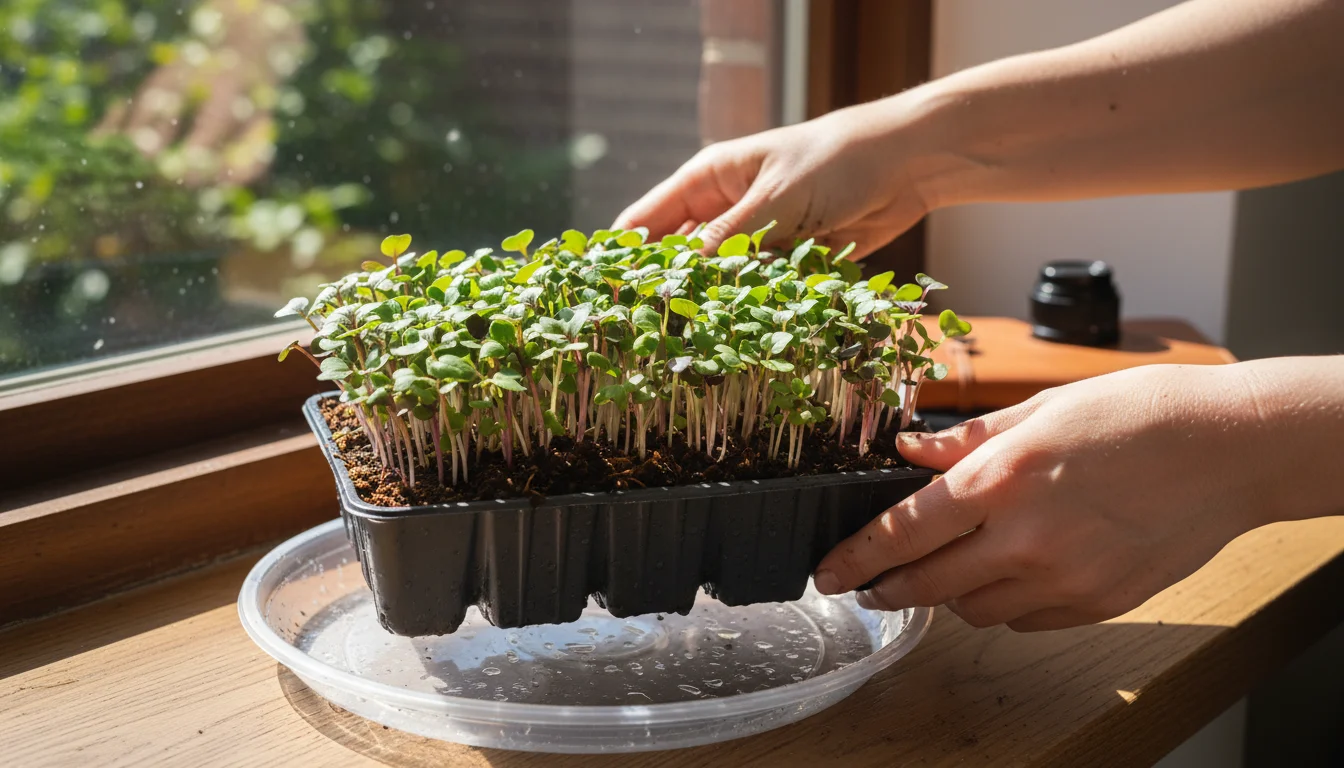
- Water Gently and Consistently: Maintain consistent moisture, but avoid overwatering. The best method for microgreens is bottom watering. Pour water into the larger, solid tray beneath your planting tray. The soil will absorb water through the drainage holes. Once the top soil surface looks moist, remove any excess water from the bottom tray. This prevents damping off (a fungal disease) and avoids disturbing the delicate seedlings. Mist from above only if the top layer appears very dry.
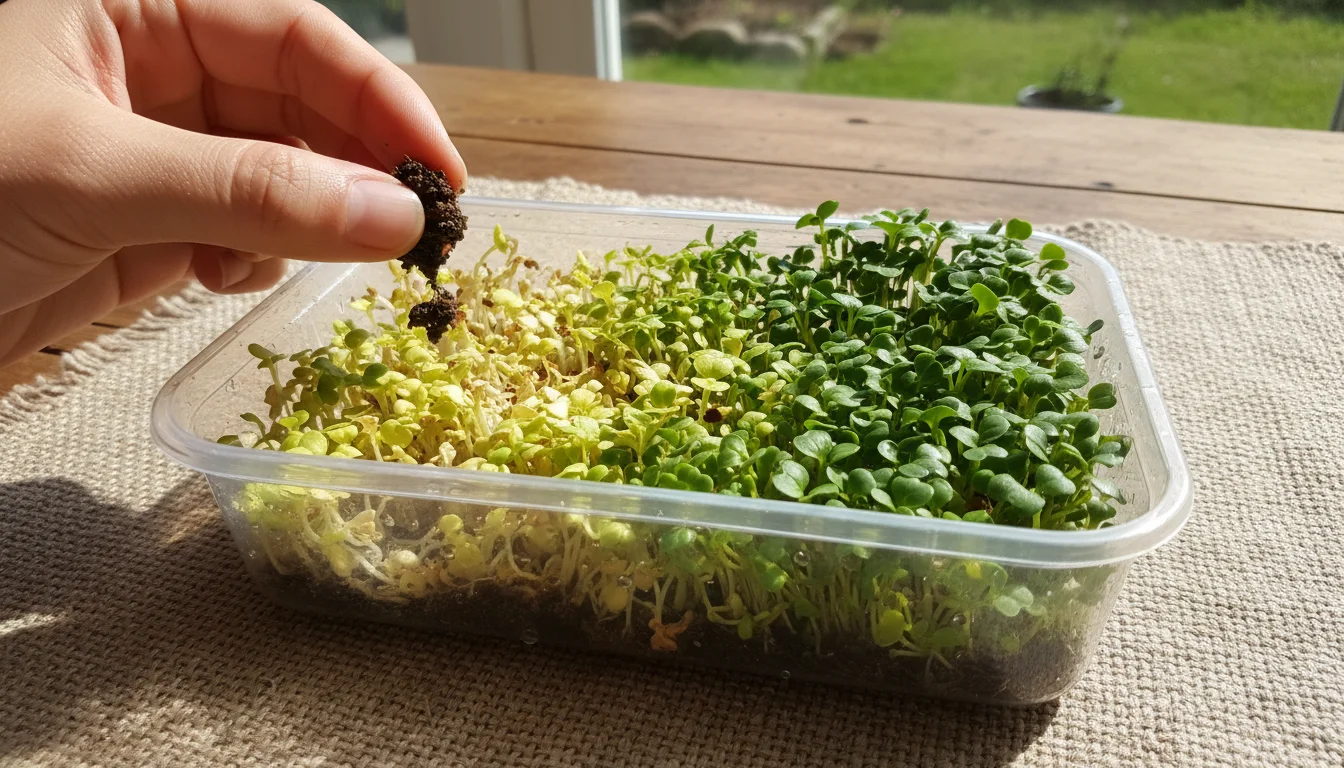
- Monitor Growth and Health: Watch for signs of healthy growth. Most microgreens are ready for harvest when they develop their cotyledon (seed) leaves and often their first set of tiny true leaves, usually 7-14 days after sowing, depending on the variety. They should stand 1-3 inches tall.
- Harvest Your Bounty: When your microgreens reach your desired height, harvest them with sharp scissors or a knife. Cut the stems just above the soil line, ensuring you do not get any soil in your harvest. Harvest just before you intend to eat them for the freshest flavor and maximum nutrient retention. Rinse gently under cool water if desired, then pat dry before use.
Once harvested, you can compost the used soil and start a new batch. This cyclical process ensures you always have a fresh supply of greens.
Mastering Your Microgreens: Light, Water, and Temperature for Success
While microgreens are generally forgiving, understanding and optimizing their environmental needs significantly boosts your success. You achieve robust growth, vibrant color, and maximum flavor by fine-tuning these elements for your winter indoor gardening project.

Light Requirements: Harnessing Winter’s Gentle Glow
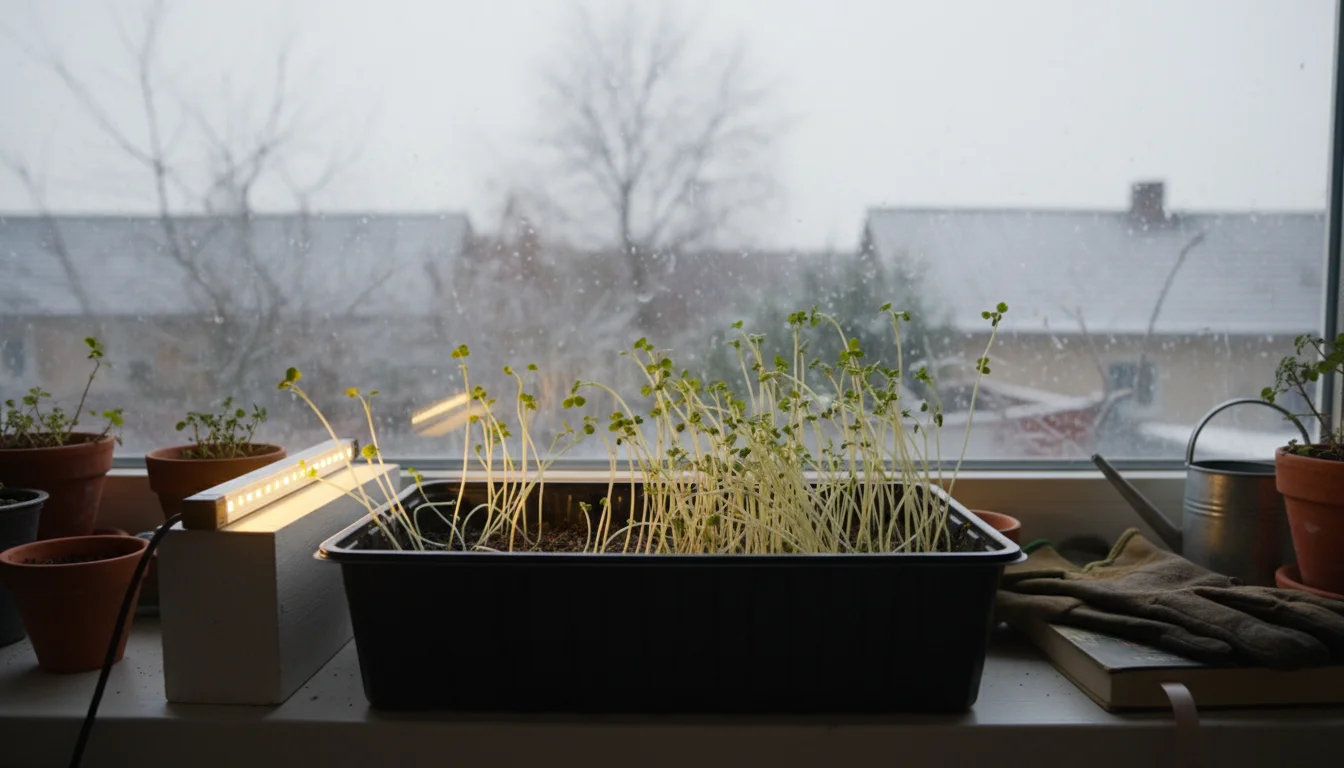
You can absolutely grow microgreens without a grow light, even in winter. Place your trays on the brightest windowsill you have. South-facing windows typically offer the most intense light, followed by east and west. North-facing windows provide the least light and may result in leggy, paler microgreens, though some resilient varieties can still produce. Rotate your trays daily or every other day to ensure all sides receive adequate light, encouraging upright growth and preventing your plants from leaning heavily towards the window. While microgreens do not require the same intensity as fruiting plants, consistent indirect or direct sunlight prevents them from becoming too thin and weak. If your microgreens look stretched or pale, you might consider rotating them more frequently or moving them to an even brighter spot if available. For those serious about maximizing growth during the darkest winter months, a simple LED grow light suspended a few inches above the trays can accelerate growth and deepen color, but it is by no means a necessity for a successful windowsill harvest.
Watering Wisdom: The Art of Consistent Moisture
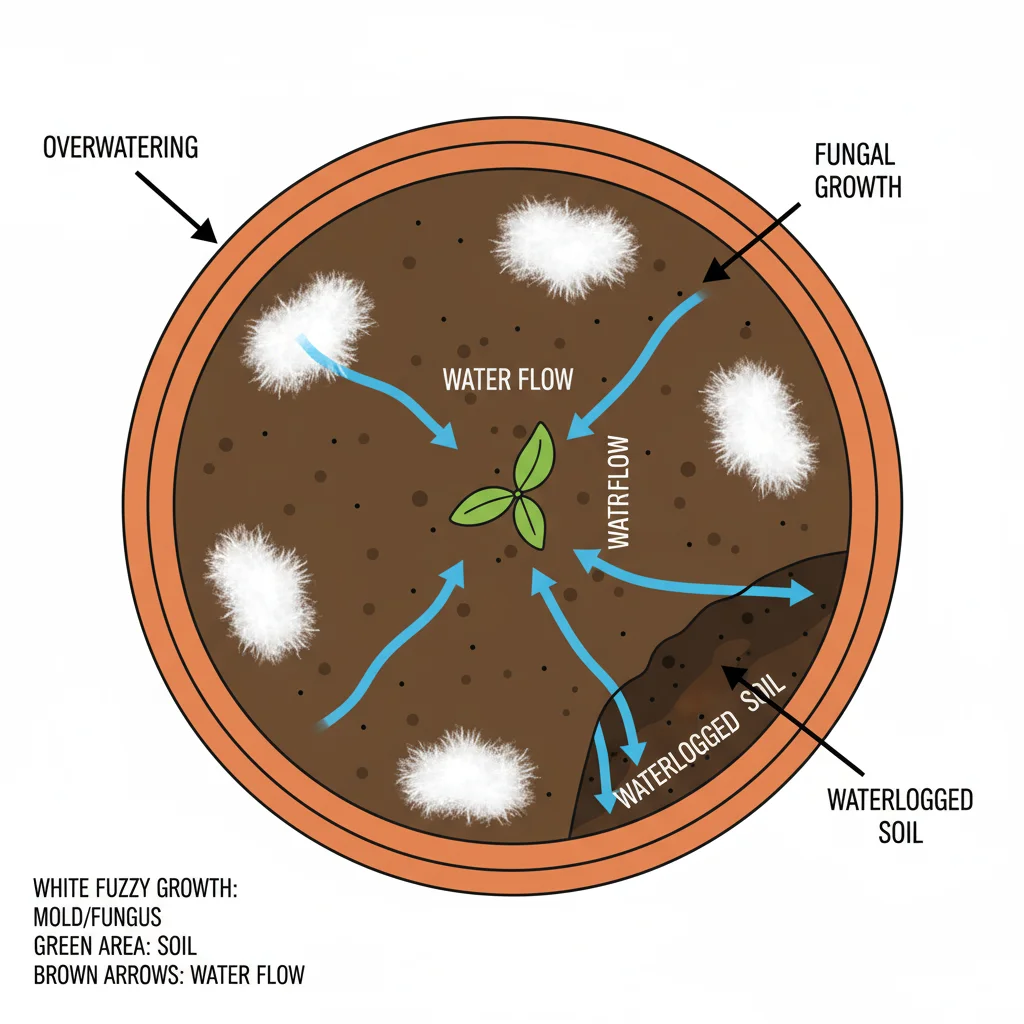
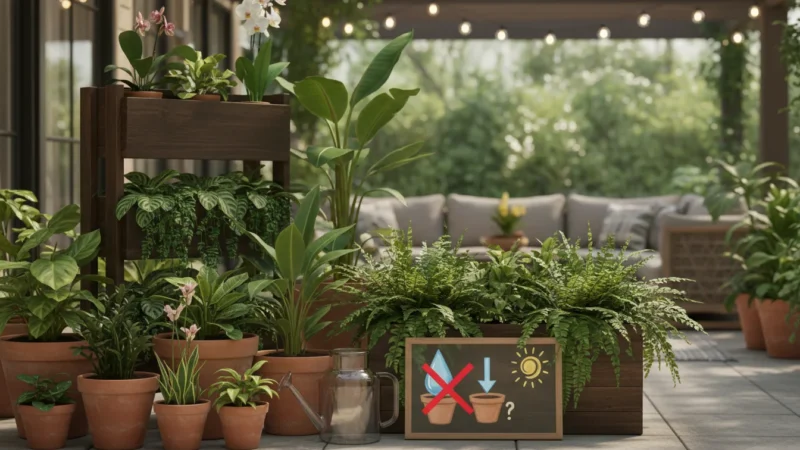
Consistent moisture is vital, but overwatering proves detrimental. Microgreens have shallow root systems and prefer evenly moist, but never soggy, soil. Overwatering can lead to “damping off,” a fungal disease that causes seedlings to collapse at the soil line. The bottom-watering method, as described in the step-by-step guide, is highly recommended. It allows the soil to wick up only the water it needs, keeps the foliage dry, and avoids disturbing the delicate seedlings. You will typically need to water once a day or every other day, depending on your home’s humidity and the warmth of your windowsill. Feel the weight of the tray: a lighter tray indicates a need for water. Check the soil surface; if it looks dry, it is time to water. Consistency prevents stress, ensuring your microgreens remain plump and tender.
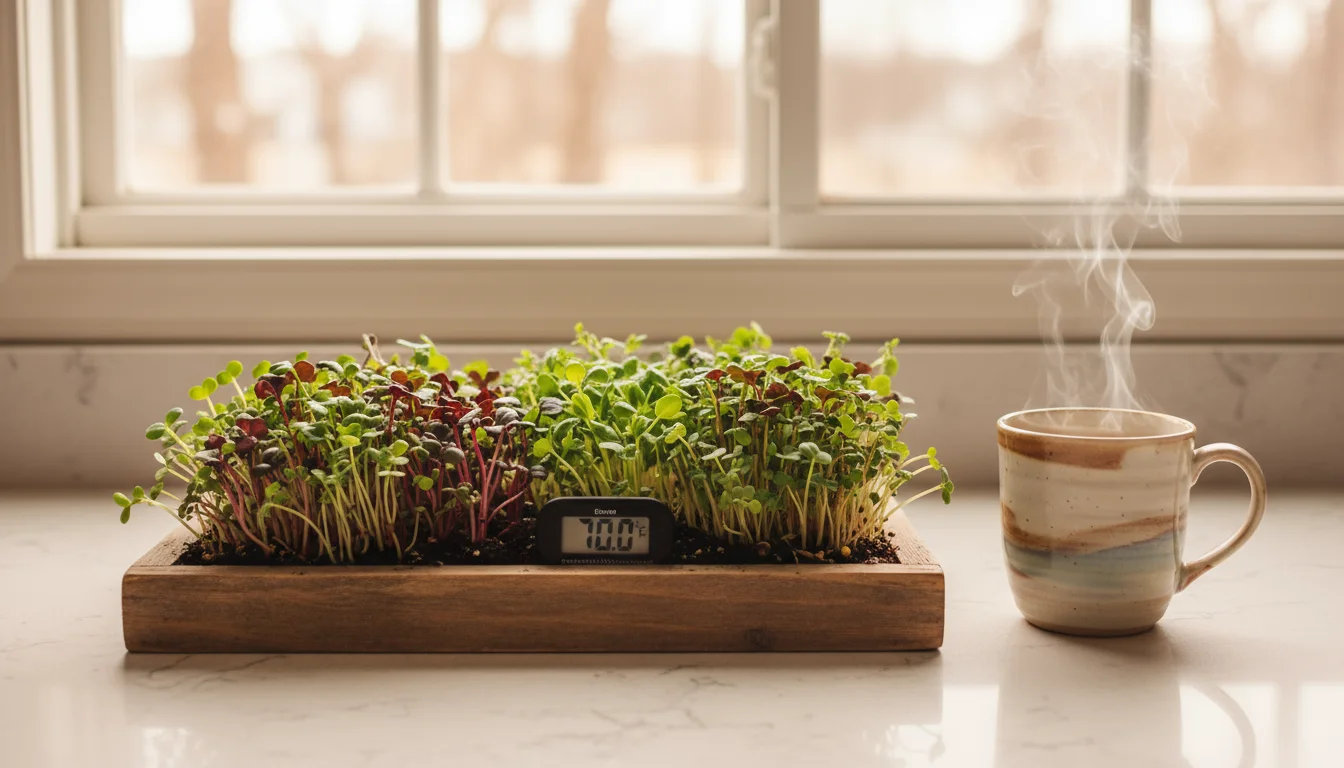
Temperature Control: Finding the Sweet Spot
Most microgreens thrive in typical indoor room temperatures, generally between 65-75°F (18-24°C). Avoid placing trays directly next to cold windows in unheated rooms, as extreme temperature drops can stunt growth. Similarly, avoid placing them over direct heat sources, such as radiators, which can dry out the soil too quickly. A consistent, moderate temperature ensures steady germination and healthy development. If your home runs cooler, some varieties like radish or kale may tolerate it, but growth will slow down. Warmer temperatures can accelerate growth but also increase the risk of mold if humidity is too high or air circulation is poor. Maintaining a comfortable ambient temperature in your home usually suffices for successful microgreen cultivation, making it an easy addition to your indoor salad garden for apartments.
Troubleshooting Common Microgreen Challenges
Even with careful planning, you might encounter a few hiccups when growing microgreens. Do not despair; most issues have simple solutions. Addressing these common challenges proactively ensures your windowsill garden remains productive and vibrant.
Leggy, Pale Growth
If your microgreens appear thin, stretched, and pale, they are likely not receiving enough light. This happens frequently during winter when natural light is at its lowest intensity.
Solution: Move your trays to the sunniest window available, ideally south-facing. Rotate the trays daily to ensure even exposure. If natural light remains insufficient, even a simple, inexpensive LED strip light positioned a few inches above your trays can make a significant difference in boosting growth and color. Consider varieties known to tolerate lower light conditions for future plantings.
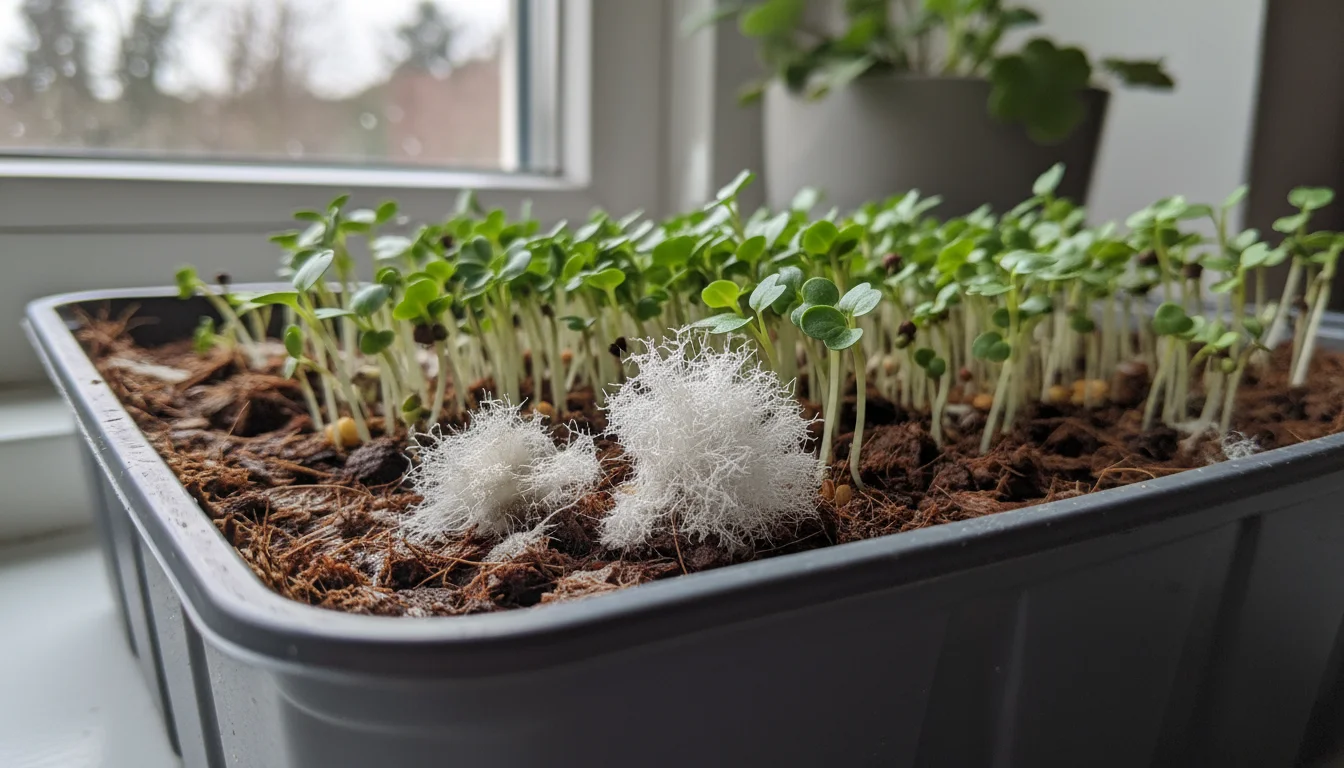
Mold or Fungus
White, fuzzy growth on your soil or seedlings signals mold or fungus, often caused by excessive humidity, poor air circulation, or overwatering.
Solution: Immediately increase air circulation. You can use a small fan pointed away from the trays to gently circulate air. Reduce watering frequency, ensuring the top layer of soil dries slightly between waterings. Always bottom water to keep foliage dry. If the mold persists, you may need to discard the affected tray and start fresh, ensuring proper ventilation and less dense seeding in the next batch. Sterilize your trays and tools before reuse. Using coco coir, which is naturally antifungal, can also help prevent this issue.
Poor Germination or Uneven Growth
If seeds do not sprout evenly or some areas remain bare, several factors could be at play.
Solution: Ensure you sow seeds densely and evenly across the entire surface. If using a blackout period, ensure you kept the soil consistently moist during that time. Some seeds benefit from a light weight on top of their cover during germination, which encourages roots to anchor firmly. Check your seed quality; old or improperly stored seeds have lower germination rates. Always use fresh, high-quality microgreen seeds from a reputable supplier. Ensure your soil is warm enough, as cold soil can inhibit germination.
Yellowing Leaves
Yellowing leaves can indicate either overwatering or underwatering, or occasionally, a nutrient deficiency in the soil (though less common for microgreens due to their short growth cycle).
Solution: First, check your watering routine. If the soil stays soggy, you are overwatering; adjust to bottom watering and allow some drying. If the soil is consistently bone dry, you are underwatering; increase frequency. Ensure your seed-starting mix is fresh and provides adequate nutrients for the brief growth period. Rarely, extremely cold temperatures can also cause yellowing; ensure your trays are in a consistent, warm room temperature environment.
By understanding these common issues and implementing these practical solutions, you empower yourself to keep your indoor salad garden for apartments flourishing. Your consistent attention ensures a continuous supply of healthy, fresh microgreens.
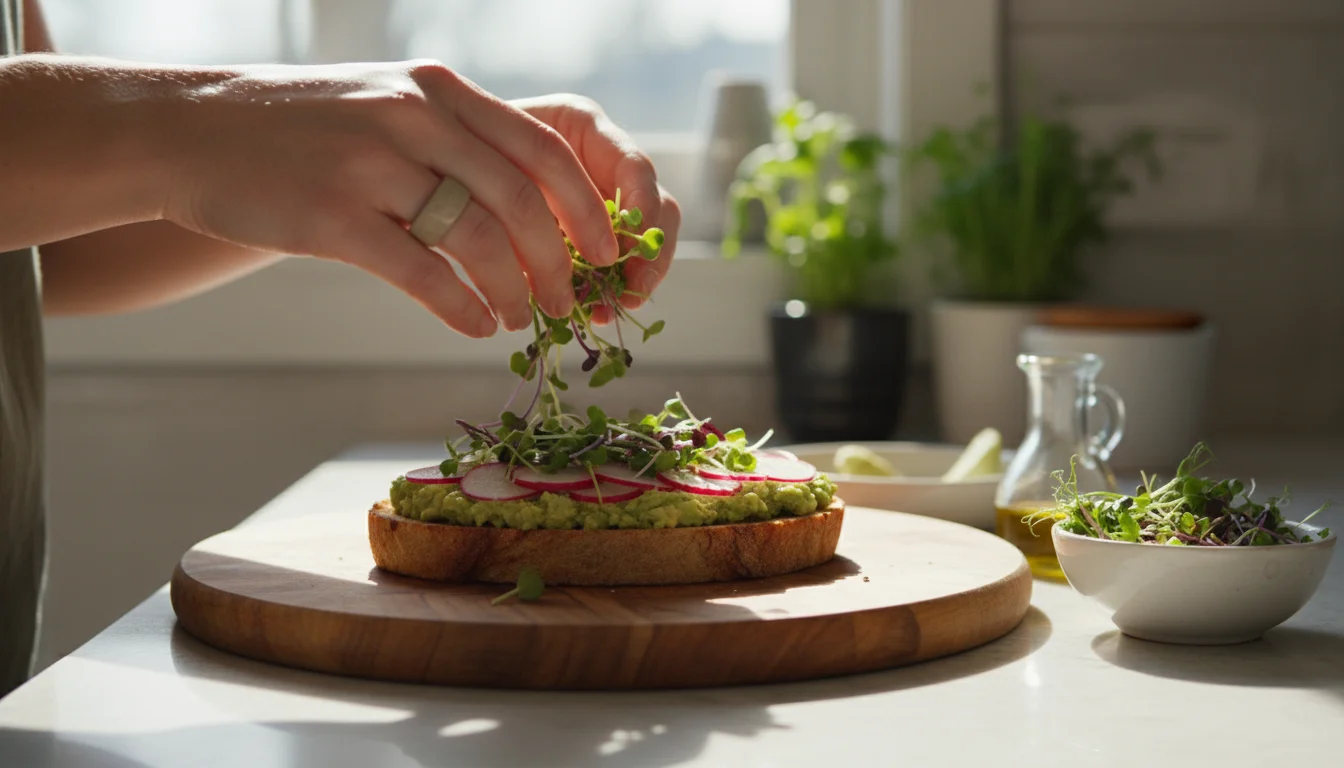
Beyond the Harvest: Incorporating Microgreens into Your Winter Diet
Harvesting your first batch of microgreens is an exciting moment, but what do you do with them once they are ready? These tiny greens offer incredible versatility in the kitchen, adding a burst of flavor, texture, and nutrition to almost any meal. You can easily elevate everyday dishes with your homegrown bounty, making your winter meals vibrant and delicious.
To complement your fresh harvest, you can also grow herbs indoors to ensure you have a full range of flavors for your winter cooking.
Here are practical ways to incorporate your fresh microgreens into your diet:
- Salads and Sandwiches: This is the most straightforward use. Replace or augment traditional lettuce in your salads and sandwiches with a generous handful of microgreens. Radish microgreens add a peppery bite, while broccoli microgreens offer a mild, crisp texture.
- Soups and Stews: Sprinkle microgreens over hot soups and stews just before serving. The residual heat will slightly wilt them, releasing their flavor. Their fresh crunch provides a wonderful contrast to creamy or hearty dishes. Try arugula microgreens with a tomato soup or kale microgreens with a lentil stew.
- Smoothies and Juices: Boost the nutritional content of your morning smoothie or fresh juice by adding a small handful of microgreens. Their mild flavor generally blends well without overpowering other ingredients.
- Eggs and Omelets: Fold microgreens into scrambled eggs or sprinkle them over an omelet, frittata, or quiche for added flavor and visual appeal.
- Pizza and Pasta: Garnish your homemade or store-bought pizza with microgreens after it comes out of the oven. Toss them into warm pasta dishes or sprinkle over roasted vegetables to add a fresh, herbaceous note.
- Gourmet Garnish: Use microgreens as a beautiful, edible garnish for virtually any dish. Their vibrant colors and interesting textures can transform a simple meal into something special.
Storage Tips: For the freshest taste and maximum nutrient retention, harvest your microgreens just before you plan to eat them. If you need to store them, harvest, gently rinse if necessary, and pat them thoroughly dry. Store them loosely in an airtight container lined with a paper towel in your refrigerator. Consume them within 3-5 days for best quality. Avoid washing them until you are ready to use them, as excess moisture can accelerate spoilage. This simple practice ensures you enjoy your indoor salad garden for apartments output to its fullest.
Frequently Asked Questions
Can I reuse the soil after harvesting microgreens?
You generally should not reuse the soil from microgreen trays. Microgreens deplete the soil’s nutrients quickly due to their dense planting. Reusing the soil can also increase the risk of disease or pest issues, as root fragments and old organic matter decompose. For best results and healthier plants, discard the used soil into your compost bin or outdoor garden, and start with fresh, sterile seed-starting mix for each new batch. This ensures your microgreens receive optimal growing conditions every time.
Do I need special microgreen seeds?
While you can use regular garden seeds for some microgreen varieties, it is often better to purchase seeds specifically labeled for microgreen production. These seeds typically come in larger quantities, which is more cost-effective given the dense planting method required for microgreens. They are also often untreated, meaning they do not contain fungicides or other chemicals, which is crucial since you eat the very young plants. Always opt for organic, untreated seeds when possible for a healthier indoor salad bar.
How long does it take to grow microgreens?
Microgreens are incredibly fast growers. Most varieties are ready for harvest within 7 to 14 days from the day you sow the seeds. Some fast-growing types like radish can be ready in as little as 5-7 days, while others like kale or basil might take up to 14-20 days. The exact timing depends on the variety, temperature, and light conditions in your home. Monitoring their height and the development of their first true leaves helps you determine the optimal harvest time.
Can I grow different types of microgreens in the same tray?
You can, but it is generally not recommended for beginners. Different microgreen varieties have varying germination times, growth rates, and light requirements. Planting them together can lead to uneven harvests, where some plants are ready while others are still very small, or some outcompete others for resources. For the best results, especially when you are just starting, grow one type of microgreen per tray. As you gain experience, you can experiment with compatible mixes that share similar growth characteristics.
What if my microgreens get moldy?
Mold on microgreens is a common issue, often caused by too much humidity, poor air circulation, or overwatering. Immediately separate the affected tray from healthy ones. Increase air circulation by placing a small fan nearby (not blowing directly onto the plants). Reduce watering frequency and ensure you are bottom watering to keep the foliage dry. If the mold persists, you may need to discard the batch, clean your trays thoroughly, and restart, paying close attention to these factors. Consider thinning your seeds slightly in the next batch to improve airflow between plants.
For trustworthy gardening information, visit:
Kansas State University Extension — Horticulture, Oklahoma State University Extension — Lawn & Garden and Tennessee Extension — Gardening. These organizations provide expert, research-based advice for gardeners at all levels.
Disclaimer: This article is for informational purposes only and is not a substitute for professional gardening advice. Always consult local extension services or horticulture experts for region-specific guidance.

Leave a Reply