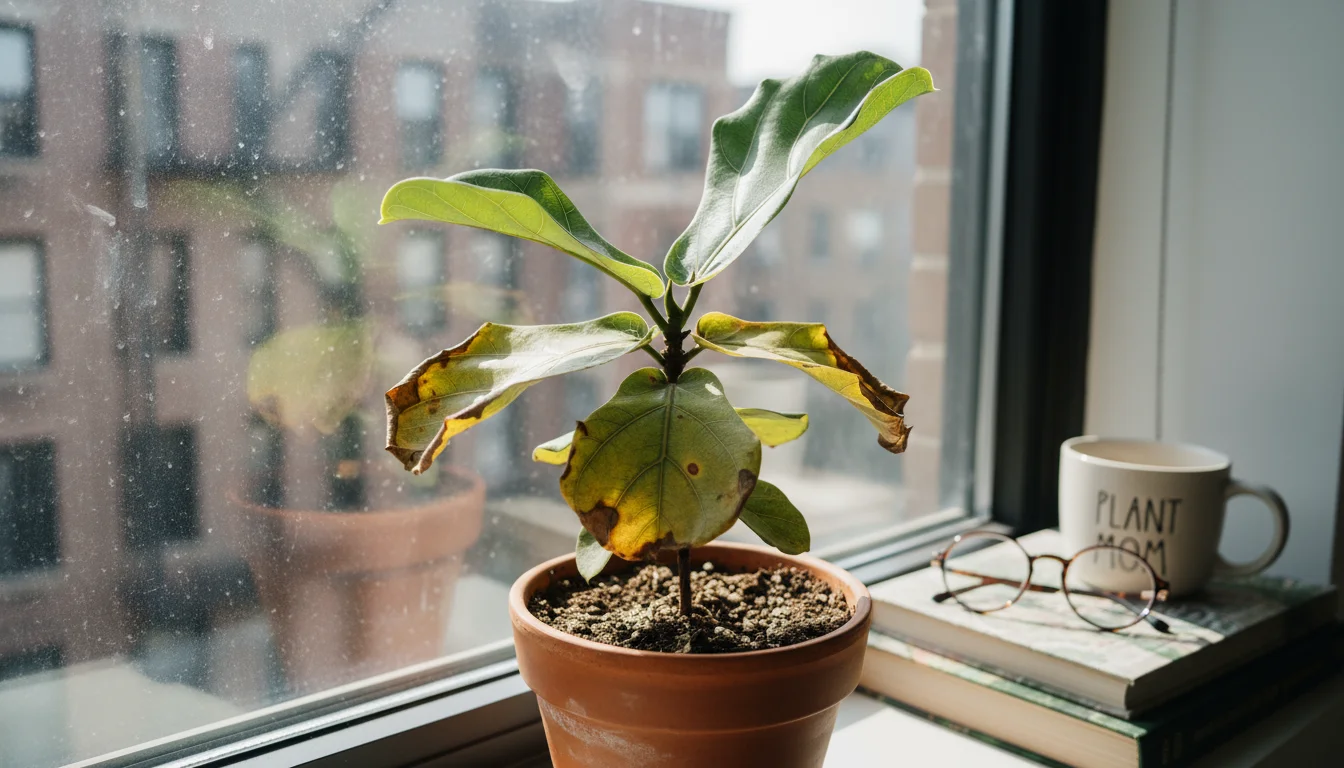
Seeing your beloved houseplants develop yellow leaves can be disheartening. This common plant problem signals that something is amiss, but identifying the exact cause can feel like detective work. Yellowing leaves, or chlorosis, indicate a lack of chlorophyll, the green pigment vital for photosynthesis. Your plant is effectively telling you it is not getting what it needs to thrive. Understanding the specific signals your plant sends allows you to respond effectively, ensuring your indoor garden remains vibrant and healthy, even in small spaces. This guide addresses the seven most frequent reasons leaves turn yellow, offering practical, actionable insights for beginner and intermediate plant keepers.
Understanding Chlorosis: Your Plant’s Cry for Help
Chlorosis, the technical term for yellowing leaves, occurs when plant cells cannot produce enough chlorophyll. Chlorophyll is essential because it absorbs sunlight, converting it into energy for growth. When leaves turn yellow, it means this vital process is hindered, impacting the plant’s overall health and vigor. Addressing the root cause quickly prevents further decline and keeps your indoor oasis thriving. This guide focuses on common issues affecting yellow leaves on houseplants, offering solutions for your indoor gardening issues.
During the colder months, you may need a seasonal checklist for yellow leaves to determine if your plant is reacting to the weather or a care mistake.
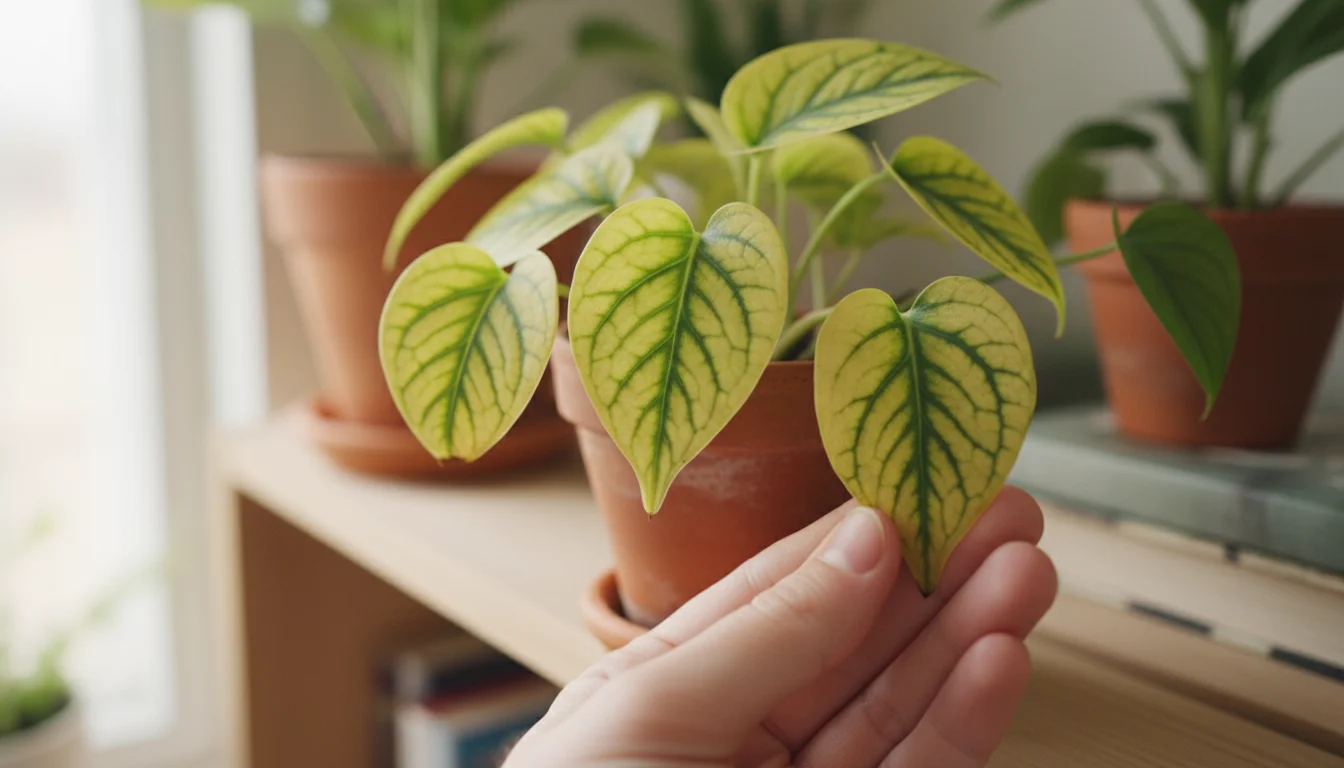
Observing your plant closely provides critical clues. Are all leaves yellowing, or only the older ones at the bottom? Is the yellowing uniform, or are veins still green while the tissue between them turns pale? The pattern of yellowing helps pinpoint the problem, allowing you to choose the most effective intervention. Remember, small changes in your care routine often make a big difference for your yellow leaves houseplants.

Overwatering: The Silent Killer of Healthy Foliage
Overwatering is arguably the most common culprit behind yellow leaves, especially for beginner plant enthusiasts. When you provide too much water, the soil becomes waterlogged, depriving roots of oxygen. Roots need oxygen to respire and absorb nutrients effectively. Without oxygen, roots begin to rot, turning soft and mushy, and eventually cease to function. This leads to a plant that cannot take up water or nutrients, despite being in wet soil. The plant shows signs of dehydration and nutrient deficiency, manifesting as yellowing leaves.
Signs of Overwatering:
- Yellowing lower leaves: Often, older leaves at the bottom of the plant turn yellow first, then droop and fall off.
- Mushy stems or roots: Gently check the stem base. If it feels soft or mushy, root rot is likely. If you can, carefully lift the plant to inspect roots. Healthy roots are firm and white; rotting roots are brown, soft, and brittle.
- Stunted growth: The plant struggles to produce new, healthy growth.
- Fungus gnats: These small, fly-like insects thrive in consistently wet soil. Their presence often indicates overwatering.
- Foul odor: Severely rotted roots can produce an unpleasant smell from the soil.
Actionable Solutions:
- Check soil moisture: Before watering, insert your finger about two inches deep into the soil. If it feels moist, wait. Only water when the top two inches are dry for most plants. For succulents and cacti, let the soil dry out completely.
- Improve drainage: Ensure your pot has drainage holes. If it doesn’t, repot into a container with holes. Consider adding perlite or pumice to your potting mix to enhance aeration and drainage.
- Reduce watering frequency: Adjust your watering schedule. Instead of watering on a fixed day, water only when the plant’s specific needs indicate it. Factors like light, humidity, and plant size influence how quickly soil dries.
- Address root rot: If you suspect root rot, gently remove the plant from its pot. Inspect the roots, cutting away any brown, mushy, or foul-smelling sections with clean, sterile scissors. Repot into fresh, well-draining soil and a clean pot, possibly a smaller one if you removed many roots. Then, adjust your watering habits immediately. For detailed guidance on identifying and treating plant problems like root rot, consult resources from the Royal Horticultural Society.
Watering without guesswork is key. Consider using a moisture meter for accuracy, especially when you are just learning your plant’s needs. This helps you avoid the pitfalls of excessive moisture that lead to yellow leaves on houseplants.
Underwatering: Thirsty Plants and Brittle Leaves
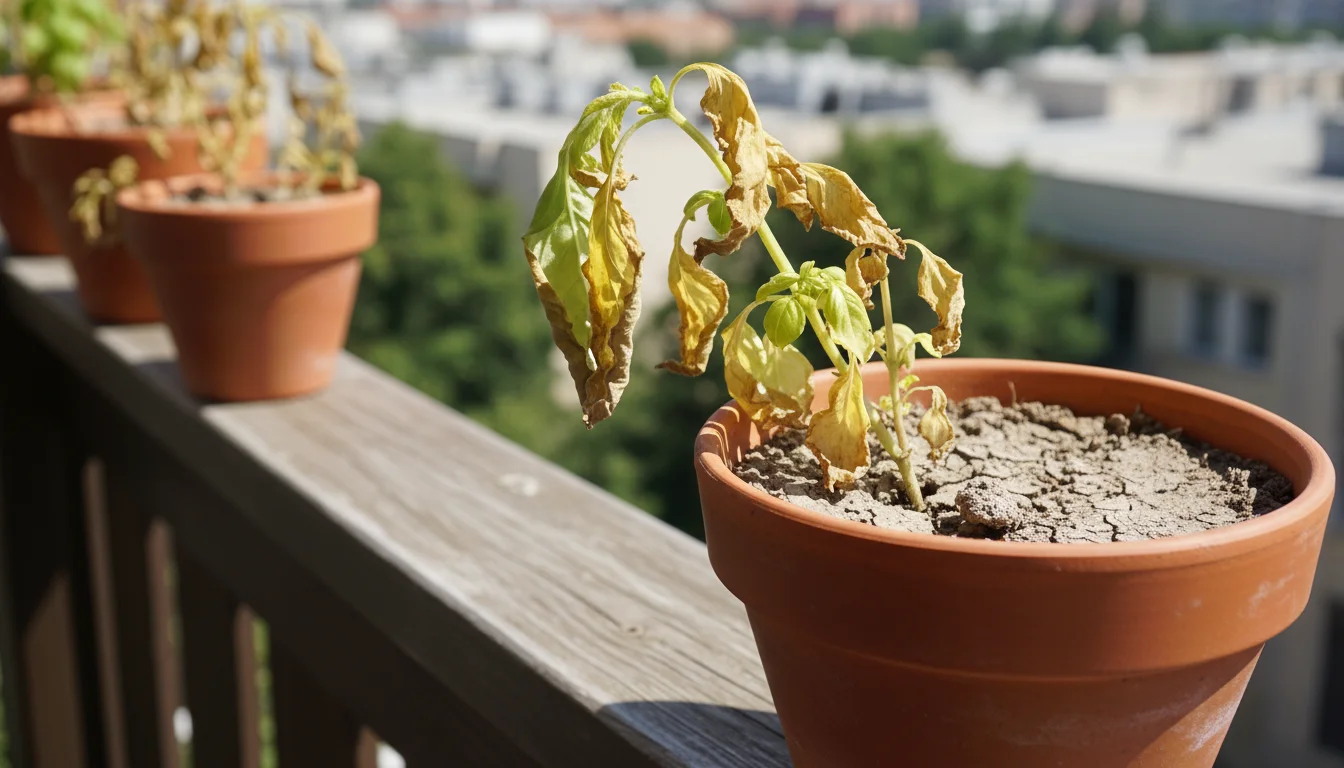
While overwatering is common, underwatering also causes leaves to yellow, often with slightly different symptoms. When a plant does not receive enough water, it enters survival mode. To conserve moisture, it sacrifices its older, lower leaves first, allowing them to yellow, shrivel, and drop off. This directs the limited water supply to newer, more vital growth points. Plants wilt dramatically when thirsty, but consistent mild underwatering leads to yellowing over time.
Signs of Underwatering:
- Dry, crispy yellow leaves: Unlike the soft, often mushy yellow leaves of overwatered plants, underwatered leaves become brittle and crispy, especially at the edges.
- Wilting: The entire plant, or specific stems, might droop significantly. While overwatered plants can also wilt, their soil remains wet. Underwatered plants have dry soil.
- Stunted growth: Lack of water inhibits new growth and overall plant development.
- Pot feels light: The pot feels noticeably lighter when the soil is completely dry.
- Soil pulling away from pot edges: Severely dry soil often shrinks, creating a gap between the soil and the pot walls.
Actionable Solutions:
- Water thoroughly: When you do water, saturate the soil completely until water drains from the bottom of the pot. This ensures all roots receive moisture. Discard any excess water from the saucer after 15-30 minutes to prevent standing water.
- Bottom watering: For extremely dry soil, or plants that struggle to absorb water from the top, try bottom watering. Place the potted plant in a tray or sink filled with a few inches of water for 30 minutes to an hour, allowing the soil to soak up water from the drainage holes. This is particularly useful for plants with dense root balls or those in terracotta pots.
- Increase watering frequency: Adjust your schedule based on the plant’s needs, not a rigid calendar. During active growing seasons (spring and summer), plants typically need more frequent watering.
- Consider pot material: Terracotta pots wick away moisture faster than plastic or glazed ceramic pots. If you find yourself watering very frequently, a plastic pot might retain moisture better for certain plants.
Balancing water is a fundamental skill in indoor gardening issues. Paying attention to both the plant and the soil provides the best indicators for proper hydration. Remember that consistent, appropriate watering is essential to prevent yellow leaves on houseplants.
Insufficient Light: The Energy Drain for Greenery
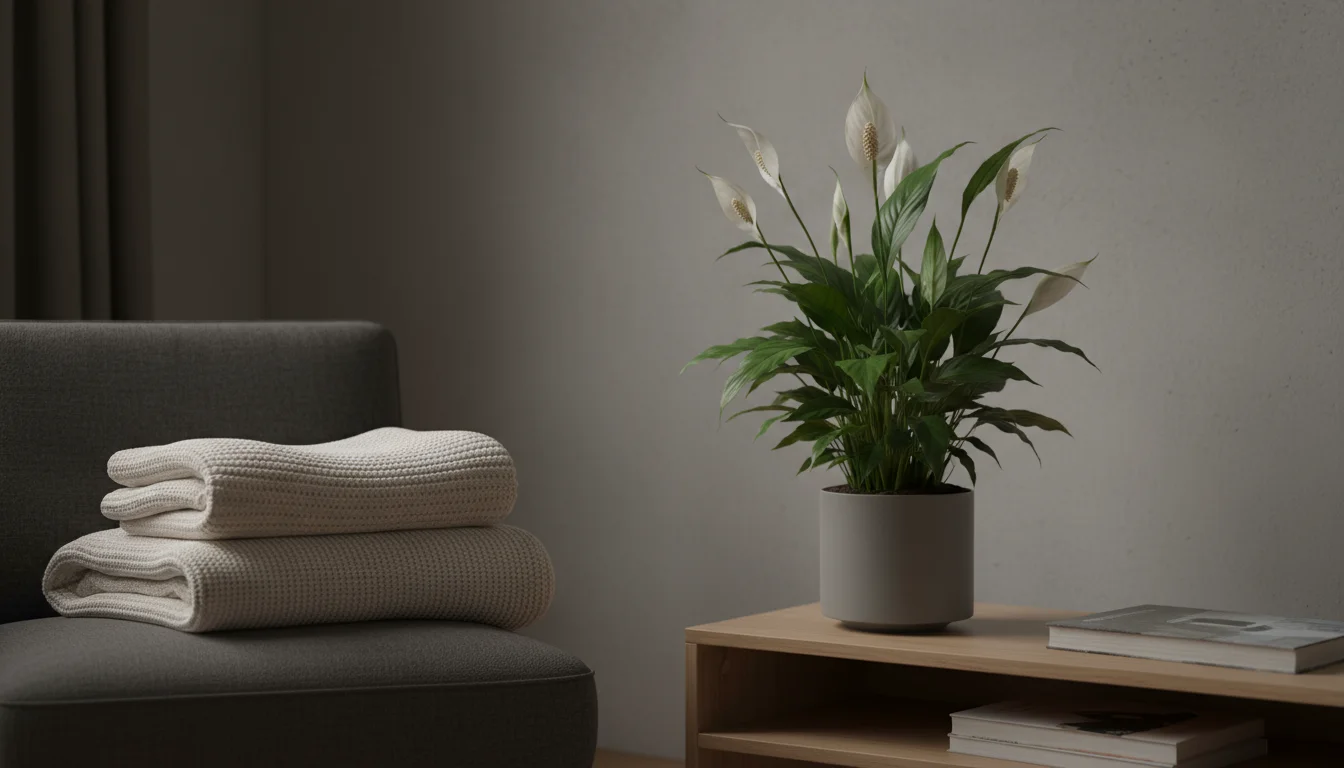
Light is energy for plants. Without enough light, plants cannot perform photosynthesis efficiently, leading to a decline in health and ultimately, yellowing leaves. Plants adapt to their light conditions. If a plant accustomed to brighter light is moved to a darker spot, it may shed leaves that are no longer efficient at photosynthesis, causing them to yellow and drop. This is a common indoor gardening issue, especially in apartments or compact homes with limited windows.
Understanding Light Levels:
- Low Light: An area far from a window, or a north-facing window, where you cannot comfortably read a book without artificial light. Plants like ZZ plants, snake plants, and Pothos tolerate low light.
- Medium Light/Bright Indirect Light: The sweet spot for most houseplants. This is typically near an east or west-facing window, or a south-facing window with a sheer curtain to diffuse direct sun. The sun’s rays do not directly hit the leaves, preventing sunburn.
- Bright Direct Light: Unobstructed light from a south-facing window, where the sun’s rays directly hit the plant for several hours a day. Succulents, cacti, and some flowering plants thrive here.
Signs of Insufficient Light:
- Pale green to yellow leaves: Leaves, especially older ones, lose their vibrancy and turn pale green then yellow.
- Leggy growth: Stems stretch and become elongated with widely spaced leaves as the plant “reaches” for light.
- Lack of new growth: The plant stops producing new leaves or flowers.
- Variegation fades: For variegated plants, the colorful patterns diminish, and leaves may become uniformly green.
Actionable Solutions:
- Relocate your plant: Move the yellow leaves houseplants to a brighter spot that matches its specific light requirements. For many plants, a few feet from an east or west-facing window works wonders.
- Clean windows and leaves: Dust on windows and plant leaves can block light. Regularly clean both.
- Consider grow lights: For truly dark spaces, a simple LED grow light can provide the necessary spectrum for healthy growth. These are energy-efficient and effective for small-space gardening.
- Rotate your plant: Regularly turning your plant ensures all sides receive adequate light, promoting even growth and preventing one-sided yellowing.
Matching your plant to the light conditions available in your home is one of the most impactful changes you can make to prevent yellowing leaves and promote vigorous growth. The Brooklyn Botanic Garden provides excellent resources on selecting plants based on light exposure.
Nutrient Deficiencies: When Your Plant Needs a Meal
Plants require a balanced diet of macro and micronutrients for healthy growth. Over time, potting mix can become depleted of these essential elements. When a specific nutrient is lacking, the plant cannot perform its physiological functions properly, often resulting in yellowing leaves. This is a common cause of plant problems, particularly in plants that have been in the same pot for a long time without repotting or fertilization.
Understanding when and how to feed your plants is crucial for preventing chlorosis caused by a lack of nitrogen or iron.
Common Deficiencies and Their Signs:
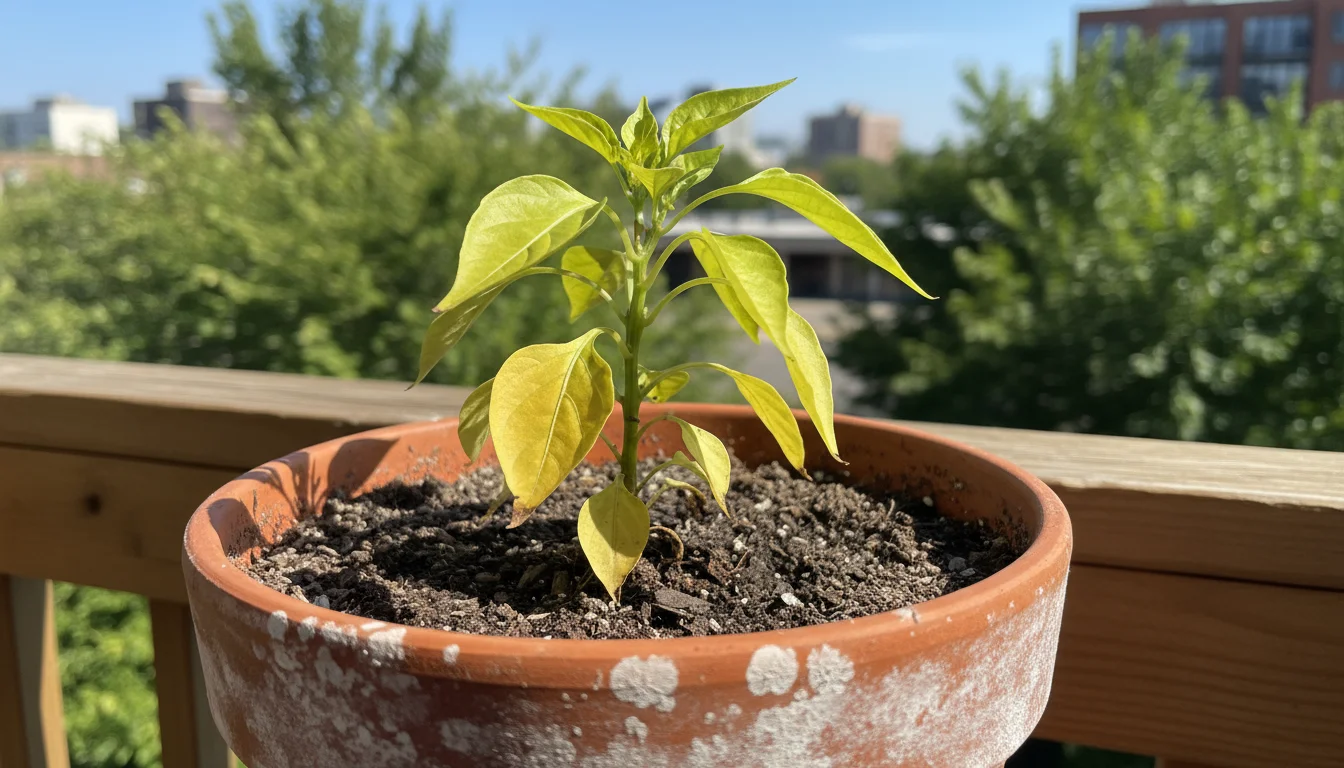
- Nitrogen (N) Deficiency: The most common nutrient deficiency causing yellow leaves. Nitrogen is crucial for chlorophyll production. Symptoms include general yellowing of older, lower leaves, which then spread upwards. New growth might appear pale.
- Magnesium (Mg) Deficiency: Appears as interveinal chlorosis, meaning the tissue between the leaf veins turns yellow, while the veins themselves remain green. Often affects older leaves first.
- Iron (Fe) Deficiency: Also causes interveinal chlorosis, but typically appears on newer leaves first, as iron is less mobile within the plant.
- Potassium (K) Deficiency: Can cause yellowing along leaf margins or tips, sometimes followed by browning.
Actionable Solutions:
- Fertilize regularly during growing season: Use a balanced, all-purpose houseplant fertilizer, diluted to half or quarter strength, during spring and summer (the plant’s active growing period). Reduce or stop fertilizing in fall and winter when growth naturally slows.
- Choose the right fertilizer: Look for a fertilizer with a balanced N-P-K ratio (e.g., 5-5-5 or 10-10-10) for general health. Liquid or slow-release granular fertilizers are practical for indoor plants.
- Repot with fresh soil: Every 1-2 years, repot your plant into fresh, nutrient-rich potting mix. This replenishes depleted nutrients and provides better aeration for roots.
- Avoid over-fertilizing: Too much fertilizer can burn roots and cause more harm than good. Always follow product instructions carefully and err on the side of under-fertilizing rather than over-fertilizing.
Proper nutrition is foundational for preventing yellow leaves houseplants. Think of your plant’s soil as its pantry; regular replenishment ensures it always has the ingredients it needs for robust health.
Temperature Stress and Environmental Shock
Houseplants, like us, prefer stable, comfortable conditions. Sudden changes in temperature, drafts, or extreme heat or cold can put a plant into shock, leading to yellowing and leaf drop. This is a common reason for plant problems when moving plants or during seasonal transitions.
In small apartments, it’s easy to accidentally cook your plants with a heater, leading to rapid yellowing and leaf drop during winter.
Sources of Temperature Stress:
- Cold drafts: Placing plants near poorly insulated windows, exterior doors, or in the path of air conditioning vents can cause leaves to yellow and curl, often showing a bluish tint first.
- Heat stress: Proximity to heating vents, radiators, or strong, direct sun (especially through glass that magnifies heat) can scorch leaves, turning them yellow or brown, and making them crispy.
- Sudden temperature drops: Moving a plant from a warm indoor environment to a cold outdoor one, even briefly, can trigger shock.
- Acclimation shock: Newly purchased plants or plants moved to a new home often experience a period of adjustment. Yellowing leaves during the first few weeks after a move are common as the plant adapts to its new light, temperature, and humidity conditions.
Actionable Solutions:
- Maintain stable temperatures: Most houseplants thrive between 65-75°F (18-24°C). Avoid placing plants in areas with significant temperature fluctuations.
- Protect from drafts: Move plants away from exterior doors, leaky windows, and direct blasts from HVAC systems.
- Relocate from heat sources: Ensure plants are not directly over or next to radiators, heating vents, or other appliances that generate heat.
- Introduce new plants gradually: When bringing home a new plant, place it in an area with stable conditions and monitor it closely for a few weeks as it adjusts. Don’t immediately move it to the sunniest or most humid spot.
- Consider humidity: Extreme temperatures often coincide with low humidity. Grouping plants, using pebble trays, or a small humidifier can help mitigate stress in dry environments. For more information on environmental factors, the Oregon State University Extension Service offers science-backed advice.
A stable environment helps plants devote their energy to growth, rather than recovering from stress. Consistent conditions significantly reduce yellow leaves houseplants.
Pests and Diseases: Unwelcome Guests
Pests and diseases can wreak havoc on your houseplants, and yellowing leaves are a common symptom of their presence. These invaders feed on plant sap, damage tissues, or introduce pathogens, all of which disrupt a plant’s ability to photosynthesize and remain healthy. Catching these plant problems early is crucial for effective treatment.
Keep a close eye out for a spider mite invasion, as these tiny pests drain chlorophyll and cause stippled yellow foliage.
Common Pests and Their Effects:
- Spider Mites: Tiny, almost invisible pests that create fine webbing, especially on the undersides of leaves and in leaf axils. They suck sap, leading to tiny yellow stippling on leaves, which eventually turn completely yellow or bronzed.
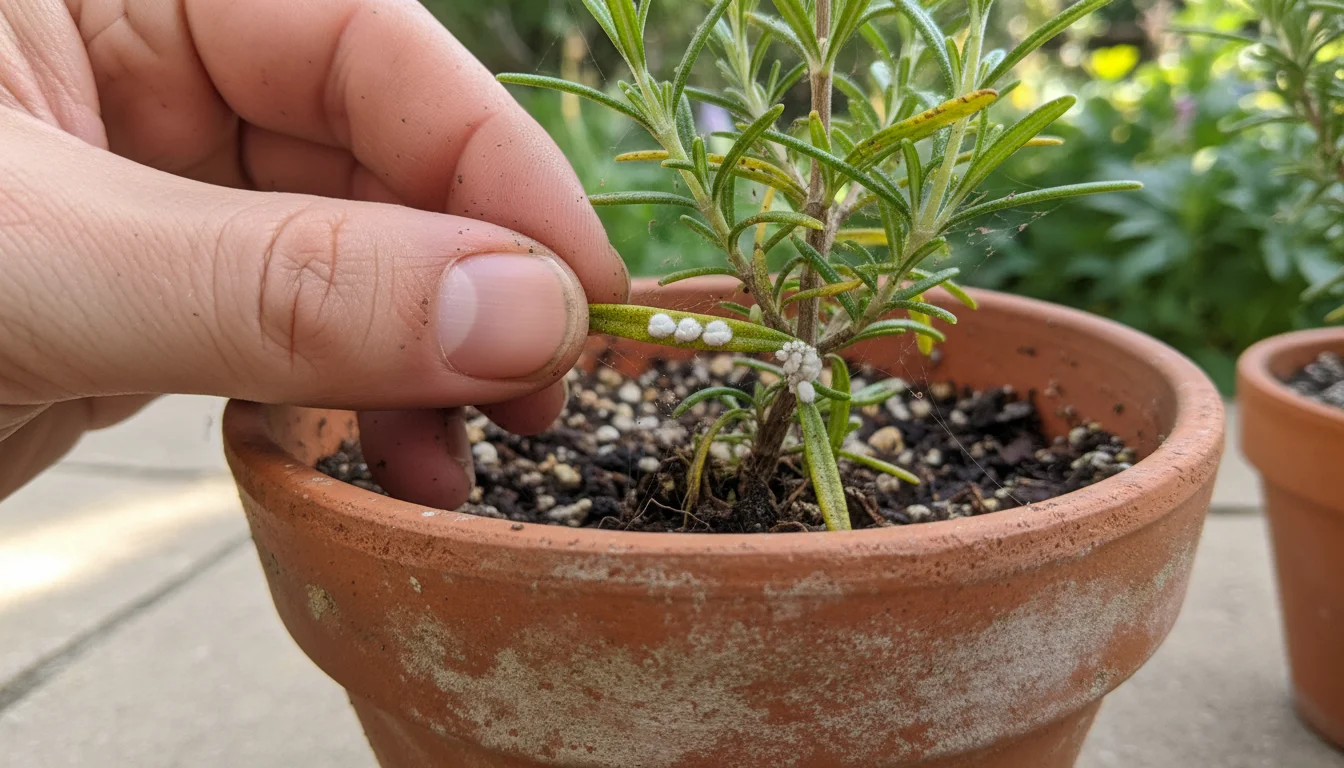
- Mealybugs: Look like small, white, cottony masses found in leaf axils, on stems, and undersides of leaves. They also feed on sap, causing yellowing, distorted growth, and sometimes sticky honeydew.
- Aphids: Small, pear-shaped insects that can be green, black, orange, or brown. They cluster on new growth and leaf undersides, sucking sap and causing yellowing, curling, and stunted growth.
- Scale Insects: Appear as small, immobile bumps on stems and leaves. They are protected by a waxy coating. They feed on sap, leading to yellowing, weakened growth, and sometimes honeydew.
Common Diseases and Their Effects:
- Root Rot: (As discussed under overwatering) Caused by fungal pathogens in waterlogged soil, leading to mushy roots and overall yellowing, wilting, and collapse of the plant.
- Fungal Leaf Spots: Can cause yellow spots that turn brown or black, often with a yellow halo. Spreads in humid conditions and poor airflow.
Actionable Solutions:
- Regular inspection: Make it a habit to inspect your plants weekly. Check the undersides of leaves, stems, and new growth. Early detection makes treatment much easier.
- Quarantine new plants: Always isolate new plants for 2-4 weeks before introducing them to your existing collection to prevent pest spread.
- Manual removal: For small infestations, physically remove pests using a cotton swab dipped in rubbing alcohol, or by wiping them off with a damp cloth.
- Pesticidal soap or neem oil: For more widespread infestations, spray plants thoroughly with insecticidal soap or a diluted neem oil solution. Always follow product instructions and test on a small area first. These are effective and generally safe for indoor use.
- Improve airflow: Good air circulation helps prevent fungal diseases. Avoid overcrowding plants.
- Prune affected parts: Remove any heavily infested or diseased leaves or stems to stop spread and encourage new growth.
A proactive approach to pest management is essential for preventing plant problems. Consistent vigilance keeps your yellow leaves houseplants free from unwelcome guests.
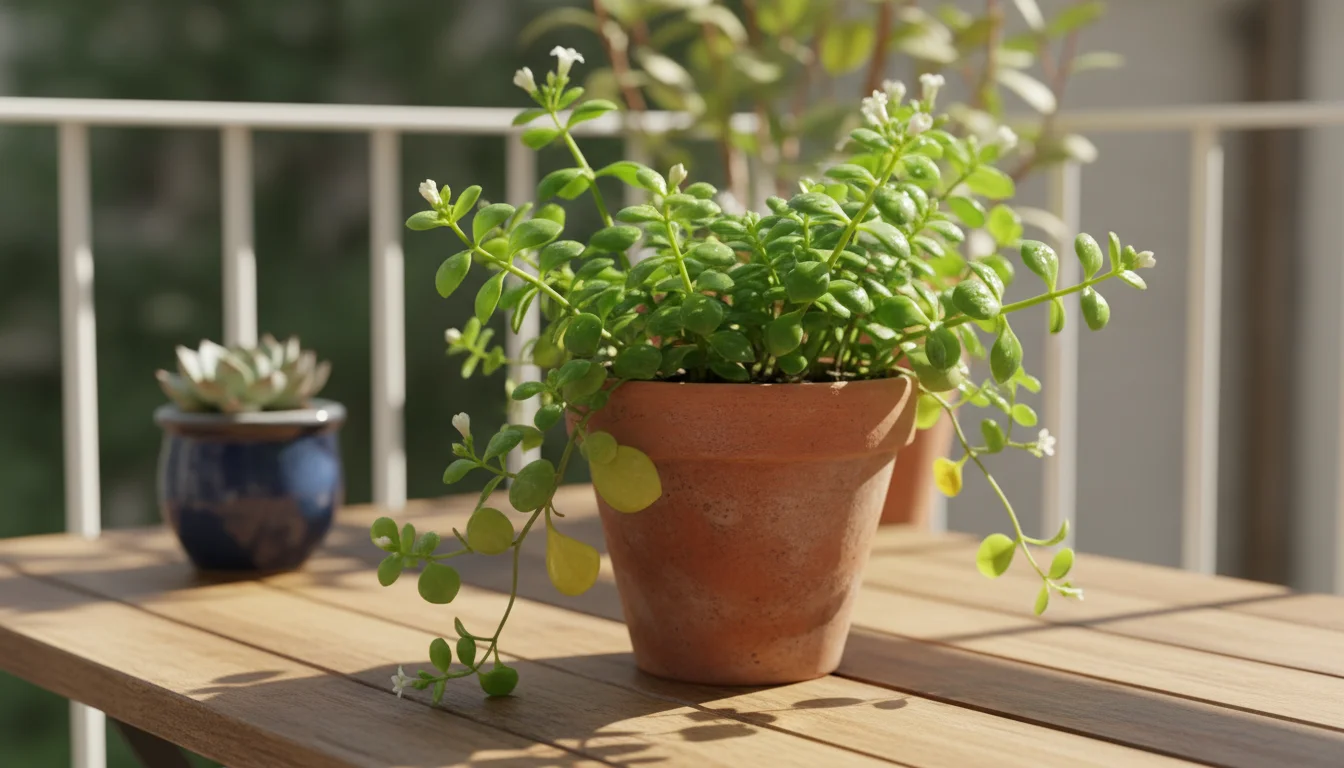
Natural Aging: The Cycle of Life
Not all yellow leaves are a sign of trouble. Just like all living things, plant leaves have a life cycle. Older leaves, typically at the bottom of the plant, naturally age, turn yellow, and eventually drop off. This is a perfectly normal process, especially as the plant focuses its energy on producing new growth at the top.
While single leaves falling is normal, if your houseplant drops all its leaves suddenly, you may need to follow an emergency recovery plan.
Signs of Natural Aging:
- Isolated yellowing: Only one or a few older, lower leaves turn yellow.
- Gradual process: The yellowing occurs slowly over several days or weeks, not suddenly.
- New growth is healthy: The rest of the plant, particularly new growth, appears vibrant and green.
Actionable Solutions:
- Observe and confirm: First, rule out other causes. If only older leaves are affected, and the plant is otherwise healthy, it is likely natural aging.
- Prune if desired: Once a leaf has fully yellowed and is no longer green, you can gently snip it off at the stem with clean scissors or prune it. This tidies up the plant and directs the plant’s energy towards producing new, healthy foliage.
- Do not panic: Understanding this natural process helps you avoid unnecessary interventions that could stress your plant.
Embrace this natural part of your plant’s life cycle. It is a sign of a living, growing organism adapting over time, and a reminder that some yellow leaves on houseplants are simply part of their journey.

Choosing the Right Potting Mix and Drainage
The foundation of a healthy houseplant is its potting mix and the pot it resides in. Poor drainage or an inappropriate potting mix can quickly lead to water-related issues that manifest as yellow leaves and other plant problems. Selecting the right components ensures your plant’s roots get the air and moisture balance they need.
Potting Mix Matters:
- Standard vs. Specialty Mixes: A good quality general-purpose houseplant potting mix is suitable for many plants. However, some plants, like succulents and cacti, require a fast-draining mix (often with more perlite or sand), while others, like ferns, prefer a moisture-retentive mix (perhaps with peat or coco coir).
- Aeration Components: Additions like perlite, pumice, or horticultural grit improve aeration and drainage, preventing compaction and waterlogging. These create tiny air pockets in the soil, allowing roots to breathe.
- Sustainable Choices: Opt for peat-free potting mixes whenever possible. Peat extraction has environmental concerns. Coco coir, composted bark, and other sustainable alternatives perform just as well and support environmentally conscious gardening.
- Nutrient Retention: While potting mixes contain some nutrients, they deplete over time. Fresh soil provides a nutrient boost.
Drainage is Non-Negotiable:
- Drainage Holes: Every pot must have at least one drainage hole at the bottom. This allows excess water to escape, preventing root rot.
- Saucers: Use a saucer underneath your pot to catch runoff. Empty it within 15-30 minutes after watering to prevent the plant from sitting in standing water.
- “Drainage Layers” Myth: Adding a layer of gravel or broken pot shards at the bottom of a pot without drainage holes does not improve drainage. It simply raises the water table within the pot, potentially making root rot worse. Always rely on actual drainage holes.
Repotting for Health:
- When to Repot: Repot when roots start growing out of the drainage holes, when the plant becomes top-heavy, or when growth slows significantly despite good care. Generally, every 1-2 years during spring or early summer is a good rhythm.
- Choosing Pot Size: Typically, go up one pot size (e.g., from a 6-inch to an 8-inch pot). Too large a pot holds excess soil and moisture, increasing the risk of overwatering and yellow leaves.
- The Repotting Process:
- Gently remove the plant from its current pot.
- Loosen any circling or matted roots.
- Remove as much old soil as possible, especially if it smells sour or looks compacted.
- Place a small layer of fresh potting mix in the new pot.
- Center the plant, ensuring the top of the root ball is at the same level as in the old pot.
- Fill the pot with fresh mix, gently tamping it down to remove large air pockets.
- Water thoroughly after repotting.
By providing the right medium and ensuring proper drainage, you create a healthy foundation for your plants, significantly reducing indoor gardening issues and promoting lush, green foliage instead of yellow leaves on houseplants.
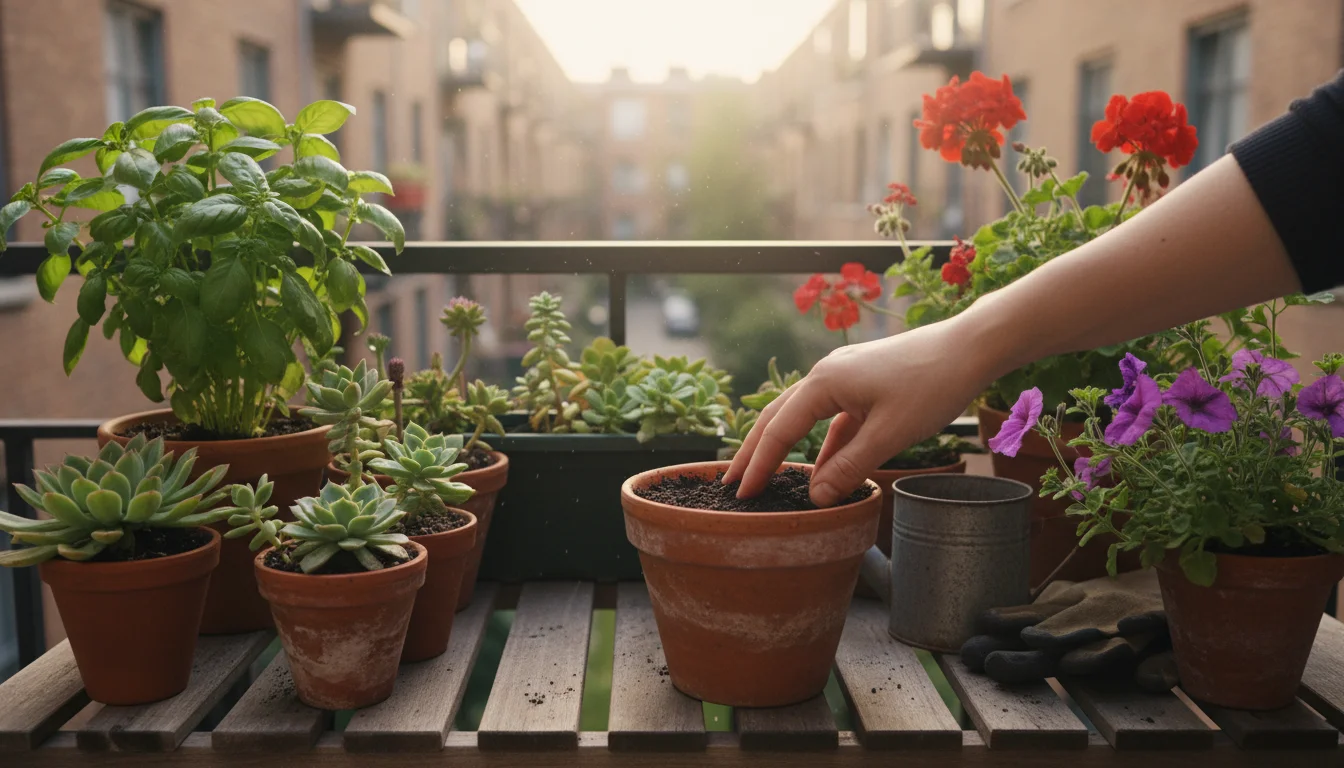
Practical Steps to Prevent Yellowing Leaves
Beyond addressing specific causes, adopting a holistic approach to houseplant care promotes overall vitality and minimizes the occurrence of yellow leaves. These preventative measures focus on low-effort routines and sustainable practices suitable for small-space gardeners.
1. Consistent Routine:
- Regular Checks: Dedicate a few minutes each week to visually inspect all your plants. Look for changes in leaf color, texture, pest signs, or wilting. Early detection is your best defense against major plant problems.
- Watering Schedule: Instead of a fixed calendar, develop a watering intuition. Feel the soil, lift the pot, and observe your plant’s demeanor. Adjust frequency based on seasonal changes, light levels, and plant growth.
2. Understanding Your Microclimate:
- Know Your Windows: Understand which windows provide what kind of light (north, east, south, west) and for how long. Place plants accordingly.
- Monitor Humidity: Most houseplants prefer moderate to high humidity (40-60%). In dry indoor environments, especially during winter, group plants together to create a microclimate, use a pebble tray (a tray with pebbles and water beneath the pot, not touching the pot’s bottom), or a small room humidifier. For guidance on improving humidity, the New York Botanical Garden offers helpful insights.
- Avoid Drafts: Keep plants away from heating and cooling vents, and drafty windows or doors to prevent sudden temperature shifts.
3. Sustainable Practices for a Healthier Home:
- Water-Wise Habits: Collect rainwater or spent cooking water (unsalted and cooled) for your plants. This reduces tap water usage and often provides beneficial trace minerals.
- Composting: If you have access, add spent potting mix and plant trimmings to a compost bin. This enriches soil and reduces waste.
- DIY Pest Solutions: Opt for natural pest controls like insecticidal soap or neem oil before resorting to chemical pesticides.
- Reuse Pots: Clean and reuse plastic or ceramic pots. If purchasing new, consider durable, long-lasting options.
4. Seasonal Adjustments:
- Winter Slowdown: Plants generally enter a semi-dormant phase in winter due to less light and cooler temperatures. Reduce watering frequency and stop fertilizing.
- Summer Growth: Increase watering and resume fertilizing during the warmer, brighter months. Monitor for increased light intensity and potential sunburn.
By integrating these practical, low-maintenance strategies into your routine, you minimize plant problems and foster robust growth. Your plants reward you with lush, green foliage, free from the worries of yellow leaves houseplants.
Frequently Asked Questions
Why are only the bottom leaves of my plant turning yellow?
Yellowing on just the bottom, older leaves is most often a sign of natural aging. Plants shed old leaves to redirect energy to new growth. If only a few lower leaves are affected and the rest of the plant appears healthy, it is generally no cause for concern. It can also be an early sign of underwatering or nutrient deficiency if multiple leaves are yellowing quickly.
Can too much sun cause yellow leaves?
Yes, direct, intense sunlight can cause leaves to “sunburn” or become stressed, leading to yellowing, bleaching, or browning patches. This often appears on the leaves facing the window. Move the plant to a spot with bright, indirect light, or use a sheer curtain to diffuse the intensity.
My new plant’s leaves are turning yellow. What should I do?
New plants often experience transplant shock or acclimation stress when moved to a new environment. Yellowing leaves during the first few weeks are common. Ensure you provide consistent care: appropriate watering, stable temperatures, and suitable light. Avoid immediate repotting, as this can add to the stress. Allow the plant time to adjust.
How do I know if I’m overwatering or underwatering?
Check the soil moisture. For overwatering, the soil feels constantly wet or soggy, and yellow leaves are often soft or mushy. For underwatering, the soil feels very dry, sometimes pulling away from the pot, and yellow leaves are typically crispy or brittle. The key is to feel the soil two inches deep before watering.
Should I remove yellow leaves?
Once a leaf is fully yellow and no longer green, it is not photosynthesizing and will not recover its green color. You can prune it off with clean scissors or by gently pulling it, especially if it detaches easily. Removing these leaves helps the plant redirect its energy to healthy growth. Ensure you address the underlying cause of yellowing first.


Leave a Reply