Winter often feels like a dormant season for gardeners, but it presents a fantastic opportunity for indoor projects that bring life and growth into your home. One of the most rewarding and cost-effective winter gardening activities involves propagating your favorite woody herbs, such as rosemary and thyme. Imagine expanding your herb garden, creating thoughtful gifts, or simply ensuring a continuous supply of fresh flavors, all from cuttings you take from existing plants. You can achieve this without spending a cent on new plants.
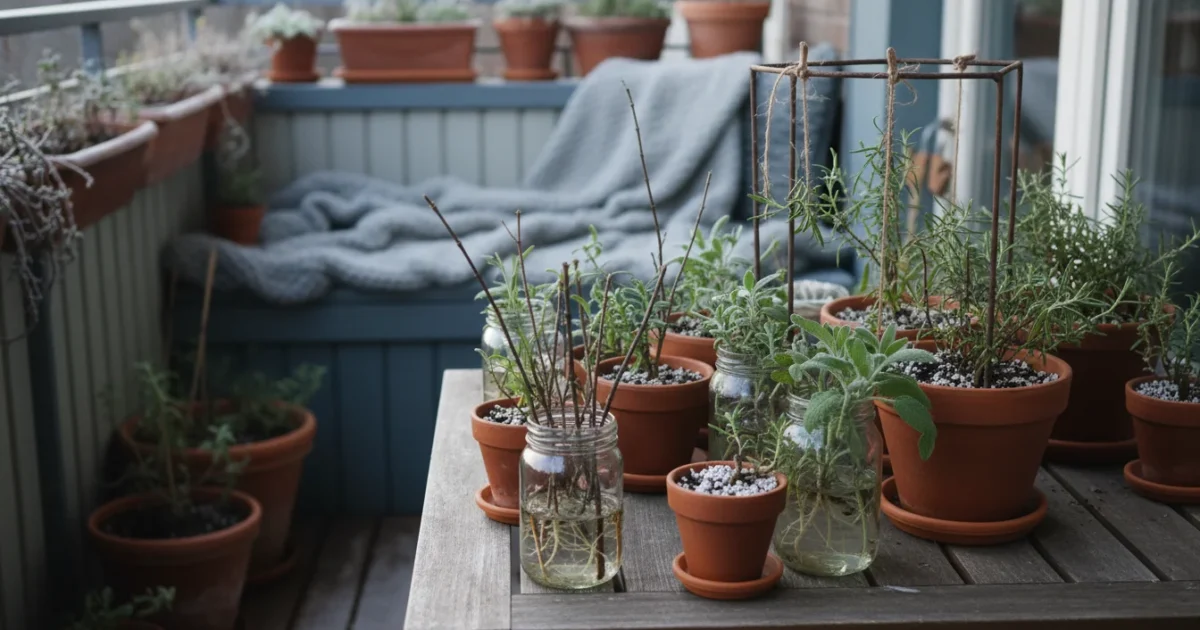
You can also set up a dedicated windowsill propagation station to manage multiple herb cuttings efficiently during the colder months.
This article guides you through the process of successfully rooting woody herb cuttings indoors. You will learn the simple techniques to multiply your beloved rosemary and thyme plants, even during the chilliest months. This skill ensures you always have fresh herbs at your fingertips and empowers you to grow your garden sustainably, no matter how small your space. You are about to embark on a propagation journey that will transform how you think about expanding your plant collection.
Why Propagate Woody Herbs in Winter?
Winter propagation offers several compelling benefits, making it an excellent project for any small-space gardener. First, you get a head start on the growing season. While outdoor gardens rest, your indoor cuttings actively develop roots, allowing them to establish robust plants by spring. You can transfer these established young herbs outdoors or into larger indoor pots when warmer weather arrives.
Second, this method saves you money. Instead of buying new plants each year, you multiply your existing favorites for free. This is especially valuable for plants like rosemary, which can be expensive to purchase. Data from home gardening surveys consistently show that propagating from cuttings is among the most budget-friendly ways to expand a garden, often costing nothing beyond basic supplies you may already own.
Third, propagation provides a fantastic opportunity for skill development. You learn about plant biology, observe the fascinating process of root formation, and gain confidence in your gardening abilities. This hands-on experience deepens your connection to your plants and fosters a sense of accomplishment.
Finally, it is incredibly satisfying. Growing new plants from cuttings feels like magic. It is also an environmentally friendly practice. You reduce the demand for commercially grown plants, which often travel long distances, and you utilize existing resources instead of contributing to packaging waste.
Understanding Your Woody Herbs: The Basics of Growth
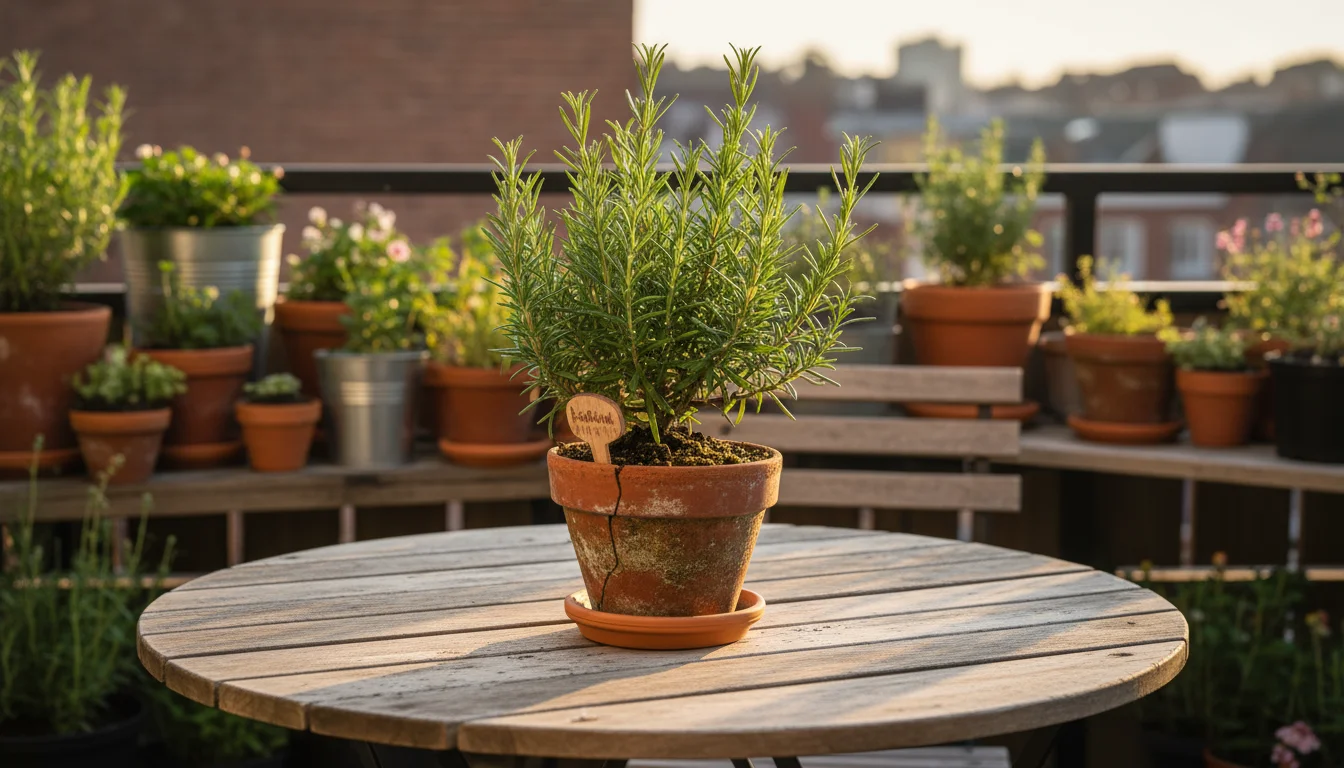
Rosemary and thyme are excellent candidates for winter propagation because they are woody herbs. This means their stems become tough and somewhat rigid as they mature, unlike soft-stemmed herbs like basil. Woody stems contain more stored energy, which aids in root development.
To ensure your parent plant remains healthy enough for more cuttings, follow our guide on keeping potted rosemary alive indoors.
Both rosemary (Rosmarinus officinalis) and thyme (Thymus vulgaris) thrive in sunny conditions and well-draining soil. Understanding their natural growth patterns helps you choose the best cuttings. They produce new, softer growth at their tips and more mature, woody growth lower down the stem. You want a cutting that balances these characteristics: not too soft that it wilts quickly, and not too woody that it struggles to produce roots.
Rosemary plants, for instance, often develop long, somewhat leggy stems. Taking cuttings helps prune the parent plant, encouraging bushier growth. Thyme, with its low-growing, sprawling habit, also benefits from pruning, and its cuttings root quite readily. You effectively rejuvenate the parent plant while creating new ones.
The science behind rooting woody herbs indoors involves encouraging the plant to produce adventitious roots. These are roots that develop from plant tissues other than the primary root. When you take a cutting, you create a wound. The plant’s natural healing response, combined with suitable environmental conditions, stimulates the formation of these new roots. Hormones within the plant, particularly auxins, play a crucial role in this process.
Gathering Your Propagation Essentials
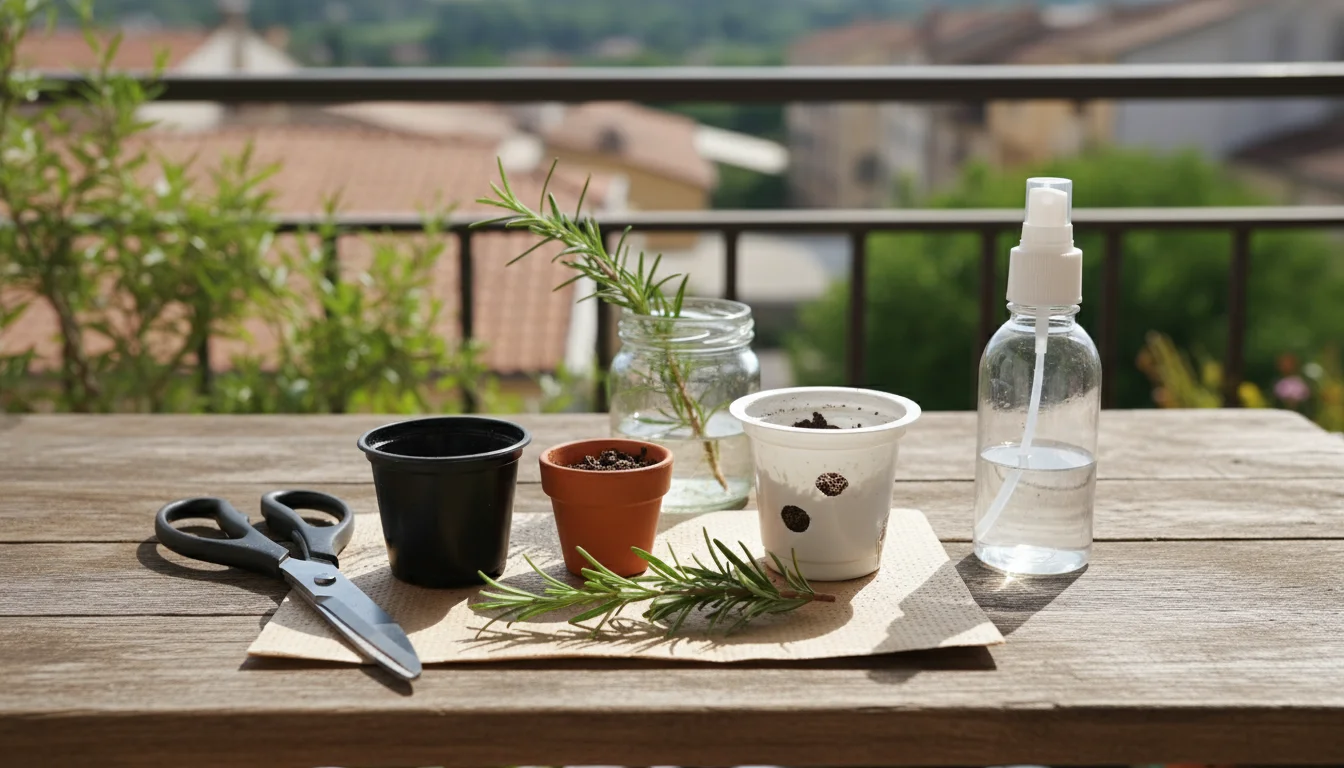
Before you begin, gather all your tools. This preparation makes the process smooth and efficient. You probably have most of these items already around your home, aligning perfectly with low-maintenance, small-space gardening.
Here is what you need:
- Healthy Parent Plant: Select a vigorous, disease-free rosemary or thyme plant. Avoid taking cuttings from stressed or wilting plants.
- Sharp Pruning Shears or Scissors: Clean tools prevent disease transmission and create precise cuts that heal better. You can sterilize them with rubbing alcohol or a 10 percent bleach solution.
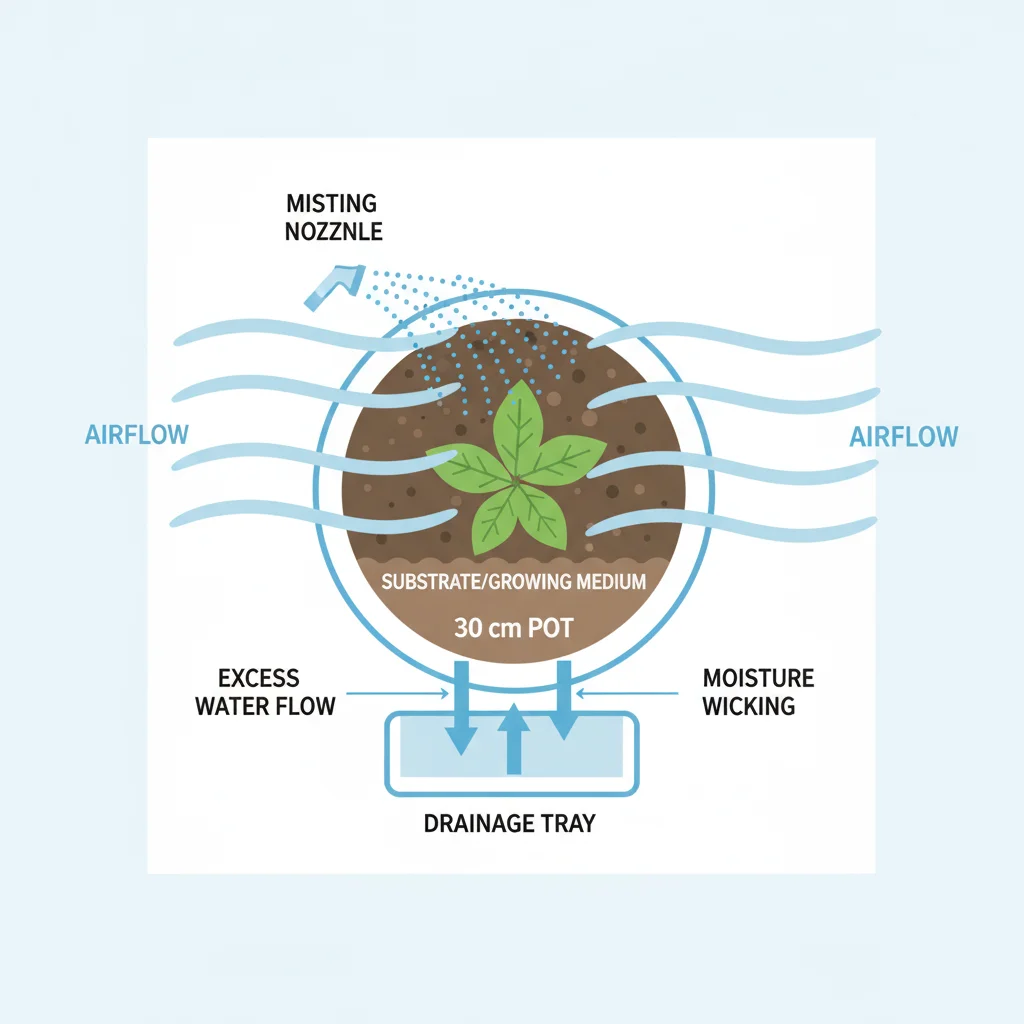
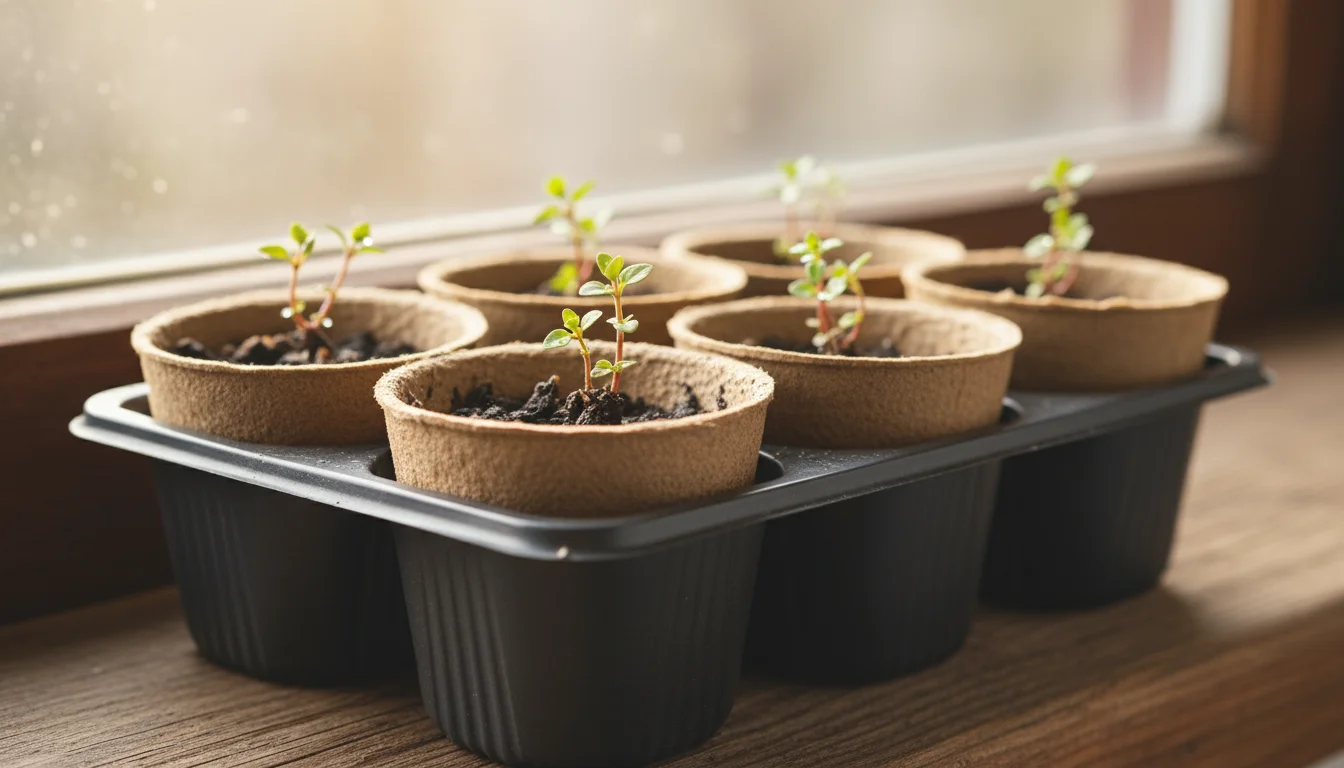
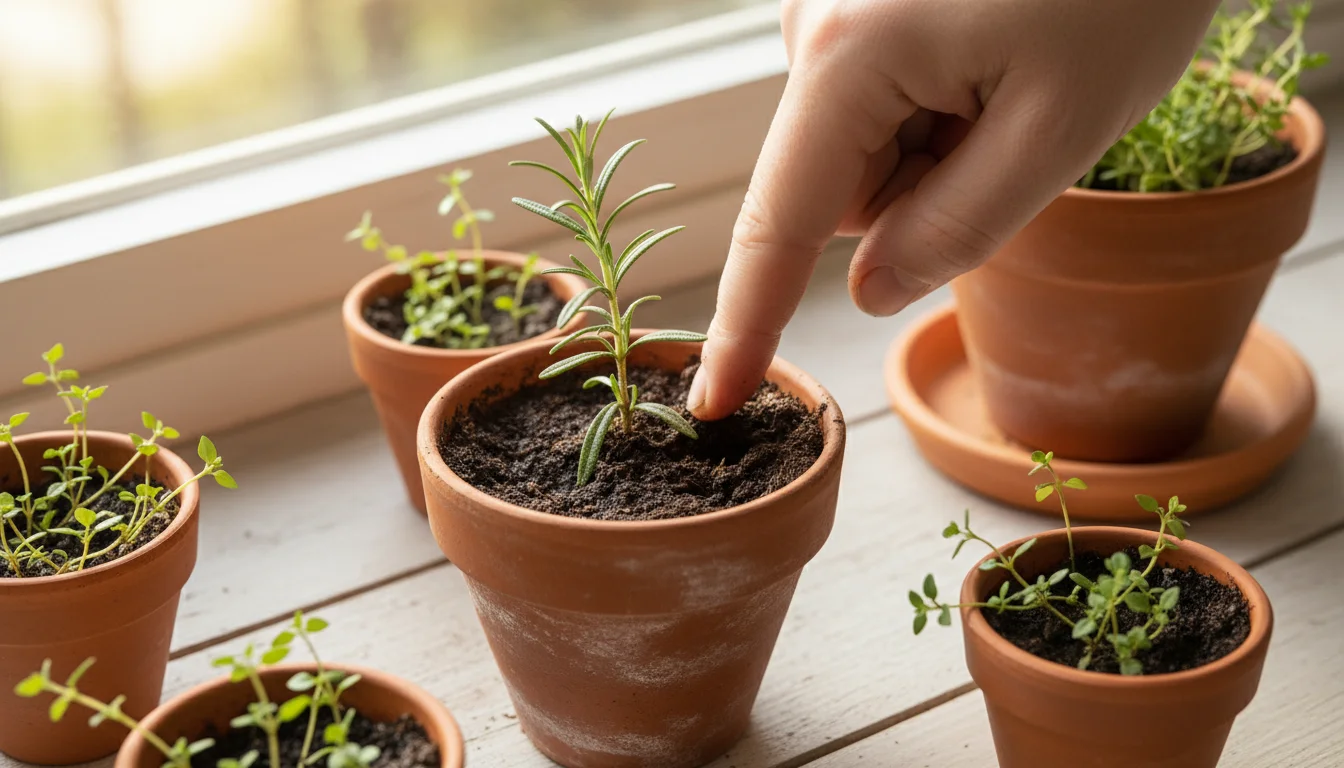
- Small Pots or Trays: Use containers with drainage holes. Peat pots, plastic nursery pots, or even recycled yogurt cups (with holes poked in the bottom) work well. Small pots, around 2-4 inches in diameter, are ideal for starting cuttings.
- Seed Starting Mix or Perlite/Vermiculite: This sterile, well-draining medium is critical. Regular potting soil often retains too much moisture and can lead to rot. A mix of 50 percent perlite and 50 percent peat moss or coco coir also creates an excellent rooting environment. Perlite is a volcanic glass that helps aeration and drainage, while vermiculite is a mineral that retains moisture and nutrients.
- Rooting Hormone (Optional, but Recommended): Available in powder or gel form, rooting hormone encourages faster, more reliable root development. While not strictly necessary for herbs like rosemary and thyme, it significantly increases your success rate.
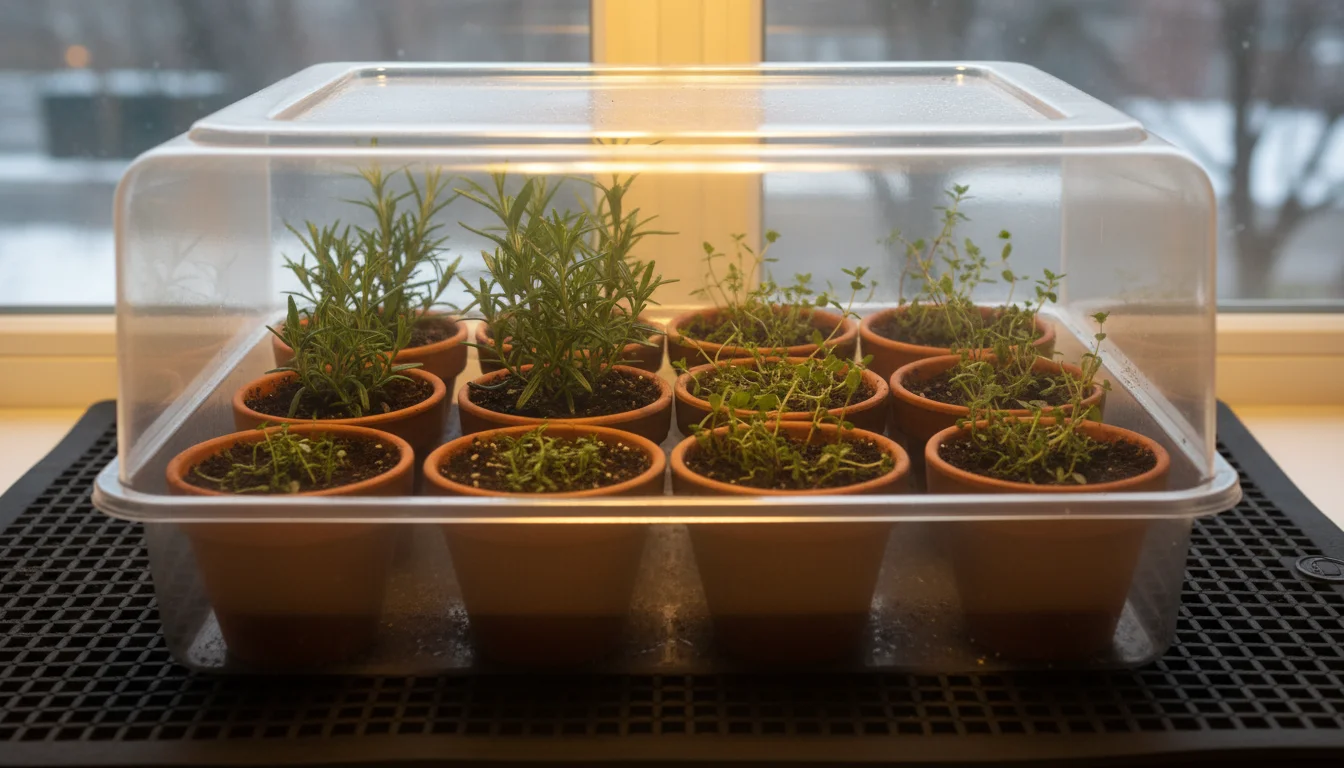
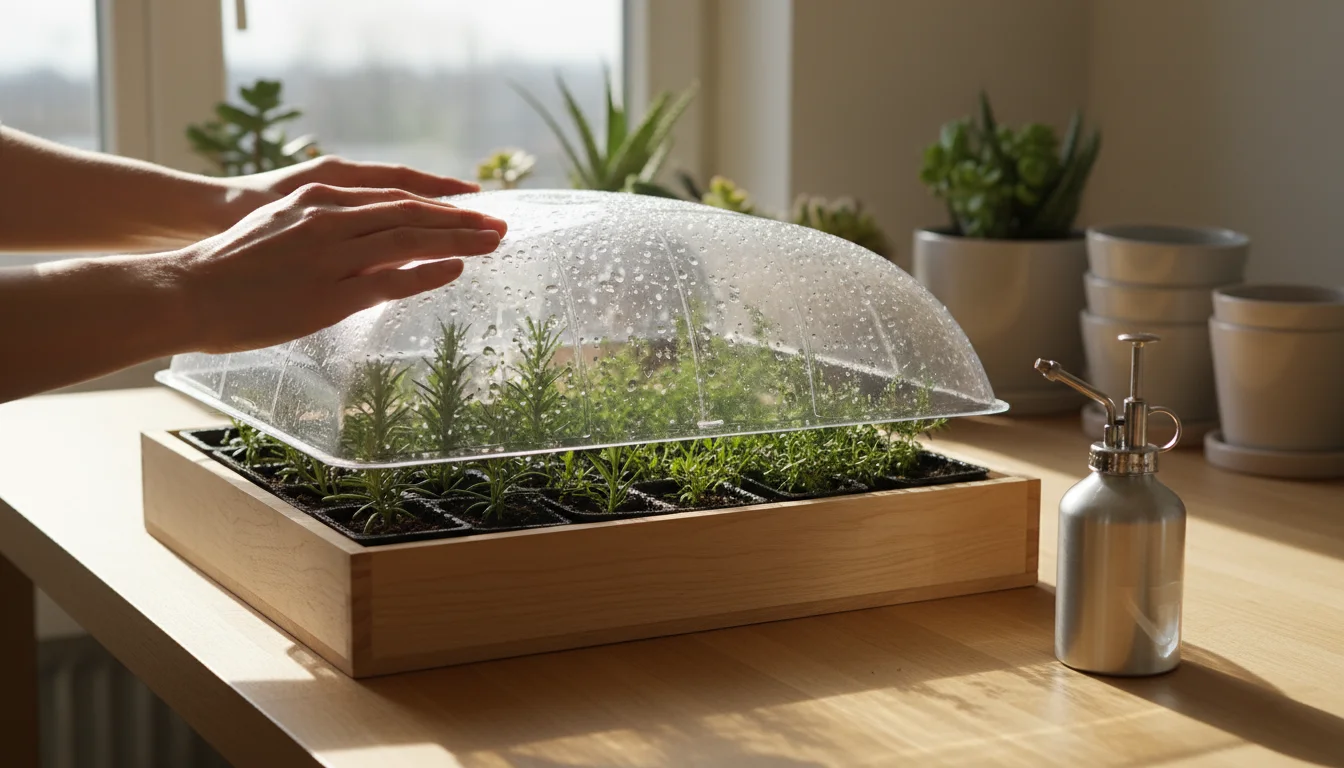
- Clear Plastic Dome or Plastic Bag: This creates a humid environment, which is vital for preventing cuttings from drying out while they lack roots.
- Misting Bottle: For keeping the rooting medium and foliage moist.
- Bright, Indirect Light Source: A sunny window or a grow light.
- Water: Room temperature water for misting and moistening the rooting medium.
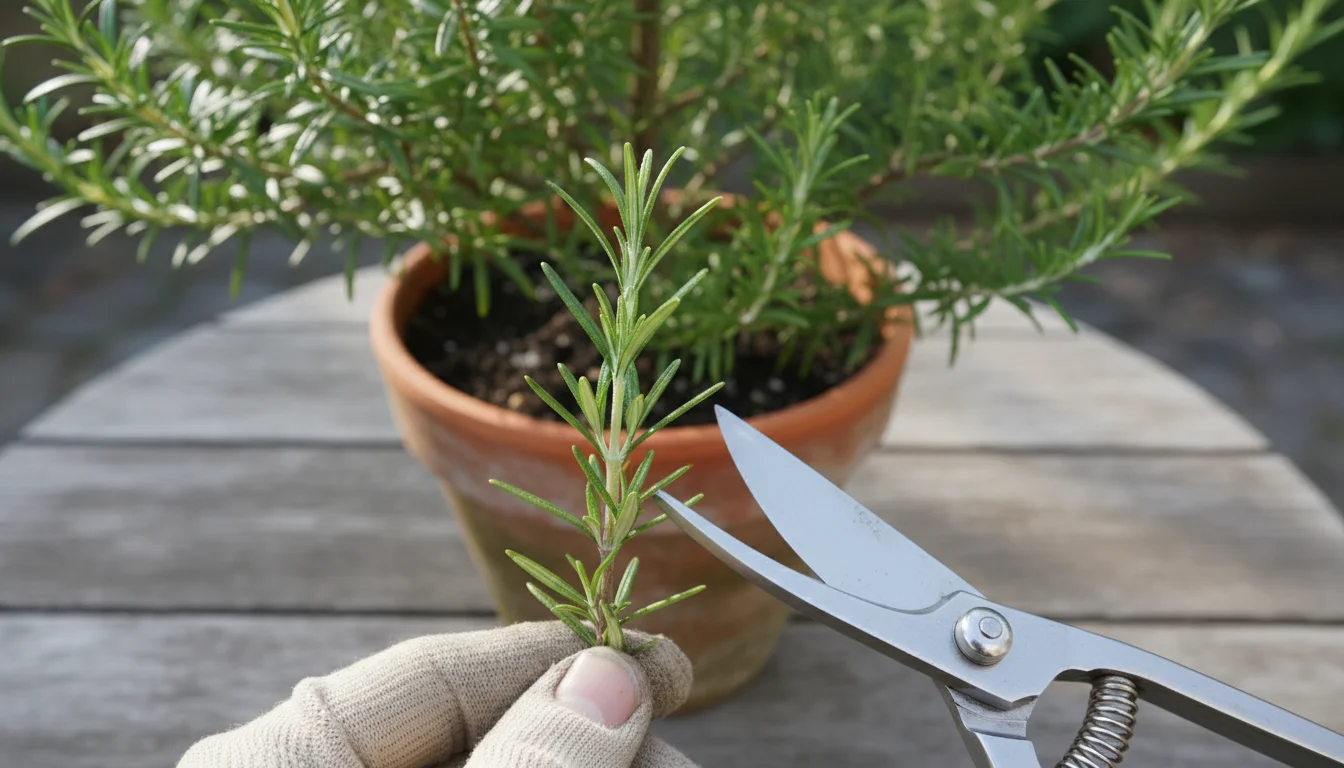
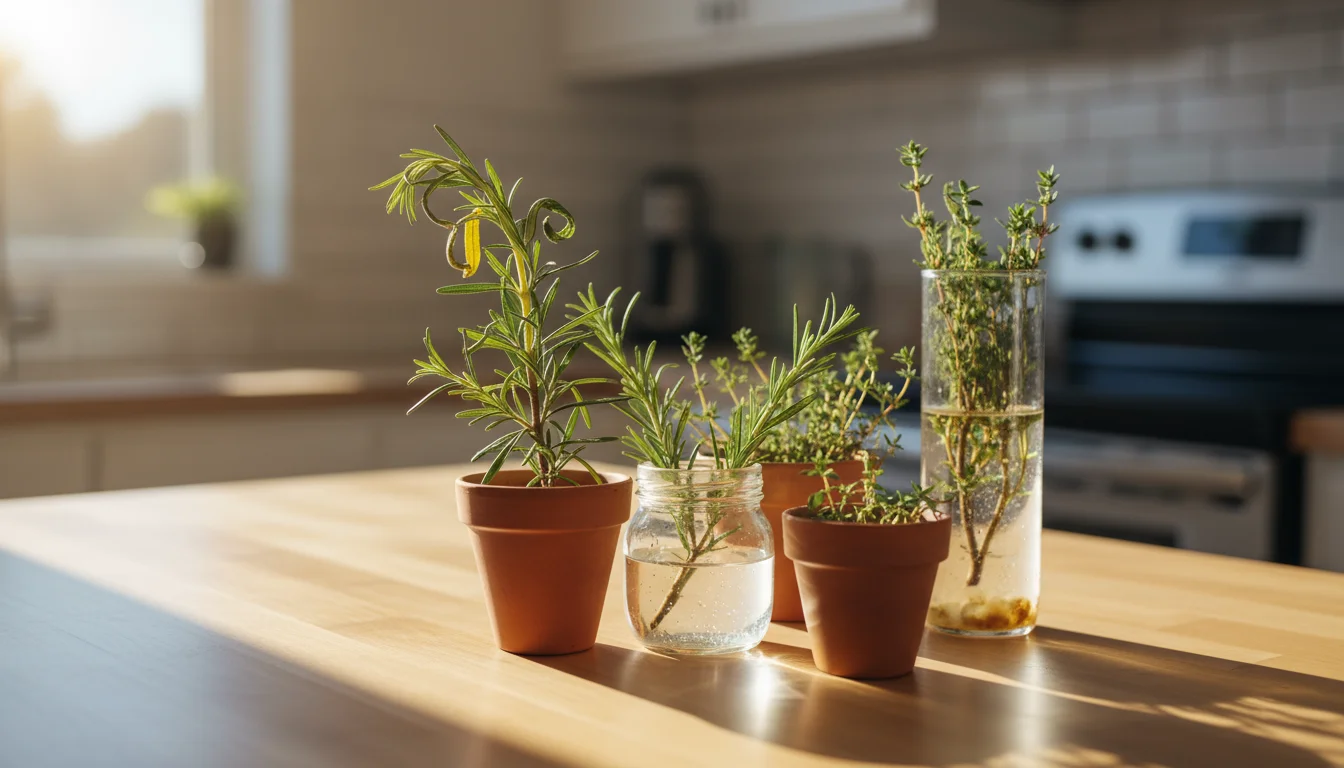
The Precise Art of Taking Cuttings
Taking healthy cuttings correctly is the most critical step in successful propagation. A clean cut and careful selection directly impact rooting success.
If you are new to the hobby, reviewing the fundamentals of plant propagation can help increase your success rate with different varieties.
- Choose Your Stems: Look for healthy, non-flowering stems on your parent plant. These stems should be semi-hardwood, meaning they are firm but still slightly flexible, not too green and soft, nor too woody and brittle. Aim for stems about 4-6 inches long.
- Make the Cut: Using your clean, sharp shears, cut just below a leaf node. A leaf node is the point on the stem where leaves emerge. This area contains cells that actively differentiate, making it a prime spot for root formation. Aim for a clean, angled cut, which increases the surface area for root development.
- Prepare the Cutting: Remove the leaves from the bottom 2-3 inches of the cutting. You want to expose at least two or three leaf nodes. These are the points where roots will emerge. Removing lower leaves also prevents them from rotting in the moist rooting medium. Leave 3-4 sets of leaves at the top of the cutting to allow for photosynthesis, but you can trim larger leaves in half to reduce moisture loss.
- Apply Rooting Hormone (Optional): If using rooting hormone, dip the cut end of the stem into the powder or gel. Ensure the bottom nodes are covered. Gently tap off any excess hormone.
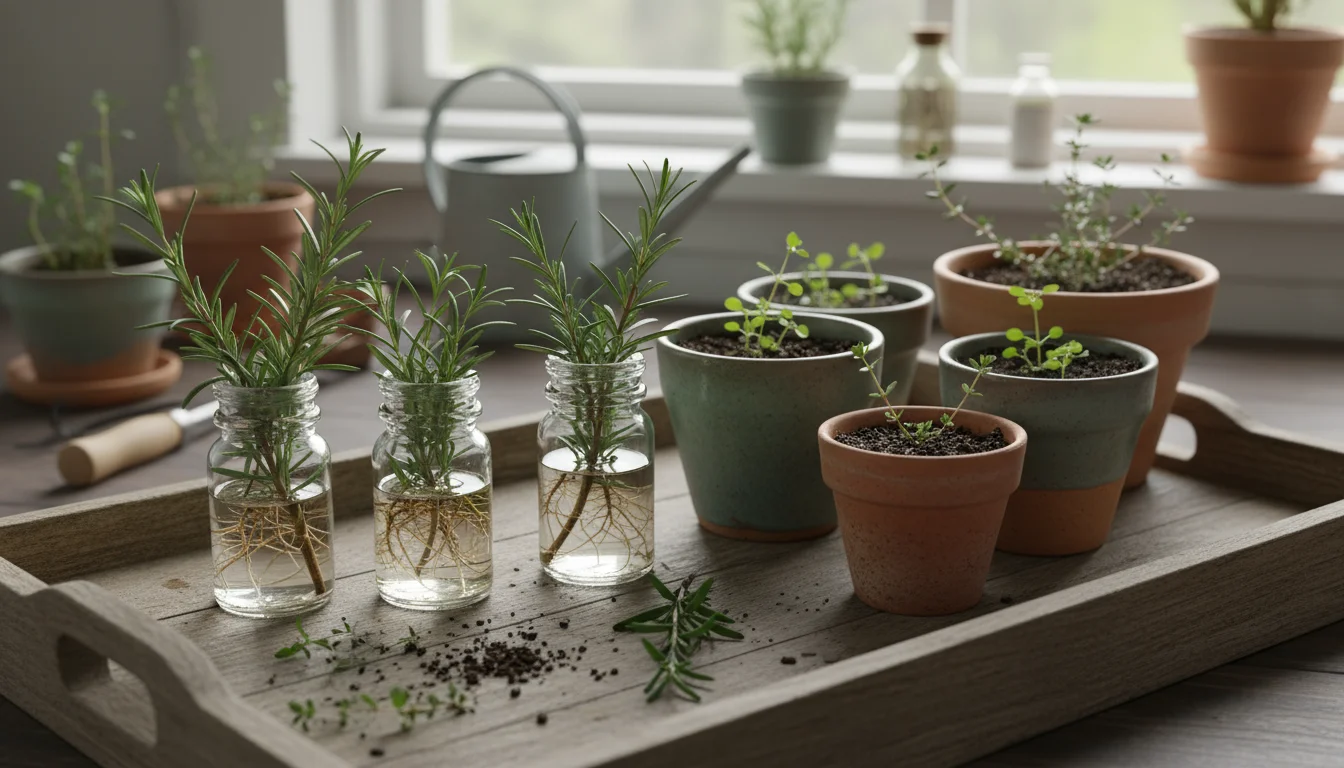
- Plant the Cutting: Pre-moisten your seed starting mix or rooting medium. Use a pencil or chopstick to create a small hole in the medium. Insert the prepared cutting into the hole, ensuring at least two leaf nodes are buried. Gently firm the medium around the base of the cutting to provide good contact. Plant multiple cuttings in each pot or tray, spacing them a few inches apart. This increases your chances of success.
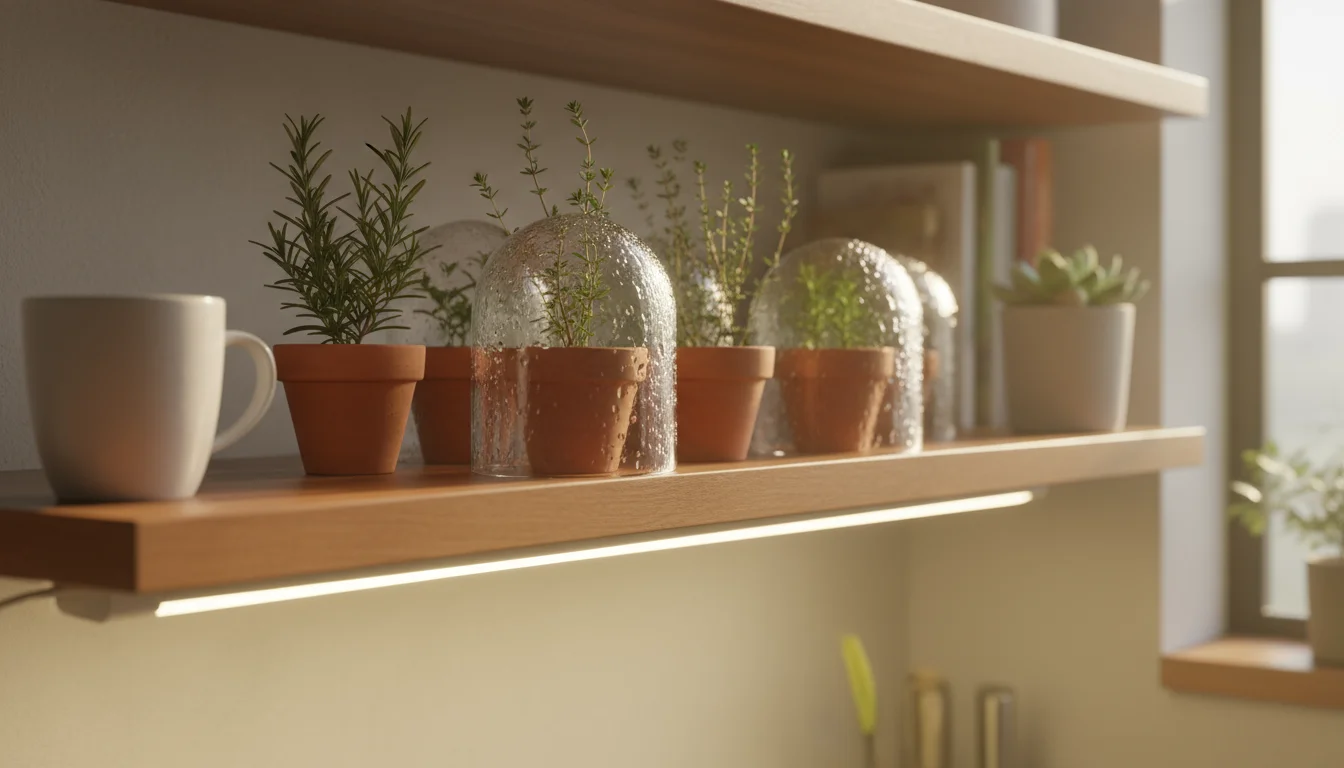
Creating the Ideal Rooting Environment
The success of your winter propagation project depends heavily on providing the right conditions for your cuttings. You need to mimic the humid, warm, and bright environment that encourages root development.

Humidity: The Key to Survival
Cuttings lack roots, so they cannot absorb water efficiently. High humidity helps prevent desiccation, or drying out. Place a clear plastic dome over your pots or enclose the entire tray in a clear plastic bag. This creates a miniature greenhouse effect, trapping moisture around the cuttings. Regularly mist the cuttings and the surface of the medium, especially if you notice condensation decreasing inside the dome or bag. Aim to maintain a consistent moisture level in the rooting medium, keeping it damp but never soggy, which can lead to rot. Remember, drainage is how water moves through soil, so a well-draining medium prevents waterlogging.
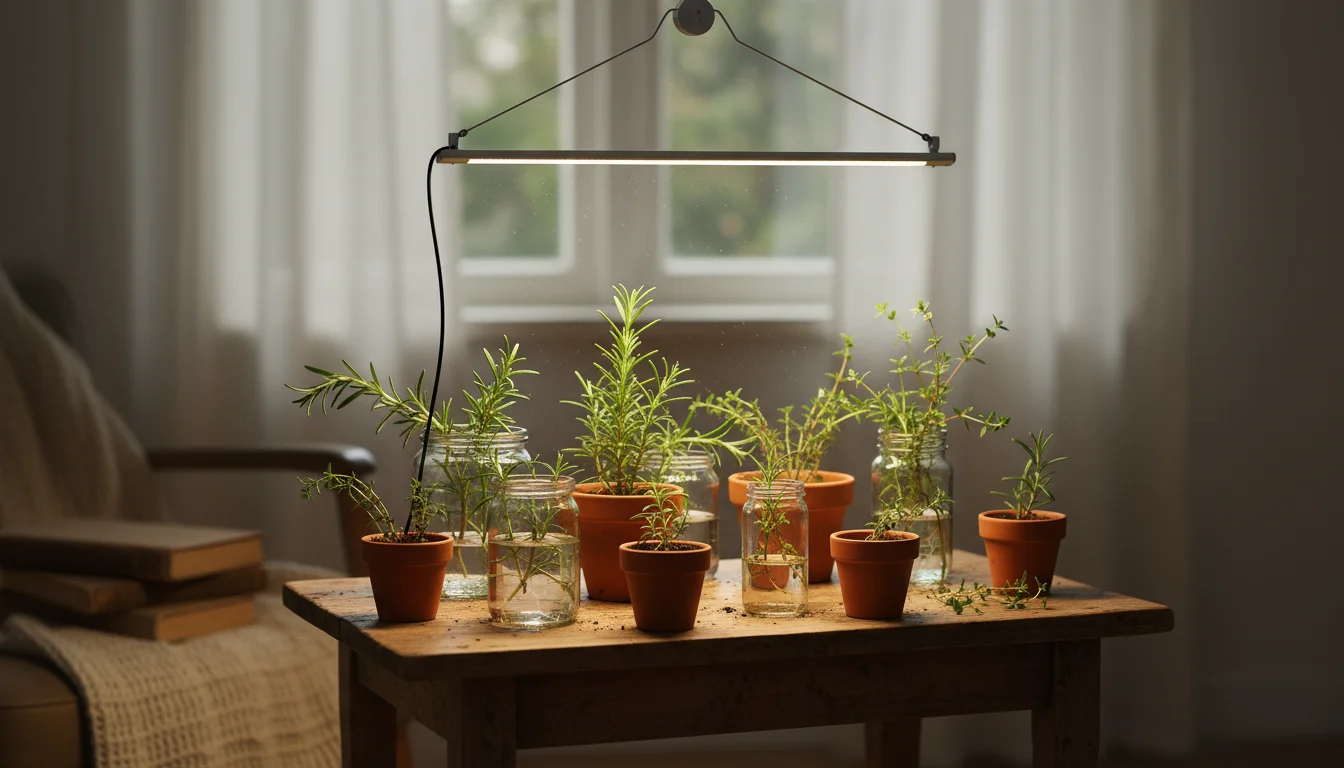
Light: Energy for Growth
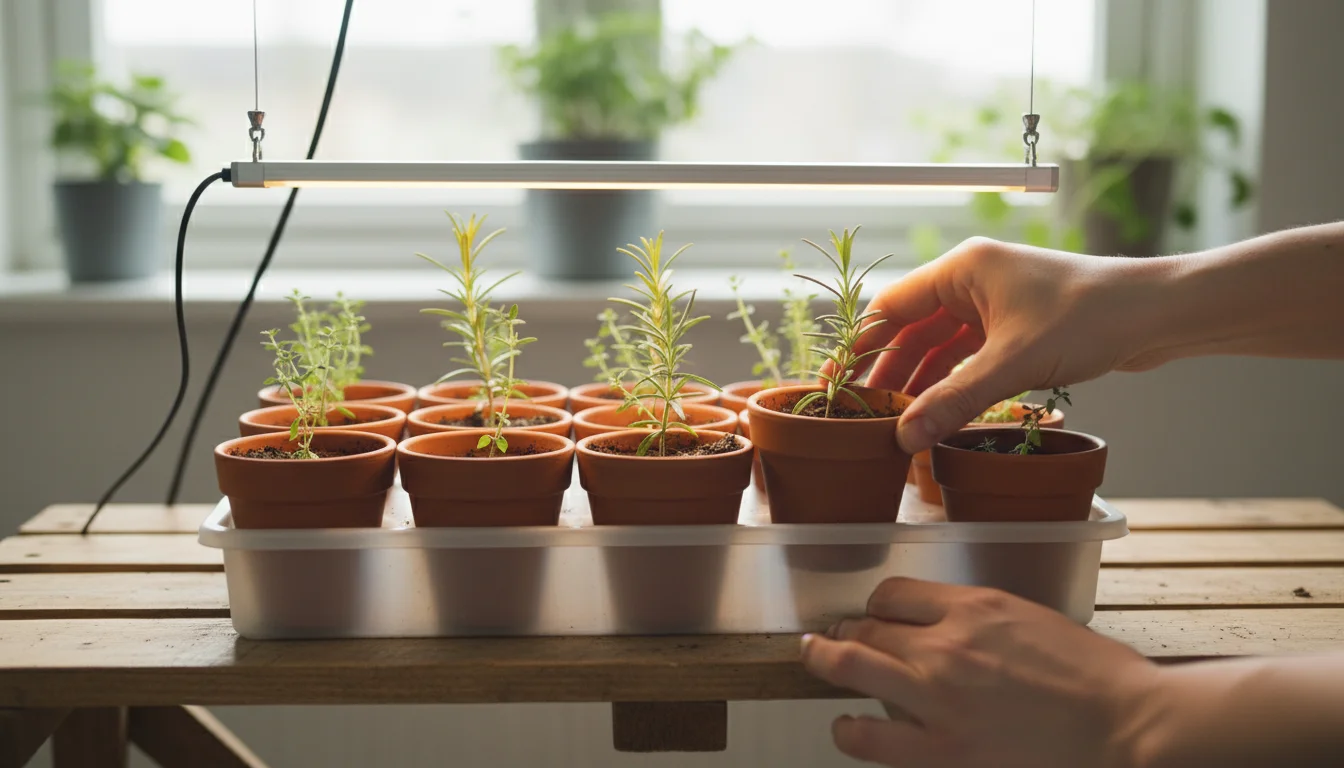
Provide bright, indirect light. A south-facing window that receives ample ambient light works well, but avoid direct, intense sun that can scorch the tender cuttings. If natural light is limited, particularly during short winter days, consider using a grow light. Position the grow light about 6-12 inches above the cuttings for 12-14 hours a day. LED grow lights are energy-efficient and produce little heat, making them ideal for small indoor setups.
Temperature: Warmth for Root Development
Maintain a consistent room temperature, ideally between 65-75°F (18-24°C). Temperatures that are too cold slow down root development, while excessively high temperatures can stress the cuttings or encourage fungal growth. Avoid placing cuttings near cold drafts from windows or direct heat sources like radiators. A heating mat placed under the rooting tray can provide gentle, consistent bottom heat, significantly accelerating root formation. This is particularly beneficial during colder winter months.
Nurturing Your Cuttings: From Callus to Roots
Patience is a gardener’s virtue, especially during propagation. Rooting takes time, typically 3-6 weeks for rosemary and thyme, sometimes longer in less-than-ideal conditions. Consistent care and observation are crucial during this period.
Ongoing Care: Misting, Airflow, and Moisture
- Mist Regularly: Keep the humidity high by misting the foliage and the rooting medium daily or every other day.
- Monitor Moisture: Check the rooting medium’s moisture level frequently. It should feel consistently damp, like a wrung-out sponge. If the top feels dry, gently water from the bottom or mist thoroughly.
- Provide Airflow: While humidity is important, stagnant, overly wet conditions invite fungal diseases. Lift the plastic dome or open the plastic bag for 15-30 minutes each day to allow for air circulation. This “hardening off” period strengthens the cuttings and reduces the risk of mold.
- Watch for Wilting: Some initial wilting is normal as cuttings adjust. However, persistent wilting despite adequate moisture indicates stress. Increase humidity or reduce light intensity.
Checking for Roots: The Gentle Pull Test
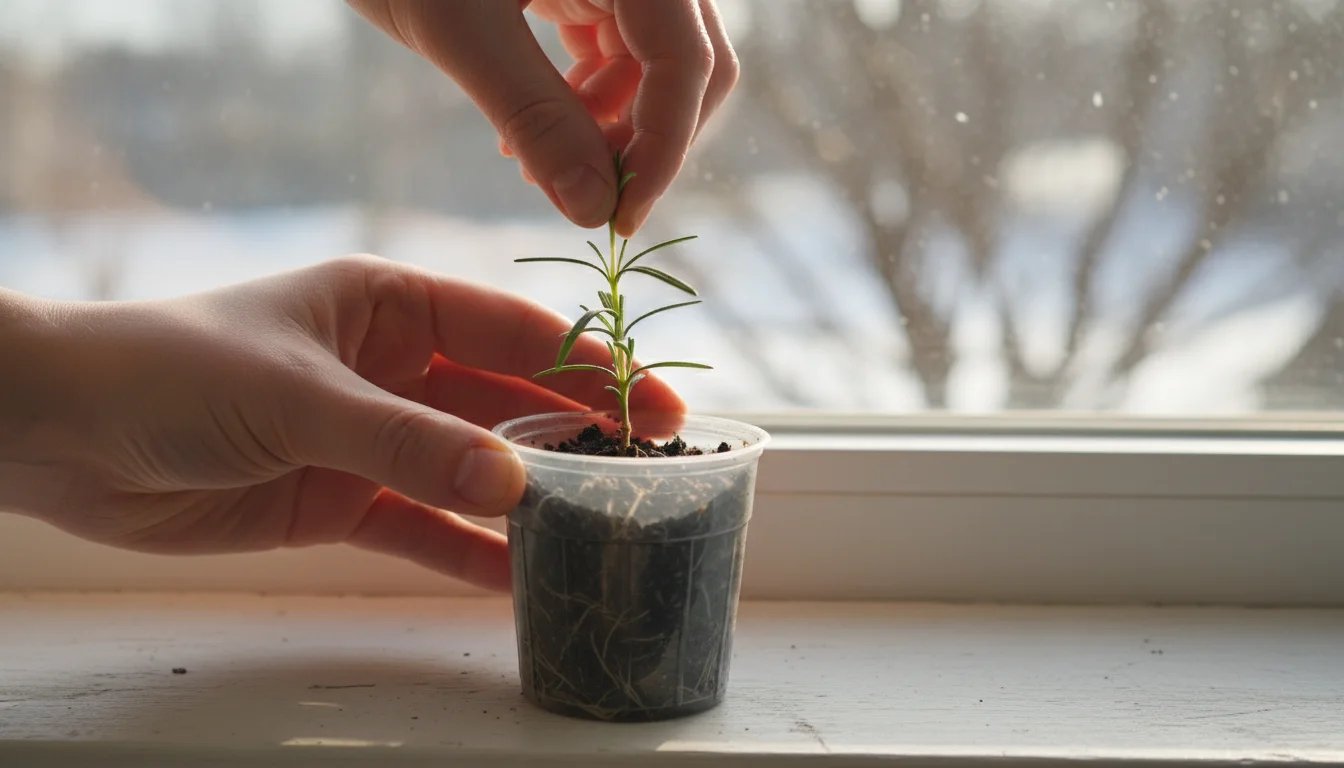
After a few weeks, you can gently check for roots. Very carefully tug on a cutting. If you feel resistance, it means roots have started to form and anchor the cutting to the medium. Avoid pulling too hard, as this can damage tender new roots. Alternatively, if using clear pots, you might see roots developing against the sides.
Signs of Success: New Growth
The most encouraging sign of successful rooting is new leaf growth at the top of the cutting. This indicates that the cutting has established roots and is actively photosynthesizing and growing. Once you see significant new growth, you know your efforts are paying off.
Transplanting Your New Herb Plants
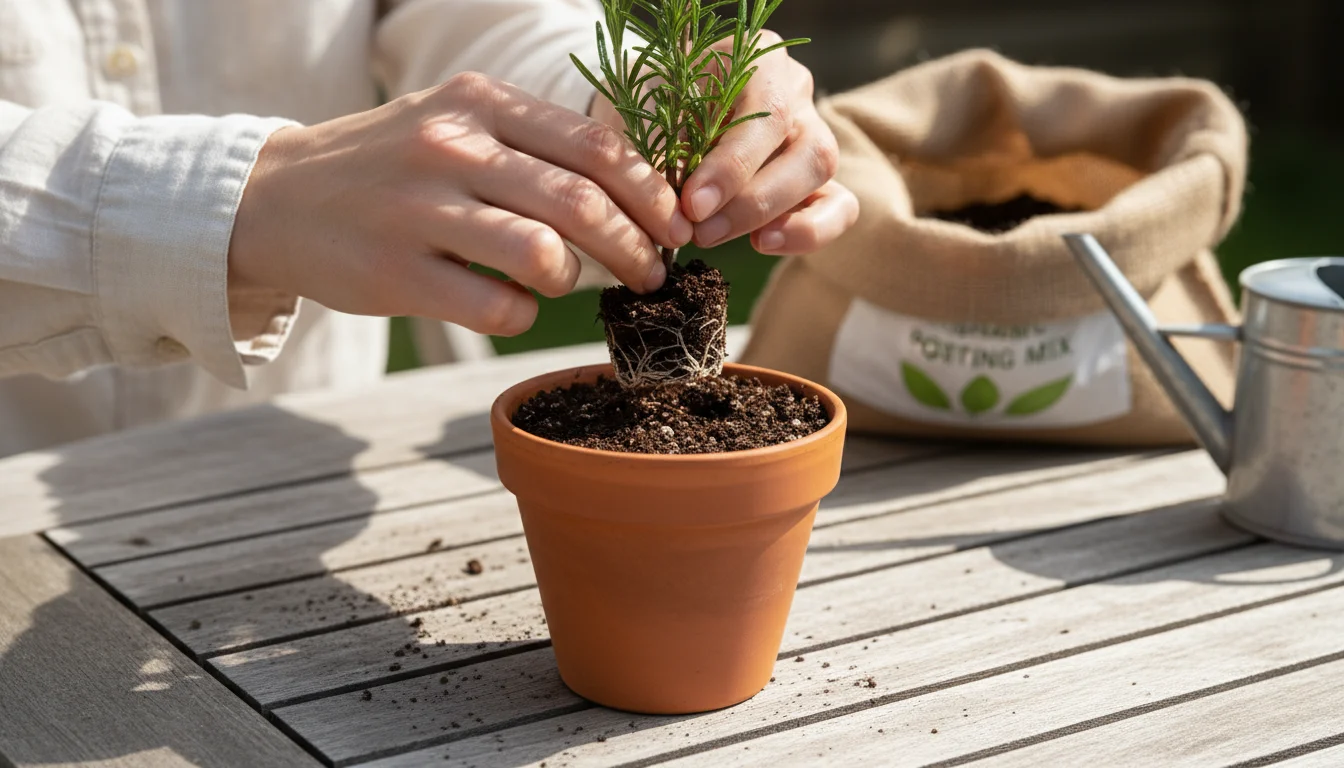
Once your cuttings have developed a robust root system, typically 1-2 inches long, they are ready for transplanting into individual pots with regular potting soil. This transition is another delicate phase, so handle your new plants with care.
- Prepare the New Pots: Choose pots slightly larger than your rooting containers, around 4-6 inches in diameter, with excellent drainage holes. Fill them with a high-quality potting mix formulated for herbs or general container gardening. This soil provides the necessary nutrients and structure for ongoing growth.
- Water the Cuttings: Lightly water your rooted cuttings about an hour before transplanting. This makes the rooting medium less likely to crumble and helps the roots slide out more easily.
- Gently Remove the Cutting: Carefully invert the small rooting pot and tap the bottom to loosen the medium. Support the base of the cutting and the root ball with your hand as you ease it out. Avoid pulling the stem. If you planted multiple cuttings in one pot, gently separate them, being careful not to tear or damage the delicate new roots.
- Place in New Pot: Create a small indentation in the center of the new pot’s potting mix. Carefully place the rooted cutting into the hole, ensuring the base of the stem is at the same level as it was in the rooting medium.
- Backfill and Water: Gently fill around the roots with more potting mix, lightly firming it to remove large air pockets. Water thoroughly until water drains from the bottom of the pot. This settles the soil around the roots.
- Initial Care After Transplanting: Place your newly transplanted herbs in a location with bright, indirect light for a few days to help them acclimate. Avoid direct sun immediately after transplanting, as this can stress the plants. Gradually introduce them to brighter conditions over a week or two.
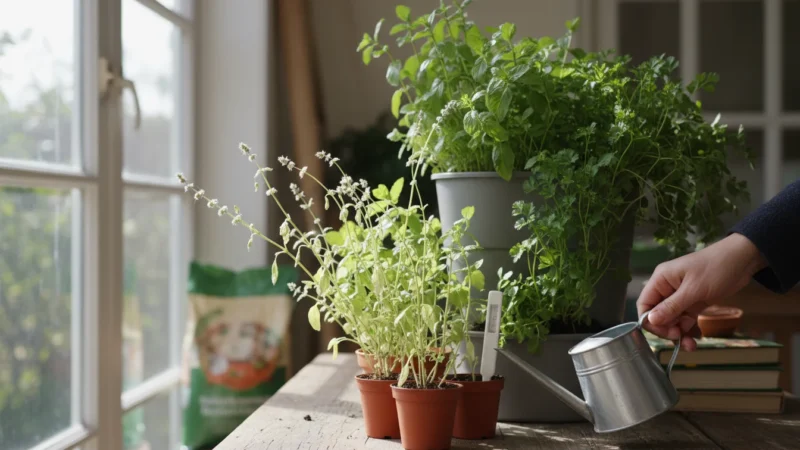
Caring for Your Young Herb Plants Indoors
Your newly propagated rosemary and thyme plants now require consistent care to thrive indoors and develop into strong, productive herbs. Remember, small-space gardening means optimizing every inch for plant health.
Light Requirements
Rosemary and thyme are sun-loving herbs, so provide them with at least 6-8 hours of bright light daily. A south-facing window is often ideal. If natural light is insufficient, especially during winter, supplement with a grow light. Position the grow light a few inches above the plants and run it for 12-14 hours a day. Rotate your pots regularly to ensure all sides of the plant receive adequate light, promoting even growth.
Watering Practices
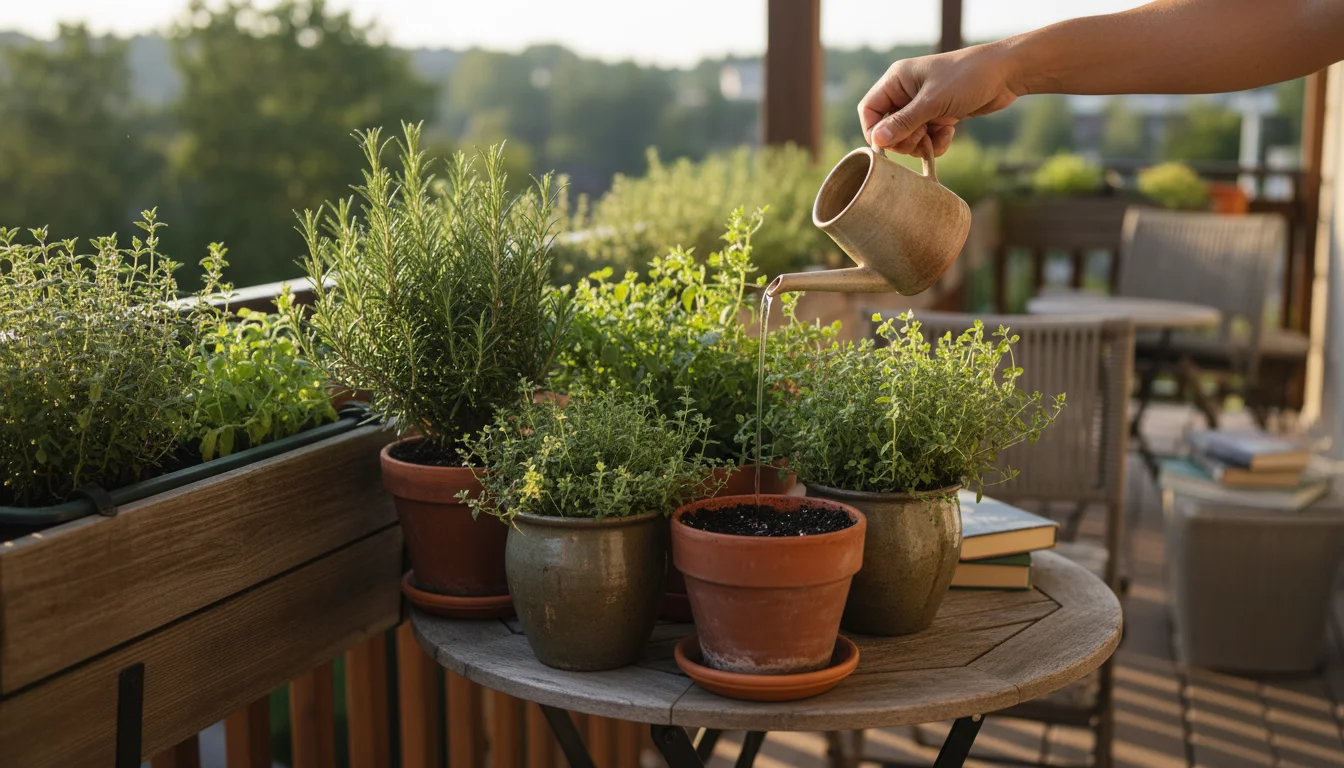
Allow the top inch or two of soil to dry out between waterings. Rosemary and thyme prefer slightly drier conditions and are susceptible to root rot if overwatered. When you water, do so thoroughly until water drains from the bottom of the pot. Ensure you empty any excess water from the saucer to prevent the roots from sitting in standing water. Monitoring soil moisture with your finger is a reliable method; stick your finger into the soil to assess its dryness.
Temperature and Humidity
Maintain consistent room temperatures, ideally between 60-70°F (15-21°C). Most homes provide suitable humidity levels for established herbs. Avoid placing plants directly next to heat vents or cold, drafty windows. While they appreciate some airflow, extreme temperature fluctuations stress them.
Fertilizing Your Herbs
Once your herbs are established and showing active growth, you can begin a light fertilizing regimen. Use a balanced liquid fertilizer diluted to half strength every 4-6 weeks during their active growing season (spring and summer). Avoid over-fertilizing, as this can lead to leggy growth and diminish the potency of the herb’s flavor. During winter, when growth naturally slows, reduce or stop fertilizing.
Pruning for Bushiness and Harvest
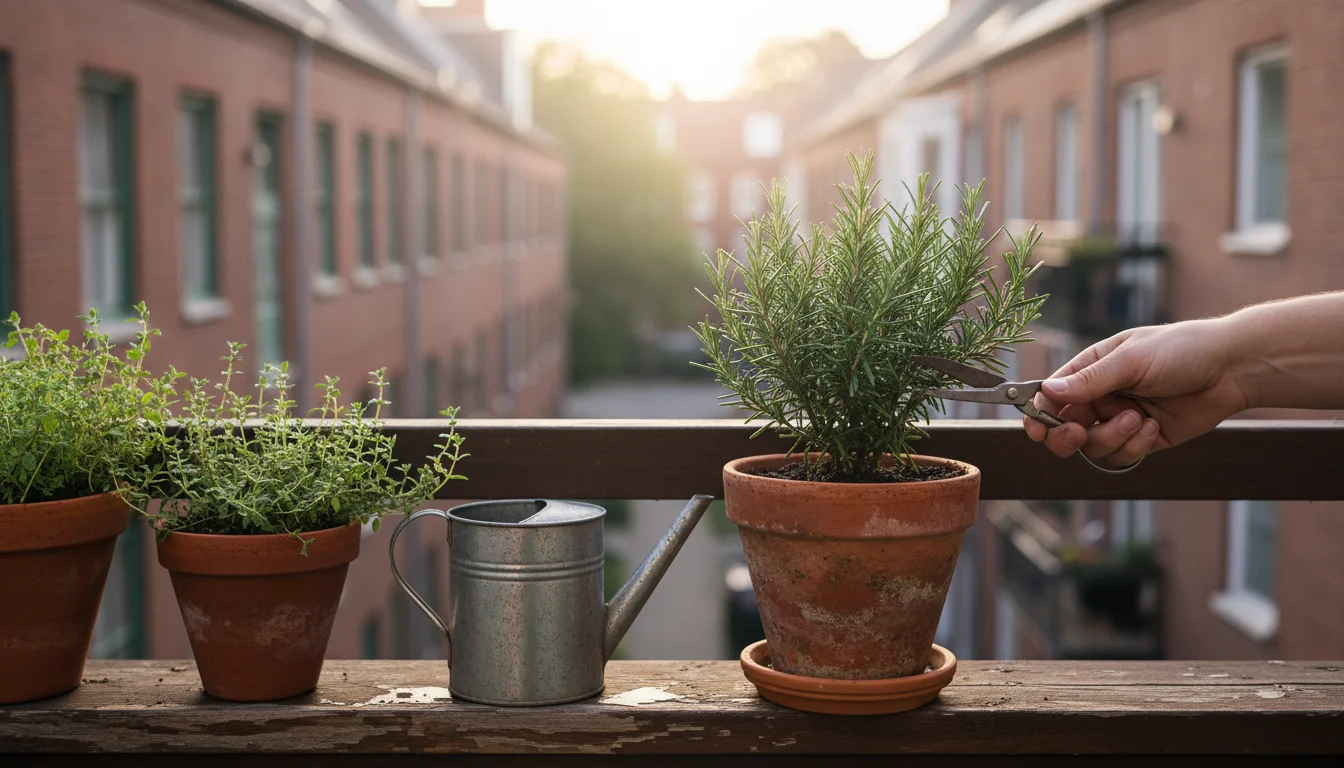
Regular pruning encourages bushier growth and provides you with fresh herbs for cooking. Pinch back the growing tips of your rosemary and thyme plants regularly. This prevents them from becoming leggy and stimulates new side shoots. Harvest your herbs by snipping off sprigs, always leaving at least two-thirds of the plant intact to ensure continued growth. You can start harvesting small amounts once the plants are well-established and have several inches of new growth.

Pest and Disease Prevention
Indoor herbs are generally less susceptible to pests than outdoor plants, but they can still encounter issues. Common indoor pests include spider mites, aphids, and whiteflies. Inspect your plants regularly for any signs of pests, such as sticky residue, webbing, or tiny insects on the undersides of leaves. If you detect pests, isolate the affected plant and treat it with an insecticidal soap or neem oil solution, following product instructions carefully. Good airflow and appropriate watering practices also deter fungal diseases.
Troubleshooting Common Propagation Challenges
Even experienced gardeners encounter challenges during propagation. Understanding common issues helps you react quickly and save your cuttings.
| Problem | Likely Cause | Solution |
|---|---|---|
| Cuttings wilt and die quickly. | Low humidity, insufficient watering, or too much direct sunlight. | Increase humidity with a dome or plastic bag. Mist more frequently. Move to brighter indirect light. |
| Cuttings turn yellow or mushy at the base. | Overwatering, poor drainage, or fungal rot. | Reduce watering frequency. Ensure excellent drainage. Use sterile rooting medium. Increase airflow by venting the dome daily. You might need to discard affected cuttings and start fresh. |
| Cuttings show no signs of rooting after several weeks. | Temperatures are too cold, insufficient light, or cuttings were too woody/soft. | Increase ambient temperature, consider a heating mat. Provide brighter light (grow light). Ensure you selected semi-hardwood cuttings. Rooting hormone can also speed up the process. |
| Mold or mildew appears on the rooting medium or leaves. | Excessive humidity with poor airflow. | Increase daily airflow by removing the dome for longer periods. Reduce misting slightly. You can gently scrape off mold from the medium surface. Fungicides are generally not recommended for edibles unless absolutely necessary. |
| New roots are very sparse or weak. | Lack of proper nutrients in the rooting medium (though not usually an issue for initial rooting), or inconsistent environmental conditions. | Ensure consistent warmth and humidity. If propagating in plain water for an extended period, the cutting might benefit from transfer to a sterile rooting medium with minimal nutrients. Consider using a rooting hormone for stronger root development. |
Staying observant is your best defense. Check your cuttings daily. Slight adjustments to watering, light, or humidity can often rectify problems before they become irreversible. Do not be discouraged by a few failures; learning from them is part of the gardening process.
Frequently Asked Questions
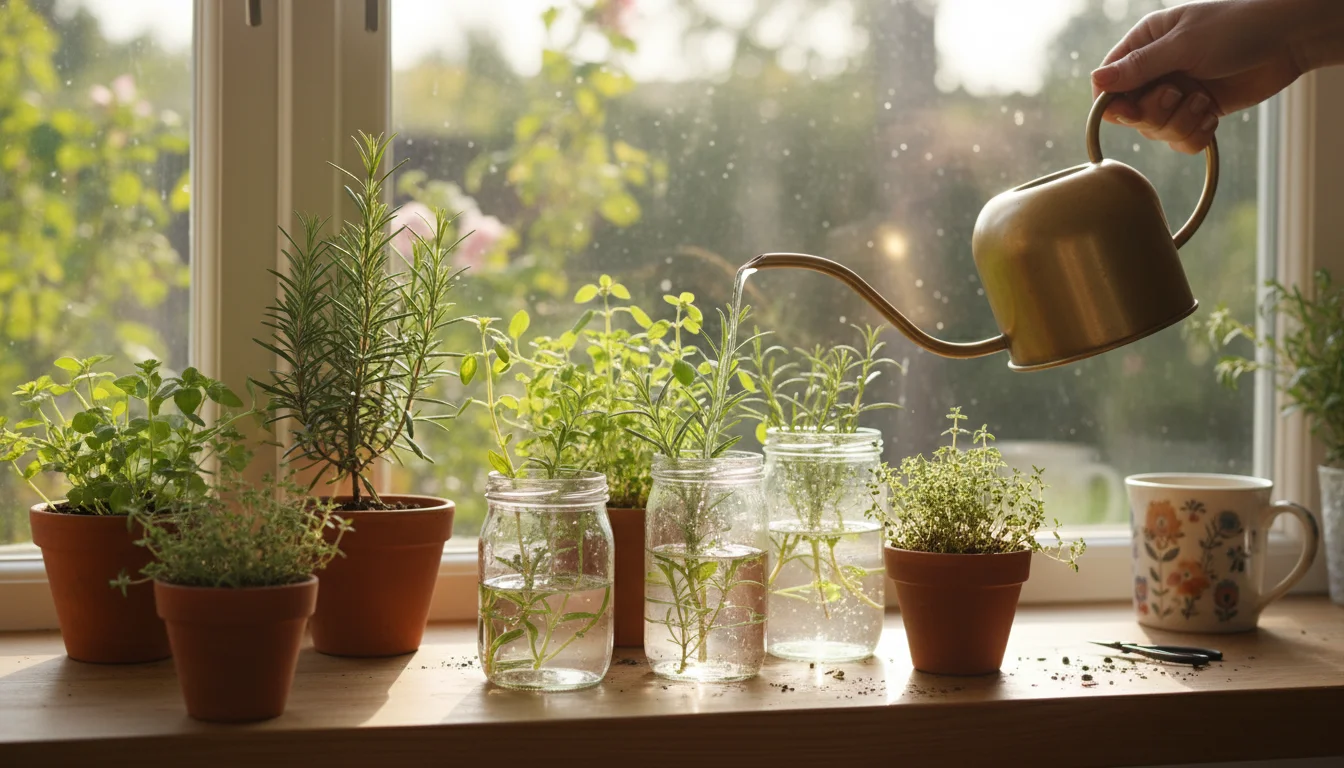
Can I root rosemary and thyme in water?
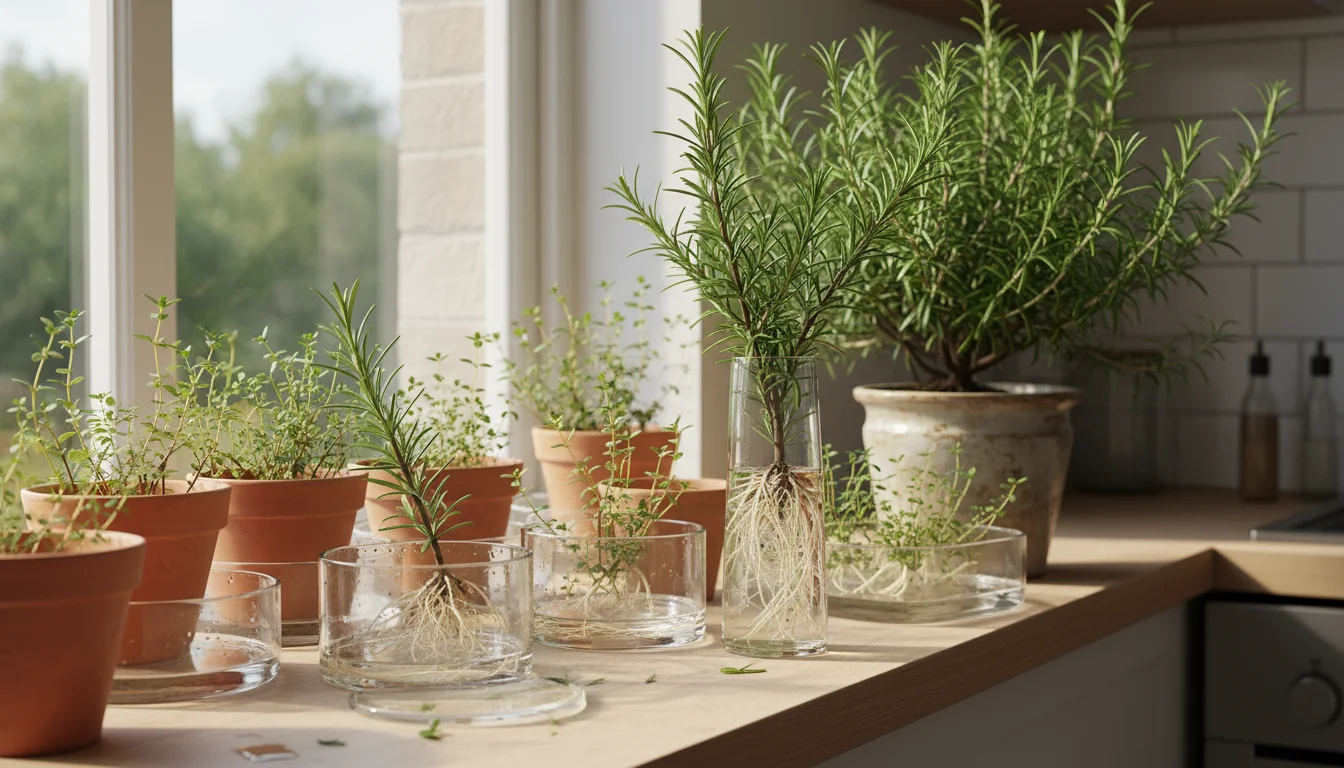
Yes, you can root both rosemary and thyme in water, but success rates vary. Woody herbs generally prefer a solid rooting medium for stronger, more robust root development. If you choose water, change the water every few days to prevent bacterial growth. Once roots appear, transfer the cutting to a soil-based medium as soon as possible, as water roots often struggle to adapt to soil.
What time of year is best for taking cuttings?
While this article focuses on winter propagation, you can take cuttings from rosemary and thyme throughout the growing season, from spring to late summer. However, winter propagation indoors provides controlled conditions, making it an excellent time to expand your garden when outdoor growth is dormant. You achieve a head start for spring planting.
How long does it take for rosemary and thyme cuttings to root?
Rooting time varies based on environmental conditions and the health of the cutting. Typically, rosemary cuttings take 4-8 weeks to root, while thyme often roots faster, within 3-5 weeks. Providing consistent warmth, high humidity, and bright, indirect light significantly speeds up the process.
Do I need special equipment for indoor propagation?
You do not need highly specialized equipment. Basic items like sharp scissors, small pots with drainage, seed starting mix, and a clear plastic cover are usually sufficient. A heating mat and a grow light can significantly improve success rates, especially in colder homes or with limited natural light, but they are not always strictly necessary for a first attempt.
Can I use leaves to propagate rosemary or thyme?
No, you generally cannot propagate rosemary or thyme from single leaves. These woody herbs require a stem section with at least one or two leaf nodes for successful root development. The nodes contain the necessary cells and hormones to initiate root growth. Always aim for stem cuttings.
For trustworthy gardening information, visit:
Michigan State University Extension — Gardening, University of Wisconsin Extension — Horticulture and Iowa State University Extension — Yard & Garden. These organizations provide expert, research-based advice for gardeners at all levels.
Propagating your favorite woody herbs like rosemary and thyme indoors during winter offers a rewarding and practical gardening experience. You multiply your plants for free, hone your gardening skills, and ensure a continuous supply of fresh herbs. This project aligns perfectly with the small-space, low-maintenance ethos, providing actionable steps to enhance your indoor herb garden. You now have the knowledge and confidence to transform a simple cutting into a thriving new plant. Embrace this winter propagation project, and watch your indoor garden flourish with new life.
Disclaimer: This article is for informational purposes only and is not a substitute for professional gardening advice. Always consult local extension services or horticulture experts for region-specific guidance.


Leave a Reply