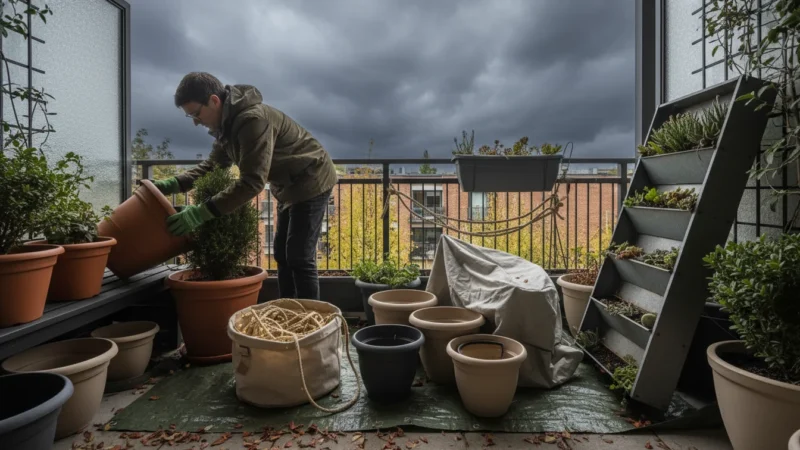
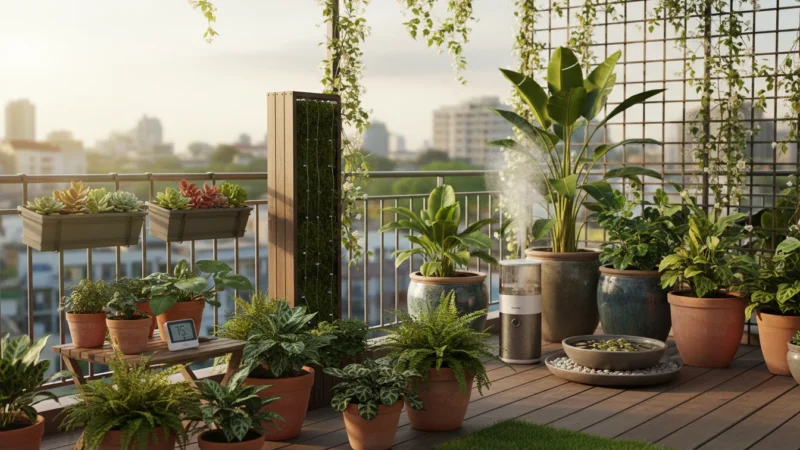
As a small-space gardener, you likely appreciate the unique beauty and minimal footprint of air plants, those fascinating Tillandsia species that thrive without soil. They bring a touch of living art to any corner, patio, or balcony. However, when winter arrives and the air inside our homes turns crisp and dry, your usually carefree air plants can begin to show signs of distress. The sudden drop in humidity, combined with changes in light and temperature, creates a challenging environment for these epiphytes.
Many successful indoor gardeners also find that grouping plants together can naturally boost the ambient moisture levels in a small space.
Much like caring for delicate ferns in an apartment, maintaining Tillandsia requires a careful balance of humidity and light.
Do you notice curled leaves, brown tips, or a general lack of vigor in your air plant collection? You are not alone. Many gardeners face this struggle. This guide empowers you with practical, actionable strategies to keep your Tillandsia not just surviving, but thriving, even through the harshest winter conditions. We will cover everything from identifying early signs of trouble to implementing effective watering routines and creating the perfect indoor environment. Get ready to transform your air plant care and ensure your botanical treasures remain vibrant all season long.
Understanding Your Air Plant’s Needs in Winter
Tillandsia, commonly known as air plants, are truly remarkable members of the Bromeliad family. In their natural habitats, which often span tropical and subtropical regions of the Americas, they cling to trees or rocks, drawing all the moisture and nutrients they need from the air and rain. Their specialized leaves possess trichomes, tiny, silvery, hair-like cells that absorb water and minerals directly. This unique adaptation allows them to flourish without soil, making them perfect candidates for small-space gardening on balconies, patios, or indoors.
Winter presents a distinct set of challenges for these seemingly resilient plants. Outdoors, the cooler temperatures often bring increased humidity. Indoors, however, our heating systems strip moisture from the air, creating an environment far drier than an air plant’s native jungle home. This significant drop in ambient humidity is the primary reason many air plants struggle during winter. Additionally, shorter daylight hours and less intense sunlight mean their light needs also shift. Understanding these fundamental environmental changes helps you proactively adapt your care routine and keeps your tillandsia care guide on track.

The Silent Killers: Signs Your Air Plant is Struggling
Learning how to tell if your air plant is dying starts with keen observation. Air plants communicate their needs through subtle changes in their appearance. Ignoring these signals often leads to irreversible damage. Here are the common signs of an air plant struggling, particularly during the dry winter months:
- Curled or Crispy Leaves: This is the most common indicator of dehydration. The leaves, particularly at the tips, curl inwards and feel brittle to the touch. The plant actively tries to conserve moisture. If the entire plant feels crispy and the leaves break easily, it is severely dehydrated.
- Brown or Dry Tips: Similar to curling, brown, crispy tips on the leaves point directly to insufficient moisture. This occurs when the plant cannot absorb enough humidity from the air or through its regular watering schedule.
- Dull or Faded Color: A healthy air plant exhibits vibrant green, silvery, or reddish hues depending on its variety. A struggling plant often appears dull, faded, or washed out. Its vibrant color diminishes as its health declines.
- Soft or Mushy Base: This is a critical warning sign of overwatering or rot, a common issue even in winter if plants do not dry adequately between waterings. If the base feels squishy, soft, or smells foul, your plant is likely rotting from excess moisture retention. This usually signals advanced decay.
- Lack of New Growth: While air plants are slow growers, you typically observe some subtle growth over time. A complete halt in new leaf production, especially when combined with other symptoms, suggests the plant expends all its energy trying to survive rather than grow.
- Leaves Falling Off: If healthy-looking leaves simply detach from the plant with a light touch, this usually indicates the base has rotted. This is a severe sign of distress.
Distinguishing between dehydration and overwatering is crucial. Dehydrated plants feel light and dry, with curling leaves. Overwatered plants feel heavy, with a soft or mushy base and often a dark discoloration. Your ability to accurately identify these symptoms guides your targeted intervention and improves your success with air plant care winter.
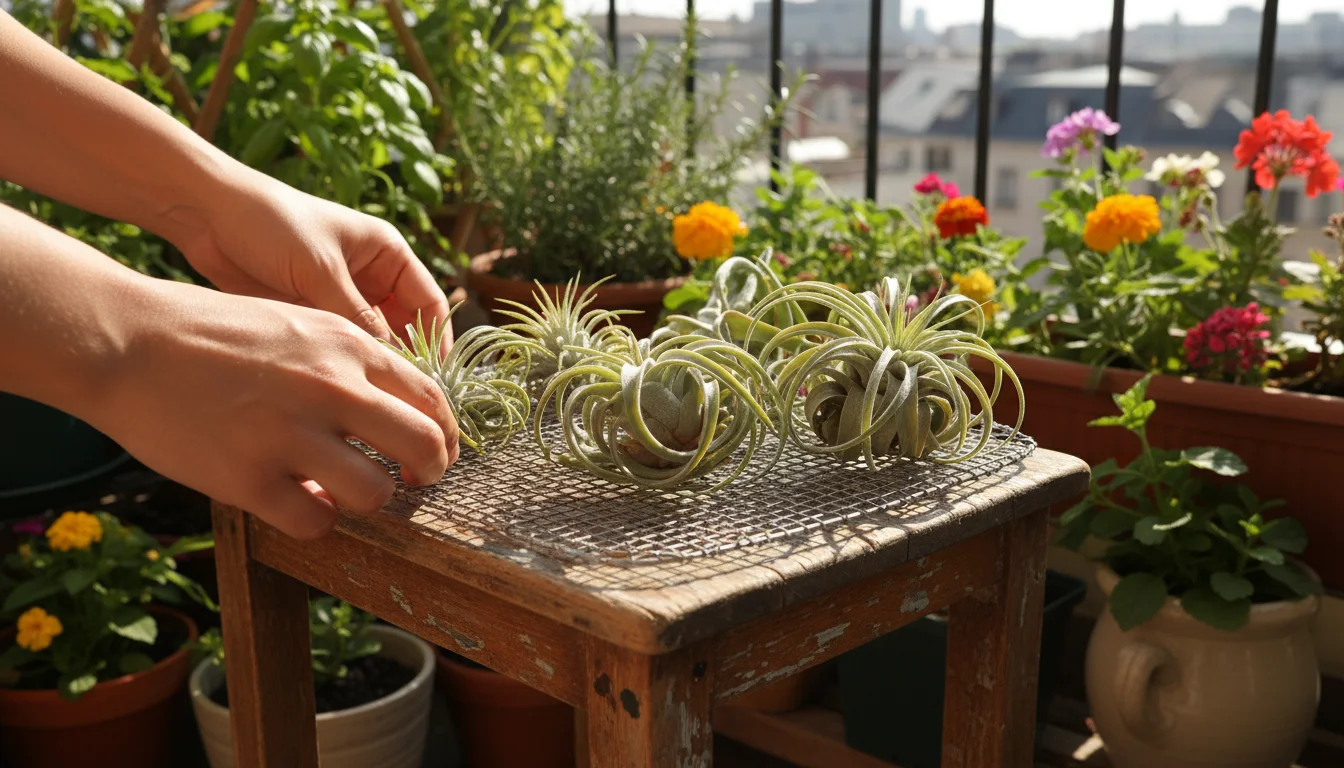
Mastering Winter Watering for Thriving Tillandsia
Watering air plants effectively in winter stands as the cornerstone of their survival. The dry indoor air demands a more deliberate approach than in warmer, more humid seasons. Forget the idea of simply misting; soaking is often the most beneficial method for how often to soak air plants in winter.
Assembling a mini tool kit for winter ensures you have everything you need for these essential soaking and drying routines.
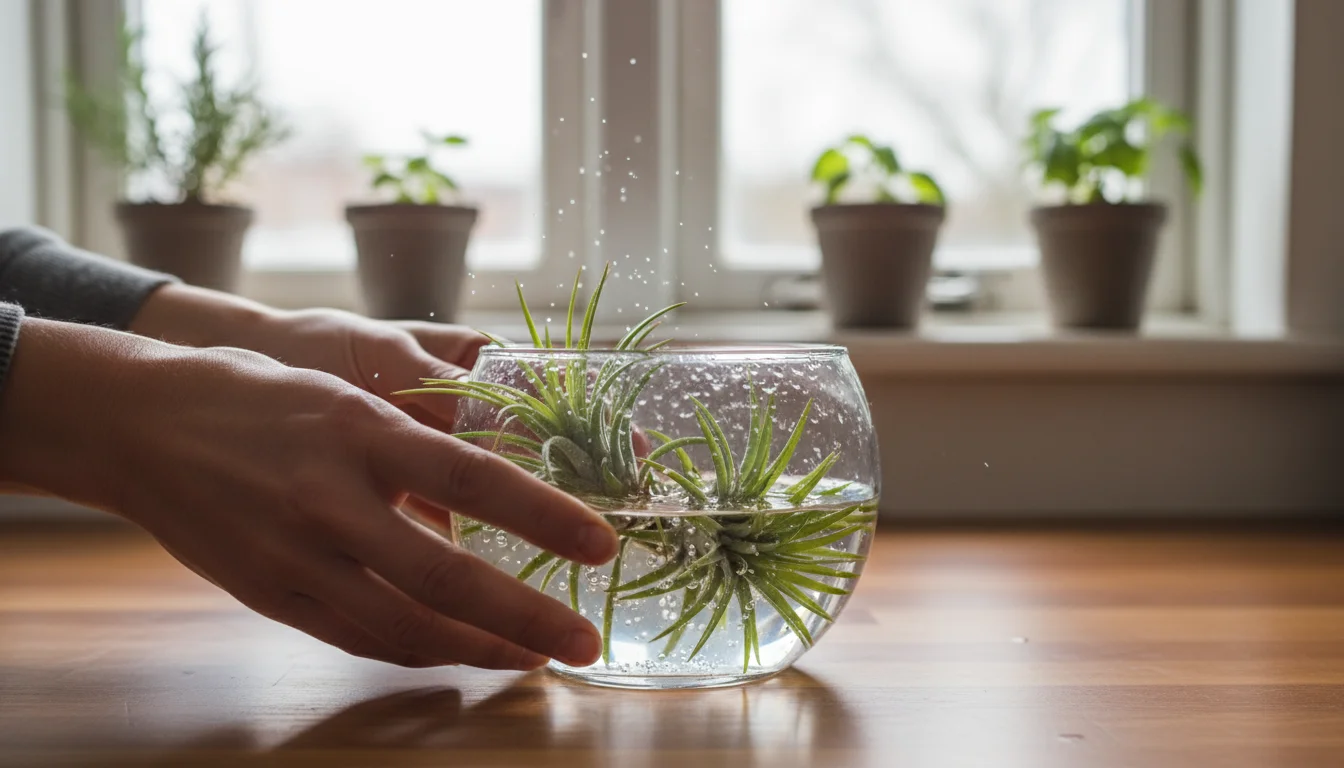
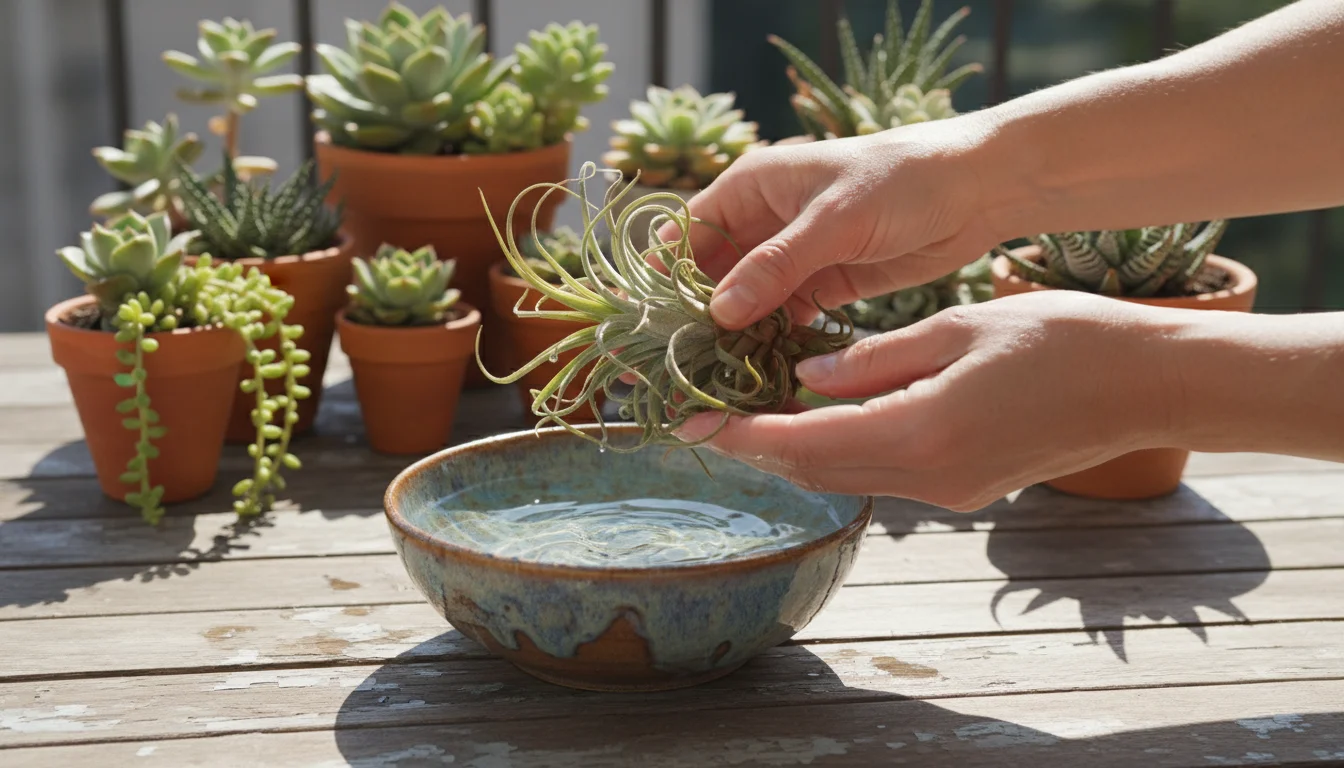
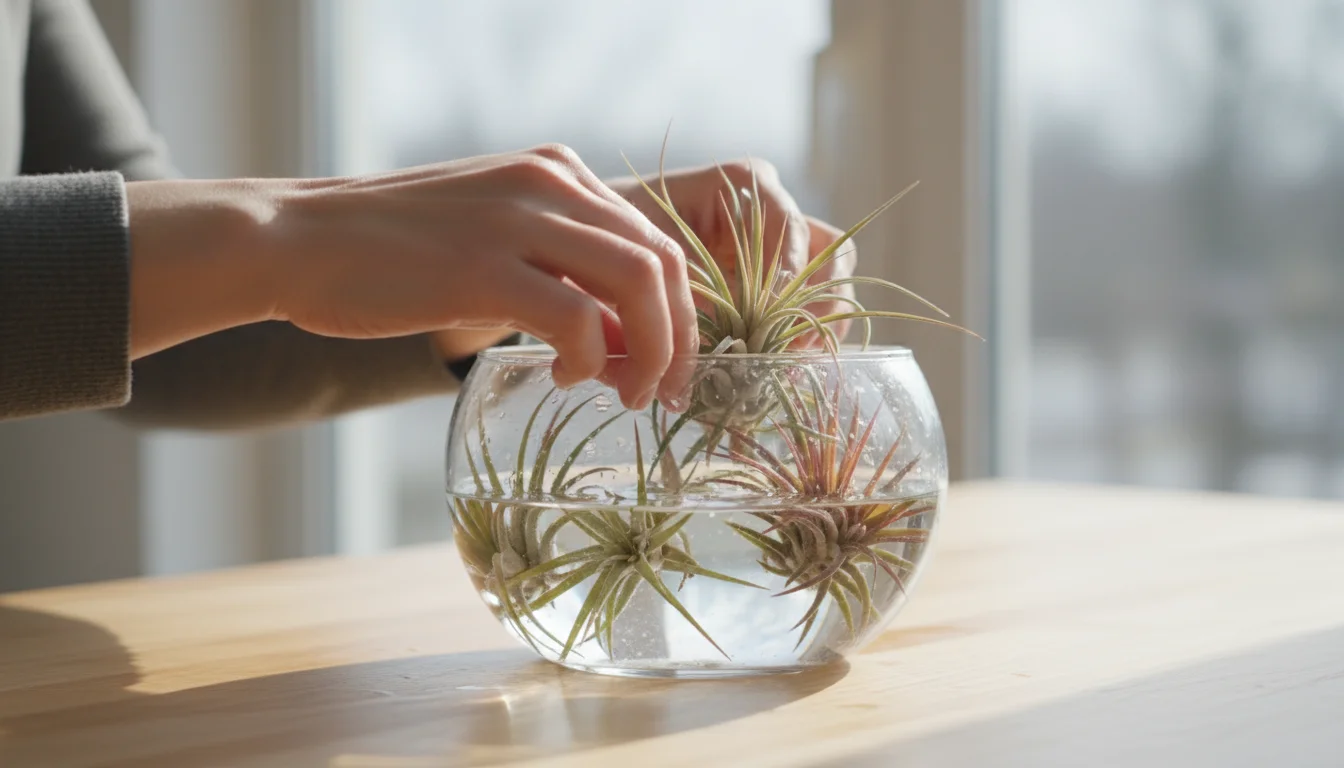
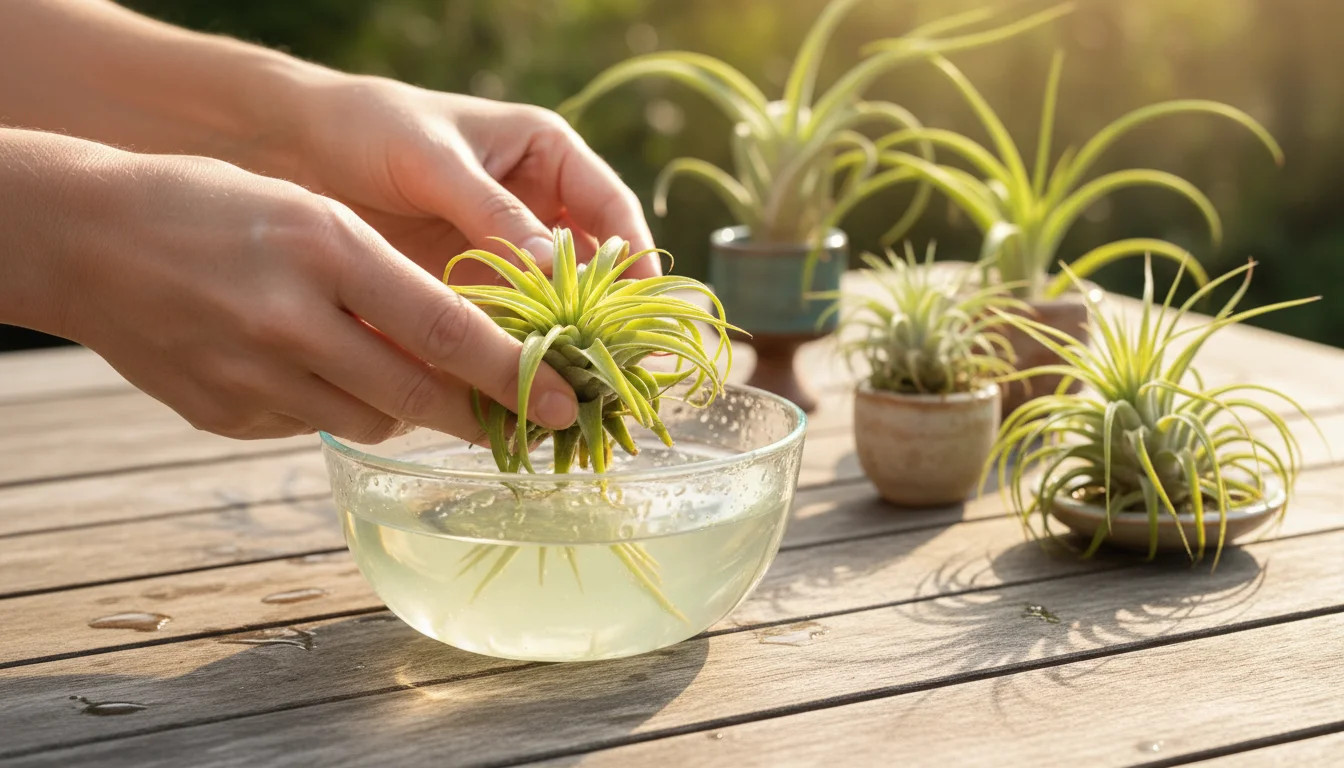
The Soaking Method: Your Winter Watering Essential
Soaking allows your air plant’s trichomes to fully hydrate. This is far more effective than misting, which often provides only superficial moisture. Follow these steps for successful winter soaking:
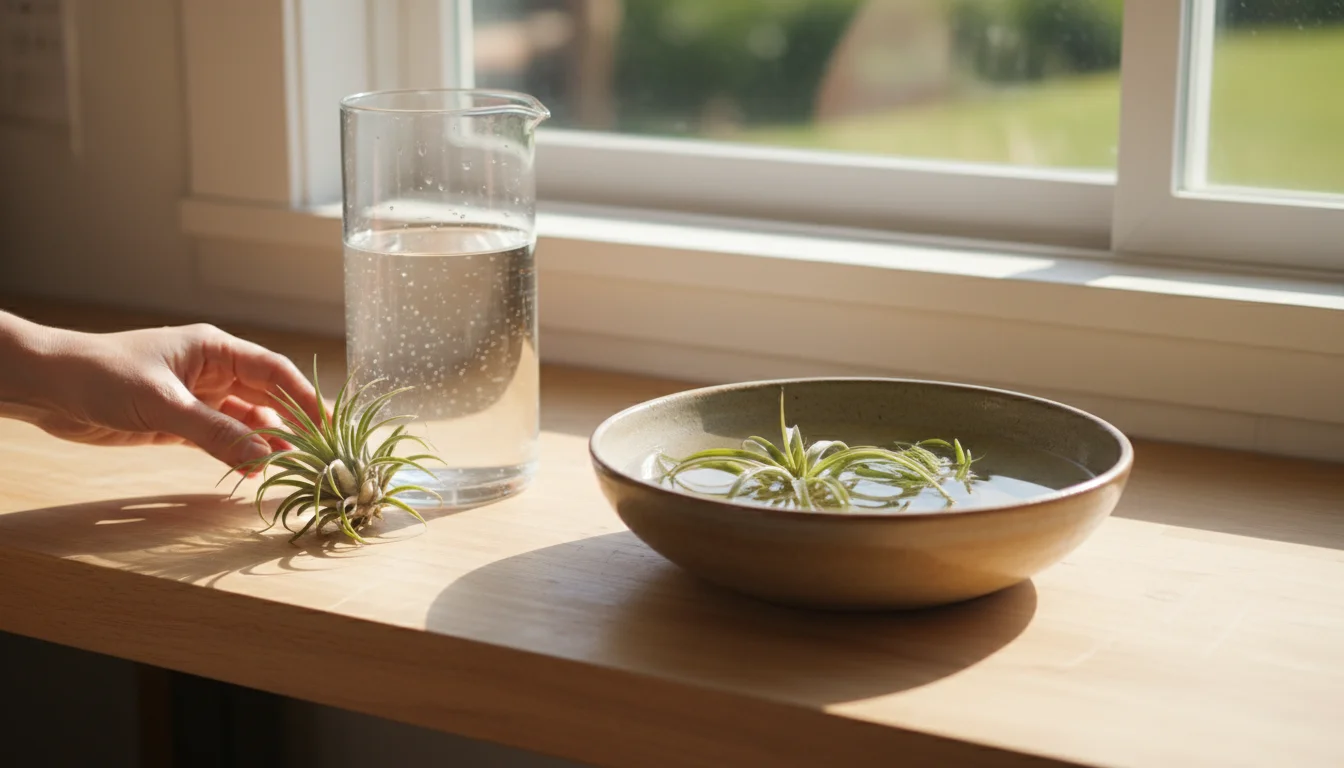
- Choose the Right Water: Tap water often contains chlorine and other chemicals that can harm your air plants over time. Use filtered tap water, distilled water, or rainwater. If using tap water, let it sit out for 24 hours to allow chlorine to dissipate. Avoid softened water, which contains salts harmful to Tillandsia.
- Prepare the Soak: Fill a bowl or shallow basin with your chosen water. Ensure the water is room temperature.
- Submerge Your Plants: Gently place your air plants into the water, ensuring they are fully submerged. If your plant has a bloom, try to keep the bloom out of the water to prolong its life. However, if the plant shows severe dehydration, a full submersion including the bloom for a shorter duration can be considered.
- Soak Duration: During the dry winter months, soak your air plants for 30 minutes to an hour. Severely dehydrated plants may benefit from a 1-2 hour soak, but never exceed two hours.
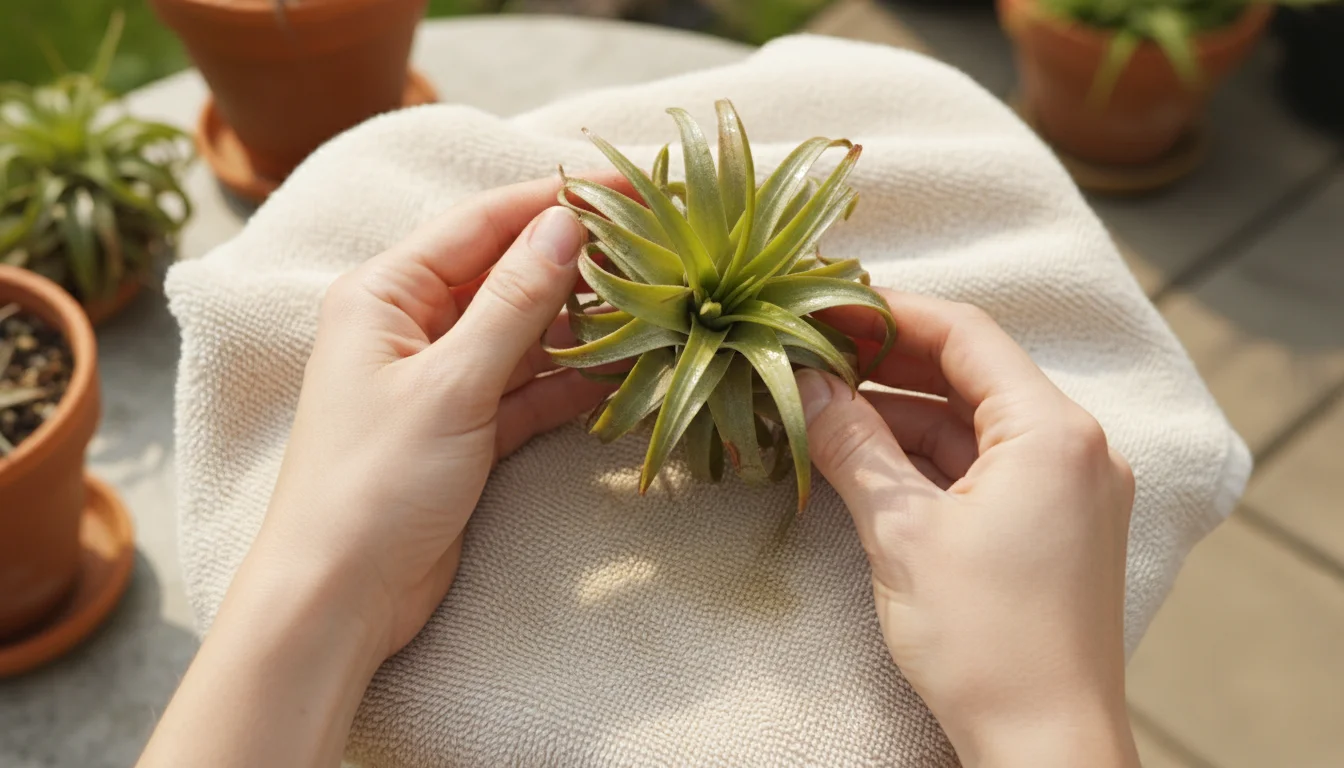
- Thorough Drying: This step is arguably the most critical for watering air plants. After soaking, gently shake off excess water. Then, place your air plants upside down on a towel or drying rack in a well-ventilated area. Allow them to dry completely for at least 2-4 hours, or even overnight. Any water left standing in the plant’s crevices, particularly at its base, leads to rot. Ensure no water collects in the core of the plant.
- Frequency: In winter’s dry conditions, a weekly soak is generally sufficient for most Tillandsia varieties. You might increase this to every 5-7 days if your home is exceptionally dry or if you notice signs of dehydration reappearing quickly. Always adjust based on your plant’s appearance and your home’s humidity levels.
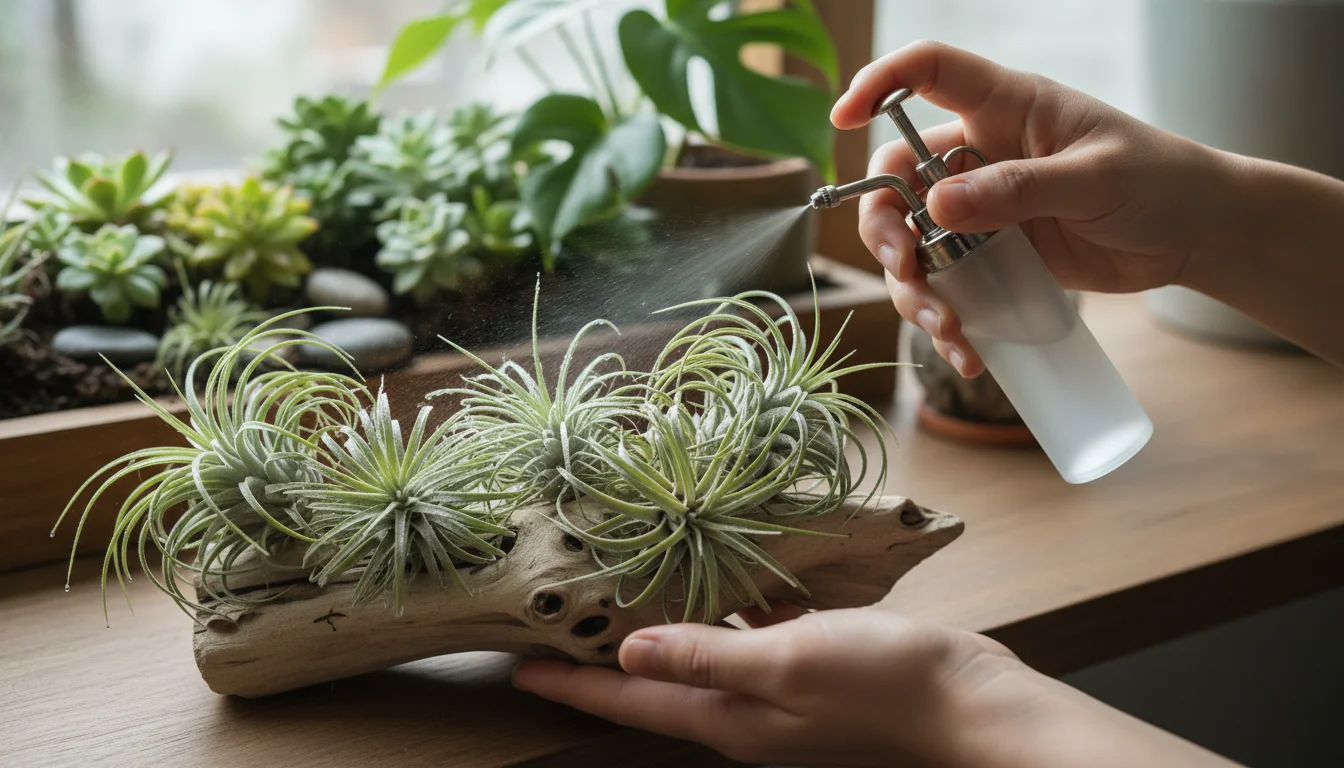
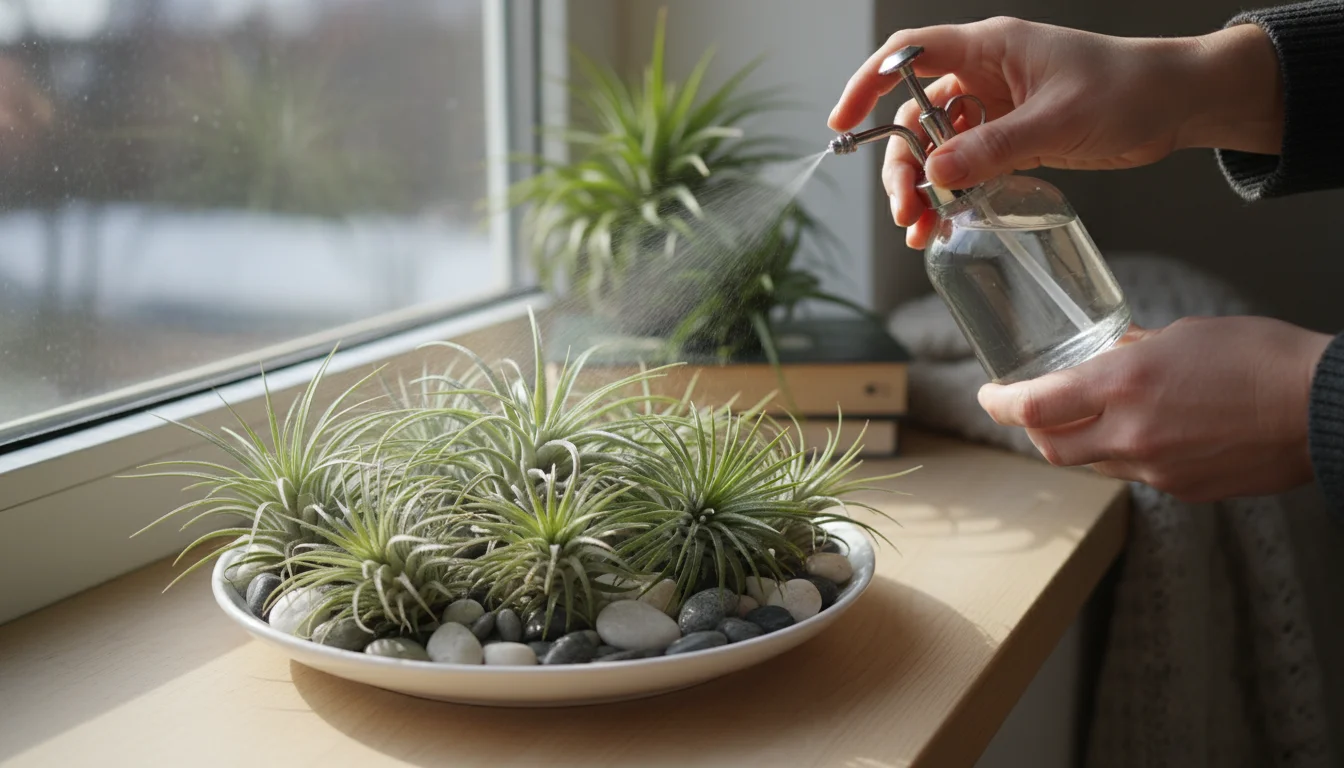
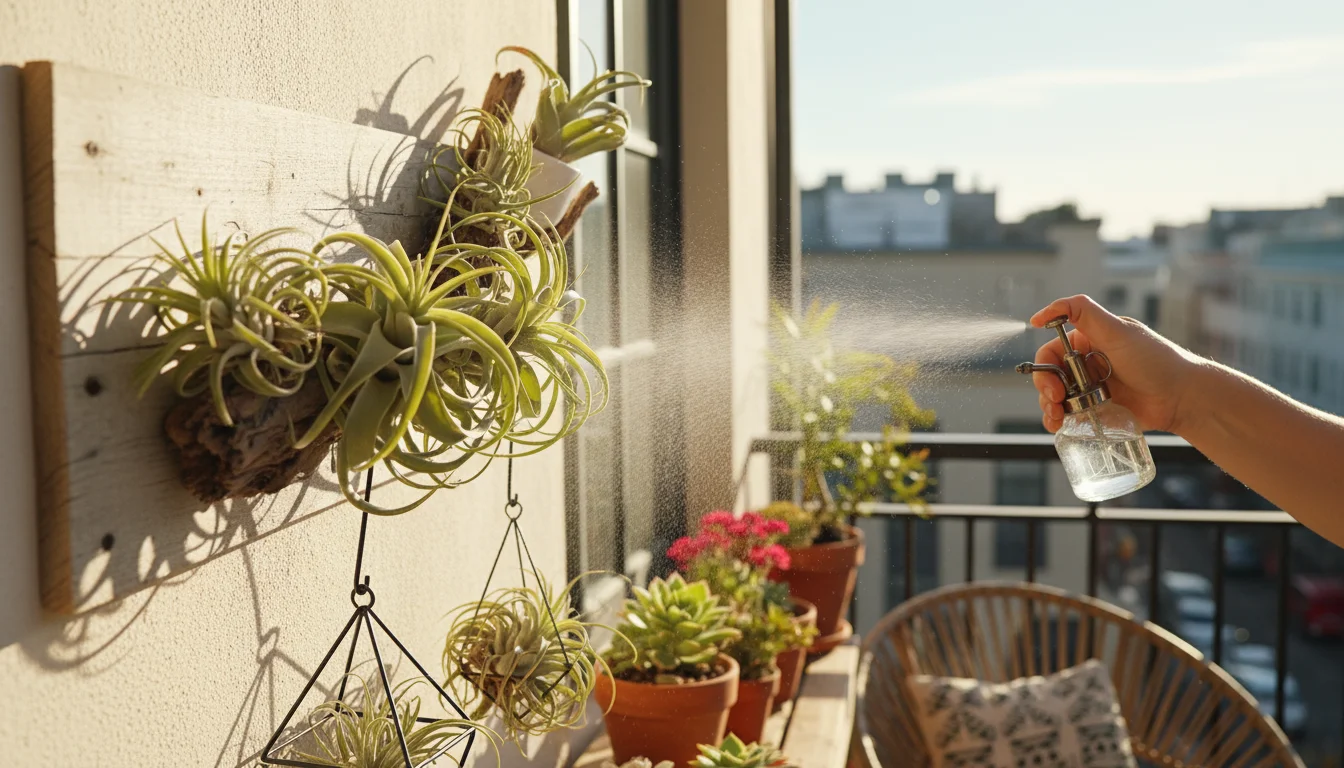
Misting: A Supplemental Boost, Not a Primary Solution
While misting provides a temporary humidity boost, it rarely offers sufficient moisture for an air plant to thrive long-term, especially in dry winter air. Use misting as a supplement to soaking, perhaps once or twice between soaks, particularly if you observe minor leaf curling. Mist until the leaves appear wet, but not dripping, and ensure good air circulation afterwards to prevent water accumulation.
By prioritizing thorough soaks and meticulous drying, you effectively manage your tillandsia care guide through the winter, preventing both dehydration and dreaded rot.
Optimizing Light and Airflow Indoors
Beyond watering, light and airflow play critical roles in keeping your air plants healthy during winter. These environmental factors often change dramatically when plants move indoors, requiring careful adjustment.
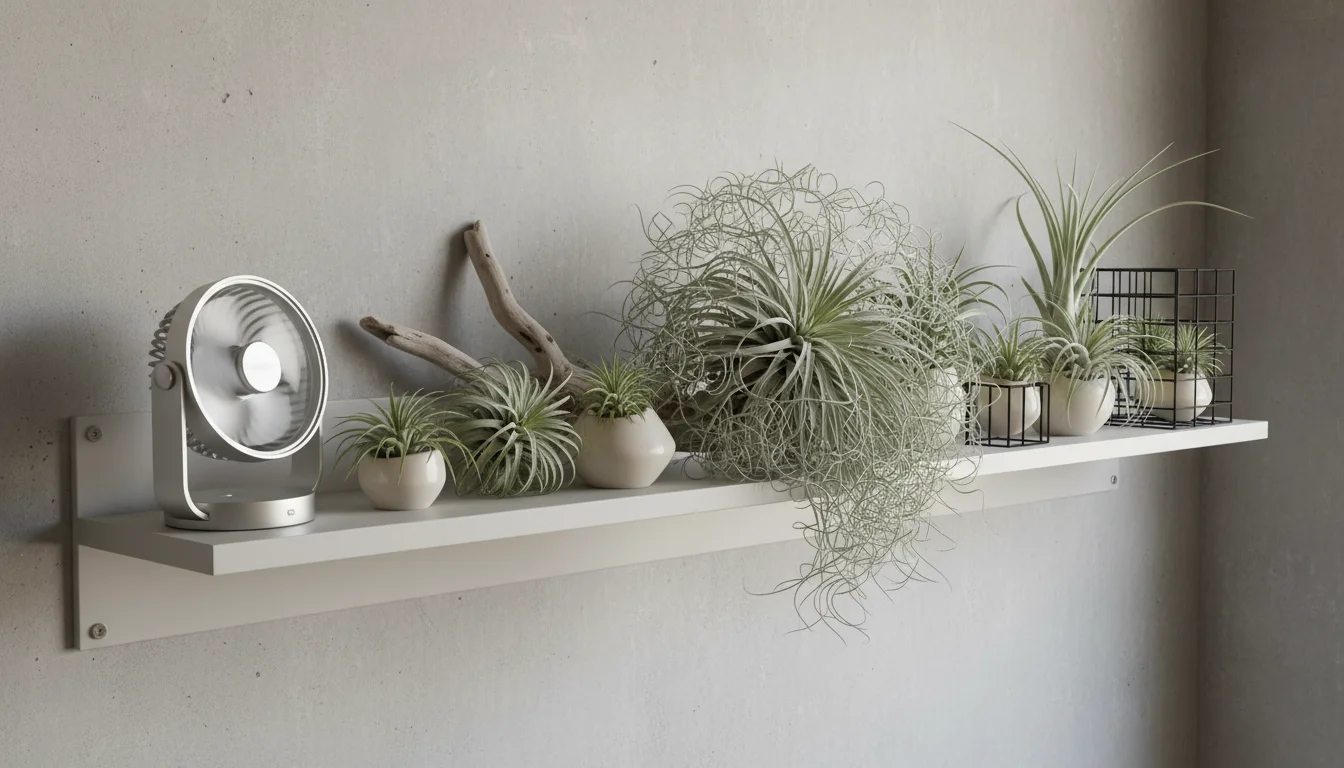
You should also verify that no radiators are killing your plants by ensuring your plant shelf is positioned away from direct heat sources.
Winter Light Considerations
Indoors, winter sunlight typically offers less intensity and shorter durations compared to summer. Your air plants, which generally prefer bright, indirect light, might struggle to receive enough. Direct, harsh sunlight can scorch their leaves, but too little light leads to weak, leggy growth and a decline in overall health.
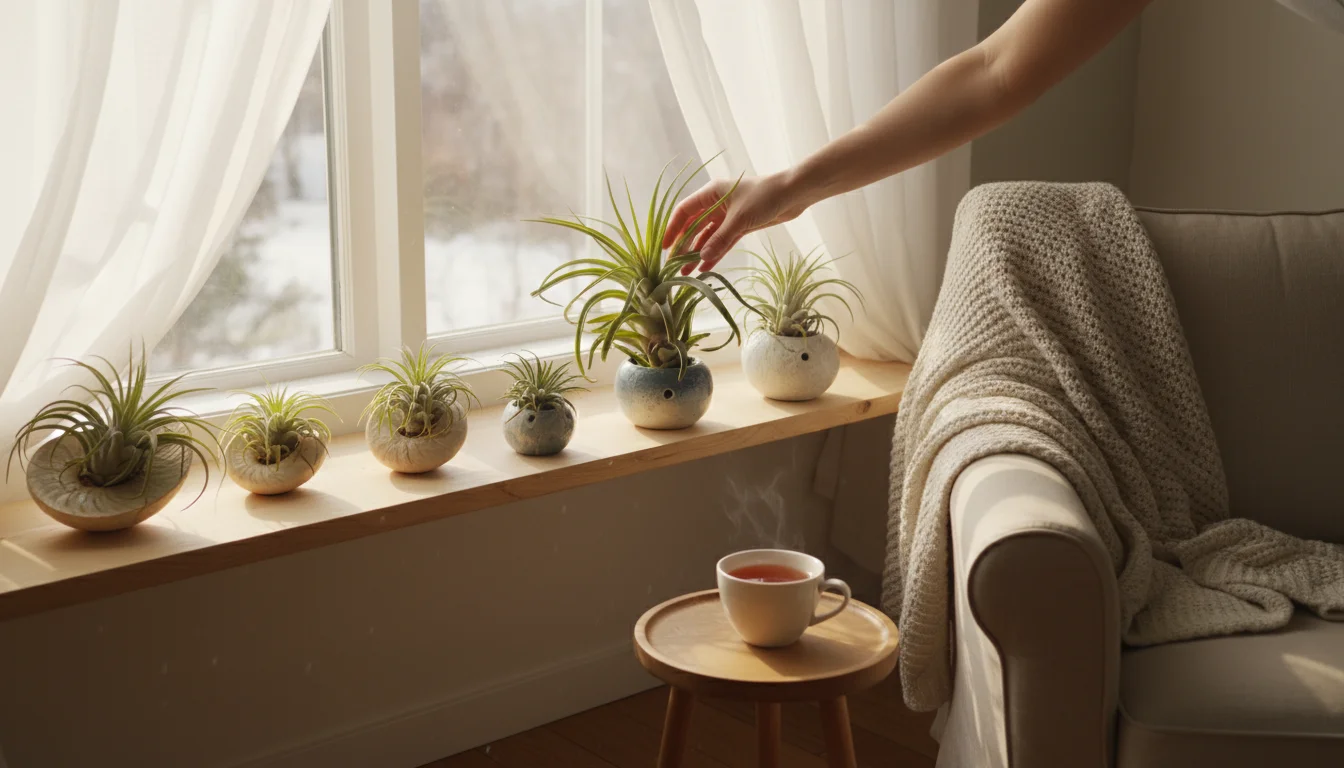
- Ideal Placement: Place your air plants near a window that receives bright, filtered light. An east or north-facing window often provides suitable light without the intensity of direct afternoon sun. If a south or west-facing window is your only option, position the plants a few feet back or use a sheer curtain to diffuse the light.
- Rotating Plants: Regularly rotate your air plants to ensure all sides receive adequate light, promoting balanced growth.
- Supplemental Lighting: If your home lacks sufficient natural light, especially during short winter days, consider providing supplemental lighting. Small LED grow lights, specifically designed for plants, offer an excellent solution for small spaces. Position the grow light 12-18 inches above your plants for 8-12 hours daily. This makes a significant difference in maintaining their vigor through winter.
The Importance of Air Circulation
Good air circulation is paramount for air plants, particularly after watering. In their natural habitats, breezes constantly dry their leaves, preventing fungal issues and rot. Indoors, stagnant air creates a breeding ground for problems.
- Post-Watering Drying: After soaking, always ensure your air plants dry thoroughly in a well-ventilated area. Placing them near an open window (if temperatures allow) or under a ceiling fan (on a low setting) accelerates this process.
- Avoid Stagnant Corners: Do not place air plants in enclosed spaces, such as deep terrariums without ventilation, or in corners where air movement is minimal.
- Distance from Vents: Keep air plants away from direct blasts of heating or air conditioning vents. These blasts rapidly dehydrate the plants and cause stress. The consistent, extreme temperature fluctuations are detrimental.
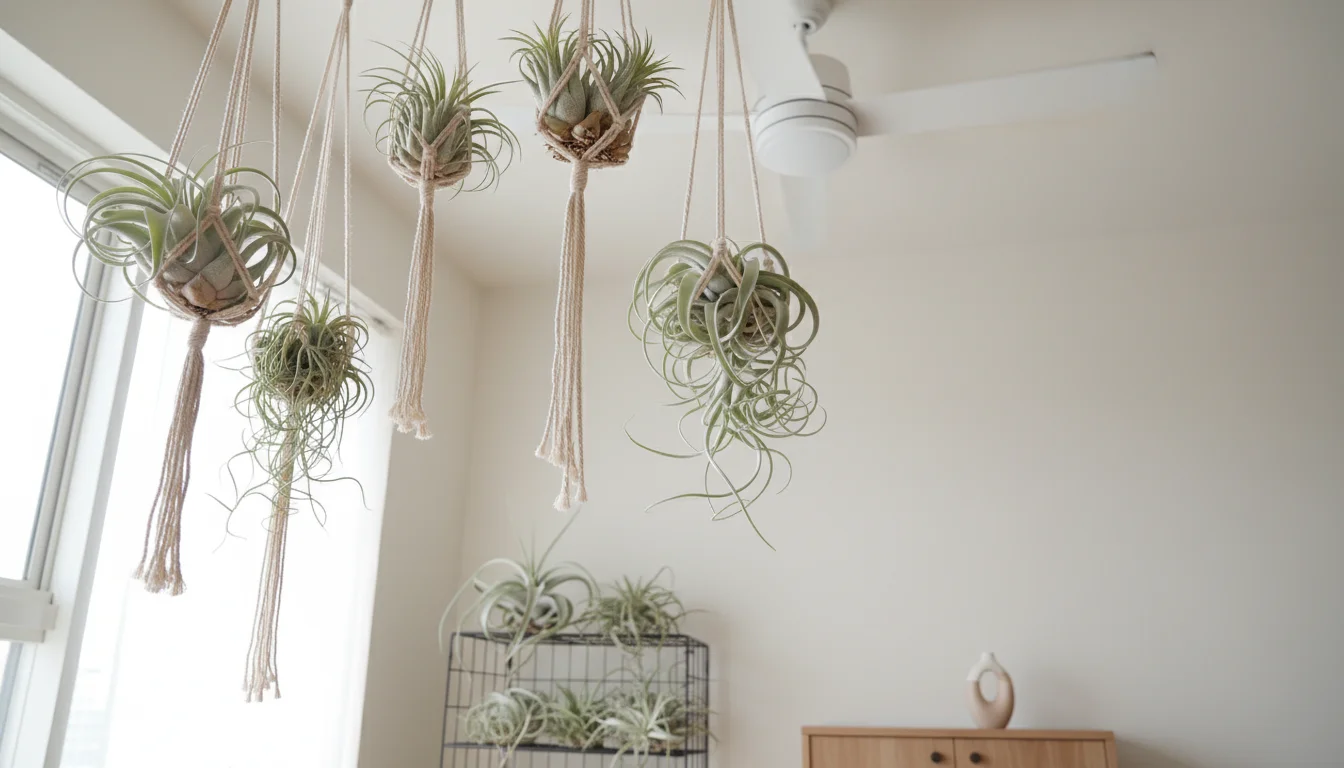
- Grouping for Humidity (with caution): While grouping plants helps create a microclimate with higher humidity, ensure enough space remains between individual air plants for air to flow. Overcrowding negates the benefits of air circulation.
By conscientiously managing both light exposure and airflow, you create an optimal indoor environment that supports your Tillandsia’s health and vitality throughout the challenging winter season.
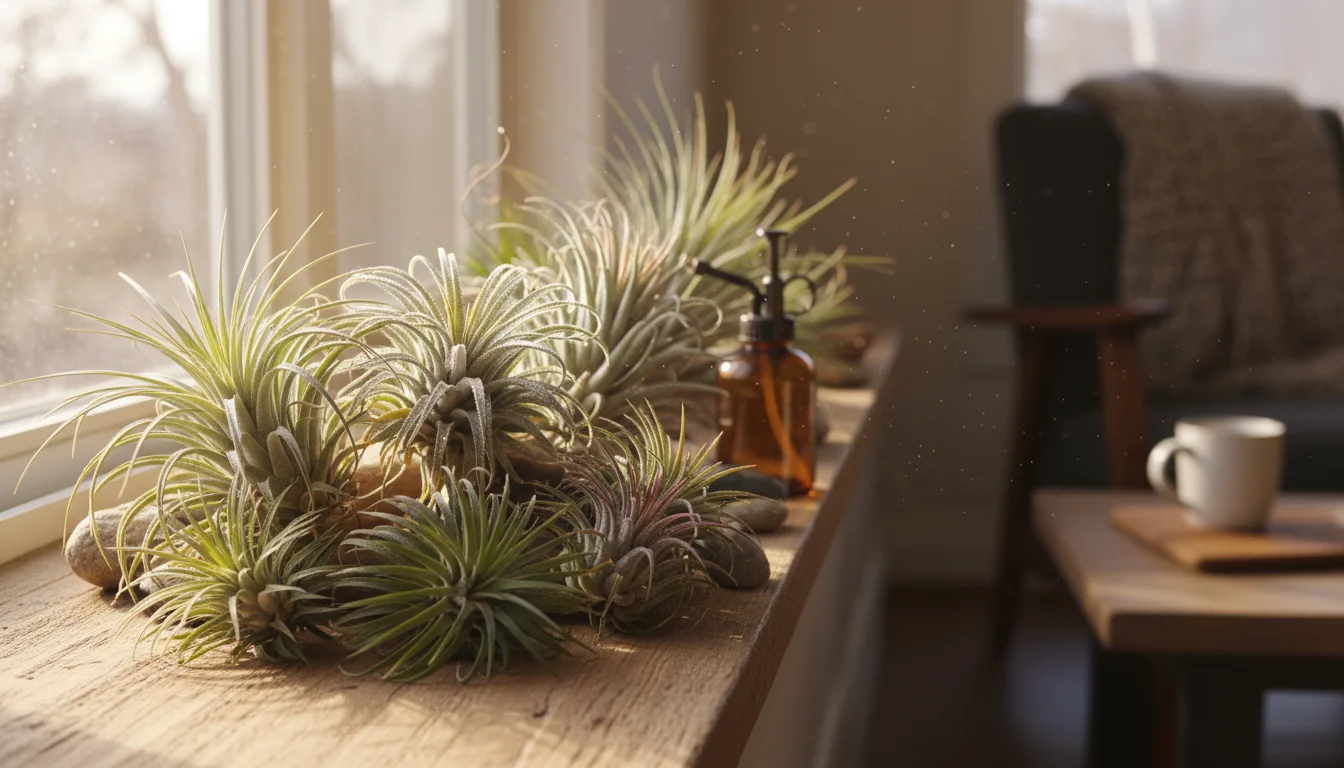
Humidity: The Key to Winter Survival
The dry winter air is a significant adversary for air plants. Their native environments boast high humidity, which they rely on to absorb moisture through their trichomes. When your indoor heating system runs, it drastically reduces ambient humidity, leaving your air plants parched. Addressing this humidity deficit is crucial for their winter survival and overall tillandsia care guide.
Practical Solutions for Boosting Humidity in Small Spaces
You do not need a jungle conservatory to provide adequate humidity for your Tillandsia. Several practical, small-space friendly methods exist:
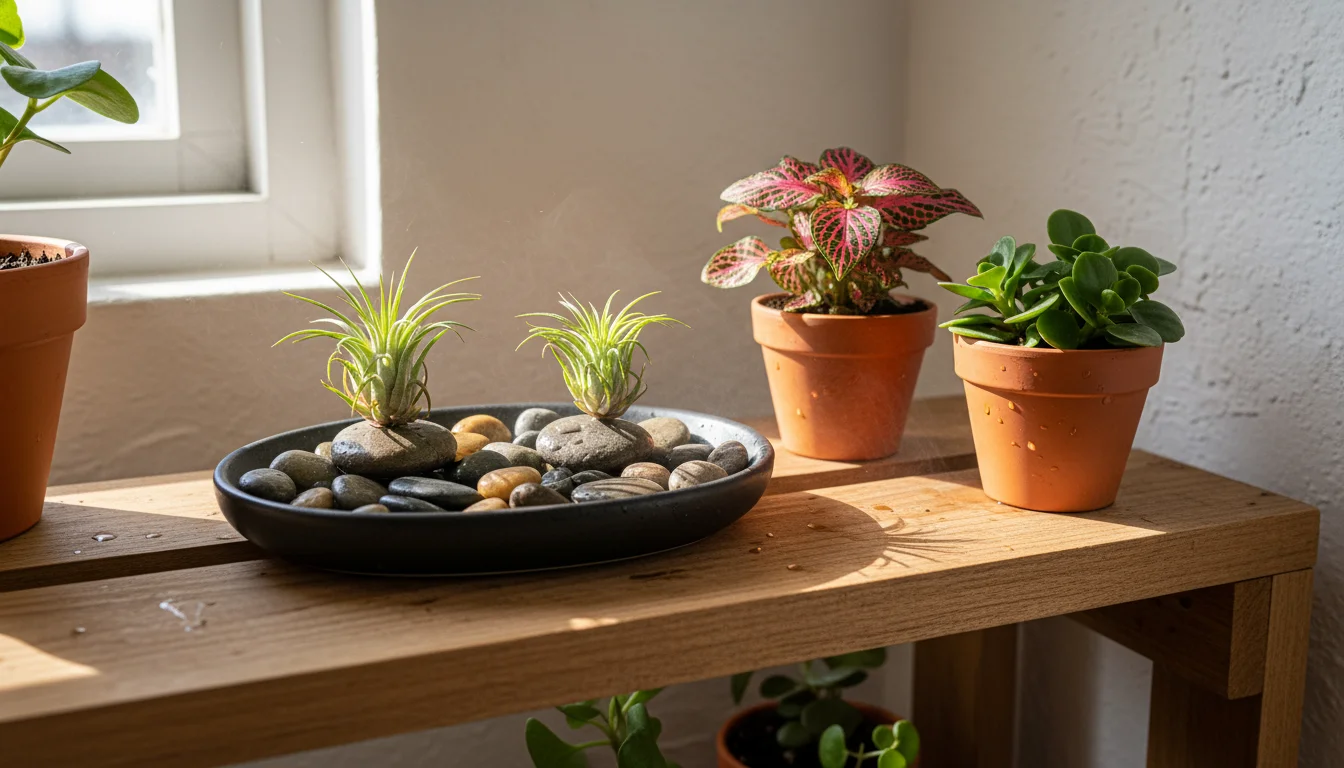
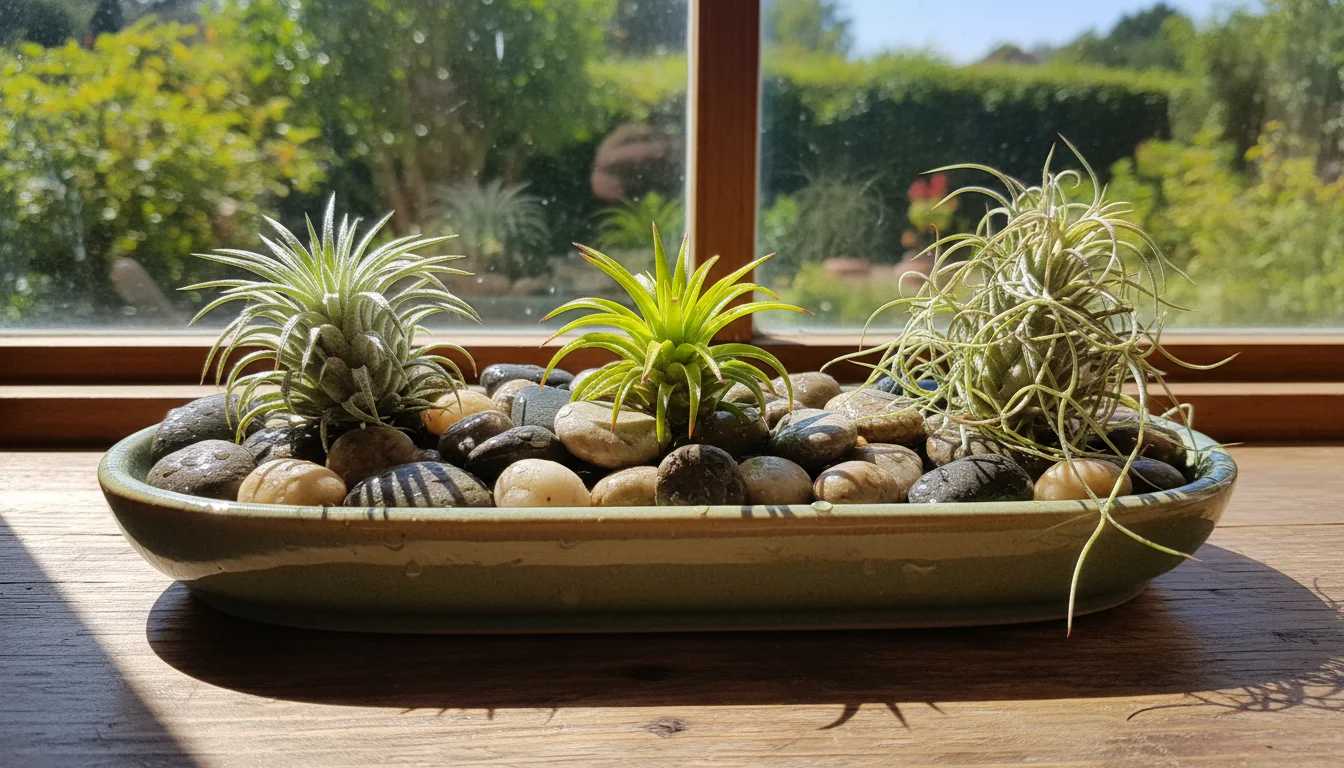
- Pebble Trays: Place a tray filled with pebbles and water beneath your air plant displays. As the water evaporates, it increases the localized humidity around your plants. Ensure the air plant itself does not sit directly in the water, as this leads to rot. The water should evaporate from the pebbles, not from contact with the plant.
- Grouping Plants: Plants naturally release moisture through transpiration. Grouping your air plants, along with other houseplants that enjoy humidity, creates a small microclimate with higher moisture levels. Just remember to allow for good airflow between the plants to prevent issues.
- Room Humidifiers: For a more significant and consistent boost, consider investing in a small room humidifier. Place it near your air plant collection, ensuring a consistent humidity level of 50-70% for optimal health. This offers the most effective solution for combating extremely dry indoor air. Many models are compact and fit perfectly into small living spaces.
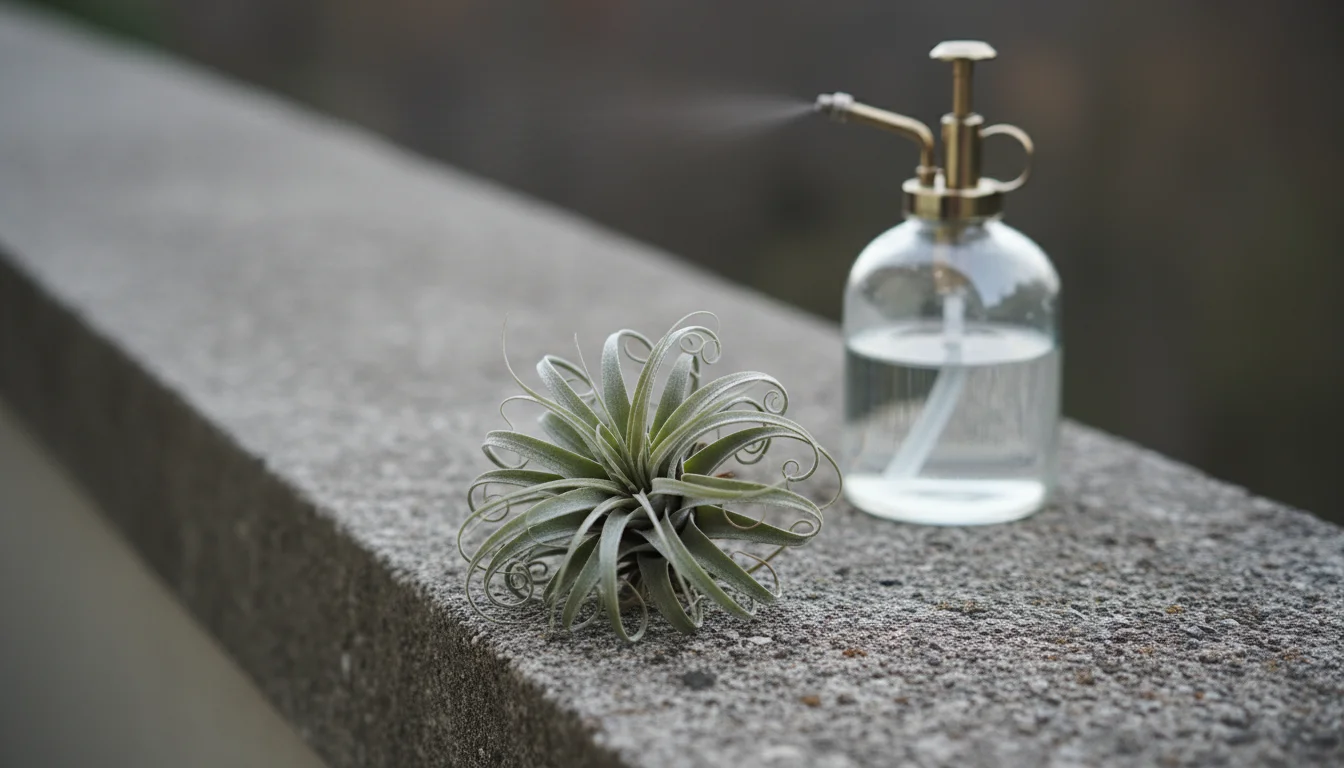
- Misting as a Supplement: While misting alone is insufficient for primary hydration, it offers a temporary spike in humidity. Use a fine mist sprayer with filtered or distilled water once or twice daily, especially on days between soaks or when the air feels particularly dry. Mist until the leaves are damp, not soaking wet, and ensure the plants dry quickly.
Why Misting Alone Isn’t Enough
Many beginners rely solely on misting, believing it fulfills their air plant’s moisture needs. However, misting provides only superficial hydration. The tiny water droplets evaporate quickly in dry air, giving the plant minimal time to absorb adequate moisture. It acts as a temporary Band-Aid, not a comprehensive solution for `watering air plants`. Soaking remains the most effective way to fully hydrate your air plants and prevent chronic dehydration, with misting serving as a supplementary method to enhance ambient humidity.
By actively increasing the humidity around your air plants, you replicate aspects of their natural environment, significantly improving their chances of thriving through the dry winter air.
Reviving a Dry or Neglected Air Plant
Encountering a crispy, dull air plant can be disheartening, but do not despair. Many Tillandsia can bounce back from severe dehydration if you intervene promptly. This section focuses on effective strategies for `reviving a dry air plant` and restoring its vitality.
Emergency Soak Method
When your air plant displays severe signs of dehydration, such as tightly curled, crispy leaves and a dull color, an emergency soak is your first line of defense. This intensive hydration method delivers a rapid infusion of moisture.
- Prepare the Bath: Fill a bowl with filtered, distilled, or rainwater at room temperature.
- Extended Submersion: Submerge the entire air plant, including its base, into the water. For severely dry plants, let it soak for 2 to 4 hours. You might even consider an overnight soak (6-8 hours) if the plant appears on the brink, but only if you are absolutely sure you can dry it thoroughly afterward.
- Gentle Shake: After the soak, gently shake off any excess water.
- Critical Drying: This step is paramount. Place the air plant upside down on a towel or drying rack in a well-ventilated area. It must dry completely, usually for 4 to 8 hours, or until no moisture remains in its crevices. Do not skip or rush this step. Rot is more likely to kill a revived plant than continued dehydration.
Gradual Recovery Steps
An emergency soak jumpstarts the recovery, but consistent care sustains it. After the initial revival, adjust your routine:
- Increased Watering Frequency: For the next few weeks, maintain a slightly more frequent watering schedule. Instead of a weekly soak, consider soaking your air plant every 3-5 days. Always ensure complete drying between waterings.
- Boost Humidity: As discussed, implement strategies to increase ambient humidity around the recovering plant. Pebble trays, grouping, or a humidifier are excellent choices.
- Optimal Lighting: Ensure the plant receives bright, indirect light. Avoid direct, intense sun, which can further stress a vulnerable plant.
- Patience and Observation: Revival takes time. You might not see dramatic improvements overnight. Continue to observe the plant for new growth, a return of vibrant color, and the unfurling of curled leaves. This slow process tests your patience.
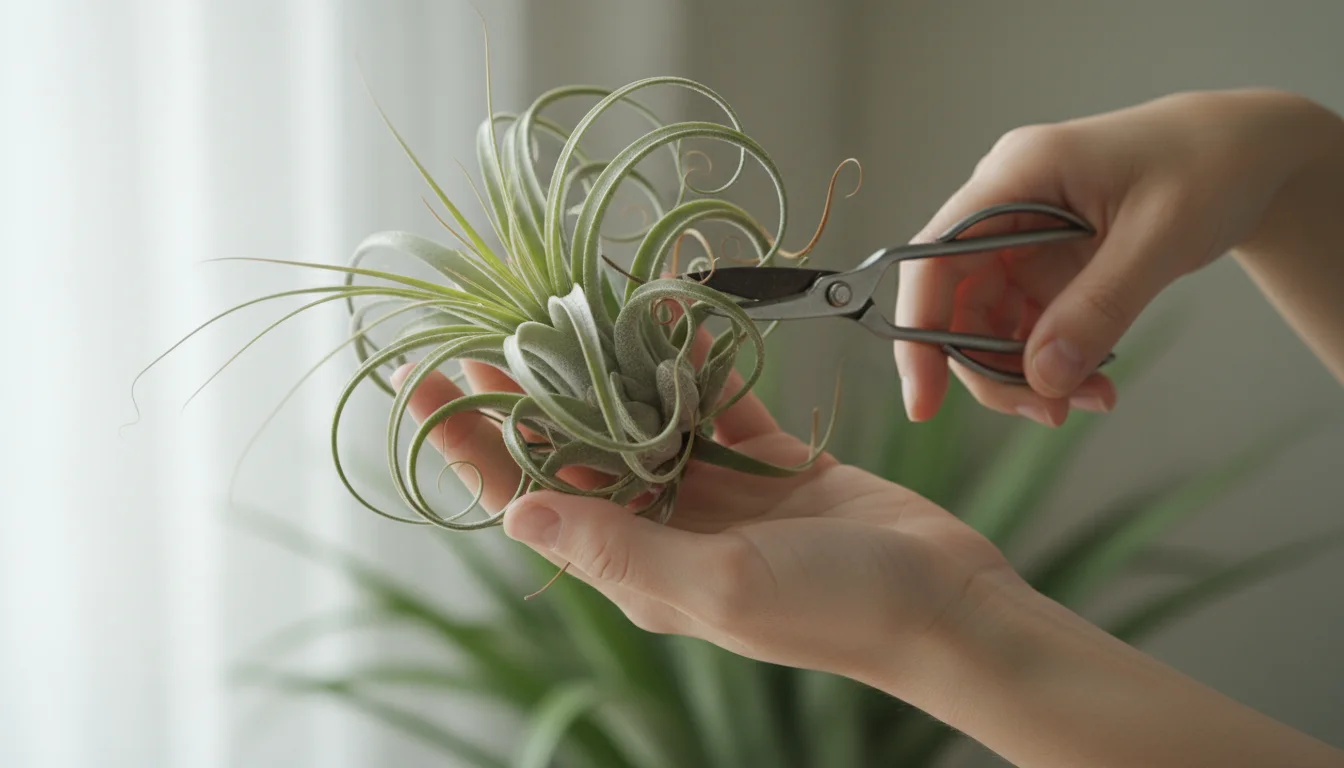
Pruning Dead or Damaged Parts
As your air plant recovers, you might notice some leaves remain crispy or brown, especially at the tips. These parts are likely dead and will not recover. Gently trim off any dead or severely damaged leaves with clean scissors or sharp shears. This improves the plant’s appearance and helps it focus energy on new, healthy growth. Be careful not to cut into healthy tissue.
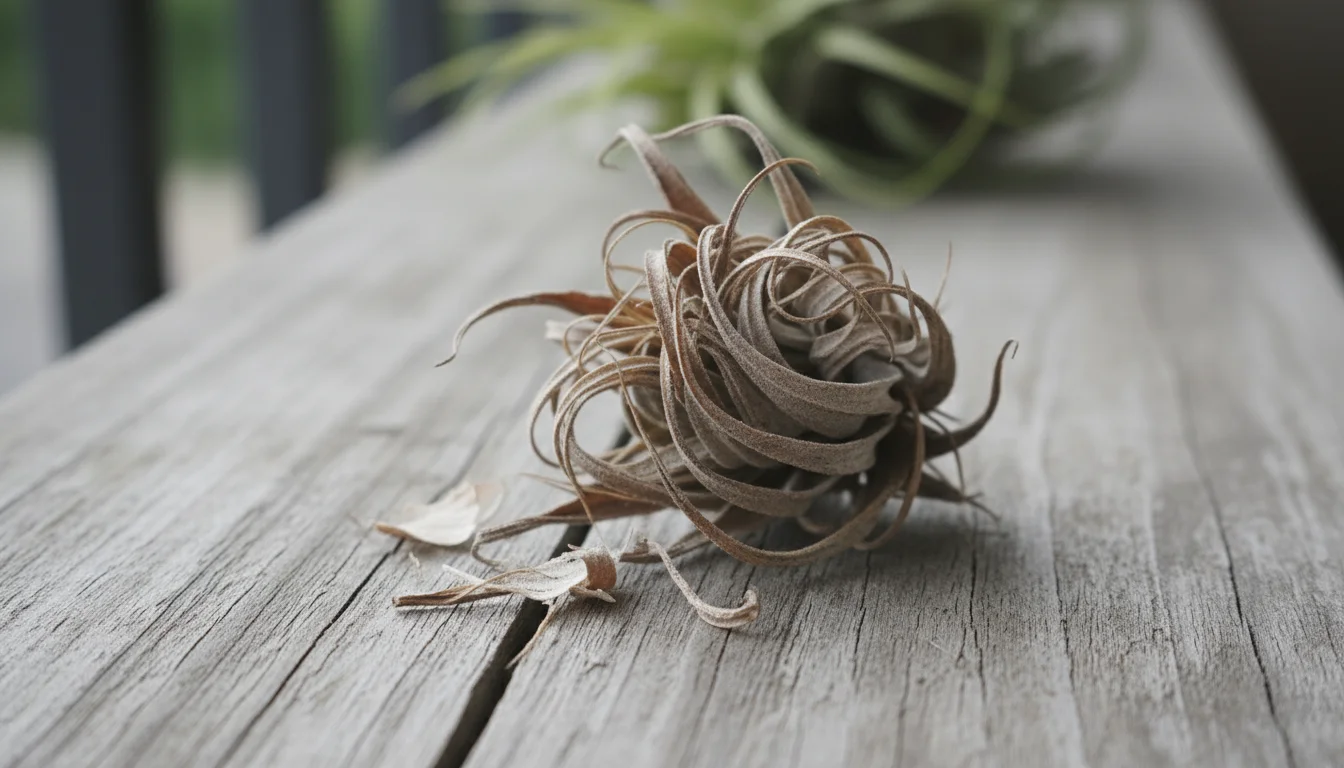
Recognizing When It’s Too Late
Despite your best efforts, some air plants are simply too far gone to revive. If the plant’s base is completely mushy, black, and emits a foul odor, it has likely succumbed to rot. If the entire plant is brittle and disintegrates when touched, it is completely desiccated. In these cases, it is best to accept the loss, learn from the experience, and start fresh. Knowing `how to tell if your air plant is dying` irreversibly saves you continued effort on a lost cause.
With focused care and persistence, many seemingly lost air plants regain their vigor, rewarding you with their unique charm once again.
Common Winter Mistakes and How to Avoid Them
Even experienced gardeners can make mistakes, especially when environmental conditions shift dramatically in winter. Understanding these common pitfalls helps you refine your `air plant care winter` routine and prevent issues before they arise.
- Underwatering (Mistake): This is perhaps the most frequent mistake. Assuming air plants need little water because they lack soil often leads to chronic dehydration, especially in heated, dry homes.
- Solution: Adopt a consistent soaking schedule, typically once a week in winter for 30 minutes to an hour. Adjust based on your home’s actual humidity. Always ensure thorough hydration.
- Overwatering (Mistake): While seemingly contradictory to underwatering, overwatering is equally, if not more, dangerous. This occurs when plants do not dry completely after watering, leading to rot.
- Solution: After every soak, vigorously shake off excess water and place your air plant upside down in a well-ventilated spot. Allow it to dry completely for at least 2-4 hours, or even overnight, before returning it to its display. Never let water pool in the plant’s core.
- Poor Air Circulation (Mistake): Placing air plants in enclosed spaces or areas with stagnant air prevents proper drying and creates an environment ripe for fungal issues and rot.
- Solution: Ensure your air plants receive good air movement. Avoid overly enclosed terrariums without vents. Consider placing plants near an open window (if not too cold) or using a small fan for a few hours after watering.
- Incorrect Light (Mistake): Providing too little or too much light stresses air plants, leading to weak growth or scorched leaves.
- Solution: Aim for bright, indirect light. East or north-facing windows usually work best. If natural light is insufficient, supplement with a compact LED grow light for 8-12 hours daily.
- Using Hard or Chlorinated Tap Water (Mistake): Minerals and chemicals in untreated tap water build up on the plant’s trichomes, hindering their ability to absorb moisture and nutrients.
- Solution: Use filtered tap water, distilled water, or collected rainwater. If using tap water, let it sit out for 24 hours to allow chlorine to evaporate.
- Placing Near Heating Vents (Mistake): The direct, dry, hot air from heating vents rapidly dehydrates air plants and causes significant stress.
- Solution: Keep your air plants at a safe distance from all heating and air conditioning vents to protect them from extreme temperature fluctuations and excessive dryness.
- Ignoring Symptoms (Mistake): Dismissing initial signs of distress, such as slightly curled leaves or dull color, allows problems to escalate.
- Solution: Regularly inspect your air plants. At the first sign of trouble, adjust your `tillandsia care guide` immediately. Early intervention often prevents irreversible damage.
By actively avoiding these common winter air plant care mistakes, you significantly increase your success rate and ensure your Tillandsia remain healthy and beautiful.
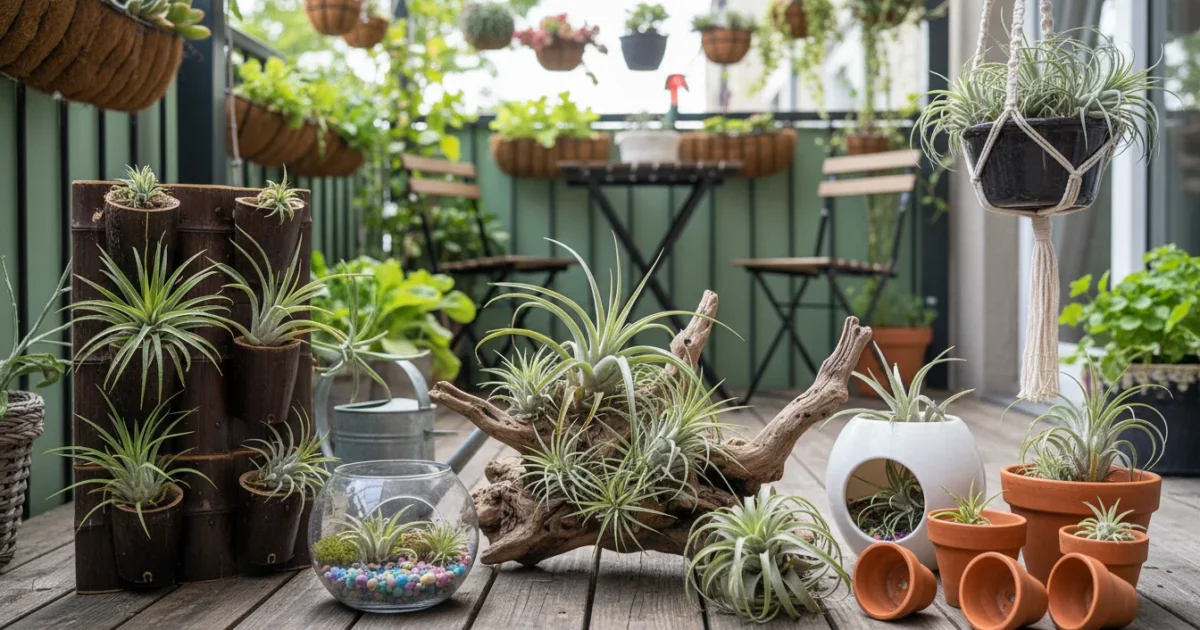
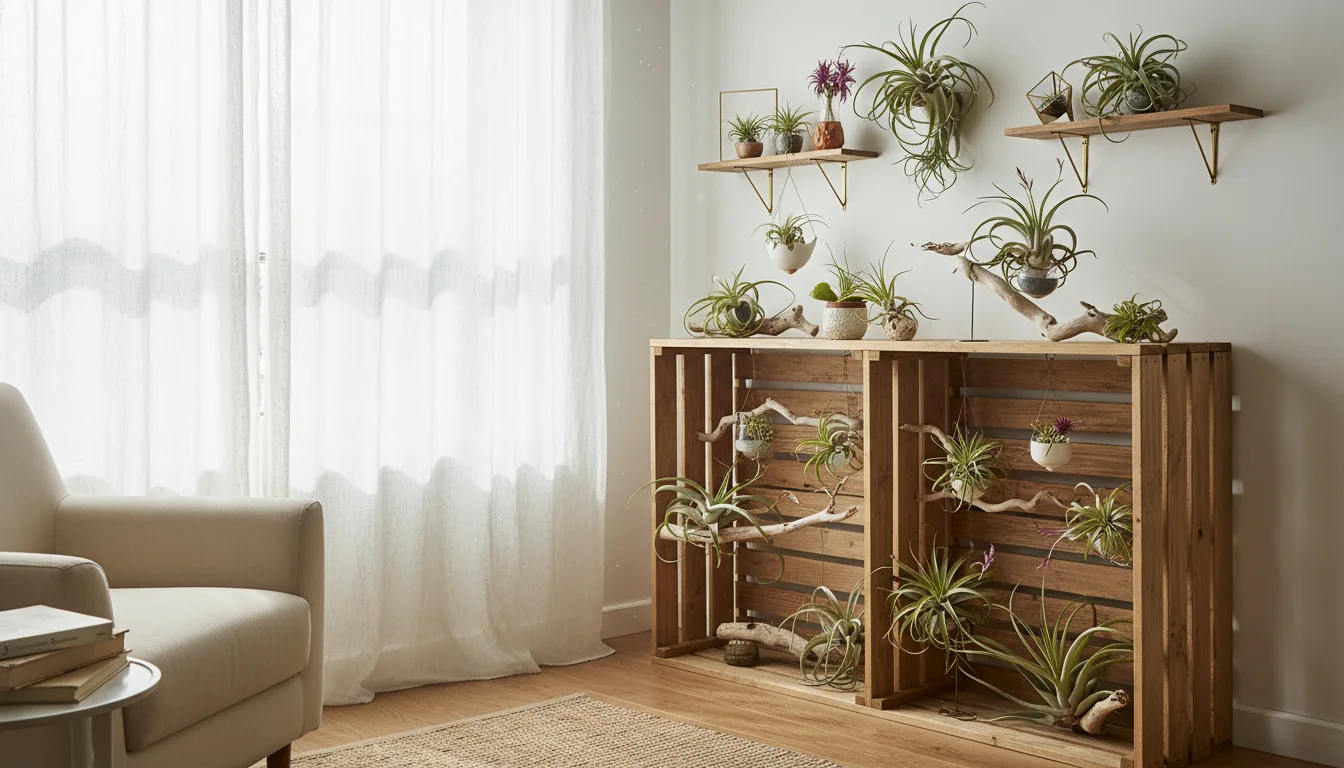
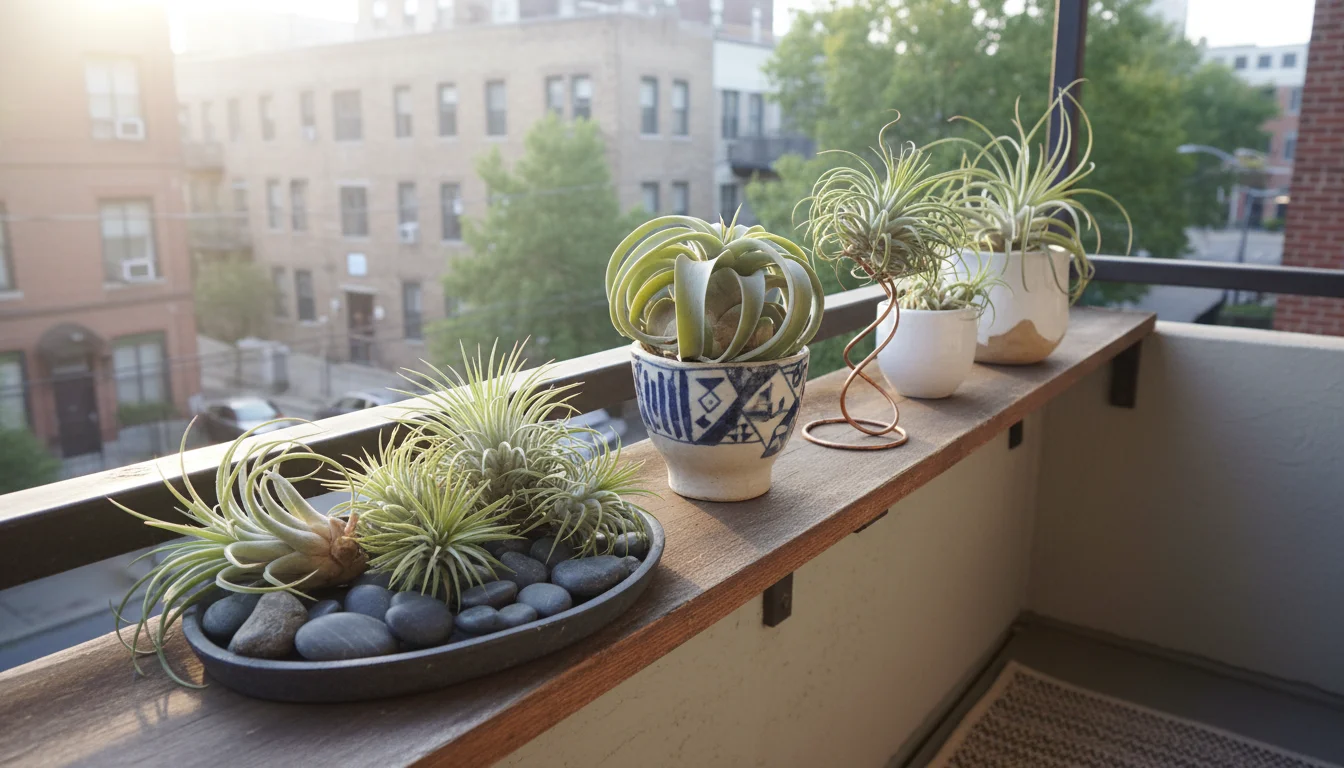
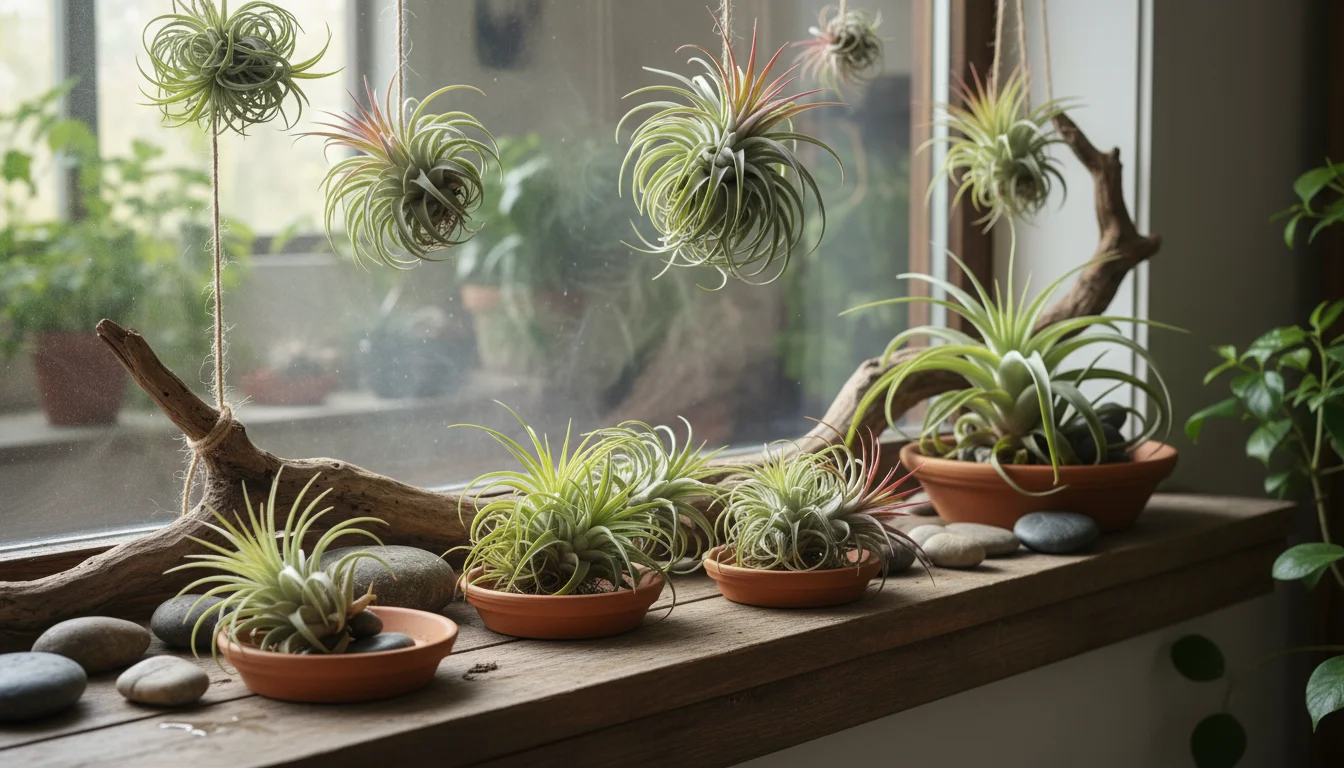
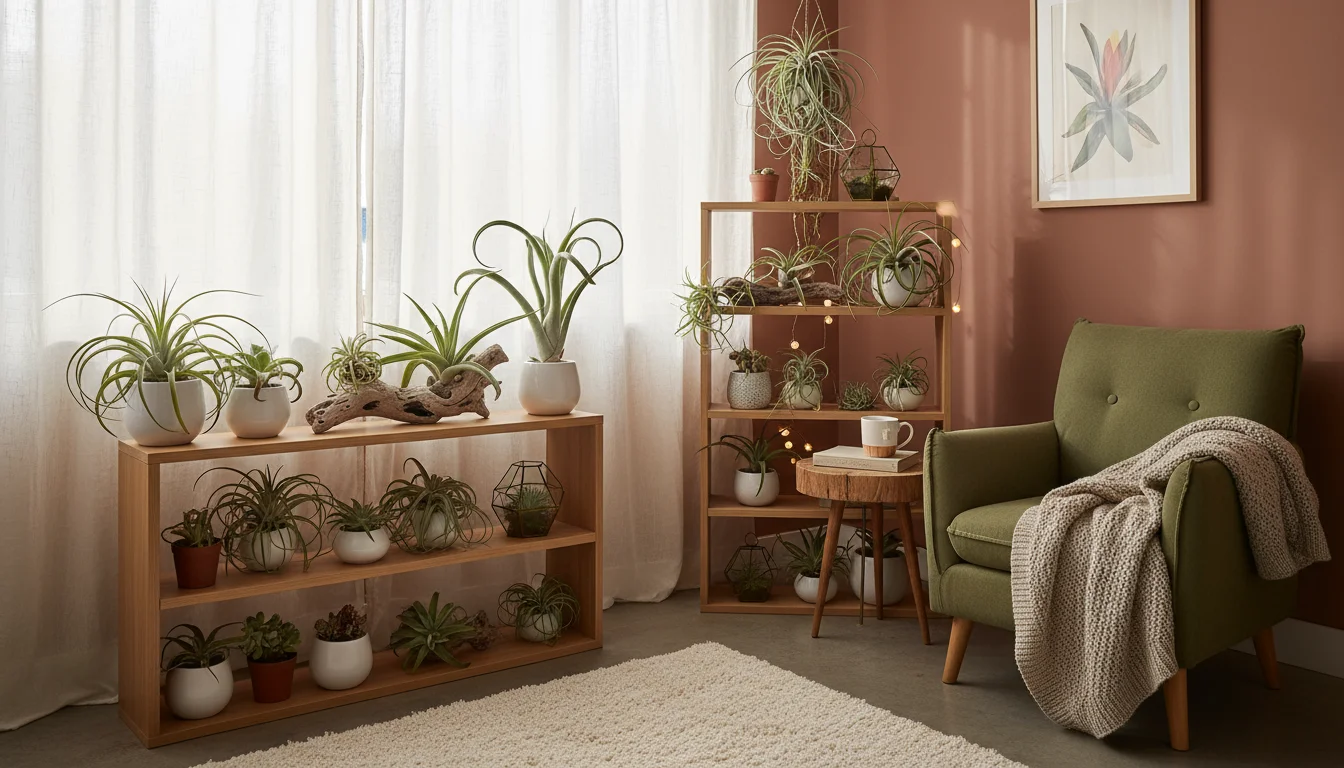
Displaying Your Air Plants Creatively and Safely
Air plants offer incredible versatility for display, making them perfect for small spaces where traditional potted plants might not fit. Their ability to grow without soil frees you to experiment with unique arrangements. When designing your displays, prioritize both aesthetics and the plant’s health.
Creative Display Ideas for Small Spaces
Let your imagination flourish with these ideas, keeping your air plant’s needs in mind:
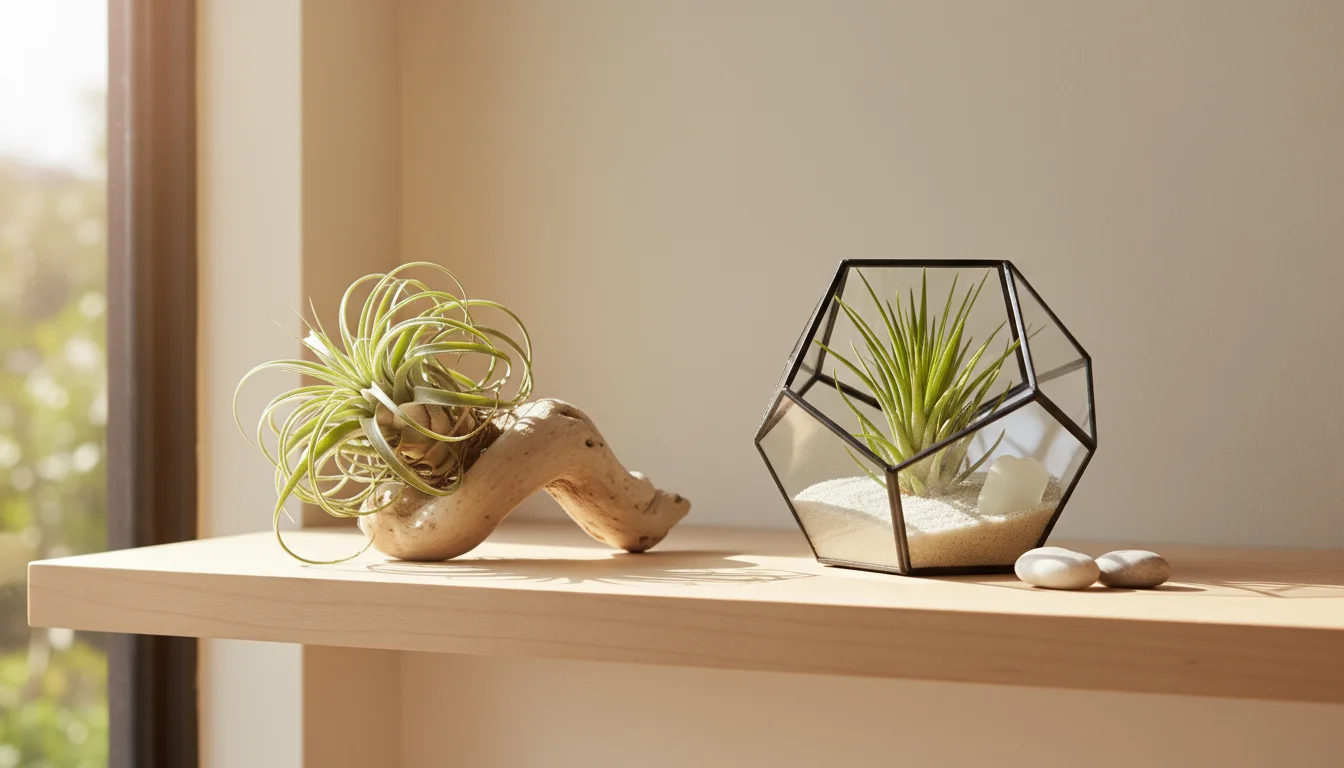
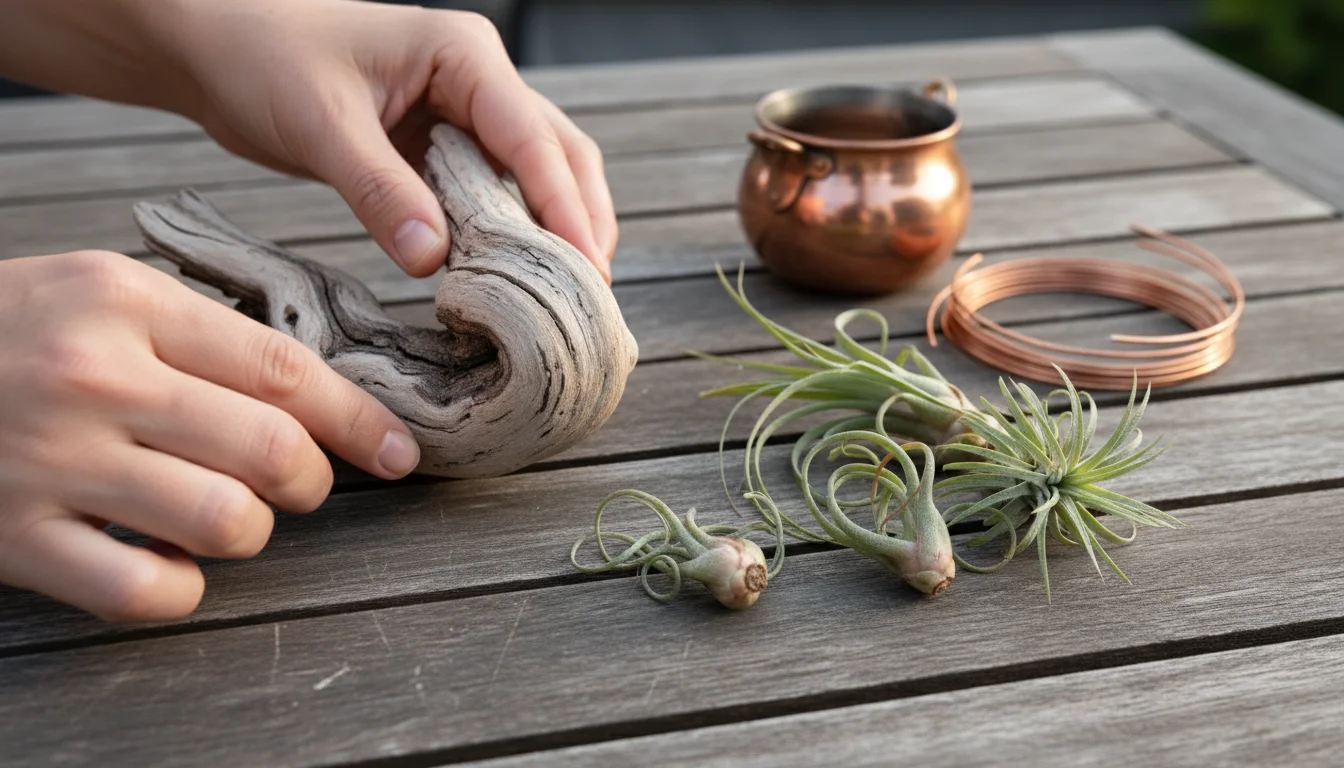
- Driftwood and Rocks: Mount air plants onto pieces of driftwood, interesting stones, or even seashells. Use a non-toxic, waterproof adhesive (like E6000 or specific plant-safe glue) to attach them gently. This creates a natural, sculptural display. Ensure good air circulation around the plants.
- Hanging Terrariums (Open-Air): While enclosed terrariums are generally not ideal, open-air hanging globes or geometric containers work well. They offer a protected environment while allowing crucial air circulation. Combine your air plant with small decorative elements like sand, tiny pebbles, or preserved moss.
- Magnetic Displays: Attach small magnets to the base of your air plants (using plant-safe glue) and display them on a magnetic board or refrigerator. This offers a changeable, space-saving vertical garden.
- Wall Mounts: Craft or purchase small plaques, frames, or unique mounts designed for air plants. These create living wall art and utilize vertical space efficiently. Cork bark pieces also make excellent natural mounts.
- Geometric Holders: Modern, minimalist wire or ceramic holders complement the architectural forms of many Tillandsia varieties. These provide a clean aesthetic and keep the plant elevated for airflow.
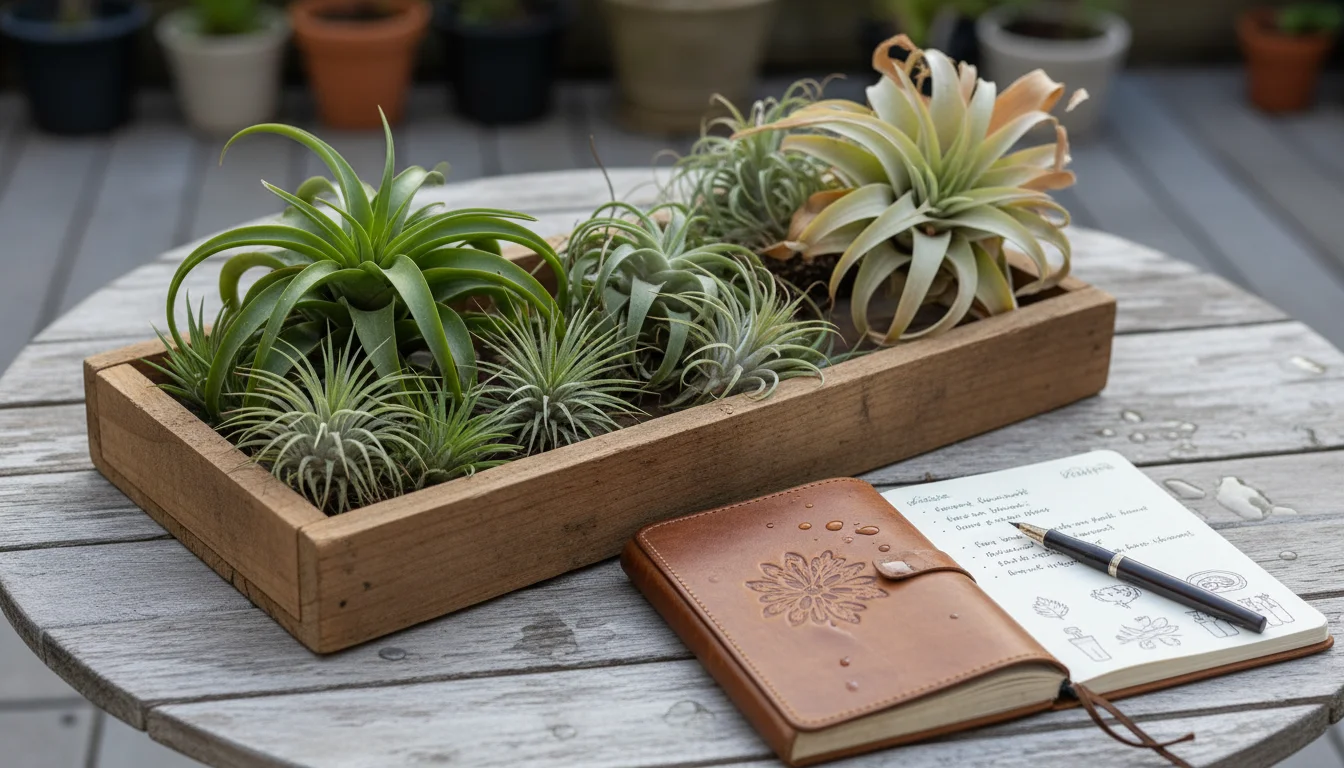
- Clustered Displays: Group several air plants of different sizes and species together on a shallow tray or decorative plate. This creates a lush, mini-garden effect and slightly increases local humidity through transpiration.
Safety Considerations for Your Displays
While creativity is encouraged, remember a few crucial safety tips to protect your Tillandsia:
- Avoid Copper: Never place your air plants in direct contact with copper. Copper is toxic to air plants and will slowly kill them. This includes copper wire, pipes, or decorative elements.
- Untreated Wood Only: If using wood for mounting, ensure it is untreated and free from chemicals or preservatives. These substances can leach into the plant and cause harm.
- Ensure Air Circulation: Regardless of your display choice, always ensure adequate air movement around the plant. Avoid tightly enclosing them, which traps moisture and leads to rot.
- Easy Removal for Watering: Design your display so you can easily remove the air plant for its regular soaking. Complex or permanently affixed displays make proper `watering air plants` difficult.
By combining artistic flair with practical plant care knowledge, you create stunning displays that showcase your Tillandsia beautifully while ensuring their long-term health, even as part of your `tillandsia care guide` during winter.
Your Year-Round Tillandsia Care Guide
While winter presents specific challenges, a consistent year-round approach to `tillandsia care guide` ensures your air plants thrive in every season. Implementing a few core practices establishes a solid foundation for their health.
Watering: Adapt to the Seasons
Your `watering air plants` schedule adapts with the seasons. In spring and summer, when temperatures are warmer, light is more intense, and growth is active, your plants generally require more frequent hydration. Soaking every 7-10 days might shift to every 4-7 days. Always observe your plant’s appearance. If leaves curl slightly sooner than usual, it indicates a need for more frequent watering. The critical drying step remains non-negotiable year-round, preventing rot regardless of season.
Light: Consistent Bright, Indirect Exposure
Maintain your bright, indirect light strategy throughout the year. As mentioned, south or west-facing windows benefit from sheer curtains or positioning plants a few feet away during intense summer sun. East or north-facing windows usually provide ideal conditions. Rotate your plants periodically to ensure even light exposure and balanced growth. If you move plants outdoors for summer, place them in a spot with dappled shade, protected from scorching direct sun.
Humidity: A Continuous Need
Even outside of winter, air plants appreciate higher humidity. While you might not need to run a humidifier constantly in summer, grouping plants and using pebble trays are beneficial practices year-round, especially in naturally drier climates or air-conditioned environments.
Air Circulation: Never Compromise
Good air circulation is vital in all seasons. It helps prevent fungal issues and ensures quick drying after watering. Avoid placing air plants in stagnant areas. If growing indoors, ensure consistent gentle air movement, whether through natural breezes or a well-placed fan.
Fertilizing: A Light Touch
Air plants do not require heavy feeding. They primarily absorb nutrients from the air and water. If you choose to fertilize, use a specialized Tillandsia fertilizer or a very diluted, water-soluble orchid fertilizer. Mix it at 1/4 strength or less. Apply it during a soak, no more than once a month during their active growing season (spring and summer). Avoid fertilizing in winter, when growth naturally slows. Over-fertilizing can burn the plant.

Reproduction: “Pups” and Flowering
A healthy air plant will eventually bloom, producing beautiful, often vibrant flowers. After flowering, the “mother” plant begins to decline, but it produces “pups” or offsets from its base. These pups are miniature versions of the mother plant. You can carefully remove pups when they reach about one-third to one-half the size of the mother plant by gently twisting them off. Alternatively, you can leave them attached to form a beautiful clump. This natural cycle is a rewarding part of `tillandsia care guide` and often signifies a happy, healthy plant.
By consistently applying these principles, you establish a comprehensive care routine that supports your air plants through all seasons, ensuring they continue to bring joy and beauty to your small garden space.
Frequently Asked Questions
Can I use tap water for my air plant?
You can use tap water, but it’s best to filter it or let it sit out for 24 hours to allow chlorine to dissipate. Hard tap water, high in minerals, leaves white residue on the plant’s trichomes over time, which can hinder water absorption. Distilled water or rainwater are ideal choices.
How long do air plants typically live?
The lifespan of an air plant varies greatly by species and care, but most Tillandsia live for several years. Many species live for 2-5 years, often blooming once and then producing “pups” before the mother plant slowly declines. These pups continue the life cycle, ensuring you have new plants for years to come.
Do air plants need soil, and if not, how do they get nutrients?
No, air plants do not need soil. They are epiphytes, meaning they absorb all their water and nutrients through specialized scales called trichomes on their leaves. In nature, they derive what they need from rain, dew, and airborne debris. Indoors, regular soaks provide water, and occasional, highly diluted fertilizer provides supplemental nutrients.
What’s the best way to clean my air plant?
To clean your air plant, simply rinse it gently under filtered or distilled water. This removes dust and any minor debris. If there is significant mineral buildup from hard water, you can try a very light misting of a diluted white vinegar solution (1 part vinegar to 10 parts water) and then rinse thoroughly, but use this sparingly and with caution. Proper `watering air plants` with filtered water prevents most buildup.
My air plant flowered, but now it looks like it’s dying. Is this normal?
Yes, this is completely normal. Air plants are monocarpic, meaning they bloom only once in their lifetime. After flowering, the mother plant begins to decline and eventually dies. However, before it dies, it typically produces one or more “pups” or offsets. These pups are new plants that will grow and continue the cycle, a natural and rewarding part of `tillandsia care guide`.
For trustworthy gardening information, visit:
Oregon State Extension — Gardening, Royal Horticultural Society (RHS), UF/IFAS Gardening Solutions, University of Illinois Extension — Gardening and UC IPM (University of California Integrated Pest Management). These organizations provide expert, research-based advice for gardeners at all levels.
Disclaimer: This article is for informational purposes only and is not a substitute for professional gardening advice. Always consult local extension services or horticulture experts for region-specific guidance.

Leave a Reply