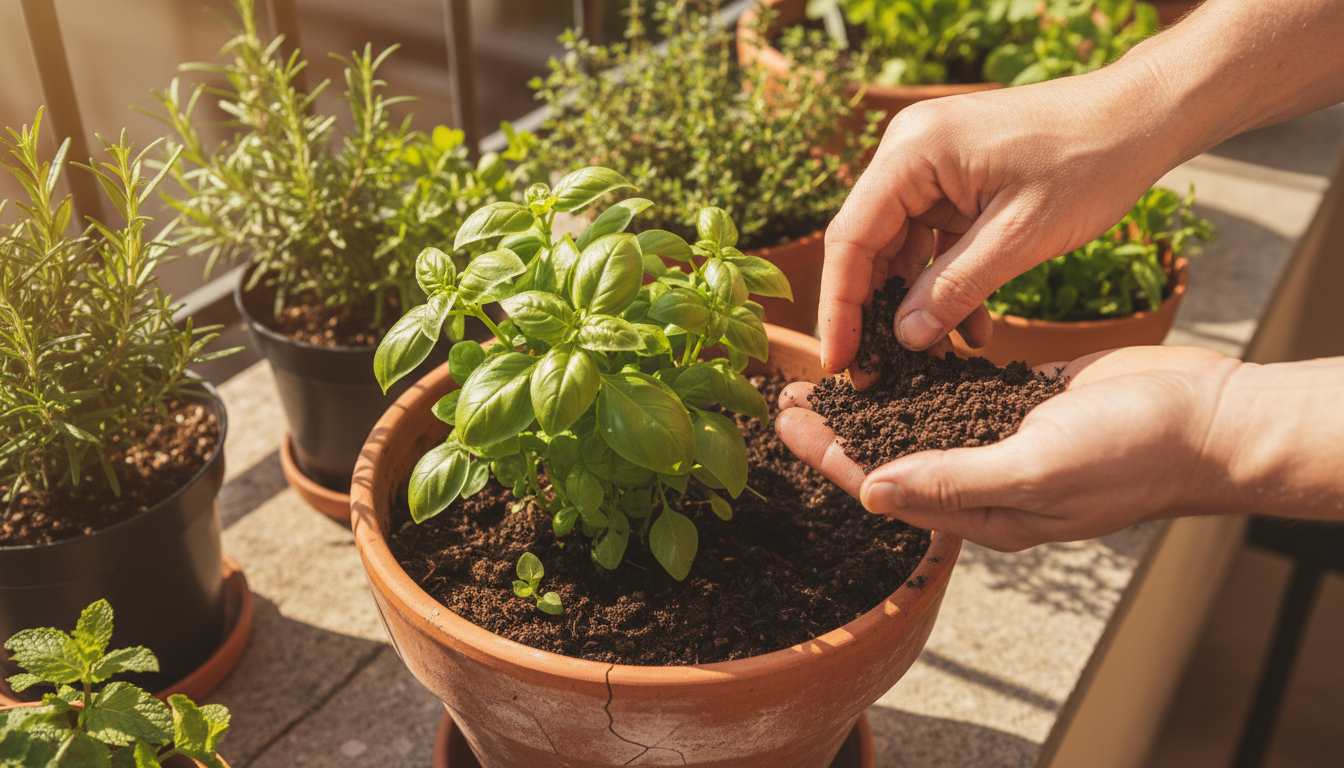
If you have ever wished for a simple, eco-friendly way to transform your kitchen waste into a valuable resource for your plants, then a DIY worm bin is your answer. This article guides you through creating a thriving worm composting system right in your small space, turning everyday kitchen scraps into nutrient-rich “black gold” for your garden. You will learn how to build your own DIY worm bin, care for your composting worms, and harvest their powerful castings.
For those who prefer to build nutrients directly in their planters, the lasagna composting method is another efficient way to improve soil health without a separate bin.
Understanding the basics of composting in small spaces can help you decide which method best suits your lifestyle and balcony setup.
For research-based sustainable gardening guidance, see The Xerces Society – Pollinator Conservation, Pollinator Partnership – Garden for Pollinators, EPA WaterSense – Outdoor Water Use, and Rodale Institute – Organic Farming Research.
Disclaimer: This article is for informational purposes only and is not a substitute for professional advice. Check local regulations before installing rain capture, using greywater, or composting food scraps outdoors.
Why Vermicomposting for Your Small Space?
Your small balcony, patio, or compact yard does not prevent you from making a significant impact on waste reduction and soil health. In fact, worm composting, or vermicomposting, offers one of the most efficient and space-saving methods to recycle organic waste. You divert kitchen scraps from landfills, which reduces methane gas emissions. The process also creates an incredible soil amendment that supercharges your container plants and garden beds.
If you are looking for a method that handles dairy or meat scraps as well, indoor composting with Bokashi buckets works perfectly alongside a traditional worm bin.
Integrating a composting system early can help you avoid common balcony garden mistakes related to poor soil quality and plant nutrition.
If you are working with very limited square footage, integrating a few small-space composting hacks can help keep your system efficient and odor-free.
Vermicomposting refers to the practice of using certain species of earthworms to consume organic waste, transforming it into a nutrient-dense material called worm castings. For those of you with limited space, a DIY worm bin fits neatly under a sink, on a balcony, or in a corner of your patio, offering a discreet yet powerful composting solution. Unlike traditional hot composting, vermicomposting works without heat, making it perfect for smaller areas and preventing odors when managed correctly. You reduce your waste footprint, enhance your soil naturally, and contribute to a greener planet, all from your compact growing area.
Understanding Your Wormy Allies: Red Wigglers
Not all worms are suitable for a composting bin. The stars of vermicomposting small space systems are typically red wigglers (Eisenia fetida) and sometimes European nightcrawlers (Eisenia hortensis) for larger bins. Red wigglers thrive in decaying organic matter, consuming their body weight in food scraps daily under ideal conditions. They reproduce quickly, tolerate a wide range of conditions, and stay within the bin, unlike garden earthworms which tend to burrow deep into the soil.
While worms work below the surface, you can also support your garden’s ecosystem by building a balcony bug hotel for pollinators and beneficial insects.
You can purchase red wigglers from online suppliers, local garden centers, or bait shops. When you receive your worms, introduce them gently to their new home. They adjust to their environment over a few days, so avoid disturbing them immediately after introduction. These diligent decomposers work tirelessly to break down your kitchen waste, converting it into nutrient-rich humus and castings that benefit your plants. Their efficiency makes them invaluable partners in your low-waste gardening journey.
Gathering Your Materials: What You Need
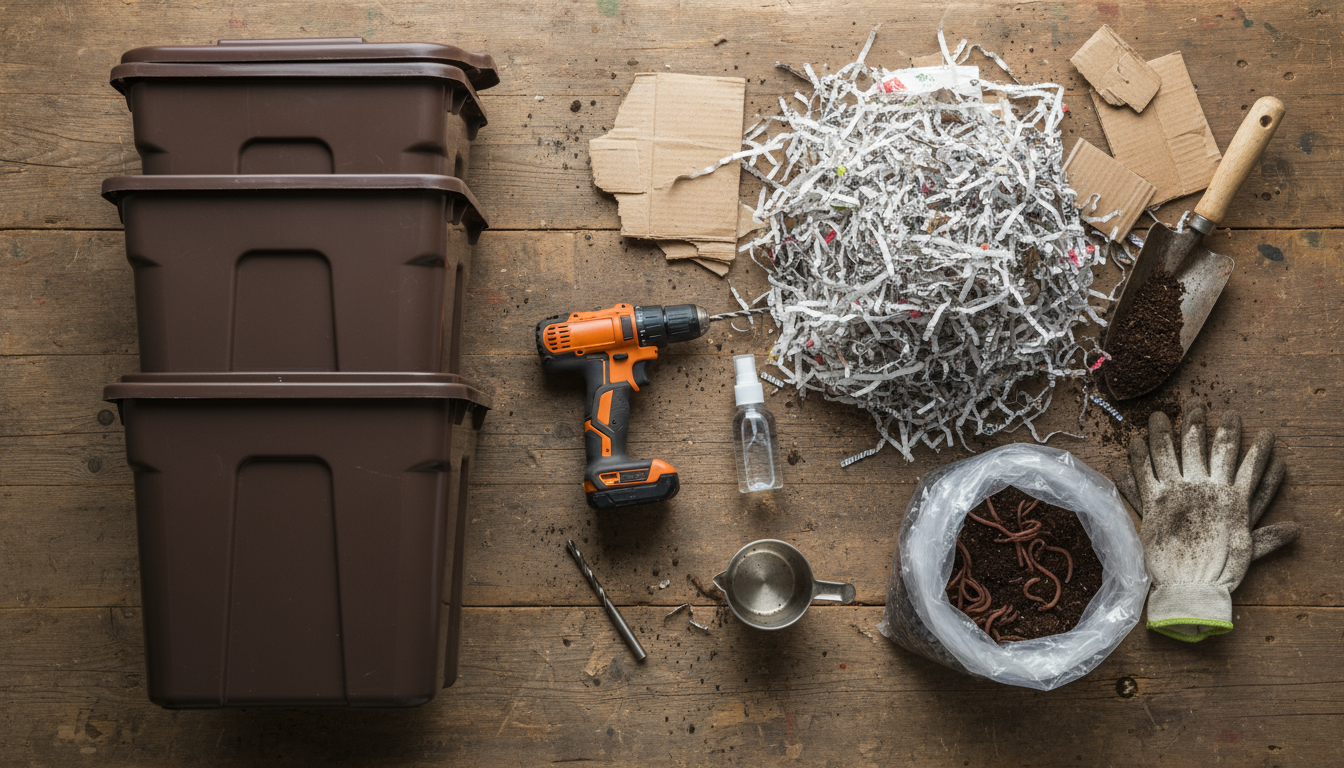
Building a DIY worm bin requires only a few accessible items. You can often reuse materials, further reducing your environmental impact. Start by collecting these essentials:
Before you begin your build, it is worth learning how to manage dead plants to ensure you are efficiently disposing of all your balcony green waste.
Constructing your own bin is part of a larger trend of DIY garden tool hacks that use common household objects to make urban gardening more affordable.
- Bins: Two or three opaque plastic storage containers (5-10 gallon capacity is ideal for small spaces) with lids. Choose containers that nest slightly. Dark colors are preferable to block light, which worms avoid.
- Drill with drill bits: A small bit (1/8 to 1/4 inch) for aeration and drainage holes, and a larger bit (1/2 to 1 inch) for larger drainage and migration holes between bins in a stacking system.
- Bedding material: Shredded newspaper, cardboard, coco coir, or aged leaves. Avoid glossy paper or heavily dyed materials.
- Water: For moistening the bedding.
- Soil or Sand: A handful of garden soil or sand helps provide grit for the worms’ digestion.
- Worms: Approximately one pound of red wigglers for a 5-10 gallon bin.
- Optional: Spigot for a liquid collection bin, mesh screen for bottom drainage holes.
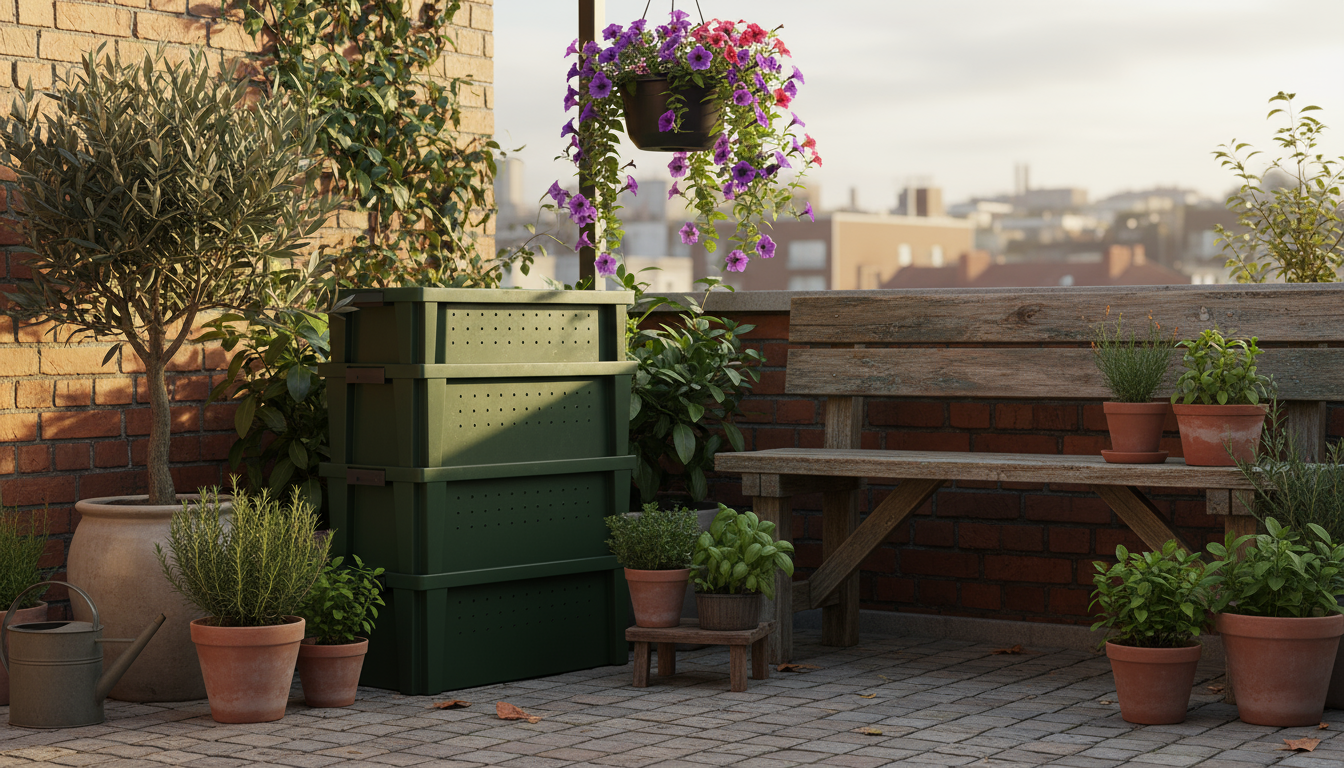
Selecting the right containers is crucial. Opaque plastic bins are lightweight, inexpensive, and easy to clean. You ensure your worms live in a dark, protected environment, mimicking their natural habitat. If you opt for a wooden bin, untreated cedar or cypress offers natural resistance to rot, though plastic is often more manageable for a vermicomposting small space.
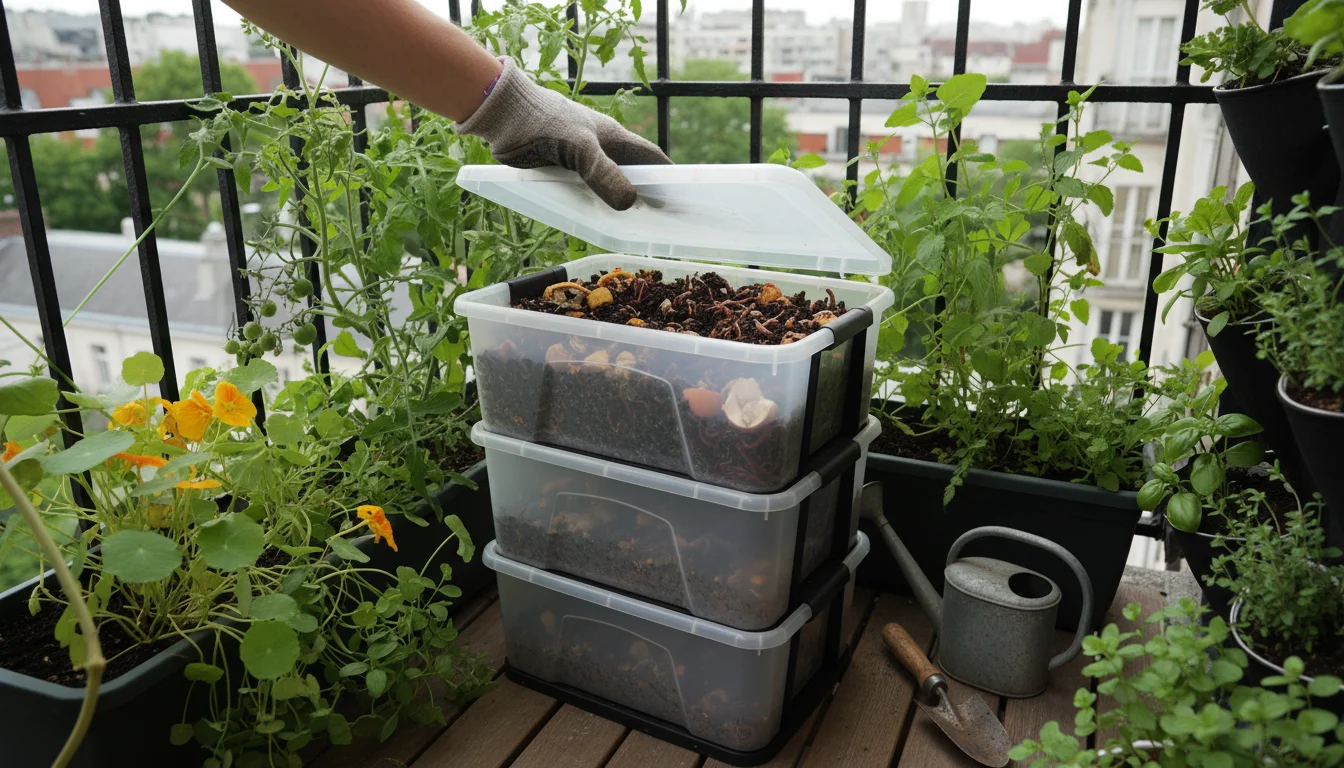
Build Your DIY Worm Bin: A Step-by-Step Guide
Creating your DIY worm bin is a straightforward process. You will construct a basic stacking system, which allows for easier harvesting of castings and better aeration. Follow these steps:
- Prepare the Bottom Bin (Liquid Collector):
- Take one plastic bin. This will be your leachate collection tray.
- Drill a few small holes (1/8 inch) near the bottom edge on one side if you plan to install a spigot later. If not, you will simply lift the upper bins to drain collected liquid.
- Do not drill any holes in the bottom of this bin.
- Prepare the Working Bins (Worm Homes):
- Take two or more identical bins. These will house your worms and food scraps.
- Drill numerous small holes (1/8 to 1/4 inch) across the entire bottom surface of each of these bins. These holes allow worms to move between layers and provide drainage.
- Drill additional small aeration holes (1/8 inch) around the top perimeter of each working bin for air circulation. Approximately 10-15 holes per bin are sufficient.
- Prepare the Lid:
- Take the lid that came with your bins.
- Drill several small aeration holes (1/8 inch) across the lid. These holes prevent condensation and allow air to enter the top layer.
- Assemble Your Bin:
- Place the liquid collection bin (with no bottom holes) on the ground or a sturdy surface.
- Nest one of the working bins (with bottom holes) inside the liquid collection bin. Ensure it sits slightly elevated, allowing space for liquid to collect. You might need to add small wooden blocks or plastic risers inside the liquid bin if your bins do not nest with a gap.
- Place the second working bin on top of the first working bin.
- Place the prepared lid on the very top working bin.
You now have a multi-tiered system ready for your worms. This design makes management easier as you add food scraps to the top bin and harvest castings from the bottom working bin without disturbing the entire ecosystem. This setup promotes excellent airflow and drainage, crucial elements for successful worm composting.
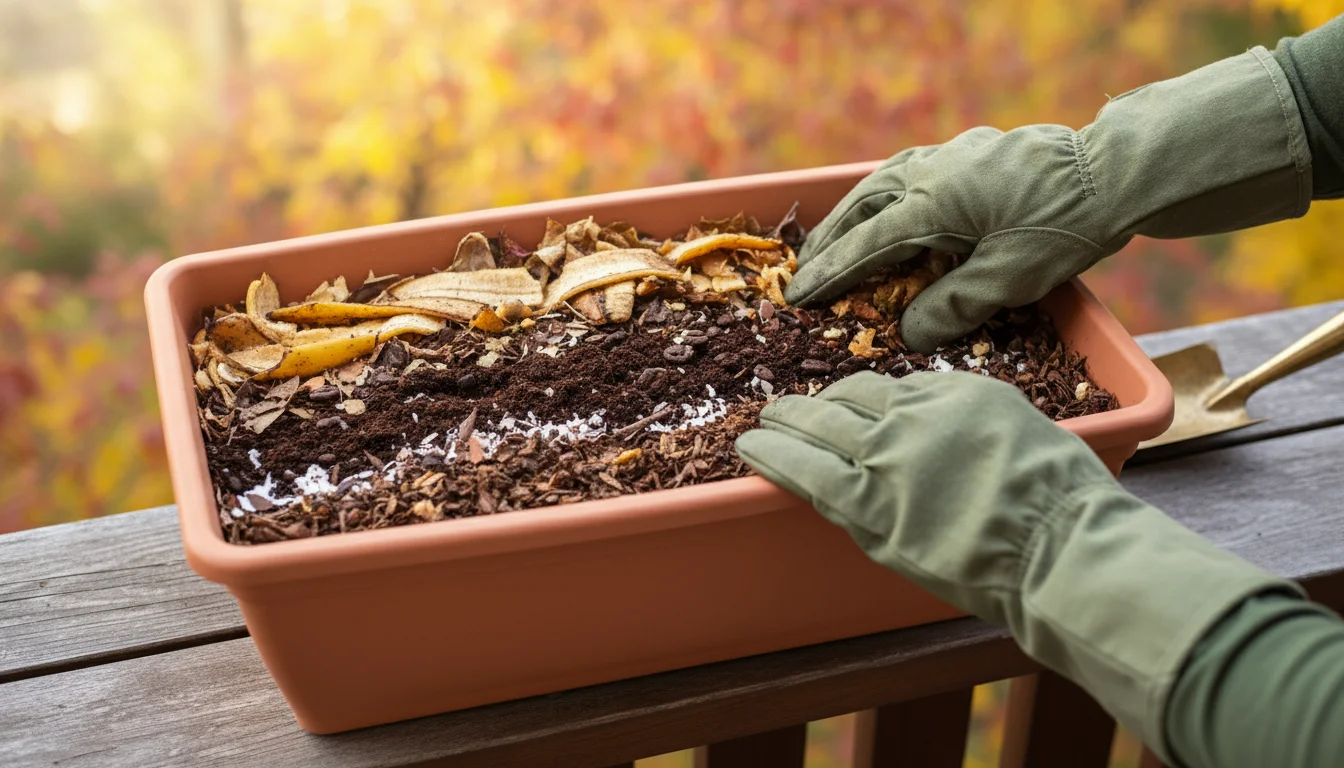
Setting Up for Success: Bedding, Moisture, and First Feast
The initial setup establishes the foundation for a thriving vermicomposting small space system. Your worms need a comfortable, moist environment to begin their work. Follow these steps to prepare their new home:
For those living in cold climates, starting a worm bin for an apartment ensures your composting doesn’t stop when the temperature drops outside.
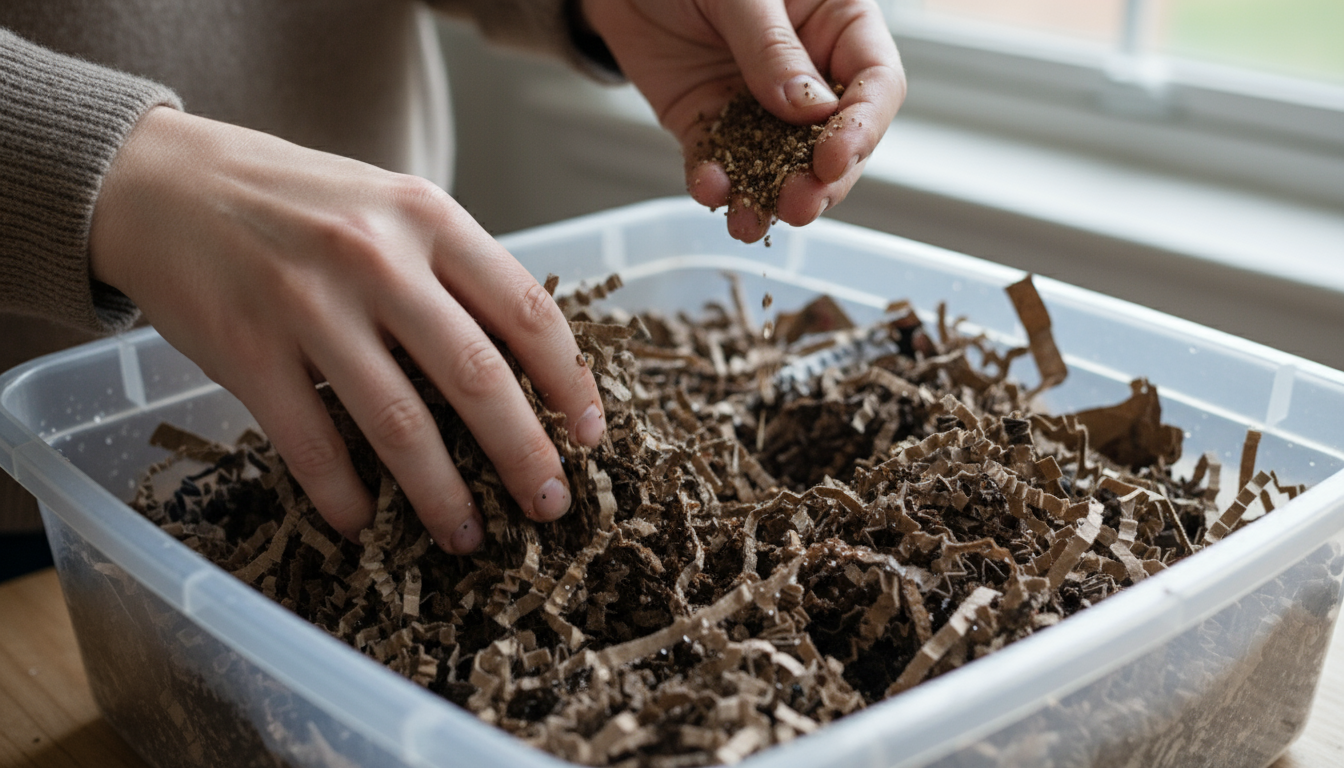
- Prepare the Bedding:
- Shred your chosen bedding material (newspaper, cardboard, coco coir) into strips about 1-2 inches wide.
- Moisten the bedding thoroughly with water until it feels like a damp sponge. You should be able to squeeze out a few drops of water, but it should not be dripping wet.
- Fluff the bedding to ensure good air circulation.
- Fill the Top Working Bin:
- Place a 6-8 inch layer of the moist, fluffed bedding into the top working bin.
- Add a handful of garden soil or sand. This provides the grit worms need to digest their food.
- Introduce Your Worms:
- Gently place your red wigglers directly onto the surface of the bedding.
- Leave the lid off or slightly ajar for a few minutes. Worms dislike light and will burrow down into the bedding, indicating they are settling in.
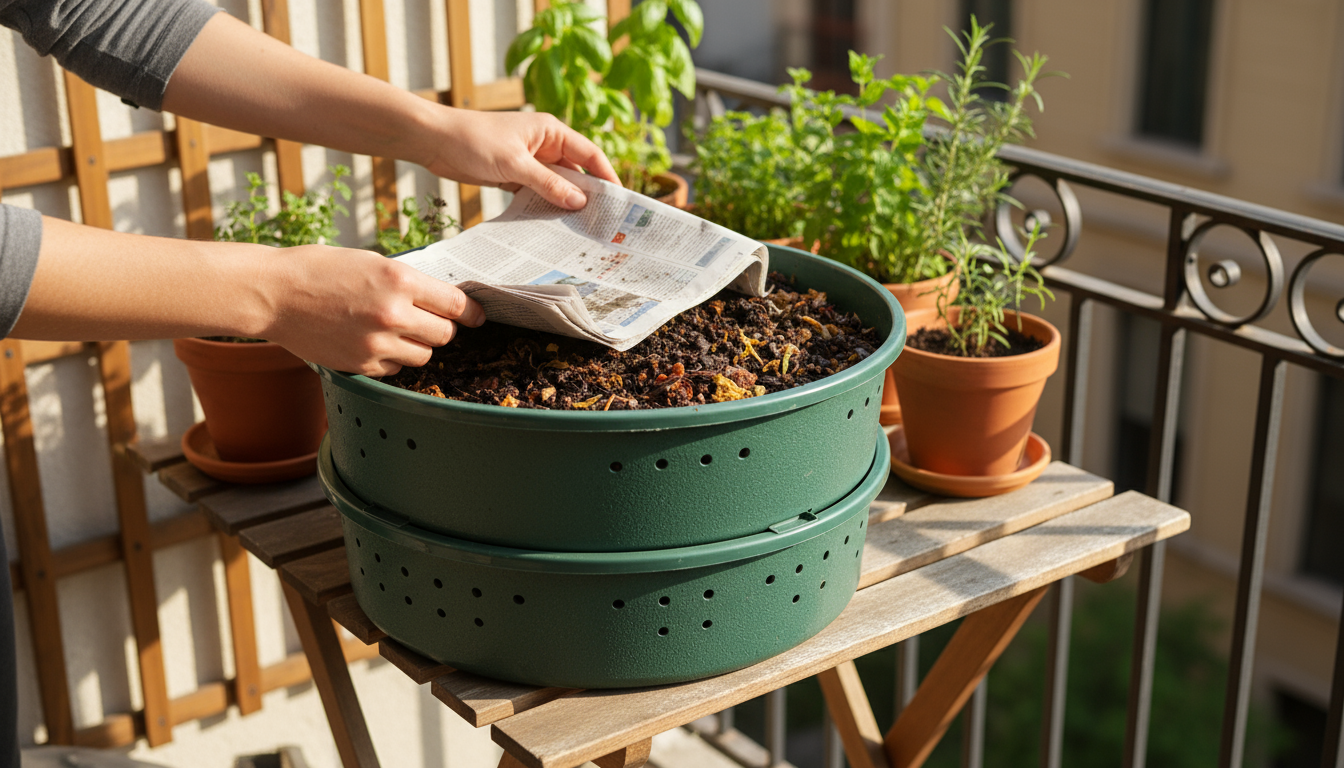
- First Feeding (Optional, but recommended after a few days):
- After your worms have settled for 2-3 days, you can offer their first small meal.
- Bury a small amount (about a cup) of finely chopped kitchen scraps in a corner of the bin, under the bedding.
- Do not overfeed. Allow them time to process this first meal before adding more.
- Placement:
- Choose a sheltered location for your DIY worm bin. Indoors, a laundry room, kitchen corner, or garage works well. Outdoors, place it in a shaded area protected from extreme temperatures. Worms thrive in temperatures between 55-77°F (13-25°C).
Proper initial setup greatly impacts your bin’s success. You provide a stable, welcoming environment, allowing your worms to establish themselves and begin their vital work of transforming waste.
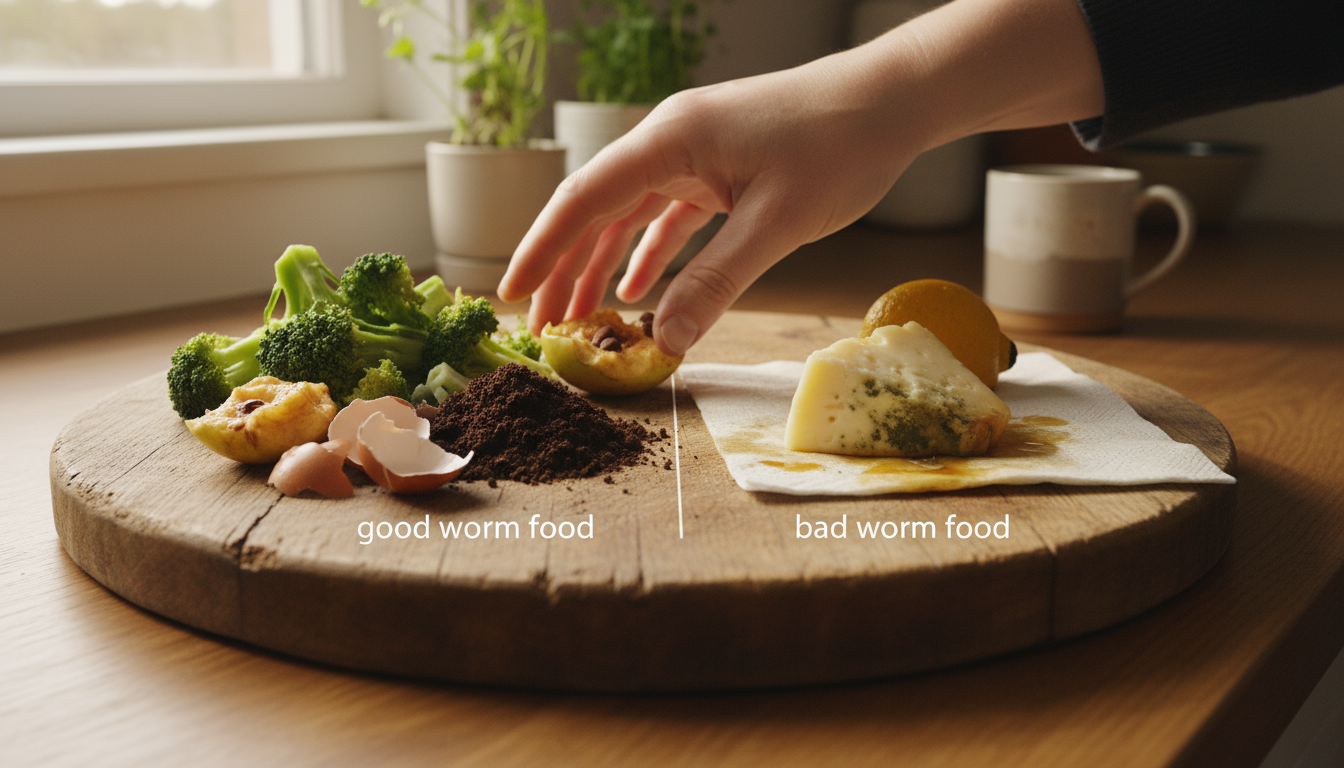
What to Feed Your Worms (and What to Avoid)
Your worms are not picky eaters, but feeding them the right balance of kitchen scraps ensures a healthy, odor-free bin. You aim for a diet rich in “greens” (nitrogen-rich food) balanced with “browns” (carbon-rich bedding). Overfeeding or feeding inappropriate items causes odors, attracts pests, and harms your worm colony. Here is a practical guide:
If you find you have too many acidic or dairy scraps for your worms, indoor composting with bokashi buckets is an excellent way to ferment those materials separately.
| Feed Your Worms (Greens) | Avoid Feeding Your Worms (Harmful/Problematic) |
|---|---|
| Fruit and vegetable scraps (non-citrus) | Meat, bones, fish (attracts pests, odors) |
| Coffee grounds and filters | Dairy products (attracts pests, odors) |
| Tea bags (staple-free) | Oily or greasy foods (slows decomposition) |
| Crushed eggshells (adds grit) | Citrus peels (too acidic, can harm worms) |
| Stale bread or grains (in moderation) | Spicy foods (onions, garlic, hot peppers) |
| Small amounts of yard waste (non-treated grass clippings, aged leaves) | Pet waste (contains pathogens) |
| Non-glossy newspaper, cardboard (as bedding and food) | Diseased plants (can spread disease) |
Chop your food scraps into small pieces. Smaller pieces decompose faster, making it easier for your worms to process them. Bury the food under the bedding to deter fruit flies and reduce odors. Rotate feeding locations within the bin to encourage even exploration by your worms. You learn to recognize how quickly your worms consume food, adjusting your feeding schedule accordingly. Typically, you feed them once or twice a week, adding about half their body weight in food during each feeding. For a one-pound worm colony, this means about a half-pound of food per feeding. Monitoring food consumption helps prevent overfeeding, a common pitfall in new worm composting systems.
Maintaining Your Worm Bin: Troubleshooting Common Challenges
Even with careful setup, you might encounter a few issues as you manage your vermicomposting small space system. Addressing these proactively keeps your worms healthy and your bin productive.
- Odor: A healthy worm bin smells earthy, like forest soil. If you detect foul odors (rotten egg or ammonia), you likely have anaerobic conditions, meaning too much moisture, too much food, or insufficient air.
- Action: Reduce feeding, add more dry bedding, and gently fluff the contents to increase airflow. Ensure drainage holes are clear.
- Fruit Flies: These common pests are attracted to exposed food scraps.
- Action: Always bury food completely under a few inches of bedding. Reduce feeding if flies persist, and add a layer of moist newspaper or cardboard on top of the bedding.
- Worms Escaping: If worms try to leave the bin, something is wrong with their environment. Common causes include too much moisture, too little moisture, acidic conditions, or a lack of food.
- Action: Check moisture levels (should feel like a damp sponge). Add dry bedding for excess moisture or spray with water for dryness. Add crushed eggshells to buffer acidity. Ensure you are feeding them regularly.
- Too Wet/Too Dry: An overly wet bin becomes slimy and anaerobic. A dry bin slows decomposition and harms worms.
- Action: For wet bins, add shredded dry newspaper or cardboard and fluff. For dry bins, spray with a mist of water.
- Temperature Extremes: Worms are sensitive to temperature. They thrive between 55-77°F (13-25°C).
- Action: Move your bin to a more sheltered location. In summer, place it in deep shade. In winter, bring it indoors or insulate it.
Regular observation helps you catch problems early. You learn to interpret the signs your bin gives you, adjusting conditions to maintain a thriving worm composting environment.
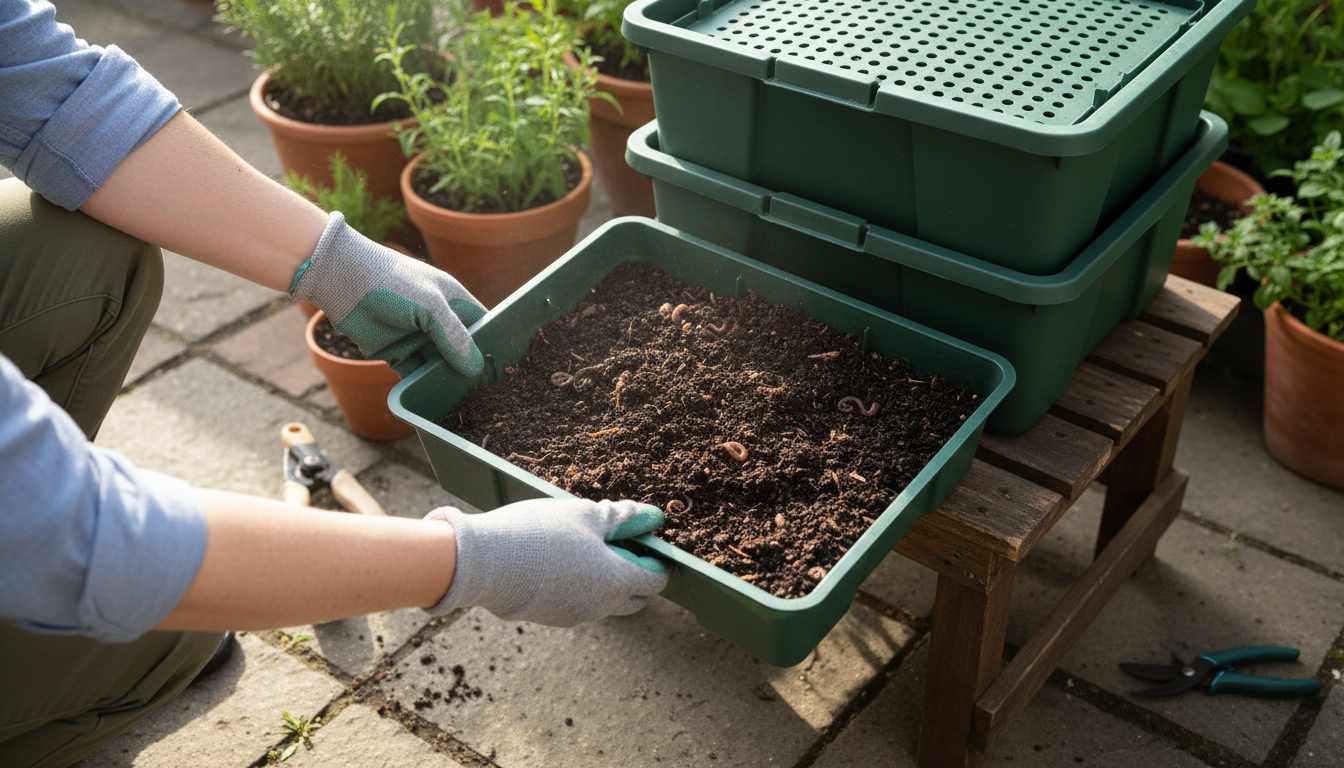
Harvesting Your ‘Black Gold’: Worm Castings
After about 3-6 months, your bin will be full of dark, crumbly, earthy-smelling material: worm castings. This “black gold” is a powerful, organic fertilizer, rich in microbial activity and essential plant nutrients. You want to harvest the castings without taking all your worms, allowing them to continue their work. Here are effective harvesting methods for your DIY worm bin:
- The Migration Method (for stacking bins):
- Stop feeding the bottom working bin for a week or two. Your worms will naturally move upwards in search of food.
- Place your fresh bedding and food scraps only in the top working bin.
- After a few weeks, most worms will have migrated to the upper bin.
- You can then remove the now mostly worm-free bottom bin, which contains your harvested castings.
- Replace the harvested bin with a new empty bin at the top to become the next working bin once the current top bin is full.
- The “Dump and Sort” Method (for single bins or if migration is slow):
- Lay a large plastic sheet or tarp on the ground in a brightly lit area (indoors or outdoors on a sunny day).
- Gently dump the entire contents of your worm bin onto the tarp, forming several small mounds.
- The light will drive the worms downwards. Wait 15-20 minutes.
- Carefully scrape off the top layers of castings from each mound.
- Repeat this process, waiting for the worms to burrow deeper, until you are left with mostly worms at the bottom of each mound.
- Collect the worms and return them to your cleaned bin with fresh bedding.
- Gather the harvested castings.
Regardless of the method you choose, you now possess a highly valuable amendment for your garden. Store your castings in an aerated container, like a bucket with holes, to maintain their beneficial microbial life. You have successfully completed the cycle of waste reduction and resource creation!

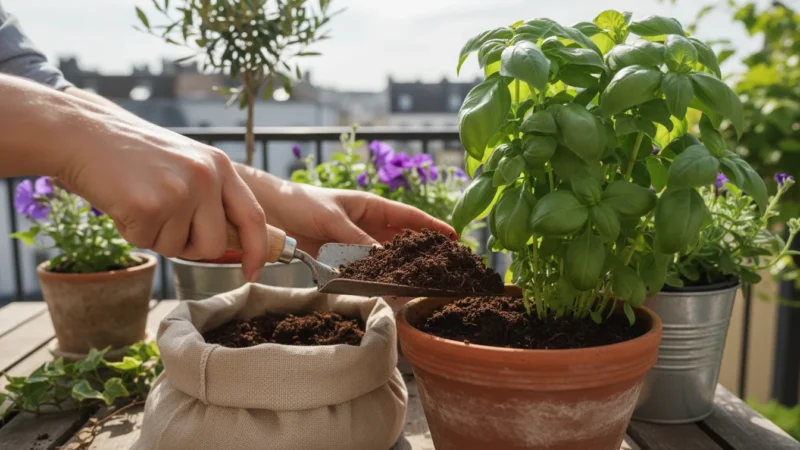
Unleashing the Power of Castings in Your Small-Space Garden
Now that you have your precious worm castings, you might wonder how best to apply them to your small-space garden. These potent nuggets are not just fertilizer, they are a living soil amendment, teeming with beneficial microbes that improve soil structure, enhance nutrient availability, and even help plants resist disease. You have several effective ways to use your “black gold”:
- Potting Mix Amendment:
- Mix 1 part worm castings with 3-4 parts peat-free potting mix before planting. This provides a slow-release nutrient boost for seedlings and established plants alike.
- The castings improve water retention and aeration in your containers, giving your plants a strong start.
- Top Dressing:
- Sprinkle a thin layer (1/2 to 1 inch) of worm castings around the base of your established plants in containers or garden beds.
- Gently work it into the top layer of soil, then water thoroughly. The nutrients slowly release with each watering, feeding your plants over time.
- Seed Starting:
- Add a small amount of castings (no more than 10-20% of the total mix) to your seed-starting medium.
- This gentle nutrient source provides young seedlings with vital energy without risking “burn” from stronger fertilizers.
- Compost Tea:
- Fill a breathable bag (like a paint strainer bag or old pillowcase) with 1-2 cups of worm castings.
- Steep the bag in a gallon of unchlorinated water (rainwater or tap water left out for 24 hours) for 12-24 hours.
- Aerate the mixture with an aquarium pump and air stone if possible, to encourage beneficial aerobic microbes.
- Dilute the resulting “tea” with water (1:1 ratio) and use it as a foliar spray or soil drench to boost plant health and disease resistance. Use immediately.
You find worm castings particularly beneficial for container gardening, where nutrients leach out more quickly than in in-ground beds. Their slow-release nature means you do not need to fertilize as frequently, simplifying your plant care routine. By integrating worm castings into your gardening practices, you complete the sustainable cycle: your kitchen scraps feed your worms, and your worms feed your plants, fostering a truly regenerative small space ecosystem.
Frequently Asked Questions
How many worms do I need to start my DIY worm bin?
You typically start with one pound of red wigglers for a standard 5-10 gallon DIY worm bin. A pound of worms contains approximately 800-1200 individual worms. This number allows them to establish a healthy colony and begin processing your kitchen scraps efficiently without overwhelming the bin.
Can I keep my worm bin indoors?
Yes, you can absolutely keep your worm bin indoors. When properly managed, a worm bin should not produce foul odors. Choose a stable temperature location, such as a laundry room, basement, or even a kitchen corner. Ensure the bin is opaque and the lid fits snugly to deter pests and maintain darkness, which worms prefer. Many small-space gardeners find indoor bins convenient for year-round composting.
What if my worms die?
If you notice a significant number of dead worms, investigate the cause immediately. Common reasons include extreme temperatures (too hot or too cold), overfeeding (leading to anaerobic conditions and odors), too much moisture, or insufficient airflow. Check the bin’s moisture level, reduce feeding, and gently fluff the bedding. If the issue persists, you might need to partially or fully refresh the bedding and consider adding a fresh batch of worms. You prevent future die-offs by closely monitoring your bin’s conditions.
How often should I feed my worms?
You typically feed your worms once or twice a week, depending on the size of your worm colony and the amount of food scraps you generate. A good rule of thumb is to add about half the worms’ body weight in food during each feeding. For a one-pound colony, this means about a half-pound of food. Observe how quickly they consume their previous meal. If the food is still mostly there from your last feeding, wait a day or two before adding more. Consistent, moderate feeding maintains a healthy balance in your worm composting system.
What about fruit flies in my worm bin?
Fruit flies are a common annoyance, but you can manage them effectively. The primary cause is exposed food scraps. Always bury your kitchen scraps deep within the bedding, ensuring they are completely covered. You can also place a layer of moist newspaper or cardboard on top of the bedding. Reducing the amount of food you add or temporarily stopping feeding until the flies subside also helps. Setting up a simple fruit fly trap (a small dish of apple cider vinegar with a drop of dish soap) near the bin can also help reduce their population.

Leave a Reply