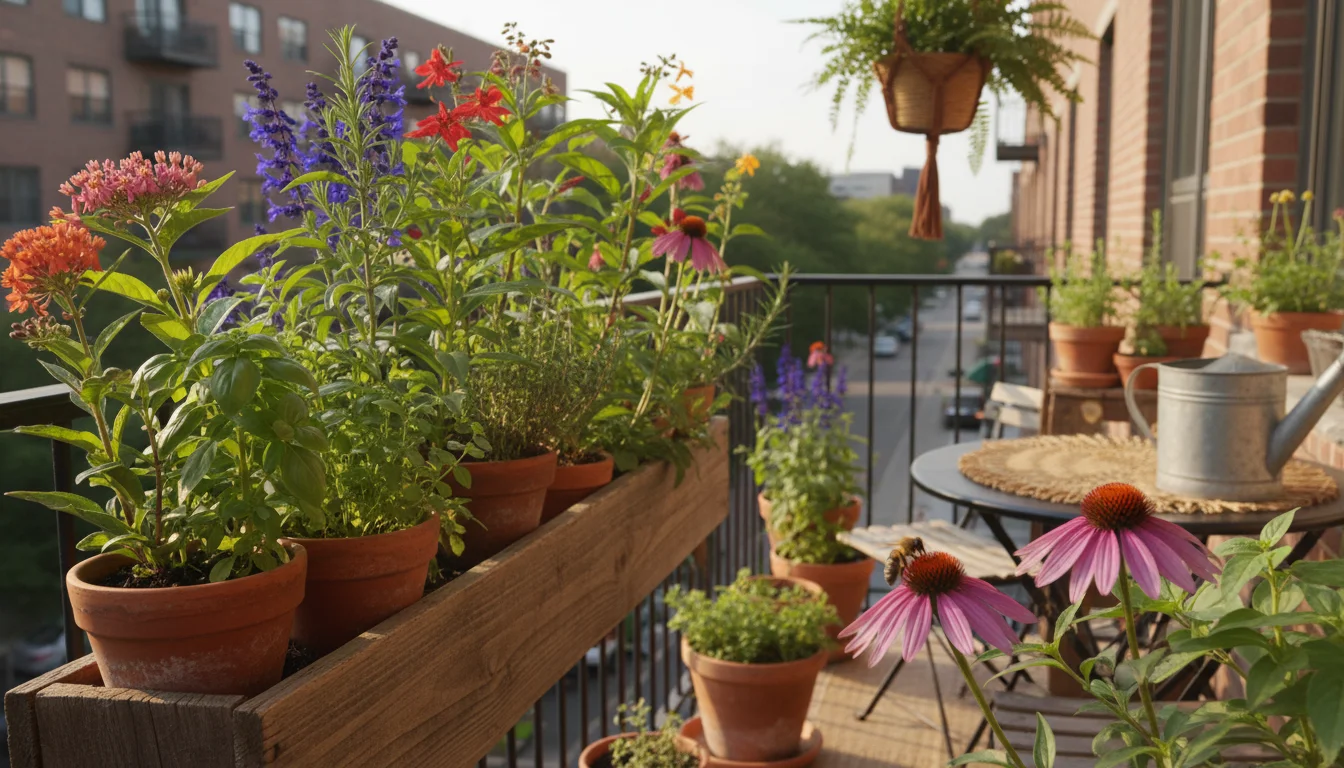
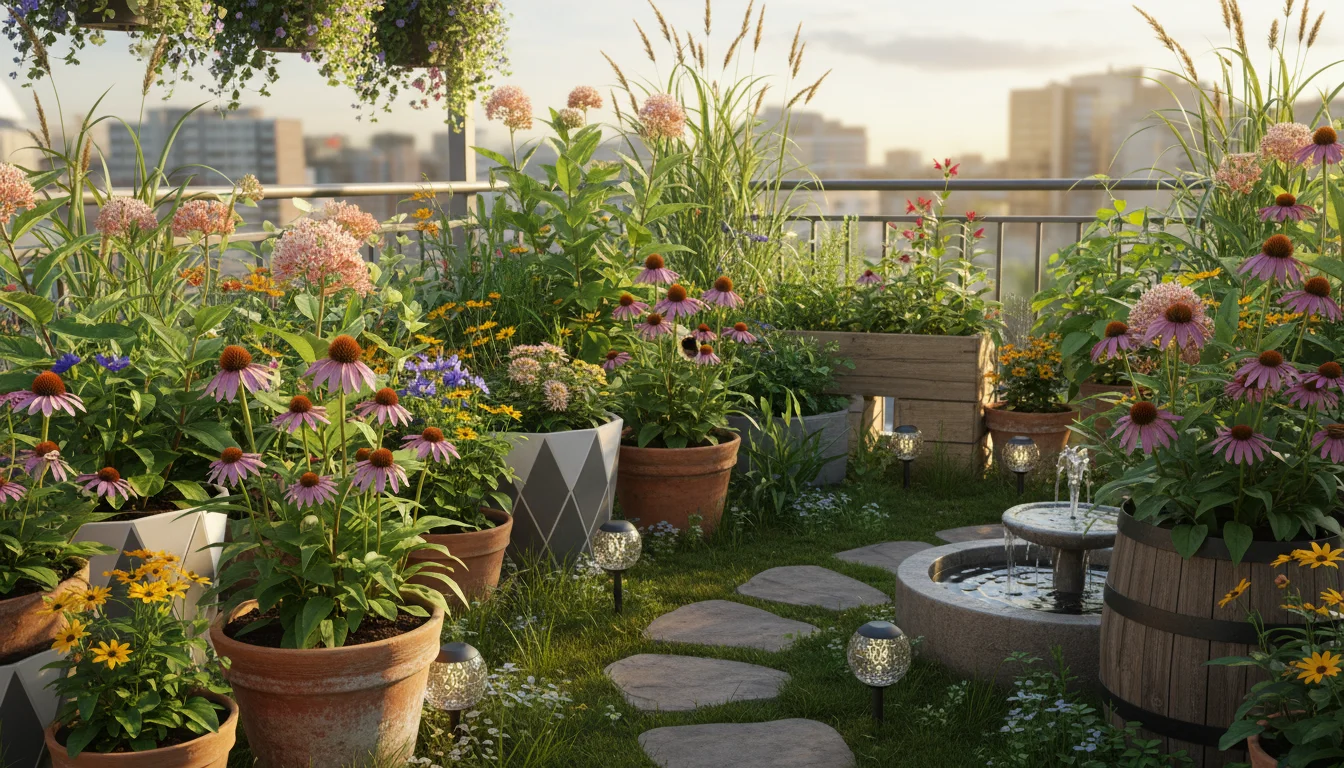
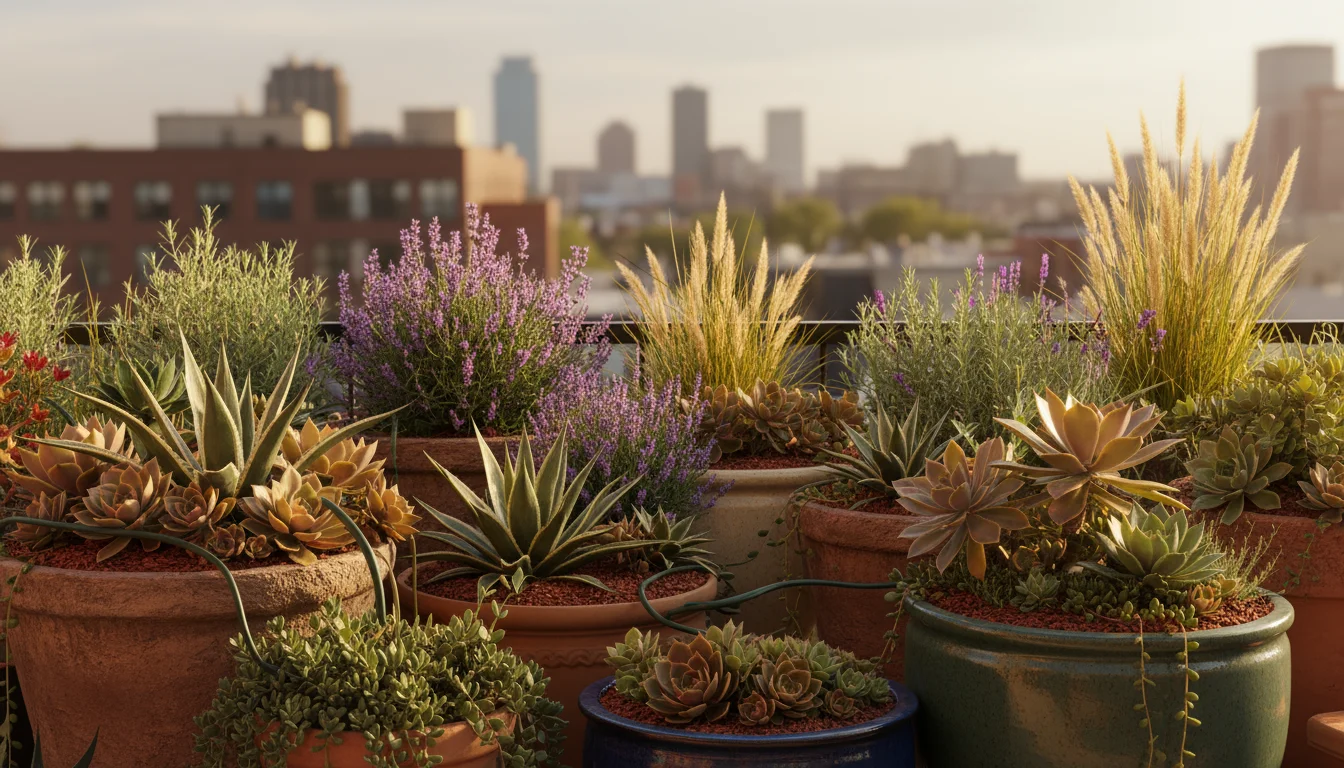
You probably consider your balcony garden a small slice of paradise, a vibrant space where you grow fresh produce and beautiful blooms. What if that tiny garden could offer even more, saving you money and deepening your connection to the plants you nurture? Seed saving empowers you to do exactly that. It transforms your annual gardening expenses into an investment in future harvests, turning your compact space into a self-sustaining ecosystem.
Pairing seed saving with a winter garden budget ensures your spring setup stays affordable and productive.
Seed saving is a practical, eco-friendly habit for any gardener, especially those with limited space. It reduces waste, supports biodiversity, and fosters a profound understanding of your plants’ life cycles. Forget buying new seed packets every season. You can cultivate a continuous cycle of growth right from your patio or balcony. Fall, with its mature harvests and changing weather, creates ideal conditions to prepare your seeds for dormancy, ensuring they thrive when spring arrives.
Introduction to Frugal Gardening and Seed Saving
Embracing seed saving is a cornerstone of frugal gardening, allowing you to maximize your balcony or patio space for continuous harvests. Imagine planting tomatoes this year, knowing their offspring will feed you next season without another trip to the garden center. This practice cuts down on costs and reduces your ecological footprint. You eliminate the need for new seed packets, often packaged in plastic or non-recyclable materials. This small change in your gardening habits contributes to a larger movement of sustainability.
Beyond the financial benefits, saving your own container garden seeds connects you more deeply with nature’s rhythm. You observe your plants through their entire life cycle, from tiny seedling to seed-producing maturity. This intimate knowledge helps you select the strongest, most productive plants for future generations. Over time, the seeds you save adapt to your specific microclimate on your balcony, potentially leading to more resilient and higher-yielding plants in your unique growing conditions. This adaptability makes your garden more robust.
This article guides you through the simple, rewarding steps of seed saving. You will learn which seeds are easiest for beginners to save, how to handle specific plants like tomatoes and herbs, and crucial techniques for drying and storing your precious bounty. Prepare to unlock a new level of self-sufficiency and enjoyment in your small-space garden, making it a true source of joy and abundance.
Why Fall is Your Prime Seed Saving Season
Fall signals the culmination of the growing season for many plants, making it the perfect time for seed saving. Throughout spring and summer, your plants invest energy into producing fruit, flowers, and foliage. As temperatures cool and daylight hours shorten, plants naturally shift their focus towards reproduction, culminating in mature seeds. These fully developed seeds contain all the genetic material and stored energy necessary for successful germination next spring.
As you harvest, capture your fall garden reflections to help you decide which varieties are worth saving for next year.
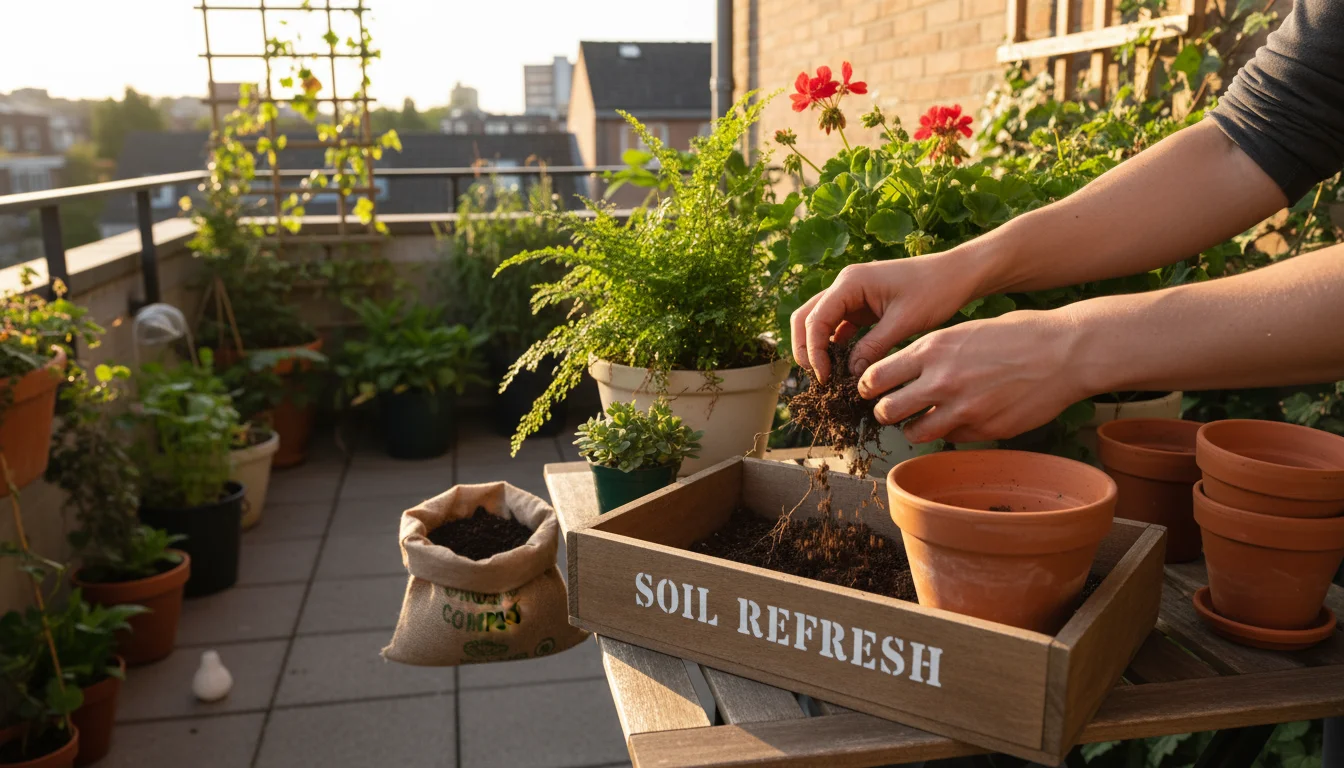
While you are busy gathering seeds, it is also the ideal time to complete other essential fall gardening tasks to prepare your containers for the off-season.
Harvesting seeds too early means they might not be fully viable. Immature seeds often lack the necessary endosperm or embryo development to sprout successfully. Waiting until fall ensures your plants have maximized their efforts, providing you with a higher percentage of viable seeds. For many annual vegetables and flowers, you will observe fruits shriveling, pods drying, or flower heads browning as a clear sign of seed maturity. For instance, cilantro flowers will fade and small, round seeds will form and dry on the plant in late summer or early fall. Similarly, bean pods will turn yellow and brittle, indicating the seeds inside are ready.
The drier air and cooler temperatures typical of autumn also aid in the crucial drying process for seeds. After harvesting, seeds require careful drying to prevent mold and ensure long-term viability. Fall’s natural conditions reduce the need for artificial drying methods, making the process simpler and more energy-efficient. This seasonal timing aligns perfectly with your garden’s natural cycle, setting you up for success in your seed saving endeavors.
Understanding Your Seeds: Open-Pollinated vs. Hybrid
Before you begin saving container garden seeds, understand the crucial difference between open-pollinated and hybrid varieties. This knowledge directly impacts the success and predictability of your future harvests. Saving seeds from the right type of plant ensures your efforts yield desirable results.
Open-Pollinated Seeds
Open-pollinated, often labeled “OP,” varieties result from natural pollination by wind, insects, birds, or other natural means. If you save seeds from an open-pollinated plant, the offspring will generally resemble the parent plant, provided it did not cross-pollinate with another variety. This stable genetic trait means you can reliably grow the same plant year after year. Heirloom varieties are a specific type of open-pollinated plant, typically those passed down through generations, celebrated for their unique flavors, colors, and histories. Tomatoes like ‘Brandywine’ or beans like ‘Kentucky Wonder’ exemplify open-pollinated heirlooms that consistently produce true to type.

Hybrid Seeds
Hybrid seeds, labeled “F1,” result from cross-breeding two distinct parent plants to achieve specific desirable traits, such as disease resistance, higher yield, or uniform size. While F1 hybrids often perform exceptionally well in the first generation, saving seeds from them rarely produces plants identical to the parent. The offspring, known as F2 generations, often exhibit a wide range of characteristics, some reverting to grandparent traits, others displaying undesirable features. This genetic variability means your F2 plants might not taste the same, resist diseases as well, or yield as much. For consistent results, avoid saving seeds from hybrid plants. You will typically find “F1” clearly marked on the seed packet if it is a hybrid.
Focus your seed saving efforts on open-pollinated and heirloom varieties. These seeds offer predictability and ensure your hard work pays off with successive generations of plants you know and love. By making this distinction, you lay a solid foundation for successful and rewarding frugal gardening.
Getting Started: Easy Seeds for Beginners
Starting your seed saving journey does not require extensive horticultural knowledge. Many common balcony garden plants offer easy seeds for beginners to save. Focus on varieties known for straightforward collection and reliable germination. These plants minimize effort and maximize your chances of success, providing a rewarding introduction to the practice.
You can even host a seed swap with neighbors to trade your extra heirloom beans for other unique container varieties.
Consider these beginner-friendly options for your container garden:
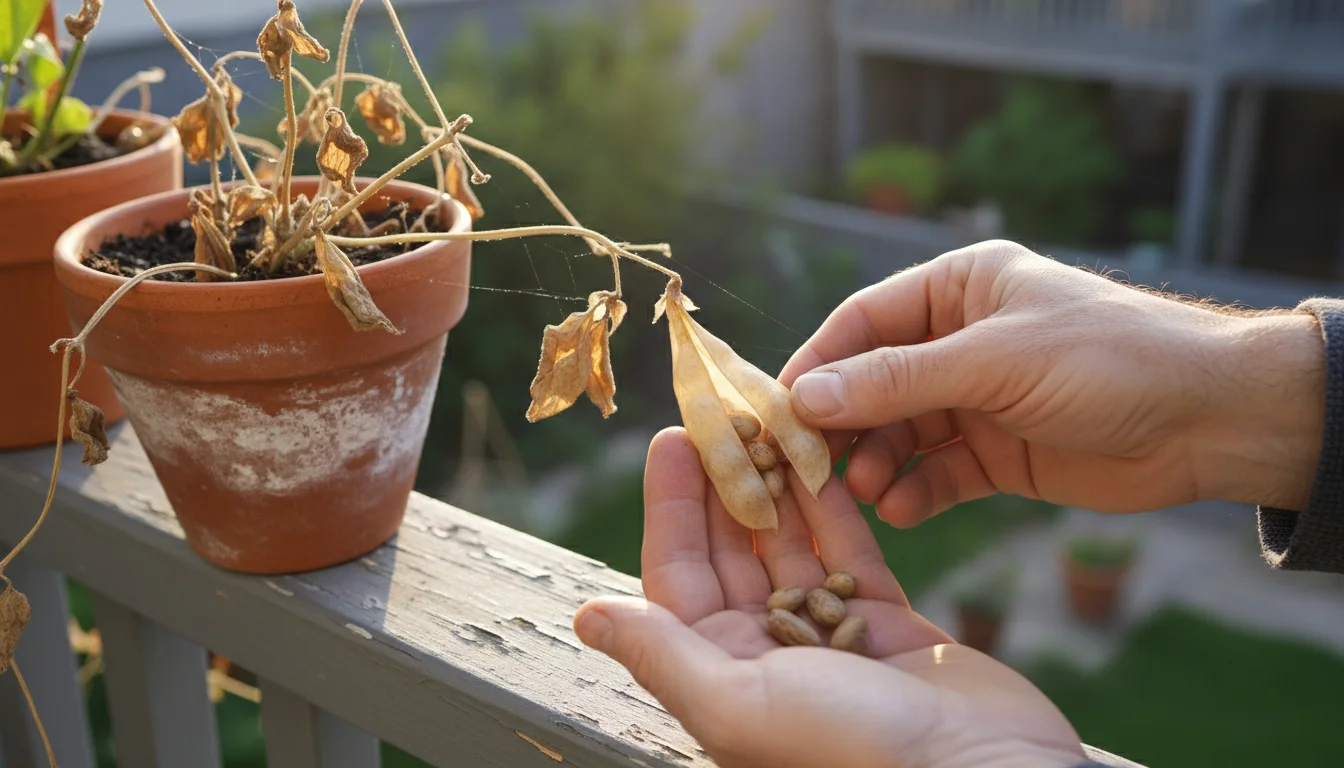
- Beans and Peas: These are among the easiest. Allow the pods to dry completely on the plant until they become brittle and change color, typically yellow or brown. Once dry, simply crack open the pods and collect the hard, mature seeds. Common varieties like ‘Blue Lake’ bush beans or ‘Sugar Snap’ peas are excellent choices.
- Lettuce and Other Leafy Greens: Let a few lettuce plants “bolt,” meaning they send up a tall flower stalk. The flowers are small and inconspicuous, but they will eventually produce tiny dandelion-like puffs, each containing a seed. Collect these when the puffs are dry and fluffy. Romaine or loose-leaf varieties are particularly simple.
- Radishes: If you let radishes go to seed, they produce distinctive seed pods. Allow these pods to dry fully on the plant until they are crisp. Then, break them open to release the small, round seeds.
- Peppers: Both sweet and hot peppers are excellent candidates. Select a fully ripe, healthy pepper that has reached its full color. Slice it open, scrape out the seeds, and spread them on a paper towel or screen to dry thoroughly for several weeks.
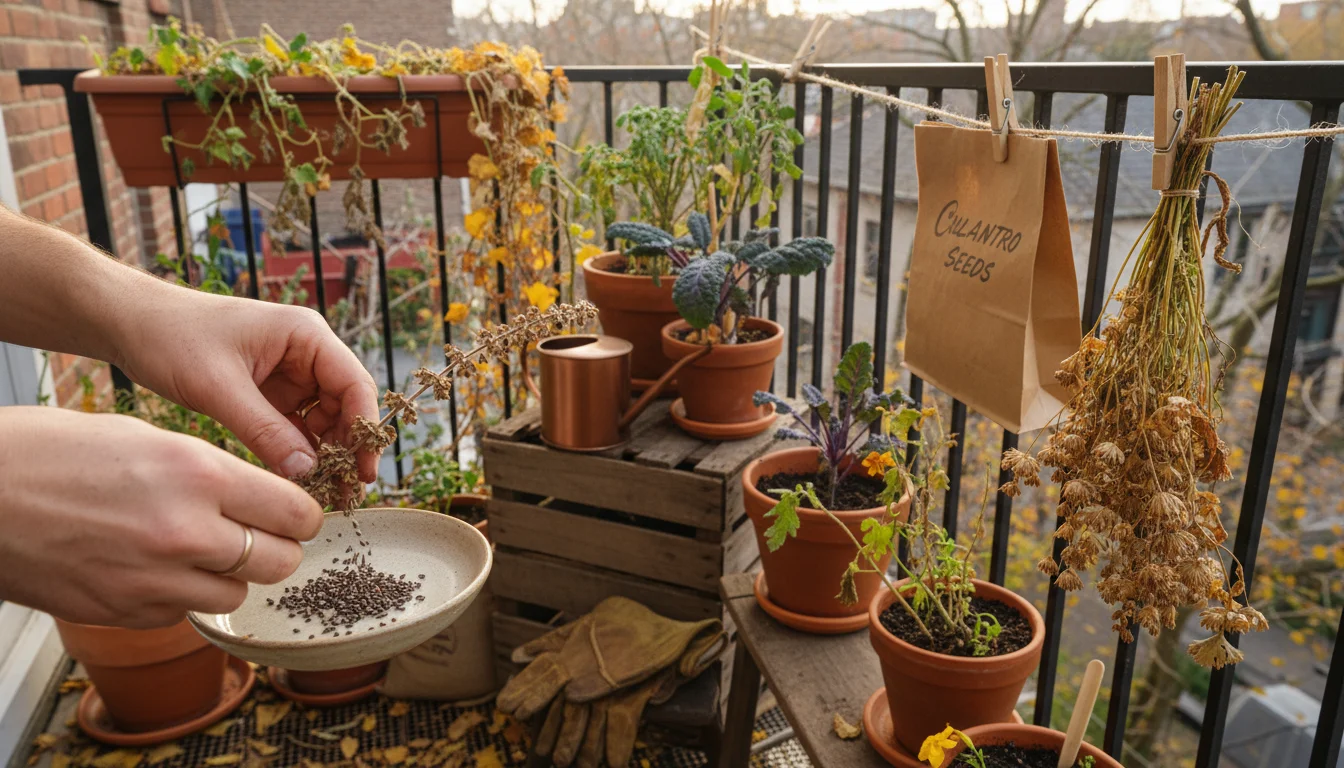
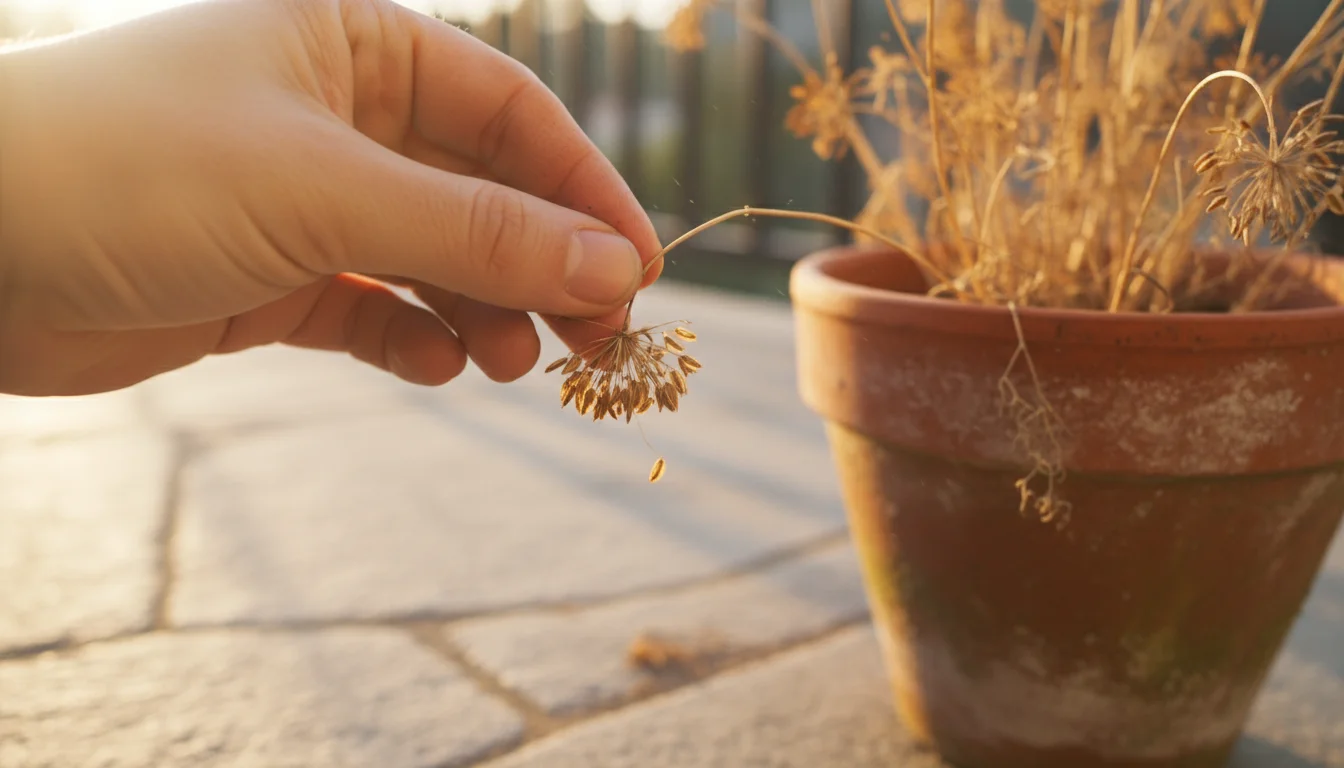
- Cilantro and Dill: These herbs are easy to save once they flower and produce seeds. Allow the plant to go to seed, and the flower heads will eventually form small, round seeds that dry on the stalk. Collect these by shaking the dry flower heads over a container.
- Marigolds and Zinnias: For flowers, simply let the blooms mature and fade on the plant. Once the flower heads are completely dry and brown, gently pull them apart. You will find the seeds nestled at the base of the petals.
For most of these, the key is patience. Allow the seeds to fully mature and dry on the parent plant as much as possible. This ensures the best viability. By starting with these forgiving plants, you build confidence and gain essential experience in seed saving, propelling you into more advanced techniques.
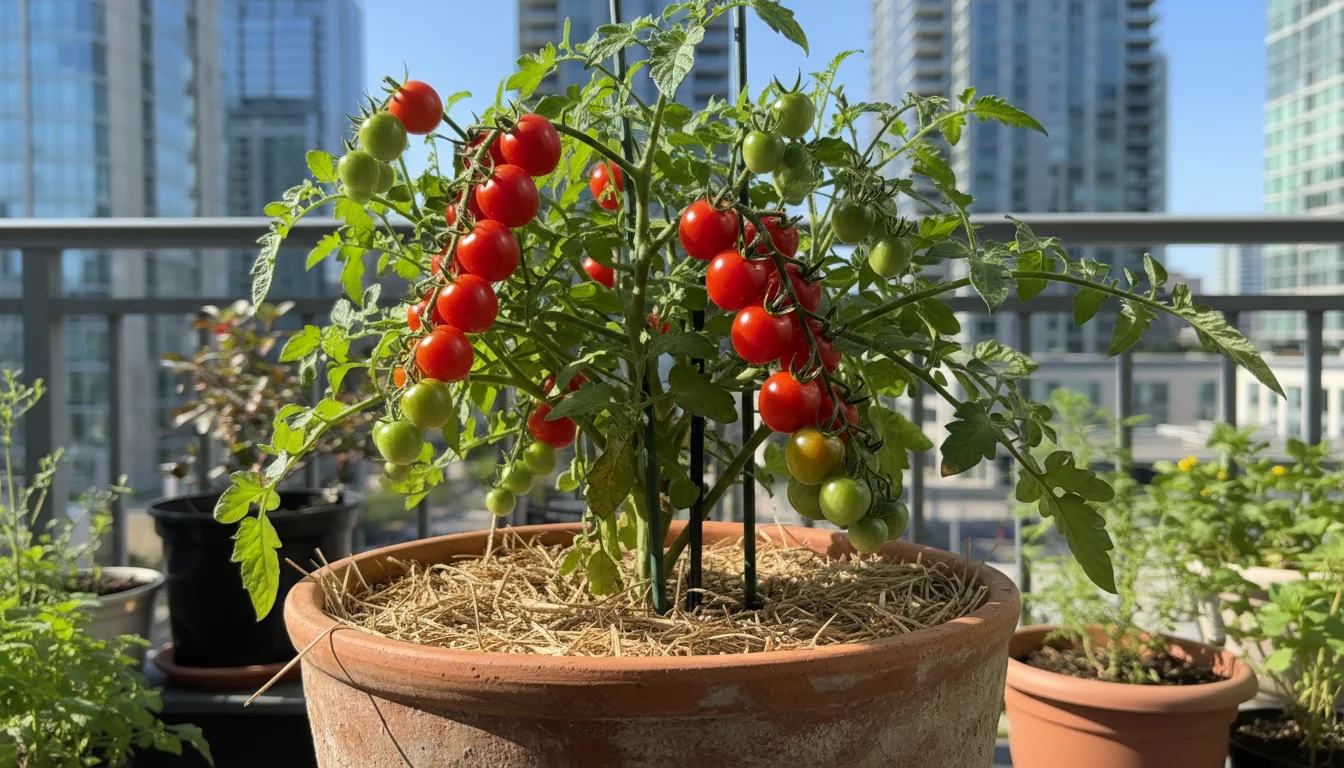
Mastering Tomato Seed Saving from Container Plants
Saving tomato seeds from container plants is a rewarding project, especially if you have a favorite open-pollinated variety thriving on your balcony. Tomato seeds require a specific process called fermentation, which mimics their natural environment and helps remove germination inhibitors. This extra step ensures better viability and prevents seed-borne diseases. Even from compact container plants, you can harvest a surprising number of viable seeds.
To ensure late-season tomatoes fully ripen for seed collection, consider using a small cold frame during cool nights.
Step-by-Step Tomato Seed Saving:
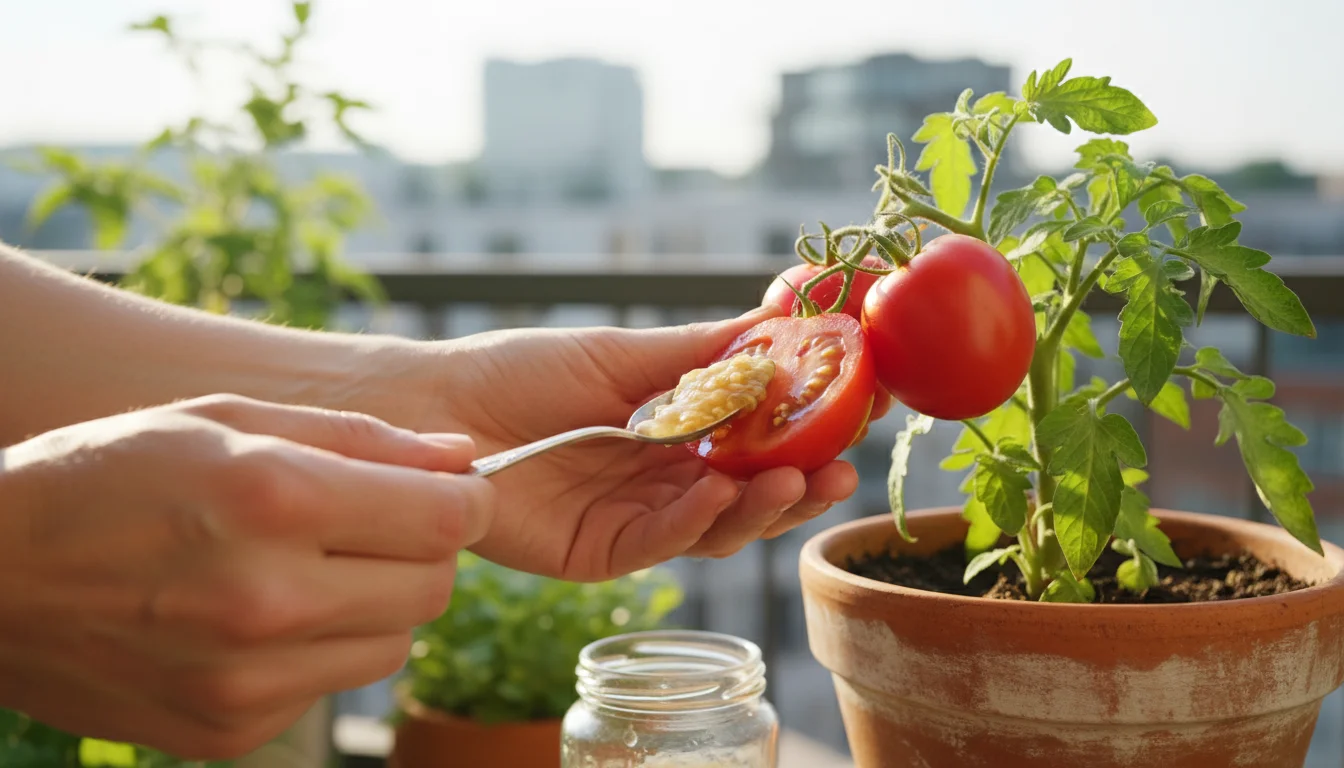
- Select Your Best Tomatoes: Choose fully ripe, healthy, open-pollinated tomatoes from your most vigorous and productive container plants. Avoid any fruit showing signs of disease or pest damage. Letting the fruit over-ripen slightly on the vine enhances seed maturity.
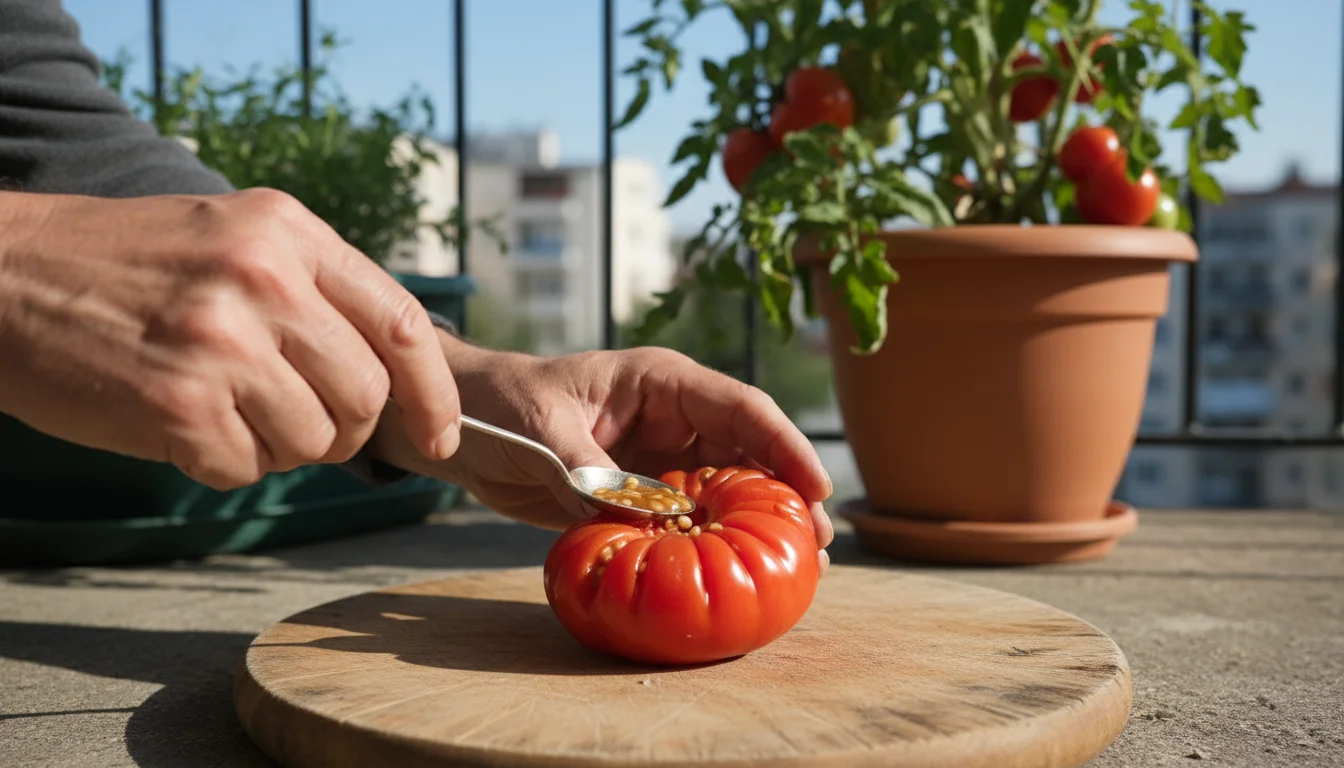
- Extract the Seeds and Pulp: Cut the chosen tomato in half crosswise. Squeeze or scoop the seeds and the surrounding jelly-like pulp into a clean glass jar or container.
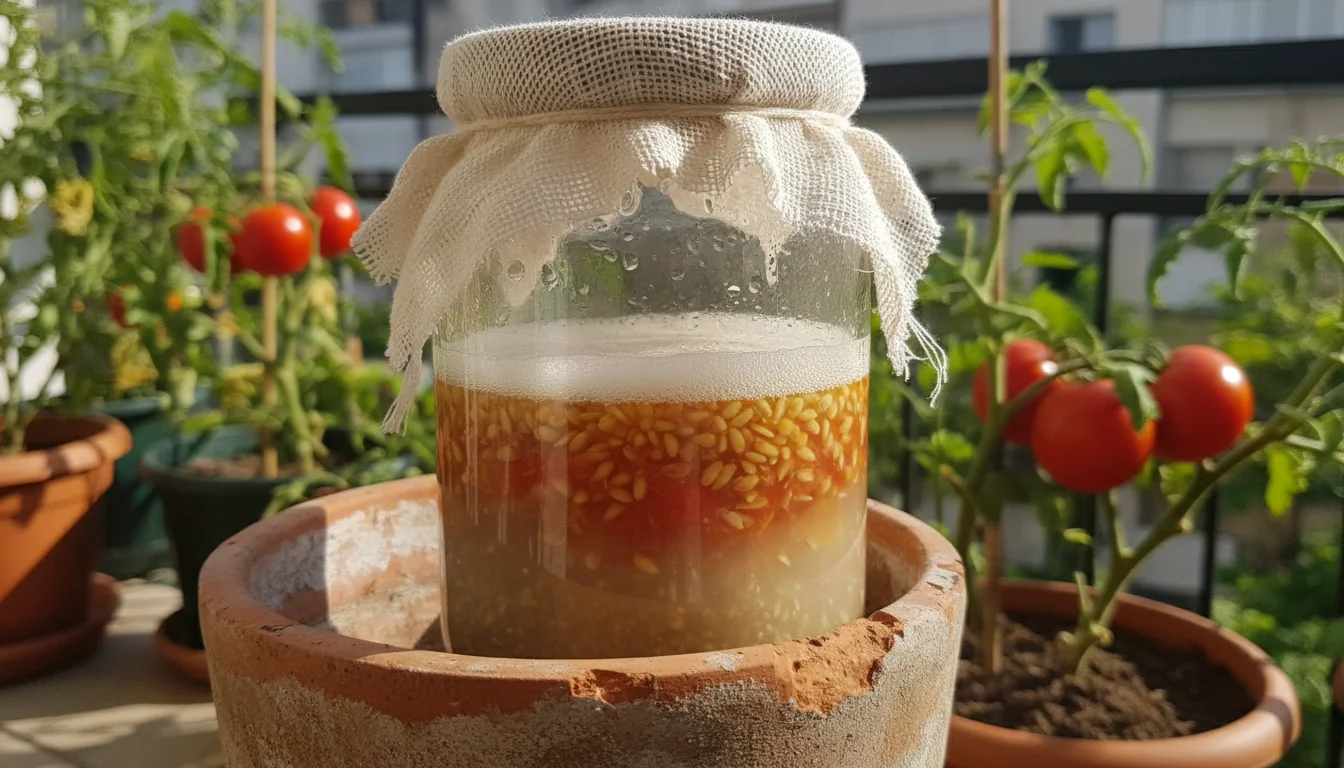
- Fermentation Process: Add a small amount of water to the jar, just enough to cover the seeds and pulp. Cover the jar loosely with a lid or breathable material like cheesecloth. Place the jar in a warm spot, out of direct sunlight, for 2 to 5 days. During this time, a layer of mold may form on top, and a foamy layer will appear. This fermentation breaks down the gel coating around the seeds, which contains germination inhibitors, and helps kill off potential pathogens. Stir the mixture once a day.
- Identify Viable Seeds: After a few days, viable seeds will sink to the bottom of the jar. Non-viable seeds, pulp, and mold will float on the surface. If you see vigorous mold, you can rinse and restart the process with fresh water or just proceed.
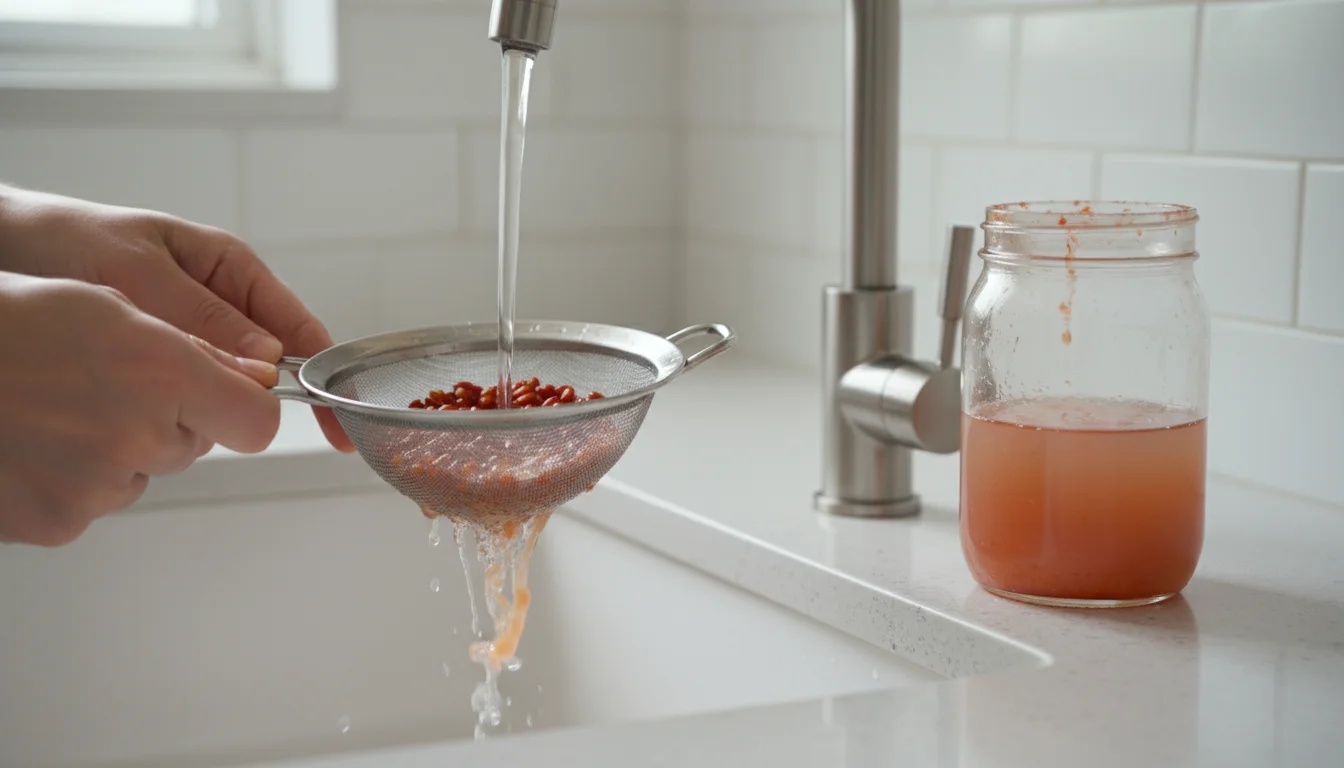
- Rinse and Clean: Pour off the floating pulp, mold, and non-viable seeds. Rinse the remaining viable seeds thoroughly under cool running water using a fine-mesh strainer. Ensure all traces of pulp and mold are gone. This meticulous cleaning is vital for preventing storage issues.
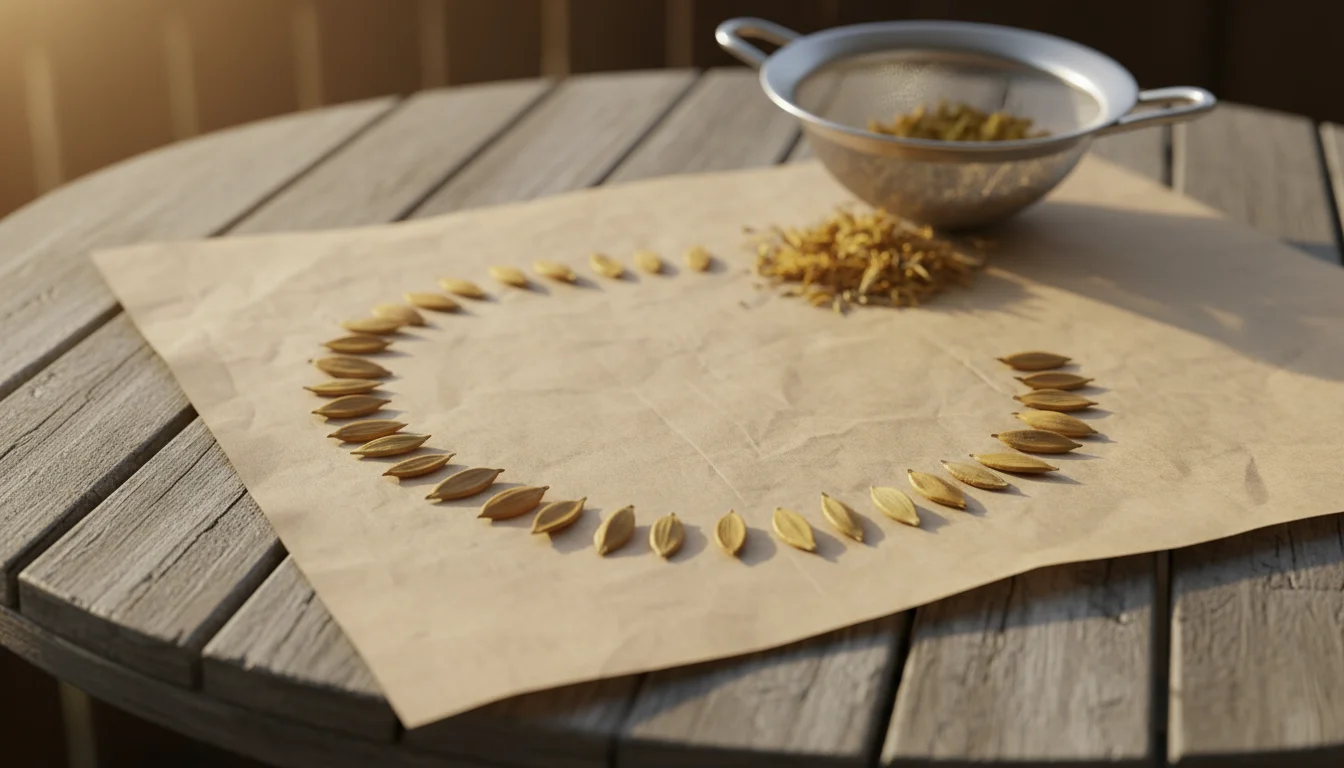
- Dry Thoroughly: Spread the clean tomato seeds in a single layer on a non-stick surface. Use a ceramic plate, a glass pane, or parchment paper. Avoid paper towels, as the seeds might stick. Label the surface with the tomato variety and date. Allow the seeds to dry completely in a well-ventilated area, away from direct sunlight, for 1 to 3 weeks. They must be bone-dry, snapping easily when bent, before storage.
- Store Properly: Once completely dry, store your clean, labeled tomato seeds in airtight containers in a cool, dark, and dry place.
This method of saving tomato seeds from container plants ensures you preserve the best traits from your garden’s most successful plants, providing a continuous supply for future seasons.
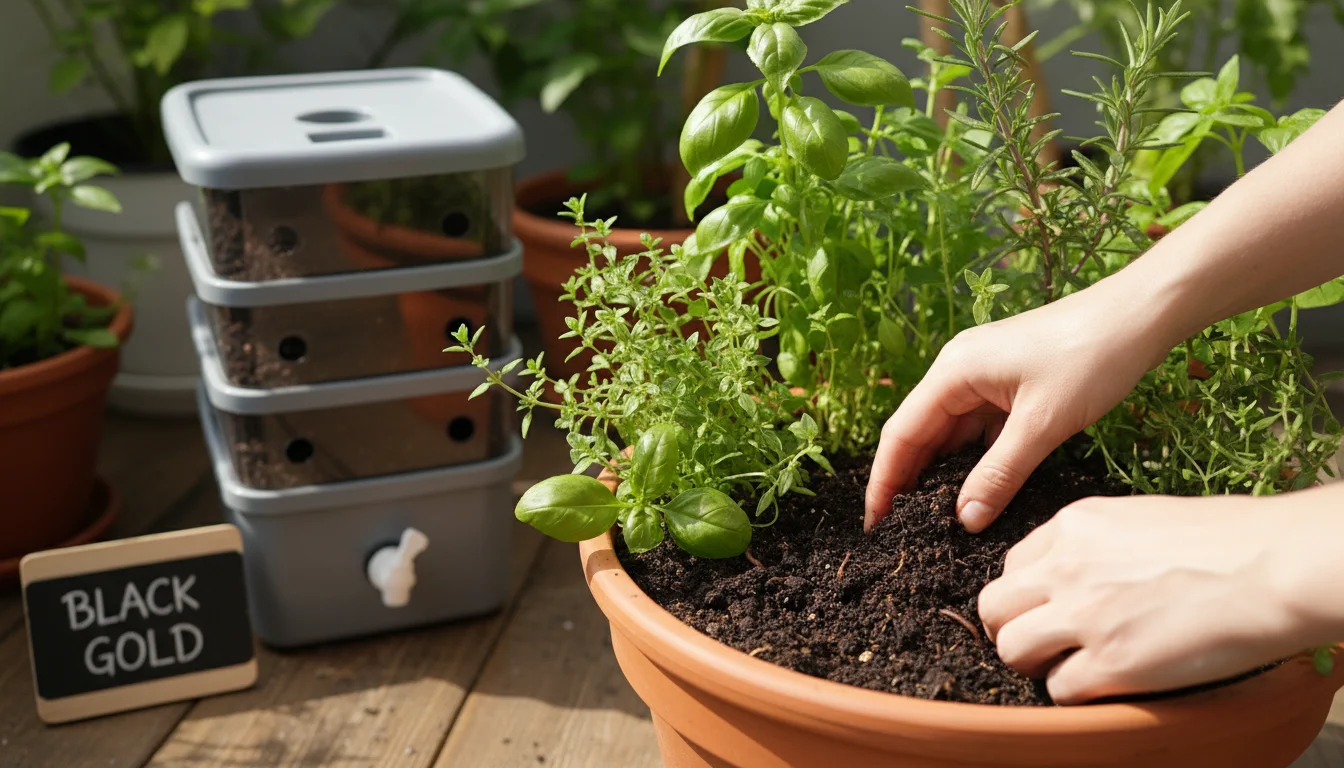
Harvesting and Storing Herb Seeds for Next Year
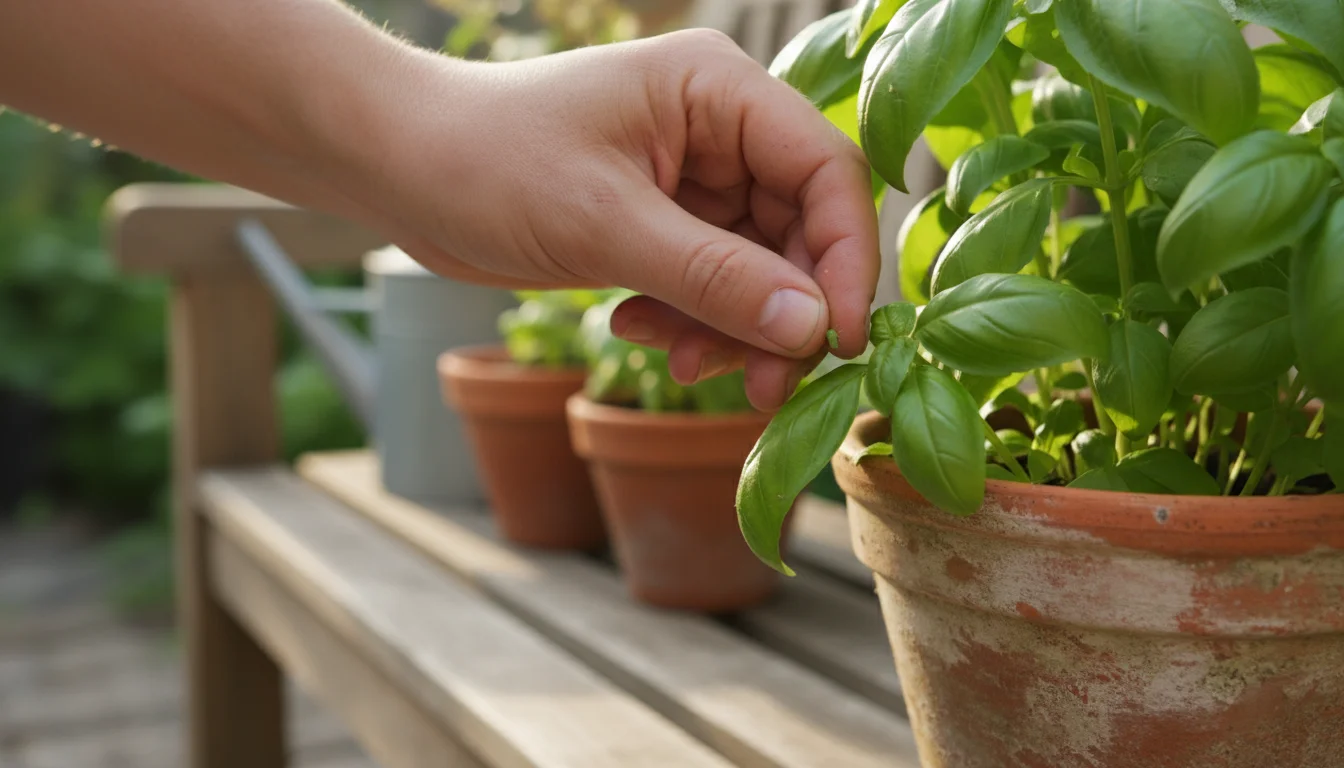
Saving herb seeds for next year is an incredibly rewarding aspect of frugal gardening, particularly for those with container gardens. Many popular culinary herbs are annuals or biennials that readily produce abundant seeds. This practice ensures a continuous supply of your favorite flavors, directly from your balcony.
For most herbs, the key involves allowing the plant to “bolt,” meaning it sends up a flower stalk and then develops seeds. While bolting often changes the flavor of leaves, it is essential for seed production. You can usually sacrifice a few plants or sections of plants for seed while continuing to harvest leaves from others.
Common Herbs and Their Seed Saving Methods:
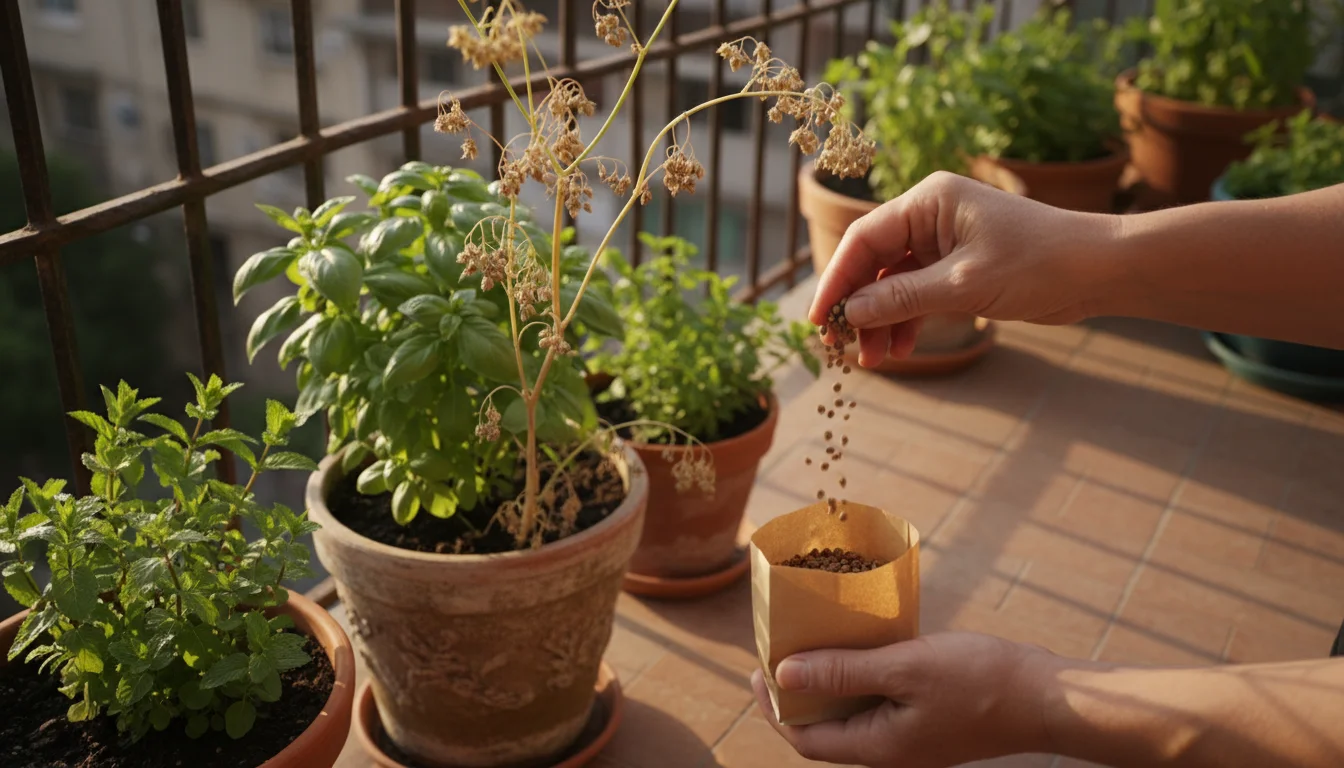
- Cilantro: This annual herb produces small, round seeds after flowering. Allow the plant to go to seed, and the umbels (flower heads) will dry and turn brown. Harvest the entire stalk when dry and hang it upside down in a paper bag. The seeds will fall into the bag as they fully dry.
- Dill: Similar to cilantro, dill also produces abundant seeds from its dried flower heads. Once the flower heads turn brown and brittle, cut them off and gently shake the seeds into a container.
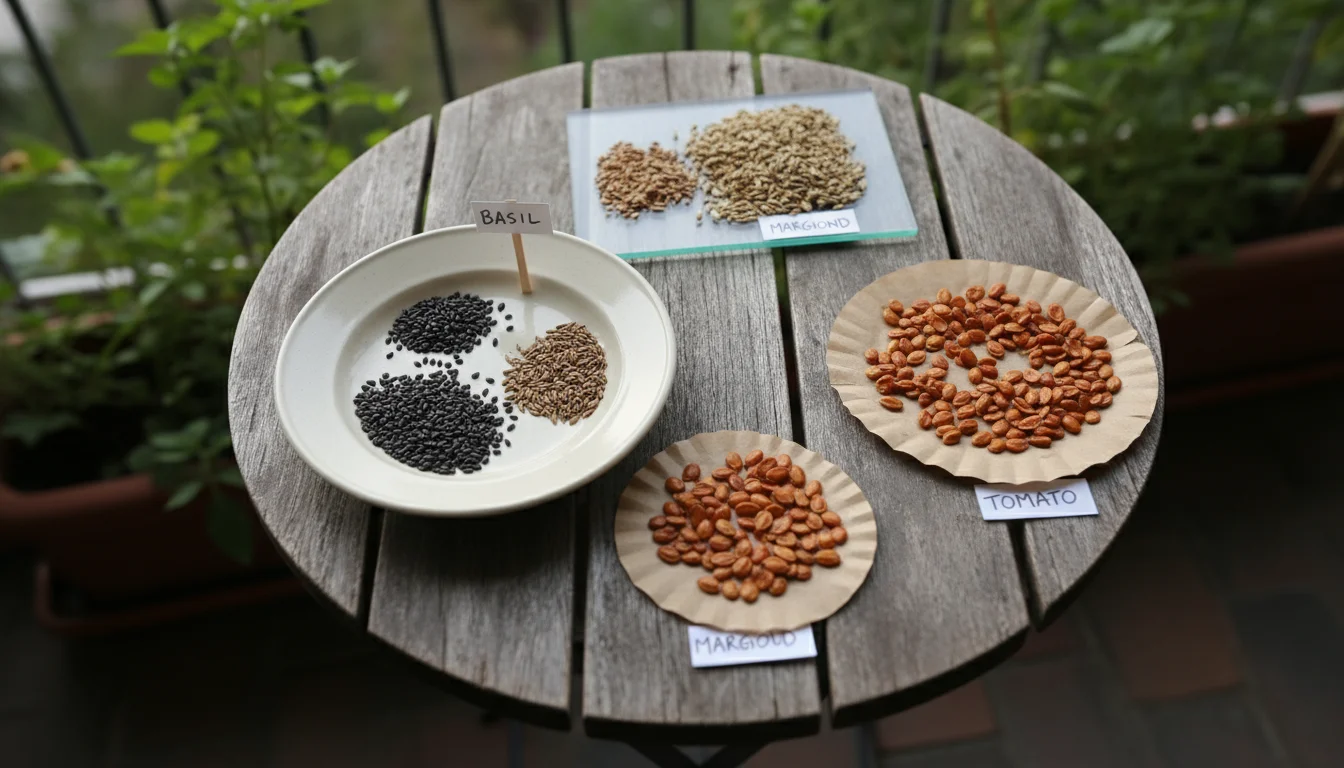
- Basil: As basil plants flower, small black seeds form inside the dried flower casings. Once the flower spikes dry and turn brown, rub them between your fingers over a shallow dish to release the tiny black seeds.
- Parsley: A biennial, parsley typically flowers and sets seed in its second year. Allow the flower stalks to mature and dry completely. Cut the dried stalks and gently tap them over a container to collect the seeds.
- Lettuce (as an herb, if you use young leaves): Although often considered a vegetable, many gardeners use young lettuce leaves as a delicate herb. Allow lettuce plants to bolt and develop seed heads resembling tiny dandelions. Collect these fluffy seed heads when they are dry, then rub them to release the small seeds.
After harvesting, spread your herb seeds on a clean, dry surface like a plate or screen in a well-ventilated area. Allow them to dry completely for several days to a week. They must be bone-dry to prevent mold during storage. Once dry, store them in labeled, airtight containers, such as small envelopes or glass jars, in a cool, dark, and dry location. This simple process provides you with a free and reliable source of fresh herbs for next season, embodying true frugal gardening.
The Seed Saving Process: Harvest, Clean, Dry
Successful seed saving, whether from your container garden seeds or ground-planted varieties, relies on three fundamental steps: harvesting mature seeds, thoroughly cleaning them, and ensuring complete dryness. Meticulous attention to each phase drastically improves your seeds’ viability and storage life.
1. Harvest: Timing is Everything
Harvesting seeds at their peak maturity is crucial. Immature seeds often lack the necessary endosperm or fully developed embryo to germinate. Look for these indicators:
- Pods and Husks: For plants like beans, peas, and many herbs, allow pods or husks to dry completely on the plant. They should turn yellow, then brown, and become brittle.
- Fruits: For fleshy fruits like tomatoes, peppers, and squash, allow the fruit to fully ripen, even past its edible prime. It should be soft or deeply colored.
- Flowers: For flowers like marigolds, zinnias, or lettuce, let the flower heads dry and turn brown on the stalk. Seeds often form at the base of faded petals or within dry seed capsules.
- Slightly Over-Ripe: For many plants, allowing the fruit or seed pod to remain on the plant a little longer than you would for eating ensures the seeds are fully developed.
Collect seeds on a dry day, ideally in the afternoon after morning dew has evaporated. This reduces initial moisture content.
2. Clean: Removing Debris and Pulp
Cleaning removes non-viable material, pulp, and disease-causing organisms. The cleaning method depends on whether the seeds are “wet” or “dry” harvested.
- Wet-Processed Seeds (e.g., Tomatoes, Cucumbers, Squash):
- Extract: Scoop or squeeze seeds and pulp into a jar.
- Ferment (Optional, but Recommended for Tomatoes): Add a little water, cover loosely, and let sit for 2-5 days in a warm spot. This breaks down the gel coating and kills pathogens.
- Rinse: Pour off floating debris, then rinse viable seeds (which sink) thoroughly under running water using a fine-mesh strainer.
- Dry-Processed Seeds (e.g., Beans, Peas, Lettuce, Herbs, Flowers):
- Thresh: Gently rub, crush, or shake the dried pods, husks, or flower heads to release the seeds.
- Winnow: Pour the threshed material from one container to another in front of a gentle fan or on a breezy day. The lighter chaff will blow away, leaving the heavier seeds behind.
- Sieve: Use screens or sieves of various mesh sizes to separate seeds from larger or smaller debris.
Clean seeds are less prone to mold and rot during storage.
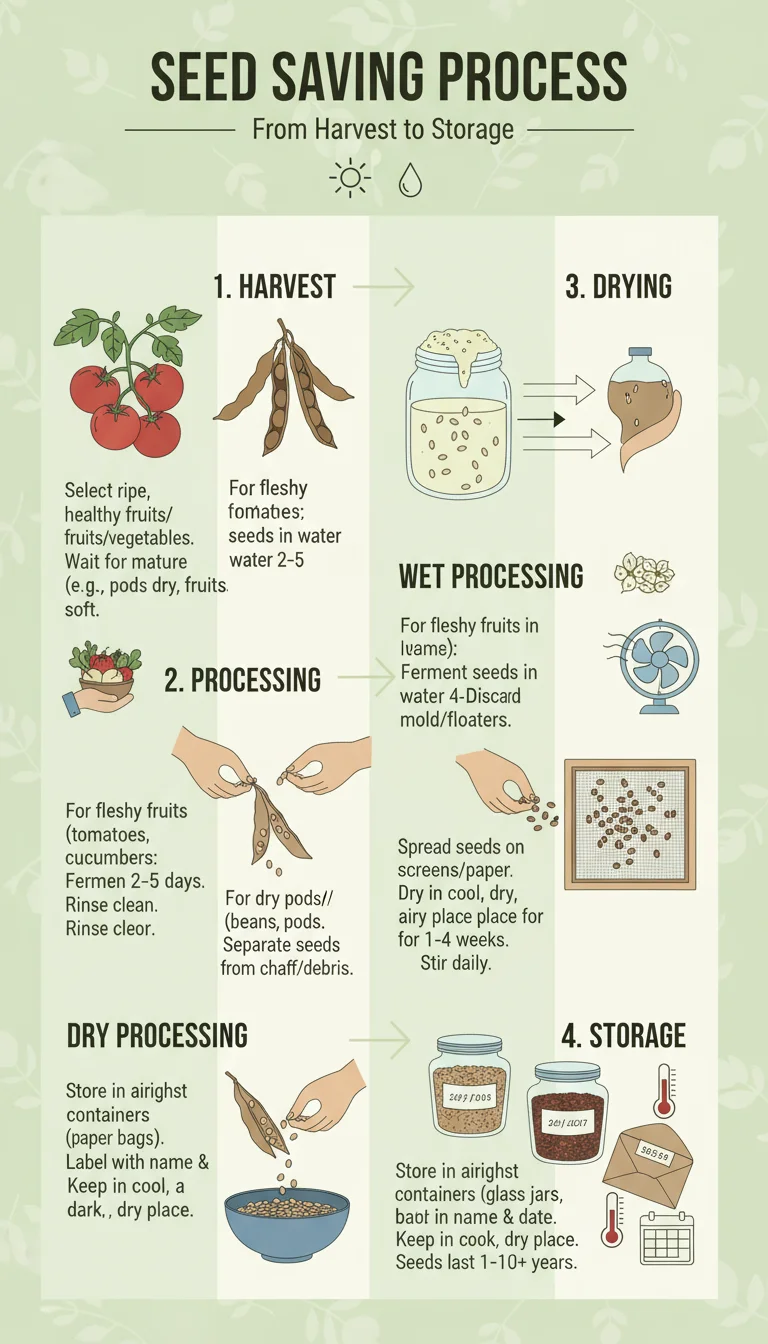
3. Dry: Preventing Mold and Extending Viability
This is arguably the most critical step. Any residual moisture can lead to mold, rot, and loss of viability. Spread cleaned seeds in a single layer on a non-stick surface: ceramic plates, glass panes, coffee filters, or screens work well. Avoid paper towels for wet seeds, as they can stick. Label your drying surfaces clearly with the plant type and date.
- Ventilation: Ensure good airflow around the seeds.
- Temperature: Keep seeds at room temperature (65-80°F, 18-27°C).
- Humidity: Aim for low humidity. A dehumidifier can help if your climate is humid.
- Avoid Direct Sunlight: Intense sunlight can damage delicate embryos.
- Drying Time: This varies widely, from a few days to several weeks, depending on the seed type and environmental conditions. Seeds are truly dry when they snap cleanly when bent (larger seeds) or feel rough and completely hard, resembling tiny pebbles.
Test dryness by placing a small amount of seeds in a sealed plastic bag overnight. If condensation forms inside, they need more drying time. Thorough drying ensures your saved seeds remain viable for many seasons, making your efforts a true success.

Ensuring Longevity: Proper Seed Storage
After you invest time and effort in harvesting, cleaning, and drying your container garden seeds, proper storage becomes paramount. The goal is to keep seeds dormant, preserving their viability for future planting seasons. Factors like temperature, humidity, and light directly affect how long your seeds remain viable. By controlling these elements, you significantly extend their shelf life.
Think of seed storage as a cool, dark, and dry environment. Here is a breakdown of best practices:
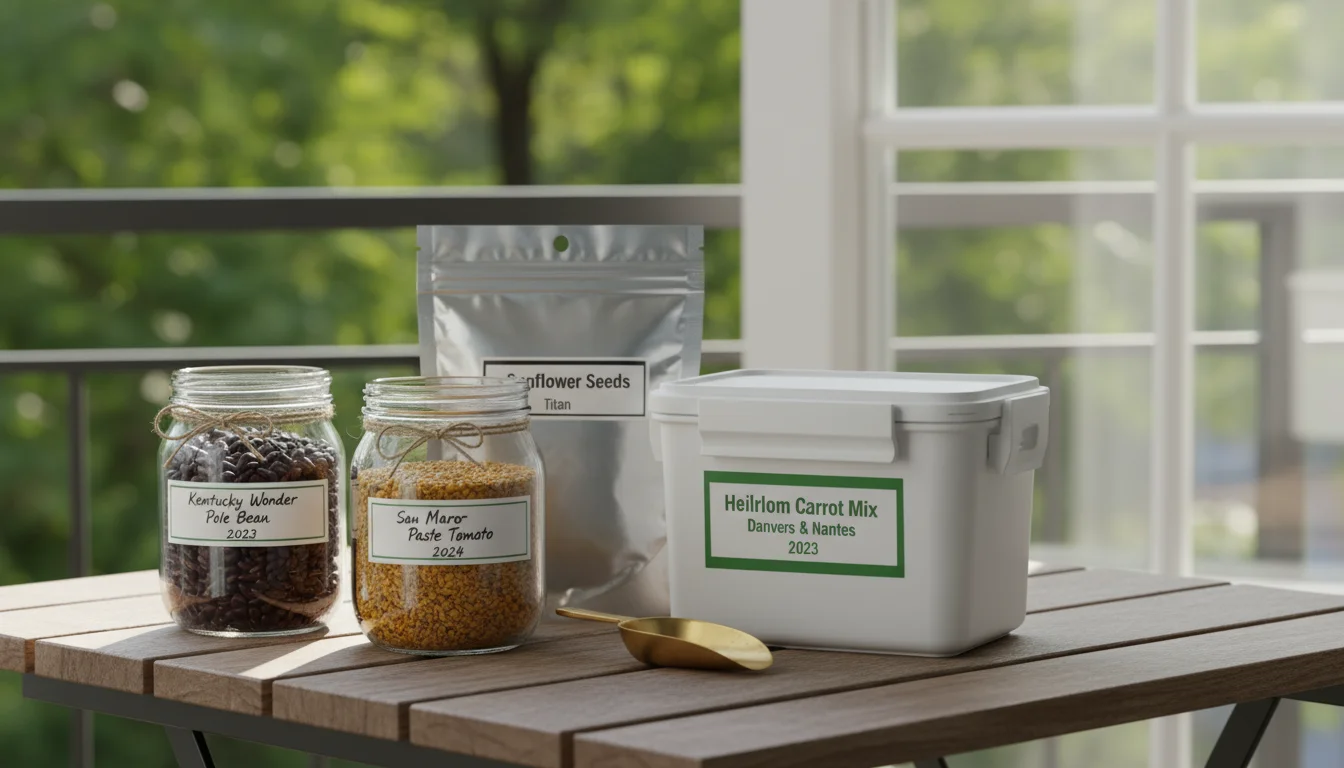
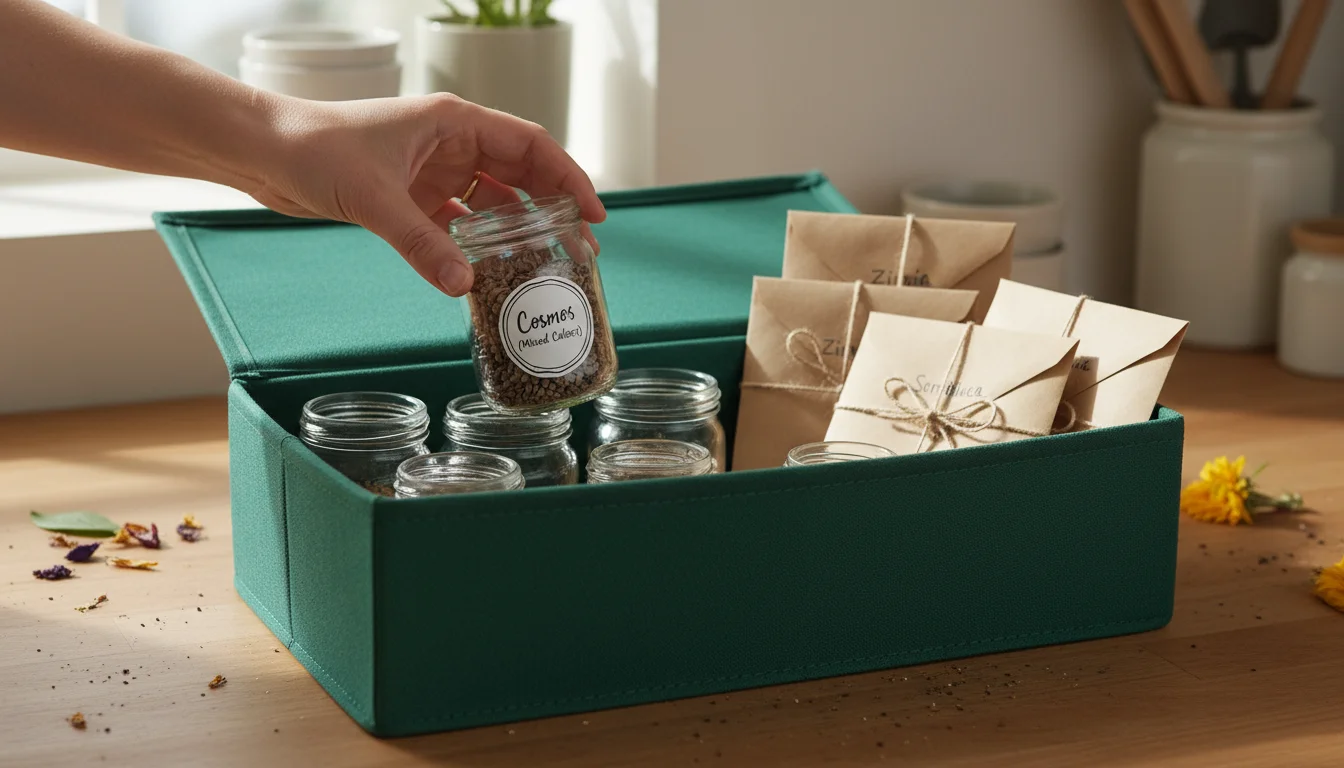
1. Containers: Airtight is Key
Use airtight containers to protect seeds from moisture and pests. Glass jars with tight-fitting lids work exceptionally well, as do sealed plastic containers or even Mylar bags. For smaller batches, paper envelopes placed inside a larger airtight container are suitable. Label each container clearly with:
- Plant variety (e.g., ‘Brandywine’ Tomato, ‘Kentucky Wonder’ Bush Bean)
- Date of harvest
- Any specific notes about the parent plant (e.g., “very productive,” “disease resistant”)
Accurate labeling helps you track seed performance and viability over time.
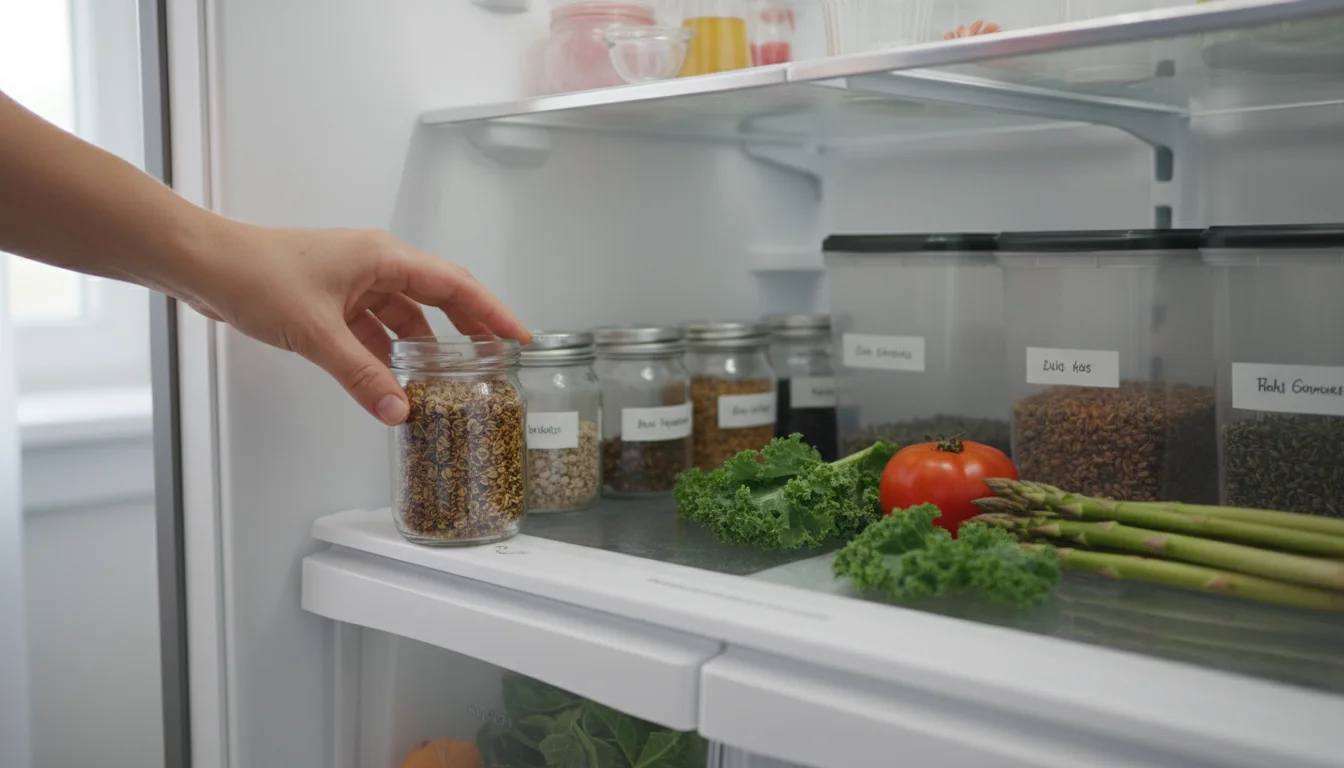
2. Temperature: Cooler is Better
Lower temperatures slow down the metabolic processes within the seed, extending its dormancy. Ideally, store seeds at a consistent temperature between 32-50°F (0-10°C). A refrigerator offers an excellent option, particularly the crisper drawer, which often has slightly higher humidity than the main compartment. If using a refrigerator, ensure your containers are truly airtight to prevent moisture absorption from the humid environment.
Avoid temperature fluctuations, as these can trigger seeds to break dormancy prematurely.
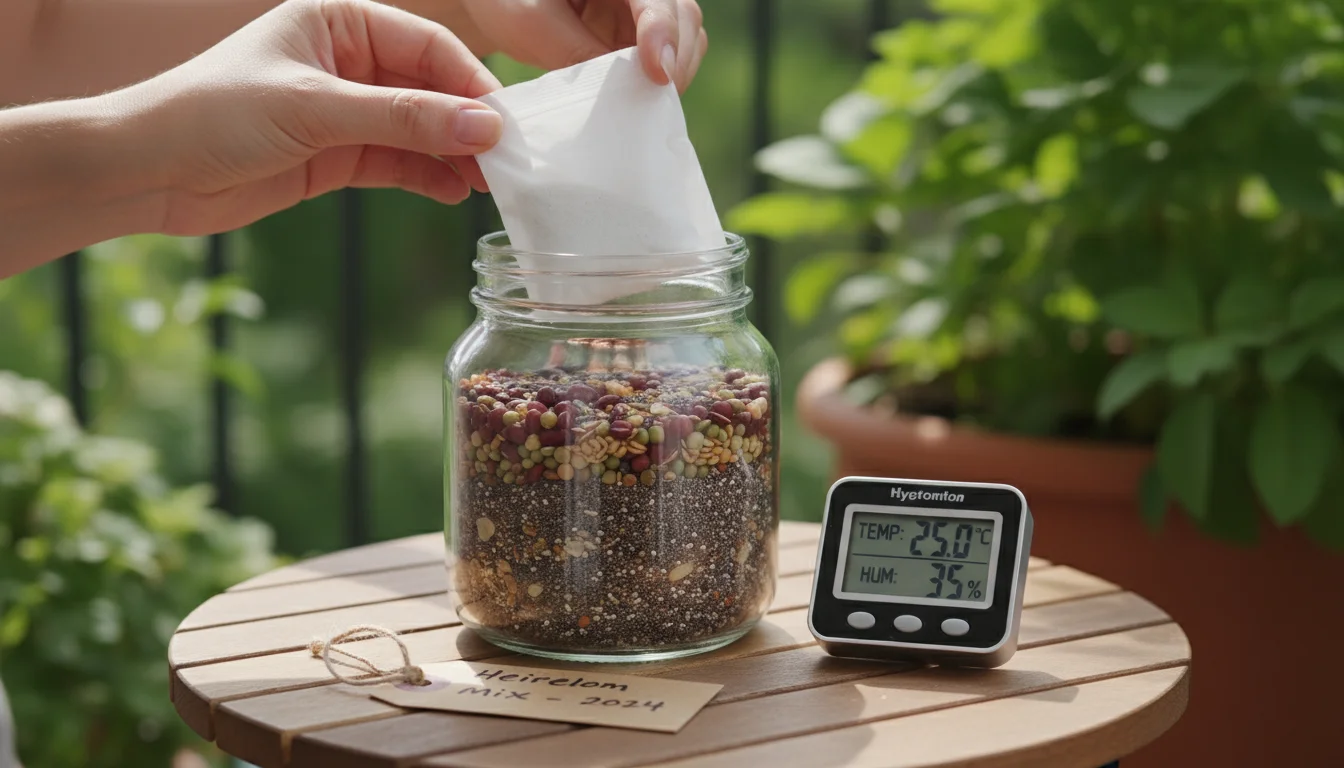
3. Humidity: Keep it Low
Moisture is the enemy of stored seeds. A relative humidity level of 20-40% is ideal. If storing seeds in a humid environment or a refrigerator, consider adding a desiccant, such as silica gel packets or a small amount of powdered milk wrapped in a tissue, inside the airtight container to absorb excess moisture. Ensure the desiccant does not directly touch the seeds.
4. Light: Darkness Preserves
Store seeds in complete darkness. Light can degrade seed viability over time. Opaque containers, dark cupboards, or simply placing your clear containers inside a dark box or bag will protect them effectively.

Practical Storage Locations:
- Refrigerator: Often the best option for long-term storage due to consistent cool temperatures and relatively low humidity (if seeds are sealed).
- Freezer: For very long-term storage (many years), freezing can be effective, but only for very dry seeds. If seeds contain any moisture, ice crystals will form and destroy them. This method is generally for experienced seed savers.
- Cool, Dark Cupboard or Pantry: For seeds you plan to use within 1-2 years, a stable, cool, and dark cupboard works well.
With careful attention to these storage principles, your saved seeds from this fall’s balcony garden will remain vibrant and ready to sprout, bringing new life to your space for seasons to come. You have truly mastered the art of frugal gardening with these practices.
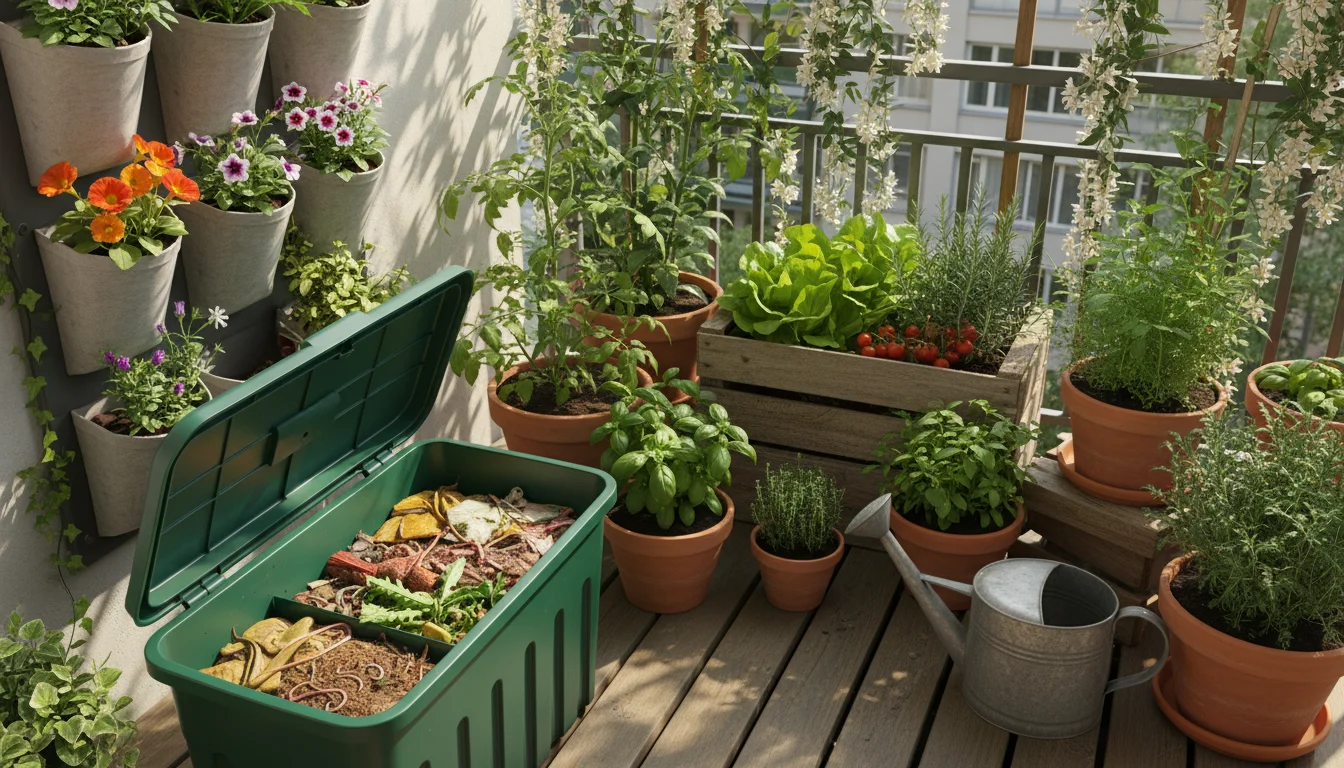
Beyond Seeds: Cultivating a Sustainable Balcony
Saving your container garden seeds is a powerful step towards a more sustainable and self-sufficient balcony. Your efforts reduce waste and foster resilience. However, sustainability in a small space extends beyond seed saving. Integrating other eco-conscious practices amplifies your positive impact and creates a truly thriving, low-maintenance urban oasis.
Water-Wise Irrigation
Efficient water use is paramount in container gardening. Containers dry out faster than in-ground beds, making thoughtful irrigation essential. Implement strategies to conserve every drop:
- Deep Watering Rhythm: Water thoroughly until water drains from the bottom, then wait until the top inch or two of soil feels dry before watering again. This encourages deeper root growth and makes plants more resilient.
- Drip Lines: Consider a simple drip irrigation system or self-watering containers. These deliver water directly to the root zone, minimizing evaporation. You can find small-scale kits designed for balcony use.
- Mulch for Containers: Apply a layer of organic mulch, such as shredded leaves or straw, on top of your container soil. This significantly reduces water evaporation, keeps soil temperatures stable, and suppresses weeds.
- Rain Capture Basics: For balconies or patios with direct rainfall, even a small rain barrel or strategically placed buckets can collect precious rainwater. This water, free from chlorine and other additives, benefits your plants. Remember to check local regulations before installing rain capture systems.
Native and Pollinator-Friendly Planting
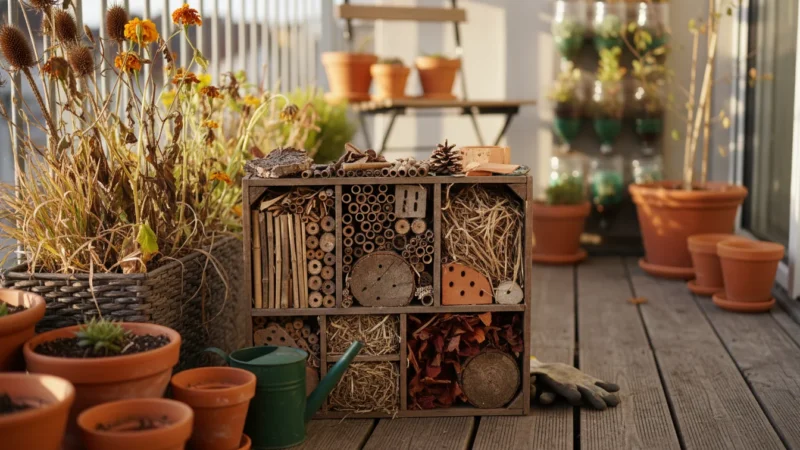
Beyond edible seeds, dedicate some space to native plants and pollinator-friendly flowers. These choices provide critical habitat and food sources for local bees, butterflies, and other beneficial insects. Supporting pollinators increases fruit set on your edible plants and contributes to local biodiversity. Choose native varieties appropriate for your region. For instance, in the Southwest, desert marigolds thrive, while in the Northeast, coneflowers attract many beneficials. Research regional picks and plan for a bloom sequence that provides nectar and pollen throughout the season. Avoid invasive species, which can outcompete native flora.
Safe Pest Management
A sustainable garden minimizes chemical use. Adopt Integrated Pest Management (IPM) strategies for your balcony:
- Prevention: Start with healthy plants. Use high-quality, peat-free potting mix. Ensure proper air circulation between plants.
- Monitoring: Regularly inspect your plants for early signs of pests. Catching issues early makes them easier to manage.
- Mechanical Controls: Hand-pick larger pests. Use a strong spray of water to dislodge aphids. Install physical barriers like row covers for vulnerable plants.
- Least-Toxic Options: If infestations persist, use organic, least-toxic options like insecticidal soap or neem oil. Always follow product instructions carefully.
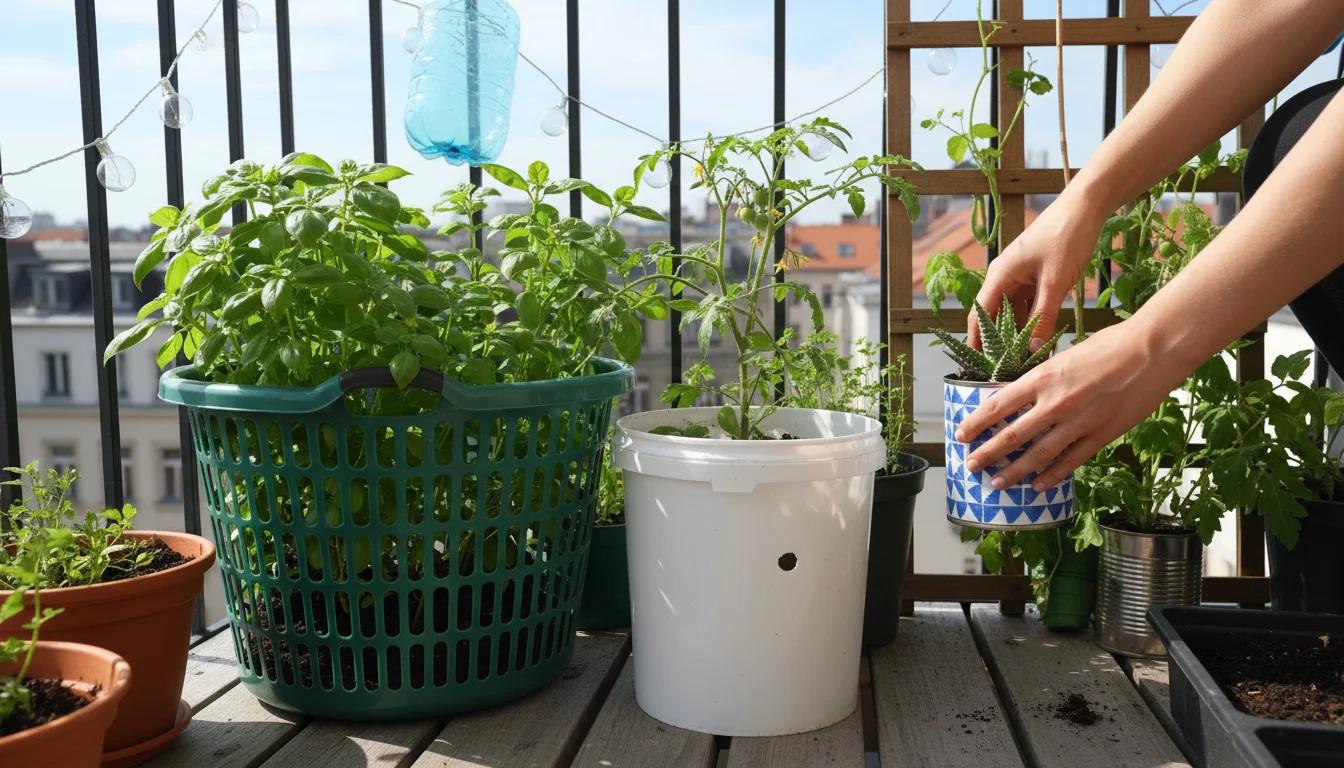
Reuse and Material Choices
Embrace a circular economy in your balcony garden:
- Upcycling Containers: Transform old buckets, laundry baskets, or even sturdy food-grade containers into planters. Ensure they have drainage holes.
- FSC Wood: If you build raised beds or trellises, opt for FSC (Forest Stewardship Council) certified wood, ensuring sustainable forestry practices.
- Recycled Plastic: Choose planters made from recycled plastic when purchasing new containers.
- Non-Toxic Finishes: If painting or sealing wood, select non-toxic, food-safe finishes, especially for edible plants.
By implementing these sustainable practices, you create a vibrant, resilient, and eco-friendly balcony garden that aligns perfectly with the spirit of seed saving and frugal gardening. Your small space becomes a powerful example of sustainable living.
Frequently Asked Questions
How long do saved seeds remain viable?
Seed viability varies significantly by plant type and storage conditions. Generally, seeds stored correctly in cool, dark, dry conditions remain viable for 1 to 5 years. Some, like corn or onions, may only last a year, while others, like tomatoes or squash, can last 4-6 years or more. Conducting a simple germination test with a few seeds on a damp paper towel can verify viability before planting.
Can I save seeds from any plant in my container garden?
You can save seeds from most plants, but saving seeds from open-pollinated or heirloom varieties yields plants true to the parent. Avoid saving seeds from hybrid (F1) plants, as their offspring will not reliably resemble the parent plant, often producing unpredictable and undesirable traits in the next generation.
Do I need special equipment for seed saving?
No special equipment is necessary for basic seed saving. You primarily need clean hands, a small dish or jar, a fine-mesh strainer, and a non-stick surface (like a ceramic plate or glass) for drying. Airtight containers for storage are also essential. Many items you already own will suffice.
What if my seeds get moldy during drying or storage?
Mold indicates too much moisture. If seeds mold during drying, discard them. Moldy seeds are not viable and can spread pathogens. Ensure seeds are bone-dry before storing. If mold appears in storage, it means moisture infiltrated the container. Discard moldy seeds and review your drying and storage methods for future batches.
Can I save seeds from grocery store produce?
Yes, you can save seeds from grocery store produce, but there are caveats. Many store-bought fruits and vegetables are hybrids (F1), meaning their seeds will not grow true to the parent plant. Additionally, produce grown for commercial markets often comes from treated seeds or is picked before full maturity, which can affect seed viability. Prioritize saving seeds from open-pollinated or heirloom varieties you grow yourself for best results.
For research-based sustainable gardening guidance, see San Diego Botanic Garden, U.S. National Arboretum and American Horticultural Society.
Disclaimer: This article is for informational purposes only and is not a substitute for professional advice. Check local regulations before installing rain capture, using greywater, or composting food scraps outdoors.
Leave a Reply