Gardening in small spaces, whether a balcony, patio, or compact yard, brings immense joy. You do not need a shed full of specialized gear to grow a thriving garden. Resourcefulness, creativity, and a practical approach transform common household items into effective gardening tools. This guide empowers you to cultivate your green oasis using clever DIY garden tool hacks and everyday objects, saving you money and valuable storage space.
Starting early with an early spring garden prep checklist ensures your DIY tools are ready when the growing season begins.
Using these hacks is a core part of budget-friendly garden design, allowing you to save funds for more plants or decor.
We explore practical DIY gardening tips, offering creative tool uses that simplify tasks like planting, watering, pruning, and soil management. You will discover how to look at your kitchen drawers and recycling bin with a new gardener’s eye, ready to turn everyday items into indispensable assets for your small-space garden. Get ready to innovate, save, and grow.
Unearthing Your Inner Inventor: The Mindset of a DIY Gardener
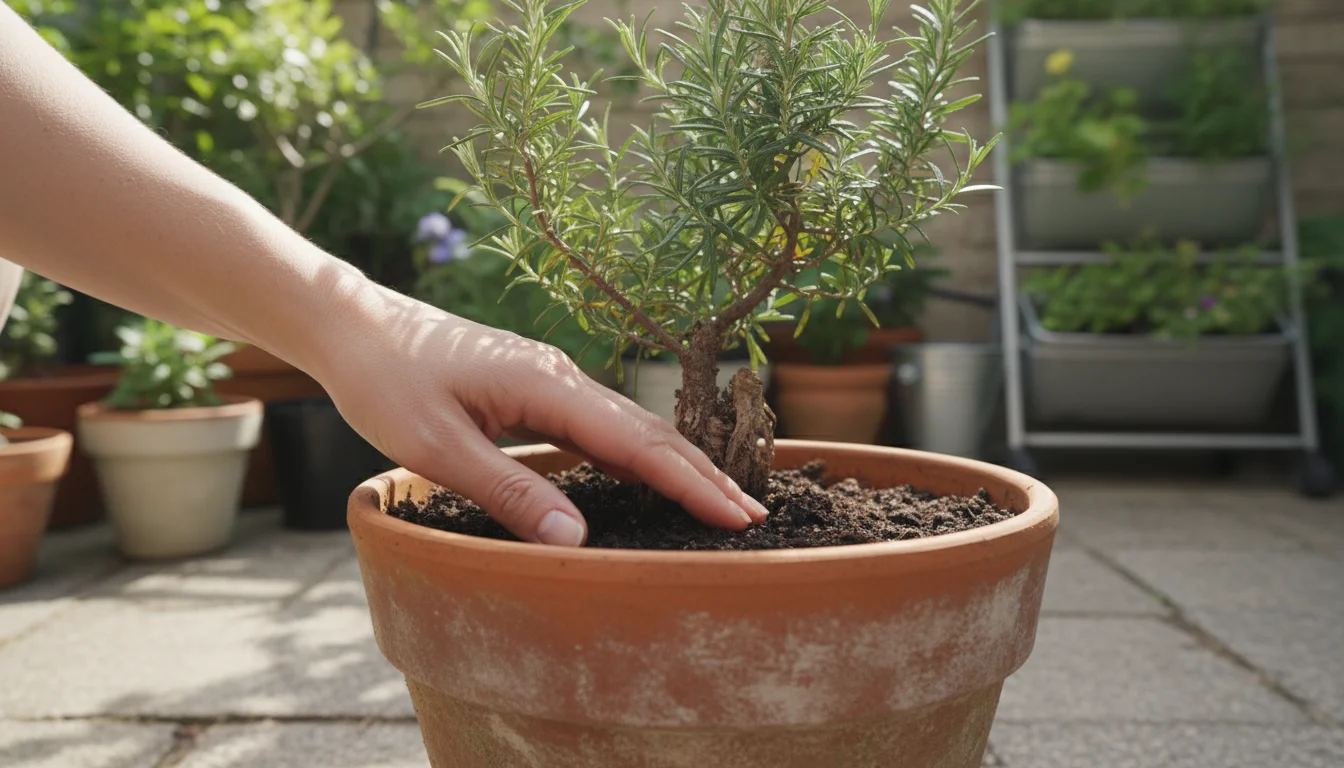
The core of successful small-space gardening, especially with DIY tools, lies in adaptability. You view everyday items not just for their original purpose, but for their potential to solve a gardening problem. This approach fosters sustainability, reduces waste, and saves you money. Instead of buying a specialized dibber, you might use a discarded broom handle. Rather than purchasing fancy labels, a repurposed plastic container lid provides the perfect surface. This mindset makes gardening accessible and enjoyable, transforming what you already own into valuable assets.
Finding creative ways to use tools is a great first step to maximizing every inch of your space.
Applying this resourceful mindset is also essential when implementing small-space composting hacks to nourish your soil naturally.
Embracing DIY gardening tips means recognizing the inherent versatility in common household objects. A sturdy plastic milk jug, for example, can become a scoop, a mini-greenhouse, or even a watering can. Its robust handle and ample volume make it ideal for multiple garden tasks. This ingenuity not only helps your garden thrive but also deepens your connection to the process, making you a more observant and resourceful gardener.
Kitchen Conversions: Culinary Tools for the Garden
Your kitchen holds a treasure trove of potential garden tools. Many items designed for cooking or eating possess shapes, strengths, or edges that translate perfectly to gardening tasks. You already own these, making them ideal candidates for garden tool hacks.
While kitchen tools are excellent, you can also find affordable garden gadgets that offer specialized help without breaking the bank.
While household items are fantastic for many tasks, you may eventually want to supplement your kit with a few 12 essential gardening tools for beginners that every gardener should have.

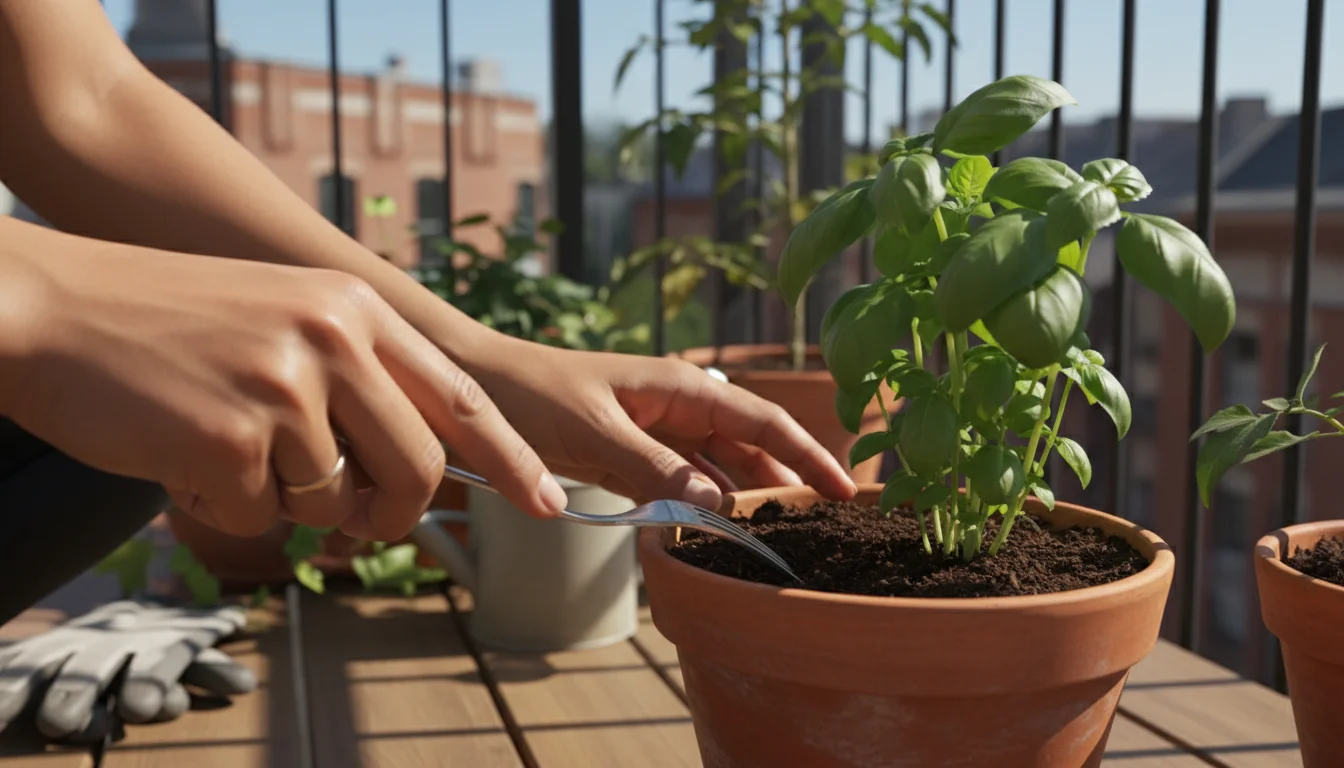
Forks: Your Miniature Tiller and Weeder
A sturdy old dinner fork proves incredibly useful for various soil-related tasks in containers and raised beds. Its tines easily break up compacted soil, making it easier for roots to grow. You can also use it to gently tease apart root-bound plants during transplanting without causing significant damage.
- Loosening Soil: Use a fork to aerate the top few inches of soil in pots. This improves drainage and oxygen flow to plant roots.
- Gentle Weeding: Its narrow tines effectively pluck out small weeds from between desirable plants, minimizing disturbance to their root systems. The fork works well for shallow-rooted annual weeds.
- Transplanting Seedlings: Carefully slide the fork under delicate seedlings to lift them from trays, preserving their root ball.
- Mixing Amendments: When adding compost or slow-release fertilizer to a pot, use the fork to mix it thoroughly into the top layer of soil.
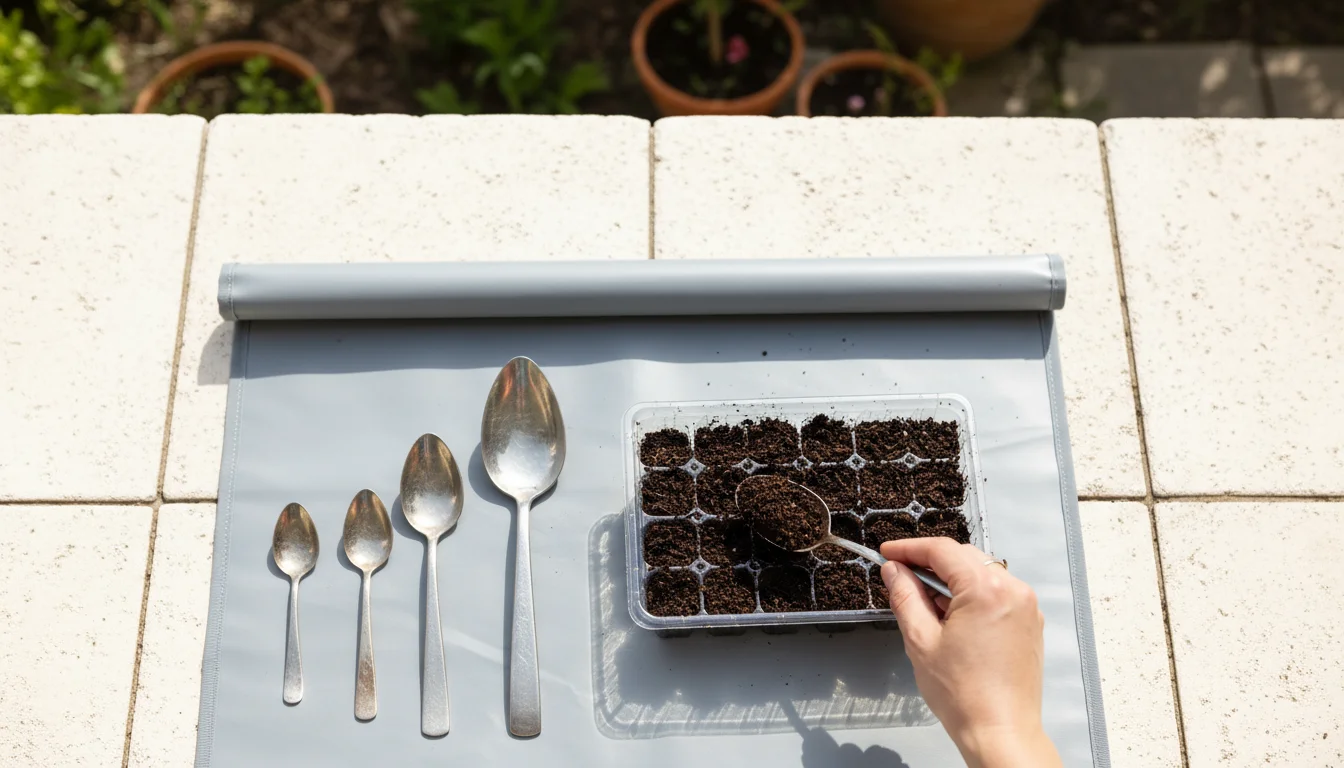
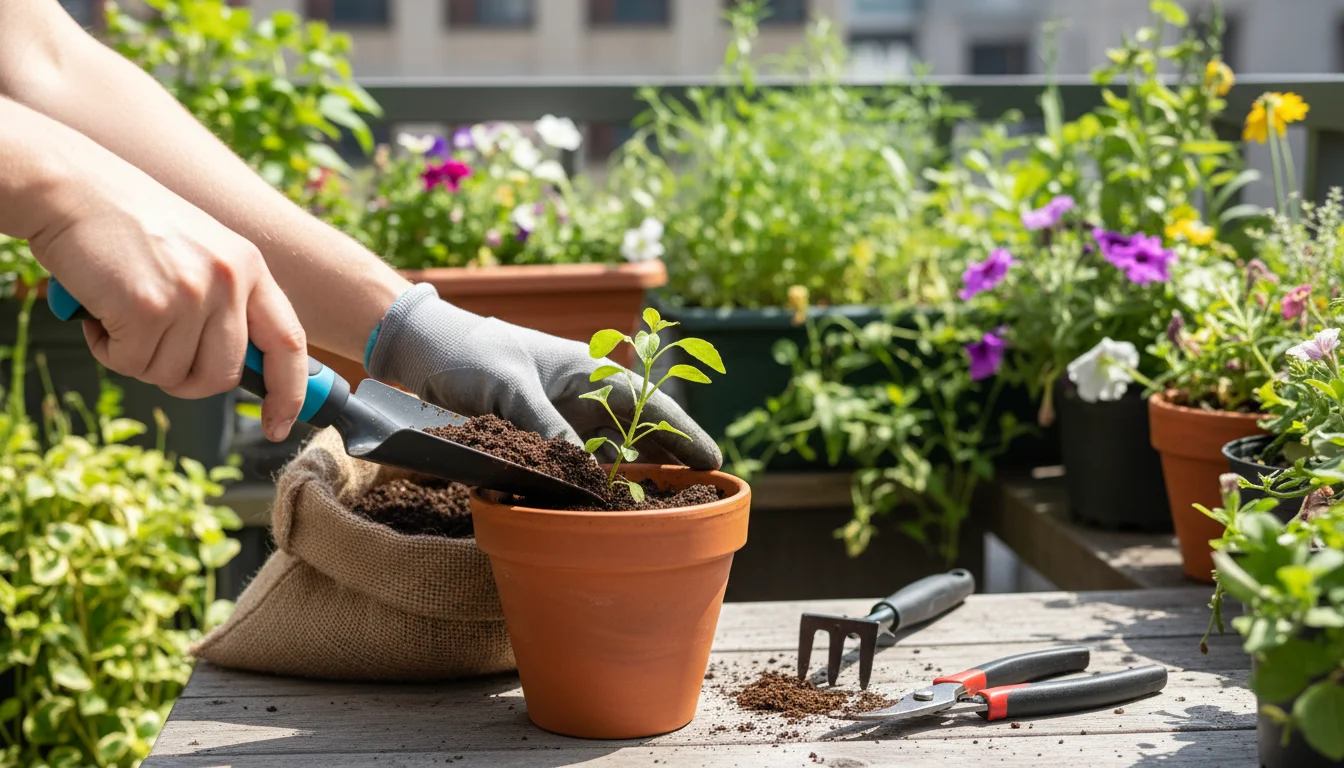
Spoons: Precision Planters and Scoopers
From tea spoons to serving spoons, these offer different sizes for precise work. A spoon excels where a larger trowel feels clumsy, especially in small pots or when working with delicate seedlings.
- Seed Sowing: A teaspoon or tablespoon creates perfect small indentations for seeds. It also helps you precisely place individual seeds, preventing overcrowding.
- Transplanting Tiny Seedlings: Use a spoon to scoop up individual germinated seeds or very small seedlings, complete with a small amount of soil, for careful relocation.
- Soil Scooping: A larger serving spoon efficiently transfers small amounts of potting mix into containers without spillage.
- Fertilizer Application: Measure and apply granular fertilizers accurately around the base of plants, avoiding direct contact with stems or leaves.
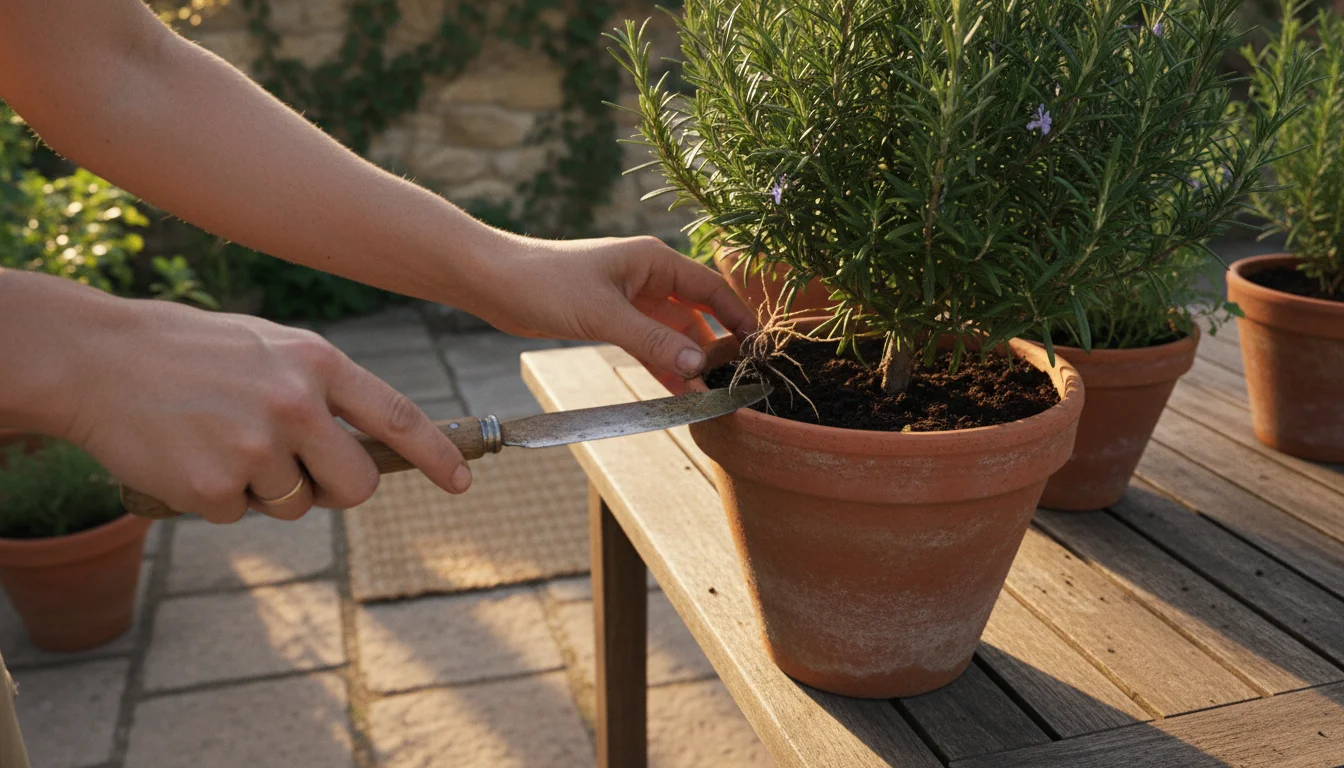
Old Knives (Carefully!): Root Trimming and Crevice Cleaning
A dull butter knife or an old utility knife becomes a surprisingly effective tool for specific tasks. Exercise extreme caution. You use it for tasks requiring a thin, rigid blade, not for cutting anything thick.
- Root Separation: When dividing crowded plants, a thin knife blade helps slice through dense root masses. Ensure the blade is clean to prevent disease transmission.
- Crevice Cleaning: Use the tip to scrape dirt and debris from tight spaces, such as between paving stones or around the rims of pots.
- Soil Augering: For planting small bulbs or plugs, a knife can create a narrow, deep hole in prepared soil.
Always prioritize safety when using any sharp object. Keep the blade clean and store it securely away from children and pets.
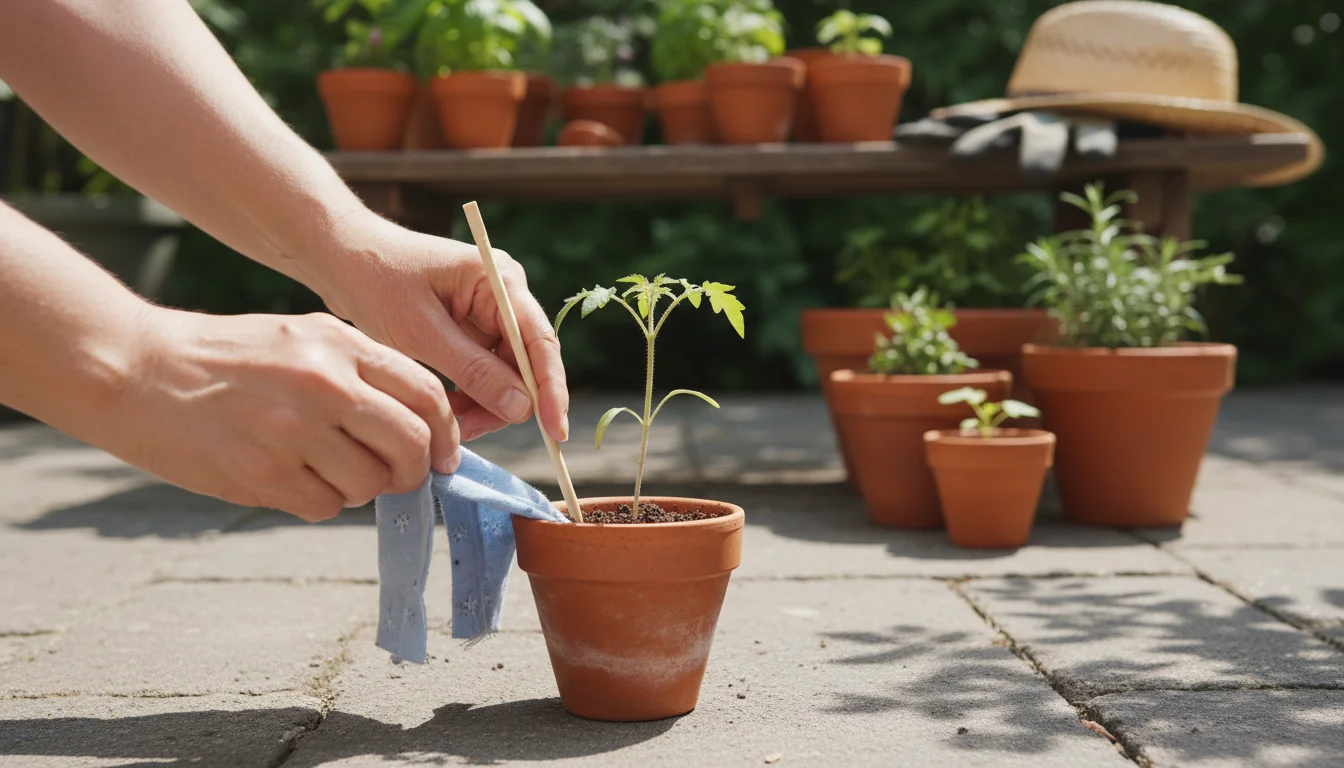
Chopsticks: Support, Aeration, and Seedling Spacers
Disposable wooden chopsticks are remarkably versatile. Their slender, rigid form makes them perfect for delicate garden work.
- Seedling Support: Insert a chopstick next to a leggy seedling to provide gentle support. Use garden twine or a soft strip of cloth to tie the stem to the chopstick.
- Soil Aeration: Poke chopsticks into the soil of potted plants to create air channels, which improves drainage and oxygen delivery to roots.
- Creating Planting Holes: Make uniform holes for seeds or small plant starts.
- Testing Soil Moisture: Push a chopstick into the soil. If it comes out clean, the soil is dry and needs watering. If soil clings to it, the soil remains moist.
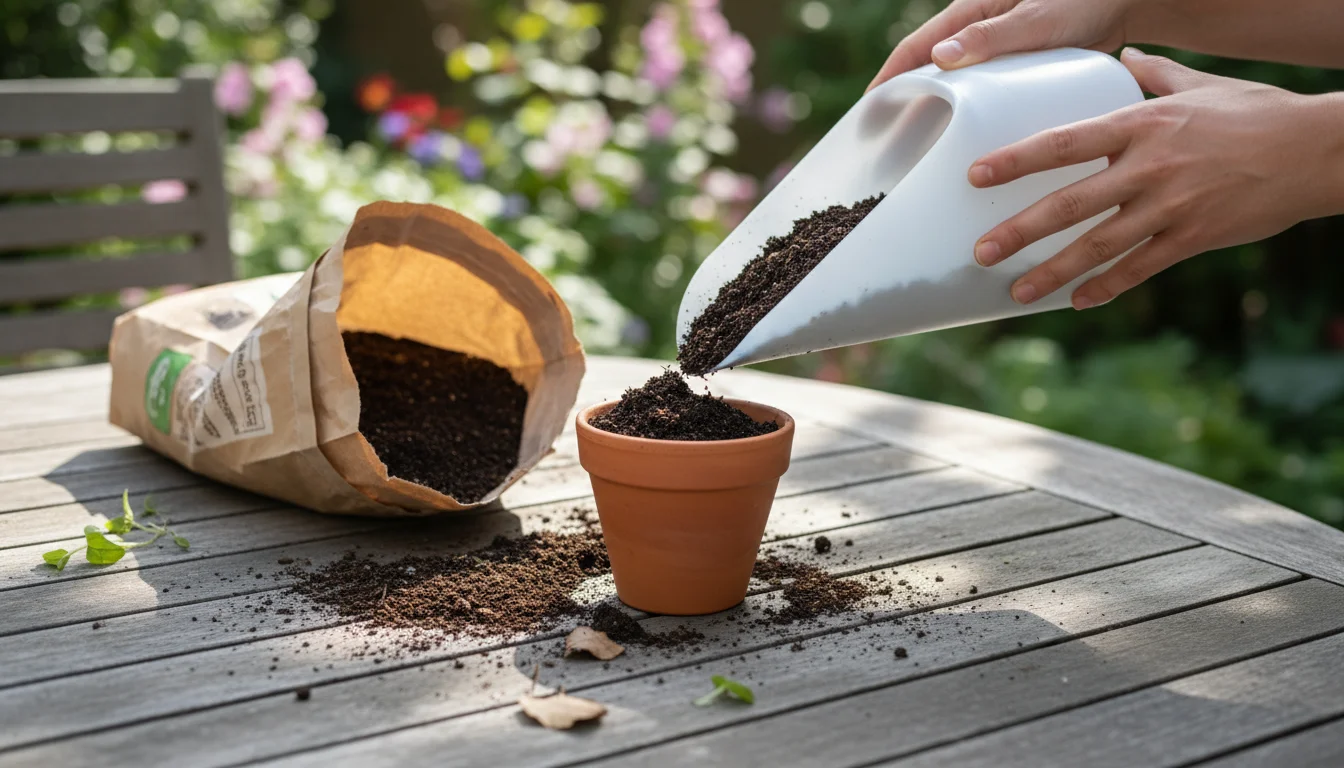
Plastic Fantastic: Repurposing Containers for Planting and Care
Your recycling bin holds immense potential for innovative garden solutions. Plastic containers, often destined for landfill, transform into durable, free tools and planting aids. These garden tool hacks leverage readily available materials, reducing your environmental footprint and garden expenses.
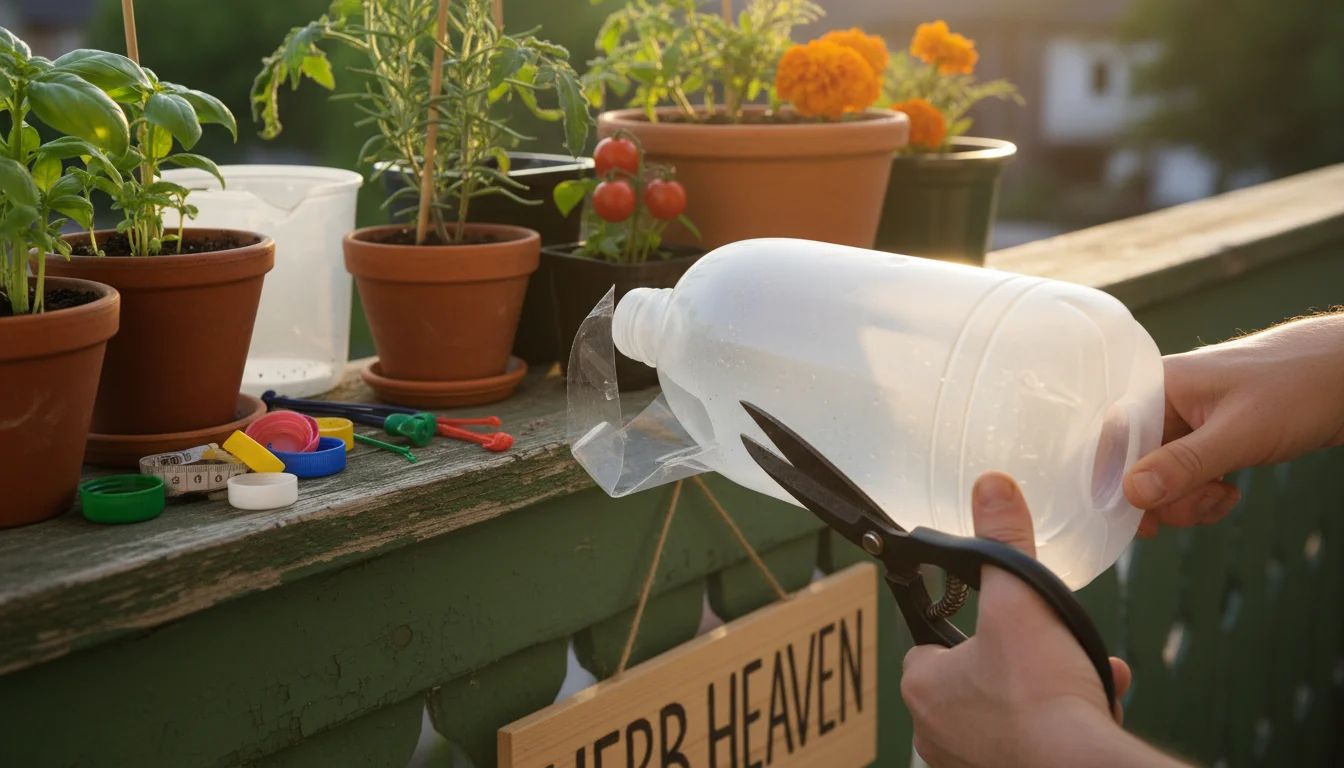
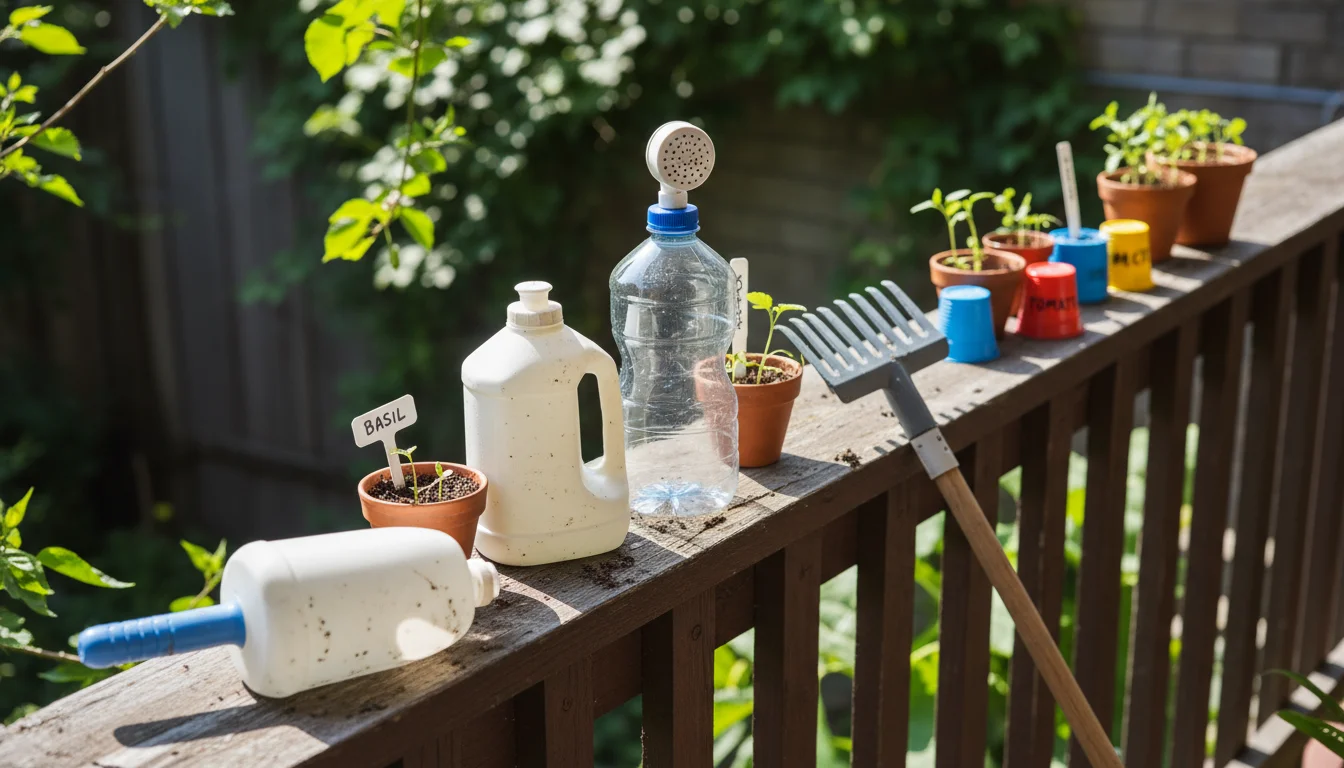
Milk Jugs and Gallon Bottles: Scoops, Watering Cans, and Cloches
These large plastic containers are perhaps the most versatile items in your DIY arsenal. Their robust structure and integrated handles offer numerous applications.
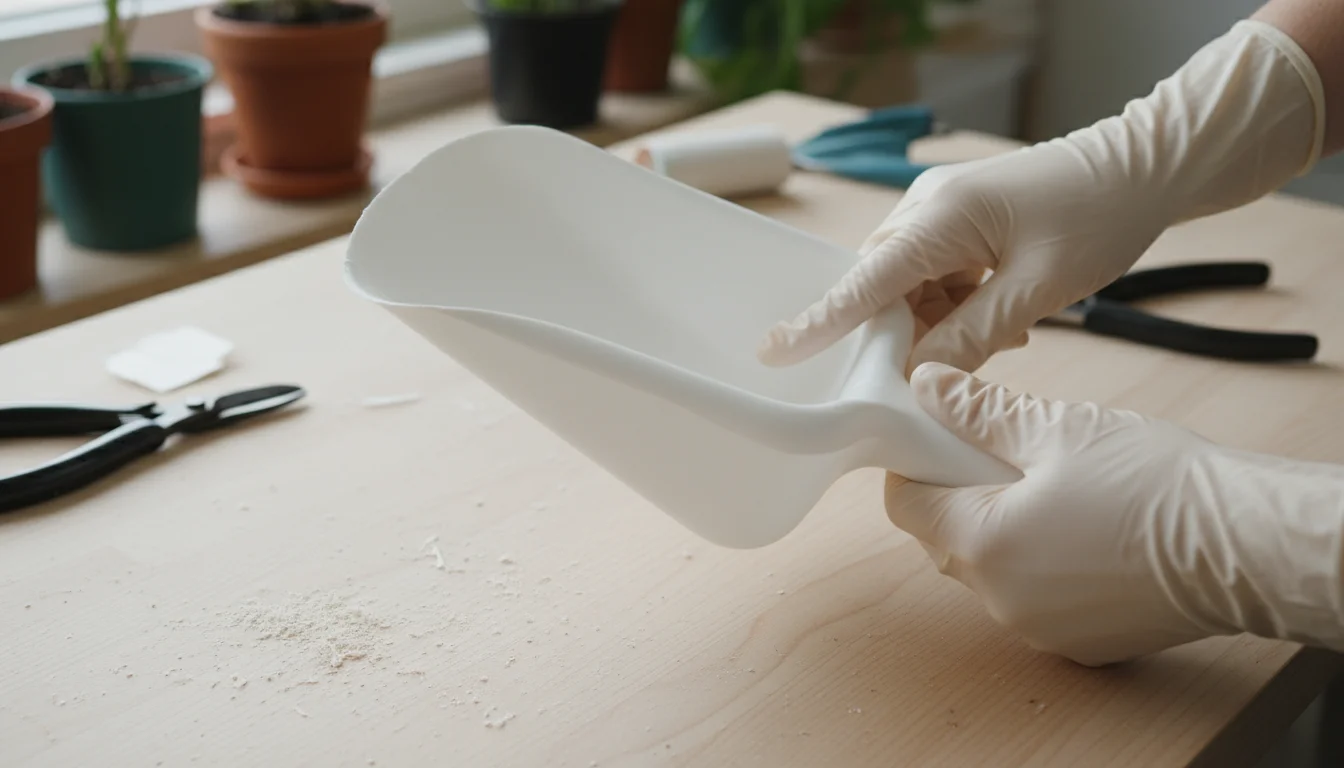
- Soil Scoop: Cut the bottom off a plastic milk jug diagonally, leaving the handle intact. This creates a large, ergonomic scoop perfect for moving potting mix, compost, or even applying mulch. The angled edge helps you get into bags easily.
- Makeshift Watering Can: Poke several small holes into the cap of a plastic jug, or gently heat a needle to create holes. Fill the jug with water, screw on the cap, and you have a gentle watering device ideal for seedlings or delicate plants. This method reduces splash and soil disturbance.
- Mini-Cloche or Greenhouse: Cut the bottom off a clear plastic gallon jug. Place the top portion over small seedlings or newly planted starts. This protects them from pests, strong winds, and sudden temperature drops, creating a humid microclimate for better establishment. Remove it on hot, sunny days to prevent overheating.
The ability to transform a simple milk jug into three distinct and highly functional garden tools exemplifies the power of creative tool uses. This approach significantly extends the lifespan of plastic items, keeping them out of waste streams while providing practical support for your gardening endeavors.
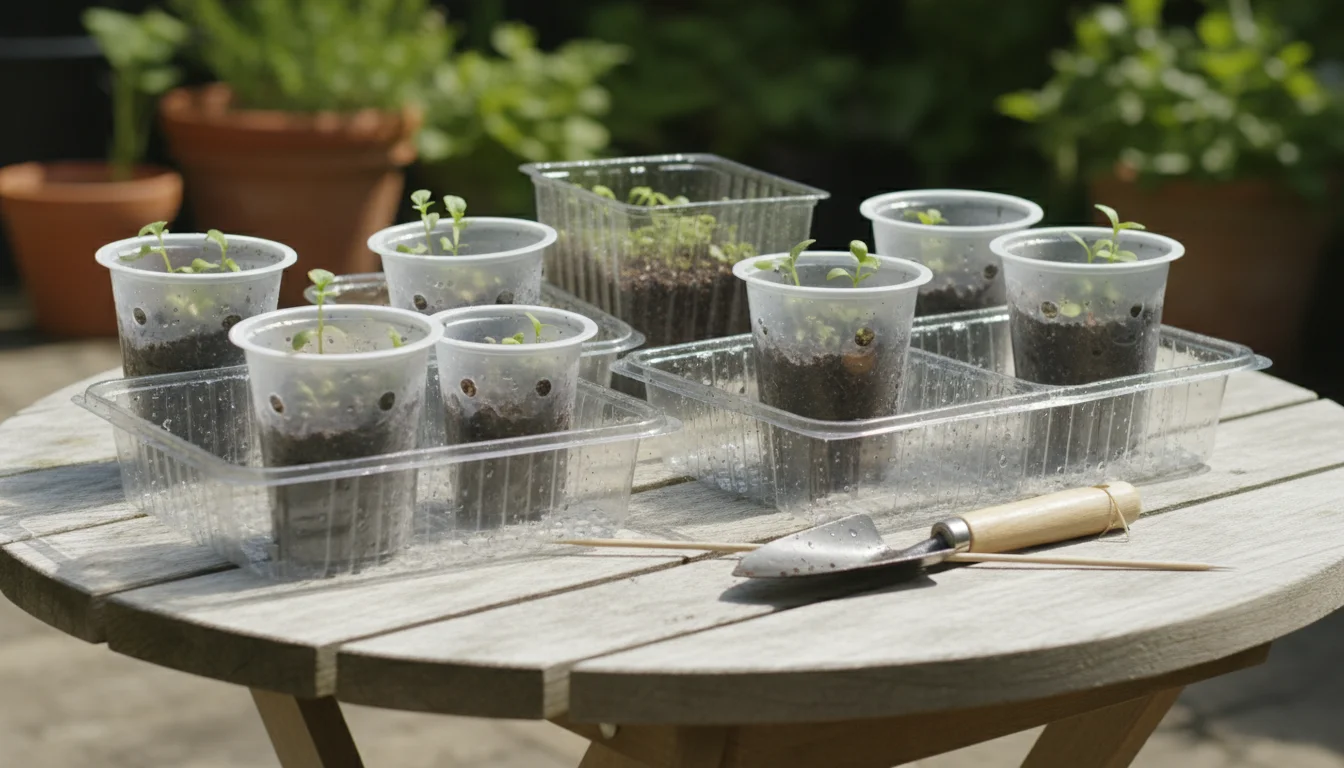
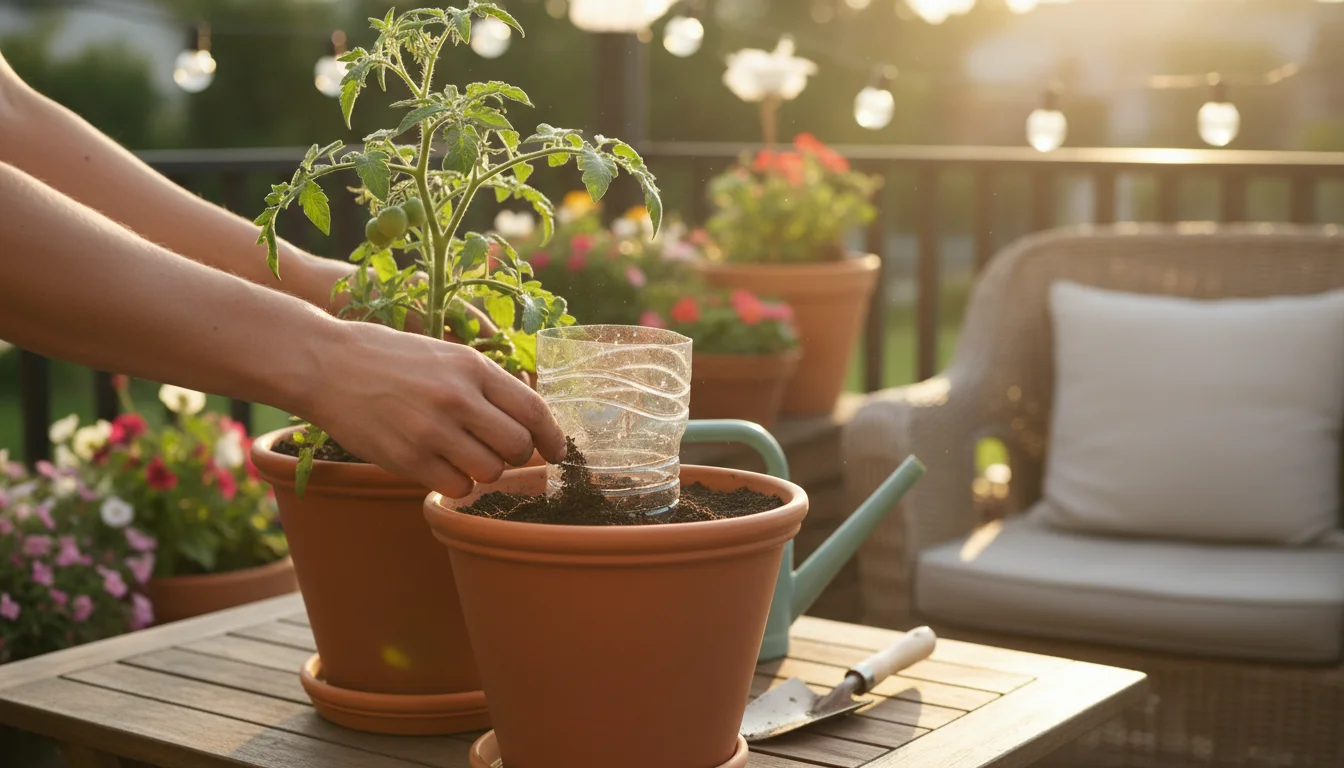
Yogurt Cups, Berry Containers, and Food Tubs: Seed Starting and Potting
Almost any clean plastic food container can find new life in your garden. Their varying sizes suit different stages of plant growth.
- Seed Starting Pots: Punch drainage holes into the bottom of yogurt cups, plastic fruit containers, or small food tubs. These are perfect for starting individual seeds indoors.
- Drip Trays: Use larger, solid plastic trays, such as those from pre-packaged salads, as drip trays under your seed-starting pots. This prevents water from pooling and protects surfaces.
- Herb Garden: A clean, rectangular plastic berry container, with its pre-existing drainage holes, makes an excellent starter pot for herbs on a windowsill.
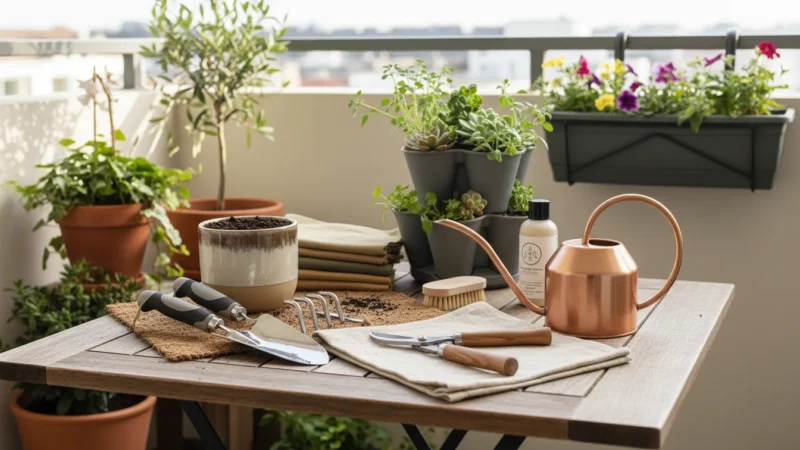
Smart Solutions for Watering and Irrigation
Efficient watering is crucial for small-space gardens, where containers can dry out quickly. DIY solutions help you deliver water precisely and without waste. These garden tool hacks focus on controlled delivery and moisture retention.
DIY Drip Systems from Plastic Bottles
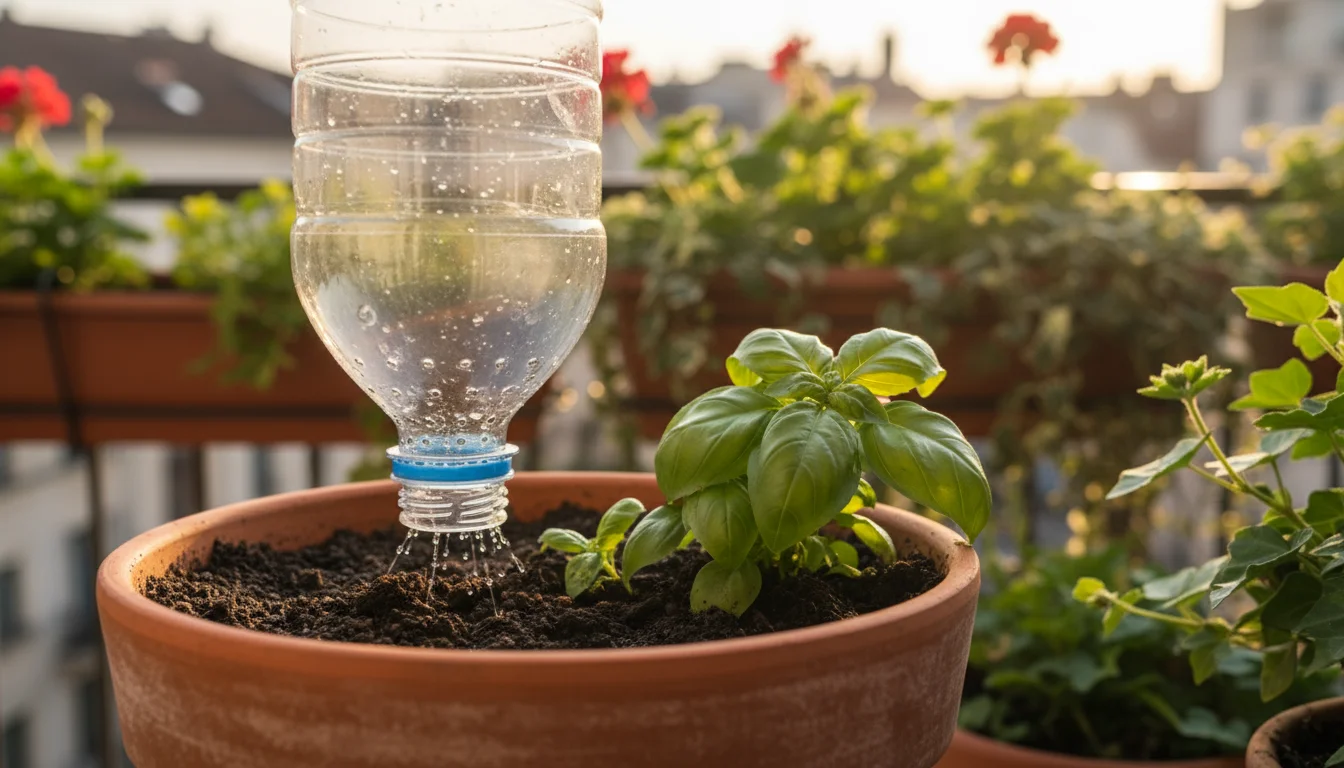
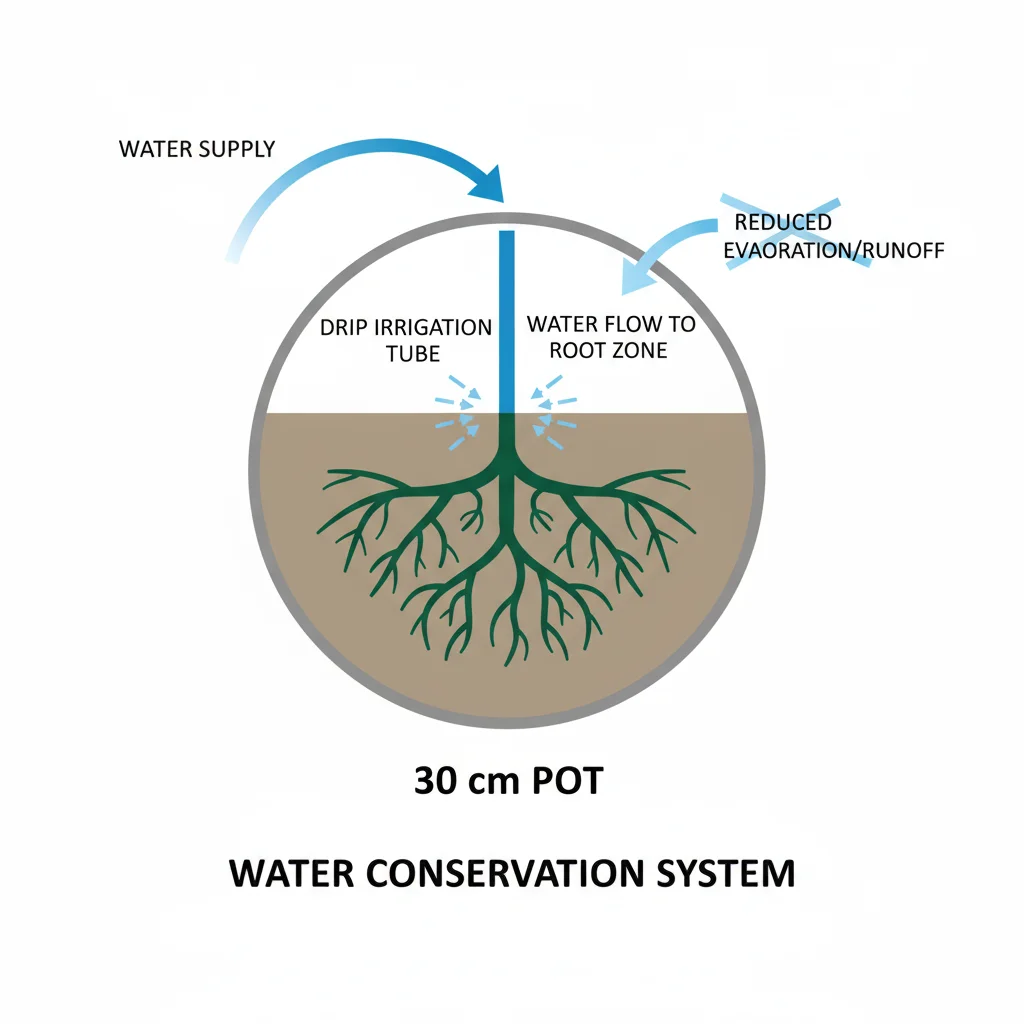
For consistent, slow watering, individual plastic bottles can create effective drip irrigation for specific plants.
- Prepare the Bottle: Take a clean plastic water or soda bottle (0.5 to 2 liters).
- Create Drip Holes: Poke one or two very small holes into the bottle cap using a heated pin or a tiny drill bit. Alternatively, a single, slightly larger hole near the bottom edge of the bottle works if you bury the bottle directly.
- Fill and Place: For surface watering, fill the bottle with water, screw on the cap, and invert it. Bury the cap end slightly into the soil next to a plant. For deeper watering, cut off the bottom of the bottle, dig a small hole next to the plant, and bury the bottle neck-down so only the bottom (now open) end remains above ground. Fill the bottle from the top.
- Monitor and Refill: The water will slowly seep into the soil, providing a steady supply. This method is particularly useful for plants that prefer consistent moisture. Adjust the hole size to control the drip rate.
This system conserves water by delivering it directly to the root zone, reducing evaporation and runoff, which is highly beneficial for arid climates or when you are away for a few days. You are delivering water exactly where your plants need it, minimizing waste.
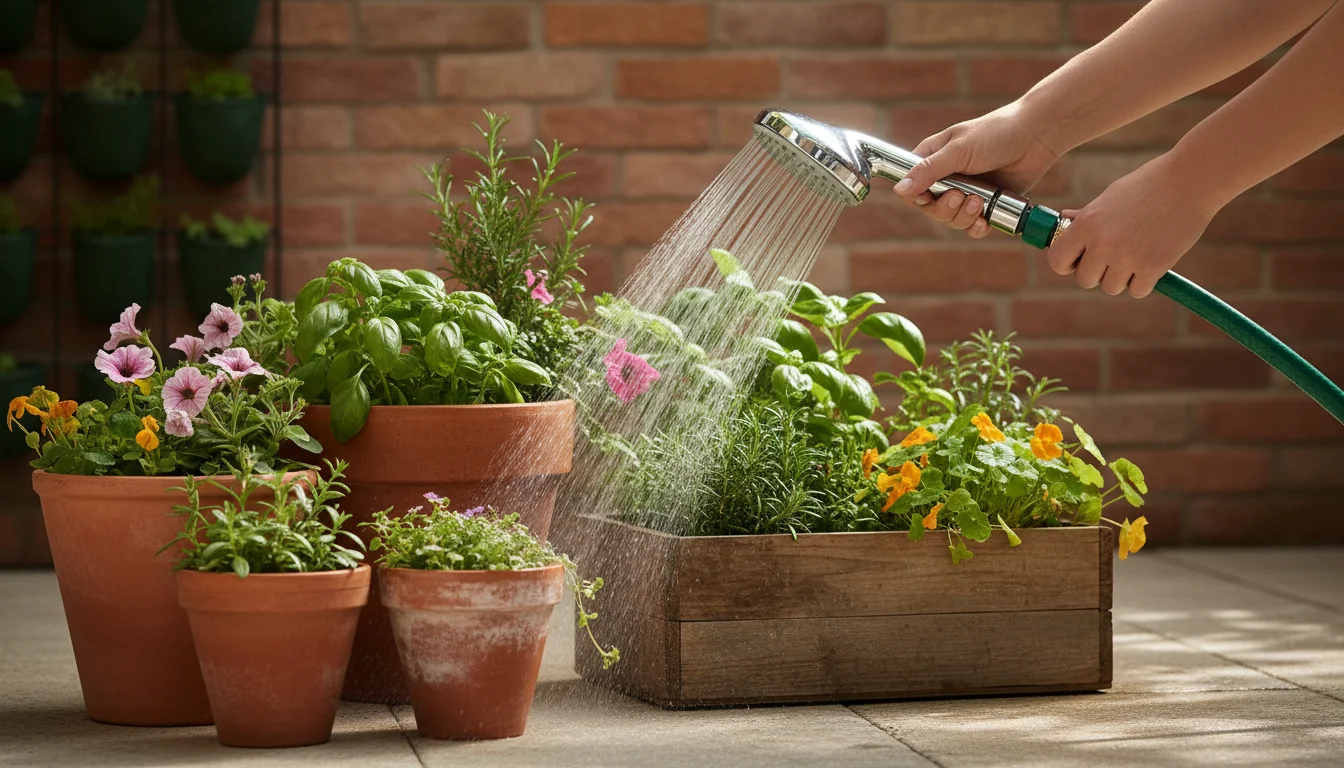
DIY Watering Wands from Hose Attachments
If you have a garden hose, you can create a gentle watering wand for your potted plants without buying a specialized tool.
- Showerhead Attachment: Secure an old, clean showerhead to the end of your garden hose. The multiple small nozzles provide a broad, gentle spray that mimics rainfall, preventing soil erosion from strong streams.
- Perforated Pipe: Attach a short length of narrow PVC pipe, drilled with small holes along its length, to your hose. This allows you to reach deeper into dense foliage or water multiple pots at once with a soft shower.
Pruning and Trimming Without Specialized Shears
Even without professional pruners, you can maintain your plants’ health and shape. These creative tool uses help you handle light pruning and deadheading tasks with precision.
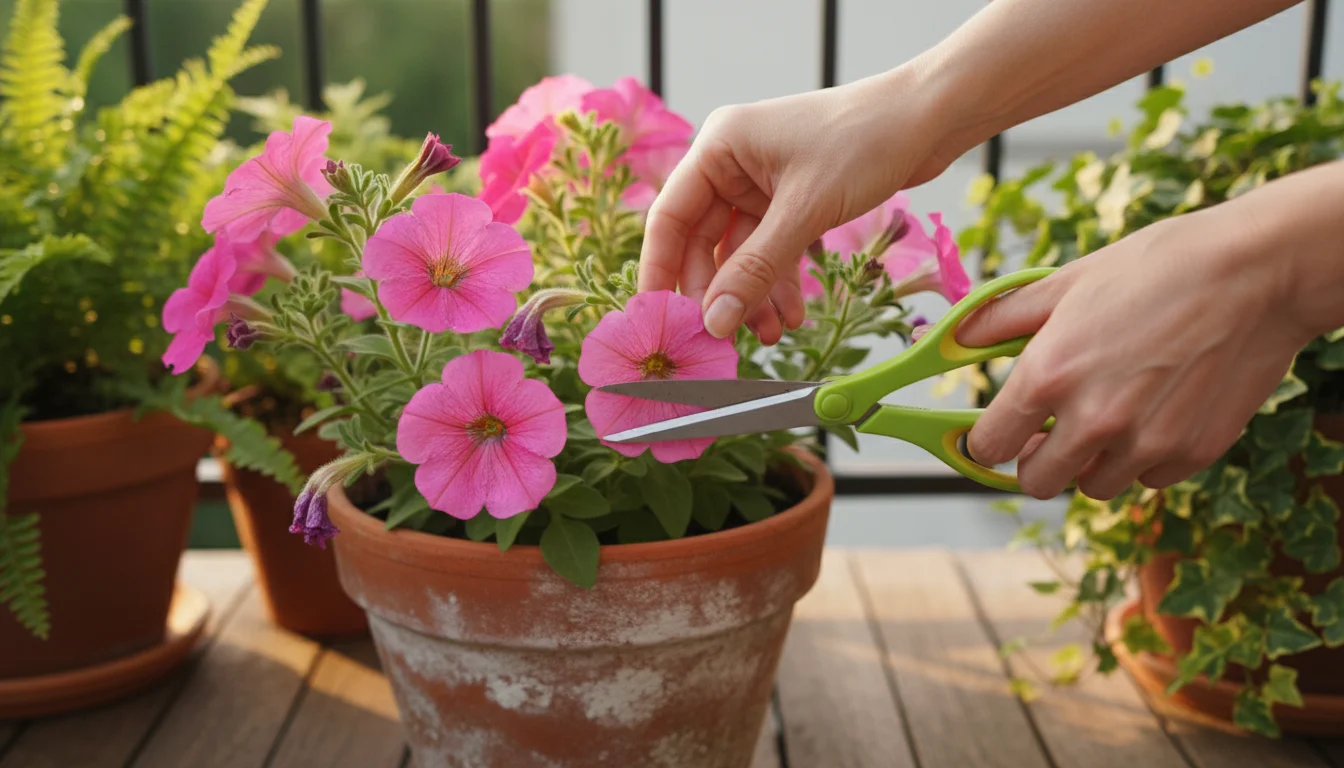
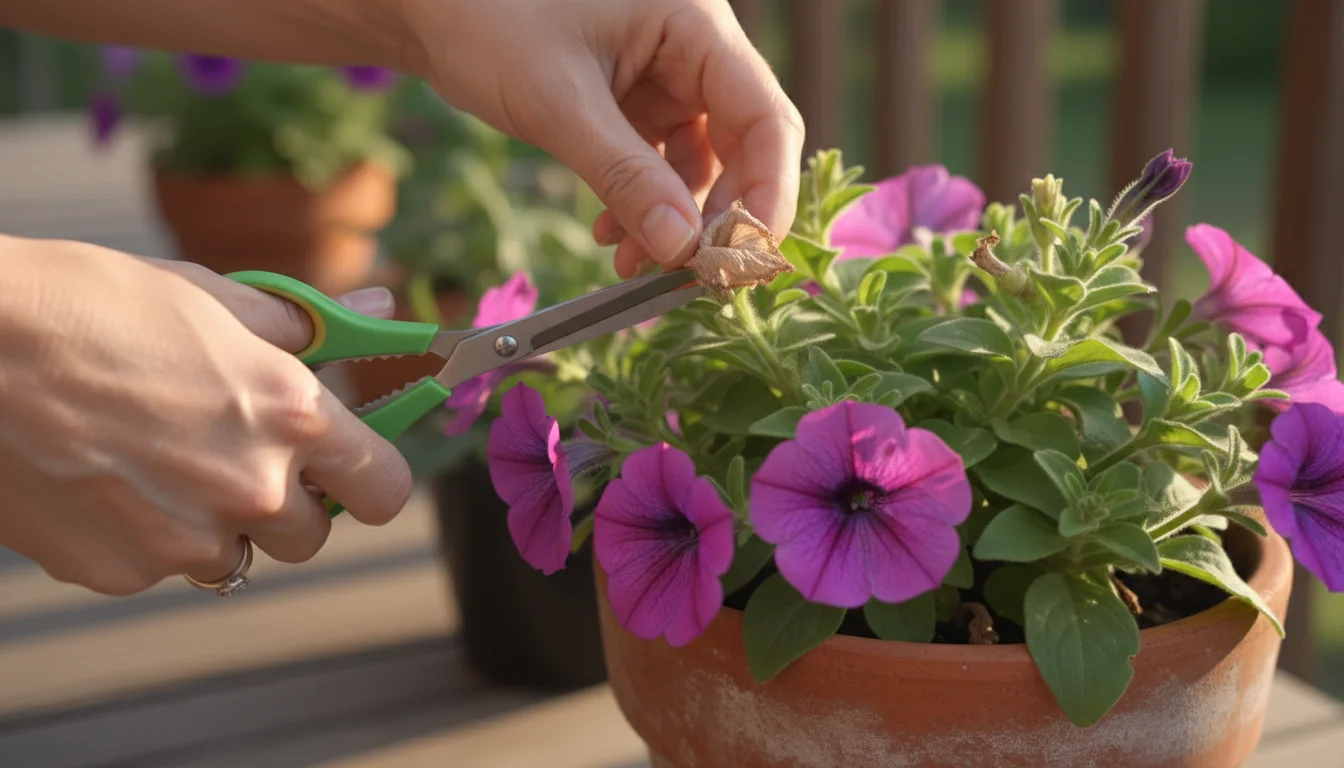
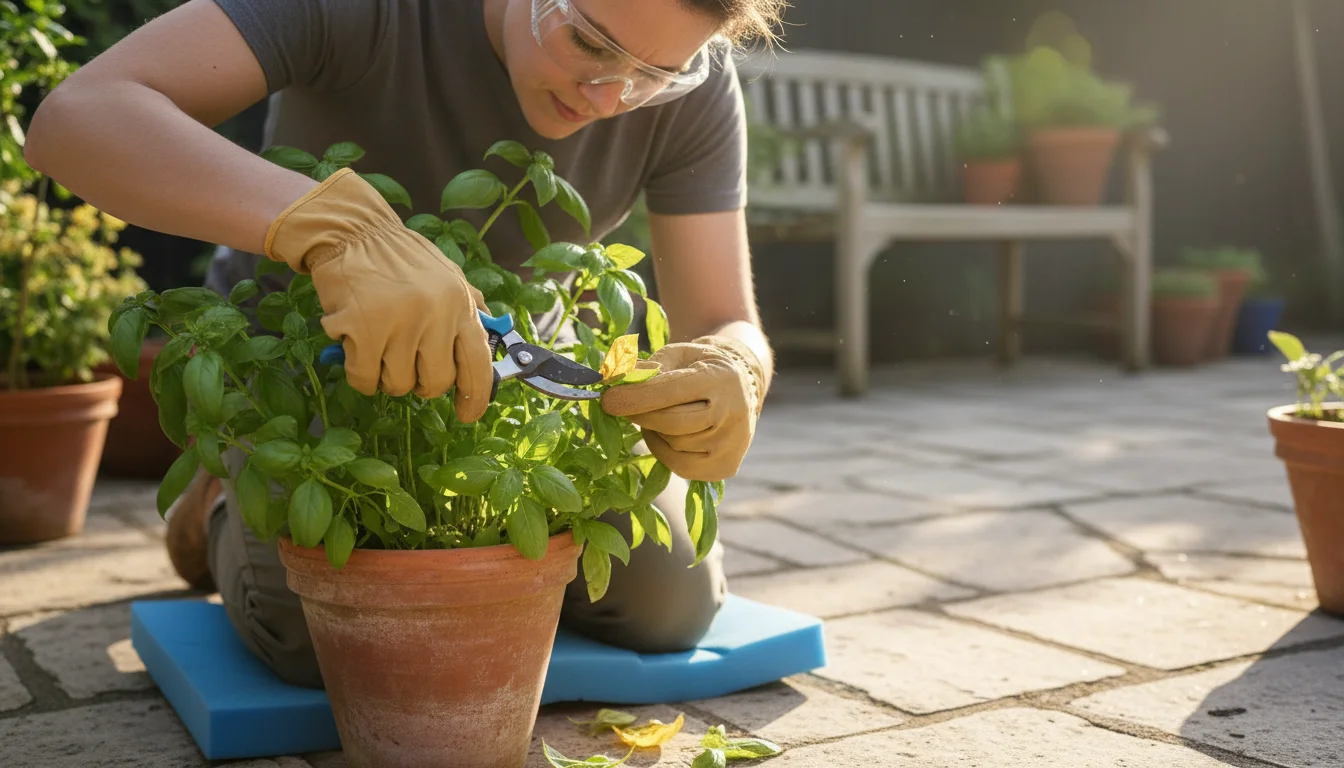
Kitchen Scissors: Herb Snips and Delicate Deadheaders
Sharp kitchen scissors are perfect for many light pruning tasks. You should use a dedicated pair for gardening that you do not use for food preparation to prevent cross-contamination.
- Harvesting Herbs: Snip individual herb stems cleanly, encouraging bushier growth. The fine blades prevent crushing delicate leaves.
- Deadheading Flowers: Remove spent blooms to encourage new flower production and maintain plant vigor. Scissors provide the precision needed to cut just below the faded flower.
- Trimming Small Stems: For young plants or very thin stems, scissors offer a clean cut, minimizing damage.
Keep your gardening scissors clean and sharp. Wipe them down after each use, especially if you move between different plants, to prevent the spread of diseases.
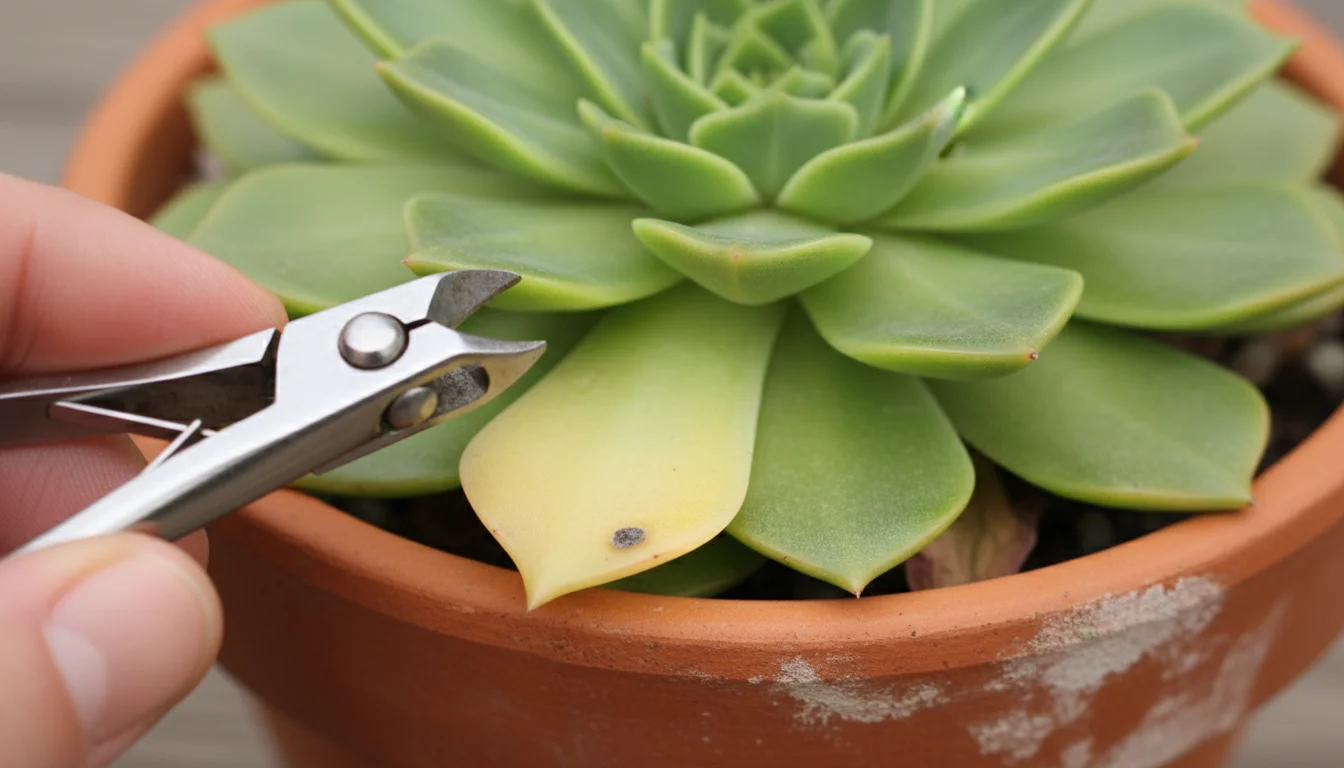
Nail Clippers: Tiny Trims and Fungal Spot Removal
For the most delicate work, such as pruning tiny air roots on orchids or removing a single yellowing leaf from a small succulent, nail clippers offer unparalleled precision. They are excellent for those detailed garden tool hacks.
- Delicate Pruning: Remove small, unhealthy leaves or flower stems from very small plants without disturbing the surrounding foliage.
- Fungal Spot Removal: If you spot a small fungal lesion on a leaf, you can often nip it out cleanly with nail clippers, containing the spread before it becomes a larger problem.
Disinfect nail clippers with rubbing alcohol before and after each use to ensure you do not transfer pathogens between plants.
Labels, Supports, and Seed Starting Ingenuity
Organization and proper support are vital for a healthy, manageable small-space garden. You can achieve both with simple, repurposed items, avoiding expensive specialized products. These DIY gardening tips make your life easier.
If you run out of horizontal space for your starts, a DIY vertical pallet garden is a fantastic way to organize seedlings and small pots.
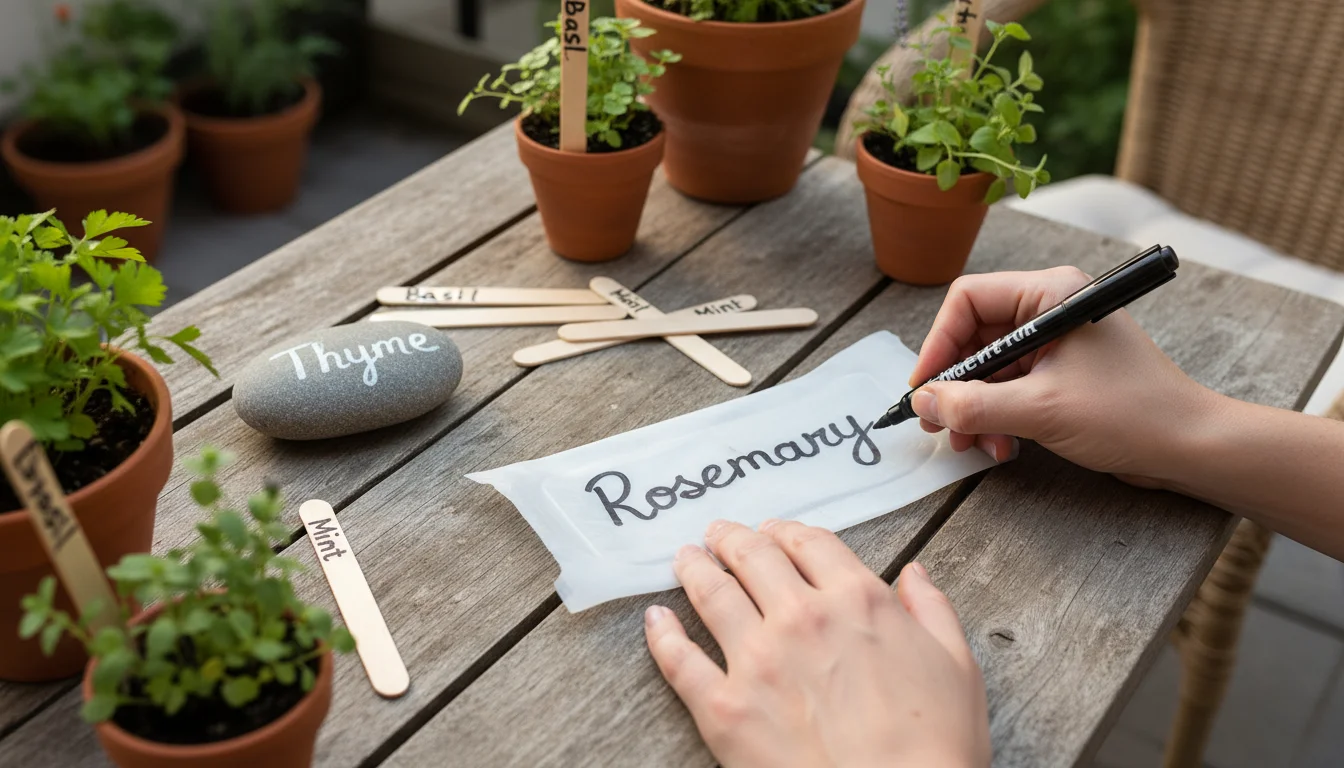
Repurposed Labels for Plant Identification
Knowing what you planted where prevents confusion and ensures proper care. Durable, waterproof labels are easy to make.
- Plastic Container Lids: Cut strips from old plastic yogurt lids or milk jugs. Write plant names with a permanent marker. These are weather-resistant and free.
- Popsicle Sticks/Craft Sticks: These are biodegradable and work well for temporary indoor labels or quick outdoor identification. You can write on them with pencil or permanent marker.
- Stones: Collect flat stones and use paint pens or permanent markers to label them. These add a rustic charm and are very durable.
Ensure your writing tool is waterproof and fade-resistant, especially for outdoor use. Re-label as needed, as even “permanent” markers can fade over time.
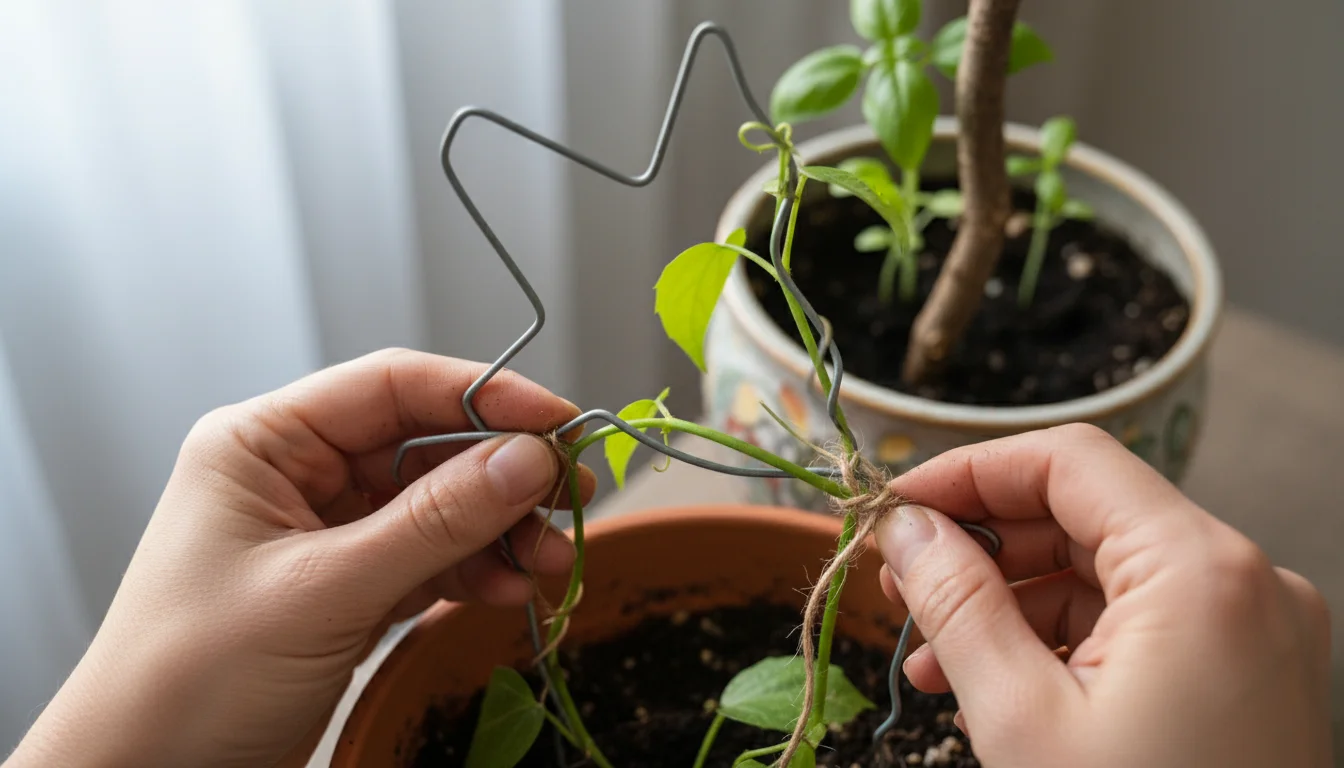
DIY Plant Supports
Vining plants and those with heavy fruit or flowers often need support. You can create effective trellises and stakes from household discards.
- Old Clothes Hangers: Bend wire hangers into small trellises for peas, beans, or lightweight climbing flowers in pots. You can interlock several to create a larger support structure.
- Branches and Twigs: Collect sturdy fallen branches from your yard or local park. Insert them into pots to provide a natural-looking support structure for growing plants.
- Bamboo Skewers/Chopsticks: As mentioned, these provide simple stakes for individual seedlings or small, delicate plants.
- Old Pantyhose/Fabric Strips: Instead of buying expensive plant ties, cut old pantyhose or soft fabric scraps into strips. These are gentle on stems and provide flexible support.
When selecting materials for plant supports, choose items that are strong enough to hold the mature weight of your plants and will not decompose too quickly, especially in moist conditions. For organic materials like wood, ensure they are free from pests or diseases.
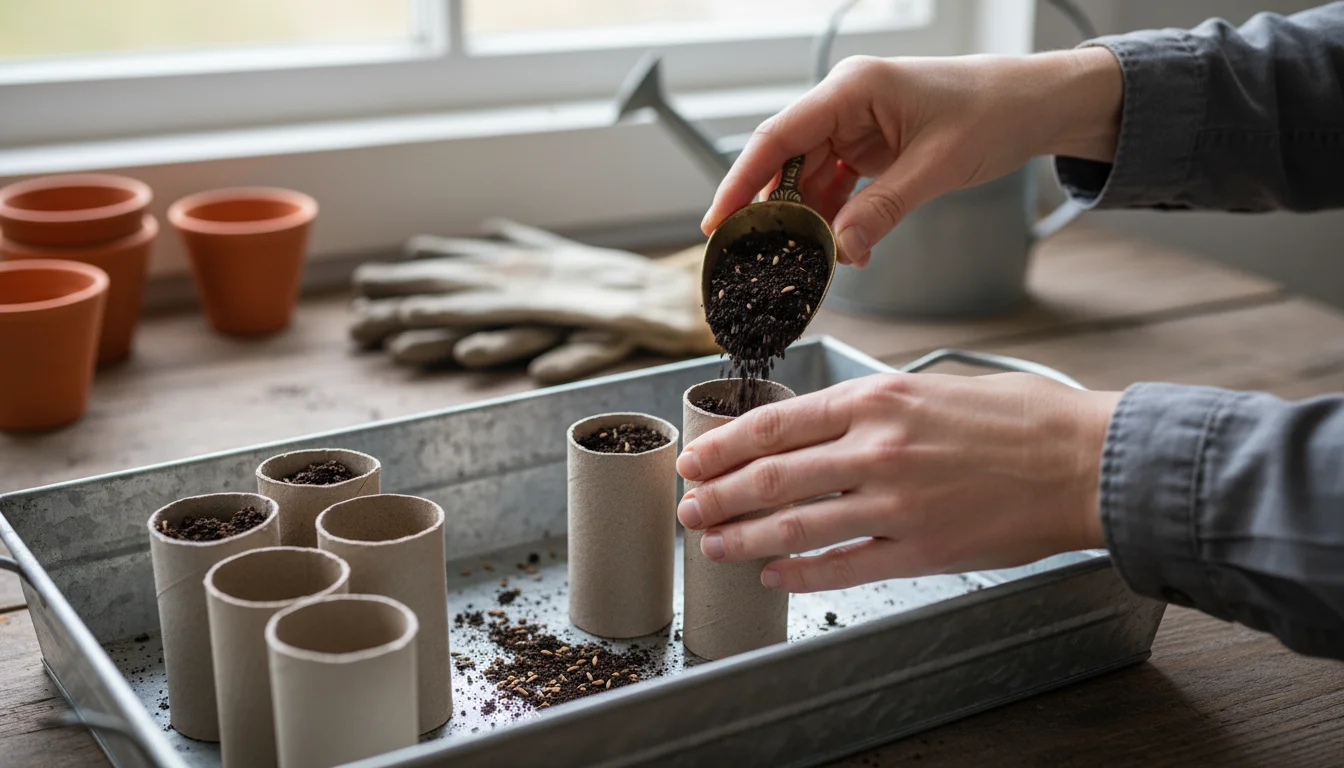
Egg Cartons and Toilet Paper Rolls for Seed Starting
These biodegradable items are excellent for starting seeds, reducing plastic waste, and simplifying transplanting.
- Egg Cartons: Fill individual egg carton cups with seed-starting mix. Plant one or two seeds per cup. When seedlings are ready for transplanting, you can often plant the entire paper cup directly into the garden, as it will break down in the soil. Remember to poke small drainage holes in the bottom of each cup.
- Toilet Paper Rolls: Cut toilet paper or paper towel rolls into 2-3 inch sections. Stand them upright in a waterproof tray, fill with seed-starting mix, and plant seeds. Like egg cartons, you can plant the entire roll directly into the ground or a larger pot when transplanting, as the cardboard will decompose. This method protects delicate roots during transfer.
These creative tool uses save money and promote healthy plant starts. They also eliminate the need to handle fragile root systems, reducing transplant shock.

Cleaning and Maintenance Hacks for Longevity
Even DIY tools benefit from proper care. Cleaning and maintaining your repurposed items ensures their longevity, prevents the spread of plant diseases, and keeps them effective. These DIY gardening tips apply to all your tools, whether store-bought or homemade.
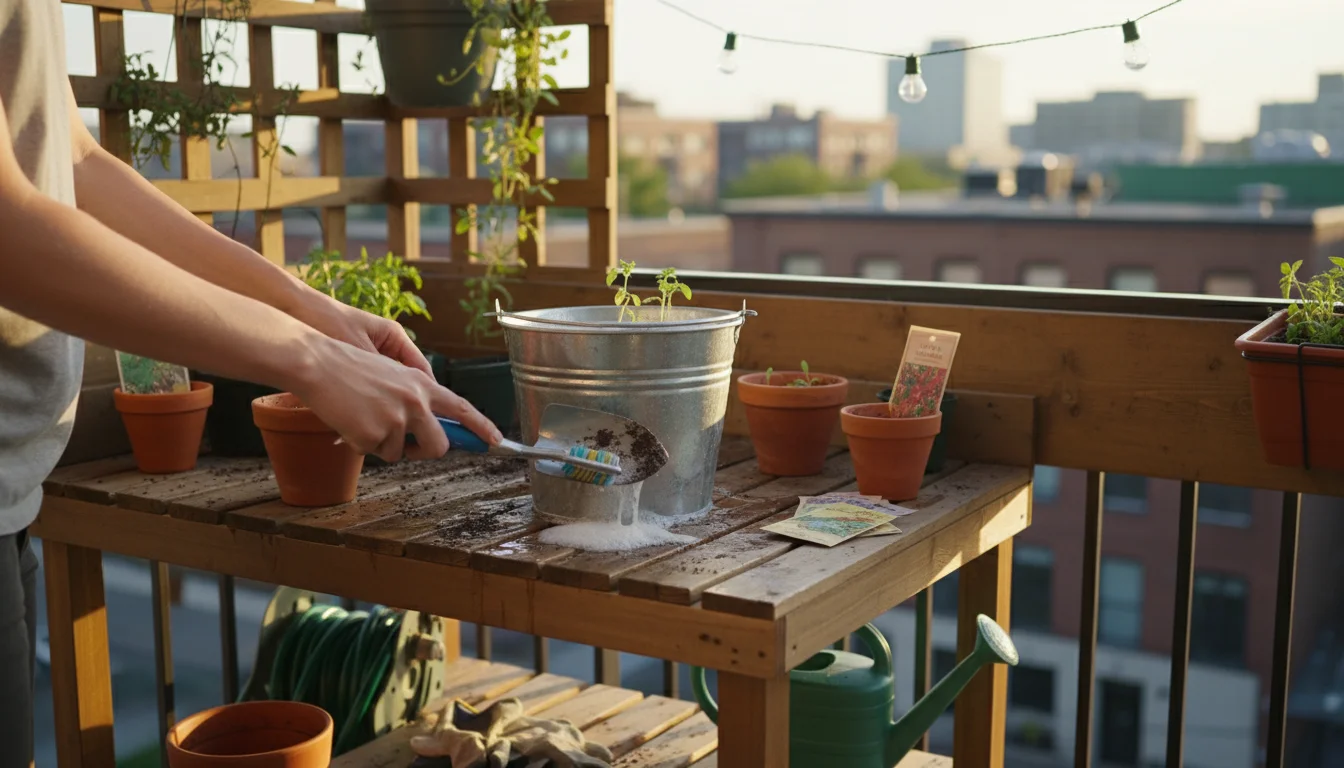
Simple Cleaning Solutions
Clean tools perform better and prevent disease. You do not need harsh chemicals for most cleaning tasks.
- Warm Soapy Water: For general dirt and grime, a bucket of warm water with a few drops of dish soap works wonders. Scrub plastic items, metal forks, or spoons with a brush.
- Vinegar Solution: A mixture of equal parts white vinegar and water helps remove mineral deposits and can act as a mild disinfectant. Soak items for a few minutes, then scrub.
- Rubbing Alcohol: For disinfecting cutting tools like scissors or old knives, wipe blades thoroughly with a cloth soaked in rubbing alcohol. This kills bacteria, fungi, and viruses, preventing their transfer between plants. This step is crucial when pruning diseased plants.
- Old Toothbrushes/Bottle Brushes: These are excellent for scrubbing tight corners and intricate parts of tools, like fork tines or inside watering bottle caps.
Always rinse tools thoroughly after cleaning with soap or vinegar to remove any residue. Ensure they dry completely before storage to prevent rust on metal components.
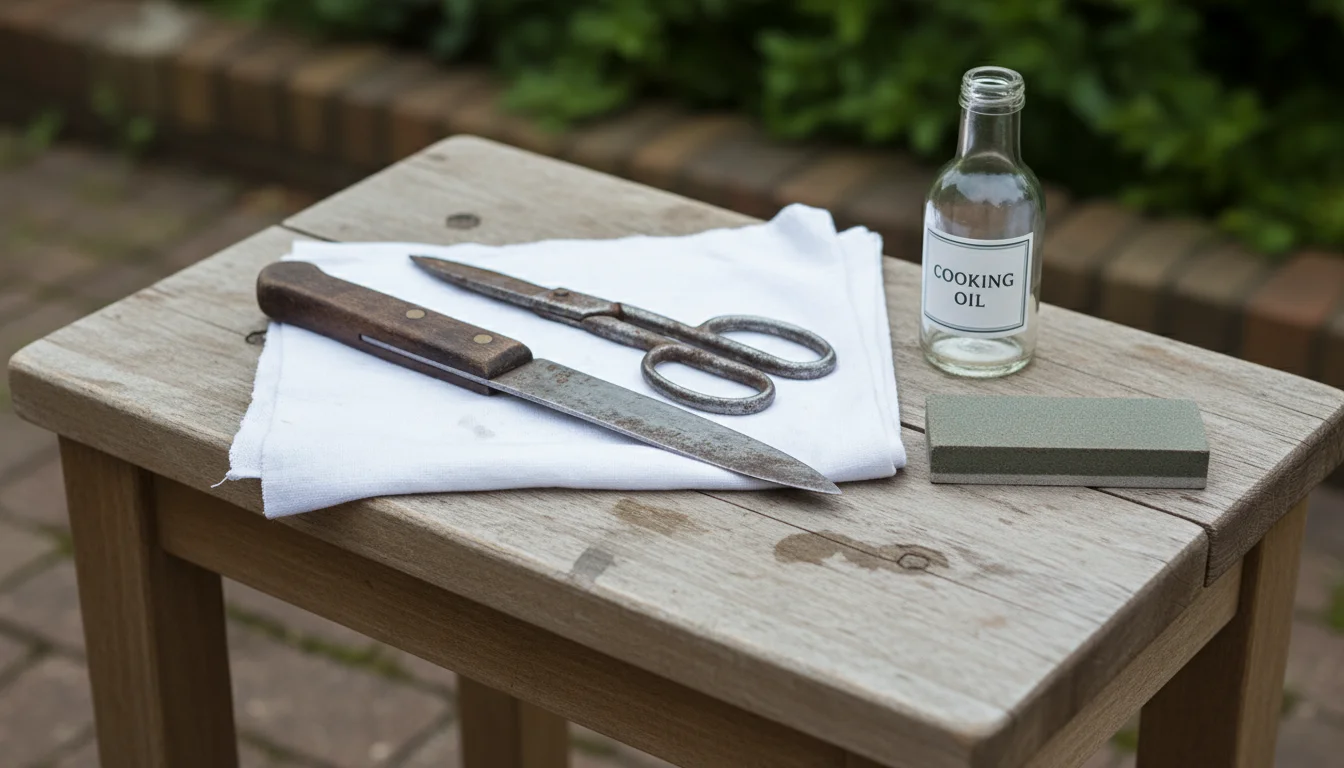
Preventing Rust and Maintaining Sharp Edges
While many DIY tools are plastic, some, like old knives or scissors, are metal and susceptible to rust. Keeping edges sharp enhances their performance.
- Drying and Oiling: After cleaning, completely dry any metal tools. A light coating of mineral oil or cooking oil on blades and joints prevents rust. Apply oil with an old cloth.
- Sharpening Kitchen Knives/Scissors: Use a kitchen knife sharpener or a fine-grit sharpening stone for old knives and scissors. Follow the manufacturer’s angle recommendations. A sharp blade makes clean cuts, reducing stress on plants and your effort. For scissors, try separating the blades if possible to sharpen them individually.
- Sandpaper for Rough Edges: For plastic scoops or containers with rough cut edges, a piece of fine-grit sandpaper can smooth them down, making them safer and more comfortable to use.
Proper maintenance extends the life of your tools, regardless of their origin, and ensures they remain effective helpers in your garden. Regular cleaning and attention to metal parts will keep your DIY implements ready for action.
Safety First: Practicing Care With Your DIY Tools
While DIY garden tool hacks offer creativity and savings, safety remains paramount. You must approach gardening tasks with awareness, especially when repurposing items. Your well-being and the health of your plants depend on it.
Personal Protective Equipment (PPE)
Even for light gardening, wearing appropriate protection safeguards you from minor injuries.
- Gloves: Protect your hands from thorns, soil microbes, and rough surfaces. Choose gloves that fit well and offer good grip. Thin latex or nitrile gloves are excellent for delicate tasks like handling seedlings or applying fertilizer, while thicker work gloves protect against cuts and scrapes.
- Eye Protection: When pruning, especially with repurposed scissors or knives, wear safety glasses. They shield your eyes from flying debris or snapping branches.
- Kneelers or Pads: For tasks requiring kneeling, a simple foam pad or old cushion provides comfort and protects your knees from hard surfaces and moisture.
Always assess the task at hand and select the appropriate protection. An ounce of prevention truly prevents an hour of pain.
Safe Handling and Storage of DIY Tools
Improper storage of even makeshift tools can lead to accidents. Implement safe practices for all your garden implements.
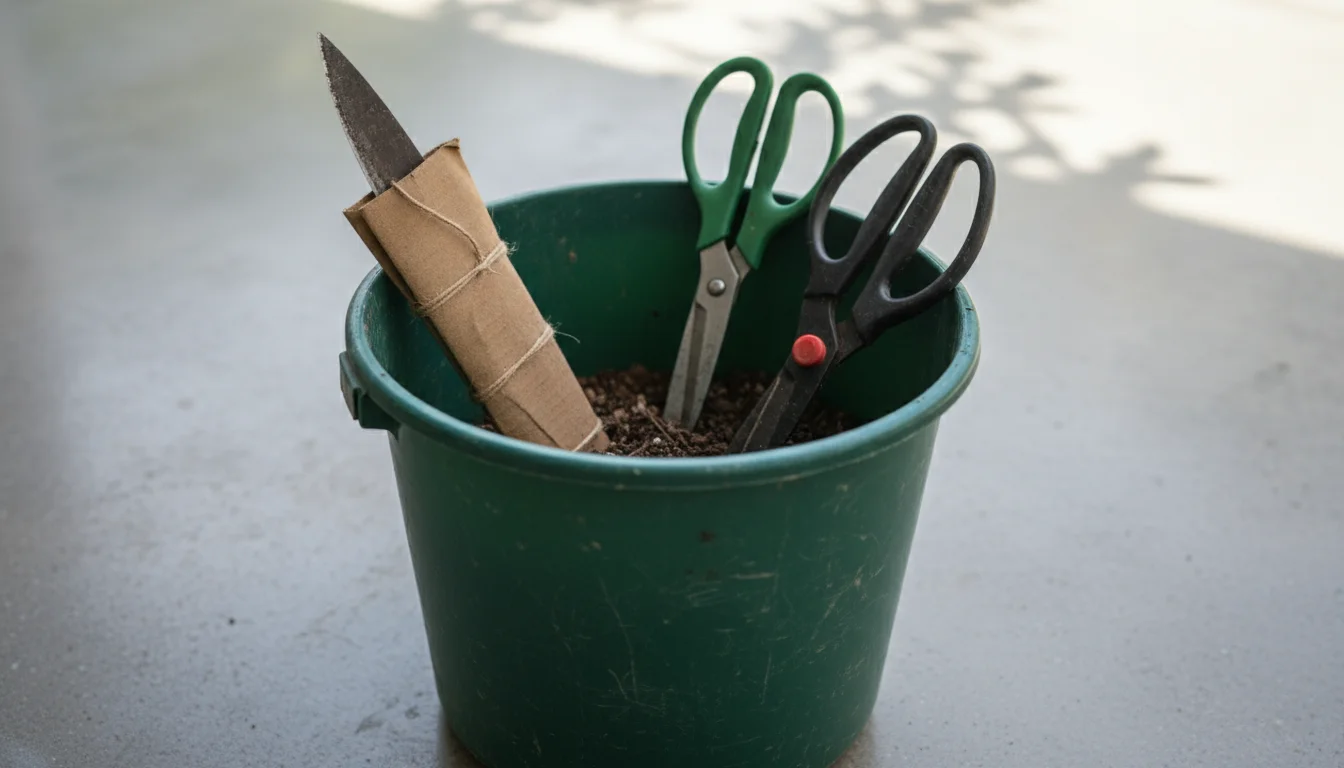
- Blades Down or Covered: If using repurposed knives or sharp scissors, always store them with blades pointing down in a sturdy container or with a protective sheath. You can make sheaths from cardboard or thick plastic.
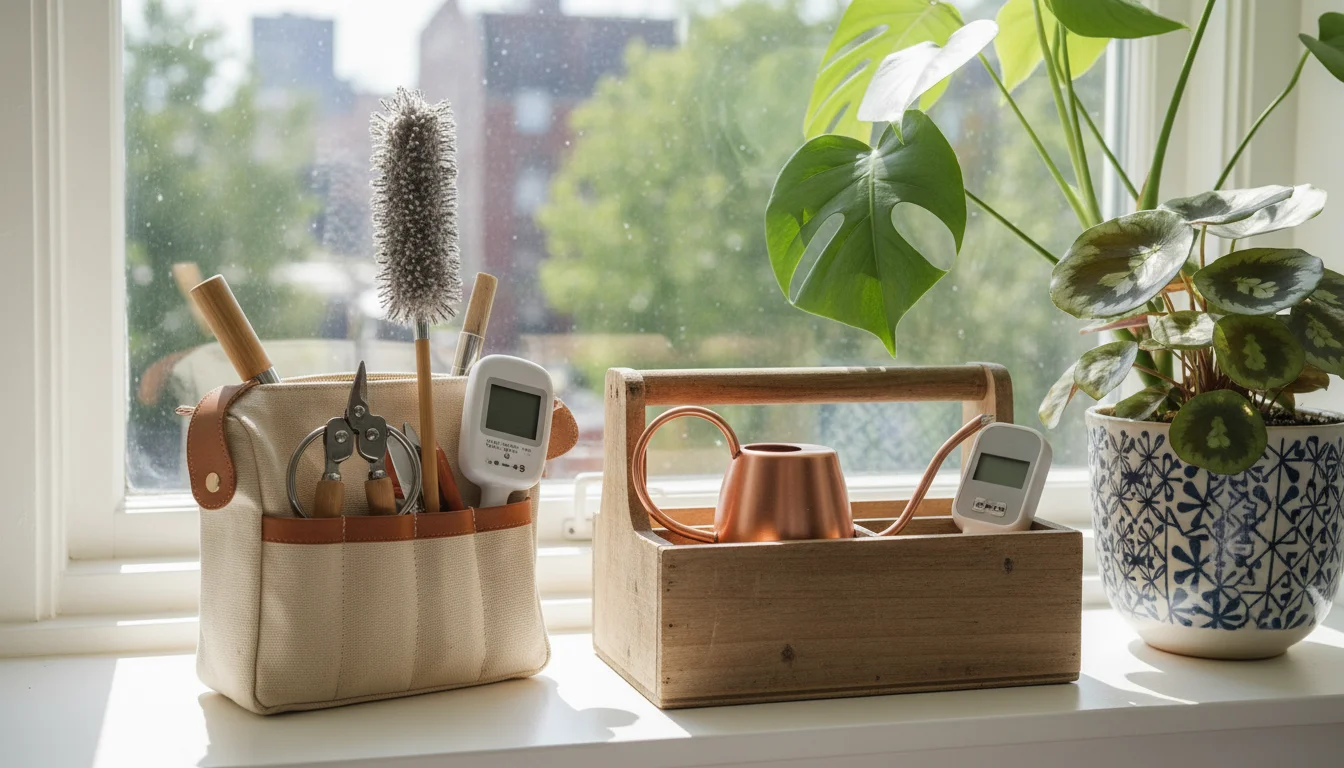
- Designated Container: Keep all your small DIY tools in a designated bucket, caddy, or clear plastic container. This prevents them from getting lost or damaged and makes them easily accessible. An old plastic bucket or a sturdy tote bag works perfectly.
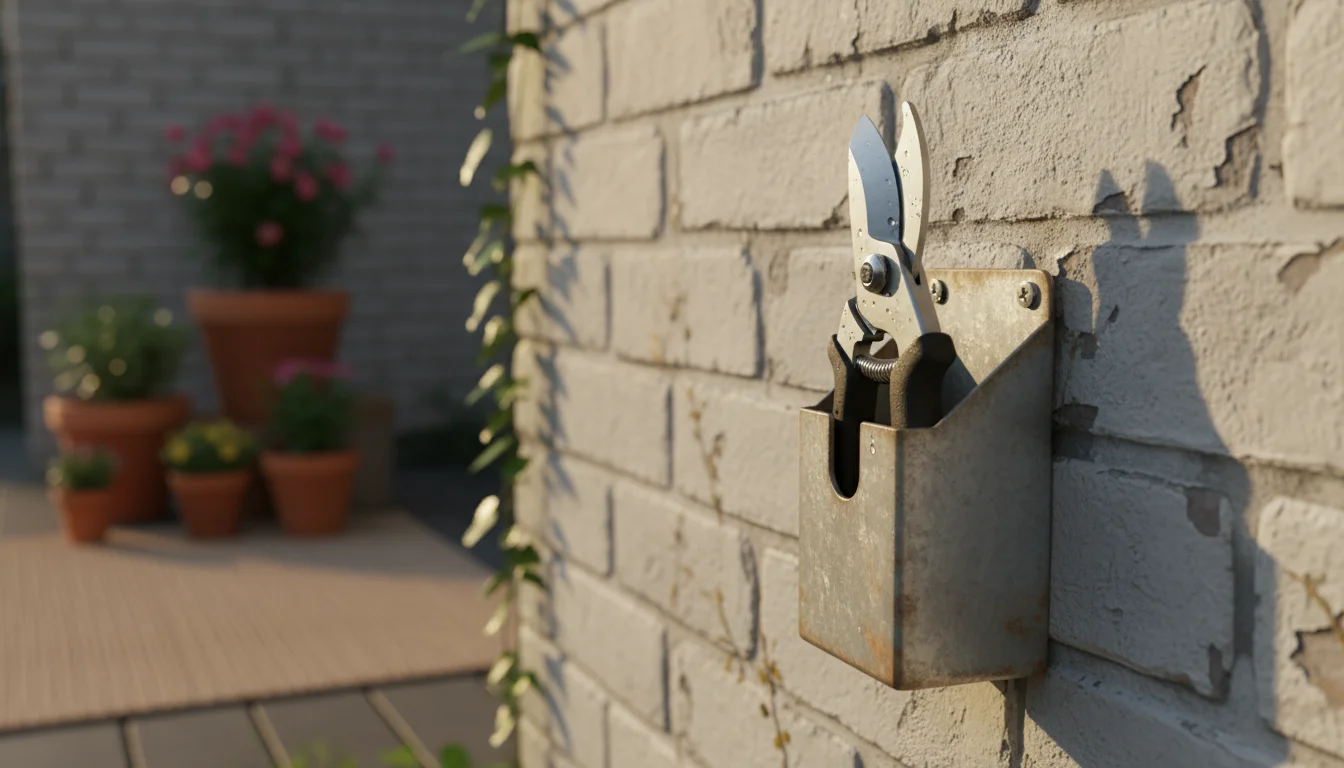
- Out of Reach: Store all gardening tools, especially sharp ones, out of reach of children and pets. Balconies and patios often mean limited storage space, so consider a wall-mounted organizer or a locked cabinet if available.
- Inspect Before Use: Before each gardening session, quickly inspect your DIY tools. Check for cracks in plastic, loose handles, or excessive rust. A damaged tool can be unsafe and ineffective.
Remember, your DIY gardening tools are just as capable of causing injury as specialized ones if handled carelessly. Cultivate safe habits, and your gardening experience will remain enjoyable and productive.
For reliable tool and safety guidance, see National Safety Council — Home & Garden Safety, Royal Horticultural Society (RHS) — Tools & Equipment Advice, University of Minnesota Extension — Pruning Basics and UF/IFAS — Microirrigation for Home Landscapes.
Disclaimer: Follow manufacturer instructions and local regulations. Wear appropriate protection, store blades safely, and keep tools away from children and pets.

Frequently Asked Questions
Can I use any plastic container for seed starting?
You can use most clean plastic containers for seed starting, but always ensure they have adequate drainage holes. Punch several small holes in the bottom. Clear containers allow light to reach roots, which some plants dislike, so consider opaque options or wrap clear ones if needed. Wash containers thoroughly with soap and water to remove food residue and prevent mold.
How can I make a DIY watering can for very delicate seedlings?
To make a watering can suitable for delicate seedlings, use a small plastic bottle, such as a water bottle or a soda bottle. Heat a needle or a fine paperclip with a flame, then carefully poke several tiny holes into the bottle cap. This creates a fine, gentle spray that will not disturb delicate seedlings or wash away soil. Test the flow before watering your plants.
Are homemade plant labels durable enough for outdoor use?
Homemade plant labels made from plastic container lids or stones, written with a permanent, UV-resistant marker or paint pen, prove quite durable for outdoor use. Wooden labels like popsicle sticks last for a season or two, but eventually decompose. You should check and refresh your labels periodically, especially after heavy rain or prolonged sun exposure, to ensure readability.
What are the best everyday items for aerating soil in potted plants?
Chopsticks, old dinner forks, or even a barbecue skewer work exceptionally well for aerating soil in potted plants. Gently push them into the soil around the base of the plant, avoiding major root systems. Wiggle them slightly to create channels for air and water. This simple action helps prevent soil compaction and improves root health.
How do I sharpen old kitchen scissors for gardening use?
You can sharpen old kitchen scissors using a household knife sharpener or a fine-grit sharpening stone. If your scissors separate, sharpen each blade individually. Hold the blade at its original bevel angle against the sharpener and pull it across, repeating several times. If they do not separate, use a small sharpening tool or the fine side of a honing steel along the edge. Always sharpen away from your body. Test the sharpness on a piece of paper or a thin twig. Regularly wipe down and oil the pivot point for smooth operation.


Leave a Reply