Do you dream of fresh, homegrown vegetables but believe your small apartment, cozy balcony, or limited patio space restricts your gardening ambitions? Many aspiring gardeners face this exact challenge. The good news is you absolutely can start your own vegetable garden, even without a yard, a greenhouse, or expensive equipment. This guide empowers you to begin your gardening journey with a revolutionary, incredibly simple technique: the ziplock bag seed starting method.
If you enjoy this soil-free start, you might also want to try growing sprouts in a jar for a quick, edible harvest without any light requirements.
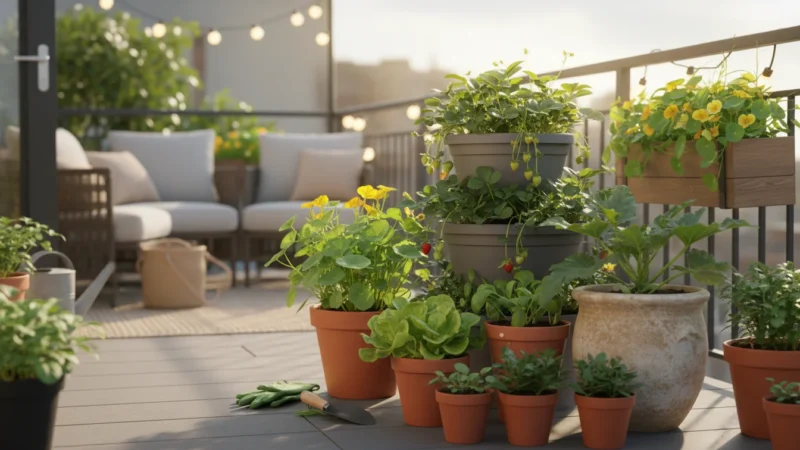
This method is perfect for apartment gardening and anyone eager to experience the joy of growing plants from scratch, regardless of space constraints. You will transform a sunny window into a miniature nursery, using common household items to give your seeds the perfect start. By following these practical, actionable steps, you will quickly learn how to start seeds without a greenhouse, taking control of your food source and connecting with nature right from your home.

Why Start Seeds Indoors, Even in a Ziplock Bag?
Starting seeds indoors provides a significant head start on the growing season, especially valuable for those gardening in northern climates or with limited outdoor space. This practice offers numerous advantages, making it a cornerstone for successful small-space gardening.
To keep your garden on schedule, follow a dedicated apartment seed-starting calendar to time your sowings perfectly.
Extend Your Growing Season
Beginning your seeds inside allows you to sow them weeks, or even months, before the last frost date. This means your plants mature earlier, leading to earlier harvests. For example, if your region experiences a short summer, starting tomatoes or peppers indoors gives them the crucial extra time they need to produce fruit before the cold weather returns. This strategy maximizes the yield from your limited space, ensuring you enjoy fresh produce for a longer period.
Cost Savings and Variety
Purchasing seedling starts from nurseries quickly adds up, particularly when you buy multiple plants. Seeds, on the other hand, are remarkably affordable. A single packet often contains dozens, if not hundreds, of seeds for just a few dollars. This cost efficiency allows you to experiment with a wider variety of plants than you could afford to buy as starts. You gain access to unique heirloom varieties or specific cultivars not typically found in local garden centers, opening up a world of culinary and aesthetic possibilities for your apartment gardening endeavors.

Control Over Growing Conditions
When you start seeds indoors, you control the critical environmental factors. You manage the temperature, moisture, and light exposure, giving your delicate seedlings the ideal conditions for robust growth. This control reduces the risk of pests, diseases, or extreme weather conditions that young plants might face outdoors. By providing a stable, nurturing environment from day one, you build stronger, healthier plants that are better equipped to thrive once they transition to their permanent homes.
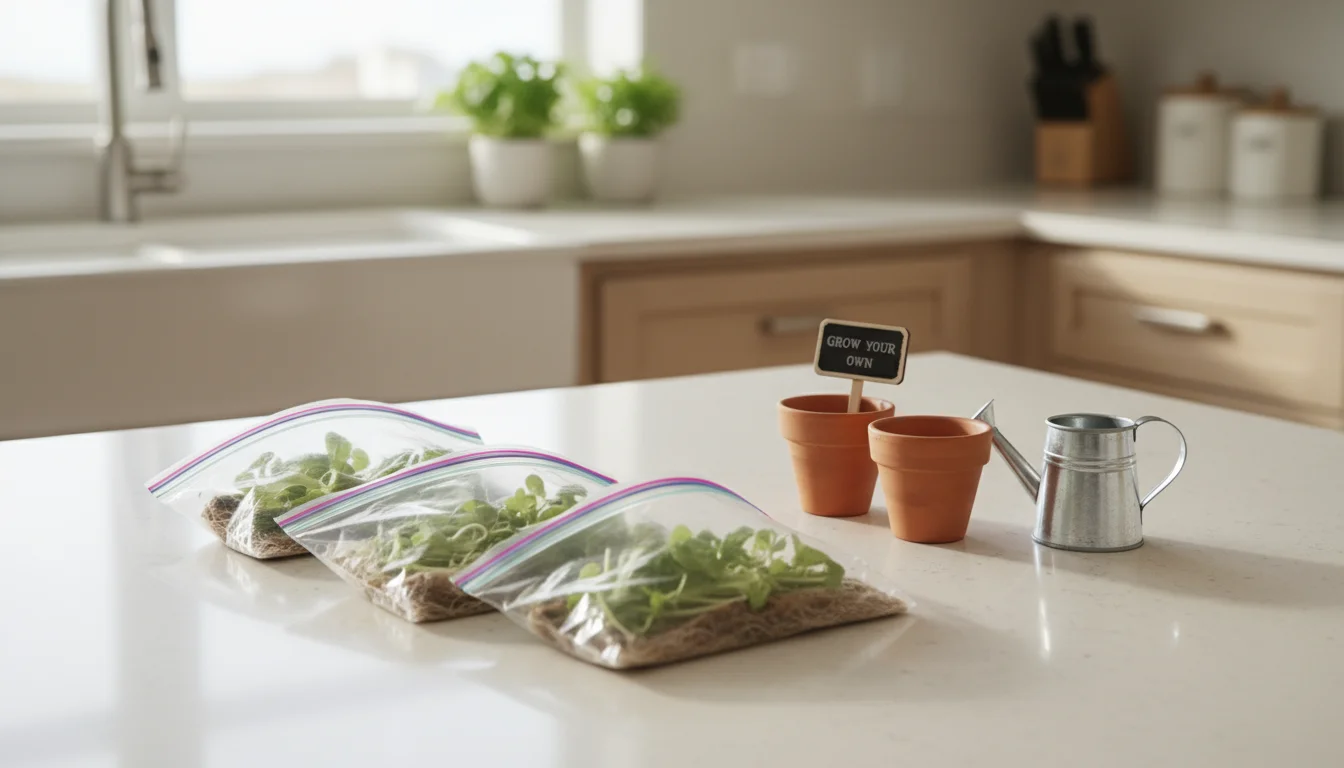
The Ziplock Bag Advantage for Small Spaces
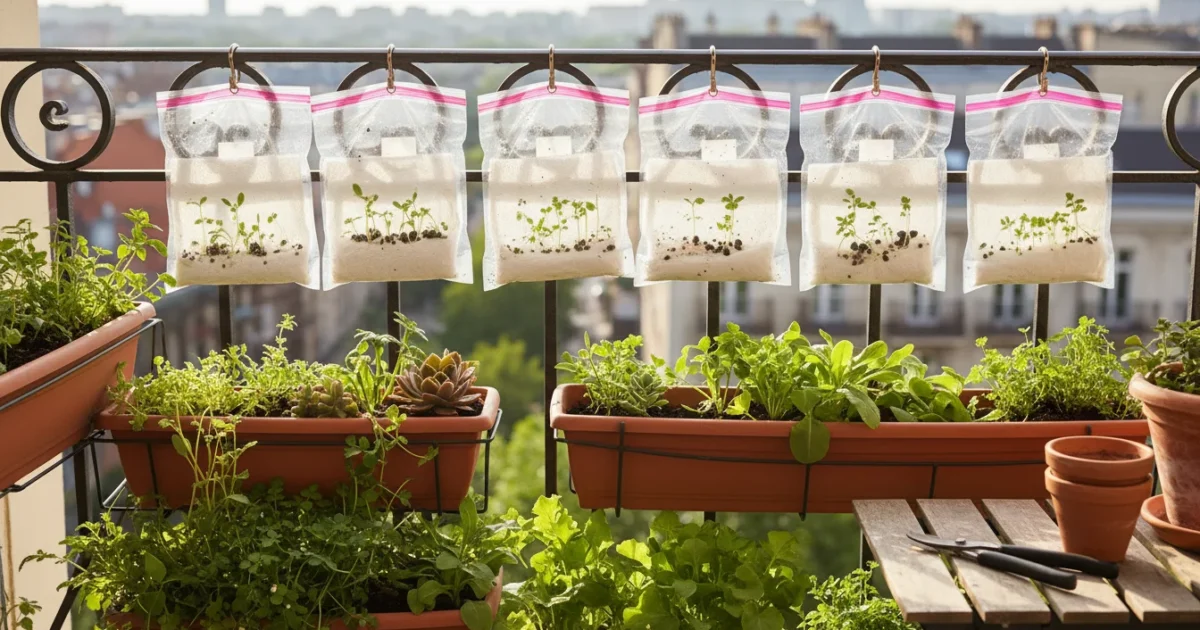
The ziplock bag method specifically addresses the challenges of small-space gardening. Traditional seed starting trays take up considerable surface area, requiring dedicated shelves or tables. This paper towel seed germination technique, however, uses virtually no counter space. The bags lie flat, occupy minimal room, and you can easily move them around. You place them directly on a sunny window, utilizing vertical space that might otherwise go unused. This method is incredibly clean, mess-free, and requires very few supplies, making it an ideal entry point for anyone thinking about starting vegetable seeds in a small apartment or any compact living situation.
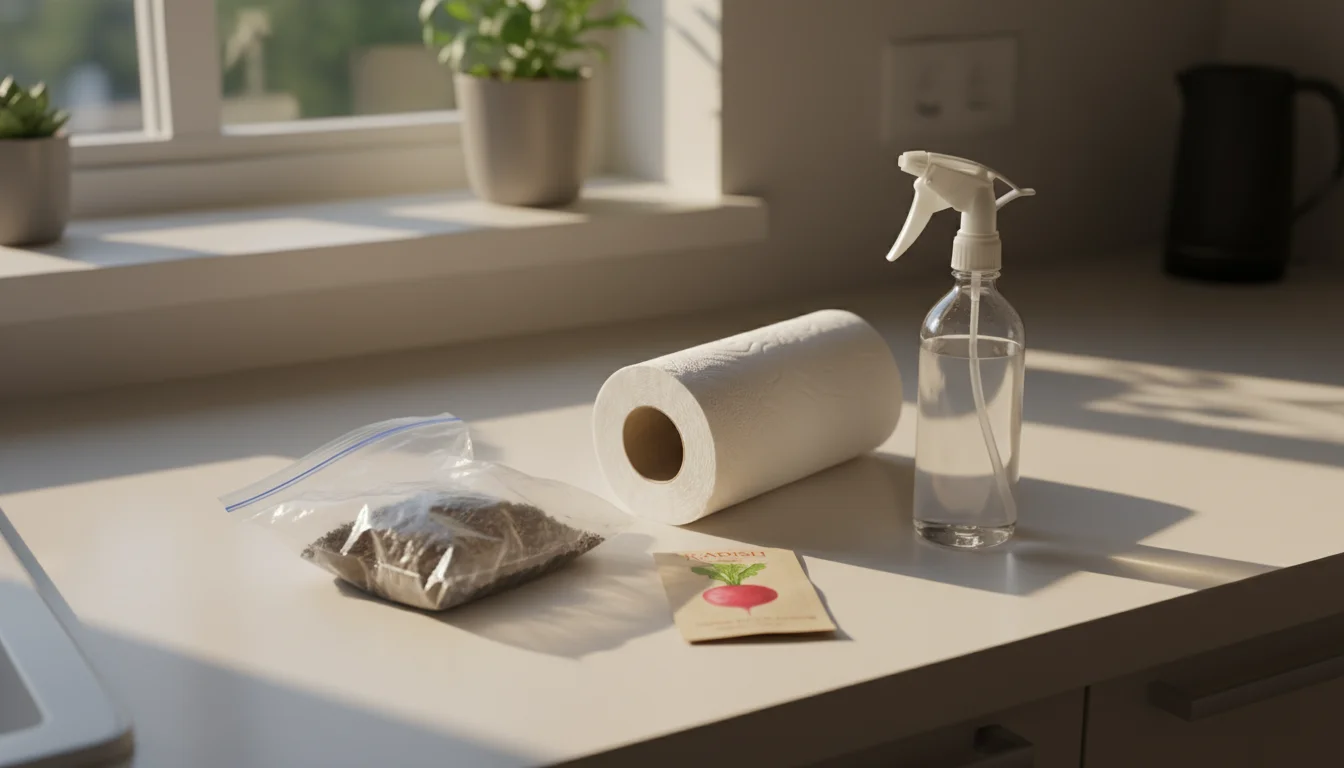
Gathering Your Simple Supplies: The Minimalist’s Checklist
One of the most appealing aspects of the ziplock bag seed starting method is its simplicity. You do not need expensive specialized equipment. You likely already possess most of the necessary items in your home. This minimalist approach proves perfect for individuals living in small apartments or anyone seeking a low-cost, low-barrier entry into gardening.
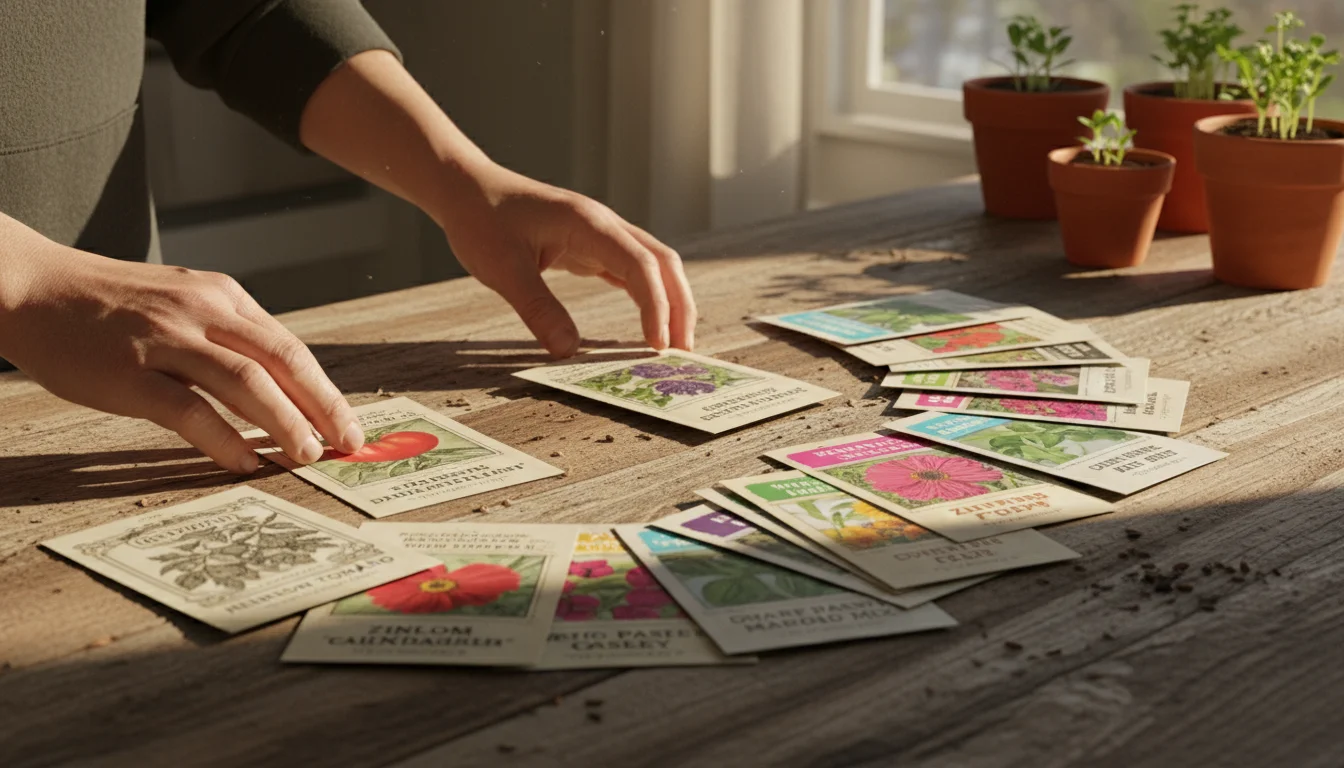
Before you begin, spend a few minutes organizing your collection of seeds to see what you have on hand and which are ready to plant.
The Essentials You Will Need:
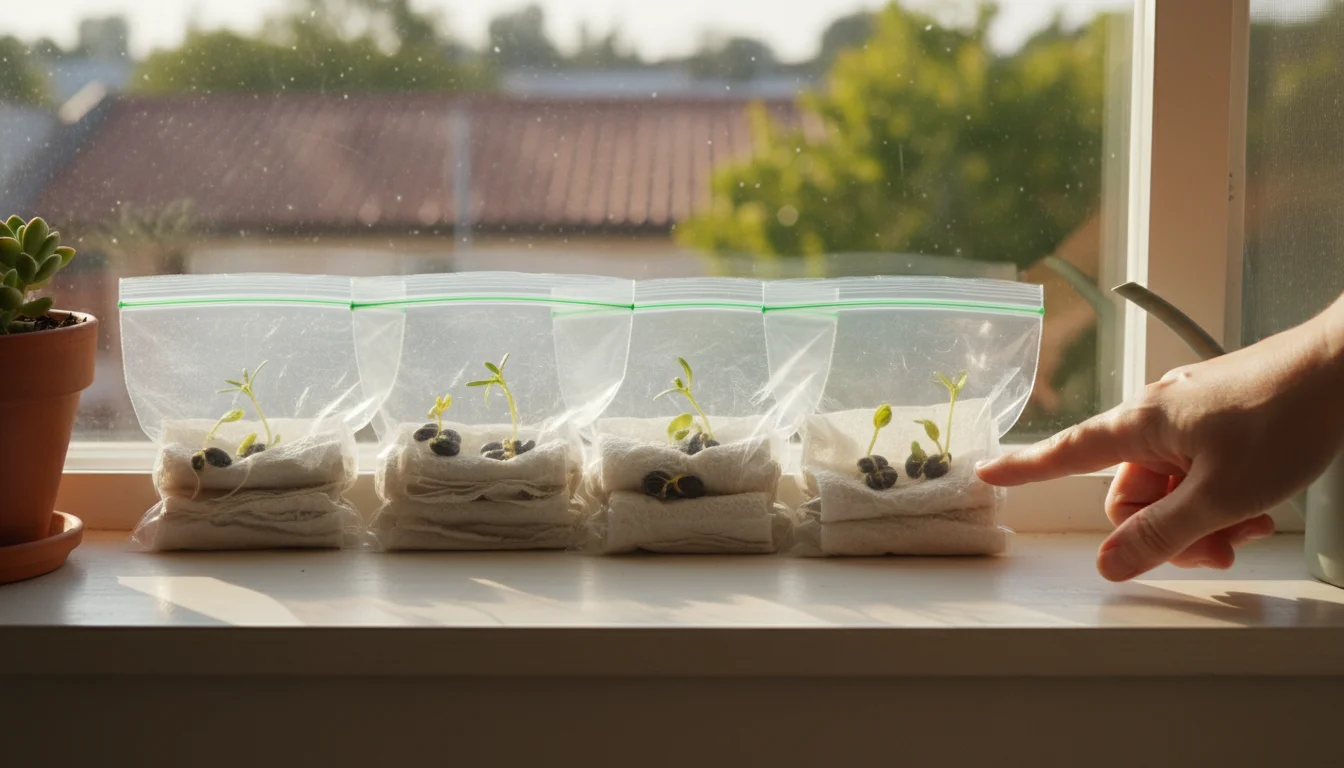
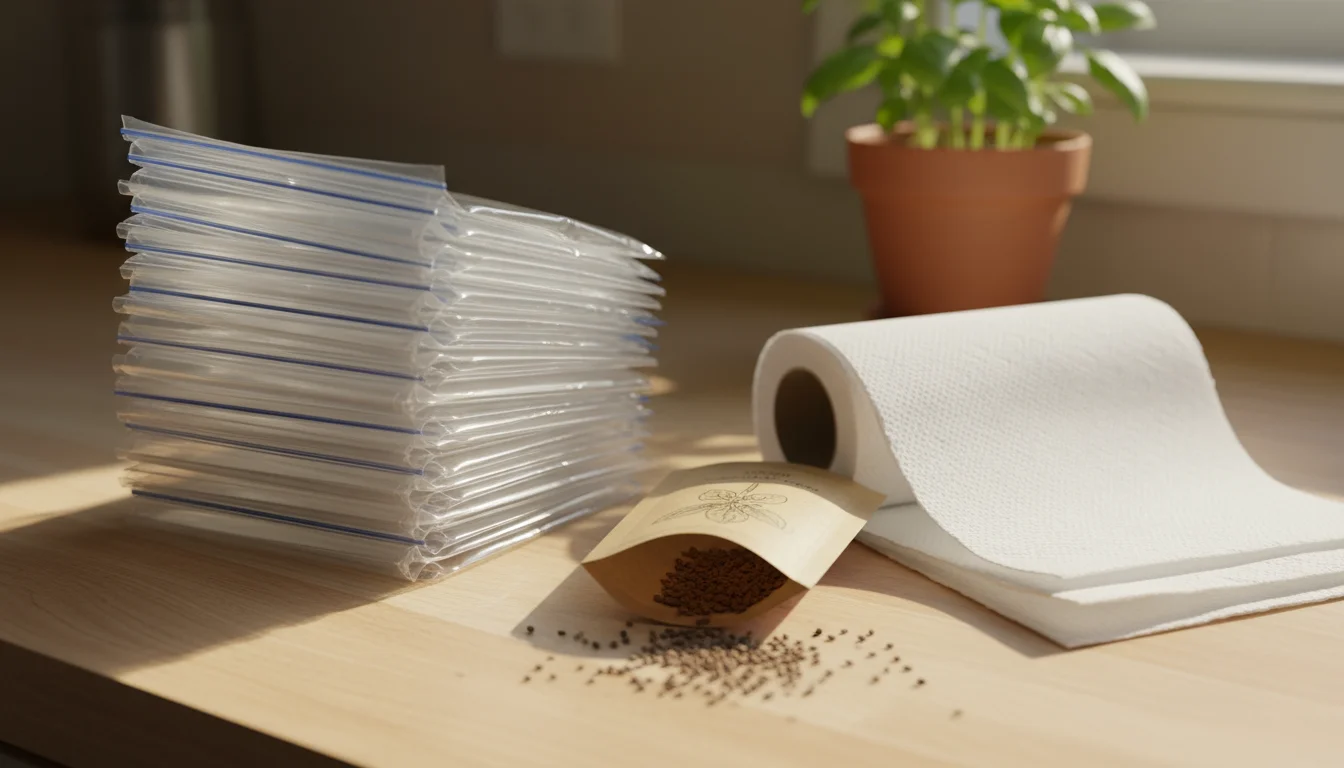
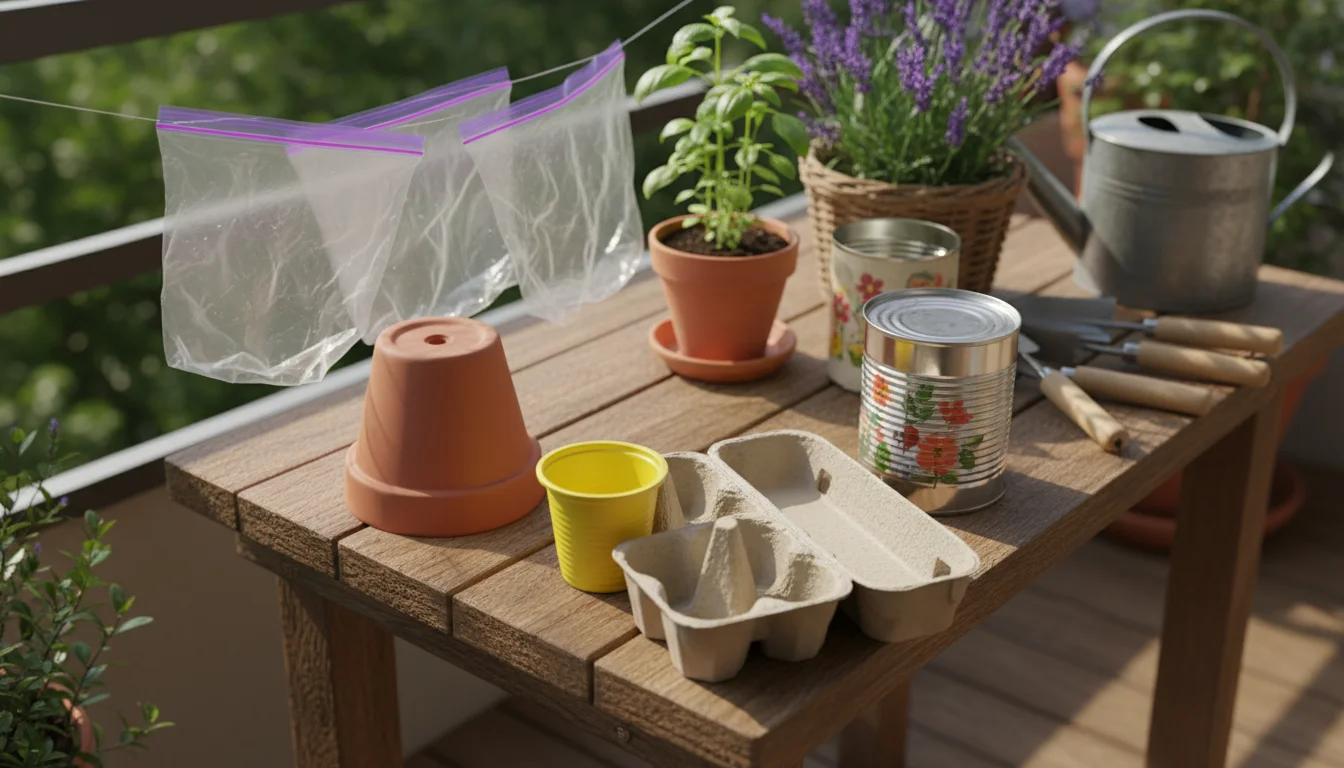
- Ziplock Bags (Gallon or Quart Size): Standard clear plastic ziplock bags work perfectly. Choose a size that accommodates your paper towel and seeds without overcrowding. Clear bags are crucial because they allow sunlight to penetrate, providing the necessary warmth and light for germination. Their sealable nature creates a mini-greenhouse effect, trapping humidity and maintaining a consistent environment.
- Paper Towels: Plain, unscented paper towels are ideal. Avoid paper towels with strong patterns or dyes, as these could contain chemicals that inhibit seed germination. The paper towel serves as a moist medium that cradles your seeds, absorbing and retaining water effectively. Its fibrous texture also provides a gentle grip for the developing roots.
- Seeds: This is the exciting part! Select fresh seeds from a reputable source. Old seeds often have poor germination rates, leading to disappointment. For beginners, choosing easy-to-germinate seeds like lettuce, spinach, radishes, or basil maximizes your chances of success. (We will discuss seed choice in more detail shortly).
- Water: Plain tap water is generally fine. If your tap water is heavily chlorinated, you might consider letting it sit out for 24 hours to allow the chlorine to dissipate, or use filtered water. The water keeps the paper towel consistently moist, which triggers the germination process.
- Permanent Marker: Labeling your bags is absolutely critical. Without labels, you will quickly forget which seeds are which, especially if you start multiple varieties. Write the plant type and the date you started them directly on the bag. This practice helps you track germination times and plan for future planting.
- Spray Bottle (Optional but Recommended): A small spray bottle allows you to moisten the paper towels gently and evenly without oversaturating them. This controlled application prevents displacement of the seeds and helps maintain optimal moisture levels.
Why These Supplies are So Effective
These supplies work together to create an optimal microclimate for seed starting indoors. The ziplock bag acts as a mini-greenhouse, maintaining consistent humidity and temperature. The moist paper towel provides the necessary hydration for the seed to break dormancy and begin sprouting. The transparency of the bag allows light to reach the seeds, contributing to germination and early growth. This simple yet effective setup perfectly demonstrates how you can start vegetable seeds in a small apartment using minimal resources. You are essentially creating ideal conditions for life to begin, right on your window sill.
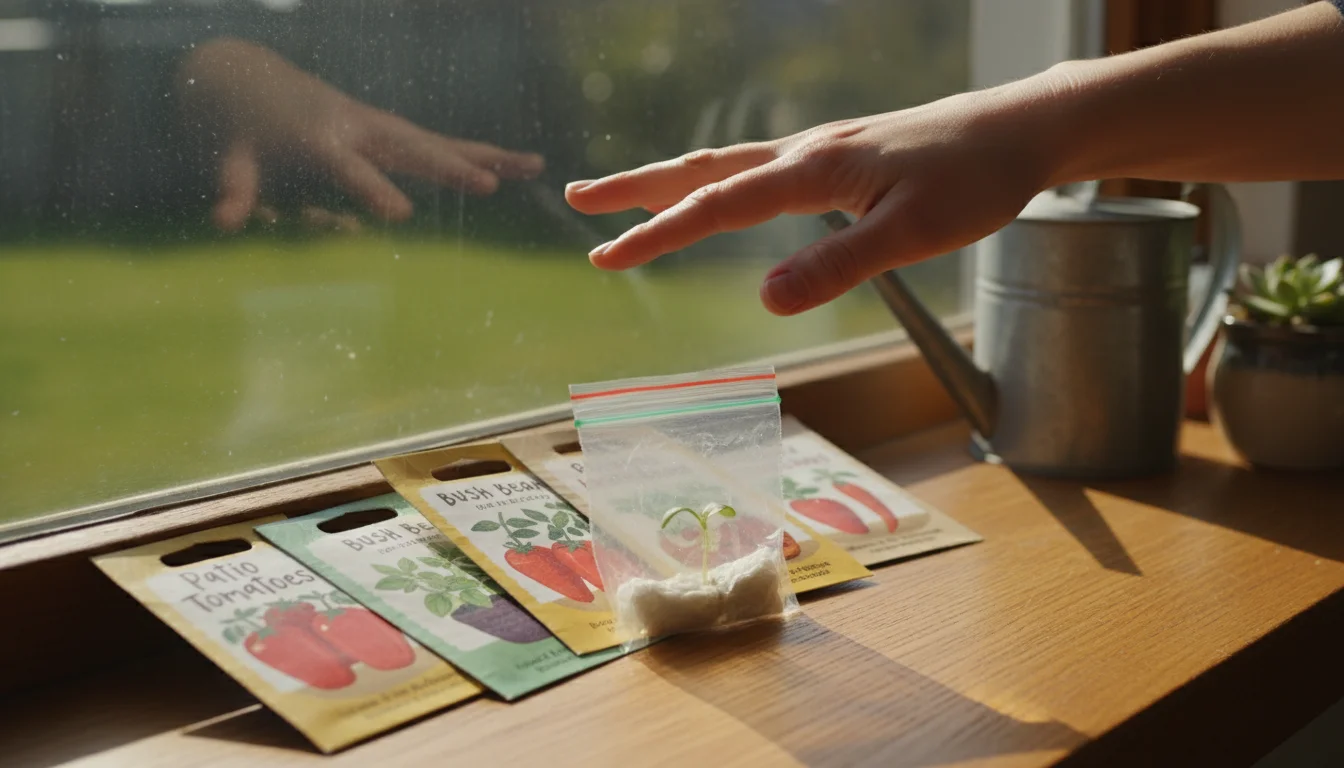
Choosing the Right Seeds for Your Space and the Ziplock Method
Selecting the appropriate seeds significantly influences your success with the ziplock bag method, especially when you focus on small-space and low-maintenance gardening. Not all seeds thrive in this method, and some plants simply perform better in compact environments.

Ideal Candidates for Ziplock Germination
Certain seeds respond exceptionally well to the paper towel germination method. These typically include:
- Leafy Greens: Lettuce, spinach, arugula, and kale germinate quickly and reliably. These plants are also excellent choices for continuous harvesting in small containers.
- Radishes: Known for their rapid growth, radishes sprout within a few days and are satisfying for beginners.
- Herbs: Basil, cilantro, and parsley are good choices. Basil, in particular, germinates well and thrives in pots.
- Peppers: Both sweet and hot peppers benefit from an early indoor start, as they require a long growing season. Their seeds germinate reliably in the warm, humid environment of the bag.
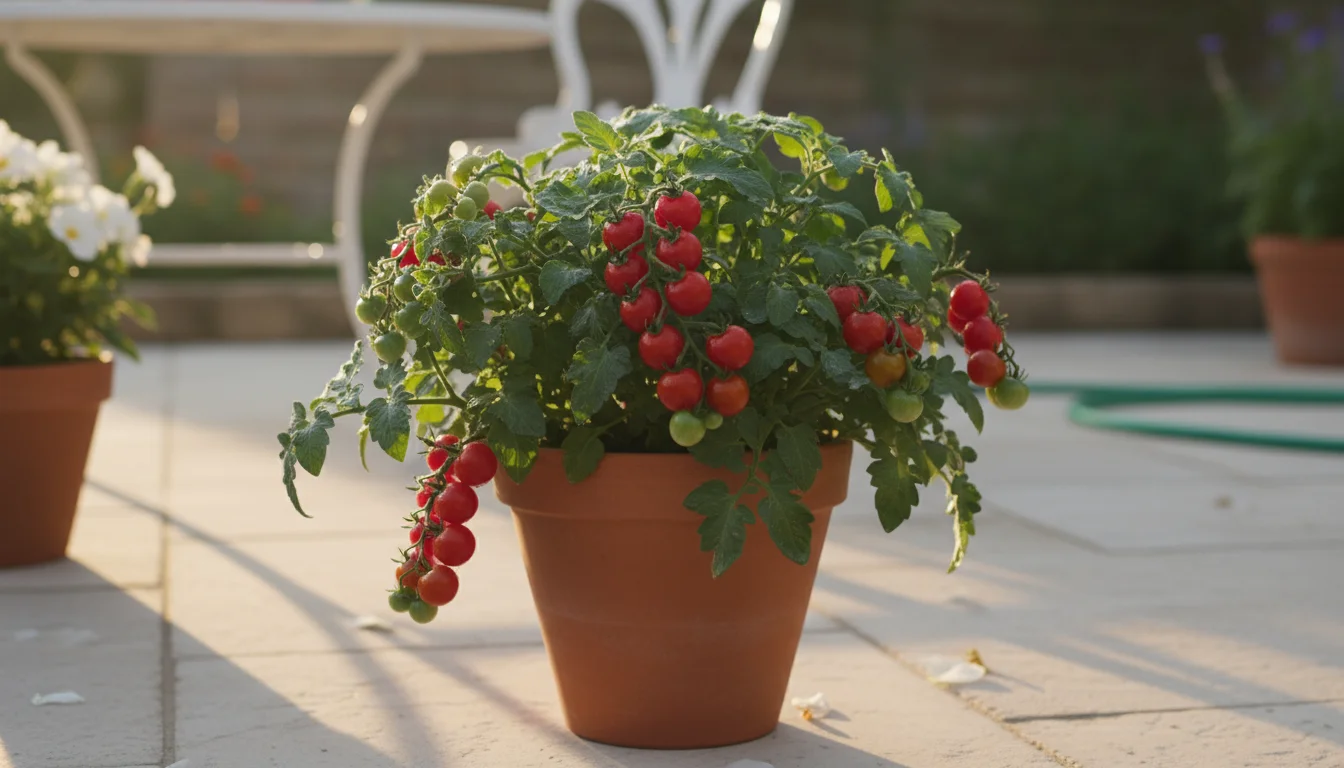
- Tomatoes: Many smaller, “patio” or “bush” varieties of tomatoes do very well with indoor seed starting and are suitable for container growing. Choose determinate varieties for compact growth.
- Squash and Cucumbers (with caution): While these larger plants can be germinated this way, they grow quickly and require prompt transplanting into larger containers. They also need significant space to vine, so select “bush” varieties for small spaces.
Factors for Successful Seed Selection
When selecting your seeds, consider these crucial factors:
- Seed Freshness and Viability: Always check the “packed for” date on your seed packets. Older seeds have a lower germination rate. Purchasing from reputable seed companies increases your chances of getting viable seeds. A simple germination test (which you are already doing with this method!) helps confirm viability before you commit many resources.
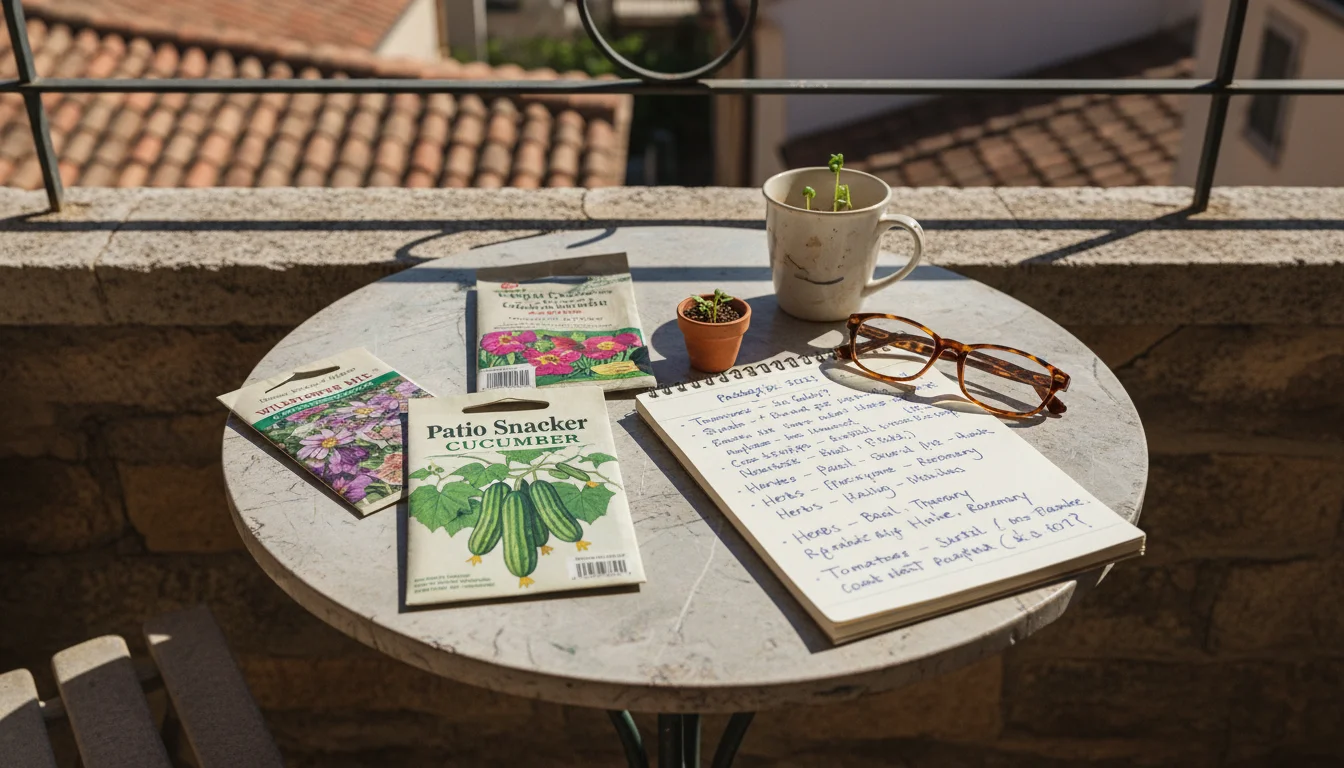
- Container Gardening Suitability: For `apartment gardening`, choose varieties specifically bred for container growing. These often have “bush” or “patio” in their name, indicating a more compact growth habit. For example, “Bush Celebrity” tomatoes or “Patio Snacker” cucumbers perform much better in pots than their sprawling counterparts.
- Germination Time: Some seeds germinate quickly (3-7 days), while others take longer (14-21 days or more). Plan accordingly. Starting quick germinators first builds confidence.
- Light Requirements: While the ziplock bag primarily provides warmth and humidity for germination, some seeds benefit from a little light during this stage. Most vegetable seeds germinate best in darkness or low light initially, but once sprouted, they will demand bright light.
Seeds to Avoid for this Method (or to direct sow)
Some seeds are less suited for the ziplock bag method or prefer direct sowing:
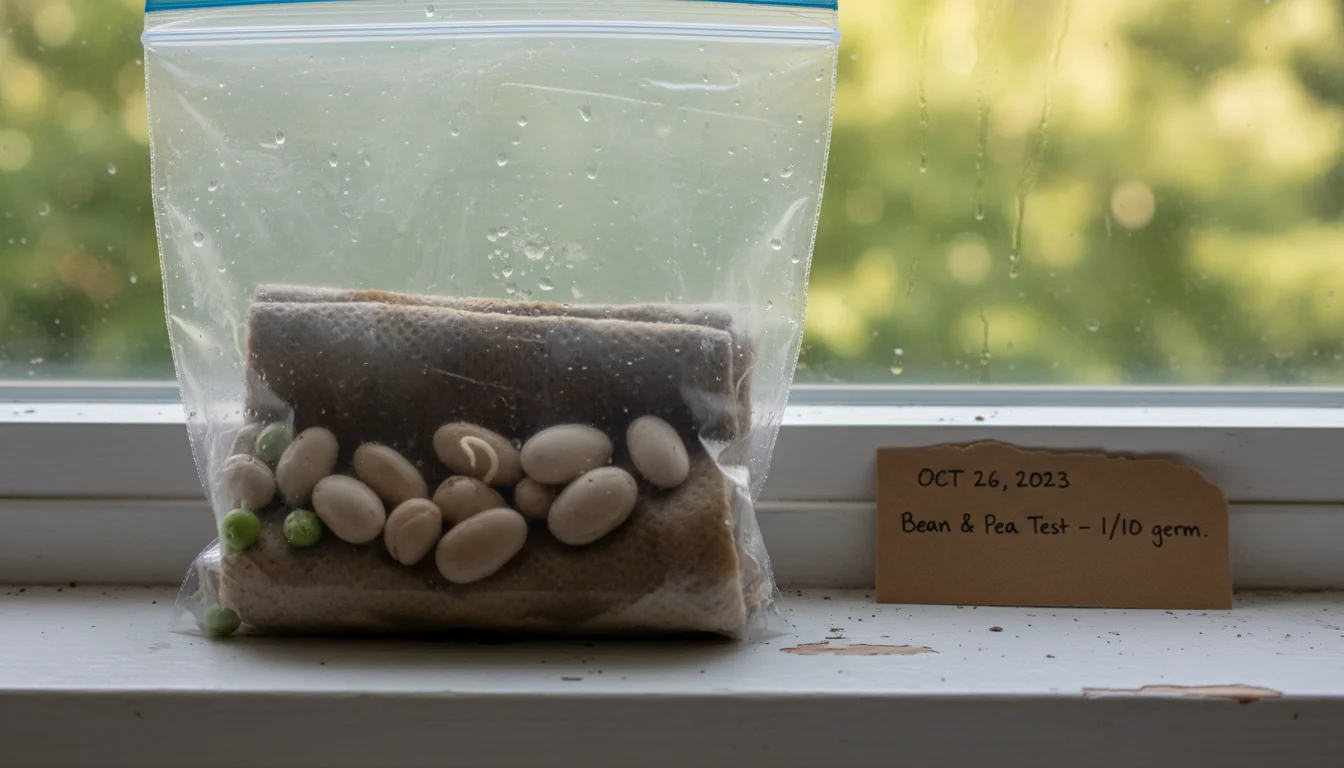
- Large Beans and Peas: While they germinate easily, they grow very quickly and become leggy or root-bound in a paper towel within days. You usually direct sow these.
- Root Vegetables: Carrots, beets, and parsnips dislike root disturbance. They are best direct sown into their final growing medium to avoid issues.
- Cucurbits (melons, large pumpkins): Like beans, these grow rapidly and develop extensive root systems, making transplanting difficult if left too long in a bag. If you do start them this way, transplant them immediately upon seeing the first tiny root.
By making informed seed choices, you set yourself up for greater success, ensuring your efforts in `starting vegetable seeds in a small apartment` yield delicious results that fit your gardening space.
Step-by-Step: The Ziplock Bag Germination Method
This section provides a clear, actionable guide to the ziplock bag method, ensuring you understand each step of `paper towel seed germination` for successful `seed starting indoors`.
Step 1: Prepare Your Paper Towel
Take a single sheet of paper towel. Fold it in half, and then in half again, creating a square or rectangle roughly 3-4 inches wide. This multi-layered approach helps retain moisture evenly. You want a medium thickness that holds water without becoming overly soggy.
Step 2: Moisten the Paper Towel
Lightly mist the folded paper towel with water from your spray bottle until it feels thoroughly damp but not dripping wet. The goal is consistent moisture throughout the paper towel. Alternatively, you can briefly dip it in a shallow dish of water and then gently squeeze out any excess. Avoid oversaturation; waterlogging can suffocate the seeds.
Step 3: Arrange Your Seeds
Carefully place your seeds onto one half of the moistened paper towel. Maintain a small amount of space between each seed, roughly 1-2 inches apart. This spacing prevents overcrowding and makes transplanting easier later. For instance, if you are germinating lettuce, place 5-7 seeds on the towel, ensuring they are not touching. Do not place too many seeds in one bag; you want to give each potential sprout ample room to develop without competing for resources.
Step 4: Fold and Seal the Bag
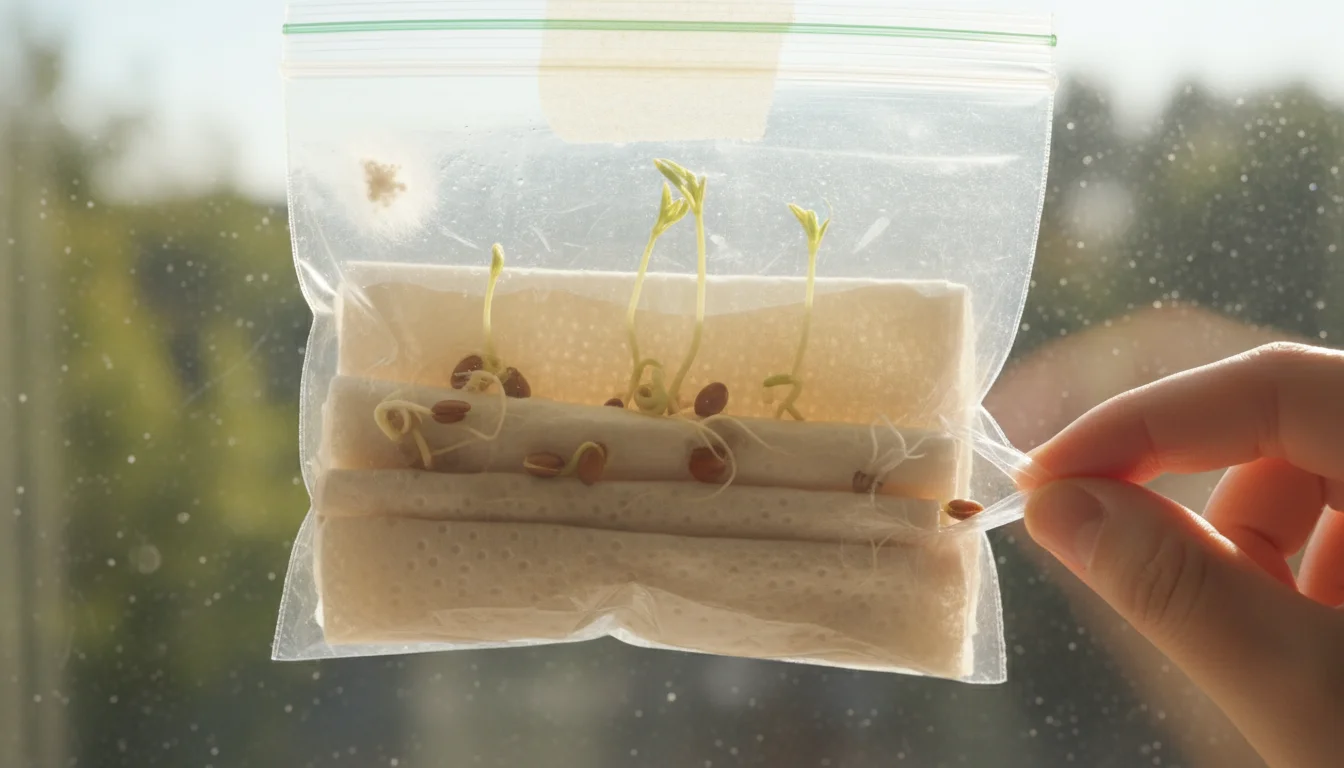
Once your seeds are arranged, fold the other half of the paper towel over them, sandwiching the seeds gently. This keeps them secure and ensures even moisture contact. Next, carefully slide the folded paper towel with the seeds into your ziplock bag. Before sealing, blow a small puff of air into the bag to inflate it slightly. This trapped air creates a mini-dome effect inside the bag, preventing the paper towel from pressing too tightly against the seeds and allowing for better air circulation around them. Seal the bag securely, ensuring no air escapes.
Step 5: Label Your Bag
Using your permanent marker, clearly write the name of the seeds (e.g., “Bush Tomato – Celebrity”) and the date you started them directly onto the ziplock bag. This step is non-negotiable, especially if you plan to germinate multiple types of seeds. Proper labeling prevents confusion and helps you track germination times. For example, “Lettuce – 03/15” gives you all the information you need at a glance.
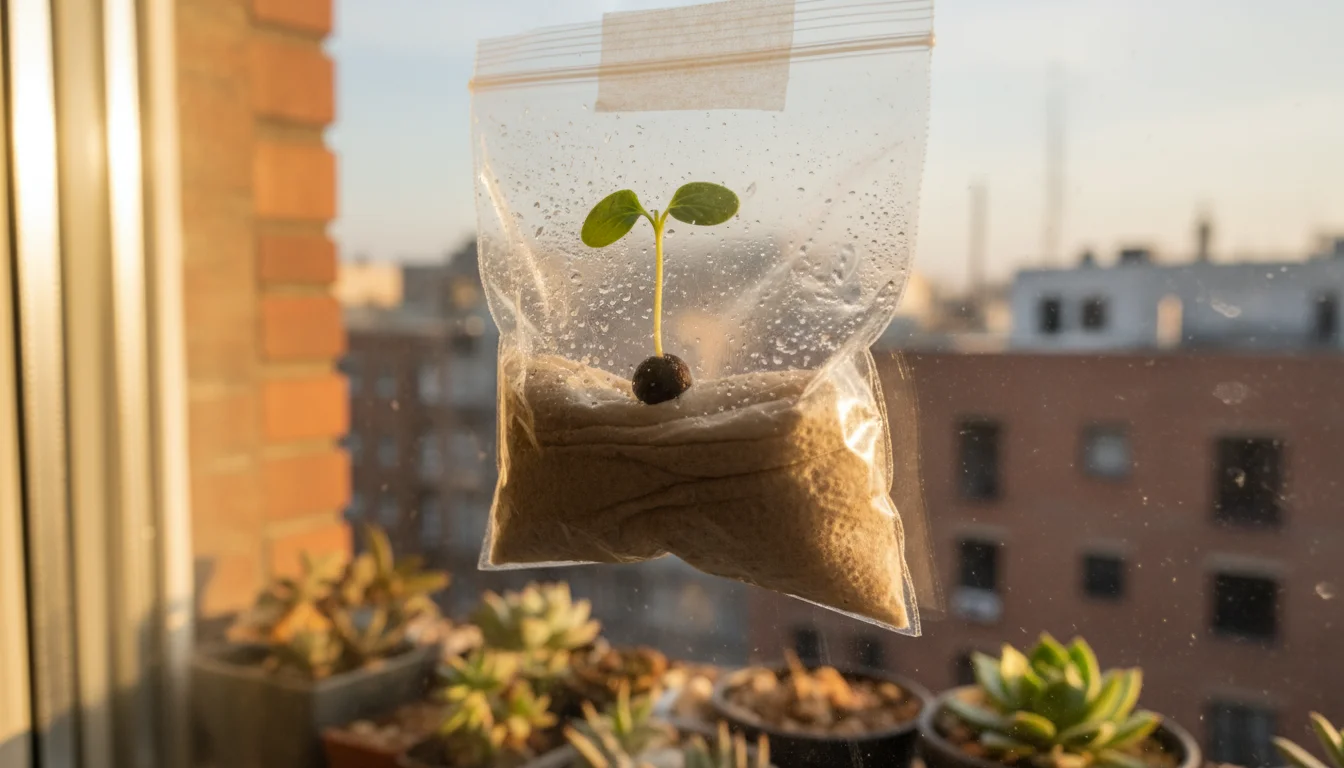
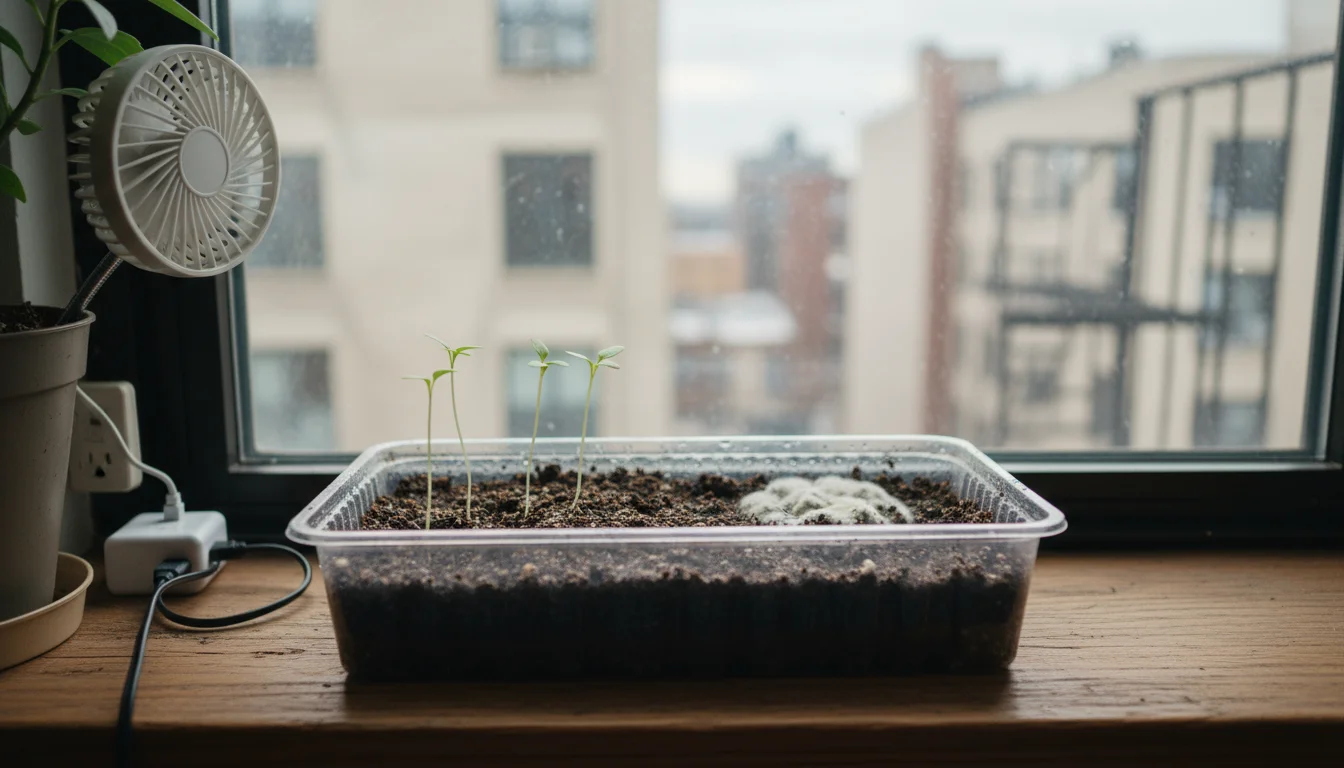
Step 6: Place Your Ziplock Bag on a Window
Position the sealed ziplock bag in a warm location, ideally on a sunny window. The warmth from the sun, combined with the humidity inside the bag, creates the perfect environment for germination. A south-facing window typically offers the most consistent warmth and light exposure. If you do not have a sunny window, any warm spot in your home will work initially, such as on top of a refrigerator or a warm shelf, until germination begins. Consistent warmth, usually between 70-85°F (21-29°C) for most vegetables, significantly accelerates the germination process. Ensure the bags lie flat so the seeds remain in contact with the moist paper towel.
Step 7: Monitor Daily
Check your bags daily. Look for signs of germination, which usually appears as a tiny white root emerging from the seed. This root is the radicle, the first part of the plant to emerge. The exact germination time varies greatly by seed type, ranging from 3 days for radishes to 14 days or more for peppers. If the paper towel appears to be drying out, open the bag, mist it lightly with water, and then reseal it. Your consistent attention ensures the seeds maintain optimal moisture levels for sprouting.
Nurturing Your Sprouts: From Ziplock to Pot
Witnessing a tiny root emerge from your seeds is exhilarating! This success marks the critical transition from `ziplock bag method` germination to developing robust seedlings ready for a container garden. The next steps involve careful transplanting and providing the right conditions for continued growth.
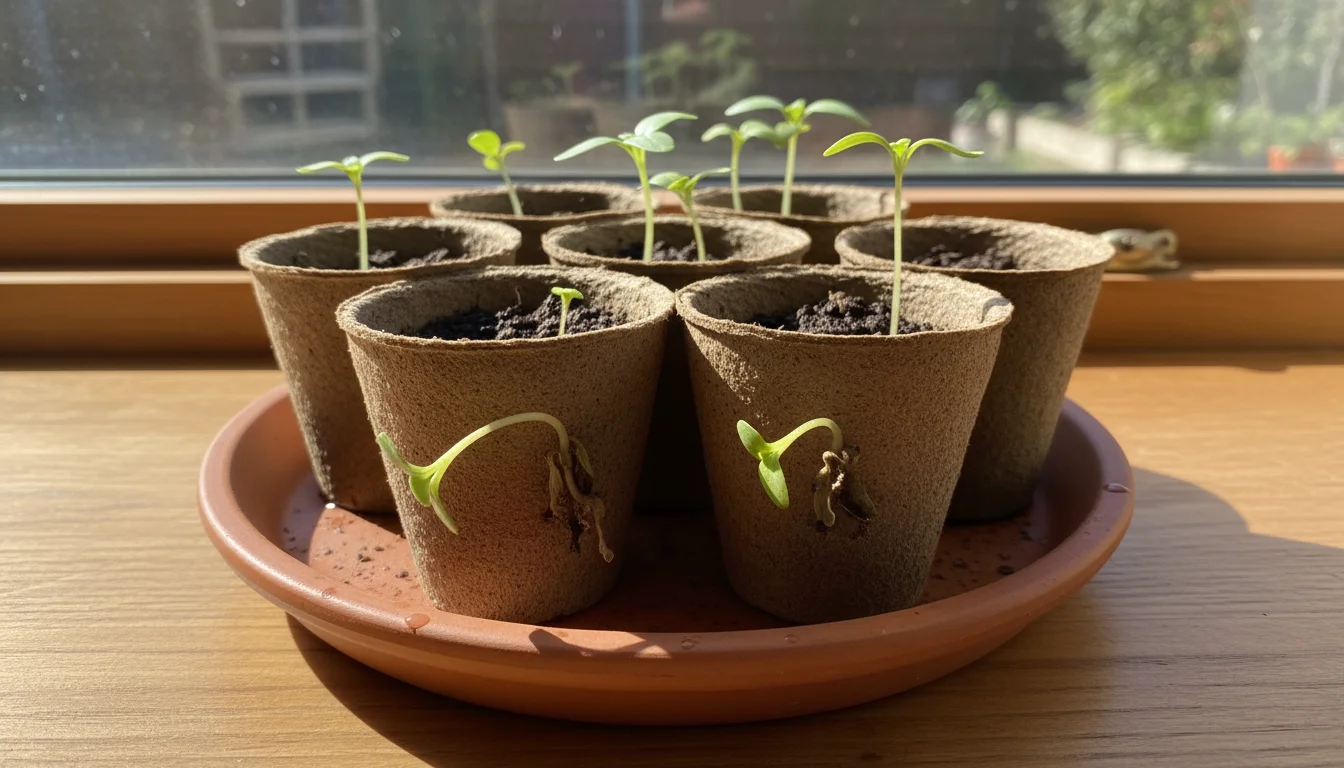
When to Transplant Your Delicate Sprouts
The ideal time to transplant your sprouted seeds is when you observe the first tiny root (radicle) emerging, or when the first two seed leaves, known as cotyledons, fully open. These cotyledons provide the initial energy for the seedling. Do not wait until the roots grow extensively or intertwine within the paper towel. Prolonged stays in the ziplock bag can lead to root damage during transplanting or stunt growth due to lack of nutrients.
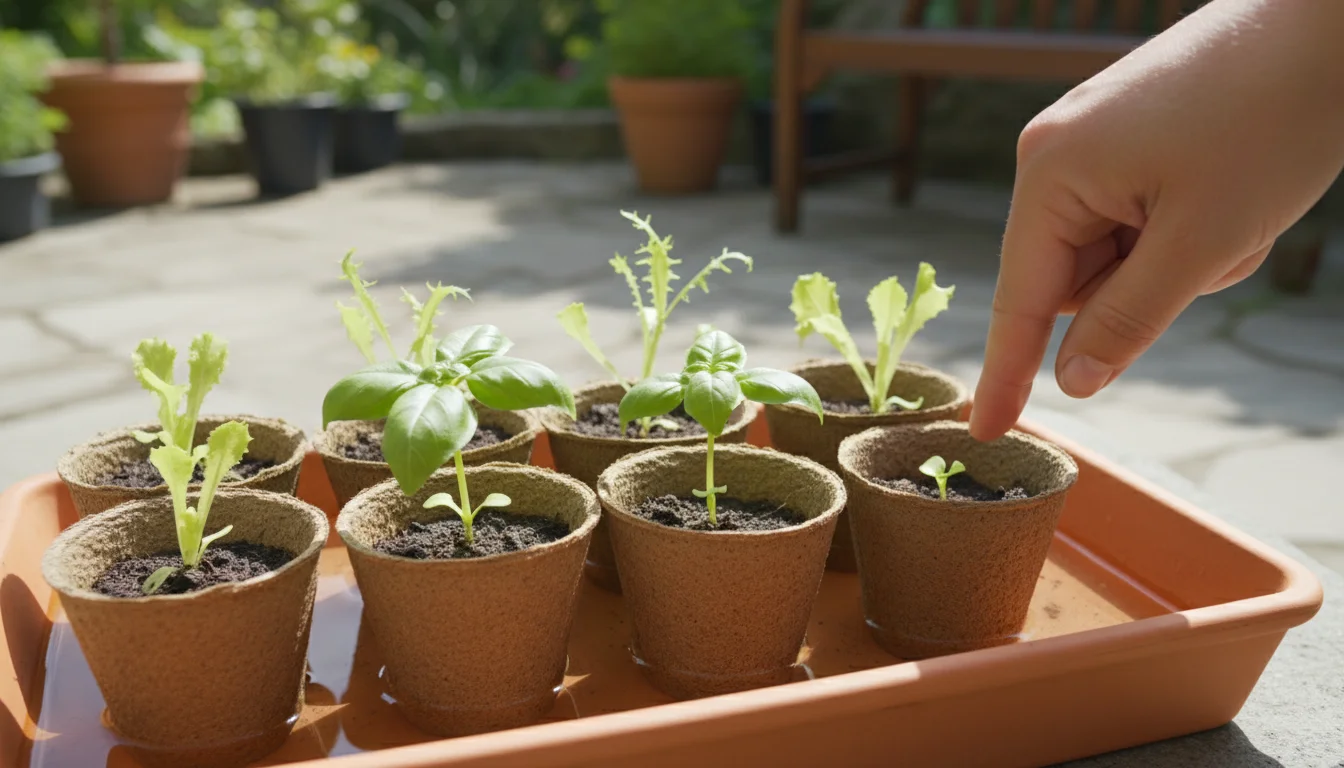
Preparing Their New Home: Small Pots and Soil
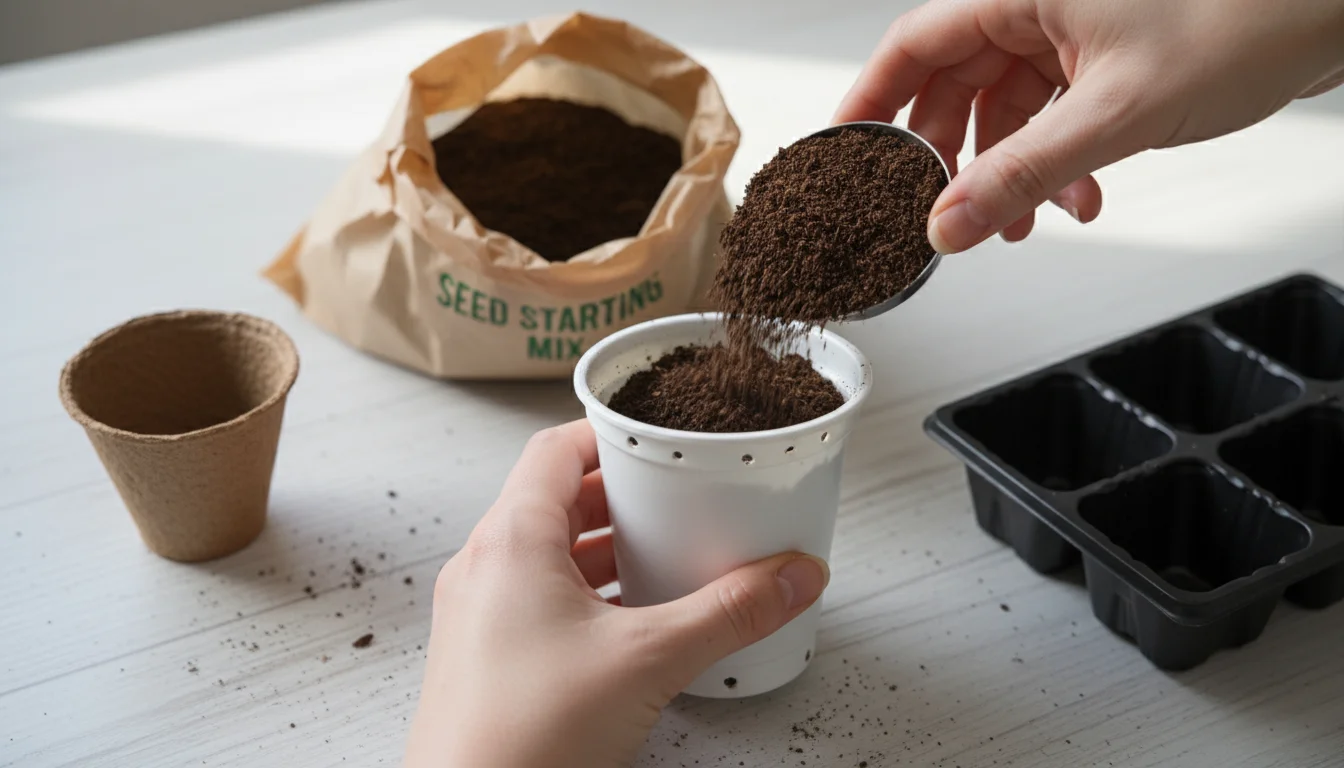
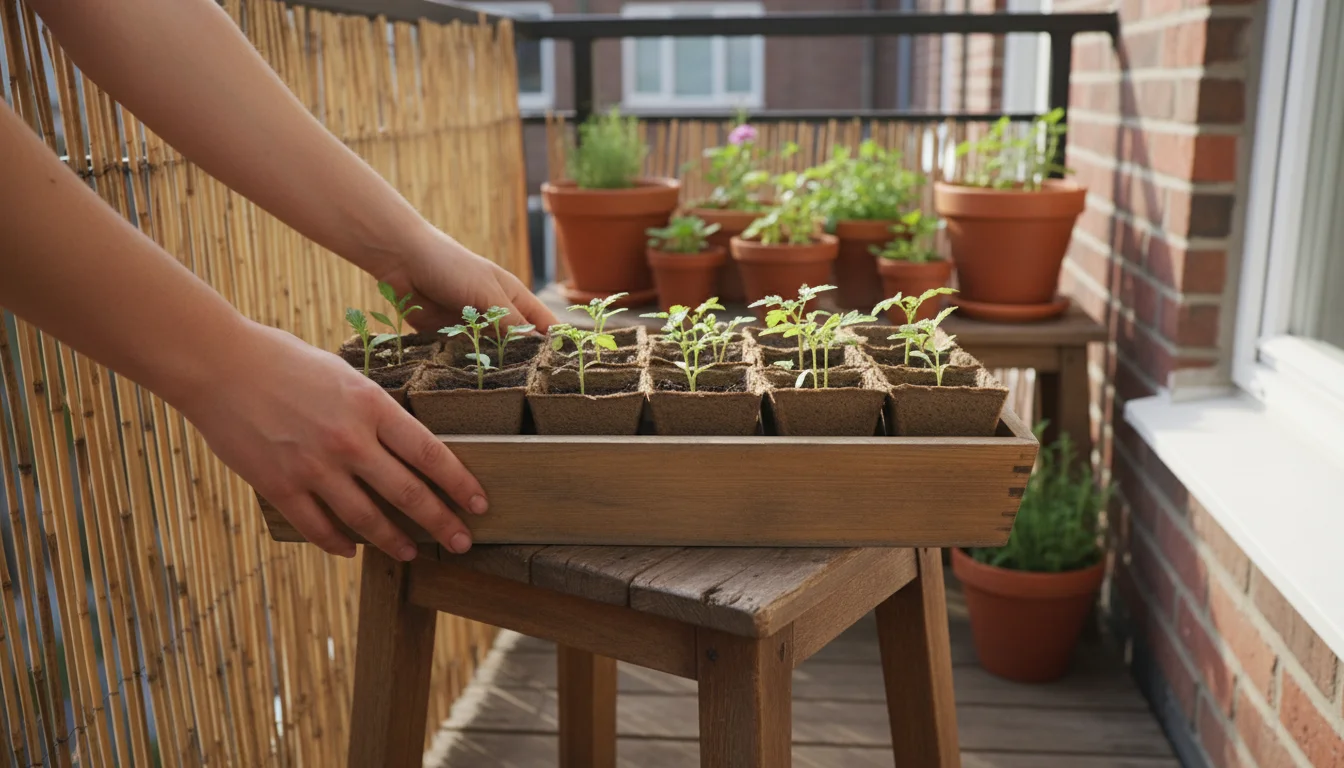
- Choose Appropriate Containers: For initial transplanting, select small pots or seedling cells. These can be recycled yogurt cups, small plastic containers with drainage holes poked in the bottom, or biodegradable peat pots. Aim for containers that are 2-4 inches in diameter. Adequate drainage is essential; it means water can escape freely from the bottom of the pot, preventing roots from sitting in stagnant water and rotting.
- Select the Right Soil: Use a high-quality seed-starting mix or a potting mix specifically designed for containers. These mixes are lighter, finer, and typically sterile, which prevents disease. Avoid using heavy garden soil, which can compact in pots, drain poorly, and introduce pests or pathogens to your young seedlings. Good seed-starting mixes often contain vermiculite or perlite, which improve aeration and drainage.
- Moisten the Soil: Before transplanting, thoroughly moisten your seed-starting mix. It should feel damp and crumbly, like a wrung-out sponge. Pre-moistening prevents the soil from washing away during the first watering after transplant and ensures an even moisture level for your delicate roots.
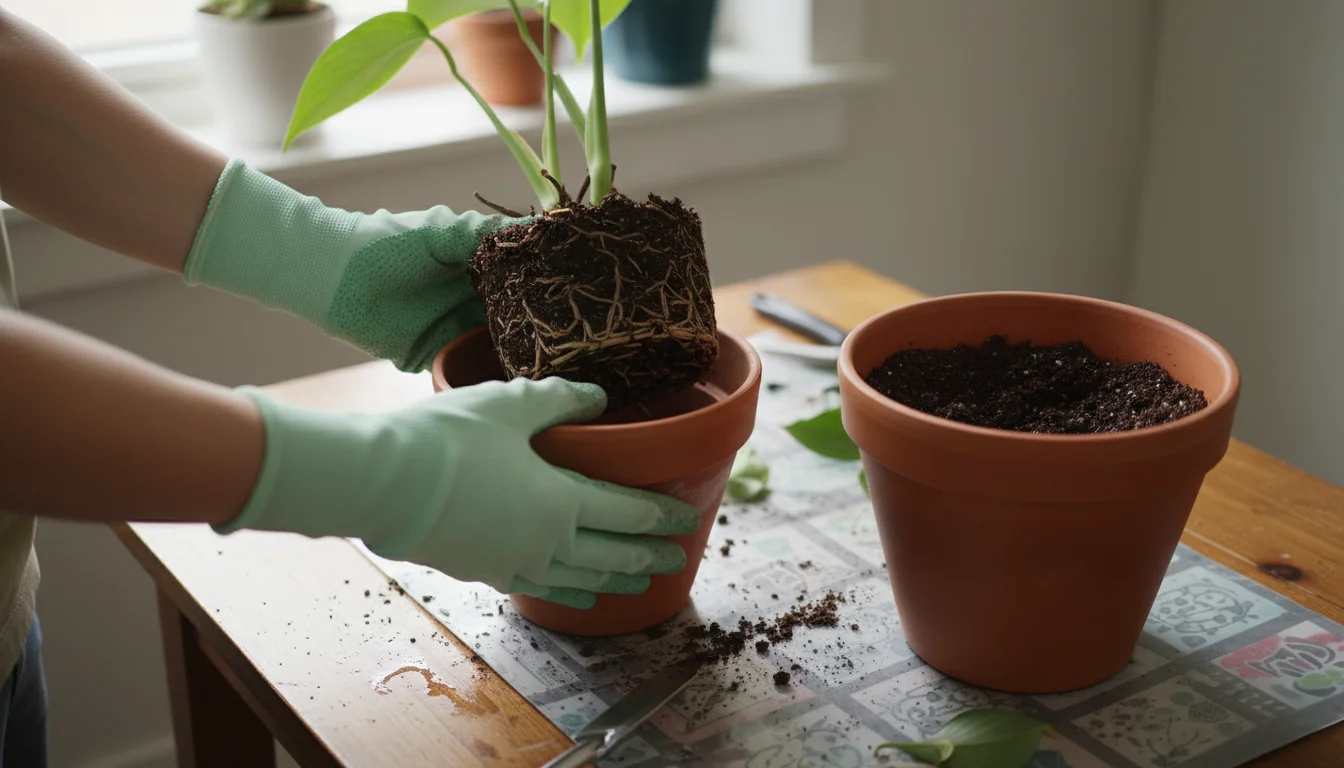
The Transplanting Process: Handle with Care
This stage requires a gentle touch. Your sprouts are incredibly fragile.
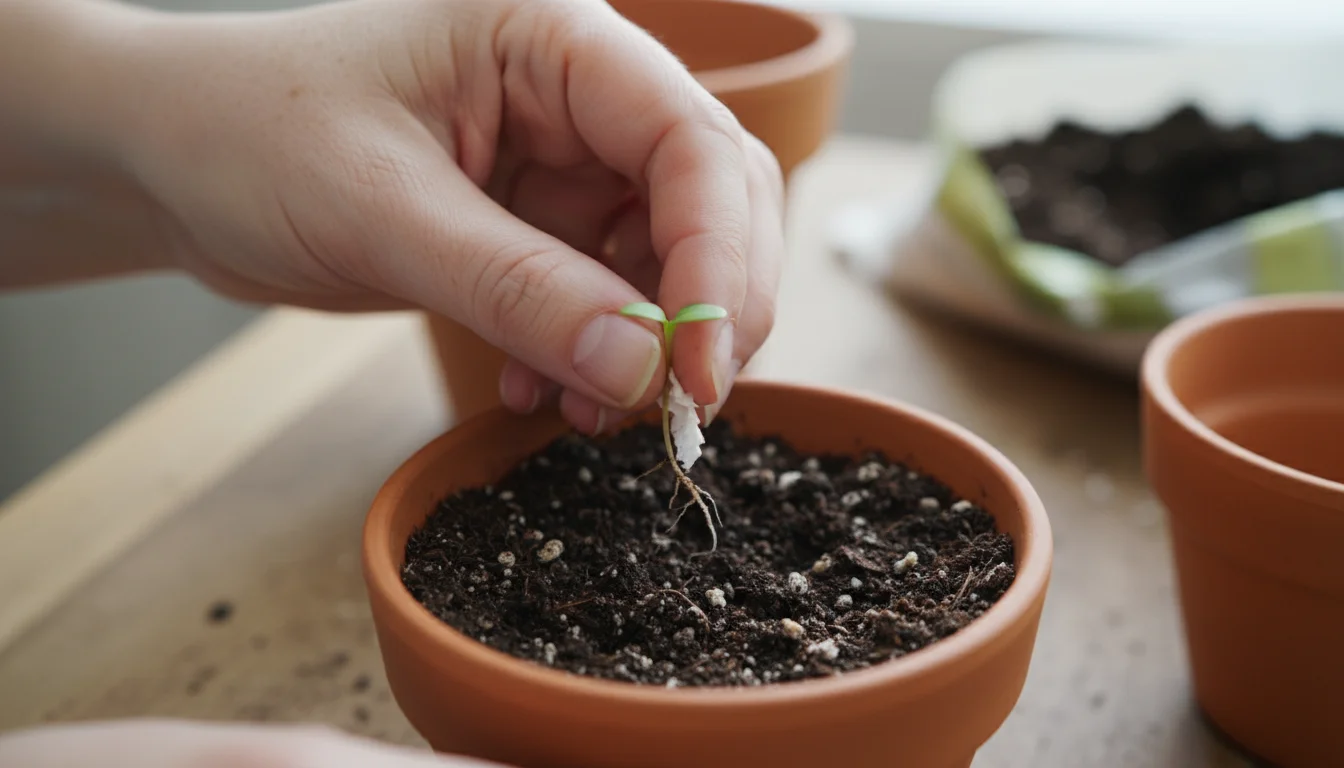
- Create a Small Hole: Fill your chosen pots with the pre-moistened seed-starting mix. Use a pencil, a chopstick, or your finger to create a small, shallow hole in the center of the soil, just large enough to accommodate the sprout’s root.
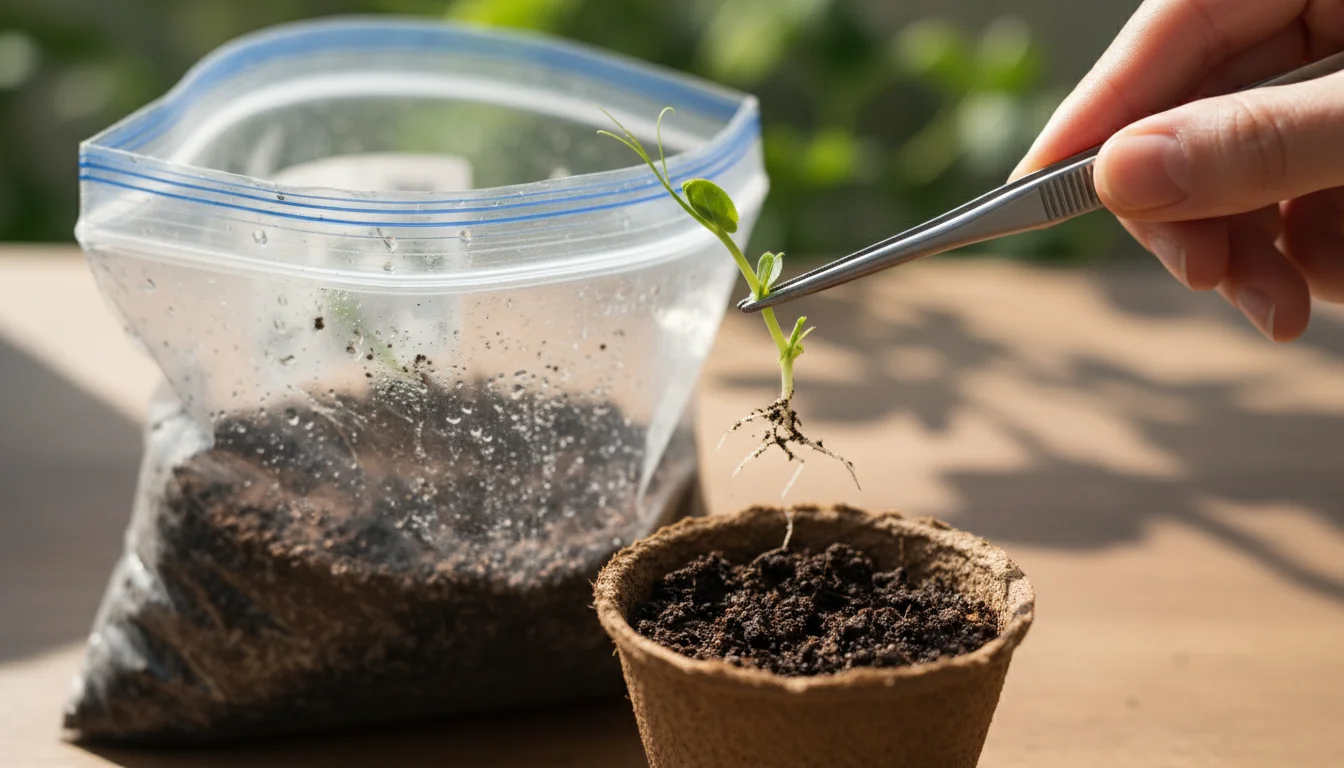
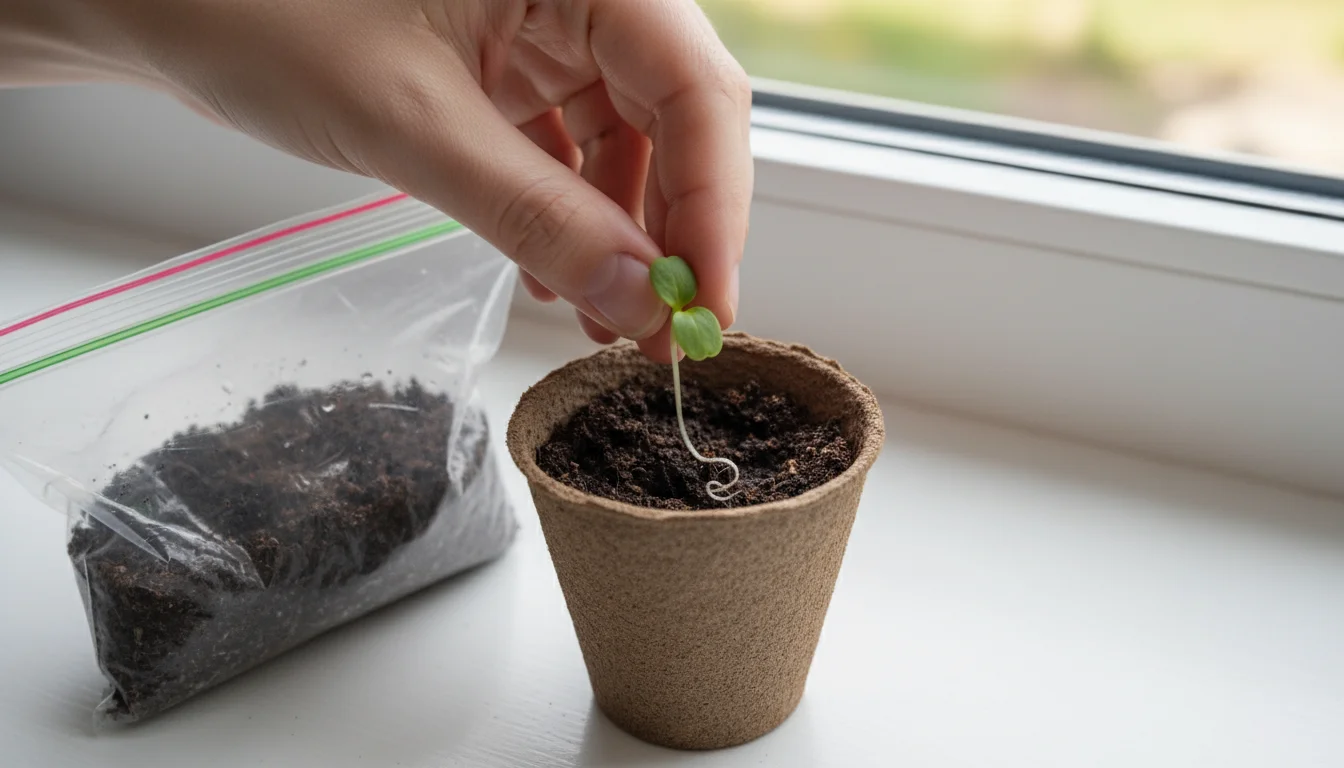
- Extract the Sprout: Carefully open your ziplock bag. Using tweezers or a toothpick, gently lift the sprouted seed from the paper towel. Avoid touching the tiny root if possible. If the root clings to the paper towel, you can carefully tear a small piece of the towel to keep attached to the root, planting it along with the sprout. This minimizes disturbance.
- Position and Cover: Place the sprouted seed into the prepared hole with the root pointing downwards. Ensure the root is fully covered by soil, but do not bury the cotyledons. The top of the root ball should be just below the soil surface.
- Gently Firm the Soil: Lightly press the soil around the base of the sprout to ensure good contact between the root and the soil. Avoid compacting the soil too much.
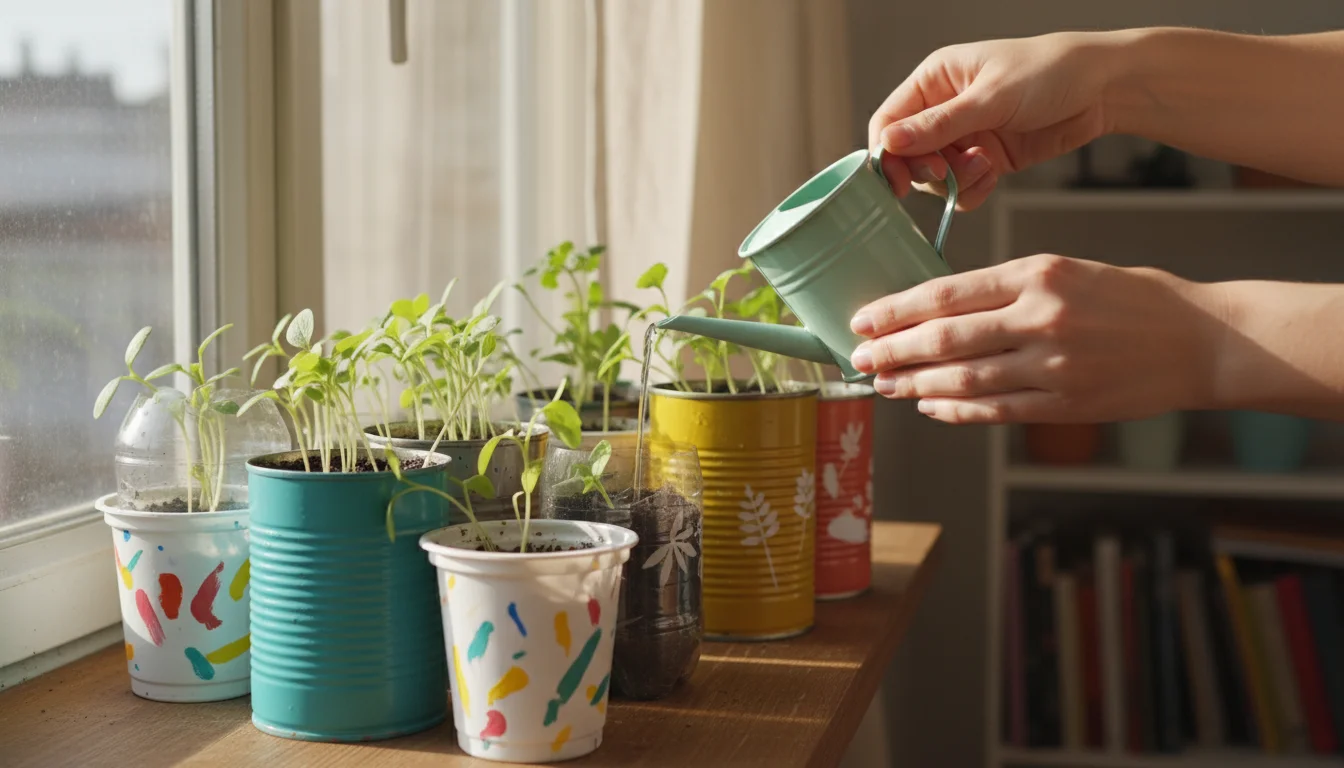
- Water Gently: After transplanting, water your newly potted sprouts very gently. A spray bottle works well here to avoid dislodging the tiny seedling. The goal is to settle the soil around the roots without disturbing the plant.
Initial Care After Transplanting
After transplanting, your seedlings need consistent conditions to thrive:
- Light: Immediately provide bright light. A south-facing window is ideal. If natural light is insufficient, consider a grow light. Lack of adequate light causes seedlings to become “leggy,” meaning they stretch tall and thin, becoming weak and floppy. Place the light source just a few inches above the seedlings.
- Temperature: Maintain a consistent temperature, generally between 65-75°F (18-24°C). Avoid drafts or sudden temperature fluctuations.
- Moisture: Keep the soil consistently moist but never waterlogged. Check the soil moisture daily by gently touching the surface. Water when the top inch of soil feels dry.
By following these steps, you successfully transition your tiny sprouts from the `ziplock bag method` to a more stable environment, ready to grow into robust plants for your `apartment gardening` efforts.
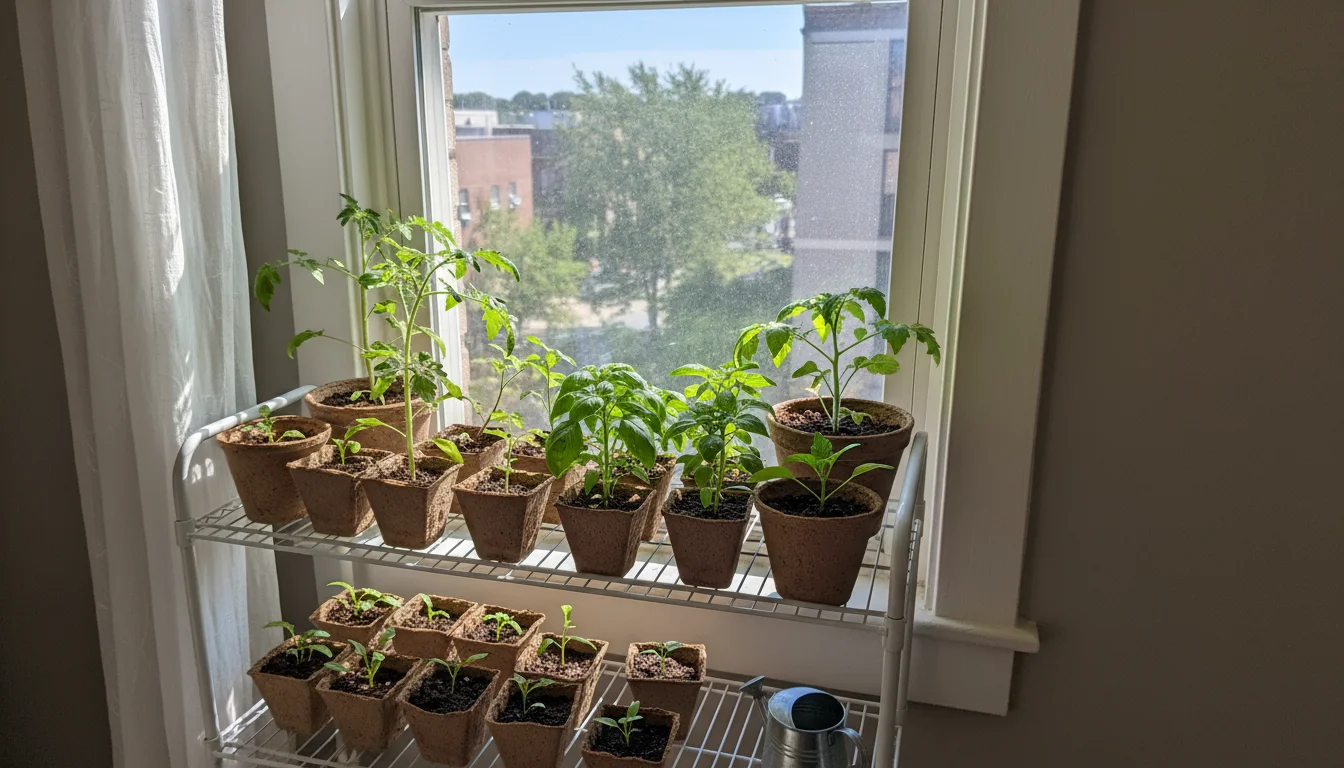
Finding the Perfect Spot for Your Growing Seedlings
After successfully transplanting your germinated seeds, the next crucial step is providing an optimal environment for their continued growth. Adequate light, appropriate temperature, and protection from drafts are paramount for developing strong, healthy seedlings in your small-space garden.
Once your seedlings are ready for the outdoors, consult our spring planting guide to help them transition to your patio successfully.
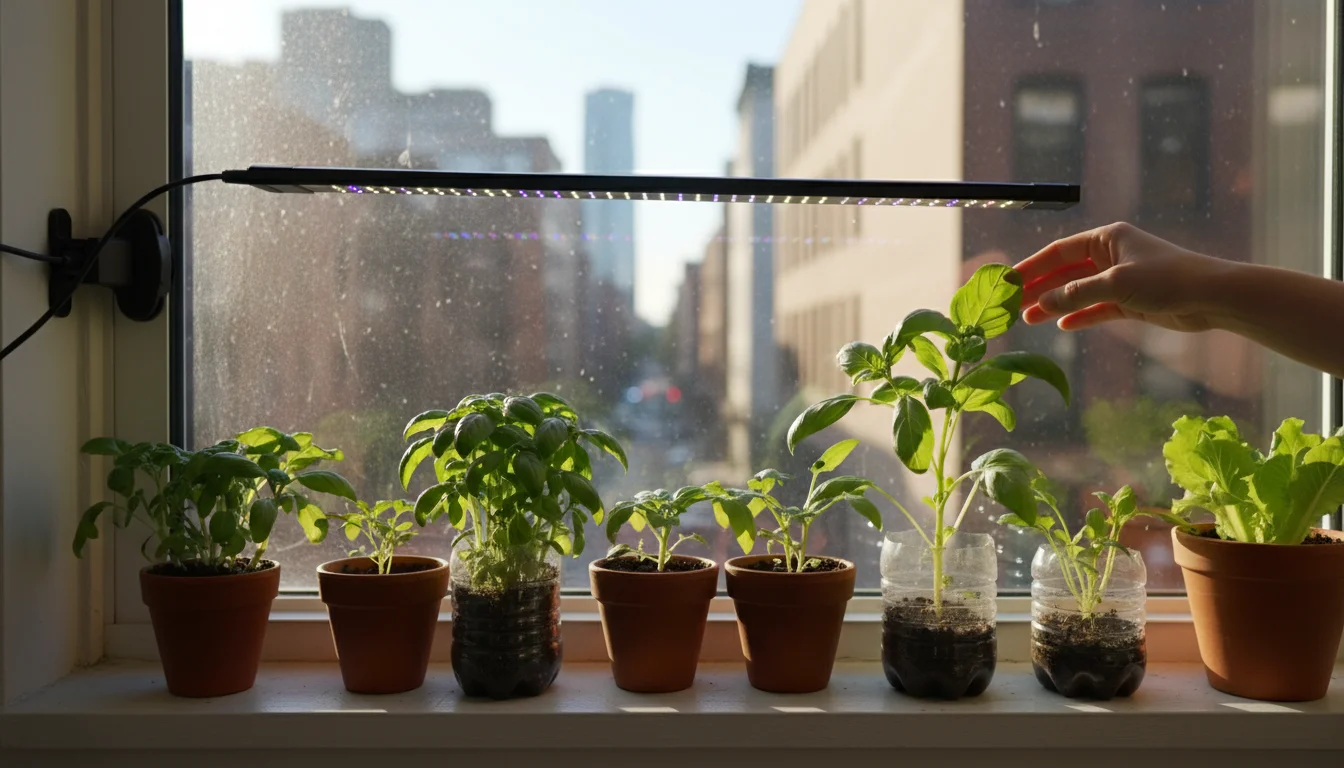
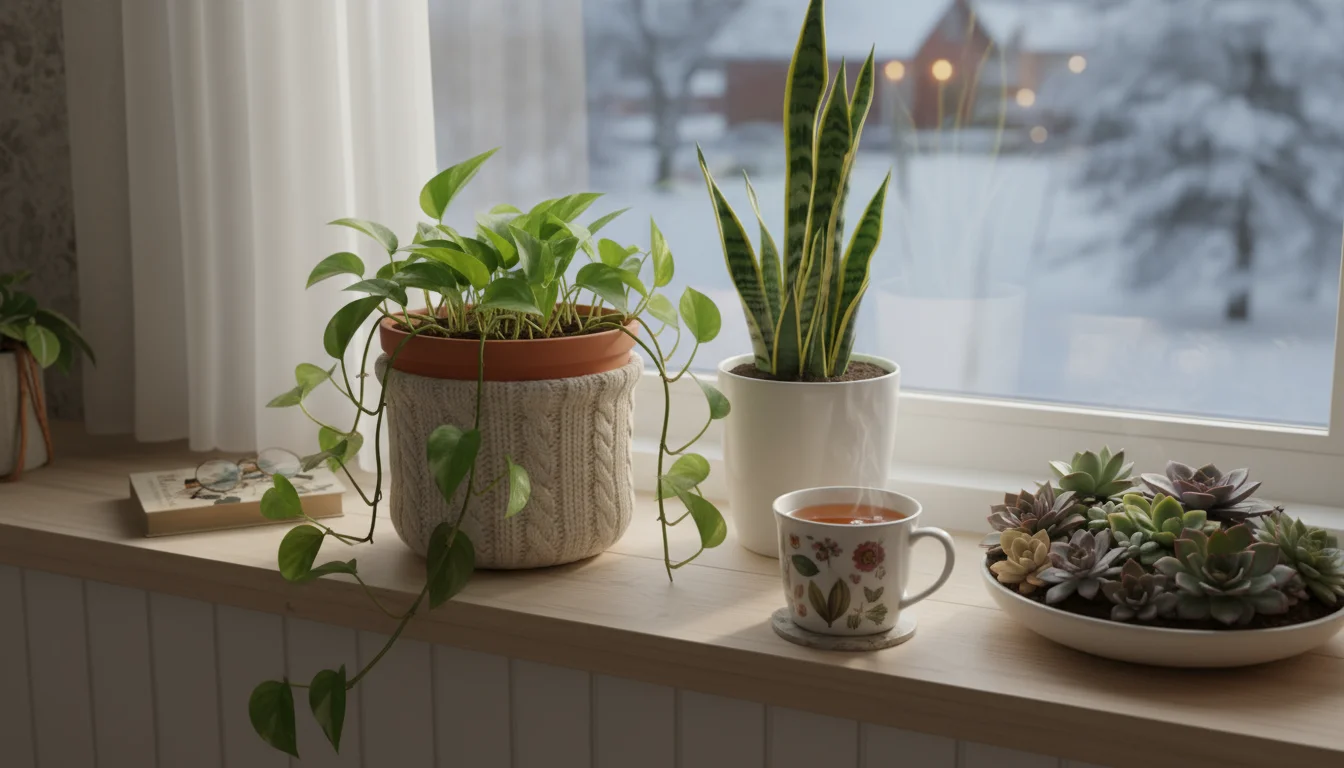
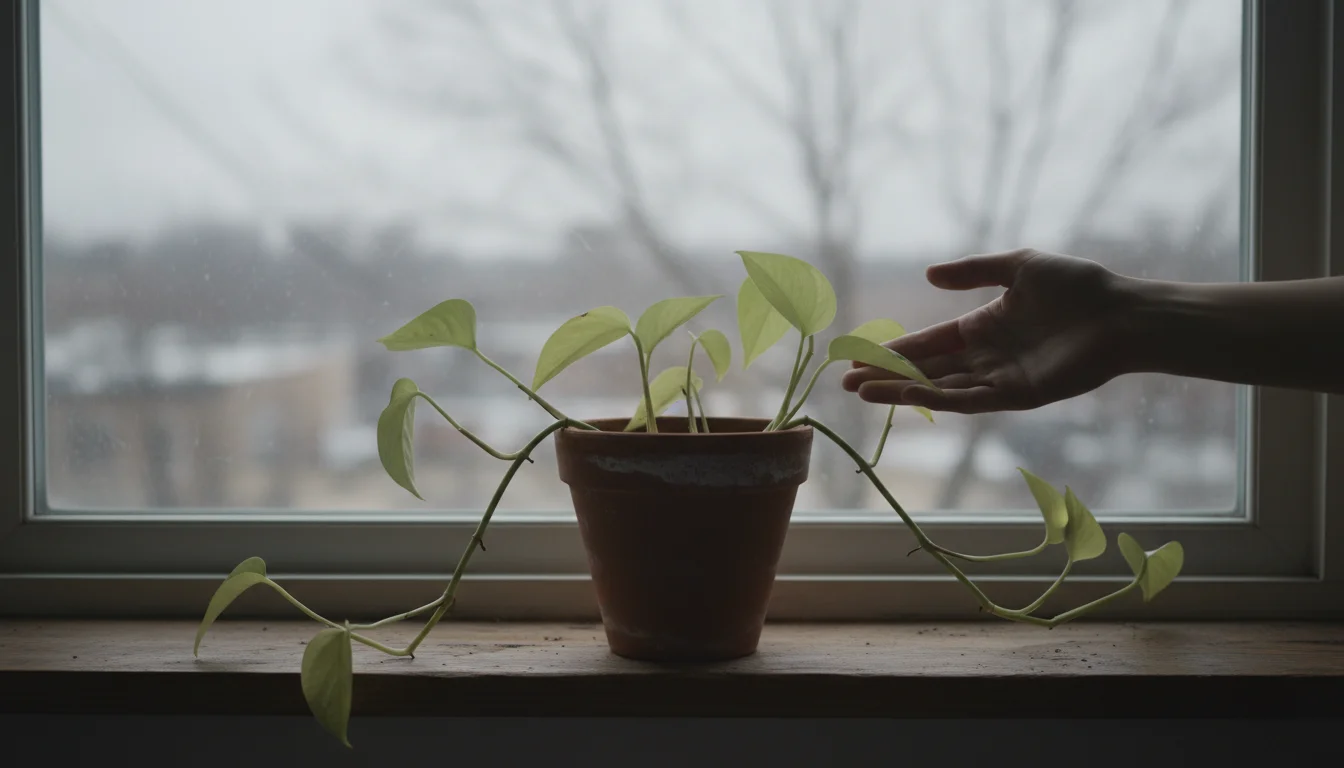
Maximizing Natural Light: The Window Solution
For most beginner `seed starting indoors` projects, a sunny window provides sufficient light. A south-facing window typically offers the most intense and prolonged sunlight exposure throughout the day. Place your newly potted seedlings directly on the windowsill. North-facing windows generally offer insufficient light for vigorous growth, while east- or west-facing windows provide moderate light, which may be enough for leafy greens but might prove insufficient for fruiting plants like tomatoes or peppers.
- Rotate Your Pots: Seedlings naturally grow towards their light source. To encourage even, upright growth and prevent them from becoming lopsided, rotate your pots 180 degrees every day or two. This ensures all sides of the plant receive adequate light.
- Clean Windows: Dust and grime on windows can block a significant amount of light. Regularly clean your windows to maximize light penetration for your growing seedlings.
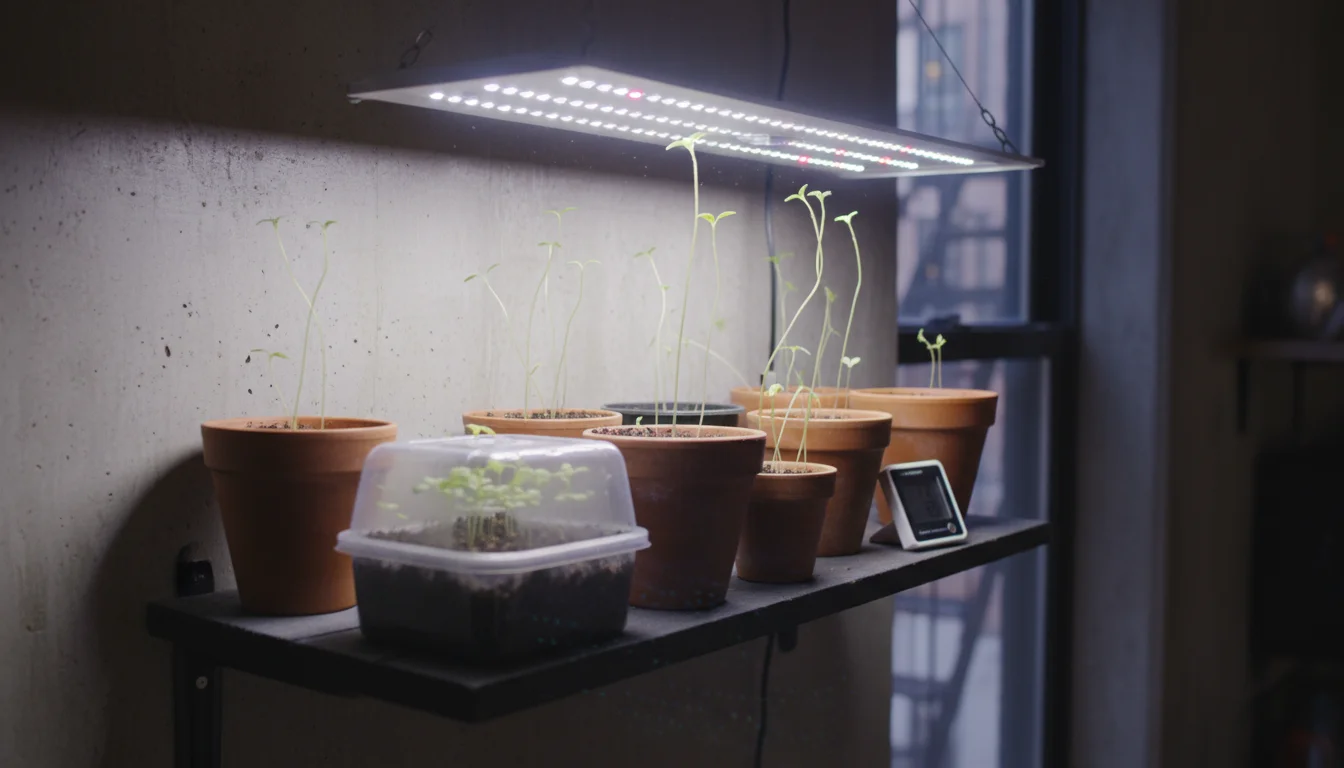
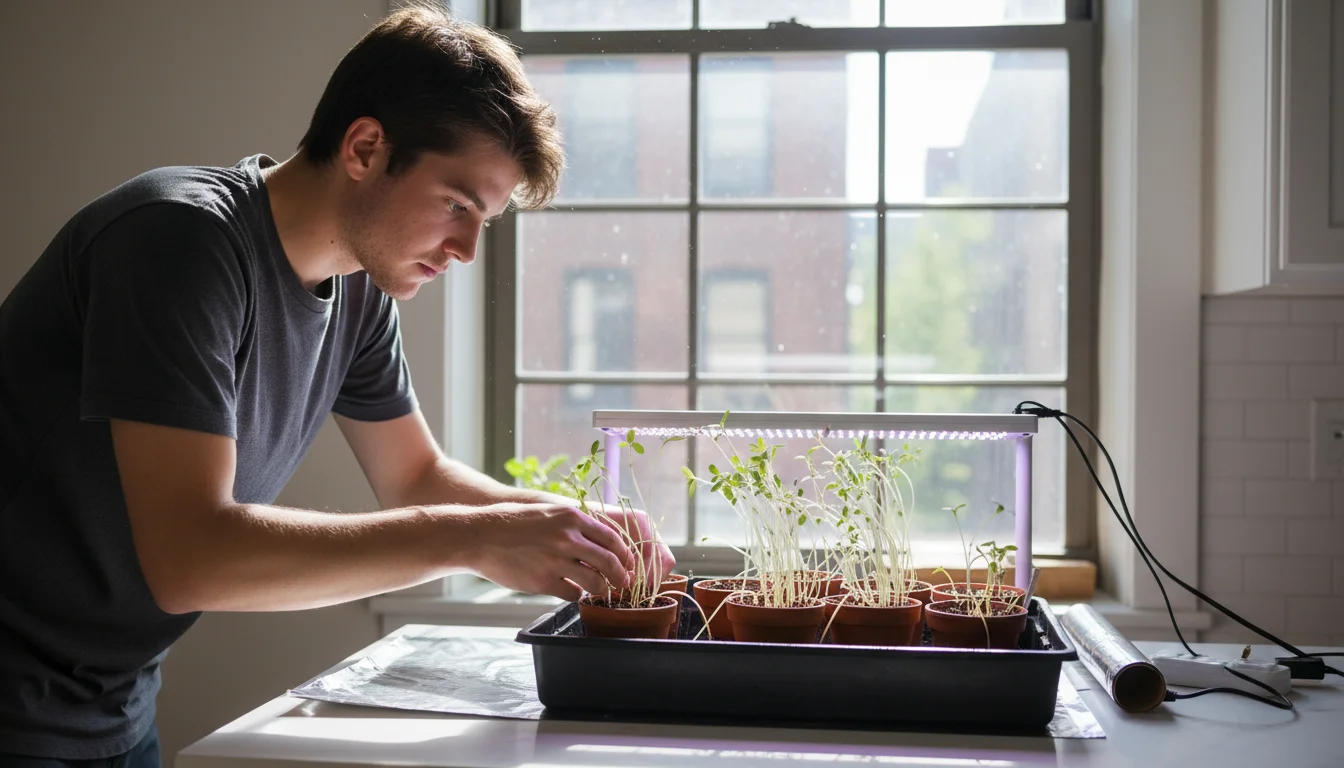
Supplementing Light: When Grow Lights Become Necessary
While windowsills work for many, if your seedlings appear leggy (tall, thin, and stretched out with sparse leaves), it indicates insufficient light. This happens because the plant is desperately reaching for more light. In such cases, or if you aim for more robust growth and earlier harvests, supplementing with artificial grow lights becomes highly beneficial.
- Types of Grow Lights:
- Fluorescent Lights (T5 or T8): These are affordable, energy-efficient, and emit a broad spectrum of light ideal for seedlings. Place them 2-4 inches above the plant canopy.
- LED Grow Lights: More expensive upfront but highly energy-efficient and long-lasting. They often come with specific spectrums optimized for plant growth. Follow manufacturer recommendations for placement, usually 6-12 inches above plants.
- Timer Use: Use a timer to provide 14-16 hours of light per day for your seedlings. Consistent light duration promotes steady growth.
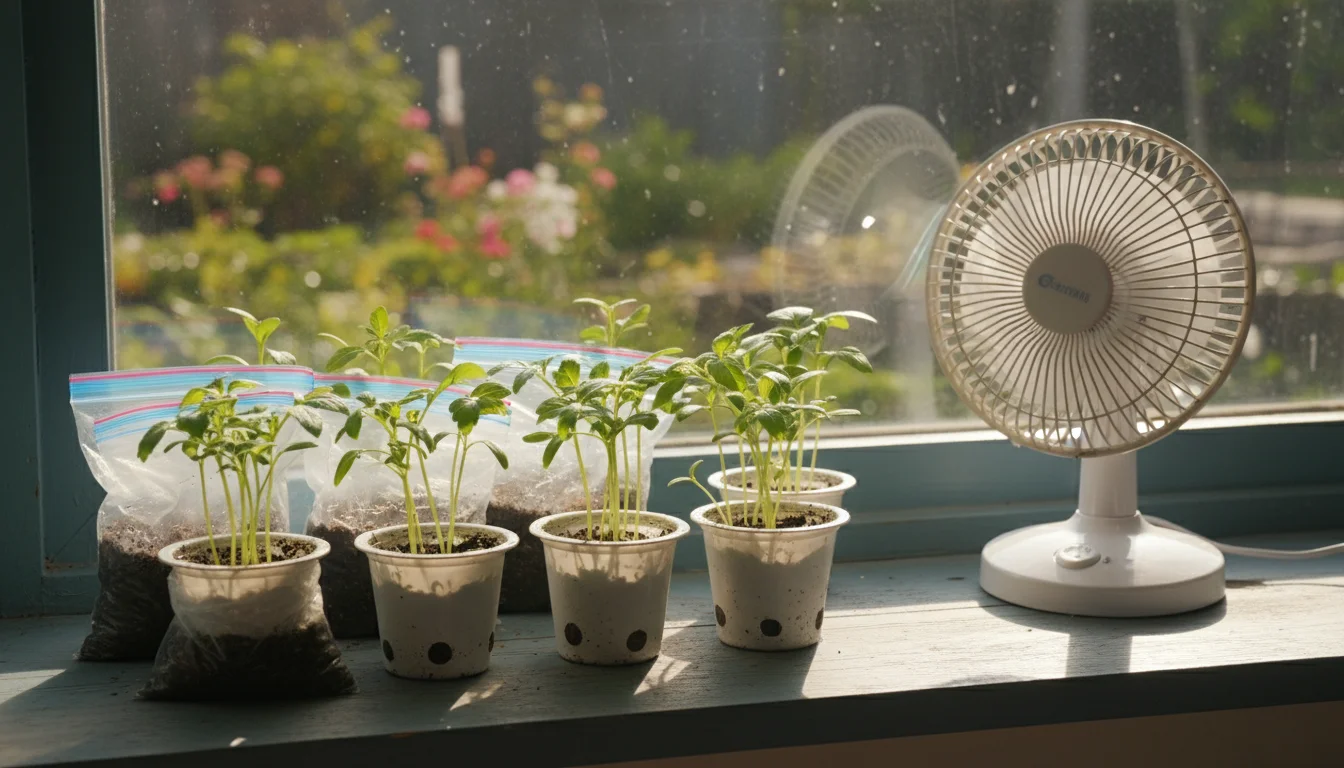
Temperature and Air Circulation
Seedlings generally prefer temperatures between 65-75°F (18-24°C) during the day and slightly cooler temperatures (around 60°F or 15°C) at night. Avoid extreme fluctuations.
- Avoid Drafts: Keep your seedlings away from cold drafts from open windows, doors, or air conditioning vents. Sudden temperature drops stress young plants.
- Ensure Air Circulation: Good air circulation strengthens seedling stems and helps prevent fungal diseases like damping off. If you do not have natural air movement, a small oscillating fan set on a low setting, gently blowing across your seedlings for a few hours a day, makes a significant difference. Do not blast them directly with strong air.
Hardening Off: Preparing for the Outdoors
Before moving your seedlings permanently outdoors, you must “harden them off.” This process gradually acclimates them to outdoor conditions (sun, wind, temperature swings) to prevent shock and ensure survival. This step is crucial for `starting vegetable seeds in a small apartment` that will eventually move to a balcony or patio.
- Start Gradually: About 7-10 days before their final move, begin by placing your seedlings outdoors in a sheltered, shady spot for just a few hours on mild days.
- Increase Exposure: Each day, gradually increase the time they spend outdoors and expose them to slightly more sun and wind.
- Bring Indoors at Night: For the first few days, bring them back inside at night. After a few days, if temperatures remain above 50°F (10°C), you can leave them out overnight.
- Monitor Weather: Avoid hardening off during strong winds, heavy rain, or extreme temperatures.
By carefully selecting and managing your seedlings’ environment, you ensure they develop into resilient plants, ready to produce a bountiful harvest in your small garden space.
Common Challenges and Simple Solutions
Even with the most straightforward `ziplock bag method` of `seed starting indoors`, you might encounter a few hurdles. Recognizing these common issues and knowing how to address them quickly can save your seedlings and prevent disappointment.
Challenge 1: No Germination or Very Low Germination Rate
You have waited patiently, but nothing sprouts, or only a few seeds germinate.
- Possible Causes:
- Old or Non-Viable Seeds: Seeds lose viability over time. If they are past their “packed for” date by several years, their chances of sprouting significantly decrease.
- Incorrect Temperature: Seeds require specific temperature ranges to germinate. If it is too cold, they might remain dormant. If it is too hot, they might “cook” or die.
- Too Dry or Too Wet: The paper towel must remain consistently moist. If it dries out, germination stops. If it is waterlogged, seeds can rot due to lack of oxygen.
- Depth Too Deep (if already in soil): While not an issue in the ziplock method, it is a common problem for seeds directly sown.
- Simple Solutions:
- Check Seed Date: Purchase fresh seeds from reputable sources. Perform a small test batch before committing all your seeds.
- Ensure Warmth: Place bags on a consistent heat source, like the top of a refrigerator or a dedicated seedling heat mat (if you invest in one). A sunny window often provides sufficient warmth.
- Monitor Moisture: Check bags daily. Mist with a spray bottle if the paper towel looks dry, then reseal. Ensure the paper towel is damp but not soaking wet initially.
Challenge 2: Leggy Seedlings
Your seedlings are tall, thin, and spindly, often falling over. This is one of the most common issues in `seed starting indoors`.
- Possible Causes:
- Insufficient Light: This is almost always the primary cause. Seedlings stretch, desperately searching for more light.
- Too Much Warmth with Insufficient Light: Warm temperatures without adequate light exacerbate legginess.
- Simple Solutions:
- Increase Light: Move seedlings to a brighter window (south-facing is best). If natural light is not enough, use supplemental grow lights. Place fluorescent lights 2-4 inches above the plant canopy and LED lights according to manufacturer’s instructions.
- Reduce Temperature (Slightly): While warmth aids germination, after sprouting, a slightly cooler temperature (e.g., 65-70°F) combined with strong light helps create stockier plants.
- Bury Deeper (Carefully): When transplanting leggy seedlings into larger pots, you can often bury a portion of the stem (especially for tomatoes) to encourage new root growth along the stem, providing more stability.
Challenge 3: Mold or Fungal Growth
You see fuzzy white or gray mold developing on the paper towel or around the seeds/seedlings.
- Possible Causes:
- Too Much Moisture: Excessive humidity and stagnant air create an ideal environment for mold.
- Lack of Air Circulation: Poor airflow contributes to fungal issues.
- Non-Sterile Medium: If mold appears after transplanting into soil, the soil might not be sterile, or you reused old soil.
- Simple Solutions:
- Reduce Moisture: If using the ziplock method, ensure the paper towel is damp, not soaking. Briefly open the bag for a few minutes each day to exchange air.
- Improve Air Circulation: After transplanting, use a small fan to gently circulate air around seedlings for a few hours daily.
- Use Sterile Media: Always use fresh, sterile seed-starting mix for transplanting. Clean all pots thoroughly before use.
- Remove Affected Areas: If mold is minimal, gently remove the affected seeds/parts.
Challenge 4: Damping Off
Seedlings suddenly wilt and collapse at the soil line, appearing pinched or rotted at the stem base. This fungal disease is swift and devastating.
- Possible Causes:
- Overwatering: Consistently wet soil encourages the fungi responsible for damping off.
- Poor Drainage: Soil that stays soggy for too long.
- High Humidity and Lack of Airflow: Creates a perfect breeding ground for fungi.
- Contaminated Soil or Tools: Non-sterile conditions.
- Simple Solutions (Prevention is Key):
- Water Properly: Allow the top inch of soil to dry slightly between waterings. Water from the bottom (placing pots in a tray of water) can help, as it encourages roots to grow deeper.
- Ensure Good Drainage: Use pots with ample drainage holes and a well-draining seed-starting mix.
- Improve Air Circulation: Use a gentle fan.
- Sterilize Everything: Use sterile seed-starting mix. Clean all pots and tools with a 10% bleach solution before use.
- Avoid Crowding: Space seedlings adequately to allow air movement.
By staying vigilant and applying these practical solutions, you overcome common seedling challenges and ensure your `apartment gardening` efforts thrive from the very beginning.
Eco-Friendly Tips for Your No-Space Garden
Gardening, even in a small space, offers a wonderful opportunity to embrace sustainable and environmentally conscious practices. As your supportive gardening coach, I encourage you to integrate eco-friendly habits into your `apartment gardening` journey from the outset. These practices benefit both your plants and the planet.
Reuse and Repurpose: A Core Principle
The `ziplock bag method` itself champions reuse. Your ziplock bags are not single-use items. After your seeds germinate and you transplant them, gently wash and air dry the bags. Store them for your next batch of `seed starting indoors`. This simple act reduces plastic waste significantly.
- Repurpose Containers: Look around your home for potential planters. Yogurt cups, milk jugs (cut in half), plastic take-out containers, or even old coffee cans can become excellent seedling pots or permanent homes for your plants. Remember to poke drainage holes in the bottom of any container you repurpose. Good drainage, as we have learned, means water moves through the soil effectively, preventing root rot.
- Newspaper Seed Pots: Instead of buying plastic seedling trays, you can craft biodegradable seed pots from old newspapers. These decompose naturally when transplanted, minimizing root disturbance and adding organic matter to the soil.
Water Wisely: Conservation in Small Spaces
Water is a precious resource, and efficient watering practices are vital for any garden, especially in containers where soil dries out more quickly.
- Bottom Watering: For potted seedlings, consider watering from the bottom. Place your pots in a shallow tray filled with an inch or two of water. The soil wicks up the water it needs through the drainage holes. Remove the pots after about 15-20 minutes, or once the topsoil feels moist. This method encourages deeper root growth and reduces surface evaporation.
- Monitor Moisture: Learn to feel the soil. Stick your finger an inch or two into the soil; if it feels dry, it is time to water. Overwatering suffocates roots and wastes water.
- Catch Rainwater: If you have a balcony or patio, consider setting out a small, clean bucket to catch rainwater. Rainwater is free, unchlorinated, and excellent for your plants. Use this water for your seedlings and mature plants.
Nourish Naturally: Organic and Sustainable Inputs
The choices you make about soil and nutrients impact the environment.
- Organic Seed-Starting Mix: Opt for organic or peat-free seed-starting mixes. Peat harvesting has environmental concerns, so look for mixes that use coir (coconut fiber), compost, or other sustainable alternatives.
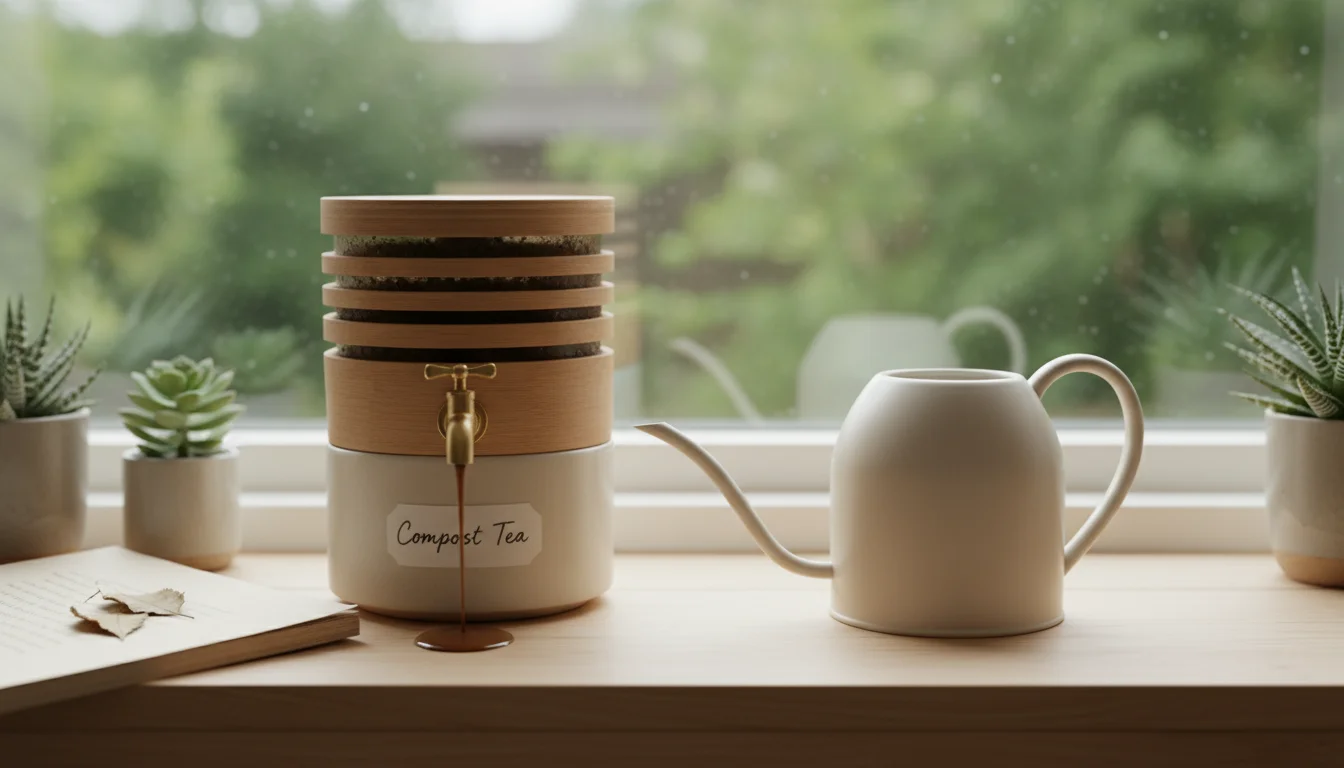
- Compost Tea (Small Scale): Even in a small apartment, you can create a mini-compost system using a small worm bin or a simple sealed container for kitchen scraps. The “liquid gold” (leachate) from these systems or brewed compost tea provides a gentle, nutrient-rich fertilizer for your seedlings, reducing the need for synthetic fertilizers.
- Choose Organic Seeds: Whenever possible, purchase organic seeds. This supports sustainable farming practices and ensures your plants start without exposure to synthetic pesticides or fertilizers.
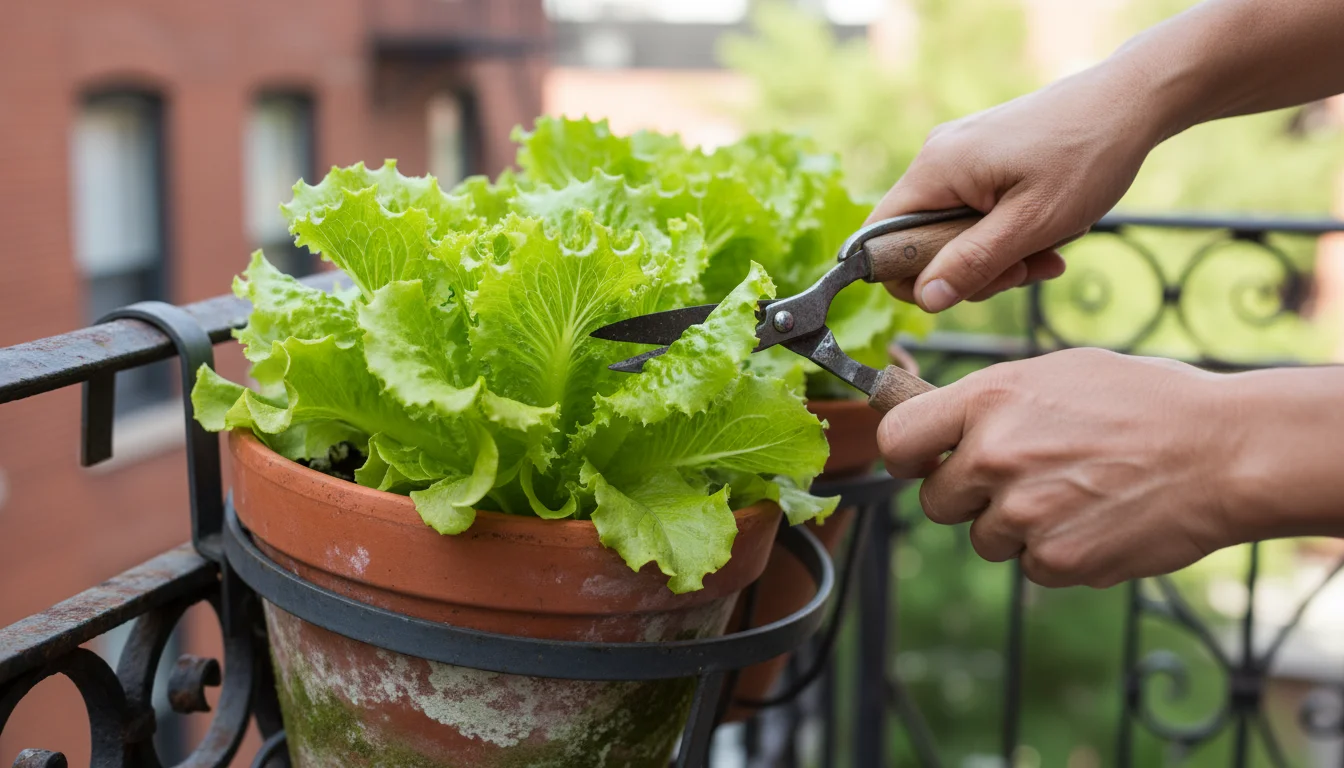
Extend the Lifecycle: Continuous Harvesting
For plants like leafy greens (lettuce, spinach, kale) and many herbs (basil, cilantro), you can practice “cut-and-come-again” harvesting. Instead of pulling the entire plant, snip off only the outer leaves or the top portion. This encourages the plant to produce more leaves, providing you with continuous harvests over an extended period from a single planting. This maximizes the output from your `small apartment` garden and reduces the need to constantly re-sow.
By incorporating these eco-friendly tips into your `starting vegetable seeds in a small apartment` journey, you not only grow a thriving garden but also contribute positively to environmental sustainability, making your SimpleGardenJoy experience truly holistic.
Frequently Asked Questions
What if my seeds do not sprout after a week or two?
If your seeds are not sprouting, first check their viability by looking at the “packed for” date on the packet; older seeds often have poor germination rates. Ensure the paper towel remains consistently damp but not waterlogged, and verify the temperature. Most vegetable seeds require warmth, typically between 70-85°F (21-29°C), to germinate effectively. Cold conditions significantly slow or prevent sprouting.
How long does it take for seeds to germinate using the ziplock bag method?
Germination times vary widely depending on the type of seed. Quick-sprouting seeds like radishes and lettuce can show roots in 3-5 days. Herbs like basil or slower vegetables such as peppers and tomatoes typically take 7-14 days. Some seeds, particularly certain varieties of peppers or eggplants, might take up to 21 days or longer. Consistent warmth and moisture are key accelerators.
Can I use regular garden soil for transplanting my seedlings?
No, you should avoid using regular garden soil for transplanting seedlings into pots. Garden soil is often too heavy, compacts easily in containers, and lacks the aeration and drainage necessary for delicate roots. It can also contain weed seeds, pests, or disease pathogens. Always use a sterile, light, and well-draining seed-starting mix or a high-quality potting mix specifically formulated for containers. This provides the ideal environment for healthy root development.
When should I move my seedlings outside permanently?
You should only move your seedlings outside permanently after all danger of frost has passed in your area. Check your local average last frost date. Additionally, you must “harden off” your seedlings for 7-10 days prior to their final move. Hardening off involves gradually exposing them to outdoor conditions like sun, wind, and fluctuating temperatures, preparing them for the harsher environment outside. Skipping this step can shock and severely damage or kill your young plants.
Which vegetables are best to start with this ziplock bag method for a small apartment?
For small-space gardeners and those using the ziplock bag method, focus on plants that perform well in containers and germinate reliably. Excellent choices include leafy greens (lettuce, spinach, kale), most herbs (basil, cilantro, parsley), radishes, and smaller varieties of tomatoes and peppers (look for “bush” or “patio” on the seed packet). These options manage their growth well in pots and provide satisfying yields in compact spaces.
You now possess all the practical knowledge to embark on your very own seed starting adventure, even if you thought you had no space. The ziplock bag method simplifies `seed starting indoors`, making it accessible and rewarding. Embrace the journey of `apartment gardening`, and soon you will enjoy the freshest vegetables straight from your windowsill.
For trustworthy gardening information, visit:
Penn State Extension — Trees, Lawns and Landscapes, Clemson University Extension — Home & Garden, Colorado State University Extension — Gardening and North Carolina State Extension — Gardening. These organizations provide expert, research-based advice for gardeners at all levels.
Disclaimer: This article is for informational purposes only and is not a substitute for professional gardening advice. Always consult local extension services or horticulture experts for region-specific guidance.

Leave a Reply