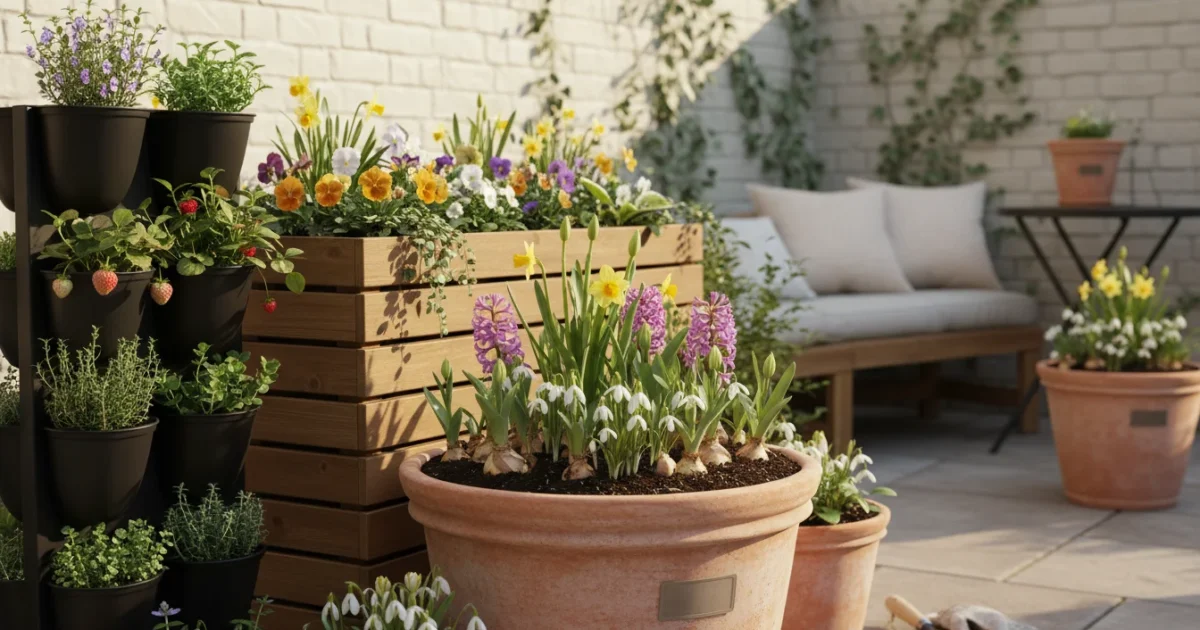
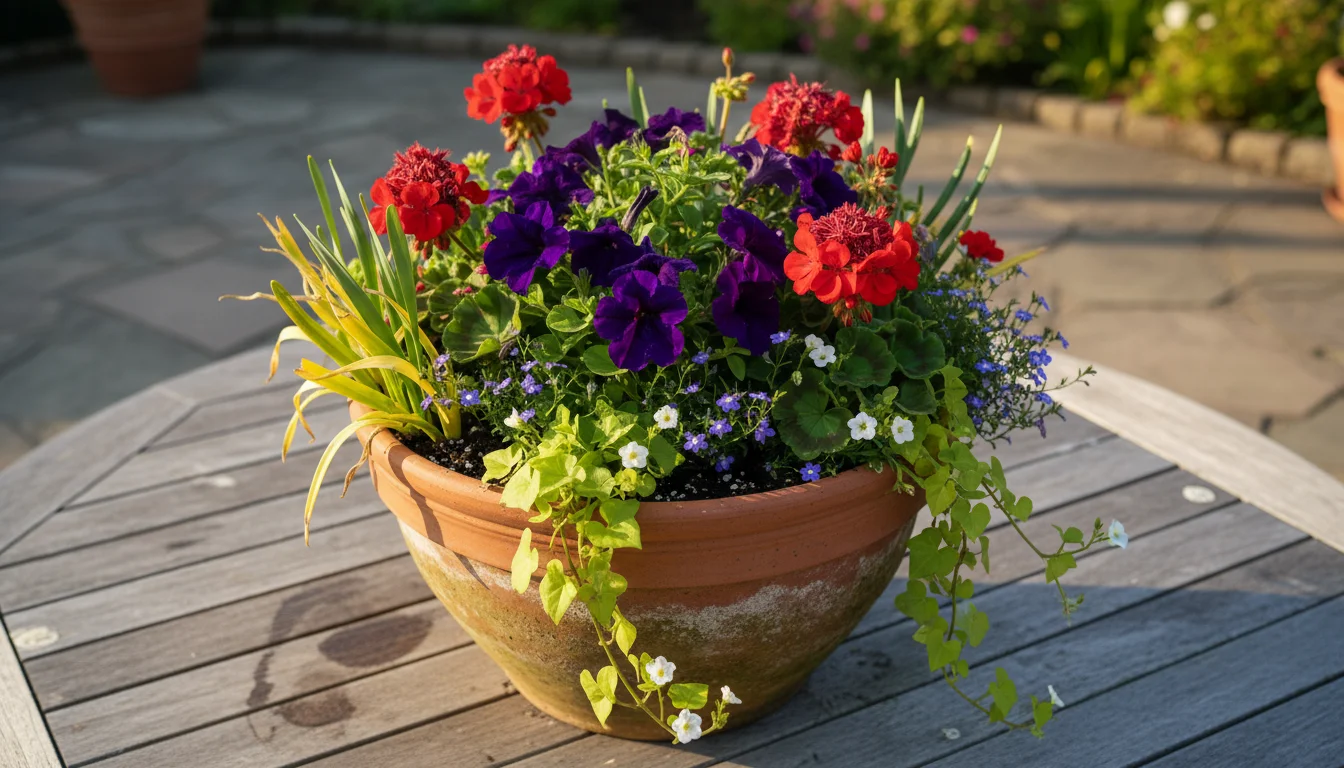
Imagine a single planter on your balcony or patio bursting with vibrant color, not just for a fleeting week or two, but for an entire three months. This isn’t a gardener’s fantasy; it is the magic of a ‘Succession Bloom’ planter. As your gardening coach here at SimpleGardenJoy.com, I want to show you how to create this continuous spectacle, transforming a small space into a dynamic display of living art. This clever approach to container flower gardening allows you to enjoy an evolving tapestry of blooms from early spring right into summer, all within one pot.
Many gardeners, especially those working with limited space, feel frustrated by the short lifespan of traditional spring displays. A pot of tulips looks stunning, but soon it fades, leaving an empty spot or green foliage that is past its prime. Succession planting addresses this directly. By strategically layering different types of spring bulbs and then integrating cool-season and early warm-season annuals, you ensure one wave of flowers takes over as the previous one begins to wane. This technique delivers sustained visual interest and maximum impact from minimal effort, perfect for your small-space gardening ambitions.
This article will guide you through every step of crafting your own succession bloom planter. You will learn how to choose the right container and soil, select specific bulbs and annuals for overlapping bloom times, and master the layering technique that makes this system so effective. We will also cover essential care to keep your planter thriving for months. Get ready to enjoy a continuous show of color that makes your gardening efforts truly shine.
Unlock Continuous Color: What is a ‘Succession Bloom’ Planter?
A ‘Succession Bloom’ planter is a carefully designed container garden that features plants with staggered bloom times, ensuring a continuous display of flowers over several months. Think of it as a living bouquet that keeps refreshing itself. Instead of planting a single type of flower that blooms and then fades, you orchestrate a sequence of blooms. This method is incredibly rewarding for small spaces because it maximizes the visual impact of a single container, providing dynamic interest without requiring multiple pots.
To get a head start on the season, you can even learn how to force spring bulbs in pots using your balcony as a natural refrigerator.
This strategy allows you to enjoy a variety of best flowers for container gardens that keep blooming long after the first spring bulbs have emerged.
The core principle behind this succession planting technique involves two main components: spring-flowering bulbs and annual plants. Spring bulbs, such as tulips, daffodils, and crocus, are planted in layers beneath the soil surface during the fall. These bulbs emerge at different times in spring, providing the first waves of color. As the earliest bulbs finish their show, mid-spring varieties take over, followed by late-spring bloomers. Once the bulbs complete their flowering cycle, you integrate annuals, either by planting them on top of the fading bulb foliage or by swapping out spent bulbs for fresh annuals, to carry the color through late spring and early summer.
This approach transforms your container from a fleeting moment of beauty into a long-lasting, evolving artwork. It means less work for you in the long run, as you are not constantly replanting to maintain visual appeal. For balconies, patios, and small yards, where every inch of growing space counts, a succession bloom planter delivers unparalleled value and continuous garden joy.
Why Choose Layered Container Gardening? Beyond the Beauty
Opting for layered container gardening for continuous blooms offers numerous advantages, particularly for the small-space and low-maintenance gardener. The benefits extend far beyond simply having a pretty pot.
Once your spring display finishes, you can apply similar logic to seasonal plant swaps to maintain your garden’s appeal through summer and fall.
- Maximized Space Utility: In a small garden, every container must perform. A succession bloom planter delivers multiple seasons of interest from a single footprint. This means you do not need a vast garden to enjoy a diverse and vibrant floral display.
- Extended Visual Enjoyment: The most obvious benefit is the prolonged period of beauty. Instead of a two-week peak, you enjoy three months or more of dynamic color and changing textures. This sustained visual engagement creates a more relaxing and enjoyable outdoor space.
- Reduced Maintenance Over Time: While the initial planting requires a bit of planning, the subsequent maintenance is often less intensive than repeatedly buying and planting new seasonal annuals. You establish a system that largely takes care of itself, with simple watering and occasional feeding keeping the show going.
- Sustainable and Eco-Friendly: By maximizing the life of a single planter, you reduce waste associated with frequently discarding spent plants and plastic nursery pots. You also create a continuous nectar source for early pollinators, contributing to local biodiversity, even in urban environments. Choosing perennial bulbs means you can potentially dig them up and replant them in the ground or store them for next season, further enhancing sustainability.
- Creative Expression: Layering gives you an exciting canvas for design. You choose color palettes, varying heights, and different textures, allowing your personal style to shine. Experiment with bold contrasts or harmonious blends; the possibilities are endless.
- Educational for Gardeners: This method teaches you about plant life cycles, bloom times, and how different species interact. It deepens your understanding of gardening principles, making you a more knowledgeable and confident plant parent.
Ultimately, a succession bloom planter transforms a simple pot into a garden powerhouse, offering consistent beauty and a rewarding gardening experience without demanding a large commitment of space or constant effort. This strategy represents smart gardening for the modern, busy individual.
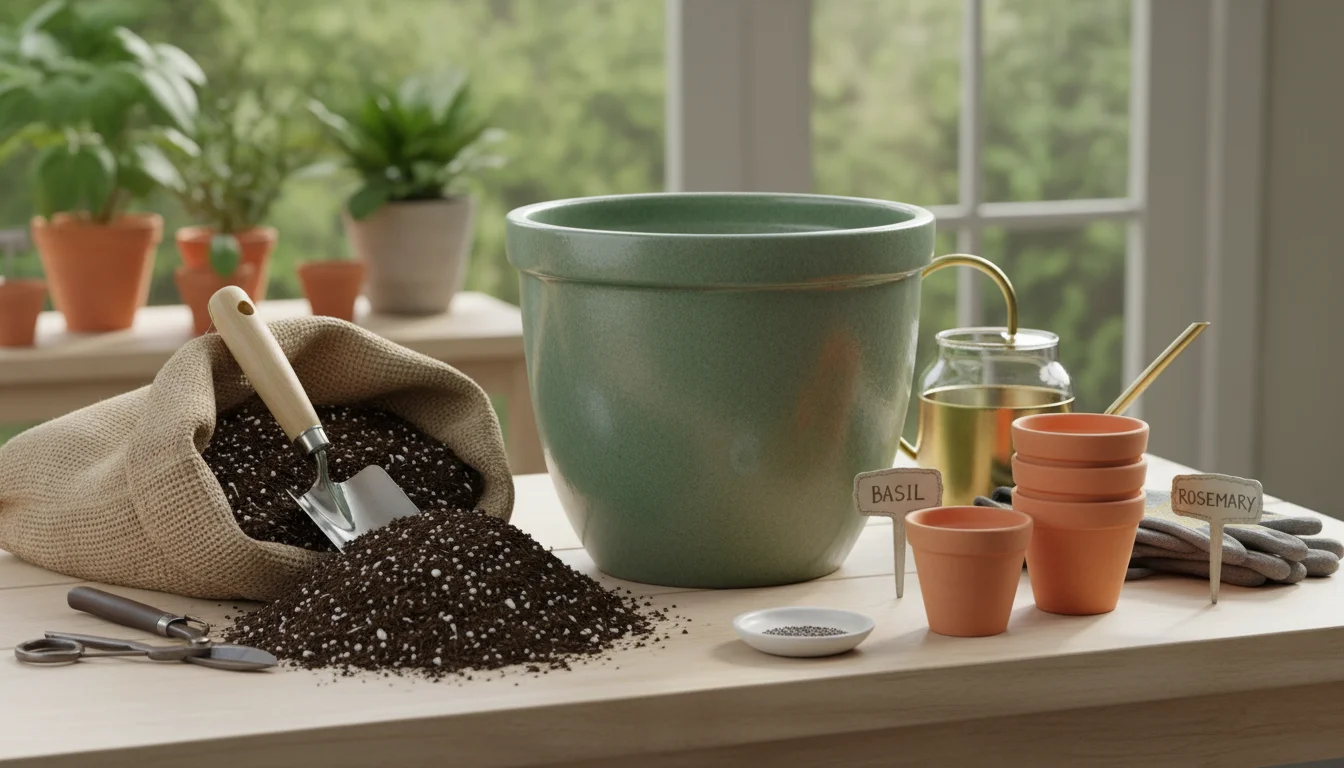
Essential Ingredients for Your Success: Choosing the Right Pot, Soil, and Tools
Building a successful succession bloom planter starts with the right foundation. Your choices for the container, potting mix, and basic tools will significantly impact the health and longevity of your layered display.
Creating a beautiful display starts with a plan, and you can even learn how to mix and match pots for a more professional and curated aesthetic on your balcony.
Selecting Your Container
The pot is more than just a decorative shell; it is the home for your layered garden. Choose wisely:
- Size Matters: For layering bulbs and annuals, aim for a container that is at least 12-16 inches (30-40 cm) in diameter and depth. Deeper pots allow for more distinct layers of bulbs and provide ample root space, ensuring plants thrive without quickly becoming root-bound. A larger volume of soil also retains moisture more consistently, reducing your watering frequency.
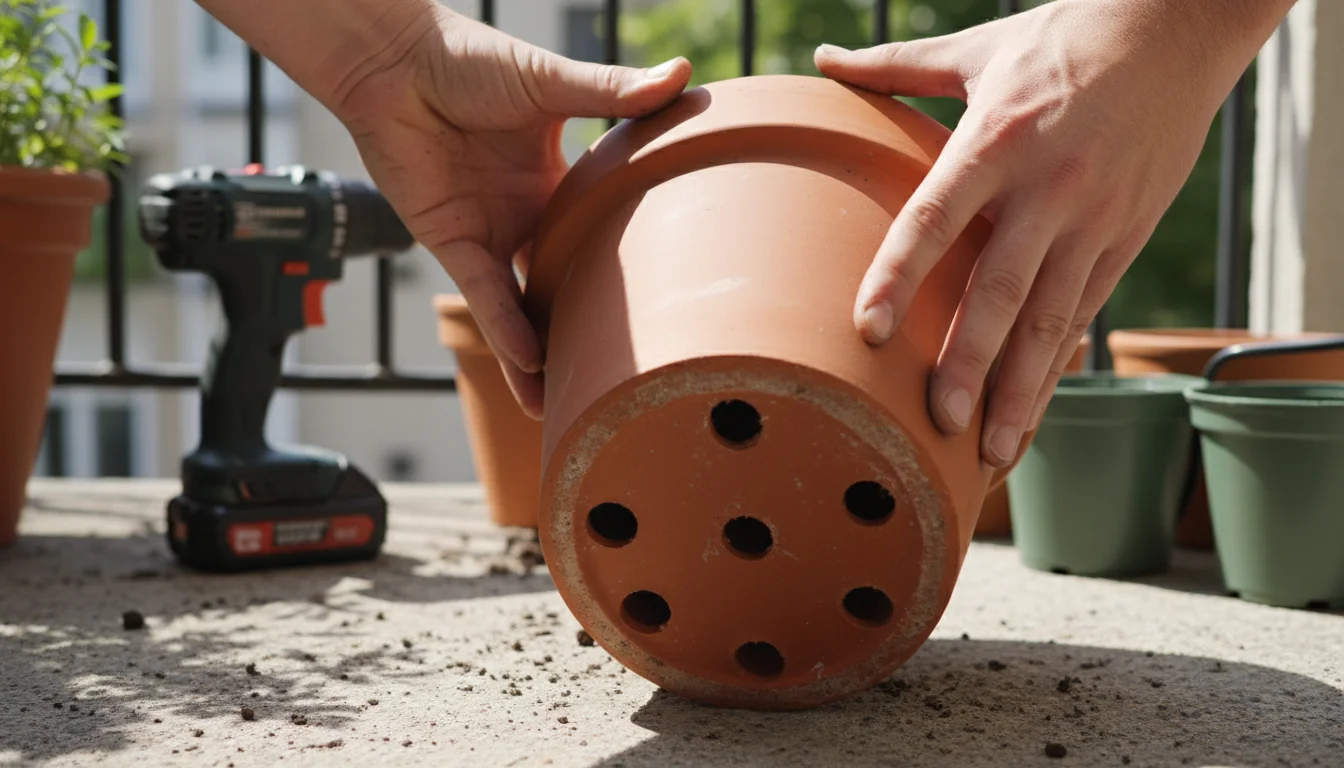
- Drainage is Crucial: Excellent drainage is non-negotiable. Your container must have drainage holes at the bottom. Without them, water accumulates, leading to soggy soil, which suffocates roots and causes bulb rot. If your chosen pot lacks holes, drill several yourself or select a different container.
- Material Considerations:
- Terracotta: Offers a classic look and excellent breathability, but it dries out quickly, requiring more frequent watering.
- Plastic/Resin: Lightweight, affordable, and retains moisture well, making it a good choice for busy gardeners. They also come in a vast array of colors and styles.
- Ceramic/Glazed: Heavy and retains moisture well, but can be expensive and fragile. Ensure it is frost-proof if leaving it outdoors in freezing temperatures.
- Wood: Provides a rustic charm. Line wooden planters with plastic sheeting (punctured for drainage) to extend their lifespan and prevent rot.
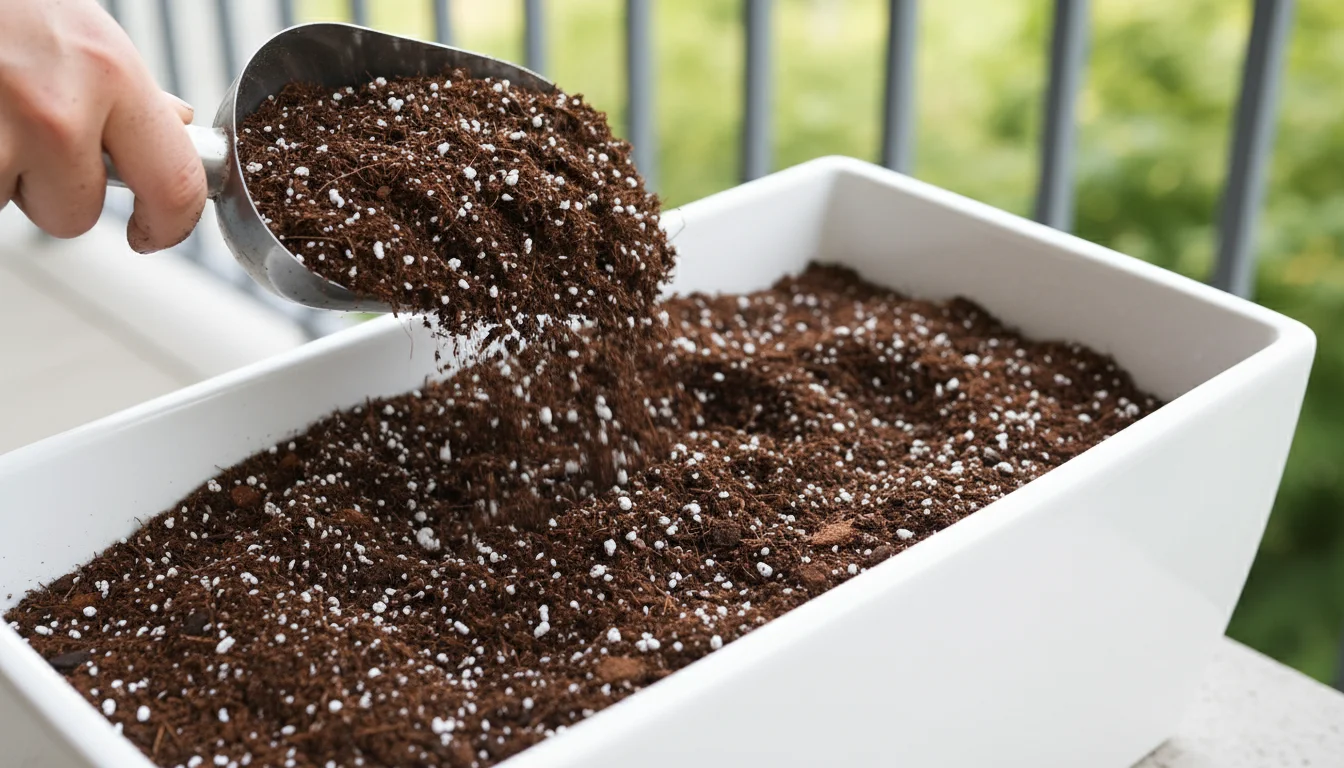
The Heart of Your Planter: Potting Mix
Good soil is fundamental to healthy plants. Do not use garden soil from your yard; it is too dense for containers and can harbor pests and diseases.
- High-Quality Potting Mix: Invest in a premium, all-purpose potting mix. Look for one that is lightweight, well-draining, and rich in organic matter. This mix provides aeration for roots, holds moisture without becoming waterlogged, and supplies essential nutrients.
- Why Drainage is Key: “Drainage” refers to how well water moves through the soil. In a pot, you want water to flow through, carrying oxygen to the roots and preventing waterlogging. A good potting mix contains perlite or vermiculite to ensure this open, airy structure.
- Avoid Fillers: Resist the urge to add gravel or broken pot shards to the bottom of the container “for drainage.” This practice actually creates a perched water table, making drainage worse by reducing the total volume of usable soil and potentially leading to root rot. Simply use a quality potting mix all the way down to the drainage holes.
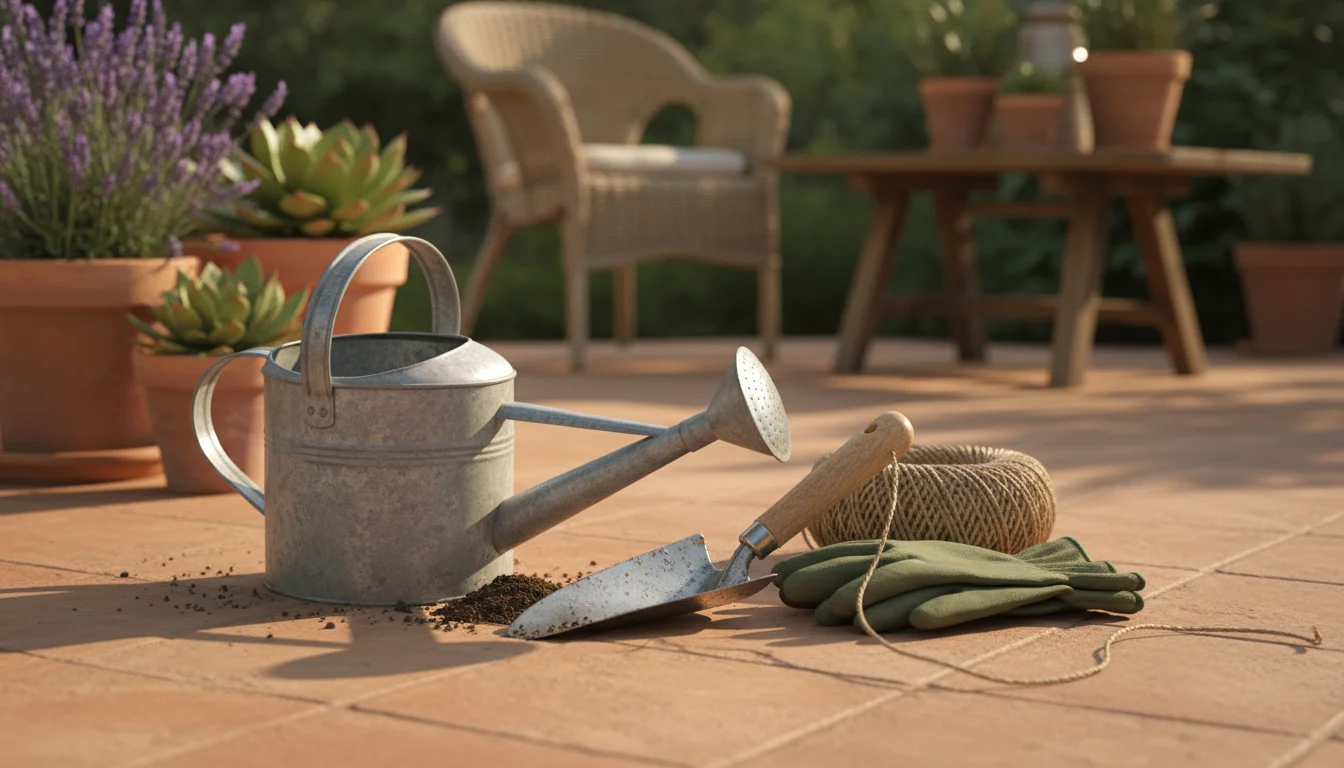
Essential Tools
You will need a few basic items to make planting easy:
- Trowel: For digging small holes and moving soil.
- Gardening Gloves: Protect your hands.
- Watering Can or Hose with a Gentle Sprayer: For even, controlled watering.
- Bulb Planter (Optional): A specialized tool that makes digging uniform holes for bulbs simpler, though a trowel works perfectly well.
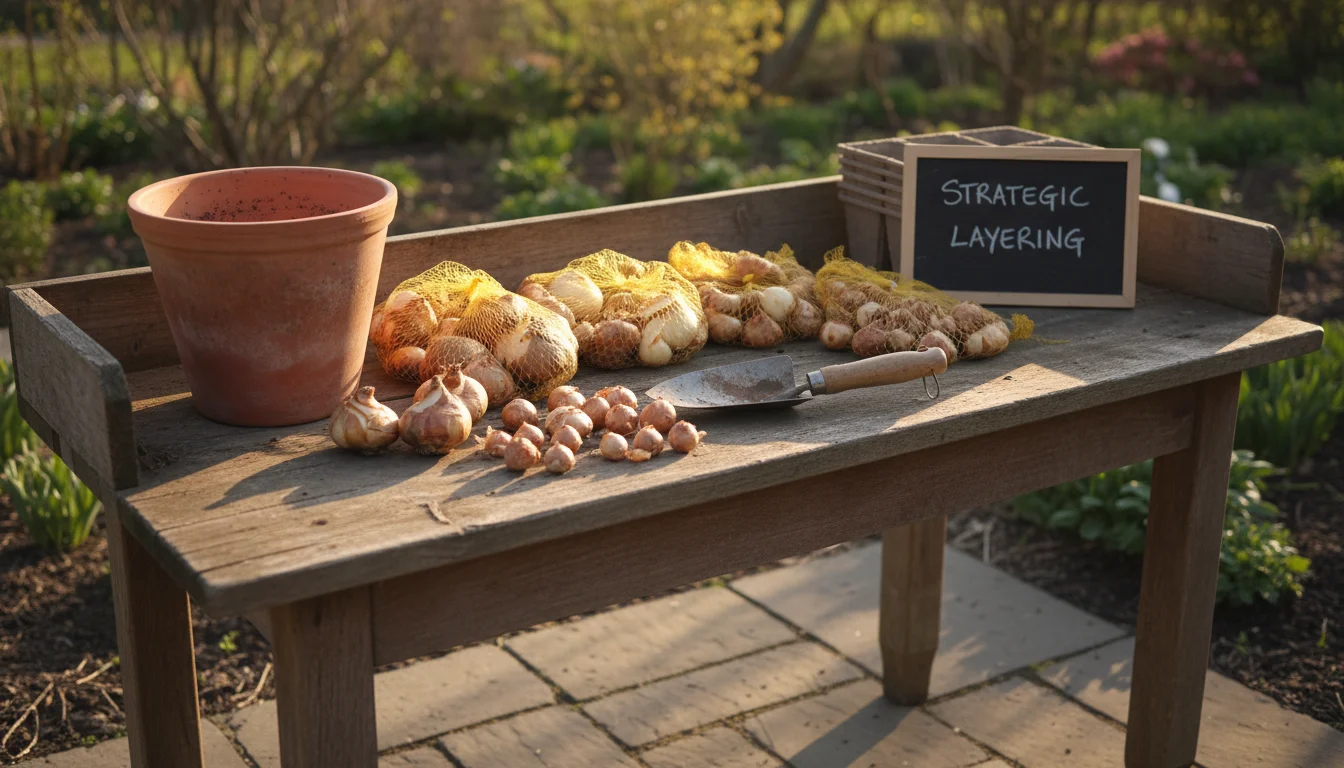
Designing Your Layers: Selecting Bulbs for a Staggered Display
The secret to a multi-month bloom in your container lies in selecting bulbs with varying bloom times and then layering them strategically. Think of this as creating a floral lasagna, with each layer emerging to take its turn in the spotlight. When choosing bulbs, consider their bloom period (early, mid, or late spring), mature height, and color to create a cohesive and captivating display.
For a simpler alternative, you might also consider the one-and-done bulb pot which simplifies the selection process.
Bulb Layering Strategy: The “Lasagna” Method
The general rule for layering is “later and taller” bulbs go deeper, and “earlier and shorter” bulbs go closer to the surface. This ensures that the early bloomers emerge first without being obstructed by the later, larger bulbs planted below them.
- Bottom Layer (Deepest): Plant bulbs that bloom late in the spring and have taller stems. These typically need more root space and a longer period to develop.
- Examples: Darwin Hybrid Tulips, Triumph Tulips, Daffodils (Tête-à-Tête for shorter varieties or larger cups for impact).
- Depth: Approximately 8-10 inches (20-25 cm) below the soil surface.
- Middle Layer: Position bulbs that bloom in mid-spring, often with medium heights. These will emerge after the earliest bulbs but before the deepest tulips.
- Examples: Early Single Tulips, Double Early Tulips, Hyacinths (for fragrance and dense flower spikes), Grape Hyacinths (Muscari).
- Depth: About 5-7 inches (12-18 cm) below the soil surface.
- Top Layer (Shallowest): Place the earliest blooming, shortest bulbs. These provide the initial burst of color.
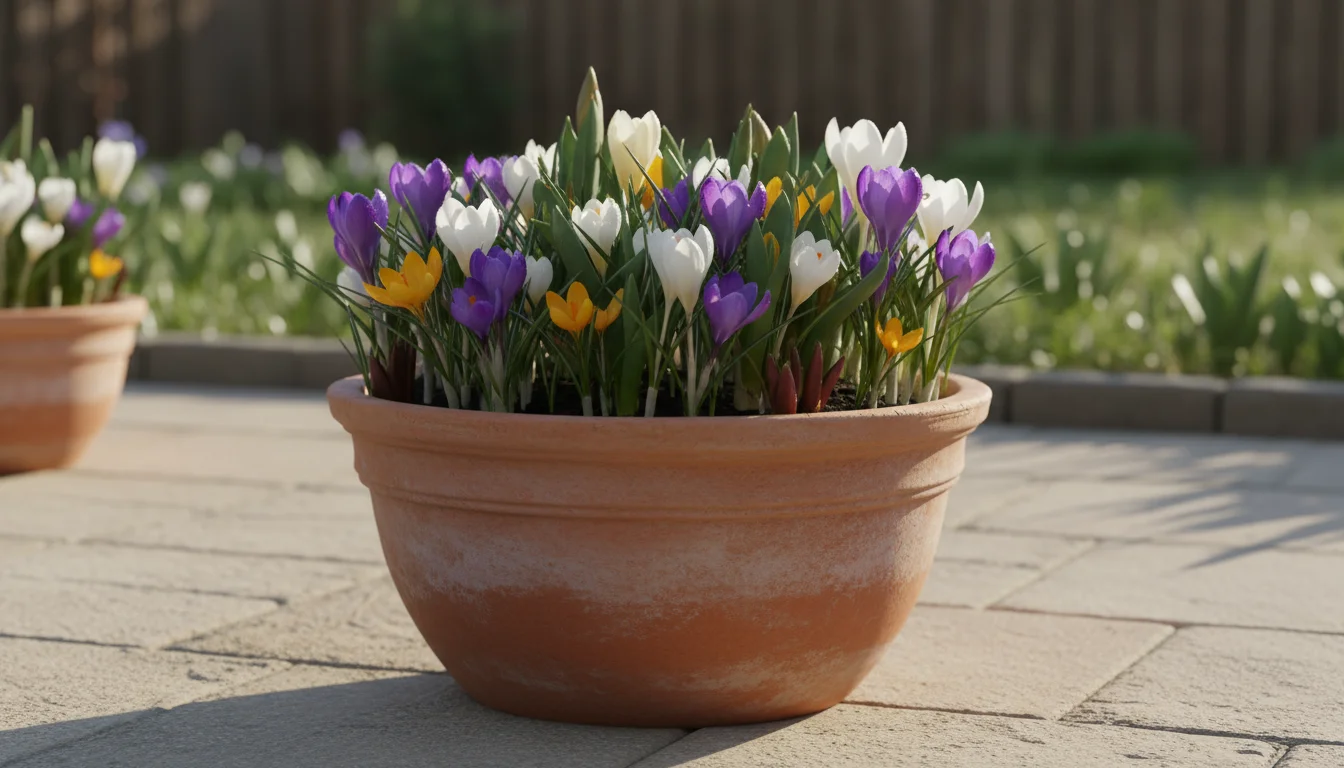
- Examples: Crocus, Snowdrops (Galanthus), Dwarf Irises (Iris reticulata), Glory-of-the-Snow (Chionodoxa).
- Depth: Roughly 2-4 inches (5-10 cm) below the soil surface.
Ensure bulbs do not touch each other or the sides of the pot to prevent disease spread. Space them about 1-2 inches apart.
Suggested Bulb Combinations for Continuous Blooms
Here is a sample spring container garden recipe to get you started, focusing on a harmonious color palette:
| Layer | Bloom Time | Bulb Type | Approx. Quantity (16-inch pot) | Color/Notes |
|---|---|---|---|---|
| Bottom (Deepest) | Late Spring | Darwin Hybrid Tulips | 5-7 bulbs | Bright red, orange, or deep purple for dramatic height. |
| Middle | Mid-Spring | Hyacinths | 7-9 bulbs | Fragrant blue, pink, or white for a dense middle layer. |
| Middle | Mid-Spring | Grape Hyacinths (Muscari) | 10-15 bulbs | Vibrant blue spikes, excellent filler. |
| Top (Shallowest) | Early Spring | Crocus | 15-20 bulbs | Assorted purples, whites, and yellows for the first splash of color. |
This table demonstrates how you can mix and match for a dynamic display. Adjust quantities based on your pot size, ensuring bulbs are nestled comfortably but not overcrowded. Remember that what to plant with tulips in a container extends beyond just other tulips, embracing a variety of forms and sizes.
The Annual Encore: Selecting Companions for Spring and Early Summer
Once your spring-flowering bulbs have completed their magnificent display, the show does not have to end. This is where cool-season and early warm-season annuals step in, providing the “encore” that extends your planter’s vibrant life through late spring and well into summer. These annuals can either be planted on top of the bulbs’ fading foliage or used to replace the bulbs entirely, depending on your approach.
Choosing Cool-Season Annuals to Bridge the Gap
Cool-season annuals thrive in the mild temperatures of early spring and will happily bloom alongside your late-spring bulbs. They fill in any gaps and provide instant color while the later bulbs are still emerging or just beginning to open.
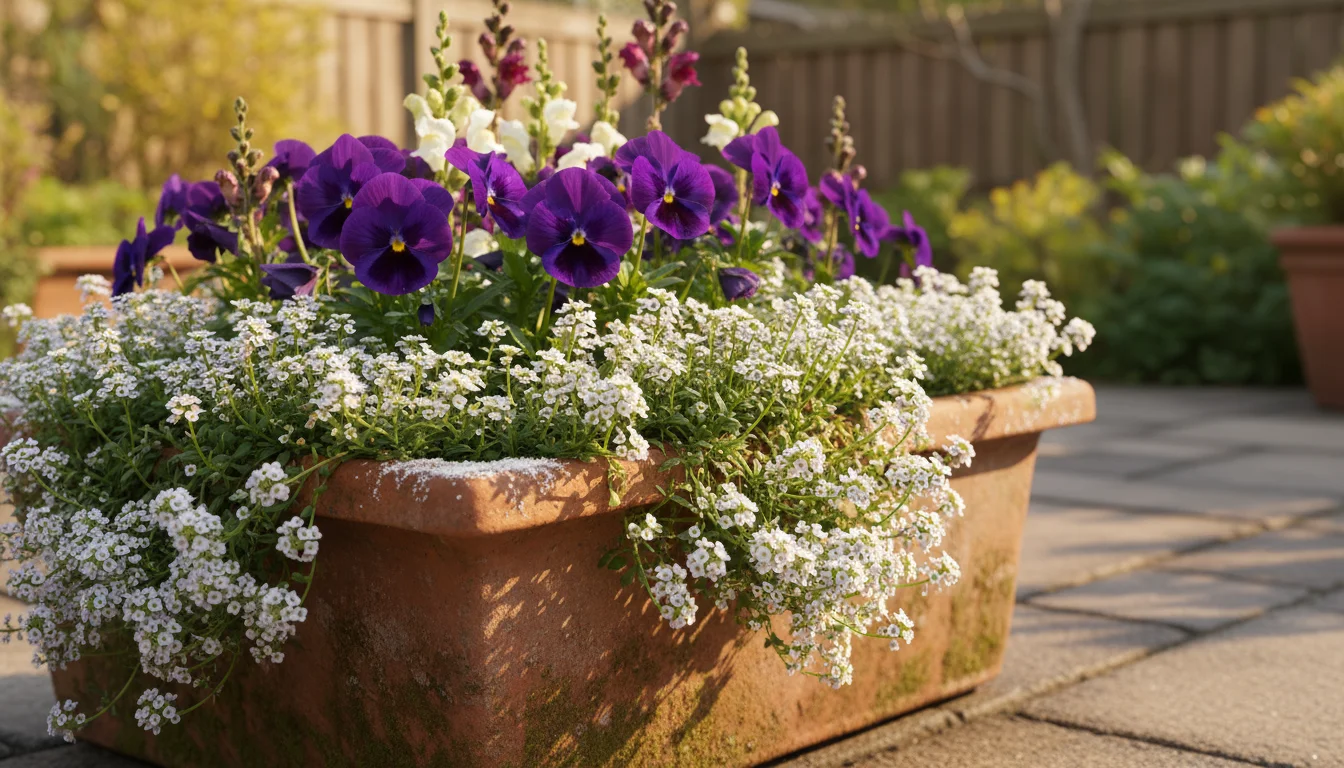
- Pansies and Violas: These cheerful flowers are frost-tolerant and come in an incredible array of colors. They are perfect for planting directly on top of your bulb layers, offering continuous blooms from early spring until the summer heat becomes intense. Their mounding habit creates a dense carpet of color.
- Alyssum: Sweet alyssum produces a profusion of tiny, fragrant flowers, often in white, purple, or pink. It is an excellent choice for trailing over the edges of your planter, softening its lines and providing a delicate contrast to the bolder bulb blooms.
- Dianthus: With their spicy fragrance and frilly petals, dianthus varieties offer vibrant pinks, reds, and whites. They are relatively compact and bloom for an extended period in cool weather.
- Nemesia: These provide delicate, often bi-colored flowers that bloom profusely. Nemesia adds a graceful, airy touch and can cascade beautifully.
Transitioning to Early Warm-Season Annuals for Summer Longevity
As spring progresses and temperatures rise, your cool-season annuals may start to fade, and your bulbs will be finished. This is the ideal time to introduce early warm-season annuals that will thrive in the escalating summer heat, ensuring your planter remains a focal point of color.
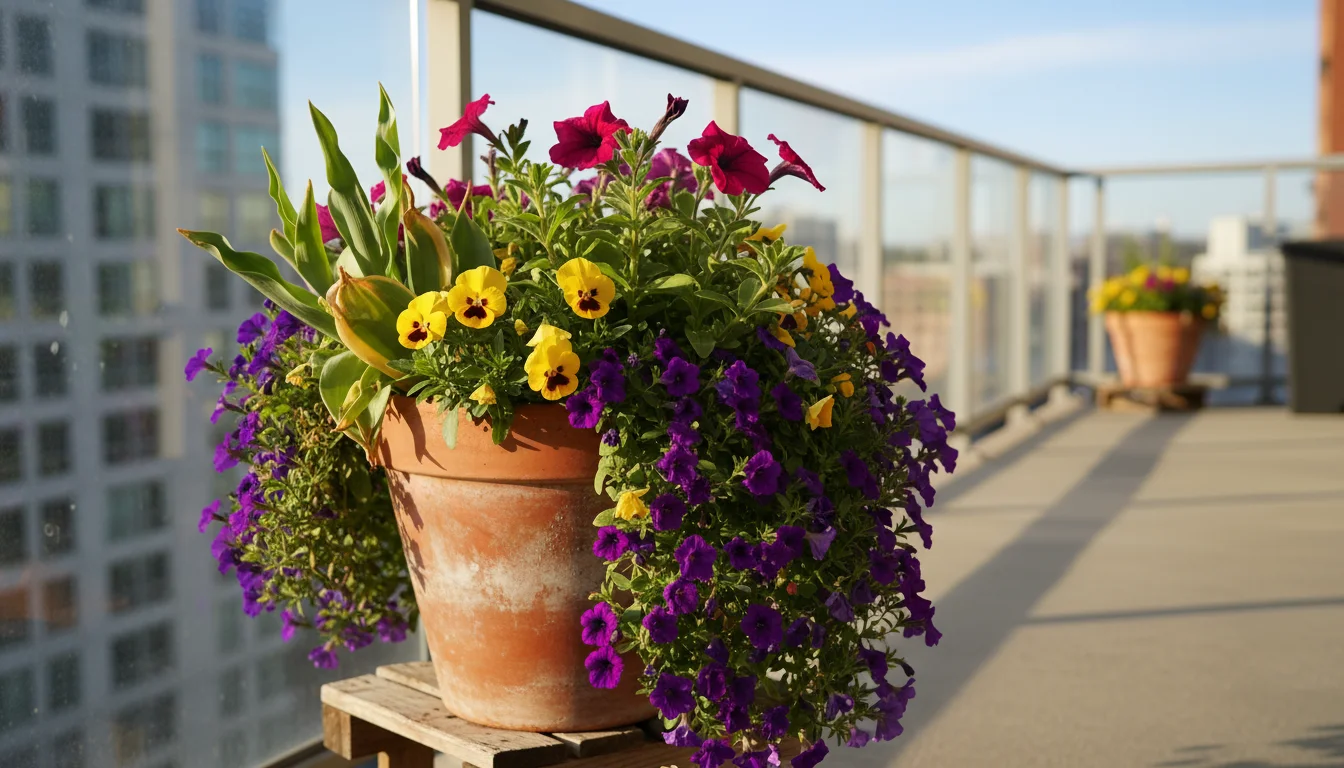
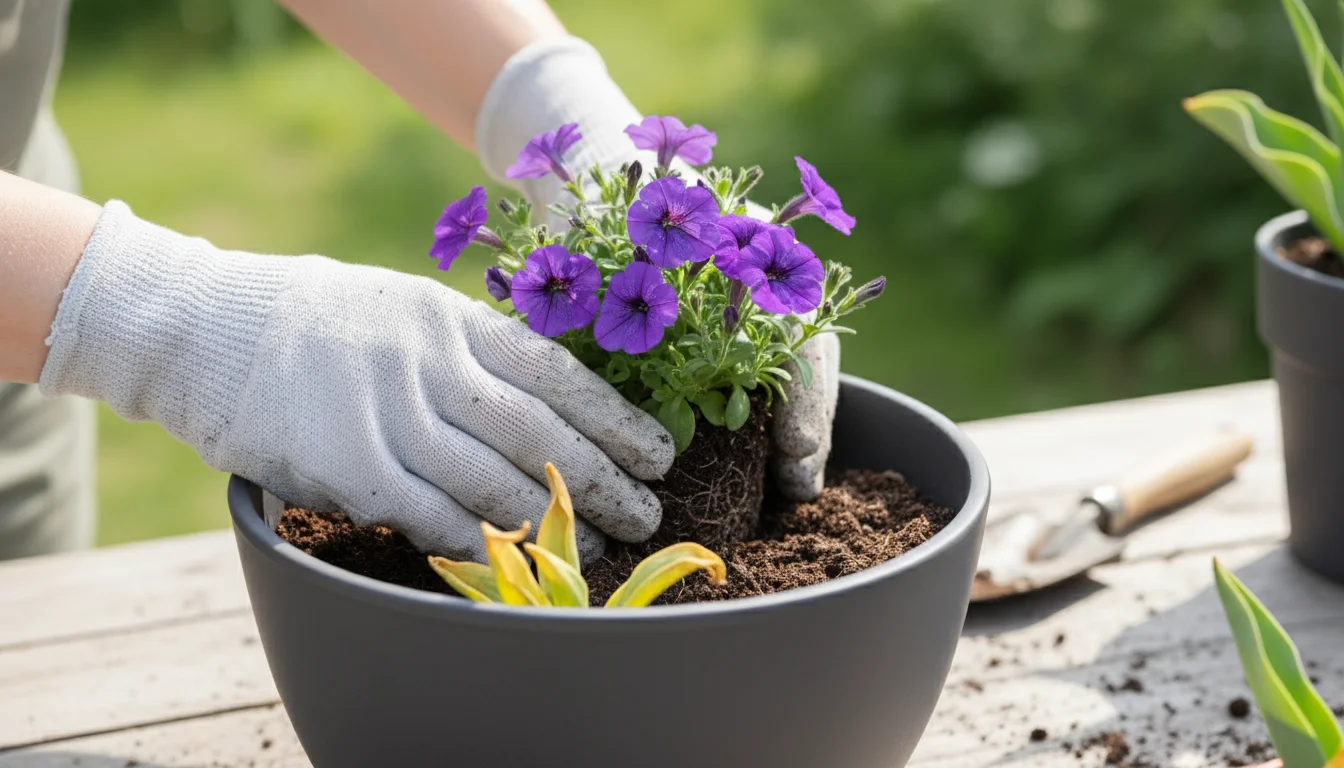
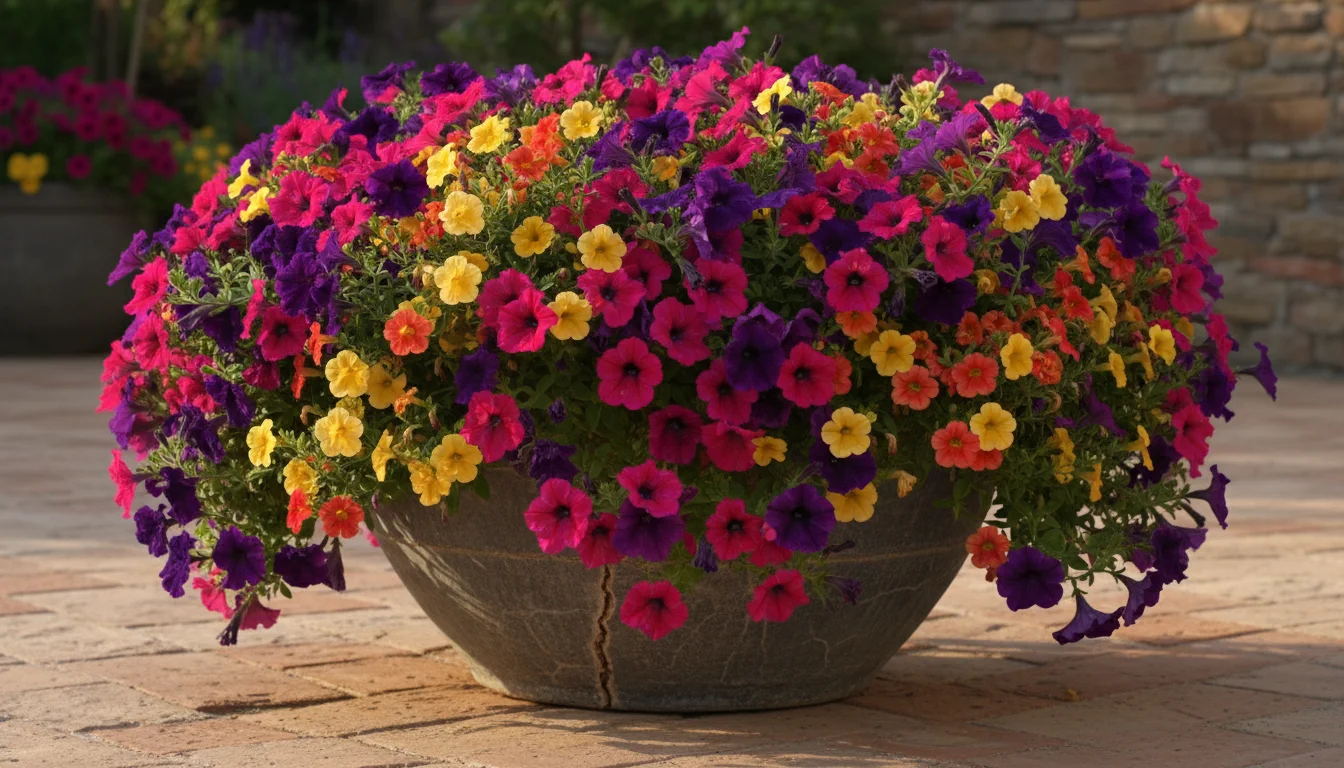
- Petunias (especially Wave Petunias): These are classic choices for continuous summer color. They offer prolific blooms and excellent trailing habits, perfect for container edges. Petunias require consistent feeding to perform their best.
- Calibrachoa (Million Bells): Similar to petunias but with smaller, bell-shaped flowers, calibrachoa provides a profusion of color and is excellent for cascading. They are relatively low-maintenance and thrive in full sun.
- Verbena: Many verbena varieties offer extended bloom times and come in vibrant purples, pinks, and reds. Trailing verbena works wonderfully to spill over the container’s sides.
- Bacopa: Known for its delicate white, pink, or blue flowers, bacopa trails beautifully and adds a fine texture to arrangements. It performs best with some afternoon shade in very hot climates.
- Fuchsias: For a partially shaded spot, upright or trailing fuchsias provide exotic, pendulous blooms in shades of pink, purple, and red.

Planting Strategy for Annuals
When incorporating annuals, you have a few options:
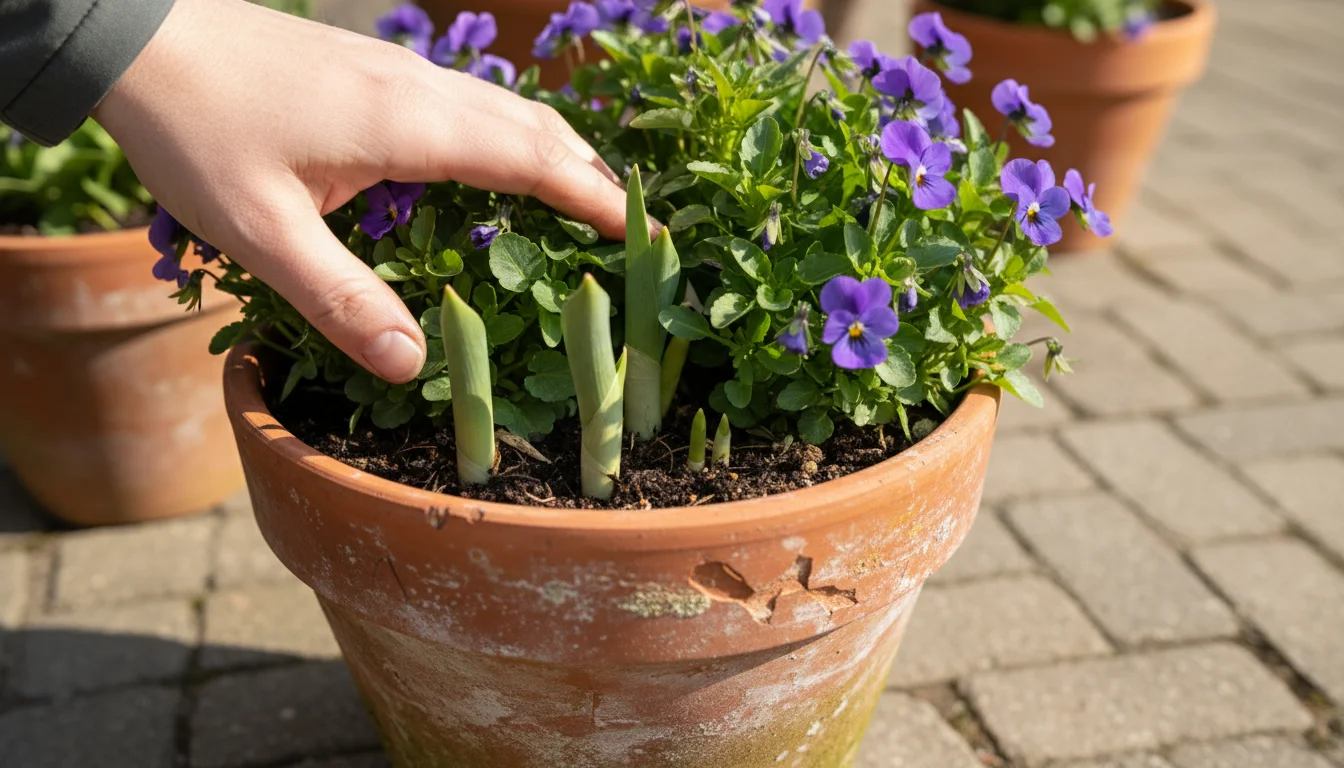
- Planting on Top of Bulbs: If your bulbs’ foliage is still green and healthy, you can gently plant cool-season annuals around them. Ensure you do not disturb the bulbs too much. As the bulb foliage yellows, you can carefully snip it back.
- Replacing Spent Bulbs: Once the bulb foliage completely yellows and dies back, you can gently dig out the spent bulbs (if you plan to save them or simply discard them) and then plant your warm-season annuals directly into the space, ensuring you add fresh potting mix if needed. This is a common approach for dedicated spring planters.
- Complementary Foliage: Consider adding annuals or perennials known for attractive foliage, such as Heuchera (Coral Bells), Coleus, or certain types of ornamental grasses. These provide structure and color even when flowers are sparse.
The key is to select plants that thrive in similar light and water conditions and to think about the “thriller, filler, spiller” design concept: a tall central plant (thriller), mounding plants around it (filler), and trailing plants over the edges (spiller). This creates a full, lush, and continuously appealing container.
Step-by-Step Guide: Planting Your Succession Bloom Masterpiece
Creating your succession bloom planter is an enjoyable project that delivers months of reward. Follow these steps carefully to ensure your layered bulbs and annuals thrive.
- Gather Your Supplies (Fall):
- Selected container with drainage holes (at least 12-16 inches deep and wide).
- High-quality, well-draining potting mix.
- Your chosen spring-flowering bulbs (deepest/latest bloomers, then middle, then shallowest/earliest bloomers).
- Gardening gloves, trowel, watering can.
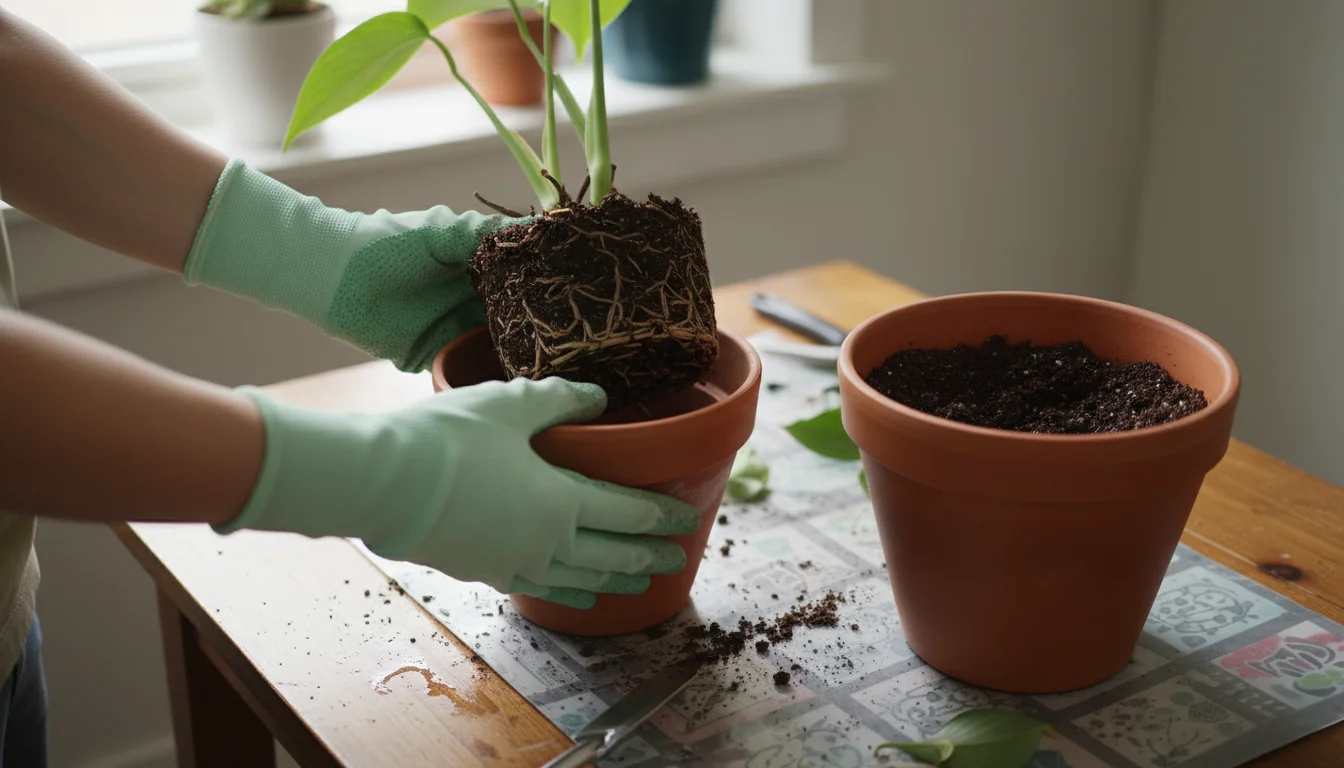
- Prepare Your Container:
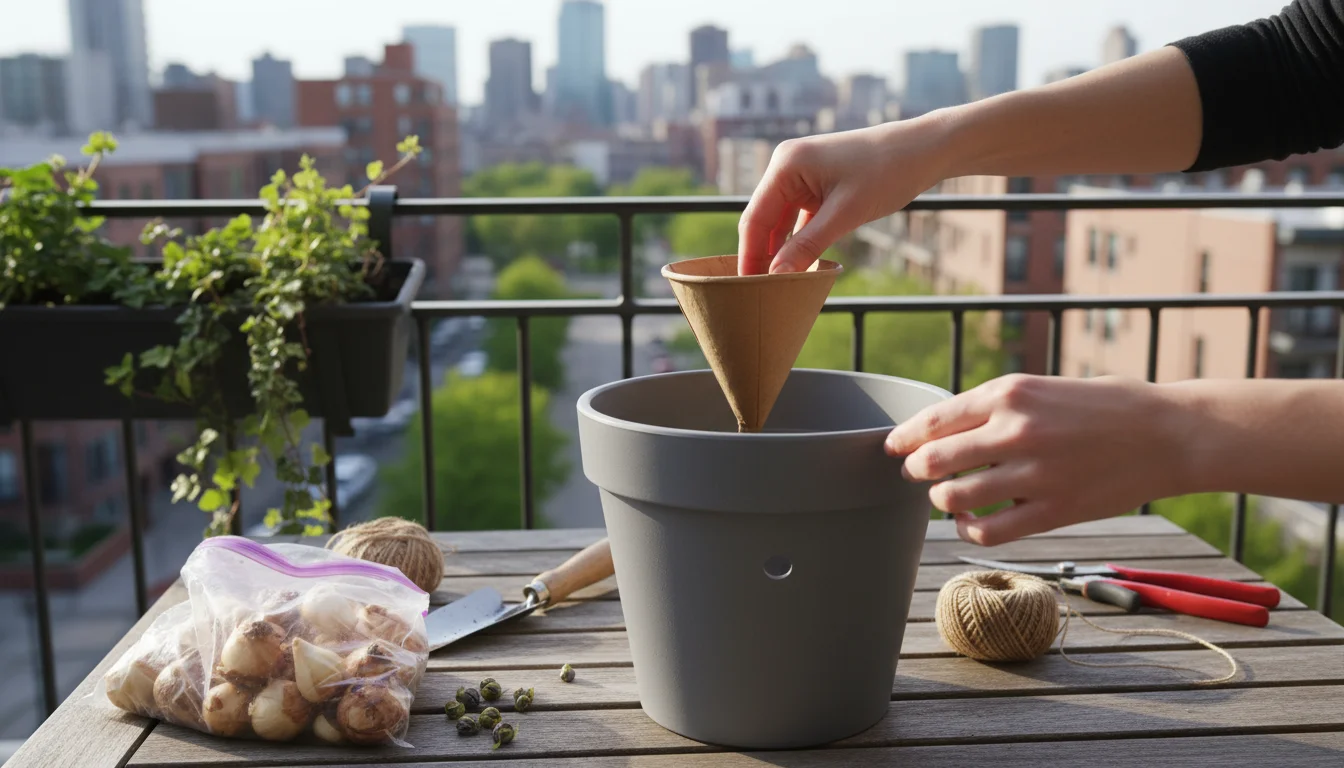
Ensure your chosen container is clean. If it is an old pot, wash it thoroughly with soap and water (and a diluted bleach solution if there were past disease issues) to prevent spreading pathogens. Place a piece of mesh, a coffee filter, or a broken pot shard over the drainage holes to prevent soil from escaping, while still allowing water to flow freely.
- Add the First Layer of Soil:
Fill the bottom of your container with 4-6 inches (10-15 cm) of potting mix. Gently pat it down to remove large air pockets, but do not compact it too tightly. You want it firm but still airy.
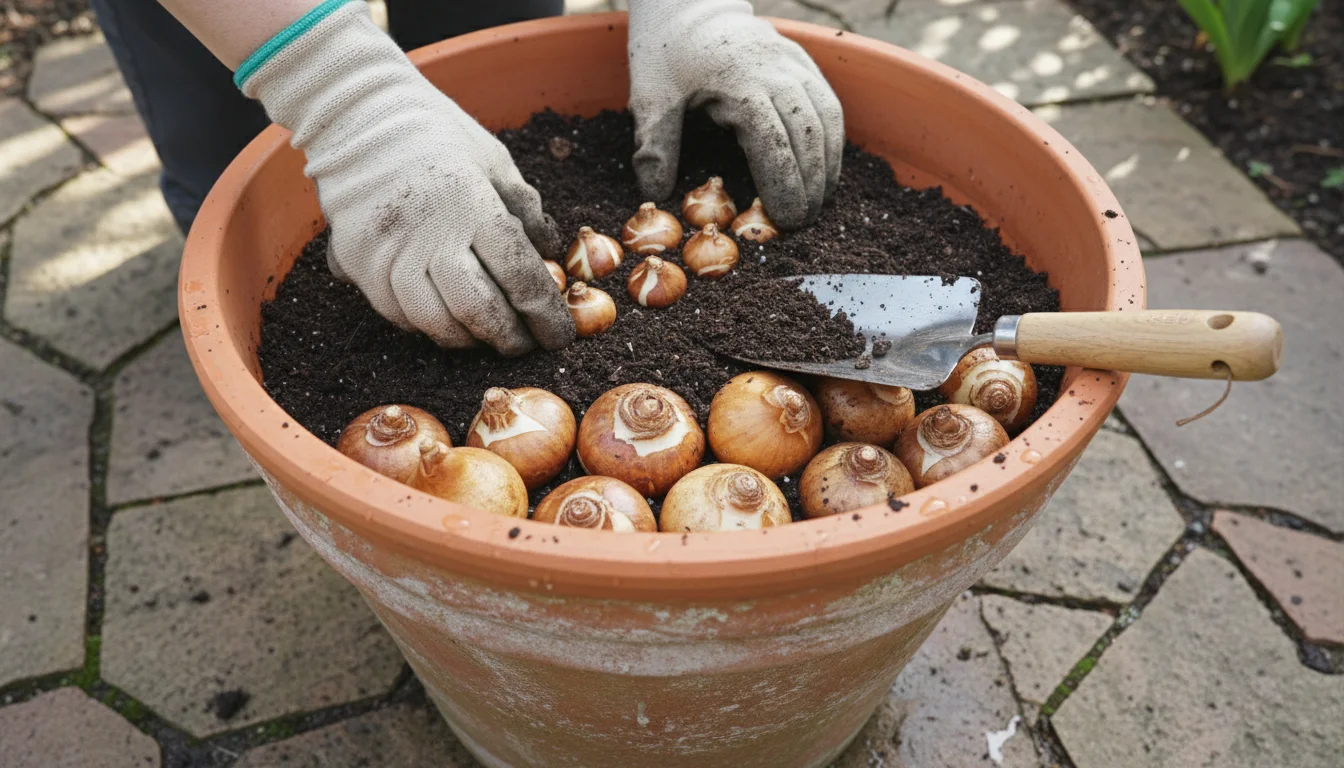
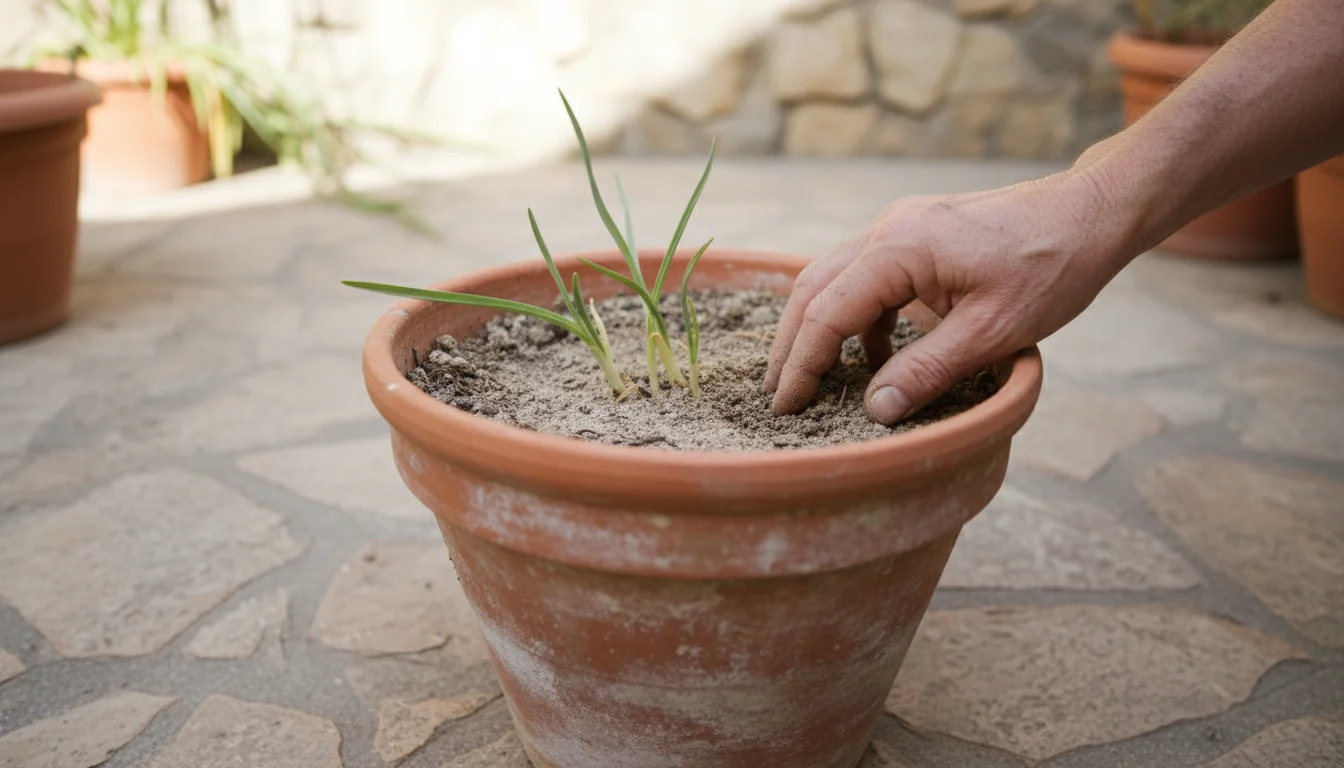
- Plant the Deepest Bulbs (Largest, Latest Bloomers):
Place your largest, latest-blooming bulbs (e.g., Darwin Hybrid Tulips, Daffodils) on top of the first soil layer. Orient them with the pointed side facing upwards and the flatter, root-end facing down. Arrange them somewhat closely, about 1-2 inches (2.5-5 cm) apart, but ensure they do not touch each other or the sides of the pot. Stagger them slightly for a more natural look.
- Cover with Soil, Add Middle Layer:
Add another 3-4 inches (7-10 cm) of potting mix, completely covering the first layer of bulbs. Gently firm the soil. Now, place your mid-spring blooming bulbs (e.g., Hyacinths, Grape Hyacinths) on top of this soil layer. Again, pointed side up, spaced about 1 inch (2.5 cm) apart.
- Cover with Soil, Add Top Layer:
Add another 2-3 inches (5-7 cm) of potting mix, covering the second layer of bulbs. Gently firm the soil. Finally, place your earliest and smallest bulbs (e.g., Crocus, Dwarf Irises) on top. These should be the closest to the surface, again pointed side up.
- Fill with Soil to the Top:
Completely fill the rest of the container with potting mix, leaving about 1 inch (2.5 cm) of space between the soil surface and the rim of the pot. This “headroom” prevents water from spilling over when you irrigate. Gently pat down the soil.
- Water Thoroughly (Fall):
Water the planter deeply until water drains freely from the bottom. This settles the soil around the bulbs and kick-starts their root development. Place your planted container in a cool, dark location (like an unheated garage, shed, or protected outdoor spot) to allow the bulbs to chill over winter. Consistent moisture, but not soggy conditions, is vital during this dormancy period.
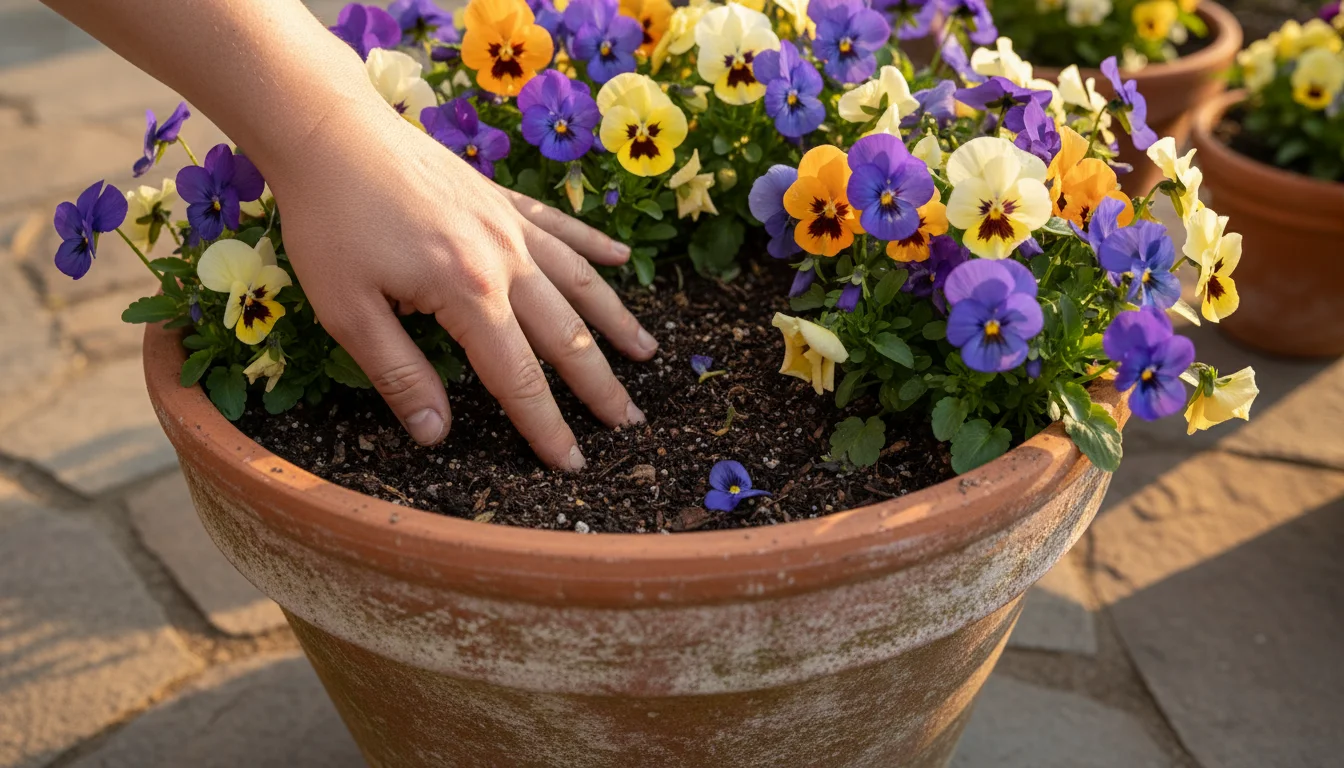
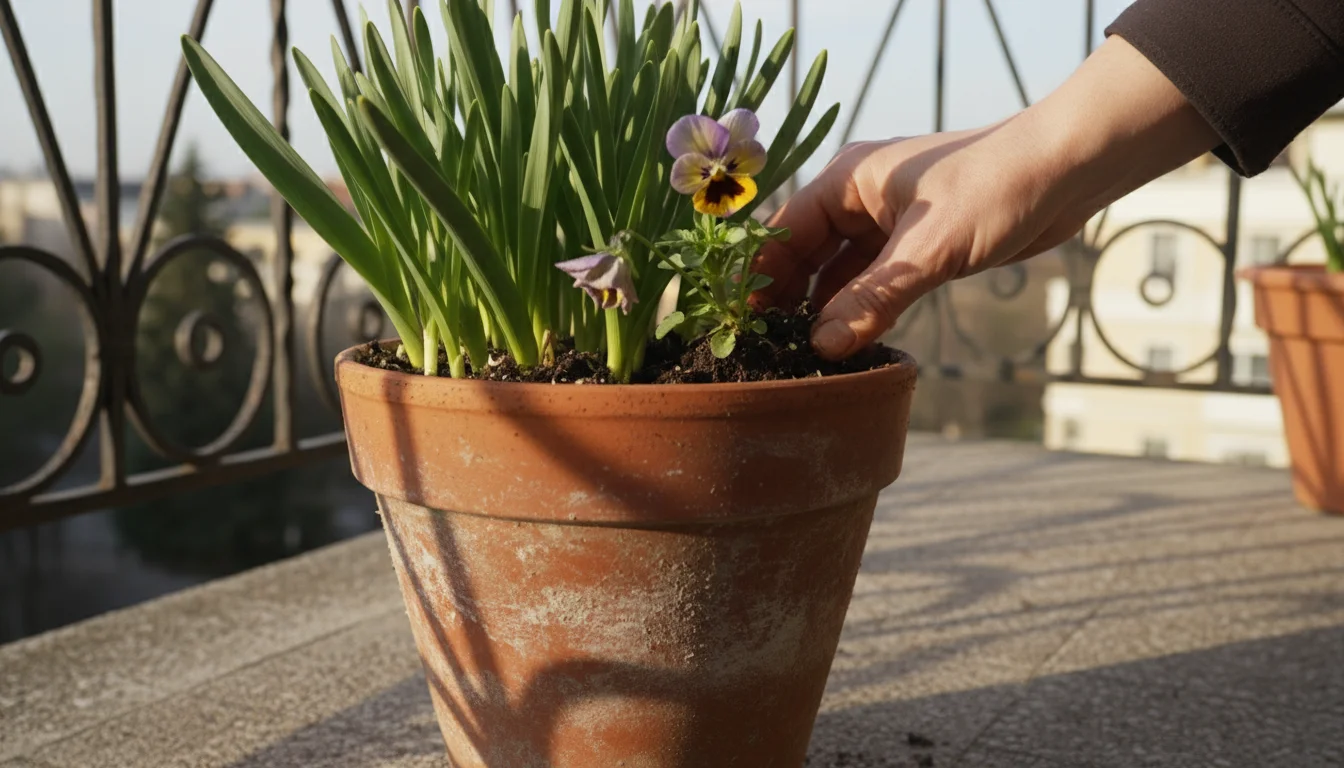
- Add Annuals (Early Spring, after bulbs emerge):
Once your earliest bulbs begin to emerge and temperatures moderate, you can strategically plant cool-season annuals (e.g., Pansies, Violas, Alyssum) directly into the top layer of soil. Create small pockets for their root balls without disturbing the underlying bulbs too much. This adds immediate color and fills the planter while the bulbs are developing. You may need to add a bit more potting mix if settling occurred over winter.
- Transition to Warm-Season Annuals (Late Spring/Early Summer):
As your spring bulbs finish blooming and their foliage begins to yellow, you have a choice. You can let the foliage fully die back, and then carefully remove the spent bulbs (if you wish to store them or discard them). Then, replenish the soil with fresh potting mix and plant a new array of summer annuals (e.g., Petunias, Calibrachoa, Vinca) directly into the pot. Alternatively, you can plant warm-season annuals around the still-green bulb foliage, allowing them to take over as the bulbs recede.
This detailed layering process, coupled with mindful annual integration, sets the stage for months of spectacular, continuous bloom. Remember that how to layer bulbs in a pot for continuous blooms means thinking about time and space in vertical dimensions.
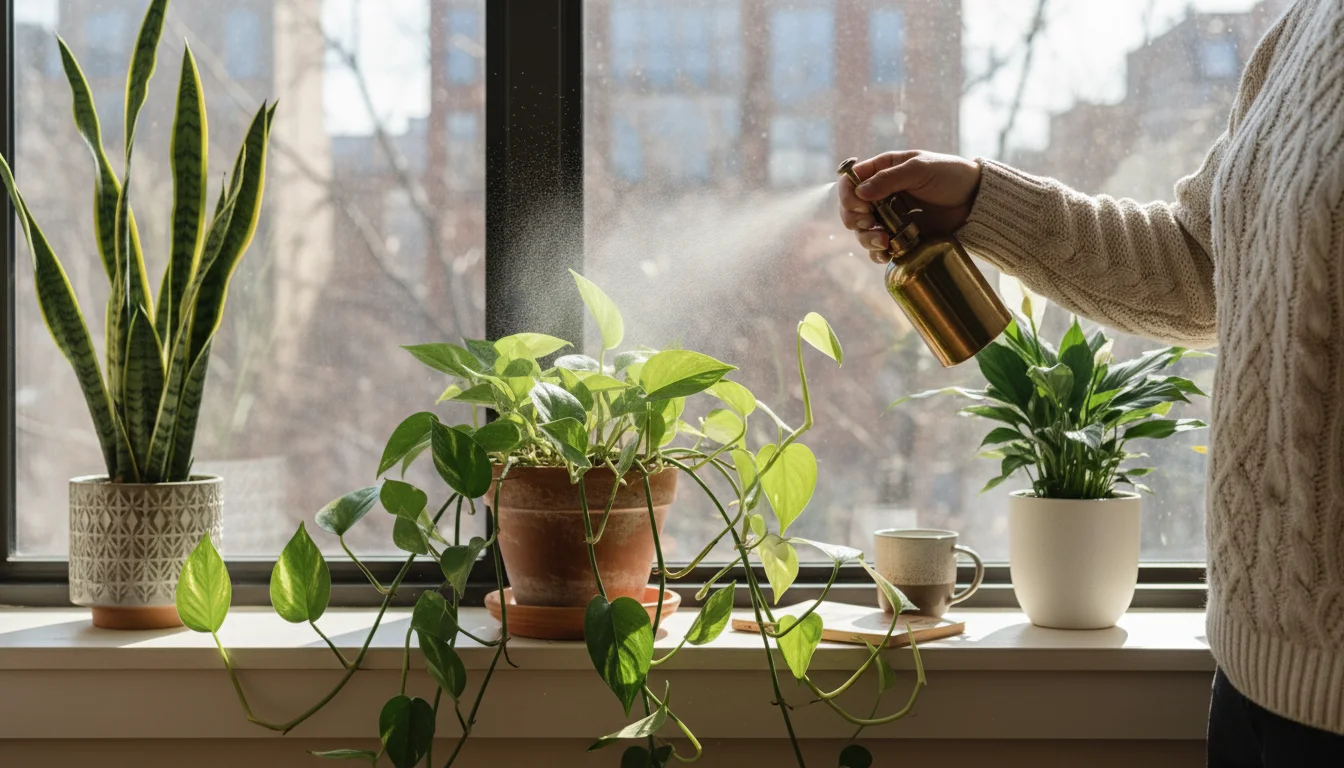
Nurturing Your Bloom: Watering, Feeding, and Ongoing Care
Once your succession bloom planter is established, consistent care ensures a prolonged and vibrant display. Even with low-maintenance plants, a little attention goes a long way in keeping your container looking its best for months.
Watering: The Golden Rule
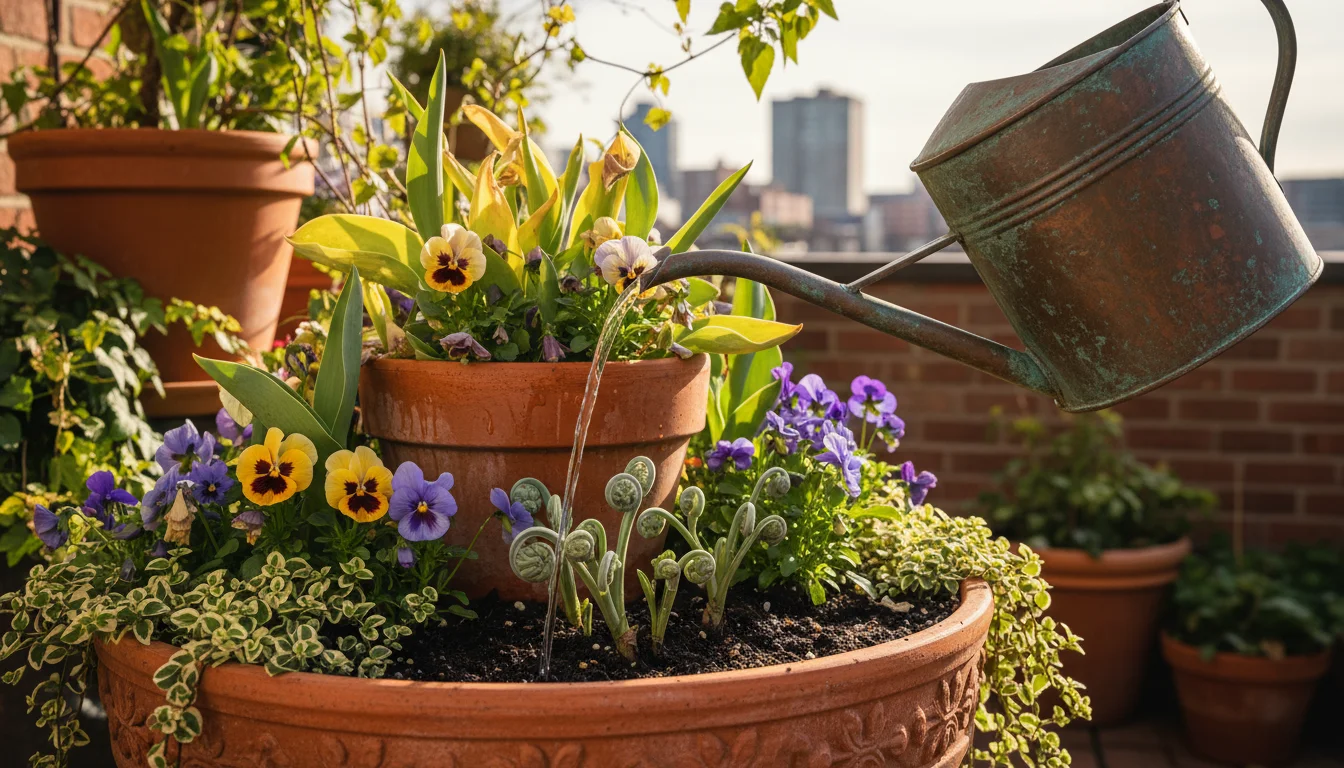
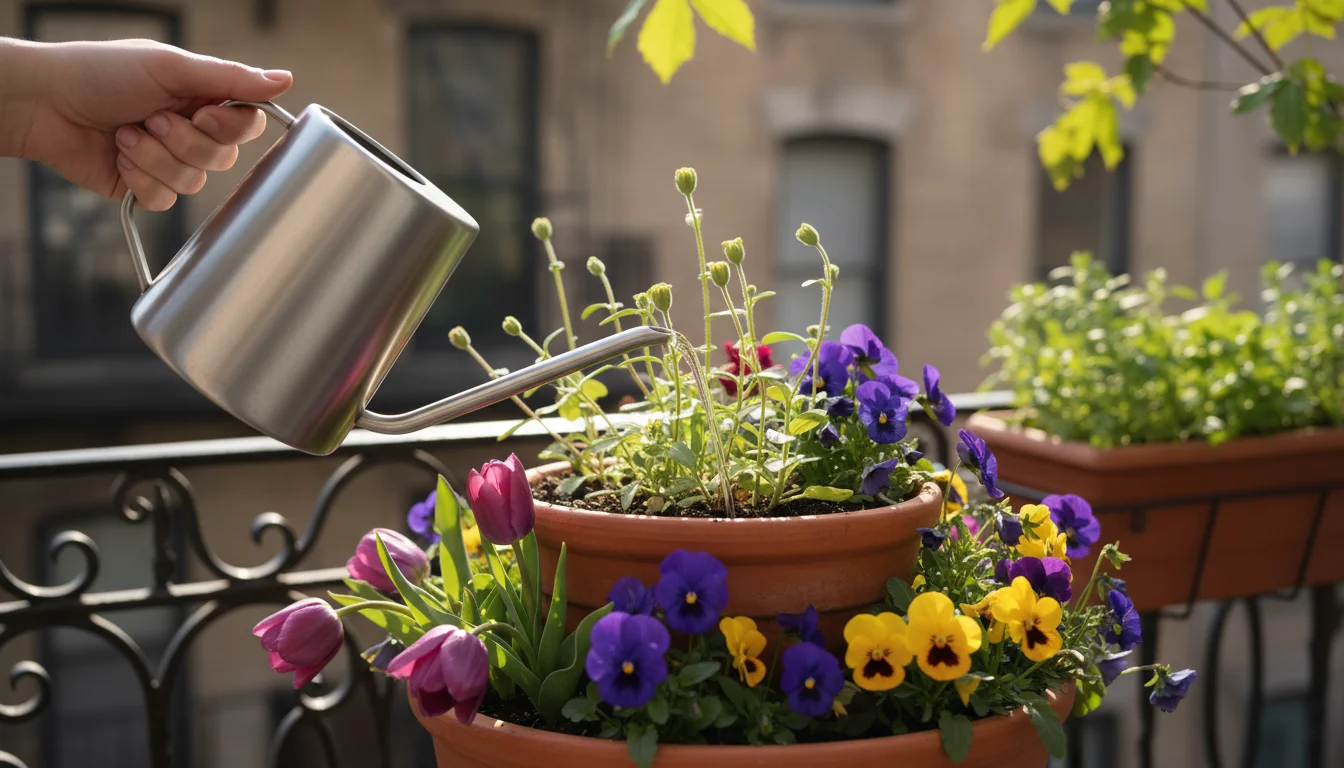
Proper watering is critical, especially for container plants which dry out faster than garden beds.
- Check Soil Moisture: Do not water on a schedule. Instead, feel the soil. Stick your finger about 1-2 inches (2.5-5 cm) deep. If it feels dry, it is time to water. If it still feels moist, wait.
- Water Deeply: When you do water, do so thoroughly until you see water draining from the bottom of the pot. This ensures moisture reaches all the roots, including those of the deeper bulbs. Avoid frequent, shallow watering, which encourages shallow root growth and leaves deeper roots thirsty.
- Adjust for Weather: Hot, sunny, or windy conditions will dry out your planter much faster. Expect to water more frequently during summer months, perhaps daily or even twice daily during heatwaves. Cooler, overcast weather requires less frequent watering.
- Morning is Best: Water in the morning when possible. This allows foliage to dry before nightfall, reducing the risk of fungal diseases.
Feeding Your Flowers
Container plants quickly deplete the nutrients in their limited soil volume, so regular feeding is essential for continuous blooms.
- Initial Boost: Many high-quality potting mixes contain a slow-release fertilizer that provides nutrients for the first few weeks. Check your bag.
- Liquid Fertilizer: Once your bulbs emerge and annuals are established, begin feeding with a balanced liquid fertilizer (e.g., 5-10-5 or 10-10-10) diluted to half strength, every 2-4 weeks. Alternatively, you can use a bloom-boosting fertilizer (higher phosphorus, like 1-2-1 or 1-3-2 ratio) once flowering begins to encourage more blooms.
- Follow Instructions: Always follow the dosage instructions on your fertilizer product. Over-fertilizing can harm plants, leading to burnt foliage or excessive leafy growth at the expense of flowers.
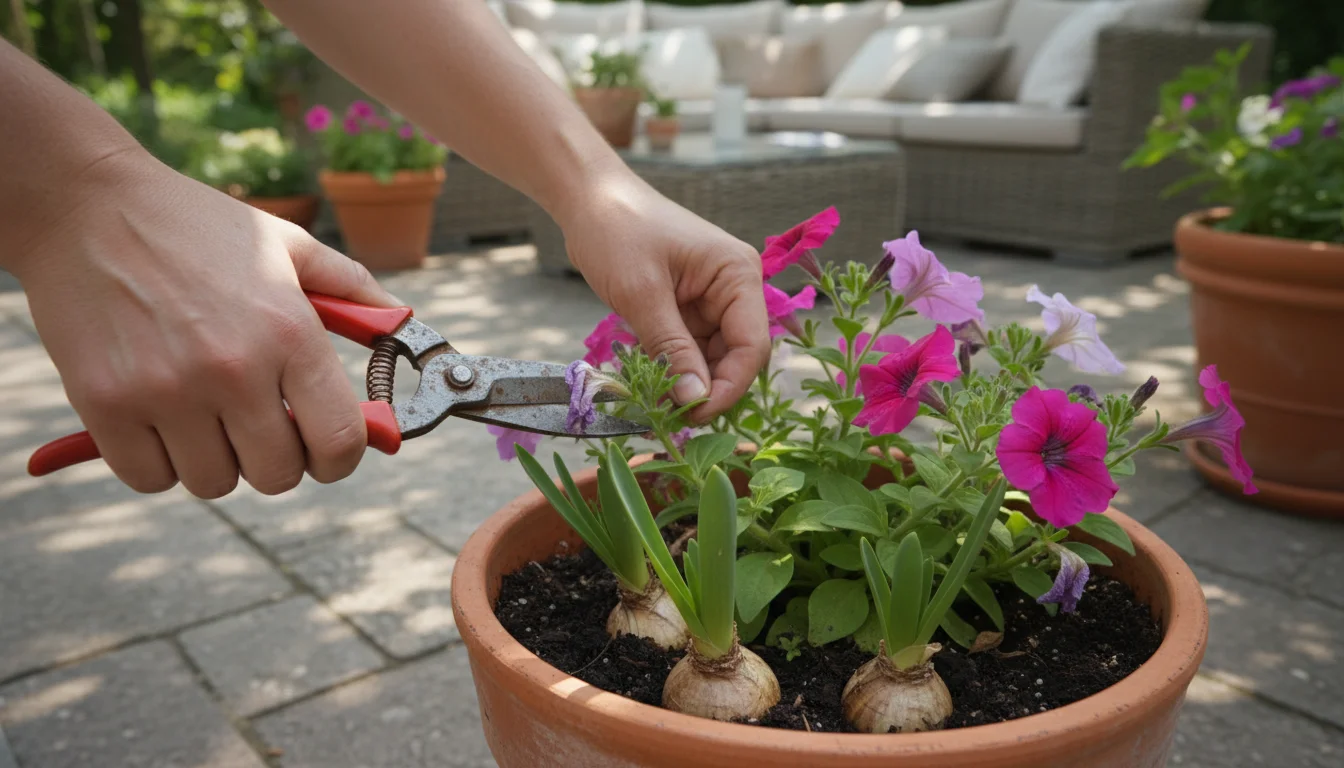
Deadheading and Pruning: Keep the Show Going
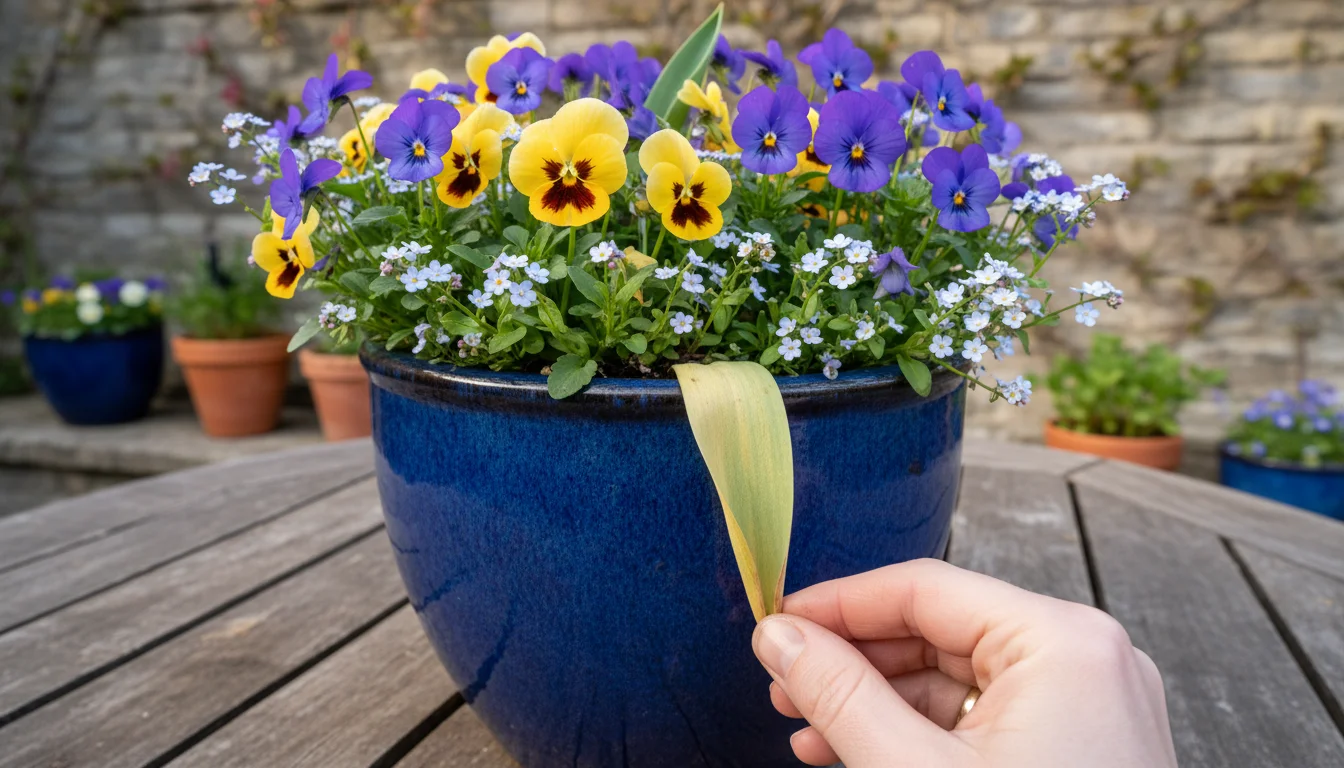
- Deadheading: This practice involves removing spent (faded) flowers. Deadheading redirects the plant’s energy from seed production back into producing more blooms. For bulbs, once the flower fades, you can snip off the flower head, but leave the foliage intact until it yellows naturally. For annuals like petunias, violas, and calibrachoa, deadhead regularly to encourage continuous flowering.
- Light Pruning: If annuals become leggy or overgrown, give them a light trim. This encourages bushier growth and more flowers. Do not prune bulbs until their foliage has completely died back naturally, as the leaves are vital for photosynthesis, which recharges the bulb for next year’s bloom.
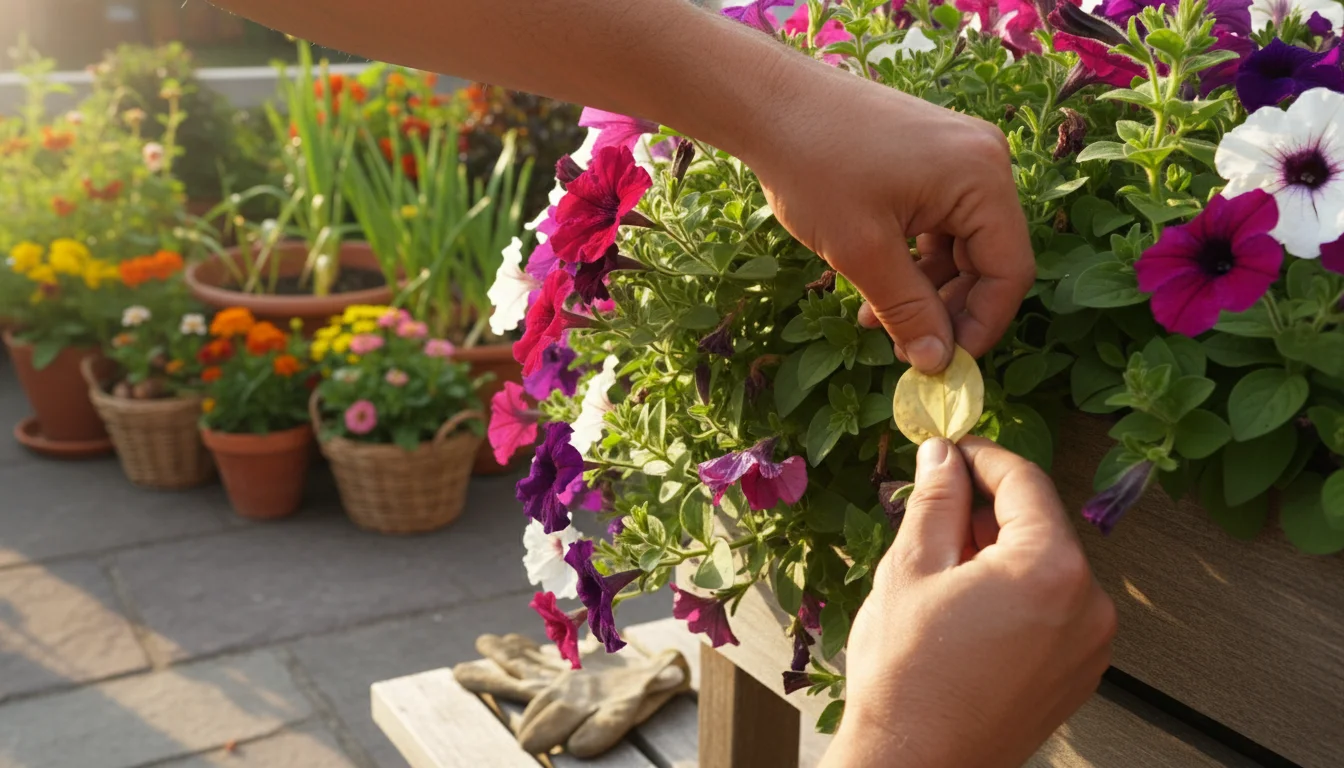
Monitoring for Pests and Diseases
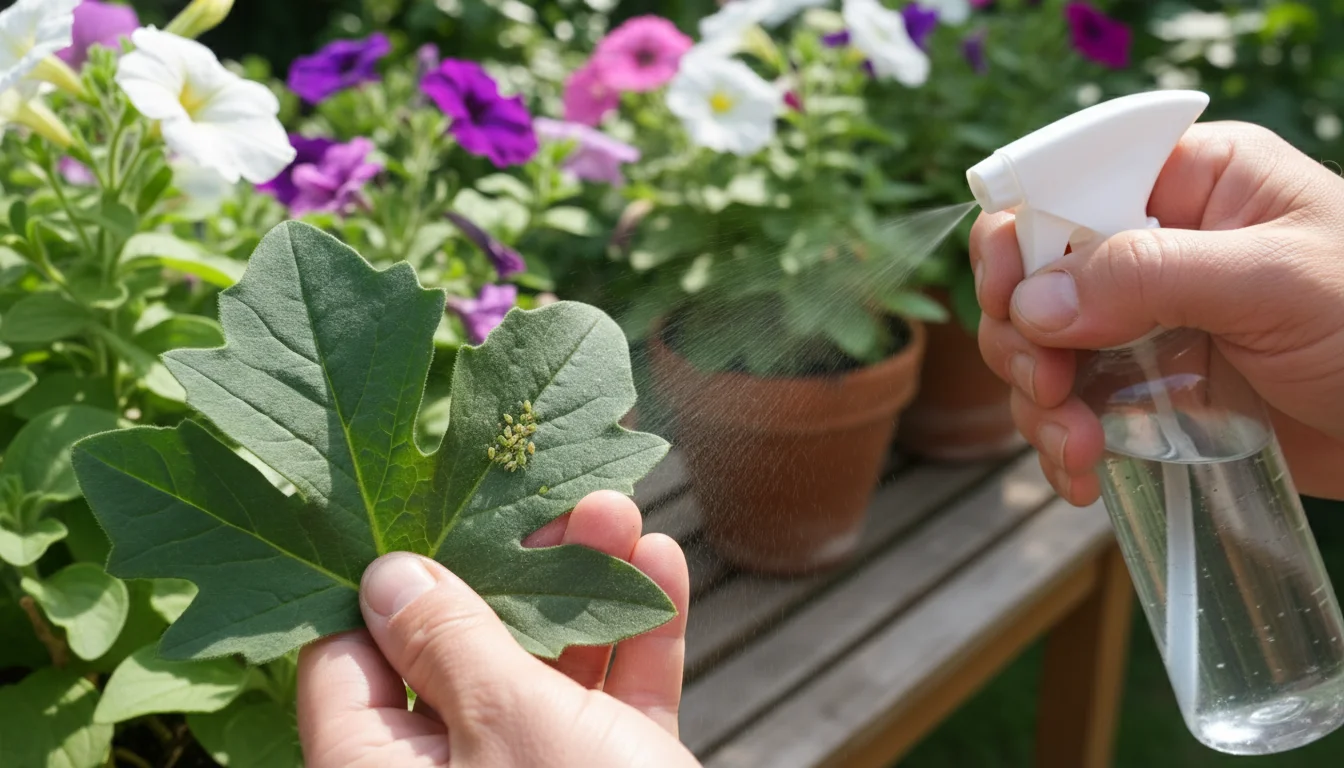
Regularly inspect your plants for any signs of trouble. Early detection makes control much easier.
- Common Pests: Look for aphids (small, often green insects clustered on new growth), spider mites (tiny mites that cause stippling and webbing), and whiteflies.
- Simple Solutions: Often, a strong spray of water can dislodge many pests. For more persistent issues, use an insecticidal soap or neem oil spray, applying it according to product instructions.
- Disease Prevention: Ensure good air circulation around plants, avoid overwatering, and remove any yellowing or diseased leaves promptly to prevent the spread of fungal issues.
By providing consistent water, nutrients, and a little grooming, you empower your succession bloom planter to deliver a continuous, breathtaking display that truly enhances your small-space garden.
Troubleshooting Your Planter: Common Challenges and Simple Solutions
Even the most meticulously planned succession bloom planter can encounter minor setbacks. As your gardening coach, I want to equip you with practical solutions for common issues, ensuring your continuous display stays on track.
No Blooms or Sparse Flowering
- Bulbs Not Blooming:
- Insufficient Chilling: If you live in a warm climate, your bulbs might not have received enough cold exposure during winter. Consider pre-chilled bulbs next fall, or place your potted bulbs in a refrigerator for 10-12 weeks before planting.
- Planting Depth: Bulbs planted too shallow or too deep can struggle. Refer to our layering guide for correct depths.
- Nutrient Deficiency: Ensure you used a good potting mix and are feeding your bulbs lightly as they emerge.
- Overwatering/Underwatering: Both extremes stress bulbs. Ensure consistent, but not soggy, moisture during dormancy and active growth.
- Pest/Disease Damage: Check for signs of bulb rot (mushy bulbs) or pest damage that might have occurred underground.
- Annuals Not Blooming:
- Lack of Sunlight: Most flowering annuals require at least 6 hours of direct sunlight daily. If your planter is in too much shade, move it or select shade-tolerant annuals.
- Insufficient Nutrients: Annuals are heavy feeders. Ensure regular fertilization with a bloom-boosting fertilizer.
- Lack of Deadheading: If you do not remove spent flowers, the plant puts energy into seed production instead of new blooms.
- Temperature Stress: Some cool-season annuals (like pansies) stop blooming in intense summer heat. Consider replacing them with heat-tolerant varieties.
Yellowing or Drooping Leaves
- Overwatering: This is a common culprit. Soggy soil suffocates roots, leading to yellowing, wilting, and eventually root rot. Check drainage holes and allow the soil to dry out between waterings.
- Underwatering: Leaves may wilt and become crispy. Check the soil moisture and water thoroughly.
- Nutrient Deficiency: Overall yellowing (chlorosis) can indicate a lack of nitrogen or other micronutrients. Use a balanced liquid fertilizer.
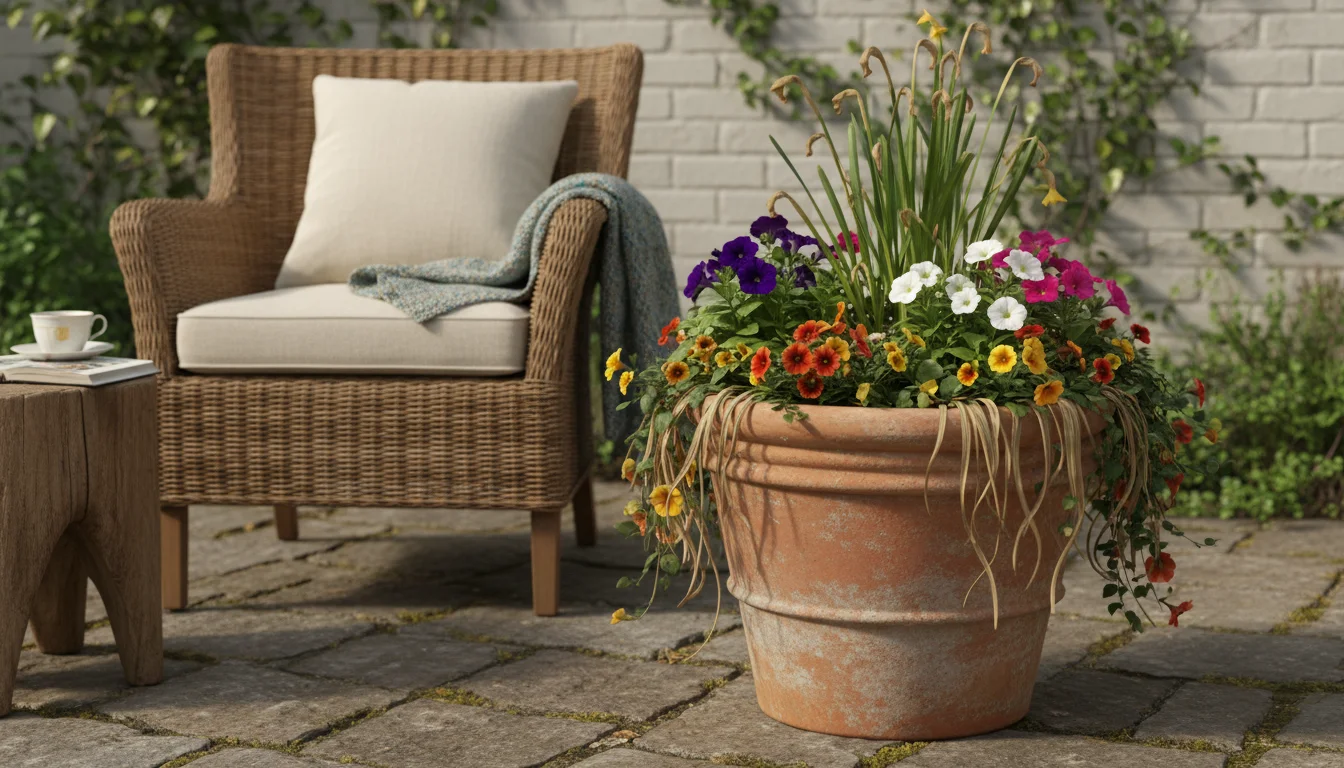
- Natural Senescence: For bulbs, yellowing foliage after blooming is normal. This means the bulb is storing energy for next year. Do not cut it back until it is completely yellow and easily pulls away.
Pests Infestation
- Aphids, Spider Mites, Whiteflies: These small insects can cause stunted growth, distorted leaves, or webbing.
- Solution: First, try a strong spray of water to dislodge them. For persistent issues, apply an insecticidal soap or neem oil, ensuring full coverage of affected plant parts, including undersides of leaves. Repeat as directed.
- Prevention: Inspect plants regularly. Good air circulation and avoiding over-fertilization (which encourages lush, tender growth attractive to aphids) help prevent infestations.
Leggy or Stretched Annuals
- Insufficient Light: Plants stretch towards light when they are not getting enough. Move your planter to a brighter location.
- Lack of Pruning/Pinching: Regularly pinching back the tips of young annuals encourages bushier, more compact growth.
- Over-fertilization (Nitrogen): Too much nitrogen can promote leafy growth at the expense of flowers, often resulting in lanky stems. Balance your fertilizer.
By understanding these common challenges and implementing these straightforward solutions, you can quickly address issues and keep your succession bloom planter flourishing, delivering consistent beauty and joy throughout its long season.
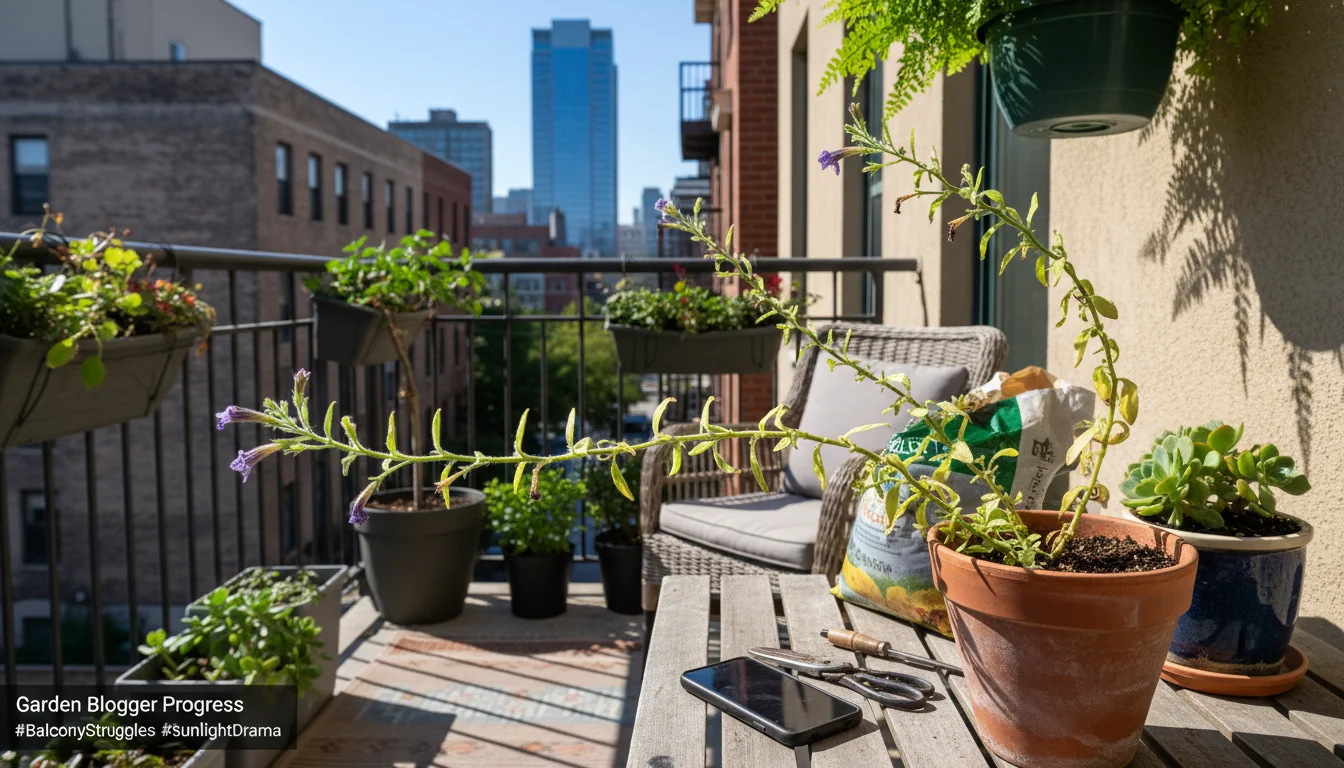
Beyond Spring: Extending Your Planter’s Life Cycle
The beauty of a succession bloom planter does not end when the last tulip fades. This ingenious system is designed for longevity and adaptability. You can extend its life and vibrancy well beyond spring, transitioning it seamlessly into a stunning summer display, and even planning for future seasons.
To further simplify your routine, you can incorporate winter-hardy perennials that return year after year, reducing the need for constant replanting.
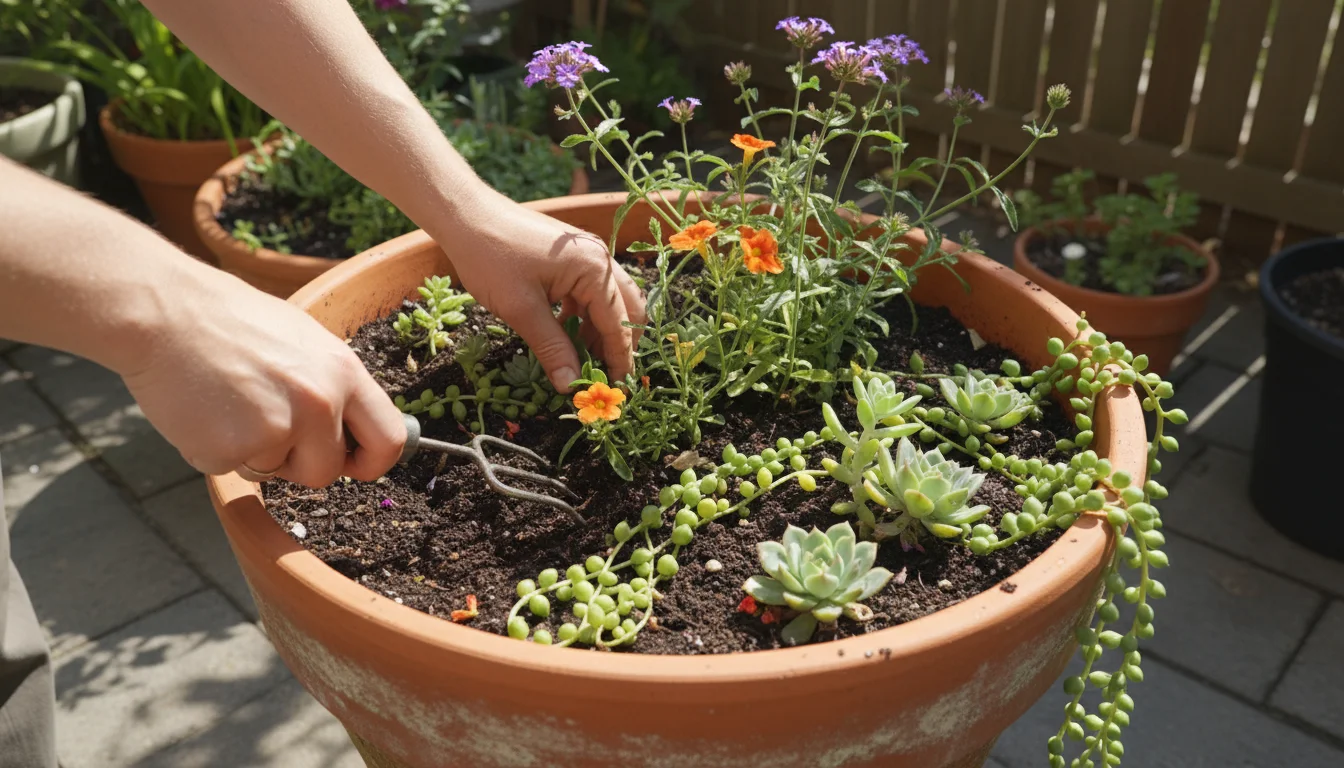
What to Do After Spring Blooms Fade
- Deadhead Spent Flowers: As soon as a bulb’s flower fades, snip off the flower head. This prevents the plant from expending energy on seed production.
- Nurture the Foliage: This is critically important for bulbs. Do not cut back the green leaves until they have completely yellowed and withered naturally. The leaves are essential for photosynthesis, which recharges the bulb, storing energy for next year’s bloom. This process usually takes 4-6 weeks after flowering.
- Replace or Replant Annuals:
- Cool-Season to Warm-Season Transition: Once your cool-season annuals (like pansies) start to look tired from increasing temperatures, gently remove them. You can then plant heat-loving annuals (e.g., Petunias, Calibrachoa, Vinca) directly into the top layer of soil, around the still-recharging bulb foliage.
- Bulb Removal Option: If you prefer a completely fresh look, or if your bulbs are not perennial in your climate, you can carefully dig out the spent bulbs once their foliage has fully died back. Then, replenish the soil with fresh potting mix and plant a new array of summer annuals.
Options for Your Bulbs After the Season
- Leave Them in the Pot: If you live in a climate where your specific bulbs are hardy and your pot is large enough to prevent extreme temperature fluctuations, you can leave them in the container. Provide consistent moisture during the growing season. In very cold regions, protect the pot by insulating it or moving it to an unheated garage for winter. However, container bulbs generally do not perform as well in subsequent years as those in the ground, as they face more stress.
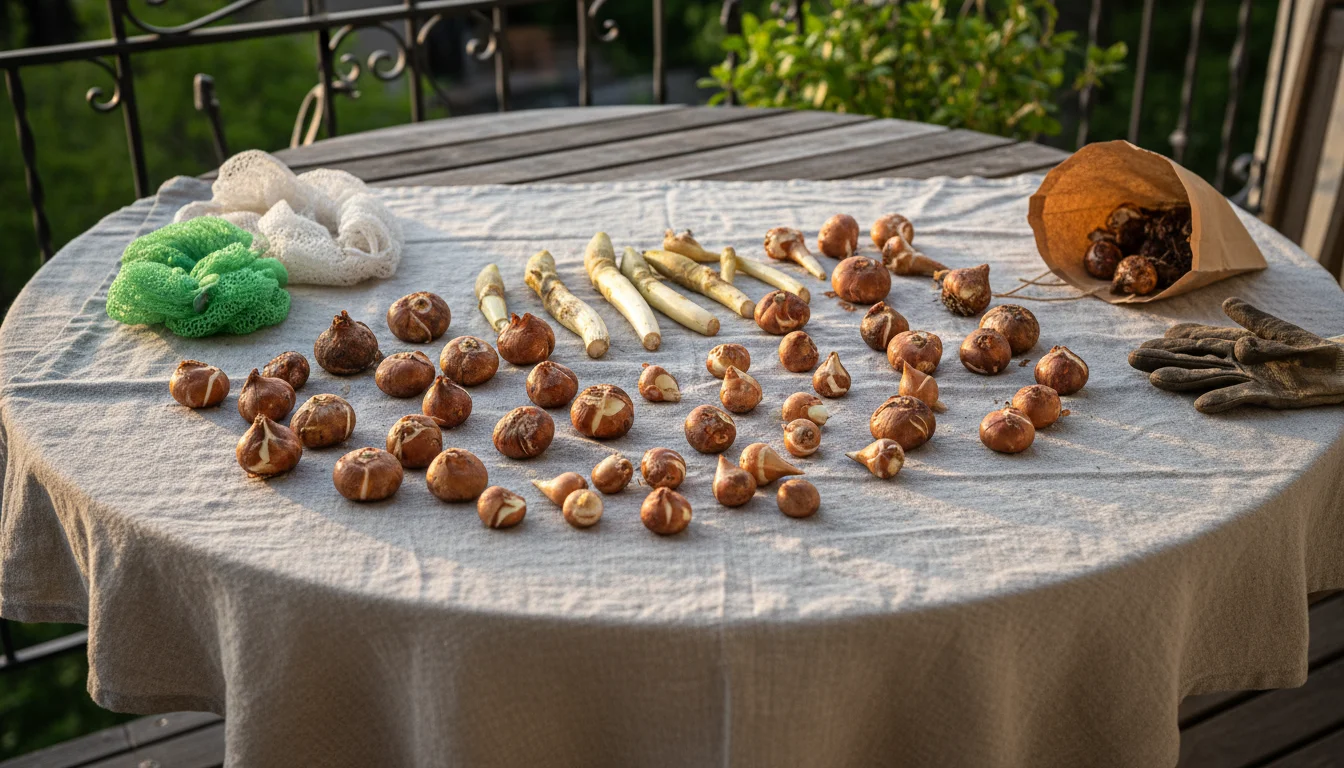
- Store Them for Next Year: Once the bulb foliage has completely died back, carefully dig up the bulbs. Clean off any soil, allow them to air dry for a few days in a cool, dry, well-ventilated spot, then store them in a mesh bag, old nylon stocking, or paper bag filled with peat moss or sawdust. Label them clearly. Store in a cool, dark, dry place (e.g., basement, unheated closet) until it is time to replant in the fall. This is an excellent option for preserving your investment.
- Replant in the Garden: If you have a garden bed, you can move the spent bulbs into the ground after they have died back. They often naturalize better and have a better chance of returning year after year when planted in a larger, more stable environment.

Planning for Future Seasons
The success of your ‘Succession Bloom’ planter encourages forward-thinking. In late summer/early fall, start planning your next bulb combination. Consider different color schemes or explore new bulb varieties. Many bulb retailers offer excellent selections in autumn, perfect for your next round of succession planting. Remember to rotate your annuals for healthier soil and to introduce new visual interest.
By actively managing your planter through its various stages, you ensure continuous beauty and maximize your gardening efforts. This adaptable approach makes small-space gardening an ongoing source of joy and creative expression, delivering dynamic spring planters year after year.
Frequently Asked Questions
Do I need to dig up the bulbs every year from my succession planter?
It depends on your climate and the type of bulbs. In colder climates (Zones 3-7), many spring bulbs, especially tulips, often do not reliably rebloom in containers after their first year due to the harsh winter conditions and stress of container life. Digging them up and storing them, or treating them as annuals, is often the most practical approach. Daffodils and some minor bulbs are more forgiving and might rebloom for a few years if the pot is protected. In warmer climates where bulbs need a chilling period, you must dig them up and refrigerate them or buy pre-chilled bulbs annually.
Can I use compost instead of potting mix?
While compost is excellent for enriching garden beds, it is generally too heavy and dense for container planting on its own. It can compact easily, leading to poor drainage and suffocated roots. Always use a high-quality potting mix as your primary medium for containers. You can amend your potting mix with a small amount (up to 20%) of well-rotted compost to boost nutrients and organic matter, but it should not be the sole planting medium.
My annuals are wilting even after watering. What is wrong?
Wilting, despite adequate watering, can indicate several issues. Overwatering is a common cause; roots deprived of oxygen cannot take up water, leading to wilting that mimics thirst. Check the soil moisture deeply to confirm it is not saturated. Root rot, often caused by poor drainage, also manifests as wilting. Alternatively, severe heat stress can cause temporary wilting as plants lose water faster than they can absorb it; they often recover once temperatures cool. Finally, pests or diseases affecting the roots or vascular system can also lead to wilting.
When is the best time to plant the bulbs for a succession bloom planter?
Plant spring-flowering bulbs in the fall, typically between September and December, before the ground freezes solid. The exact timing depends on your local climate. You want to plant them early enough for their roots to establish before winter’s hard freeze, but late enough that they do not sprout premature foliage during a warm spell. Aim for nighttime temperatures consistently falling into the 40s (Fahrenheit) or single digits (Celsius).
Can I use this method for shaded areas?
Yes, but your plant selections will differ. For bulbs, choose varieties that tolerate or prefer partial shade, such as certain varieties of daffodils, snowdrops, or specific tulips. For annuals, focus on shade-loving options like impatiens, fuchsias, coleus (for foliage color), torenia (wishbone flower), or certain varieties of begonia. The layering principle remains the same, but the plant palette shifts to suit lower light conditions. Always check the light requirements for each plant you choose.
Creating a succession bloom planter is a truly rewarding endeavor, bringing continuous beauty and vibrant life to even the smallest gardening spaces. By following these practical steps, you unlock months of dynamic color, transforming your balcony, patio, or small yard into a focal point of gardening joy. Embrace the layers, watch your garden evolve, and savor the extended show of blooms.
For trustworthy gardening information, visit: San Diego Botanic Garden, U.S. National Arboretum, American Horticultural Society and National Garden Bureau. These organizations provide expert, research-based advice for gardeners at all levels.
Disclaimer: This article is for informational purposes only and is not a substitute for professional gardening advice. Always consult local extension services or horticulture experts for region-specific guidance.

Leave a Reply