
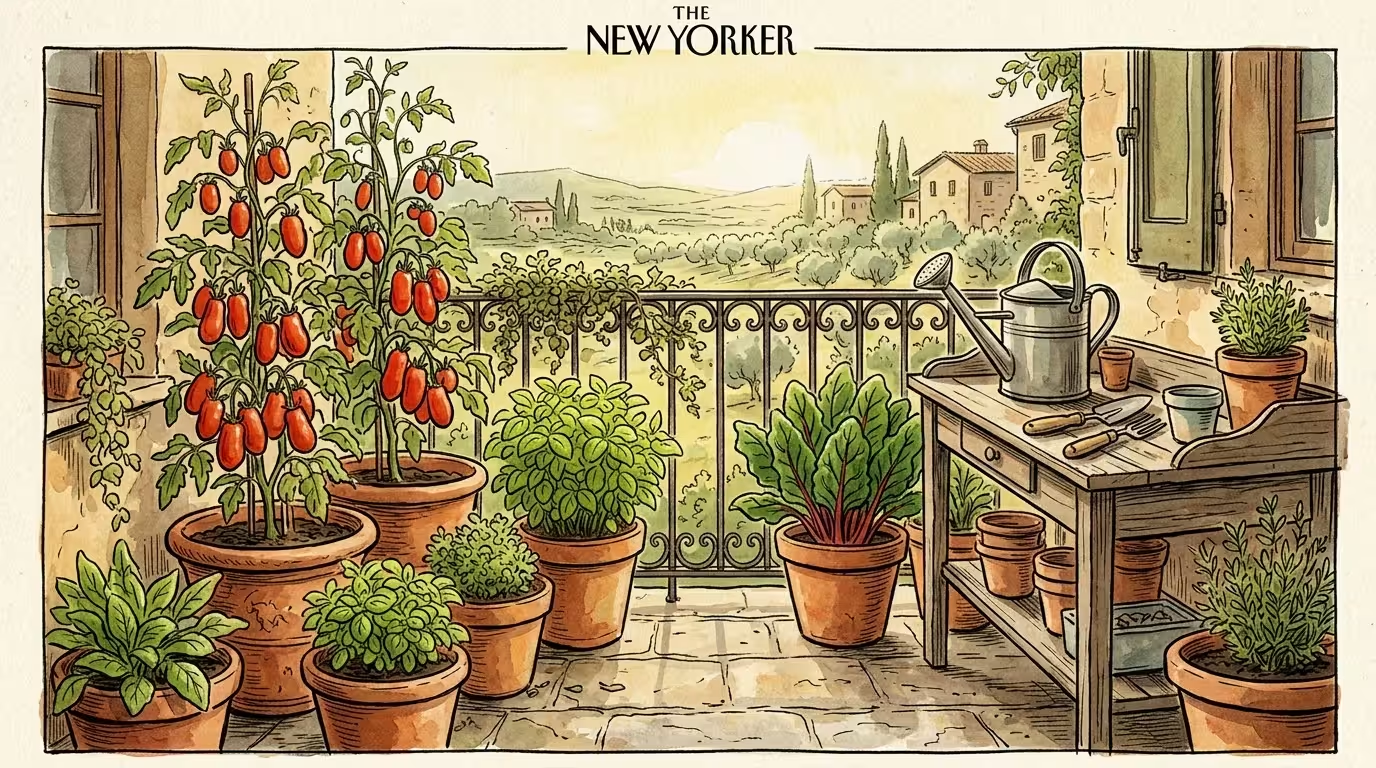
Growing a vibrant, productive vegetable garden in a small space feels effortless when you apply the time-tested wisdom of traditional Italian farmers.
You can transform your modest balcony, patio, or courtyard into a thriving food oasis by mastering a few foundational techniques centered around soil health, strategic watering, and clever plant pairings.
Italian agriculture relies on working with nature rather than against it, focusing on deep roots and continuous harvests rather than quick, artificial fixes.
By adapting these rich, generational practices to modern container and raised-bed setups, you will produce sweeter tomatoes, crisper greens, and more fragrant herbs. Discover the six essential strategies that bring rustic, abundant Italian farming directly to your compact urban garden.
To keep your garden productive month after month, you can also implement a succession planting guide to coordinate your seeding schedules.
Contents9 sections
- Tip 1: Maximize Sunlight for Mediterranean Yields
- Tip 2: Cultivate Soil Like Family
- Tip 3: Water With Purpose Using the Deep Soak Method
- Tip 4: Embrace Companion Planting the Italian Way
- Tip 5: Harvest Continually for Endless Yields
- Tip 6: Embrace the Seasons With Succession Sowing
- Troubleshooting Common Vegetable Garden Pests Naturally
- Frequently Asked Questions
- Trusted Resources and Expert Guidance
Tip 1: Maximize Sunlight for Mediterranean Yields
When you picture the rolling hills of Tuscany or the terraced farms of the Amalfi Coast, one element stands out above all others: brilliant, unyielding sunlight. Sunlight acts as the engine for plant growth.
Vegetables native to the Mediterranean—such as tomatoes, eggplants, peppers, and basil—require significant energy to produce their vibrant colors, rich sugars, and deep flavors. Traditional Italian farmers meticulously map their land to position the most demanding crops in full, uninterrupted sun.
You can adopt this exact mindset for your balcony or patio, even if your space feels limited by surrounding buildings or roof overhangs.
To select the highest producing crops for your space, check out the best vegetables to grow in pots before finalizing your garden plan.
To get the absolute most out of your sunniest balcony spots, learning how to grow tomatoes in containers will help you avoid common mistakes and secure a heavy harvest.
First, you need to understand your local microclimate. A microclimate refers to the specific environmental conditions in your exact growing space, which can differ significantly from the general weather forecast.
Spend a weekend tracking the sun across your balcony or patio. Check your space every two hours from morning until evening.
Note exactly which corners receive direct sunlight—where the sun hits the leaves without any obstruction—and which areas remain in the shadows.
To grow summer fruiting vegetables successfully, you need a minimum of six to eight hours of direct sunlight each day. If you discover that your patio only receives four hours of sun, do not despair.
You simply need to adjust your plant choices. Leafy greens like Swiss chard, arugula, and certain varieties of Italian flat-leaf parsley thrive in partial sun and will wilt less during the intense heat of midsummer.
You can also manipulate your environment to capture more light. Light colors reflect solar energy, while dark colors absorb it.
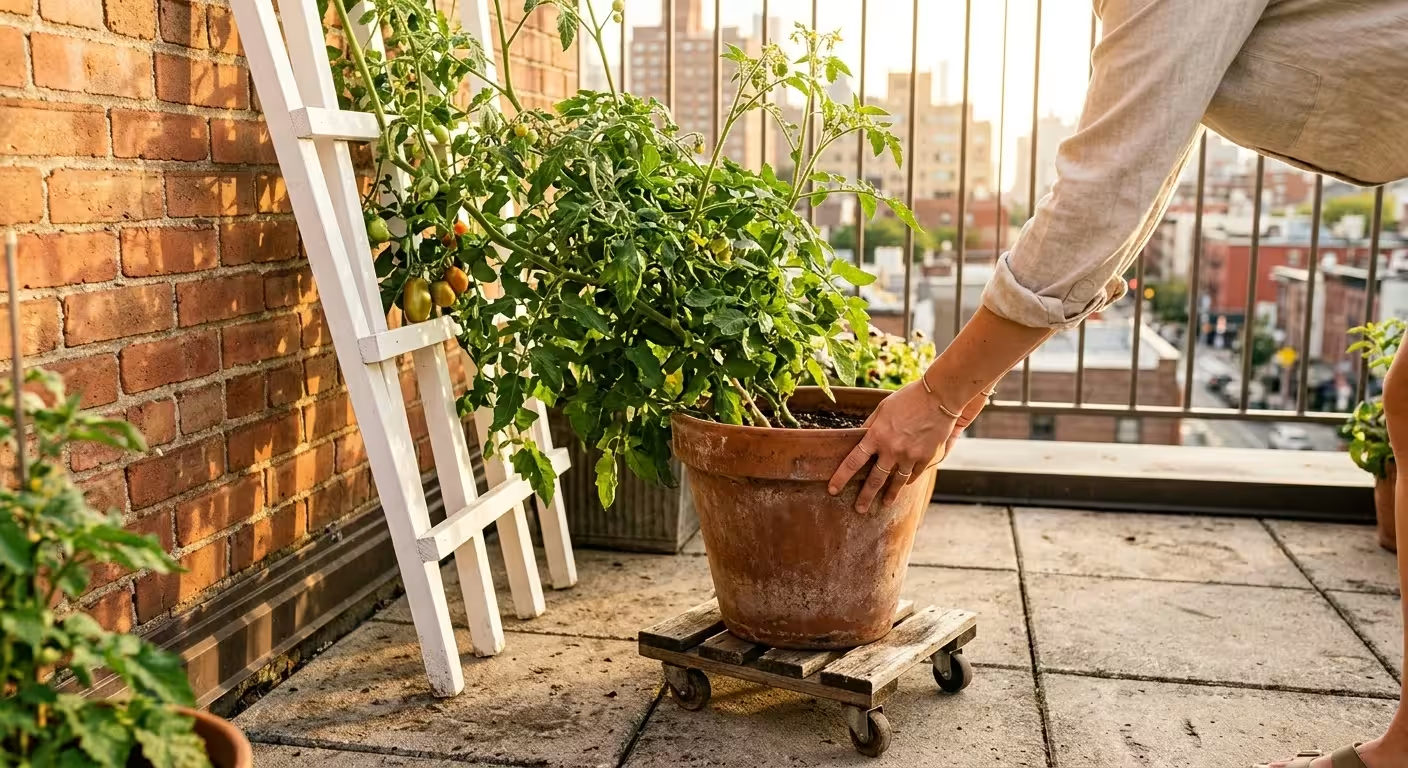
If your balcony features dark brick or wood, place a simple white trellis behind your pots or paint an adjacent wall a bright, reflective shade. This simple trick bounces ambient light back onto your plants, increasing their overall daily exposure.
Furthermore, utilize wheeled plant caddies for heavy pots. As the season progresses and the sun shifts lower or higher in the sky, you can easily roll your prize San Marzano tomatoes into the brightest spots, ensuring they receive the continuous light required to ripen completely.
Tip 2: Cultivate Soil Like Family
A classic Italian farming proverb states that you should feed the soil, not the plant. In traditional agriculture, farmers spend generations building the organic matter in their fields, creating a living ecosystem teeming with beneficial microbes and earthworms.
When you transition this philosophy to small-space gardening, you face a unique challenge: plants growing in containers rely entirely on the limited soil volume you provide. You cannot simply scoop dirt from a local yard and place it in a pot.
Native garden soil becomes highly compacted in containers, preventing roots from breathing and stopping water from flowing freely.
If you want to revitalize your potting mix at the end of the season, consider cover cropping for containers to naturally restore nutrients.
Instead, you must build a custom soil environment that balances moisture retention with excellent drainage. Drainage simply refers to how easily water moves through the soil.
If water sits at the bottom of a pot, the roots drown, rot sets in, and the plant dies. An ideal container soil feels light, fluffy, and rich.
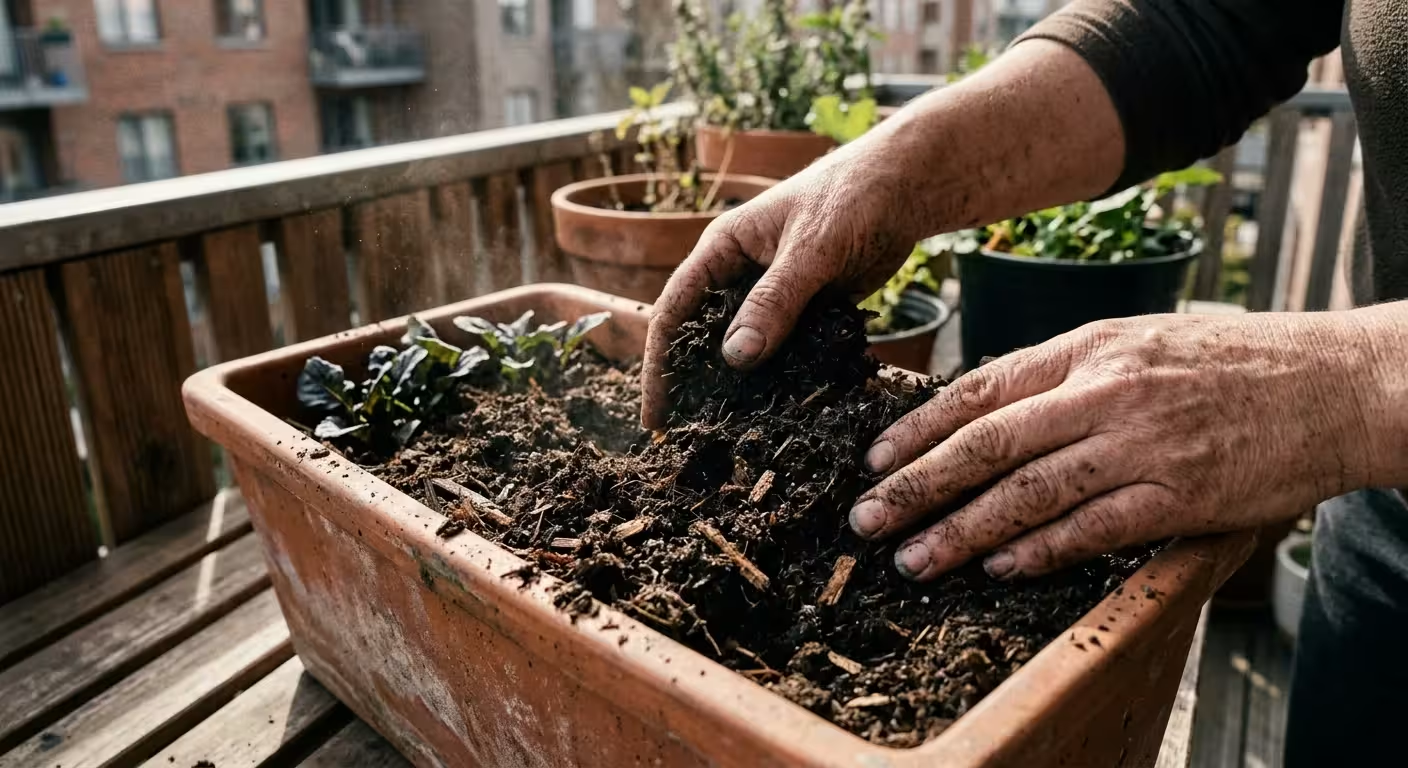
To replicate the rich, loamy earth of an Italian farm, you can mix your own premium potting soil. Creating your own mix saves money and gives you total control over the growing medium.
Use this simple, highly effective recipe measured by volume:
- One-third organic compost: Compost provides the foundational nutrients for your vegetables. It breaks down slowly over the season, offering a steady supply of nitrogen, phosphorus, and potassium.
- One-third coconut coir or peat moss: These materials act as sponges. They hold onto moisture during hot summer afternoons, releasing water back to the plant roots as the surrounding soil dries out. Coconut coir offers an exceptionally eco-friendly alternative to peat moss.
- One-third perlite or pumice: These lightweight, porous volcanic rocks create tiny air pockets in your soil mixture. Plant roots require oxygen just as much as they require water. Perlite guarantees that your soil remains loose and well-aerated, promoting vigorous root expansion.
When preparing your containers, always ensure that your pots feature multiple drainage holes at the base. Before adding your soil mix, resist the outdated advice to place a layer of gravel at the bottom of the pot.
Gravel actually hinders drainage by creating a perched water table, forcing the saturated soil closer to the plant roots.
Simply fill your container entirely with your custom mix, leaving about an inch of space at the top to prevent water from spilling over the edge during watering.
Tip 3: Water With Purpose Using the Deep Soak Method
Watering vegetables in a small space requires a delicate touch. Many beginner gardeners fall into the trap of sprinkling their plants lightly every single day.
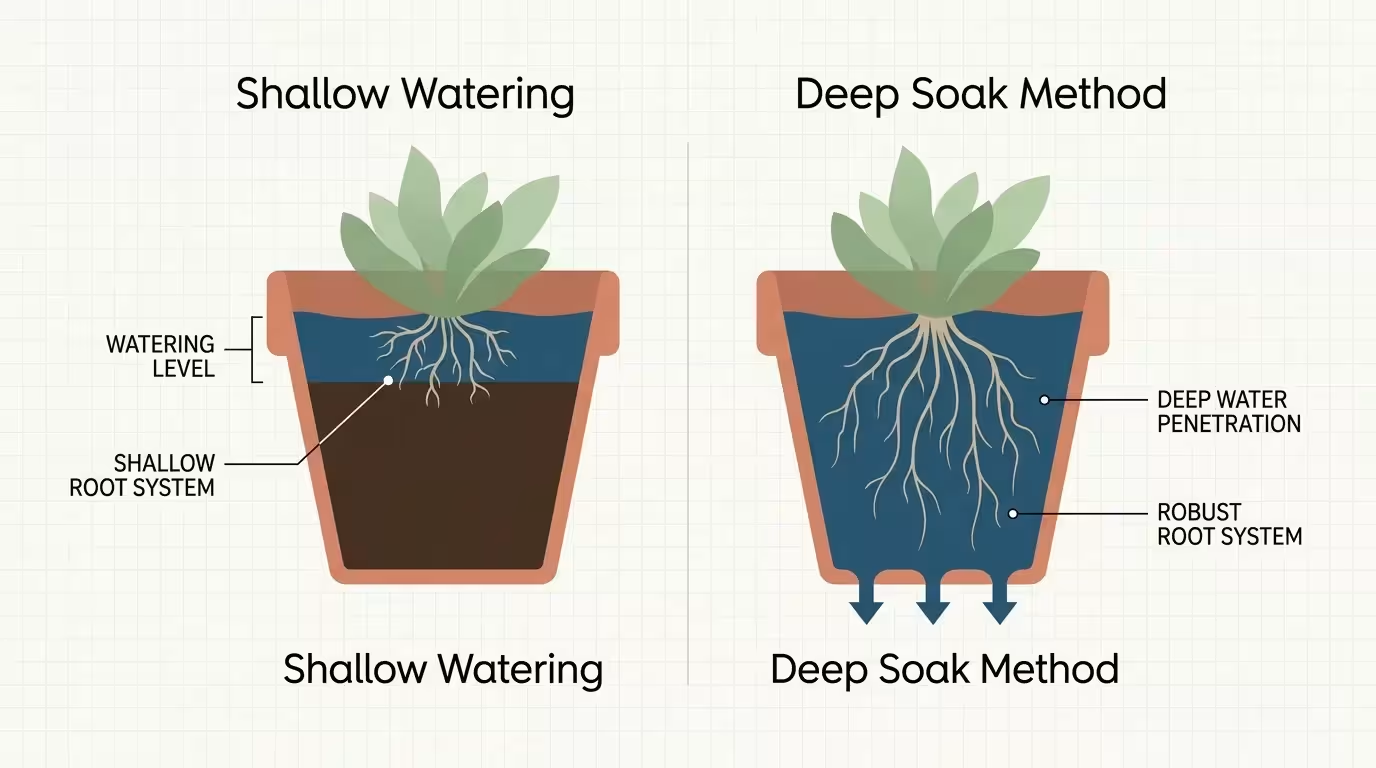
This shallow watering habit encourages roots to stay near the surface of the soil, making the plant incredibly vulnerable to sudden heat waves and drought. Italian farmers utilize a different strategy rooted in the hot, dry summers of the Mediterranean: they water deeply and infrequently.
For more tips on protecting your crops during peak summer, read about beating summer heat stress in small gardens to ensure continuous health.
If you reside in an arid climate or want to practice conservation, exploring low-water gardening techniques can keep your crops happy without wasting resources.
Deep watering encourages roots to push down toward the bottom of the container in search of moisture. A plant with a deep, expansive root system grows stronger, produces more resilient stems, and handles environmental stress with ease.
To apply the deep soak method to your container garden, you must change how you evaluate soil moisture.
Instead of guessing when to water, use the finger test. Push your index finger into the soil up to your second knuckle (about two inches deep).
If the soil feels damp or cool to the touch, do not water. Wait another day.
If the soil feels completely dry at that depth, your plant requires a thorough soaking.
When it is time to water, apply water slowly to the base of the plant, keeping the leaves dry to prevent fungal diseases. Continue pouring until you see water actively flowing out of the drainage holes at the bottom of the pot.
This visual cue confirms that moisture has saturated the entire root zone. If you notice that the water runs immediately down the sides of the pot and out the bottom without soaking in, your soil has become hydrophobic (repelling water).
To fix this, place the entire container in a shallow basin of water for thirty minutes, allowing the soil to absorb moisture from the bottom up through capillary action.
To reduce your watering chores and protect the soil from the baking sun, apply a generous layer of mulch to the top of your containers. In Italy, farmers often use dry straw or shredded leaves.
In an urban setting, organic straw, untreated wood chips, or even a layer of decorative pebbles will drastically reduce surface evaporation. Mulch acts as a thermal blanket, keeping the roots cool during intense afternoon heat while locking moisture into the soil profile.
Tip 4: Embrace Companion Planting the Italian Way
Space represents the most valuable currency in a balcony or patio garden. To maximize every square inch of soil, Italian farmers rely heavily on companion planting.
This technique involves grouping specific plants together that benefit one another. When combined strategically, companions can deter harmful pests, improve soil nutrients, and utilize different layers of vertical space without competing for resources.
You can also incorporate highly beneficial companion herbs that boost vegetable growth to naturally protect and stimulate your main crops.
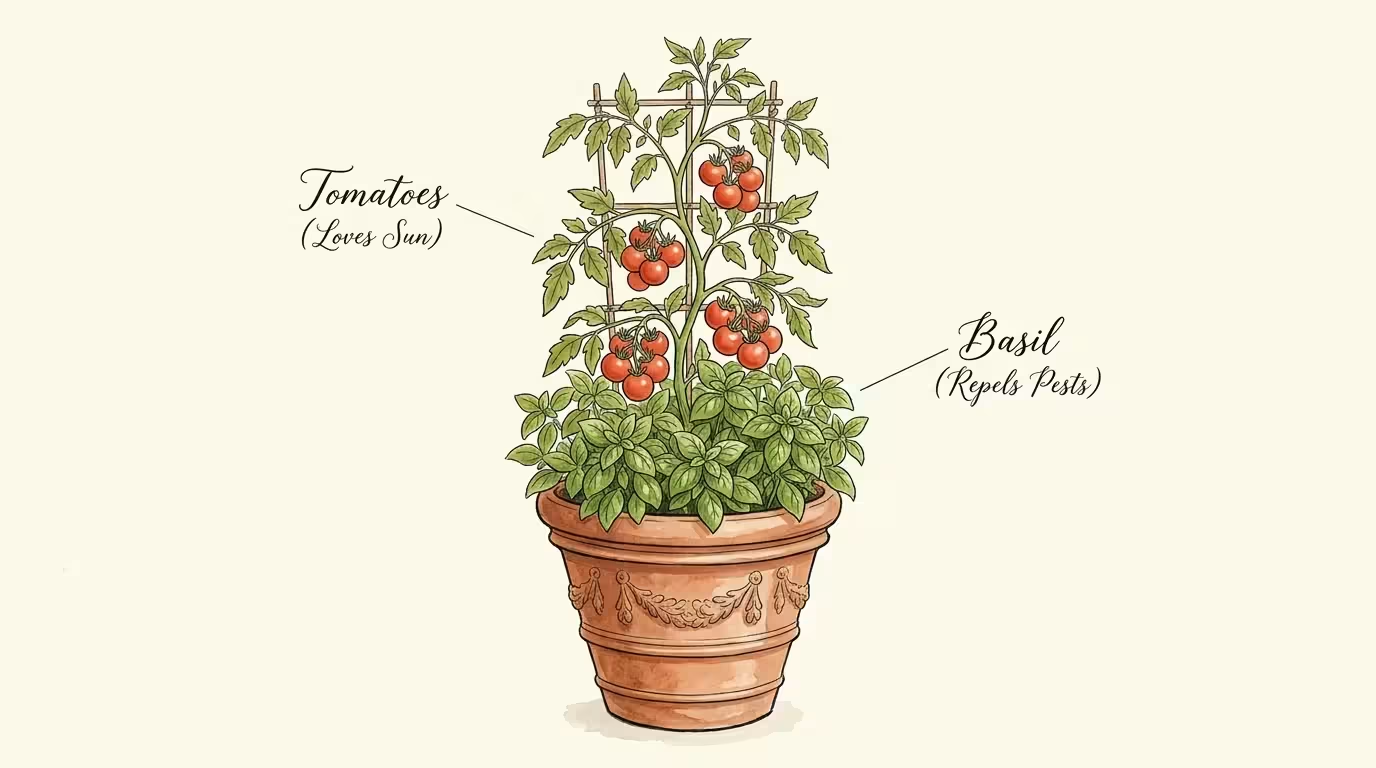
The most famous Italian pairing brings tomatoes and basil together in the soil just as beautifully as they come together on a plate. Tomatoes grow tall, requiring vertical staking and leaving the soil surface bare.
Basil grows low and bushy, thriving in the dappled shade cast by the tomato leaves during the hottest part of the day. Furthermore, the strong scent of basil actively masks the smell of the tomato plant, confusing pests like aphids and the destructive tomato hornworm.
By designing your containers with complementary plant families, you create miniature ecosystems that require less maintenance and yield a higher volume of food. Review the table below for classic, space-saving companion combinations ideal for containers and raised beds:
| Primary Crop | Ideal Companion Plant | Why This Pairing Works in Small Spaces |
|---|---|---|
| Tomatoes | Genovese Basil | Basil acts as a living mulch, shading the soil and deterring pests with its strong essential oils. |
| Bell Peppers | Sweet Alyssum | Alyssum trails elegantly over the edge of the pot and attracts predatory wasps that eat aphids. |
| Zucchini / Squash | Nasturtiums | Nasturtiums act as a trap crop, drawing pests away from the squash while adding peppery, edible flowers to your salads. |
| Pole Beans | Radishes | Radishes grow rapidly and harvest early, breaking up the soil for the deeper roots of the beans. |
| Kale | Garlic or Chives | The sharp sulfur scent of alliums repels cabbage moths, keeping your leafy greens free of caterpillar holes. |
To build a beautiful companion container, start with a large pot (at least 15 to 20 gallons). Plant your tallest crop, such as a staked cherry tomato, directly in the center.
Surround the base with three small basil plants. Finally, tuck a trailing flower like marigold or alyssum right at the edge of the rim.
This tiered approach guarantees that you harvest vegetables, herbs, and flowers from a single footprint, echoing the dense, productive plots of rural Italian homesteads.
Tip 5: Harvest Continually for Endless Yields
Many novice gardeners hesitate to pick their vegetables, waiting for every single fruit to look completely flawless before harvesting. This hesitation actually signals the plant to slow down its production.
From a biological standpoint, a vegetable plant only has one goal: to reproduce by creating mature seeds. Once a plant produces fully ripened fruit holding mature seeds, it believes its life mission is complete and it stops generating new flowers.
Italian farmers understand that to keep a plant working, you must harvest continually.
To set yourself up for the highest productivity possible, review the best vegetables to grow in pots so you know which varieties yield the most.
This principle applies to almost every crop in your garden. Take zucchini, for example.
If you leave a zucchini on the vine until it reaches the size of a baseball bat, the plant channels all of its energy into that single giant vegetable.
However, if you harvest the zucchini when they are small, tender, and about six inches long, the plant immediately pushes out new blossoms to replace the lost fruit. You end up with a much larger overall harvest of significantly better-tasting vegetables.
Pruning also plays a vital role in continuous harvesting. For indeterminate tomatoes (varieties that continue growing taller until frost kills them), you must remove the suckers.
A sucker is a small, diagonal shoot that emerges in the “V” shape where a side branch meets the main vertical stem. If left alone, these suckers grow into entirely new main stems, creating a massive, tangled bush that produces small, poorly ripened fruit.
To channel the plant’s energy into large, beautiful tomatoes, simply snap these small suckers off between your thumb and index finger once a week.
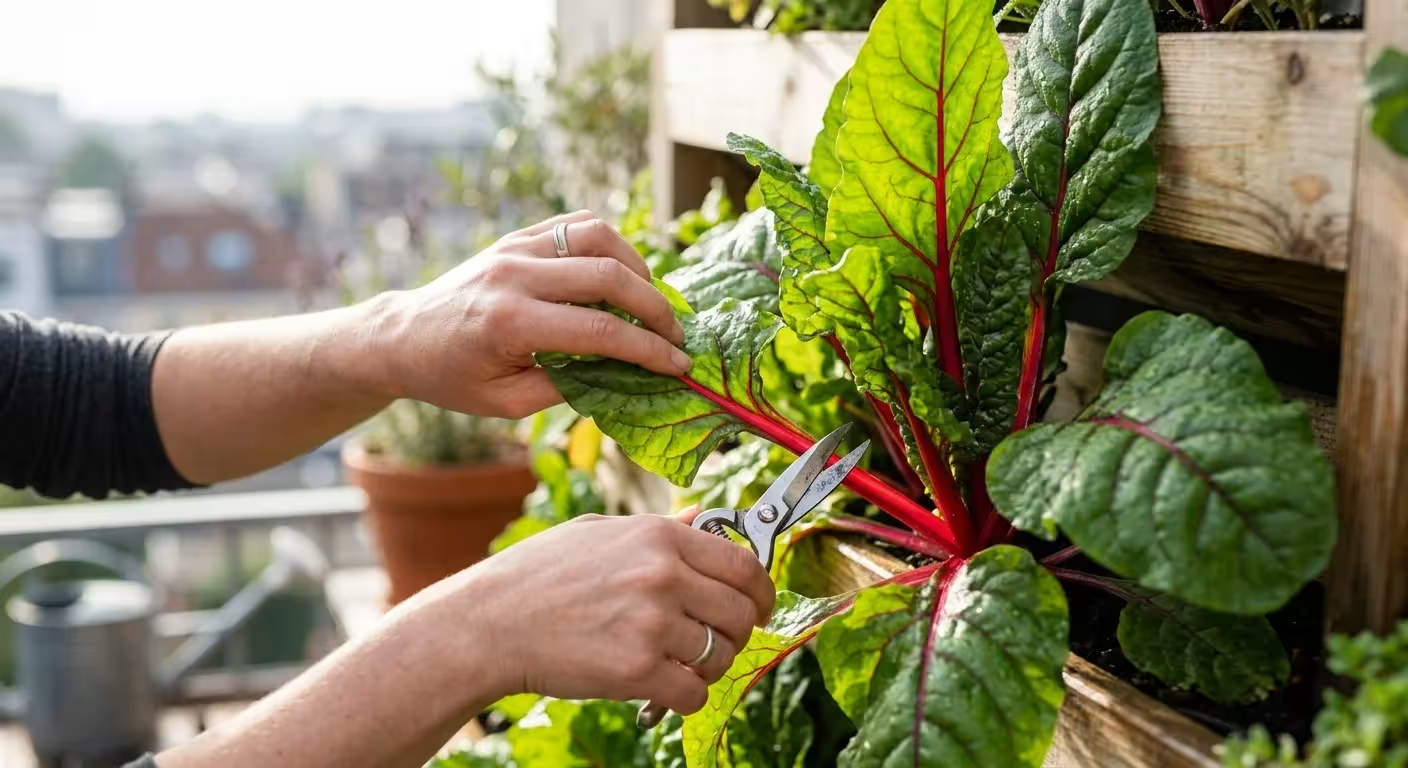
Herbs require aggressive harvesting to maintain their flavor. When basil plants grow too tall, they attempt to flower.
Once basil flowers, the leaves turn bitter and tough. To prevent this, practice the pinching method.
Identify a node—the spot on the stem where a pair of leaves branches out. Using clean scissors or your fingernails, snip the main stem just above that node.
The plant will respond by sending out two new branches from that exact spot, transforming a spindly stalk into a dense, bushy mound of fragrant foliage.
Tip 6: Embrace the Seasons With Succession Sowing
A true Italian kitchen garden never sits empty, even as the blazing heat of summer fades into the crisp air of autumn. To maximize the output of a small space, you must utilize succession sowing.
Succession sowing simply means planting new seeds every few weeks so that crops mature at staggered intervals, or replacing a finished crop immediately with a new one that suits the upcoming weather.
When you grow in containers, you have the advantage of complete control over your soil. As soon as a plant finishes its lifecycle, you can pull it out, refresh the soil with a handful of organic compost, and plant something new the very same day.
This practice ensures your limited patio space remains highly productive for eight to ten months of the year.
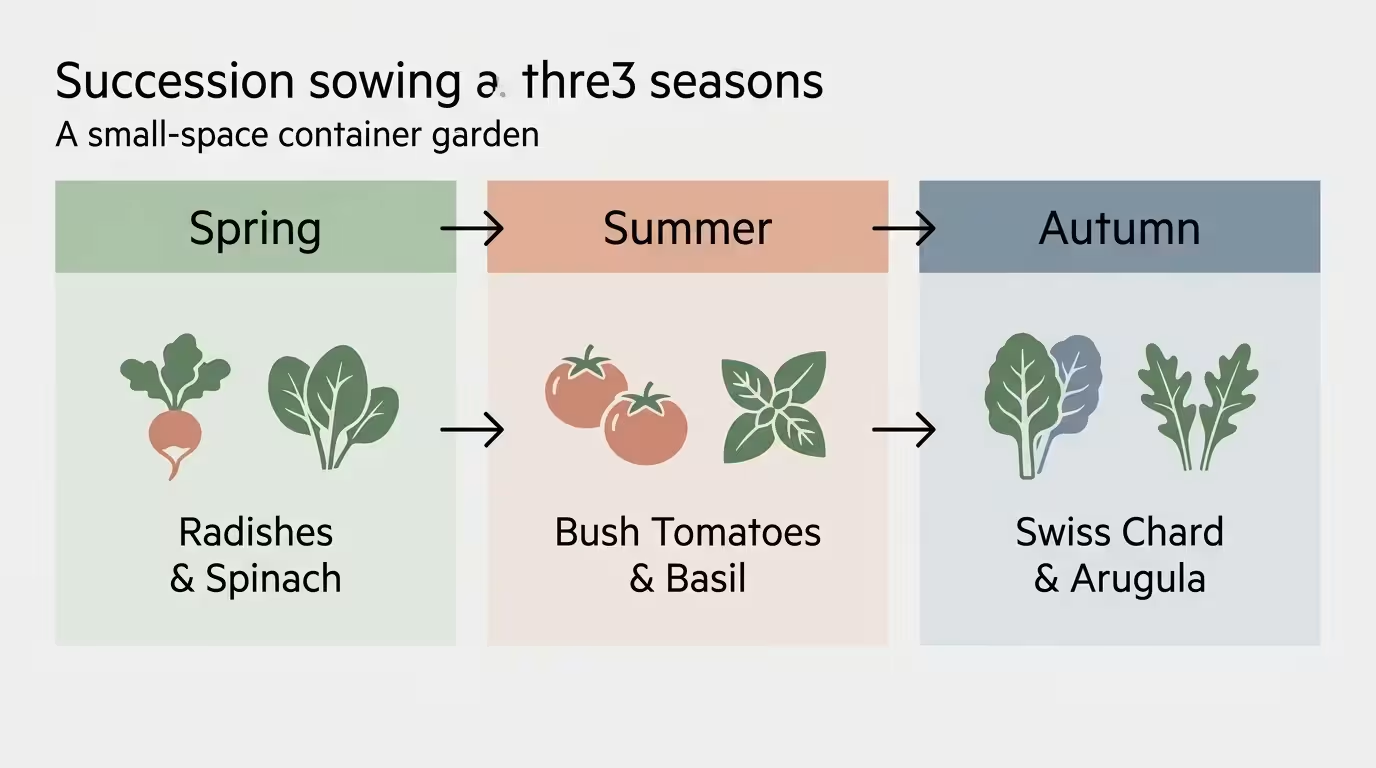
Break your small-space growing calendar into three distinct phases to emulate the Italian growing seasons:
- Early Spring (The Cool Awakening): Before the danger of frost fully passes, fill your containers with cold-tolerant crops. Plant radishes, sweet peas, and hearty greens like spinach and arugula. These crops grow incredibly fast. By the time the weather turns hot in late May, you can harvest them completely to make room for summer vegetables.
- High Summer (The Mediterranean Peak): This phase belongs to the sun-lovers. Plant your tomatoes, eggplants, bell peppers, and basil. These crops will occupy your containers through the hottest months. Keep them well-watered and heavily pruned to encourage maximum fruiting.
- Late Summer and Autumn (The Second Spring): As the days begin to shorten in August, your tomato plants will look tired and production will slow down. Do not wait for the first frost to pull them. Remove struggling summer plants and sow seeds for the autumn harvest. Italian favorites like radicchio, Swiss chard, broccoli rabe (rapini), and Tuscan kale thrive as the temperatures drop. In fact, a light autumn frost actually sweetens the flavor of kale and chard by converting the plants’ starches into sugars.
By treating your garden as a continuous, rotating cycle rather than a one-time summer event, you will harvest fresh, homegrown produce long after neighboring gardens have shut down for the year.
Troubleshooting Common Vegetable Garden Pests Naturally
Even the most meticulously planned container gardens occasionally attract unwanted visitors. Rather than reaching for harsh chemical pesticides that can harm beneficial insects and contaminate your homegrown food, follow the eco-friendly traditions of sustainable farming.
The most effective pest control relies on daily observation. When you water your plants, take a moment to inspect the undersides of the leaves, as this is where pests hide and lay their eggs.
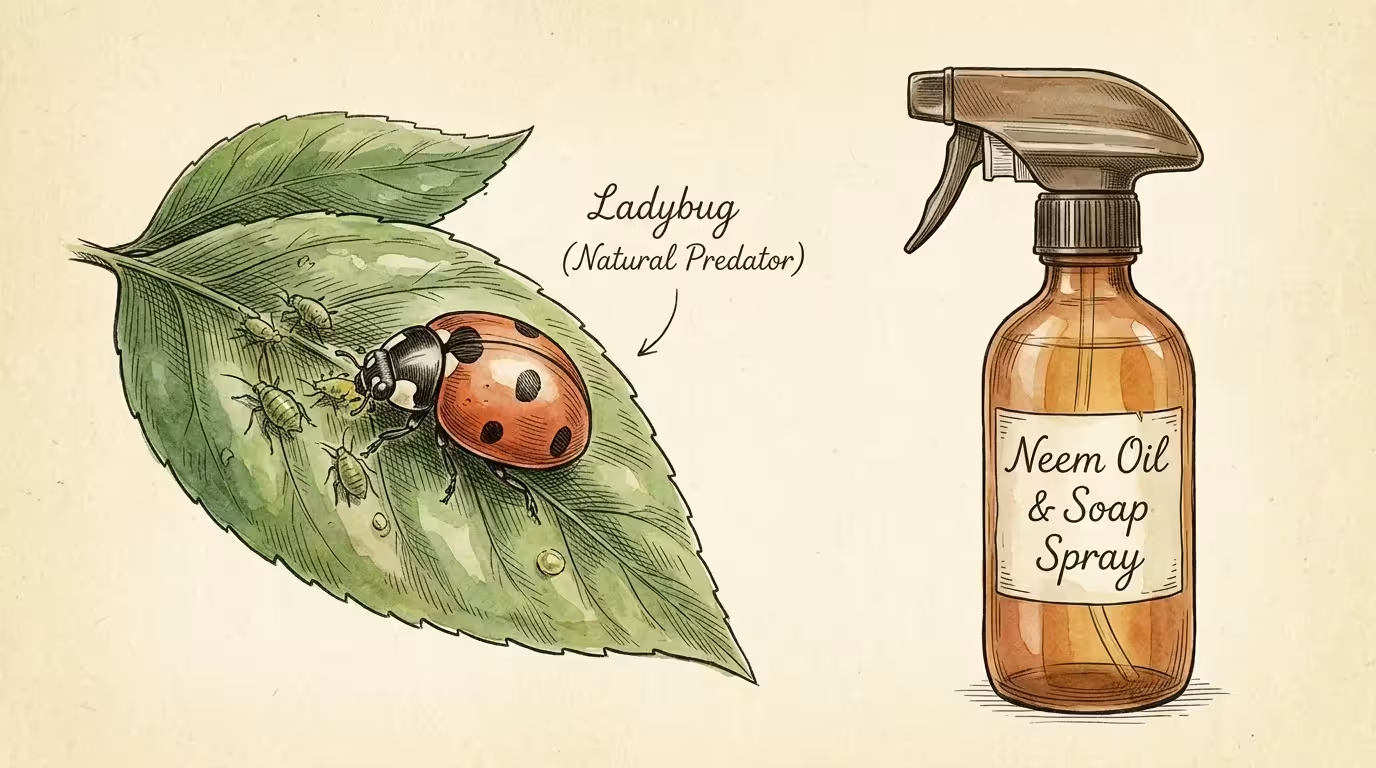
Aphids frequently appear on the soft, new growth of tomato and pepper plants. These tiny, pear-shaped insects suck the sap from your vegetables, causing the leaves to curl and yellow.
Fortunately, aphids possess very soft bodies. You can simply blast them off your plants with a strong stream of water from your hose or a spray bottle.
If they persist, mix one tablespoon of pure liquid castile soap into a quart of water and spray the foliage in the early evening. The soap breaks down the insects’ protective coating, naturally eliminating the problem without toxic residues.
The tomato hornworm presents a more intimidating challenge. These massive, bright green caterpillars possess white diagonal stripes and a distinct horn on their rear.
They camouflage perfectly against tomato foliage and can strip an entire plant of its leaves overnight. Because they grow so large, the safest and most effective method of control is hand-picking.
Put on a pair of gardening gloves, gently pull the caterpillars off the stems, and drop them into a bucket of soapy water. If you notice a hornworm covered in small white cocoons, leave it alone.
Those are the pupae of the parasitic braconid wasp, a highly beneficial insect that naturally controls hornworm populations.
Fungal issues, such as powdery mildew, often strike squash and cucumber plants late in the season. Powdery mildew looks like a dusting of white flour across the surface of the leaves.
It thrives in stagnant, humid air. To prevent it, ensure your containers are not crowded too closely together.
Good airflow acts as an invisible shield against fungal spores. If you spot infected leaves, prune them off immediately and dispose of them in the trash, not your compost bin, to stop the spread.
Finally, address nutritional and watering disorders before they ruin your harvest. Blossom end rot represents one of the most frustrating issues for balcony gardeners.
This condition causes the bottom of a tomato or pepper to turn black, sunken, and leathery. While caused by a lack of calcium in the fruit, the root issue almost always traces back to inconsistent watering.
When the soil dries out completely and is then flooded, the roots cannot transport calcium smoothly. By adhering to the deep soak method and applying a thick layer of mulch, you stabilize the soil moisture and prevent blossom end rot entirely.
Frequently Asked Questions
Can I grow traditional Italian vegetables successfully indoors?
Growing fruiting vegetables like tomatoes and peppers entirely indoors proves very difficult without specialized equipment. These plants require immense amounts of direct sunlight and rely on wind or insects for pollination.
However, you can easily grow Italian herbs—such as basil, oregano, and parsley—on a bright, south-facing windowsill. If you want to grow indoor vegetables, invest in high-quality, full-spectrum LED grow lights and a small circulating fan to mimic outdoor conditions.
How deep should a container be for growing tomatoes?
Tomatoes develop extensive, deep root systems. For a compact or determinate bush tomato (like Roma or Patio Princess varieties), select a container that holds at least 10 gallons of soil and measures approximately 12 to 14 inches deep.
If you wish to grow indeterminate vining tomatoes (like San Marzano or Cherry cascades), you need a much larger pot.
Aim for a minimum of 15 to 20 gallons of soil volume with a depth of 18 inches to prevent the plant from becoming root-bound and stunting your harvest.
What type of fertilizer works best for container vegetables?
Because container plants cannot reach deep into the earth for nutrients, frequent feeding remains essential. Organic liquid fertilizers work exceptionally well because the nutrients are immediately available to the roots.
Look for a liquid seaweed or fish emulsion fertilizer and apply it every two weeks once your plants begin setting flowers.
Additionally, top-dressing your pots with a handful of fresh compost once a month provides a slow, steady release of essential minerals without the risk of chemical burn.
How do I protect my balcony pots from intense wind?
Balconies, especially on higher floors, often suffer from strong winds that can snap stems and rapidly dry out the soil. To protect your garden, choose heavy, wide-based pots made of ceramic or thick resin so they do not tip over.
Tie tall plants securely to sturdy bamboo stakes using soft plant ties or torn strips of old cotton t-shirts.
If wind remains a severe issue, group your pots tightly together so the plants buffer one another, or install a permeable windbreak screen along your balcony railing to slow the air current.
Can I reuse the same potting soil next season?
Yes, you can reuse potting soil, provided the previous plants did not suffer from severe disease or pest infestations. However, old soil becomes depleted of nutrients and loses its fluffy texture.
To revive it for a new growing season, dump the old soil into a wheelbarrow or a large tarp. Break up any compacted root balls and remove old plant debris.
Mix in one part fresh compost and a few handfuls of perlite for every three parts of old soil. This simple process restores the soil’s structure and fertility, saving you money year after year.
Trusted Resources and Expert Guidance
For trustworthy gardening information, visit:
Chicago Botanic Garden, New York Botanical Garden, ASPCA Animal Poison Control, Michigan State University Extension — Gardening and University of Wisconsin Extension — Horticulture. These organizations provide expert, research-based advice for gardeners at all levels.
Disclaimer: This article is for informational purposes only and is not a substitute for professional gardening advice. Always consult local extension services or horticulture experts for region-specific guidance.