
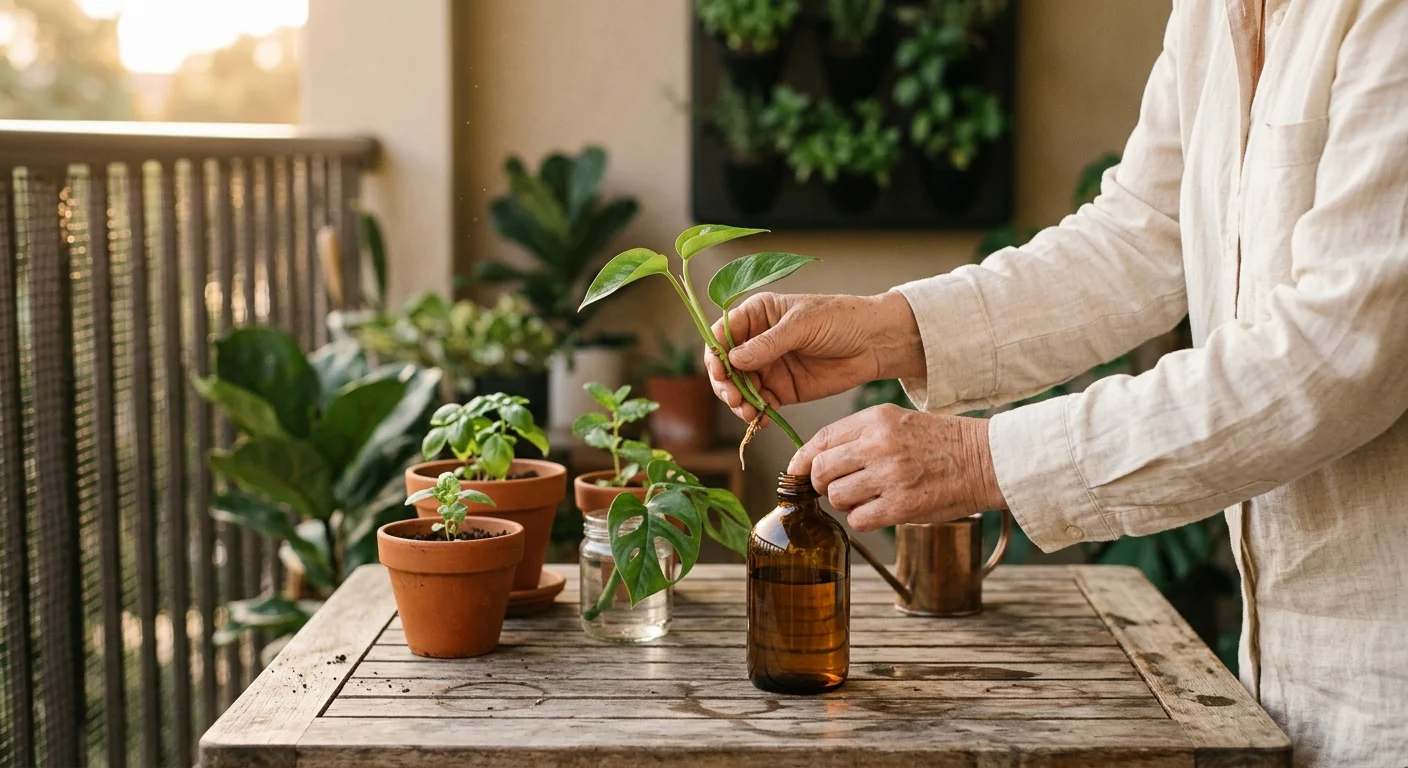
Multiplying your favorite houseplants and garden favorites through stem cuttings saves you money while quickly filling your home with vibrant greenery. Plant propagation offers a rewarding way to create free plants for your balcony or patio using simple tools you already own.
When you take a cutting from a healthy parent plant, you encourage fresh roots to develop in either water or soil, transforming a tiny snippet into a fully grown masterpiece.
Mastering this basic botanical skill lets you share beloved varieties with friends and sustainably expand your indoor jungle without visiting a nursery.
You just need a sharp pair of scissors, a glass of tap water, and a bit of patience to watch those first delicate roots emerge.
Before the cold weather sets in, learning how to take fall cuttings from geraniums can save your favorite balcony annuals from freezing.
Contents8 sections
- The Magic Of Plant Propagation Explained
- Essential Tools For Successful Cuttings
- Water Versus Soil Propagation Methods
- Top Indoor Plants That Grow From Cuttings
- Best Herbs And Outdoor Plants To Propagate
- Sustainable Practices For Growing New Plants
- Common Propagation Mistakes And Troubleshooting
- Frequently Asked Questions
The Magic Of Plant Propagation Explained
Plant propagation feels like a specialized science, but it relies on a completely natural survival mechanism. Many plant species possess unique cellular structures known as meristematic tissue; these are undifferentiated cells capable of transforming into whatever specific part the plant needs to survive.
When a branch snaps off a parent plant in the wild, these remarkable cells quickly shift their focus from growing new leaves to generating an entirely new root system.
By taking cuttings at home, you deliberately trigger this biological response to cultivate a genetically identical clone of your original plant.
While cuttings offer a fast track to new growth, you can also take on a slower windowsill project and learn how to start common houseplants from seed indoors.
To expand your backyard collection without spending a dime, learn how to take fall cuttings from potted herbs and perennials as the growing season winds down.
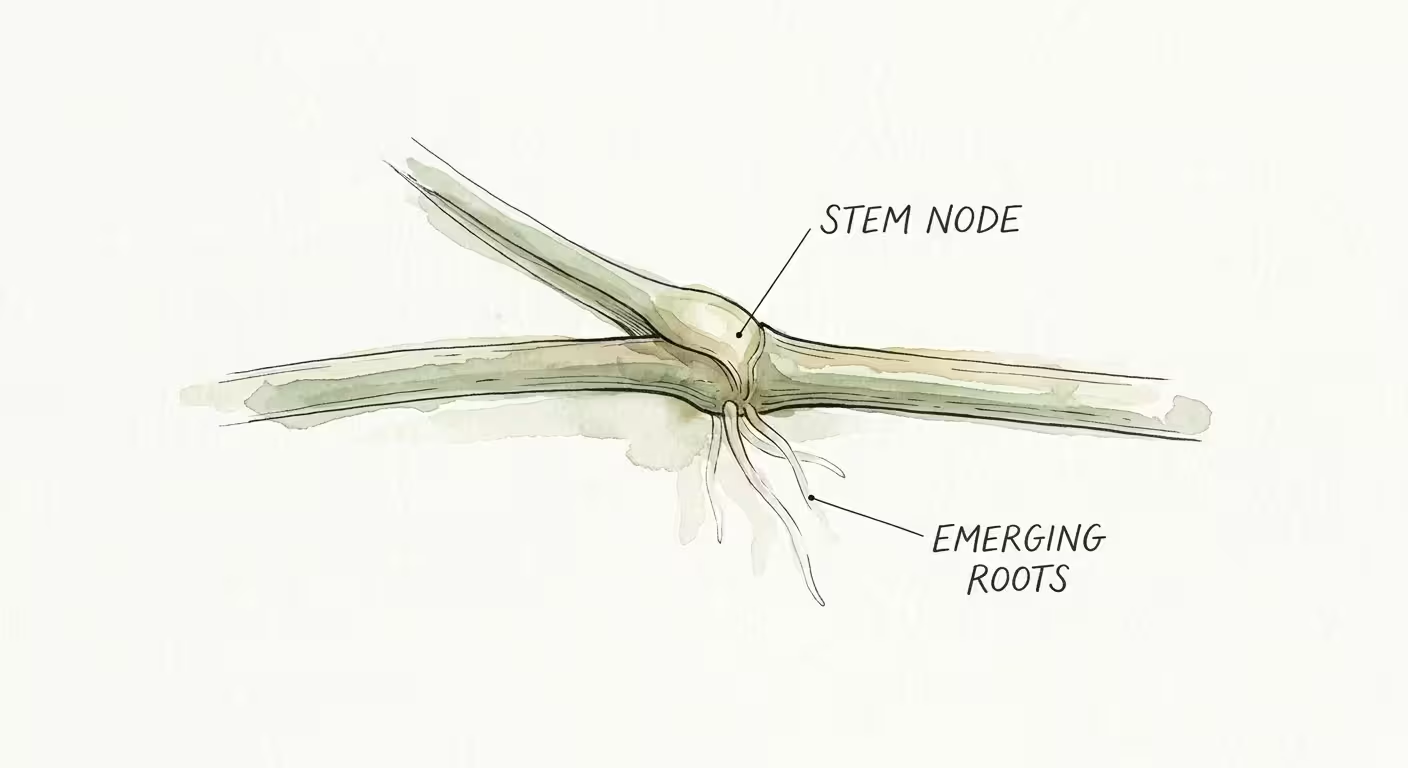
Understanding plant anatomy significantly increases your propagation success rate. You must locate the nodes on your plant’s stem before you make a cut.
Nodes act as the command centers for new growth; they are the slightly swollen bumps, joints, or rings along a stem where leaves and branches emerge. If you place a leafless stretch of stem in water without including a node, the cutting will eventually rot.
The node contains the highest concentration of those essential meristematic cells, ensuring rapid and healthy root development when exposed to moisture.
Learning to grow plants from cuttings transforms how you approach small-space gardening. Instead of spending fifty dollars on a mature, trailing plant for your living room shelf, you can borrow a small clipping from a neighbor and grow it yourself.
Propagation also benefits your existing collection. When you prune a leggy, overgrown houseplant to take cuttings, the parent plant responds by branching out from the cut site, resulting in a fuller, bushier appearance.
You simultaneously improve the health of your original plant while creating new ones to decorate your patio or share with fellow gardening enthusiasts.
Essential Tools For Successful Cuttings
Creating a clean, precise cut remains the most critical factor in successful plant propagation. Jagged tears or crushed stems invite bacterial infections and fungal rot, which quickly destroy delicate plant tissue before roots have a chance to form.
Gathering a few high-quality, sanitized tools ensures your cuttings start their journey in the best possible environment.
Repurposing everyday household objects for your plants is a great way to save money, much like other clever gardening hacks that use items you already own.
You do not need to invest in expensive, commercial-grade greenhouse equipment to build a functional propagation station. In fact, most of the supplies required to root robust plants already sit in your kitchen cabinets or tool drawer.
Maintaining strict hygiene with these tools will dramatically improve your overall success rate.
| Tool | Purpose | Best Practices & Alternatives |
|---|---|---|
| Pruning Shears or Floral Snips | Making sharp, clean cuts through plant stems without crushing the cellular tissue. | A sharp craft knife or dedicated pair of household scissors works well for softer stems. Avoid dull blades. |
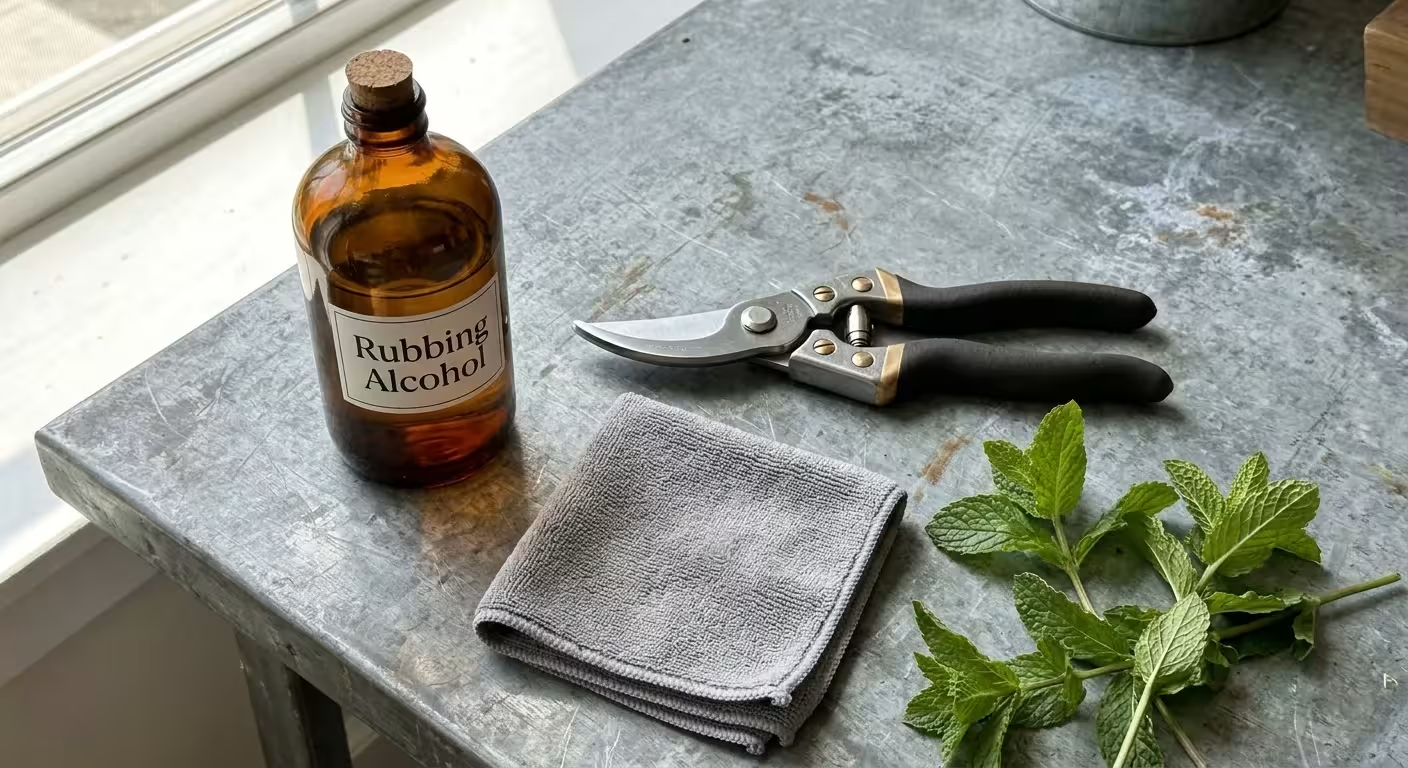
| Isopropyl Alcohol (70%) | Sterilizing your cutting tools to prevent the transfer of pathogens and plant diseases. | Wipe blades thoroughly before and after every single use. Do not use higher concentrations; 70% evaporates at the ideal rate to kill bacteria. |
| Glass Jars or Vases | Holding water and cuttings while allowing you to monitor root growth visually. | Upcycle clean jam jars, drinking glasses, or test tubes. Clear glass helps you spot cloudy water early. |
| Rooting Hormone Powder | Providing synthetic auxins (plant hormones) to stimulate faster, more aggressive rooting. | Highly recommended for woody herbs, but optional for easy-rooting tropicals like pothos. |
| Lightweight Potting Mix | Providing a well-aerated, moisture-retentive medium for soil propagation. | Mix standard potting soil with generous handfuls of perlite or pumice to ensure excellent drainage. |
Aside from the physical tools listed above, adequate lighting acts as the engine driving the propagation process. Your cuttings no longer have root systems to draw up massive amounts of water, so placing them in harsh, direct sunlight will quickly dehydrate and scorch them.
Set your propagation station in a spot that receives bright, indirect sunlight—such as a few feet away from an east-facing or west-facing window. This provides the cuttings with enough energy to photosynthesize and generate roots without overwhelming their limited water reserves.
Water Versus Soil Propagation Methods
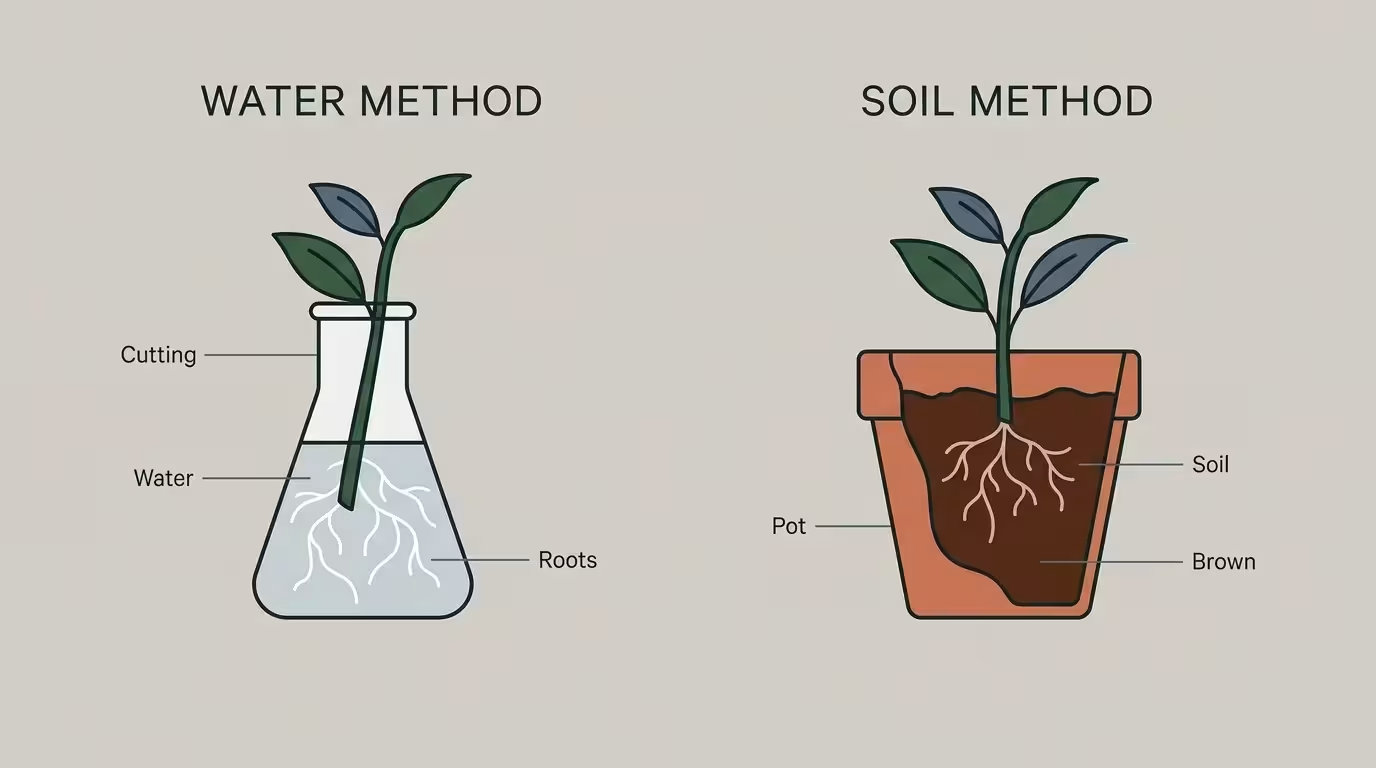
Gardeners generally choose between two primary mediums for rooting stem cuttings: water and soil. Both approaches offer unique advantages, and selecting the right method often depends on the specific plant species you wish to multiply and your personal preferences for monitoring growth.
If you want to expand beyond cuttings, you can also learn how to divide your overcrowded potted perennials to multiply your container garden easily.
If you want to start simple, setting up a water propagation station on a windowsill is the perfect way to watch those roots develop.
Water propagation remains incredibly popular because of its simplicity and the visual satisfaction it provides. Placing a stem in a clear glass jar allows you to watch the delicate, white roots emerge day by day.
This method works exceptionally well for soft-stemmed tropical houseplants and tender herbs. To begin water propagation, snip a healthy stem just below a node, remove any leaves that will sit below the water line, and place the cutting in a jar of room-temperature water.
Change the water completely every three to five days. Stagnant water quickly loses dissolved oxygen, suffocating the developing roots and encouraging bacterial rot.
While water rooting is highly successful, roots grown in water tend to be slightly brittle. When you eventually transition the cutting to potting soil, you must keep the soil consistently moist for the first two weeks while the plant acclimates to its new, drier environment.
Soil propagation often yields stronger, more resilient root systems from the very beginning. Because the roots develop directly in potting mix, they adapt immediately to pulling moisture from the soil, eliminating the transplant shock associated with water propagation.
To root a cutting in soil, take your sterilized snips and cut a healthy stem section. Dip the freshly cut end into water, tap off the excess, and roll the bottom inch of the stem in rooting hormone powder.
Gently insert the cutting into a small pot filled with a pre-moistened mixture of potting soil and perlite. Press the soil firmly around the stem to ensure good contact and eliminate large air pockets.
Because the cutting lacks roots to absorb water, it loses moisture rapidly through its leaves via transpiration.
You must create a humid microclimate to keep the foliage hydrated; simply place a clear plastic bag or a transparent takeout container over the pot to trap moisture, lifting it for ten minutes a day to allow fresh air circulation.
Top Indoor Plants That Grow From Cuttings
Indoor gardening in limited spaces requires a strategic selection of forgiving, adaptable plants. The following five houseplants look stunning on apartment windowsills and happen to be some of the easiest plants in the world to propagate from cuttings.
Many of these easily propagated species are also famous for being excellent low-light plants that thrive indoors.
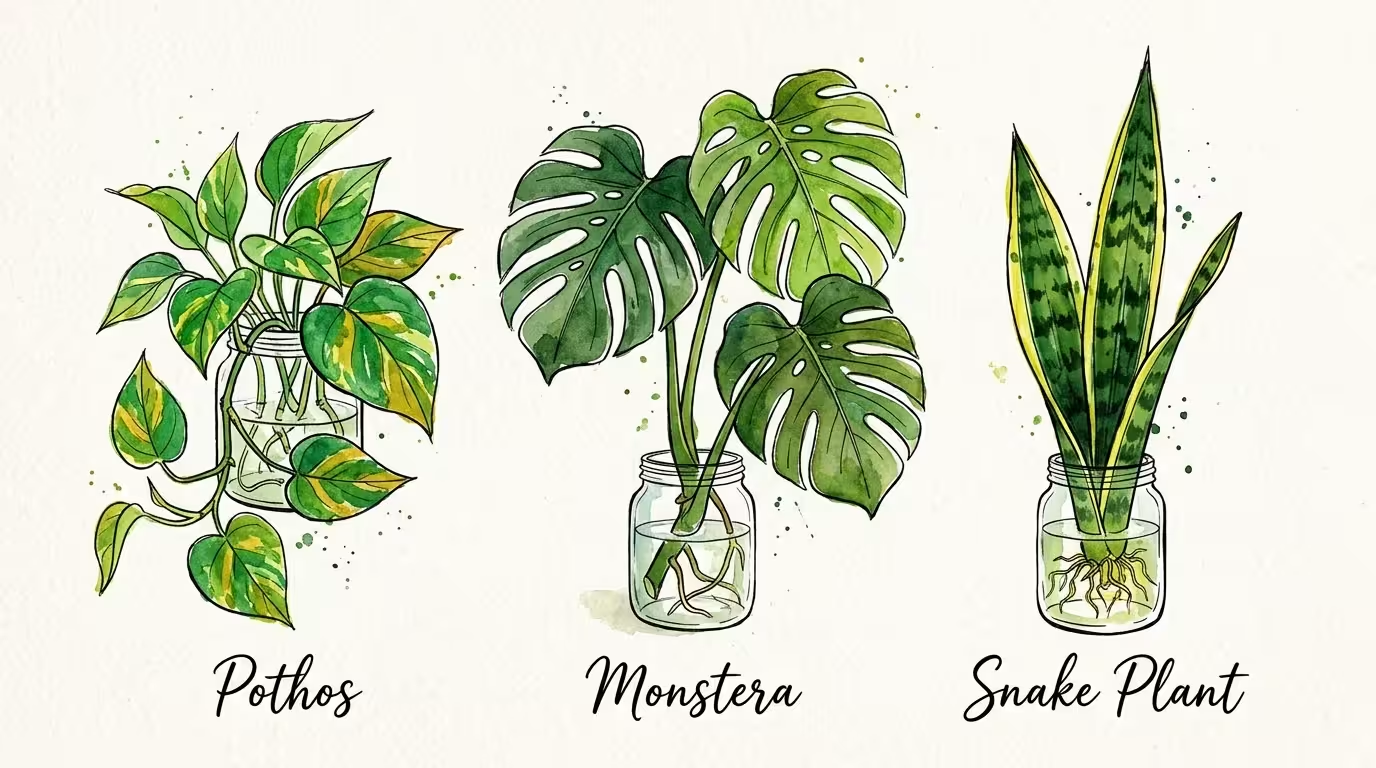
1. Pothos (Epipremnum aureum)
Pothos vines thrive on neglect and possess a legendary ability to root quickly. Look along a healthy, trailing vine to find small, brown nubs protruding near the base of the leaves; these are aerial roots waiting to grow.
Snip the vine into sections, ensuring each piece has at least one leaf and one node. Drop the cuttings into a jar of water, and you will typically see robust white roots pushing out within seven to ten days.
Once the roots reach two inches in length, plant several cuttings together in a single pot to create a lush, full plant.
2. Monstera Deliciosa (Swiss Cheese Plant)
The striking, fenestrated leaves of a Monstera add an instant tropical feel to any room. Propagating these giants requires a slightly larger cutting.
Identify a section of the main stem that includes a healthy leaf, a node, and ideally an existing aerial root. Use heavy-duty, sterilized shears to cut below the node.
Because Monstera stems are thick and fleshy, let the cut end air-dry on your counter for two hours before submerging it in a large vase of water. This brief drying period allows the wound to form a protective callus, dramatically reducing the risk of rot.
3. Spider Plant (Chlorophytum comosum)
While technically propagating through offsets rather than stem cuttings, Spider Plants multiply so effortlessly they belong in every beginner’s collection. Mature plants produce long, arching stems that bloom with tiny white flowers, eventually forming miniature clones known as “spiderettes.”
Leave these babies attached to the mother plant until they develop tiny root nodules of their own. Snip the spiderette off the runner and suspend it over a shallow glass of water so only the very bottom touches the moisture.
The roots will rapidly lengthen, and the plant will be ready for soil in just a few weeks.
4. Snake Plant (Sansevieria trifasciata)
Snake plants utilize a fascinating propagation technique known as leaf cuttings. Select a healthy, rigid leaf and slice it horizontally into two-inch sections.
You must pay strict attention to polarity; the cutting will only produce roots from the edge that faced the bottom of the original plant. If you plant the leaf upside down, it will simply rot.
To avoid confusion, cut a slight notch or “V” shape into the bottom of each section. Dip the notched ends in rooting hormone and press them about one inch deep into a sandy succulent mix.
Snake plant propagation requires intense patience; you might wait two to three months before new pups emerge from the soil line.
5. Tradescantia Zebrina (Inch Plant)
Renowned for its shimmering, purple-and-silver striped foliage, the Inch Plant grows with astonishing speed. Tradescantia stems contain exceptional amounts of rooting hormone naturally, making them perfect candidates for direct soil propagation.
Take four-inch clippings from the tips of the vines, strip off the bottom set of leaves, and poke the bare stems directly into a pot of moist soil. Skip the water glass entirely.
Keep the pot in bright, indirect light, and the cuttings will root and begin producing new growth in roughly one week.
Best Herbs And Outdoor Plants To Propagate
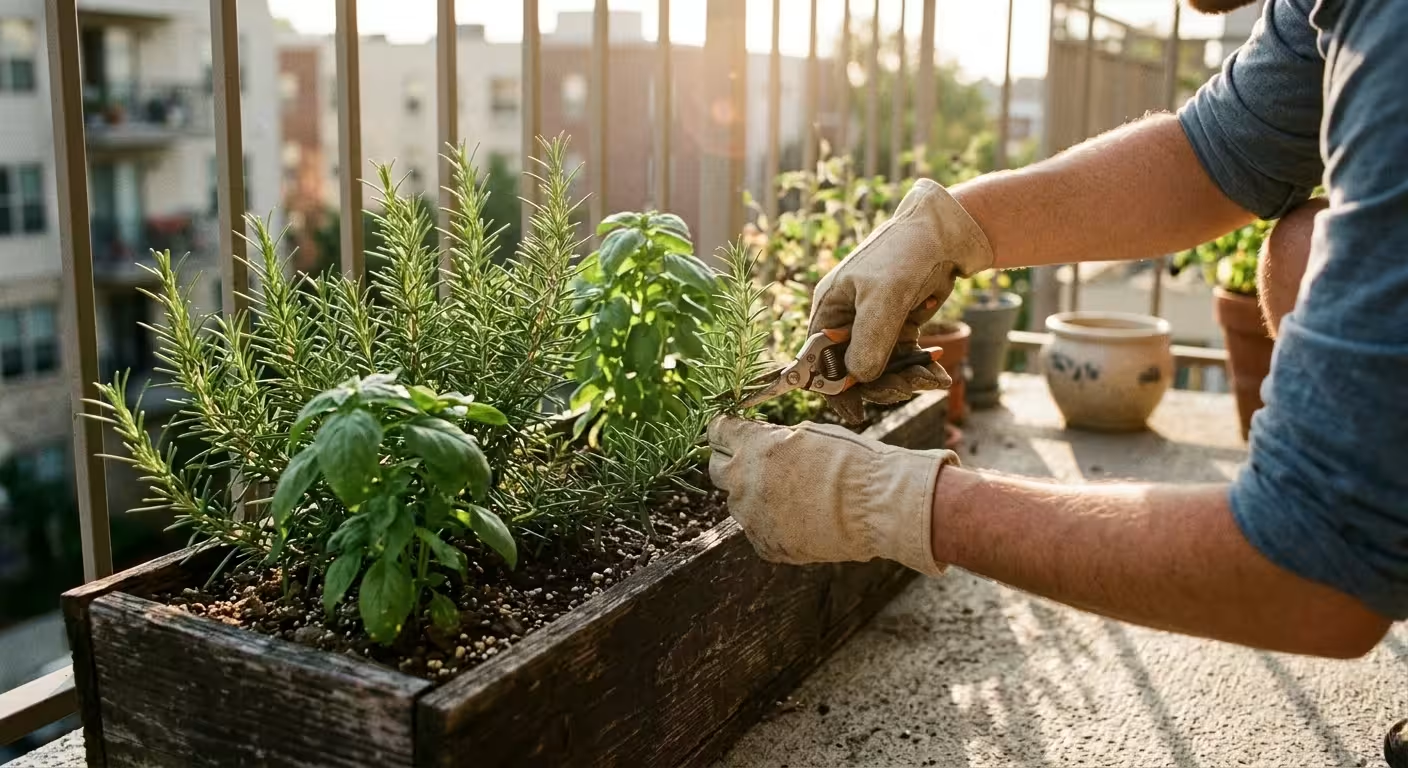
Taking cuttings extends far beyond tropical houseplants. Multiplying your favorite edible herbs and colorful patio plants allows you to fill window boxes and balcony planters for a fraction of the cost of buying established nursery flats.
Before the first freeze, you can take fall cuttings from potted geraniums and coleus to preserve your colorful patio plants indoors during the winter.
6. Basil (Ocimum basilicum)
Supermarket basil often dies quickly when kept in its flimsy plastic sleeve, but you can turn those fresh stems into an endless supply of pesto. Select a healthy, non-flowering stem roughly five inches long.
Strip the leaves from the bottom three inches and place the bare stem in a glass of water on a sunny windowsill. Basil roots eagerly and enthusiastically.
Change the water frequently to keep it fresh, and transfer the rooted cutting to rich, well-draining soil once the root system looks robust.
7. Mint (Mentha)
Mint is notoriously vigorous—so vigorous that you should only grow it in containers to prevent it from overtaking your garden. This aggressive growth habit makes it ridiculously easy to propagate.
Take a few four-inch cuttings from the tips of a healthy mint plant, remove the lower leaves, and place them in water. You will see vigorous root development in less than a week.
Planting newly rooted mint cuttings in separate small pots gives you wonderful gifts for friends who enjoy making fresh teas or cocktails.
8. Rosemary (Salvia rosmarinus)
Unlike soft-stemmed basil or mint, rosemary produces woody branches. Propagating woody herbs requires a technique called semi-hardwood cutting.
In late spring or early summer, snip a six-inch piece of new growth where the green tip just begins to turn brown and woody at the base. Strip the needles from the bottom two inches.
Because woody stems root slowly, water propagation often leads to rot. Instead, dip the bare stem in rooting hormone and plant it in a very well-draining mix of sand and potting soil.
Use a plastic bag to maintain high humidity around the needles until roots establish.
9. Coleus (Plectranthus scutellarioides)
Coleus plants provide brilliant splashes of neon pink, deep burgundy, and lime green to shaded patios. While often treated as annuals in cooler climates, you can easily overwinter coleus by taking cuttings before the first frost.
Pinch off a four-inch stem tip, ensuring you remove any flower buds, as flowers drain energy away from root production. Drop the stem into a jar of water indoors.
They root almost instantly and will happily live on a bright windowsill all winter, ready to be planted outside when spring returns.
10. Pelargoniums (Scented and Zonal Geraniums)
Geraniums remain a staple for balcony railing planters due to their drought tolerance and vivid blooms. To propagate them, take a four-inch cutting from a healthy, non-flowering shoot.
Geranium stems hold a lot of moisture and are highly susceptible to fungal rot if planted immediately. Set the fresh cuttings on a paper towel in a shaded room for twelve hours to allow the cut end to dry and form a protective seal.
Once callused, plant the stem securely in a pot of moist, gritty soil. Avoid overwatering the soil while waiting for roots to form.
Sustainable Practices For Growing New Plants
Plant propagation naturally aligns with an eco-friendly lifestyle, encouraging a closed-loop approach to gardening that minimizes waste and reduces your environmental footprint. Expanding your garden does not require purchasing stacks of brand-new plastic nursery pots or expensive chemical fertilizers.
Instead, look around your home for materials you can effortlessly repurpose.
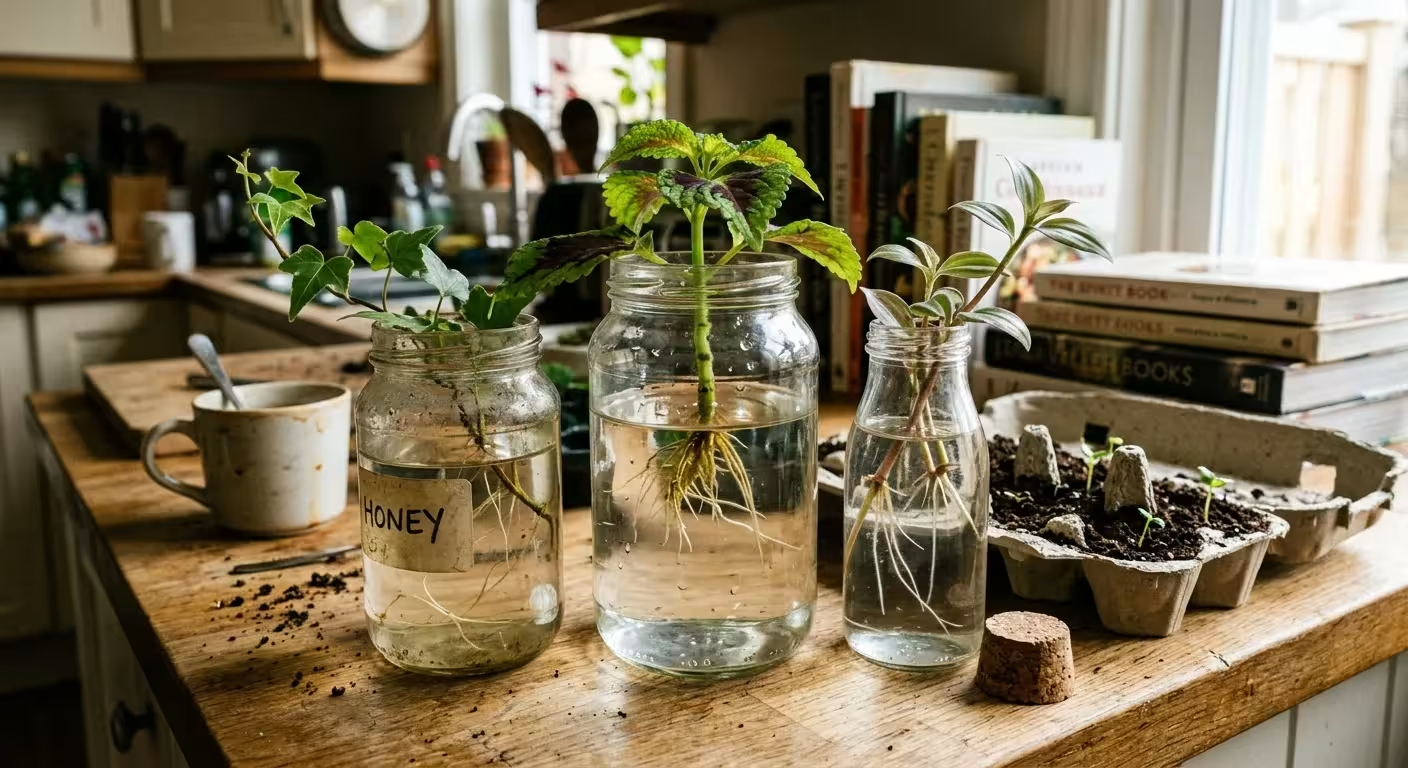
Begin by upcycling household packaging for your propagation station. Cleaned yogurt cups with holes poked in the bottom make excellent starter pots for soil cuttings.
Clear plastic clamshell containers from takeout salads serve perfectly as miniature greenhouse domes, retaining crucial humidity for tender leaves while letting in bright light. Old glass hot sauce bottles and jam jars provide beautiful, free vessels for water rooting.
By reusing these items, you prevent single-use plastics from entering landfills while providing your cuttings with everything they need to thrive.
Consider your water and soil sources carefully. Municipal tap water frequently contains chlorine or chloramine, which can mildly inhibit sensitive root development.
Leave a watering can outside to collect rainwater, or simply let a pitcher of tap water sit on your counter overnight to allow the chlorine to off-gas before topping up your propagation jars.
When blending your potting mix, seek out sustainable alternatives to peat moss, such as coconut coir. Peat extraction damages natural bog ecosystems, whereas coconut coir is a renewable byproduct of the agricultural industry that offers exceptional aeration and moisture retention for developing roots.
Finally, incorporating a small amount of homemade compost into your initial potting mix gives young cuttings a gentle, slow-release source of organic nutrients, eliminating the need for synthetic liquid fertilizers during those critical early weeks of growth.
Common Propagation Mistakes And Troubleshooting
Even seasoned gardeners occasionally lose a cutting. Recognizing the early warning signs of distress allows you to adjust your environment and save the plant before it collapses.
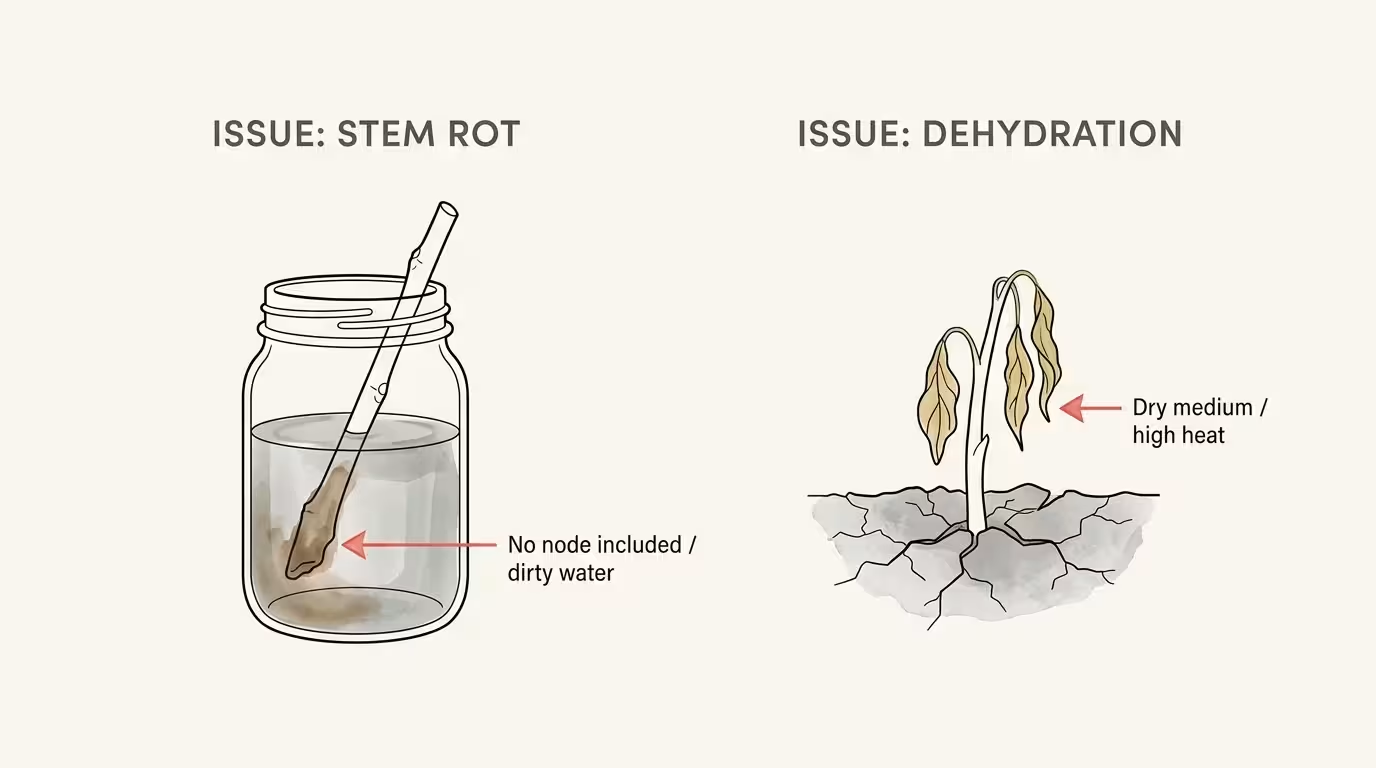
The most frequent issue encountered during propagation is stem rot.
If you notice the submerged portion of your cutting turning black, squishy, or developing a foul odor, rot has set in. This typically happens when cuttings are placed in stagnant water, when the pruning shears were not sanitized, or when a fleshy cutting wasn’t allowed to callus before entering soil.
If you catch it early, you can pull the cutting out, use sterilized snips to cut off the rotted section an inch above the decay, and start over in fresh water or soil.
Another common mistake involves leaving too much foliage on the stem. Leaves constantly release moisture into the air through a process called transpiration.
A cutting with no roots cannot pull up enough water to sustain five or six large leaves, resulting in rapid dehydration. The foliage will quickly turn crispy, yellow, and drop off.
To prevent this, actively trim your cuttings down to just two or three healthy leaves. If you are propagating large-leaf varieties like Monstera, you can even cut the remaining leaves in half horizontally with scissors to drastically reduce the surface area and limit moisture loss.
Lighting problems also derail many propagation attempts. It is incredibly tempting to place a struggling cutting in direct, baking sunlight, hoping the extra energy will force roots to grow.
In reality, a cutting without a root system simply burns under intense solar radiation. If your cuttings look bleached, scorched, or aggressively wilted during the hottest part of the day, immediately pull them back a few feet from the window.
Conversely, if your cuttings sit in a dark corner for weeks and do absolutely nothing, they likely lack the photosynthetic energy required to push out new cells. Finding that perfect balance of bright, indirect, dappled sunlight is the key to vigorous root development.
Frequently Asked Questions
How long does it typically take for cuttings to root?
Rooting time varies dramatically depending on the plant species, the season, and your home’s temperature. Soft-stemmed tropicals like pothos or inch plants often show visible roots in just five to seven days.
Woody herbs like rosemary or thick-leaved succulents like snake plants can take anywhere from four to ten weeks. Warm temperatures and bright, indirect light will consistently speed up the process for any species.
Should I transfer my water cuttings to soil as soon as roots appear?
No, you should exercise a little patience. Wait until the primary roots reach at least two to three inches in length.
Ideally, you want to see secondary roots forming—meaning the main roots have started branching out with tiny side roots of their own. This extensive network ensures the plant can absorb enough moisture once it transitions to the drier environment of potting soil.
Do I absolutely need rooting hormone to grow plants from cuttings?
Rooting hormone is highly beneficial but not strictly necessary for every plant. Many common houseplants contain enough natural rooting hormones to successfully propagate in plain water.
However, applying a synthetic rooting hormone powder dramatically increases your success rate and speeds up root development for woody stems, tough shrubs, or plants that are notoriously slow to root.
Why are the leaves on my cutting turning yellow and falling off?
Yellowing leaves on a fresh cutting usually indicate that the plant is cannibalizing its older foliage for energy, or that it is losing water faster than it can absorb it.
Ensure you have removed excess leaves (leaving only two or three), check that your water is fresh, and move the cutting out of harsh, direct sunlight. Occasional loss of the lowest leaf is normal as the plant redirects energy to root production.
For trustworthy gardening information, visit:
University of Maryland Extension — Home & Garden, Rutgers New Jersey Agricultural Experiment Station and University of Arizona Cooperative Extension — Gardening. These organizations provide expert, research-based advice for gardeners at all levels.
Disclaimer: This article is for informational purposes only and is not a substitute for professional gardening advice. Always consult local extension services or horticulture experts for region-specific guidance.