
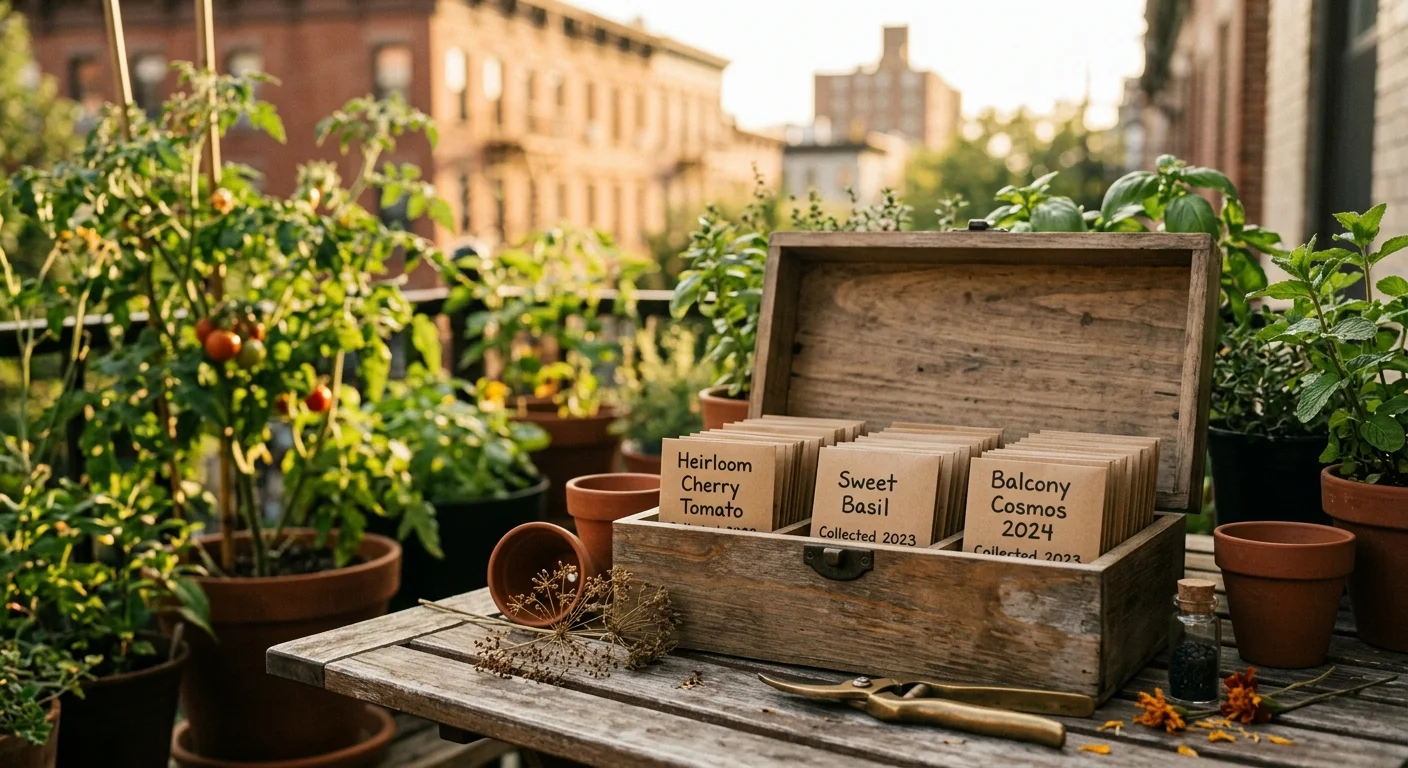
Proper seed storage transforms leftover garden packets into a thriving, cost-effective seed bank for future seasons. By controlling ambient moisture, temperature fluctuation, and light exposure, you can double or even triple the natural shelf life of your favorite heirloom tomatoes, herbs, and native flowers.
Seeds are living embryonic organisms in a state of suspended animation; maintaining ideal environmental conditions slows down their cellular respiration without killing the tiny embryo inside.
Whether you garden on a sunny urban balcony or tend a sprawling backyard plot, learning how to store seeds long term protects your financial investment and preserves valuable plant genetics across multiple growing seasons.
Taking stock of your stored packets is an essential step on any early spring garden prep checklist before purchasing new varieties.
Contents9 sections
- Understanding Seed Viability and Why Storage Matters
- The Environmental Golden Rules: Temperature, Moisture, and Light
- Choosing the Best Seed Storage Containers and Materials
- Step-by-Step Guide: How to Store Seeds Long Term
- Cold and Freezer Storage: Advanced Preservation Techniques
- Seed Longevity Guide by Plant Family
- Five Common Seed Storage Mistakes to Avoid
- How to Test Seed Viability Before Planting
- Frequently Asked Questions
Understanding Seed Viability and Why Storage Matters
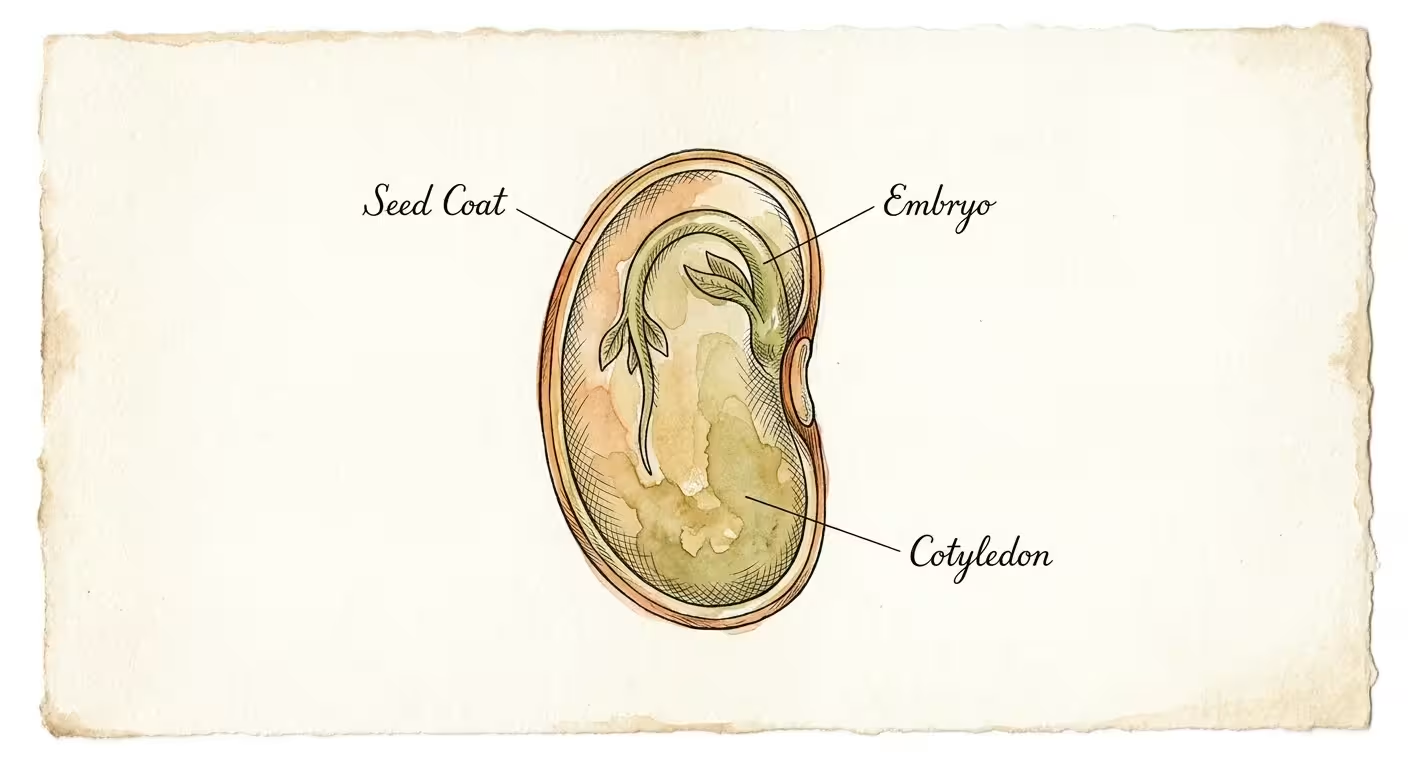
Seed viability refers to a seed’s ability to germinate and produce a healthy, vigorous seedling. Inside every seed casing sits a tiny, living plant embryo paired with a energy reserve known as the endosperm or cotyledon.
Surrounding these delicate structures is the seed coat, a protective outer boundary designed by nature to insulate the interior from environmental hazards.
When you place a seed into moist, warm soil, you signal the embryo to break its natural dormancy, consume its stored nutrients, and send out its first root radicle.
Having a steady supply of preserved seeds also makes it easy to practice continuous succession planting in small patio containers throughout the season.
During storage, your goal is to keep that embryo resting in deep metabolic dormancy. Seeds continuously consume tiny amounts of oxygen and burn through their stored food reserves through cellular respiration.
High temperatures and elevated humidity accelerate this internal engine; the seed consumes its energy reserves too quickly and starves to death long before you sow it into a container.
Once an embryo exhausts its food reserves, seed viability drops to zero, and no amount of water or fertilizer will wake it up.
Botanists divide seeds into two major evolutionary categories: orthodox seeds and recalcitrant seeds. The vast majority of garden vegetables, annual flowers, and culinary herbs produce orthodox seeds.
These seeds naturally dry down on the parent plant and can survive extreme dehydration, making them ideal candidates for multi-year seed saving and storage guide techniques.
Conversely, recalcitrant seeds—such as avocado, mango, citrus, and certain oak trees—die if their internal moisture content drops below a high threshold. Recalcitrant seeds cannot undergo long-term dry storage and require immediate planting.
For small-space gardeners operating on urban balconies, patios, or windowsills, mastering keeping seeds viable for years offers massive practical advantages. High-quality heirloom seed packets often contain 50 to 100 seeds, far more than a container gardener can plant in a single season.
Instead of discarding remaining seeds or buying fresh packets every spring, implementing proper storage lets you build a reliable personal seed bank; this approach saves money, preserves rare heritage plant genetics, and ensures you always have high-performing seeds ready for seasonal planting.
The Environmental Golden Rules: Temperature, Moisture, and Light
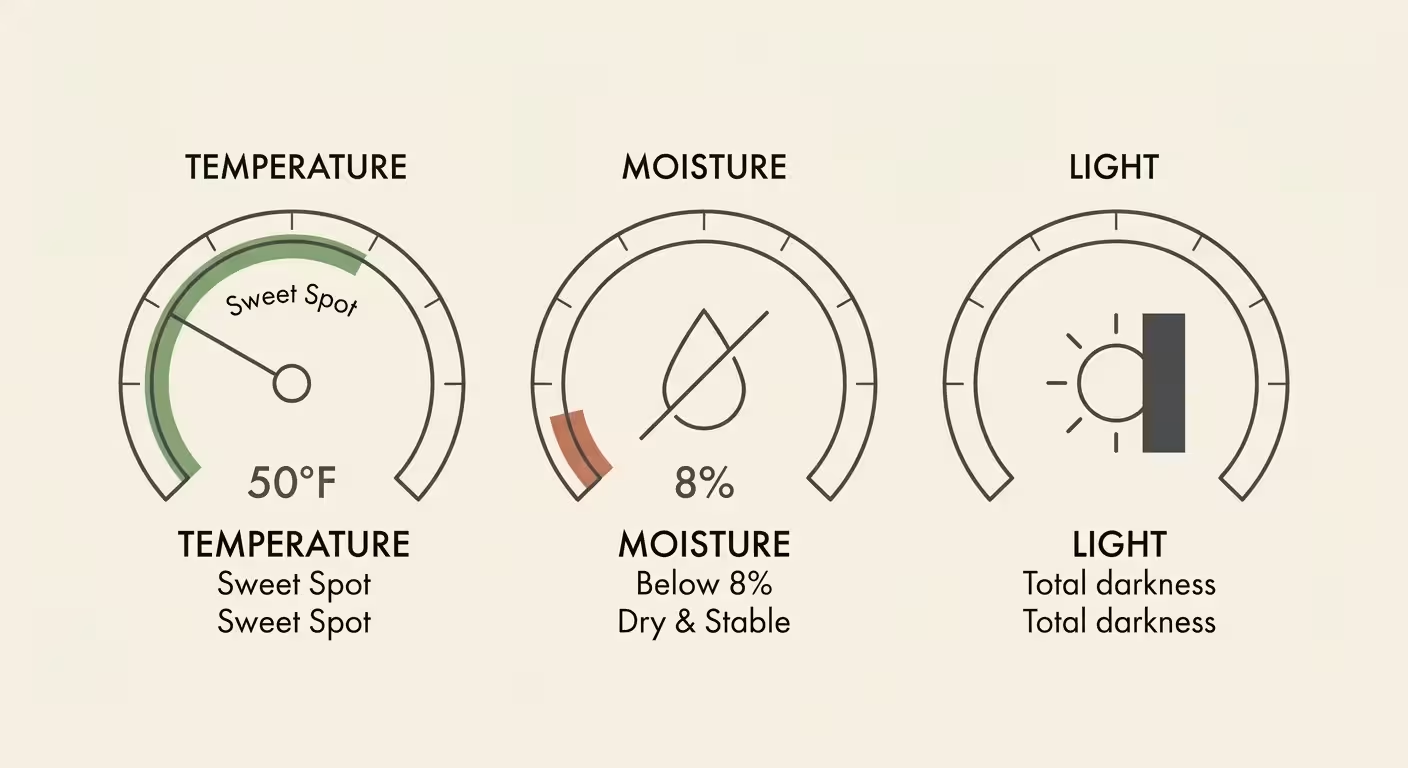
To maximize seed longevity, you must control three environmental variables: relative humidity, ambient temperature, and light exposure. Professional seed vaults and commercial seed producers rely on strict environmental mathematical standards to protect millions of crop varieties.
The most famous standard among horticulturalists is Harrington’s Rule of Thumb, often called the “Sum Rule” for seed preservation.
These climate rules also protect indoor varieties if you plan to start houseplants from seed indoors during the winter months.
Harrington’s Rule states that the sum of the storage temperature (expressed in degrees Fahrenheit) plus the ambient relative humidity percentage should always remain below 100. For optimal long-term results, dedicated seed preservers aim for a combined sum of 80 or lower.
- Unfavorable Environment: Room temperature of 72°F + 55% relative humidity = 127. Under these conditions, delicate seeds like onion, parsnip, and sweet corn lose significant germination capacity within 10 to 12 months.
- Optimal Environment: Cool basement or interior closet at 50°F + 25% relative humidity = 75. Seeds stored within this threshold maintain high germination vigor for three to six years.
Internal moisture content is the single most critical factor determining seed survival. Seeds rapidly absorb or release moisture based on the relative humidity of their surrounding environment.
When internal seed moisture stays between 4% and 8%, metabolic respiration drops to a near standstill. If internal moisture rises above 12%, internal fungal activity begins to damage the embryo; if moisture reaches 18% to 20%, internal heating occurs, rapidly destroying seed vitality.
If moisture climbs above 40% to 50%, the seed receives a false environmental signal and attempts full germination inside your storage container.
Temperature controls the speed of chemical decay. Horticultural data demonstrates that for orthodox seeds, every 10°F (5.5°C) drop in storage temperature doubles the seed’s lifespan, provided internal moisture remains low.
Storing seeds at 40°F in a stable refrigerator doubles their functional shelf life compared to storing them on an open shelf at 50°F. Combining low temperatures with ultra-low humidity creates an environment where cellular aging virtually stops.
Light exposure also plays a destructive role in seed degradation. Bright natural sunlight generates localized heat and emits high-energy ultraviolet radiation; this radiation degrades organic molecules within the protective seed coat and can trigger chemical pathways associated with breaking dormancy.
Storing seeds in complete, uninterrupted darkness prevents light-induced decay and keeps seeds resting peacefully.
Choosing the Best Seed Storage Containers and Materials
Selecting the right containers represents a foundational decision in any robust seed saving and storage guide. The ideal storage vessel must form an impermeable barrier against external water vapor, air currents, and hungry pantry pests.
While many gardeners default to original paper seed packets or thin plastic sandwich bags, these materials allow atmospheric moisture to drift freely in and out over time.
To keep your storage jars and future seedling trays neatly arranged, you can build a space-saving seed starting shelf tailored for small living spaces.
Glass containers equipped with airtight seals represent the gold standard for home seed preservers. Heavy glass mason jars with rubber gaskets or glass latch jars provide complete resistance to vapor transmission; water molecules cannot migrate through solid glass.
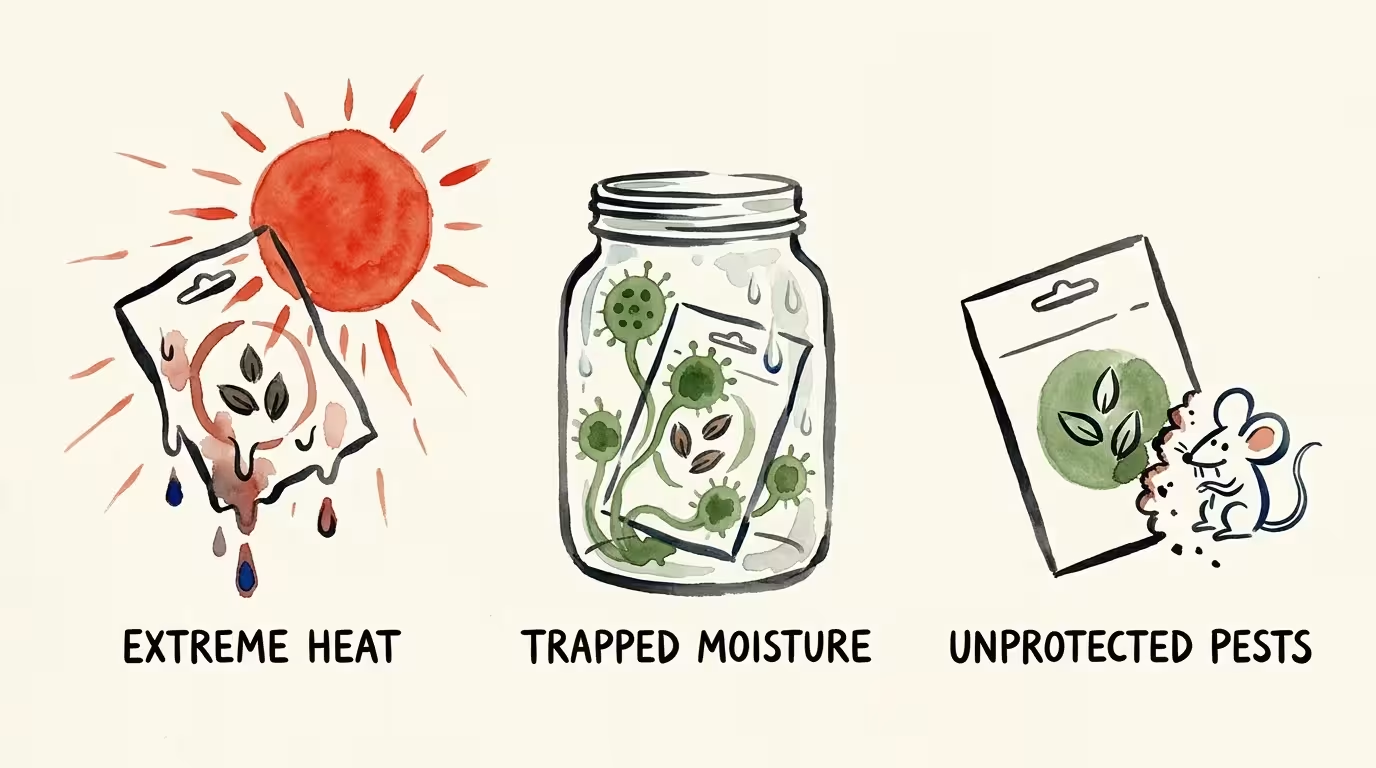
Furthermore, glass protects delicate seed packets from physical crushing and prevents pests like mice, flour beetles, and Indianmeal moths from chewing into your collection.
| Container Material | Moisture Protection | Pest Resistance | Space Efficiency | Best Used For |
|---|---|---|---|---|
| Glass Mason Jars | Excellent (100% Vapor Barrier) | Impermeable | Moderate | Primary outer storage for multiple seed packets |
| Mylar Foil Pouches | Excellent (Heat-Sealed) | High | Exceptional | Long-term bulk storage and space-saving systems |
| Rigid Plastic (Tupperware) | Moderate to High | Moderate | High | Short-term organizing (1-2 seasons max) |
| Paper Envelopes | None (Permeable) | Low | Exceptional | Inner primary organization inside airtight outer jars |
| Glassine Packets | Low (Slight Water Resistance) | Low | Exceptional | Individual seed variety categorization and small seeds |
Heat-sealable Mylar pouches offer an exceptional alternative for urban gardeners managing limited apartment space. Mylar features multiple layers of laminated plastic and aluminum foil, creating a flexible, light-blocking container that resists air and moisture migration.
You can easily seal Mylar bags using a simple household flat iron or heat sealer. Because Mylar bags lay flat, you can pack hundreds of seed varieties into a compact shoe-box-sized container, making them ideal for apartment and balcony growers.
Paper envelopes and glassine packets remain essential, but you should use them exclusively as inner primary packaging. Paper allows excess internal seed moisture to evaporate naturally during the initial drying phase.
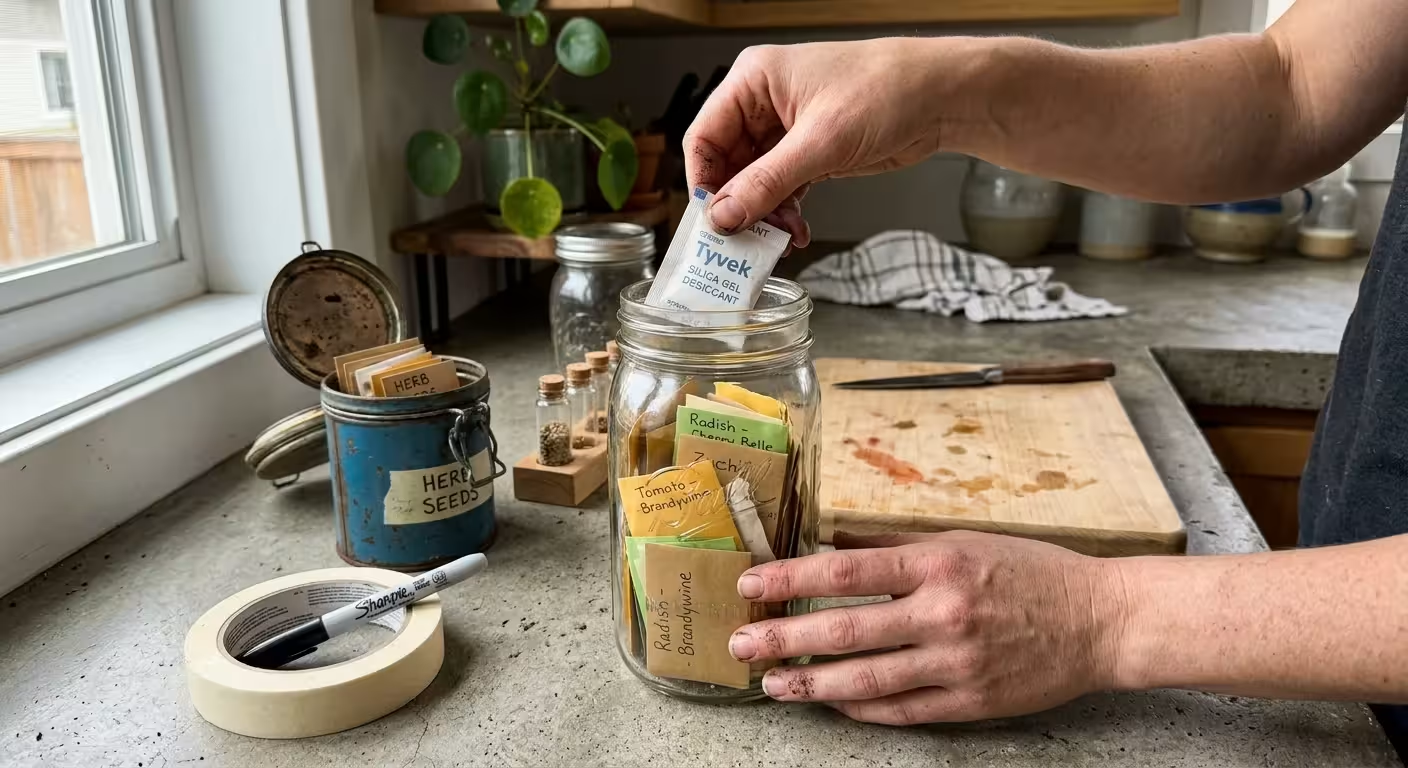
Once your seeds reach proper dryness inside their paper envelopes, place those envelopes inside a large glass mason jar or Mylar pouch filled with a desiccant.
Desiccants act as moisture sponges, absorbing ambient humidity trapped inside the outer container during sealing. Commercial food-grade silica gel packets are inexpensive, reusable, and highly effective.
You can also craft low-cost homemade desiccants by using plain, uncooked white rice or active dry powdered milk.
To make a milk desiccant, fold two tablespoons of dry powdered milk into a piece of facial tissue and place it at the bottom of your jar; the powdered milk will absorb free moisture, keeping your seed packets safely dry for months.
Step-by-Step Guide: How to Store Seeds Long Term
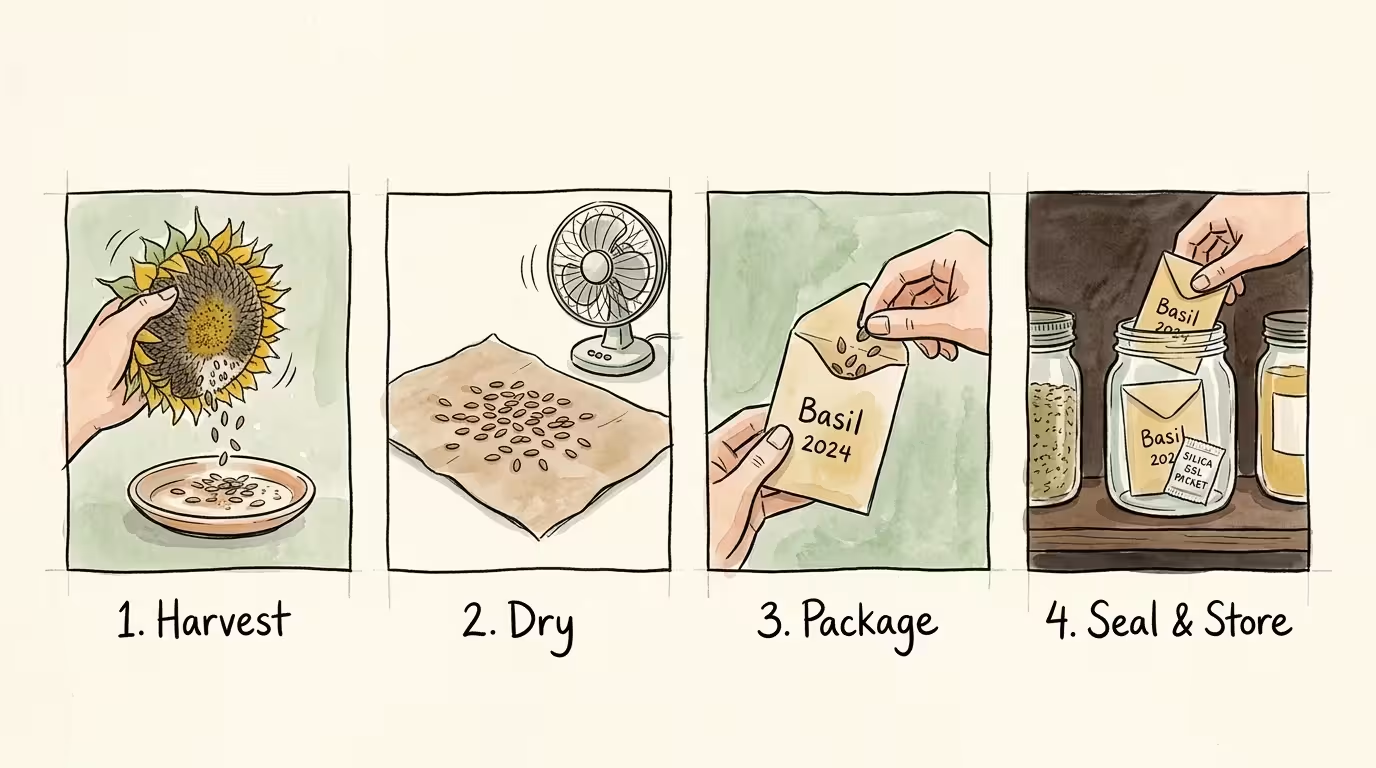
Follow these best seed storage methods to transform freshly harvested or purchased seed packets into a preserved seed collection that lasts for years. Executing these steps systematically ensures your seeds remain healthy, energetic, and ready to sprout when spring arrives.
When planting time arrives, you can sprout your preserved stock using the low-cost shoebox seed starting method on any compact windowsill.
Step 1: Clean and Decontaminate Your Seeds
Before storing home-saved seeds, remove all non-seed organic matter, including stems, dried leaves, seed pod fragments, and soil particles. Gardener’s call this extra organic debris “chaff.”
Chaff harbors microscopic fungal spores, mold spores, and pest eggs that thrive inside enclosed storage jars. Separate heavy seeds from light chaff using natural wind currents, fine mesh kitchen strainers, or gentle winnowing techniques.
Harvesting and cleaning mature seed pods fits naturally alongside your routine fall garden cleanup tasks as balcony plants finish their life cycle.
Step 2: Perform the “Bend vs. Snap” Dryness Test
Never seal damp seeds into airtight storage vessels; doing so traps internal moisture and invites destructive mold growth. To verify dryness without expensive laboratory equipment, apply the traditional bend-or-snap test to large seeds like beans, peas, corn, and squash.
Once dried and properly prepped, you can eventually wake these seeds up using a simple ziplock bag seed starting method without needing extra floor space.
- If you try to bend a large dried bean seed and it yields or feels leathery, the seed retains too much internal moisture for sealed storage. Continue air-drying it in a warm, ventilated room.
- If the bean breaks cleanly in half or shatters under pressure, its internal moisture content sits safely below 8%. It is ready for immediate airtight packaging.
- For smaller seeds like tomato or pepper, press your thumbnail firmly into the seed coat. If your nail leaves a visible indentation, dry the seeds for another three to five days.
Step 3: Package Seeds into Breathable Primary Envelopes
Transfer cleaned, dry seeds into paper seed packets, small glassine envelopes, or coin envelopes. Write the complete plant identification details directly onto the paper using permanent, waterproof ink.
Include the specific crop variety name, original seed supplier or harvest location, exact year of collection, and any initial germination rates from the manufacturer.
Step 4: Add Desiccants to Your Outer Storage Vessel
Place fresh silica gel packets or homemade desiccant pouches at the bottom of a clean, dry glass mason jar. Use approximately 1 to 2 grams of silica gel per quart-sized jar.
If you use moisture-indicating silica gel beads, choose products that change from orange to green rather than older varieties containing cobalt chloride, ensuring your seed storage environment remains non-toxic and food-safe.
Step 5: Load Packets and Create an Airtight Seal
Arrange your paper seed envelopes neatly inside the glass jar above the desiccant layer. Inspect the rubber gasket or silicone lid ring to confirm it is clean, flexible, and free of dirt.
Tighten the jar lid firmly to create an absolute barrier against room air. If you use Mylar pouches, squeeze out excess air and heat-seal the open edge with an iron.
Step 6: Select a Low-Fluctuation Storage Location
Place sealed jars into a dark, cold location where ambient temperatures remain stable year-round. Ideal household spots include a low shelf in an unheated interior closet, a cool, dry basement, or an insulated north-facing cabinet.
Avoid locations subject to dramatic thermal swings, such as uninsulated garages, attics, sunny windowsills, or wall cabinets directly above heat vents or kitchen stoves.
Cold and Freezer Storage: Advanced Preservation Techniques
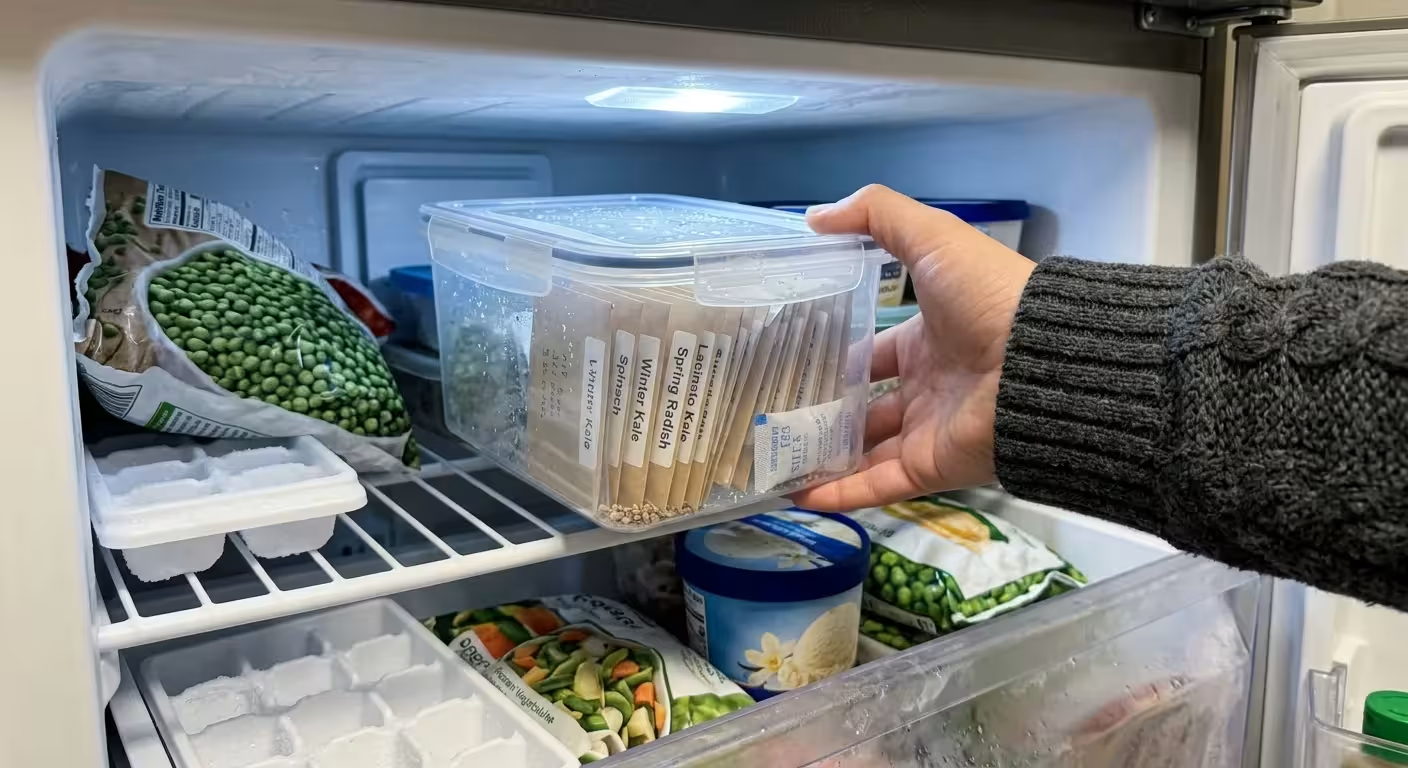
When you want to retain seed viability for ten years or more, freezing offers the ultimate preservation strategy. Cryogenic and sub-zero storage suspended animation stops biological aging in orthodox seeds.
Modern national seed banks preserve rare crop genetics for decades by maintaining sub-zero vault conditions. However, freezing seeds at home requires strict attention to detail; improper freezing techniques can kill an entire seed collection in hours.
The single greatest hazard of freezing seeds is ice crystal formation. Water expands as it freezes.
If a seed contains an internal moisture level above 10% to 12%, free water molecules inside the embryo cells freeze into jagged ice crystals. These microscopic crystals act like tiny knives, puncturing cell walls, destroying cellular architecture, and killing the plant embryo instantly.
Consequently, you must ensure seeds are thoroughly dry before placing them into a freezer.
Follow this safe, professional protocol when using cold freezer storage for your seeds:
- Drying Phase: Place paper seed packets into an airtight jar with active silica gel for 7 to 14 days at room temperature. This preliminary step strips deep internal moisture down to a safe 5% to 7% range.
- Airtight Barrier Phase: Transfer dried packets into a fresh, heavy-duty glass mason jar or a thick, heat-sealed Mylar bag. Ensure the seal is 100% airtight to prevent the freezer’s humid, frost-building air from entering.
- Freezing Phase: Place the container into a deep freezer operating at 0°F (-18°C) or colder. Keep the jar toward the back of the freezer shelf where temperatures remain stable during door openings.
- The Thermal Thawing Protocol (Crucial Step): When you decide to retrieve seeds from freezer storage, do not open the container immediately. If you open an ice-cold glass jar in a warm room, atmospheric moisture will instantly condense on the cold inner walls and seeds, coating them in tiny water drops. This sudden surge in moisture ruins your drying efforts and damages seed health.
Always remove the sealed jar from the freezer and leave it unopened on a dry room-temperature counter for at least 12 to 24 hours. Allow the entire contents—glass, air, and seeds—to reach room temperature before breaking the seal.
Once warm, open the container, extract the specific seed packets you need for spring planting, reseal the jar, and return the remaining seeds to the freezer.
Seed Longevity Guide by Plant Family
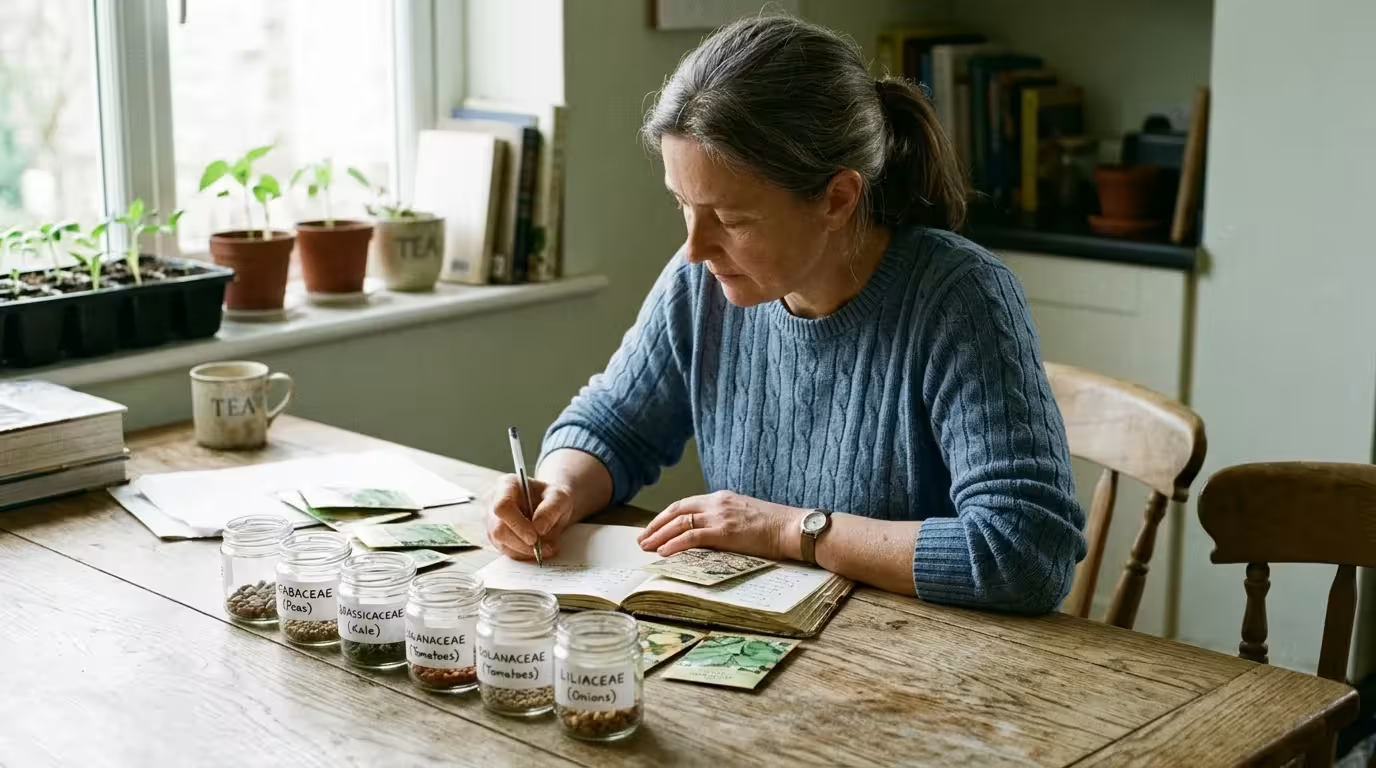
Not all crop seeds age at the same speed. Seeds rich in botanical oils—such as onions, sweet corn, and parsnips—undergo natural lipid oxidation over time, causing internal rancidity and embryo death within one to two years.
Conversely, carbohydrate-dense seeds featuring hard, protective coats—such as melons, radishes, and brassicas—remain viable for over half a decade when stored correctly.
Understanding these natural biological lifespans helps you prioritize which seeds to sow quickly and which varieties you can comfortably store long term.
| Crop Category | Plant Varieties | Standard Storage Lifespan | Optimal Storage Lifespan | Natural Decay Rate |
|---|---|---|---|---|
| Short-Lived Seeds | Onions, Leeks, Parsnips, Sweet Corn, Delphinium, Pansies | 1 Year | 2 to 3 Years | Rapid (High lipid oxidation) |
| Moderate-Lived Seeds | Carrots, Celery, Lettuce, Spinach, Beans, Peas, Peppers | 2 to 3 Years | 4 to 5 Years | Moderate (Balanced carbohydrates & fats) |
| Long-Lived Seeds | Tomatoes, Eggplants, Radishes, Squash, Cucumbers, Melons | 4 to 5 Years | 6 to 10+ Years | Slow (Protective coats & dense starches) |
| Brassica Family | Cabbage, Broccoli, Kale, Cauliflower, Brussels Sprouts | 4 Years | 5 to 8 Years | Slow (Durable seed coats) |
| Herbs | Basil, Parsley, Cilantro, Dill, Chives, Oregano | 2 to 3 Years | 4 to 6 Years | Moderate to Slow (Variable essential oils) |
If you enjoy growing culinary herbs on small apartment balconies, treat cilantro and parsley as short-to-moderate lifespan seeds. Their aromatic compounds degrade quickly if exposed to ambient air.
In contrast, basic tomato and pepper seeds remain surprisingly resilient; even six-year-old tomato seeds stored in simple airtight jars often yield 80% germination rates or higher.
Five Common Seed Storage Mistakes to Avoid
Even experienced gardeners occasionally make critical mistakes that reduce seed lifespan. By avoiding these five common storage pitfalls, you protect your home seed bank from accidental loss.
Mistake 1: Storing Seed Packets in Non-Climate-Controlled Outbuildings
Leaving seed collections in outdoor garden sheds, uninsulated garages, or greenhouses exposes them to severe environmental swings. Summer heat spikes drive humidity into seed coats, while winter freezing cycles cause cell-damaging condensation.
Always store precious seed collections inside climate-controlled living spaces maintained at stable room temperatures.
Mistake 2: Relying Solely on Standard Plastic Sandwich Bags
Thin polyethylene sandwich bags or cheap slide-seal bags seem convenient, but their thin walls feature microscopic pores that allow water vapor to migrate freely. Over a six-month summer period, ambient room humidity will pass directly through thin plastic film, causing internal moisture to rise.
Always use thick glass jars or certified aluminum Mylar pouches for multi-year seed storage.
Mistake 3: Storing Seeds Near Ethylene-Emitting Produce
Keep seed storage jars far away from fruit bowls, winter squash piles, or root cellars containing ripening apples, pears, or bananas. Ripening fruits give off ethylene gas, a natural plant hormone that triggers cellular changes, accelerates aging, and breaks seed dormancy prematurely.
Store seeds in dedicated, clean closets or separate refrigerators free from ripening produce.
Mistake 4: Allowing Direct Contact with Bare Concrete Surfaces
Setting seed boxes directly onto bare concrete basement floors invites moisture problems. Concrete is porous and continually wicks liquid moisture and cold vapor upward from the surrounding soil.
This vapor creates a humid, chilly microclimate around the base of your storage containers. Always elevate your storage boxes on wooden shelves, plastic pallets, or interior furniture.
Mistake 5: Storing Seeds Before Complete Processing and Drying
When saving wet seeds from tomatoes, squash, or melons, complete fermentation and drying are mandatory. Placing sticky, wet seeds directly onto paper towels and sealing them into jars traps moisture and encourages mold development.
Always ferment wet seeds in water to strip away germination-inhibiting pulp, rinse them thoroughly, and spread them in a single layer on non-stick screens or ceramic plates until they pass the snap test.
How to Test Seed Viability Before Planting
Before spending valuable time, potting soil, and windowsill space planting older seed packets, run a quick germination test. Testing viability measures the exact percentage of living seeds in a batch, helping you decide whether to sow normally, plant more thickly, or re-order fresh stock.
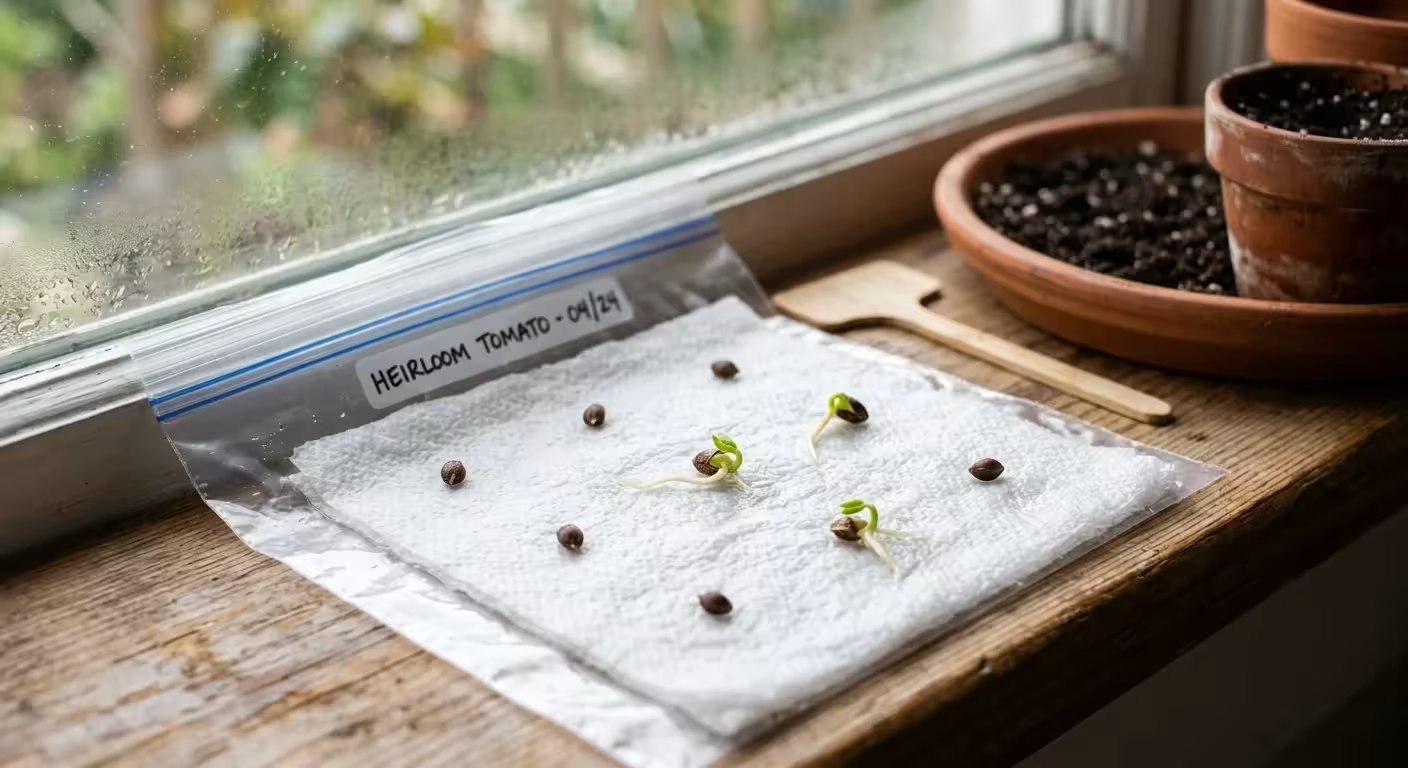
The standard paper towel method—often called the “ragdoll test”—provides quick, highly accurate results without wasting soil mix:
- Select a Sample: Randomly take 10 seeds from your stored seed packet. Testing 10 seeds makes calculating your germination percentage quick and simple.
- Prepare the Towel: Moisten a clean, unprinted paper towel with lukewarm water. Wring it out thoroughly until it feels uniformly moist, like a wrung-out sponge, but isn’t dripping wet.
- Position the Seeds: Space your 10 test seeds evenly across one half of the paper towel, leaving at least one inch of space between individual seeds.
- Enclose and Seal: Fold the empty half of the towel over the seeds to cover them. Place the moist towel inside a clear plastic zip-top bag, seal it almost completely to retain moisture, and leave a tiny gap for oxygen exchange.
- Provide Warmth: Place the bag in a warm location maintained between 70°F and 80°F (21°C to 27°C), such as on top of a refrigerator or warm seed-starting mat. Keep it out of harsh direct sunlight.
- Evaluate Results: Inspect the towel every two days. Keep the towel moist with a light mist of water if it begins to dry out. Count the sprouted seeds after 7 to 14 days, depending on the crop’s natural sprouting window.
Calculate your viability percentage by counting the sprouted seeds out of the 10 tested:
- 8 to 10 Seeds Sprouted (80%–100% Viability): Your stored seeds possess high vigor. Sow them at normal spacing recommendations.
- 5 to 7 Seeds Sprouted (50%–70% Viability): Seed vigor is declining. Sow seeds twice as thick as normal to achieve desired container plant densities.
- 1 to 4 Seeds Sprouted (10%–40% Viability): The batch has expired. Discard the remaining seeds or sow heavily in practice trays, and replace the packet with fresh stock for main balcony containers.
Frequently Asked Questions
Can I store seeds in my kitchen refrigerator?
Yes, kitchen refrigerators offer cool, stable temperatures that slow seed aging. However, domestic refrigerators operate at high relative humidity levels.
To protect seeds inside a refrigerator, you must place your seed packets inside a completely sealed glass mason jar accompanied by fresh silica gel packets to prevent damp air from reaching the seed coats.
Is uncooked white rice a safe desiccant for seed storage?
Uncooked white rice acts as a decent short-term desiccant, but it carries small amounts of natural moisture. To turn plain white rice into an effective moisture absorber, spread it on a baking sheet and toast it in an oven at 250°F (120°C) for 45 minutes.
Allow the rice to cool completely inside a sealed jar before adding a cloth pouch of it to your seed containers.
Do commercial seed packets expire at the end of the stamped stamped year?
No, the “Packed for Year” date stamped on commercial seed packets is a regulatory requirement for seed distributors, not an expiration date. While regulatory standards require high initial germination rates (typically 70% to 80%), seeds stored under cool, dry conditions remain viable long past the stamped year.
How do I know if my saved seeds have spoiled during storage?
Spoiled seeds display distinct physical warning signs. Dark discoloration, soft or mushy seed coats, visible white or green mold, or a sour, musty odor all indicate moisture damage.
Healthy stored seeds feel rock-hard, stay odor-free, and display clean, consistent seed coat coloration.
For trustworthy gardening information, visit:
Botanical Society of America, Oregon State Extension — Gardening and Royal Horticultural Society (RHS). These organizations provide expert, research-based advice for gardeners at all levels.
Disclaimer: This article is for informational purposes only and is not a substitute for professional gardening advice. Always consult local extension services or horticulture experts for region-specific guidance.