
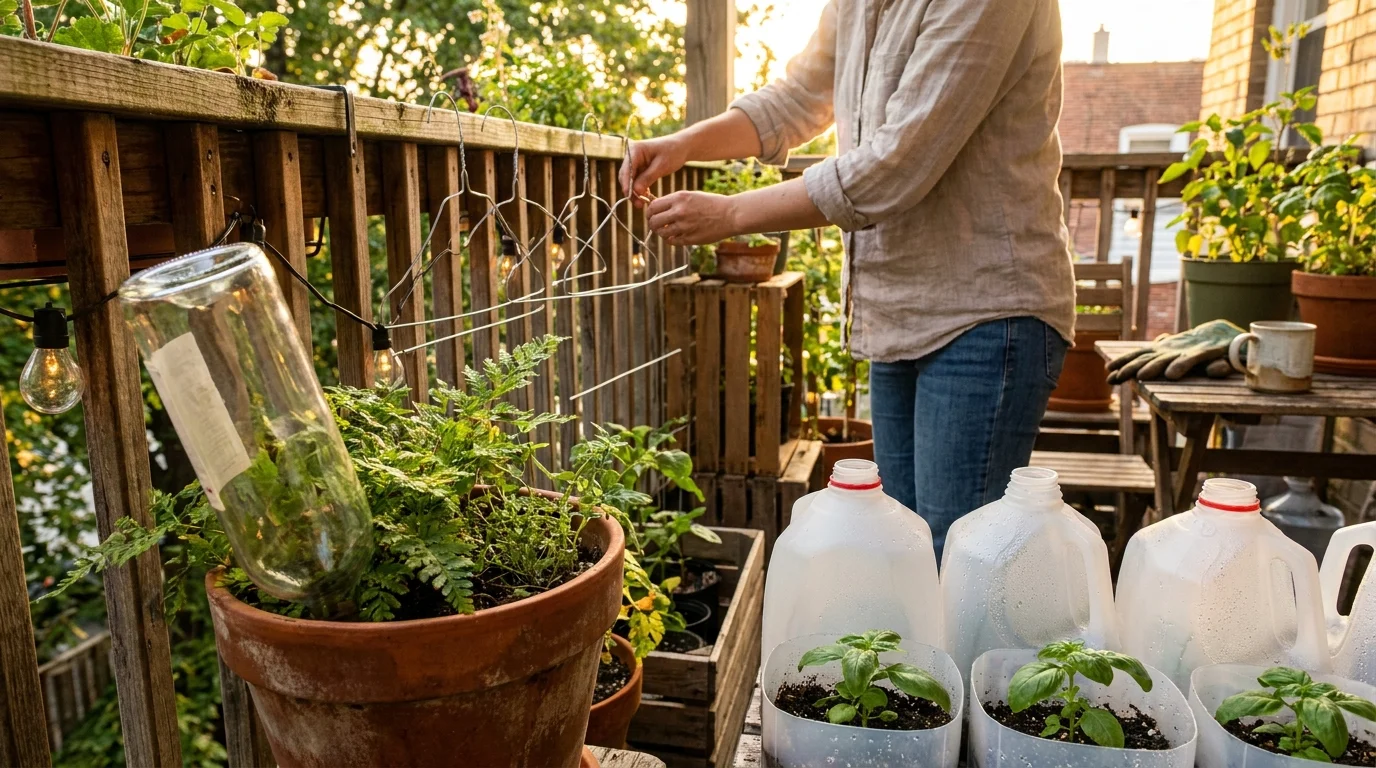
Transform your patio into a thriving green oasis without spending a single dime on expensive specialty equipment. Your kitchen cupboards and recycling bins secretly hold highly effective tools for cultivating healthy plants, from nutrient-packed fertilizers to clever irrigation systems.
Repurposing everyday household items allows you to reduce waste while solving common small-space gardening challenges like poor soil quality and inconsistent watering. You can build protective mini-greenhouses, deter hungry pests, and nourish deep root systems using materials you already own.
By embracing these accessible methods, you cultivate sustainable habits that benefit both the environment and your wallet. Read on to discover actionable techniques that will immediately elevate your home garden.
Contents10 sections
- Repurpose Coffee Grounds for Nutrient-Rich Soil
- Transform Toilet Paper Rolls Into Seed Starters
- Use Crushed Eggshells for Pest Control and Calcium
- Turn Plastic Milk Jugs Into Mini Greenhouses
- Create Self-Watering Systems With Wine Bottles
- Build Vertical Plant Supports Using Old Wire Hangers
- Utilize Baking Soda for Natural Fungal Prevention
- Organize Tiny Seeds With Empty Spice Shakers
- Troubleshoot DIY Gardening Mistakes
- Frequently Asked Questions
Repurpose Coffee Grounds for Nutrient-Rich Soil
Your morning cup of coffee produces an exceptional byproduct that can dramatically improve your soil quality. Coffee grounds contain high levels of nitrogen, a primary macronutrient responsible for fueling robust, leafy green growth in your plants.
When you brew your coffee, the hot water extracts the majority of the natural acidity. This means that the leftover brewed grounds are nearly pH neutral, making them a safe and effective organic amendment for almost any container garden or raised bed.
Rather than tossing this valuable resource into the trash, you can incorporate it directly into your gardening routine to boost plant vitality.
Learning how to rebuild potting soil can further boost the performance of these coffee-rich mixtures.
Beyond simply adding nitrogen, coffee grounds physically enhance the structure of your potting mix. They improve soil tilth—the physical condition and texture of the soil—which encourages vigorous root expansion.
Furthermore, mixing coarse grounds into your pots improves drainage, which is how water moves through soil. Proper drainage prevents water from pooling at the bottom of your containers, a common issue that quickly leads to root rot.
If you garden outdoors on a patio, the grounds will also attract beneficial earthworms. Earthworms consume the organic matter and leave behind nutrient-dense castings, naturally aerating the dirt as they tunnel through your pots.
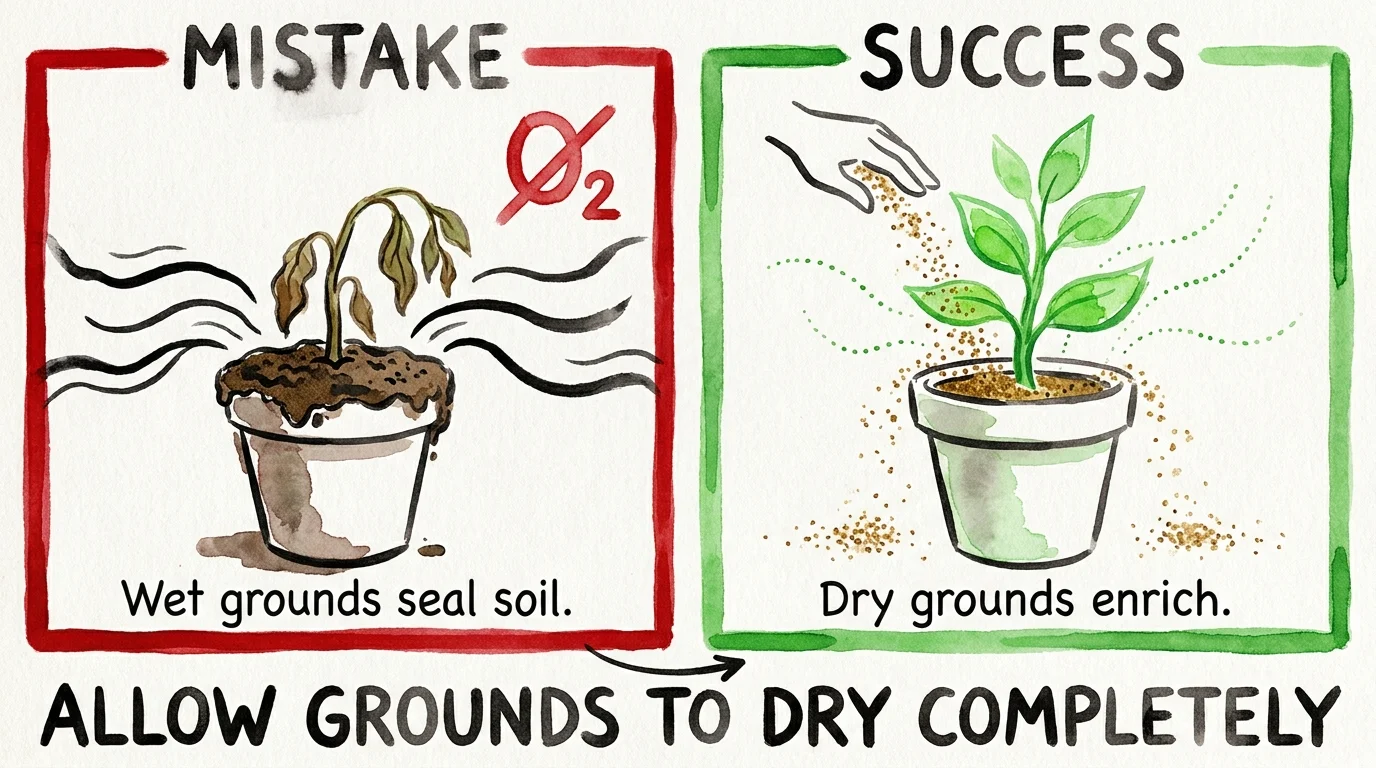
To safely apply coffee grounds, you must follow a few simple guidelines to avoid common pitfalls. Wet coffee grounds clump together tightly and can form a dense crust over the top of your soil, which blocks water and oxygen from reaching the root zone.
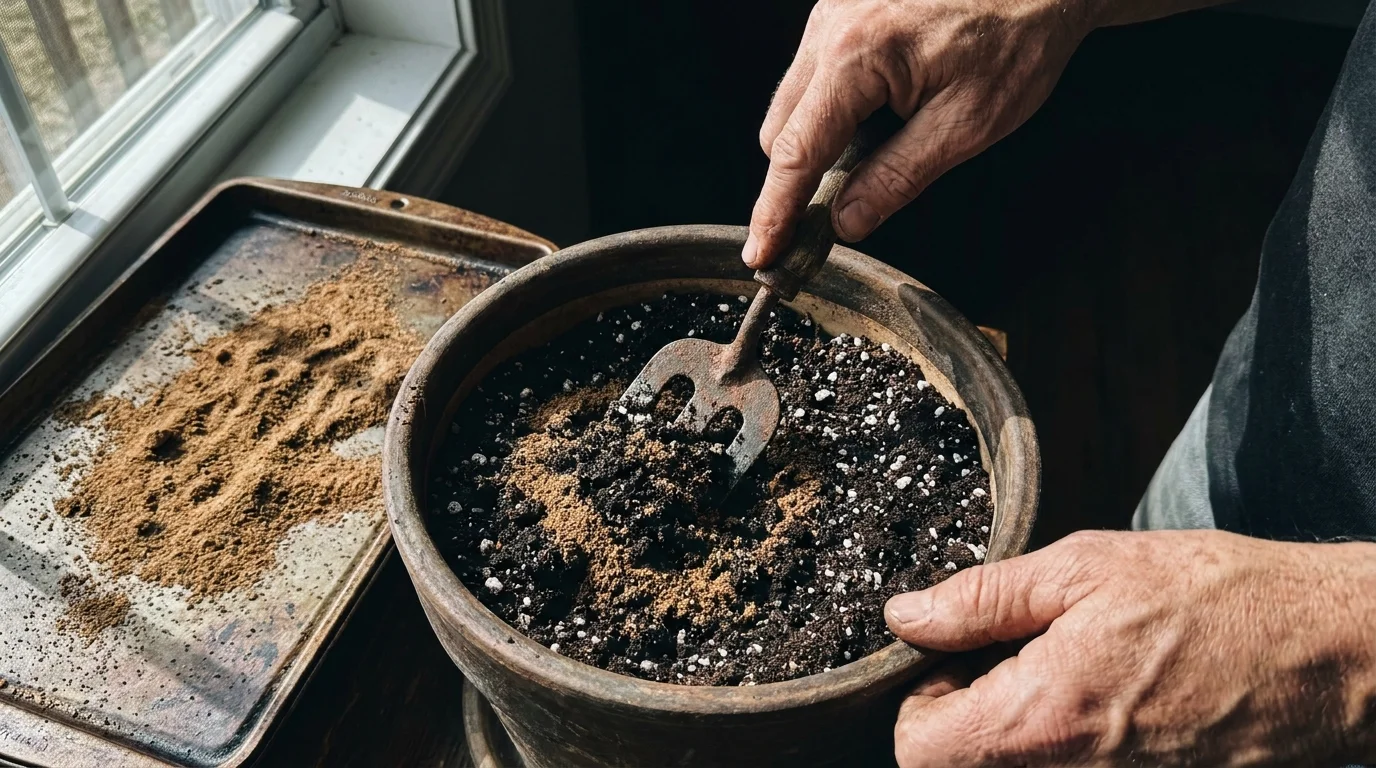
To prevent this, spread your leftover grounds on a baking sheet and allow them to dry completely in the sun or on your kitchen counter. Once they resemble dry sand, sprinkle a thin, even layer over the surface of your soil.
Use a hand fork or your fingers to scratch the dry grounds into the top two inches of the dirt. This gentle incorporation ensures the organic matter begins breaking down immediately without forming a barrier.
Transform Toilet Paper Rolls Into Seed Starters
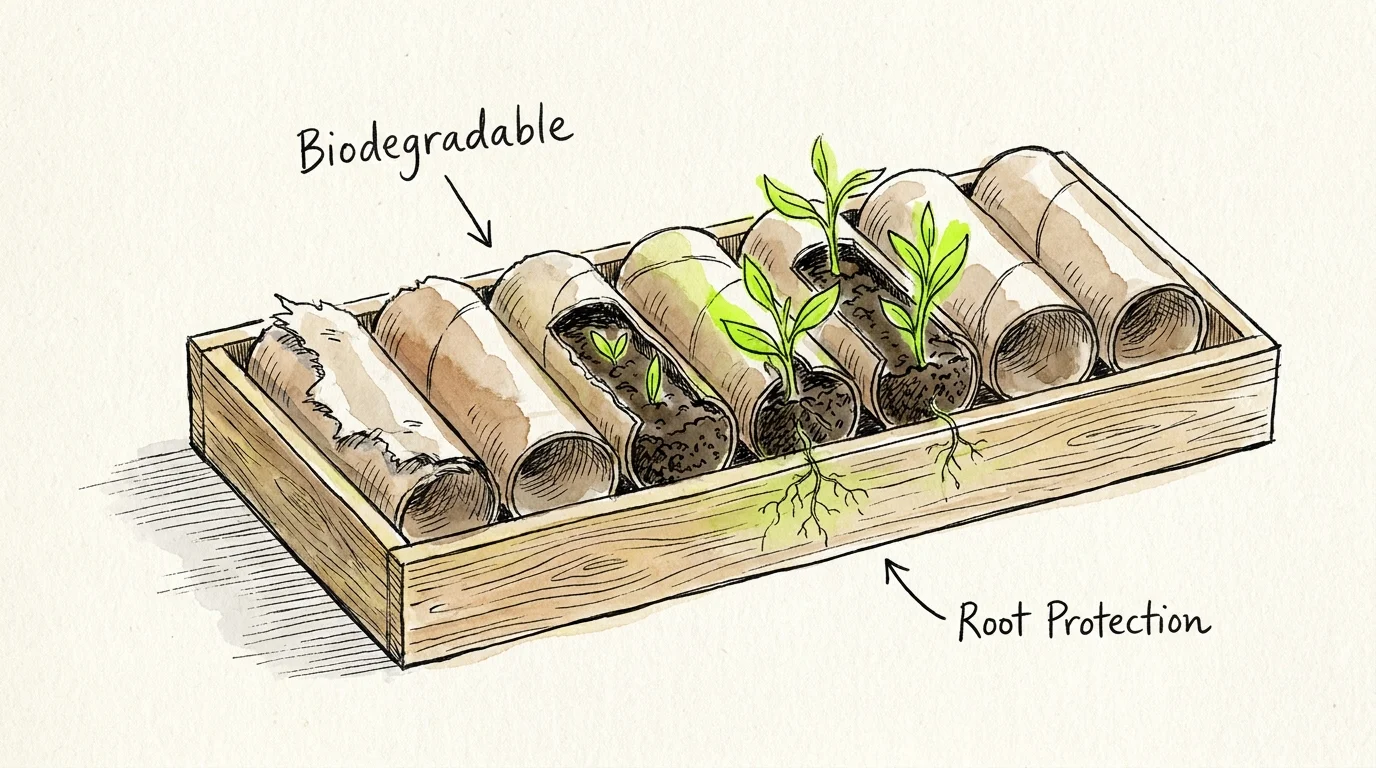
Starting seeds indoors gives you a massive advantage when the growing season is short, but purchasing specialized plastic nursery flats is entirely unnecessary. Empty toilet paper rolls provide a biodegradable, free alternative that functions beautifully as a seed starting vessel.
Many popular garden additions, such as cucumbers, zinnias, and nasturtiums, possess highly sensitive root systems. These plants often experience severe transplant shock when you pull them out of traditional plastic pots.
Cardboard tubes eliminate this risk entirely because you plant the entire container directly into the final growing space, leaving the fragile root ball completely undisturbed.
Crafting these sustainable seed starters takes only a few seconds per tube. First, use sharp scissors to cut four evenly spaced vertical slits—each about one inch long—into one end of the cardboard cylinder.
Fold these four newly created flaps inward, overlapping them just like you would close a cardboard moving box. This creates a secure, flat bottom that holds the potting mix inside while still allowing excess water to seep out.
Stand the prepared tubes upright tightly together in a waterproof tray or an old plastic food container. Fill each roll nearly to the top with a lightweight seed starting mix, gently tapping the tray on your table to settle the dirt before sowing your seeds.
Managing moisture stands out as the most critical task when utilizing cardboard pots. Because cardboard naturally wicks moisture away from the interior dirt and evaporates it into the air, these tiny containers dry out much faster than non-porous plastic ones.
You must check the hydration levels daily. Pouring water directly into the bottom tray allows the cardboard and the soil to draw the moisture upward through capillary action.
This bottom-watering technique encourages the emerging roots to grow deep toward the moisture source. When it is finally time to move your seedlings outdoors, bury the entire cardboard roll into the patio planter.
The soil microbes will quickly digest the wet paper, adding carbon to the ecosystem while your plant thrives.
Use Crushed Eggshells for Pest Control and Calcium
Eggshells consist almost entirely of calcium carbonate, an essential mineral that dictates how plants build robust cellular walls.
A lack of available calcium in your potting soil frequently manifests as blossom end rot—a frustrating condition where the bottom of your ripening tomatoes, peppers, or eggplants turns into a sunken, black, leathery patch.
By recycling your breakfast waste, you can slowly release calcium back into your containers and protect your vegetable harvest.
Because soil microbes need time to digest the hard organic matter and convert it into a usable format for plant roots, you should begin adding eggshells to your soil weeks before you plan to transplant your summer crops.
Using food waste like this is part of a larger strategy for creative upcycling ideas that save money and space.
Proper preparation ensures your eggshells perform effectively and safely. Never throw raw, unwashed eggshells straight into your outdoor pots, as the residual egg whites and yolks will quickly rot, emitting foul odors and attracting unwanted neighborhood scavengers like raccoons or rats.
Instead, rinse the empty shells thoroughly under warm water to strip away the inner slimy membrane. Spread the clean shells on a tray and bake them in your oven at a low temperature until they become completely dry and brittle.
This baking step sterilizes the shells and makes them exceptionally easy to crush. Use a rolling pin or pulse them in a food processor until they form a fine, powdery grit, which you can easily mix into your soil.
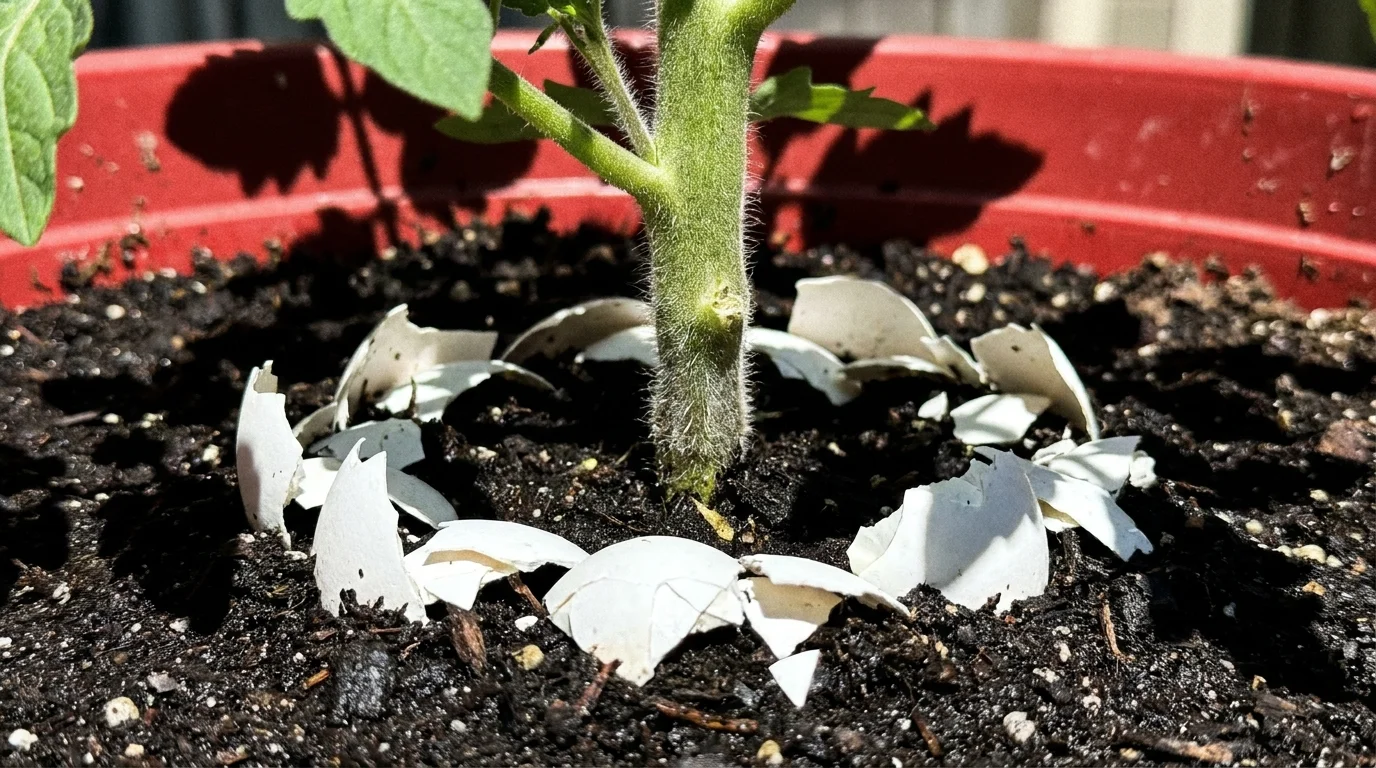
In addition to nutritional benefits, roughly crushed eggshells serve as a formidable, chemical-free pest deterrent. Soft-bodied garden pests like slugs and snails cause massive destruction in damp, shaded small-space gardens, devouring tender hosta leaves and young lettuce overnight.
You can create a defensive perimeter by sprinkling a thick ring of jagged, roughly crushed eggshells directly on the soil surface around your most vulnerable plants. The sharp, abrasive edges irritate the soft underbellies of the gastropods, forcing them to seek easier meals elsewhere.
This physical barrier eliminates the need for toxic, synthetic slug pellets, keeping your gardening space perfectly safe for roaming pets and beneficial insects.
Turn Plastic Milk Jugs Into Mini Greenhouses
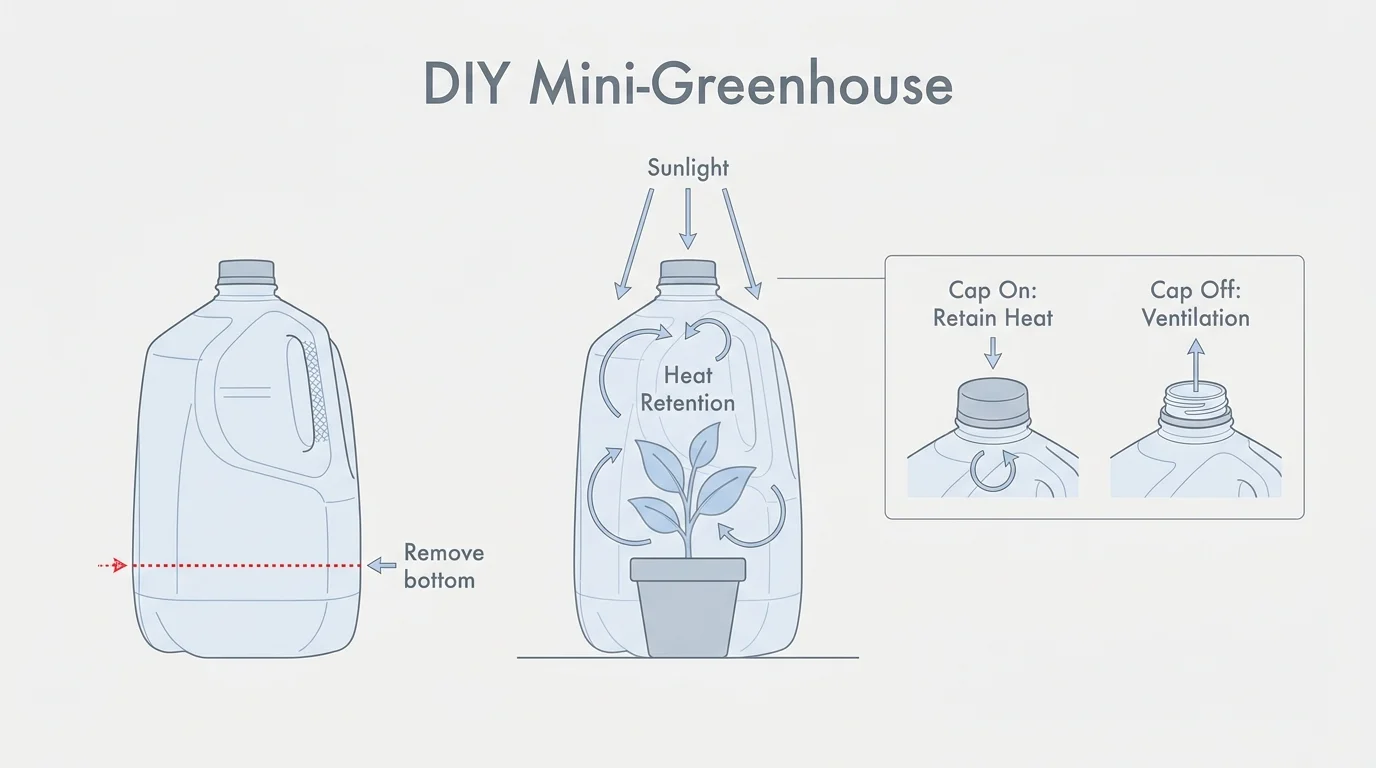
Balcony and patio gardeners often struggle to find enough warm, sunny windowsill space to germinate a large volume of seeds indoors. You can completely bypass this limitation by embracing a technique known as winter sowing, which utilizes empty translucent plastic milk jugs or water bottles.
These standard household recyclables mimic the exact thermodynamic properties of an expensive glass greenhouse. Sunlight easily penetrates the thin plastic walls, converting to trapped heat that prematurely warms the damp soil inside.
This creates a humid, protected microclimate that shields delicate seeds from late spring frosts, freezing winds, and hungry birds, allowing you to start your gardening season weeks earlier.
Building a milk jug greenhouse requires minimal effort and basic tools. First, thoroughly wash the jug with warm soapy water to remove any residual dairy, which would otherwise sour and grow dangerous molds.
Flip the jug upside down and carefully puncture four to six drainage holes in the sturdy bottom plastic using a hot nail or heavy-duty scissors. Without these vital drainage holes, heavy spring rains would flood the container and drown your seeds.
Next, slice horizontally around the equator of the jug, cutting through three of the four sides. Leave the handle section completely intact so it functions as a flexible hinge, allowing you to flip the top half backward like a lid.
Once you construct the miniature greenhouse, fill the bottom reservoir with three to four inches of high-quality, pre-moistened potting soil. Sow your chosen cold-hardy seeds—such as spinach, kale, or sweet peas—directly onto the dirt and cover them lightly.
Swing the top half of the jug back down into place and seal the horizontal seam tightly using strong waterproof tape, such as duct tape. Finally, remove and discard the original plastic screw cap.
The open spout serves as a crucial ventilation chimney; it allows excess trapped heat to escape during unseasonably warm afternoons while permitting natural rain and snow to enter and hydrate the soil.
Place your sealed jugs outdoors in a sunny corner of your patio and wait for the seeds to sprout naturally.
Create Self-Watering Systems With Wine Bottles
Maintaining consistent soil moisture represents one of the most demanding challenges for container gardeners. Potted plants dry out significantly faster than plants grown directly in the ground, as the sun and wind bake the sides of the containers.
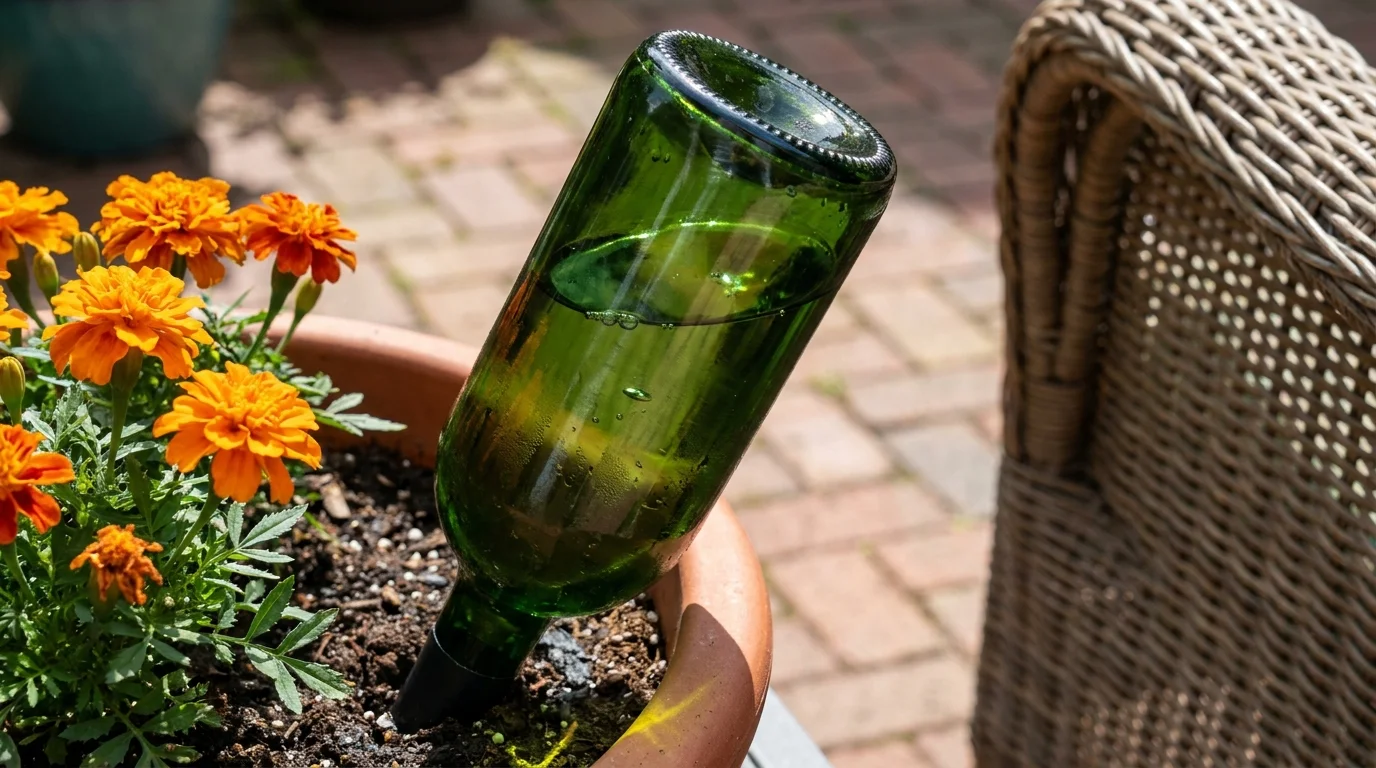
If you plan to leave town for a summer weekend or simply struggle to keep up with daily watering chores during a heatwave, an empty glass wine bottle offers an elegant and scientifically sound solution.
This clever repurposing trick utilizes basic physics to deliver a slow, steady supply of water deep into the root zone exactly when the plant requires hydration.
For larger setups, you can even construct DIY self-watering containers from scratch.
The success of the wine bottle hack relies entirely on the principle of capillary action and soil tension. Start by thoroughly cleaning a standard glass wine bottle, ensuring no sugary alcohol residue remains inside.
Water the target plant deeply using a standard watering can so the potting soil is thoroughly saturated. If you plunge a water-filled bottle into dry, cracked soil, the dirt will rapidly siphon all the liquid out within hours.
Once the soil is evenly moist, fill your clean wine bottle completely to the very brim with fresh tap water. Quickly invert the bottle and thrust the long neck firmly into the dirt, burying it at least three to four inches deep to ensure stability.
As the bottle rests upside down in the container, the damp earth firmly packed around the opening acts as a physical plug.
Gravity wants to pull the water down, but the vacuum created inside the rigid glass bottle prevents the liquid from rushing out all at once.
As the surrounding dirt gradually dries out from sun exposure and root absorption, it pulls small amounts of water from the bottle opening to rehydrate itself. This slow-release mechanism targets the deepest roots directly, bypassing the soil surface entirely.
Watering beneath the surface dramatically reduces water lost to evaporation and discourages the proliferation of fungus gnats, which require damp topsoil to breed.
Build Vertical Plant Supports Using Old Wire Hangers
Maximizing limited square footage requires you to think vertically. Climbing plants and trailing vines—such as pothos, sweet potato vines, or miniature climbing roses—quickly overtake a small balcony if left to sprawl randomly across the floor.
Providing sturdy structural support encourages these plants to grow upward, creating dramatic living walls that improve air circulation around the foliage and increase sunlight exposure. You do not need to purchase expensive decorative trellises from a garden center to achieve this effect.
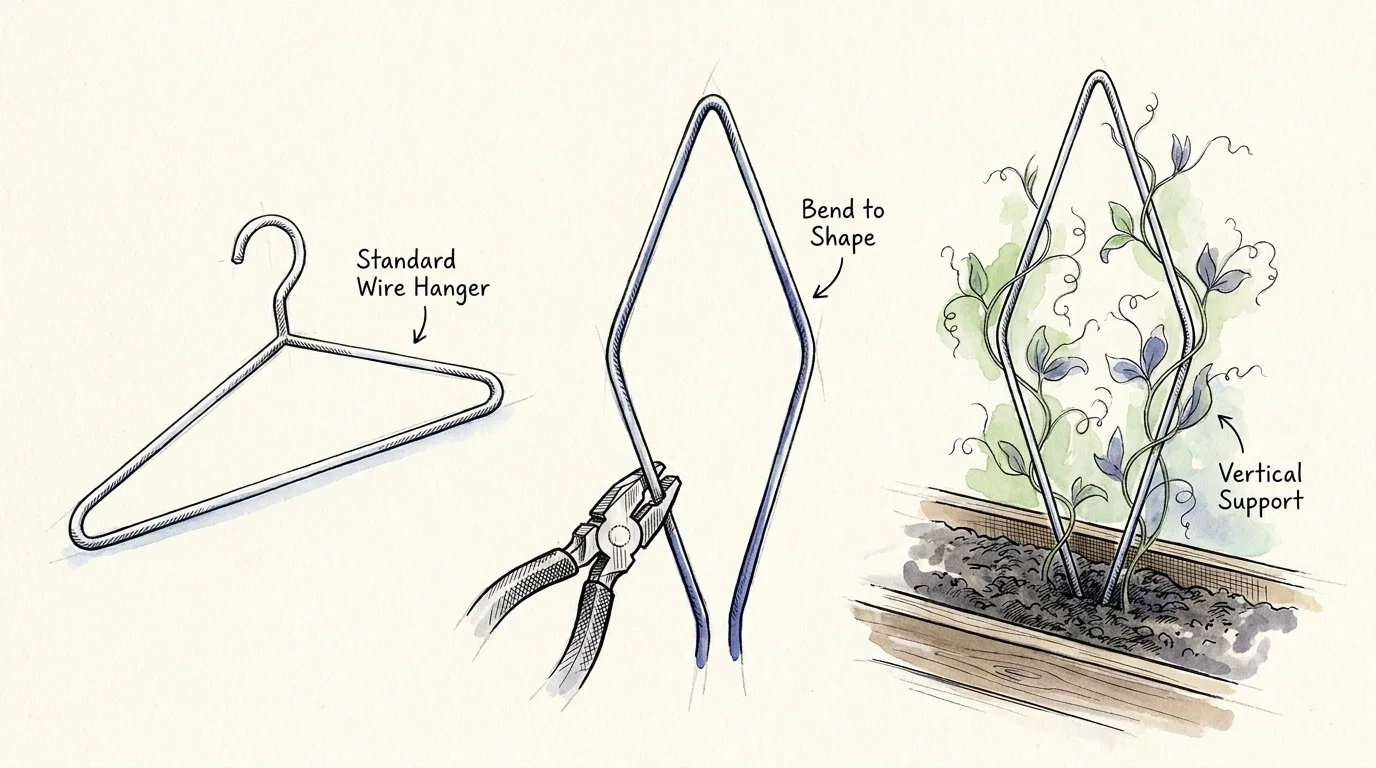
Standard metal wire coat hangers, often buried in the back of your closet, provide exceptional, malleable material for crafting custom plant supports.
To begin constructing your DIY trellis, select thick, unbending metal hangers rather than the flimsy aluminum ones. Use pliers to forcefully untwist the wire tightly coiled right beneath the hanging hook.
Once separated, use your hands to straighten the wire out as much as possible, resulting in one long, continuous metal rod. From this starting point, you can bend the heavy wire into any shape that suits your aesthetic preferences and container size.
Simple tall arches, geometric diamonds, or playful heart shapes all provide excellent frameworks. Push the two raw ends of your newly shaped wire firmly into the potting soil, sinking them deep enough to anchor the structure against high winds.
Training your plants to utilize the new wire support requires a gentle touch and ongoing attention. As the vines stretch outward, manually weave the flexible new growth over and under the metal framework.
Do not force thick, woody stems to bend abruptly, as they will easily snap. If the vines resist holding onto the wire by themselves, secure them loosely using soft materials from around your house.
Torn strips of old cotton t-shirts or lengths of natural jute twine work perfectly; avoid using thin plastic zip ties or harsh wire twist ties, which can cut into the expanding plant stems and invite disease.
Within a few weeks, the dense foliage will completely obscure the metal wire, leaving a stunning architectural display.
Utilize Baking Soda for Natural Fungal Prevention
Fungal diseases frequently decimate small-space gardens because tightly grouped containers often suffer from poor air circulation.
When foliage remains damp and shaded, aggressive pathogens like powdery mildew and black spot quickly establish themselves, coating your beautiful leaves in a destructive white powder or dark, rotting lesions.
Reaching for harsh, synthetic chemical fungicides poses significant health risks to you, your pets, and the local pollinator population. Fortunately, common household baking soda, or sodium bicarbonate, provides a highly effective, eco-friendly alternative for managing the spread of destructive garden fungi.
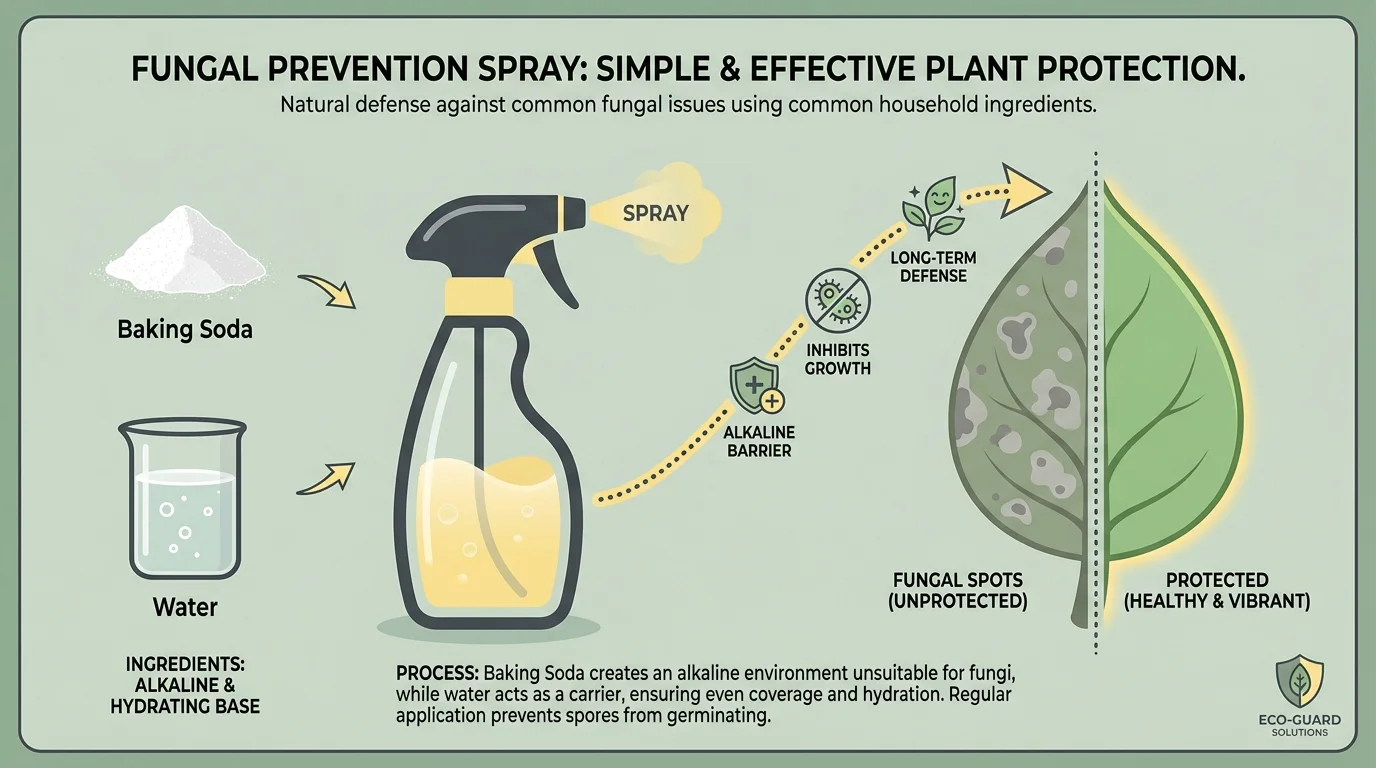
Baking soda works by radically altering the chemical environment on the surface of your plant leaves. Fungal spores require a slightly acidic environment to germinate and penetrate plant tissue.
When you spray an alkaline baking soda solution over the foliage, you temporarily raise the pH level of the leaf surface, creating a hostile, highly alkaline barrier where spores simply cannot survive or replicate.
To create your preventative spray, dissolve one level tablespoon of baking soda into one gallon of clean water. Add half a teaspoon of mild, liquid dish soap to the mixture.
The dish soap acts as a vital surfactant; it breaks the surface tension of the water, allowing the alkaline solution to coat the leaves in an even film rather than beading up and rolling off.
You must employ this baking soda spray strategically to achieve the best results. It functions exclusively as a preventative shield, meaning it will not cure leaves that are already heavily infected and dying.
You should apply the spray early in the growing season or immediately following a period of heavy, prolonged rainfall when humidity peaks.
Always test the mixture on a single, low-hanging leaf and wait forty-eight hours to ensure your specific plant does not suffer an adverse reaction to the salt content.
Furthermore, never apply the liquid during the intense heat of the afternoon; the magnifying effect of the sun on the wet droplets will severely scorch the plant tissue. Apply the spray only during the cool, calm morning hours.
Organize Tiny Seeds With Empty Spice Shakers
Sowing minuscule seeds remains one of the most tedious and frustrating tasks in home gardening. Vegetable seeds like carrots, radishes, and lettuce are practically the size of dust particles.
When you attempt to pinch and drop these seeds by hand, the wind easily blows them away, or they clump together heavily in the dirt.
This uneven distribution inevitably forces you to perform a massive thinning operation later in the season, where you must pull up and discard dozens of perfectly healthy, overcrowded seedlings to give the survivors enough room to mature.
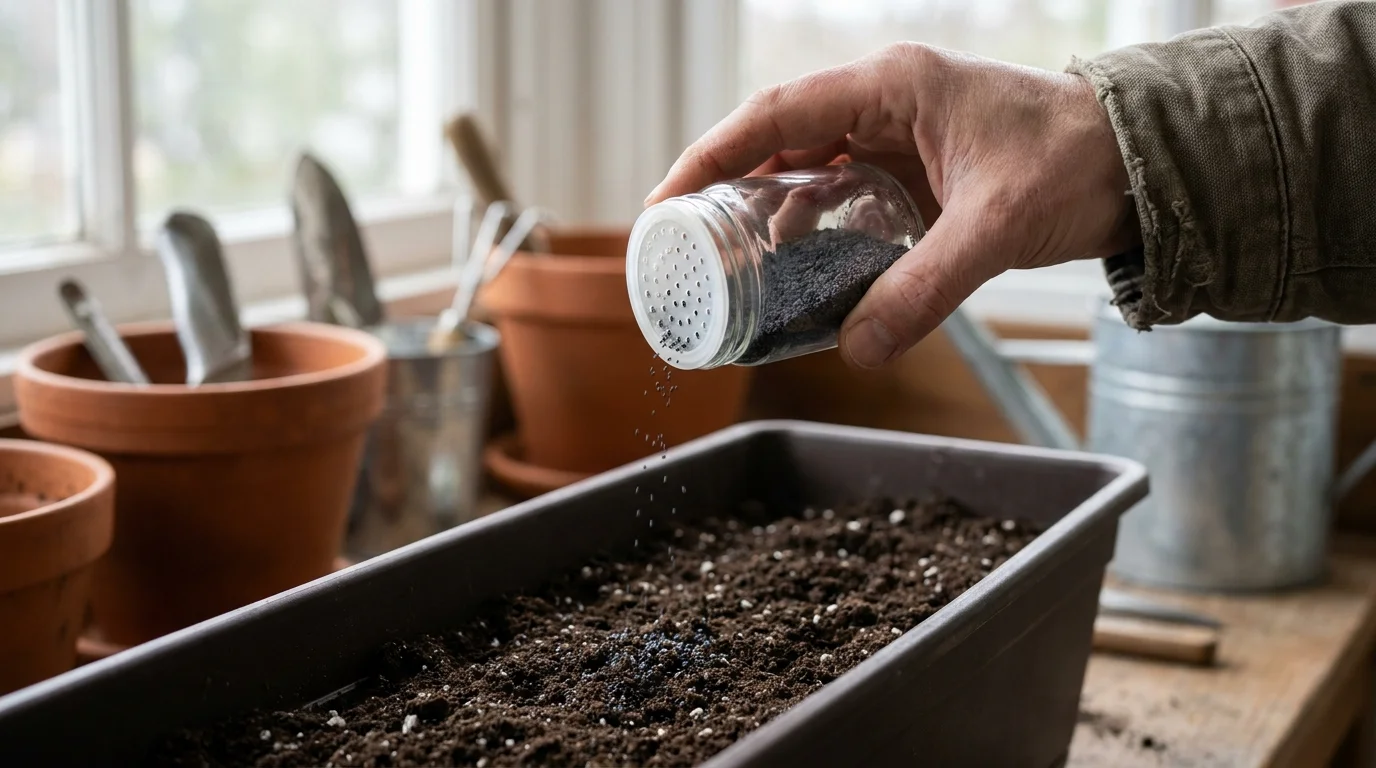
You can completely avoid this stressful waste by repurposing an empty glass spice jar equipped with a perforated shaker lid.
Preparation proves essential for this seed-sowing hack. Thoroughly wash the spice jar and lid to remove all lingering oils, salts, or potent spices like chili powder, which could potentially inhibit seed germination.
You must dry the inside of the jar completely; even a microscopic drop of remaining water will cause the tiny seeds to stick permanently to the glass walls. Once the jar is perfectly dry, pour your tiny seeds inside.
Next, add a generous handful of fine, dry play sand or dry used coffee grounds into the jar. Screw the shaker lid back on tightly and shake the container vigorously until the seeds and the sand mix evenly together.
The sand acts as a highly effective diluting agent, physically separating the tiny seeds from one another inside the jar. When you take the shaker out to your garden bed or patio container, gently sprinkle the mixture over the surface of your prepared soil.
The sand provides immediate visual feedback, showing you exactly where you have already sown seeds and preventing you from heavily double-planting specific areas.
This simple household trick guarantees a uniform, even distribution of seedlings, promoting stronger, independent root development and saving you a tremendous amount of manual labor.
Troubleshoot DIY Gardening Mistakes
Even the most practical household gardening methods require minor observation and environmental adjustments. A technique that works flawlessly on a sunny, southern-facing patio might require modification on a shaded, wind-swept balcony.
When you repurpose items, observing how the materials interact with your local weather remains your most powerful tool. You must actively monitor soil moisture, temperature fluctuations, and plant responses to ensure your DIY interventions help rather than hinder your growing space.
Below is a comprehensive guide to identifying and rapidly resolving the most frequent challenges that arise when implementing these techniques.
| The Gardening Hack | Common Issue Encountered | The Practical Fix |
|---|---|---|
| Coffee Grounds Fertilizer | Thick white mold forms rapidly over the top layer of the potting soil. | You applied wet grounds too thickly. Scratch the moldy layer deeper into the dirt to improve airflow, and ensure you completely dry future batches before application. |
| Toilet Paper Roll Pots | The cardboard dries out extremely fast, causing the seedlings to wilt daily. | Pack the individual rolls much tighter together in the plastic holding tray to reduce exposed surface area. Water the tray from the bottom to encourage upward wicking. |
| Milk Jug Greenhouses | The seedlings grow incredibly tall, pale, and weak, leaning heavily to one side. | The plants lack adequate sunlight and suffer from excess heat. Move the jug to direct sunlight, remove the duct tape, and prop the lid open widely during warm afternoons. |
| Wine Bottle Watering | The water completely drains out of the glass bottle within ten minutes. | The surrounding dirt is far too loose or completely dry. Pack moist, dense soil tightly against the glass neck and ensure you bury the bottle at least three inches deep. |
Do not feel discouraged if your first attempt at repurposing a household item yields imperfect results. Adjusting your watering schedule, changing the physical location of your containers, or modifying the quantities of your organic amendments will quickly put you back on the path to success.
The true joy of small-space gardening stems from continuous experimentation and adapting clever techniques to serve the unique microclimate of your own backyard or balcony.
Frequently Asked Questions
Can I use artificially flavored coffee grounds in my garden?
You should entirely avoid using artificially flavored coffee grounds in your soil. The synthetic chemicals and artificial oils utilized to create popular hazelnut, vanilla, or caramel flavors can heavily disrupt the natural balance of beneficial soil microbes.
Furthermore, these sticky oils often repel water, making it harder for your plant roots to drink. Always stick strictly to pure, unflavored organic coffee grounds to ensure you introduce only healthy, beneficial organic matter into your patio containers.
How long do toilet paper roll seed starters take to break down in the dirt?
When you bury a standard cardboard tube in damp, biologically active garden soil, it typically decomposes completely within four to six weeks. To significantly accelerate this biological breakdown, ensure the surrounding soil remains consistently moist.
You can also gently tear or heavily score the bottom of the wet cardboard roll right before you plant it into its final location, which provides an immediate exit path for the expanding roots while the paper slowly rots away.
Will plastic milk jug greenhouses overheat my plants in the late spring?
Yes, trapped solar heat quickly damages or kills young seedlings during bright, sunny spring days. Once the daytime ambient temperatures consistently rise above fifty degrees Fahrenheit, you must actively monitor the internal temperature of the jug.
Cut significantly larger ventilation holes near the top or simply prop the top half open during peak sunlight hours to prevent the enclosed plastic environment from literally cooking your tender young plants.
Is a baking soda fungal spray safe to use on edible plants?
The standard baking soda solution is completely safe for application on herbs, vegetables, and all fruit-bearing plants. Because the recipe utilizes everyday food-grade pantry ingredients, it leaves no harmful synthetic chemical residue on the skin of your crops.
You simply need to rinse your freshly harvested produce thoroughly under clean running water before consuming it to wash away any lingering soapy film or salty taste.
For trustworthy gardening information, visit: North Carolina State Extension — Gardening, Virginia Cooperative Extension — Lawn & Garden and University of Maryland Extension — Home & Garden. These organizations provide expert, research-based advice for gardeners at all levels.
Disclaimer: This article is for informational purposes only and is not a substitute for professional gardening advice. Always consult local extension services or horticulture experts for region-specific guidance.