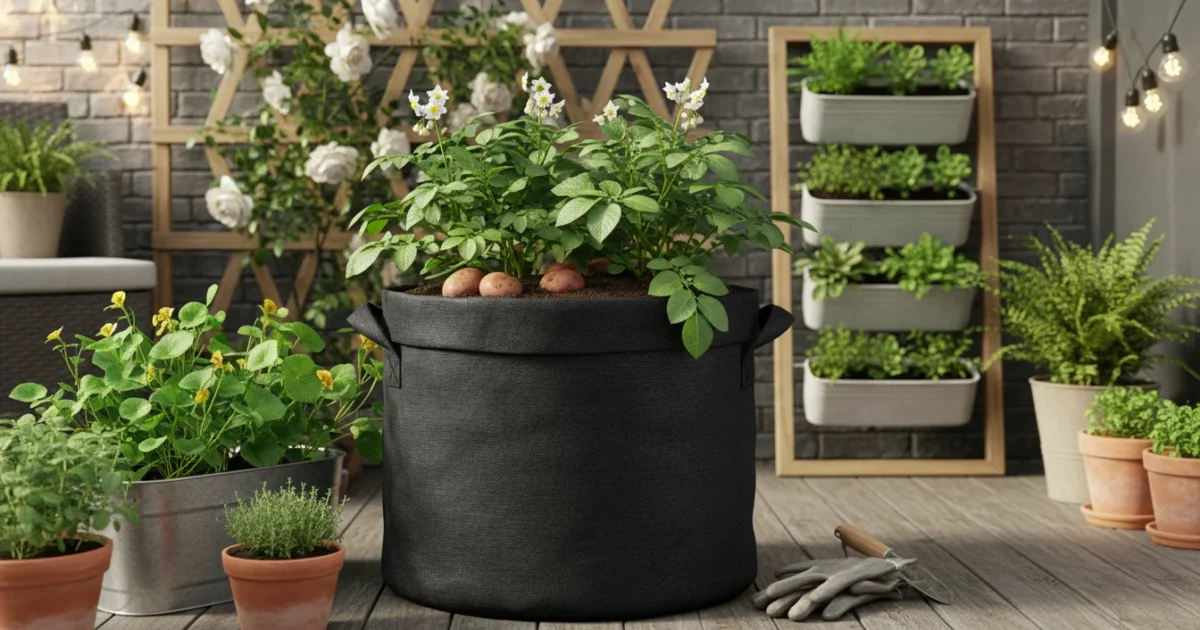
The ‘One Square Foot’ Potato Patch: How to Grow Spuds in a Fabric Grow Bag on a Tiny Balcony
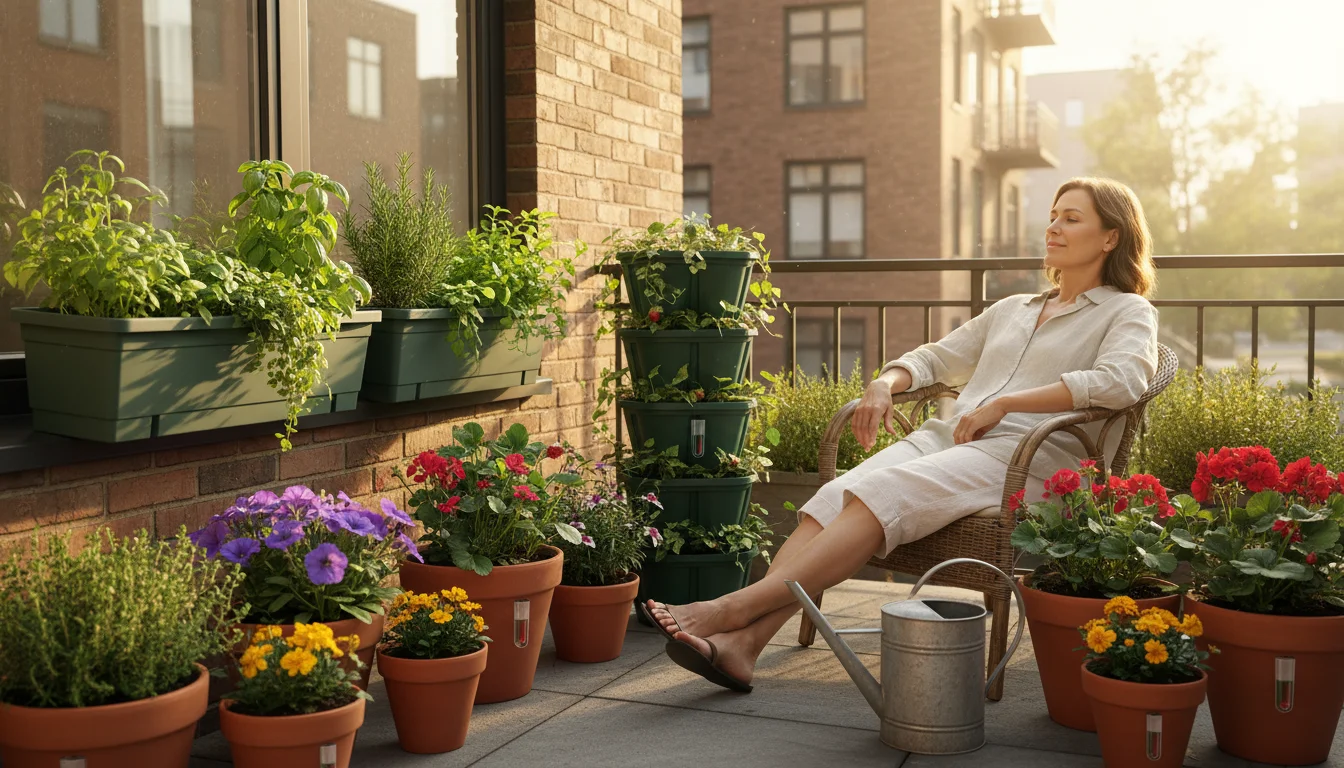
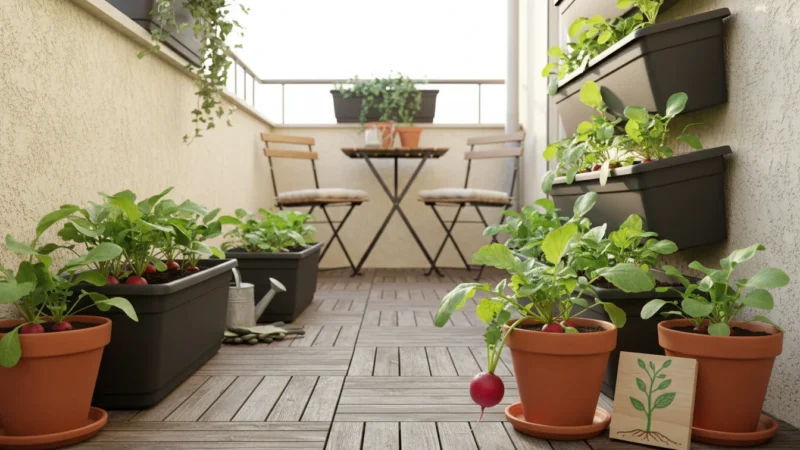
Do you dream of homegrown potatoes but think your small balcony or patio limits your gardening ambitions? Think again. Growing potatoes in grow bags transforms tiny spaces into productive food factories. This method offers a surprisingly easy and rewarding path to fresh spuds, even if your garden measures in mere square feet. You can truly create a ‘one square foot’ potato patch and enjoy the satisfaction of harvesting your own delicious crop.
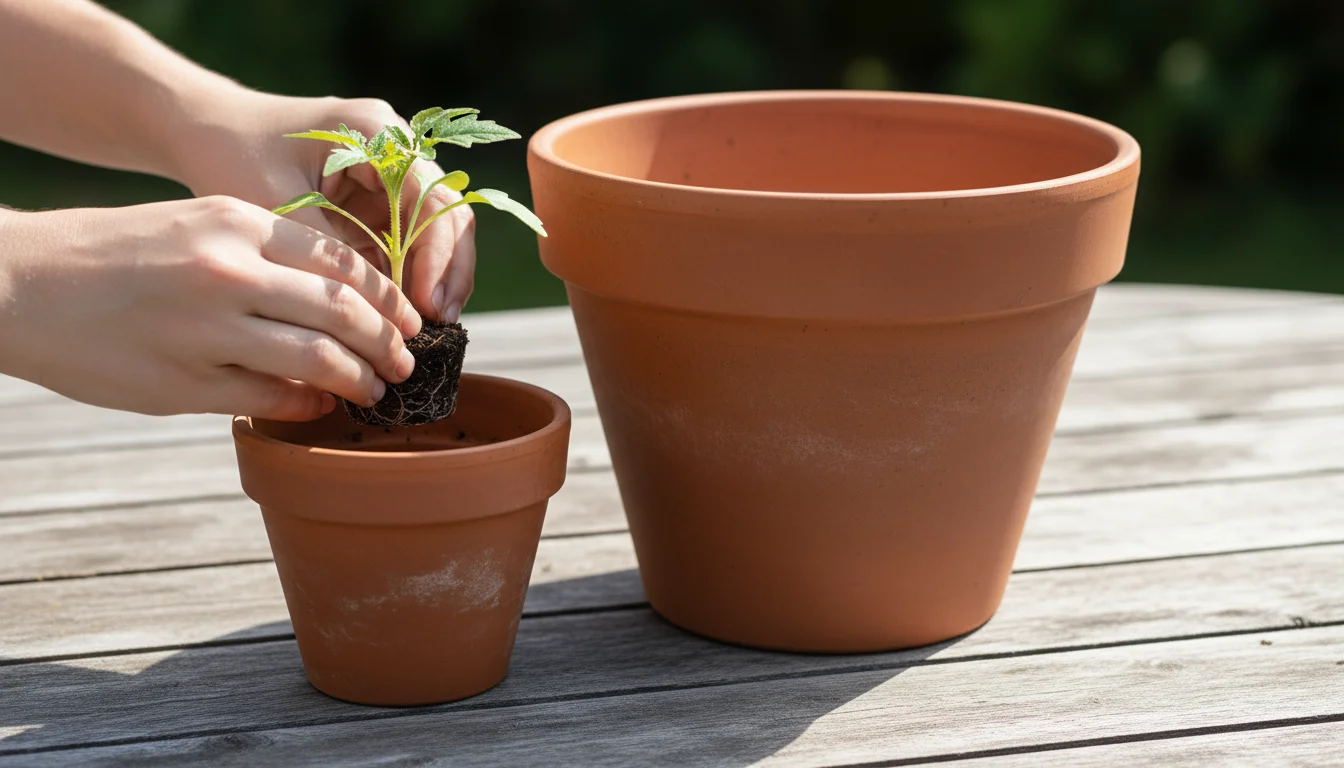
If you’re just starting out, reading a beginner’s guide to container gardening will help you master the fundamentals of pot selection and soil health.
Many urban gardeners believe certain crops are out of reach, but potatoes are not among them. Fabric grow bags provide an ideal environment for these root vegetables, offering superior drainage and aeration compared to traditional containers. This article guides you through every step of growing potatoes in grow bags, turning your small outdoor area into a thriving hub for urban vegetable gardening. Get ready to plant, nurture, and harvest your very own homegrown potatoes.
Why Grow Potatoes in Grow Bags on Your Balcony?
Container potato growing offers unique advantages, particularly for those with limited space. Fabric grow bags, in particular, revolutionize how we approach urban vegetable gardening. These flexible, breathable containers solve many of the common problems associated with traditional pot gardening, making them the best containers for growing potatoes in compact settings. Let’s explore why this method is a game-changer for your balcony or patio.
Once your plants establish, you can feed them sustainably using a homemade kitchen scrap fertilizer tea to support healthy tuber growth.
Space Efficiency and Portability
One of the most compelling reasons to choose grow bags for your potatoes is their incredible space efficiency. A single grow bag typically occupies about one square foot of floor space, allowing you to grow a substantial crop in an area you might consider unusable for traditional gardening. This is ideal for tiny balconies, patios, or even sunny spots on a fire escape. Furthermore, grow bags are lightweight and portable. If the weather shifts unexpectedly, or if your plants need more or less sun throughout the day, you can easily move your potato patch to a more suitable location. This flexibility is invaluable in urban environments where sunlight patterns can change with building shadows or seasonal shifts. You maintain control over your microclimate, ensuring optimal conditions for your growing potatoes in grow bags.
While you wait for your potatoes to mature, you can secure quick crops by growing radishes in a pot nearby.
Superior Drainage and Aeration
Potatoes require well-draining soil to thrive. Root rot, a common issue in overly wet conditions, can devastate a potato crop. Fabric grow bags naturally prevent this problem. Their porous material allows excess water to drain freely, eliminating the risk of waterlogged soil. This breathability also provides excellent aeration to the root zone. Roots need oxygen to absorb nutrients and grow vigorously. Unlike plastic or ceramic pots that can compact soil and restrict airflow, fabric bags ensure your potato plants’ roots receive ample oxygen, promoting healthier growth and a more abundant harvest. This optimal environment reduces stress on your plants, making them more resilient to disease and temperature fluctuations.
This loose, highly aerated environment is also ideal if you are interested in planting carrots in deep containers alongside your spuds.
Temperature Regulation
Soil temperature significantly impacts potato growth. Traditional containers can sometimes overheat in direct sun, stressing the plants and hindering tuber development. Fabric grow bags help regulate soil temperature more effectively. The breathable material allows air to circulate around the soil, dissipating excessive heat during hot periods. This cooling effect keeps the root zone within an ideal temperature range, fostering consistent and healthy growth. In cooler weather, the insulated fabric can offer a slight protective benefit against sudden drops in temperature. This thermal stability contributes to a more predictable and successful harvest, even in fluctuating urban climates.
Pest and Disease Control
Growing potatoes in grow bags offers a natural barrier against soil-borne pests and diseases that might be present in garden beds. Since you use fresh, sterile potting mix each season, you significantly reduce the chance of introducing pathogens or insect larvae into your crop. This isolated environment protects your plants from issues like potato scab or blight that can spread easily through contaminated garden soil. You also gain better control over the growing medium, allowing you to monitor and adjust as needed without impacting an entire garden bed. This proactive approach to pest and disease management saves you time and effort in the long run, ensuring your efforts in how to grow potatoes on a small balcony lead to healthy plants.
This level of soil control is also vital when learning how to grow tomatoes in containers to avoid common nightshade family blights.
Ease of Harvesting
Harvesting potatoes from traditional in-ground beds often involves considerable digging, which can be messy and lead to accidental damage to tubers. With grow bags, harvesting becomes incredibly simple. When your plants are ready, you merely tip the bag over, and the soil and potatoes spill out. This method ensures you collect every single potato without any strenuous digging or guesswork. It minimizes effort and maximizes your yield, making the end-of-season reward even sweeter. The ease of harvesting is a significant benefit, especially for gardeners with physical limitations or those who simply prefer a cleaner, more efficient process.
Choosing Your Gear: The Right Grow Bag and Potato Varieties
Success in container potato growing starts with selecting the right tools: the grow bag itself and potato varieties suited for small spaces. Investing in quality materials and appropriate seeds ensures a strong foundation for your ‘one square foot’ potato patch.
Before buying new equipment, you can save money by using DIY garden tool hacks with everyday household items.
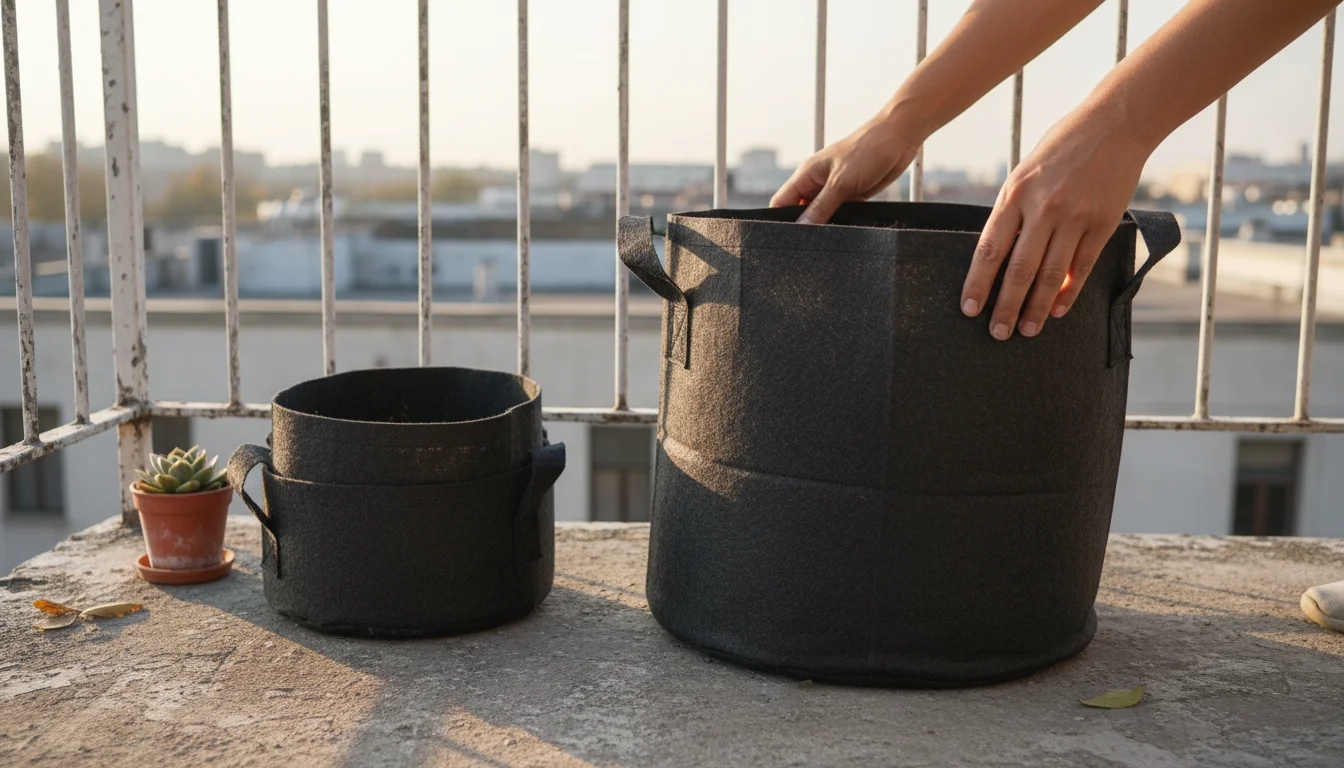
Selecting the Best Containers for Growing Potatoes
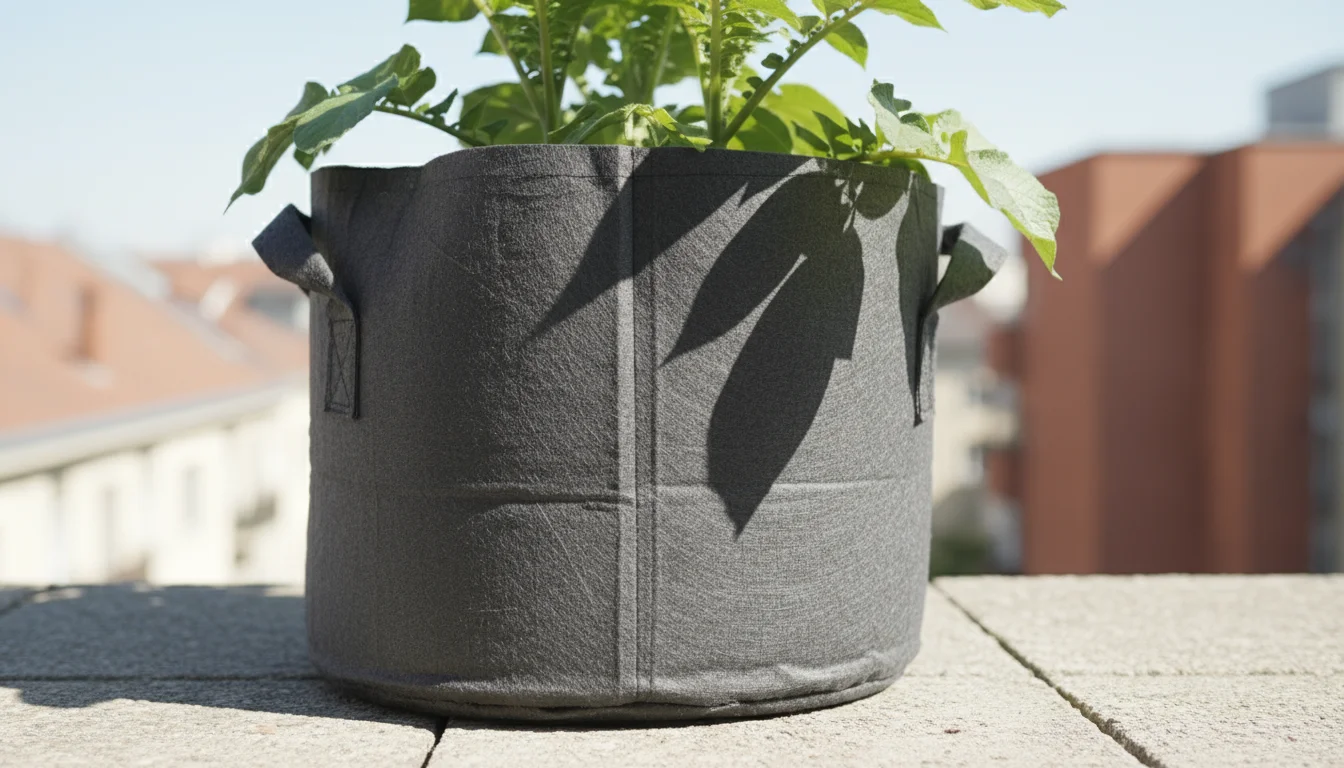
When it comes to `growing potatoes in grow bags`, not all bags are created equal. Focus on fabric grow bags, specifically those designed for vegetables. Look for the following characteristics:
To create rich organic matter for future fills, you can also set up simple composting systems for small spaces right on your patio.
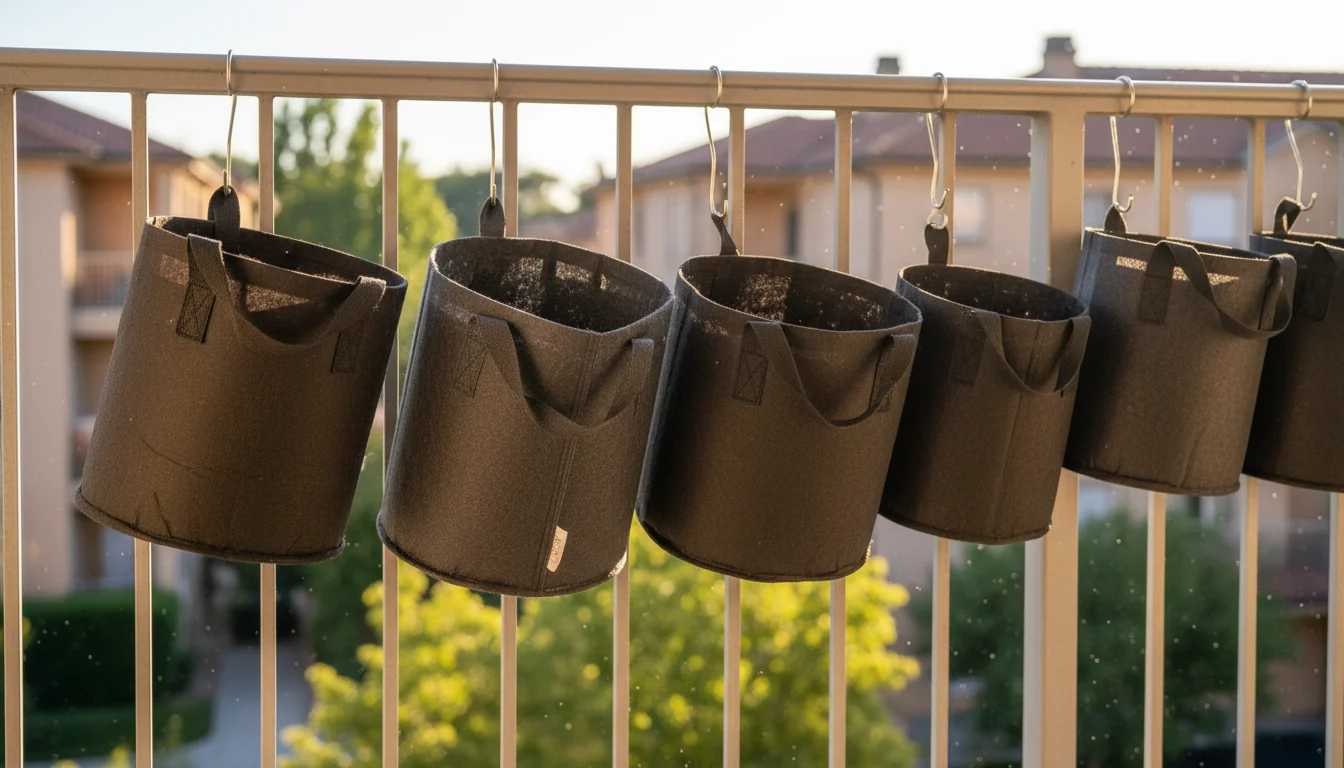
- Size: For a substantial harvest, aim for grow bags that are at least 10-15 gallons in capacity. A 15-gallon bag often measures about 18 inches in diameter and 14-16 inches high, providing ample space for root and tuber development. You can get away with 7-gallon bags for smaller yields or novelty varieties, but a 10-15 gallon size offers the best balance of yield and space efficiency for `how to grow potatoes on a small balcony`.
- Material: Most grow bags are made from a thick, non-woven fabric, often polypropylene. This material is durable, UV-resistant, and, critically, breathable. Ensure the fabric feels robust and has reinforced stitching, especially around handles, if you plan to move them.
- Handles: Integrated, sturdy handles are a huge plus. They make relocating your bags much easier, a practical consideration for `urban vegetable gardening` where conditions can change.
- Drainage Holes: While the fabric itself provides excellent drainage, some bags include extra drainage holes at the bottom. This is not strictly necessary but can further ensure no standing water, especially if your balcony gets heavy rains.
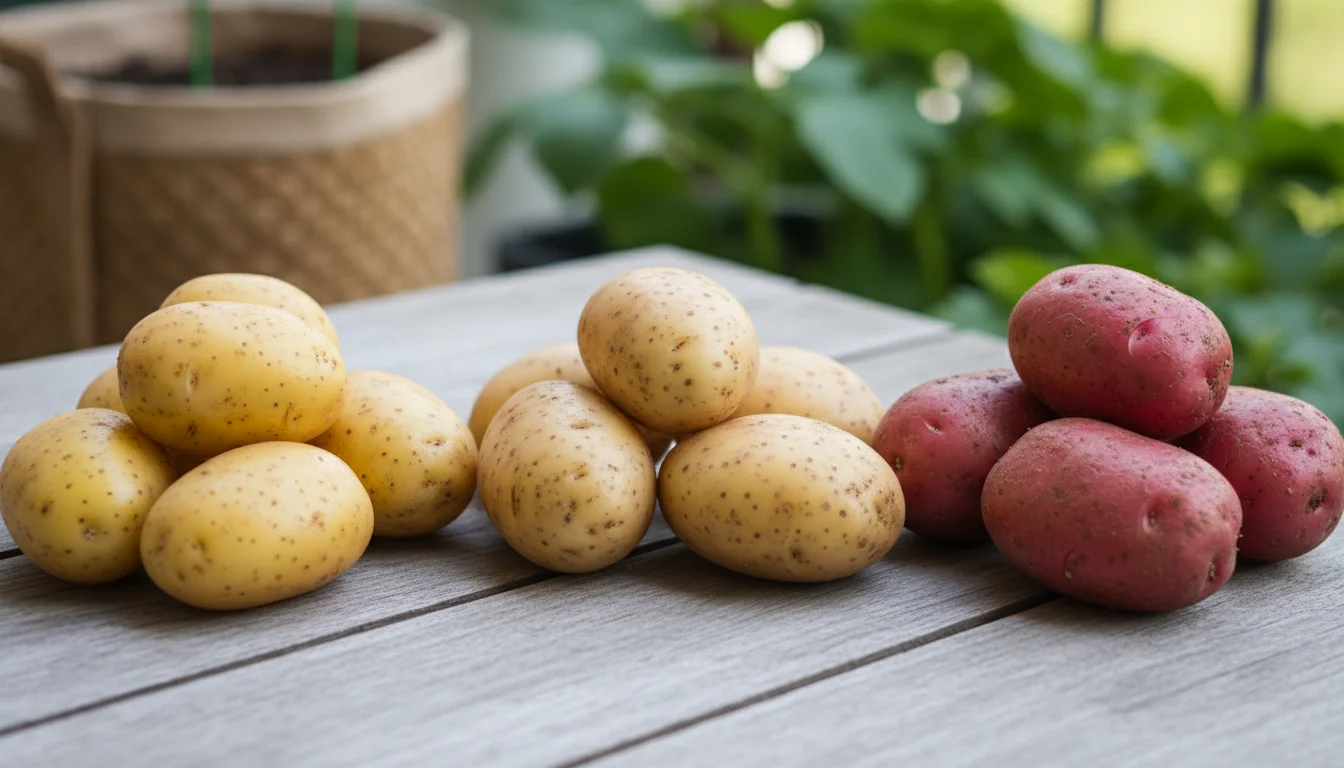
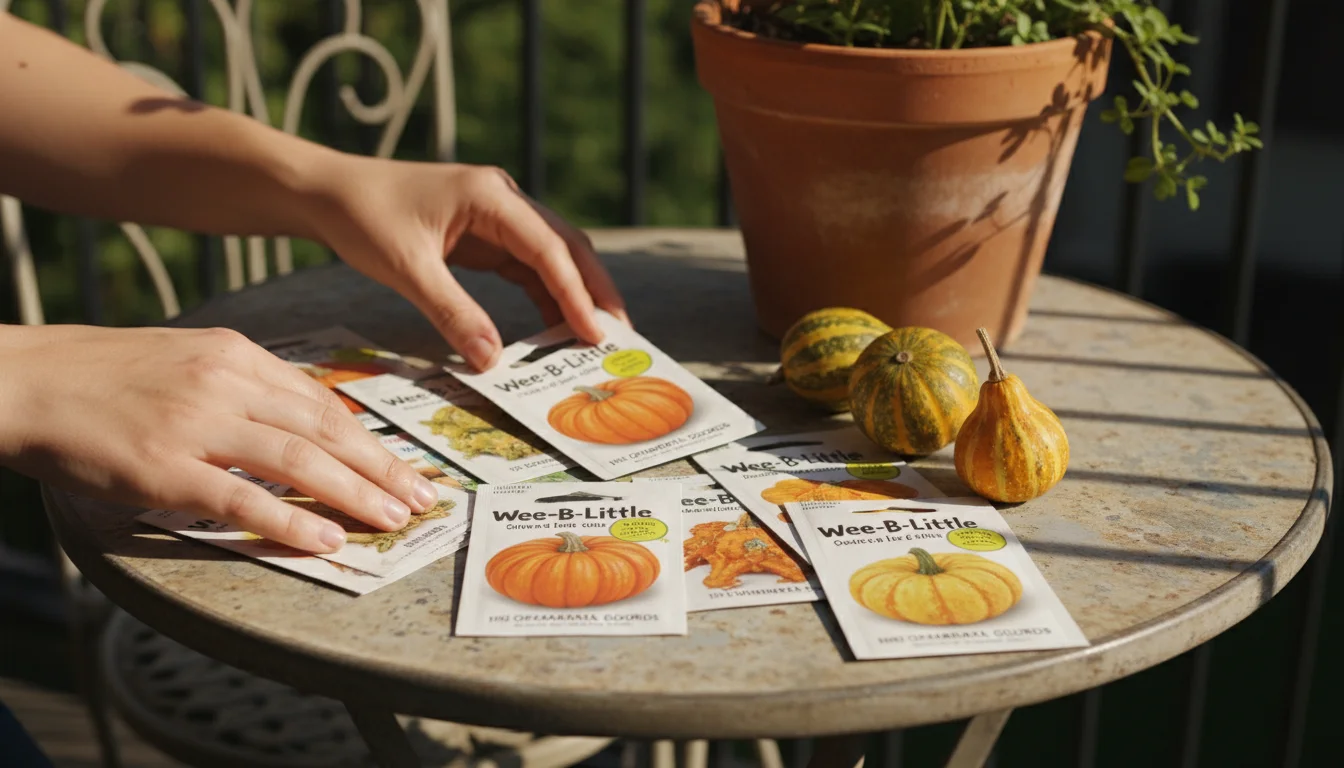
Choosing Potato Varieties for Container Growing
Not all potato varieties perform equally well in containers. Focus on “early” or “determinate” varieties, which produce potatoes in a more compact root ball and mature faster. “Indeterminate” varieties, while yielding more in the ground, grow taller and wider, making them less suitable for the confined space of a grow bag. Here are some excellent choices:
If you plan to mix grow bags with other setups, check out the easiest vegetables for small raised beds to expand your harvest.
- ‘Yukon Gold’: A popular choice for its buttery flavor and early maturity. It produces medium-sized, round-to-oval tubers with yellow flesh, perfect for mashing or roasting.
- ‘Kennebec’: A versatile, white-fleshed potato that produces good yields. It’s a reliable choice for containers and performs well in various cooking applications.
- ‘Red Pontiac’: Known for its red skin and white flesh, this variety is highly productive and relatively disease-resistant. It’s excellent for boiling and roasting.
- ‘Norland’: An early red-skinned variety with white flesh. It matures quickly, making it a great option for a faster harvest in your grow bag.
- ‘Irish Cobbler’: An old favorite, early-maturing, with white flesh and slightly rough skin. It offers a classic potato flavor.
You will need “seed potatoes,” which are specially grown potato tubers free of disease and certified for planting. Do not use grocery store potatoes, as they may carry diseases or be treated with sprout inhibitors.
Preparing for Planting: The Art of Chitting and Crafting the Perfect Soil Mix
Proper preparation lays the groundwork for a bountiful potato harvest. This involves “chitting” your seed potatoes and creating an optimal soil environment. These steps are crucial for robust `container potato growing`.
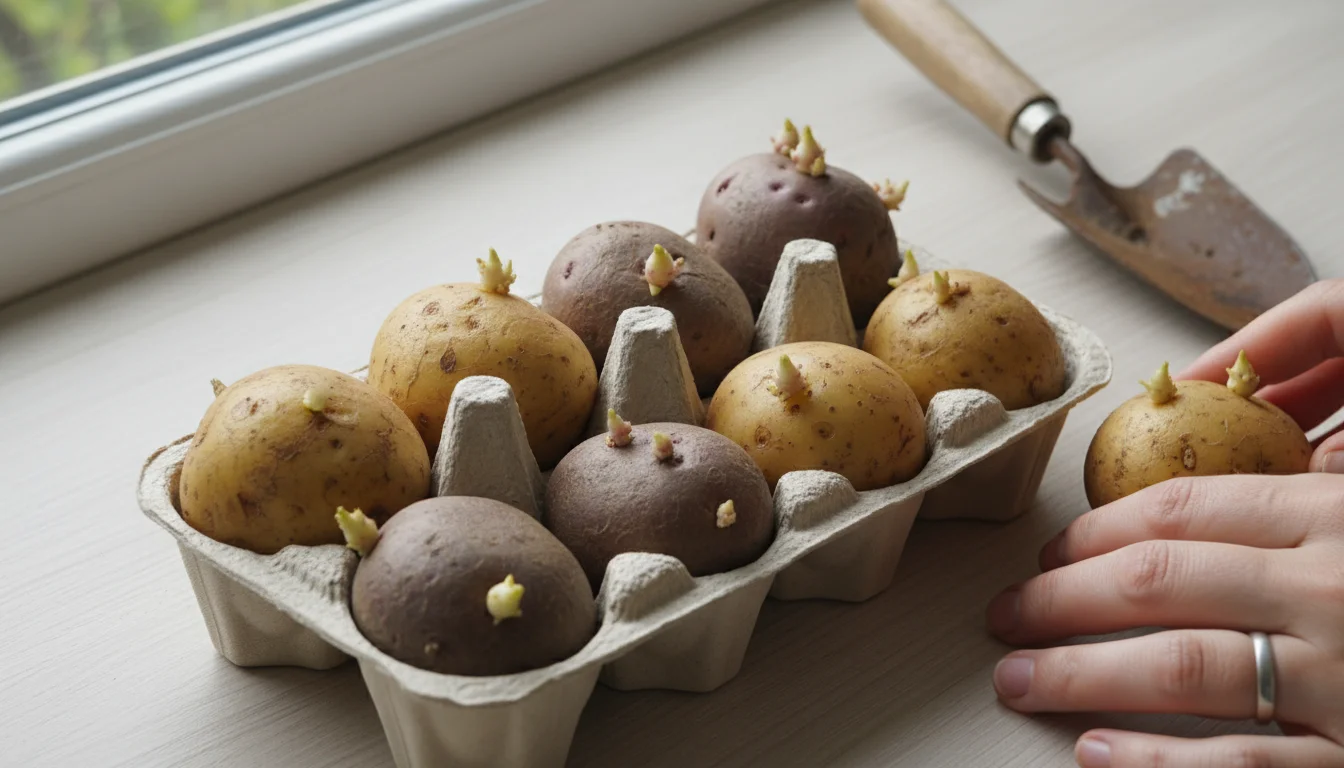
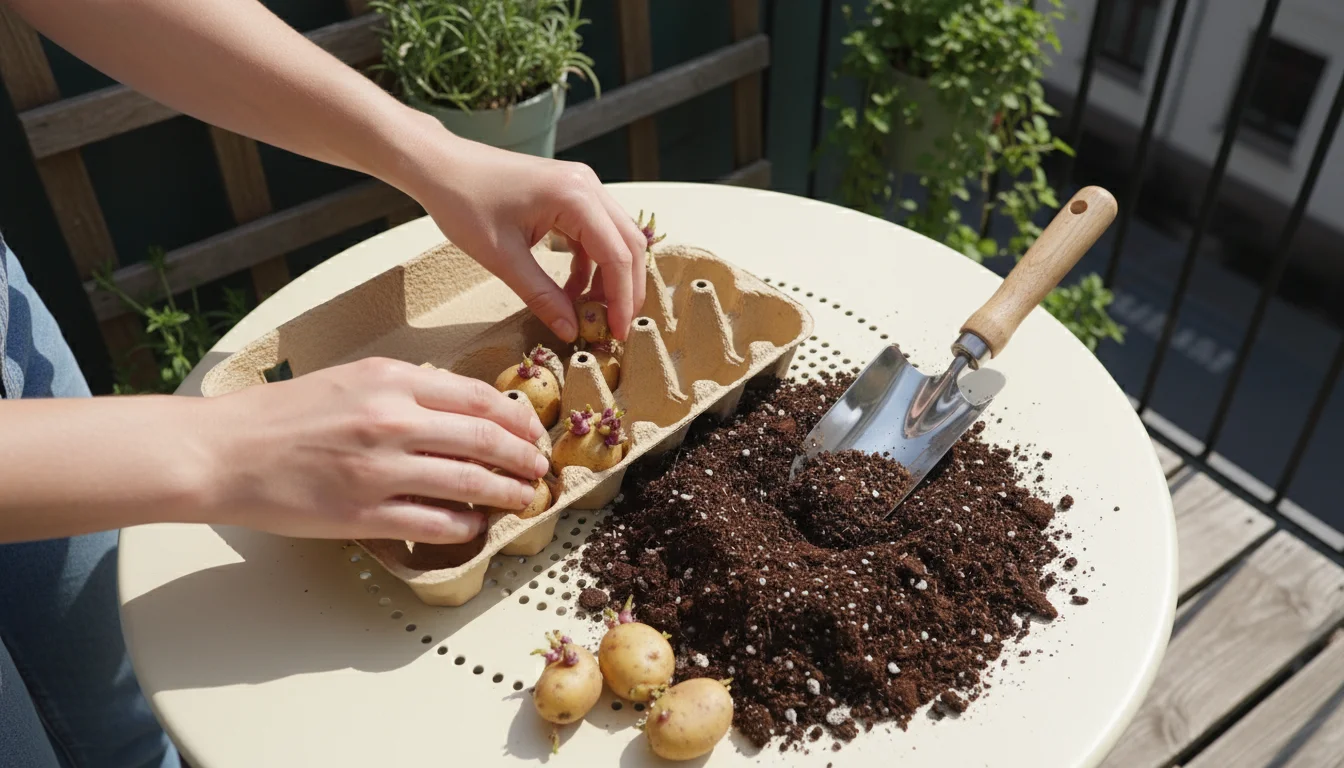
Chitting Your Seed Potatoes: Giving Them a Head Start
“Chitting” is the process of pre-sprouting your seed potatoes before planting. This gives them a significant head start, leading to faster growth and an earlier harvest. It is a simple but effective technique:
If you enjoy starting your own crops, you can also experiment with a ziplock bag seed starting method to sprout other vegetables indoors.
- Selection: Choose healthy, firm seed potatoes. Each potato should have at least one “eye” (a small dimple where sprouts emerge).
- Placement: Arrange your seed potatoes in a single layer in an egg carton, an old apple tray, or any shallow container. Ensure the end with the most “eyes” faces upwards.
- Environment: Place the trays in a cool (around 50-60°F or 10-15°C), bright location, but out of direct sunlight. A spare room, a garage with a window, or a protected porch works well.
- Waiting Game: Over two to three weeks, small, stubby, dark green or purple sprouts will emerge. Avoid long, pale sprouts, as these indicate too little light. These short, sturdy sprouts signal that your seed potatoes are ready for planting.
Chitting improves the initial vigor of your potato plants, leading to a more successful start in your `growing potatoes in grow bags` project.
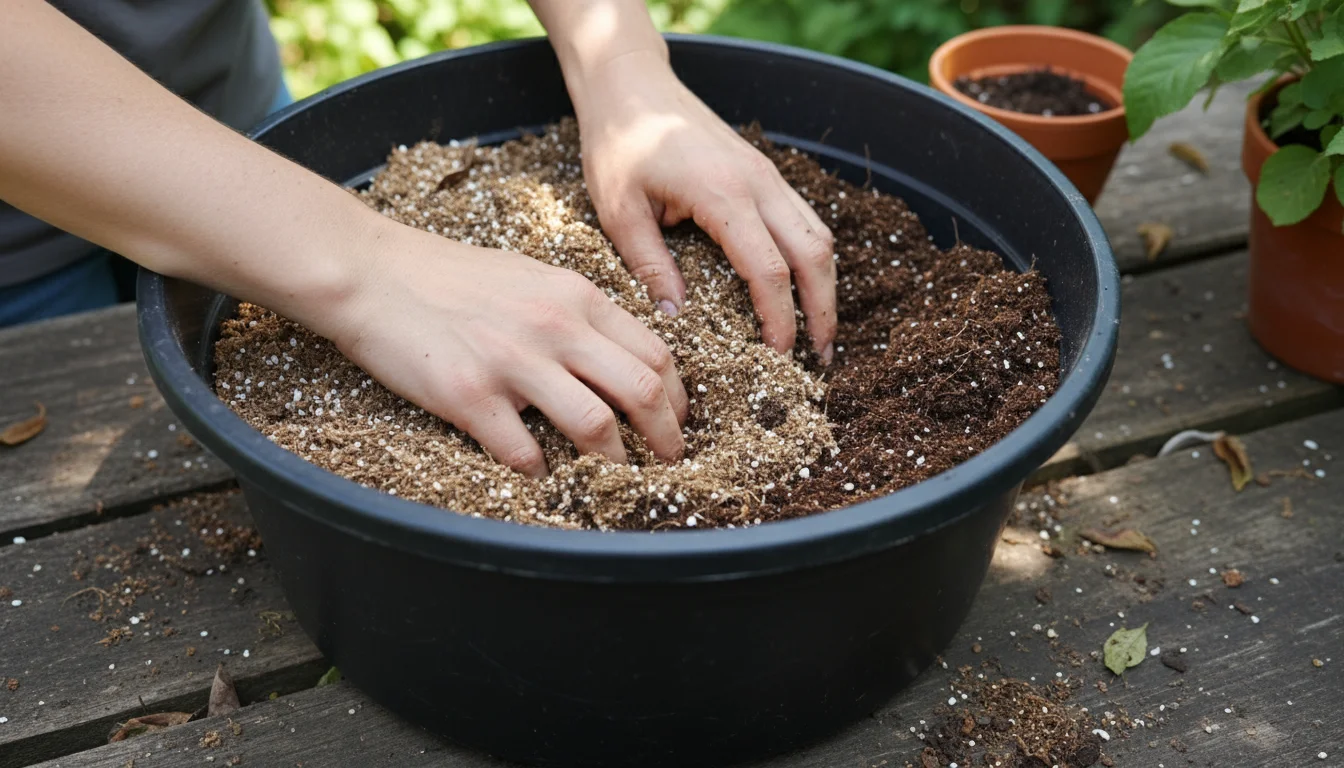
Crafting the Perfect Soil Mix for Your Grow Bag
The right soil mix is paramount for `container potato growing`. Potatoes need well-draining, loose, and nutrient-rich soil to develop healthy tubers. Garden soil from your yard is often too heavy and can compact in a container, restricting root growth and causing drainage issues. Always use a high-quality potting mix. Here’s what to look for and how to amend it:
- Base Potting Mix: Start with a premium, all-purpose potting mix. Look for brands that include ingredients like peat moss (or coco coir for a more sustainable option), perlite, and vermiculite. These components improve drainage and aeration while retaining moisture.
- Compost: Enrich your potting mix with a good quality compost. Compost provides essential nutrients and improves soil structure, slowly releasing food for your growing potatoes. Aim for about 20-30% compost in your total mix. This organic matter fuels your plants throughout the growing season.
- Aged Manure (Optional): If available, a small amount of well-aged manure (5-10% of the total mix) can provide an additional nutrient boost. Ensure it is fully composted to avoid burning your plants.
- Balanced Fertilizer: Incorporate a slow-release granular fertilizer formulated for vegetables, or an organic amendment like bone meal (for phosphorus) and blood meal (for nitrogen), following package directions. Potatoes are heavy feeders, especially during tuber development.
Example Soil Mix Ratio:
- 2 parts high-quality potting mix
- 1 part compost (or a mix of compost and aged manure)
- Add a slow-release granular organic vegetable fertilizer according to product instructions.
Mix all ingredients thoroughly in a wheelbarrow or large tub. The ideal mix should feel light and fluffy, draining well but still holding some moisture when squeezed. This carefully prepared soil will support vigorous growth and excellent tuber formation, setting you up for success in your `urban vegetable gardening` endeavor.
The Step-by-Step Planting Process: Your Guide to Growing Potatoes in a Bag
With your chitted seed potatoes and enriched soil ready, it is time for the exciting part: planting! This `step-by-step planting potatoes in a bag` guide simplifies the process, making it approachable for any gardener.
-
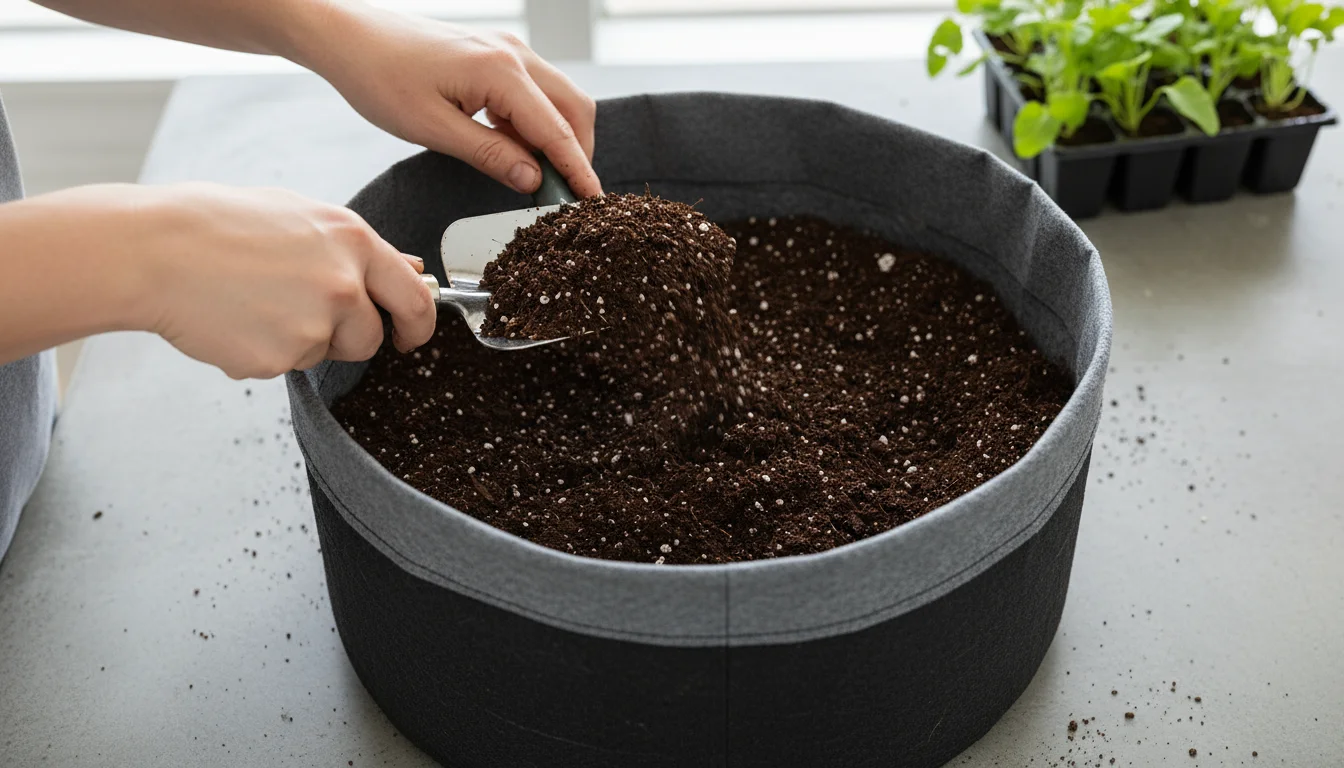
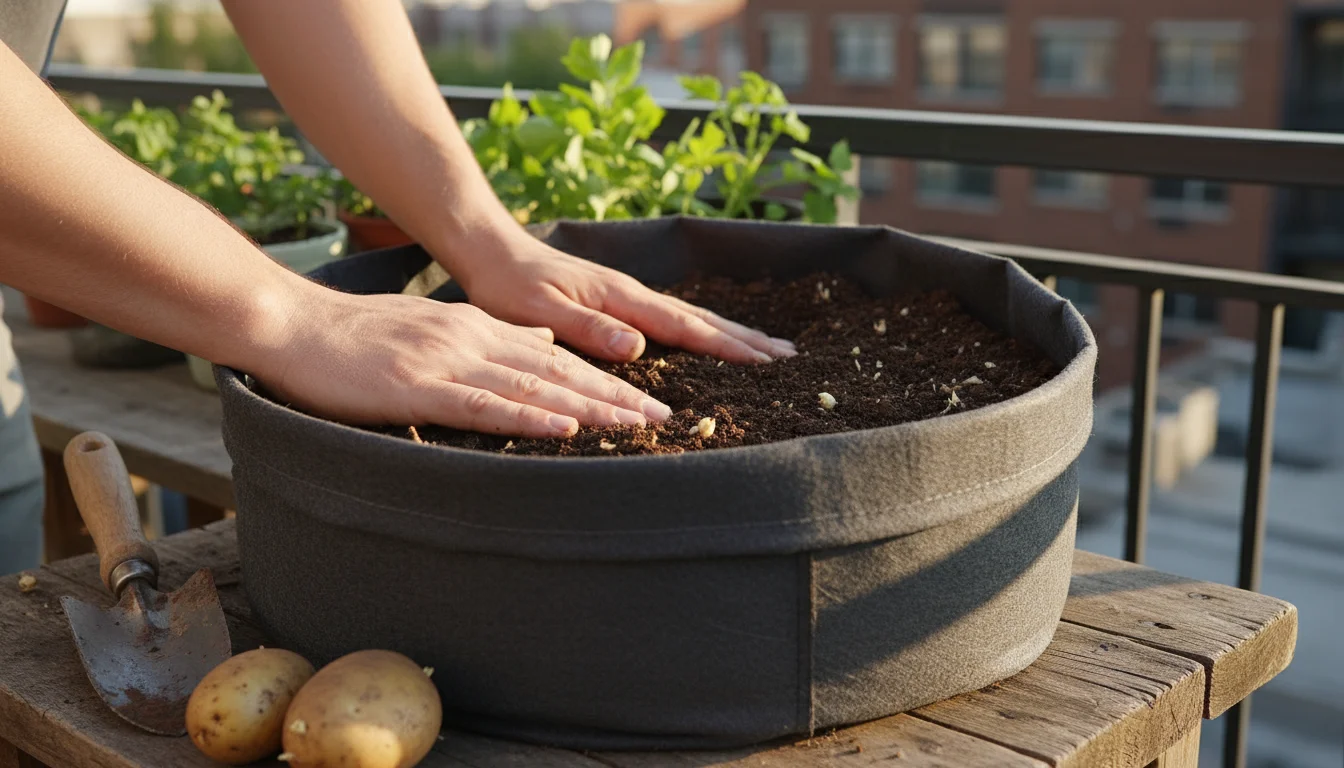
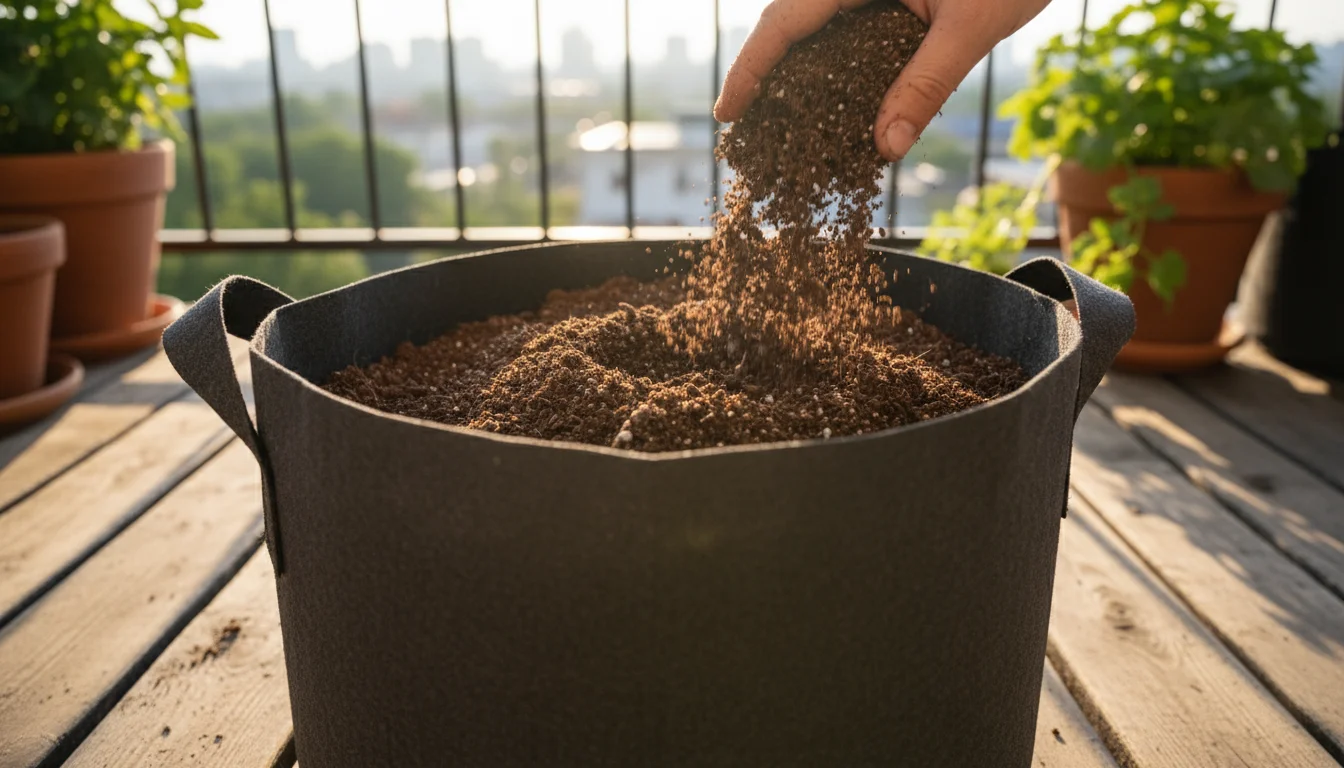
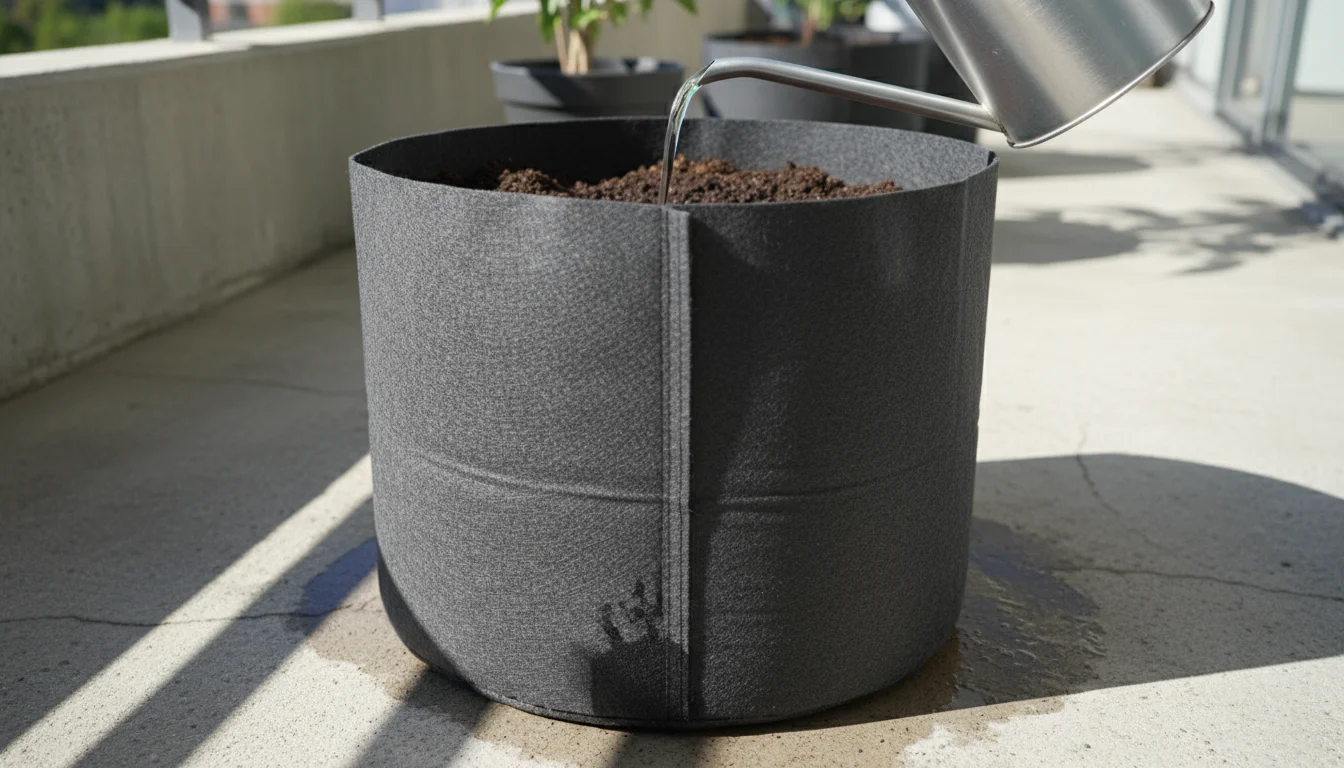
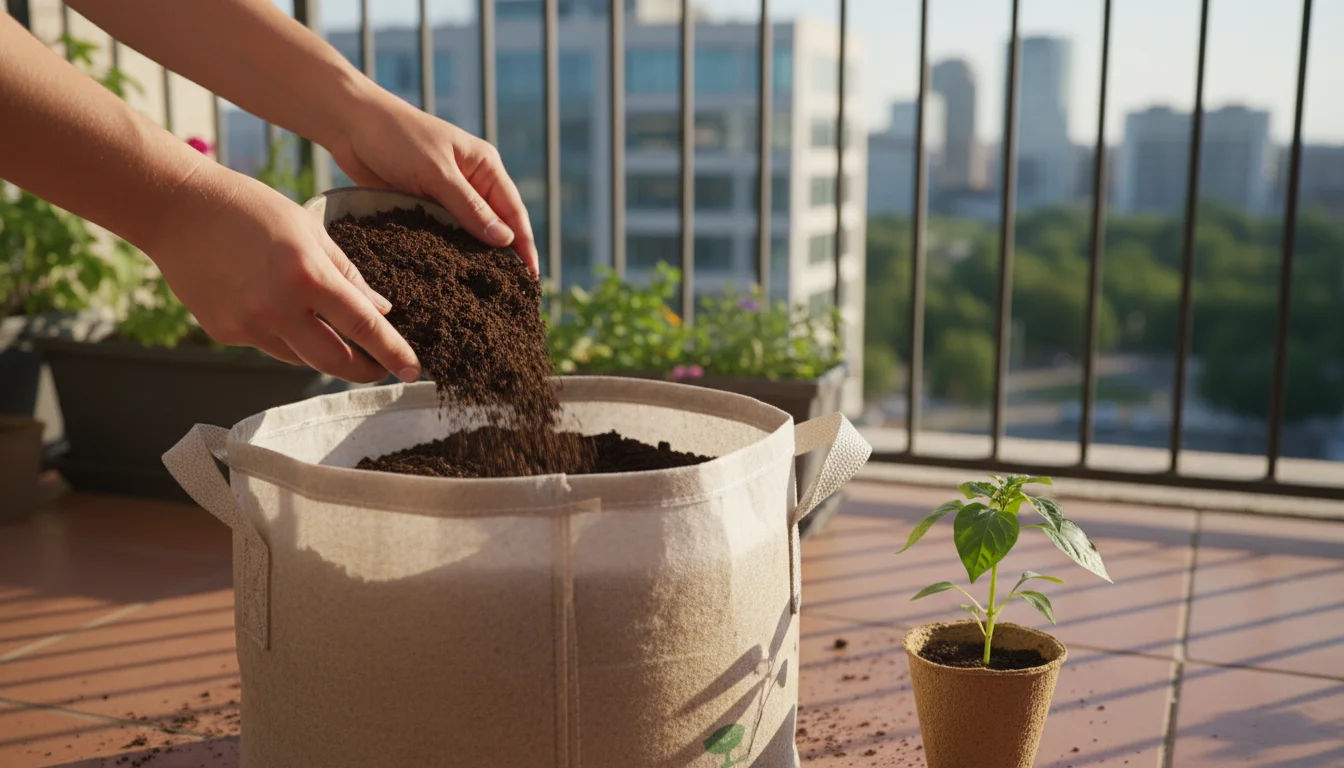
Prepare Your Grow Bag and Initial Soil Layer
Unfold your chosen 10-15 gallon fabric grow bag. Roll down the sides of the bag to create a cuff, making it easier to work with. This also helps contain the soil as you gradually fill the bag. Pour approximately 6-8 inches of your prepared soil mix into the bottom of the bag. Gently pat it down to remove large air pockets, but avoid compacting it too much. Remember, potatoes thrive in loose soil.
-
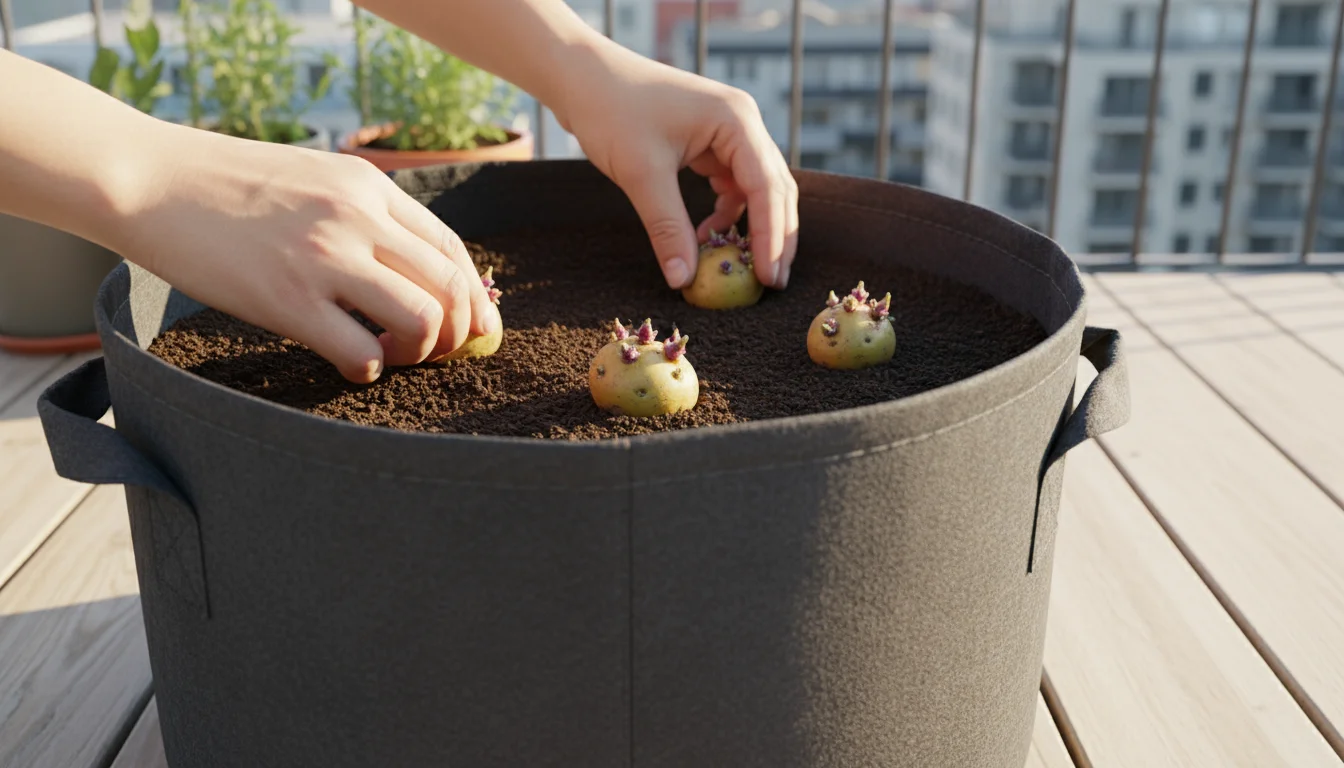
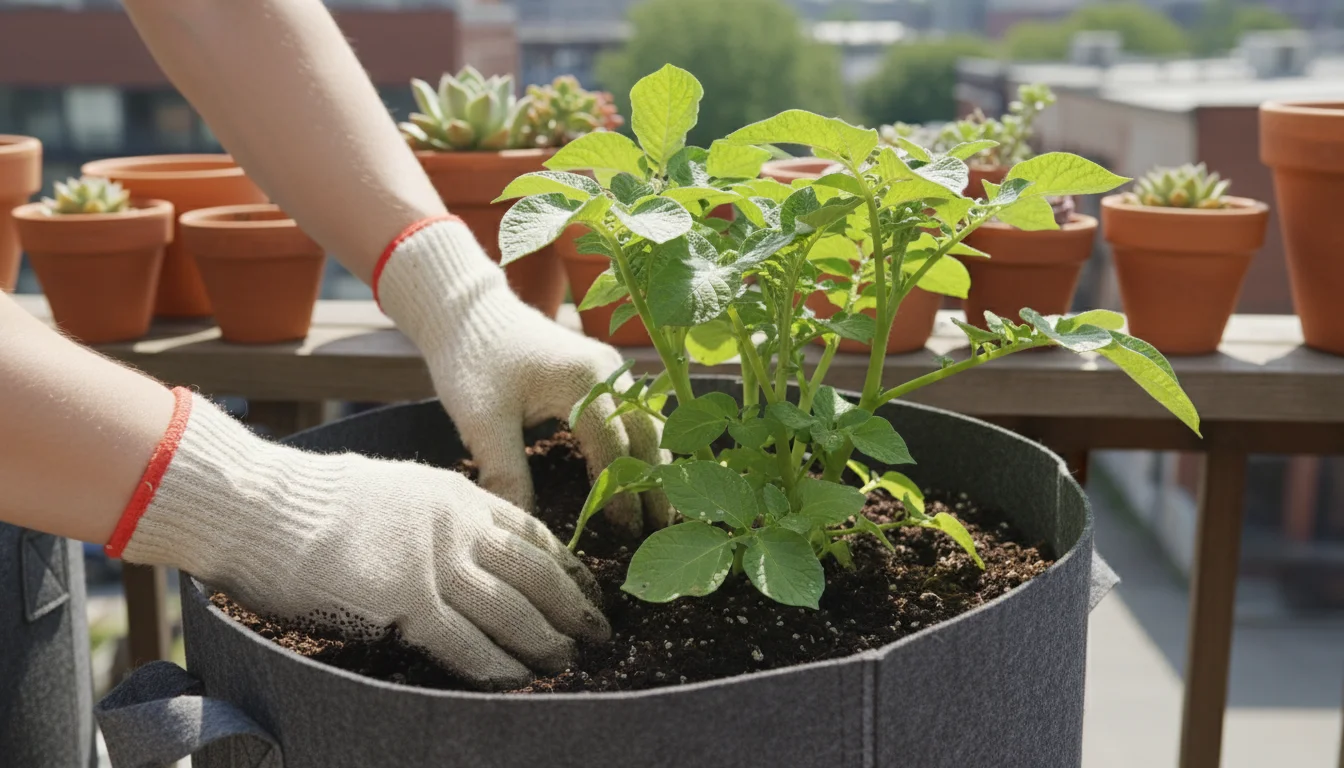
Position Your Seed Potatoes
Place 2-3 chitted seed potatoes directly on top of the initial soil layer. If your seed potatoes are large (larger than a golf ball), you can cut them into pieces, ensuring each piece has at least 1-2 sturdy sprouts or “eyes.” Allow cut pieces to “cure” or dry for 24-48 hours before planting to prevent rot. Position them evenly spaced, if possible, but do not overcrowd. For a 15-gallon bag, three seed potatoes generally yield the best results.
-
Cover with More Soil
Gently cover the seed potatoes with another 4-6 inches of your prepared soil mix. Do not press down firmly; a light pat is sufficient. The sprouts on your seed potatoes should now be completely buried. This initial covering allows the roots to establish well before the plant focuses on upward growth.
-
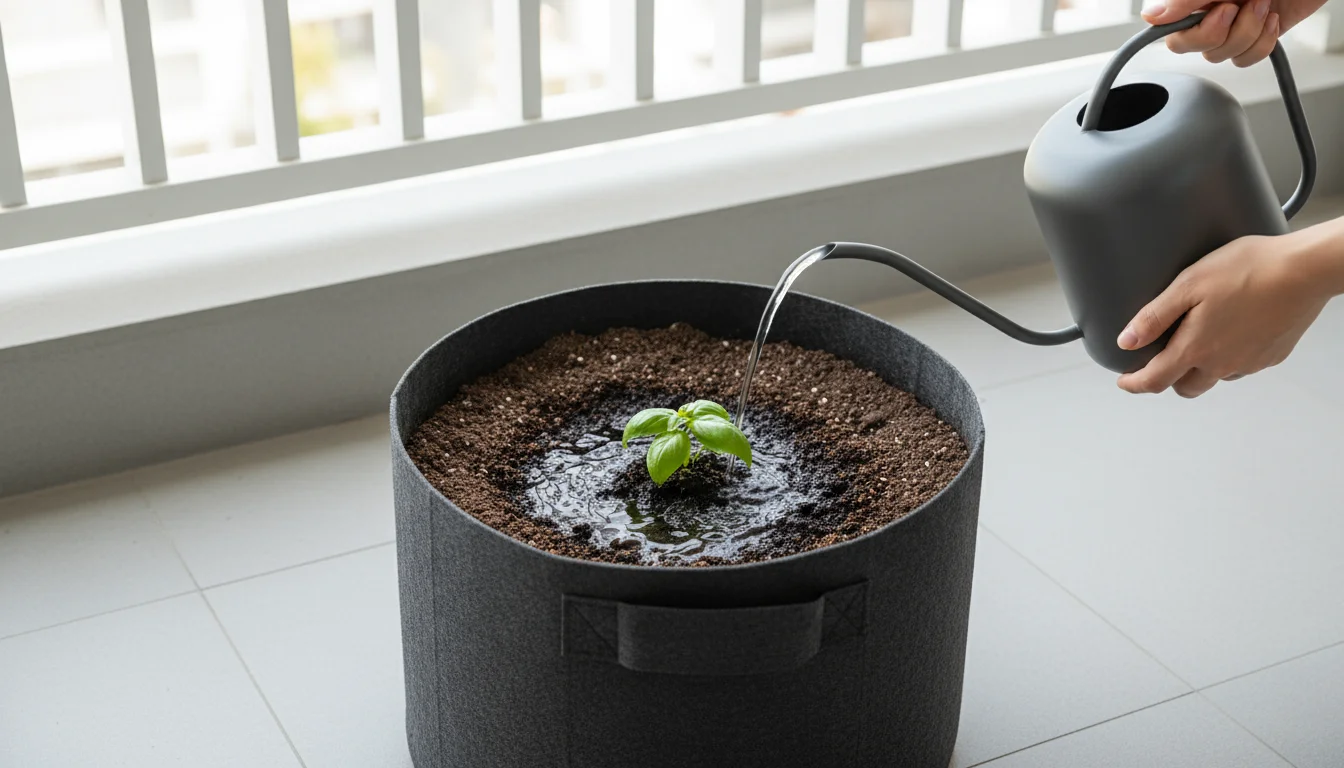
Initial Watering
Water the bag thoroughly after planting. The soil should feel consistently moist, but not soggy. The fabric grow bag will ensure good drainage, so you do not need to worry about water pooling. Consistent moisture is crucial for encouraging root development in this early stage of `growing potatoes in grow bags`.
-

Locate Your Potato Patch
Place your grow bag in a location that receives at least 6-8 hours of direct sunlight per day. A south-facing balcony or patio typically works best for `how to grow potatoes on a small balcony`. Ensure the area has good air circulation, which is important for plant health and preventing fungal issues.
-
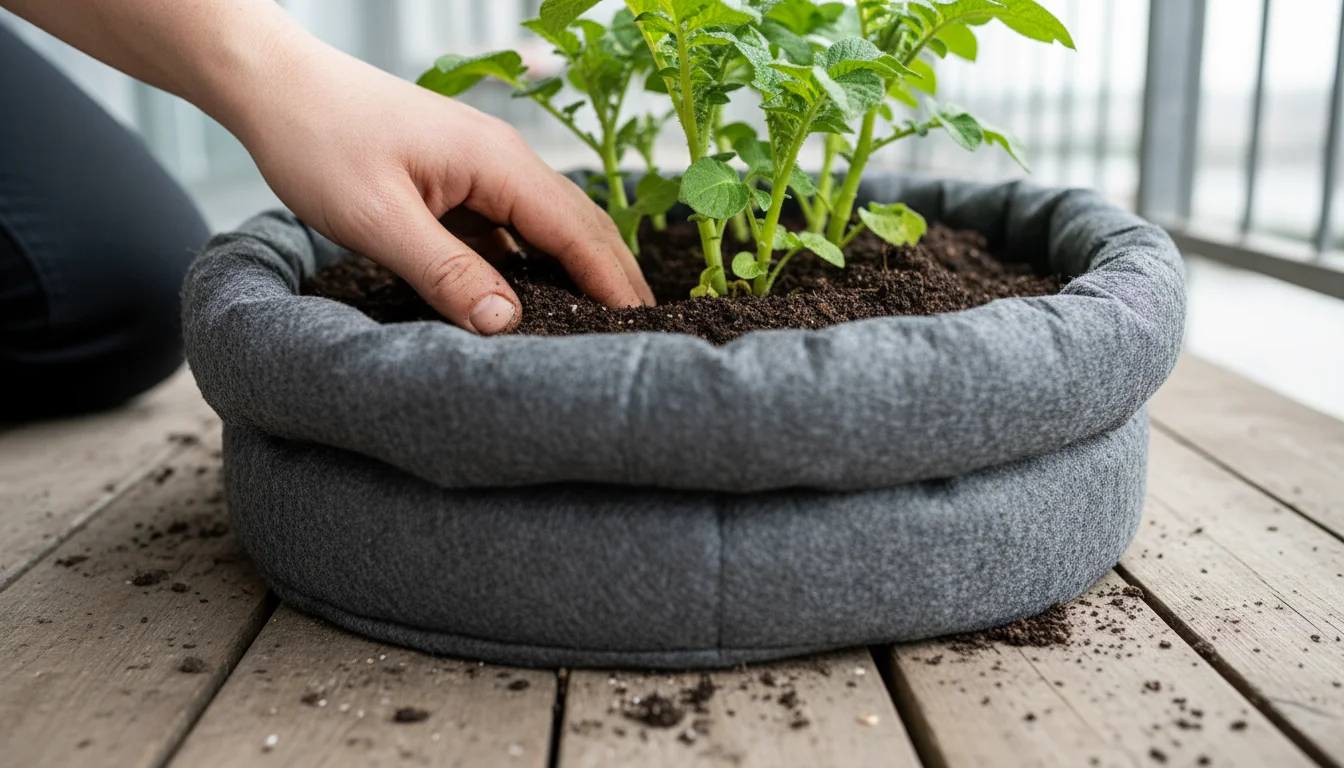
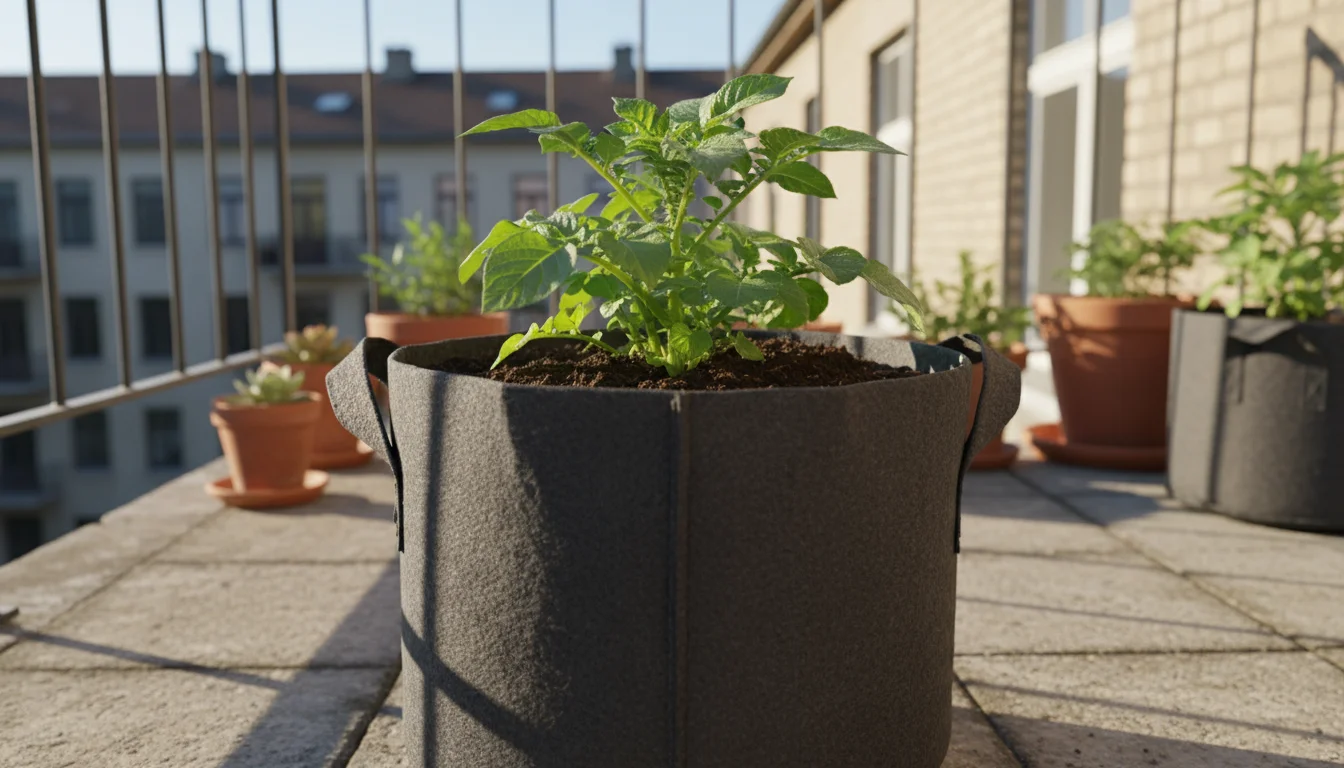
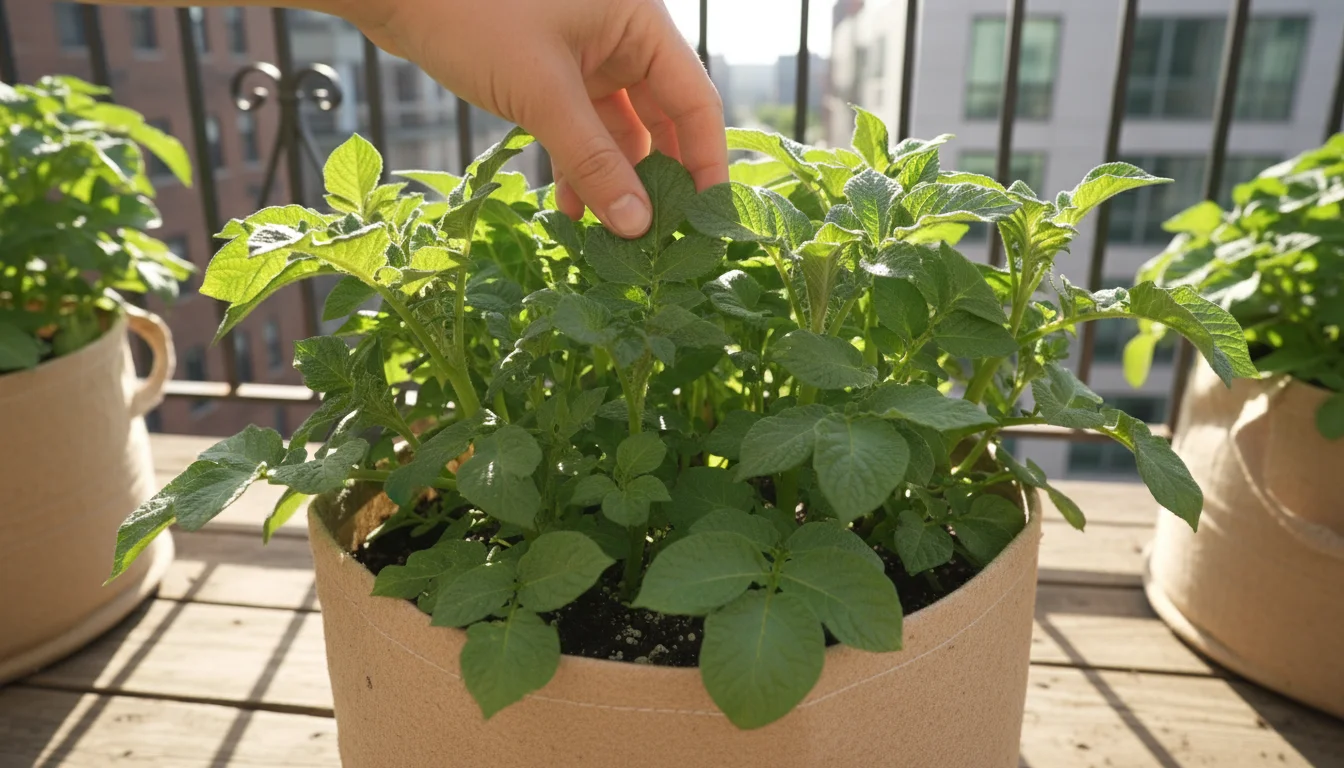
The “Hilling” Process Begins as Plants Grow
This is a unique and essential part of `container potato growing`. As your potato plants grow and reach about 6-8 inches tall, you will begin the “hilling” process. Carefully add more soil around the stems, leaving only the top few inches of foliage exposed. This encourages the plant to produce more tubers along the buried stem. Continue this process every time the plant grows another 6-8 inches, until the soil level reaches about 2-3 inches from the top of the grow bag. Rolling up the cuff of the grow bag as you hill makes this process easier. Hilling significantly boosts your yield by creating more space for potatoes to form.
Following these steps ensures your `step-by-step planting potatoes in a bag` effort is efficient and effective, leading to a strong start for your potato plants.
Watering, Feeding, and Hilling: Essential Care for Thriving Spuds
Once planted, your potato plants need consistent care to produce a healthy and abundant harvest. Proper watering, timely feeding, and the critical “hilling” process are key to success in `container potato growing`.
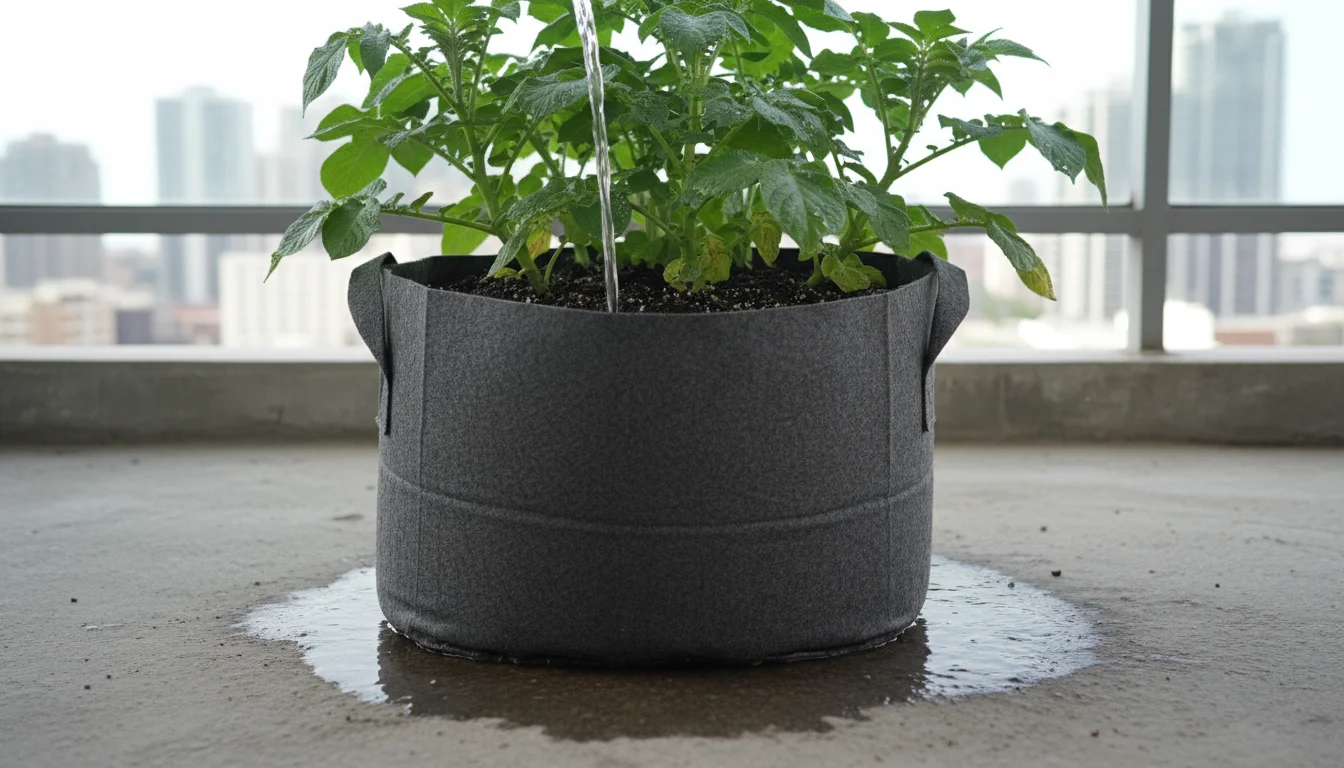
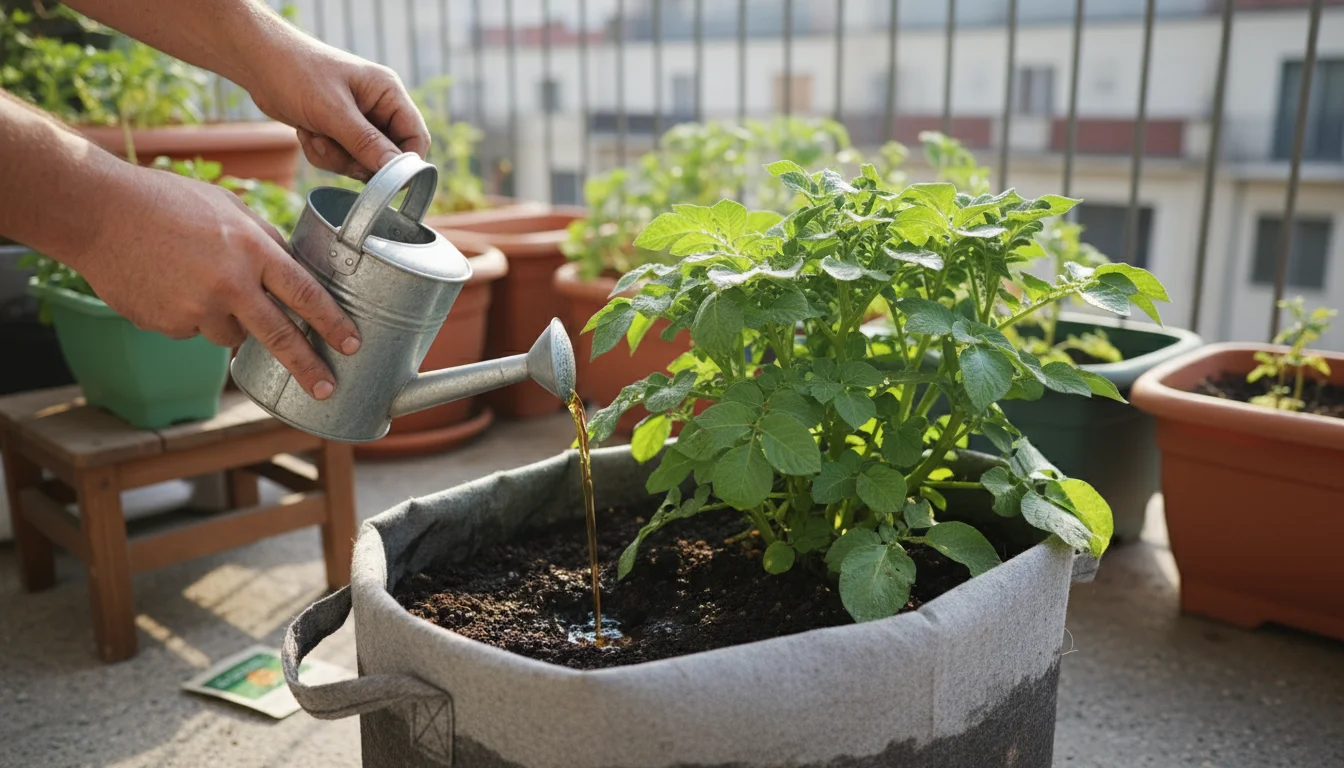
Consistent Watering is Key
Potatoes are thirsty plants, especially when grown in containers. Fabric grow bags promote excellent drainage, which means they also dry out faster than in-ground gardens. You must maintain consistent moisture for healthy tuber development. Erratic watering, such as cycles of extreme dryness followed by drenching, can lead to issues like hollow heart, growth cracks, or secondary growth in your potatoes.
- Feel the Soil: The best way to know when to water is to feel the soil. Stick your finger about two inches deep into the soil. If it feels dry, it is time to water.
- Thorough Watering: Water deeply until you see water draining from the bottom of the grow bag. This ensures moisture reaches the entire root zone.
- Frequency: During hot, dry weather, you might need to water daily, sometimes even twice a day. In cooler, overcast conditions, every two to three days might suffice. Adjust your watering schedule based on weather, bag size, and plant maturity.
- Critical Period: Pay extra attention to watering when the plants are flowering and forming tubers. This stage is crucial for yield.
Feeding Your Hungry Potato Plants
Potatoes are heavy feeders, requiring a steady supply of nutrients, especially as they grow and produce tubers. While your initial soil mix provides a good start, supplemental feeding is usually necessary for `growing potatoes in grow bags`.
- Balanced Fertilizer: About 2-3 weeks after planting, once the plants are actively growing, apply a balanced liquid organic fertilizer (e.g., 5-5-5 or 4-6-4 NPK ratio) every 2-4 weeks. Follow the product’s dilution instructions carefully.
- Phosphorus and Potassium Boost: Once the plants start to flower (a sign that tubers are forming), switch to a fertilizer higher in phosphorus (P) and potassium (K) and lower in nitrogen (N). Examples include a 2-8-4 or 3-4-6 formulation. Phosphorus promotes tuber development, and potassium aids in overall plant health and disease resistance.
- Compost Tea (Optional): For an organic boost, you can apply compost tea every few weeks. This provides a gentle, nutrient-rich liquid feed that also enhances soil microbial life.
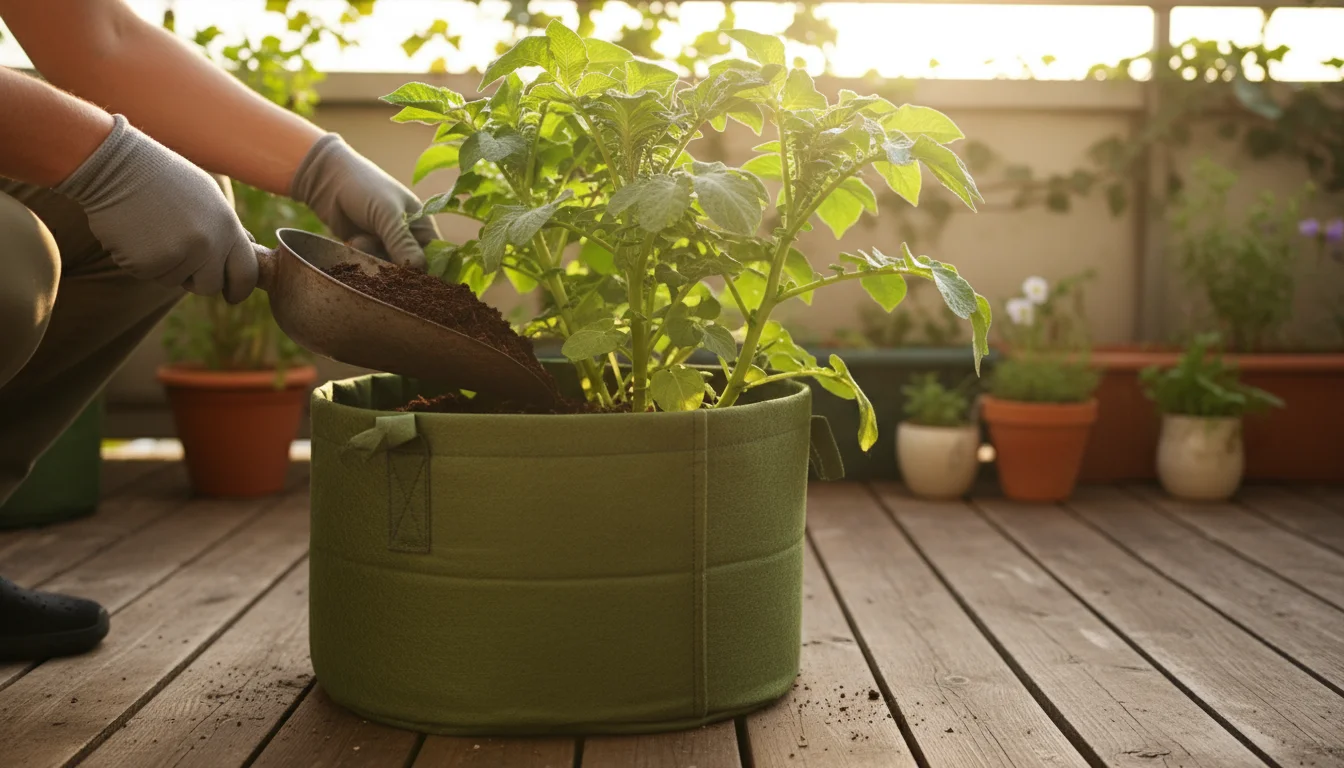
The Importance of Hilling (Continued)
As mentioned in the planting section, hilling is critical for maximizing your potato yield. Tubers form along the buried stem of the potato plant, not just at the original planting depth. By continually adding soil as the plant grows, you encourage more stem growth and, consequently, more potatoes.
- When to Hill: Begin hilling when your potato plants are about 6-8 inches tall.
- How to Hill: Gently add more of your prepared soil mix or plain compost around the base of the plant, covering the lower leaves and leaving only the top 3-4 inches of foliage exposed. As the plant grows taller (another 6-8 inches), repeat the process.
- Filling the Bag: Continue hilling until the soil level is about 2-3 inches from the top of your grow bag. This typically involves 2-3 hilling sessions over the growing season. If you rolled down the top of the grow bag, unroll it as you add soil.
- Benefits: Hilling not only encourages more tubers but also protects developing potatoes from sunlight, which can turn them green and inedible (producing solanine, a toxic compound). It also provides stability to the growing plants.
By diligently managing watering, feeding, and hilling, you provide your potato plants with the best conditions to produce a plentiful harvest, making your `urban vegetable gardening` efforts truly pay off.
Common Challenges and Troubleshooting Your Potato Patch
Even with the best intentions, gardeners occasionally encounter challenges. Knowing how to identify and address common issues can save your potato crop and ensure your efforts in `growing potatoes in grow bags` are not wasted. Here are some problems you might face and practical solutions.
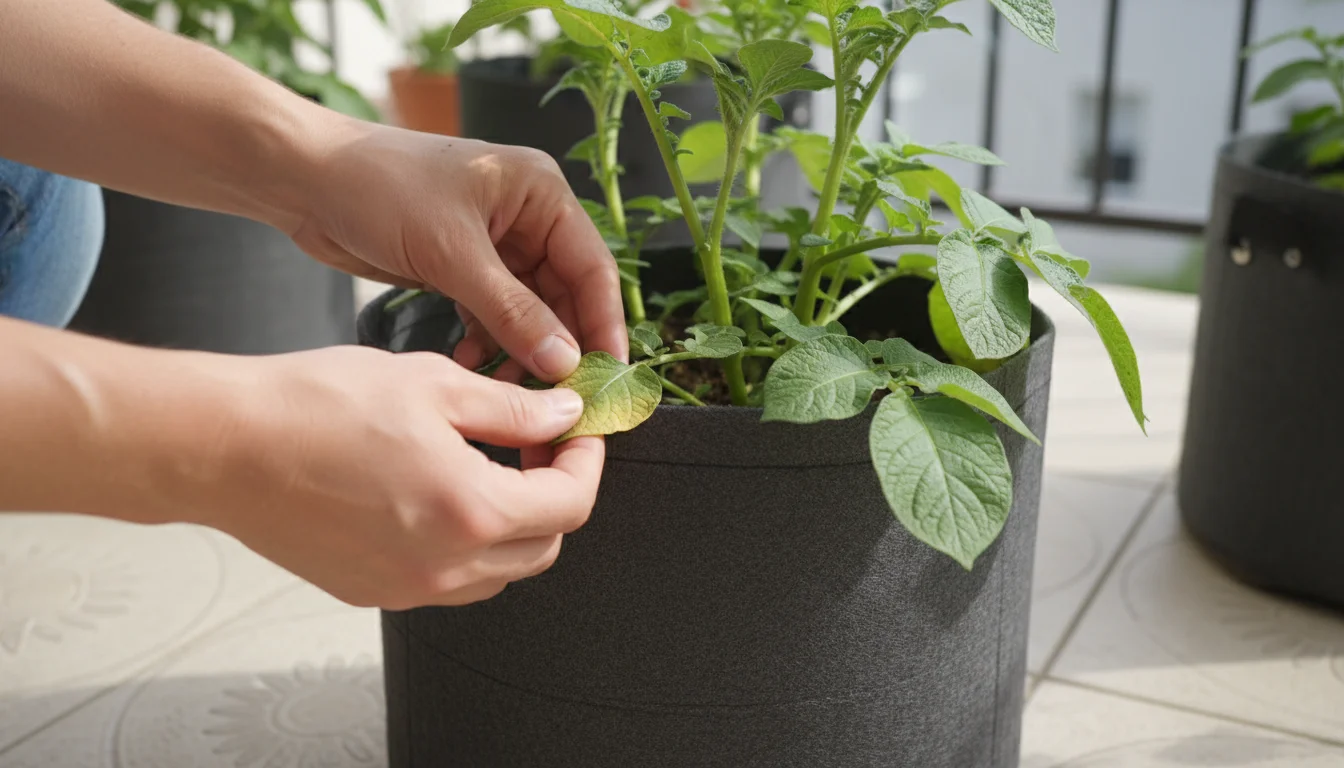
Pest Control in Grow Bags
While `container potato growing` offers some protection from soil-borne pests, aerial insects can still find your plants. Common potato pests include:
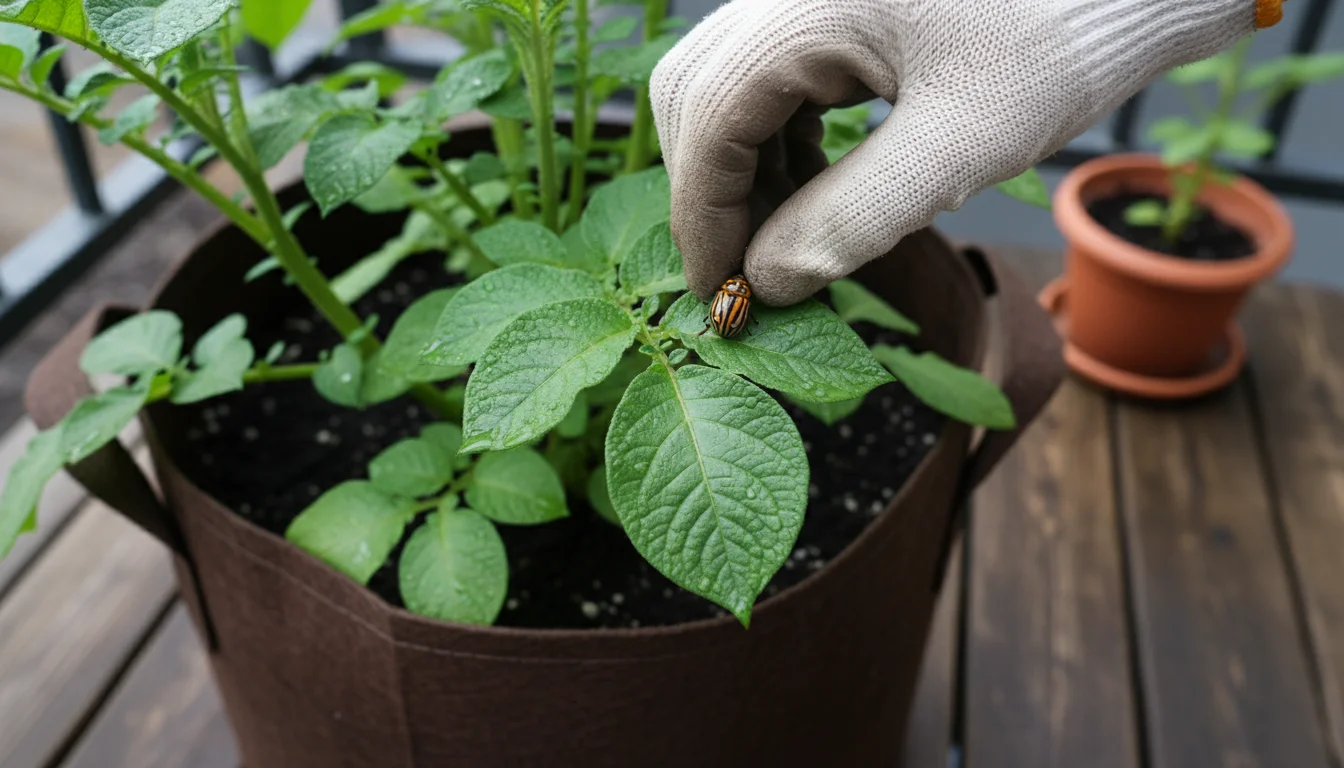
- Colorado Potato Beetles: These black and yellow striped beetles and their reddish larvae can quickly defoliate plants.
- Solution: Hand-pick adults and larvae from plants and drop them into a bucket of soapy water. Inspect plants regularly, especially the undersides of leaves, for their clusters of orange-yellow eggs and squash them. For severe infestations, consider an organic insecticide containing neem oil or spinosad, used strictly according to label instructions.
- Aphids: Small, soft-bodied insects that cluster on new growth, sucking sap and potentially spreading viruses.
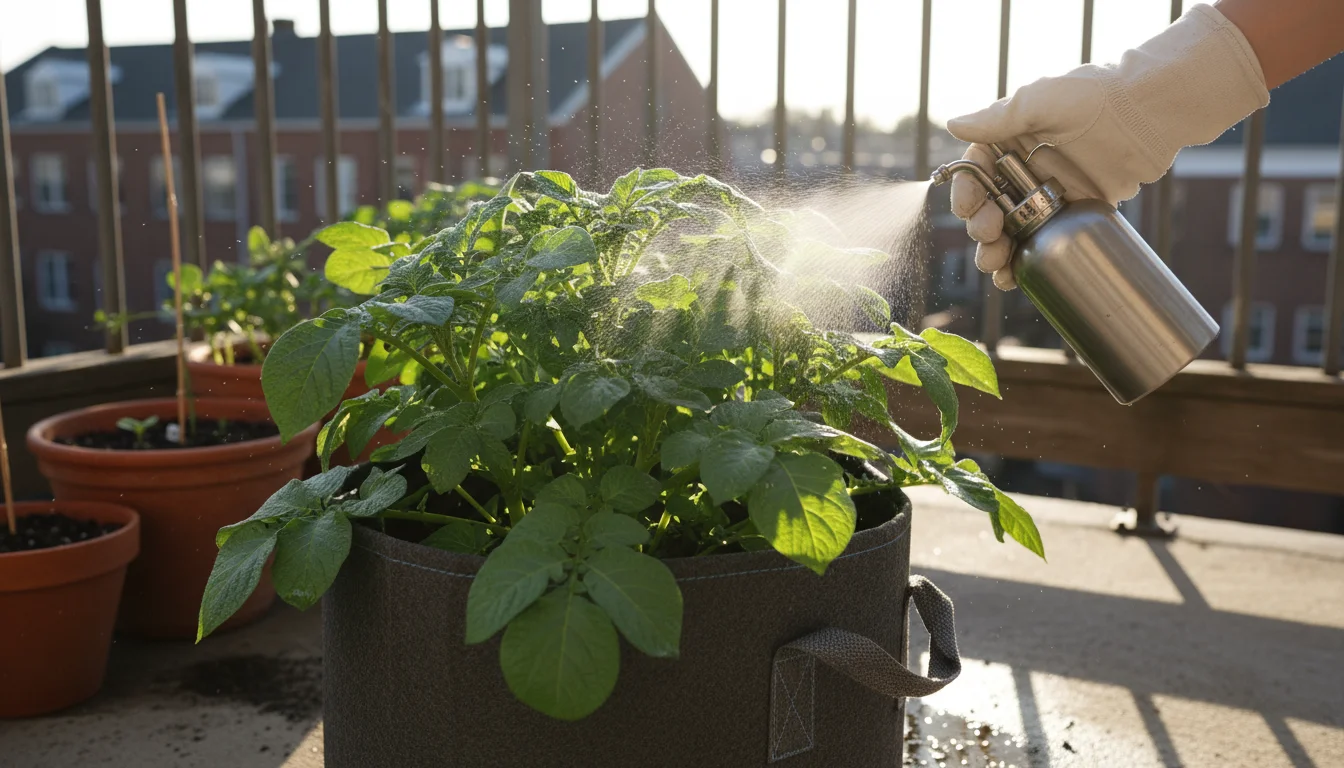
- Solution: Spray plants with a strong stream of water to dislodge them. For persistent issues, use insecticidal soap or neem oil. Encourage beneficial insects like ladybugs by planting companion flowers nearby.
- Flea Beetles: Tiny, jumping black beetles that chew small “shot holes” in leaves.
- Solution: Use row covers early in the season to prevent them from reaching young plants. Neem oil can also help deter them.
Disease Prevention and Management
Diseases can spread quickly, so early detection and prevention are crucial.
- Late Blight: A serious fungal disease that causes dark, water-soaked spots on leaves that quickly turn brown and mushy. It thrives in cool, wet conditions.
- Solution: The best defense is prevention. Choose resistant varieties if available. Ensure good air circulation around your plants. If blight appears, immediately remove and destroy (do not compost) affected plant parts. Fungicides can be used preventatively in high-risk areas, but organic options like copper-based sprays are available.
- Early Blight: Causes small, dark, concentric spots (like a target) on older leaves.
- Solution: Remove affected leaves. Practice good sanitation. Ensure plants are well-fed and watered to improve their natural resistance. Copper or sulfur sprays can help manage it.
- Scab: Causes rough, corky patches on potato skins. It affects appearance but rarely taste. More common in alkaline soils.
- Solution: Maintain slightly acidic soil pH (5.0-5.2) if possible. Ensure consistent moisture during tuber formation. Plant resistant varieties.
Always source certified disease-free seed potatoes to minimize the risk of introducing diseases to your `urban vegetable gardening` efforts.
Nutrient Deficiencies
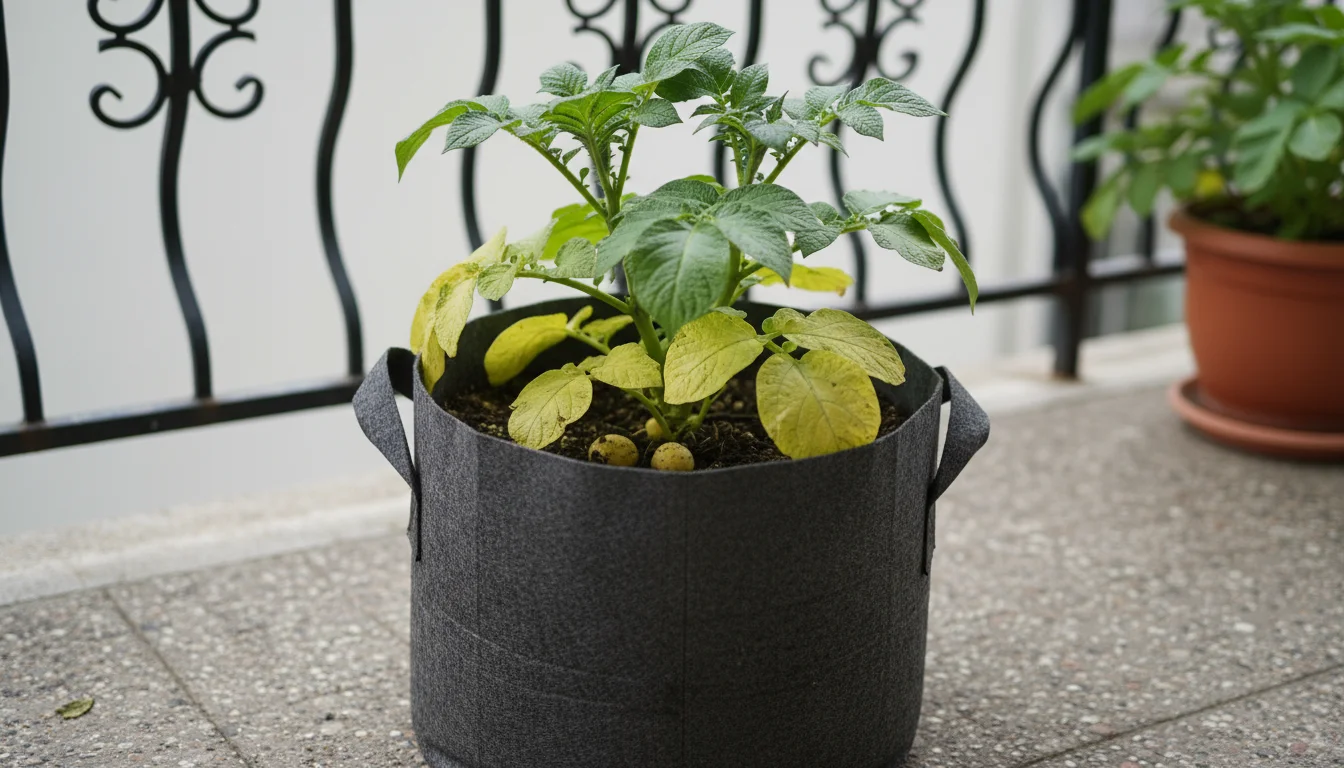
Yellowing leaves or stunted growth can indicate nutrient deficiencies. Potatoes require a good balance of nitrogen, phosphorus, and potassium, plus micronutrients.
- Yellowing Lower Leaves: Often a sign of nitrogen deficiency.
- Solution: Apply a balanced liquid fertilizer or a nitrogen-rich organic amendment like blood meal.
- Purple Tinge on Leaves: Can indicate phosphorus deficiency.
- Solution: Use a fertilizer higher in phosphorus, such as bone meal or a bloom booster.
- Weak Stems or Poor Flowering: May suggest a potassium deficiency.
- Solution: Apply a fertilizer rich in potassium, like greensand or kelp meal.
Regular feeding, as outlined previously, usually prevents these issues. Always follow fertilizer instructions carefully to avoid overfeeding, which can also harm plants.
Green Potatoes
Potatoes exposed to sunlight turn green and produce solanine, a bitter and mildly toxic compound. These should not be eaten or should have the green parts peeled away completely.
- Solution: This issue highlights the importance of thorough hilling. Ensure all developing tubers remain covered with soil. If you notice any greening potatoes while hilling, simply add more soil on top. When harvesting, store potatoes in a dark, cool place immediately.
By staying vigilant and responding promptly, you can overcome most challenges in your `how to grow potatoes on a small balcony` project, ensuring a healthy and productive potato patch.
Harvesting Your Hard-Earned Spuds: Knowing When and How
The moment you have been waiting for has arrived: harvest time! Knowing when and how to harvest your potatoes from grow bags ensures you maximize your yield and enjoy your homegrown bounty at its best. This is the rewarding culmination of your `growing potatoes in grow bags` efforts.
When to Harvest
Timing your potato harvest is crucial. There are generally two types of harvests:
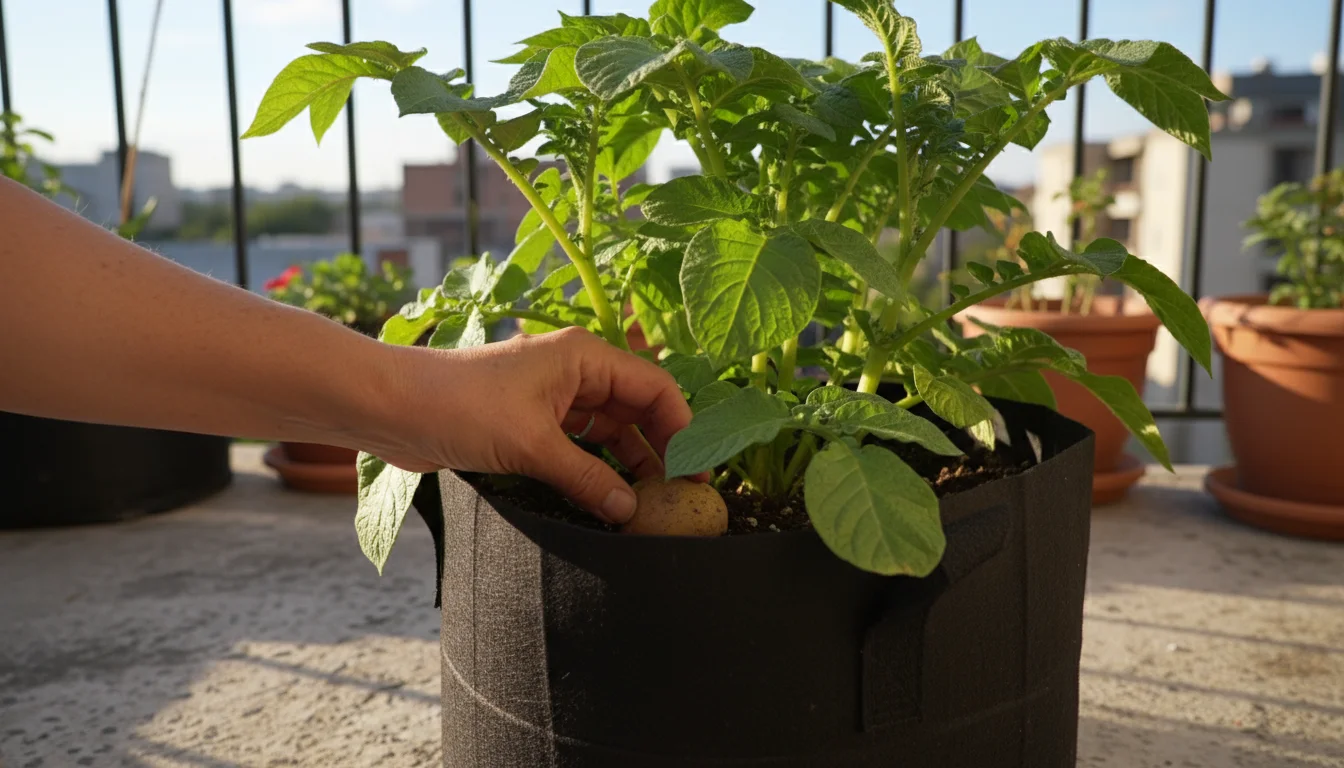
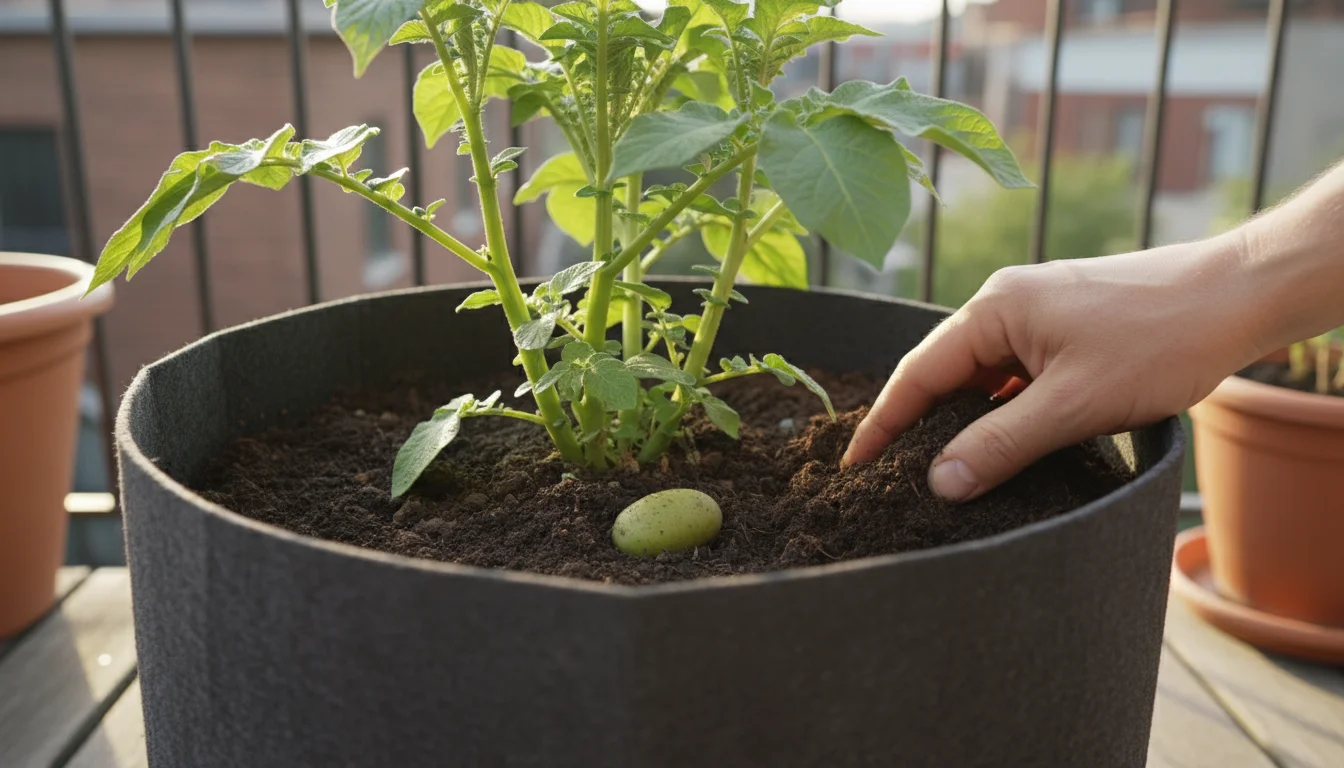
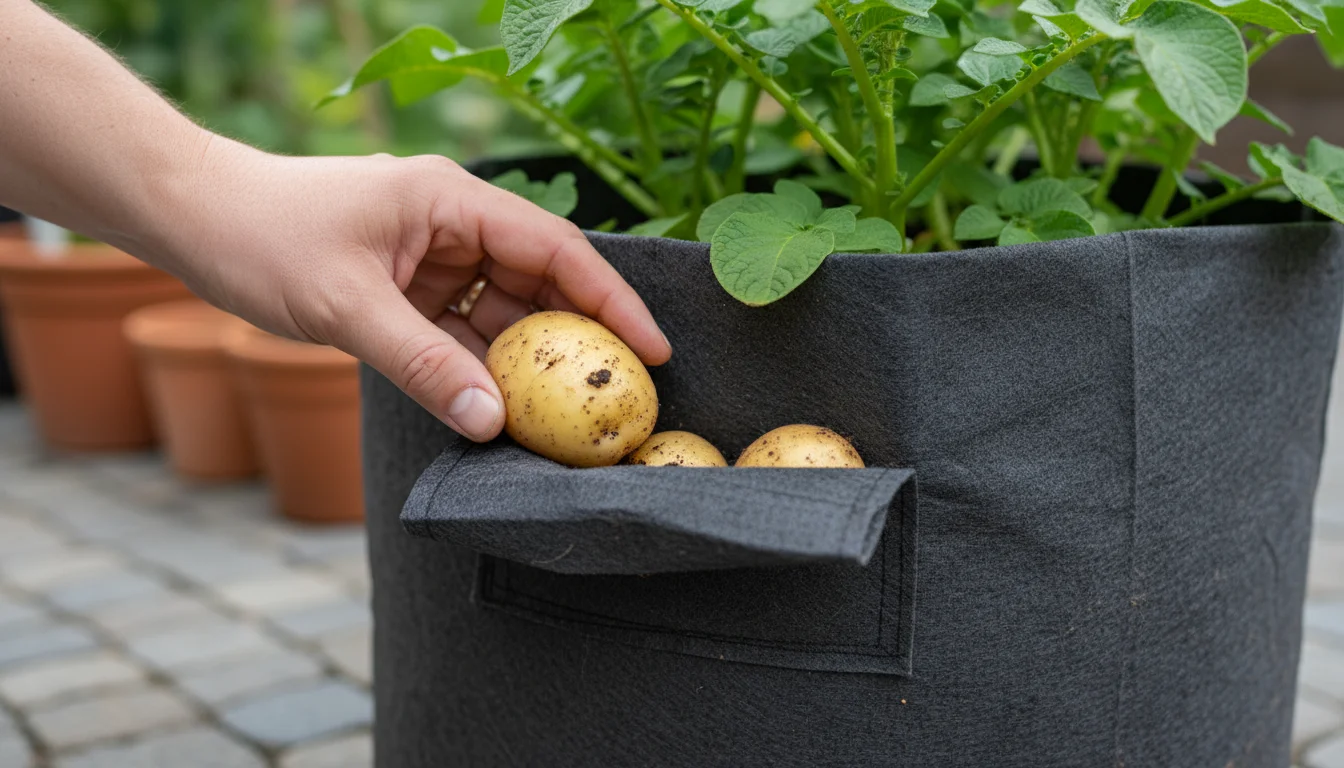
- New Potatoes (Optional, Early Harvest): If you are eager for an early taste, you can gently “rob” a few new potatoes. Approximately 7-8 weeks after planting, or about 2-3 weeks after the plants have finished flowering, you can carefully reach into the side of the grow bag (if it has an access flap) or gently dig around the perimeter to retrieve a few small, tender new potatoes. Do not disturb the main plant too much if you plan for a full harvest later. These are best eaten fresh, often boiled or steamed, with their skins on.
- Main Crop Potatoes (Full Harvest): For your main harvest, wait until the potato plants have naturally matured and begun to die back. This typically occurs 100-120 days after planting, depending on the variety. You will notice the foliage turning yellow, wilting, and eventually browning and collapsing. This is a sign that the plant has directed all its energy into developing the tubers underground.
Once the foliage has completely died back, wait an additional 1-2 weeks before harvesting. This “curing” period in the soil allows the potato skins to thicken and harden, which improves their storage quality and reduces bruising during handling. Harvesting too early can result in thin-skinned potatoes that do not store well.
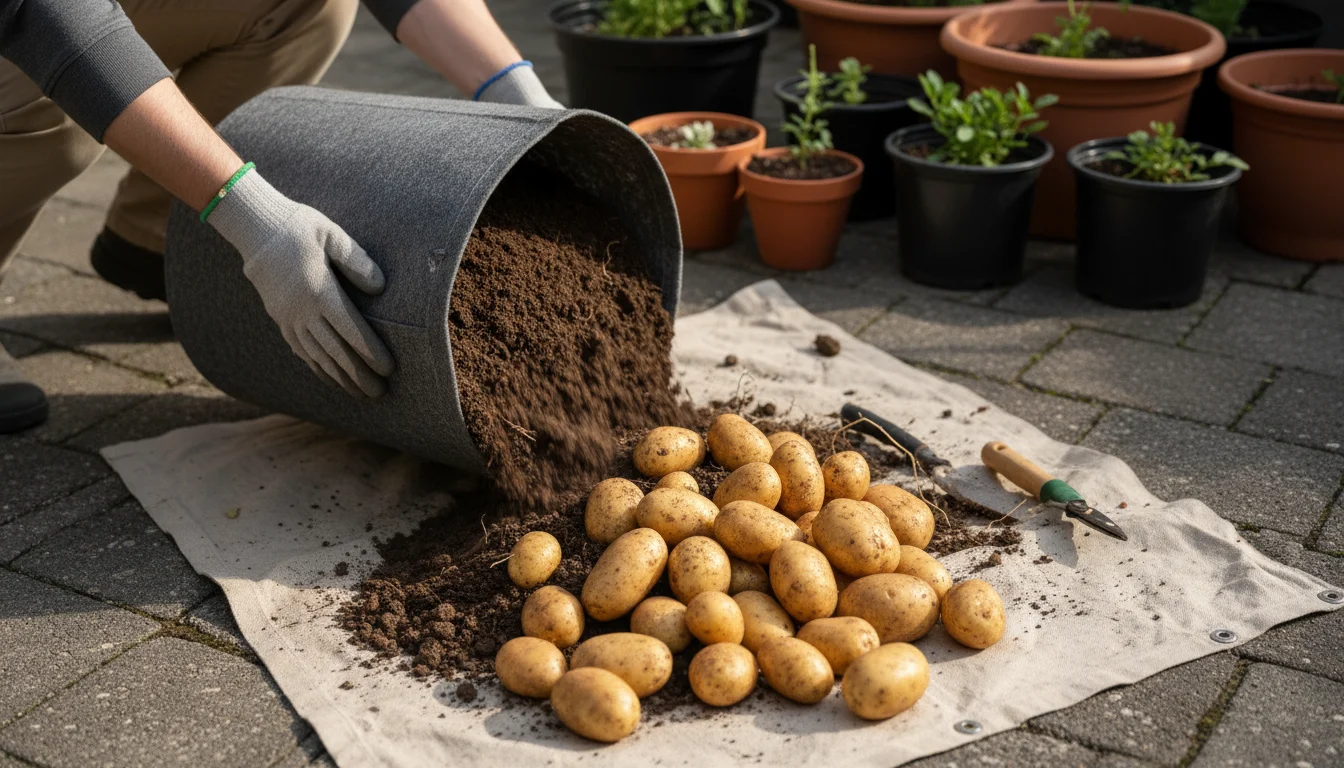
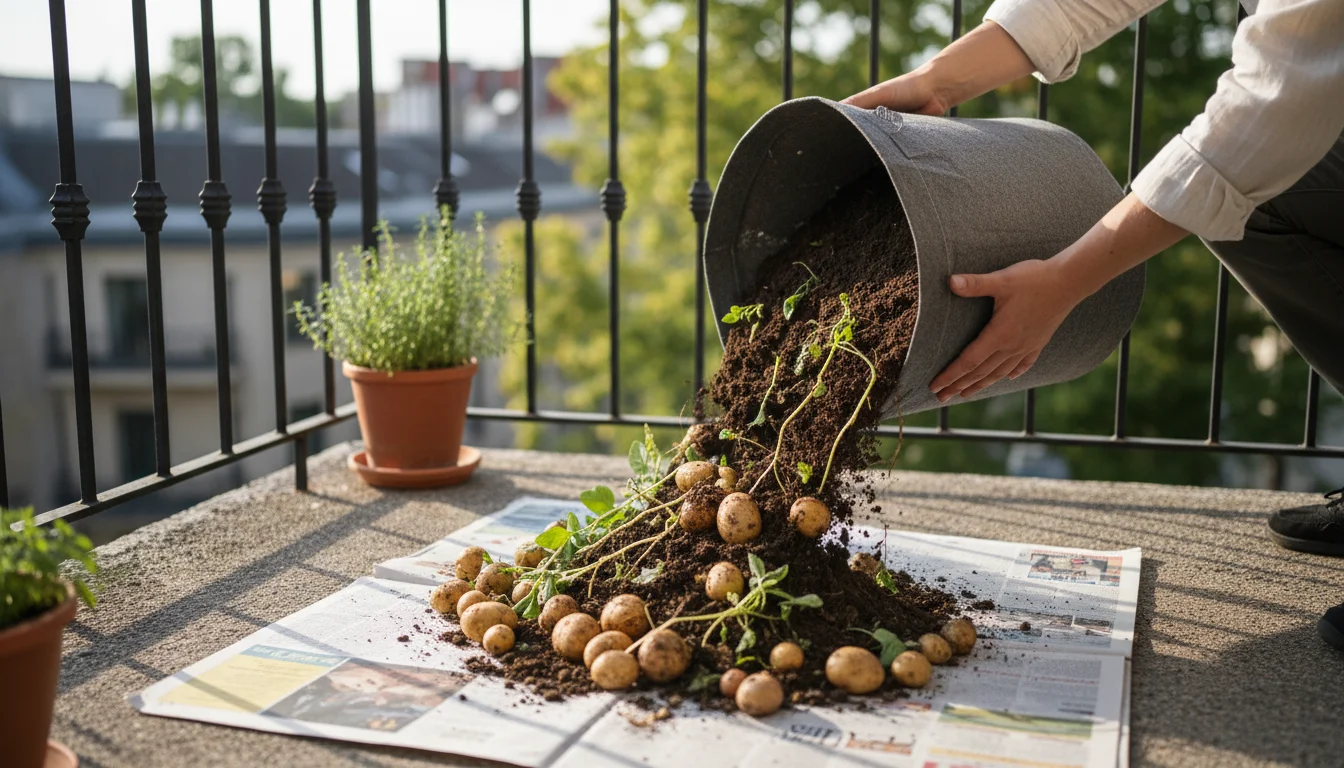
How to Harvest Your Potatoes from Grow Bags
This is where the advantage of `best containers for growing potatoes` truly shines. Harvesting from a grow bag is incredibly simple and mess-free compared to digging in the ground. You will appreciate the ease of this method for your `urban vegetable gardening` endeavors.
- Prepare Your Area: Choose a clear, accessible spot, perhaps a tarp or an old sheet, to contain the soil.
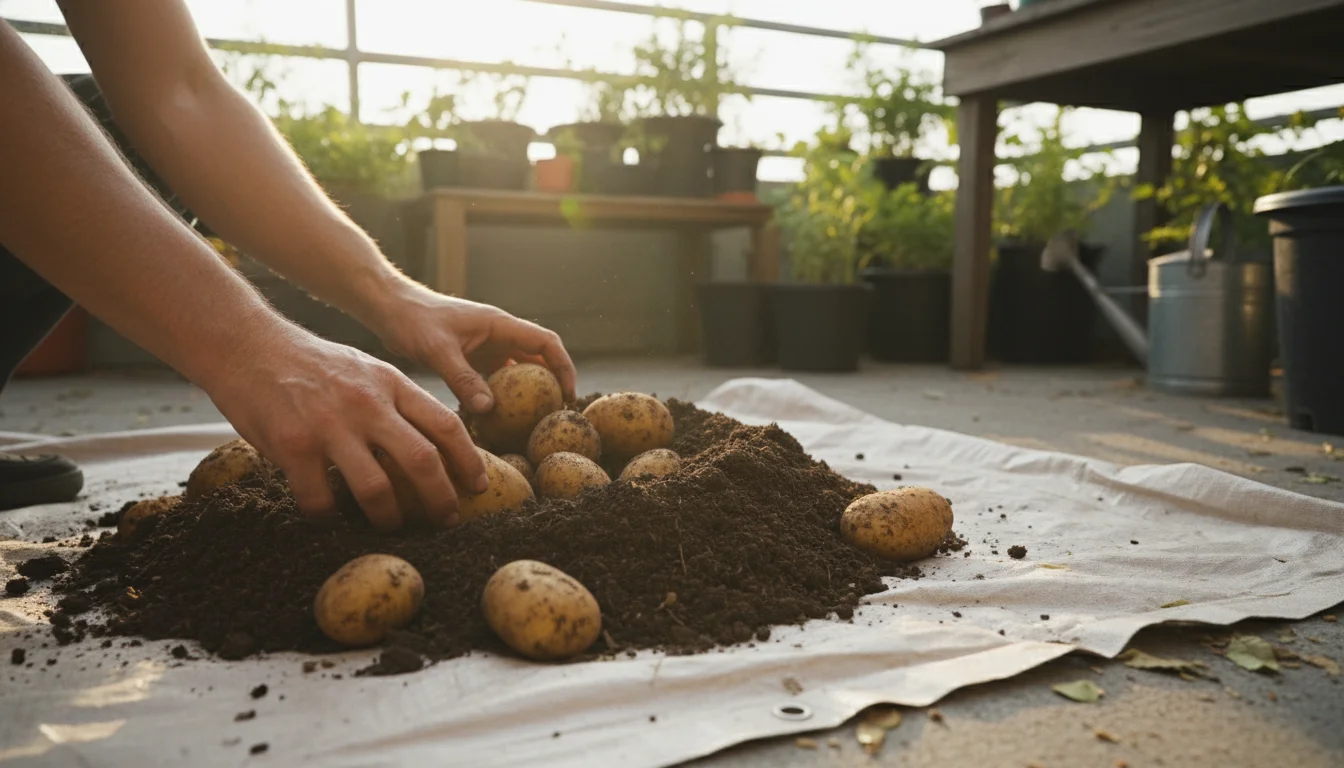
- Empty the Bag: Carefully tip the entire grow bag onto your prepared surface. The soil and potatoes will spill out.
- Sift Through the Soil: Gently sift through the loose soil, feeling for the potatoes. They might be nestled at various depths. Take your time to ensure you do not miss any hidden gems. You will be amazed at how many potatoes can come from one ‘one square foot’ potato patch!
- Separate and Clean: Separate the potatoes from the spent soil and any remaining plant debris. Gently brush off excess soil. Do not wash the potatoes at this stage, as moisture can encourage rot during storage.
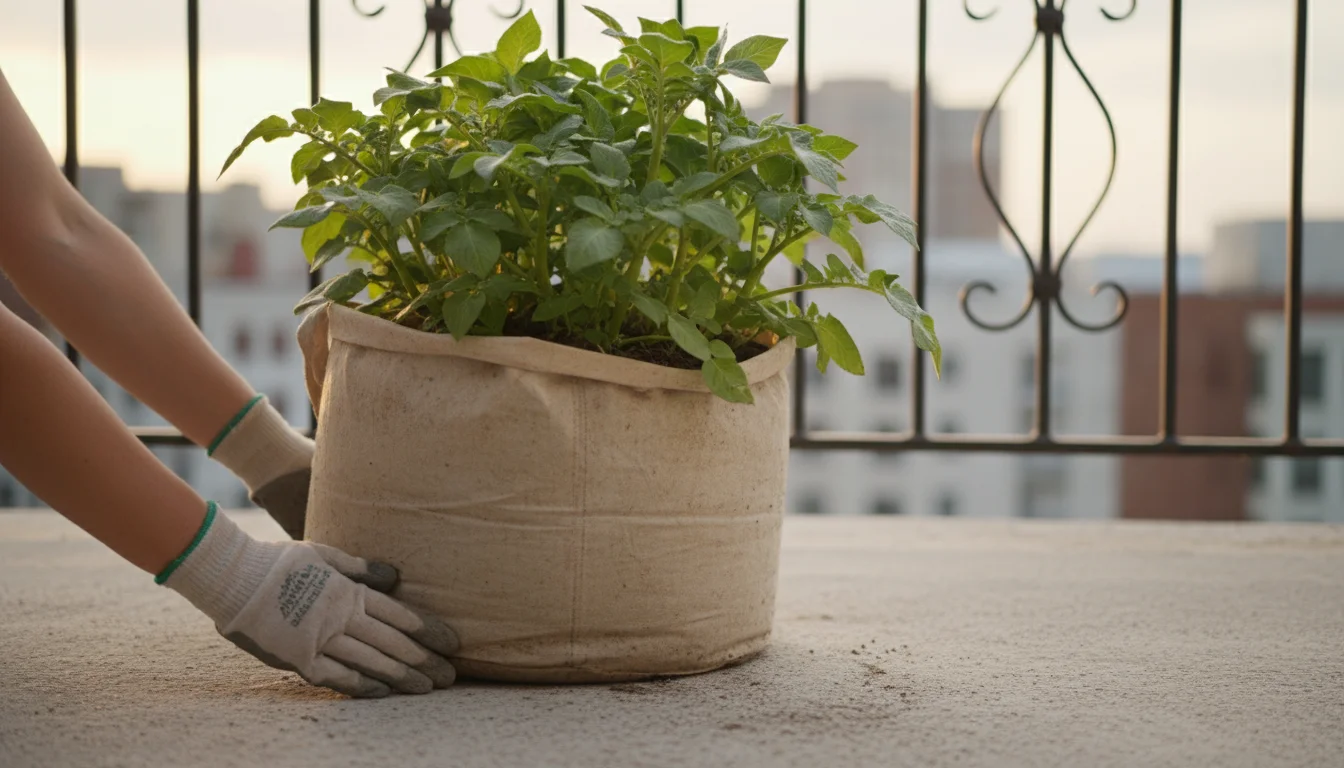
Discard the spent soil from the grow bag (do not reuse it for potatoes next season, to prevent disease build-up, but it is great for other non-potato plants or compost piles). Clean your grow bag thoroughly, allow it to dry completely, and store it for next season.
Your successful harvest is a testament to the effectiveness of `how to grow potatoes on a small balcony` using grow bags. Enjoy the fruits of your labor!

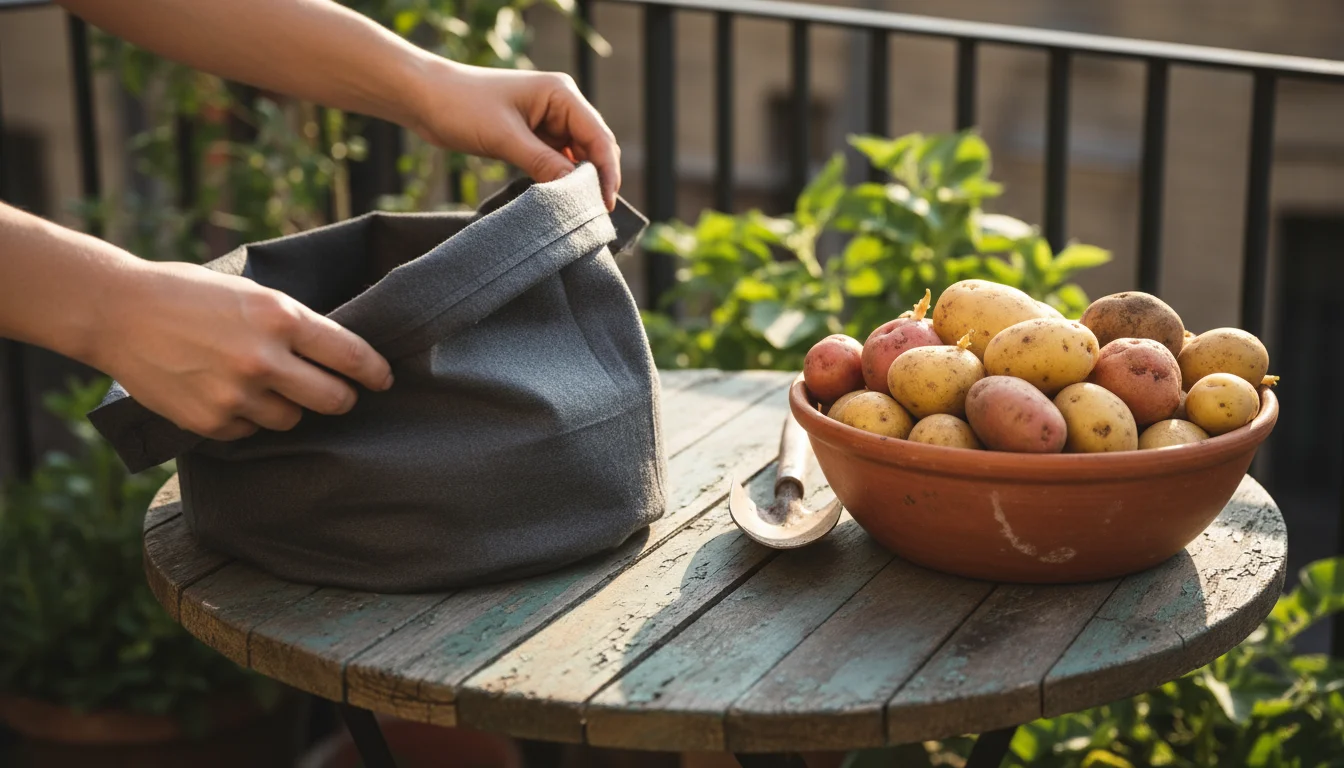
Enjoying and Storing Your Homegrown Potatoes
After the satisfying harvest, the next step is to properly enjoy and store your homegrown potatoes. Correct storage extends their freshness, allowing you to savor your `urban vegetable gardening` bounty for months.

Curing Your Potatoes for Long-Term Storage
Before storing your main crop potatoes, it is essential to “cure” them. This process further hardens their skins, heals minor cuts, and reduces moisture loss, making them last longer.
- Duration: Cure your potatoes for 1-2 weeks.
- Conditions: Spread the unwashed potatoes in a single layer in a cool (50-60°F or 10-15°C), dark, and humid location. A garage, basement, or even a covered porch (if temperatures are stable) works well. Avoid direct sunlight, which causes greening.
- Airflow: Ensure good air circulation around the potatoes during curing. Do not stack them too high.
After curing, carefully inspect each potato. Discard any that show signs of disease, damage, or are overly soft. Only store healthy, firm potatoes.
Optimal Storage Conditions
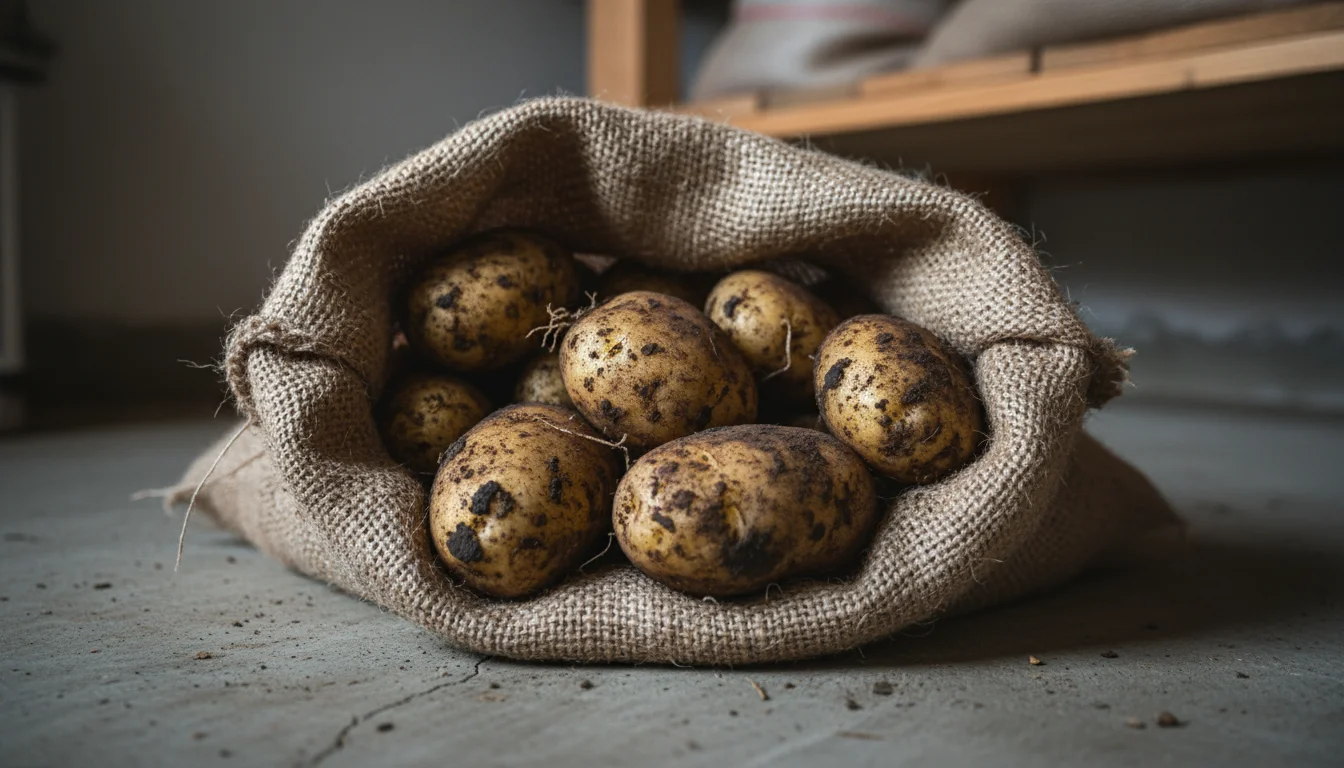
Once cured, store your potatoes in conditions that mimic their natural underground environment.
- Cool and Dark: The ideal temperature for long-term storage is between 40-45°F (4-7°C). Any warmer, and they may sprout too quickly. Any colder (below 38°F or 3°C), and the starches can convert to sugars, resulting in sweet, gritty potatoes. Darkness is crucial to prevent greening and sprouting.
- Humid: A relatively high humidity (85-95%) helps prevent the potatoes from shriveling.
- Good Ventilation: Store potatoes in breathable containers like burlap sacks, mesh bags, wooden crates, or even cardboard boxes with holes. Avoid airtight plastic bags, which trap moisture and promote rot.
- Avoid Onions: Do not store potatoes near onions. Both release gases that can accelerate spoilage in the other.
Properly stored, your homegrown potatoes can last for several months, providing you with fresh produce long after the `growing potatoes in grow bags` season ends.
Enjoying Your Homegrown Spuds
There is nothing quite like the flavor of freshly harvested, homegrown potatoes. They often taste richer and more earthy than store-bought varieties. Here are a few simple ways to enjoy your bounty:
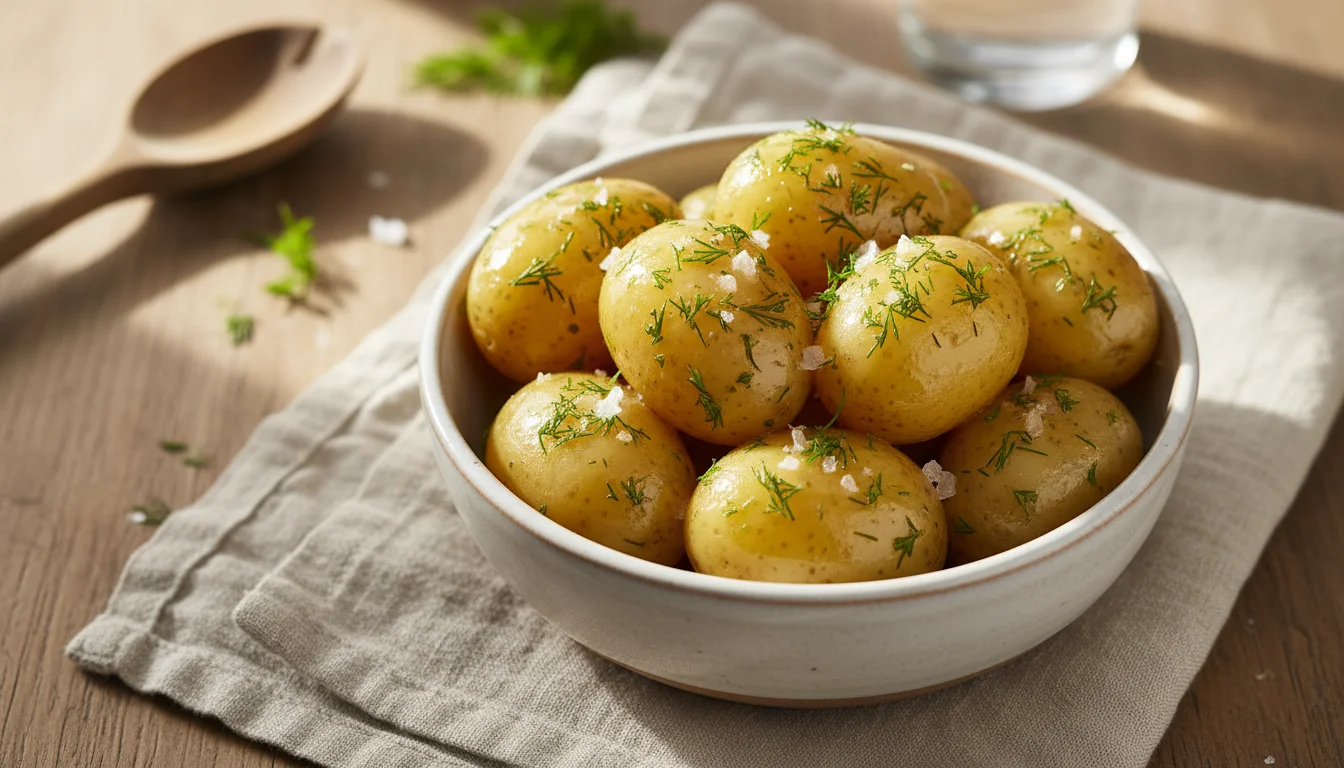
- Boiled or Steamed: Perfect for new potatoes. Serve with a little butter, salt, and fresh herbs like parsley or dill.
- Roasted: Cubed and tossed with olive oil, rosemary, salt, and pepper, then roasted until tender and crispy.
- Mashed: A classic comfort food. Mash with butter, milk, and your preferred seasonings.
- Baked: For larger varieties, a simple baked potato with your favorite toppings is always a treat.
- Potato Salad: Small, waxy potatoes are excellent in potato salads.
The culinary possibilities are endless, and each dish will remind you of the satisfaction gained from your `container potato growing` success. Enjoy the delicious rewards of your small-space garden!
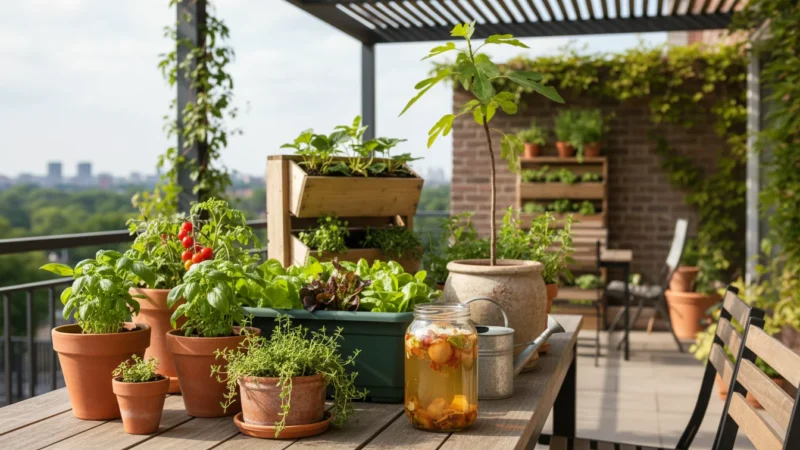
Beyond Potatoes: Sustainable Practices and Companion Planting
Embracing sustainable practices in your small-space garden elevates your `urban vegetable gardening` from a seasonal hobby to an environmentally conscious endeavor. Even in grow bags, you can implement eco-friendly strategies that benefit your plants and the planet.
Reusing and Recycling Grow Bags
Fabric grow bags are durable and designed for multiple seasons of use. After harvesting your potatoes, empty the old soil (do not reuse it for potatoes next year, as disease pathogens can accumulate). Clean the bag thoroughly with a brush and water, then let it air dry completely in the sun. Store it in a dry place. By reusing your grow bags, you reduce waste and minimize your environmental footprint.

Composting Spent Soil and Plant Material
The spent soil from your potato grow bags is not “dead” but rather depleted of the specific nutrients potatoes require. It makes an excellent addition to your compost pile. You can also mix it into flower beds or other non-potato vegetable beds to improve soil structure. Similarly, any healthy potato foliage that dies back can go into your compost, returning valuable organic matter to the soil. Avoid composting any diseased plant material to prevent the spread of pathogens.
The Importance of Crop Rotation (Even in Containers)
While growing in individual bags naturally provides some level of “rotation,” it is still important to be mindful of what you plant in subsequent seasons. Do not grow potatoes in the same bag with the same soil for consecutive years. This practice helps break pest and disease cycles. For example, if you grow potatoes in a 15-gallon bag this year, use fresh potting mix next year and consider planting a different crop like peppers, tomatoes, or beans in that bag, or simply let the bag rest with some cover crop. If you use the same bags, ensure you clean them well and fill them with fresh soil.
Companion Planting for Healthier Potatoes
Even in a single grow bag, you can explore elements of companion planting. Companion planting involves growing specific plants together that benefit each other, either by deterring pests, attracting beneficial insects, or improving soil conditions. While a potato grow bag does not allow for extensive interplanting, you can still place small, beneficial plants around the base or nearby.
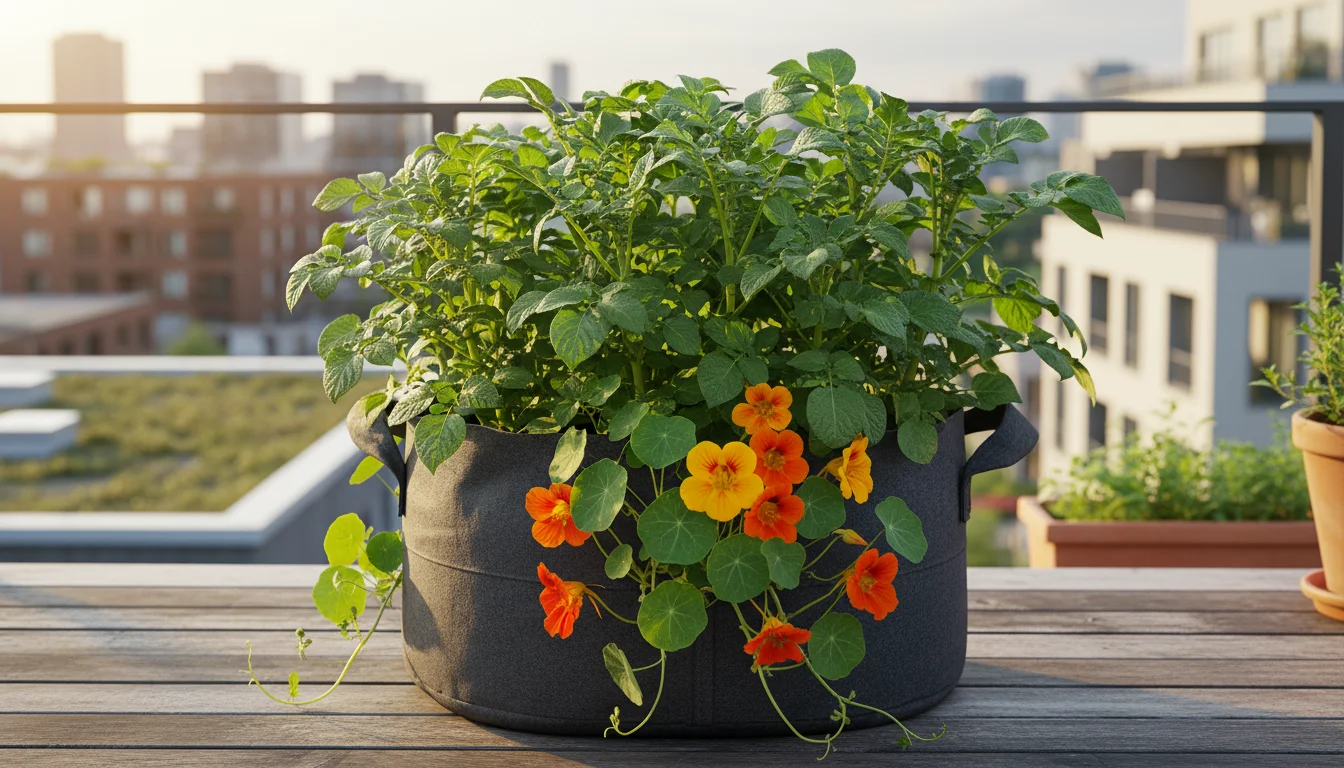
- Nasturtiums: These attractive edible flowers act as a “trap crop,” luring aphids away from your potatoes. They also deter potato beetles.
- Marigolds: Certain varieties (especially French marigolds) are known to deter nematodes and other soil-borne pests. While their roots may not fully integrate into the potato bag, having them in nearby containers can offer some protection.
- Bush Beans: Planted in separate, small containers nearby, bush beans can fix nitrogen in the soil, indirectly benefiting nitrogen-hungry potatoes.
- Horseradish: Anecdotal evidence suggests planting horseradish near potatoes can improve their disease resistance. A small pot of horseradish strategically placed could be beneficial.
Remember that companion planting is a subtle art. Observe your plants and learn what works best in your specific balcony environment. By integrating these sustainable and intelligent gardening practices, you create a more resilient and productive `how to grow potatoes on a small balcony` system, minimizing waste and maximizing your small-space gardening potential.
Frequently Asked Questions
Can I use grocery store potatoes as seed potatoes?
It is not recommended to use grocery store potatoes for planting. They are often treated with sprout inhibitors to extend shelf life, making them difficult to sprout. More importantly, they may carry diseases that could infect your soil and future crops. Always purchase certified disease-free seed potatoes from a reputable garden center or online supplier to ensure a healthy start.
How many potatoes can I expect from one grow bag?
The yield varies significantly based on grow bag size, potato variety, growing conditions, and care. From a 10-15 gallon grow bag with 2-3 seed potatoes, you can typically expect to harvest 3-5 pounds of potatoes. Some gardeners report even higher yields with optimal conditions and proper hilling. You can achieve a surprisingly abundant harvest from a relatively small `one square foot` potato patch.
What do I do if my potato leaves turn yellow early in the season?
Early yellowing leaves can indicate a few issues. It often points to a nitrogen deficiency, especially if the lower leaves are affected. Apply a balanced liquid fertilizer or a nitrogen-rich organic amendment. Other causes could be inconsistent watering, overwatering leading to root rot, or a nutrient imbalance. Check the soil moisture, ensure good drainage, and review your feeding schedule to address these potential problems effectively.
Can I reuse the soil from my potato grow bags next year?
It is generally not advisable to reuse the exact same soil mix for potatoes in consecutive seasons. Potatoes are susceptible to various soil-borne diseases and pests that can build up in the soil over time. To minimize risk, discard the spent soil (or add it to your compost or non-potato garden beds) and use fresh, sterile potting mix for your next potato crop. You can reuse the grow bags themselves after cleaning them thoroughly.
What size grow bag is best for growing potatoes?
For a good yield in `container potato growing`, a grow bag of at least 10-15 gallons is ideal. A 15-gallon bag provides ample space for root development and tuber formation, allowing you to plant 2-3 seed potatoes and achieve a substantial harvest. While smaller bags (7-gallon) can work, they will yield fewer and smaller potatoes. The larger volume ensures enough soil depth for hilling and supports the plants through their full growth cycle, making them `best containers for growing potatoes` on a small scale.
For trustworthy gardening information, visit:
University of New Hampshire Extension — Yard & Garden, University of Maine Cooperative Extension — Gardening, University of Rhode Island Cooperative Extension — Gardening, Connecticut Agricultural Experiment Station and Massachusetts Horticultural Society. These organizations provide expert, research-based advice for gardeners at all levels.
Disclaimer: This article is for informational purposes only and is not a substitute for professional gardening advice. Always consult local extension services or horticulture experts for region-specific guidance.


Leave a Reply