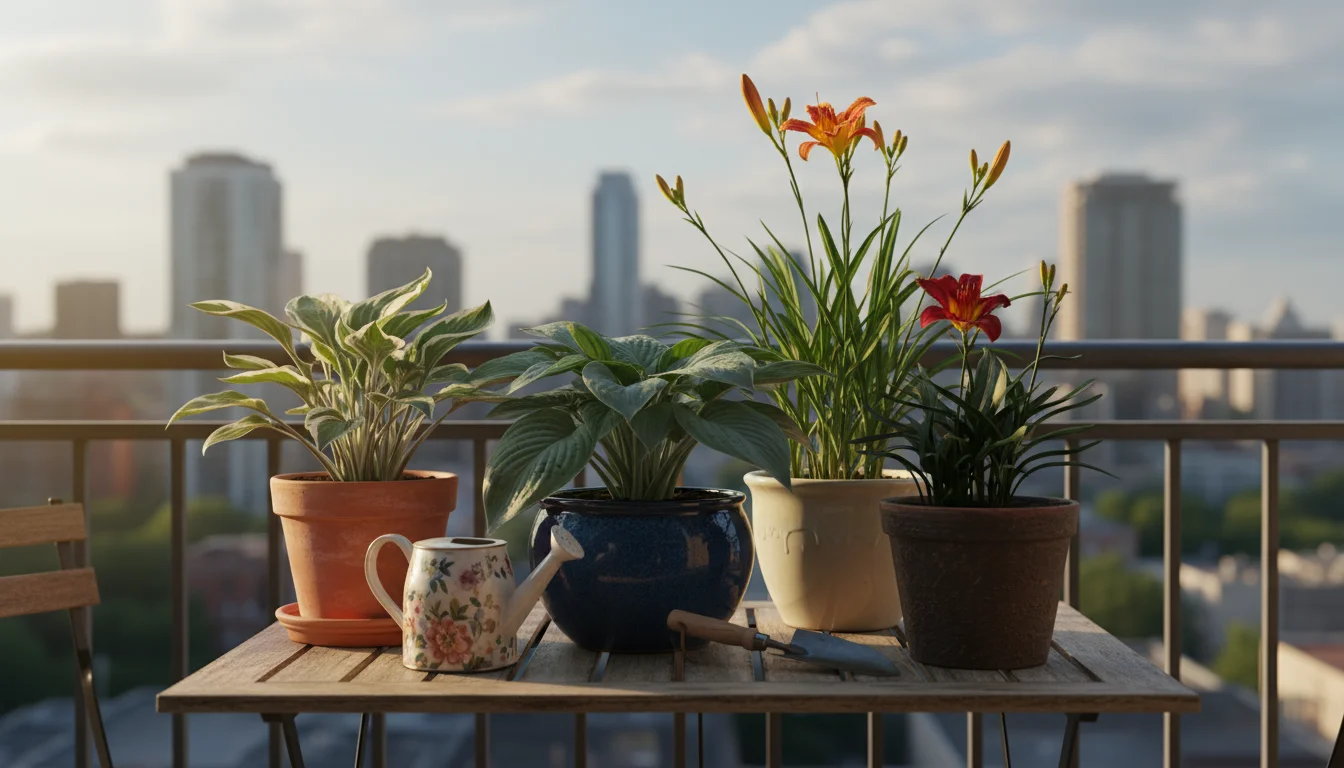
Do you look at your lush, overflowing potted perennials and wish you had more? Perhaps a few extra hostas to fill another shady corner, or some vibrant ornamental grasses to add texture to a different container display? Many gardeners believe they need to buy new plants to expand their collection, but you hold a secret weapon right in your containers. This spring, you unlock the power of division. Dividing perennials in pots gives you an abundance of new plants without spending a cent. It rejuvenates your existing plants, encourages healthier growth, and maximizes your small space garden. Think of it as spring cleaning for your pots, resulting in a thriving, expanded garden for free.

Why Divide Your Potted Perennials? The Benefits of Splitting Plants
Dividing perennials involves separating a large, mature plant clump into smaller, individual plants. Gardeners often consider this a fundamental spring garden task, especially when dealing with potted specimens. This simple technique offers a wealth of benefits that extend beyond simply getting free plants by dividing.
Learning which plants need replanting will make it much easier to decide which pots to tackle first.
Firstly, division provides an incredible opportunity for plant multiplication. One mature hosta, for example, easily yields two, three, or even more smaller plants. This significantly expands your garden or provides wonderful gifts for fellow gardeners. You save money by propagating potted plants you already own, a sustainable and budget-friendly approach to gardening.
Secondly, dividing perennials promotes plant health and vigor. Over time, many potted perennials become root-bound. This means their roots fill the entire container, circling around themselves, leaving little room for soil or nutrient uptake. An overcrowded plant struggles to absorb water and nutrients efficiently, leading to stunted growth, fewer flowers, and general decline. Dividing these plants alleviates this crowding, giving each new section fresh soil and ample space for root development. This rejuvenation results in stronger, healthier plants with improved flowering and foliage production.
Thirdly, division helps manage the size of your plants. In small-space gardens on balconies or patios, containers offer limited real estate. A perennial that grows too large for its pot becomes unwieldy and potentially unhealthy. Regular division keeps your plants appropriately sized for their containers, maintaining a tidy and balanced aesthetic. For instance, a large ornamental grass in a pot might overshadow other elements, but splitting it creates several manageable plants that fit perfectly within your design.
Finally, dividing plants can prevent the spread of diseases. When plants become overly dense, air circulation decreases, creating a humid microclimate that fosters fungal diseases. Separating the clumps improves air movement around the foliage and stems, reducing the risk of disease. This preventative measure ensures your garden remains vibrant and resilient.
Recognizing the Right Time and Signs for Division
Timing is crucial for successful perennial division. For most potted perennials, early spring stands as the ideal period. This occurs just as new growth emerges, but before the plant expends significant energy on leaf and flower production. Dividing in early spring minimizes stress on the plant because it has not fully committed its resources to the current growing season. The cooler temperatures and typically moist soil conditions of spring also aid recovery.
While spring is the prime time for dividing, remember that planting winter-hardy perennials in autumn is another excellent way to ensure beautiful returning blooms year after year.
For additional timelines and seasonal strategies, reference a comprehensive spring planting guide for container gardeners to keep your layout on track.
While spring is generally best, you recognize specific signs that tell you a plant needs division, regardless of the calendar. Look for these indicators:
- Decreased Vigor: Your once-thriving plant now appears less robust, producing fewer or smaller leaves and flowers than in previous years. The plant literally runs out of room to grow vigorously.
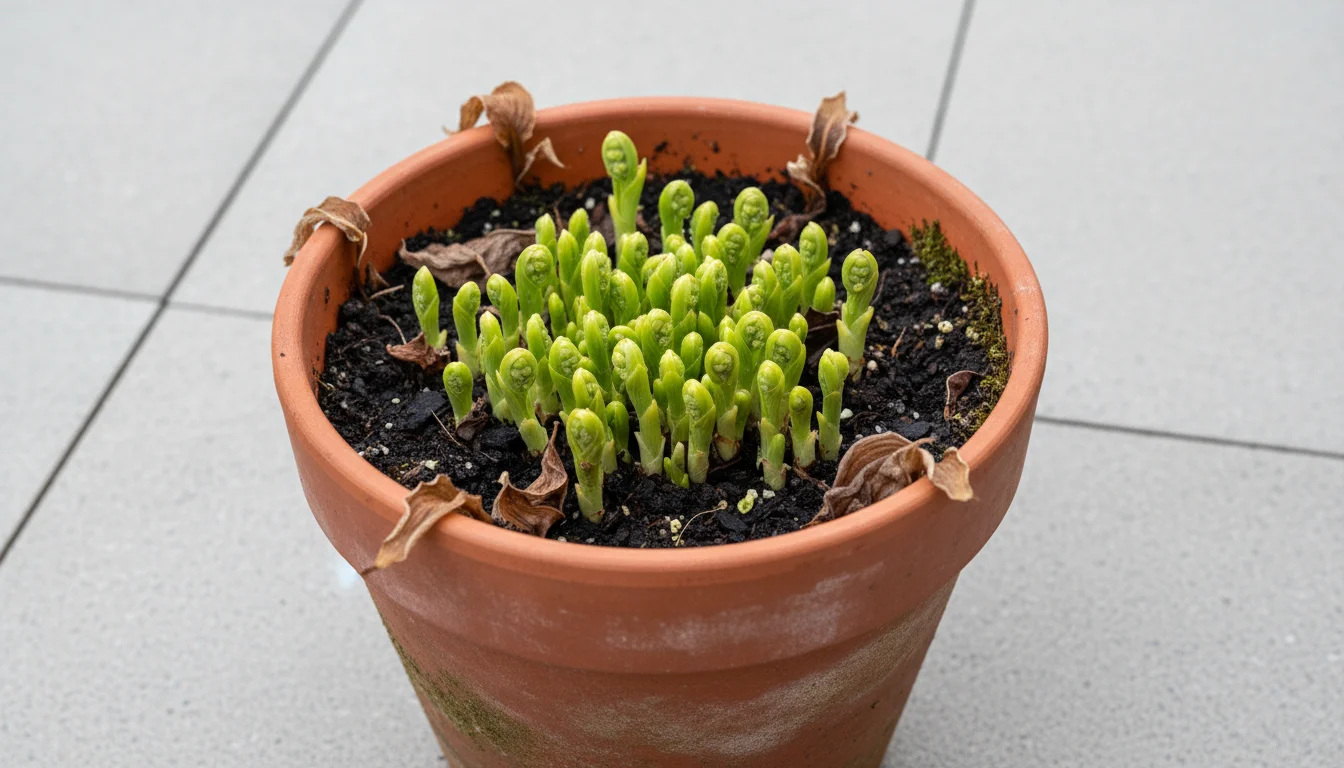
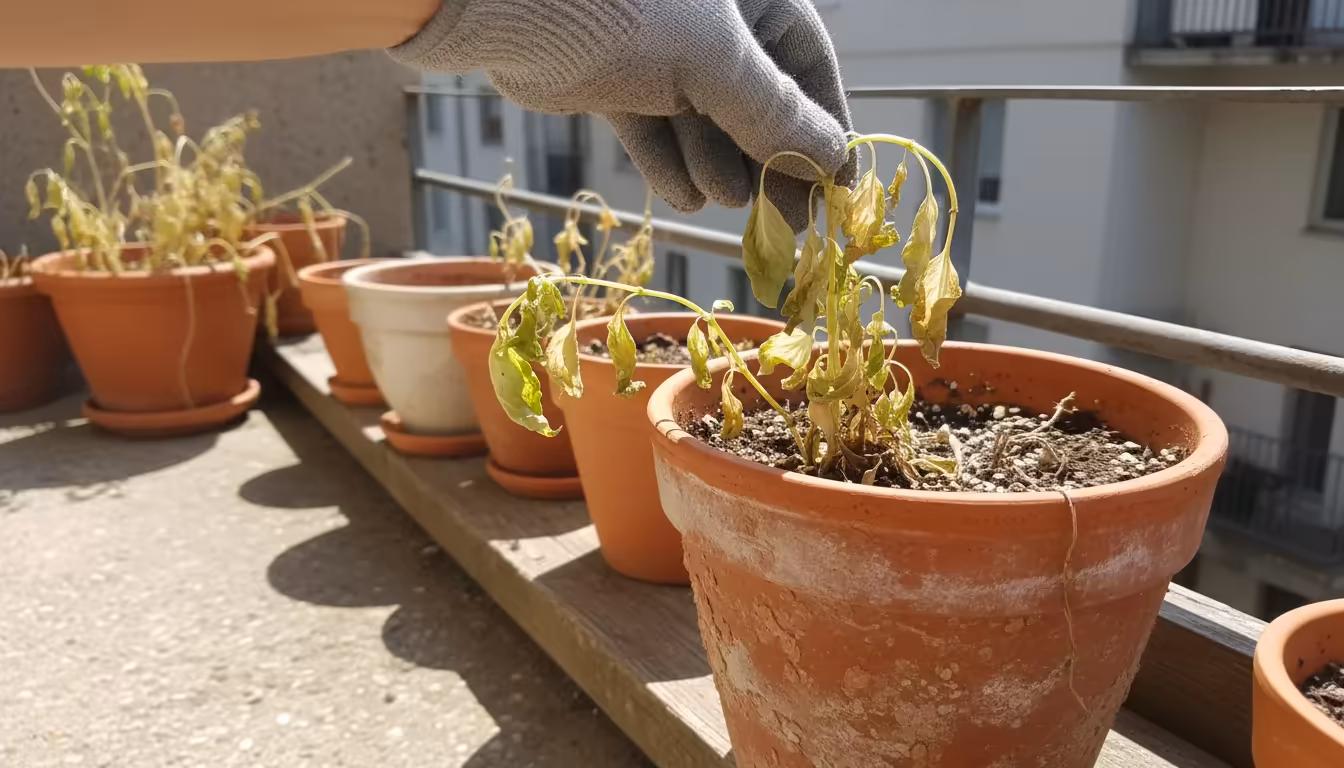
- Bare Center or Dying Out: Many clump-forming perennials, such as ornamental grasses or hostas, develop a “donut” shape where the center of the plant dies out, leaving a ring of growth around the edges. This signifies severe overcrowding and signals an urgent need for division.
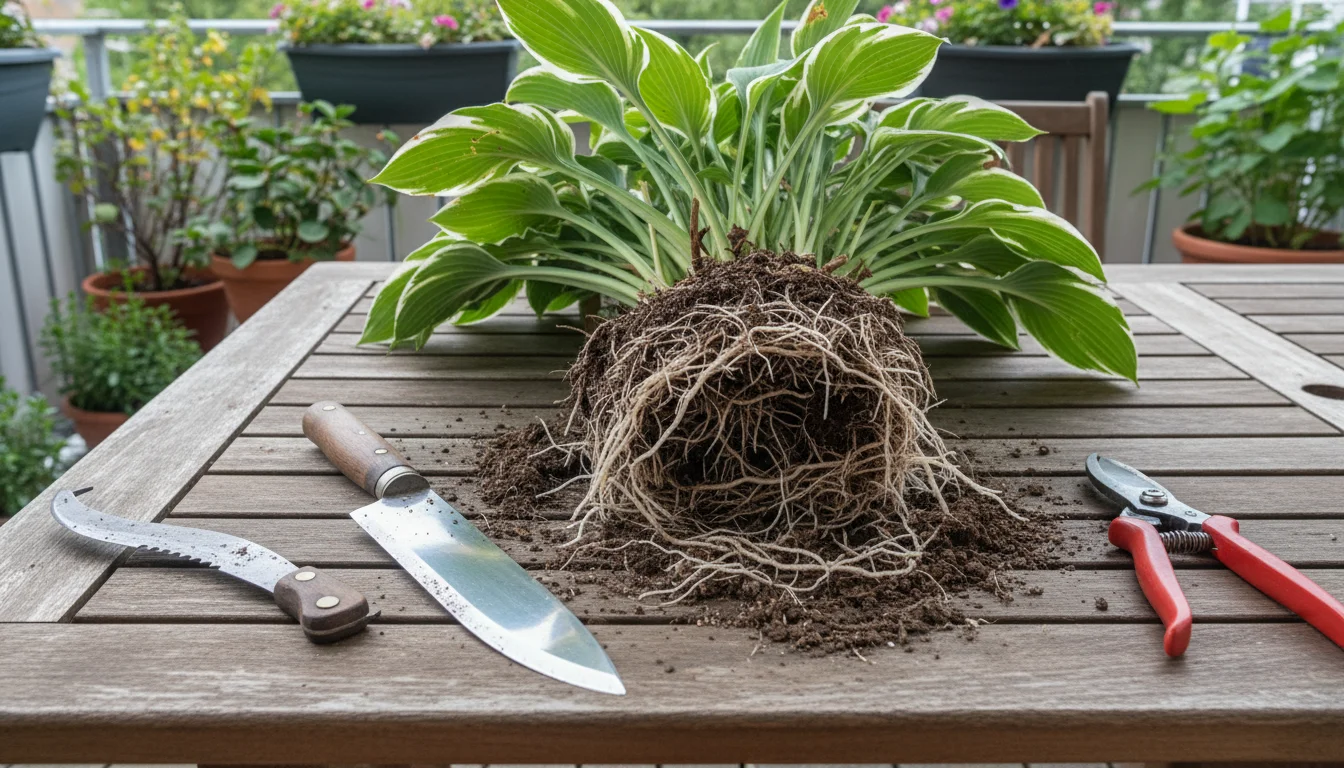
- Roots Circling the Pot: If you carefully lift the plant from its container, you will likely see a dense mat of roots encircling the inside of the pot. This indicates the plant is root-bound and desperately needs more space.
- Reduced Flowering: Perennials that previously flowered prolifically suddenly produce fewer blooms or smaller flowers. The plant lacks the energy and resources to support abundant flowering due to root congestion.
- Watering Issues: You find your plant dries out much faster than it used to, even with regular watering. The dense root ball leaves little space for soil to retain moisture effectively. Conversely, water might sit on the surface and drain slowly because the roots obstruct water movement.
For specific plants, this means knowing their growth patterns. When to split ornamental grasses in pots typically aligns with these visual cues in early spring. Similarly, how to divide hostas in a container focuses on the plant’s emergence in spring. Observing your plants closely helps you determine the perfect moment for this beneficial spring garden task.
Essential Tools for a Successful Perennial Division
Having the right tools makes the division process smoother and more efficient, reducing stress on both you and your plants. You do not need an arsenal of specialized equipment, but a few key items significantly improve your chances of success.
This is also a great time to inspect your storage and perform a thorough container garden declutter so you only keep the best pots for your new divisions.
Prepping these tools is a crucial phase of waking up your balcony pots after winter to ensure healthy new root growth.
Here are the essential tools you need:
- A Sturdy Trowel or Hori-Hori Knife: For smaller plants, a sharp trowel helps loosen soil around the edges of the pot. A hori-hori knife, with its serrated and sharp edges, proves exceptionally useful for cutting through smaller root masses and getting plants out of pots.
- Sharp Knife or Pruning Shears: A clean, sharp knife (like a kitchen knife you reserve for gardening) or sturdy pruning shears makes precise cuts through the root ball. Clean cuts minimize damage and reduce the risk of disease entering the plant.
- Root Saw or Garden Fork (for tough clumps): Some perennials, especially mature ornamental grasses or daylilies, develop incredibly dense, woody root systems. For these, a root saw (a small, robust saw designed for cutting roots) or even a sturdy garden fork becomes indispensable. You use the fork to pry apart the root ball, leveraging the tines to separate sections.
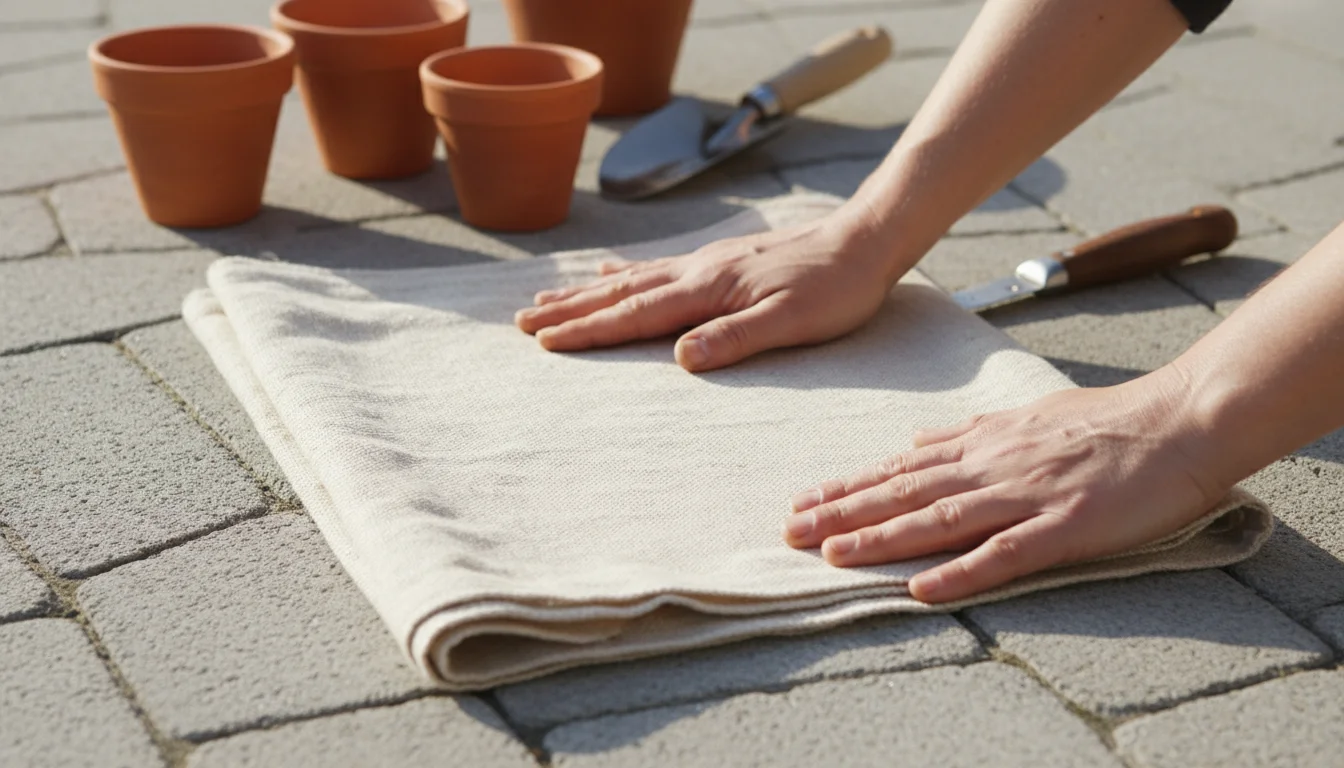
- Tarp or Old Sheet: Laying a tarp or old sheet down before you start protects your workspace from spilled soil and plant debris. This makes cleanup significantly easier.
- Watering Can: You need to water the mother plant before division and thoroughly water the new divisions afterward. A watering can provides a gentle, controlled flow.
- New Pots: Ensure you have appropriately sized new containers for your divisions. Each division needs enough space for its roots to grow comfortably. Often, you can repot the original plant back into its cleaned, original pot, and then use smaller pots for the divisions.
- Fresh Potting Mix: High-quality, well-draining potting mix is vital for your newly divided plants. Fresh soil provides essential nutrients and ensures proper drainage. Drainage refers to how easily water moves through the soil, preventing roots from sitting in soggy conditions.
- Gloves: Protect your hands from dirt, thorns, or irritating plant sap.
Always clean and sharpen your tools before and after use. A quick wipe with rubbing alcohol or a bleach solution prevents the transfer of diseases between plants.
Step-by-Step Guide: How to Divide Your Potted Perennials
Dividing your potted perennials is a straightforward process when you follow a clear set of steps. This practical “how-to” guide walks you through each stage, ensuring you achieve successful propagating potted plants for your garden.
Once your divided plants are safely repotted, remember to plan their first feed of spring to support their transition and boost growth.
Step 1: Hydrate Your Plant
Water the perennial thoroughly a day or two before you plan to divide it. A well-hydrated plant experiences less stress during the division process and recovers more quickly. Avoid watering immediately before, as wet soil adds unnecessary weight and mess.
Step 2: Prepare Your Workspace
Lay down a tarp or old sheet in your designated work area. This makes cleanup easy and provides a clean surface to work on. Gather all your tools: trowel, knife, root saw (if needed), new pots, and fresh potting mix. Fill your new pots partway with fresh potting mix; this speeds up the repotting process.
Step 3: Remove the Plant from its Pot
Gently remove the plant from its container. For smaller pots, you might turn the pot on its side, tap the rim against a firm surface, and gently slide the plant out. For larger, heavier pots, it helps to enlist an extra pair of hands if possible. If the plant resists, use your trowel or hori-hori knife to carefully loosen the soil around the inner edge of the pot. Avoid pulling the plant by its stems; instead, grasp the base of the plant firmly and ease it out. If it is stubborn, you may need to lay the pot on its side and use your foot to gently push on the side of the pot to loosen the soil and root ball.
Step 4: Inspect and Loosen the Root Ball
Once out of the pot, you see a dense mass of roots. Carefully examine the root ball. Gently tease apart any loose soil and roots with your fingers. This helps you identify natural divisions and potential weak points where the plant wants to split. For extremely root-bound plants, you might need to use your trowel or a hori-hori knife to cut some of the encircling roots to begin to open up the root ball.
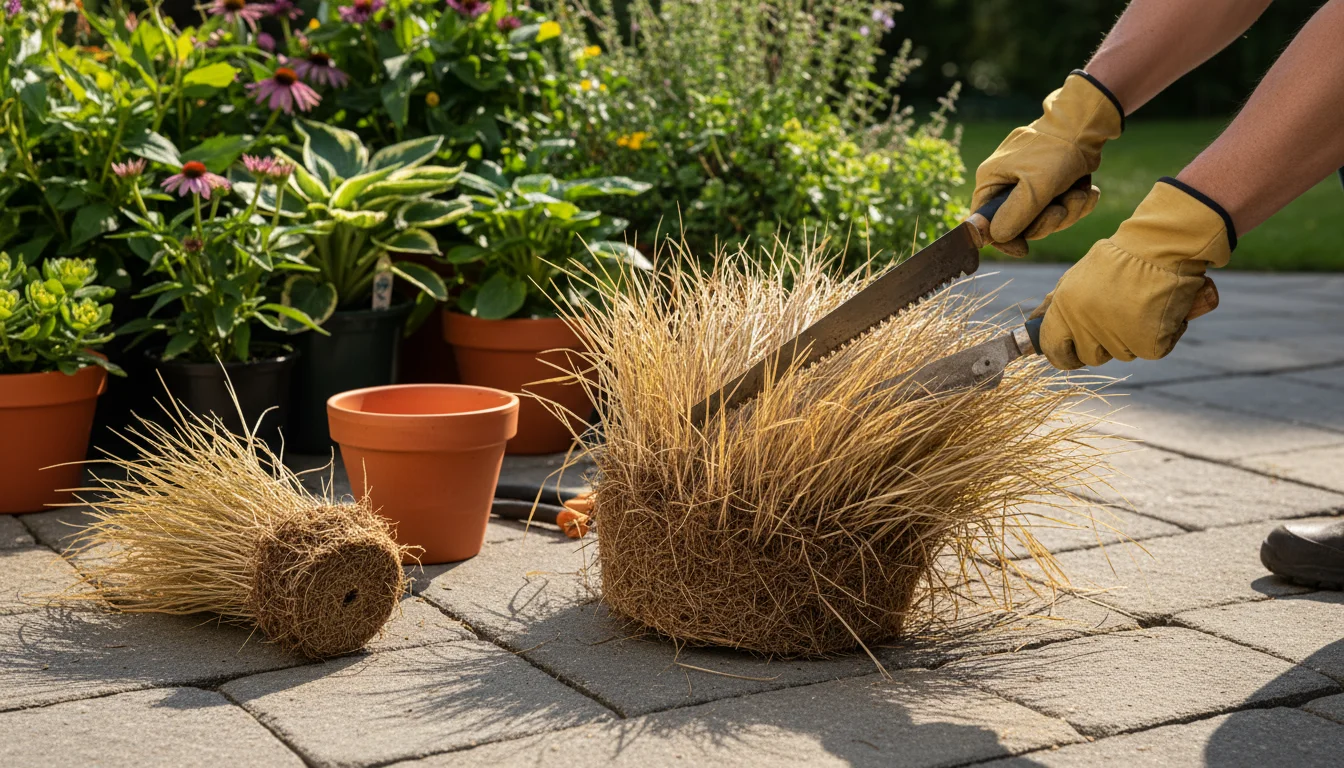
Step 5: Divide the Plant
This is the “divide and conquer” step. You have several methods for dividing, depending on the plant’s root structure:
- Hand Division: For plants with looser, fibrous root systems (like some hostas or coral bells), you often pull the clump apart with your hands. Look for natural sections or “crowns” each with roots and foliage. Gently but firmly pull these sections apart.
- Knife or Pruners: For plants with slightly denser root systems that resist hand pulling, use a sharp knife or strong pruning shears. Identify clear divisions where you can cut through the root ball cleanly. Aim to create divisions with a good amount of roots and at least one “eye” or growing point for future foliage.
- Root Saw or Garden Fork: When faced with very tough, woody root balls (common with mature ornamental grasses, daylilies, or sometimes sedum), a root saw or a garden fork becomes necessary. Place the root ball on your tarp. Position the saw or fork where you want to make a division, and apply downward pressure, wiggling or sawing until the clump separates. You may need to use a significant amount of force here.
Aim for divisions that are a reasonable size, not too small. Each division needs a healthy portion of roots and at least one to three growing points. Very small divisions struggle to establish themselves. For example, a hosta division should have at least two to three “eyes” (buds from which new leaves emerge).
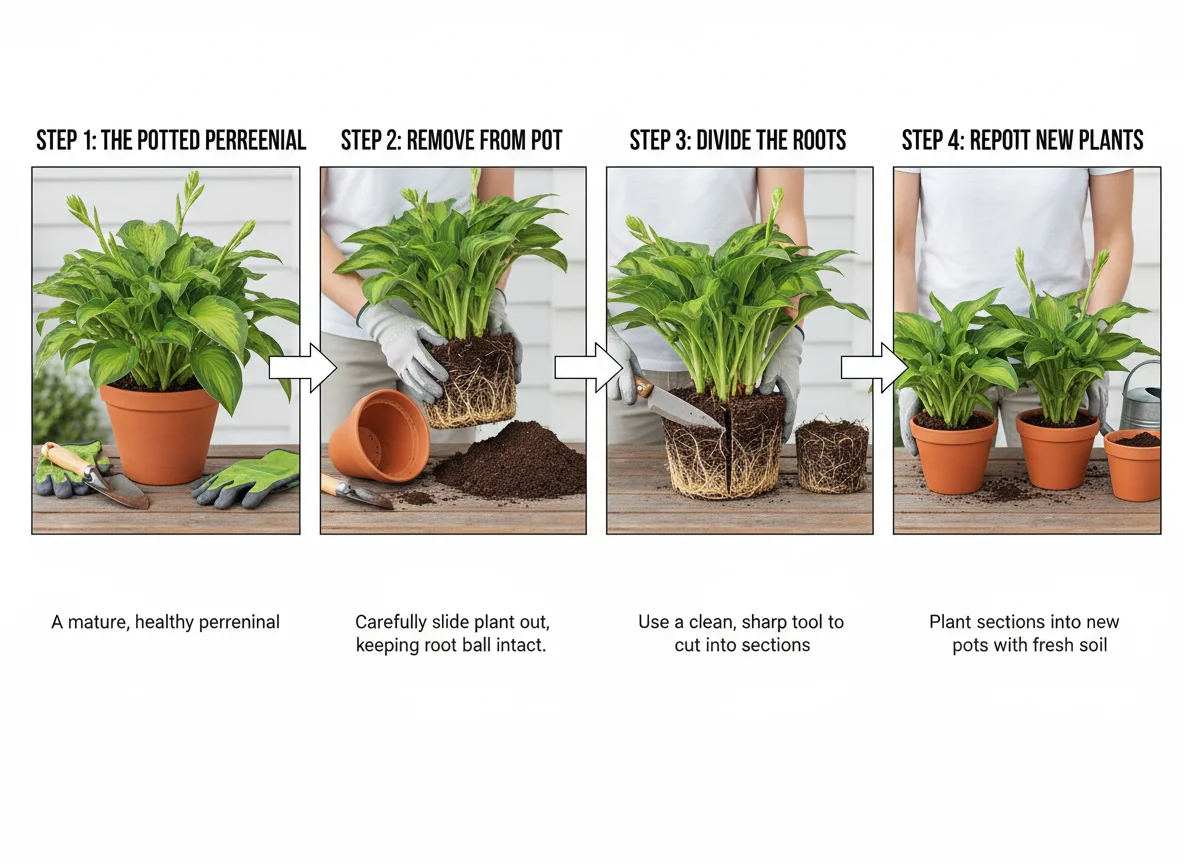
Step 6: Repot Your Divisions
Immediately repot your new divisions into their prepared containers. Ensure the crown (where the stems meet the roots) sits at the same level as it did in the original pot. Backfill with fresh, well-draining potting mix, gently firming the soil around the roots to eliminate air pockets. Leave about an inch of space between the soil surface and the rim of the pot to allow for watering.
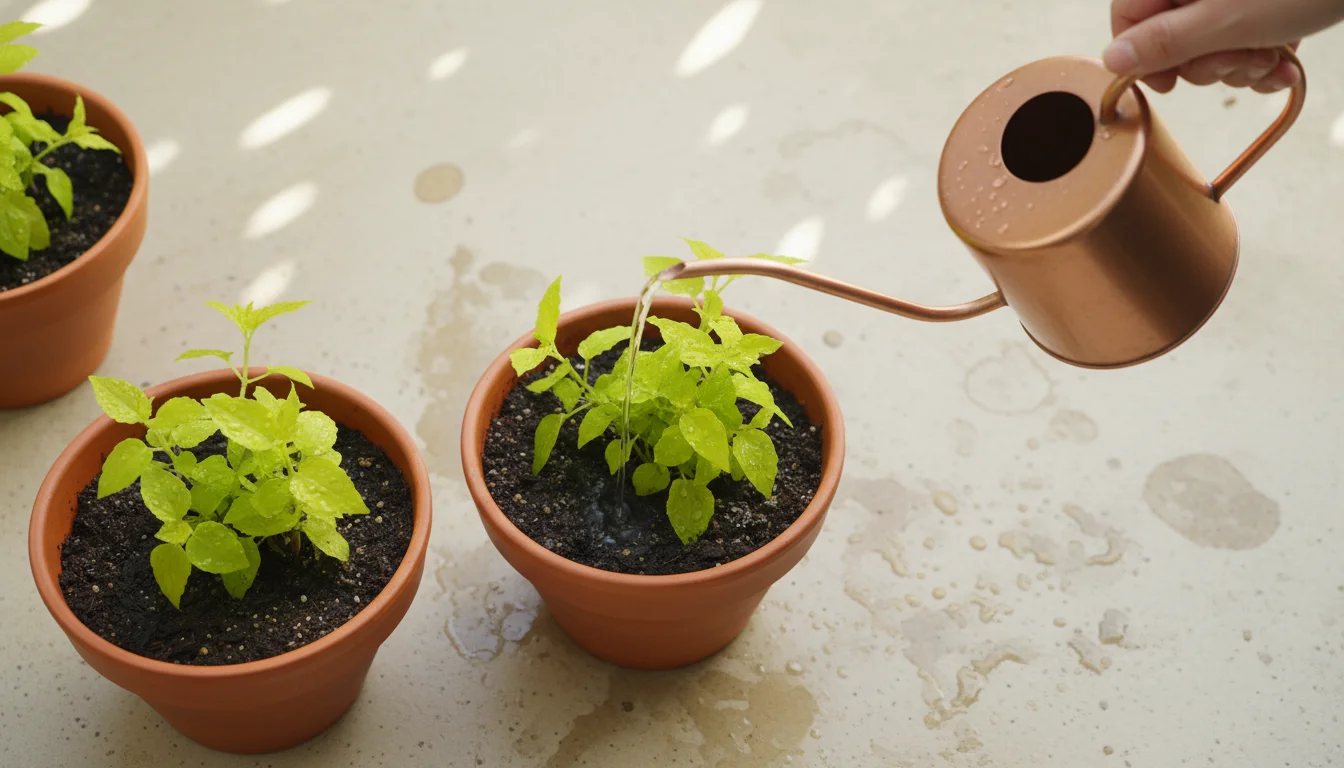
Step 7: Water Thoroughly
Water all your newly potted divisions thoroughly. This helps settle the soil around the roots and provides much-needed hydration. Water until you see it draining from the bottom of the pots.
Step 8: Initial Aftercare
Place your newly potted divisions in a sheltered location, away from direct, harsh sun for the first week or two. This allows them to recover from the shock of division without added environmental stress. Keep the soil consistently moist, but not soggy.
Specific Plant Considerations: Dividing Hostas, Ornamental Grasses, and More
While the general steps for dividing perennials in pots apply widely, some plants have specific characteristics that influence your approach. Knowing these nuances helps you tailor your technique for optimal results. This section gives you practical advice for how to divide hostas in a container, when to split ornamental grasses in pots, and other common potted perennials.
Here is a guide to common potted perennials and their division specifics:
| Plant Type | Best Time for Division | Key Division Technique | Important Notes |
|---|---|---|---|
| Hostas | Early spring, just as new “eyes” emerge. | Often hand-pulled or using a sharp knife. | Very forgiving. Ensure each division has 2-3 “eyes” and a healthy root system. They recover quickly. |
| Ornamental Grasses (e.g., Fountain Grass, Blue Fescue) | Early spring, before new growth becomes extensive. | Requires a root saw, sturdy knife, or garden fork. Their root systems are often very dense and fibrous. | Be prepared for a tough job. You may need to apply significant force. Remove any dead centers. |
| Daylilies | Early spring or late summer/early fall. Spring is preferable for potted plants. | Hand-pulling or sharp knife. | Their fleshy roots are relatively easy to separate. Trim foliage back to 6-8 inches before dividing. |
| Coral Bells (Heuchera) | Early spring. | Sharp knife or strong pruners. Their crowns can become woody. | Replant with the crown slightly above the soil line to prevent rot. Remove woody, spent stems. |
| Sedum (Stonecrop) | Early spring. | Sharp knife or hand-pulling for smaller varieties. Larger sedums may need more force. | Resilient and easy to divide. Ensure each division has some roots and a few healthy stems. |
| Bleeding Hearts (Dicentra spectabilis) | Early spring, just as new shoots appear. | Careful hand separation or sharp knife. | They resent disturbance. Only divide when absolutely necessary. Ensure each piece has a healthy tuber or root section. |
When you divide plants like ornamental grasses, you often find the center of the clump has died back and become woody. This dead material provides no benefit to the plant and should be discarded. Focus on replanting the vigorous outer sections. With hostas, you aim to get clean breaks, ensuring each division has a good root system and at least one “eye” from which new leaves will sprout. These specific considerations give you the confidence to tackle a variety of perennials, making propagating potted plants a rewarding skill.
Post-Division Care: Nurturing Your New Plant Starts
Dividing perennials puts a temporary stress on the plants. Proper aftercare ensures your new divisions establish quickly and grow into healthy, thriving additions to your garden. Think of them as baby plants that need a little extra attention during their first few weeks.
Once these young plants are established, you will need to protect them during the colder months; learning overwintering techniques for container plants will ensure your new divisions survive the winter.
Immediate Watering: You already watered them thoroughly after potting, but continue to monitor soil moisture closely. New divisions have a reduced root system and dry out faster. Keep the soil consistently moist, but never waterlogged. Stick your finger into the soil; if it feels dry an inch or two down, it is time to water again. Good drainage is key; excess water should flow freely from the pot’s bottom holes.
Light and Location: For the first one to two weeks, place your newly divided plants in a sheltered location with partial shade. This protects them from intense sun and wind, which can quickly dehydrate and stress struggling roots. Once they show signs of new growth and appear to have recovered, you can gradually move them to their permanent, appropriate light conditions.
Fertilization: Resist the urge to fertilize immediately. The fresh potting mix provides ample nutrients for the initial establishment phase. Applying fertilizer too soon can burn delicate new roots. Wait at least three to four weeks, or until you see robust new growth, before applying a balanced, slow-release granular fertilizer or a half-strength liquid fertilizer. Follow product instructions carefully.
Monitoring for Stress and Pests: Regularly inspect your new divisions for signs of stress, such as wilting, yellowing leaves, or drooping. While some initial wilting is normal, persistent wilting indicates a problem with watering or root establishment. Also, check for pests. Stressed plants are more susceptible to insect attacks. Address any pest issues promptly with appropriate organic solutions.
Hardening Off (if applicable): If you plan to move your divisions from a sheltered spot indoors or a greenhouse to full outdoor exposure, gradually acclimate them. This process, called “hardening off,” involves slowly exposing them to outdoor conditions over a week or two. Start with a few hours outdoors in a sheltered spot, increasing the duration and exposure to sun and wind each day until they are ready for their permanent home.
Consistent care during this recovery period significantly increases the success rate of your newly propagated potted plants. Patience pays off, as these small starts will soon fill out and bring joy to your garden.
Troubleshooting Common Division Challenges
Even with careful planning, you might encounter a few hiccups when dividing perennials. Knowing how to address these common issues helps you save your plants and learn from the experience.
If you find yourself with an accidental abundance of new pots, consult our guide on how to manage too many balcony plants for easy small-space placement strategies.
Challenge 1: Persistent Wilting After Division
- Check soil moisture: Ensure the soil stays consistently moist, but not waterlogged. Water frequently, especially in warmer weather.
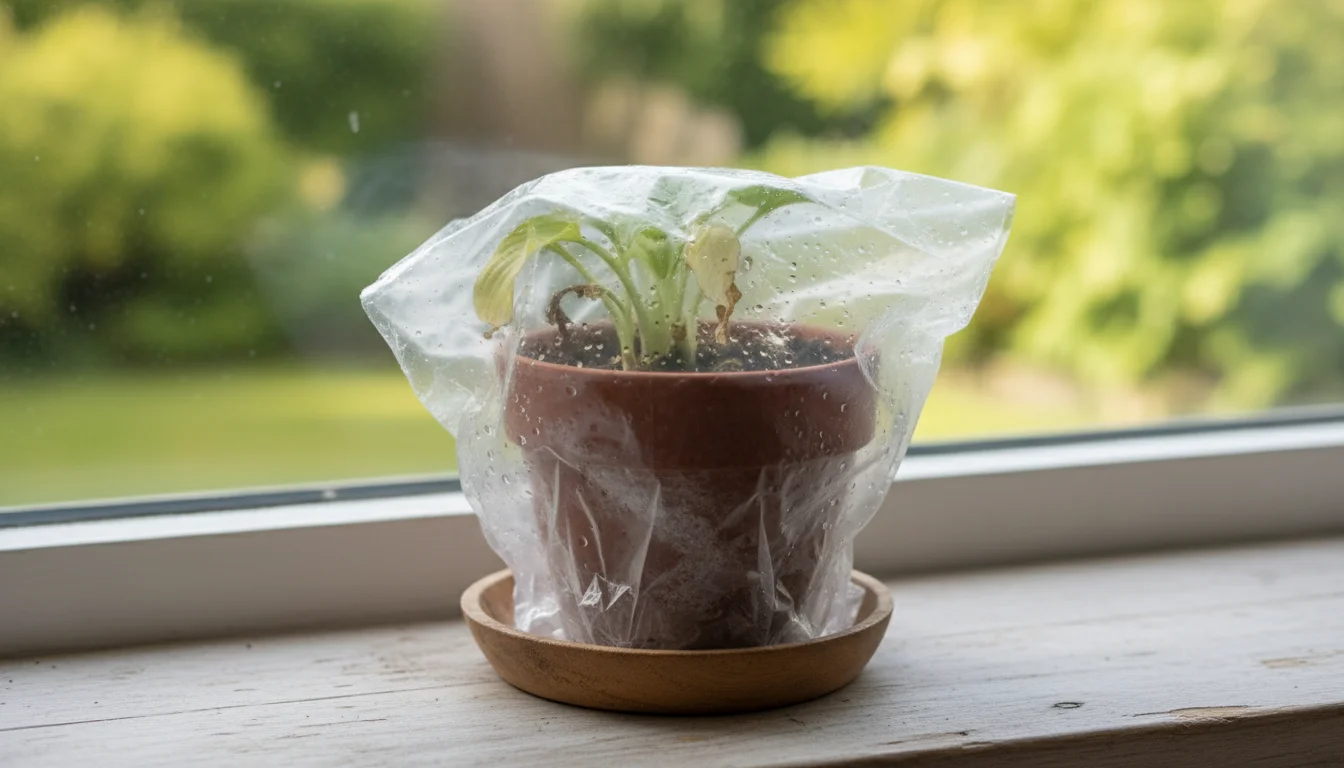
- Increase humidity: For very delicate plants, you can create a mini-greenhouse effect by placing a clear plastic bag loosely over the plant for a few days, ensuring the bag does not touch the foliage. This reduces moisture loss.
- Reduce foliage: If the plant has a lot of leaves, it might be losing too much moisture through transpiration. Trim back some of the larger leaves to reduce the burden on the compromised root system.
Challenge 2: No New Growth or Stunted Growth
- Review division size: Did you make the divisions too small, lacking sufficient roots or growing points? Very small divisions struggle to establish.
- Check soil and drainage: Ensure you used fresh, high-quality potting mix that drains well. Poor soil or soggy conditions inhibit root development.
- Assess light: Are the plants receiving appropriate light? Too much intense sun can stress them, while too little can prevent vigorous growth.
- Patience: Some plants take longer to establish than others. Give them time, consistent moisture, and proper light.
Challenge 3: Divisions Rotting
- Improve drainage: Ensure your pots have adequate drainage holes and that they are not blocked. You might need to repot into a pot with better drainage or amend the soil with more perlite or grit to improve aeration.
- Adjust watering: Allow the top inch or two of soil to dry out before watering again. Reduce watering frequency.
- Remove affected parts: If possible, carefully remove the plant, cut away any rotted sections with a sterile knife, and repot into fresh, drier soil.
Challenge 4: Tough, Tangled Root Ball
- Use stronger tools: Employ a root saw or a sturdy garden fork. You might need to be quite firm.
- Leverage: For a garden fork, insert it into the root ball and use it as a lever to pry sections apart.
- Be decisive: Sometimes a clean, strong cut with a sharp tool is less damaging than prolonged tearing or struggling.
Addressing these issues promptly increases your success rate and helps you confidently multiply your plants through dividing perennials in pots.
Creative Uses for Your Free Plants and Sustainable Practices
Dividing your potted perennials gives you an abundance of free plants, opening up exciting possibilities for your garden and promoting sustainable practices. This act of getting free plants by dividing goes beyond simple propagation; it becomes a cornerstone of eco-conscious gardening.
As you rearrange your new plants, think ahead to future seasons; using your end-of-season cleanup to redesign your balcony can help you plan your next propagation cycle.
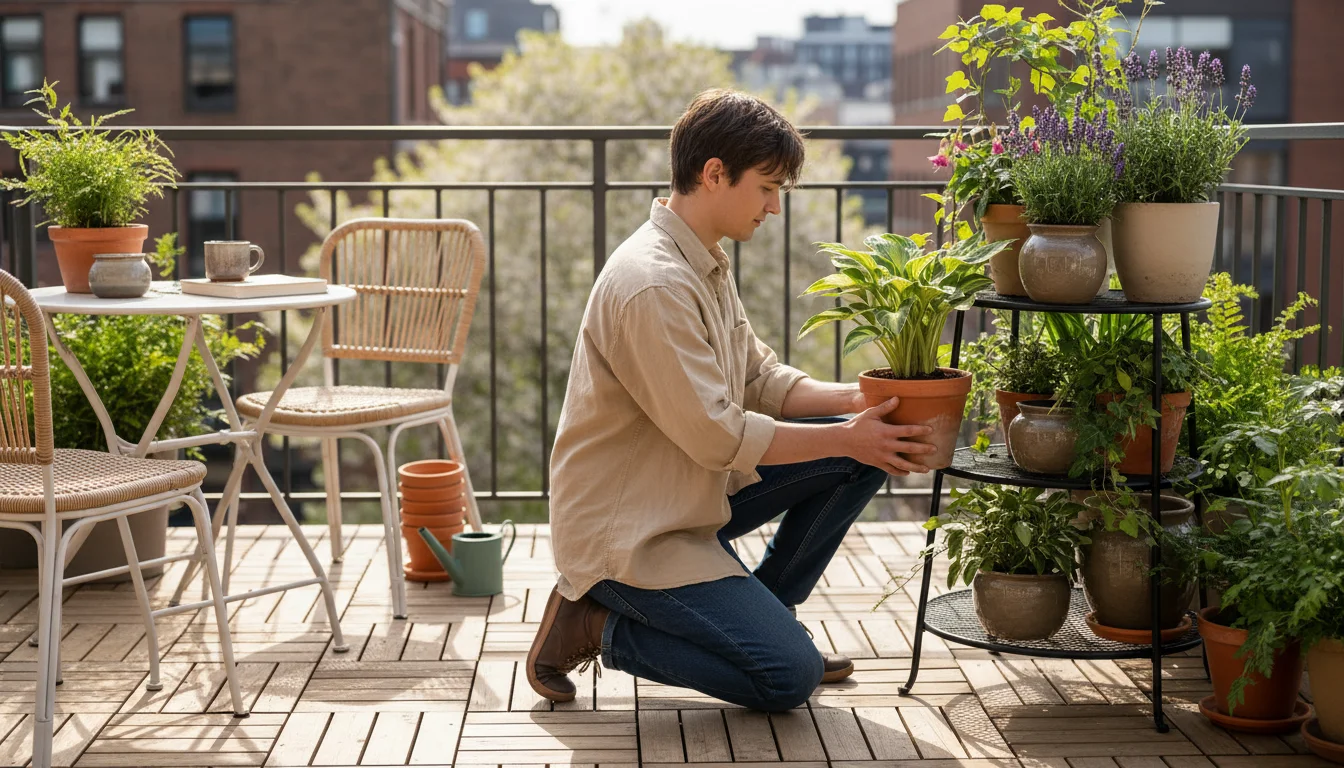
Expand Your Container Garden: The most obvious and satisfying use for your new divisions involves expanding your existing container garden. Fill empty pots, create multi-level displays, or add more greenery to previously bare corners of your balcony or patio. Imagine transforming one large hosta into several smaller ones, allowing you to create a cohesive, lush look across multiple pots in a shady spot. These new plants provide instant impact and help you achieve the garden aesthetic you desire without additional cost.
Share with Friends and Family: Gardening brings joy, and sharing that joy multiplies it. Your surplus divisions make thoughtful and personal gifts for fellow gardening enthusiasts. Imagine offering a friend a division of your favorite ornamental grass or a beloved coral bell. This fosters community and connects gardeners, promoting the exchange of plants and knowledge. It is a wonderful way to introduce someone to gardening or to help them expand their own plant collection.
Fill Small Garden Beds: If you have a small garden bed or a raised planter, your container divisions become perfect candidates for filling those spaces. Many perennials thrive equally well in containers or directly in the ground, provided they receive appropriate light and soil. This allows you to integrate your container garden with any small in-ground areas you possess, creating a more unified and expansive green space.
- Reduce Plastic Waste: Reusing your old pots for divisions or opting for terracotta and other durable materials further cuts down on plastic consumption.
- Recycle and Reuse: If you replace old potting mix, consider composting it rather than discarding it. Old soil still contains valuable organic matter.
- Conserve Resources: You leverage the natural reproductive capabilities of plants, an efficient and resource-friendly way to garden. This aligns perfectly with a low-maintenance and environmentally conscious gardening philosophy.
Embracing division transforms you from a plant consumer into a plant producer. You gain a deeper understanding of plant life cycles and develop a valuable skill that serves your garden for years to come. This approach truly embodies the spirit of practical, encouraging, and environmentally conscious gardening.
Frequently Asked Questions
How big should my divisions be?
Aim for divisions that are robust enough to establish themselves. For most perennials, this means each division should have a healthy section of roots and at least one to three “eyes” or growing points. Very small divisions may struggle to survive, while overly large ones defeat the purpose of creating more plants and might still be overcrowded in their new pot.
To keep your new divisions safe through their first cold season, you can also practice the trench and tuck overwintering method on a balcony.
Can I divide any perennial?
While many perennials benefit from division, not all are suitable. Generally, clump-forming perennials like hostas, daylilies, ornamental grasses, sedum, and coral bells divide well. Plants with taproots (like Baptisia or poppies) or woody stems (like lavender or rosemary) typically do not respond well to division. Always research your specific plant’s needs before attempting division.
What if my plant is really old and large?
Very old and large potted perennials often have extremely dense, woody root balls. You might need to use more robust tools, such as a root saw or a sturdy garden fork, to separate them. Do not be afraid to be firm. Focus on extracting the vigorous, healthy outer sections of the plant for division, discarding the spent or woody core.
Can I divide perennials in fall instead of spring?
While spring is generally ideal for dividing perennials in pots, some gardeners successfully divide certain plants in late summer or early fall, especially in milder climates. If you choose to divide in fall, do so at least 4-6 weeks before the first hard frost. This gives the new divisions enough time to establish some roots before winter dormancy. Fall division requires meticulous post-care to protect the young plants from harsh winter conditions.
How often should I divide my potted perennials?
The frequency depends on the plant’s growth rate and how quickly it outgrows its pot. Fast-growing perennials like some hostas or daylilies might benefit from division every 2-3 years. Slower-growing plants, or those that prefer to be undisturbed, may only need division every 4-5 years or even longer. Observe your plant for the signs of overcrowding mentioned earlier to determine when it needs attention.
Dividing your potted perennials is a rewarding gardening skill that brings multiple benefits. You gain new plants, rejuvenate existing ones, and contribute to a more sustainable gardening practice. With this practical guide, you possess all the knowledge needed to confidently tackle this spring garden task. Enjoy the abundance your efforts create!
For trustworthy gardening information, visit:
University of New Hampshire Extension — Yard & Garden, University of Maine Cooperative Extension — Gardening and University of Rhode Island Cooperative Extension — Gardening. These organizations provide expert, research-based advice for gardeners at all levels.
Disclaimer: This article is for informational purposes only and is not a substitute for professional gardening advice. Always consult local extension services or horticulture experts for region-specific guidance.


Leave a Reply