
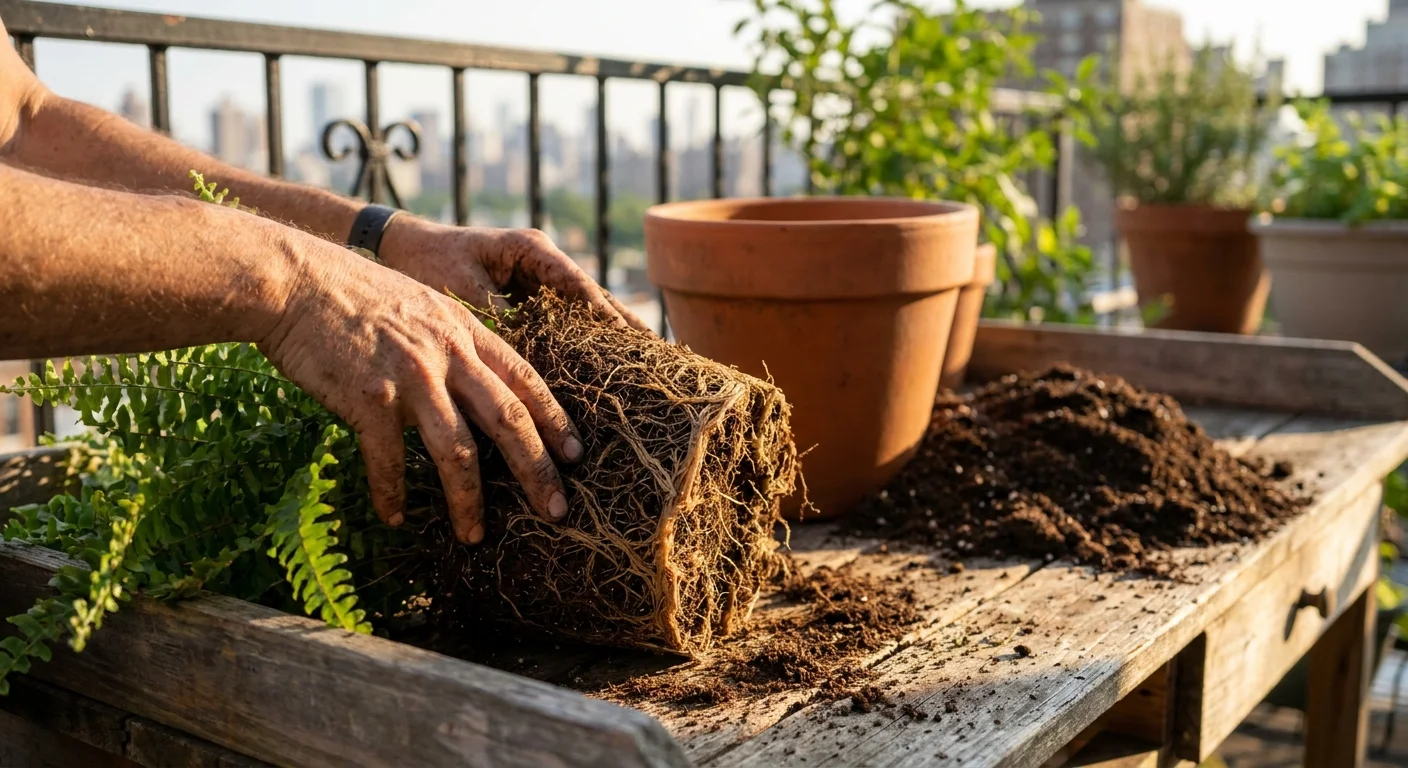
Your container garden will eventually run out of space, leaving roots cramped, soil depleted, and growth stunted—unless you take action. Replanting common plants revitalizes their root systems, replenishes vital nutrients, and maximizes your limited balcony or patio space.
Understanding exactly when to replant plants separates struggling pots from thriving green sanctuaries. You will discover exactly which species demand fresh soil and larger containers to survive, along with actionable techniques to transplant them without causing root shock.
From overgrown perennials bursting out of their pots to seasonal vegetables craving deeper soil, this comprehensive guide provides the exact steps needed to breathe new life into your container garden today.
In addition to soil nutrition, long-term success requires knowing how to overwinter container plants to protect their roots once the growing season ends.
Contents8 sections
- Why Replanting Matters for Small-Space Gardeners
- Spotting the Signs That Tell You When to Replant Plants
- Five Perennials and Herbs You Must Replant
- Five Container Vegetables and Annuals Requiring Regular Replanting
- Your Essential Plant Care Guide for Safe Transplanting
- Smart Garden Maintenance Tips During Replanting
- Sustainable Replanting Practices for Balconies and Patios
- Frequently Asked Questions
Why Replanting Matters for Small-Space Gardeners
Growing plants in containers on a balcony, patio, or small yard creates an artificial environment. While garden beds allow roots to stretch deeply into the earth in search of moisture and nutrients, a plastic or terracotta pot restricts that natural expansion.
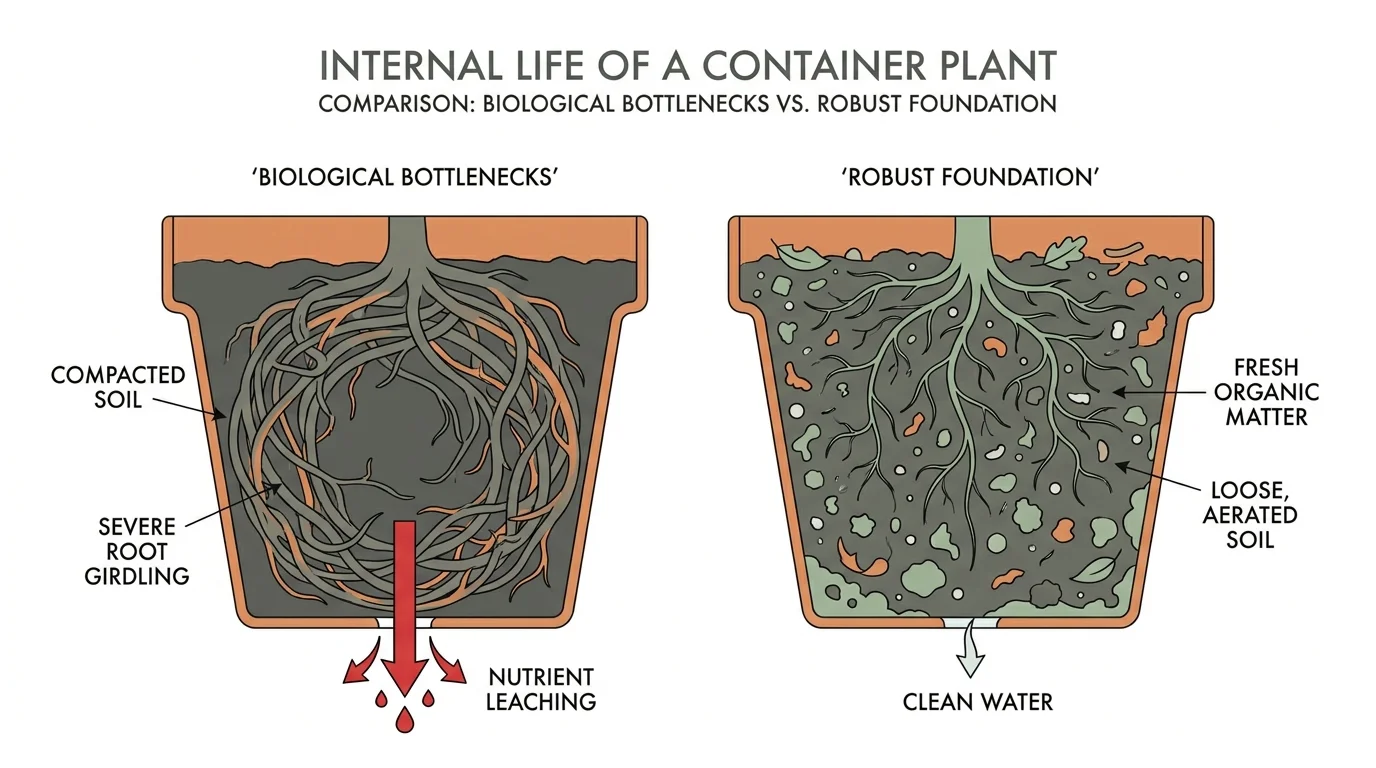
When you trap a plant inside a limited space, it eventually exhausts the available resources. The physical potting soil breaks down over time, compacting into a dense brick that starves the roots of vital oxygen.
Without proper aeration, water struggles to drain; this leads to root rot, suffocating your beloved greenery.
To simplify your maintenance routine, you might also explore native plants that thrive in containers as they often adapt better to restricted root environments.
Ignoring signs of root congestion is one of the most common balcony garden mistakes that can lead to premature plant death.
Engaging in regular garden plants replanting solves these biological bottlenecks. Upgrading a plant to a slightly larger container gives the root system room to explore, anchor the plant securely, and access fresh organic matter.
Furthermore, frequent watering leaches essential macro and micronutrients out of the drainage holes. By the time a plant has lived in the same container for a year or two, the soil functions merely as structural support rather than a nutrient-rich foundation.
Surrounding the root ball with fresh, high-quality potting mix reinstates the buffet of nutrients necessary for robust foliage and abundant blooms.
Replanting also gives you the perfect opportunity to inspect the subterranean health of your garden. You cannot see pests like root aphids, signs of fungal decay, or severe root girdling while the plant remains hidden in its original pot.
By pulling the plant from its container, you diagnose hidden ailments long before they manifest as yellowing leaves or dropping stems on the surface. Taking proactive control over your container environment guarantees long-term vitality for your small-space sanctuary.
Spotting the Signs That Tell You When to Replant Plants
Plants communicate their distress through physical symptoms. Learning to read these visual cues removes the guesswork from your gardening schedule.
Knowing exactly when to replant plants saves them from permanent physiological damage. You should inspect your potted plants at the beginning of spring and again in late summer, checking for the undeniable indicators that a container upgrade is overdue.
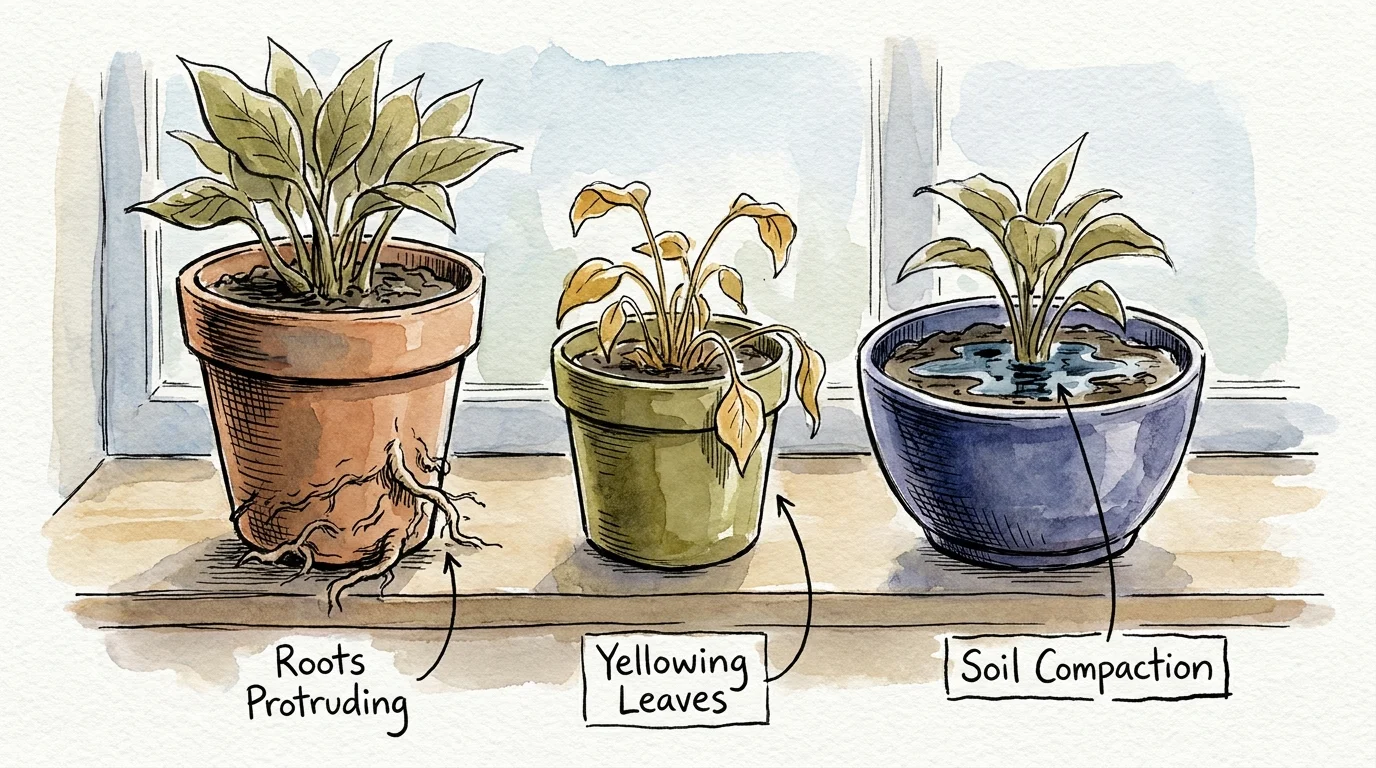
The most obvious physical sign of a cramped plant is root protrusion. Lift your pot and examine the drainage holes on the bottom.
If thick roots circle the bottom or poke through the plastic, the plant has exhausted its current real estate. This phenomenon, known as becoming root-bound, causes the roots to wrap around the inside of the pot in a tight coil.
Eventually, the roots strangle themselves, making it impossible for the plant to absorb water.
Pay close attention to how water behaves when you irrigate your containers. When potting soil becomes severely degraded and filled entirely by roots, it turns hydrophobic.
You will notice water pooling at the top of the soil, refusing to absorb, or running instantly down the interior sides of the pot and out the drainage holes without actually wetting the root ball.
This happens because the dense root mass leaves no porous pockets to hold moisture. If your plant wilts constantly despite frequent watering, a lack of soil volume is almost certainly the culprit.
Other critical warning signs include:
- Stunted top growth: The plant stops producing new leaves, or the new growth appears unusually tiny and fragile.
- Unexplained yellowing leaves: When the bottom leaves turn yellow and drop off despite proper watering and no visible pests, the plant is likely cannibalizing its oldest leaves for nitrogen because the depleted soil offers none.
- Top-heavy imbalance: A healthy plant can easily outgrow its container, becoming so physically large on top that a light breeze blows the entire pot over. Replanting into a wider, heavier base provides necessary structural stability.
- Soil recession: The soil level drops significantly below the rim of the pot over a single growing season as the organic matter decomposes and compresses.
Five Perennials and Herbs You Must Replant
Perennials and herbs form the backbone of many small-space gardens because they return year after year. However, this longevity means they quickly outgrow container constraints.
Replanting common plants in this category often involves division—a technique where you cut the plant into multiple smaller plants, instantly expanding your garden inventory for free.
Before you start digging, check out these clever gardening hacks that use common household items to make dividing and repotting a breeze.
1. Mint
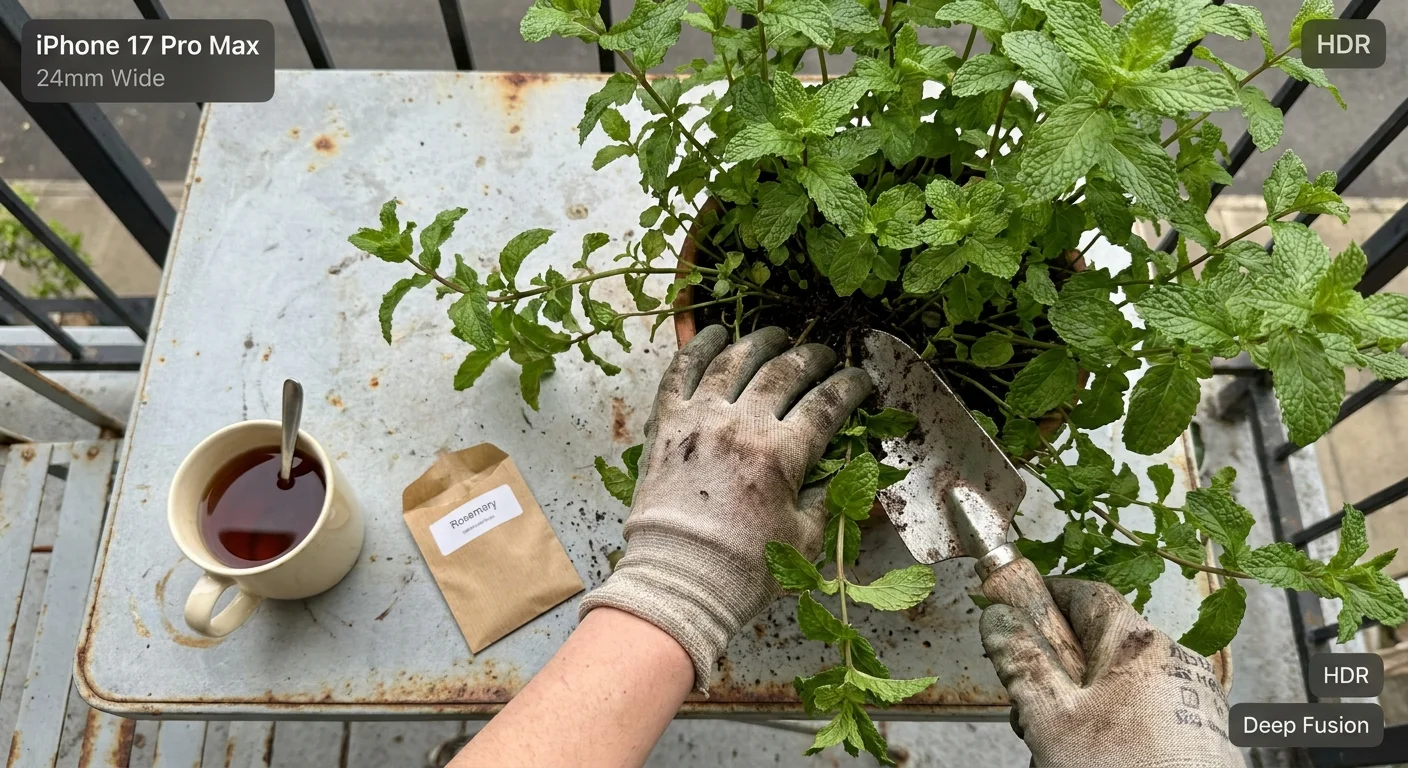
Mint grows via aggressive underground runners called rhizomes. If left alone in a container, these runners rapidly hit the walls, circle back on themselves, and choke out the main plant.
You must replant mint every single spring. Pull the thick, matted root ball out of its pot, take a sharp, serrated knife, and slice the root mass into quarters.
Discard the woody, dead center. Repot one healthy quarter back into the original container with fresh potting soil, and give the other three sections to neighbors.
This aggressive pruning stimulates vibrant, flavorful new growth.
2. Hostas
Hostas look spectacular in large, shaded patio planters, but their fleshy crowns multiply yearly. When you notice the center of your hosta looking bare while a crowded ring of smaller leaves forms around the edge, the plant is begging for division.
Dig up the entire clump during early spring before the leaves fully unfurl. Wash away the old soil so you can clearly see the individual crowns.
Carefully pry the root clumps apart with your hands or slice them cleanly with a spade. Replant the healthiest divisions into separate pots, ensuring the crown rests right at the soil surface.
3. Chives
This versatile kitchen herb grows in dense, grassy clumps. Over a few seasons, the tight grouping restricts airflow, causing the center of the clump to rot and die back.
Replanting chives revitalizes the foliage and encourages better flower production. Turn the pot upside down, extract the clump, and gently pull the bulbs apart.
Discard any squishy or decaying bulbs. Replant smaller clusters of ten to fifteen healthy bulbs into new containers using well-draining soil mixed with a handful of compost.
4. Daylilies
Daylilies adapt surprisingly well to large balcony containers, offering bright, trumpet-shaped blooms. However, container-bound daylilies cease blooming once their thick, tuberous roots fill the pot entirely.
If your daylily produces abundant foliage but refuses to flower, it is time to act. Remove the plant in early autumn, gently untangle the thick roots, and separate the fans—the individual leafy sections connected to a root system.
Repotting these smaller fans gives them the energy needed to produce prolific summer blooms the following year.
5. Aloe Vera
Aloe vera produces baby plants, commonly called “pups,” around the base of the mother plant. While they look charming, these pups drain energy and moisture from the parent.
When the pot gets crowded, carefully remove the entire aloe plant. Use a clean knife to sever the pups from the main taproot.
Let the cut ends dry out in a shaded spot for two days; this forms a protective callus over the wound to prevent fungal rot. Replant the mother aloe in fresh succulent mix, and pot the pups individually in small terracotta containers.
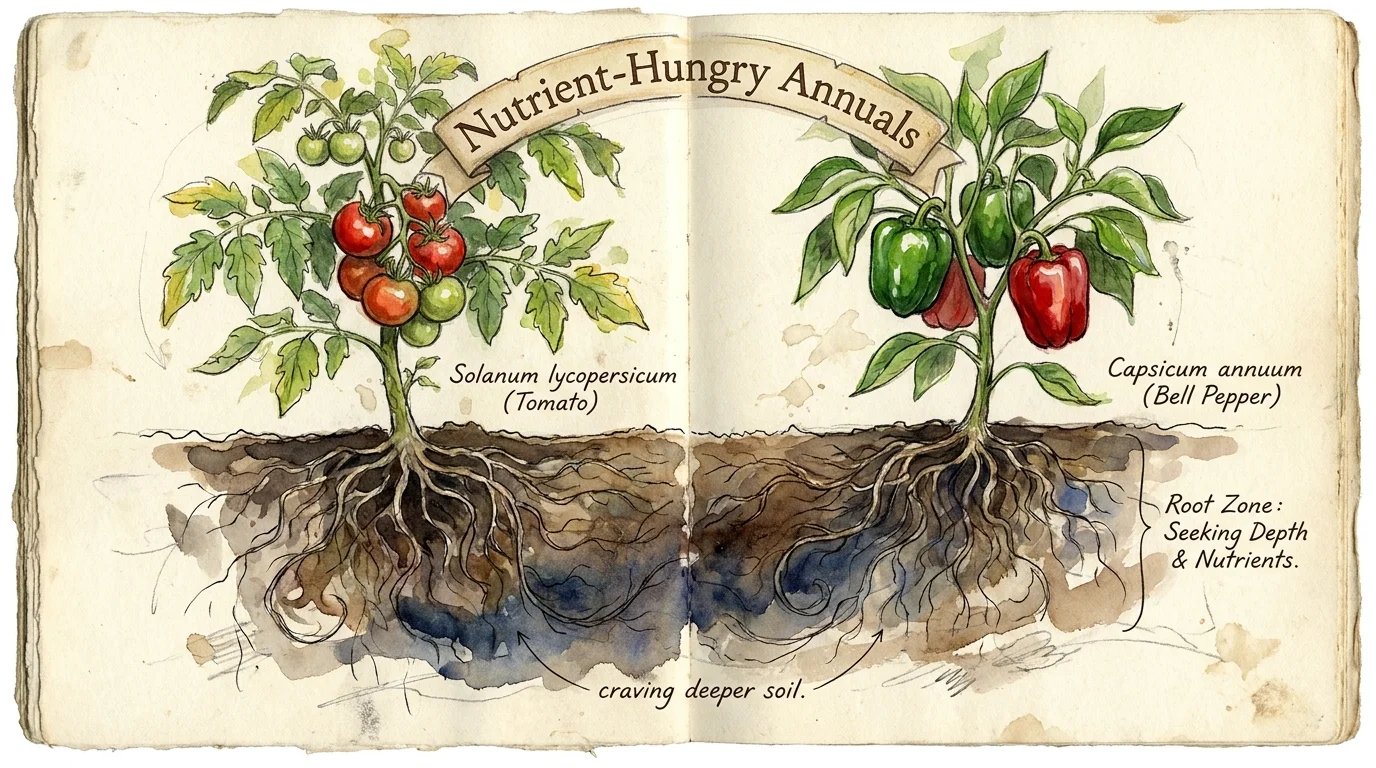
Five Container Vegetables and Annuals Requiring Regular Replanting
While annuals and vegetables live for a single growing season, they experience explosive growth phases. Purchasing these plants from nurseries or supermarkets requires immediate action.
Leaving them in their plastic nursery pots severely restricts your harvest.
Selecting the best vegetables to grow in pots ensures you get the most food possible from your small-space setup.
6. Tomatoes
Tomatoes require a unique replanting strategy because they grow adventitious roots—tiny hairs along the main stem that transform into strong structural roots when buried in soil.
When you buy a tomato seedling in a small plastic cup, you must replant it into a massive container—at least five to ten gallons.
Pinch off the lowest sets of leaves and bury the stem deep into the fresh soil, leaving only the top few inches of foliage exposed.
This deep replanting technique creates a massive underground root network capable of supporting heavy fruit and drawing up immense amounts of water during the hot summer.
7. Supermarket Basil
Those lush, bushy basil pots sold in grocery stores are actually a dozen individual seeds planted tightly together to look appealing on the shelf. If you leave them crowded in that small pot, they will rapidly consume all the water, yellow, and die.
To save supermarket basil, carefully slide the soil block out of the plastic sleeve. Place the root ball in a bowl of room-temperature water to gently tease the tangled roots apart.
Separate the clump into individual basil stems and replant them several inches apart in a wide window box. They will flourish into massive, productive bushes.
8. Strawberries
Strawberries present a dual challenge. First, the mother plants produce long runners that dangle over the edge of the pot.
You must pin these runners into fresh, small pots of soil until they root, then snip the connection to the mother plant. Second, strawberry crowns—the thick part where the leaves emerge—are incredibly sensitive.
When you replant purchased strawberries into permanent hanging baskets or balcony boxes, you must ensure the crown rests exactly above the soil line. Burying the crown causes it to rot, while leaving it too high dries out the roots.
9. Peppers (Bell and Jalapeño)
Peppers require stepping up in pot size gradually. If you move a tiny pepper seedling directly into a massive ten-gallon pot, the excess soil holds too much moisture, chilling the roots and stunting the plant.
Instead, practice incremental replanting. Move the nursery seedling into a one-gallon pot.
Once you see roots at the bottom drainage holes, replant it again into a three- or five-gallon final container. This gradual up-potting strategy keeps the soil warm and forces the plant to develop a dense, robust root system before focusing energy on fruiting.
10. Marigolds
Commonly sold in tightly packed plastic six-cells, marigolds arrive severely root-bound. You cannot simply pull them out and plop the cube of roots into a new pot.
The roots will continue growing in a square shape and fail to anchor properly. You must actively break the root memory.
Squeeze the plastic cell to pop out the marigold. Use your thumbs to gently tease and rip the bottom of the root mass, splaying the roots outward.
Replant them in your window boxes; this aggressive root handling forces the plant to send fresh growth laterally into the surrounding soil.
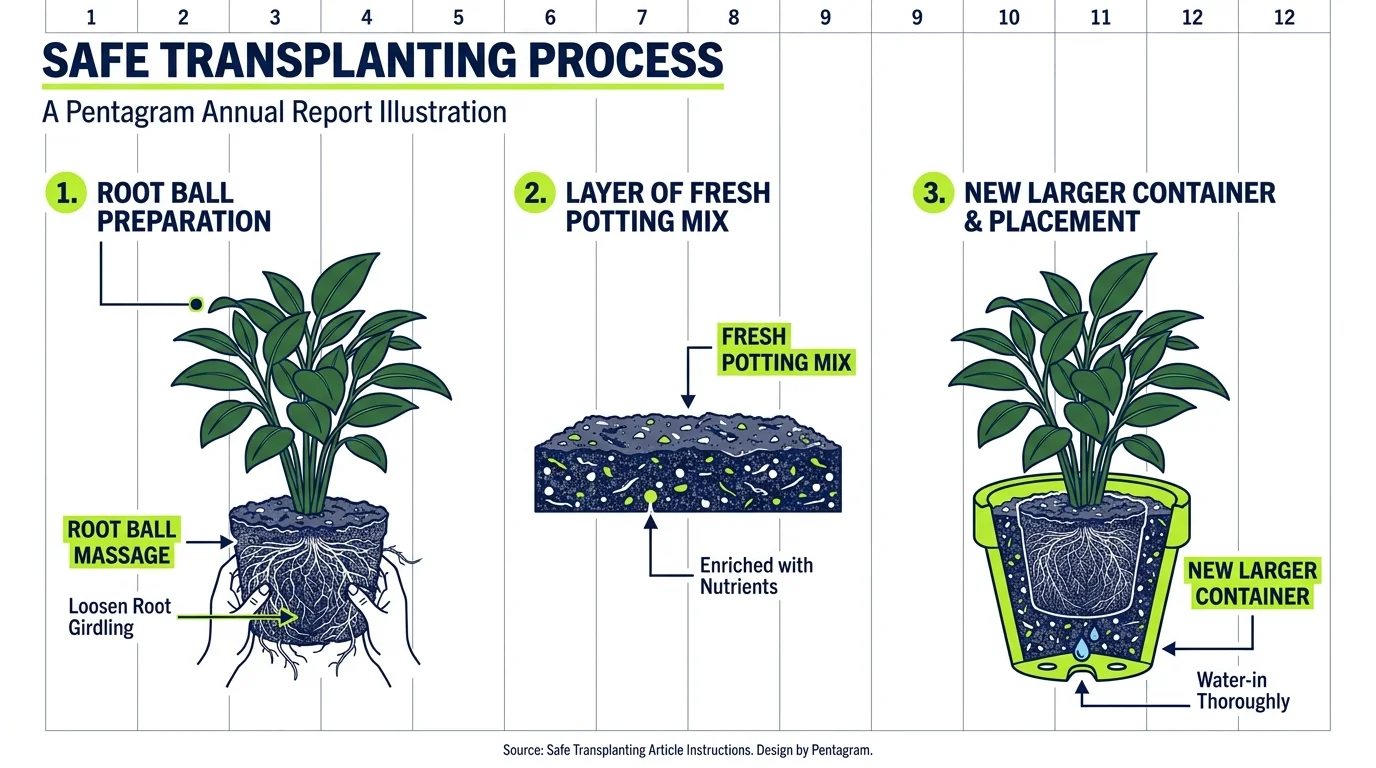
Your Essential Plant Care Guide for Safe Transplanting
Successfully relocating a plant without triggering severe transplant shock requires patience and proper technique. Transplant shock occurs when delicate feeder roots are damaged or exposed to dry air, causing the plant to droop dramatically and pause its growth.
Following a strict plant care guide during the transition minimizes this stress and encourages immediate establishment in the new home.
First, always water the plant thoroughly 24 hours before you plan to move it. Hydrated plant tissues resist the physical trauma of handling far better than dry, limp leaves.
Furthermore, moist soil holds together cleanly, allowing the root ball to slide out of the old pot intact rather than crumbling and tearing delicate root structures.
Next, prepare the destination pot before you ever touch the plant. The new container should be exactly one to two inches wider in diameter than the old pot.
Going too large surrounds the roots with soggy, unused soil that invites rot. Ensure the new pot possesses adequate drainage holes.
Place a layer of fresh, slightly moistened potting mix at the base of the new container so the plant will sit at the exact same depth it did previously.
To extract the plant, lay the old pot on its side. Never grab the stem and pull forcefully; this tears the roots from the base of the plant.
Instead, squeeze the sides of the flexible plastic pot, or tap the sides of a solid terracotta pot with the heel of your hand to break the soil’s suction. Gently slide the root ball out while supporting the main stem with your fingers.
Examine the root system immediately. If the roots form a solid, circling mass, you must loosen them.
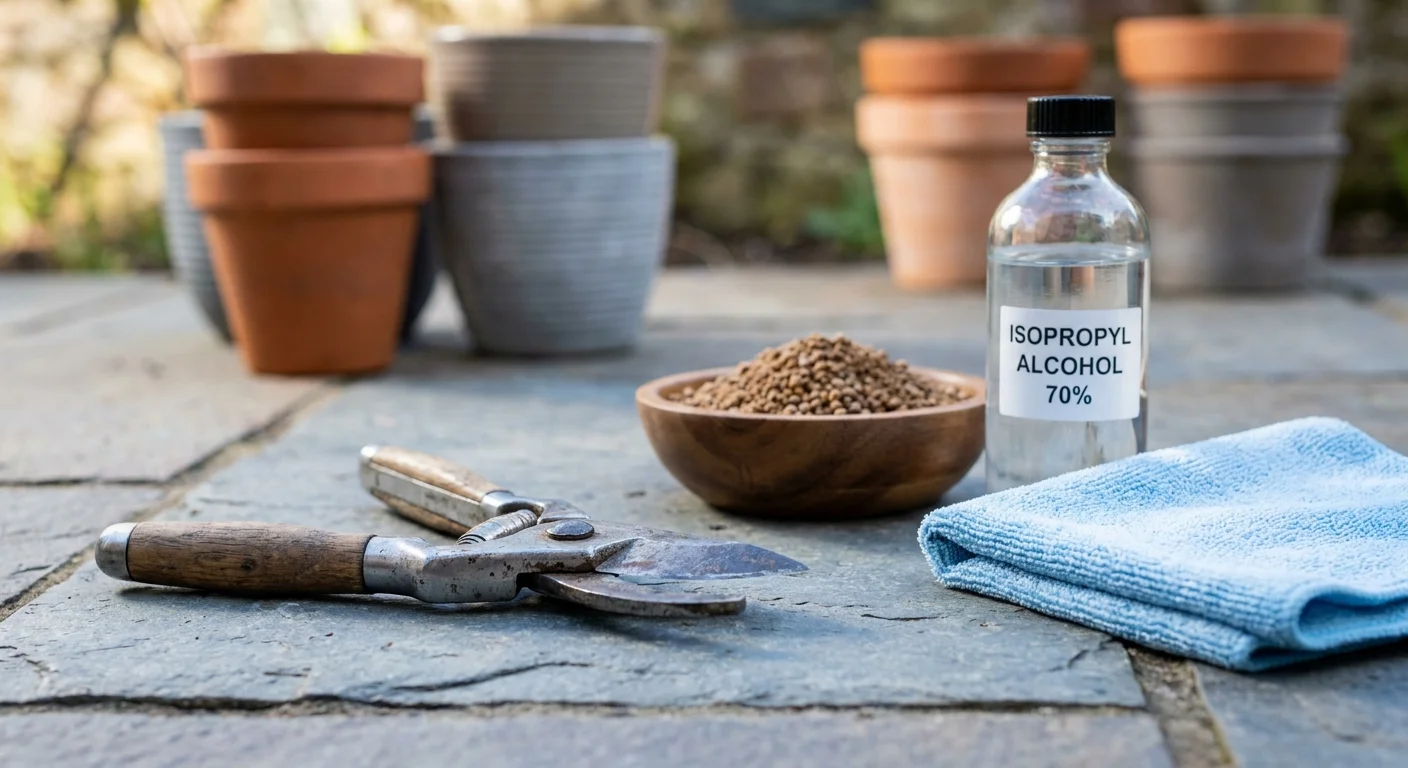
Take a clean pair of pruning shears or a sterilized kitchen knife and make three to four shallow vertical slices down the sides of the root ball. Pull the bottom roots apart gently with your thumbs.
This physical disruption stops the roots from strangling themselves and redirects their growth outward into the fresh soil.
Place the loosened root ball into the center of the new pot. Carefully scoop fresh potting mix down the sides, pressing it down lightly with your fingers to eliminate large, hidden air pockets.
Leave about one inch of space between the top of the soil and the rim of the pot to allow for easy watering.
Immediately flush the new pot with water until moisture pours out of the bottom drainage holes, settling the new soil firmly against the roots.
Smart Garden Maintenance Tips During Replanting
Replanting presents the perfect window to perform crucial garden maintenance tasks that keep your plants vigorous and disease-free. Because the plant is already undergoing a transition, combining pruning, pest-checking, and feeding routines into this single event streamlines your workload and reduces overall plant stress.
In addition to fresh mix, you can try rebuilding your potting soil during the off-season to ensure long-term fertility.
While the root ball is exposed, inspect the dirt carefully. Look for signs of root mealybugs—white, cottony masses clinging to the edges of the roots.
If you spot pests, gently rinse as much of the old soil away as possible using a garden hose before replanting, and treat the roots with a gentle insecticidal soap. Catching these hidden infestations early saves your entire balcony garden from a fast-spreading outbreak.
Above ground, perform strategic structural pruning. Removing dead, damaged, or heavily crossing branches lightens the physical load on the newly disturbed root system.
Because the roots temporarily lose some of their water-gathering efficiency during the move, trimming away excess foliage helps balance the plant, allowing it to easily support the remaining leaves while it recovers.
Be strategic about fertilization. Never apply synthetic, high-nitrogen liquid fertilizers immediately after replanting common plants.
The raw, freshly pruned roots are extremely sensitive to chemical salts and will suffer severe fertilizer burn. Instead, rely on the nutrients already present in your fresh potting mix.
Wait a minimum of two to four weeks before resuming your regular feeding schedule.
If you have massive container plants—like a small lemon tree or a giant fiddle leaf fig—that are simply too heavy to pull out of their pots, utilize a technique called top-dressing.
Scrape away the top two to three inches of old, crusted soil, being careful not to damage the thick surface roots. Replace this depleted layer with a rich blend of fresh potting mix and organic compost.
Every time you water, you will wash the fresh nutrients down into the lower root zone.
| Maintenance Task | Ideal Timing | Why It Matters |
|---|---|---|
| Root Pruning | During extraction | Stops circling roots from strangling the main taproot. |
| Foliage Pruning | Immediately after replanting | Reduces water demand on stressed roots. |
| First Watering | Immediately after replanting | Eliminates hidden air pockets in the new soil. |
| First Fertilization | 2 to 4 weeks post-replant | Prevents chemical root burn on fresh, sensitive tissue. |
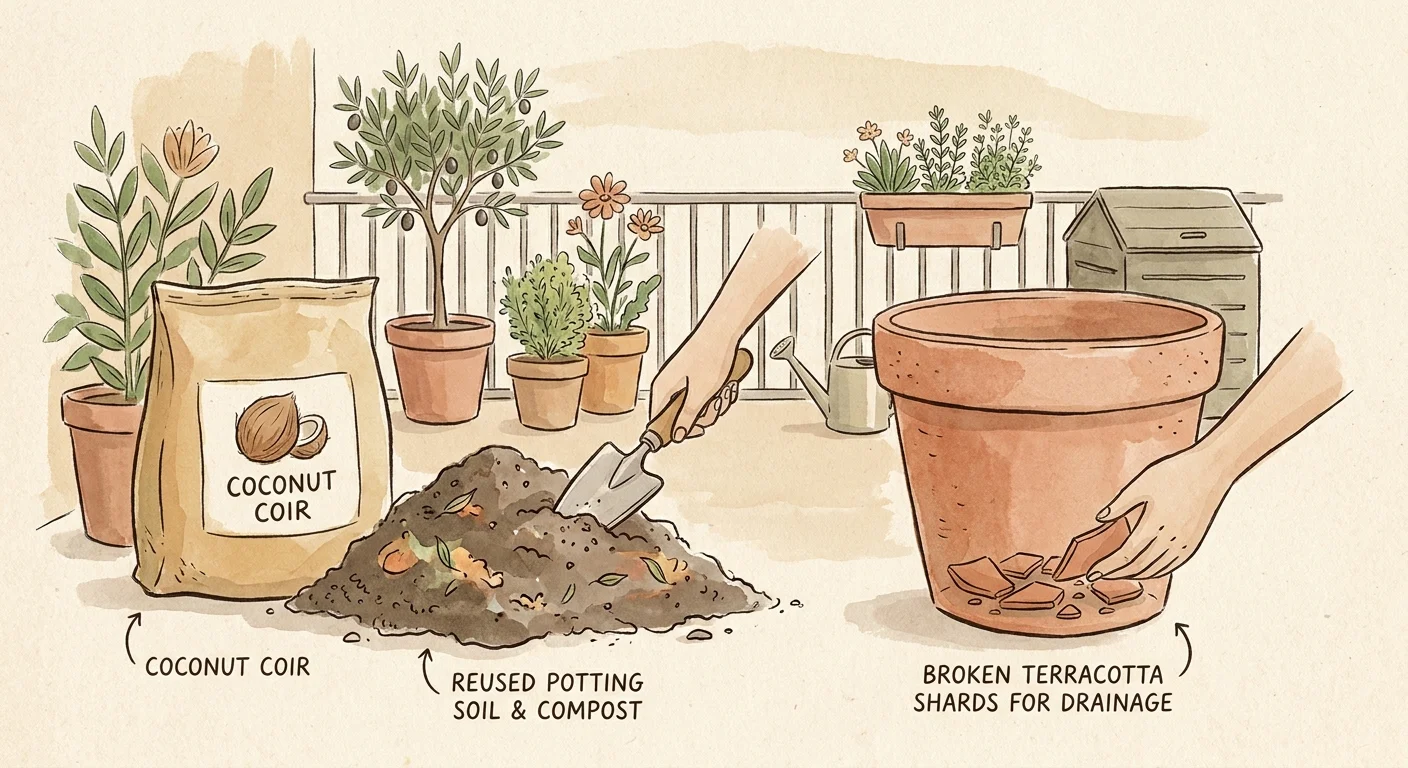
Sustainable Replanting Practices for Balconies and Patios
Small-space gardening provides a brilliant opportunity to embrace eco-friendly practices that reduce waste and build healthier ecosystems right on your patio. When engaging in heavy garden maintenance, the materials you use and the waste you generate impact the local environment.
Sustainable replanting minimizes the use of single-use plastics, conserves water, and naturally regenerates soil health.
First, rethink your container choices. Instead of purchasing new plastic pots every time your plants need a size upgrade, invest in fabric grow bags.
Woven fabric pots provide exceptional aeration; when roots hit the fabric wall, exposure to the air naturally prunes the root tips. This “air-pruning” prevents the circling root-bound phenomenon entirely and creates a fibrous, dense root mass.
Furthermore, fabric pots fold perfectly flat for winter storage, saving precious space on tight balconies.
Do not simply throw your old, exhausted potting soil into the garbage bin. Rejuvenate it.
Dump the old soil into a large plastic bin or sturdy trash bag. Pick out the thick, woody roots and discard them.
Mix the old soil with generous amounts of organic matter—such as worm castings, mushroom compost, or aged manure. Add a handful of perlite to restore drainage and a scoop of slow-release organic fertilizer.
After turning the mixture thoroughly, you have successfully recycled dead soil into a premium planting medium, keeping heavy bags out of the landfill.
Finally, rely on organic amendments rather than synthetic blue-powder fertilizers to support your freshly repotted plants. Kelp meal, bone meal, and alfalfa meal break down slowly, feeding the beneficial microbes in the soil.
These natural additives build long-term soil structure and gently nourish recovering roots without the risk of toxic salt buildup that frequently plagues synthetic container gardening.
Frequently Asked Questions
Can I reuse old potting soil when replanting common plants?
Yes, but you cannot use it exactly as it is. Old potting soil is stripped of nutrients and mechanically compacted.
You must revitalize it by sifting out old roots, fluffing it up, and mixing it with a 30% ratio of rich organic compost or worm castings to restore its biological fertility and drainage capabilities.
How much larger should the new pot be when I repot my container plants?
Always follow the “one-inch rule.” The new container should be only one to two inches wider in diameter and one to two inches deeper than the previous pot.
Upgrading to a massive pot too quickly surrounds the plant with wet, unoccupied soil, which drastically increases the risk of fatal root rot.
Is it safe to replant while a plant is blooming or fruiting?
You should actively avoid replanting during peak flowering or fruiting stages unless it is an absolute emergency.
The physical stress of the move forces the plant to redirect energy from flower production into root repair, often causing it to drop its blossoms or abort developing fruit. Wait until the dormant season or early spring.
What should I do if the roots are tightly coiled at the bottom?
Do not plant a tight coil directly into new soil; the roots will continue growing in a circle. You must physically break the pattern.
Use a sterilized knife to slice vertically down the sides of the root mass, and use your fingers to gently pull the bottom roots apart so they point outward into the new soil.
For trustworthy gardening information, visit:
Michigan State University Extension — Gardening, University of Wisconsin Extension — Horticulture, Iowa State University Extension — Yard & Garden, Washington State University Hortsense and University of Minnesota Extension. These organizations provide expert, research-based advice for gardeners at all levels.
Disclaimer: This article is for informational purposes only and is not a substitute for professional gardening advice. Always consult local extension services or horticulture experts for region-specific guidance.